

Protecting
Pets, People & Planet
Join a group of veterinarians leveraging the latest technologies to deliver excellent care to their patients while being a responsible and positive force for their local and global communities.
100% secure. We do not share your information


Recent Articles
Why Is My Dog's Foot Swollen?
Discover why your dog's foot is swollen, common causes, treatments, and when to see a vet for proper care.
A swollen dog foot is one of the most common reasons owners call their vet. It can be as simple as a bee sting or as serious as a deep infection or bone tumor. The location, speed of onset, and other symptoms all help narrow down the cause.
This guide covers every common cause, how to assess severity at home, and the exact signs that mean your dog needs same-day care.
Quick answer: A swollen dog foot usually has a local cause: injury, insect sting, foreign object, or infection. Warm, increasing, or discharging swelling needs same-day vet care. Multiple swollen paws suggest allergies.
Key takeaways
- Single-paw swelling almost always has a local cause: injury, sting, foreign body, or infection
- Interdigital furunculosis (infected hair follicle cysts between toes) is among the most misidentified causes of recurring paw swelling
- Foreign objects like foxtails and glass splinters can migrate deep into tissue if left untreated
- Pododermatitis is the clinical term for inflamed paw skin; allergies are the most common underlying driver
- Swelling spreading up the leg or paired with face or neck swelling is an emergency requiring immediate care
- Most mild swelling from a sting or minor sprain improves within 24 to 48 hours with rest and monitoring
How to assess your dog's swollen foot before calling the vet
Before looking up causes, do a quick home assessment. This takes two minutes and tells you how urgent the situation is.
Step 1: Which paw?One paw = likely local cause. All four paws = likely allergic or systemic.
Step 2: Feel for heat.Warm or hot tissue means active inflammation or infection.
Step 3: Look between every toe.Redness, swelling between the digits, or visible nodules between the toes points to interdigital furunculosis or a foreign body.
Step 4: Check the pads.Burns appear as red, blistered, or peeling pad tissue. Cuts and punctures are often visible on the pad surface.
Step 5: Look at each nail.A broken nail or swollen nail bed causes localized pain and swelling at the toe tip.
VCA Animal Hospitals: "A deeper infection, like an abscess, will appear as a warm, soft to mildly firm swelling under the skin."
8 common causes of a swollen foot in dogs
1. Injury or trauma
Sprains, cuts, fractured toes, torn nails, and pad burns are the most frequent causes of sudden single-paw swelling. Dogs running on rough, hot, or icy terrain are especially prone.
PetMD notes that pad burns are particularly common in summer: check the pads after any walk on hot pavement. If your palm cannot hold against the pavement for five seconds, it is too hot for your dog's feet.
Signs: sudden lameness after activity, localized swelling, visible wound or bruising.
2. Foreign object
Thorns, glass, foxtails, and grass awns lodge between the toes or penetrate the pad. The body mounts an inflammatory response around the object, causing swelling that worsens over days.
SpectrumCare: "Foxtails and grass awns can lodge between the toes or in the pad and trigger pain, swelling, and infection."
Foxtails are particularly dangerous because they are barbed and can migrate deeper into tissue over days, eventually requiring surgical removal. If you cannot see and safely remove the object, do not probe. See a vet.
3. Insect sting or bite
Bees, wasps, fire ants, and spiders cause rapid single-paw swelling that appears within minutes of the sting. The paw may look puffy and your dog may lick or hold it up.
Dyer Animal Clinic advises watching for anaphylaxis signs: hives, difficulty breathing, excessive swelling spreading beyond the paw. These require emergency care immediately.
Localized sting swelling that stays in the paw and is not worsening can be monitored at home for 24 to 48 hours.
4. Infection: bacterial and fungal
Bacterial or fungal infections enter through cuts, puncture wounds, or damaged skin. Infected paws are typically warm, red, swollen, and often have an odor or discharge. VCA lists the visual signs: "Skin infections on the feet may result in red, moist lesions between the toes."
Pododermatitis (inflammation of the paw skin) is the umbrella clinical term. Common causes include:
- Secondary bacterial infection from chronic licking
- Yeast overgrowth in skin folds between toes
- Fungal infections (ringworm can affect paws)
- Demodectic mange (mite overgrowth)
Pododermatitis does not resolve without treatment. Antibiotics, antifungal medication, or both are typically required.
5. Interdigital furunculosis
This is one of the most commonly missed causes of recurring paw swelling. Interdigital furunculosis occurs when hair follicles between the toes become infected, forming painful reddish-purple nodules that may rupture and drain.
AKC notes that the condition is especially prevalent in short-coated, heavyset breeds: Bulldogs, Labrador Retrievers, and Chinese Shar-Pei are among the most commonly affected. Chronic licking due to allergies is a major driver.
Signs: swollen, painful nodules between the toes, draining tracts, recurrent swelling in the same location.
For how furuncles between the toes connect to abscess formation, see abscess as a cause of limb swelling.
6. Allergic reaction and pododermatitis
Environmental allergens (pollen, grass, lawn chemicals, road salt) and food allergies frequently cause paw inflammation. Dogs with allergies lick their feet chronically, creating secondary infection on top of the allergic reaction.
Wakefield Pet Vet: "Allergic reactions typically cause itching, redness, and sometimes blistering between the toes or on paw pads."
Allergic paw swelling usually affects multiple paws. It tends to recur seasonally or after contact with the trigger substance. Dogs with seasonal allergies often have their worst paw symptoms in spring and fall.
7. Bursitis
Bursae are small fluid-filled sacs that cushion joints. Repeated pressure on bony prominences, especially the elbow and hock, can cause bursitis. Affected joints may appear as soft, fluctuant swellings near a joint.
For how bursitis specifically produces foot and joint swelling, see bursitis as a common cause of foot swelling.
8. Cysts, tumors, and nail bed disease
Cysts, mast cell tumors, and subungual (under-nail) tumors can all present as localized swelling on or near the foot. Petcube notes that toenail tumors are more prevalent in large black-coated breeds such as Standard Poodles, Gordon Setters, and Schnauzers.
A lump that is growing, firm, or pigmented should always be evaluated by a vet rather than monitored at home.
For an overview of lumps that cause swelling on the legs, see lumps that can cause swelling.
Severity triage: what to do right now
Home care for mild cases
For minor swelling without infection signs:
- Keep the dog calm and limit walking
- Soak the paw in warm (not hot) water with Epsom salts for 10 minutes. PetMD recommends this as an excellent short-term measure regardless of cause.
- Gently clean any visible wound with mild soap and warm water
- Apply a cool damp cloth for 10 to 15 minutes to reduce swelling from sprains or stings
- Do not apply antibiotic ointments without vet guidance some formulations are toxic to dogs if licked
For pressure-related paw and leg swelling in dogs that rest in one position for extended periods, see pressure-related swelling in dogs.
Frequently asked questions
How do I treat my dog's swollen paw at home?
For mild swelling with no wound or discharge, rest the dog and soak the paw in warm Epsom salt water for 10 minutes. Check carefully for a foreign object or insect stinger. Do not use human antibiotic creams without vet guidance. If swelling has not reduced within 24 to 48 hours or is getting worse, contact your vet.
When should I be worried about my dog's swollen paw?
Be concerned immediately if the swelling is warm, increasing, or has discharge or odor. Call the vet the same day if your dog refuses to bear weight, if the swelling is spreading up the leg, or if there is any sign of an allergic reaction such as facial swelling or breathing difficulty.
What can I give my dog for a swollen paw?
Do not give human pain medications (ibuprofen, acetaminophen, aspirin) to dogs; many are toxic. For minor swelling, warm Epsom salt soaks are safe and effective for short-term relief. Your vet can prescribe appropriate anti-inflammatory medication if needed after examining the paw.
My dog's foot was normal this morning and is swollen now. What happened?
Sudden single-paw swelling most often means an insect sting, a foreign object picked up during activity, or a minor sprain. Check each toe carefully for a stinger, thorn, or visible wound. If swelling is mild and localized, monitor for 24 hours. If increasing or painful, call the vet the same day.
Can swelling in a dog's foot go away on its own?
Minor swelling from a bee sting or small sprain typically resolves within 24 to 48 hours with rest. Infections, foreign objects, interdigital furunculosis, and bursitis do not resolve without treatment. If swelling has not improved within 48 hours, veterinary assessment is needed.
My dog's foot smells bad and is swollen. Is that serious?
Yes. Odor from a swollen paw strongly indicates infection. A foul smell means bacteria are actively present. Common sources include interdigital furunculosis, a nail bed infection, or an abscess. This requires prompt veterinary treatment and should not be left to resolve on its own.
Resources
- PetMD. Dogs Swollen Paws: Causes and Treatments. petmd.com
- VCA Animal Hospitals. First Aid for Limping Dogs. vcahospitals.com
- AKC. Pododermatitis on Dog Paw: Causes, Symptoms and Treatment. akc.org
- SpectrumCare. Paw Swelling in Dogs. spectrumcare.pet
- Dyer Animal Clinic. Reasons Your Dog's Paw is Swollen. dyeranimalclinic.com
Laser Therapy for Dogs After TPLO Surgery
Learn how laser therapy helps dogs recover faster and with less pain after TPLO surgery for cruciate ligament repair.
Laser therapy also called photobiomodulation (PBMT) or low-level laser therapy (LLLT) is one of the most commonly offered adjunct treatments during TPLO recovery. Many specialist and rehabilitation centres include it routinely.
But the evidence for its benefits is more nuanced than the marketing suggests, and owners deserve an honest picture of what it does and does not reliably achieve.
Quick answer: Laser therapy after TPLO uses specific light wavelengths to reduce inflammation and support tissue healing. Evidence for early pain reduction is moderately supported; evidence for improved radiographic bone healing is weak. It is a safe adjunct but should not replace rehabilitation exercises, pain medication, or activity restriction.
Key takeaways
- Laser therapy reduces postoperative inflammation and may improve gait scores: a TPLO study found better hindlimb function at 8 weeks in treated dogs
- Evidence for improving radiographic bone healing is weak: three controlled studies found no statistically significant difference in healing time
- The 2024 AVMA randomized trial found no significant difference in CRP, weight bearing, pain scores, or SSI rates between PBMT and sham groups
- Sessions typically begin within the first few days of surgery and continue through the rehabilitation phase
- Laser therapy is safe with few contraindications: avoid eyes and active tumour sites; safe over the TPLO incision once closed
- It works best as part of a multimodal plan: exercise therapy and pain medication carry stronger evidence than laser alone
What laser therapy does
Laser therapy for dogs, also known as photobiomodulation, involves using specific wavelengths of light to penetrate tissues and promote cellular regeneration and healing. The laser light stimulates the production of ATP (adenosine triphosphate), enhancing cell repair and growth, reducing inflammation, and increasing blood circulation.
Photobiomodulation therapy has been shown to decrease inflammation, and increase analgesia, vascularization, and tissue healing after musculoskeletal injury or surgery.
The mechanism is photochemical: light energy at specific wavelengths (typically 630 to 980 nm) is absorbed by mitochondria.
This increases ATP production, modulates reactive oxygen species, and influences gene expression related to inflammation and healing.
The effects are local confined to the tissue depth the light reaches.
For post-TPLO use, the targets are: the surgical incision, the osteotomy site in the proximal tibia, and the surrounding periarticular soft tissues.
What the clinical evidence shows
Pain and function
Research following TPLO surgery showed that dogs receiving LLLT had better hindlimb function and gait scores at 8 weeks compared to controls. This is especially valuable in orthopedic recovery, where early weight-bearing can prevent muscle atrophy and joint stiffness.
In a controlled veterinary study, dogs with surgical incisions treated with laser therapy exhibited significantly less inflammatory cell infiltration and tissue necrosis within the first week post-op compared to untreated controls.
The 2024 randomized trial
54 client-owned dogs with CCL rupture undergoing unilateral TPLO surgery were enrolled. The study population was randomly assigned to either a treatment group receiving PBMT (24 dogs) or a control group (30 dogs). PBMT was performed immediately after induction, and at 6 hours, 24 hours, 48 hours, and 8 weeks postoperatively. Evaluation of CRP, pain scores, evidence of SSI, and percentage weight bearing were assessed at all time points.
The trial found the therapy showed promise but no statistically significant difference between groups on any primary outcome measure.
Bone healing
Three studies compared LLLT to a control and concluded that LLLT treatment did not make a significant difference in improving radiographic bone healing. The studies collectively provide weak evidence for this outcome.
This is an important distinction: laser therapy may support soft tissue healing, pain, and early function but it does not appear to accelerate the osteotomy healing visible on radiographs.
When to start and how often
Laser therapy uses focused light energy on the surgical site to support healing.
Most rehabilitation programmes begin laser therapy within the first 1 to 3 days after TPLO surgery, often at the surgical centre before discharge or at the first rehabilitation visit.
Typical post-TPLO laser protocol:
- Frequency: 3 to 5 sessions per week in the first 2 to 3 weeks
- Frequency: 1 to 2 sessions per week from weeks 3 to 8
- Session duration: 5 to 15 minutes depending on the laser system and dosing protocol
- Total sessions: typically 6 to 12 in the first 8-week recovery phase
The protocol varies by laser system, power output, and the individual patient's response.
Realistic expectations
Laser therapy is a useful adjunct in TPLO recovery. It is not a substitute for the treatments with stronger evidence: pain medication, activity restriction, and structured rehabilitation exercises.
Laser therapy could be particularly helpful for dogs with weight-bearing and gait issues while recovering from TPLO surgery after a cruciate injury.
Dogs with significant early swelling, wound sensitivity, or slow initial weight-bearing progress may benefit most. Dogs recovering well with standard multimodal analgesia and rehabilitation may show less measurable difference.
For the bone healing timeline that laser therapy supports during recovery, see TPLO bone healing time in dogs explained.
For the full recovery plan that laser therapy fits into, see 10 essential TPLO recovery tips for pet owners.
For the physical therapy that is the primary evidence-based adjunct, see when to start physical therapy after TPLO surgery.
For swelling management in the recovery period, see how long does swelling last after TPLO surgery.
Frequently asked questions
Is laser therapy safe over the TPLO incision?
Yes, once the incision is closed. Laser therapy is safe over sutured incisions and can be applied at the surgical site from the first post-operative day in most protocols.
Avoid direct application over open wounds or actively infected tissue.
How many laser sessions does a dog need after TPLO?
Typically 6 to 12 sessions across the first 8 weeks.
Start at 3 to 5 sessions per week for the first 2 to 3 weeks, tapering to 1 to 2 per week through the rehabilitation phase.
The exact protocol depends on the laser system and rehabilitation plan.
Does laser therapy replace pain medication after TPLO?
No. Laser therapy is an adjunct to pharmaceutical pain management, not a replacement. Post-TPLO pain management requires NSAIDs, and often gabapentin or other analgesics.
Laser therapy may reduce the pain burden and support earlier mobility but does not provide sufficient analgesia on its own.
Can I do laser therapy at home with a consumer device?
Consumer-grade red light therapy devices exist but operate at lower power densities than veterinary therapeutic lasers. The clinical evidence discussed in this article relates to veterinary-grade PBMT devices.
Home devices may offer some benefit but cannot replicate the dosing of professional equipment. Discuss with your rehabilitation veterinarian before purchasing.
Will laser therapy prevent my dog from needing more medication?
Possibly. If laser therapy reduces post-operative inflammation and pain, some dogs may need lower doses of pain medication or taper off sooner.
This should be guided by your veterinarian based on your dog's individual recovery trajectory.
Resources
- AVMA Journal. Photobiomodulation Therapy in Dogs Undergoing TPLO After Cranial Cruciate Ligament Rupture. avmajournals.avma.org
- Veterinary Evidence. Does LLLT Improve Radiographic Healing for Dogs with CCL Rupture Undergoing TPLO Surgery? veterinaryevidence.org
- AKC. Laser Therapy For Dogs: Uses, Side Effects, and Alternatives. akc.org
- Erchonia. Laser Therapy for Post-Surgical Recovery in Pets. erchonia.com
All Articles
TPLO, CBLO, and TTA: A Guide to Cruciate Surgery Options
Compare TPLO, TTA, and CBLO surgeries for dog cruciate ligament injuries. Learn differences, costs, recovery, and best option for your dog
When a dog tears its cranial cruciate ligament (CCL), three osteotomy-based surgeries are currently in widespread use: TPLO (tibial plateau leveling osteotomy), TTA (tibial tuberosity advancement), and CBLO (CORA-based leveling osteotomy).
All three aim to change the biomechanics of the stifle to eliminate the need for the damaged CCL.
They differ in the specific bone cut, the mechanism of stabilization, the implants used, and the evidence base supporting their outcomes.
Quick answer: TPLO, TTA, and CBLO all stabilize the stifle by changing tibial geometry. TPLO has the most evidence, is the ACVS gold standard for large dogs, and achieves 93% limb function at 1 year. TTA produces similar long-term outcomes. CBLO is used mainly for immature dogs and revision surgery.
Key takeaways
- TPLO is the most evidence-supported procedure: a 2013 study confirmed 93% limb function restoration at 1 year; it is the ACVS-preferred procedure for most large, active dogs
- TTA produces similar long-term outcomes to TPLO: a PMC systematic review of 72 studies found both are successful; TTA may have slightly faster early recovery
- CBLO is a newer TPLO variant: the osteotomy is made at the CORA rather than proximally; fewer long-term studies exist; mainly used for immature dogs and revision cases
- All three require 8 to 12 weeks of activity restriction: post-operative management is essentially identical; radiographic healing confirmation before activity return is required for all
- TPLO has a lower SSI rate than TTA per the PMC systematic review; this is clinically meaningful given TPLO's already-elevated SSI risk vs other orthopedic procedures
- The choice between TPLO and TTA is often surgeon preference and facility capability: no clear clinical superiority exists for appropriately selected patients; CBLO is less universally available
How each surgery works
TPLO: tibial plateau leveling osteotomy
TPLO makes a curved osteotomy through the proximal tibia and rotates the tibial plateau segment to approximately 5 degrees.
This rotation eliminates the cranial shear force that drives tibial thrust when the CCL is absent. A plate and locking screws hold the rotated segment while the osteotomy heals.
The result: the stifle is mechanically stable during weight bearing regardless of CCL integrity, because the geometry of the tibial plateau no longer creates the shear force that was causing instability.
TTA: tibial tuberosity advancement
TTA moves the tibial tuberosity (the bony prominence at the front of the tibia where the patellar tendon attaches) forward, changing the angle between the patellar tendon and the tibial plateau.
When this angle reaches approximately 90 degrees, the patellar tendon acts as an active stabilizer of the stifle during weight bearing, neutralizing the cranial shear force.
TTA uses a cage (typically titanium or porous polyethylene) to maintain the advanced position of the tuberosity during healing.
B Braun Vet Care confirms: TTA was quicker with a smaller incision; patients weight bore faster with fewer direct post-operative complications. However, longer-term studies show similar outcomes for each procedure.
CBLO: CORA-based leveling osteotomy
CBLO is a variant of the leveling osteotomy concept.
TPLO makes its circular cut proximally near the tibial plateau. CBLO makes its osteotomy at the CORA (center of rotation of angulation), which is lower on the bone.
The goal is to correct the tibial deformity at the site where it actually originates geometrically, which may produce a more anatomically accurate correction in some dogs.
Southern Animal Health confirms: CBLO benefits appear limited to immature dogs or revision surgery where cuts have already been made higher on the bone.
Outcome comparison
TPLO outcomes
A 2013 study comparing TPLO and TTA found TPLO patients achieved 93% restoration of limb function at 1 year.
A randomized blinded clinical trial comparing lateral fabellar suture stabilization with TPLO in 80 dogs confirmed TPLO produced higher peak vertical force and higher owner satisfaction at 1 year.
TPLO has the most extensive published evidence base of any cruciate repair technique in dogs.
Vetamac confirms: a 2013 study found TPLO patients averaged 93% limb function return at 1 year, and a higher percentage achieved full return compared to TTA.
TTA outcomes
The PMC systematic review of 72 studies (PMC9748159) found both TPLO and TTA are successful management options, with no lameness at long-term evaluation for most patients.
It also found TTA showed better OA scores up to 6 months postoperatively, while TPLO had lower SSI rates.
B Braun Vet Care confirms: many longer-term studies show similar outcomes for TPLO and TTA; one study suggests TPLO had a marginally better outcome than MMP.
Southern Animal Health confirms: a study of long-term results 3 years after surgery clearly shows that TTA and MMP candidates show more arthritis and more discomfort than dogs repaired with TPLO.
CBLO outcomes
CBLO has fewer published long-term studies than TPLO or TTA. Early results are promising.
The SustainableVet.org CBLO article confirms that CBLO produces good outcomes and is particularly used for dogs with steep tibial slopes or early arthritis.
Longer-term comparative data against TPLO in equivalent patient populations remains limited.
Patient selection
When TPLO is the preferred choice
- Dogs over 35 to 40 pounds (medium to large breeds)
- Young, athletic, or working dogs of any size
- Dogs with steep tibial plateau angles (TPA above 25 to 30 degrees)
- Cases where maximum long-term joint stability and arthritis control are priorities
When TTA may be considered
- Dogs with low to moderate TPA (the mechanical advantage of TTA is greatest when the existing TPA is near 90 degrees)
- Cases where a shorter surgical time is beneficial (older dogs with anesthetic risk)
- Some surgeons prefer TTA for dogs with high-velocity tibial thrust where TTA's mechanism may provide faster active stabilization
When CBLO may be considered
- Skeletally immature dogs where TPLO would cut across the growth plate
- Revision cases where a proximal osteotomy has already been performed
- Dogs with unusual tibial geometry where the CORA is positioned lower than average
SustainableVet.org confirms: CBLO is a newer, flexible option that fits many situations, especially for dogs with steep tibial slopes or early arthritis.
Recovery comparison
All three procedures require essentially the same post-operative management:
- Strict activity restriction for 8 to 12 weeks
- Leash walks only during the restriction period
- Radiographic assessment of bone healing at 6 to 8 weeks and 12 weeks
- Progressive return to activity after radiographic confirmation
The one consistent early difference: TTA dogs may weight bear more readily in the first 1 to 2 weeks.
B Braun Vet Care confirms: TTA patients were quick to weight bear with fewer direct post-operative complications compared to TPLO.
This early advantage does not produce meaningfully different long-term outcomes in most studies.
Cost comparison
All three osteotomy procedures are similarly priced at referral centers -- typically $3,000 to $6,000 per stifle. The specific cost depends on the facility, surgeon, dog size, and geographic region.
Cost differences between TPLO, TTA, and CBLO at the same facility are typically not substantial.
For the full TPLO overview, see TPLO surgery pros and cons for dogs. For CBLO specifically, see CBLO surgery in dogs. For alternatives, see alternatives to TPLO surgery for dogs.
For lateral suture comparison, see lateral suture vs TPLO for dogs.
Frequently asked questions
Is TPLO better than TTA?
For most large, active dogs, the balance of evidence slightly favors TPLO for long-term outcomes and lower arthritis progression.
However, multiple studies show no significant difference in objective gait analysis at long-term follow-up. The choice is often surgeon experience and facility capability rather than an absolute clinical superiority.
What is CBLO and is it better than TPLO?
CBLO is a variant of the leveling osteotomy that makes its bone cut at a different anatomical location. It is not established as better than TPLO for routine adult dog CCL repair.
Its main current applications are in immature dogs and revision surgery cases where TPLO would be anatomically difficult.
Which surgery has the lowest complication rate?
TTA generally has a lower SSI rate in some studies and was associated with fewer immediate post-operative complications in others.
However, TPLO and TTA have broadly comparable overall complication profiles at experienced facilities. CBLO data is more limited.
Can my regular vet perform any of these surgeries?
TPLO and TTA require specialized training and equipment (oscillating saw, specific implants, fluoroscopy for osteotomy confirmation). Both are typically performed by board-certified surgeons or general practitioners with specific TPLO or TTA training.
CBLO is similarly specialized. None of these are routine general practice procedures.
My dog had a failed TTA. Can TPLO be done as a revision?
Yes -- TPLO can be performed as a revision after a failed TTA in appropriate cases. The surgical planning differs from primary TPLO because the proximal tibial anatomy has already been altered.
CBLO may be used in these cases for similar reasons. This is a specialist procedure requiring careful pre-operative radiographic planning.
Resources
- PMC. Systematic Review of TPLO vs TTA for CCL Rupture in Dogs. ncbi.nlm.nih.gov
- Vetamac. TPLO Surgery in Dogs: Success Rates and Alternatives. vetamac.com
- Southern Animal Health. Cruciate Repair Technique Comparison. southernanimalhealth.com.au
- ACVS. Cranial Cruciate Ligament Disease. acvs.org
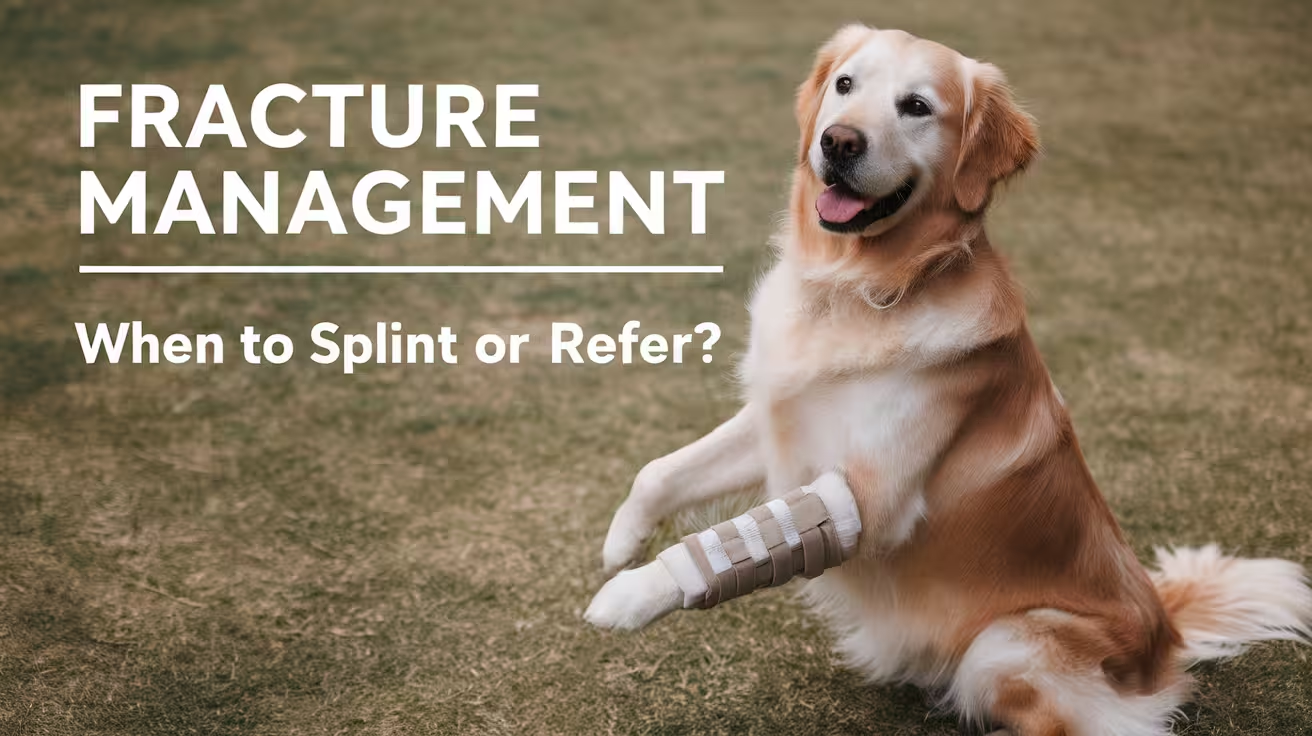
Fracture Management in Dogs: When to Splint or Refer?
Learn when to splint and when to refer dog fractures. A practical guide for vets to make the right call in canine fracture management
A broken bone in a dog needs one of three things: rest and confinement, external coaptation (splint or cast), or surgical repair. The decision depends on the bone affected, the fracture pattern, the dog's size and age, and the available equipment.
Getting this decision right the first time matters. Fusion Veterinary Orthopedics: "Attempting to use a splint or cast for several weeks with the hope of the fracture healing and doing surgery later is not advised. Chronic non-healing fractures are far more difficult to realign, are more costly, and have a lower likelihood of healing."
Quick answer: External coaptation suits minimally displaced fractures below the elbow or stifle in large adult dogs. Comminuted, articular, open, and upper-limb fractures require surgery. Small and toy breed distal radius fractures almost always need surgical repair.
Key takeaways
- Splints only work for fractures below the elbow or stifle: humeral and femoral fractures cannot be adequately immobilized externally
- Comminuted and articular fractures always require surgery: they are too unstable for external coaptation to maintain alignment
- Open fractures require emergency treatment within 8 hours: irrigation, debridement, and temporary stabilization precede definitive fixation
- 83% of distal radius/ulna fractures in small and toy breeds managed with external coaptation result in malalignment or nonunion
- Growth plate fractures should be surgically repaired within 24 to 48 hours of injury to minimize long-term joint damage
- Consult a board-certified surgeon for complex fractures including spinal, articular, and small-breed distal radial/ulnar
The three management options
1. Cage rest alone: reserved for very young dogs (puppies) with minimally displaced, inherently stable fractures for example, some rib fractures and stable pelvic fractures where the dog's own muscle mass provides sufficient immobilization.
2. External coaptation (splint or cast): for fractures below the elbow or stifle, minimally displaced, in stable large-breed adult dogs. Today's Veterinary Practice: "Ideal fractures for primary fixation using external coaptation include incomplete diaphyseal tibial fractures in young dogs, sometimes referred to as 'greenstick fractures.'"
3. Surgical repair: for the majority of fractures in adult dogs, all fractures in small and toy breeds, all comminuted and articular fractures, all open fractures, and all fractures above the elbow or stifle.
When external coaptation is appropriate
External coaptation requires that the joints above and below the fracture can both be immobilized. This is only achievable for fractures distal to (below) the elbow and stifle.
Clinical Brief: "External coaptation may be successful in fractures below the elbow or stifle, where the joints above and below the fracture can be fully immobilized."
Fractures that may be managed with splinting:
- Greenstick (incomplete) tibial fractures in young large-breed dogs
- Minimally displaced distal radius fractures in large-breed adult dogs
- Some metacarpal and metatarsal fractures
- Toe fractures
How splints are applied: Today's Veterinary Practice: "The splint should span the joint above and below the fracture, and be padded enough to prevent pressure sores and prevent movement of the limb." After placement, a radiograph confirms alignment.
Complications of splinting: ACVS: "Bandages and splints can cause very serious complications. They can be an effective treatment tool for fracture healing and pain control, but careful monitoring and appropriate follow-up must occur." Pressure sores, bandage slippage, and limb swelling are the most common complications; daily monitoring is essential.
When surgical repair is required
Fractures above the elbow or stifle
Animal Medical Center: "It is easy to temporarily immobilize bones below the elbow and knee, while the upper arm and thigh are more challenging to manage because the shoulder and hip are difficult to splint."
Today's Veterinary Practice: "Temporary stabilization of humeral and femoral fractures should not be attempted. In these cases, hospitalization with confinement to a crate along with analgesic relief is ideal while awaiting definitive fixation."
SustainableVet: "Trying to splint these upper limb fractures often leads to pain, delayed healing, and poor limb function. Immediate referral for surgical repair is recommended."
Comminuted fractures
A comminuted fracture means the bone is broken into multiple pieces. These are mechanically unstable fragments shift with any weight bearing. SustainableVet: "These are very unstable and cannot be held in place by a splint alone. The pieces move easily, and the risk of poor healing is high. In these cases, surgical fixation is needed to realign and stabilize the fragments."
Articular fractures (fractures entering a joint)
Any fracture that enters a joint surface requires anatomical reduction the fracture fragments must be restored to near-perfect anatomical position and rigid fixation to prevent joint surface step-off and subsequent arthritis. Fusion Veterinary Orthopedics: "Any growth plate fracture or joint fracture should be treated as quickly as possible within about 24 to 48 hours after injury."
Open (compound) fractures
Animal Medical Center: "Open fractures often require an initial surgery to clean the wound and bone within 8 hours of the injury." The management sequence is:
- Immediate wound irrigation and debridement under anesthesia
- Temporary stabilization (bandage)
- Systemic antibiotics
- Definitive fracture repair after soft tissue stabilization
Do not attempt definitive fixation of a contaminated open fracture at the initial presentation; this dramatically increases infection risk.
Small and toy breed radius and ulna fractures
Today's Veterinary Practice: "In small and toy breed dogs, 83% of distal radius and ulna fractures addressed with external coaptation alone result in malalignment or nonunion. Therefore, internal fixation is recommended for these fractures in small and toy breed dogs."
SustainableVet: "Toy breeds like Chihuahuas, Pomeranians, and Yorkies are at high risk of nonunion. Their small bones have less blood supply, which slows healing. Even simple fractures may not heal with splints alone."
Spinal fractures and luxations
Spinal fractures with cord involvement are neurosurgical emergencies requiring immediate specialist referral for stabilization and decompression. Clinical Brief: "For complex fractures including spinal, consider consultation with a boarded veterinary surgeon or referral to a specialty practice."
Surgical options for fracture repair
Vets4Pets provides a useful overview: "Two types of surgical fracture repair are normally used in pets. Internal fixation involves placing surgical screws, pins, or metal plates under the skin around the fracture site to stabilize the bone. External fixation involves attaching surgical scaffolding to the bone through small holes in the skin."
Specific implant systems used:
- Intramedullary (IM) pins: inserted down the bone canal; suitable for some long-bone fractures
- Bone plates and screws: the most common implant system; provides rigid fixation; locking plate systems are particularly stable
- External skeletal fixators (ESF): transcutaneous pins connected by an external frame; useful for open fractures, infected fractures, and certain metaphyseal fractures
- Interlocking nails: for femoral and tibial shaft fractures
Timing matters
Animal Medical Center: "You should treat a closed fracture within 2 to 4 days. Timely veterinary fracture repair can prevent complications like bone misalignment or long-term mobility issues."
Fusion Veterinary Orthopedics: "Chronic non-healing fractures are far more difficult to realign, are more costly, and have a lower likelihood of healing."
Delaying evaluation hoping the dog will be "better tomorrow" consistently leads to worse outcomes. Fractures should be radiographed and assessed by a veterinarian on the day they are suspected.
For recovery care after fracture surgery, see orthopedic surgery home care guide. For the referral decision framework across orthopedic conditions, see when to refer orthopedic cases. For the full specialist referral process, see what is veterinary referral surgery.
Frequently asked questions
My dog is walking on the leg a little. Does that mean it is not broken?
No. Weight bearing on a fractured limb is common many dogs do not display obvious non-weight-bearing lameness with incomplete or minimally displaced fractures. Any dog with pain, swelling, or abnormal limb conformation after trauma needs radiographs.
How do I transport a dog with a suspected broken leg to the vet?
Keep the dog calm and restrict movement. Do not splint at home; improper application can worsen the fracture. Carry small dogs; use a rigid surface for large dogs. Call ahead so the clinic can prepare.
Will my dog's fracture heal faster with rest than surgery?
For fractures that require surgery, no. Fusion Veterinary Orthopedics: "Surgery ensures optimal alignment and stabilization for less pain and faster healing." Splinting a fracture that needs surgery delays appropriate treatment and often results in malunion or nonunion.
What is a growth plate fracture and why is it urgent?
Growth plates are bone formation zones at long bone ends in immature dogs. Fractures disrupt blood supply to growth cells. Fusion Veterinary Orthopedics: "Growth plate fractures should be treated within 24 to 48 hours." Delay risks permanent deformity.
Can a dog live with an untreated fracture?
Some dogs survive without repair, particularly with stable pelvic fractures. However, untreated fractures often result in malunion, nonunion, chronic pain, and permanent functional loss. Any decision against surgery should be fully informed.
How often does a splint need to be checked when my dog is wearing one?
ACVS: splints require careful monitoring and appropriate follow-up. Checks every 3 to 5 days are standard initially. Watch for swelling above or below the splint, foul odor, cold or pale toes, or the dog chewing the bandage.
Resources
- SustainableVet. Fracture Management in Dogs: When to Splint or Refer? sustainablevet.org
- Today's Veterinary Practice. Definitive Treatment of Limb Fractures With Splints or Casts. todaysveterinarypractice.com
- ACVS. Fractured Limbs. acvs.org
- Clinical Brief. Fracture Management. cliniciansbrief.com
- Fusion Veterinary Orthopedics. Minimally Invasive or Open Fracture Repair. fusionvetortho.com
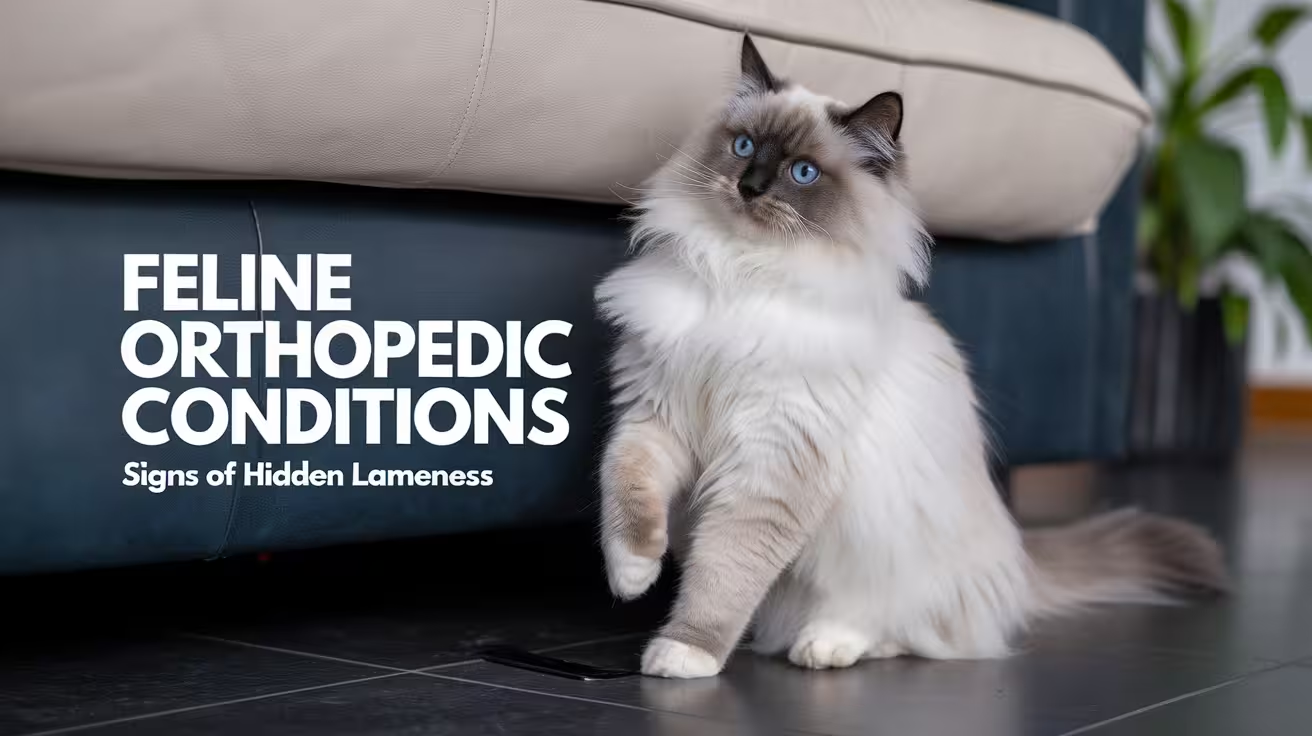
Feline Orthopedic Conditions: Signs of Hidden Lameness
Learn how to spot hidden lameness in cats, recognize common feline orthopedic conditions early, and keep your cat healthy and comfortable
Cats are exceptional at concealing pain. This is not stubbornness it is a deeply ingrained survival instinct. In the wild, a visibly lame or injured animal becomes prey.
Domestic cats retain this drive to mask weakness, which means orthopedic disease in cats is frequently underdiagnosed and undertreated.
Quick answer: Cats rarely limp overtly even with significant orthopedic pain. Reliable signs of hidden lameness include reduced jumping, reluctance to use stairs, grooming changes, and irritability when handled. OA affects 60 to 90% of older cats. Hip dysplasia affects up to 46.7% of some pedigree cat populations.
Key takeaways
- Cats rarely limp overtly even with significant joint pain; behavioral changes are the primary indicator of orthopedic disease
- 60 to 90% of older cats have radiographic OA but most owners do not recognize it as a clinical problem
- Hip dysplasia affects up to 46.7% of pedigree cats in some studies, with Maine Coons and Siamese most commonly affected
- Reduced jumping height or frequency is one of the earliest reliable signs of feline orthopedic pain
- Examining lame cats is challenging: they are often anxious and aggressive in the clinic; a calm, low-stress approach is essential
- CT is the most reliable non-invasive tool for subtle elbow and coronoid lesions that radiographs may miss
Why cats hide orthopedic pain
Cats can often much better compensate for pelvic limb lameness and hide their pain, and as a result, owners are less likely to notice this condition.
Osteoarthritis is common in cats but may not be noticed because cats often hide signs of pain. Approximately 60 to 90% of older cats have osteoarthritis.
Examination of the lame cat can be difficult. Owner history is often not helpful because most injuries are not witnessed. Cats can be highly anxious in a hospital setting and may be aggressive.
The clinical implication is clear: waiting for a cat to present with an obvious limp means waiting for a level of pain that most cats will never openly display.
Earlier detection requires recognizing the subtler behavioral signals.
Behavioral signs of hidden orthopedic pain in cats
Rather than an overt limp, cats with orthopedic disease typically show:
Changes in jumping behavior:
- Reduced jumping height landing lower than usual on furniture
- Reduced jumping frequency choosing not to jump when they previously would
- Hesitating before jumping, or looking for an alternative route up
Activity and movement changes:
- Reluctance to use stairs
- Slower, more deliberate movement
- Spending more time on lower surfaces
- Stiffness when rising after rest, particularly in the morning
Grooming changes:
- Reduced grooming of the hindquarters and tail base (hips or spine painful to flex toward)
- Matted coat in areas the cat cannot reach comfortably
- Overgrooming of a painful limb (licking at the joint or foot)
Litter box behavior:
- Difficulty squatting defecating outside the box, particularly in cats with hip pain
- Reluctance to step over a high-sided litter box
Behavioral and temperament changes:
- Increased irritability, especially when touched around the affected area
- Withdrawal from family interaction
- Reduced playfulness or hunting behavior
- Vocalizing when handled or picked up
The main clinical signs are decreased activity and reluctance to jump on higher places, reluctance to use stairs and to squat when defecating and defecation outside of the litter box; signs of pelvic limb lameness are rare.
Common feline orthopedic conditions
Osteoarthritis (OA)
The most prevalent orthopedic condition in cats, particularly in middle-aged and older animals.
The joint cartilage in freely moving joints may degenerate over time, leading to loss of joint movement and, in many cases, pain. Joint degeneration can be caused by trauma, infection, the body's immune system, or malformation during development.
The elbows and hips are most commonly affected, followed by the stifles and spine.
Management is multimodal: weight management, environmental modifications (ramps, low-sided litter boxes, raised food bowls), NSAIDs formulated for cats (meloxicam), and joint supplements.
Hip dysplasia
Hip OA is relatively common in cats but is often not recognised, either because cat owners do not appreciate the pelvic limb lameness or because cats are better able to compensate for the resulting functional impairment.
The prevalence of hip joint dysplasia in all pedigree cats was 46.7%, of which 78% of cats had bilateral dysplasia. Dysplasia was mainly mild to moderate; however, 6.1% of hip joints showed signs of severe hip dysplasia in Maine Coon and Siberian cats.
Fortunately, hip dysplasia is rarer in cats than in dogs, and many cats with hip dysplasia may never show symptoms. This may occur because cats are better at compensating for hind limb lameness and hiding their pain.
Most cats with hip dysplasia are managed conservatively. Surgical options exist for severe cases.
Patellar luxation
Patellar luxation was noted in 32.7% of pedigree cats, present bilaterally in 91.4%, and was grade 1 or 2 in most cats.
Most feline patellar luxations are low-grade and clinically silent. Higher-grade luxations causing intermittent lameness may require surgical correction.
Fractures
Feline fractures are a prevalent orthopedic issue in cats. Accidents often result in these injuries, with the shoulder, elbow, wrist, knee, and ankle joints being the most susceptible to fracture.
Cats sustaining high-rise falls (high-rise syndrome) often present with thoracic, facial, and forelimb injuries. A cat presented after a fall with any lameness or reluctance to bear weight requires radiographic assessment.
Cranial cruciate ligament (CCL) disease
Mediolateral and craniocaudal radiographs of a seven-year-old domestic shorthair cat showed cranial cruciate ligament rupture.
CCL rupture is less common in cats than dogs, but it does occur, particularly in middle-aged neutered cats. Unlike in dogs, some cats achieve functional stability through fibrosis without surgery.
Feline vs. canine orthopedic anatomy: key differences
The cat appendicular skeleton has numerous subtle differences compared to dogs. Cats tend to have a more shallow acetabular fossa and this must be taken into account when interpreting radiographs for hip dysplasia. Cats have a high degree of pronation and supination in their elbow joint, and about 40% will have a sesamoid in the supinator muscle that can be mistaken for a chip fracture.
These anatomical differences mean that normal feline radiographic findings can be misinterpreted as pathology, and vice versa. Feline orthopedic radiographs should be interpreted with species-specific reference ranges in mind.
Assessment approach
The feline orthopedic examination requires a low-stress approach. Allow the cat to settle in the room before beginning. Observe spontaneous movement first: how the cat rises, walks, and places each foot.
Palpation of joints should be systematic but gentle, noting pain responses, crepitus, reduced range of motion, and muscle atrophy.
The most commonly reported physical examination findings in cats with hip dysplasia are pain and crepitus upon extension of the hips, and muscle atrophy.
For subtle lesions, particularly of the elbow, CT provides better sensitivity than radiography alone.
For the referral decision framework, see when to refer for orthopedic surgery: surgical vs non-surgical cases. For post-surgical home care in cats, see post-op home care for pets after orthopedic surgery.
Frequently asked questions
How can I tell if my cat is in orthopedic pain if it isn't limping?
Watch for behavioral changes: reduced jumping, reluctance to use stairs, grooming changes, litter box avoidance, and increased irritability when touched.
These are often more reliable indicators of feline orthopedic pain than gait changes, which cats suppress effectively.
Is arthritis common in cats?
Yes. Radiographic evidence of OA affects 60 to 90% of older cats.
The condition is significantly underdiagnosed because cats compensate so well that owners rarely notice clinical signs until the disease is advanced.
My cat is a Maine Coon. Should I be concerned about hip dysplasia?
Maine Coons are one of the most commonly affected breeds, with hip dysplasia rates of 18 to 21% reported in some studies.
Annual veterinary checks including orthopedic assessment are worthwhile, even in the absence of obvious clinical signs.
Can cats have surgery for orthopedic conditions?
Yes. Fracture repair, patellar luxation correction, femoral head ostectomy for hip disease, and CCL repair are all performed in cats. Outcomes are generally good.
The decision to pursue surgery depends on severity, the cat's overall health, and owner circumstances.
How should I modify my home for a cat with arthritis?
Lower-sided litter boxes, ramps to reach favourite resting spots, raised food and water bowls, soft bedding in warm locations, and healthy weight management all significantly reduce the daily pain burden of OA.
Resources
- Merck Veterinary Manual. Joint Disorders in Cats. merckvetmanual.com
- VetTimes. Common Feline Orthopaedic Conditions Beyond OA Cases. vettimes.com
- MSPCA-Angell. Feline Orthopedic Disease. mspca.org
- PMC. Prevalence of Feline Hip Dysplasia, Patellar Luxation and Lumbosacral Transitional Vertebrae in Pedigree Cats. ncbi.nlm.nih.gov
- PetMD. Hip Dysplasia in Cats. petmd.com
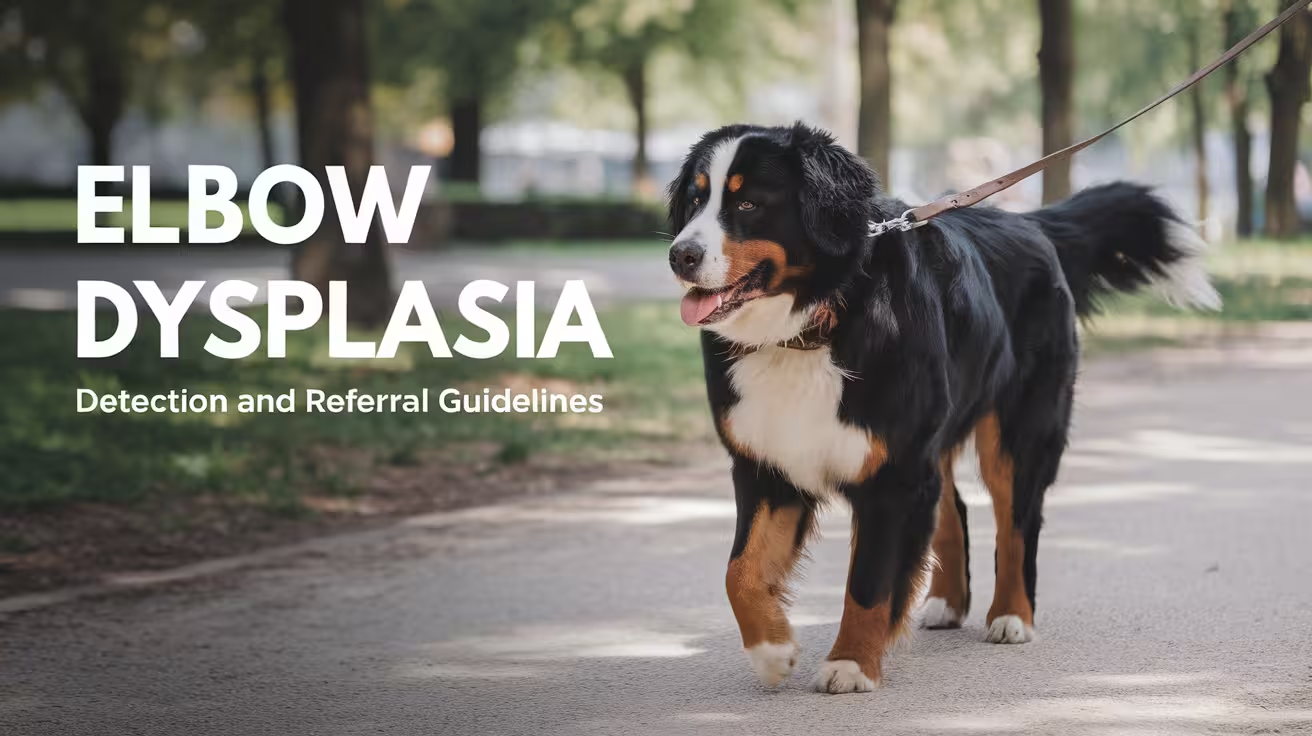
Elbow Dysplasia in Dogs: Early Detection and Referral Guidelines
Learn how to spot early signs of elbow dysplasia in dogs and when to refer for specialist care to prevent long-term joint damage
Elbow dysplasia is one of the most common causes of forelimb lameness in large and giant breed dogs.
It is not a single condition it is a group of developmental abnormalities that affect the elbow joint during skeletal growth.
Early diagnosis is important because cartilage damage is irreversible and osteoarthritis begins accumulating from the earliest stages of disease.
Quick answer: Elbow dysplasia encompasses FCP, OCD, UAP, and joint incongruity. It presents as forelimb lameness in large-breed puppies aged 4 to 12 months. Radiographs are first-line; CT is more sensitive for FCP. Refer when lameness persists beyond 2 to 4 weeks of conservative management.
Key takeaways
- Elbow dysplasia encompasses FCP, OCD, UAP, and joint incongruity most dogs have only one component, rarely all three
- Forelimb lameness in a large-breed puppy aged 4 to 12 months should prompt elbow radiographs as first-line imaging
- CT is significantly more sensitive than radiographs for FCP: medial coronoid lesions are frequently missed on plain films
- UAP is diagnosed when the anconeal process has not fused by 20 weeks in large breeds; visible on a flexed lateral radiograph
- Both elbows must always be imaged: bilateral disease is common and can mask the lameness asymmetry
- Arthroscopy provides definitive diagnosis and minimally invasive treatment in a single procedure; it is the gold standard
What is elbow dysplasia?
Canine elbow dysplasia is a condition involving multiple developmental abnormalities of the elbow joint. The elbow is a complex joint made up of 3 bones (radius, ulna, and humerus). If the 3 bones do not fit together perfectly due to growth abnormalities, abnormal weight distribution on areas of the joint occurs, causing pain, lameness, and the development of arthritis.
Elbow dysplasia is a multifactorial developmental condition that involves one or more of the following: ununited anconeal process (UAP), medial coronoid disease (MCD), osteochondrosis or osteochondritis dissecans of the medial humeral condyle, and joint incongruity. Clinical signs include forelimb lameness, joint pain, decreased range of motion, and joint effusion, typically noticed between 4 and 10 months of age.
The three main components
Fragmented medial coronoid process (FCP / MCD)
There are three common developmental problems often referred to as elbow dysplasia: a fragmented medial coronoid process (FMCP), an ununited anconeal process (UAP), and osteochondritis dissecans (OCD). Dogs with elbow dysplasia typically have only one of the three conditions.
FCP develops through abnormal wear and stress and micro-fracture through the coronoid, resulting in fragmentation. The resulting loose fragment causes irritation, inflammation, and osteoarthritis.
MCD is the most common form of elbow dysplasia. Affected breeds include Labrador Retrievers, Golden Retrievers, Bernese Mountain Dogs, and Rottweilers.
Radiographic findings: early MCD is often not visible on plain radiographs. Subtle signs include increased subchondral bone density, mild joint effusion, and early periarticular new bone. CT is required to confirm and characterize the lesion.
Ununited anconeal process (UAP)
UAP is failure of the anconeal process to unite with the proximal ulna during the first 5 months of skeletal maturation. The normal anconeal process should be fused with the ulna by 150 days of age; failure to ossify after this time is termed ununited and leads to joint instability and secondary degenerative joint disease.
UAP is usually readily confirmed on x-rays. A lateral radiograph of the elbow in a fully flexed position enables visualization of the ununited process.
UAP is most common in large breeds with a secondary ossification centre for the anconeal process: German Shepherd Dogs, Saint Bernards, and Basset Hounds.
Osteochondritis dissecans (OCD)
OCD is an abnormality in endochondral ossification resulting in a poor connection between cartilage and the underlying bone. The result of this weak connection is separation and peeling away of cartilage from the bone, leading to lameness, pain, and progressive osteoarthritis.
OCD of the medial humeral condyle can coexist with MCD. Arthroscopy confirms the extent of cartilage involvement and allows concurrent treatment.
Clinical presentation
Affected dogs develop a front limb lameness that typically worsens over a period of weeks to months. Lameness is usually worse after exercise and typically never completely resolves with rest. Often both fore legs are affected, which can make detection of lameness difficult, as the gait is symmetrically abnormal.
Classic presentation:
- Large or giant breed dog, aged 4 to 12 months
- Forelimb lameness, often worse after exercise and after rest
- Elbow pain on palpation and manipulation
- Reduced range of elbow flexion
- Joint effusion (swelling around the elbow)
- Possible external rotation of the affected limb
When both elbows are affected which is common the dog may appear to have a bilaterally stiff, stilted forelimb gait rather than a unilateral limp.
Diagnostic imaging
Radiographs (first-line)
Radiographs should include mediolateral and craniocaudal views. A flexed mediolateral view is essential to assess the anconeal process for UAP.
The primary radiographic finding of ununited anconeal process is a radiolucent line separating the anconeal process from the olecranon in dogs older than 5 months.
Both elbows must always be radiographed. Early MCD may show only subtle changes mild subchondral sclerosis, slight joint effusion or may appear radiographically normal despite significant disease.
CT scan (second-line, often essential)
The most reliable non-surgical test for FCP, OCD, and MCD is a CT scan. Ununited anconeal process is usually readily confirmed on x-rays, but the other conditions cannot always be distinguished on radiographs alone.
Early diagnosis of elbow dysplasia is based on radiographic evidence. Unfortunately, by the time lameness is persistent and not controlled by anti-inflammatory drugs, degenerative joint disease has already been established.
CT should be performed early before significant OA has developed to guide treatment decisions.
Arthroscopy
Arthroscopy provides direct visualization of the joint surfaces and cartilage, confirmation of the specific lesion, and the ability to treat (fragment removal, cartilage debridement) in the same procedure.
It is considered the gold standard for diagnosis and treatment of MCD and OCD.
When to refer
Refer to an orthopedic specialist when:
- Forelimb lameness in a large-breed puppy persists beyond 2 to 4 weeks despite rest and anti-inflammatory treatment
- Radiographs show elbow OA in a young dog without a confirmed diagnosis
- CT or arthroscopy is needed to characterize the lesion
- Surgical treatment is indicated
Early treatment of elbow dysplasia is indicated when radiographs show that the disease process has started and further development of OA may be expected. Early treatment of UAP consists of dynamic ulnar osteotomy to release the pressure on the anconeal process.
At-risk breeds that warrant a low threshold for elbow imaging: Labrador Retriever, Golden Retriever, Bernese Mountain Dog, Rottweiler, German Shepherd Dog, Newfoundland.
For the broader referral decision guide, see when to refer for orthopedic surgery: surgical vs non-surgical cases.
For imaging and diagnostics before referral, see imaging and diagnostics before referral: what's essential and when.
Frequently asked questions
At what age does elbow dysplasia typically show up?
Clinical signs most commonly appear between 4 and 12 months of age. Some dogs present later (12 to 18 months) when lameness becomes significant enough to prompt veterinary attention.
The underlying lesion, however, develops during the rapid bone growth phase in the first few months of life.
Can elbow dysplasia be managed without surgery?
Conservative management (activity modification, weight management, NSAIDs, physiotherapy) can reduce clinical signs but does not address the underlying lesion. OA progression continues regardless.
Surgery particularly arthroscopy for fragment removal is generally recommended for FCP and OCD to give the best chance of slowing arthritis development.
How accurate are radiographs for diagnosing FCP?
Radiographs have relatively poor sensitivity for early FCP many cases appear normal or show only subtle indirect signs. CT is significantly more sensitive.
If radiographs are inconclusive and clinical suspicion is high, CT should be performed rather than assuming the elbow is normal.
Is elbow dysplasia always in both elbows?
Not always, but bilateral disease is common. Both elbows should always be imaged, even if only one is clinically lame.
A dog with bilateral disease will often distribute weight more evenly, making the lameness appear milder or even absent on either side individually.
Can elbow dysplasia be prevented?
There is a strong hereditary component.
Breeding programs that screen for elbow dysplasia using radiographic or CT grading (IEWG grade 0 to 3) and exclude affected dogs from breeding reduce prevalence over time.
Weight management during growth to avoid over-nutrition may also reduce severity of expression in genetically susceptible dogs.
Resources
- ACVS. Canine Elbow Dysplasia. acvs.org
- Merck Veterinary Manual. Elbow Dysplasia in Dogs. merckvetmanual.com
- Davies Veterinary Specialists. Elbow Dysplasia Fact Sheet. vetspecialists.co.uk
- Today's Veterinary Practice. Radiographic Diagnosis of Developmental Orthopedic Disease of the Canine Elbow. todaysveterinarypractice.com
- VCA Animal Hospitals. Fragmented Coronoid Process in Dogs. vcahospitals.com

Hip Dysplasia Management: When Is Surgery the Best Option?
Find out when surgery is the right choice for managing hip dysplasia in dogs. Learn signs, options, and what to expect from treatment
Hip dysplasia is one of the most common orthopedic diagnoses in dogs, but it doesn't always mean surgery is coming.
Many dogs with hip dysplasia live comfortably for years on conservative management. Others reach a point where pain or mobility loss makes surgery the right path. Knowing which situation your dog is in, and which surgical option makes sense, is what this guide is for.
Quick answer: Surgery becomes the best option for hip dysplasia when conservative management no longer controls pain, when mobility is significantly impaired, or when a dog is young enough for preventive procedures. The two main surgical options are FHO (femoral head ostectomy) and THR (total hip replacement), each suited to different dogs.
Key takeaways
- Surgery isn't always necessary: many dogs manage well with medication, weight control, and physiotherapy.
- Two main surgical paths exist: FHO removes the femoral head; THR replaces the entire joint.
- FHO suits smaller dogs and tight budgets; THR delivers better function in large, active breeds.
- Early preventive surgery (DPO/TPO) is an option for puppies under 10 months with minimal joint damage.
- The trigger for surgery is quality of life, not the X-ray grade alone.
- Delaying surgery in severe cases worsens outcomes: arthritis accumulates and options narrow.
What hip dysplasia actually is
Hip dysplasia is a developmental condition in which the ball (femoral head) and socket (acetabulum) of the hip joint don't fit together correctly. Instead of a tight, smooth connection, the joint is loose, allowing abnormal movement that gradually wears down cartilage and produces bone-on-bone friction.
The result is pain, inflammation, and over time, progressive osteoarthritis.
Hip dysplasia is most common in large and giant breeds: German Shepherds, Labrador Retrievers, Golden Retrievers, Rottweilers, and Saint Bernards among the most frequently affected, but it occurs in any size dog.
The severity on X-ray does not always match the dog's visible symptoms. Some dogs with significant radiographic changes are relatively comfortable. Others with moderate findings are clearly in pain. Both the X-ray and the clinical picture matter.
When conservative management is enough
For many dogs with hip dysplasia, especially mild to moderate cases, non-surgical management controls symptoms well enough that quality of life is maintained without surgery.
Conservative management typically includes:
- Weight management: Reducing body weight is the single most impactful intervention. Every pound of excess weight adds direct mechanical load to an already unstable joint.
- Pain medication: NSAIDs (such as carprofen, meloxicam, or grapiprant) reduce inflammation and pain. Regular bloodwork monitoring is required for long-term NSAID use.
- Joint supplements: Glucosamine, chondroitin, and omega-3 fatty acids support cartilage health and reduce inflammation over time.
- Physical therapy and low-impact exercise: Controlled walking, swimming, and hydrotherapy build the muscle mass that stabilizes the joint and reduces the load on the hip.
- Environmental modifications: Ramps instead of stairs, non-slip flooring, orthopedic bedding.
Conservative management doesn't fix the underlying anatomy. It manages symptoms within the constraints of what the joint can do. When symptoms outgrow what this approach can control, surgery enters the conversation.
For non-surgical alternatives in more detail, see non-surgical alternatives to consider.
When surgery becomes the better path
According to Ask A Vet (2025), surgery is recommended when conservative management fails or when early intervention can prevent arthritis. The clinical signals include:
- Persistent limping or bunny-hopping that doesn't resolve with medication and rest
- Reluctance to stand, jump, or climb stairs that's significantly limiting daily life
- Muscle atrophy in the hindquarters from disuse
- Radiographic evidence of progressive joint damage alongside clinical decline
- Quality of life that is clearly impacted despite consistent conservative management
The decision to move to surgery is a quality-of-life decision, not purely a radiographic one. Two dogs with similar X-rays may need different approaches based on their clinical response to conservative care.
The surgical options for hip dysplasia
FHO (femoral head ostectomy)
FHO removes the head and neck of the femur: the "ball" of the ball-and-socket joint. The remaining femur is cushioned by a "false joint" of fibrous scar tissue that forms over the following weeks.
Best suited to:
- Small to medium dogs (typically under 50 lbs)
- Any size dog when THR isn't feasible (financial constraints, health contraindications)
- Cats
Limitations: The false joint doesn't provide the mechanical function of a real hip. Large breeds may have residual pain or gait abnormality. Function depends heavily on muscle mass and rehabilitation.
For a full explanation of what the procedure involves, see what FHO surgery is and how it helps.
THR (total hip replacement)
THR replaces the entire hip joint with a prosthetic implant. The femoral head and acetabulum are both replaced with precisely fitted components.
Best suited to:
- Medium to large dogs (typically over 40 to 50 lbs) who want full athletic function restored
- Skeletally mature dogs (typically over 9 to 12 months)
- Dogs in otherwise good health without significant comorbidities
Advantage over FHO: THR restores near-normal hip anatomy and function. Success rates of 80 to 98% are reported across published studies. Large active breeds return to full exercise capacity more reliably than with FHO.
For a full overview of the THR procedure, see total hip replacement as an alternative.
DPO/TPO (double or triple pelvic osteotomy)
This is a preventive surgery performed only in young dogs (typically under 10 months old) with hip laxity but minimal joint damage. The surgeon cuts and rotates the pelvic bones to improve how the socket holds the femoral head, reducing abnormal motion before cartilage damage accumulates.
Candidates: puppies with confirmed hip laxity on radiograph, little or no arthritis, and growing bones.
This window closes as the dog matures and joint damage develops.
How to know which surgical option applies to your dog
The right surgical option depends on the intersection of several variables:
For the direct comparison of FHO versus THR across all major factors, see FHO vs total hip replacement for hip dysplasia.
For the specific indications that guide the FHO recommendation, see when FHO is recommended.
The cost of waiting
For dogs with mild disease and adequate pain control, watchful waiting is entirely appropriate.
For dogs with moderate to severe disease where quality of life is declining, delay carries real costs:
- Progressive arthritis: The damaged joint continues to deteriorate. Every month of delay means more cartilage loss and more established arthritis.
- Muscle atrophy: Disuse of the painful leg causes the supporting muscle to waste away, making recovery from eventual surgery harder and longer.
- Narrowing options: As joint damage progresses, some surgical options become less appropriate. DPO/TPO is only available during a brief window in puppyhood.
Early action, when indicated, typically means simpler surgery, cleaner recovery, and better long-term outcomes.
For guidance on whether your dog is a candidate for THR specifically, see how to know if your dog is a THR candidate.
Frequently asked questions
My dog has hip dysplasia but doesn't seem to be in pain. Do they need surgery?
Not necessarily. Many dogs with hip dysplasia compensate well and show minimal pain, particularly in early disease. Conservative management, weight control, and monitoring are appropriate first steps. Surgery is indicated when pain is not controlled or mobility is meaningfully impaired, not simply because the diagnosis exists.
How old does a dog need to be for hip replacement surgery?
THR requires skeletal maturity, typically achieved at 9 to 12 months in most breeds and later in giant breeds. FHO can be performed at any age. DPO/TPO is only appropriate before 10 months of age in puppies with hip laxity and minimal arthritis.
Can hip dysplasia go away without surgery?
The underlying anatomic abnormality doesn't resolve. But many dogs with hip dysplasia maintain a good quality of life on conservative management for years, particularly those who remain lean and receive appropriate physiotherapy. "Going away" isn't the goal; managing symptoms within the joint's limits is.
Hip dysplasia doesn't come with a single right answer. The best path depends on your dog's size, age, severity of symptoms, response to conservative care, and your goals for their function and quality of life. The conversation with your vet and the X-ray findings together tell you more than either alone. Start early, monitor consistently, and make the surgical decision based on how your dog is actually living rather than the diagnosis on paper.
Resources
- PetMD. FHO Surgery in Dogs and Cats. petmd.com
- Ask A Vet. Vet-Approved 2025 Guide: Hip Dysplasia Surgery in Dogs. askavet.com
- Simon Vet Surgical. Hip Dysplasia Surgery in Dogs. simonvetsurgical.com

Canine Cruciate Injuries in Dogs | Surgery vs. Conservative Management
Explore treatment options for canine cruciate injuries in dogs. Learn when to choose surgery vs. conservative care for better recovery and joint health
CCL rupture is the most common orthopedic injury in dogs.
Once it occurs, the joint will develop osteoarthritis regardless of treatment.
The question is whether surgery offers enough benefit over conservative management to justify the cost and recovery.
The answer depends heavily on the dog's size.
Quick answer: Surgery is the standard of care for dogs over 15 to 20 kg with CCL rupture. TPLO and TTA both achieve 85 to 95% return to good function. Small dogs under 15 kg sometimes achieve acceptable function without surgery. OA progresses in all cases; surgery reduces the rate significantly.
Key takeaways
- Surgery is standard for dogs over 15 to 20 kg: conservative management produces worse outcomes in medium and large breeds
- TPLO is most commonly recommended by ACVS surgeons for dogs over 27 kg; it achieves excellent limb function in most cases
- TTA produces outcomes comparable to TPLO in most studies; evidence for superiority of either technique is weak
- Lateral suture is appropriate for small dogs under 15 to 20 kg; it relies on periarticular fibrosis for long-term stability
- Conservative management is reasonable only for small dogs or dogs that cannot safely undergo anesthesia
- OA progresses in all cases regardless of treatment; surgery reduces the rate of progression and preserves long-term joint function
Why surgery is generally preferred
The unstable stifle with no functioning CCL causes two problems simultaneously: cartilage erosion from abnormal joint movement with each step, and progressive meniscal damage. Every day of instability adds cumulative damage.
The goal of TPLO or TTA is to change the biomechanical function of the knee to limit cranial drawer during weight-bearing movement. TPLO is currently the most commonly recommended procedure by ACVS surgeons for CrCLR therapy in dogs weighing over 60 lb.
Surgical treatment usually results in better long-term outcomes, especially for medium to large dogs. It provides stronger joint stability, a quicker return to normal activity, and a lower risk of arthritis progression.
Both TPLO and TTA work by neutralizing the forces the CCL normally resists.
Neither replaces the ligament; they change joint geometry so the CCL is no longer needed during weight-bearing.
Surgical options
TPLO (Tibial Plateau Leveling Osteotomy)
TPLO rotates the tibial plateau until the joint is stable during weight-bearing without a functional CCL. It is the most widely performed cruciate repair in the UK, North America, and Australia.
In a retrospective study of 1,000 patients, TPLO carried a 14.8% complication rate (6.6% major, requiring repeat surgery or causing extended lameness), which included 2.8% late meniscal injury and 6.6% infections.
TPLO has a better functional outcome on subjective and objective gait analysis than TTA. At first glance, the analysis of multiple studies allows the hypothesis that TPLO is superior to TTA in terms of long-term clinical outcomes, although further research is needed to confirm this.
Best for: dogs over 20 kg, active dogs, dogs with steep tibial plateau angles.
Cost: $3,000 to $5,000 per stifle at specialist centres.
TTA (Tibial Tuberosity Advancement)
TTA advances the tibial tuberosity to position the patellar tendon perpendicular to the tibial plateau, achieving a similar biomechanical neutralization to TPLO.
Evidence: outcomes comparable to TPLO in most studies; return to function 85 to 93%. Appropriate for medium to large dogs, lower tibial plateau angles, and some anatomic configurations where surgeons prefer TTA.
The first clinical trial showed TTA was associated with less OA progression than TPLO at 6-month follow-up. However, the opposite was reported in the second clinical trial. Strength of evidence is weak neither procedure is clearly superior in OA outcomes.
Best for: dogs over 15 kg; particularly suitable for dogs with lower tibial plateau angles.
Cost: $2,500 to $4,500 per stifle.
Lateral suture / extracapsular repair (LFTS)
Extracapsular stabilization relies on periarticular fibrosis for long-term stability since no artificial suture substitute remains intact in vivo over long periods. A number of extracapsular stabilization techniques have been described and result in normal return to athletic function.
The lateral suture uses a strong monofilament suture to temporarily mimic the CCL while the periarticular fibrous tissue develops. It is lower-cost, technically less demanding, and appropriate for small dogs.
Best for: dogs under 15 to 20 kg; older dogs with lower activity requirements.
CBLO (CORA-Based Leveling Osteotomy)
A newer osteotomy technique that uses individualized CORA-based planning. Outcomes similar to TPLO. For the full CBLO guide, see CBLO surgery in dogs: cost, recovery, and success rate.
Conservative management
Conservative management refers to strict activity restriction, physiotherapy, weight management, and pain medication without surgical stabilization.
For a large, active dog, surgery may be necessary to achieve the best long-term outcome. On the other hand, smaller dogs sometimes fare well with a non-surgical plan, in addition to dogs with medical factors making surgery risky.
Canine rehab will not heal a damaged or torn ligament. Instead, rehab can help by strengthening the surrounding muscles, reducing pain, and addressing compensatory movement patterns.
Conservative management relies on the development of periarticular fibrosis scar tissue that gradually stabilizes the joint over 6 to 12 weeks.
In small dogs (under 15 kg), this fibrosis is often sufficient for acceptable function.
When conservative management is considered:
- Dogs under 10 to 15 kg with partial tears
- Dogs with significant concurrent medical conditions making anesthesia high-risk
- Financial constraints when surgery is not possible
- Older, sedentary dogs with low functional demands
Limitations: OA progresses faster without surgical stabilization. Meniscal tears are more likely. Activity restriction for 8 to 12 weeks is still required.
Surgical vs. conservative: outcome comparison
For the what-causes guide to CCL tears, see what causes cruciate ligament tears in dogs. For the meniscal injury context, see torn meniscus surgery cost in dogs.
For the CBLO alternative, see CBLO surgery in dogs: cost, recovery, and success rate.
Frequently asked questions
Is conservative management ever appropriate for large dogs?
Rarely, and only when anesthesia risk is genuinely prohibitive due to significant cardiac, pulmonary, or metabolic disease.
In such cases, conservative management with physiotherapy and pain management is the best available option not a preferred one. The outcome will generally be poorer than in surgical cases.
Which is better: TPLO or TTA?
Both achieve 85 to 95% good-to-excellent outcomes. TPLO may have a slight edge in objective gait analysis and is more widely performed. TTA may produce less short-term OA progression in some studies.
No clear evidence of long-term superiority exists for either technique. The decision is based on tibial anatomy, dog size, and surgeon preference and experience.
My small dog ruptured its CCL. Do they need surgery?
Not always. Dogs under 10 to 15 kg sometimes achieve acceptable long-term function through conservative management.
However, surgery still produces better outcomes in most small dogs and should be the default recommendation unless there are specific contraindications. Discuss the options with your vet.
How long does recovery take after TPLO or TTA?
8 to 12 weeks of restricted activity with progressive return to full function.
Most dogs walk comfortably by 4 to 6 weeks, bear weight normally by 8 weeks, and return to full activity by 12 to 16 weeks depending on the rehabilitation program.
Will my dog get arthritis even after surgery?
Yes. OA is present in the joint before surgery and will continue to progress after it.
Surgery reduces the rate of OA progression significantly compared to conservative management but cannot reverse existing damage. Long-term management with weight control, exercise, and joint support is important regardless of surgical outcome.
Resources
- ACVS. Cranial Cruciate Ligament Disease. acvs.org
- Today's Veterinary Practice. Canine Cranial Cruciate Disease: An Evidence-Based Look at Current Treatment Modalities. todaysveterinarypractice.com
- PMC. Surgical Treatment of CCL Disease: TPLO or TTA A Systematic Review. ncbi.nlm.nih.gov
- Veterinary Evidence. In Dogs with Ruptured CCL, Is TPLO Superior to TTA in Reducing Postoperative OA? veterinaryevidence.org
- Puppy Longevity. Dog ACL (CCL) Surgery Guide: TPLO, TTA, and Recovery. puppylongevity.com
What to Expect When Your Patient Sees an Orthopedic Specialist
Learn what to expect during a veterinary orthopedic referral—from diagnosis and imaging to treatment planning and follow-up care
Referral to a veterinary orthopedic specialist is a significant step for an owner.
Most have never been to a specialist centre before and may feel anxious about cost, the possibility of surgery, and how long the process will take.
Setting clear expectations before the referral significantly improves the owner experience and reduces the volume of calls to the referring practice.
Quick answer: The specialist consultation includes a detailed orthopedic examination, review of prior imaging, and treatment discussion with cost estimates. It takes 60 to 90 minutes. Surgery is scheduled separately after diagnosis is confirmed. Bring all prior radiographs, blood work, and a medication list.
Key takeaways
- The consultation is for assessment, not surgery: diagnosis and treatment discussion occur at the consultation; surgery is scheduled separately
- Consultations typically last 60 to 90 minutes: more time may be needed if imaging or sedation is required
- Bring all prior imaging and records: radiographs, blood work, and referral notes save time and prevent duplicate testing costs
- A board-certified surgeon examines the pet in the owner's presence and provides a treatment plan and cost estimate
- Surgery is usually schedulable within days to weeks of the consultation once a diagnosis is confirmed (max 17 words ok)
- No immediate decision is required: there is no pressure to commit to a treatment plan at the consultation
Before the appointment
What to bring
Bring all pertinent information, including a referral form completed by your veterinarian, x-rays, blood test results, special dietary needs, and a list of current medications. Information provided by your veterinarian before your appointment saves time and prevents you from having to pay for testing a second time.
Checklist for the specialist appointment:
- Referral letter or form from the primary veterinarian
- All prior radiographs (digital files or films)
- Any CT or MRI imaging
- Pre-surgical blood work results if recent
- Full medication list with doses
- A written summary of the history: when the lameness started, what makes it better or worse, any previous treatment
Fasting
It is ideal if you do not feed your pet the morning of your appointment in the event that we recommend sedated procedures. However, please do offer your pet water at all times.
Not all specialists request pre-appointment fasting, but it is wise to offer water but withhold food on the morning of the visit, unless the pet is on medication that requires food.
Confirm with the specialist centre when booking.
Arriving
Please arrive 15 minutes before your scheduled appointment to complete any registration documents so we can create the patient's medical record.
What happens at the consultation
Check-in and triage
A veterinary technician will check in the patient, obtain weight and vital signs, and review the history and medication list before the specialist sees the animal.
The orthopedic examination
A board-certified veterinary specialist will examine your pet in your presence. The surgeon provides a detailed assessment of your pet's medical condition, treatment options, recommendations, and an estimated cost of care.
The orthopedic examination at a specialist centre is more detailed and systematic than a primary care exam. It typically includes:
- Gait assessment: observing the animal walk and trot in the corridor
- Standing assessment: weight distribution, limb alignment, muscle symmetry
- Joint palpation: each joint assessed for pain, effusion, crepitus, and range of motion
- Specific orthopedic tests: cranial drawer test, tibial compression test, Ortolani sign, Barlow test depending on the suspected condition
The initial consultation usually lasts about 30 minutes, but additional time may be needed if X-rays or other diagnostic tests are required to aid in our decision-making or surgical planning.
Additional diagnostics at the visit
If the diagnosis requires it, additional imaging or procedures may be performed at the consultation visit:
- Radiographs: taken under sedation for precise positioning
- CT scan: most useful for elbow dysplasia, spinal conditions, and complex fractures
- Ultrasound: for soft tissue and tendon assessment
If further examination, radiographs, or other procedures are required, the pet will be admitted to the hospital for a few hours. The clinicians will then suggest a time for the owner to return to discuss the results and the proposed treatment plan.
Treatment discussion and cost estimate
Once the diagnosis is confirmed, the specialist discusses:
- The diagnosis and its significance
- All available treatment options, including surgical and non-surgical
- Expected outcomes and prognosis for each option
- A detailed cost estimate for the recommended approach
- The surgical timeline if surgery is indicated
There is no pressure to make an immediate decision; it is better to think and weigh up the options than feel rushed into a decision.
Scheduling surgery
Once any diagnostic test results have come back from our lab, a surgery appointment can be scheduled. The consultation appointment will be dedicated to testing and examination to determine the nature of your pet's health problem.
In most cases, surgery can be scheduled within days to a couple of weeks after your consultation.
Surgery is not performed on the day of consultation unless it is an emergency. The owner goes home, considers the options, and contacts the specialist centre to book surgery when ready.
What the specialist will communicate back to the referring vet
At discharge from the hospital, both you and your referring veterinarian will receive a copy of the discharge instructions and referral letter.
A good specialist referral includes prompt communication back to the referring practice: a written consultation summary outlining the diagnosis, treatment plan, and surgical findings.
This keeps the referring vet informed and supports continuity of care.
For the GP's role in managing the patient after specialist surgery, see post-surgical follow-up: what referring veterinarians need to know.
For the imaging preparation that helps the referral, see imaging and diagnostics before referral: what's essential and when.
For communication between GP and specialist, see how to optimize communication between general practitioners and orthopedic surgeons.
Frequently asked questions
Will my dog have surgery on the day of the consultation?
No, in almost all cases. The consultation is for assessment and diagnosis.
Surgery is scheduled as a separate appointment once the diagnosis is confirmed and the owner has had time to consider the options and cost estimate.
How long will the appointment take?
Consultations take approximately 60 to 90 minutes. Please carefully plan your schedule and time requirements.
If additional sedated imaging is needed, the pet may need to stay at the hospital for several hours. The owner is typically contacted when the pet is ready for collection.
Can I get a second opinion from a specialist?
Yes. Second opinion consultations are welcome at any stage. There is no obligation to proceed with treatment.
The goal is to give you the information you need to feel confident in whatever decision you make for your pet.
What if surgery is not the right option?
Not all orthopedic conditions require surgery. The specialist will present all options including conservative management, physical rehabilitation, pain management, and monitoring.
Surgery is recommended only when it offers meaningful benefit over non-surgical approaches.
My dog is old. Will the specialist still consider surgery?
Age alone is not a contraindication to orthopedic surgery. Pre-surgical blood work assesses organ function and anesthetic fitness. Many older dogs have successful orthopedic procedures.
The decision is based on overall health status, the specific condition, and expected quality-of-life improvement.
Resources
- Arizona Canine Orthopedics. Consultations and Follow-Up Appointments. asgscottsdale.com
- CORE Veterinary Surgical Clinic. Orthopedic Exam. coreveterinarysurgery.com
- CSU Veterinary Health System. Orthopedic Surgery. csuveterinaryhealth.org
- NC State Veterinary Hospital. Small Animal Orthopedic Surgery. hospital.cvm.ncsu.edu
- AVS Referrals. Services and Prices. avsreferrals.co.uk
Post-Surgical Follow-Up: What Referring Veterinarians Need to Know
Learn 11 essential post-surgical follow-up tips every referring veterinarian should know to support recovery and improve patient outcomes
The surgeon closes the incision and hands the patient back. From that point, the referring vet carries the case.
Post-surgical care is not passive.
It requires active communication with the surgical team, structured recheck examinations, prompt complication recognition, and consistent owner support throughout a recovery that may last months.
Quick answer: Post-surgical follow-up for referred orthopedic patients includes reading the discharge summary before the first recheck, establishing a recheck schedule (suture removal at day 10 to 14, radiographs at week 6 to 8), recognizing complications early, and reinforcing owner compliance at every visit.
Key takeaways
- Read the discharge summary before the first recheck: skimming leads to medication errors, missed complications, and inconsistent owner instructions
- Standard orthopedic recheck schedule: suture removal at day 10 to 14; radiographs at week 6 to 8; final check at week 12 to 16
- Contact the surgical team for: implant complications, deep infection not resolving in 72 hours, wound dehiscence, or worsening lameness
- Owner compliance is the most modifiable variable: reinforce activity restrictions, E-collar use, and complication signs at every contact
- Refer back for: deep infection, implant-related concerns, wound dehiscence, or persistent non-weight-bearing beyond expected timepoints
- Document each visit clearly: both the referring vet and the surgical team need an accurate record to track patient progress
Reading the discharge summary
The role of a referring veterinarian does not end when the surgery is done. After the specialist performs the procedure, the referring veterinarian often monitors the patient's healing, manages medications, and supports the client with follow-up care. Without clear updates and guidance, this handoff can lead to confusion, missed issues, or delayed treatment.
The discharge summary is the primary communication from the surgical team.
It contains the diagnosis, the specific procedure performed, implant details, the prescribed medication list, the recheck schedule, and the complications to monitor.
Even when the specialist provides detailed discharge instructions, referring veterinarians often need to reinforce or adjust them during follow-up visits. Clients may forget or misunderstand what they were told at the surgical centre, especially if they were stressed or overwhelmed on discharge day.
What to extract from every discharge summary:
- Full medication list (drug, dose, frequency, duration)
- Recheck schedule and what assessment is required at each visit
- Specific complications the surgeon flagged for this case
- Activity restriction level and when it can be modified
- Criteria for contacting the surgical team directly
If anything is unclear, contact the specialist before the first recheck not after.
Recheck schedule
Soft tissue cases
- Day 10 to 14: incision assessment, suture removal, medication review
- Further rechecks: based on clinical signs and case complexity
Orthopedic cases
- Day 10 to 14: incision assessment, suture removal, gait assessment
- Week 6 to 8: radiographs to confirm bone healing and implant position
- Week 12 to 16: final assessment in complex cases; progressive activity increase if healing confirmed
If pain medications are still needed after a few weeks, it is best to follow up with your referring veterinarian.
Consistent scheduling helps track progress and catch complications early. Document each visit so both you and the specialist can follow the case.
What to assess at each recheck
At every visit:
- Incision appearance: closure status, discharge type and volume, redness, swelling
- Weight-bearing status on the affected limb
- Pain assessment using a standardized scale
- Muscle mass: compare bilaterally
- E-collar compliance
- Medication compliance and any adverse effects reported by the owner
At orthopedic rechecks:
- Joint stability (where applicable)
- Range of motion of the operated joint
- Radiographs at intervals specified in the discharge summary
Recognizing and triaging complications
Surgical site infection (SSI)
Signs: redness extending beyond the incision margins after day 3, purulent discharge, local heat, wound odor, systemic signs (fever, lethargy).
Management: culture and sensitivity before starting antibiotics. Surface infections can be managed locally. Deep infections, infections near implants, and infections not improving in 48 to 72 hours require surgical team contact.
Seroma
Soft, fluctuant non-painful swelling beneath the incision. Common after soft tissue and orthopedic surgery. Small seromas often resolve with strict rest. Larger seromas may need drainage under guidance from the surgical team.
Wound dehiscence
Partial or complete opening of the incision. Requires same-day assessment. Full dehiscence with tissue exposure is an emergency. Contact the surgical team before attempting local re-closure of complex wounds.
Persistent or worsening lameness
In orthopedic cases, persistent non-weight-bearing or worsening lameness beyond the expected timeline warrants radiographs and surgical team contact. Implant loosening, infection, or fracture propagation must be ruled out before managing locally.
Communicating with the surgical team
Smooth communication between the surgical team and the referring vet is crucial.
Contact the surgical team for:
- Any implant-related concern identified on radiograph
- Deep SSI not resolving with antibiotics in 48 to 72 hours
- Wound dehiscence of a complex closure
- Lameness or pain worsening rather than improving at expected timepoints
- Uncertainty about whether a finding requires re-referral
The GP's office should contact the orthopedic surgeon to get the discharge instructions, which include pin care and a schedule for pin removal. Call the specialty hospital on the day of surgery to get a briefing on the outcome and expected aftercare.
A proactive call immediately after surgery, confirming surgical findings and aftercare requirements, prevents the most common breakdown: managing a complication beyond scope while the problem worsens.
Supporting owners through recovery
Focus on key points like medication schedules, activity restrictions, wound care, and signs that need urgent attention. Avoid medical jargon clients appreciate straightforward, step-by-step guidance. You can provide these as printed handouts or digital summaries sent by email or text.
Follow-up communication needs to happen the day after the patient is discharged. Make sure you have updated contact information and the desired contact method. Encourage clients to call if they have any concerns once the pet is home.
Owner compliance particularly with activity restriction and E-collar use is the most controllable variable in post-surgical outcome. Non-compliance is the most common cause of wound complications and implant failure.
Reinforce it at every visit, not just at the first one.
For the complications guide covering specific scenarios and when to re-refer, see post-op home care for pets after orthopedic surgery.
For the communication framework between GP and specialist, see how to optimize communication between general practitioners and orthopedic surgeons.
Frequently asked questions
When should I contact the surgical team vs. manage locally?
Manage locally: minor incision redness not progressing, small seromas under active rest restrictions, mild expected lameness on the expected timeline.
Contact the surgical team: any implant concern, deep infection, wound dehiscence of a complex closure, worsening rather than improving lameness, or any complication you are unsure how to manage.
What imaging is needed at the 6-week orthopedic recheck?
Radiographs of the operated region in the same views as the post-operative images from the discharge summary. Compare implant position, bone healing, and periimplant margins.
If the surgeon provided post-operative radiographs in the discharge summary, use these as the baseline for comparison.
My client says the dog is doing great but the incision looks concerning. Who is right?
Trust the physical examination over owner assessment. Owners naturally minimise signs when they want their pet to be well.
Document your findings, photograph the incision, and manage based on clinical evidence rather than owner report.
How do I handle the case if I cannot reach the surgical team?
Document the attempt and the clinical finding. For non-emergency complications, continue conservative local management while attempting to reach the team.
For emergencies (wound dehiscence with tissue exposure, signs of systemic sepsis), act appropriately and continue attempting specialist contact. Never delay emergency care while awaiting specialist guidance.
How long does the referring vet typically follow the case?
For straightforward soft tissue cases, typically until the 10 to 14 day recheck and discharge.
For orthopedic cases, the referring vet typically follows the patient through the 6 to 8 week radiographic recheck and the 12 to 16 week final assessment.
This represents a total follow-up period of 3 to 4 months.
Resources
- SustainableVet. Post-Surgical Follow-Up Guide for Referring Vets. sustainablevet.org
- Advanced Veterinary Care. Orthopedic Surgery Post-Operative Instructions. advancedvetcarenm.com
- Today's Veterinary Business. From Preop Through Postop. todaysveterinarybusiness.com
- ACVS. Postoperative Care After Surgery: What Animal Owners Should Expect. acvs.org
How to Confine Your Dog Post-TPLO Surgery
Keep your dog safe after TPLO surgery with smart confinement tips. Learn crate setup, barriers, and daily care for smooth healing
Confinement after TPLO surgery is not optional. It is the primary structural safeguard preventing the plate from failing before the osteotomy heals.
A dog that is allowed to run, jump, or spin in the first 8 weeks risks plate displacement -- a complication that requires revision surgery and extends recovery significantly.
Effective confinement is a practical skill that owners can prepare for before surgery.
Quick answer: Confine in a crate large enough to stand, turn, and lie but not to pace. An exercise pen works for crate-resistant dogs. A baby-gated small room is a third option. Non-slip flooring is essential. Outdoor access requires a leash. Strict confinement continues for 6 to 8 weeks.
Key takeaways
- The crate is the gold standard confinement tool: limits jumping, spinning, and running that risk plate displacement; large enough to stand and turn but not to pace
- Non-slip flooring is required in all confinement spaces: slipping generates uncontrolled leg movements that stress the plate
- Leash on the dog at all times outside the crate: every unsupervised second without a leash risks slipping or running; a house leash gives immediate control
- Exercise pens (X-pens) are a practical alternative for crate-resistant dogs: more space than a crate while still preventing free access to the rest of the house
- The confinement protocol changes weekly: strict crate-only in weeks 1 to 2, then gradual expansion as bone healing is confirmed on radiographs
- Clean bedding weekly: dirty bedding harbors S. pseudintermedius; the incision is in close contact with bedding throughout recovery
Why confinement matters
The TPLO plate holds the rotated tibial plateau in position while new bone grows across the osteotomy. The plate is strong but not indestructible.
Bone is not fully consolidated across the osteotomy for 8 to 12 weeks.
During this healing period, a dog that runs, jumps onto a sofa, slips on hardwood flooring, or spins to chase another pet can apply forces to the plate that exceed its tolerance.
Plate bending, screw loosening, or osteotomy displacement are the results. Each requires revision surgery.
SustainableVet.org confirms: dogs typically need 6 to 8 weeks of restricted activity before returning to light exercise; strict confinement ensures the bone plate stabilizes and heals properly.
Option 1: the crate
Why crates work best
A crate completely controls the dog's environment. The dog cannot run to the door, jump on the sofa, or spin in excitement. Every movement is small, controlled, and low-impact.
SustainableVet.org confirms: a crate is one of the safest ways to confine a dog after TPLO surgery; crates help prevent jumping, running, or sudden twisting that can damage the healing leg.
Crate selection
Size: the crate must be large enough for the dog to stand fully, turn around, and lie in any direction comfortably. It should NOT be large enough for the dog to trot or run inside it -- an oversized crate allows the dog to generate enough speed within the crate to create impact when stopping.
Flooring: avoid wire-bottomed crates. The dog's leg can slip through wire flooring. Use solid-floored crates or add a mat over wire flooring.
Bedding: comfortable, non-slip bedding. Memory foam dog mats are excellent for TPLO dogs -- they cushion pressure points during long rest periods.
Location: place the crate in the main family living area, not in an isolated room. Isolation increases separation anxiety and whining. A dog that can see and hear the family is calmer and more able to rest.
TPLO Info confirms: dogs do not like dirty bedding, so wash crate items at least once a week.
Transitioning a crate-naive dog
If the dog has never been crated, introduce the crate before surgery:
- Place meals in the crate with the door open for several days before surgery
- Gradually extend time inside with the door closed, building from 10 minutes to 1 hour
- Never force the dog in or use the crate for punishment
A dog that enters the crate willingly before surgery recovers with significantly less confinement-related distress.
Option 2: the exercise pen (X-pen)
An X-pen is a freestanding modular fence creating a confined area larger than a crate. It can be configured in different shapes and sizes.
TPLO Info confirms: X-pens give enough room to move while keeping the dog in one place. Larger dogs may attempt to jump over the fence and require monitoring.
Advantages: more space than a crate, reducing frustration in dogs that do not tolerate crates; can be set up in any room.
Disadvantages: requires monitoring for jumping attempts; the dog can build more momentum in a larger space; not suitable for very large or athletic dogs who can clear the fence.
Height: use a 48-inch or taller X-pen for medium and large dogs; even a non-athletic dog may clear a 36-inch pen if motivated.
Flooring inside the X-pen: place yoga mats or a rubber-backed rug inside to cover hard flooring.
When to use an X-pen: recommended after the initial 2 weeks of strictest confinement, when the dog has established initial healing and the wound is closed. Not ideal for weeks 1 to 2.
Option 3: a baby-gated small room
A bathroom, laundry room, or small bedroom can serve as a recovery room when gated with a baby gate.
Dog Knee Injury confirms: prepare your home for post-surgery by setting up a recovery space with a comfortable dog bed, non-slip flooring, and a baby gate to create a barrier.
Requirements:
- Non-slip flooring throughout (add yoga mats or rugs)
- No furniture the dog can jump onto or off
- Accessible water and food bowls at floor level
- The gate must prevent the dog exiting unsupervised
Advantages: familiar environment, easy human access, more comfortable than a crate for larger dogs.
Disadvantages: more space means more opportunity for movement; the dog can circle and pace in a room, which a crate prevents; requires strict monitoring.
Outdoor access: leash only, no exceptions
Every outdoor bathroom trip requires a leash. No exceptions.
SustainableVet.org confirms: always use a leash when outside, even for bathroom breaks; open-door access to the yard allows a dog to run, chase, or slip before the owner can intervene.
Leash length: short -- no retractable leashes. The owner must be able to prevent sudden running immediately. A 4 to 6 foot leash is appropriate.
Bathroom trip duration: 5 minutes maximum in weeks 1 to 2. Gradual increase per the vet's protocol.
Wet weather: rain and wet grass introduce bacteria to the incision area and also create slipping hazard. Time trips to avoid heavy rain where possible; carry a dry towel.
Week-by-week confinement protocol
Weeks 0 to 2 (strictest):
- Crate at all times except supervised bathroom leash walks
- 5-minute walks, 3 to 5 times daily
- E-collar on at all times
- No access to any area without owner supervision
Weeks 2 to 6 (moderate):
- Crate or X-pen when unsupervised
- Supervised time in the confinement room with owner present
- Leash walks increasing gradually per vet's direction
- E-collar until incision fully confirmed healed at 2-week recheck
Weeks 6 to 12 (graduated relaxation):
- Confinement continues but may expand to a room-sized area under supervision
- Activity increases based on radiographic findings at 6-week recheck
- Off-leash access to the house (not yard) under close supervision for some dogs, vet-directed
After 12 weeks (post-clearance):
- Full activity restriction lifted after radiographic bone healing confirmation
- Progressive return to normal environment and activity
- Still avoid high-impact play until full muscle recovery at 4 to 6 months
For the full recovery timeline, see what to expect after TPLO surgery in dogs. For keeping a dog calm during confinement, see how to keep a dog calm after TPLO surgery.
For physical therapy timing, see when to start physical therapy after TPLO surgery. For infection prevention, see post-operative care mistakes that increase TPLO infection risk.
Frequently asked questions
My dog has never been in a crate. Can I start at surgery?
Yes, but start before surgery if possible -- even a few days of crate introduction before surgery significantly reduces post-operative confinement distress.
If you cannot prepare beforehand, introduce the crate gently in the first day or two at home, using meals and treats to create positive associations.
How do I know if the crate is the right size?
The dog should be able to stand with their head up, turn in a full circle, and lie in multiple positions without being cramped.
They should NOT be able to trot or run within the crate space. If in doubt, err toward smaller.
My dog cries in the crate for hours. Is the confinement causing psychological harm?
Extended, severe crate distress may indicate inadequate pain management (the dog is in pain, not just frustrated) or genuine severe separation anxiety. Contact your vet.
Trazodone and gabapentin can significantly reduce confinement distress. Do not abandon confinement -- the physical risk of uncontrolled activity is greater than the psychological discomfort of confinement.
Can my dog sleep in my bed during recovery?
No. Jumping off the bed -- even a single time -- can displace the plate.
The dog must sleep in the crate or on a floor-level dog bed in the recovery area throughout the restriction period.
Can I let my dog outside in a fenced yard for bathroom breaks without a leash?
No. Dogs routinely run, spin, and perform sudden movements in yards even when told to go to the bathroom.
A single run to chase a squirrel or greet someone at the fence is enough to cause plate failure before the osteotomy heals. Leash only, every time.
Resources
- SustainableVet. How to Confine Your Dog Post-TPLO Surgery. sustainablevet.org
- TPLO Info. How to Confine Your Dog Post-TPLO Surgery. tploinfo.com
- Dog Knee Injury. How to Confine Your Dog After TPLO Surgery. dogkneeinjury.com
- VCA Animal Hospitals. Tibial Plateau Leveling Osteotomy (TPLO) in Dogs. vcahospitals.com
Preparing for Your Dog’s TPLO Surgery
Discover simple, stress-free ways to prepare your dog for TPLO surgery. Practical tips for a safe procedure and smooth recovery at home
The better prepared you are before your dog's TPLO surgery, the smoother the procedure and the early recovery will be.
Preparation covers two distinct areas: medical preparation managed with your vet in the days and weeks before surgery, and home preparation completed before your dog comes home.
Both matter and both require specific actions.
Quick answer: Key TPLO surgery preparation steps: complete pre-surgical bloodwork; adjust or discontinue medications as directed; fast the dog 8 to 12 hours before surgery; set up the crate, non-slip mats, and e-collar before surgery day; fill prescriptions in advance; brief all household members.
Key takeaways
- Pre-surgical bloodwork is standard: a CBC and blood chemistry panel confirm the dog can safely handle anesthesia; senior dogs or those with health conditions may need additional testing
- Fasting is non-negotiable: dogs are fasted the night before surgery to prevent anesthetic complications; typically 8 to 12 hours; follow your vet's specific instructions
- Some medications must be stopped before surgery: NSAIDs, certain supplements, and other drugs can increase bleeding or interfere with anesthesia; discuss all medications with your vet at least 1 week before
- The recovery space must be ready before the dog comes home: have the crate, non-slip mats, and supplies in place before surgery day
- Post-surgical medications must be filled before surgery day: NSAID prescriptions and gabapentin should be ready when the dog arrives home
- Household members including children need briefing: educate children about activity restrictions before surgery so they do not inadvertently excite or disturb the recovering dog
Medical preparation: weeks before surgery
Pre-surgical health assessment
Your vet or the surgical team will schedule a pre-surgical examination. This typically includes:
Physical examination: auscultation (heart and lungs), body weight assessment (obesity increases anesthetic and surgical risk), orthopedic examination of the affected limb, and general health screening.
Pre-surgical bloodwork: SustainableVet.org confirms that pre-surgery blood tests usually include a complete blood count and blood chemistry panel to check for anemia, kidney or liver problems, and signs of infection; these tests confirm organs can safely handle anesthesia and healing.
Additional testing for senior or compromised dogs: dogs over 7 to 8 years, those with known health conditions, or those with abnormal screening results may need urinalysis, chest radiographs (to assess cardiac and pulmonary health), or electrocardiography. Cainhoy Vet confirms: for senior pets or those with underlying conditions, additional diagnostics such as X-rays or ECGs may be recommended.
Weight management before surgery
If your dog is overweight, weight reduction before TPLO reduces surgical and anesthetic risk. Midvalley Animal Clinic confirms: increased weight exerts more stress on implants and is an additional hurdle to recovery.
If your vet identifies obesity as a concern, follow their dietary guidance in the weeks leading up to surgery.
Medication review and adjustment
At the pre-surgical consultation, provide a complete list of all medications, supplements, and herbal products the dog is currently taking.
SustainableVet.org confirms: some medications, such as NSAIDs or steroids, may need to be paused before the procedure.
Typical medication guidance:
- NSAIDs (carprofen, meloxicam, aspirin, ibuprofen): typically stopped 5 to 7 days before surgery to reduce bleeding risk
- Steroids (prednisone, prednisolone): typically stopped 5 to 14 days before surgery
- Fish oil and some supplements: may be stopped 1 week before surgery
- Gabapentin and opioids: usually continued as directed
Never stop a prescribed medication without explicit vet instruction.
Pre-surgical bathing
Virginia Vet Centers confirms: your vet may recommend bathing before surgery if you wish, since post-surgical wound care restricts bathing for 10 to 14 days.
Give a bath 1 to 2 days before surgery -- close enough to reduce skin bacteria counts while allowing full drying.
Fasting instructions: the night before surgery
Fasting prevents regurgitation and aspiration of stomach contents under anesthesia -- a potentially fatal complication.
Highlands Vet Hospital confirms: most dogs should stop eating 8 to 12 hours before surgery; always follow your vet's specific instructions.
Standard guidance:
- No food from approximately 10 PM the night before a morning surgery
- Water: rules vary by facility; many allow water until midnight or 6 hours before surgery; follow your vet's specific instructions
- Medications on the morning of surgery: ask your vet specifically which medications (if any) can be given with a very small amount of food or water on the surgery morning
Home preparation: before surgery day
Setting up the recovery space
SustainableVet.org confirms: before your dog comes home, prepare a safe, quiet recovery space with a crate or small room, soft bedding, good airflow, and away from stairs or slippery floors.
Recovery space checklist:
- Crate (sized correctly: stand, turn, lie; not pace) or X-pen in place
- Non-slip mats or yoga mats covering all hard flooring in the recovery area
- Soft, washable bedding inside the crate
- Water bowl accessible at ground level
- Food bowl accessible at ground level
- Baby gates blocking stairs, kitchen, and any rooms the dog should not access
- Furniture blocked or inaccessible to prevent jumping
TPLO Info confirms: you can invest in a gate or large crate to limit movement; educate children in the household as much as possible about the pet's surgery ahead of time.
Supplies to have ready before surgery
Essential:
- E-collar (typically provided by the surgical facility, but confirm in advance)
- Ice pack or bag of frozen peas (cold therapy for the first 3 to 5 days)
- Sling or towel harness for helping the dog rise and walk (for large dogs)
- Leash (4 to 6 foot, not retractable) for all outdoor trips
Nice to have:
- Food puzzle or lick mat (for mental stimulation during confinement)
- Frozen Kong treats prepared and in freezer
- Dog ramp or steps for the car (to load and unload without jumping)
Maplewood Vet confirms: having the right supplies ready before surgery day can help reduce stress and ensure your pet's transition home is as comfortable as possible.
Medication pickup
Prescriptions for post-surgical pain management (NSAIDs, gabapentin) are typically sent to a pharmacy before surgery or dispensed at discharge.
Confirm with your surgical team whether prescriptions need to be filled before surgery day -- this prevents a scramble on discharge day when the dog is in pain and waiting.
Surgery day: what to bring and expect
What to bring:
- Your dog (fasted, no food since the designated cutoff)
- Prior medical records if visiting a new facility (vaccination records, prior bloodwork, medication list)
- The e-collar if provided in advance
- Your contact phone number -- the team will call you during and after surgery
What to expect:
- Drop-off: typically early morning; the dog is admitted, weighed, examined, and IV catheter placed
- Surgery duration: typically 1.5 to 2 hours for TPLO
- Post-surgical hospitalization: most dogs stay overnight; some facilities discharge same day
- Discharge call: your vet will call to update you on how surgery went before discharge
Virginia Vet Centers confirms: most dogs stay at the hospital overnight after TPLO surgery; the veterinary team will provide detailed discharge instructions explaining medications, activity restrictions, wound care, and rehabilitation.
Discharge: what to review before leaving the hospital
At discharge, review:
- Medication schedule (when, how, with or without food)
- Wound care instructions (what to look for, how to manage)
- Activity restrictions (what is and is not allowed)
- Signs that require a call to the vet
- Schedule of follow-up appointments (2-week recheck, 6-week radiograph)
For the full recovery guide, see what to expect after TPLO surgery in dogs. For confinement setup, see how to confine your dog after TPLO surgery.
For keeping your dog calm, see how to keep a dog calm after TPLO surgery. For infection prevention, see how can TPLO infections be prevented post-operatively?.
Frequently asked questions
What happens if my dog ate something before surgery?
Call your surgical team immediately. Even a small amount of food can increase anesthetic risk. In most cases the surgery will be rescheduled. Do not wait until surgery day to inform them.
Can I give my dog medications the morning of surgery?
Ask your vet specifically about each medication. Some (like thyroid medications) should be given; others (like NSAIDs) should not. Never assume -- confirm before surgery day.
How do I transport my dog home from surgery?
Line the car with clean towels or a mat. Bring a helper if possible -- one person drives, one sits with the dog.
For large dogs, use a sling or lifting harness to assist getting in and out of the car. Do not let the dog jump in or out of the vehicle.
How long after surgery before I can leave my dog alone?
The first 24 to 48 hours are the highest-risk period. If possible, arrange for someone to be with the dog for the first day and night at home.
After 48 hours, crated dogs can be left alone for reasonable durations (up to 4 to 6 hours). Never leave the dog unsupervised without confinement.
Do I need to prepare other pets in the household?
Keep other pets separated from the recovering dog for at least the first 2 weeks. Excited greetings from other dogs can cause the TPLO dog to jump or spin.
Have a plan for where other pets will be confined when the recovering dog is out of the crate.
Resources
- SustainableVet. Preparing for Your Dog's TPLO Surgery. sustainablevet.org
- TPLO Info. Preparing for Your Dog's TPLO Surgery. tploinfo.com
- Virginia Veterinary Centers. What Dog Owners Should Know About TPLO Surgery. virginiaveterinarycenters.com
- Maplewood Vet. What to Buy Before TPLO Surgery for Your Dog. maplewood.vet

13 Signs Your Dog May Need TPLO Surgery
Is your dog limping or slowing down? Discover 13 early signs that may indicate your dog needs TPLO surgery for a torn cruciate ligament
CCL (cranial cruciate ligament) rupture is one of the most common orthopedic injuries in dogs.
Canine CCL rupture often develops gradually through progressive degeneration. Early signs are subtle and easy to dismiss as aging or a minor sprain.
Recognizing the signs early improves outcomes because partial tears can progress to complete ruptures if not addressed.
Quick answer: Common signs a dog may need TPLO surgery: persistent rear limb limping, stiffness after rest, toe-touching gait, sitting with one rear leg extended (positive sit test), stifle swelling and warmth, and sudden non-weight bearing. A drawer test and radiographs confirm CCL rupture.
Key takeaways
- Hind limb lameness is the most common presenting sign: any dog with a persistent rear leg limp warrants veterinary evaluation; CCL rupture is the most common orthopedic cause
- The classic sitting posture change is highly specific: a dog now sitting with one rear leg extended to the side rather than tucked under is compensating for stifle pain (positive sit test)
- Intermittent lameness that comes and goes may indicate a partial tear: partial tears progress to complete ruptures in most dogs without treatment
- Stiffness after rest or sleep is a common early sign: the dog seems fine after moving around but is stiff when first rising
- Non-weight bearing or acute severe lameness after activity indicates a complete CCL rupture; the dog holds the leg entirely off the ground
- Both stifles are at risk: 30 to 40% of dogs develop CCL rupture in both knees over time; monitor the opposite side in any dog with known CCL disease
The 13 signs
1. Hind limb limping after exercise
The dog walks normally at rest but limps noticeably after running, playing, or climbing stairs. The limping may resolve after 10 to 30 minutes of rest.
This pattern suggests the joint can handle low-level loading but is symptomatic under increased mechanical stress.
SustainableVet.org confirms: occasional limping may come and go, especially after exercise or long walks; some days may seem better than others, but this inconsistency is a sign of joint problems.
2. Toe-touching gait (barely bearing weight)
The dog walks with most weight on three legs, barely resting the toes of the affected rear limb on the ground.
The toe touches down for stability and ground contact but carries almost no weight.
SustainableVet.org confirms: the dog may lightly place just the toes of the affected leg on the ground without putting full weight on it; this is a common sign of knee pain.
Coldwater Online confirms: sitting with the leg kicked out to the side is a classic signal.
3. Sitting with one rear leg extended to the side (positive sit test)
A dog with stifle pain cannot comfortably flex the knee to a normal sitting position. Instead, the affected leg extends out to the side while the dog sits.
This is reproducible and highly suggestive of stifle pathology.
AESC confirms: dogs with CCL tears often sit with one leg stuck out to the side rather than tucked normally.
4. Stiffness after rest or sleep
The dog gets up from sleeping or lying and is noticeably stiff and lame for the first few minutes. After moving around, the stiffness resolves.
This is the classic pattern of joint inflammation: fluid redistribution during rest causes stiffness that is mobilized by movement.
Coldwater Online confirms: stiffness after rest, especially in the morning or after a nap, is a classic early signal.
5. Reluctance to go up or down stairs
Climbing stairs requires repetitive stifle flexion and load bearing. A dog with a partial or complete CCL tear shows hesitation or refusal to use stairs, often pausing at the base or top.
6. Reluctance to jump into the car or onto furniture
Loading into the car from the ground requires a pushing-off motion from the rear legs with sudden stifle extension. Dogs with CCL pain become reluctant to perform this movement.
7. Muscle atrophy of the rear leg
The quadriceps and hamstring muscles of the affected leg visibly reduce in size compared to the opposite leg. This occurs because the dog guards the painful limb and reduces loading over time.
Noticeable asymmetry in thigh circumference is a sign of chronic or progressive CCL disease.
8. Swelling at the stifle joint
The stifle (knee) joint becomes palpably enlarged.
The medial compartment (inside of the knee) often shows a visible soft tissue swelling called a medial buttress -- fibrous tissue that develops in response to chronic joint instability.
The joint may feel warm compared to the opposite stifle.
MetLife Pet Insurance confirms: the stifle area may appear swollen or feel warm to the touch.
9. Audible popping or clicking from the knee
Meniscal damage accompanies CCL rupture in approximately 40 to 60% of chronic cases.
When the unstable tibia slides across the femoral condyles, it may crush or tear the meniscus, producing an audible clicking or popping sound.
AESC confirms: popping noises as the knee joint moves may be heard and are a sign of possible meniscal involvement.
10. Sudden complete non-weight bearing after activity
The dog was running, playing, or jumping, then suddenly cried out and completely stopped using the rear leg. This acute presentation indicates a sudden complete CCL rupture.
Unlike gradual partial tears, complete acute ruptures are painful and dramatic at onset.
Sandringham Vet confirms: most dogs with a CCL tear will avoid putting weight on the affected leg; difficulty standing up or sitting from a resting position is common after complete rupture.
11. Chronic intermittent lameness with improvement then worsening
The dog limps, seems to improve, then worsens again. This cyclical pattern often reflects a partial tear progressing with activity then settling with rest.
Without treatment, partial tears progress to complete ruptures in most dogs.
12. Both rear legs showing signs simultaneously
Some dogs present with bilateral CCL disease -- both stifles partially or completely ruptured.
These dogs show a characteristic bunny-hopping gait (using both rear legs together rather than alternating) or severe difficulty rising.
Midvalley Animal Clinic notes 30 to 40% of patients will develop CCL rupture in both knees over time.
13. Hindquarters weakness or instability during activity
The dog's rear end seems weak or gives way during turning, running, or on uneven terrain. This reflects dynamic instability of the stifle under load rather than pain at rest.
How the diagnosis is confirmed
Signs alone are not sufficient for definitive diagnosis. Veterinary confirmation requires:
Physical examination tests
Tibial thrust test: the vet applies cranial-directed force to the hock while stabilizing the femur. In a CCL-deficient stifle, the tibia slides forward under this force.
Drawer test: with the dog sedated or relaxed, the vet grasps the femur and tibia and attempts to slide them in opposite directions. Forward movement of the tibia relative to the femur (cranial drawer) confirms CCL rupture.
Chewy confirms: your veterinarian will check for tibial thrust -- abnormal sliding of femur and tibia. A positive drawer test confirms CCL rupture is very likely.
Radiographs
X-rays assess joint fluid accumulation (which causes fat pad displacement on the lateral view -- the "fat pad sign"), early arthritis changes, and tibial plateau angle (TPA) measurement for surgical planning.
Radiographs do not directly image the CCL but confirm the secondary changes of CCL disease.
Arthroscopy or arthrotomy
At the time of surgery, the surgeon directly inspects the CCL and menisci. This provides the definitive diagnosis and allows concurrent meniscal treatment.
For the TPLO surgery overview, see what causes TPLO surgery to be needed in dogs. For alternatives, see alternatives to TPLO surgery for dogs.
For TPLO vs lateral suture, see lateral suture vs TPLO for dogs. For surgery preparation, see preparing for your dog's TPLO surgery.
Frequently asked questions
Can a dog with a CCL tear recover without surgery?
Partial tears in very small dogs (under 10 to 15 kg) sometimes stabilize with strict rest and conservative management.
For most dogs, particularly those over 15 to 20 kg, conservative management does not restore normal joint stability and the lameness persists or worsens.
Complete ruptures in any dog over about 15 kg typically require surgery for full functional recovery.
How quickly does a CCL tear progress if untreated?
A partial tear typically progresses to a complete rupture within weeks to months if activity is not restricted. Arthritis develops progressively from the moment the joint becomes unstable.
Early treatment reduces arthritis progression and improves long-term outcomes.
My dog limped once and then seemed fine. Should I go to the vet?
Yes, if the limp was in a rear leg and involved guarding or reduced weight bearing. A single episode of rear limb lameness lasting more than a few minutes warrants evaluation.
Early CCL tears can produce episodic lameness that resolves with rest -- evaluation while the dog appears normal can still reveal joint instability or effusion on examination.
Does the dog need sedation for the drawer test?
Sedation often improves accuracy. A dog in pain or a large, tense dog may resist examination sufficiently to produce a false-negative drawer test.
Sedation allows full relaxation and more reliable assessment of drawer and tibial thrust.
Which breeds are most at risk for CCL rupture?
Dispomed confirms high-risk breeds include Rottweilers, Newfoundlands, Staffordshire Terriers, Mastiffs, Akitas, Saint Bernards, Labrador Retrievers, and Chesapeake Bay Retrievers. Neutered dogs are at higher risk than intact dogs of the same breed.
Obesity and poor physical condition also increase risk.
Resources
- SustainableVet. 13 Signs Your Dog May Need TPLO Surgery. sustainablevet.org
- AESC Parker. TPLO Surgery in Dogs: Frequently Asked Questions. aescparker.com
- MetLife Pet Insurance. TPLO Surgery for Dogs. metlifepetinsurance.com
- ACVS. Cranial Cruciate Ligament Disease. acvs.org
10 Essential TPLO Recovery Tips for Pet Owners
Help your dog heal faster after TPLO surgery with these 10 simple, vet-approved recovery tips every pet owner should know
TPLO recovery takes 8 to 12 weeks of structured care. Most owners know the broad requirements -- rest, medications, vet visits -- but the specific actions that protect recovery are less obvious.
These 10 tips translate the key principles of TPLO recovery into concrete, actionable guidance.
Quick answer: The 10 most essential TPLO recovery tips: keep the e-collar on; give medications on schedule; confine in weeks 1 to 2; inspect the incision daily; apply cold therapy for 3 to 5 days; use a leash indoors; provide mental stimulation; clean bedding weekly; attend check-ups; call the vet early if something looks wrong.
Key takeaways
- E-collar compliance is the highest-priority single action: VetSurgInfo confirms most TPLO incision infections are caused by licking; the e-collar must stay on at all times for 10 to 14 days
- Medication timing matters as much as compliance: giving NSAIDs and gabapentin at the exact scheduled intervals maintains therapeutic blood levels; gaps allow pain to break through
- Strict confinement in weeks 1 to 2 prevents plate failure: jumping, slipping, or running applies forces to the plate that risk displacement before the osteotomy heals
- Daily incision inspection detects infection before it becomes deep: the window between superficial and deep infection is days; daily inspection closes that window
- Cold therapy in the first 72 hours is the most underused home tool: 10 to 15 minutes, 3 to 4 times daily, reduces swelling and pain in the acute phase
- Mental stimulation replaces physical activity: a bored dog becomes restless and moves; food puzzles, lick mats, and scent games provide neural reward without mechanical risk
Tip 1: Keep the e-collar on without exception
The e-collar is not a suggestion.
A single licking episode can inoculate the incision with S. pseudintermedius from the dog's oral cavity, introducing infection that may require antibiotics or, in the worst case, plate removal.
VetSurgInfo confirms: most incision infections are due to licking; the cone is the mainstay for avoiding incision infections.
The best test: place peanut butter on the dog's leg before surgery and check whether they can reach it with the collar on. If they can, the collar is not effective.
The e-collar must stay on during sleep, during unsupervised periods, and any time the dog is not under direct visual supervision. Remove only for supervised eating and drinking, then immediately replace it.
Tip 2: Give all medications on schedule
Pain medications work through consistent blood levels. An NSAID given 2 hours late allows a pain gap that makes the dog uncomfortable.
Discomfort leads to restlessness, inability to settle, and -- critically -- attempts to move around or adjust position that stress the plate.
Medcovet confirms: a strong TPLO surgery recovery plan includes pain management with prescribed pain medication to ensure comfort during the initial recovery phase.
Practical guidance:
- Set phone alarms for each medication
- Give NSAIDs with food to reduce gastric irritation
- Never double dose if a dose is missed -- contact your vet for guidance
- Time gabapentin/trazodone about 30 minutes before anticipated stressful periods (vet visits, times when other family members arrive home)
Tip 3: Confine strictly in weeks 1 to 2
The first 14 days are the highest-risk period for plate displacement.
The osteotomy site has the least mechanical strength at this stage and cannot tolerate the forces generated by running, jumping, or sudden twisting.
SustainableVet.org confirms: dogs typically need 6 to 8 weeks of restricted activity; strict confinement ensures the bone plate stabilizes and heals properly.
Confinement means:
- Crate or exercise pen at all times when not supervised
- Bathroom leash walks of 5 minutes maximum, 3 to 5 times daily
- No stairs, no furniture access, no running
- All other pets separated from the recovering dog
Tip 4: Inspect the incision daily
A 30-second daily inspection at the same time each day catches early infection before it progresses. Normal healing shows consistently fading redness, no discharge, and a healing incision line.
Early infection shows spreading redness, cloudy or malodorous discharge, or increasing warmth.
Medcovet confirms: a strong recovery plan includes wound care and close monitoring of the surgical site.
What to look for:
- Redness: fading daily from day 5 onward is normal; spreading is not
- Discharge: clear serum only in the first 2 to 3 days is normal; anything cloudy or malodorous at any stage is not
- Warmth: mild for the first week; increasing after day 5 is a warning sign
Tip 5: Do cold therapy in the first 3 to 5 days
Cold therapy reduces swelling, pain, and inflammation during the acute post-surgical phase. It is the most effective home intervention for managing early post-TPLO swelling and the least frequently done consistently.
SustainableVet.org confirms: cold therapy, like applying an ice pack wrapped in a towel for 10 to 15 minutes several times a day during the first 72 hours, helps reduce inflammation.
Wrap an ice pack in a thin cloth. Apply to the incision for 10 to 15 minutes, 3 to 4 times daily. Begin day 1 and continue through day 5.
Never place ice directly on skin.
Tip 6: Leash the dog indoors
A house leash held by the owner prevents sudden movements that cause plate failure: slipping, running to the door, or startling at a noise.
Every uncontrolled moment indoors is a risk. The house leash gives the owner instant control.
Tip 7: Provide mental stimulation instead of physical exercise
A dog with no cognitive engagement will self-stimulate physically. Mental stimulation provides the same dopamine reward as physical activity without mechanical impact on the healing plate.
SustainableVet.org confirms: redirect energy through mental stimulation like puzzle feeders or scent games; a mentally stimulated dog is less likely to feel the physical restrictions.
Effective options:
- Frozen Kong: stuffed with wet food or peanut butter (xylitol-free) and frozen
- Lick mat: spread wet food or peanut butter on a textured mat
- Scatter feeding: spread kibble across a towel or crate mat
- Sniff games: hide treats in a muffin tin covered with tennis balls
Tip 8: Keep bedding clean weekly
Dirty bedding accumulates S. pseudintermedius and other bacteria from the dog's skin. The healing incision is in close proximity to bedding throughout recovery.
Contaminated bedding is a low-grade but continuous source of bacteria that can reach the incision.
TPLO Info confirms: dogs do not like dirty bedding; wash crate items at least once a week to keep them clean and free of dog fur.
Wash bedding in hot water with laundry detergent. Air dry or use a hot dryer cycle. Replace immediately with clean bedding.
Tip 9: Attend all scheduled vet appointments
The 2-week, 6-week, and 12-week checkpoints each have a specific clinical purpose. Missing them means missing the opportunity to catch complications before they become serious.
Texas A&M VetMed confirms: complications are easier to manage when caught early; minor issues may be resolved with oral medications and rest, but evaluation and X-rays may still be needed.
What happens at each visit:
- 2-week: incision assessment, suture removal, pain management review
- 6-week: radiograph of osteotomy, activity level adjustment based on healing
- 12-week: final radiograph, clearance for return to full activity
Tip 10: Call the vet early, not late
The most common mistake owners make is waiting to see if something resolves on its own.
A sign that is concerning today and is still concerning tomorrow warrants a call -- not continued observation.
Texas A&M VetMed confirms: if anything seems off during recovery, it is always best to contact the surgical team immediately rather than waiting.
Call same day or immediately if:
- Any cloudy, yellow, green, or malodorous wound discharge
- Redness spreading beyond the incision line
- Fever, lethargy, or loss of appetite
- Lameness worsening after prior improvement
- Wound edges separating
For the full recovery timeline, see what to expect after TPLO surgery in dogs. For confinement setup, see how to confine your dog after TPLO surgery.
For keeping the dog calm, see how to keep a dog calm after TPLO surgery. For the infection prevention guide, see post-operative care mistakes that increase TPLO infection risk.
Frequently asked questions
How strict does the activity restriction need to be?
Very strict in weeks 1 to 2. The dog cannot run, jump, use stairs, or play with other pets. Leash walks of 5 minutes for bathroom purposes only.
This is not an exaggeration -- a single running episode in the first 2 weeks can displace the plate and require revision surgery.
My dog seems completely fine by week 2. Can I relax the restrictions?
No. Clinical improvement (the dog appears comfortable and energetic) does not mean the osteotomy is healed.
The plate holds the rotated tibial plateau in position while new bone grows across the cut -- a process that takes 8 to 12 weeks regardless of how well the dog appears.
Radiographic confirmation of healing is required before any restriction is relaxed.
Which medication side effects should I watch for?
NSAIDs: vomiting, diarrhea, reduced appetite, dark stools (suggests GI bleeding). Gabapentin: sedation (which is expected), unsteadiness (monitor and report if severe). Trazodone: sedation (expected), vomiting in some dogs.
Contact your vet if any medication appears to be causing significant side effects -- alternatives are usually available.
Can I give my dog human supplements like fish oil or turmeric during recovery?
Fish oil (omega-3 fatty acids) is generally considered safe and potentially beneficial for joint health.
However, do not add any supplement without discussing with your vet first -- some supplements interact with NSAIDs or affect bleeding. Turmeric in high doses has similar concerns. When in doubt, ask.
My dog is crying or whining a lot. Should I give extra pain medication?
No -- never give extra medication beyond what is prescribed without vet guidance. Contact your vet and describe the pain signs.
They may adjust the dosing schedule, add a medication, or ask you to bring the dog in.
Whining can also reflect anesthesia effects, anxiety, or opioid dysphoria rather than uncontrolled pain -- your vet can help distinguish these.
Resources
- VetSurgInfo. TPLO Recovery Tips. vetsurginfo.com
- Medcovet. Essential Guide to Dog Recovery TPLO Surgery. medcovet.com
- Texas A&M VetMed. TPLO Recovery: Setting Pets Up for Success. vetmed.tamu.edu
- SustainableVet. 10 Essential TPLO Recovery Tips for Pet Owners. sustainablevet.org

Sustainable Vet | Copyright ©2026 | All Rights Reserved

