

Protecting
Pets, People & Planet
Join a group of veterinarians leveraging the latest technologies to deliver excellent care to their patients while being a responsible and positive force for their local and global communities.
100% secure. We do not share your information


Recent Articles
Why Is My Dog's Foot Swollen?
Discover why your dog's foot is swollen, common causes, treatments, and when to see a vet for proper care.
A swollen dog foot is one of the most common reasons owners call their vet. It can be as simple as a bee sting or as serious as a deep infection or bone tumor. The location, speed of onset, and other symptoms all help narrow down the cause.
This guide covers every common cause, how to assess severity at home, and the exact signs that mean your dog needs same-day care.
Quick answer: A swollen dog foot usually has a local cause: injury, insect sting, foreign object, or infection. Warm, increasing, or discharging swelling needs same-day vet care. Multiple swollen paws suggest allergies.
Key takeaways
- Single-paw swelling almost always has a local cause: injury, sting, foreign body, or infection
- Interdigital furunculosis (infected hair follicle cysts between toes) is among the most misidentified causes of recurring paw swelling
- Foreign objects like foxtails and glass splinters can migrate deep into tissue if left untreated
- Pododermatitis is the clinical term for inflamed paw skin; allergies are the most common underlying driver
- Swelling spreading up the leg or paired with face or neck swelling is an emergency requiring immediate care
- Most mild swelling from a sting or minor sprain improves within 24 to 48 hours with rest and monitoring
How to assess your dog's swollen foot before calling the vet
Before looking up causes, do a quick home assessment. This takes two minutes and tells you how urgent the situation is.
Step 1: Which paw?One paw = likely local cause. All four paws = likely allergic or systemic.
Step 2: Feel for heat.Warm or hot tissue means active inflammation or infection.
Step 3: Look between every toe.Redness, swelling between the digits, or visible nodules between the toes points to interdigital furunculosis or a foreign body.
Step 4: Check the pads.Burns appear as red, blistered, or peeling pad tissue. Cuts and punctures are often visible on the pad surface.
Step 5: Look at each nail.A broken nail or swollen nail bed causes localized pain and swelling at the toe tip.
VCA Animal Hospitals: "A deeper infection, like an abscess, will appear as a warm, soft to mildly firm swelling under the skin."
8 common causes of a swollen foot in dogs
1. Injury or trauma
Sprains, cuts, fractured toes, torn nails, and pad burns are the most frequent causes of sudden single-paw swelling. Dogs running on rough, hot, or icy terrain are especially prone.
PetMD notes that pad burns are particularly common in summer: check the pads after any walk on hot pavement. If your palm cannot hold against the pavement for five seconds, it is too hot for your dog's feet.
Signs: sudden lameness after activity, localized swelling, visible wound or bruising.
2. Foreign object
Thorns, glass, foxtails, and grass awns lodge between the toes or penetrate the pad. The body mounts an inflammatory response around the object, causing swelling that worsens over days.
SpectrumCare: "Foxtails and grass awns can lodge between the toes or in the pad and trigger pain, swelling, and infection."
Foxtails are particularly dangerous because they are barbed and can migrate deeper into tissue over days, eventually requiring surgical removal. If you cannot see and safely remove the object, do not probe. See a vet.
3. Insect sting or bite
Bees, wasps, fire ants, and spiders cause rapid single-paw swelling that appears within minutes of the sting. The paw may look puffy and your dog may lick or hold it up.
Dyer Animal Clinic advises watching for anaphylaxis signs: hives, difficulty breathing, excessive swelling spreading beyond the paw. These require emergency care immediately.
Localized sting swelling that stays in the paw and is not worsening can be monitored at home for 24 to 48 hours.
4. Infection: bacterial and fungal
Bacterial or fungal infections enter through cuts, puncture wounds, or damaged skin. Infected paws are typically warm, red, swollen, and often have an odor or discharge. VCA lists the visual signs: "Skin infections on the feet may result in red, moist lesions between the toes."
Pododermatitis (inflammation of the paw skin) is the umbrella clinical term. Common causes include:
- Secondary bacterial infection from chronic licking
- Yeast overgrowth in skin folds between toes
- Fungal infections (ringworm can affect paws)
- Demodectic mange (mite overgrowth)
Pododermatitis does not resolve without treatment. Antibiotics, antifungal medication, or both are typically required.
5. Interdigital furunculosis
This is one of the most commonly missed causes of recurring paw swelling. Interdigital furunculosis occurs when hair follicles between the toes become infected, forming painful reddish-purple nodules that may rupture and drain.
AKC notes that the condition is especially prevalent in short-coated, heavyset breeds: Bulldogs, Labrador Retrievers, and Chinese Shar-Pei are among the most commonly affected. Chronic licking due to allergies is a major driver.
Signs: swollen, painful nodules between the toes, draining tracts, recurrent swelling in the same location.
For how furuncles between the toes connect to abscess formation, see abscess as a cause of limb swelling.
6. Allergic reaction and pododermatitis
Environmental allergens (pollen, grass, lawn chemicals, road salt) and food allergies frequently cause paw inflammation. Dogs with allergies lick their feet chronically, creating secondary infection on top of the allergic reaction.
Wakefield Pet Vet: "Allergic reactions typically cause itching, redness, and sometimes blistering between the toes or on paw pads."
Allergic paw swelling usually affects multiple paws. It tends to recur seasonally or after contact with the trigger substance. Dogs with seasonal allergies often have their worst paw symptoms in spring and fall.
7. Bursitis
Bursae are small fluid-filled sacs that cushion joints. Repeated pressure on bony prominences, especially the elbow and hock, can cause bursitis. Affected joints may appear as soft, fluctuant swellings near a joint.
For how bursitis specifically produces foot and joint swelling, see bursitis as a common cause of foot swelling.
8. Cysts, tumors, and nail bed disease
Cysts, mast cell tumors, and subungual (under-nail) tumors can all present as localized swelling on or near the foot. Petcube notes that toenail tumors are more prevalent in large black-coated breeds such as Standard Poodles, Gordon Setters, and Schnauzers.
A lump that is growing, firm, or pigmented should always be evaluated by a vet rather than monitored at home.
For an overview of lumps that cause swelling on the legs, see lumps that can cause swelling.
Severity triage: what to do right now
Home care for mild cases
For minor swelling without infection signs:
- Keep the dog calm and limit walking
- Soak the paw in warm (not hot) water with Epsom salts for 10 minutes. PetMD recommends this as an excellent short-term measure regardless of cause.
- Gently clean any visible wound with mild soap and warm water
- Apply a cool damp cloth for 10 to 15 minutes to reduce swelling from sprains or stings
- Do not apply antibiotic ointments without vet guidance some formulations are toxic to dogs if licked
For pressure-related paw and leg swelling in dogs that rest in one position for extended periods, see pressure-related swelling in dogs.
Frequently asked questions
How do I treat my dog's swollen paw at home?
For mild swelling with no wound or discharge, rest the dog and soak the paw in warm Epsom salt water for 10 minutes. Check carefully for a foreign object or insect stinger. Do not use human antibiotic creams without vet guidance. If swelling has not reduced within 24 to 48 hours or is getting worse, contact your vet.
When should I be worried about my dog's swollen paw?
Be concerned immediately if the swelling is warm, increasing, or has discharge or odor. Call the vet the same day if your dog refuses to bear weight, if the swelling is spreading up the leg, or if there is any sign of an allergic reaction such as facial swelling or breathing difficulty.
What can I give my dog for a swollen paw?
Do not give human pain medications (ibuprofen, acetaminophen, aspirin) to dogs; many are toxic. For minor swelling, warm Epsom salt soaks are safe and effective for short-term relief. Your vet can prescribe appropriate anti-inflammatory medication if needed after examining the paw.
My dog's foot was normal this morning and is swollen now. What happened?
Sudden single-paw swelling most often means an insect sting, a foreign object picked up during activity, or a minor sprain. Check each toe carefully for a stinger, thorn, or visible wound. If swelling is mild and localized, monitor for 24 hours. If increasing or painful, call the vet the same day.
Can swelling in a dog's foot go away on its own?
Minor swelling from a bee sting or small sprain typically resolves within 24 to 48 hours with rest. Infections, foreign objects, interdigital furunculosis, and bursitis do not resolve without treatment. If swelling has not improved within 48 hours, veterinary assessment is needed.
My dog's foot smells bad and is swollen. Is that serious?
Yes. Odor from a swollen paw strongly indicates infection. A foul smell means bacteria are actively present. Common sources include interdigital furunculosis, a nail bed infection, or an abscess. This requires prompt veterinary treatment and should not be left to resolve on its own.
Resources
- PetMD. Dogs Swollen Paws: Causes and Treatments. petmd.com
- VCA Animal Hospitals. First Aid for Limping Dogs. vcahospitals.com
- AKC. Pododermatitis on Dog Paw: Causes, Symptoms and Treatment. akc.org
- SpectrumCare. Paw Swelling in Dogs. spectrumcare.pet
- Dyer Animal Clinic. Reasons Your Dog's Paw is Swollen. dyeranimalclinic.com
Laser Therapy for Dogs After TPLO Surgery
Learn how laser therapy helps dogs recover faster and with less pain after TPLO surgery for cruciate ligament repair.
Laser therapy also called photobiomodulation (PBMT) or low-level laser therapy (LLLT) is one of the most commonly offered adjunct treatments during TPLO recovery. Many specialist and rehabilitation centres include it routinely.
But the evidence for its benefits is more nuanced than the marketing suggests, and owners deserve an honest picture of what it does and does not reliably achieve.
Quick answer: Laser therapy after TPLO uses specific light wavelengths to reduce inflammation and support tissue healing. Evidence for early pain reduction is moderately supported; evidence for improved radiographic bone healing is weak. It is a safe adjunct but should not replace rehabilitation exercises, pain medication, or activity restriction.
Key takeaways
- Laser therapy reduces postoperative inflammation and may improve gait scores: a TPLO study found better hindlimb function at 8 weeks in treated dogs
- Evidence for improving radiographic bone healing is weak: three controlled studies found no statistically significant difference in healing time
- The 2024 AVMA randomized trial found no significant difference in CRP, weight bearing, pain scores, or SSI rates between PBMT and sham groups
- Sessions typically begin within the first few days of surgery and continue through the rehabilitation phase
- Laser therapy is safe with few contraindications: avoid eyes and active tumour sites; safe over the TPLO incision once closed
- It works best as part of a multimodal plan: exercise therapy and pain medication carry stronger evidence than laser alone
What laser therapy does
Laser therapy for dogs, also known as photobiomodulation, involves using specific wavelengths of light to penetrate tissues and promote cellular regeneration and healing. The laser light stimulates the production of ATP (adenosine triphosphate), enhancing cell repair and growth, reducing inflammation, and increasing blood circulation.
Photobiomodulation therapy has been shown to decrease inflammation, and increase analgesia, vascularization, and tissue healing after musculoskeletal injury or surgery.
The mechanism is photochemical: light energy at specific wavelengths (typically 630 to 980 nm) is absorbed by mitochondria.
This increases ATP production, modulates reactive oxygen species, and influences gene expression related to inflammation and healing.
The effects are local confined to the tissue depth the light reaches.
For post-TPLO use, the targets are: the surgical incision, the osteotomy site in the proximal tibia, and the surrounding periarticular soft tissues.
What the clinical evidence shows
Pain and function
Research following TPLO surgery showed that dogs receiving LLLT had better hindlimb function and gait scores at 8 weeks compared to controls. This is especially valuable in orthopedic recovery, where early weight-bearing can prevent muscle atrophy and joint stiffness.
In a controlled veterinary study, dogs with surgical incisions treated with laser therapy exhibited significantly less inflammatory cell infiltration and tissue necrosis within the first week post-op compared to untreated controls.
The 2024 randomized trial
54 client-owned dogs with CCL rupture undergoing unilateral TPLO surgery were enrolled. The study population was randomly assigned to either a treatment group receiving PBMT (24 dogs) or a control group (30 dogs). PBMT was performed immediately after induction, and at 6 hours, 24 hours, 48 hours, and 8 weeks postoperatively. Evaluation of CRP, pain scores, evidence of SSI, and percentage weight bearing were assessed at all time points.
The trial found the therapy showed promise but no statistically significant difference between groups on any primary outcome measure.
Bone healing
Three studies compared LLLT to a control and concluded that LLLT treatment did not make a significant difference in improving radiographic bone healing. The studies collectively provide weak evidence for this outcome.
This is an important distinction: laser therapy may support soft tissue healing, pain, and early function but it does not appear to accelerate the osteotomy healing visible on radiographs.
When to start and how often
Laser therapy uses focused light energy on the surgical site to support healing.
Most rehabilitation programmes begin laser therapy within the first 1 to 3 days after TPLO surgery, often at the surgical centre before discharge or at the first rehabilitation visit.
Typical post-TPLO laser protocol:
- Frequency: 3 to 5 sessions per week in the first 2 to 3 weeks
- Frequency: 1 to 2 sessions per week from weeks 3 to 8
- Session duration: 5 to 15 minutes depending on the laser system and dosing protocol
- Total sessions: typically 6 to 12 in the first 8-week recovery phase
The protocol varies by laser system, power output, and the individual patient's response.
Realistic expectations
Laser therapy is a useful adjunct in TPLO recovery. It is not a substitute for the treatments with stronger evidence: pain medication, activity restriction, and structured rehabilitation exercises.
Laser therapy could be particularly helpful for dogs with weight-bearing and gait issues while recovering from TPLO surgery after a cruciate injury.
Dogs with significant early swelling, wound sensitivity, or slow initial weight-bearing progress may benefit most. Dogs recovering well with standard multimodal analgesia and rehabilitation may show less measurable difference.
For the bone healing timeline that laser therapy supports during recovery, see TPLO bone healing time in dogs explained.
For the full recovery plan that laser therapy fits into, see 10 essential TPLO recovery tips for pet owners.
For the physical therapy that is the primary evidence-based adjunct, see when to start physical therapy after TPLO surgery.
For swelling management in the recovery period, see how long does swelling last after TPLO surgery.
Frequently asked questions
Is laser therapy safe over the TPLO incision?
Yes, once the incision is closed. Laser therapy is safe over sutured incisions and can be applied at the surgical site from the first post-operative day in most protocols.
Avoid direct application over open wounds or actively infected tissue.
How many laser sessions does a dog need after TPLO?
Typically 6 to 12 sessions across the first 8 weeks.
Start at 3 to 5 sessions per week for the first 2 to 3 weeks, tapering to 1 to 2 per week through the rehabilitation phase.
The exact protocol depends on the laser system and rehabilitation plan.
Does laser therapy replace pain medication after TPLO?
No. Laser therapy is an adjunct to pharmaceutical pain management, not a replacement. Post-TPLO pain management requires NSAIDs, and often gabapentin or other analgesics.
Laser therapy may reduce the pain burden and support earlier mobility but does not provide sufficient analgesia on its own.
Can I do laser therapy at home with a consumer device?
Consumer-grade red light therapy devices exist but operate at lower power densities than veterinary therapeutic lasers. The clinical evidence discussed in this article relates to veterinary-grade PBMT devices.
Home devices may offer some benefit but cannot replicate the dosing of professional equipment. Discuss with your rehabilitation veterinarian before purchasing.
Will laser therapy prevent my dog from needing more medication?
Possibly. If laser therapy reduces post-operative inflammation and pain, some dogs may need lower doses of pain medication or taper off sooner.
This should be guided by your veterinarian based on your dog's individual recovery trajectory.
Resources
- AVMA Journal. Photobiomodulation Therapy in Dogs Undergoing TPLO After Cranial Cruciate Ligament Rupture. avmajournals.avma.org
- Veterinary Evidence. Does LLLT Improve Radiographic Healing for Dogs with CCL Rupture Undergoing TPLO Surgery? veterinaryevidence.org
- AKC. Laser Therapy For Dogs: Uses, Side Effects, and Alternatives. akc.org
- Erchonia. Laser Therapy for Post-Surgical Recovery in Pets. erchonia.com
All Articles
Why Is My Dog's Leg Clicking After TPLO Surgery?
Wondering why your dog’s leg is clicking after TPLO surgery? Learn common causes, when to worry, and what to expect during recovery
A clicking or popping sound from the stifle after TPLO surgery is a common observation that owners report, especially during the first weeks of recovery.
It is not automatically a sign of a problem.
The clinical significance depends on what accompanies the click: is the dog bearing weight and recovering normally, or is clicking associated with lameness, pain, or a trajectory reversal?
Quick answer: Post-TPLO clicking most often reflects normal joint adjustment, soft tissue movement, or cavitation. The most clinically important cause is a meniscal tear, producing a meniscal click with pain and returning lameness. Clicking without lameness or pain in early recovery is usually benign.
Key takeaways
- Most post-TPLO clicking is benign: the click typically comes from joint adjustment to new mechanics; the dog usually feels fine even when a sound is present
- The meniscal click is the clinically significant type: dogs with meniscal tears exhibit a meniscal click accompanied by lameness and pain
- Clicking with lameness or pain warrants prompt veterinary evaluation: clicking with swelling, limping, or avoiding the leg could signal instability, implant issues, or a torn meniscus
- Clicking that is isolated, early in recovery, and not associated with lameness is usually normal and improves as healing progresses
- Late-onset clicking in a previously normal recovery is more concerning than early clicking; it suggests a new event such as meniscal tear or implant loosening
- Implant loosening is a rare but serious cause of clicking: abnormal joint mechanics from loosened screws or plate produce clicking accompanied by pain and radiographic changes
What causes clicking after TPLO surgery
Normal joint adjustment
After TPLO, the tibial plateau is repositioned to a new angle. The soft tissues, tendons, and joint capsule require weeks to adapt to this new geometry.
During this adaptation period, movement can produce audible sounds as structures slide over each other or snap slightly over new contours.
TPLO Info confirms: after CCL repair, the joints adjust to new motion. The click comes from the knees. The dog usually feels fine even when a sound is present.
Soft tissue movement over the implant
The TPLO plate sits against the medial tibial surface. Tendons and fascial layers that previously moved over the normal tibial contour now move over a plate with a different profile.
This can produce audible snapping or clicking sounds during flexion and extension, particularly in the first weeks before soft tissue accommodation occurs.
Gas bubble release (cavitation)
Joint capsule distension from post-surgical effusion can trap gas in the joint space. Movement releases this gas in small pops -- the same mechanism as knuckle cracking in humans.
This is painless and harmless.
Meniscal click (most significant cause)
The medial meniscus is vulnerable to injury in CCL disease. At the time of TPLO, the surgeon assesses the meniscus and removes damaged tissue.
However, meniscal injury can occur after TPLO -- either from previously undetected damage that progresses, or from new injury in a joint that has not yet fully stabilized.
Laguna Woods Vets confirms: dogs with meniscal tears frequently exhibit a meniscal click. If damage is noted during TPLO, the meniscus is removed. If not removed, it may tear later.
SustainableVet.org confirms: symptoms of meniscal damage include clicking when the dog moves, lameness, reluctance to use the affected leg, and discomfort when bending the knee.
The meniscal click is distinguished from benign clicking by:
- Accompanying lameness (often a sudden return of limping after initial improvement)
- Pain when the stifle is manipulated on examination
- Worsening trajectory rather than improvement
Implant-related clicking (uncommon)
Plate or screw loosening generates abnormal tibial motion during weight bearing, which can produce clicking.
This is uncommon in an uncomplicated TPLO but more likely if the dog has been overactive during recovery.
Signs include pain localized to the plate site and radiographic evidence of implant migration or peri-implant bone changes.
SustainableVet.org confirms: implant failure is rare but serious; plates or screws can loosen or break if the dog is too active early, leading to discomfort and joint noises.
Normal vs. concerning clicking: a practical guide
Likely normal (benign):
- Clicking present from the first days after surgery
- No lameness associated with the click
- Dog is bearing weight and improving week by week
- Click is quiet and intermittent
- Dog does not react (wince, pull back, vocalize) when the stifle is manipulated
Warrants veterinary evaluation:
- Clicking that appears new after a period of recovery without clicking
- Clicking accompanied by lameness or reluctance to bear weight
- Dog flinches or vocalizes when the stifle is flexed
- Clicking that is getting louder or more frequent over time
- Lameness that had been improving and then reverses
SustainableVet.org confirms: contact your vet if the clicking sound is persistent or getting worse over time; a mild clicking early in recovery is normal but it should improve as healing progresses.
Meniscal tear after TPLO: what happens next
If a meniscal tear is suspected or confirmed, management depends on severity.
Mild cases: pain management with NSAIDs, joint supplements, and controlled exercise restriction. The meniscus may stabilize with conservative management if the tear is small and the joint is otherwise stable.
Cases with ongoing pain or lameness: partial meniscectomy (surgical removal of the torn portion of the meniscus) is required. This is a second surgical procedure requiring general anesthesia and a repeat recovery period.
SustainableVet.org confirms: if a meniscal tear causes ongoing pain and instability, surgery is often needed; this may involve a partial meniscectomy.
Larger dogs and clicking
Larger dogs are more likely to produce audible joint sounds during recovery. Greater body mass means greater joint loading forces, which amplify soft tissue and implant movement sounds.
SustainableVet.org confirms: larger dogs are more likely to make joint sounds during recovery; their extra weight puts more pressure on the healing leg, which can make clicking more noticeable.
This does not mean clicking in large dogs is more likely to be pathological -- only that it is more audible when it occurs.
When to contact your vet about clicking
Contact your vet promptly (same day or within 24 hours) if:
- Clicking is accompanied by lameness or non-weight bearing
- A dog that was improving begins to worsen (trajectory reversal)
- The click is producing a visible pain response
- The click appears late in recovery (after weeks of silent healing)
Contact at your next scheduled appointment (can wait):
- Intermittent clicking early in recovery without lameness
- Click that is quieter week by week
- Dog is bearing full weight and improving in function
For the full TPLO complications guide, see common complications after TPLO surgery. For the toe-tapping guide, see dog toe tapping after TPLO surgery.
For the lameness guide, see lameness after TPLO surgery in dogs. For the leg shaking guide, see dog leg shaking after TPLO surgery.
Frequently asked questions
My dog's knee has been clicking for 3 weeks but she is not limping at all. Should I be worried?
Three weeks of clicking with no lameness and a normal, improving recovery trajectory is most likely benign joint adjustment. Monitor for lameness, pain on stifle palpation, or worsening of the click.
Mention it at your next scheduled vet appointment -- this is not an emergency call.
My dog's leg clicked once loudly while getting up, and then she held the leg up. What do I do?
Contact your vet the same day. A sudden loud click followed by acute lameness may indicate a meniscal injury event. This presentation warrants veterinary examination and likely radiographs.
Can clicking after TPLO get better on its own?
Yes -- benign mechanical clicking from joint adjustment and soft tissue accommodation typically resolves or reduces significantly over the first 4 to 8 weeks.
A meniscal click does not resolve without treatment of the meniscal tear.
Does clicking mean the plate is failing?
Not typically. Implant failure clicking is accompanied by pain and worsening lameness. Benign clicking in a comfortable, normally-recovering dog does not indicate implant failure.
Radiographs at the scheduled 6-week and 12-week appointments assess implant integrity.
My dog clicks on every step. Is that different from occasional clicking?
Consistent clicking on every step, particularly if it has a regular, reproducible pattern during weight bearing, is more likely to have a structural cause (meniscal click) than intermittent clicking.
Mention this to your vet and assess whether lameness is present.
Resources
- TPLO Info. Why Is My Dog's Leg Clicking After TPLO Surgery? tploinfo.com
- SustainableVet. Why Is My Dog's Leg Clicking After TPLO Surgery? sustainablevet.org
- Laguna Woods Vets (LHAH). TPLO Surgery Complications. lhah.com
- ACVS. Cranial Cruciate Ligament Disease. acvs.org
When Can Dogs Resume Agility Training Post-TPLO?
Learn when and how to safely resume dog agility training after TPLO surgery. Get expert-backed recovery tips, rehab steps, and risk precautions
Returning an agility dog to sport after TPLO surgery requires more than standard recovery. The standard 8 to 12 week bone healing protocol restores a dog to normal household function.
Returning to agility -- a high-impact sport involving jumping, sharp turns, weave poles, and contact obstacles -- requires a further 4 to 6 months of structured conditioning on top of that foundation.
Quick answer: Most agility dogs return to training 7 to 9 months post-TPLO. The Balanced Dog confirms 80% returned before 9 months (average 7.5 months). Bone healing at 8 to 12 weeks is the starting point. Return to sport requires muscle symmetry, pain-free movement, and a graduated protocol with vet clearance.
Key takeaways
- The return-to-agility timeline averages 7 to 9 months: The Balanced Dog confirms 80% returned before 9 months, average 7.5 months; 3 to 6 months reflects light training, not full competition
- Bone healing at 8 to 12 weeks is the starting point, not the endpoint: high-impact agility may require 4 to 6 more months; healed bone does not mean rebuilt muscle
- Agility-specific demands require agility-specific conditioning: jumping, tight turns, weave poles, and contacts generate forces far greater than walking; the dog must be conditioned for these before returning
- All dogs with agility return goals need a return-to-sport protocol: it adds sport-specific movement, progressive jumping, and fitness benchmarks beyond the standard recovery protocol
- Veterinary clearance at each phase is non-negotiable: vet or surgeon clearance is required before resuming training; no benchmark should be self-assessed
- Not all dogs will reach pre-surgery performance: most regain significant function but some need training changes to reduce joint stress
Why agility is a higher bar than normal recovery
Normal TPLO recovery targets return to household mobility: walking, light running, stairs, and play. Agility sport involves:
- Jumping: impact forces on landing of 2 to 3 times body weight
- Tight turns at speed: high lateral shear forces on the stifle
- Weave poles: rapid lateral flexion and extension
- Contact obstacles (A-frame, dog walk, teeter): climbing and controlled descent under dynamic loading
Each of these demands requires not just healed bone but fully rebuilt muscle, coordinated neuromuscular control, and joint proprioception. These take months to restore after TPLO.
SustainableVet.org confirms: dogs in sports or agility should reintroduce jumps and running only after veterinary clearance; swimming or uphill walking maintains muscle tone during the conditioning phase.
The return-to-sport timeline
Phase 1: bone healing (weeks 0 to 12)
Standard TPLO recovery. Strict confinement, graduated leash walking, and passive range-of-motion exercises. No running, jumping, or agility activity of any kind.
Radiographic bone healing is confirmed at the 8 to 12 week recheck. This is the gate that opens Phase 2.
Phase 2: rebuilding foundation fitness (months 3 to 5)
After bone healing is confirmed, the focus shifts to rebuilding the muscle mass and neuromuscular coordination that atrophied during the restriction period.
Activities during Phase 2:
- Progressive leash walking with duration increasing weekly
- Hydrotherapy (underwater treadmill) for muscle building without joint impact
- Hill walking (controlled inclines) to load the hip extensors and stifle stabilizers
- Balance and proprioception work (wobble boards, cavaletti poles)
- Core strengthening exercises
TPLO Info confirms: overall return to agility takes around 3 to 6 months; this period of rebuilding is what fills the gap between bone healing and sport re-entry.
Phase 3: sport-specific conditioning (months 5 to 7)
Once the dog has rebuilt baseline fitness, sport-specific conditioning begins. This is distinct from the standard recovery protocol.
Activities:
- Controlled jumping starting very low (4 inches for a dog that jumps 24 inches in competition) and increasing progressively over 6 to 8 weeks
- Slow figure-8 work and curved running to restore stifle lateral mechanics
- Individual weave pole work at slow speed before full weave sequence
- Contact obstacle approach and exit work at slow, controlled speed
- Video gait assessment to identify any asymmetry or compensation patterns
Petcarepartners.co confirms: most vets suggest a waiting period of 4 to 6 months for running and fetch; for agility, add a further structured sport-specific phase on top of this.
Phase 4: return to full competition (months 7 to 9+)
Full competition resumption follows veterinary clearance of the sport-specific conditioning phase. The criteria for clearance include:
- Pain-free movement through full range of stifle motion
- Muscle symmetry (thigh circumference equal bilaterally)
- Confident single-leg weight bearing during agility-specific movements
- No lameness following a full practice session
- Surgeon clearance based on physical and radiographic assessment
The Balanced Dog confirms: it typically takes 7 to 9 months to return to sport; 80% of dogs returned to agility before 9 months with a good rehabilitation and return-to-sport program.
Factors that affect the return timeline
Dog's age: younger dogs (under 4 years) typically rebuild muscle faster than older dogs. Senior dogs may take 10 to 12 months or longer.
Dog's pre-surgical fitness: well-conditioned sport dogs with strong baseline muscle mass rebuild faster than deconditioned dogs. Body condition score at the time of surgery matters.
Adherence to the restriction protocol: dogs that were overactive during weeks 1 to 6 may have developed micro-complications or delayed healing that shifts the timeline.
Concurrent meniscal tear: dogs that had a meniscal tear treated at the time of TPLO may need additional time, particularly if a late meniscal tear occurs during the return-to-sport phase.
Bilateral CCL disease: dogs with CCL rupture on the second side during or after recovery for the first require the full protocol on the second side before bilateral agility work resumes.
SustainableVet.org confirms: average recovery time to agility is about seven months; some dogs start controlled activity at six months, while others take up to two years.
Using a certified canine rehabilitation therapist
For agility dogs, professional rehabilitation is strongly recommended rather than a home-only protocol. Certified canine rehabilitation practitioners (CCRPs) provide:
- Biomechanical gait analysis to detect compensatory movement patterns before return to sport
- Underwater treadmill protocols calibrated to the specific demands of agility
- Sport-specific functional testing to determine readiness
- Individualized return-to-sport programs
The Balanced Dog confirms: surgery is just the start; a good-quality rehabilitation and return-to-sport program is instrumental in giving the dog the best chance at returning to competitive agility.
For the recovery timeline, see what to expect after TPLO surgery in dogs. For physical therapy timing, see when to start physical therapy after TPLO surgery.
For recovery exercises, see TPLO recovery exercises for dogs. For the failure rate overview, see TPLO failure rate in dogs.
Frequently asked questions
My agility dog had TPLO 6 months ago and is moving well. Can she start jumping?
Six months is within the average return-to-sport window but requires veterinary assessment before starting jumping.
The criteria -- muscle symmetry, pain-free full range of motion, confident single-leg weight bearing -- must be met and confirmed by your vet or rehabilitation therapist before any jumping begins.
Do not self-assess readiness.
Will my dog ever compete at the same level as before TPLO?
Many dogs do return to pre-injury competitive levels, especially those with strong pre-surgical conditioning and an excellent rehabilitation program.
SustainableVet.org confirms most dogs regain significant function and can participate in agility, though not all will reach pre-injury performance levels. The Balanced Dog study confirms 80% returned before 9 months.
Should I lower my dog's jump height after TPLO?
Discuss with your vet. Some dogs perform best at a jump height one level below their pre-surgery height to reduce cumulative joint loading. Others return to their full height without adjustment.
This is an individual decision based on the dog's age, size, arthritis level, and post-recovery movement quality.
Can I use a FitPaws or conditioning equipment at home?
Yes -- proprioception and balance equipment (wobble boards, FitPaws equipment, balance pads) is appropriate during Phase 2 and Phase 3 under the direction of your rehabilitation therapist.
These tools help rebuild the neuromuscular coordination needed for agility-specific movements. Always use on non-slip flooring.
What happens if my dog tears the other CCL during agility return?
Bilateral CCL disease is common (30 to 40% of dogs develop it). If the second stifle becomes symptomatic during the return-to-agility phase, the rehabilitation program pauses and the second stifle is assessed.
The return-to-agility timeline resets based on the second surgery date. Most dogs with bilateral TPLO can still return to agility.
Resources
- The Balanced Dog. Returning to Dog Agility After TPLO Surgery. the-balanced-dog.com
- TPLO Info. Can You Resume Dog Agility Training After TPLO Surgery? tploinfo.com
- SustainableVet. When Can Dogs Resume Agility Training Post-TPLO? sustainablevet.org
- ACVS. Cranial Cruciate Ligament Disease. acvs.org

Dog Meniscus Tear After TPLO: Symptoms and Solutions
Learn the causes, symptoms, and treatment options for dog meniscus tears after TPLO surgery. Find out how to aid recovery and prevent complications
A meniscal tear after TPLO surgery is one of the most recognized post-operative complications.
The medial meniscus is at risk both at the time of CCL rupture and after surgery, when residual instability or degenerative changes can damage tissue that appeared normal during the original procedure.
Recognizing the signs early significantly improves outcomes.
Quick answer: Post-TPLO meniscal tears present as sudden lameness return in a previously improving dog, often with a meniscal click. Late tears occur in 2 to 22% of TPLO cases (RCVS). PubMed found 5.6% late meniscal tear incidence. Treatment is partial meniscectomy; all dogs treated returned to peak limb function per PubMed.
Key takeaways
- Late meniscal tears occur in 2 to 22% of post-TPLO dogs: RCVS confirms this range; a PubMed TPLO arthroscopy study found a 5.6% late meniscal tear incidence
- The hallmark sign is sudden lameness regression in a previously improving dog: RCVS confirms affected dogs display good mobility and then go suddenly lame; this trajectory reversal distinguishes meniscal injury
- The meniscal click is audible but not always present: the absence of a click does not rule out meniscal injury
- The meniscus does not heal on its own: limited blood supply prevents natural regeneration; small tears may be managed conservatively but most require partial meniscectomy
- Partial meniscectomy produces excellent outcomes: all dogs treated by partial meniscectomy returned to peak limb function (PubMed); outcomes at 6 months are comparable to dogs with intact menisci
- Concurrent meniscal tears do not worsen long-term outcomes: AVMA research found similar midterm outcomes for TPLO plus meniscectomy vs TPLO alone, despite more severe arthritis at surgery
The medial meniscus: what it is and why it is at risk
The medial meniscus is a crescent-shaped fibrocartilage structure on the inner surface of the stifle joint. It distributes joint load, provides shock absorption, and stabilizes the joint during weight bearing.
Each stifle has two menisci. The medial is injured far more frequently because it is firmly attached to the tibia and cannot shift away from the abnormal tibial movement during CCL rupture.
SustainableVet.org confirms: the medial meniscus is more prone to injury because it is firmly attached to the tibia. When the tibia slides forward, it is compressed by the femoral condyle.
Why meniscal tears occur after TPLO
Latent tears missed at surgery
At the time of TPLO, the surgeon examines the meniscus through a small arthrotomy or arthroscopy and removes any clearly damaged tissue. However, not all tears are visible at surgery.
Small partial-thickness tears or areas of early degeneration may not be identifiable intraoperatively but progress to complete tears in the weeks or months after surgery.
PMC confirms: post-surgical meniscal pathology may be due to failure of diagnosis at the time of surgery (latent tears) or a result of residual joint instability (post-liminary tears).
Residual joint instability after TPLO
TPLO eliminates the cranial shear force that destabilized the joint. However, the stifle undergoes significant remodeling in the weeks after surgery, and some residual instability may persist during this period.
This can subject a structurally weakened meniscus to loading forces that produce tearing.
SustainableVet.org confirms: meniscal tears after TPLO can occur due to ongoing joint instability before surgery, direct trauma, or degenerative changes.
Progressive degeneration
Older dogs are at higher risk for meniscal tears because the meniscus undergoes age-related degeneration -- loss of collagen fiber organization, reduced cell density, and decreased water content.
PMC confirms: increasing age is a risk factor for medial meniscal tear; the meniscus experiences oxidative stress and abnormal matrix organization that can lead to injury under normal loading forces.
Concurrent vs. late meniscal tears
Concurrent (primary) tears
These are meniscal tears present at the time of TPLO and treated during the original surgery. PubMed data found a concurrent meniscal tear prevalence of 32.2% in dogs undergoing TPLO.
These are removed at the time of the procedure via arthrotomy or arthroscopy.
Late (secondary) tears
These are meniscal tears that develop after TPLO in a previously intact or adequately treated meniscus. The PubMed TPLO arthroscopy study found a late meniscal tear incidence of 5.6%.
RCVS Canine Cruciate Registry confirms late meniscal tears are seen in 2 to 22% of cases.
SustainableVet.org confirms: a secondary meniscus tear often happens weeks or months after the initial procedure and results in immediate pain, limping, and reluctance to move.
Symptoms of a post-TPLO meniscal tear
Sudden lameness regression: the most characteristic sign. A dog making steady progress suddenly becomes lame on the operated leg. This is distinct from the gradual variability of normal TPLO recovery.
Audible or palpable meniscal click: a clicking or popping sound during stifle flexion and extension. SustainableVet.org confirms the knee may produce a clicking sound when moving. The click is heard when the torn meniscal flap is displaced by the femoral condyle.
Pain on stifle manipulation: the dog flinches, vocalizes, or resists when the stifle is flexed through its range. This distinguishes pain from benign mechanical clicking.
Stifle swelling: joint effusion may increase from the baseline level. The joint feels fuller and may be warmer than the contralateral stifle.
Reluctance to bear weight: the dog shifts weight off the operated leg, holds the leg up, or toe-touches only.
SustainableVet.org confirms: symptoms include a sudden return of lameness, difficulty bearing weight, or a clicking or popping sound when the knee moves; dogs may yelp when standing or walking.
Diagnosis
Veterinary evaluation includes:
Physical examination: stifle manipulation to assess pain, range of motion, joint effusion, and presence of a palpable meniscal click. The McMurray-type maneuver and medial meniscal compression test are used to localize meniscal pain.
Radiographs: assess joint effusion (fat pad displacement), osteotomy healing, and implant position. Radiographs do not directly image the meniscus but rule out implant complications as the cause of lameness.
Arthroscopy or arthrotomy: definitive diagnosis. Direct visualization of the meniscus under anesthesia identifies the location, type, and severity of the tear.
Treatment
Conservative management
Small or partial-thickness tears without significant clinical signs can be managed conservatively with:
- NSAIDs for 4 to 8 weeks
- Strict activity restriction
- Joint supplements (omega-3 fatty acids, glucosamine, chondroitin)
- Reassessment if signs do not resolve
SustainableVet.org confirms: small tears may be managed with rest, NSAIDs, and joint supplements; but severe cases often require surgical intervention.
Partial meniscectomy
The definitive treatment for complete or symptomatic meniscal tears. The surgeon removes the damaged portion of the meniscus arthroscopically or via a small arthrotomy, leaving the undamaged portion intact.
The outcomes of partial meniscectomy are excellent. PubMed confirms: all dogs with late meniscal tears treated by partial meniscectomy returned to peak postoperative limb function based on client-assessed outcomes.
AVMA research confirms: treatment for meniscal tear results in significant improvement in lameness, with postoperative outcomes at 6 months comparable to dogs with intact menisci.
RCVS confirms: meniscal tears are treated by removing the torn portion. Dogs with long-term meniscal tears have a bit more osteoarthritis but generally maintain a good quality of life.
Post-meniscectomy recovery
Recovery after partial meniscectomy is typically faster than the original TPLO recovery. The osteotomy is already healed; the additional recovery is for the joint to settle after the meniscectomy.
Most dogs return to normal activity within 4 to 8 weeks.
For the clicking guide, see why is my dog's leg clicking after TPLO surgery?. For the lameness guide, see lameness after TPLO surgery in dogs.
For the infection signs guide, see earliest signs of TPLO infection. For the TPLO complications guide, see 15 common complications after TPLO surgery.
Frequently asked questions
How do I know if it is a meniscal tear or normal recovery variability?
The key is trajectory. Normal recovery shows week-over-week improvement with occasional minor setbacks. A meniscal tear produces a clear regression: the dog was improving, then suddenly lame.
If your dog has been consistently improving and then becomes acutely lame, contact your vet the same day.
Can a meniscal tear be seen on X-ray?
No. Radiographs cannot image cartilage. X-rays assess bone, implant, and joint effusion. A suspected meniscal tear requires arthroscopy or an MRI (less common in veterinary practice) for definitive diagnosis.
Will my dog need another general anesthetic for the meniscectomy?
Yes. Arthroscopy or arthrotomy for partial meniscectomy requires general anesthesia. The procedure is typically shorter than the original TPLO and recovery is faster because the plate and osteotomy are already healed.
Is there anything that could have been done to prevent this?
Not reliably. The risk of late meniscal tears is partly structural (inherent joint instability during healing), partly degenerative (pre-existing meniscal weakness), and partly age-related.
Strict activity restriction during recovery reduces the risk by minimizing the abnormal joint loading that can damage a weakened meniscus, but it cannot eliminate risk entirely.
My dog had a concurrent meniscal tear treated at the time of TPLO. Is the outcome worse?
No.
AVMA research confirms similar midterm functional outcomes for TPLO plus meniscectomy vs TPLO alone in dogs with intact menisci.
Resources
- RCVS Canine Cruciate Registry. Meniscal Tears. ccr.rcvsknowledge.org
- PubMed. Incidence of Medial Meniscal Tears After Arthroscopic Assisted TPLO. pubmed.ncbi.nlm.nih.gov
- AVMA Journals. Concurrent Bucket Handle Meniscal Tear Treated with Arthroscopic Partial Meniscectomy Does Not Influence Midterm Outcomes After TPLO. avmajournals.avma.org
- PMC. Associations Between Meniscal Tears and Osteoarthritis Among Dogs Undergoing TPLO. pmc.ncbi.nlm.nih.gov
15 Common Complications After TPLO Surgery in Dogs
Worried about TPLO surgery complications? Discover 15 common risks, from infection to implant failure, learn how to prevent and manage them effectively
TPLO has a high overall success rate, but complications do occur. The published overall complication rate ranges from 10 to 34%, with most complications being minor and manageable.
Knowing what to watch for -- and when a sign requires a same-day call vs. a mention at the next scheduled appointment -- allows owners to respond appropriately.
Quick answer: The 15 most common post-TPLO complications: surgical site infection, seroma, implant loosening or failure, osteomyelitis, late meniscal tear, tibial tuberosity fracture, delayed bone healing, persistent lameness, non-union, intra-articular screw placement, nerve damage, patellar tendon thickening, patellar luxation, progressive osteoarthritis, and contralateral CCL rupture. Most are minor and manageable.
Key takeaways
- The overall complication rate is 10 to 34%: most complications are minor (swelling, mild infection); serious complications such as implant failure or osteomyelitis are less common
- SSI is the most frequent single complication: reported in 2.9% to 17.3% of TPLO procedures; most are superficial and treatable with antibiotics if caught early
- Late meniscal tear occurs in 1.8% to 10.5% of cases where the meniscus was normal at surgery; it presents as sudden lameness return with meniscal click
- Tibial tuberosity fracture is reported in 1 to 9% of TPLO cases: incorrect positioning and oversized saw blades are the main risk factors
- Implant-associated infection occurred in 3.4% and osteomyelitis in 0.6% across numerous studies; osteomyelitis requires strong antibiotics for 4 to 6 months and sometimes plate removal
- Contralateral CCL rupture is a significant long-term risk: 30 to 40% of dogs develop rupture of the opposite CCL; owners should monitor the opposite stifle
Early complications (weeks 0 to 8)
1. Surgical site infection (SSI)
The most common complication. SSI ranges from superficial incisional infection (treatable with oral antibiotics and wound care) to deep implant-associated infection requiring plate removal.
Signs: redness spreading beyond the incision, warmth, swelling, cloudy or malodorous discharge.
Incidence: 2.9% to 17.3% per published literature; the PMC 769-TPLO study (769 procedures) found 8.5%.
Management: culture-directed antibiotics for superficial infections; surgical debridement and sometimes plate removal for deep implant infections.
2. Seroma
A localized collection of clear serous fluid under the skin near the incision, typically appearing 1 to 3 weeks post-surgery.
Signs: soft, fluctuant swelling at or near the incision; no warmth or redness; clear fluid if aspirated.
Incidence: common; most resolve without treatment.
Management: monitoring; aspiration if large or causing discomfort; bandaging in some cases.
3. Acute lameness from overactivity
The dog is over-active during the restriction period and bears too much load on the plate before the osteotomy heals.
Signs: sudden worsening of lameness after a period of improvement; may indicate implant stress or early failure.
Management: strict crate rest; radiographic assessment to rule out implant displacement.
4. Wound dehiscence
The incision edges separate before fully healing. More common in dogs that lick the incision despite an e-collar that fits incorrectly.
Signs: open wound edges, sometimes with tissue visible.
Management: cleaning and re-closure in most cases; e-collar compliance review.
Mid-term complications (weeks 4 to 16)
5. Delayed bone healing
The osteotomy is not showing expected consolidation on radiographs at the 6 to 8 week checkpoint.
Signs: radiographic evidence of widening osteotomy gap or absence of callus formation; may or may not produce clinical signs.
Risk factors: infection, excessive activity, poor bone quality (older dogs, large breeds), NSAIDs at high doses for extended periods.
Management: extended activity restriction; investigate for underlying infection; nutritional support.
6. Tibial tuberosity fracture
A fracture of the tibial tuberosity (the prominence where the patellar tendon attaches) caused by the osteotomy saw blade coming too close to this structure.
Incidence: 1 to 9% per Laguna Woods Vets; higher in dogs with high TPA, high body weight, and large TPA change.
Signs: acute severe lameness; radiographic evidence of fracture.
Management: surgical repair or conservative management depending on displacement.
7. Late meniscal tear
A meniscal tear occurring after TPLO in a meniscus that appeared normal at surgery. See the dedicated meniscal tear article for full detail.
Incidence: 1.8% to 10.5% of cases with normal meniscus at TPLO (Dog Discoveries).
Signs: sudden lameness regression; meniscal click on movement; pain on stifle manipulation.
Management: partial meniscectomy.
8. Implant loosening or failure
The plate or screws shift, bend, or break -- typically from premature overactivity before the osteotomy heals.
Signs: sudden severe lameness; pain at plate site; radiographic evidence of screw loosening, plate migration, or osteotomy displacement.
Management: revision surgery in most cases of significant displacement.
Long-term complications (months 3 and beyond)
9. Osteomyelitis
Bone infection extending from a superficial SSI or introduced via hematogenous seeding. Difficult to treat.
Incidence: 0.6% per Dog Discoveries citing multiple studies.
Signs: persistent lameness; draining tract; radiographic bone destruction, periosteal reaction, or sequestrum.
Management: Laguna Woods Vets confirms osteomyelitis requires strong antibiotics for 4 to 6 months; a wound culture aids antibiotic selection; plate removal is often required.
10. Non-union
The osteotomy fails to heal, resulting in permanent instability at the cut site.
Risk factors: infection, inadequate fixation, excessive motion, poor blood supply.
Signs: persistent lameness; radiographic evidence of osteotomy gap persisting beyond 16 weeks with no bridging callus.
Management: revision surgery, bone grafting, and often implant revision.
11. Intra-articular screw placement
A screw tip violates the joint space, causing joint damage and persistent pain. Best identified on the postoperative radiograph.
Signs: ongoing lameness; pain on stifle range of motion; radiographic evidence of screw in joint space.
Management: removal of the offending screw.
12. Persistent lameness without identifiable cause
Some dogs have persistent mild lameness despite uncomplicated bone healing and no identifiable complication. This may reflect residual arthritis progression, muscle atrophy, or subclinical meniscal issues.
Management: rehabilitation, joint supplements, and management of secondary osteoarthritis.
13. Patellar tendon thickening
Fibrous thickening of the patellar tendon develops in some TPLO dogs over time. This is typically not clinically significant.
Signs: palpable thickening of the patellar tendon on examination; usually incidental finding.
Management: generally none required; physiotherapy in some cases.
14. Patellar luxation
Medial patellar luxation can develop or worsen after TPLO, particularly if the plate is contoured in a way that affects patellar tracking.
Signs: intermittent lameness, popping of the patella medially on examination.
Management: surgical correction (trochleoplasty and tibial crest transposition) in symptomatic cases.
15. Progressive osteoarthritis
All dogs with CCL disease develop some arthritis progression regardless of surgical technique. TPLO slows but does not stop this process.
Signs: gradual stiffness, lameness that is worse after rest, reduced activity tolerance.
Management: joint supplements (omega-3 fatty acids, glucosamine), weight management, NSAIDs for flares, hydrotherapy.
Contralateral CCL rupture: a special consideration
Contralateral CCL rupture is not a complication of TPLO but deserves mention.
Midvalley Animal Clinic confirms it is very common (30 to 40% of patients) for both knees to develop this ligament injury.
Owners of dogs that have had unilateral TPLO should monitor the opposite stifle for early signs.
For the infection guide, see TPLO plate infection signs and treatment. For the meniscal tear guide, see dog meniscus tear after TPLO surgery.
For the failure rate overview, see TPLO failure rate in dogs. For the implant failure signs, see TPLO implant failure signs and causes.
Frequently asked questions
What is the most common serious complication after TPLO?
Deep implant-associated infection requiring plate removal is the most common serious complication, with an implant removal rate of 3.5 to 7.5% of procedures (ResearchGate).
Osteomyelitis (0.6%) and tibial tuberosity fracture (1 to 9%) are other serious but less common complications.
Is a 10 to 34% complication rate high for an orthopedic surgery?
The range is real but the majority of complications are minor -- a seroma, mild superficial infection treated with antibiotics, or a brief period of increased lameness.
Serious complications requiring revision surgery are significantly less common. TPLO's overall success rate (93% limb function restoration at 1 year per a 2013 study) reflects that most dogs recover well.
Can complications be prevented?
Most can be reduced in risk but not eliminated.
Owner-controlled risk reduction: e-collar compliance, strict activity restriction for 8 to 12 weeks, daily incision inspection, and attending all scheduled vet appointments.
What happens if my dog develops two complications simultaneously?
This is uncommon but does occur (for example, SSI leading to delayed bone healing). Management is coordinated by your surgical team based on the severity and interaction of the complications.
Contact your vet immediately for any concern.
Should I be worried every time my dog limps?
A degree of lameness is expected throughout the recovery period. The key signal is trajectory: steadily improving lameness is expected; suddenly worsening or reversed lameness is not.
Monitor for any sudden changes and contact your vet for trajectory reversals.
Resources
- PMC. Surgical Site Infection After 769 TPLOs. pmc.ncbi.nlm.nih.gov
- Laguna Woods Vets. TPLO Surgery Complications. lhah.com
- Dog Discoveries. TPLO Failure and Complications in Dogs. dogdiscoveries.com
- Clinician's Brief. Common Tibial Plateau-Leveling Osteotomy Complications. cliniciansbrief.com
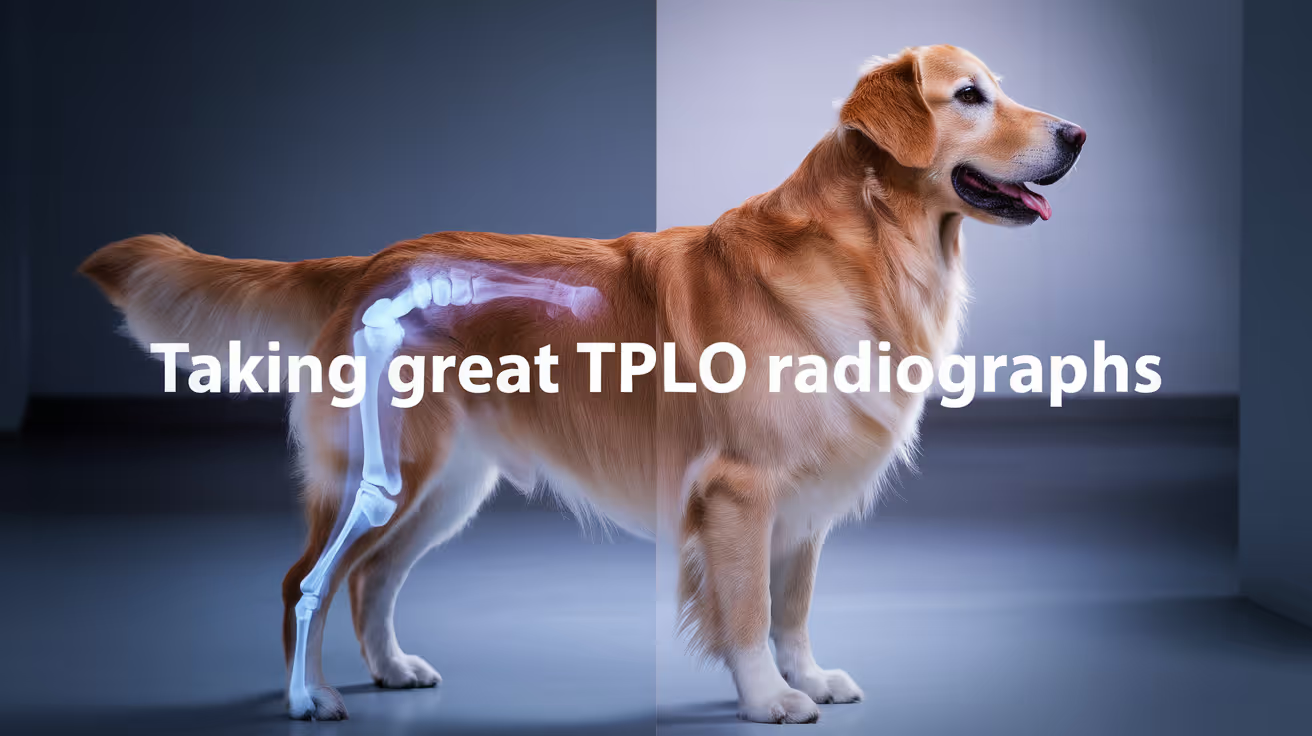
Taking Great TPLO Radiographs
Learn how to take great TPLO radiographs with proper positioning, imaging tips, & techniques. Watch videos to improve accuracy for better surgical planning
High-quality radiographs are the foundation of TPLO planning and post-operative assessment. The tibial plateau angle (TPA) measurement that determines plate size, osteotomy arc, and rotation amount depends entirely on image quality.
A poorly positioned radiograph produces inaccurate TPA measurements, which can lead to undercorrection, overcorrection, or incorrect implant selection.
Understanding what makes a TPLO radiograph diagnostically reliable is essential for any veterinary professional involved in TPLO cases.
Quick answer: A diagnostic TPLO lateral radiograph requires: stifle and hock at approximately 90 degrees; tibia and fibula superimposed throughout; femoral condyles superimposed; the entire tibia visible; and the beam centered over the stifle. Femoral condyle non-superimposition is the most common cause of TPA measurement error.
Key takeaways
- Limb positioning is the single most important variable for TPA accuracy: limb positioning affects the appearance of anatomic landmarks used for TPA determination
- The femoral condyles must be superimposed on the lateral view: MDPI research confirms 3 mm non-superimposition produces 90.6% of measurements within 1 degree of true TPA; error increases substantially beyond 3 mm
- The stifle and hock should both be at approximately 90 degrees for the lateral view: this is required for accurate tibial plateau angle measurement
- Sedation is recommended: a sedated dog allows accurate limb placement without motion artifact; an unsedated dog in pain cannot maintain the required positioning
- The TPA averages 23 to 29 degrees in most dogs: some small breeds average higher; dogs with TPA over 30 degrees may be poor candidates for extracapsular repair or TTA
- Post-operative TPA target is 5 to 6.5 degrees: achieving this angle eliminates cranial tibial thrust; post-operative radiographs confirm whether the target was achieved
Why radiograph quality matters for TPLO
TPLO planning is based entirely on the pre-operative lateral stifle radiograph. From this image, the surgeon:
- Measures the TPA (tibial plateau angle)
- Selects the appropriate osteotomy saw blade radius
- Plans the rotation amount needed to achieve the target post-operative TPA (5 to 6.5 degrees)
- Selects the implant size (plate and screw dimensions)
A 2-degree error in TPA measurement from a poorly positioned radiograph can result in a plate one size too small or large, or an osteotomy rotation that undercorrects or overcorrects the joint.
Today's Veterinary Practice confirms: a well-positioned lateral stifle radiograph is essential for accurate diagnostic interpretation and TPA measurement; correct tibial alignment is most important for TPA measurement.
The lateral (mediolateral) projection
This is the critical image for TPA measurement.
Patient positioning
Body position: the dog is placed in lateral recumbency with the limb of interest (affected stifle) closest to the table. The limb is extended slightly away from the body.
Stifle angle: the stifle is positioned at approximately 90 degrees of flexion.
Hock angle: the hock (tarsus) is positioned at approximately 90 degrees of flexion.
Cave Vet Specialists confirms: ensure the stifle and hock are collimated into the area of interest; keep the leg in a natural position; place an appropriate-sized plate under the limb.
Femoral condyles: both femoral hemicondyles should be precisely superimposed. This is the most technically demanding aspect of lateral stifle radiography. To achieve superimposition, the opposite limb is elevated with foam wedges or a triangular positioning aid to allow the limb of interest to lie flat and parallel to the table.
Cave Vet Specialists confirms: place the non-interest limb onto wedges to tilt the limb of interest centrally; place a triangular wedge or sandbag on the opposite side.
Tibia-fibula superimposition: the tibia and fibula should be superimposed throughout their full length. If the tibia and fibula are not superimposed, the tibia is rotated relative to the plate -- and this same rotation is captured in the TPA measurement.
What to include
The radiograph must include the entire tibia from the tibial plateau (top) to at least the distal metaphysis (ideally the entire bone).
Today's Veterinary Practice confirms: the x-ray beam should be centered over the stifle joint with collimation to include the entire tibia.
The most common positioning errors
Femoral condyle non-superimposition: the most frequent and most impactful error. Caused by the hindquarters tilting, the contralateral limb not elevated sufficiently, or the dog being unsedated and shifting position.
The MDPI Animals research quantified the impact: 3 mm of non-superimposition produces about 1 degree of TPA error; errors increase substantially beyond 3 mm.
Tibial rotation: the tibia is internally or externally rotated relative to the true mediolateral plane. This occurs when the hock is not held in a natural position. Rotation changes the apparent slope of the tibial plateau and produces a falsely high or low TPA.
Today's Veterinary Practice confirms: the tibia can easily be rotated with CCL injury even when the femur appears straight.
Incomplete tibia: if the distal tibia is cut off by collimation, the surgeon cannot assess the full tibial axis -- which is required for TPA measurement.
The caudocranial (CrCd or AP) projection
The caudocranial view assesses limb alignment, varus and valgus deformity, and tibial torsion. It is a standard part of the pre-operative TPLO radiograph set.
Patient positioning
The dog is placed in sternal recumbency or dorsal recumbency with the affected limb extended caudally (toward the x-ray plate). The stifle and hock should be visible.
Rita Leibinger confirms: the AP projection must have the stifle and tarsus included for the attending surgeon to assess limb alignment.
DVM360 confirms: on the caudocranial view, the medial margin of the tuber calcis should align with the center of the distal tibia, confirming the absence of tibial torsion.
Calibration for surgical planning
When radiographs will be used for surgical planning (plate size selection), a calibration marker must be placed at the same level as the stifle joint.
This allows the surgeon to scale the digital image to real-world measurements.
Rita Leibinger confirms: image calibration does not alter TPA measurement (the angle is size-independent), but it enables radiographs to be used for surgical plate-size planning.
Post-operative radiographs
After TPLO, radiographs are taken:
- Immediately post-surgery: to confirm osteotomy position, plate position, screw placement, and achieved post-operative TPA
- At 6 to 8 weeks: to assess early bone healing and callus formation
- At 12 weeks: to confirm bone union before lifting activity restrictions
What a good post-operative radiograph shows
- Post-operative TPA of approximately 5 to 6.5 degrees
- No screws violating the joint space
- Plate in correct medial position on the tibia
- Osteotomy gap that is progressively narrowing on follow-up films (callus formation)
Warning signs on post-operative radiographs
- Screw tip in the joint space (requires removal of that screw)
- Plate migration from original position
- Peri-implant radiolucent halos (suggests implant loosening or infection)
- Osteotomy gap not narrowing by 8 weeks (suggests delayed union or infection)
For the TPA measurement guide, see what causes TPLO surgery in dogs. For post-operative complications, see 15 common complications after TPLO surgery.
For the plate infection guide, see TPLO plate infection signs and treatment. For bone healing information, see TPLO bone healing time in dogs.
Frequently asked questions
Does the dog need to be sedated for TPLO radiographs?
Sedation is strongly recommended and preferred. An unsedated dog -- particularly one in pain from CCL disease -- cannot maintain the precise positioning required for accurate TPA measurement.
Even minor position changes between preparation and exposure produce significant error. Sedation allows the technician to position the limb correctly and hold it in place without the dog shifting.
Why does the hock position matter for the lateral view?
The hock angle affects the position of the tibia relative to the table and the imaging plate.
When the hock deviates from approximately 90 degrees, the tibia is either elevated or depressed at the distal end, which changes the apparent angle of the tibial plateau.
This error is captured in the TPA measurement.
What is a normal TPA range and when should TPLO be recommended?
Today's Veterinary Practice confirms the average TPA in most dogs is 23 to 29 degrees. Some small breeds have higher averages.
Dogs with TPA greater than 30 degrees may be poor candidates for extracapsular repair or TTA.
TPLO is appropriate for dogs of all TPA values -- the procedure specifically corrects whatever TPA angle the dog presents with.
Can the same radiograph be used for both diagnosis and surgical planning?
Yes, if it is of adequate quality and includes a calibration marker.
Diagnostic-only radiographs taken without a calibration marker can confirm CCL disease and measure TPA, but cannot be used for plate-size surgical planning.
Including a calibration marker at the time of acquisition allows a single radiograph to serve both purposes.
What happens if the TPA is measured incorrectly pre-operatively?
If the pre-operative TPA is underestimated, the surgeon may under-rotate the osteotomy and fail to reach the target 5 to 6.5 degree post-operative TPA.
This results in residual cranial tibial thrust and potentially ongoing instability. If overestimated, overcorrection is possible.
This underscores why positioning accuracy at the time of radiography is critical -- errors propagate through the entire surgical plan.
Resources
- Cave Vet Specialists. Tips for TPLO Radiographs. cave-vet-specialists.co.uk
- Today's Veterinary Practice. Cruciate Disease: How and Why to Measure Tibial Plateau Angle. todaysveterinarypractice.com
- MDPI Animals. The Effect of Femur Positioning on Measurement of Tibial Plateau Angle. ncbi.nlm.nih.gov
- Rita Leibinger. TPLO Surgical Technique. leibinger.vet
Bilateral TPLO Surgery Explained
Comprehensive guide to bilateral TPLO surgery for dogs, covering procedure, recovery, benefits, risks, and cost considerations for better mobility
Bilateral CCL (cranial cruciate ligament) disease -- affecting both stifle joints -- is common in dogs.
Midvalley Animal Clinic confirms 30 to 40% of dogs with unilateral CCL rupture will eventually develop rupture of the contralateral CCL.
When both stifles are significantly affected, the decision between simultaneous bilateral TPLO and staged TPLO is one of the most important surgical planning discussions an owner will have.
Quick answer: Simultaneous bilateral TPLO operates on both stifles in one anesthetic event, offering a single recovery period and lower total cost. Staged TPLO operates on one leg at a time, reducing anesthetic risk. Simultaneous is preferred for healthy, large dogs with both stifles unstable. Staged is preferred for older, smaller, or compromised dogs.
Key takeaways
- 30 to 40% of dogs with unilateral CCL disease develop contralateral CCL rupture: bilateral TPLO may be planned proactively at presentation or urgently when the second CCL ruptures during recovery
- Simultaneous bilateral TPLO offers a single anesthetic event and shorter overall recovery: both knees heal together; total cost is lower than two staged surgeries
- Staged bilateral TPLO reduces surgical risk: each surgery is shorter; the dog has one functional leg during recovery; preferred for older or medically compromised dogs
- The critical challenge of simultaneous bilateral TPLO is recovery: with both rear legs restricted, owners must provide intensive physical support (slings) for the first 2 to 3 weeks
- PubMed research (176 bilateral TPLO cases) found no significant difference in overall complication rates between simultaneous and staged approaches in appropriately selected patients
- Large dogs with strong front limbs handle simultaneous TPLO better: smaller or weaker dogs benefit from the staged approach due to greater difficulty bearing weight on two compromised rear legs
Why bilateral CCL disease is common
CCL disease in dogs is degenerative, not purely traumatic.
The same factors that caused one CCL to rupture -- degenerative fiber changes, abnormal tibial plateau angle, breed predisposition, obesity, and mechanical overload -- are typically present in both stifles.
When a dog ruptures one CCL, it often shifts weight onto the contralateral leg, increasing the load on the already-compromised contralateral CCL. This accelerates degeneration and the timeline to rupture.
The clinical implication: even when only one stifle is symptomatic at presentation, the surgeon will typically assess both stifles.
Pre-operative radiographs of both stifles help determine whether the contralateral joint shows early instability, effusion, or an elevated TPA that warrants planning for bilateral surgery.
Simultaneous bilateral TPLO
Overview
Both stifles are operated on during a single general anesthetic event. The dog is positioned, the first TPLO is performed, the dog is repositioned, and the second TPLO is performed.
Total surgical time is approximately 3 to 4 hours.
Advantages
Single anesthetic event: the dog is exposed to general anesthesia once rather than twice. Each anesthetic event carries inherent risk; eliminating one event reduces cumulative anesthetic risk.
Faster total recovery: both legs heal simultaneously. Rather than 8 to 12 weeks of restriction for the first leg, then a second 8 to 12 week restriction for the second leg, the dog completes one restriction period covering both.
SustainableVet.org confirms: when both knees are corrected in a single surgery, the dog undergoes just one healing phase rather than two separate ones, returning to normal activity sooner.
Lower total cost: while the simultaneous surgery costs more than a single TPLO, it is less than two completely separate procedures with individual hospitalization, anesthesia fees, and post-operative care expenses.
SustainableVet.org confirms: simultaneous TPLO often reduces overall costs by avoiding duplicate anesthesia, hospitalization, and post-operative care fees.
Risks and challenges
Both rear legs are compromised simultaneously: the dog cannot transfer weight to a strong rear leg during the recovery period. All rear-limb support requires either front-limb loading (difficult for large breeds) or active owner assistance via sling.
Increased owner demand: SustainableVet.org confirms post-surgical care is more challenging because the dog cannot rely on a strong leg for support, requiring owners to provide intensive assistance.
Longer anesthetic duration: total surgical time of 3 to 4 hours for bilateral vs. 1.5 to 2 hours for unilateral increases the physiological burden of anesthesia and surgery.
Potentially higher complication rate in some populations: the PubMed 176-case study compared simultaneous and staged TPLO complications and found no significant overall difference, but the study population was highly selected.
Staged bilateral TPLO
Overview
The more significantly affected stifle is operated on first. After a full recovery (typically 8 to 12 weeks until bone healing is confirmed), the second stifle is operated on.
Advantages
Reduced surgical risk per event: each procedure is a standard unilateral TPLO, carrying the same risk profile as any single TPLO.
One functional rear leg during recovery: the dog can weight-bear on the unoperated leg immediately after the first surgery. This simplifies nursing care significantly and allows most dogs to stand and toilet independently.
Better option for older or compromised dogs: SustainableVet.org confirms older dogs or those with other health issues benefit from a staged approach to reduce surgical risk. Dogs with cardiac, renal, hepatic, or respiratory disease may not tolerate a 3 to 4 hour bilateral procedure safely.
Disadvantages
Two separate anesthetic events: two exposures to general anesthesia over a 3 to 6 month period.
Longer total recovery timeline: the dog may not reach full bilateral function for 6 to 9 months or longer from the date of the first surgery.
Higher total cost: two separate surgeries, two hospitalizations, two sets of post-operative medications and supplies.
Risk of contralateral rupture during the first recovery: the contralateral leg bears additional load during the first recovery period, accelerating degeneration. In some dogs, the second CCL ruptures acutely during the first recovery -- this forces an emergency decision about timing of the second surgery.
Which approach is right for a given dog?
Generally prefer simultaneous bilateral TPLO when:
- Both stifles are confirmed significantly unstable at presentation
- The dog is young, healthy, and large with strong front limb musculature
- The owner is able to provide intensive physical support during the bilateral recovery period
- The surgeon is experienced with bilateral TPLO technique
- Financial considerations favor the single-event approach
Generally prefer staged bilateral TPLO when:
- Only one stifle is currently significantly symptomatic (the second may be monitored and staged only if it progresses)
- The dog is older, small, or has significant concurrent health conditions
- The owner's ability to provide intensive bilateral recovery support is limited
- The anesthetic risk for a prolonged bilateral procedure is elevated
SustainableVet.org confirms: large dogs with strong front limbs may handle simultaneous TPLO better, while smaller or weaker dogs may benefit from a staged approach.
Bilateral TPLO recovery: what to expect
Simultaneous recovery
Weeks 1 to 2: the most demanding period. Both rear legs are compromised. The dog requires a sling for all mobility. Bathroom trips require active owner support.
Crate rest at all other times.
Weeks 2 to 6: gradual improvement. Both legs begin partial weight bearing. Sling use may reduce but is still needed for most dogs on stairs or uneven surfaces.
Weeks 6 to 12: radiographic assessment of both osteotomies. Activity increases based on healing of both legs.
Key equipment for bilateral TPLO recovery
- Lifting harness or rear-end sling (essential, not optional)
- Non-slip mats throughout the house
- Ramps for car access (no jumping in or out)
- Low dog beds at floor level
For the standard TPLO recovery timeline, see what to expect after TPLO surgery in dogs. For confinement advice, see how to confine your dog after TPLO surgery.
For post-op tips, see 10 essential TPLO recovery tips for pet owners. For the cost guide, see TPLO surgery cost in dogs.
Frequently asked questions
How will I know if my dog needs bilateral TPLO?
Your vet will assess both stifles during the physical examination.
Signs that the contralateral stifle is also affected include drawer sign or tibial thrust on the second side, joint effusion on radiographs, or intermittent lameness on both rear legs.
Both stifles are typically radiographed at the pre-operative planning visit.
Can the second CCL rupture while my dog is recovering from the first TPLO?
Yes. This is one of the main risks of staged TPLO. The unoperated leg bears more weight during recovery, accelerating degeneration.
If the second CCL ruptures acutely, the dog becomes bilateral suddenly and the timing of the second surgery must be reassessed with your vet.
Is bilateral TPLO safe for large breeds?
Yes, when appropriately selected. Large dogs with good front limb strength typically handle the bilateral recovery better than small dogs.
The challenge is the nursing care requirement, which is significant regardless of size. Ensure you have the physical ability to support a large dog in a sling before committing to simultaneous surgery.
My dog needs bilateral TPLO but I can only afford one surgery now. What should I do?
This is a common situation. Staged TPLO is appropriate and legitimate. Operate on the more severely affected stifle first and monitor the second closely.
Discuss weight management and controlled activity to reduce load on the second stifle during the first recovery. Plan financially for the second surgery.
Do both TPLO plates stay in permanently?
Yes, unless a complication (infection, implant failure) necessitates removal.
If both plates require removal, it can be done as a single procedure or staged, depending on the reason for removal and the healing status of each osteotomy.
Resources
- SustainableVet. Bilateral TPLO Surgery. sustainablevet.org
- PubMed. Comparison of Intra- and Postoperative Complications Between Bilateral Simultaneous and Staged TPLO. pubmed.ncbi.nlm.nih.gov
- Midvalley Animal Clinic. Pre-Op Instructions for TPLO. midvalleyanimalclinic.com
- ACVS. Cranial Cruciate Ligament Disease. acvs.org
How Dogs Get Enterococcus faecalis
Learn how dogs acquire Enterococcus faecalis, its transmission routes, risk factors, and prevention methods to protect your pet from infections
Enterococcus faecalis is a normal inhabitant of your dog's gastrointestinal tract. In healthy dogs, it causes no problems. The trouble starts when this opportunistic bacterium moves from where it belongs into tissue where it does not urinary tracts, wounds, surgical sites, and bloodstream.
What makes E. faecalis clinically significant is not just where it ends up, but how resistant it is once it gets there.
Quick answer: Dogs get Enterococcus faecalis from their own gut flora, spreading to the urinary tract or wounds via fecal contamination. It is the top Enterococcus in canine UTIs and is highly antibiotic resistant. Culture testing is essential.
Key takeaways
- E. faecalis is a normal gut commensal; infections occur when it migrates to the urinary tract, wounds, or bloodstream
- Fecal contamination is the primary route: UTI-causing E. faecalis originates from the dog's own stool microflora
- E. faecalis is the most common Enterococcus in canine UTIs: one study found it in 68% of canine Enterococcus isolates
- High antibiotic resistance is the defining clinical challenge: 74.5% resistant to enrofloxacin, 84.3% to clindamycin
- Dogs can transmit resistant E. faecalis to humans; immunocompromised owners are particularly at risk
- Culture and sensitivity testing is essential: empirical antibiotic treatment without testing frequently fails
What is Enterococcus faecalis?
Enterococcus faecalis is a Gram-positive, facultatively anaerobic bacterium that naturally colonizes the gastrointestinal tracts of most mammals, including dogs and humans. Veterian Key (Sykes): "In healthy dogs and cats, enterococci can be found on the skin and within the oral cavity, nasal cavity, and gastrointestinal tract."
It belongs to a group of bacteria once called "Group D Streptococci" and is now classified separately. Enterococci are remarkably resilient: they tolerate a wide range of temperatures, salt concentrations, and pH levels, allowing them to persist on surfaces and in environments where most bacteria cannot survive.
E. faecalis vs. E. faecium: Both are common in dogs, but they are not equivalent. The peer-reviewed UTI study (MDPI Animals, 2021) found: "E. faecalis predominated among UTI isolates... E. faecalis seems to be more virulent than E. faecium, justifying its more frequent involvement in urinary tract infections." E. faecalis carries more virulence genes, including those enabling biofilm formation.
How dogs acquire E. faecalis infections
From their own gut flora
The most common route. The MDPI study confirmed: "Our data confirm that enterococci inhabitant of the gut flora probably represent the main source of UTI in dogs."
When E. faecalis from fecal matter contacts the urethral opening, the bacteria can ascend into the bladder. This is particularly common in:
- Female dogs: shorter urethra provides a shorter path for bacteria to ascend
- Dogs that groom after defecation: licking the perineal area transfers gut bacteria to nearby surfaces
- Dogs with incontinence or urinary retention: stagnant urine is a bacterial growth medium
Environmental exposure
E. faecalis survives in soil, water, and on surfaces for extended periods. Kennels, veterinary clinics, dog parks, shared water bowls, and poorly sanitized equipment can all harbor the organism. Veterian Key: "Mode of transmission: direct contact. Organisms are usually commensals that invade opportunistically."
Nosocomial (hospital-acquired) infections are a documented concern: dogs recovering from surgery in veterinary hospitals can acquire E. faecalis from contaminated surfaces or instruments.
Surgical sites and wound infections
Any break in the skin or mucosal surface is a potential entry point. Post-surgical wound infections with E. faecalis occur when fecal or environmental bacteria contaminate the surgical site during recovery most commonly abdominal surgeries where the gastrointestinal tract is opened, or perineal surgeries near the rectum.
Veterian Key lists the full spectrum of clinical presentations: "Major clinical signs include neonatal septicemia, urinary tract infections, postoperative incision or wound infections, otitis externa, bacteremia and endocarditis."
Which dogs are most at risk?
Dogs with existing urinary tract disease
Clinician's Brief (UTI study): "55% of dogs infected with Enterococcus spp in the urinary tract were presented with LUT signs... up to 45% of cases may have been subclinical." Dogs with structural urinary abnormalities, bladder stones, or indwelling catheters have significantly elevated risk.
Immunocompromised dogs
Dogs on long-term corticosteroids, chemotherapy, or with conditions like Cushing's disease or diabetes have impaired immune defenses that allow normally harmless gut commensals to establish infection.
Post-surgical patients
Any surgery involving the abdomen, perineal area, or urinary tract creates pathways for E. faecalis to access normally sterile tissue. Dogs with urinary catheters are at particular risk.
Dogs on prior antibiotics
Prior antibiotic treatment eliminates susceptible bacteria and creates ecological space for resistant E. faecalis to proliferate. This is one reason E. faecalis is disproportionately found in dogs that have received previous antibiotic courses.
Where E. faecalis causes infection in dogs
Urinary tract infections (UTIs)
The most common clinical presentation. Dogs with E. faecalis UTI may show:
- Frequent urination (pollakiuria)
- Straining to urinate (stranguria)
- Blood in urine (hematuria)
- Genital licking
- Accidents in the house
- Sometimes no signs at all (subclinical bacteriuria)
Clinician's Brief: "Enterococcus spp bacteriuria could serve as a marker of underlying LUT inflammation."
Wound and surgical site infections
Recognized by: poor wound healing, increasing discharge, redness extending from the wound, pain at the site, and odor.
Bacteremia and endocarditis
Severe systemic infection when E. faecalis enters the bloodstream. Associated with fever, lethargy, and in the case of endocarditis, heart murmur development. Veterian Key confirms this clinical spectrum in dogs.
For how E. faecalis contributes to severe wound infections including necrotizing fasciitis, see Enterococcus in severe wound infections.
The antibiotic resistance challenge
This is the defining clinical concern with E. faecalis. The MDPI 2021 study of canine isolates found alarming resistance rates:
- Enrofloxacin (fluoroquinolone): 74.5% resistant
- Clindamycin: 84.3% resistant
- Tetracycline: 78.4% resistant
- Ampicillin: 64.7% resistant (MIC ≥ 64 µg/mL in 47.1% of isolates)
E. faecalis has intrinsic resistance to cephalosporins, lincosamides, and low-level resistance to aminoglycosides. It can also acquire high-level resistance to aminoglycosides (HLAR phenotype) found in 47.1% of isolates in the study.
What this means in practice: empirical antibiotic treatment (prescribing without culture results) for E. faecalis infections has a high probability of failure. Culture and sensitivity testing is not optional it is essential for selecting an antibiotic with a reasonable chance of working.
Effective options (subject to susceptibility results) include nitrofurantoin (for uncomplicated UTI), linezolid, or ampicillin when susceptibility is confirmed. Vancomycin resistance was not detected in the MDPI study this is an important distinction from some human E. faecalis strains.
Zoonotic risk: can E. faecalis pass from dogs to humans?
Yes. The Korean resistance study confirmed: "Companion animals treated with antibiotics in an intensive care unit were a source for the zoonotic transmission of MDR Enterococcus." The MDPI study: "Infected dogs may be a source of Enterococcus spp. for their owners who, mainly in case of immunocompromised persons, can develop severe pathologies."
Practical guidance:
- Wash hands after handling a dog with a known E. faecalis infection
- Clean and disinfect wound dressings and surfaces that contact discharge
- Immunocompromised household members (chemotherapy patients, transplant recipients, those with HIV) should discuss additional precautions with their physician
- There is no need to remove a dog from the home in most circumstances, but hygiene is essential
For how resistant organisms like Pseudomonas relate to the same clinical picture of treatment-resistant infections, see other resistant organisms alongside Enterococcus. For how antimicrobial prophylaxis relates to Enterococcus in surgical patients, see antimicrobial prophylaxis against Enterococcus.
Diagnosis and treatment
Diagnosis: urine culture with colony count (for UTI); wound swab culture for wound infections. Sensitivity testing is required for every case.
Treatment:
- Antibiotic selection guided entirely by culture and sensitivity results
- Duration: typically 4 to 6 weeks for UTI; longer for systemic infection
- Recurrent UTI requires investigation for underlying structural, hormonal, or immune causes
- Wound infections require drainage, debridement, and wound care alongside antibiotics
Prevention:
- Prompt treatment of any wound or surgical site
- Post-surgical monitoring for early infection signs
- Judicious antibiotic use (avoiding unnecessary courses that select for resistance)
- Hygiene in multi-dog environments and kennels
Frequently asked questions
Is Enterococcus faecalis in a dog's urine always an infection?
Not necessarily. Subclinical bacteriuria (bacteria in urine without clinical signs) exists. Clinician's Brief: up to 45% of dogs with enterococcal bacteriuria may have no lower urinary tract signs. Whether to treat depends on the dog's clinical presentation, the species identified, and whether underlying disease predisposes to ascending infection. Your vet will interpret the culture result in the context of the full clinical picture.
My dog was prescribed a fluoroquinolone for an E. faecalis UTI. Is that appropriate?
Potentially problematic. The MDPI study found 74.5% of canine E. faecalis isolates were resistant to enrofloxacin. A fluoroquinolone should only be used if the sensitivity test shows susceptibility. If your dog was prescribed one empirically (before culture results), follow up with your vet when results are available and ask whether the antibiotic needs to be changed.
Can E. faecalis cause a UTI to keep coming back?
Yes. Recurrent E. faecalis UTIs occur for several reasons: antibiotic treatment that did not fully clear the infection, structural abnormalities (bladder stones, ectopic ureters, tumors) that maintain bacterial colonization, inadequate treatment duration, or reinfection from the dog's own gut flora. A full urological workup (imaging, repeat culture) is appropriate for any dog with more than two UTIs per year.
How long does E. faecalis survive on surfaces?
Enterococci are notably hardy. They can survive on environmental surfaces for days to weeks. This is why shared water bowls, bedding, and poorly sanitized kennel runs can serve as transmission sources. Regular cleaning with disinfectants effective against Gram-positive bacteria reduces this risk.
My dog has no symptoms but E. faecalis was found in a urine sample. What should I do?
Discuss with your vet whether treatment is indicated. In dogs without clinical signs and no predisposing conditions, subclinical bacteriuria may not require antibiotic treatment treating asymptomatic bacteriuria can select for resistance without clinical benefit. Your vet will weigh the evidence for your dog specifically.
Is there a vaccine against E. faecalis for dogs?
No vaccine currently exists for E. faecalis in dogs. Prevention relies on hygiene management, judicious antibiotic use, prompt wound treatment, and monitoring for early infection signs in high-risk dogs.
Resources
- MDPI Animals (2021). Characterization and Comparison of Enterococcus spp. Isolates from Feces of Healthy Dogs and Urine of Dogs with UTIs. mdpi.com
- Veterian Key (Sykes). Streptococcal and Enterococcal Infections. veteriankey.com
- Clinician's Brief. Risk Factors for Enterococcal Bacteriuria in Dogs. cliniciansbrief.com
- PMC (2021). Antimicrobial Resistance Profiles of E. faecium and E. faecalis from Healthy Dogs and Cats. ncbi.nlm.nih.gov
How to Treat MRSP in Dogs: Best Practices
Learn how to treat MRSP in dogs with vet-approved methods. Explore symptoms, best treatments, & prevention tips to manage antibiotic-resistant infections
Your vet has confirmed MRSP. Now what?
MRSP treatment follows a clear sequence: confirm the diagnosis, use the right topical care, add systemic antibiotics only when the sensitivity result shows what will work, run the full course, and address the underlying condition driving recurrence.
Here's what each step means in practice.
Quick answer: MRSP treatment starts with chlorhexidine 2 to 4% shampoo 2 to 3 times weekly as the foundation for all skin infections. Systemic antibiotics are added for deep or widespread infection, selected based strictly on culture and sensitivity results. Never use amoxicillin, cephalexin, or any beta-lactam for MRSP: they are always ineffective. Treatment continues 1 to 2 weeks past visible healing. The underlying cause (allergy, endocrine disease) must be managed or infection returns.
Key takeaways
- Topical chlorhexidine shampoo is the foundation of MRSP skin treatment, effective regardless of antibiotic resistance.
- Never use amoxicillin, cephalexin, or any beta-lactam for confirmed MRSP: all are ineffective.
- Systemic antibiotics must be based on the sensitivity result, not guessed.
- Treatment continues past visible healing: stopping when skin "looks better" is the most common cause of relapse.
- E-collar on at all times during treatment: licking introduces bacteria and delays healing.
- Underlying disease management is not optional: allergy control is as important as antibiotic selection.
Step 1: Confirm the diagnosis with culture
Before any antibiotic is chosen, you need to know which bacteria is present and what it's susceptible to.
Culture and sensitivity testing (C&S) identifies:
- Whether S. pseudintermedius is causing the infection
- Whether it's methicillin-resistant (MRSP) or susceptible
- Which specific antibiotics retain activity against this isolate
If your dog has already been prescribed antibiotics and the infection isn't improving: ask your vet about culture and sensitivity testing before the antibiotic is changed. Switching without culture data is guesswork that may apply the wrong drug a second time.
For how MRSP is diagnosed in detail, see MRSP diagnosis explained.
Step 2: Start topical antiseptic therapy
Topical antiseptic treatment is the foundation of MRSP management for skin infections. It works regardless of antibiotic resistance profile because chlorhexidine disrupts bacterial membranes mechanically: bacteria cannot develop resistance to it the way they develop resistance to antibiotics.
Published research (PMC4204846) found that 65.4% of MRSP pyoderma cases resolved with topical therapy alone, without systemic antibiotics.
Chlorhexidine shampoo 2 to 4%: the main tool
How to use it correctly:
- Wet the coat thoroughly
- Apply shampoo to all affected areas (and surrounding skin)
- Massage in gently
- Leave on for 5 to 10 minutes: this contact time is when the antibacterial effect happens
- Rinse completely
- Dry the coat thoroughly, especially in skin folds
Frequency during active infection: 2 to 3 times weekly
Frequency for maintenance (recurrence-prone dogs): once weekly
Other topical agents your vet may prescribe
- Chlorhexidine spray or mousse: applied between baths for spot treatment
- Mupirocin ointment: applied twice daily to small, defined lesions with a gloved fingertip
- Fusidic acid gel: applied twice daily to localized lesions if sensitivity is confirmed
- Antiseptic wipes: useful for skin folds, paw pads, and ear pinnae between baths
For treatment of wound-type MRSP infections specifically, see topical treatment for MRSP wound infections.
Step 3: Systemic antibiotics, only when needed, based on the sensitivity result
Systemic antibiotics are added when:
- Topical therapy alone isn't controlling the infection after 3 weeks
- The infection is deep (painful nodules, draining tracts)
- The infection covers a large body surface area
- There are systemic signs (fever, lethargy)
When systemic treatment is prescribed, the selection must be based on the sensitivity result. No exceptions.
What can't be used for MRSP
Amoxicillin, Clavamox (amoxicillin-clavulanate), cephalexin, cefpodoxime (Simplicef), and all other penicillins and cephalosporins are ineffective against MRSP. If your dog has been on any of these and not improving, it's not because the dose was wrong: these drugs have no effect on MRSP by definition.
What may be active (subject to sensitivity result)
Critical owner rule: Do not stop antibiotics when the skin looks better. Treatment must continue for the full prescribed course, typically 1 to 2 weeks past complete visible resolution.
Step 4: Supporting treatment at home
E-collar: non-negotiable
Keep the E-collar on at all times unless your vet specifically says otherwise. This means:
- During sleep
- During meals (use a shallow bowl if needed)
- Outdoors on leash
A dog that licks its MRSP lesions even once is introducing bacteria from its mouth directly to the infection site, undoing the effect of topical treatment and spreading bacteria to new skin areas.
Wound cleaning (if prescribed)
If your vet has prescribed wound cleaning at home:
- Use only the prescribed solution (typically dilute chlorhexidine or sterile saline)
- Use clean gauze or cotton, not bare hands
- Follow the prescribed frequency exactly
- Do not use hydrogen peroxide or alcohol (they damage healing tissue)
Preventing licking of other body parts
MRSP from an infection on one body area can spread to other areas through the dog's own licking. If the infected area is accessible to the dog's mouth, an E-collar or recovery bodysuit is essential.
For home hygiene to prevent household spread, see home hygiene during MRSP infection.
Step 5: Manage the underlying cause
This is where most recurrent MRSP cases fail. Without managing the condition that created the infection opportunity, the bacteria establishes again after every treatment cycle.
Common underlying causes and their management:
For how underlying disease drives recurrence, see why MRSP keeps coming back.
Treatment duration and what to expect
Superficial MRSP (skin surface infections)
- Topical therapy alone: 3 to 4 weeks minimum
- If systemic antibiotics added: 2 to 3 weeks minimum, with recheck
- Continue treatment 1 week past complete clinical resolution
- Do not stop based on appearance alone
Deep MRSP (nodules, draining tracts)
- Systemic antibiotics required
- Duration: 8 to 12 weeks minimum
- Continue 2 to 3 weeks past complete lesion resolution
- Culture recheck 2 weeks after finishing antibiotics recommended
What improvement looks like:
- Pustules resolving without new ones forming
- Existing collarettes healing without discharge underneath
- Dog scratching the area less
- Odor reducing
- Redness fading
Signs treatment isn't working (call your vet):
- No improvement after 10 to 14 days of topical treatment
- New lesions appearing while on antibiotics
- Existing lesions worsening
- Dog developing systemic signs (fever, lethargy)
For MRSP treatment guidelines in the veterinary clinical context, see veterinary MRSP treatment guidelines.
Preventing recurrence after treatment
Three rules for preventing the next episode:
Keep topical maintenance going: once weekly chlorhexidine shampoo keeps bacterial counts on the skin lower than active-infection-level bathing frequency, and reduces the chance of the next skin disruption converting to infection.
Monitor closely for early signs: new pustules, epidermal collarettes, odor changes, or increased scratching in a specific area. Early-stage superficial infections respond to topical-only treatment more often than established infections.
Culture before the next antibiotic course: resistance profiles can change between infections. Last year's sensitivity result does not necessarily apply to this year's isolate.
Frequently asked questions
My dog has been on cephalexin for 2 weeks and isn't getting better. What now?
If MRSP is confirmed, cephalexin will have zero effect: no amount of additional time or higher dosing will make it work. Contact your vet to discuss culture and sensitivity testing (if not already done) and selection of an active antibiotic based on the result. Don't continue ineffective treatment while infection progresses.
How long before I see improvement once we're on the right antibiotic?
For superficial MRSP with topical therapy, visible improvement typically begins within 10 to 14 days. With systemic antibiotics targeting MRSP, some improvement is usually visible within 7 to 10 days. If there's no improvement at all within 2 weeks on treatment that the sensitivity result confirmed should work, contact your vet for reassessment.
Can MRSP be cured, or will my dog always have it?
Most dogs achieve clinical resolution of each MRSP episode with appropriate treatment. Complete elimination from the dog's body is harder: S. pseudintermedius is normal skin flora, and the resistant strain may persist as a carrier after infection resolves. Long-term success depends on managing the underlying skin condition that creates the infection opportunity.
Treating MRSP isn't mysterious. It requires the right topical care applied consistently, antibiotics selected by sensitivity rather than by appearance or habit, a full treatment course run past visible healing, and the underlying condition that keeps creating the opportunity actually managed. Each of those components matters, and missing any one of them produces the infection cycle most owners are trying to escape.
Resources
- Clinician's Brief. Staphylococcus pseudintermedius: An Overview. cliniciansbrief.com
- PMC. A case of MRSP pyoderma in a Labrador retriever dog. pmc.ncbi.nlm.nih.gov
- ISCAID. Antimicrobial use guidelines for canine pyoderma. PMC, 2025. pmc.ncbi.nlm.nih.gov
- DVM360. Managing MRSA, MRSP, and MRSS dermatologic infections in pets. dvm360.com
MRSP Infection in Dogs: Causes and Symptoms
MRSP infection in dogs is a drug-resistant bacterial infection causing skin issues and wounds. Learn its causes, symptoms, and the best treatment options
MRSP stands for methicillin-resistant Staphylococcus pseudintermedius. That's a mouthful, but the practical reality is simpler: it's a resistant form of a bacteria that already lives on most dogs' skin, one that has become harder to kill because the antibiotics most vets reach for first no longer work against it.
This guide covers what MRSP is, how dogs get it, what it looks like, how it's confirmed, and what treatment actually requires.
Quick answer: MRSP is a resistant form of Staphylococcus pseudintermedius, the most common bacteria on dog skin. It develops resistance through repeated antibiotic exposure. It causes skin infections, ear infections, and post-surgical wound infections that don't respond to standard antibiotics like amoxicillin or cephalexin. Diagnosis requires bacterial culture and sensitivity testing. Treatment centers on topical chlorhexidine for skin infections and sensitivity-guided systemic antibiotics for deep infections.
Key takeaways
- MRSP is S. pseudintermedius that has become antibiotic-resistant most commonly through prior antibiotic exposure.
- MRSP is different from MRSA MRSP is dog-adapted; MRSA comes from humans.
- Skin infections, ear infections, and surgical wound infections are the most common presentations.
- The key clinical clue is failure to respond to standard antibiotics after 7 to 10 days.
- Culture and sensitivity testing is mandatory there is no other way to confirm MRSP.
- Most dogs with MRSP recover with correct treatment and underlying disease management.
What is MRSP?
Staphylococcus pseudintermedius is a coagulase-positive staph bacterium that colonizes approximately 50% of healthy dogs as normal skin flora. Under normal circumstances it causes no disease. When the skin barrier is damaged (by allergy, wounds, or surgery) or the immune system is reduced, it can establish infection.
MRSP is the methicillin-resistant form of this bacteria. It carries the mecA gene, which produces a modified penicillin-binding protein (PBP2a) that prevents beta-lactam antibiotics from binding to it. This makes all penicillins and cephalosporins ineffective and most MRSP isolates carry additional resistance genes making them resistant to multiple other antibiotic classes as well.
MRSP vs. MRSA:
For a complete comparison, see MRSP and MRSA compared.
How dogs get MRSP
From their own bacteria (most common)
The bacteria responsible for MRSP is already on the dog's skin. Repeated antibiotic courses apply selection pressure, shifting the bacterial population toward resistant organisms. A dog who has had multiple courses of amoxicillin or cephalexin over their lifetime has progressively higher risk of MRSP.
From hospital and kennel environments
Veterinary hospitals, ICUs, and kennels concentrate MRSP from multiple dogs. A Portuguese ICU study found 21.6% of admitted dogs had MRSP, with documented acquisition during hospitalization.
From direct contact with MRSP-positive dogs
Contact with active lesions or contaminated bedding can transfer bacteria between dogs, particularly when the receiving dog has compromised skin.
For the full transmission picture, see how dogs acquire MRSP.
Symptoms of MRSP infection
Skin infections (most common)
MRSP skin infections look identical to routine staph infections initially. The distinguishing feature emerges over time: the infection doesn't improve with standard antibiotics.
What to watch for:
- Pustules (pimple-like bumps) at hair follicle bases
- Epidermal collarettes (circular crusty rings where pustules have burst)
- Patchy hair loss over affected areas
- Redness and mild swelling
- Skin odor that persists or worsens despite treatment
- Persistent itching, licking, or scratching in the affected area
Deeper infections additionally show:
- Painful, firm nodules under the skin
- Draining tracts releasing pus or blood-tinged fluid
- Significant hair loss and skin discoloration
Ear infections
MRSP otitis externa presents with the same signs as routine ear infection head shaking, pawing at ears, ear odor, brown or yellow discharge but does not respond to standard ear medications. Culture of ear discharge is required before treatment.
Post-surgical wound infections
MRSP post-surgical infections typically present between days 5 and 14 after surgery, though implant-associated infections can emerge weeks to months later. Signs include discharge not clearing, wound failing to close, and returning lameness in orthopedic cases.
For MRSP after surgery specifically, see MRSP after surgery.
Systemic signs (serious infection)
If infection spreads beyond skin or wound:
- Fever above 103°F
- Significant lethargy
- Loss of appetite beyond 48 hours
- Vomiting
Systemic signs alongside wound changes require same-day emergency assessment.
Which dogs are most at risk
Higher-risk dogs:
- Dogs with atopic dermatitis, hypothyroidism, or Cushing's disease
- Dogs with prior antibiotic exposure in the past 12 months
- Dogs that have had recent surgery, particularly orthopedic procedures
- Dogs with a history of MRSP infection
- Dogs that visit veterinary hospitals or kennels frequently
- Puppies and elderly dogs with immature or reduced immunity
For immunocompromised dogs specifically, see MRSP in immunocompromised dogs.
Diagnosis
Culture and sensitivity testing
There is no way to diagnose MRSP visually. A wound or skin infection looks the same whether it's caused by susceptible or resistant staph.
Culture and sensitivity testing:
- Identifies the species (S. pseudintermedius vs. others)
- Confirms methicillin resistance
- Identifies which antibiotics retain activity against this isolate
Sample collection:
- Intact pustule: swab the contents directly
- Epidermal collarette: swab under the active edge
- Deep pyoderma: punch biopsy for tissue culture
- Ear: swab otic discharge
When to suspect MRSP
- No improvement after 7 to 10 days on an appropriate antibiotic
- Infection returning within weeks of completing a course
- History of MRSP diagnosis
- Multiple antibiotic courses in the past year
MedVet confirms: "Most pets with MRSP infection are treated successfully."
Treatment
Topical chlorhexidine: the foundation
For all skin infections, topical chlorhexidine shampoo 2 to 4% is the first-line treatment. It is effective regardless of antibiotic resistance because it works through physical membrane disruption, not through binding to cellular targets bacteria can mutate around.
- 5 to 10-minute contact time before rinsing
- 2 to 3 times weekly during active infection
- Once weekly for maintenance in recurrence-prone dogs
Published research: 65.4% of MRSP pyoderma cases resolved with topical therapy alone (PMC4204846).
Systemic antibiotics (when needed)
Added for deep infections, widespread disease, or failure of topical-only therapy. Always based on sensitivity results.
Never for MRSP: amoxicillin, Clavamox, cephalexin, cefpodoxime, or any beta-lactam.
Potentially active options (sensitivity result determines which):
- Chloramphenicol
- Potentiated sulfonamides
- Rifampicin (always in combination)
- Doxycycline (variable activity)
- Amikacin (injectable; severe cases)
For full treatment detail, see how to treat MRSP in dogs.
Managing the underlying cause
Recurrent MRSP without atopy, endocrine disease, or skin fold management will keep returning. Treatment of each infection episode must be paired with management of the trigger.
Prognosis
MedVet: "Most pets with MRSP infection are treated successfully."
The resistance makes treatment more complex but not untreatable. The key factors determining prognosis:
- Whether the underlying disease can be managed
- Whether the sensitivity result identifies an active antibiotic
- Whether the full treatment course is completed
- For post-surgical cases: whether implant removal is feasible if needed
Frequently asked questions
Can my dog spread MRSP to my other dog or to me?
Dog-to-dog spread is possible through direct wound contact but uncommon. Human infection from MRSP is documented but rare for healthy adults; immunocompromised household members are at higher risk. Standard hygiene (handwashing, wound avoidance, gloves during wound care) reduces household risk. Full quarantine is not typically necessary.
My dog was diagnosed with MRSP once. Will every future skin infection also be MRSP?
Not necessarily, but MRSP carrier status can persist for months after infection. Future infections may be MRSP or susceptible staph which is why culture and sensitivity testing before each systemic antibiotic course is important rather than assuming.
Is MRSP the same thing as a "superbug"?
MRSP is resistant to multiple antibiotic classes, which is what earns it the "resistant" label. It is not inherently more virulent than susceptible staph the clinical danger comes from the narrow treatment options, not from the bacteria being biologically more aggressive.
MRSP is a manageable infection with the right approach. Culture before antibiotics. Topical antiseptic as the foundation. Sensitivity-guided systemic treatment when needed. Full course completed past visible healing. Underlying disease addressed. That's the framework.
Resources
- MedVet. Methicillin-Resistant Staphylococcus Pseudintermedius (MRSP) in Dogs and Cats. medvet.com
- Animal Friends Dermatology. MRSP in Dogs and Cats. animalfriendsdermatology.com
- Clinician's Brief. Staphylococcus pseudintermedius: An Overview. cliniciansbrief.com
Staph Infection After TPLO Surgery: Signs & Risks
Staph infections after TPLO surgery can cause serious issues. Learn how to spot early symptoms, treat infections, and prevent complications
Staphylococcus species are the most common cause of surgical site infections (SSI) after TPLO surgery in dogs.
The primary culprit is Staphylococcus pseudintermedius -- a bacterium that normally lives on the skin, nares, and perianal area of healthy dogs.
Understanding why this organism is so prevalent, how it produces infection, and what makes methicillin-resistant strains particularly challenging is essential for owners of TPLO dogs and the veterinary professionals treating them.
Quick answer: S. pseudintermedius is the most common cause of post-TPLO infection. MRSP accounted for 28% of infections in a 659-TPLO study. Signs include redness, swelling, warmth, and discharge -- or only lameness regression and plate-site swelling for deep implant infections. Culture and sensitivity testing is required; empirical treatment risks selecting for further resistance.
Key takeaways
- S. pseudintermedius is the most frequently identified pathogen in TPLO infections: a normal skin commensal in dogs; the PMC 769-TPLO study identified it in 37 of 65 SSI cases
- MRSP accounted for 28% of infections in a 659-TPLO study: a high proportion of resistant organisms in a single surgical population; MRSP does not respond to many first-line antibiotics
- Biofilm formation on the TPLO plate makes staph infections difficult to treat: once established on the metal plate, bacteria are protected from antibiotics; deep implant infections often require plate removal
- Signs of staph infection range from visible wound changes to none: superficial infections produce redness, warmth, and discharge; implant infections may show only lameness regression and plate-site swelling
- Diagnosis requires bacterial culture and sensitivity testing: MRSP cannot be diagnosed visually; empirical antibiotic treatment without culture risks selecting for further resistance
- Pre-operative MRSP carriage significantly increases SSI risk: preoperative MRSP colonization is an independent risk factor; dogs with known carriage require enhanced perioperative protocol
Why S. pseudintermedius is so prevalent in TPLO SSI
It is a normal resident of dog skin
S. pseudintermedius colonizes the skin, nares, and perianal area of most dogs as part of their normal flora. It is present on the surgical preparation area even after antiseptic skin preparation.
The preparation reduces the bacterial load but does not sterilize the skin.
SustainableVet.org confirms: S. pseudintermedius is naturally found on a dog's skin; in healthy dogs it rarely causes issues, but after TPLO surgery it can infect the surgical incision and implants.
The TPLO plate provides a preferred colonization surface
Metal implants dramatically lower the minimum infective dose -- the number of bacteria required to establish infection. On a plate surface, S. pseudintermedius can form biofilm with far fewer organisms than required to infect soft tissue alone.
SustainableVet.org confirms: TPLO surgeries are particularly prone to infection because of the metal implants, which provide a surface for bacteria to stick to and form biofilms.
Licking introduces oral cavity organisms to the incision
The oral cavity of dogs is also colonized with S. pseudintermedius. When a dog licks the incision, it introduces additional bacteria directly to the wound.
This is the most common mechanism of avoidable post-TPLO SSI.
ResearchGate MRSA TPLO case report confirms: the dog licked the surgical site, causing dehiscence, and MRSA was detected from the purulent discharge. This underscores the critical importance of e-collar compliance.
MRSP: the resistant strain that complicates treatment
MRSP (methicillin-resistant Staphylococcus pseudintermedius) is resistant to beta-lactam antibiotics via the mecA gene -- the same mechanism as MRSA in humans. Cephalexin, amoxicillin-clavulanate, and most penicillins are ineffective.
Why MRSP is a particular challenge in TPLO
Most perioperative antibiotic protocols use cefazolin (a cephalosporin). MRSP is resistant to cephalosporins by definition.
If a dog unknowingly colonized with MRSP receives cefazolin prophylaxis, the MRSP is not suppressed. If it reaches the plate, it establishes infection against which standard first-line antibiotics are ineffective.
SustainableVet.org confirms: MRSP has developed resistance to many commonly used antibiotics, making infections harder to treat and increasing the risk of complications.
MRSP incidence in TPLO infections
ResearchGate TPLO MRSA/MRSP study (659 TPLO procedures, SSI rate 11%): MRSP accounted for 20 of 71 infections (28%). This is a high proportion of resistant organisms in a post-surgical population.
Antibiotic options for MRSP
First-line options for susceptible S. pseudintermedius (cephalexin, amoxicillin-clavulanate) do not work for MRSP. Culture and sensitivity testing is required to identify effective agents. Common options based on sensitivity results include:
- Chloramphenicol: effective against many MRSP; requires bone marrow monitoring
- Clindamycin: effective if sensitivity confirmed; not all MRSP strains
- Doxycycline: bacteriostatic; used for some superficial MRSP infections
- Rifampin (rifampicin): excellent biofilm penetration; always combined with another agent to prevent resistance; used for implant-associated MRSP
- Vancomycin: last resort; the MRSA TPLO case report describes a rifampin-vancomycin combination resolving MRSA infection that persisted despite implant removal and vancomycin alone
SustainableVet.org confirms: one of the biggest challenges in treating staph infections after TPLO is the presence of multidrug-resistant bacteria, particularly MRSP; this strain has developed resistance to many commonly used antibiotics.
Signs of post-TPLO staph infection
Superficial incisional infection (SSI-S)
- Redness spreading beyond the incision line (after day 5)
- Warmth at the incision site increasing rather than decreasing
- Swelling that is not resolving or is increasing
- Discharge: cloudy, yellow, green, or malodorous from the incision
- Wound edges that are not healing or are separating
Deep implant-associated infection (SSI-D)
- New or worsening lameness after a period of improvement
- Swelling over the plate site (not necessarily at the incision)
- Warmth specifically at the plate site on palpation
- A draining tract opening near but not at the incision (typically weeks to months post-surgery)
- No discharge from the original incision despite significant clinical signs
SustainableVet.org confirms: signs of infection include redness, swelling, warmth around the incision, pus-like discharge, an unpleasant odor, and increased pain or tenderness.
Diagnosis
Wound swab culture: taken from discharge at the incision or from the draining tract. Provides the organism identification and sensitivity profile.
Deep tissue culture: more accurate than wound swabs because it avoids surface contamination. Obtained at surgery (arthrotomy or plate removal).
Plate surface culture: the most sensitive diagnostic for implant-associated infection. Obtained when the plate is removed.
Imaging: radiographs assess peri-implant bone changes (radiolucent halos, periosteal reaction); advanced imaging (CT) may be used for complex deep infections.
The PMC 769-TPLO study confirmed: bacterial culture was positive in 72% of samples submitted when SSI was first suspected.
Treatment
Superficial infection: culture-directed oral antibiotics for 2 to 4 weeks; wound cleaning; e-collar compliance to prevent licking; local wound care.
Deep implant-associated infection: surgical debridement (lavage and debridement of the plate site); culture; culture-directed antibiotics for 4 to 8 weeks; plate retention if the osteotomy is not yet healed (with the understanding that complete resolution may require later plate removal); plate removal once the osteotomy has healed.
MRSP-specific: culture results guide antibiotic selection. Rifampin combinations are used for biofilm-associated implant infections. Veterinary infectious disease consultation is appropriate for complex MRSP cases.
For the infection prevention guide, see how can TPLO infections be prevented post-operatively?. For MRSP specifically, see can MRSP or MRSA occur after TPLO surgery?.
For the SSI rate data, see how common are infections after TPLO surgery?. For the antibiotic guide, see antibiotics commonly used for TPLO infections.
Frequently asked questions
My dog had a culture and it came back as S. pseudintermedius. Is that MRSP?
Not necessarily. S. pseudintermedius can be methicillin-susceptible (MSSP) or methicillin-resistant (MRSP). The sensitivity panel on the culture report will indicate whether the organism is susceptible to cephalexin and other beta-lactam antibiotics.
If susceptible, it is MSSP and responds to standard first-line drugs. If resistant to cephalosporins, it is MRSP and requires second-line agents.
Can I prevent staph infection after TPLO?
Licking prevention (e-collar compliance for 10 to 14 days) is the single most impactful owner-controlled prevention measure. Licking is the most common avoidable cause of post-TPLO SSI.
Wound dryness, clean bedding, limited environmental contamination, and daily wound inspection are additional preventive measures.
My dog finished the antibiotic course but the discharge came back. What does that mean?
Recurrence after antibiotic completion most commonly indicates biofilm-associated implant infection that was suppressed but not eradicated by antibiotics. Plate removal is likely needed for definitive resolution.
Contact your vet immediately -- do not wait to see if it resolves again.
Can my dog spread MRSP to other dogs or people?
MRSP is primarily a veterinary pathogen. It is less commonly transmitted to humans than MRSA, but zoonotic transmission has been documented.
Standard hygiene measures (hand washing after wound care, gloves for wound dressing changes, avoiding face contact with the infected wound) are appropriate precautions during treatment.
How long does it take to clear a deep staph infection after TPLO?
Deep implant-associated infections typically require 4 to 8 weeks of culture-directed antibiotics plus plate removal once the osteotomy is healed.
MRSP infections that involve biofilm and require rifampin combinations may take 3 to 6 months of total treatment. Osteomyelitis extends this further.
Long courses are necessary because biofilm-associated bacteria are protected from antibiotics and resistant populations can regrow when treatment stops.
Resources
- PMC. Surgical Site Infection After 769 TPLOs. pmc.ncbi.nlm.nih.gov
- ResearchGate. Treatment of MRSA Infection Following TPLO in a Dog. researchgate.net
- SustainableVet. Staph Infection After TPLO Surgery. sustainablevet.org
- SustainableVet. Is Staph the Most Common Infection After TPLO Surgery? sustainablevet.org
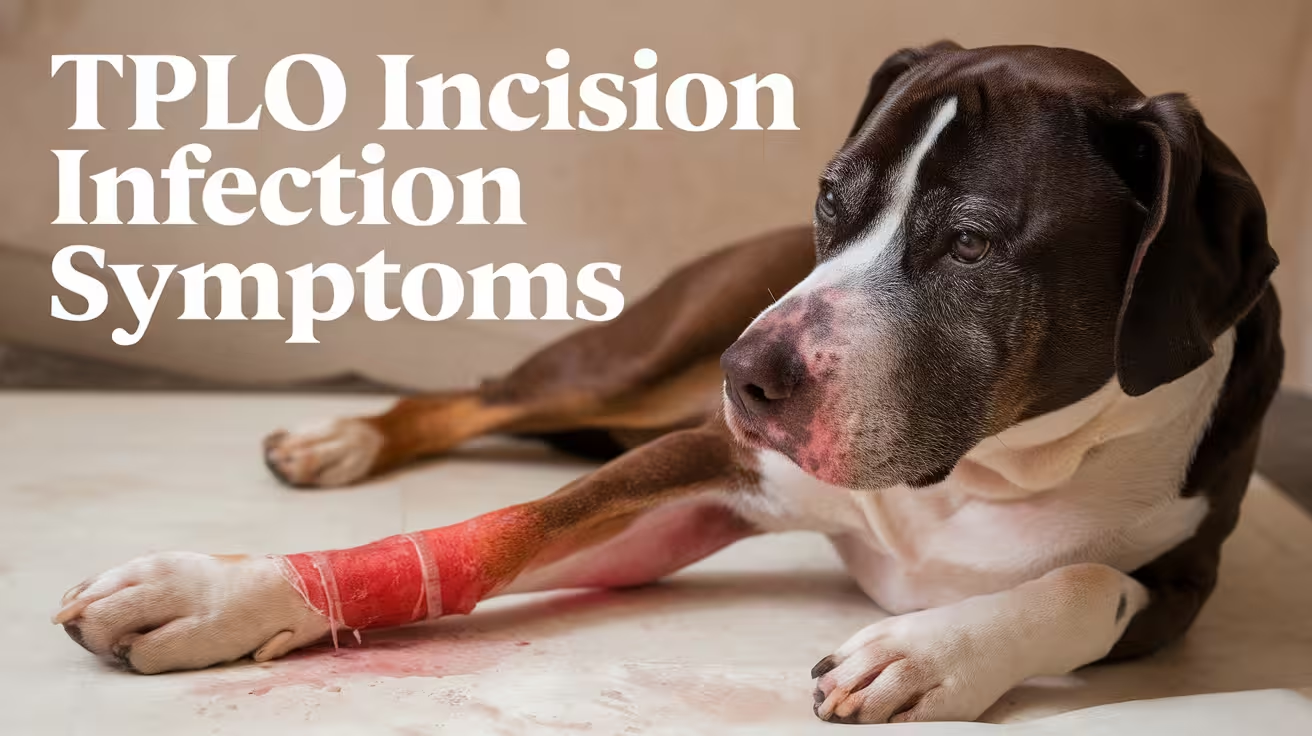
TPLO Incision Infection? Symptoms & Prevention
Worried about a TPLO incision infection? Learn the symptoms, causes, and best prevention tips to keep your dog’s recovery smooth and infection-free
TPLO incision infection is one of the most common complications after surgery. Most incision infections are preventable with consistent owner-managed wound care, and most are treatable when caught early.
The window between a superficial incision infection (treatable with antibiotics) and a deep implant infection (requiring surgical intervention) is measured in days -- which is why daily inspection is not optional.
Quick answer: Normal TPLO incision healing shows mild redness fading from day 5, no discharge after day 3, and a clean approximated incision line. Infection signs: spreading redness, increasing warmth, cloudy or malodorous discharge, swelling not resolving, wound edges separating, or lameness worsening. Prevention centers on e-collar compliance, dryness, and daily inspection.
Key takeaways
- Licking is the most common preventable cause of TPLO incision infection: the oral cavity carries S. pseudintermedius that can inoculate the incision; e-collar compliance for 10 to 14 days is the most protective owner action
- The distinction between normal healing and early infection is trajectory-based: mild redness and clear serum discharge are normal for 2 to 3 days; anything worsening from day 5 onward warrants veterinary attention
- Infection signs requiring a same-day call: spreading redness, yellow or green discharge, malodorous discharge, wound dehiscence, or systemic signs alongside local wound changes
- Keeping the incision dry is the second most important prevention measure: bacteria proliferate in moist environments; no bathing or wet-grass walks until incision healing is confirmed by the vet
- Daily inspection at the same time each day creates a baseline: daily comparison of today to yesterday reveals whether the incision is improving or worsening
- Most superficial incision infections resolve with oral antibiotics if treated promptly: treatment escalates significantly if deep implant involvement occurs; early action prevents this escalation
Normal TPLO incision healing: what to expect
Understanding normal healing is the prerequisite for recognizing abnormal changes.
Days 1 to 3: acute inflammatory phase
Normal: the incision is red, mildly swollen, and warm. A small amount of clear to pale yellow serum may seep from the wound edges. The swelling may extend slightly beyond the incision line.
Context: this is the inflammatory phase -- the biological response to surgical trauma. It is expected and appropriate.
Days 3 to 5: peak swelling subsides
Normal: redness should be fading. Swelling should begin to reduce. Any discharge should have stopped by day 3. The incision line should be approximated (edges together and not gaping).
Days 5 to 10: healing consolidation
Normal: redness is minimal or absent. No discharge. The incision line is dry and the skin edges are growing together. The dog may experience some surface itching as new skin forms.
Suture/staple removal: typically at 10 to 14 days. The vet confirms incision healing before removal.
Day 14 onward
Normal: incision is healed, sutures removed, skin intact. Mild surface discoloration (pink to pale) is normal for several weeks. No further discharge.
Signs of TPLO incision infection
Spreading redness (most concerning early sign)
Normal healing produces redness confined to the incision line (typically 1 to 2 mm on each side).
Infection produces redness that spreads outward from the incision -- a widening halo of red skin extending beyond the original margins.
SustainableVet.org confirms: redness that worsens, especially with pain or heat, often accompanies infection. Contact your vet the same day if spreading redness is observed.
Warmth that is increasing rather than decreasing
Mild warmth is normal in the first 3 to 5 days.
Warmth that is increasing at day 7 or beyond -- when normal healing produces cooling -- indicates ongoing active inflammation, typically from infection.
Discharge type and timing
- Clear serum for 24 to 48 hours: normal
- Any discharge after day 3: concerning
- Cloudy, yellow, or green discharge at any stage: infection until proven otherwise
- Malodorous discharge: infection; contact vet immediately
SustainableVet.org confirms: inspect the incision daily for redness, swelling, or discharge; yellow or green discharge is not normal and needs immediate attention.
Wound dehiscence
The incision edges separate, exposing subcutaneous tissue or deeper structures. Most often caused by licking, but can occur from excessive activity, suture reaction, or infection undermining the tissue.
SustainableVet.org (complications article) confirms: if stitches are removed too soon or dehiscence occurs, a vet should assess the wound immediately.
Swelling that is not resolving
Expected swelling peaks at days 2 to 5 and consistently resolves after that.
Swelling that is the same or larger at day 7 as it was at day 3 is not following the expected trajectory.
Systemic signs alongside local changes
Fever (rectal temperature above 39.5 C / 103.1 F), lethargy, reduced appetite, or behavioral changes accompanied by any local wound sign constitute an emergency call. These suggest the infection is systemic.
SustainableVet.org (redness article) confirms: systemic signs including fever, lethargy, or loss of appetite along with redness indicate the infection may be spreading; contact your vet immediately.
Prevention: the actions that matter most
1. E-collar compliance without exception
The e-collar prevents the single most common preventable cause of TPLO incision infection: licking. Even one licking episode directly inoculates the wound with oral bacteria.
SustainableVet.org confirms: even brief periods of licking can introduce bacteria; an Elizabethan collar or medical pet shirt should be used at all times until the incision fully heals.
The e-collar must be worn:
- During sleep
- Unsupervised periods in the crate
- Whenever the dog is not under direct eye contact with the owner
If the dog can reach the incision with the collar on, the collar is the wrong size -- contact the vet for a larger size.
2. Keep the incision dry
Moisture promotes bacterial growth and skin maceration at the incision edges. No bathing or submerging the leg until the vet confirms healing at the 2-week recheck.
During wet weather, minimize wet-grass time on outdoor bathroom trips. Pat the leg dry immediately if it gets wet.
SustainableVet.org confirms: keep the incision clean and dry; avoiding moisture reduces infection risks.
3. Daily incision inspection
Inspect the incision at a consistent time each day. Compare today directly to yesterday. The trajectory (better, same, worse) is more diagnostically useful than any single observation.
Inspection takes 30 seconds. Pick a time (e.g., after the evening bathroom walk) and make it routine.
4. Do not clean with unapproved solutions
Unless instructed by your vet, do not apply hydrogen peroxide, alcohol, iodine, or other antiseptics to the incision. These can damage healing tissue and delay closure.
If cleaning is needed, use the vet-approved solution (typically dilute chlorhexidine or sterile saline).
5. Clean bedding weekly
Bedding in contact with the incision area accumulates skin bacteria. Wash crate bedding weekly in hot water.
6. Hand hygiene before touching the wound
Wash hands before any wound inspection or dressing change. Human skin also carries bacteria capable of contaminating an open or healing incision.
Treatment
Superficial infection (SSI-S): oral culture-directed antibiotics for 2 to 4 weeks; wound cleaning; continued e-collar compliance; wound recheck in 3 to 5 days to confirm response.
Progressing or deep infection: surgical debridement; deep culture; IV or long-course oral antibiotics; imaging to assess implant involvement.
Implant-associated infection: see the dedicated TPLO plate infection guide. Treatment typically includes plate removal once the osteotomy has healed.
For the infection signs guide, see earliest signs of TPLO infection. For the prevention mistakes guide, see post-operative care mistakes that increase TPLO infection risk.
For the staph infection guide, see staph infection after TPLO surgery. For the plate infection guide, see TPLO plate infection signs and treatment.
Frequently asked questions
My dog's incision looks red but the vet said it looks normal at the 2-week recheck. Should I still be worried?
If the vet examined the incision in person at 2 weeks and found it normal, trust that assessment. Post-recheck monitoring continues -- if the incision changes after the recheck, contact the vet.
A single normal exam does not guarantee no infection will develop later.
Can I tell the difference between a seroma and an infection at the incision?
Seromas are soft, fluctuant (fluid-filled), non-painful swellings without redness, warmth, or discharge. Infection produces warmth, redness, possible discharge, and pain. If you cannot clearly distinguish the two, contact your vet for assessment.
The incision looked fine yesterday but today there is yellow discharge. What do I do?
Call your vet the same day. Yellow discharge at any point after the first 2 to 3 days is concerning. Do not wait to see if it resolves.
Keep the e-collar on and do not apply any home remedies to the wound before the vet advises.
My dog keeps trying to lick the incision even with the e-collar. What else can I try?
Ensure the collar is the correct size -- most dogs can reach their hind legs with a too-small collar.
A longer cone, a recovery suit (medical pet shirt), or a contact bandage over the incision site (applied by your vet) can supplement the collar.
Ask your vet about trazodone or gabapentin if anxiety is driving the licking behavior.
Does the incision need to be cleaned every day?
In most cases, no. Daily cleaning is not required and may introduce contamination or irritate healing tissue. Daily inspection is required.
Clean only if the vet specifically instructs it and with the approved solution only.
Resources
- SustainableVet. TPLO Incision Infection: Symptoms and Prevention. sustainablevet.org
- SustainableVet. Earliest Signs of TPLO Infection. sustainablevet.org
- SustainableVet. TPLO Plate Infection Signs and Treatment. sustainablevet.org
- VCA Animal Hospitals. Tibial Plateau Leveling Osteotomy (TPLO) in Dogs. vcahospitals.com
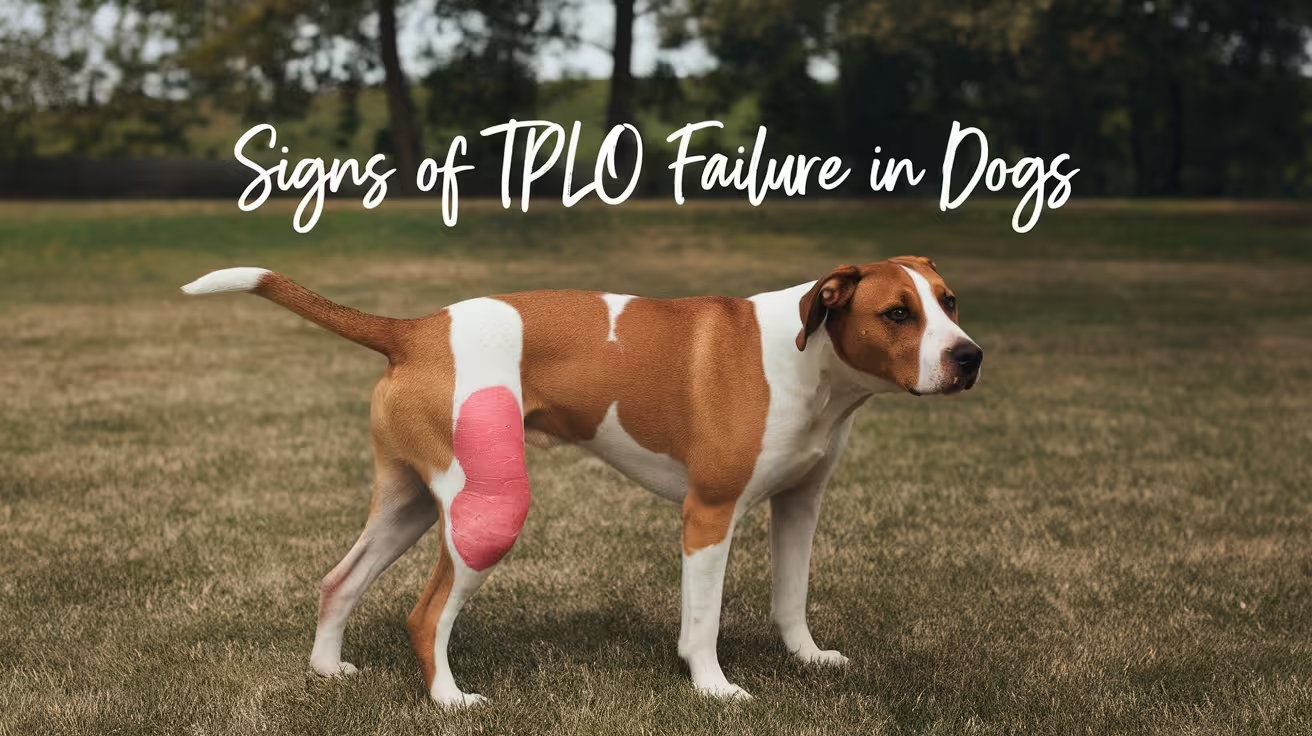
Signs of TPLO Failure in Dogs & When to See a Vet
Learn the key symptoms of TPLO failure in dogs, from limping to implant issues. Spot warning signs early and know when to seek veterinary care
TPLO failure is not a single event -- it is a spectrum of complications that can occur at different stages of recovery. Some signs are emergencies requiring same-day veterinary contact.
Others are patterns that require evaluation at the next scheduled appointment.
Understanding which signs fall into which category -- and what each sign most likely indicates -- allows owners to respond appropriately rather than either ignoring a serious complication or panicking unnecessarily.
Quick answer: Key signs of TPLO failure: persistent or worsening lameness beyond the expected trajectory; sudden acute non-weight bearing; swelling, warmth, or discharge at the plate site; clicking or popping with pain; and radiographic changes at follow-up. Call your vet the same day for sudden acute lameness, spreading infection signs, or systemic illness.
Key takeaways
- The key diagnostic principle is trajectory: normal TPLO recovery shows steady week-over-week improvement; any reversal -- worsening lameness, new swelling, returning pain -- signals a problem
- Persistent lameness beyond expected recovery is the most common sign of TPLO failure: continued limping or inability to bear weight beyond the expected level weeks after surgery is the hallmark symptom
- Sudden acute non-weight bearing after improvement is a same-day emergency call: causes include plate failure, tibial fracture, late meniscal tear, or acute infection; radiographs are required urgently
- Swelling at the plate site weeks after surgery indicates deep implant infection: this is distinct from normal post-surgical swelling and represents a late-developing implant-associated SSI
- Clicking or popping with pain or lameness indicates meniscal injury: isolated early clicking without lameness is usually benign; clicking with pain or worsening lameness indicates meniscal tear
- Radiographic confirmation is required to diagnose most causes of TPLO failure: X-rays confirm the specific mechanism and guide management
The recovery trajectory principle
The single most useful concept for identifying TPLO failure is trajectory.
Recovery from TPLO is not linear -- there are good days and less good days -- but the overall trend over weeks should be consistently improving.
Normal trajectory: each week, the dog uses the leg a little more freely, lameness is slightly less obvious, weight bearing is more consistent.
Abnormal trajectory: lameness worsens after a period of improvement; the dog is using the leg less at week 4 than at week 2; the dog that was consistently toe-touching now holds the leg entirely off the ground.
Trajectory reversal is the key signal. Single-day fluctuations can occur with activity and weather. Week-over-week regression cannot be dismissed.
Signs of TPLO failure: by type
1. Persistent or progressive lameness
What it means: the dog is limping beyond the expected level for the stage of recovery. At 4 weeks, some lameness is expected. At 8 weeks, most dogs should be consistently bearing significant weight. At 12 weeks, most are nearly normal.
Differential: implant loosening, delayed bone healing, non-union, deep infection, late meniscal tear, progressive arthritis.
When to call: if lameness has not improved for 2 or more weeks at any stage, or has worsened compared to the previous week -- contact your vet for evaluation before the next scheduled appointment.
SustainableVet.org confirms: persistent lameness is the hallmark symptom of TPLO failure; continued limping or inability to bear weight weeks after surgery may indicate failure.
2. Sudden acute non-weight bearing
What it means: the dog was bearing weight adequately and suddenly stops using the leg entirely. This is a distinct clinical event, not a gradual worsening.
Differential: acute plate failure (plate bending or screw pullout), acute tibial tuberosity fracture, acute late meniscal tear, acute hematogenous implant infection.
When to call: same-day emergency veterinary contact. Radiographs are required urgently to determine the cause.
SustainableVet.org confirms: a failed TPLO often presents as persistent pain, joint instability, swelling, or difficulty bearing weight; dogs may show progressive lameness or reluctance to move.
3. Swelling at the plate site (not the incision)
What it means: a distinct swelling appearing over the medial tibial surface at the plate location, separate from and later than the normal post-surgical incision swelling. This is a late-developing sign, often appearing weeks to months after surgery.
Differential: deep implant-associated infection (SSI-D) with abscess formation; rarely, a non-infectious reaction to the implant material.
When to call: same-day if accompanied by warmth, redness, or discharge. Within 24 hours if soft and non-painful but new and increasing.
4. Wound discharge or draining tract
What it means: a draining tract opening near (but not necessarily at) the original incision, often appearing weeks or months after surgery in a wound that appeared fully healed. This is a classic sign of deep implant-associated infection with sinus tract formation.
When to call: same-day. Do not wait.
5. Clicking or popping with pain or lameness
What it means: a meniscal click -- the torn meniscal flap being displaced by the femoral condyle during movement. Distinguished from benign joint adjustment clicking by the presence of pain on stifle manipulation and lameness.
Differential: late meniscal tear (2 to 22% incidence after TPLO).
When to call: same-day if acute lameness accompanies the click. Within 24 to 48 hours for new clicking with mild lameness.
See the dedicated meniscal tear article for full detail on diagnosis and treatment.
6. Radiographic findings at follow-up imaging
What it means: the 6-week and 12-week radiographs may show: peri-implant radiolucent halos (implant loosening or infection), widened osteotomy gap without callus formation (delayed union or non-union), plate migration from original position, screw in joint space, or cortical erosion (osteomyelitis).
When to call: your vet interprets these radiographs and will advise on urgency. Do not wait for the next scheduled appointment if the vet identifies a significant radiographic abnormality.
7. Systemic signs of infection
What it means: fever (rectal temperature above 39.5 C / 103.1 F), lethargy, reduced appetite, or behavioral changes. These indicate the infection has systemic involvement.
When to call: same-day emergency contact. Systemic infection from an implant site is a serious condition.
What is not TPLO failure
Not every deviation from ideal recovery represents failure.
Normal: gradual lameness that is slowly improving week over week.
Normal: mild swelling at the incision that peaks at days 2 to 5 and resolves.
Normal: mild stiffness in the morning that improves with movement.
Normal: intermittent toe-touching or three-legged walking during high-activity periods in the first 4 weeks.
Normal: a dog that is more lame on a day after increased activity compared to a day of rest.
The distinguishing feature is trajectory and pattern. Gradual improvement with day-to-day variation is normal. Reversal of the improvement trend is not.
Revision TPLO: when failure requires re-operation
SustainableVet.org confirms: revision TPLO may involve removing or replacing implants, repositioning the tibial cut, or addressing infections; revision surgery is more complex and requires strict post-op care.
The specific revision approach depends on the cause:
- Implant failure without infection: plate replacement or addition of a fixation device
- Non-union: bone grafting, implant revision, and extended restriction
- Deep infection with healed osteotomy: plate removal, surgical debridement, prolonged antibiotics
- Osteomyelitis: plate removal, debridement, 4 to 6 months of culture-directed antibiotics
For the complication list, see 15 common complications after TPLO surgery. For the implant failure guide, see TPLO implant failure signs and causes.
For the infection guide, see TPLO plate infection signs and treatment. For the meniscal tear guide, see dog meniscus tear after TPLO surgery.
Frequently asked questions
My dog is limping at week 6 but the 6-week radiograph was normal. Is this TPLO failure?
Not necessarily.
Normal radiographs at 6 weeks with persistent lameness suggests the issue is soft-tissue rather than bone or implant related -- meniscal injury, muscle atrophy, scar tissue, or rehabilitation lagging behind bone healing.
Discuss with your vet: physiotherapy and pain management are typically the next step for this presentation.
What happens if TPLO failure is not recognized early?
Delayed recognition of implant infection leads to establishment of deeper infection and biofilm, requiring more complex treatment. Delayed recognition of non-union leads to fibrous union or permanent instability.
Delayed recognition of meniscal tear allows progressive joint damage. Early action is consistently associated with better outcomes across all causes of TPLO failure.
Is TPLO failure common?
Overall TPLO complication rates are 10 to 34%, but most complications are minor (superficial infection, seroma). Serious failure requiring revision surgery is uncommon.
The 2013 study confirmed 93% limb function restoration at 1 year -- meaning the vast majority of TPLO dogs recover successfully.
Can TPLO failure happen years after surgery?
Yes. Late implant-associated infection (hematogenous seeding from dental disease, UTI, or skin infection) can occur years after surgery. The hallmark is sudden lameness regression in a dog with previously normal function.
Any unexplained lameness in a TPLO dog warrants radiographic assessment.
Should I ask for radiographs at every sign of lameness?
Not necessarily for every minor fluctuation.
Radiographs are indicated for: sudden acute lameness, lameness that has not improved for 2 or more weeks, new swelling at the plate site, a draining tract, or any systemic sign of infection.
Your vet will advise on imaging timing based on clinical presentation.
Resources
- SustainableVet. TPLO Failure Symptoms. sustainablevet.org
- Clinician's Brief. Common Tibial Plateau-Leveling Osteotomy Complications. cliniciansbrief.com
- SustainableVet. TPLO Failure Rate in Dogs. sustainablevet.org
- ACVS. Cranial Cruciate Ligament Disease. acvs.org

Sustainable Vet | Copyright ©2026 | All Rights Reserved

