

Post-Op Home Care for Pets After Orthopedic Surgery
Learn how to care for your pet after orthopedic surgery. Tips on pain, activity, wound care, and safe recovery at home

This article is for informational purposes only and is not a substitute for professional veterinary advice. Every case is unique, so always consult your veterinarian for guidance specific to your pet.
This content is intended for veterinary professionals for educational purposes. It does not replace clinical judgment or tailored advice. Always rely on your training, expertise, and the specific context of your patients.

Orthopedic surgery recovery is significantly longer and more demanding than soft tissue surgery recovery. The bone, implants, and remodeled joint need 8 to 12 weeks to reach adequate strength not 10 to 14 days. What happens at home during this period determines the outcome at least as much as what happened in the operating room.
This guide covers everything from the first hours after arriving home through the 8-week imaging recheck.
Quick answer: After orthopedic surgery, restrict activity for 8 to 12 weeks. Start 5-minute leash walks within 24 hours; increase gradually. The 8-week radiograph recheck confirms bone healing. No running, jumping, or stairs until specialist clearance.
Key takeaways
- Activity restriction for 8 to 12 weeks is non-negotiable; bone healing does not accelerate with optimism
- Short leash walks start within 24 hours of orthopedic surgery weight bearing is beneficial for bone healing
- Ice the surgical site for the first 3 to 5 days: 10 to 15 minutes, 2 to 3 times daily
- The 8-week radiograph recheck confirms bone healing; do not increase activity until imaging clears it
- TPLO has a 2 to 10% failure rate; most complications involve infection (8 to 17% of cases) or implant irritation
- Rehabilitation exercises including passive range of motion and graduated leash walking improve outcomes
Setting up the home recovery space
Orthopedic surgery patients need a confined, safe space before they arrive home.
Required:
- Crate or small room: prevents uncontrolled movement, jumping, and access to stairs
- Non-slip flooring: orthopedic surgical patients are at high risk of slipping and falling; rubber mats or yoga mats over hardwood or tile are essential
- Floor-level bedding: no couch or bed access; orthopedic bedding (memory foam or egg-crate foam) reduces pressure on the operated limb and other joints compensating for it
- Baby gates on stairs and doorways to furniture rooms
MedVet TPLO recovery guide: "Restricting activity is extremely important. This generally means confinement to a crate or small room, no jumping, no running, no stairs, no rough housing, and no playing with other dogs until recovery is well advanced."
PAW Vet Practice: "The ride home after surgery deserves more thought than it commonly receives. A large dog may need help getting into the car. Use a flat loading approach if possible. Lift with support under both the chest and hindquarters, or use a ramp."
The first 24 to 72 hours
Expect grogginess, disorientation, and significantly reduced appetite the first evening. Pain medication dispensed at discharge should be given on schedule.
Ice therapy: TPLO Info: "We advise using ice therapy directly to the incision site for the first 3 to 5 days following surgery. Icing helps to reduce inflammation and pain at surgery sites." Apply a cold pack wrapped in a thin cloth for 10 to 15 minutes, 2 to 3 times daily. Never apply ice directly to skin or the incision.
Leash walks: TPLO Info: "We recommend taking your pet for short 5-minute leash walks multiple times a day, beginning within 24 hours after surgery." This is counterintuitive for many owners, but weight bearing stimulates bone healing and maintains joint range of motion and muscle mass.
Sling support: Dogwood Veterinary Surgical Care: "A sling may be used for the first 2 to 4 weeks after orthopedic surgery until better mobility is achieved." This helps with hind-end control, slows movement, and prevents slipping particularly important on smooth floors.
Activity progression: week by week
Oakland Veterinary Referral Services: "You can anticipate that your dog will need rest and exercise restrictions for 8 to 12 weeks. This allows the incision and bone to heal and the knee function to return."
Weeks 1 to 2:
- Leash walks only; 5 minutes, 2 to 3 times daily
- No stairs, no running, no off-leash time
- Suture or staple removal recheck at day 10 to 14
- Incision checks daily (morning and evening)
Weeks 2 to 8:Dogwood Veterinary Surgical Care: "After 2 weeks (or after suture removal), gradually increase your pet's leash walks by 5 minutes each week. Do not increase walking to more than 30 minutes by week 8."
- Week 2: 10-minute walks
- Week 3: 15-minute walks
- Week 4 to 6: 20-minute walks, can begin gentle inclines/declines on leash
- Week 7 to 8: 25 to 30-minute walks as tolerated
All walks must be on leash. Dogwood: "This increase in activity should be supervised and on a leash until full function is achieved."
Week 8: radiograph recheckDogwood: "Pets with orthopedic implants and expected bone healing should have additional radiographs performed in 8 weeks from the initial surgery."
Oakland OVRS: "At 8 to 10 weeks post-operatively, your surgeon will do recheck X-rays to assess bone healing. Your dog will be able to gradually resume normal activities."
If bone healing is confirmed: controlled activity can be gradually increased. If healing is incomplete: restrictions continue and the next recheck is scheduled.
Rehabilitation exercises
TPLO Info: "Physical rehabilitation protocols benefit recovery following a TPLO. It is important to tailor a rehabilitation protocol to a specific patient, considering the pet's range of motion, strength, degree of healing, and ability to perform each exercise."
Passive range of motion (PROM): performed daily, typically from day 1 to 2 post-surgery.
Dogwood: "Please start at the toes and work up the leg performing bending and extending exercises at each joint. 10 to 15 repetitions can be performed per joint as tolerated by your pet. Please go slowly and minimize stress."
How to perform PROM:
- Position the dog lying on their side, operated limb upward
- Support the limb with both hands; one on the femur, one on the tibia
- Gently flex and extend the stifle through a comfortable range
- Do not force the joint if the dog shows pain or resistance
- 10 to 15 slow repetitions per session, 2 to 3 times daily
Leash walking: the most important rehabilitation exercise. TPLO Info: "Weight bearing is good for bone healing, maintaining range of motion in the joints of the affected limb, and maintaining muscle mass."
Water treadmill: Dogwood: "Your pet may also benefit from water treadmill therapy." Underwater treadmill allows supported weight bearing with reduced joint load excellent for pain-limited patients who need more exercise than on-land walking allows.
Oakland OVRS: "We recommend a rehabilitation program to optimize your dog's recovery. The rehabilitation facility should have experience in postoperative recovery from orthopedic injuries such as the TPLO."
At-home exercises from week 2 to 4 (if formal rehab is not available):
- Sit-to-stand exercises (5 to 10 repetitions): strengthens the quadriceps
- Slow leash walk on varied terrain: promotes proprioception
- Gentle inclines and declines on leash from week 4 onward
Incision care for orthopedic surgery patients
The incision care principles are the same as for soft tissue surgery with two additional considerations:
Implant-associated infection: infection around orthopedic implants (TPLO plate, fracture repair screws) is significantly more serious than soft tissue SSI. PAW Vet Practice cites SustainableVet's data: "TPLO has a low failure rate of 2 to 10%, and most complications relate to manageable issues such as infection, which occurs in 8 to 17% of cases, or implant irritation."
Any sign of infection near an orthopedic implant requires prompt veterinary assessment and specialist contact. Do not attempt to manage periimplant infection locally without specialist input.
E-collar compliance: orthopedic incisions are often on the limb a location dogs can reach. E-collar must be worn at all times.
Pain management
Orthopedic surgery creates more significant post-operative pain than most soft tissue procedures. Multi-modal pain management is standard:
- NSAIDs (meloxicam, carprofen, grapiprant): reduce inflammation and provide analgesia; give with food; do not skip doses
- Gabapentin: neuropathic pain component; expect additional sedation
- Tramadol or buprenorphine: for the immediate post-operative period in higher-pain patients
Signs that pain is not adequately controlled: panting at rest, inability to settle, not eating at day 2 or beyond, whimpering when the limb is touched. Call the vet for medication adjustment.
Warning signs that require a vet call
Today's Veterinary Practice: "Clinical signs include acute onset of lameness, pain on palpation of the implant, and possible bony thickening or swelling more than 1 year after surgery. Radiographic examination is indicated for patients with these clinical signs."
For the full complications guide covering what these findings mean, see post-surgical complications in referred pets. For the infection-specific guide, see dog incision infection signs causes and treatment. For the general recovery care context, see soft tissue surgery care for dogs. For when referral was appropriate, see when to refer orthopedic cases.
Frequently asked questions
My dog is already using the leg well on day 5. Can I let them off the leash?
No. Early weight bearing is expected and positive but does not indicate bone healing. Bone consolidation takes 8 to 10 weeks minimum. Off-leash activity risks implant failure or joint instability regardless of how the dog appears.
How do I know if the bone is healing correctly?
Radiographs at the 8-week recheck are the only reliable way to assess bone healing. Clinical improvement (weight bearing, reduced lameness) correlates with but does not confirm bone healing. Do not substitute clinical assessment for imaging.
My dog is still very lame at week 4. Is that normal after TPLO?
Some degree of lameness at week 4 is common, especially in large dogs. Gradual, consistent improvement is the pattern to look for. Sudden worsening, complete non-weight bearing, or no improvement at all by week 4 warrants a veterinary assessment.
Can I start swimming during the recovery period?
Open-water swimming is not permitted during the restricted activity phase. Underwater treadmill in a clinical rehabilitation setting is different and may be recommended by your vet as a controlled form of rehabilitation. Ask your vet specifically.
What is a sling and do I need one?
A sling is a soft harness under the hindquarters that partially supports the dog's weight and guides movement. Dogwood: "This helps with hind-end control and prevents slipping." Not all patients need one; ask your surgeon.
My dog had a TPLO and the opposite leg now seems lame too. What does that mean?
Contralateral limb lameness is common after TPLO. The dog shifted weight to the unaffected leg during recovery, increasing its load. Underlying CCL disease affects both legs in many dogs. Have the new lameness assessed promptly.
Resources
- MedVet. TTA and TPLO Home Recovery Guide. medvet.com
- TPLO Info. Rehab for Dogs After TPLO Surgery. tploinfo.com
- Dogwood Veterinary Surgical Care. After Care Instructions: TPLO and Fracture Repair. tplocharlotte.com
- Oakland Veterinary Referral Services. TPLO Surgery for CCL Tears: The Dog Owner's Guide. ovrs.com
- Today's Veterinary Practice. Evaluation After TPLO: A Guide for the General Practitioner. todaysveterinarypractice.com

Get a Free Poster
Enhance your workspace with a high-quality radiographs reference poster, designed for veterinary professionals. This free physical poster will be shipped directly to you—just fill out the form to request your copy.







Taking Great TPLO Radiographs
Click Below to Watch Live Video Demos


We'll send you a Free Wall Poster with all the steps
Step #1
Getting Ready
Ensuring a clean surgical field starts with proper skin preparation. This video demonstrates the best practices for:
- Shaving the patient – Achieving a close, even shave while minimizing skin irritation
- The Dirty Scrub – The initial skin prep step to remove surface debris and reduce bacterial load before the sterile scrub.
Following these techniques helps reduce infection risk and improve surgical outcomes. Watch the video to see how it’s done effectively!


Step #2
Reduce Your Risks
Many surgeons are shocked to find out that their patients are not protected from biofilms and resistant bacteria when they use saline and post-op antibiotics.
That’s Where Simini Comes In.
Why leave these risks and unmanaged? Just apply Simini Protect Lavage for one minute. Biofilms and resistant bacteria can be removed, and you can reduce two significant sources of infection.
Step #3
Take the Course
Preventing surgical infections is critical for patient safety and successful outcomes. This course covers:
- Aseptic techniques – Best practices to maintain a sterile field.
- Skin prep & draping – Proper methods to minimize contamination.
- Antibiotic stewardship – When and how to use perioperative antibiotics effectively.
Stay up to date with the latest evidence-based protocols. Click the link to start learning and earn CE credits!

Things to know
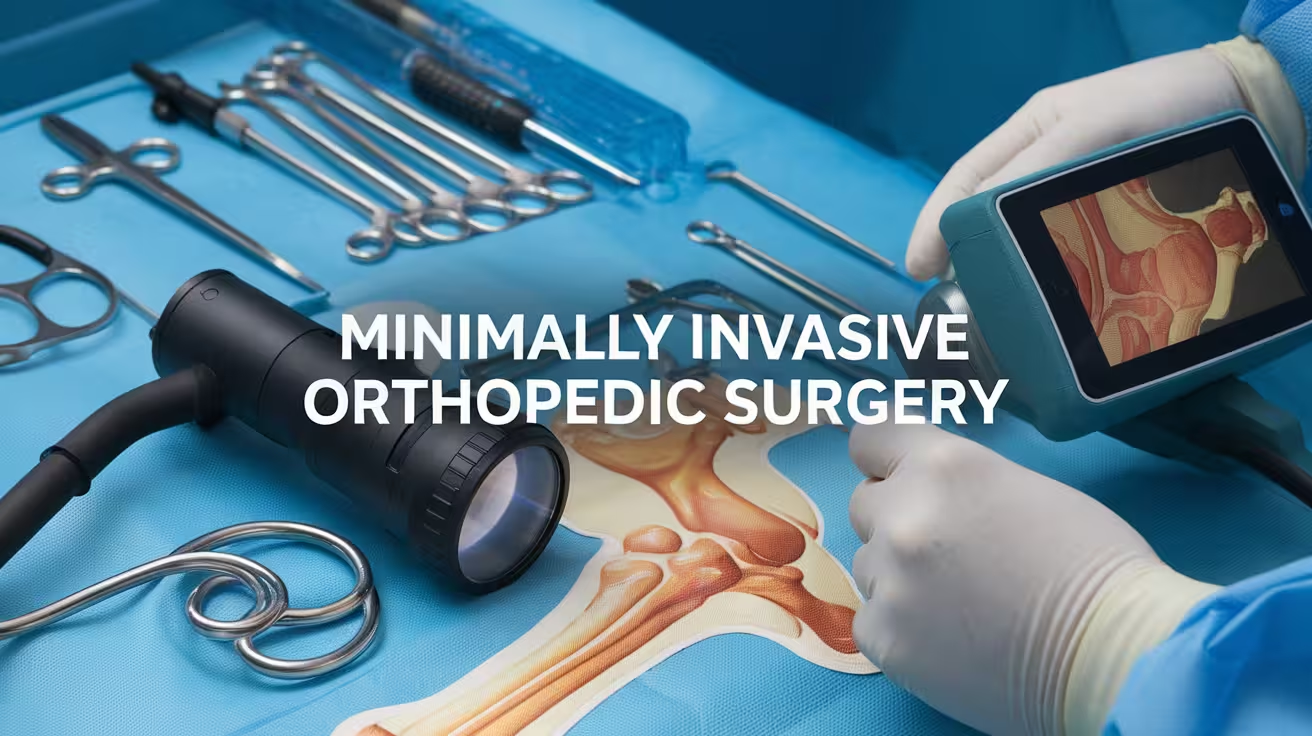
Minimally Invasive Orthopedic Surgery: What General Practitioners Should Know
Learn when to refer, how to guide clients, and what every GP should know about minimally invasive orthopedic surgery in veterinary practice
Minimally invasive surgery (MIS) has become a significant part of veterinary orthopedics over the past two decades. Where open surgery once required large incisions and extensive tissue dissection, MIS techniques use small portals and imaging guidance to achieve the same therapeutic goals with substantially less tissue trauma.
Understanding MIS helps general practitioners recognize which patients may benefit from it, counsel owners accurately about recovery expectations, and make timely referrals to surgeons who offer it.
Quick answer: Veterinary MIS uses arthroscopy or fluoroscopy through small incisions rather than open dissection. Arthroscopy recovery takes 2 to 4 weeks vs 6 to 12 weeks for open surgery. MIS requires specialist equipment not widely available.
Key takeaways
- MIS uses small incisions and camera-based imaging instead of large open dissections, reducing tissue trauma
- Arthroscopy is the most common veterinary MIS, used for joint diagnosis and treatment including OCD, meniscal tears, and CCL
- Recovery from arthroscopy is typically 2 to 4 weeks versus 6 to 12 weeks for open joint surgery
- MIS is not available at most general practices: it requires specialized equipment and significant training
- Early referral for MIS-amenable conditions improves outcomes: arthroscopy for OCD or early joint disease before secondary arthritis develops
- Open surgery remains better for conditions requiring soft tissue reconstruction, infected fields, or complex anatomical access
What is minimally invasive surgery?
SustainableVet: "Minimally Invasive Surgery (MIS) in orthopedics involves performing procedures through small incisions using specialized tools and imaging guidance. The goal is to treat bone, joint, or soft tissue conditions while reducing tissue disruption, pain, and recovery time. Unlike traditional open surgery, MIS avoids large cuts and deep dissection. Instead, surgeons use instruments like arthroscopes or fluoroscopy to see inside the body and make precise movements."
The key tools:
- Arthroscope: a thin rigid telescope with a light source and camera, inserted into a joint through a small portal (typically 3 to 5 mm)
- Fluoroscope: real-time X-ray imaging used to guide implant placement in fracture repair without large incisions
- Laparoscope: used for abdominal MIS (laparoscopic spay, liver biopsy, adrenalectomy)
- Thoracoscope: used for chest cavity access
Arthroscopy: the most common veterinary MIS
CARE Vets: "Joints commonly scoped in canines include the shoulder, elbow, hip, stifle, and tarsus."
Arthroscopy serves both diagnostic and therapeutic functions:
Diagnostic arthroscopy
Allows direct visualization of joint surfaces, synovium, cartilage, and intra-articular structures in real-time, magnified detail. SustainableVet (arthroscopy article): "Arthroscopy provides magnified, real-time views inside the joint."
This is particularly valuable for:
- Confirming partial or complete CCL tears
- Assessing meniscal injury concurrent with CCL rupture
- Evaluating joint surface damage in elbow dysplasia
- Staging OCD lesions before deciding on open vs. arthroscopic treatment
Therapeutic arthroscopy
SustainableVet (arthroscopy indications article): "It allows for precise treatment of joint conditions like OCD, ligament injuries, and cartilage damage with smaller incisions, less pain, and faster recovery compared to traditional surgery."
Common therapeutic arthroscopic procedures:
- OCD (osteochondrosis dissecans) treatment: removal of the OCD flap and curettage of the subchondral bone bed
- Meniscal tear management: partial meniscectomy under direct vision
- Elbow fragmented coronoid process (FCP) removal
- Ununited anconeal process (UAP) removal or fixation
- Joint lavage and debridement: for early septic arthritis or inflammatory joint disease
- CCL assessment: most surgeons perform arthroscopy concurrent with TPLO to assess meniscal integrity and perform meniscectomy if needed
MIS fracture repair
Beyond arthroscopy, MIS principles are applied to fracture repair using fluoroscopic guidance. This allows implant placement (IM nails, bone plates) through small stab incisions rather than large open approaches.
SustainableVet (MIS for GPs article): "MIS is used for procedures like fracture repair, arthroscopy, joint stabilization, and implant placement. This results in less trauma to muscles, less bleeding, and fewer complications."
Minimally invasive plate osteosynthesis (MIPO) uses fluoroscopy to slide a bone plate under the skin through small incisions at each end of the fracture, without exposing the fracture site itself. This preserves the fracture hematoma (which promotes healing), reduces blood loss, and decreases infection risk.
Laparoscopy in soft tissue and oncology cases
While not strictly orthopedic, laparoscopy is increasingly used for procedures previously done open:
- Laparoscopic ovariectomy (spay): CARE Vets: "Laparoscopy is a minimally invasive technique performed in organs located in the abdomen and pelvis." Dogs undergoing laparoscopic spay return to activity significantly faster than with open spay.
- Liver, spleen, and kidney biopsy: organ sampling without large incisions
- Adrenalectomy: NCBi (MIS in oncology): "Laparoscopic adrenalectomy is a common procedure in both human and veterinary medicine for non-invasive adrenal tumors."
- Laparoscopic splenectomy: NCBi: "Proposed benefits include decreased pain and decreased rate of infection" compared to open splenectomy.
Benefits vs. limitations of MIS
Benefits
Maine Veterinary Medical Center: "Reduced trauma and pain: MIS involves smaller incisions, resulting in less tissue damage and reduced postoperative pain. This decreased trauma leads to faster recovery times and shorter hospital stays."
SustainableVet (arthroscopy vs open): "Recovery after arthroscopy is usually quicker, with most dogs returning to light activity in 2 to 4 weeks. In contrast, open joint surgery often requires 6 to 12 weeks of restricted activity."
CARE Vets: "Not only do patients experience less postoperative pain and recover more quickly, but endoscopy typically results in shorter hospitalization times and decreased financial commitment by the owners."
Maine MVMC: "Enhanced visualization and precision: MIS techniques provide superior visualization of surgical sites using advanced imaging technologies."
SustainableVet (arthroscopy indications): "May reduce progression to osteoarthritis if done early: by removing damaged tissue and flushing the joint early, arthroscopy can slow down the development of arthritis, especially in young or active dogs."
Limitations
SustainableVet (MIS for GPs): "Open surgery may be better in some cases. If soft tissue needs reconstruction, infection is present, or access to a complex area is needed, traditional open techniques may provide safer or more complete treatment."
Other limitations:
- Equipment cost: arthroscope systems represent a significant capital investment; not available at most general practices
- Learning curve: CARE Vets: "For the surgeon to be efficient at these procedures, considerable technical training is necessary." MIS requires substantial case volume before proficiency is established
- Patient size: arthroscopy in very small dogs (under 3 to 4 kg) is technically challenging due to joint size
When to refer for MIS evaluation
SustainableVet (MIS for GPs): "General practitioners (GPs) are often the first to assess dogs with orthopedic injuries. Recognizing when a patient may benefit from minimally invasive surgery helps ensure timely referral and better outcomes."
Refer early for MIS evaluation when:
- A dog has clinical signs consistent with OCD (young large-breed dog with unilateral or bilateral forelimb lameness)
- Elbow dysplasia is suspected and advanced imaging or surgical treatment is being considered
- CCL assessment is needed before TPLO to evaluate meniscal status
- Early septic arthritis where arthroscopic lavage may be preferred to open arthrotomy
- Laparoscopic spay is a client preference or medically preferred
Early referral principle: SustainableVet: "By identifying suitable candidates early and sending complete diagnostic information, GPs help surgical teams plan effectively."
For the referral decision framework in orthopedic cases, see when to refer orthopedic cases. For the fracture management referral decision, see dog fracture management splint vs refer. For the home care guide after orthopedic MIS, see orthopedic surgery home care guide.
Frequently asked questions
How does arthroscopy compare to open surgery for my dog's elbow problem?
Arthroscopy for elbow dysplasia provides direct visualization and precise fragment removal with less trauma and faster recovery than open arthrotomy. SustainableVet: "Most dogs recover well and show noticeable improvement in comfort and mobility."
Is my dog too small for arthroscopy?
Arthroscopy becomes technically challenging under approximately 3 to 4 kg due to joint size. CARE Vets: "the carpus can be successfully scoped in large dogs but is more difficult." Ask the specialist whether your dog's joint is compatible.
Will my dog still need a TPLO if arthroscopy is used?
Usually yes. Arthroscopy assesses and treats the meniscus and joint, while TPLO stabilizes the stifle mechanically by changing the joint's biomechanics. Most surgeons perform arthroscopy concurrent with TPLO. The two procedures complement rather than replace each other.
How long does recovery take after arthroscopy compared to open joint surgery?
SustainableVet: "Recovery after arthroscopy is usually quicker, with most dogs returning to light activity in 2 to 4 weeks. Open joint surgery often requires 6 to 12 weeks." The shorter recovery benefits particularly working and active dogs.
Does laparoscopic spay cost more than open spay?
Yes, typically. Equipment and specialist training costs are reflected in the fee. Faster return to activity may offset the difference for some owners. Ask the clinic for a written estimate comparing both approaches.
Can MIS be used if my dog has a joint infection?
Generally no. SustainableVet: "Open surgery may be better if infection is present." Very early septic arthritis may be managed arthroscopically, but established infection typically requires open arthrotomy for thorough debridement.
Resources
- SustainableVet. Minimally Invasive Orthopedic Surgery: What GPs Should Know. sustainablevet.org
- SustainableVet. Arthroscopy vs. Open Surgery. sustainablevet.org
- CARE Vets. Minimally Invasive Surgical Techniques. carecharlotte.com
- Maine Veterinary Medical Center. Minimally Invasive Techniques Transforming Veterinary Surgical Care. mvmc.vet
- NCBi. Use of Minimally Invasive Surgery in the Diagnosis and Treatment of Cancer in Dogs and Cats. ncbi.nlm.nih.gov

External Fixators and Internal Plating: When Are These Indicated?
When do dogs need external fixators vs. internal plating? Learn key indications, pros, and real case examples in veterinary fracture repair
When a dog breaks a bone, the surgical goal is to stabilize the fracture so it heals correctly. Two of the most common methods are external skeletal fixation and internal plate fixation.
Choosing between them depends on the fracture type, location, the dog's size and health, and the presence of any concurrent wounds or infection.
Quick answer: External fixators use pins through the skin connected to an external frame; internal plates fix directly to bone. External fixators suit open fractures and contaminated bone. Internal plating is preferred for most closed fractures and needs less daily home care.
Key takeaways
- External fixators use pins through the skin connected to external bars; preferred for open fractures and when internal implants would increase infection risk
- Internal plating fixes a plate directly to bone under the skin; it provides rigid fixation for most closed long-bone fractures
- Fracture type is the primary determinant: open or contaminated fractures favour external fixation; simple closed fractures favour internal plating
- External fixators need daily pin-site cleaning to prevent tract infections, the most common complication
- Internal plating is generally superior for most closed fractures; no direct head-to-head studies exist for all configurations
- Both methods can be combined (hybrid fixation) for complex fractures requiring biological and mechanical advantages
External skeletal fixation (ESF)
What it is
External fixation is completed using a device called an external fixator. This specialized device consists of multiple pins and external bars or rings, which hold a fractured bone in place during the healing process.
Pins are placed through the skin and bone on either side of the fracture. These pins connect to an external frame bars in linear fixators, rings in circular (Ilizarov-type) fixators.
The frame holds the fracture in alignment without directly contacting the fracture site.
Types
Type I (uniplanar, unilateral): pins exit one side of the limb only; the simplest and most commonly used type.
Type II (biplanar, bilateral): pins exit both sides of the limb; more rigid than Type I.
Circular fixators: ring-based frames that allow gradual correction of complex deformities and angular limb corrections. More technically demanding.
When external fixation is indicated
External fixation is an effective procedure to correct complex fractures and angular limb deformities in dogs.
Key indications:
- Open fractures with skin wounds communicating with the fracture site placing internal implants risks trapping contamination
- Infected or contaminated bone external fixation avoids implant-associated biofilm infection
- Soft tissue compromise severe bruising, degloving, or burn injury around the fracture
- Angular limb deformities gradual correction is possible with circular fixators
- Skeletally immature dogs where growth plates need to be protected
- Temporary stabilization before definitive repair (damage control orthopaedics)
Limitations and home care
External fixators require daily pin-site care by the owner cleaning around each pin to prevent tract infection. Pin-tract infection is the most common complication and can require early removal if severe.
The external frame can be bulky and requires the dog to avoid catching it on furniture or other dogs.
Internal plate fixation
What it is
Internal plating fixes a metal plate directly to the bone surface using cortical screws. The plate bridges the fracture and holds the bone in alignment during healing.
Everything is under the skin; no external components are visible once the wound is closed.
In all but the most minor fractures, internal fixation is superior to external fixation. Typically implants are made from inert metals such as stainless steel and take the forms of pins, plates, screws, or wires.
When internal plating is indicated
The advantages of addressing long bone fractures with internal fixation versus external coaptation include early return to function and maintenance of joint motion. Internal fixation is indicated for fractures that are subjected to compression, shearing, and/or tensile forces.
Key indications:
- Closed long-bone fractures in medium and large breeds radius/ulna, femur, tibia, humerus
- Articular fractures where precise anatomical reduction is essential
- Highly comminuted closed fractures where external fixation cannot achieve adequate stability
- Periprosthetic fractures around existing implants
- Fractures requiring early weight bearing plates provide more rigid fixation than most external frames
Plate types
Locking plates (LCP): the most commonly used system in modern veterinary orthopaedics. Screws lock into the plate, creating an angular-stable construct that does not rely on friction between the plate and bone.
Conventional dynamic compression plates (DCP): older design; still used in some straightforward fractures.
Specialty plates: T-shaped for proximal tibia, L-shaped for distal femur, curved for acetabular fractures.
Limitations
Internal plating requires open surgical access to the fracture, which temporarily disrupts the blood supply and soft tissue around the bone. In open or infected fractures, this approach increases infection risk.
Implant removal is sometimes required if pain or implant loosening develops, though many plates remain in place for life without issues.
Comparison summary
It is recommended that veterinarians base treatment choice on available orthopaedic equipment at their clinic and their personal experience with fracture stabilisation methods they are comfortable using. Both methods have potential risks and complications.
For the broader fracture management decision guide, see fracture management in dogs: when to splint or refer. For minimally invasive approaches to orthopedic repair, see minimally invasive orthopedic surgery for general practitioners.
Frequently asked questions
Which is better an external fixator or an internal plate?
Neither is universally better. The right choice depends on fracture type, whether the fracture is open or closed, the presence of contamination, the dog's size, and surgeon experience.
For most closed long-bone fractures in medium and large dogs, internal plating provides more reliable fixation. For open or infected fractures, external fixation is generally safer.
How long does a dog wear an external fixator?
Typically 6 to 10 weeks, until radiographic evidence of sufficient bone healing allows safe removal. The frame is removed under sedation or light anesthesia at the clinic.
Timeline varies by fracture severity, the dog's age, and healing rate.
Do internal plates need to be removed?
Not routinely. Most plates remain in place permanently without causing problems.
Removal is considered if the dog develops pain, implant loosening, or infection around the plate or occasionally in very young dogs where the plate may interfere with bone growth.
Can my dog bear weight with an external fixator?
Yes, often earlier than with splints or casts. One advantage of external fixation is that it allows some controlled weight bearing during healing, which promotes bone healing through mechanical stimulation.
Your vet will specify the allowed activity level.
What is hybrid fixation?
Hybrid fixation combines elements of both methods for example, a plate for primary stabilization with an external component for additional support.
It is used for very complex fractures where a single method cannot achieve adequate stability alone.
Resources
- WagWalking. External Fixation in Dogs. wagwalking.com
- WagWalking. Internal Fixation in Dogs. wagwalking.com
- Today's Veterinary Practice. A Practitioner's Guide to Fracture Management, Part 3: Selection of Internal Fixation Technique. todaysveterinarypractice.com
- PMC. Comparing Internal versus External Fixation for Diaphyseal Tibial and Fibular Fractures in Skeletally Immature Dogs. pmc.ncbi.nlm.nih.gov
- VIN / WSAVA 2016. External Skeletal Fixation: Options and Techniques. vin.com
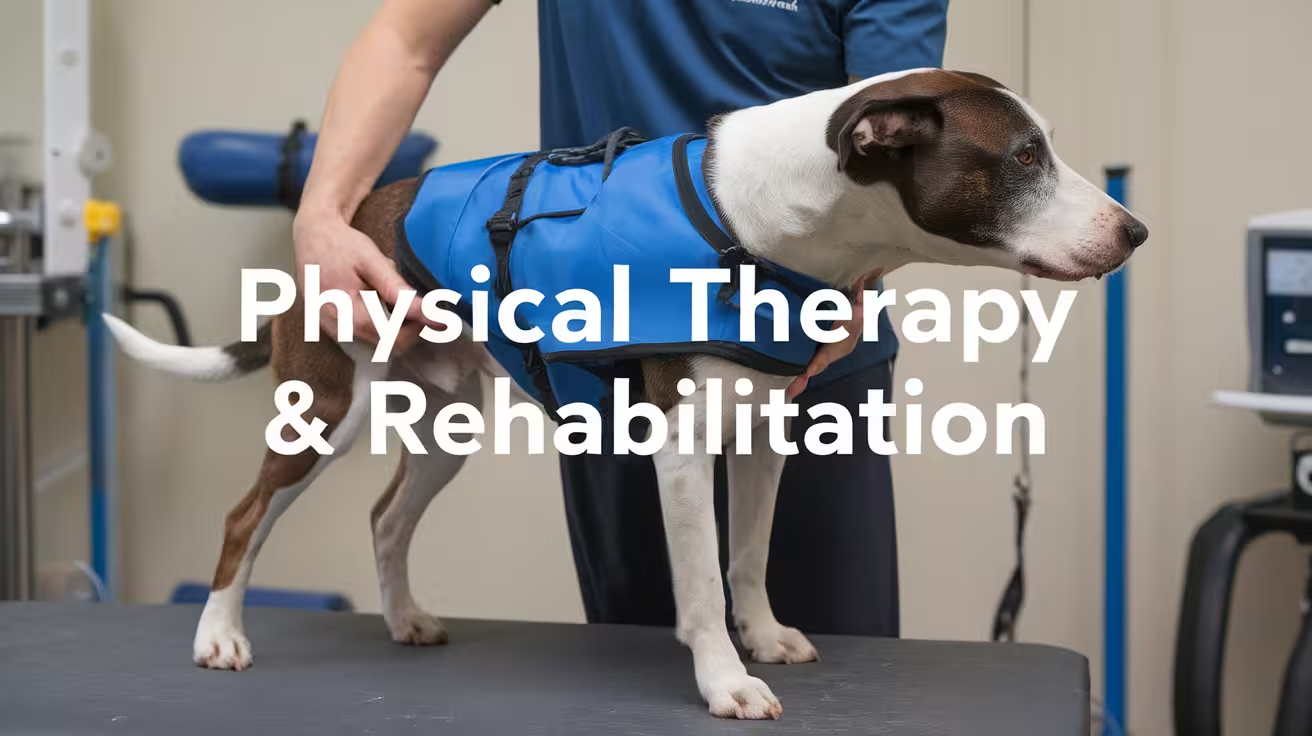
Physical Therapy & Rehabilitation: How Referring Vets Can Support Recovery
Learn how referring vets can support pet recovery with timely rehab, better communication, and tailored treatment plans
Rehabilitation after orthopedic surgery is not optional it is a core component of recovery.
Dogs that receive structured rehabilitation after procedures such as TPLO, FHO, or fracture repair consistently return to function faster and more completely than those managed with rest alone.
Referring veterinarians are in a key position to set expectations, identify appropriate patients for formal rehabilitation referral, and guide owners through what they can do at home between specialist visits.
Quick answer: Rehabilitation after orthopedic surgery combines passive range-of-motion exercises, controlled leash walking, hydrotherapy, therapeutic laser, and progressive strengthening. Formal rehabilitation with a certified canine rehabilitation practitioner produces measurably better outcomes than rest alone.
Key takeaways
- Rehabilitation significantly improves post-surgical outcomes: dogs receiving post-TPLO rehab return to limb use faster than controls managed with rest alone
- Hydrotherapy is one of the most impactful modalities: water buoyancy reduces weight-bearing stress by up to 90% while building muscle
- Passive range-of-motion exercises begin within the first few days post-surgery to prevent joint stiffness and soft tissue adhesion
- Therapeutic laser can be initiated immediately after surgery to reduce inflammation and support tissue healing
- Rehabilitation referral should be considered for any orthopedic surgical patient, particularly large-breed dogs, bilateral cases, and slow-progressors
- Home exercises taught to owners at discharge sit-to-stands, controlled leash walking, passive ROM extend the benefit of formal sessions
Why rehabilitation matters after orthopedic surgery
Surgery creates a stable repair. Rehabilitation determines the quality of function that is achieved on top of that repair.
Physical rehabilitation is a specialty of veterinary medicine that focuses on strength, mobility, and comfort of pets. Rehabilitation therapy utilizes a combination of therapeutic exercises, physical modalities like laser, and hands-on techniques to alleviate pain and improve function.
Without proper rehabilitation, dogs may experience prolonged pain, stiffness, muscle atrophy, or even a decline in overall function. Physical therapy helps bridge the gap between surgery and a full return to normal activities by promoting safe and effective healing.
The referring vet's role after orthopedic surgery is threefold: enforce rest during early healing, manage pain so the dog can engage in rehab exercises, and identify patients who need formal rehabilitation referral.
Rehabilitation modalities
Passive range-of-motion exercises (PROM)
Range-of-motion and stretching exercises are vital activities to help improve joint motion and flexibility in pets after surgery. These exercises help prevent adhesions between soft tissues and bone, improve muscle extensibility, and prevent further injury to joints, ligaments, tendons, and muscles.
PROM begins within the first few days of surgery, before the dog can actively bear weight. Owners are typically taught how to perform these at discharge.
The technique involves gentle flexion and extension of the affected joint through its comfortable range, without forcing the endpoint.
Hydrotherapy (underwater treadmill)
The buoyancy effect reduces weight-bearing stress by up to 90%, allowing pets to exercise with minimal pain while still building muscle mass.
Most veterinarians recommend beginning hydrotherapy only after the surgical site is fully closed and inflammation has subsided, which usually occurs after two to four weeks but this timeline varies depending on the procedure and the individual pet.
The underwater treadmill is the most commonly used hydrotherapy tool in veterinary rehabilitation. Pool swimming is also used but provides less controlled, task-specific exercise.
Therapeutic laser (photobiomodulation)
Laser therapy can be initiated right after surgery to stimulate healing.
Therapeutic laser reduces inflammation, decreases pain, and promotes tissue repair at the cellular level. It is one of the few modalities that can begin immediately post-operatively at the surgical site.
Therapeutic exercises
Physiotherapy exercises for dogs can include things like balancing on three legs, walking on the front legs, sit-and-stand exercises, and side-hopping. These exercises can help with recovery.
Progressive land-based exercises are introduced as healing advances. Sit-to-stand exercises build hindlimb strength without high-impact loading. Balance boards, cavaletti poles, and incline walking are added as the dog progresses.
Heat and cold therapy
Cold therapy (cryotherapy) is used in the first 48 to 72 hours post-surgery to reduce inflammation and swelling. Heat is introduced later to relax muscles and increase local circulation before exercise sessions.
When to refer to a certified rehabilitation practitioner
Formal rehabilitation referral is appropriate for:
- Large and giant breed dogs after major orthopedic procedures (TPLO, THR, fracture repair)
- Any dog that is not bearing weight on the operated limb by the expected timepoint
- Bilateral cases where both limbs are affected
- Dogs with concurrent neurological signs
- Dogs with pre-existing muscle atrophy or poor baseline condition
- Cases where owners cannot reliably perform home exercises
A certified canine rehabilitation practitioner (CCRP) or diplomate of the American College of Veterinary Sports Medicine and Rehabilitation (DACVSMR) provides the most structured and evidence-based program.
Home exercises for owners
Most owners can learn and perform the following between formal sessions:
Short controlled leash walks: beginning as short as 5 minutes, three times daily, increasing progressively per the surgeon's protocol. No pulling, no running.
Passive range-of-motion: gentle flexion and extension of the surgical joint, 10 to 15 repetitions, two to three times daily. Stop at the point of resistance; never force.
Sit-to-stand exercises: asking the dog to sit and stand repeatedly encourages hindlimb muscle activation. Begin with 5 repetitions and increase over weeks.
Cold packing: 10 to 15 minutes of cold application to the surgical site after exercise sessions in the first two weeks reduces local inflammation.
For the pain management that supports engagement in rehabilitation, see orthopedic pain management in pets: multimodal approaches. For the nutrition and supplement context, see nutrition and supplements for orthopedic patients.
Frequently asked questions
How soon after orthopedic surgery can rehabilitation begin?
Passive range-of-motion and short controlled leash walks typically begin within the first few days. Hydrotherapy begins once the incision is closed and inflammation has subsided, usually at two to four weeks.
Therapeutic laser can begin immediately. The surgeon's discharge protocol sets the specific timeline for each patient.
My patient is not bearing weight at two weeks post-TPLO. Should I refer?
Yes. Persistent non-weight-bearing at two weeks warrants assessment either by the performing surgeon or a rehabilitation specialist. Causes include inadequate pain management, implant-related issues, or lack of physiotherapy engagement.
Formal rehabilitation evaluation is appropriate here.
Can owners do rehabilitation at home without formal sessions?
Home exercises taught at discharge are valuable and can significantly improve outcomes. However, formal sessions with a certified practitioner provide progression, monitoring, and modalities (laser, underwater treadmill) that owners cannot replicate.
Where resources allow, a combination is ideal.
What does a typical post-TPLO rehabilitation program look like?
Week 1 to 2: PROM, cold therapy, very short leash walks. Week 3 to 4: progressive leash walk duration, sit-to-stand exercises, hydrotherapy begins.
Week 5 to 8: increased land exercises, balance work, progressive incline walking. Month 3 to 4: gradual return to normal activity. Specific protocols vary by surgeon and practitioner.
Is rehabilitation covered by pet insurance?
Some comprehensive pet insurance plans cover rehabilitation therapy following surgery. Coverage varies significantly by policy and provider. Owners should check their policy before assuming coverage.
Resources
- AESC Parker. Physical Rehabilitation to Improve Surgical Recovery. aescparker.com
- DVM360. Physical Rehabilitation: Improving the Outcome in Dogs with Orthopedic Problems. dvm360.com
- AKC. Canine Rehabilitation Therapy: What to Know. akc.org
- PetMD. Dog Physical Therapy: Everything a Pet Parent Should Know. petmd.com
- VetGarofallo. Swimming and Physical Therapy After Surgery in Pets. vetgarofallo.com

Hip Dysplasia Management: When Is Surgery the Best Option?
Find out when surgery is the right choice for managing hip dysplasia in dogs. Learn signs, options, and what to expect from treatment
Hip dysplasia is one of the most common orthopedic diagnoses in dogs, but it doesn't always mean surgery is coming.
Many dogs with hip dysplasia live comfortably for years on conservative management. Others reach a point where pain or mobility loss makes surgery the right path. Knowing which situation your dog is in, and which surgical option makes sense, is what this guide is for.
Quick answer: Surgery becomes the best option for hip dysplasia when conservative management no longer controls pain, when mobility is significantly impaired, or when a dog is young enough for preventive procedures. The two main surgical options are FHO (femoral head ostectomy) and THR (total hip replacement), each suited to different dogs.
Key takeaways
- Surgery isn't always necessary: many dogs manage well with medication, weight control, and physiotherapy.
- Two main surgical paths exist: FHO removes the femoral head; THR replaces the entire joint.
- FHO suits smaller dogs and tight budgets; THR delivers better function in large, active breeds.
- Early preventive surgery (DPO/TPO) is an option for puppies under 10 months with minimal joint damage.
- The trigger for surgery is quality of life, not the X-ray grade alone.
- Delaying surgery in severe cases worsens outcomes: arthritis accumulates and options narrow.
What hip dysplasia actually is
Hip dysplasia is a developmental condition in which the ball (femoral head) and socket (acetabulum) of the hip joint don't fit together correctly. Instead of a tight, smooth connection, the joint is loose, allowing abnormal movement that gradually wears down cartilage and produces bone-on-bone friction.
The result is pain, inflammation, and over time, progressive osteoarthritis.
Hip dysplasia is most common in large and giant breeds: German Shepherds, Labrador Retrievers, Golden Retrievers, Rottweilers, and Saint Bernards among the most frequently affected, but it occurs in any size dog.
The severity on X-ray does not always match the dog's visible symptoms. Some dogs with significant radiographic changes are relatively comfortable. Others with moderate findings are clearly in pain. Both the X-ray and the clinical picture matter.
When conservative management is enough
For many dogs with hip dysplasia, especially mild to moderate cases, non-surgical management controls symptoms well enough that quality of life is maintained without surgery.
Conservative management typically includes:
- Weight management: Reducing body weight is the single most impactful intervention. Every pound of excess weight adds direct mechanical load to an already unstable joint.
- Pain medication: NSAIDs (such as carprofen, meloxicam, or grapiprant) reduce inflammation and pain. Regular bloodwork monitoring is required for long-term NSAID use.
- Joint supplements: Glucosamine, chondroitin, and omega-3 fatty acids support cartilage health and reduce inflammation over time.
- Physical therapy and low-impact exercise: Controlled walking, swimming, and hydrotherapy build the muscle mass that stabilizes the joint and reduces the load on the hip.
- Environmental modifications: Ramps instead of stairs, non-slip flooring, orthopedic bedding.
Conservative management doesn't fix the underlying anatomy. It manages symptoms within the constraints of what the joint can do. When symptoms outgrow what this approach can control, surgery enters the conversation.
For non-surgical alternatives in more detail, see non-surgical alternatives to consider.
When surgery becomes the better path
According to Ask A Vet (2025), surgery is recommended when conservative management fails or when early intervention can prevent arthritis. The clinical signals include:
- Persistent limping or bunny-hopping that doesn't resolve with medication and rest
- Reluctance to stand, jump, or climb stairs that's significantly limiting daily life
- Muscle atrophy in the hindquarters from disuse
- Radiographic evidence of progressive joint damage alongside clinical decline
- Quality of life that is clearly impacted despite consistent conservative management
The decision to move to surgery is a quality-of-life decision, not purely a radiographic one. Two dogs with similar X-rays may need different approaches based on their clinical response to conservative care.
The surgical options for hip dysplasia
FHO (femoral head ostectomy)
FHO removes the head and neck of the femur: the "ball" of the ball-and-socket joint. The remaining femur is cushioned by a "false joint" of fibrous scar tissue that forms over the following weeks.
Best suited to:
- Small to medium dogs (typically under 50 lbs)
- Any size dog when THR isn't feasible (financial constraints, health contraindications)
- Cats
Limitations: The false joint doesn't provide the mechanical function of a real hip. Large breeds may have residual pain or gait abnormality. Function depends heavily on muscle mass and rehabilitation.
For a full explanation of what the procedure involves, see what FHO surgery is and how it helps.
THR (total hip replacement)
THR replaces the entire hip joint with a prosthetic implant. The femoral head and acetabulum are both replaced with precisely fitted components.
Best suited to:
- Medium to large dogs (typically over 40 to 50 lbs) who want full athletic function restored
- Skeletally mature dogs (typically over 9 to 12 months)
- Dogs in otherwise good health without significant comorbidities
Advantage over FHO: THR restores near-normal hip anatomy and function. Success rates of 80 to 98% are reported across published studies. Large active breeds return to full exercise capacity more reliably than with FHO.
For a full overview of the THR procedure, see total hip replacement as an alternative.
DPO/TPO (double or triple pelvic osteotomy)
This is a preventive surgery performed only in young dogs (typically under 10 months old) with hip laxity but minimal joint damage. The surgeon cuts and rotates the pelvic bones to improve how the socket holds the femoral head, reducing abnormal motion before cartilage damage accumulates.
Candidates: puppies with confirmed hip laxity on radiograph, little or no arthritis, and growing bones.
This window closes as the dog matures and joint damage develops.
How to know which surgical option applies to your dog
The right surgical option depends on the intersection of several variables:
For the direct comparison of FHO versus THR across all major factors, see FHO vs total hip replacement for hip dysplasia.
For the specific indications that guide the FHO recommendation, see when FHO is recommended.
The cost of waiting
For dogs with mild disease and adequate pain control, watchful waiting is entirely appropriate.
For dogs with moderate to severe disease where quality of life is declining, delay carries real costs:
- Progressive arthritis: The damaged joint continues to deteriorate. Every month of delay means more cartilage loss and more established arthritis.
- Muscle atrophy: Disuse of the painful leg causes the supporting muscle to waste away, making recovery from eventual surgery harder and longer.
- Narrowing options: As joint damage progresses, some surgical options become less appropriate. DPO/TPO is only available during a brief window in puppyhood.
Early action, when indicated, typically means simpler surgery, cleaner recovery, and better long-term outcomes.
For guidance on whether your dog is a candidate for THR specifically, see how to know if your dog is a THR candidate.
Frequently asked questions
My dog has hip dysplasia but doesn't seem to be in pain. Do they need surgery?
Not necessarily. Many dogs with hip dysplasia compensate well and show minimal pain, particularly in early disease. Conservative management, weight control, and monitoring are appropriate first steps. Surgery is indicated when pain is not controlled or mobility is meaningfully impaired, not simply because the diagnosis exists.
How old does a dog need to be for hip replacement surgery?
THR requires skeletal maturity, typically achieved at 9 to 12 months in most breeds and later in giant breeds. FHO can be performed at any age. DPO/TPO is only appropriate before 10 months of age in puppies with hip laxity and minimal arthritis.
Can hip dysplasia go away without surgery?
The underlying anatomic abnormality doesn't resolve. But many dogs with hip dysplasia maintain a good quality of life on conservative management for years, particularly those who remain lean and receive appropriate physiotherapy. "Going away" isn't the goal; managing symptoms within the joint's limits is.
Hip dysplasia doesn't come with a single right answer. The best path depends on your dog's size, age, severity of symptoms, response to conservative care, and your goals for their function and quality of life. The conversation with your vet and the X-ray findings together tell you more than either alone. Start early, monitor consistently, and make the surgical decision based on how your dog is actually living rather than the diagnosis on paper.
Resources
- PetMD. FHO Surgery in Dogs and Cats. petmd.com
- Ask A Vet. Vet-Approved 2025 Guide: Hip Dysplasia Surgery in Dogs. askavet.com
- Simon Vet Surgical. Hip Dysplasia Surgery in Dogs. simonvetsurgical.com
Fracture Management in Dogs: When to Splint or Refer?
Learn when to splint and when to refer dog fractures. A practical guide for vets to make the right call in canine fracture management
A broken bone in a dog needs one of three things: rest and confinement, external coaptation (splint or cast), or surgical repair. The decision depends on the bone affected, the fracture pattern, the dog's size and age, and the available equipment.
Getting this decision right the first time matters. Fusion Veterinary Orthopedics: "Attempting to use a splint or cast for several weeks with the hope of the fracture healing and doing surgery later is not advised. Chronic non-healing fractures are far more difficult to realign, are more costly, and have a lower likelihood of healing."
Quick answer: External coaptation suits minimally displaced fractures below the elbow or stifle in large adult dogs. Comminuted, articular, open, and upper-limb fractures require surgery. Small and toy breed distal radius fractures almost always need surgical repair.
Key takeaways
- Splints only work for fractures below the elbow or stifle: humeral and femoral fractures cannot be adequately immobilized externally
- Comminuted and articular fractures always require surgery: they are too unstable for external coaptation to maintain alignment
- Open fractures require emergency treatment within 8 hours: irrigation, debridement, and temporary stabilization precede definitive fixation
- 83% of distal radius/ulna fractures in small and toy breeds managed with external coaptation result in malalignment or nonunion
- Growth plate fractures should be surgically repaired within 24 to 48 hours of injury to minimize long-term joint damage
- Consult a board-certified surgeon for complex fractures including spinal, articular, and small-breed distal radial/ulnar
The three management options
1. Cage rest alone: reserved for very young dogs (puppies) with minimally displaced, inherently stable fractures for example, some rib fractures and stable pelvic fractures where the dog's own muscle mass provides sufficient immobilization.
2. External coaptation (splint or cast): for fractures below the elbow or stifle, minimally displaced, in stable large-breed adult dogs. Today's Veterinary Practice: "Ideal fractures for primary fixation using external coaptation include incomplete diaphyseal tibial fractures in young dogs, sometimes referred to as 'greenstick fractures.'"
3. Surgical repair: for the majority of fractures in adult dogs, all fractures in small and toy breeds, all comminuted and articular fractures, all open fractures, and all fractures above the elbow or stifle.
When external coaptation is appropriate
External coaptation requires that the joints above and below the fracture can both be immobilized. This is only achievable for fractures distal to (below) the elbow and stifle.
Clinical Brief: "External coaptation may be successful in fractures below the elbow or stifle, where the joints above and below the fracture can be fully immobilized."
Fractures that may be managed with splinting:
- Greenstick (incomplete) tibial fractures in young large-breed dogs
- Minimally displaced distal radius fractures in large-breed adult dogs
- Some metacarpal and metatarsal fractures
- Toe fractures
How splints are applied: Today's Veterinary Practice: "The splint should span the joint above and below the fracture, and be padded enough to prevent pressure sores and prevent movement of the limb." After placement, a radiograph confirms alignment.
Complications of splinting: ACVS: "Bandages and splints can cause very serious complications. They can be an effective treatment tool for fracture healing and pain control, but careful monitoring and appropriate follow-up must occur." Pressure sores, bandage slippage, and limb swelling are the most common complications; daily monitoring is essential.
When surgical repair is required
Fractures above the elbow or stifle
Animal Medical Center: "It is easy to temporarily immobilize bones below the elbow and knee, while the upper arm and thigh are more challenging to manage because the shoulder and hip are difficult to splint."
Today's Veterinary Practice: "Temporary stabilization of humeral and femoral fractures should not be attempted. In these cases, hospitalization with confinement to a crate along with analgesic relief is ideal while awaiting definitive fixation."
SustainableVet: "Trying to splint these upper limb fractures often leads to pain, delayed healing, and poor limb function. Immediate referral for surgical repair is recommended."
Comminuted fractures
A comminuted fracture means the bone is broken into multiple pieces. These are mechanically unstable fragments shift with any weight bearing. SustainableVet: "These are very unstable and cannot be held in place by a splint alone. The pieces move easily, and the risk of poor healing is high. In these cases, surgical fixation is needed to realign and stabilize the fragments."
Articular fractures (fractures entering a joint)
Any fracture that enters a joint surface requires anatomical reduction the fracture fragments must be restored to near-perfect anatomical position and rigid fixation to prevent joint surface step-off and subsequent arthritis. Fusion Veterinary Orthopedics: "Any growth plate fracture or joint fracture should be treated as quickly as possible within about 24 to 48 hours after injury."
Open (compound) fractures
Animal Medical Center: "Open fractures often require an initial surgery to clean the wound and bone within 8 hours of the injury." The management sequence is:
- Immediate wound irrigation and debridement under anesthesia
- Temporary stabilization (bandage)
- Systemic antibiotics
- Definitive fracture repair after soft tissue stabilization
Do not attempt definitive fixation of a contaminated open fracture at the initial presentation; this dramatically increases infection risk.
Small and toy breed radius and ulna fractures
Today's Veterinary Practice: "In small and toy breed dogs, 83% of distal radius and ulna fractures addressed with external coaptation alone result in malalignment or nonunion. Therefore, internal fixation is recommended for these fractures in small and toy breed dogs."
SustainableVet: "Toy breeds like Chihuahuas, Pomeranians, and Yorkies are at high risk of nonunion. Their small bones have less blood supply, which slows healing. Even simple fractures may not heal with splints alone."
Spinal fractures and luxations
Spinal fractures with cord involvement are neurosurgical emergencies requiring immediate specialist referral for stabilization and decompression. Clinical Brief: "For complex fractures including spinal, consider consultation with a boarded veterinary surgeon or referral to a specialty practice."
Surgical options for fracture repair
Vets4Pets provides a useful overview: "Two types of surgical fracture repair are normally used in pets. Internal fixation involves placing surgical screws, pins, or metal plates under the skin around the fracture site to stabilize the bone. External fixation involves attaching surgical scaffolding to the bone through small holes in the skin."
Specific implant systems used:
- Intramedullary (IM) pins: inserted down the bone canal; suitable for some long-bone fractures
- Bone plates and screws: the most common implant system; provides rigid fixation; locking plate systems are particularly stable
- External skeletal fixators (ESF): transcutaneous pins connected by an external frame; useful for open fractures, infected fractures, and certain metaphyseal fractures
- Interlocking nails: for femoral and tibial shaft fractures
Timing matters
Animal Medical Center: "You should treat a closed fracture within 2 to 4 days. Timely veterinary fracture repair can prevent complications like bone misalignment or long-term mobility issues."
Fusion Veterinary Orthopedics: "Chronic non-healing fractures are far more difficult to realign, are more costly, and have a lower likelihood of healing."
Delaying evaluation hoping the dog will be "better tomorrow" consistently leads to worse outcomes. Fractures should be radiographed and assessed by a veterinarian on the day they are suspected.
For recovery care after fracture surgery, see orthopedic surgery home care guide. For the referral decision framework across orthopedic conditions, see when to refer orthopedic cases. For the full specialist referral process, see what is veterinary referral surgery.
Frequently asked questions
My dog is walking on the leg a little. Does that mean it is not broken?
No. Weight bearing on a fractured limb is common many dogs do not display obvious non-weight-bearing lameness with incomplete or minimally displaced fractures. Any dog with pain, swelling, or abnormal limb conformation after trauma needs radiographs.
How do I transport a dog with a suspected broken leg to the vet?
Keep the dog calm and restrict movement. Do not splint at home; improper application can worsen the fracture. Carry small dogs; use a rigid surface for large dogs. Call ahead so the clinic can prepare.
Will my dog's fracture heal faster with rest than surgery?
For fractures that require surgery, no. Fusion Veterinary Orthopedics: "Surgery ensures optimal alignment and stabilization for less pain and faster healing." Splinting a fracture that needs surgery delays appropriate treatment and often results in malunion or nonunion.
What is a growth plate fracture and why is it urgent?
Growth plates are bone formation zones at long bone ends in immature dogs. Fractures disrupt blood supply to growth cells. Fusion Veterinary Orthopedics: "Growth plate fractures should be treated within 24 to 48 hours." Delay risks permanent deformity.
Can a dog live with an untreated fracture?
Some dogs survive without repair, particularly with stable pelvic fractures. However, untreated fractures often result in malunion, nonunion, chronic pain, and permanent functional loss. Any decision against surgery should be fully informed.
How often does a splint need to be checked when my dog is wearing one?
ACVS: splints require careful monitoring and appropriate follow-up. Checks every 3 to 5 days are standard initially. Watch for swelling above or below the splint, foul odor, cold or pale toes, or the dog chewing the bandage.
Resources
- SustainableVet. Fracture Management in Dogs: When to Splint or Refer? sustainablevet.org
- Today's Veterinary Practice. Definitive Treatment of Limb Fractures With Splints or Casts. todaysveterinarypractice.com
- ACVS. Fractured Limbs. acvs.org
- Clinical Brief. Fracture Management. cliniciansbrief.com
- Fusion Veterinary Orthopedics. Minimally Invasive or Open Fracture Repair. fusionvetortho.com
Feline Orthopedic Conditions: Signs of Hidden Lameness
Learn how to spot hidden lameness in cats, recognize common feline orthopedic conditions early, and keep your cat healthy and comfortable
Cats are exceptional at concealing pain. This is not stubbornness it is a deeply ingrained survival instinct. In the wild, a visibly lame or injured animal becomes prey.
Domestic cats retain this drive to mask weakness, which means orthopedic disease in cats is frequently underdiagnosed and undertreated.
Quick answer: Cats rarely limp overtly even with significant orthopedic pain. Reliable signs of hidden lameness include reduced jumping, reluctance to use stairs, grooming changes, and irritability when handled. OA affects 60 to 90% of older cats. Hip dysplasia affects up to 46.7% of some pedigree cat populations.
Key takeaways
- Cats rarely limp overtly even with significant joint pain; behavioral changes are the primary indicator of orthopedic disease
- 60 to 90% of older cats have radiographic OA but most owners do not recognize it as a clinical problem
- Hip dysplasia affects up to 46.7% of pedigree cats in some studies, with Maine Coons and Siamese most commonly affected
- Reduced jumping height or frequency is one of the earliest reliable signs of feline orthopedic pain
- Examining lame cats is challenging: they are often anxious and aggressive in the clinic; a calm, low-stress approach is essential
- CT is the most reliable non-invasive tool for subtle elbow and coronoid lesions that radiographs may miss
Why cats hide orthopedic pain
Cats can often much better compensate for pelvic limb lameness and hide their pain, and as a result, owners are less likely to notice this condition.
Osteoarthritis is common in cats but may not be noticed because cats often hide signs of pain. Approximately 60 to 90% of older cats have osteoarthritis.
Examination of the lame cat can be difficult. Owner history is often not helpful because most injuries are not witnessed. Cats can be highly anxious in a hospital setting and may be aggressive.
The clinical implication is clear: waiting for a cat to present with an obvious limp means waiting for a level of pain that most cats will never openly display.
Earlier detection requires recognizing the subtler behavioral signals.
Behavioral signs of hidden orthopedic pain in cats
Rather than an overt limp, cats with orthopedic disease typically show:
Changes in jumping behavior:
- Reduced jumping height landing lower than usual on furniture
- Reduced jumping frequency choosing not to jump when they previously would
- Hesitating before jumping, or looking for an alternative route up
Activity and movement changes:
- Reluctance to use stairs
- Slower, more deliberate movement
- Spending more time on lower surfaces
- Stiffness when rising after rest, particularly in the morning
Grooming changes:
- Reduced grooming of the hindquarters and tail base (hips or spine painful to flex toward)
- Matted coat in areas the cat cannot reach comfortably
- Overgrooming of a painful limb (licking at the joint or foot)
Litter box behavior:
- Difficulty squatting defecating outside the box, particularly in cats with hip pain
- Reluctance to step over a high-sided litter box
Behavioral and temperament changes:
- Increased irritability, especially when touched around the affected area
- Withdrawal from family interaction
- Reduced playfulness or hunting behavior
- Vocalizing when handled or picked up
The main clinical signs are decreased activity and reluctance to jump on higher places, reluctance to use stairs and to squat when defecating and defecation outside of the litter box; signs of pelvic limb lameness are rare.
Common feline orthopedic conditions
Osteoarthritis (OA)
The most prevalent orthopedic condition in cats, particularly in middle-aged and older animals.
The joint cartilage in freely moving joints may degenerate over time, leading to loss of joint movement and, in many cases, pain. Joint degeneration can be caused by trauma, infection, the body's immune system, or malformation during development.
The elbows and hips are most commonly affected, followed by the stifles and spine.
Management is multimodal: weight management, environmental modifications (ramps, low-sided litter boxes, raised food bowls), NSAIDs formulated for cats (meloxicam), and joint supplements.
Hip dysplasia
Hip OA is relatively common in cats but is often not recognised, either because cat owners do not appreciate the pelvic limb lameness or because cats are better able to compensate for the resulting functional impairment.
The prevalence of hip joint dysplasia in all pedigree cats was 46.7%, of which 78% of cats had bilateral dysplasia. Dysplasia was mainly mild to moderate; however, 6.1% of hip joints showed signs of severe hip dysplasia in Maine Coon and Siberian cats.
Fortunately, hip dysplasia is rarer in cats than in dogs, and many cats with hip dysplasia may never show symptoms. This may occur because cats are better at compensating for hind limb lameness and hiding their pain.
Most cats with hip dysplasia are managed conservatively. Surgical options exist for severe cases.
Patellar luxation
Patellar luxation was noted in 32.7% of pedigree cats, present bilaterally in 91.4%, and was grade 1 or 2 in most cats.
Most feline patellar luxations are low-grade and clinically silent. Higher-grade luxations causing intermittent lameness may require surgical correction.
Fractures
Feline fractures are a prevalent orthopedic issue in cats. Accidents often result in these injuries, with the shoulder, elbow, wrist, knee, and ankle joints being the most susceptible to fracture.
Cats sustaining high-rise falls (high-rise syndrome) often present with thoracic, facial, and forelimb injuries. A cat presented after a fall with any lameness or reluctance to bear weight requires radiographic assessment.
Cranial cruciate ligament (CCL) disease
Mediolateral and craniocaudal radiographs of a seven-year-old domestic shorthair cat showed cranial cruciate ligament rupture.
CCL rupture is less common in cats than dogs, but it does occur, particularly in middle-aged neutered cats. Unlike in dogs, some cats achieve functional stability through fibrosis without surgery.
Feline vs. canine orthopedic anatomy: key differences
The cat appendicular skeleton has numerous subtle differences compared to dogs. Cats tend to have a more shallow acetabular fossa and this must be taken into account when interpreting radiographs for hip dysplasia. Cats have a high degree of pronation and supination in their elbow joint, and about 40% will have a sesamoid in the supinator muscle that can be mistaken for a chip fracture.
These anatomical differences mean that normal feline radiographic findings can be misinterpreted as pathology, and vice versa. Feline orthopedic radiographs should be interpreted with species-specific reference ranges in mind.
Assessment approach
The feline orthopedic examination requires a low-stress approach. Allow the cat to settle in the room before beginning. Observe spontaneous movement first: how the cat rises, walks, and places each foot.
Palpation of joints should be systematic but gentle, noting pain responses, crepitus, reduced range of motion, and muscle atrophy.
The most commonly reported physical examination findings in cats with hip dysplasia are pain and crepitus upon extension of the hips, and muscle atrophy.
For subtle lesions, particularly of the elbow, CT provides better sensitivity than radiography alone.
For the referral decision framework, see when to refer for orthopedic surgery: surgical vs non-surgical cases. For post-surgical home care in cats, see post-op home care for pets after orthopedic surgery.
Frequently asked questions
How can I tell if my cat is in orthopedic pain if it isn't limping?
Watch for behavioral changes: reduced jumping, reluctance to use stairs, grooming changes, litter box avoidance, and increased irritability when touched.
These are often more reliable indicators of feline orthopedic pain than gait changes, which cats suppress effectively.
Is arthritis common in cats?
Yes. Radiographic evidence of OA affects 60 to 90% of older cats.
The condition is significantly underdiagnosed because cats compensate so well that owners rarely notice clinical signs until the disease is advanced.
My cat is a Maine Coon. Should I be concerned about hip dysplasia?
Maine Coons are one of the most commonly affected breeds, with hip dysplasia rates of 18 to 21% reported in some studies.
Annual veterinary checks including orthopedic assessment are worthwhile, even in the absence of obvious clinical signs.
Can cats have surgery for orthopedic conditions?
Yes. Fracture repair, patellar luxation correction, femoral head ostectomy for hip disease, and CCL repair are all performed in cats. Outcomes are generally good.
The decision to pursue surgery depends on severity, the cat's overall health, and owner circumstances.
How should I modify my home for a cat with arthritis?
Lower-sided litter boxes, ramps to reach favourite resting spots, raised food and water bowls, soft bedding in warm locations, and healthy weight management all significantly reduce the daily pain burden of OA.
Resources
- Merck Veterinary Manual. Joint Disorders in Cats. merckvetmanual.com
- VetTimes. Common Feline Orthopaedic Conditions Beyond OA Cases. vettimes.com
- MSPCA-Angell. Feline Orthopedic Disease. mspca.org
- PMC. Prevalence of Feline Hip Dysplasia, Patellar Luxation and Lumbosacral Transitional Vertebrae in Pedigree Cats. ncbi.nlm.nih.gov
- PetMD. Hip Dysplasia in Cats. petmd.com
Post-Surgical Follow-Up: What Referring Veterinarians Need to Know
Learn 11 essential post-surgical follow-up tips every referring veterinarian should know to support recovery and improve patient outcomes
The surgeon closes the incision and hands the patient back. From that point, the referring vet carries the case.
Post-surgical care is not passive.
It requires active communication with the surgical team, structured recheck examinations, prompt complication recognition, and consistent owner support throughout a recovery that may last months.
Quick answer: Post-surgical follow-up for referred orthopedic patients includes reading the discharge summary before the first recheck, establishing a recheck schedule (suture removal at day 10 to 14, radiographs at week 6 to 8), recognizing complications early, and reinforcing owner compliance at every visit.
Key takeaways
- Read the discharge summary before the first recheck: skimming leads to medication errors, missed complications, and inconsistent owner instructions
- Standard orthopedic recheck schedule: suture removal at day 10 to 14; radiographs at week 6 to 8; final check at week 12 to 16
- Contact the surgical team for: implant complications, deep infection not resolving in 72 hours, wound dehiscence, or worsening lameness
- Owner compliance is the most modifiable variable: reinforce activity restrictions, E-collar use, and complication signs at every contact
- Refer back for: deep infection, implant-related concerns, wound dehiscence, or persistent non-weight-bearing beyond expected timepoints
- Document each visit clearly: both the referring vet and the surgical team need an accurate record to track patient progress
Reading the discharge summary
The role of a referring veterinarian does not end when the surgery is done. After the specialist performs the procedure, the referring veterinarian often monitors the patient's healing, manages medications, and supports the client with follow-up care. Without clear updates and guidance, this handoff can lead to confusion, missed issues, or delayed treatment.
The discharge summary is the primary communication from the surgical team.
It contains the diagnosis, the specific procedure performed, implant details, the prescribed medication list, the recheck schedule, and the complications to monitor.
Even when the specialist provides detailed discharge instructions, referring veterinarians often need to reinforce or adjust them during follow-up visits. Clients may forget or misunderstand what they were told at the surgical centre, especially if they were stressed or overwhelmed on discharge day.
What to extract from every discharge summary:
- Full medication list (drug, dose, frequency, duration)
- Recheck schedule and what assessment is required at each visit
- Specific complications the surgeon flagged for this case
- Activity restriction level and when it can be modified
- Criteria for contacting the surgical team directly
If anything is unclear, contact the specialist before the first recheck not after.
Recheck schedule
Soft tissue cases
- Day 10 to 14: incision assessment, suture removal, medication review
- Further rechecks: based on clinical signs and case complexity
Orthopedic cases
- Day 10 to 14: incision assessment, suture removal, gait assessment
- Week 6 to 8: radiographs to confirm bone healing and implant position
- Week 12 to 16: final assessment in complex cases; progressive activity increase if healing confirmed
If pain medications are still needed after a few weeks, it is best to follow up with your referring veterinarian.
Consistent scheduling helps track progress and catch complications early. Document each visit so both you and the specialist can follow the case.
What to assess at each recheck
At every visit:
- Incision appearance: closure status, discharge type and volume, redness, swelling
- Weight-bearing status on the affected limb
- Pain assessment using a standardized scale
- Muscle mass: compare bilaterally
- E-collar compliance
- Medication compliance and any adverse effects reported by the owner
At orthopedic rechecks:
- Joint stability (where applicable)
- Range of motion of the operated joint
- Radiographs at intervals specified in the discharge summary
Recognizing and triaging complications
Surgical site infection (SSI)
Signs: redness extending beyond the incision margins after day 3, purulent discharge, local heat, wound odor, systemic signs (fever, lethargy).
Management: culture and sensitivity before starting antibiotics. Surface infections can be managed locally. Deep infections, infections near implants, and infections not improving in 48 to 72 hours require surgical team contact.
Seroma
Soft, fluctuant non-painful swelling beneath the incision. Common after soft tissue and orthopedic surgery. Small seromas often resolve with strict rest. Larger seromas may need drainage under guidance from the surgical team.
Wound dehiscence
Partial or complete opening of the incision. Requires same-day assessment. Full dehiscence with tissue exposure is an emergency. Contact the surgical team before attempting local re-closure of complex wounds.
Persistent or worsening lameness
In orthopedic cases, persistent non-weight-bearing or worsening lameness beyond the expected timeline warrants radiographs and surgical team contact. Implant loosening, infection, or fracture propagation must be ruled out before managing locally.
Communicating with the surgical team
Smooth communication between the surgical team and the referring vet is crucial.
Contact the surgical team for:
- Any implant-related concern identified on radiograph
- Deep SSI not resolving with antibiotics in 48 to 72 hours
- Wound dehiscence of a complex closure
- Lameness or pain worsening rather than improving at expected timepoints
- Uncertainty about whether a finding requires re-referral
The GP's office should contact the orthopedic surgeon to get the discharge instructions, which include pin care and a schedule for pin removal. Call the specialty hospital on the day of surgery to get a briefing on the outcome and expected aftercare.
A proactive call immediately after surgery, confirming surgical findings and aftercare requirements, prevents the most common breakdown: managing a complication beyond scope while the problem worsens.
Supporting owners through recovery
Focus on key points like medication schedules, activity restrictions, wound care, and signs that need urgent attention. Avoid medical jargon clients appreciate straightforward, step-by-step guidance. You can provide these as printed handouts or digital summaries sent by email or text.
Follow-up communication needs to happen the day after the patient is discharged. Make sure you have updated contact information and the desired contact method. Encourage clients to call if they have any concerns once the pet is home.
Owner compliance particularly with activity restriction and E-collar use is the most controllable variable in post-surgical outcome. Non-compliance is the most common cause of wound complications and implant failure.
Reinforce it at every visit, not just at the first one.
For the complications guide covering specific scenarios and when to re-refer, see post-op home care for pets after orthopedic surgery.
For the communication framework between GP and specialist, see how to optimize communication between general practitioners and orthopedic surgeons.
Frequently asked questions
When should I contact the surgical team vs. manage locally?
Manage locally: minor incision redness not progressing, small seromas under active rest restrictions, mild expected lameness on the expected timeline.
Contact the surgical team: any implant concern, deep infection, wound dehiscence of a complex closure, worsening rather than improving lameness, or any complication you are unsure how to manage.
What imaging is needed at the 6-week orthopedic recheck?
Radiographs of the operated region in the same views as the post-operative images from the discharge summary. Compare implant position, bone healing, and periimplant margins.
If the surgeon provided post-operative radiographs in the discharge summary, use these as the baseline for comparison.
My client says the dog is doing great but the incision looks concerning. Who is right?
Trust the physical examination over owner assessment. Owners naturally minimise signs when they want their pet to be well.
Document your findings, photograph the incision, and manage based on clinical evidence rather than owner report.
How do I handle the case if I cannot reach the surgical team?
Document the attempt and the clinical finding. For non-emergency complications, continue conservative local management while attempting to reach the team.
For emergencies (wound dehiscence with tissue exposure, signs of systemic sepsis), act appropriately and continue attempting specialist contact. Never delay emergency care while awaiting specialist guidance.
How long does the referring vet typically follow the case?
For straightforward soft tissue cases, typically until the 10 to 14 day recheck and discharge.
For orthopedic cases, the referring vet typically follows the patient through the 6 to 8 week radiographic recheck and the 12 to 16 week final assessment.
This represents a total follow-up period of 3 to 4 months.
Resources
- SustainableVet. Post-Surgical Follow-Up Guide for Referring Vets. sustainablevet.org
- Advanced Veterinary Care. Orthopedic Surgery Post-Operative Instructions. advancedvetcarenm.com
- Today's Veterinary Business. From Preop Through Postop. todaysveterinarybusiness.com
- ACVS. Postoperative Care After Surgery: What Animal Owners Should Expect. acvs.org
Feline Orthopedic Conditions: Signs of Hidden Lameness
Learn how to spot hidden lameness in cats, recognize common feline orthopedic conditions early, and keep your cat healthy and comfortable
Cats are exceptional at concealing pain. This is not stubbornness it is a deeply ingrained survival instinct. In the wild, a visibly lame or injured animal becomes prey.
Domestic cats retain this drive to mask weakness, which means orthopedic disease in cats is frequently underdiagnosed and undertreated.
Quick answer: Cats rarely limp overtly even with significant orthopedic pain. Reliable signs of hidden lameness include reduced jumping, reluctance to use stairs, grooming changes, and irritability when handled. OA affects 60 to 90% of older cats. Hip dysplasia affects up to 46.7% of some pedigree cat populations.
Key takeaways
- Cats rarely limp overtly even with significant joint pain; behavioral changes are the primary indicator of orthopedic disease
- 60 to 90% of older cats have radiographic OA but most owners do not recognize it as a clinical problem
- Hip dysplasia affects up to 46.7% of pedigree cats in some studies, with Maine Coons and Siamese most commonly affected
- Reduced jumping height or frequency is one of the earliest reliable signs of feline orthopedic pain
- Examining lame cats is challenging: they are often anxious and aggressive in the clinic; a calm, low-stress approach is essential
- CT is the most reliable non-invasive tool for subtle elbow and coronoid lesions that radiographs may miss
Why cats hide orthopedic pain
Cats can often much better compensate for pelvic limb lameness and hide their pain, and as a result, owners are less likely to notice this condition.
Osteoarthritis is common in cats but may not be noticed because cats often hide signs of pain. Approximately 60 to 90% of older cats have osteoarthritis.
Examination of the lame cat can be difficult. Owner history is often not helpful because most injuries are not witnessed. Cats can be highly anxious in a hospital setting and may be aggressive.
The clinical implication is clear: waiting for a cat to present with an obvious limp means waiting for a level of pain that most cats will never openly display.
Earlier detection requires recognizing the subtler behavioral signals.
Behavioral signs of hidden orthopedic pain in cats
Rather than an overt limp, cats with orthopedic disease typically show:
Changes in jumping behavior:
- Reduced jumping height landing lower than usual on furniture
- Reduced jumping frequency choosing not to jump when they previously would
- Hesitating before jumping, or looking for an alternative route up
Activity and movement changes:
- Reluctance to use stairs
- Slower, more deliberate movement
- Spending more time on lower surfaces
- Stiffness when rising after rest, particularly in the morning
Grooming changes:
- Reduced grooming of the hindquarters and tail base (hips or spine painful to flex toward)
- Matted coat in areas the cat cannot reach comfortably
- Overgrooming of a painful limb (licking at the joint or foot)
Litter box behavior:
- Difficulty squatting defecating outside the box, particularly in cats with hip pain
- Reluctance to step over a high-sided litter box
Behavioral and temperament changes:
- Increased irritability, especially when touched around the affected area
- Withdrawal from family interaction
- Reduced playfulness or hunting behavior
- Vocalizing when handled or picked up
The main clinical signs are decreased activity and reluctance to jump on higher places, reluctance to use stairs and to squat when defecating and defecation outside of the litter box; signs of pelvic limb lameness are rare.
Common feline orthopedic conditions
Osteoarthritis (OA)
The most prevalent orthopedic condition in cats, particularly in middle-aged and older animals.
The joint cartilage in freely moving joints may degenerate over time, leading to loss of joint movement and, in many cases, pain. Joint degeneration can be caused by trauma, infection, the body's immune system, or malformation during development.
The elbows and hips are most commonly affected, followed by the stifles and spine.
Management is multimodal: weight management, environmental modifications (ramps, low-sided litter boxes, raised food bowls), NSAIDs formulated for cats (meloxicam), and joint supplements.
Hip dysplasia
Hip OA is relatively common in cats but is often not recognised, either because cat owners do not appreciate the pelvic limb lameness or because cats are better able to compensate for the resulting functional impairment.
The prevalence of hip joint dysplasia in all pedigree cats was 46.7%, of which 78% of cats had bilateral dysplasia. Dysplasia was mainly mild to moderate; however, 6.1% of hip joints showed signs of severe hip dysplasia in Maine Coon and Siberian cats.
Fortunately, hip dysplasia is rarer in cats than in dogs, and many cats with hip dysplasia may never show symptoms. This may occur because cats are better at compensating for hind limb lameness and hiding their pain.
Most cats with hip dysplasia are managed conservatively. Surgical options exist for severe cases.
Patellar luxation
Patellar luxation was noted in 32.7% of pedigree cats, present bilaterally in 91.4%, and was grade 1 or 2 in most cats.
Most feline patellar luxations are low-grade and clinically silent. Higher-grade luxations causing intermittent lameness may require surgical correction.
Fractures
Feline fractures are a prevalent orthopedic issue in cats. Accidents often result in these injuries, with the shoulder, elbow, wrist, knee, and ankle joints being the most susceptible to fracture.
Cats sustaining high-rise falls (high-rise syndrome) often present with thoracic, facial, and forelimb injuries. A cat presented after a fall with any lameness or reluctance to bear weight requires radiographic assessment.
Cranial cruciate ligament (CCL) disease
Mediolateral and craniocaudal radiographs of a seven-year-old domestic shorthair cat showed cranial cruciate ligament rupture.
CCL rupture is less common in cats than dogs, but it does occur, particularly in middle-aged neutered cats. Unlike in dogs, some cats achieve functional stability through fibrosis without surgery.
Feline vs. canine orthopedic anatomy: key differences
The cat appendicular skeleton has numerous subtle differences compared to dogs. Cats tend to have a more shallow acetabular fossa and this must be taken into account when interpreting radiographs for hip dysplasia. Cats have a high degree of pronation and supination in their elbow joint, and about 40% will have a sesamoid in the supinator muscle that can be mistaken for a chip fracture.
These anatomical differences mean that normal feline radiographic findings can be misinterpreted as pathology, and vice versa. Feline orthopedic radiographs should be interpreted with species-specific reference ranges in mind.
Assessment approach
The feline orthopedic examination requires a low-stress approach. Allow the cat to settle in the room before beginning. Observe spontaneous movement first: how the cat rises, walks, and places each foot.
Palpation of joints should be systematic but gentle, noting pain responses, crepitus, reduced range of motion, and muscle atrophy.
The most commonly reported physical examination findings in cats with hip dysplasia are pain and crepitus upon extension of the hips, and muscle atrophy.
For subtle lesions, particularly of the elbow, CT provides better sensitivity than radiography alone.
For the referral decision framework, see when to refer for orthopedic surgery: surgical vs non-surgical cases. For post-surgical home care in cats, see post-op home care for pets after orthopedic surgery.
Frequently asked questions
How can I tell if my cat is in orthopedic pain if it isn't limping?
Watch for behavioral changes: reduced jumping, reluctance to use stairs, grooming changes, litter box avoidance, and increased irritability when touched.
These are often more reliable indicators of feline orthopedic pain than gait changes, which cats suppress effectively.
Is arthritis common in cats?
Yes. Radiographic evidence of OA affects 60 to 90% of older cats.
The condition is significantly underdiagnosed because cats compensate so well that owners rarely notice clinical signs until the disease is advanced.
My cat is a Maine Coon. Should I be concerned about hip dysplasia?
Maine Coons are one of the most commonly affected breeds, with hip dysplasia rates of 18 to 21% reported in some studies.
Annual veterinary checks including orthopedic assessment are worthwhile, even in the absence of obvious clinical signs.
Can cats have surgery for orthopedic conditions?
Yes. Fracture repair, patellar luxation correction, femoral head ostectomy for hip disease, and CCL repair are all performed in cats. Outcomes are generally good.
The decision to pursue surgery depends on severity, the cat's overall health, and owner circumstances.
How should I modify my home for a cat with arthritis?
Lower-sided litter boxes, ramps to reach favourite resting spots, raised food and water bowls, soft bedding in warm locations, and healthy weight management all significantly reduce the daily pain burden of OA.
Resources
- Merck Veterinary Manual. Joint Disorders in Cats. merckvetmanual.com
- VetTimes. Common Feline Orthopaedic Conditions Beyond OA Cases. vettimes.com
- MSPCA-Angell. Feline Orthopedic Disease. mspca.org
- PMC. Prevalence of Feline Hip Dysplasia, Patellar Luxation and Lumbosacral Transitional Vertebrae in Pedigree Cats. ncbi.nlm.nih.gov
- PetMD. Hip Dysplasia in Cats. petmd.com
Fracture Management in Dogs: When to Splint or Refer?
Learn when to splint and when to refer dog fractures. A practical guide for vets to make the right call in canine fracture management
A broken bone in a dog needs one of three things: rest and confinement, external coaptation (splint or cast), or surgical repair. The decision depends on the bone affected, the fracture pattern, the dog's size and age, and the available equipment.
Getting this decision right the first time matters. Fusion Veterinary Orthopedics: "Attempting to use a splint or cast for several weeks with the hope of the fracture healing and doing surgery later is not advised. Chronic non-healing fractures are far more difficult to realign, are more costly, and have a lower likelihood of healing."
Quick answer: External coaptation suits minimally displaced fractures below the elbow or stifle in large adult dogs. Comminuted, articular, open, and upper-limb fractures require surgery. Small and toy breed distal radius fractures almost always need surgical repair.
Key takeaways
- Splints only work for fractures below the elbow or stifle: humeral and femoral fractures cannot be adequately immobilized externally
- Comminuted and articular fractures always require surgery: they are too unstable for external coaptation to maintain alignment
- Open fractures require emergency treatment within 8 hours: irrigation, debridement, and temporary stabilization precede definitive fixation
- 83% of distal radius/ulna fractures in small and toy breeds managed with external coaptation result in malalignment or nonunion
- Growth plate fractures should be surgically repaired within 24 to 48 hours of injury to minimize long-term joint damage
- Consult a board-certified surgeon for complex fractures including spinal, articular, and small-breed distal radial/ulnar
The three management options
1. Cage rest alone: reserved for very young dogs (puppies) with minimally displaced, inherently stable fractures for example, some rib fractures and stable pelvic fractures where the dog's own muscle mass provides sufficient immobilization.
2. External coaptation (splint or cast): for fractures below the elbow or stifle, minimally displaced, in stable large-breed adult dogs. Today's Veterinary Practice: "Ideal fractures for primary fixation using external coaptation include incomplete diaphyseal tibial fractures in young dogs, sometimes referred to as 'greenstick fractures.'"
3. Surgical repair: for the majority of fractures in adult dogs, all fractures in small and toy breeds, all comminuted and articular fractures, all open fractures, and all fractures above the elbow or stifle.
When external coaptation is appropriate
External coaptation requires that the joints above and below the fracture can both be immobilized. This is only achievable for fractures distal to (below) the elbow and stifle.
Clinical Brief: "External coaptation may be successful in fractures below the elbow or stifle, where the joints above and below the fracture can be fully immobilized."
Fractures that may be managed with splinting:
- Greenstick (incomplete) tibial fractures in young large-breed dogs
- Minimally displaced distal radius fractures in large-breed adult dogs
- Some metacarpal and metatarsal fractures
- Toe fractures
How splints are applied: Today's Veterinary Practice: "The splint should span the joint above and below the fracture, and be padded enough to prevent pressure sores and prevent movement of the limb." After placement, a radiograph confirms alignment.
Complications of splinting: ACVS: "Bandages and splints can cause very serious complications. They can be an effective treatment tool for fracture healing and pain control, but careful monitoring and appropriate follow-up must occur." Pressure sores, bandage slippage, and limb swelling are the most common complications; daily monitoring is essential.
When surgical repair is required
Fractures above the elbow or stifle
Animal Medical Center: "It is easy to temporarily immobilize bones below the elbow and knee, while the upper arm and thigh are more challenging to manage because the shoulder and hip are difficult to splint."
Today's Veterinary Practice: "Temporary stabilization of humeral and femoral fractures should not be attempted. In these cases, hospitalization with confinement to a crate along with analgesic relief is ideal while awaiting definitive fixation."
SustainableVet: "Trying to splint these upper limb fractures often leads to pain, delayed healing, and poor limb function. Immediate referral for surgical repair is recommended."
Comminuted fractures
A comminuted fracture means the bone is broken into multiple pieces. These are mechanically unstable fragments shift with any weight bearing. SustainableVet: "These are very unstable and cannot be held in place by a splint alone. The pieces move easily, and the risk of poor healing is high. In these cases, surgical fixation is needed to realign and stabilize the fragments."
Articular fractures (fractures entering a joint)
Any fracture that enters a joint surface requires anatomical reduction the fracture fragments must be restored to near-perfect anatomical position and rigid fixation to prevent joint surface step-off and subsequent arthritis. Fusion Veterinary Orthopedics: "Any growth plate fracture or joint fracture should be treated as quickly as possible within about 24 to 48 hours after injury."
Open (compound) fractures
Animal Medical Center: "Open fractures often require an initial surgery to clean the wound and bone within 8 hours of the injury." The management sequence is:
- Immediate wound irrigation and debridement under anesthesia
- Temporary stabilization (bandage)
- Systemic antibiotics
- Definitive fracture repair after soft tissue stabilization
Do not attempt definitive fixation of a contaminated open fracture at the initial presentation; this dramatically increases infection risk.
Small and toy breed radius and ulna fractures
Today's Veterinary Practice: "In small and toy breed dogs, 83% of distal radius and ulna fractures addressed with external coaptation alone result in malalignment or nonunion. Therefore, internal fixation is recommended for these fractures in small and toy breed dogs."
SustainableVet: "Toy breeds like Chihuahuas, Pomeranians, and Yorkies are at high risk of nonunion. Their small bones have less blood supply, which slows healing. Even simple fractures may not heal with splints alone."
Spinal fractures and luxations
Spinal fractures with cord involvement are neurosurgical emergencies requiring immediate specialist referral for stabilization and decompression. Clinical Brief: "For complex fractures including spinal, consider consultation with a boarded veterinary surgeon or referral to a specialty practice."
Surgical options for fracture repair
Vets4Pets provides a useful overview: "Two types of surgical fracture repair are normally used in pets. Internal fixation involves placing surgical screws, pins, or metal plates under the skin around the fracture site to stabilize the bone. External fixation involves attaching surgical scaffolding to the bone through small holes in the skin."
Specific implant systems used:
- Intramedullary (IM) pins: inserted down the bone canal; suitable for some long-bone fractures
- Bone plates and screws: the most common implant system; provides rigid fixation; locking plate systems are particularly stable
- External skeletal fixators (ESF): transcutaneous pins connected by an external frame; useful for open fractures, infected fractures, and certain metaphyseal fractures
- Interlocking nails: for femoral and tibial shaft fractures
Timing matters
Animal Medical Center: "You should treat a closed fracture within 2 to 4 days. Timely veterinary fracture repair can prevent complications like bone misalignment or long-term mobility issues."
Fusion Veterinary Orthopedics: "Chronic non-healing fractures are far more difficult to realign, are more costly, and have a lower likelihood of healing."
Delaying evaluation hoping the dog will be "better tomorrow" consistently leads to worse outcomes. Fractures should be radiographed and assessed by a veterinarian on the day they are suspected.
For recovery care after fracture surgery, see orthopedic surgery home care guide. For the referral decision framework across orthopedic conditions, see when to refer orthopedic cases. For the full specialist referral process, see what is veterinary referral surgery.
Frequently asked questions
My dog is walking on the leg a little. Does that mean it is not broken?
No. Weight bearing on a fractured limb is common many dogs do not display obvious non-weight-bearing lameness with incomplete or minimally displaced fractures. Any dog with pain, swelling, or abnormal limb conformation after trauma needs radiographs.
How do I transport a dog with a suspected broken leg to the vet?
Keep the dog calm and restrict movement. Do not splint at home; improper application can worsen the fracture. Carry small dogs; use a rigid surface for large dogs. Call ahead so the clinic can prepare.
Will my dog's fracture heal faster with rest than surgery?
For fractures that require surgery, no. Fusion Veterinary Orthopedics: "Surgery ensures optimal alignment and stabilization for less pain and faster healing." Splinting a fracture that needs surgery delays appropriate treatment and often results in malunion or nonunion.
What is a growth plate fracture and why is it urgent?
Growth plates are bone formation zones at long bone ends in immature dogs. Fractures disrupt blood supply to growth cells. Fusion Veterinary Orthopedics: "Growth plate fractures should be treated within 24 to 48 hours." Delay risks permanent deformity.
Can a dog live with an untreated fracture?
Some dogs survive without repair, particularly with stable pelvic fractures. However, untreated fractures often result in malunion, nonunion, chronic pain, and permanent functional loss. Any decision against surgery should be fully informed.
How often does a splint need to be checked when my dog is wearing one?
ACVS: splints require careful monitoring and appropriate follow-up. Checks every 3 to 5 days are standard initially. Watch for swelling above or below the splint, foul odor, cold or pale toes, or the dog chewing the bandage.
Resources
- SustainableVet. Fracture Management in Dogs: When to Splint or Refer? sustainablevet.org
- Today's Veterinary Practice. Definitive Treatment of Limb Fractures With Splints or Casts. todaysveterinarypractice.com
- ACVS. Fractured Limbs. acvs.org
- Clinical Brief. Fracture Management. cliniciansbrief.com
- Fusion Veterinary Orthopedics. Minimally Invasive or Open Fracture Repair. fusionvetortho.com
Arthroscopy in Veterinary Orthopedics: Indications and Benefits
Discover how arthroscopy helps diagnose and treat joint issues in pets. Learn key indications, benefits, and recovery details
What Is Arthroscopy in Veterinary Orthopedics?
Arthroscopy is a minimally invasive surgical technique used to look inside your pet’s joints. It involves making small incisions to insert a tiny camera (arthroscope) and special instruments. The camera sends real-time images to a screen, allowing the surgeon to see and treat joint problems without fully opening the joint.
Unlike traditional open joint surgery, arthroscopy causes less tissue damage, smaller scars, and quicker healing. It’s especially useful for diagnosing and treating conditions like ligament damage, joint inflammation, or loose cartilage. Because it offers better visibility with less pain and swelling, more vets are using it in modern orthopedic care.
Arthroscopy is commonly performed on the shoulder, elbow, stifle (knee), and hip joints. It allows precise treatment with fewer complications, making it a preferred option for both diagnosis and surgery in many orthopedic cases.
Diagnostic Benefits of Arthroscopy
Arthroscopy gives veterinarians a clear, direct view inside the joint, which is not possible with radiographs or even CT scans. This technique helps detect issues that might be missed with imaging alone, especially soft tissue problems. Because the camera goes directly into the joint, the surgeon can see the cartilage, ligaments, and joint surfaces in real time.
Here are some key diagnostic benefits of arthroscopy:
- Direct visualization of joint interiors helps identify problems right at the source.
- Cartilage damage, such as softening, thinning, or flaking, is seen clearly.
- Ligament injuries, including partial or early tears, are more accurately diagnosed.
- Subtle abnormalities, like joint inflammation or loose fragments, are easier to detect.
- Better than radiographs or CT scans for spotting soft tissue problems like meniscal tears.
- Synovial fluid or tissue samples can be collected during the procedure for lab testing.
Overall, arthroscopy improves the accuracy of diagnosis, allows early treatment planning, and reduces the need for exploratory surgery. It helps vets make more informed decisions and improves outcomes for dogs with joint issues.
Indications: When Is Arthroscopy Used in Veterinary Orthopedics?
Arthroscopy is commonly used in veterinary orthopedics to diagnose and treat joint problems with less pain and faster recovery. It is especially helpful in joints where precision matters and where early treatment improves long-term outcomes.
1. Elbow Joint Conditions
The elbow is one of the most common joints treated with arthroscopy in dogs, especially large breeds. Common conditions include:
- Fragmented Medial Coronoid Process (FMCP): Arthroscopy allows removal of small bone fragments and smoothing of rough surfaces.
- Osteochondritis Dissecans (OCD): Loose cartilage is removed with minimal joint trauma.
- Ununited Anconeal Process (UAP): Surgeons can evaluate the extent of separation and remove or reattach the piece.
- Elbow incongruity: Arthroscopy helps detect joint mismatch early, guiding further surgical decisions.
This joint benefits from arthroscopy because of its complexity and the difficulty of seeing problems on X-rays.
2. Shoulder Joint Conditions
Shoulder arthroscopy is often used to diagnose and treat soft tissue injuries that cause lameness. Key conditions include:
- OCD of the shoulder: Cartilage flaps are easily identified and removed with minimal damage.
- Biceps tendon pathology: Allows inspection and treatment of tendon inflammation or rupture.
- Medial shoulder instability: Helps confirm ligament stretching or damage and guide surgical repair.
Because shoulder injuries can be hard to detect with imaging, arthroscopy is a valuable diagnostic and treatment tool in active dogs.
3. Stifle (Knee) Joint Conditions
Arthroscopy is useful in diagnosing and treating stifle joint problems, especially when combined with surgical repair. Common indications:
- Cranial cruciate ligament rupture: Arthroscopy can confirm partial or complete tears and assess secondary damage.
- Meniscal tears: Allows clear visualization and precise removal of torn cartilage.
- OCD of the femoral condyle: Helps detect and treat cartilage defects in the knee joint.
In many cases, arthroscopy is done before or during surgery like TPLO to evaluate joint health and improve surgical outcomes.
4. Other Joints (Selective Use)
Though less common, arthroscopy can be used in other joints when imaging is unclear or precision is needed:
- Hip joint: Occasionally used to examine cartilage damage or joint laxity in young dogs.
- Tarsus (hock): Useful in complex cases with suspected OCD or instability.
- Carpus (wrist): Allows diagnosis of ligament injuries or chronic inflammation in small breeds.
These joints are smaller and harder to access, so arthroscopy is used selectively by experienced surgeons.
Therapeutic Uses of Arthroscopy
Arthroscopy is not only helpful for diagnosing joint problems but also plays an important role in treatment. Because it uses small incisions and specialized instruments, it causes less damage than traditional surgery and speeds up recovery.
Here are key therapeutic uses of arthroscopy in veterinary orthopedics:
- Removal of loose bone or cartilage fragments: Fragments from injuries or conditions like OCD can cause pain and joint damage. Arthroscopy allows precise removal without opening the whole joint.
- Debridement of damaged cartilage: Worn or injured cartilage can be trimmed or smoothed to reduce pain and slow joint degeneration.
- Lavage in septic joints: In infected joints, arthroscopy allows joint flushing (lavage) to remove pus, bacteria, and debris, helping the joint heal faster.
- Treatment of partial ligament tears: Minor tears, such as early cruciate ligament damage, can be cleaned and evaluated to guide future treatment.
- Joint flushing to reduce inflammation: In dogs with chronic joint inflammation or immune-mediated arthritis, flushing out the joint helps decrease swelling and improve comfort.
Arthroscopy offers a way to treat problems directly with minimal trauma, which leads to faster healing, less scarring, and better long-term joint function.
Benefits of Arthroscopy Compared to Traditional Surgery
Arthroscopy has become a preferred choice in veterinary orthopedics because it offers many benefits over traditional open joint surgery. By using small incisions and a camera, it reduces trauma and improves healing outcomes.
Key benefits include:
- Smaller incisions = reduced soft tissue trauma: The small entry points cause less damage to muscles and skin, which helps with faster healing and less scarring.
- Faster post-op recovery time: Dogs often return to gentle activity sooner than with traditional surgery. This can shorten the overall rehab period.
- Lower pain levels for the patient: Less tissue damage means less pain after surgery. Many dogs show improved comfort within a few days.
- Reduced risk of infection: Smaller wounds and shorter procedure times lower the chance of bacteria entering the joint.
- Shorter anesthesia and hospital stay durations: Arthroscopy usually takes less time, which means reduced anesthesia risk and shorter clinic stays.
- Improved precision due to magnified view: The camera gives a clear, enlarged view of the joint, helping the surgeon see tiny structures and treat the exact problem.
Overall, arthroscopy allows better care with fewer risks and a smoother recovery, making it a valuable tool in modern veterinary surgery.
Limitations and Considerations
While arthroscopy offers many benefits, it’s not the right choice for every case. There are certain limitations and factors to consider before choosing this technique for your dog.
Here are key points to keep in mind:
- Not suitable for very small joints or advanced joint disease: In very small dogs or cats, the joint space may be too tight for the instruments. Arthroscopy is also less effective when the joint has severe arthritis or bone deformity.
- Requires advanced training and specialized equipment: Not all veterinary clinics offer arthroscopy. It needs a skilled surgeon with special tools and experience, which may limit availability.
- In rare cases, may need to convert to open surgery: If the problem is too complex or the joint is hard to access, the surgeon may switch to a traditional open approach during the procedure.
- Cost considerations depending on setup and expertise: Arthroscopy can be more expensive than standard surgery due to the high cost of equipment and the advanced training required.
Despite these limitations, arthroscopy remains a valuable option for many joint conditions. Your veterinarian will help you decide if it’s the right choice based on your pet’s size, diagnosis, and overall health.
Prognosis and Expected Outcomes
Arthroscopy has a high success rate when used in the right cases and performed by an experienced surgeon. Most dogs recover well and show noticeable improvement in comfort and mobility.
Here’s what you can expect from arthroscopy:
- High success rate in properly selected cases: When done for the right joint condition—such as early ligament injury, cartilage damage, or OCD—arthroscopy provides excellent results with fewer complications.
- Faster return to function and normal activity: Because the procedure is minimally invasive, dogs often regain mobility sooner than with traditional surgery. Most pets can begin light activity within a few weeks.
- Early intervention improves long-term joint health: Treating joint problems early, before there is severe damage, helps protect the joint. This can delay or prevent long-term issues like chronic pain or joint deformity.
- May reduce progression to osteoarthritis if done early: By removing damaged tissue and flushing the joint early, arthroscopy can slow down the development of arthritis, especially in young or active dogs.
Overall, arthroscopy offers a strong long-term outcome with less pain, quicker healing, and better joint function—especially when performed before the disease becomes advanced. Regular follow-up and proper rehab are key to success.
Final Thoughts
Arthroscopy is a modern, minimally invasive technique that offers both diagnostic and therapeutic benefits in veterinary orthopedics. It allows for precise treatment of joint conditions like OCD, ligament injuries, and cartilage damage with smaller incisions, less pain, and faster recovery compared to traditional surgery.
It’s especially helpful for early-stage joint problems, where quick action can protect the joint and reduce long-term damage. However, not every case is a match for arthroscopy. Factors like joint size, disease severity, and available expertise must be considered.
Early diagnosis plays a major role in successful outcomes. If your dog shows signs of joint pain, lameness, or reduced activity, don’t wait. A timely exam can make all the difference. Always consult a board-certified veterinary surgeon to determine if arthroscopy is the right choice for your dog’s condition and recovery.
FAQs About Arthroscopy in Veterinary Orthopedics
Is arthroscopy painful for dogs or cats?
Arthroscopy is less painful than traditional open joint surgery because it uses small incisions and causes less tissue damage. Most pets experience mild discomfort, which is managed with pain medication. Many animals begin walking comfortably within a few days and show steady improvement as healing progresses.
How long does recovery take after arthroscopy?
Recovery time after arthroscopy is usually shorter than open surgery. Most pets start gentle activity within 2 to 3 weeks. Full recovery takes about 6 to 8 weeks, depending on the joint treated and overall health. A structured rehab plan, including rest and controlled exercise, helps ensure the best outcome.
How much does veterinary arthroscopy cost?
The cost of arthroscopy can range from $2,000 to $4,000 or more, depending on the joint treated, clinic location, surgeon experience, and whether therapeutic procedures are done. Additional fees for diagnostics, anesthesia, and follow-up care may apply. Always ask for a full estimate before scheduling the procedure.
Can small breed dogs undergo arthroscopy?
Yes, small breed dogs can have arthroscopy, especially for shoulder, elbow, or stifle issues. However, very tiny joints may be too small for the instruments. A skilled veterinary surgeon will evaluate your dog’s size and joint structure to decide if arthroscopy is a safe and effective option.
Is arthroscopy better than MRI or CT for joint problems?
Arthroscopy gives a real-time, direct view of the inside of the joint, making it better for diagnosing cartilage, ligament, or meniscus problems. MRI and CT scans are useful for imaging bones and deeper structures, but they can miss soft tissue issues that arthroscopy can clearly reveal and treat at the same time.
Joint Replacement Surgery in Dogs: Success Rates and Expectations
Discover success rates, recovery time, and expectations for joint replacement surgery in dogs. Learn when it’s the right option for your pet
Joint replacement surgery is the most advanced intervention in veterinary orthopaedics.
For dogs with severe, irreversible joint disease that has not responded to medical management, it can transform quality of life in a way no medication or rehabilitation can match.
Quick answer: Total hip replacement in dogs achieves 90 to 95% good-to-excellent outcomes. It is indicated for end-stage hip OA unresponsive to conservative management. Recovery requires 8 to 12 weeks of strict rest. Cost is $4,000 to $7,000 per joint.
Key takeaways
- THR achieves 90 to 95% good-to-excellent function in appropriately selected dogs; most need no further pain medication after recovery
- THR complication rate is 5 to 10%: post-operative luxation is most common, occurring in 3 to 5% of cases
- THR is indicated for end-stage hip dysplasia OA not responding to conservative management; it is a salvage procedure, not first-line
- Total elbow replacement is available at only a few specialist centres and has higher complication rates than THR
- Strict activity restriction for 8 to 12 weeks post-surgery is essential owner compliance is one of the most important factors in outcome
- Cost is $4,000 to $7,000 per joint at specialist centres; bilateral cases require two separate procedures
Total hip replacement (THR)
What it is
Total hip replacement removes the femoral head and acetabulum and replaces both with prosthetic implants a metal femoral stem with a ball, and a metal or polyethylene acetabular cup.
The new joint provides smooth, pain-free movement without the bone-on-bone contact of advanced hip OA.
Canine joint replacement technology and surgeon expertise have advanced greatly over the past 20 years. Only a few relatively small companies worldwide supply the technology for joint replacement surgery, and a relatively low number of surgeons have the expertise to consistently perform the procedure with a high degree of proficiency.
Success rates
The success rate for total hip replacement in dogs is very high between 90% and 98%. Most dogs experience significant pain relief, improved movement, and a better quality of life.
Studies show more than 90 to 95% of dogs have good to excellent function with THR, providing years of pain-free activity that otherwise would not have been possible.
A large registry study reviewed 2,375 THRs in 1,852 dogs over 10 years. The majority of cases were hip dysplasia with osteoarthritis.
Owner-reported outcomes were strongly positive in the vast majority of cases.
Complications
The typical overall complication rate following a THR varies, with a reported overall average complication rate of 5 to 10%. The more commonly reported complications include postoperative luxation, often associated with a fall or excessive activity.
The most frequent complication is hip dislocation, occurring in approximately 3 to 5% of cases. Other potential complications include fracture, nerve injury, or infection.
Most complications are managed without losing the implant. Catastrophic failure requiring implant removal is uncommon in experienced hands.
Candidates for THR
Good candidates:
- Dogs with hip dysplasia and severe OA causing significant pain and reduced quality of life
- Dogs that have failed conservative management (weight management, NSAIDs, rehabilitation)
- Dogs with adequate bone stock to accept the implant
- Dogs whose owners can commit to strict post-operative restriction
Not candidates:
- Dogs with neurological disease affecting the same limb
- Dogs with active infection in or near the joint
- Dogs with severe muscle atrophy at time of surgery
- Dogs with other significant orthopaedic disease in the same limb
Candidates for THA must not have other orthopaedic disease in the limb to be operated, as well as clients willing to perform the postoperative care necessary for a successful outcome.
Implant systems
Two main systems exist: cemented (implant fixed with bone cement) and cementless (press-fit, relying on bone ingrowth for long-term fixation).
Cementless systems are now more widely used and have longer documented longevity in dogs.
In most cases, the replaced hip will last for your pet's lifetime.
Total elbow replacement
Total elbow replacement (TER) is significantly more complex than THR and available at only a small number of specialist centres worldwide.
Total elbow arthroplasty continues to be under development. The system is technically demanding and may be the reason it is not used more widely by veterinary surgeons.
The T.A.T.E. elbow system is the most widely used current system.
Indications include end-stage elbow OA from fragmented medial coronoid process disease or other elbow dysplasia conditions that have exhausted all other options.
Complication rates for total elbow replacement are higher than THR.
It is a salvage procedure reserved for dogs that have failed all other surgical and medical options and where FHO-equivalent (head and neck excision) is not anatomically applicable.
Cost
The cost of a total hip replacement typically ranges from $4,000 to $7,000. Elbow and knee replacements may fall within a similar or slightly higher range due to complexity. Although the upfront cost is high, joint replacement can eliminate the need for ongoing pain medications, frequent vet visits, or repeated surgeries.
Bilateral THR (both hips) nearly doubles the cost. Most surgeons stage bilateral cases 8 to 16 weeks apart rather than performing both simultaneously.
Recovery
Activity restrictions are significant during the initial 8 to 12 weeks of recovery. Your pet should not be allowed to be off leash, run, or jump. Your pet should be strictly confined to a small indoor area with non-slippery floors or in a crate. Most pets are ready to resume regular exercise and activities after 12 weeks of recovery.
Recovery milestones:
- Days 1 to 14: crate rest, leash-only bathroom walks, pain medication
- Weeks 2 to 8: progressive short leash walks, rehabilitation exercises begin
- Weeks 8 to 12: radiographic recheck, gradual activity increase if healing is confirmed
- Month 3 to 6: peak recovery; most dogs reach full or near-full function
Rapid recovery and high performance are expected not just hoped for in current veterinary orthopaedic surgery.
For the full rehabilitation guide covering the post-joint-replacement recovery period, see physical therapy and rehabilitation: how referring vets can support recovery.
For the pain management approach used alongside joint replacement recovery, see orthopedic pain management in pets: multimodal approaches. For the referral decision, see when to refer for orthopedic surgery.
Frequently asked questions
Is my dog a candidate for total hip replacement?
The key criteria are: end-stage hip OA with significant pain and failure of conservative management.
Additionally: no neurological disease or orthopaedic disease in the same limb, adequate bone stock, and an owner able to comply with strict activity restriction.
A board-certified orthopaedic surgeon will assess suitability at a specialist consultation.
How long does a dog live after hip replacement?
The implant is designed to last the dog's lifetime. Most dogs require no further pain medication after recovery and return to near-normal activity.
The procedure does not shorten lifespan and typically significantly improves quality of remaining life.
What happens if the hip dislocates after surgery?
Post-operative luxation occurs in approximately 3 to 5% of cases, usually associated with excessive activity or a fall.
It is managed by manual reduction under anesthesia, followed by a period of restricted activity. In some cases, revision surgery is needed.
This is why strict activity restriction in the first 8 weeks is critical.
Is hip replacement better than FHO (femoral head ostectomy)?
For medium and large breeds, THR generally produces superior outcomes compared to FHO better gait, less muscle atrophy, and more reliable function.
FHO is a reasonable salvage option for small and toy breeds where functional outcomes are more reliable, or when the cost of THR is prohibitive.
Can both hips be replaced at the same time?
Rarely. Most surgeons stage bilateral THR 8 to 16 weeks apart to allow recovery of one limb before stressing the other.
Operating both simultaneously significantly increases anesthetic time and complication risk, and leaves the dog with no sound limb during recovery.
Resources
- AVES. Total Hip Replacement: A Complete Information Guide. austinvets.com
- TVMF. Outcomes for Total Joint Replacement in Dogs and Cats. tvmf.org
- PMC. Outcomes and Complications Reported from a Multiuser Canine Hip Replacement Registry over a 10-Year Period. ncbi.nlm.nih.gov
- DVM360. Total Joint Replacement of the Elbow and Hip. dvm360.com
- Animal Orthopaedic Clinic. Total Joint Replacement. animalorthoclinic.com
Physical Therapy & Rehabilitation: How Referring Vets Can Support Recovery
Learn how referring vets can support pet recovery with timely rehab, better communication, and tailored treatment plans
Rehabilitation after orthopedic surgery is not optional it is a core component of recovery.
Dogs that receive structured rehabilitation after procedures such as TPLO, FHO, or fracture repair consistently return to function faster and more completely than those managed with rest alone.
Referring veterinarians are in a key position to set expectations, identify appropriate patients for formal rehabilitation referral, and guide owners through what they can do at home between specialist visits.
Quick answer: Rehabilitation after orthopedic surgery combines passive range-of-motion exercises, controlled leash walking, hydrotherapy, therapeutic laser, and progressive strengthening. Formal rehabilitation with a certified canine rehabilitation practitioner produces measurably better outcomes than rest alone.
Key takeaways
- Rehabilitation significantly improves post-surgical outcomes: dogs receiving post-TPLO rehab return to limb use faster than controls managed with rest alone
- Hydrotherapy is one of the most impactful modalities: water buoyancy reduces weight-bearing stress by up to 90% while building muscle
- Passive range-of-motion exercises begin within the first few days post-surgery to prevent joint stiffness and soft tissue adhesion
- Therapeutic laser can be initiated immediately after surgery to reduce inflammation and support tissue healing
- Rehabilitation referral should be considered for any orthopedic surgical patient, particularly large-breed dogs, bilateral cases, and slow-progressors
- Home exercises taught to owners at discharge sit-to-stands, controlled leash walking, passive ROM extend the benefit of formal sessions
Why rehabilitation matters after orthopedic surgery
Surgery creates a stable repair. Rehabilitation determines the quality of function that is achieved on top of that repair.
Physical rehabilitation is a specialty of veterinary medicine that focuses on strength, mobility, and comfort of pets. Rehabilitation therapy utilizes a combination of therapeutic exercises, physical modalities like laser, and hands-on techniques to alleviate pain and improve function.
Without proper rehabilitation, dogs may experience prolonged pain, stiffness, muscle atrophy, or even a decline in overall function. Physical therapy helps bridge the gap between surgery and a full return to normal activities by promoting safe and effective healing.
The referring vet's role after orthopedic surgery is threefold: enforce rest during early healing, manage pain so the dog can engage in rehab exercises, and identify patients who need formal rehabilitation referral.
Rehabilitation modalities
Passive range-of-motion exercises (PROM)
Range-of-motion and stretching exercises are vital activities to help improve joint motion and flexibility in pets after surgery. These exercises help prevent adhesions between soft tissues and bone, improve muscle extensibility, and prevent further injury to joints, ligaments, tendons, and muscles.
PROM begins within the first few days of surgery, before the dog can actively bear weight. Owners are typically taught how to perform these at discharge.
The technique involves gentle flexion and extension of the affected joint through its comfortable range, without forcing the endpoint.
Hydrotherapy (underwater treadmill)
The buoyancy effect reduces weight-bearing stress by up to 90%, allowing pets to exercise with minimal pain while still building muscle mass.
Most veterinarians recommend beginning hydrotherapy only after the surgical site is fully closed and inflammation has subsided, which usually occurs after two to four weeks but this timeline varies depending on the procedure and the individual pet.
The underwater treadmill is the most commonly used hydrotherapy tool in veterinary rehabilitation. Pool swimming is also used but provides less controlled, task-specific exercise.
Therapeutic laser (photobiomodulation)
Laser therapy can be initiated right after surgery to stimulate healing.
Therapeutic laser reduces inflammation, decreases pain, and promotes tissue repair at the cellular level. It is one of the few modalities that can begin immediately post-operatively at the surgical site.
Therapeutic exercises
Physiotherapy exercises for dogs can include things like balancing on three legs, walking on the front legs, sit-and-stand exercises, and side-hopping. These exercises can help with recovery.
Progressive land-based exercises are introduced as healing advances. Sit-to-stand exercises build hindlimb strength without high-impact loading. Balance boards, cavaletti poles, and incline walking are added as the dog progresses.
Heat and cold therapy
Cold therapy (cryotherapy) is used in the first 48 to 72 hours post-surgery to reduce inflammation and swelling. Heat is introduced later to relax muscles and increase local circulation before exercise sessions.
When to refer to a certified rehabilitation practitioner
Formal rehabilitation referral is appropriate for:
- Large and giant breed dogs after major orthopedic procedures (TPLO, THR, fracture repair)
- Any dog that is not bearing weight on the operated limb by the expected timepoint
- Bilateral cases where both limbs are affected
- Dogs with concurrent neurological signs
- Dogs with pre-existing muscle atrophy or poor baseline condition
- Cases where owners cannot reliably perform home exercises
A certified canine rehabilitation practitioner (CCRP) or diplomate of the American College of Veterinary Sports Medicine and Rehabilitation (DACVSMR) provides the most structured and evidence-based program.
Home exercises for owners
Most owners can learn and perform the following between formal sessions:
Short controlled leash walks: beginning as short as 5 minutes, three times daily, increasing progressively per the surgeon's protocol. No pulling, no running.
Passive range-of-motion: gentle flexion and extension of the surgical joint, 10 to 15 repetitions, two to three times daily. Stop at the point of resistance; never force.
Sit-to-stand exercises: asking the dog to sit and stand repeatedly encourages hindlimb muscle activation. Begin with 5 repetitions and increase over weeks.
Cold packing: 10 to 15 minutes of cold application to the surgical site after exercise sessions in the first two weeks reduces local inflammation.
For the pain management that supports engagement in rehabilitation, see orthopedic pain management in pets: multimodal approaches. For the nutrition and supplement context, see nutrition and supplements for orthopedic patients.
Frequently asked questions
How soon after orthopedic surgery can rehabilitation begin?
Passive range-of-motion and short controlled leash walks typically begin within the first few days. Hydrotherapy begins once the incision is closed and inflammation has subsided, usually at two to four weeks.
Therapeutic laser can begin immediately. The surgeon's discharge protocol sets the specific timeline for each patient.
My patient is not bearing weight at two weeks post-TPLO. Should I refer?
Yes. Persistent non-weight-bearing at two weeks warrants assessment either by the performing surgeon or a rehabilitation specialist. Causes include inadequate pain management, implant-related issues, or lack of physiotherapy engagement.
Formal rehabilitation evaluation is appropriate here.
Can owners do rehabilitation at home without formal sessions?
Home exercises taught at discharge are valuable and can significantly improve outcomes. However, formal sessions with a certified practitioner provide progression, monitoring, and modalities (laser, underwater treadmill) that owners cannot replicate.
Where resources allow, a combination is ideal.
What does a typical post-TPLO rehabilitation program look like?
Week 1 to 2: PROM, cold therapy, very short leash walks. Week 3 to 4: progressive leash walk duration, sit-to-stand exercises, hydrotherapy begins.
Week 5 to 8: increased land exercises, balance work, progressive incline walking. Month 3 to 4: gradual return to normal activity. Specific protocols vary by surgeon and practitioner.
Is rehabilitation covered by pet insurance?
Some comprehensive pet insurance plans cover rehabilitation therapy following surgery. Coverage varies significantly by policy and provider. Owners should check their policy before assuming coverage.
Resources
- AESC Parker. Physical Rehabilitation to Improve Surgical Recovery. aescparker.com
- DVM360. Physical Rehabilitation: Improving the Outcome in Dogs with Orthopedic Problems. dvm360.com
- AKC. Canine Rehabilitation Therapy: What to Know. akc.org
- PetMD. Dog Physical Therapy: Everything a Pet Parent Should Know. petmd.com
- VetGarofallo. Swimming and Physical Therapy After Surgery in Pets. vetgarofallo.com

