

What Post-Operative Care Mistakes Increase TPLO Infection Risk?
Learn which post-operative care mistakes increase TPLO infection risk, including wound handling errors, activity issues, and missed early warning signs.

This article is for informational purposes only and is not a substitute for professional veterinary advice. Every case is unique, so always consult your veterinarian for guidance specific to your pet.
This content is intended for veterinary professionals for educational purposes. It does not replace clinical judgment or tailored advice. Always rely on your training, expertise, and the specific context of your patients.
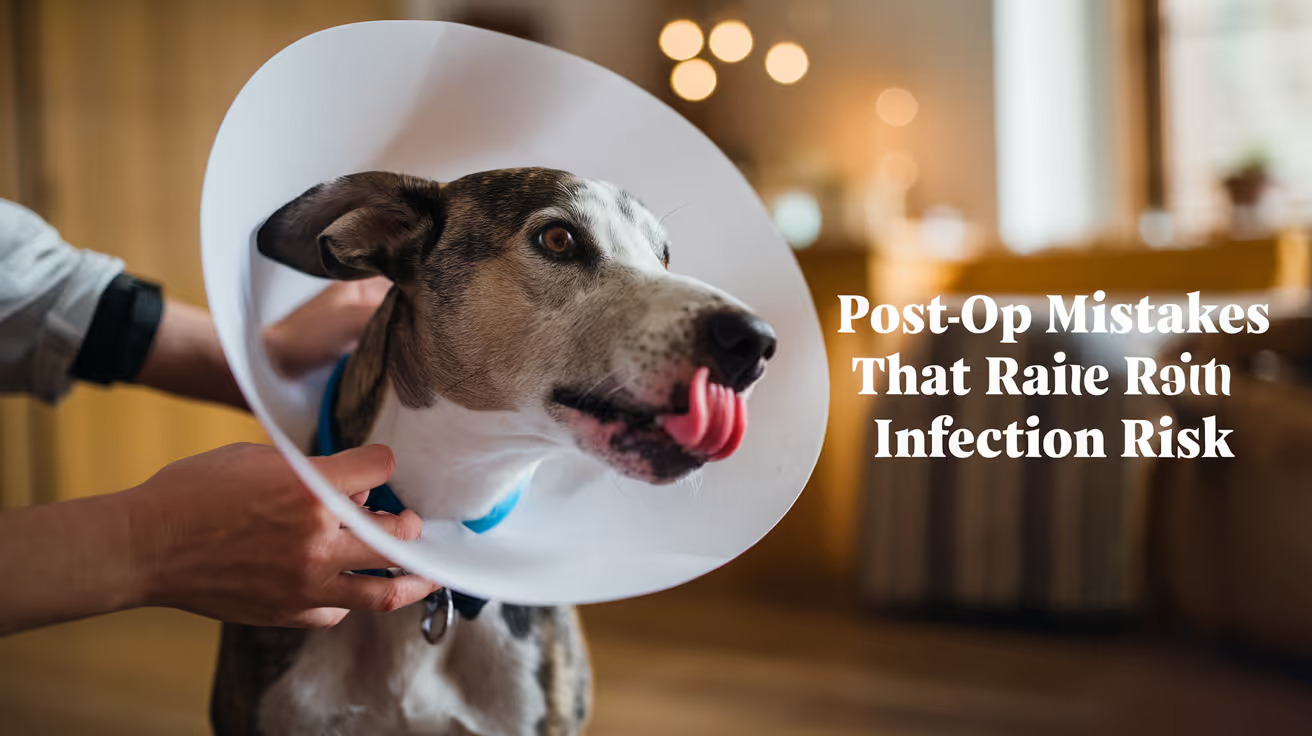
Most TPLO surgical site infections that develop in the post-operative period are not random events -- they are linked to specific, identifiable owner care failures.
Understanding these mistakes in concrete terms gives owners the information needed to actively prevent infection rather than simply hoping it does not occur.
Quick answer: Post-operative mistakes increasing TPLO infection risk: e-collar failure allowing licking; exposing the incision to water before healing; unclean recovery environment; unauthorized activity; applying unapproved substances; and failing to identify and report early infection signs.
Key takeaways
- E-collar failure is the leading owner-controlled infection risk: a single licking episode introduces oral bacteria directly into the healing incision
- Premature water exposure is the second most common mistake: bathing, rain, wet grass, and swimming before healing introduce bacteria through vulnerable tissue planes
- An unclean recovery environment increases wound contamination: dirty bedding, contaminated flooring, and other animals with wound access significantly raise infection risk
- Unauthorized activity stresses the wound mechanically: running, jumping, and rough play create wound tension, micro-tears, and fluid accumulation that promote infection
- Applying unapproved substances to the incision damages healing tissue and disrupts epithelialization, increasing rather than reducing infection risk
- Failing to identify and report early infection signs converts a manageable early infection into a deep implant infection requiring plate removal
Mistake 1: E-collar failure
Why it is the highest-risk mistake
The dog's oral cavity contains the same bacteria that cause TPLO infections -- primarily S. pseudintermedius, the most common dog skin and mucosal commensal.
When a dog licks the incision, it directly deposits these bacteria into a wound that has microscopic gaps in the epithelium during the healing process.
Maplewood Veterinary confirms: repeated licking introduces moisture and bacteria to healing tissue; even small amounts of irritation may create complications after TPLO surgery.
Incision infections: bacteria from saliva may affect healing tissues; premature suture damage may also occur.
SustainableVet.org confirms: excessive licking, poor hygiene, and delayed wound healing significantly raise infection risks. Dogs licking their incision introduce bacteria, while unclean bedding and surroundings expose wounds to environmental contaminants.
What this mistake looks like
- The e-collar is removed during meals and not replaced promptly
- The e-collar is left off at night because the dog seems distressed by it
- An alternative (inflatable donut, surgical suit) is used that does not adequately cover the incision
- The owner leaves the dog unsupervised briefly without replacing the e-collar first
The correct approach
The e-collar must be on at all times except during supervised eating and drinking. Immediately after eating or drinking, replace the collar. No unsupervised time without the collar.
If the dog is truly intolerant of a standard e-collar, discuss alternatives with your vet -- but the alternative must provide equivalent coverage of the incision site.
Mistake 2: Premature water exposure
Why it matters
Water softens the incision edges, reduces the barrier function of healing epithelium, and allows bacteria to track into the wound along the moisture path.
This applies to baths, rain, wet grass, puddles, and swimming.
SustainableVet.org confirms: water exposure can introduce bacteria into the incision, causing infection and inflammation; moisture can soften skin and slow the natural healing process.
What this mistake looks like
- Bathing the dog before the 10 to 14 day minimum
- Walking the dog in rain or wet conditions without protection over the incision
- Taking the dog near water (swimming pool, lake, pond) before the incision is confirmed healed
- Failing to dry the incision promptly if it becomes wet from dew or a puddle during bathroom walks
The correct approach
No baths for a minimum of 10 to 14 days, until the vet confirms the incision is fully healed. Time outdoor bathroom trips to avoid rain and wet conditions.
If the incision gets wet, pat it dry immediately with a clean cloth -- do not rub.
Keep swimming and hydrotherapy appointments for after incision confirmation at the 10 to 14 day recheck.
Mistake 3: Dirty recovery environment
Why it matters
The dog's immediate environment is a significant source of bacterial contamination during the healing period.
The incision is a fresh wound with microscopic gaps; any bacteria that land on it have a portal of entry.
SustainableVet.org confirms: dogs in dirty bedding or contaminated environments are exposed to bacterial load at the wound site throughout recovery.
What this mistake looks like
- Bedding not changed or washed for the first 2 weeks
- Other pets (dogs, cats) allowed to lick the incision or lie in the same sleeping area
- The dog allowed to lie on outdoor soil, grass, or dirty floors without protection
- Dog parks, pet stores, and other high-bacterial-load environments visited before healing is complete
The correct approach
Wash bedding every 3 to 4 days during recovery with hot water. Keep other pets away from the recovering dog's sleeping area.
Restrict outdoor time to leash walks on clean surfaces (paved areas preferable to grass in the first week). Avoid all communal animal environments for the full recovery period.
Mistake 4: Unauthorized activity
Why it matters
Physical stress on the incision from running, jumping, or rough play generates tension across the wound edges.
This tension disrupts early healing at the microscopic level, creates micro-tears in the forming epithelium, and promotes fluid accumulation beneath the wound. Each of these creates infection risk.
SustainableVet.org confirms: excessive activity leads to wound stress and increases contamination risk from outdoor dirt; strict activity restriction is essential in preventing implant failure, infections, and delayed healing.
SustainableVet.org (complications guide) confirms: dogs must have limited movement for the first few weeks, avoiding running, jumping, or sudden movements that can strain the surgical site.
What this mistake looks like
- The dog gets loose and runs in the yard, even briefly
- The dog jumps on and off furniture before the restriction period ends
- Leash walks are extended beyond the prescribed duration because the dog seems fine
- The dog plays excitedly with household members or other pets
The correct approach
Crate rest or strict confinement for bathroom leash walks only during weeks 1 to 2. Progressive, vet-directed activity increase from week 2 onward.
No unsupervised access to any space where the dog can run or jump.
Mistake 5: Applying unapproved substances to the wound
Why it matters
Hydrogen peroxide, povidone-iodine (undiluted), rubbing alcohol, and many topical antiseptics that owners reach for damage healing epithelial cells and fibroblasts. Damaged healing cells cannot close the wound efficiently, leaving it vulnerable longer.
SustainableVet.org confirms: no ointments unless specifically approved by your vet. Applying creams or disinfectants can interfere with healing unless specifically recommended.
The correct approach
Clean the wound only as directed by your vet. In most cases this means gentle patting with a clean dry cloth if needed and nothing else.
Never apply human antiseptics to a dog's healing surgical wound without explicit veterinary instruction.
Mistake 6: Missing or delaying early infection signs
Why it matters
The window between early, easily treatable SSI and established deep implant infection with biofilm is narrow -- days to weeks.
Missing early signs and failing to report them to the vet allows the infection to progress to the stage where plate removal is required.
SustainableVet.org confirms: owners play a crucial role in the post-operative phase; early recognition of infection signs allows timely treatment and prevents progression to deep infection.
What this mistake looks like
- Not inspecting the incision daily
- Dismissing early redness or discharge as normal healing
- Waiting a week to see if things improve rather than calling the vet when signs appear
- Not attending the 10 to 14 day recheck appointment
The correct approach
Inspect the incision daily at the same time. Know what normal healing looks like.
Contact the vet within 24 hours if you see spreading redness, cloudy or malodorous discharge, or pain that is worsening rather than improving.
For the infection prevention guide, see how can TPLO infections be prevented post-operatively?. For the earliest infection signs guide, see what are the earliest signs of TPLO infection?.
For the bathing guide, see when can I bathe my dog after TPLO surgery?. For the e-collar compliance guide, see how to keep a dog calm after TPLO surgery.
Frequently asked questions
My dog licked the wound once before I could stop it. What should I do?
Check the incision immediately. If it looks undisturbed (no redness, discharge, or change in appearance), monitor twice daily for the next 5 to 7 days for any developing signs of infection.
A single brief lick does not guarantee infection, but the risk is real. Contact your vet if any changes appear.
The dog is fighting the e-collar constantly. Is there an alternative?
Yes -- inflatable donuts, surgical recovery suits, and soft collar alternatives exist. The critical requirement is that the incision is physically inaccessible to the dog's mouth. Discuss alternatives with your vet.
Whatever is used must provide equivalent protection -- partial protection is not sufficient.
What if the dog got wet in the rain during a bathroom walk?
Pat the incision dry promptly with a clean dry cloth. Do not rub. Check for any moisture inside the wound area.
Monitor the incision closely over the next 48 to 72 hours for any change in redness, swelling, or discharge. A brief rain exposure is less concerning than sustained soaking.
Can I clean the wound with dilute chlorhexidine at home?
Only if your vet has specifically instructed you to do so.
Routine wound cleaning at home is not recommended. Keep the wound clean and dry without active cleaning unless there is discharge and your vet has directed you to do so.
My dog seems totally fine. Do I still need to follow all the restrictions?
Yes. Dogs feel better long before the incision is healed and the osteotomy is consolidated. A dog that appears comfortable and energetic at day 10 does not have a healed wound.
Restrictions exist because the healing tissues are vulnerable regardless of how the dog appears clinically.
Resources
- Maplewood Veterinary. Stop Dogs From Licking TPLO Incisions Safely. maplewood.vet
- SustainableVet. TPLO Incision Infection: Symptoms and Prevention. sustainablevet.org
- SustainableVet. How Can TPLO Infections Be Prevented Post-Operatively? sustainablevet.org
- VCA Animal Hospitals. Tibial Plateau Leveling Osteotomy (TPLO) in Dogs. vcahospitals.com

Get a Free Poster
Enhance your workspace with a high-quality radiographs reference poster, designed for veterinary professionals. This free physical poster will be shipped directly to you—just fill out the form to request your copy.



Taking Great TPLO Radiographs
Click Below to Watch Live Video Demos


We'll send you a Free Wall Poster with all the steps
Step #1
Getting Ready
Ensuring a clean surgical field starts with proper skin preparation. This video demonstrates the best practices for:
- Shaving the patient – Achieving a close, even shave while minimizing skin irritation
- The Dirty Scrub – The initial skin prep step to remove surface debris and reduce bacterial load before the sterile scrub.
Following these techniques helps reduce infection risk and improve surgical outcomes. Watch the video to see how it’s done effectively!


Step #2
Reduce Your Risks
Many surgeons are shocked to find out that their patients are not protected from biofilms and resistant bacteria when they use saline and post-op antibiotics.
That’s Where Simini Comes In.
Why leave these risks and unmanaged? Just apply Simini Protect Lavage for one minute. Biofilms and resistant bacteria can be removed, and you can reduce two significant sources of infection.
Step #3
Take the Course
Preventing surgical infections is critical for patient safety and successful outcomes. This course covers:
- Aseptic techniques – Best practices to maintain a sterile field.
- Skin prep & draping – Proper methods to minimize contamination.
- Antibiotic stewardship – When and how to use perioperative antibiotics effectively.
Stay up to date with the latest evidence-based protocols. Click the link to start learning and earn CE credits!

Things to know
Infected Dog Wound Healing Stages Explained Clearly
Learn the 4 infected dog wound healing stages, signs of infection, and when to call the vet. Simple, clear, and vet-approved guide
A wound infection does not simply resolve on its own. It follows a biological progression that takes longer than normal healing, requires intervention at specific points, and can stall or regress if care lapses.
Understanding the stages gives you a framework. Instead of checking a wound and not knowing what you are seeing, you know exactly what should be happening and whether it is.
Quick answer: Infected dog wounds go through four healing stages: inflammation, debridement, repair, and maturation. In infected wounds, every stage takes longer than in clean wounds. Inflammation is exaggerated and prolonged. Debridement requires the body to clear bacteria alongside dead tissue. Repair is slower and more fragile. Maturation can take weeks to months. Monitoring what you see at each stage tells you whether healing is progressing or whether veterinary re-evaluation is needed.
Key takeaways
- Infected wounds follow the same four stages as clean wounds: Inflammation, debridement, repair, and maturation. Infection extends the time spent in each stage.
- Pus production is part of stage two: It signals the body is fighting bacteria, but it also means bacteria are still present and actively infecting tissue.
- The repair stage produces granulation tissue: Pink, slightly bumpy tissue in the wound bed is a positive sign. Dark, grey, or black tissue is not.
- Maturation takes far longer in infected wounds: Scars from infected wounds may take months to fully mature, and tensile strength builds slowly.
- The trend matters at every stage: A wound should progress forward through stages, not stall or regress.
- Licking or chewing resets the clock: Every episode of licking reintroduces bacteria and disrupts fragile healing tissue.
How infection changes the healing process
A clean wound heals through the four stages efficiently. The immune response is proportionate to the bacterial load, tissues heal in a predictable sequence, and the wound closes within days to two weeks.
An infected wound is different in every stage. The bacterial load is higher, the immune response is more intense and sustained, tissue damage extends beyond the original injury, and the body must work simultaneously to fight infection and rebuild tissue.
These two processes, fighting infection and repairing tissue, partially compete with each other. The inflammatory resources needed to kill bacteria are the same resources that would otherwise support tissue repair. This is why infected wounds heal more slowly, more painfully, and with a higher risk of complications at every stage.
Stage 1: Inflammation
Normal duration in clean wounds: 1 to 3 daysTypical duration in infected wounds: 5 to 10 days or longer
Inflammation is the body's immediate response to injury. Blood vessels dilate, fluid rushes into the area, and white blood cells flood the wound to attack bacteria and begin clearing debris.
What you see in an infected wound during this stage:
- Significant redness that may spread beyond the wound margin
- Marked swelling, possibly firm or hot to the touch
- Pain when the area is examined
- Yellow, cream, or green discharge if bacterial levels are high
- Possible fever or behavioral changes in your dog
In a clean wound, this stage resolves within a few days as the bacterial load is brought under control. In an infected wound, inflammation persists and intensifies as the immune system battles a bacterial population that keeps growing.
The key monitoring signal in this stage: is redness and swelling reducing from day to day, or is it expanding?
If the redness is spreading and the swelling is growing, the infection is not being controlled. This requires veterinary attention.
For a clear guide on how to tell a healing wound from an infected one during this early stage, that comparison guide walks through every sign in detail.
Stage 2: Debridement
Normal duration in clean wounds: 2 to 5 daysTypical duration in infected wounds: 5 to 14 days, sometimes longer
Debridement is the body's cleanup phase. Specialized cells called macrophages move into the wound and begin digesting dead tissue, debris, and bacteria.
What you see in an infected wound during debridement:
- Pus: the yellowish, cream, or green discharge is composed of dead white blood cells, bacterial remains, and damaged tissue
- Possible scab formation over areas where the infection is contained
- The wound may look worse before it looks better as the cleanup progresses
- Gradually reducing discharge if treatment is working
Pus during this phase means the immune system is doing its job. But it also means bacteria are still present. This is the stage where antibiotics are most critical, providing systemic backup to what the immune response is attempting to do.
Some wounds, particularly deep bite wounds and abscesses, require surgical debridement, where the veterinarian physically removes dead and infected tissue that the body's own cleanup mechanisms cannot reach efficiently.
For understanding treatment at each healing stage, including what cleaning protocols and antibiotic approaches are appropriate during debridement, that guide covers every treatment decision clearly.
Stage 3: Repair (Proliferation)
Normal duration in clean wounds: 3 to 14 daysTypical duration in infected wounds: 2 to 6 weeks or longer
Once the bacterial load is under control, the body begins rebuilding. New blood vessels form in the wound bed, and fibroblasts start producing collagen to rebuild the structural tissue.
What you see in an infected wound during repair:
- Pink, slightly raised, bumpy tissue filling the wound bed: this is granulation tissue, and it is a positive sign
- Wound edges beginning to contract inward
- Reducing discharge, becoming clearer and then absent
- The wound appearing to shrink day by day as tissue fills in
Warning signs that the repair stage is not progressing:
- Tissue in the wound bed that is dark red, purple, grey, or black: this suggests necrotic (dead) tissue and requires veterinary debridement
- Excessive exuberant granulation tissue (also called proud flesh): pinkish tissue that overgrows above the wound edge can impede epithelialization
- Discharge returning or worsening after improving: infection may have re-established, often from licking or inadequate antibiotic coverage
For understanding how infection affects the healing timeline in wounds that cannot be closed primarily and must heal from the inside out, the secondary intention healing guide covers this specific trajectory in detail.
Stage 4: Maturation
Normal duration in clean wounds: Weeks to monthsTypical duration in infected wounds: Months, occasionally longer
Maturation is the final stage, where newly formed tissue strengthens and reorganizes into proper scar tissue.
What you see during maturation:
- The wound is fully closed
- New scar tissue initially appears pink, raised, and firm
- Over weeks to months, the scar flattens, fades, and becomes less noticeable
- Tensile strength builds gradually: new scar tissue starts at approximately 20% of normal skin strength and reaches a maximum of about 80% at maturity
In infected wounds, maturation takes longer because the tissue quality laid down during the repair phase is initially lower. The inflammatory damage also means more collagen remodeling is required.
For understanding how to prevent wound breakdown during healing in the maturation phase, particularly for sutured surgical wounds where tension on the scar is a risk, that guide covers dehiscence prevention at every stage.
Stage-by-stage monitoring guide
What slows or stops healing at any stage
Several factors can arrest progression through the healing stages or cause regression to an earlier stage.
Licking and chewing: Every episode introduces oral bacteria, disrupts forming tissue, and can physically remove sutures or scabs. Activity that stalls the repair stage, particularly in cats, can set healing back by days. Consistent E-collar use is essential throughout all stages.
Inadequate antibiotic coverage: Stopping antibiotics early because the wound looks better often means bacteria are reduced but not eliminated. They can re-establish rapidly and restart the inflammatory cycle.
Underlying health conditions: Diabetes, immune suppression, poor nutrition, and obesity all slow wound healing significantly. Dogs with these conditions may require extended treatment timelines.
Wound moisture and contamination: Wounds that are too wet (from licking or bandages that trap moisture) or that are exposed to dirt and debris are harder to progress through the repair stage.
Frequently asked questions
How long does an infected dog wound take to heal?
Timeline varies significantly by wound depth, infection severity, and individual dog health. Minor surface infections can resolve in two to three weeks. Deep infections, bite wounds, or abscesses may take four to eight weeks or longer. Maturation of the scar continues for months beyond wound closure.
What does healthy granulation tissue look like?
Healthy granulation tissue is pink or bright red, slightly bumpy, and moist. It fills the wound bed and bleeds easily when touched, which is normal as it is highly vascular. If the tissue in the wound bed is dark red, brownish, grey, or black, it is likely necrotic and should be assessed by a veterinarian.
My dog's wound looks worse after a few days of treatment. Is that normal?
During the debridement stage, wounds can temporarily look worse before they look better as the body expels bacterial material and dead tissue. If discharge is reducing and systemic signs like fever or lethargy are improving, this is expected. If the wound is clearly expanding or your dog is worsening overall, contact your vet.
Can an infected wound heal without closing (secondary intention)?
Yes. Many infected wounds heal by secondary intention, where the wound fills in from the bottom up rather than closing edge to edge. This is slower and produces more scar tissue but is appropriate when the wound is too infected to suture or too large to close primarily.
Why does my dog keep licking the wound even with a cone?
Cones must extend at least two inches past the nose to be effective. This is the most common fitting error. If your dog is still accessing the wound, measure the cone extension and adjust. A recovery suit is an alternative for trunk wounds. Consistent use is essential, including overnight when you cannot supervise.
Knowing the healing stages of an infected dog wound transforms monitoring from guesswork into something systematic. At each stage, you know what you should be seeing, what the warning signs look like, and when to escalate care. Most infected wounds, given the right treatment and consistent licking prevention, progress steadily through each stage to full closure.
Resources
The following sources were used as reference and background for this article:
- Vetericyn. The Healing Stages of a Dog Wound. vetericyn.com
- Kainer Veterinary. Understanding the Stages of Your Dog's Infected Wound Healing. kainervet.com
- Zarasyl. Understanding a Dog's Wound Healing Phases. zarasyl.com
- PetPlace. Infected Dog Wound: Signs, Healing Stages, and Home Care Tips. petplace.com
- Animal Hospital at Babcock Ranch. Dog Wound Care and Healing Stages. animalhospitalbabcockranch.com
How to Treat MRSP in Dogs: Best Practices
Learn how to treat MRSP in dogs with vet-approved methods. Explore symptoms, best treatments, & prevention tips to manage antibiotic-resistant infections
Your vet has confirmed MRSP. Now what?
MRSP treatment follows a clear sequence: confirm the diagnosis, use the right topical care, add systemic antibiotics only when the sensitivity result shows what will work, run the full course, and address the underlying condition driving recurrence.
Here's what each step means in practice.
Quick answer: MRSP treatment starts with chlorhexidine 2 to 4% shampoo 2 to 3 times weekly as the foundation for all skin infections. Systemic antibiotics are added for deep or widespread infection, selected based strictly on culture and sensitivity results. Never use amoxicillin, cephalexin, or any beta-lactam for MRSP: they are always ineffective. Treatment continues 1 to 2 weeks past visible healing. The underlying cause (allergy, endocrine disease) must be managed or infection returns.
Key takeaways
- Topical chlorhexidine shampoo is the foundation of MRSP skin treatment, effective regardless of antibiotic resistance.
- Never use amoxicillin, cephalexin, or any beta-lactam for confirmed MRSP: all are ineffective.
- Systemic antibiotics must be based on the sensitivity result, not guessed.
- Treatment continues past visible healing: stopping when skin "looks better" is the most common cause of relapse.
- E-collar on at all times during treatment: licking introduces bacteria and delays healing.
- Underlying disease management is not optional: allergy control is as important as antibiotic selection.
Step 1: Confirm the diagnosis with culture
Before any antibiotic is chosen, you need to know which bacteria is present and what it's susceptible to.
Culture and sensitivity testing (C&S) identifies:
- Whether S. pseudintermedius is causing the infection
- Whether it's methicillin-resistant (MRSP) or susceptible
- Which specific antibiotics retain activity against this isolate
If your dog has already been prescribed antibiotics and the infection isn't improving: ask your vet about culture and sensitivity testing before the antibiotic is changed. Switching without culture data is guesswork that may apply the wrong drug a second time.
For how MRSP is diagnosed in detail, see MRSP diagnosis explained.
Step 2: Start topical antiseptic therapy
Topical antiseptic treatment is the foundation of MRSP management for skin infections. It works regardless of antibiotic resistance profile because chlorhexidine disrupts bacterial membranes mechanically: bacteria cannot develop resistance to it the way they develop resistance to antibiotics.
Published research (PMC4204846) found that 65.4% of MRSP pyoderma cases resolved with topical therapy alone, without systemic antibiotics.
Chlorhexidine shampoo 2 to 4%: the main tool
How to use it correctly:
- Wet the coat thoroughly
- Apply shampoo to all affected areas (and surrounding skin)
- Massage in gently
- Leave on for 5 to 10 minutes: this contact time is when the antibacterial effect happens
- Rinse completely
- Dry the coat thoroughly, especially in skin folds
Frequency during active infection: 2 to 3 times weekly
Frequency for maintenance (recurrence-prone dogs): once weekly
Other topical agents your vet may prescribe
- Chlorhexidine spray or mousse: applied between baths for spot treatment
- Mupirocin ointment: applied twice daily to small, defined lesions with a gloved fingertip
- Fusidic acid gel: applied twice daily to localized lesions if sensitivity is confirmed
- Antiseptic wipes: useful for skin folds, paw pads, and ear pinnae between baths
For treatment of wound-type MRSP infections specifically, see topical treatment for MRSP wound infections.
Step 3: Systemic antibiotics, only when needed, based on the sensitivity result
Systemic antibiotics are added when:
- Topical therapy alone isn't controlling the infection after 3 weeks
- The infection is deep (painful nodules, draining tracts)
- The infection covers a large body surface area
- There are systemic signs (fever, lethargy)
When systemic treatment is prescribed, the selection must be based on the sensitivity result. No exceptions.
What can't be used for MRSP
Amoxicillin, Clavamox (amoxicillin-clavulanate), cephalexin, cefpodoxime (Simplicef), and all other penicillins and cephalosporins are ineffective against MRSP. If your dog has been on any of these and not improving, it's not because the dose was wrong: these drugs have no effect on MRSP by definition.
What may be active (subject to sensitivity result)
Critical owner rule: Do not stop antibiotics when the skin looks better. Treatment must continue for the full prescribed course, typically 1 to 2 weeks past complete visible resolution.
Step 4: Supporting treatment at home
E-collar: non-negotiable
Keep the E-collar on at all times unless your vet specifically says otherwise. This means:
- During sleep
- During meals (use a shallow bowl if needed)
- Outdoors on leash
A dog that licks its MRSP lesions even once is introducing bacteria from its mouth directly to the infection site, undoing the effect of topical treatment and spreading bacteria to new skin areas.
Wound cleaning (if prescribed)
If your vet has prescribed wound cleaning at home:
- Use only the prescribed solution (typically dilute chlorhexidine or sterile saline)
- Use clean gauze or cotton, not bare hands
- Follow the prescribed frequency exactly
- Do not use hydrogen peroxide or alcohol (they damage healing tissue)
Preventing licking of other body parts
MRSP from an infection on one body area can spread to other areas through the dog's own licking. If the infected area is accessible to the dog's mouth, an E-collar or recovery bodysuit is essential.
For home hygiene to prevent household spread, see home hygiene during MRSP infection.
Step 5: Manage the underlying cause
This is where most recurrent MRSP cases fail. Without managing the condition that created the infection opportunity, the bacteria establishes again after every treatment cycle.
Common underlying causes and their management:
For how underlying disease drives recurrence, see why MRSP keeps coming back.
Treatment duration and what to expect
Superficial MRSP (skin surface infections)
- Topical therapy alone: 3 to 4 weeks minimum
- If systemic antibiotics added: 2 to 3 weeks minimum, with recheck
- Continue treatment 1 week past complete clinical resolution
- Do not stop based on appearance alone
Deep MRSP (nodules, draining tracts)
- Systemic antibiotics required
- Duration: 8 to 12 weeks minimum
- Continue 2 to 3 weeks past complete lesion resolution
- Culture recheck 2 weeks after finishing antibiotics recommended
What improvement looks like:
- Pustules resolving without new ones forming
- Existing collarettes healing without discharge underneath
- Dog scratching the area less
- Odor reducing
- Redness fading
Signs treatment isn't working (call your vet):
- No improvement after 10 to 14 days of topical treatment
- New lesions appearing while on antibiotics
- Existing lesions worsening
- Dog developing systemic signs (fever, lethargy)
For MRSP treatment guidelines in the veterinary clinical context, see veterinary MRSP treatment guidelines.
Preventing recurrence after treatment
Three rules for preventing the next episode:
Keep topical maintenance going: once weekly chlorhexidine shampoo keeps bacterial counts on the skin lower than active-infection-level bathing frequency, and reduces the chance of the next skin disruption converting to infection.
Monitor closely for early signs: new pustules, epidermal collarettes, odor changes, or increased scratching in a specific area. Early-stage superficial infections respond to topical-only treatment more often than established infections.
Culture before the next antibiotic course: resistance profiles can change between infections. Last year's sensitivity result does not necessarily apply to this year's isolate.
Frequently asked questions
My dog has been on cephalexin for 2 weeks and isn't getting better. What now?
If MRSP is confirmed, cephalexin will have zero effect: no amount of additional time or higher dosing will make it work. Contact your vet to discuss culture and sensitivity testing (if not already done) and selection of an active antibiotic based on the result. Don't continue ineffective treatment while infection progresses.
How long before I see improvement once we're on the right antibiotic?
For superficial MRSP with topical therapy, visible improvement typically begins within 10 to 14 days. With systemic antibiotics targeting MRSP, some improvement is usually visible within 7 to 10 days. If there's no improvement at all within 2 weeks on treatment that the sensitivity result confirmed should work, contact your vet for reassessment.
Can MRSP be cured, or will my dog always have it?
Most dogs achieve clinical resolution of each MRSP episode with appropriate treatment. Complete elimination from the dog's body is harder: S. pseudintermedius is normal skin flora, and the resistant strain may persist as a carrier after infection resolves. Long-term success depends on managing the underlying skin condition that creates the infection opportunity.
Treating MRSP isn't mysterious. It requires the right topical care applied consistently, antibiotics selected by sensitivity rather than by appearance or habit, a full treatment course run past visible healing, and the underlying condition that keeps creating the opportunity actually managed. Each of those components matters, and missing any one of them produces the infection cycle most owners are trying to escape.
Resources
- Clinician's Brief. Staphylococcus pseudintermedius: An Overview. cliniciansbrief.com
- PMC. A case of MRSP pyoderma in a Labrador retriever dog. pmc.ncbi.nlm.nih.gov
- ISCAID. Antimicrobial use guidelines for canine pyoderma. PMC, 2025. pmc.ncbi.nlm.nih.gov
- DVM360. Managing MRSA, MRSP, and MRSS dermatologic infections in pets. dvm360.com
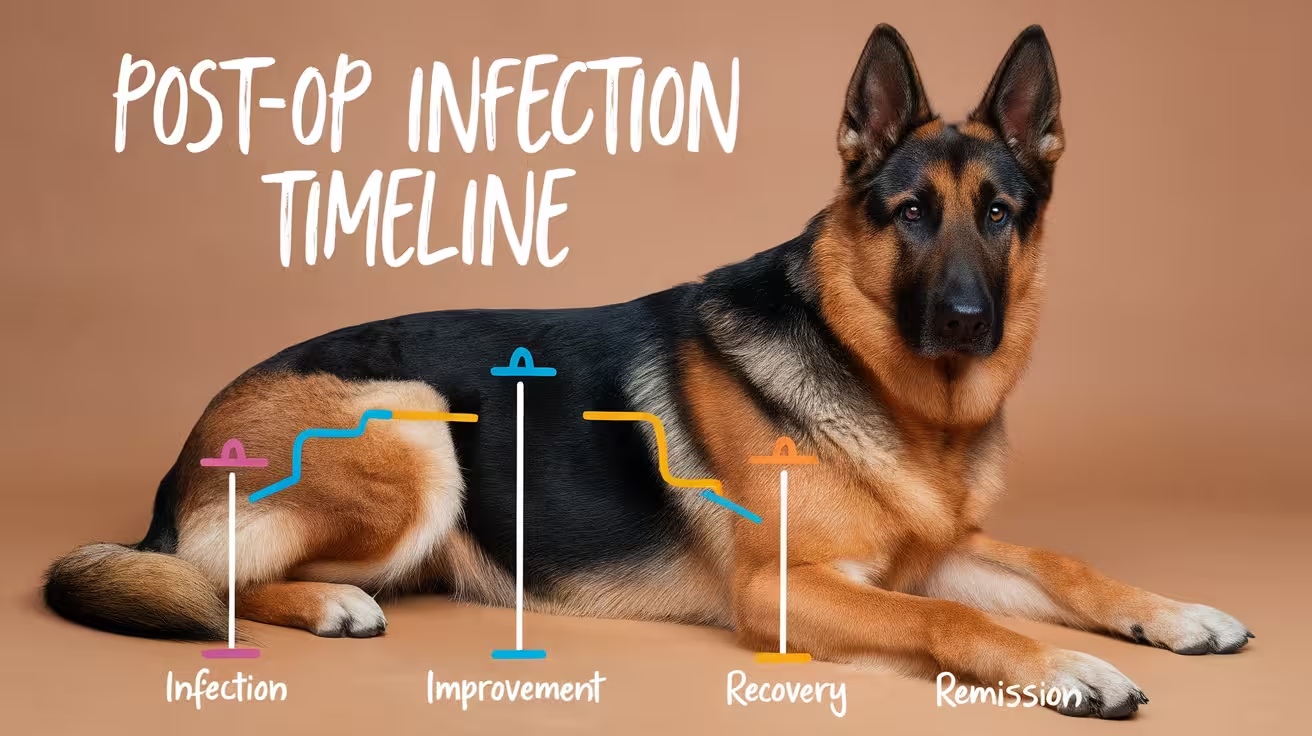
Post-Op Infection Timeline: When to Expect Warning Signs
Know when post-op infections start, key symptoms by day, and what warning signs to watch for after surgery
Post-surgical infections don't follow a rigid schedule. Some appear in the first week. Others stay hidden for 3 to 4 weeks while the surface appears healed. A few, particularly those involving implants, can emerge months after a surgery that appeared completely successful.
Knowing the typical windows helps you monitor with the right intensity at the right times.
Quick answer: Most surface and superficial post-surgical infections become visible within 3 to 14 days after surgery. Deep tissue infections often appear between weeks 2 and 6. Implant-associated infections can develop up to 1 year after surgery (CDC classification). The most important monitoring window is days 5 to 14, when most superficial SSIs become apparent. Daily photograph tracking of the incision is the most practical home monitoring tool.
Key takeaways
- Days 1 to 2 post-surgery: normal inflammation (redness, swelling, warmth) expected and not infection.
- Days 3 to 14: highest-risk window for superficial SSI detection: monitor daily.
- Most SSIs appear within 3 to 7 days per published post-op infection data.
- Failure to improve by day 7 to 10 warrants same-day vet contact.
- Deep and implant-associated infections can appear weeks to months after apparent surface healing.
- CDC defines implant SSIs as occurring within 1 year of implant placement.
The four stages of normal wound healing
Understanding normal healing gives you the baseline that infection interrupts.
Infection interrupts this sequence. Instead of swelling reducing on day 3, it increases. Instead of discharge clearing, it turns yellow or green. Instead of the dog becoming more comfortable, they become more focused on the wound.
Timeline by post-operative period
Days 1 to 2: normal inflammation window
Immediately after surgery, the inflammatory phase begins. Normal signs at this stage:
- Mild redness along the wound edge (not spreading beyond it)
- Slight puffiness around the incision
- Possible clear or slightly blood-tinged fluid (not dripping)
- Mild bruising, especially after orthopedic or deep tissue surgery
- Reduced energy, appetite, and activity from anesthesia and pain medication
What isn't normal even in hours 1 to 48:
- Yellow or green discharge at any point
- Wound already opening or sutures separating
- Active bleeding not stopped within 5 minutes
- Foul odor from the wound site
Days 3 to 7: first infection window
This is the highest-risk window for superficial SSI. Published data confirms most post-surgical infections become apparent in days 3 to 7.
The inflammatory phase should be resolving. Redness should be fading, not intensifying. Swelling should be decreasing, not increasing.
Infection signals in this window:
- Redness spreading outward beyond the wound margin
- Discharge changing from clear to cloudy, yellow, or green
- Swelling increasing after day 3 (not decreasing)
- New or intensifying odor
- Dog more focused on the wound than on day 2
The single most useful behavior: take a clear photograph of the wound every day, same lighting, same angle. Changes that feel dramatic in memory often look subtle in photos. Changes that look mild in memory often look significant. The photo sequence is your most objective monitoring record.
For what these signs mean clinically, see distinguishing healing from infection in detail.
Days 7 to 14: continued high-risk window
Infections that missed the earlier window often become apparent here. This is also when licking, activity violations (jumping), or seroma formation may disrupt a wound that was initially progressing well.
Signs warranting same-day vet contact in this window:
- No improvement in redness, swelling, or discharge despite treatment
- Wound edges separating (dehiscence)
- Dog developing systemic signs (fever, lethargy, reduced appetite) at this stage
- Return of swelling after it appeared to be resolving
Signs warranting emergency assessment:
- Wound significantly opened with visible underlying tissue
- Rapid redness spreading across a large skin area
- Dog unable to bear weight on the operated limb (orthopedic cases) combined with wound changes
Days 14 to 30: late superficial and early deep infection window
Surface wounds may look healed (epithelialized), but deep tissue healing continues for weeks. Deep infections in this window often present with:
- Return of swelling, heat, or pain at an apparently healed wound site
- New drainage beginning from a previously dry wound
- Persistent or worsening lameness (orthopedic cases) despite apparent surface healing
- Systemic signs (lethargy, fever) appearing weeks after surface healing
The CDC's 30-day SSI classification applies here: infections presenting up to 30 days post-surgery (without implants) are classified as SSIs. This window is relevant for owner monitoring, not just clinical classification.
For distinguishing normal vs. concerning signs at this stage, see normal vs. concerning signs after surgery.
Weeks 4 to 12: deep tissue and implant window
For dogs who received orthopedic implants (bone plates, screws, joint prostheses), the infection window extends well beyond 30 days. Implant-associated infections often:
- Develop after the surface wound appears completely healed
- Present as gradual return of lameness, localized swelling over the implant site, and low-grade pain
- Are caused by biofilm establishing on the implant surface during a period of subclinical colonization
- Require imaging to assess implant stability and bone integration
This delayed presentation confuses owners and sometimes veterinarians. A dog who had a smooth early recovery is not immune to late-onset implant infection.
For the specific MRSP post-surgical infection pattern, see MRSP post-surgical infection timeline.
Beyond 3 months: implant-associated late infection
The CDC classifies SSIs as occurring within 1 year of surgery when an implant is present. Infections presenting at 3, 6, or even 9 months after orthopedic surgery are within the recognized SSI window.
Late implant infection sources include:
- Hematogenous seeding (bacteria from a distant infection (dental disease, skin infection), or UTI, reaching the implant through the bloodstream
- Persister cells from a subclinical early infection resuming growth as immune suppression temporarily reduces
- New bacterial exposure from a wound or skin infection near the implant site
For the causes underlying these late infections, see causes of post-surgical infections.
Signs by infection depth and timing
Owner monitoring schedule
For any surgery involving skin incision:
Days 1 to 14 (highest vigilance):
- Check the wound twice daily
- Photograph once daily (same time, same lighting)
- Note: redness direction (fading or spreading?), discharge color, any odor, wound edge position
Days 14 to 30:
- Daily wound check, photograph every 2 days
- Monitor dog's behavior, appetite, and activity level
- In orthopedic cases: observe weight-bearing and gait
Days 30 to 90 (implant cases):
- Check weekly at minimum
- Note any swelling developing over the implant site
- Report any return of lameness to vet promptly, even if the surface wound looks healed
Beyond 3 months (implant cases):
- Inform vet of any new swelling, lameness, or drainage near the surgical site regardless of how long ago surgery was
- Any dental procedure, skin infection, or UTI in a dog with a joint implant or bone plate should prompt a vet discussion about implant risk
For the full guide on what post-op symptoms are normal versus concerning, see post-op symptoms guide.
Frequently asked questions
My dog had surgery 5 days ago and the wound looks fine. Can I relax my monitoring?
Days 5 to 14 is actually the highest-risk window for superficial SSIs, not the time to reduce vigilance. A wound that looks good on day 5 can develop infection signs by day 8 or 9. Continue daily monitoring through day 14 at minimum, and continue twice-weekly checks through day 30.
My dog had a TPLO 6 weeks ago and now there's a firm lump forming near the plate. Is that normal?
No. A new firm swelling developing over a bone plate 6 weeks after apparent healing is a significant concern for implant-associated infection. Contact your vet the same day: don't wait to see if it resolves. Expect radiographs and possibly wound culture.
What does infection look like on day 10 if the dog has been on antibiotics since surgery?
Prophylactic antibiotics used perioperatively do not prevent all infections: they reduce risk during the highest-vulnerability window. If infection has established despite peri-operative antibiotics, the wound changes (increased discharge, redness, odor) are the same as without antibiotics. The antibiotic may have delayed onset but does not mask the signs once infection is established.
Post-surgical infections follow recognizable patterns. Superficial ones announce themselves in the first two weeks. Deep ones appear later, often after the surface looks healed. Implant infections can emerge months later. Monitoring at the right intensity for each window: highest vigilance in the first two weeks, sustained attention through the first month, and periodic checking indefinitely for implant cases. That's how you catch these at the stage where they're most manageable.
Resources
- CDC. Surgical Site Infection (SSI) Event Protocol. cdc.gov
- Johns Hopkins Medicine. Surgical Site Infections. hopkinsmedicine.org
- PetMD. Dog Surgery Aftercare: What's Normal & When To Call the Vet. petmd.com
How to Treat an Infected Wound in Dog
Learn how to treat an infected wound in your dog with safe home care tips, signs to watch for, and when to see the vet
Treating an infected wound in a dog is not simply a matter of cleaning and waiting. The right approach depends on how deep the infection is, what type of wound you are dealing with, and whether the infection has moved beyond the wound surface.
Getting this wrong, using the wrong products, delaying veterinary care, or allowing your dog to lick the wound, can turn a manageable infection into a serious one quickly.
Quick answer: Minor surface infections can be managed at home with saline cleaning, vet-approved antiseptic, and strict licking prevention. Deeper infections, wounds showing pus or spreading redness, bites and puncture wounds, and any wound accompanied by systemic signs like fever or lethargy require veterinary treatment. Antibiotics are usually required to fully clear a bacterial wound infection.
Key takeaways
- Not all infected wounds can or should be treated at home: Depth of infection, wound type, and systemic signs determine whether veterinary care is needed.
- Never use hydrogen peroxide, alcohol, or undiluted iodine on wounds: These damage healthy tissue and delay healing. Saline is the safest cleaning solution.
- Antibiotics are often necessary: Most bacterial wound infections cannot be cleared with antiseptics alone, particularly if infection has penetrated beyond the surface.
- Licking prevention is non-negotiable: A dog that can reach the wound will re-contaminate it constantly. An E-collar or recovery suit must be used.
- Bite wounds and puncture wounds need same-day veterinary care: They push bacteria deep under the skin, where surface cleaning cannot reach.
- Treatment antibiotic courses must be completed in full: Stopping antibiotics early risks incomplete treatment and antimicrobial resistance development.
Step 1: Assess the wound before doing anything
Before touching the wound, decide whether it is something you can manage at home or whether your dog needs to see a vet first.
Wounds that require same-day veterinary care:
- Bite wounds from another animal, regardless of size
- Puncture wounds, which can carry bacteria deep under intact-looking skin
- Wounds with significant pus or thick colored discharge
- Wounds with spreading redness or red streaks
- Wounds that are deep, gaping, or over a joint
- Wounds accompanied by systemic signs: lethargy, fever, reduced appetite, shivering
- Wounds that have been present for more than 24 hours without being assessed
Wounds that may be appropriate for initial home care:
- Minor surface scrapes with mild early redness and no discharge
- Wounds you have already had veterinarily assessed and been instructed to care for at home
For a clear picture of how to identify infection before treating, the comparison of healthy versus infected wound appearance will help you assess correctly before proceeding.
Step 2: Gather the right supplies
Using the wrong products on a wound is one of the most common owner mistakes and can significantly delay healing.
Safe to use:
- Sterile saline solution or saline wound wash
- Vet-approved wound antiseptic (chlorhexidine diluted to 0.05%, or povidone-iodine diluted to 0.1% in saline, following your vet's instructions)
- Clean gauze or non-stick wound pads
- Medical-grade wound ointment as directed by your vet
- Disposable gloves
- Blunt-tipped scissors to trim fur around the wound if needed
Never use on dog wounds:
- Hydrogen peroxide: destroys healthy cells and significantly delays healing
- Isopropyl or rubbing alcohol: causes pain and tissue damage
- Undiluted iodine or Betadine at full concentration: too strong, causes chemical burns
- Human antiseptic creams (e.g. Neosporin): some contain ingredients harmful to dogs, particularly if licked
Step 3: Clean the wound
Wash your hands thoroughly and put on disposable gloves before touching the wound.
Cleaning steps:
- Gently restrain your dog with a calm voice and, if needed, a second person to help
- If fur is obscuring the wound, carefully trim it back with blunt scissors, removing any hair that has fallen into the wound with gauze
- Irrigate the wound with saline: use a syringe to gently flush the wound surface with saline under mild pressure. This removes debris and surface bacteria more effectively than dabbing
- If your vet has recommended a dilute antiseptic, apply it after saline irrigation as directed
- Pat dry gently with clean gauze
- Do not scrub: scrubbing removes fragile healing tissue and drives bacteria deeper
Clean the wound two to three times daily while active infection is present, or as your vet directs.
Step 4: Prevent licking and chewing
This step is not optional. A dog that can reach the wound will lick it repeatedly, re-contaminating it with oral bacteria and mechanically disrupting healing tissue.
A dog's tongue is abrasive and their saliva contains significant bacterial loads, including pathogens that can worsen wound infections. The idea that dog saliva has antibacterial properties that help wound healing is a myth. Licking worsens infections.
Effective prevention methods:
- Elizabethan collar (E-collar): The most reliable option. Must extend past the dog's nose by at least two inches to be effective. Keep it on at all times, including overnight.
- Recovery suit or surgical body suit: Can be effective for abdominal or trunk wounds. Must fully cover the wound without rubbing.
- Soft recovery collar: More comfortable than rigid cones, tolerated better by some dogs. Confirm it actually prevents access to the wound site.
Whichever method you use, check regularly that the wound has not been accessed. Even determined dogs will find angles if the barrier is insufficient.
Step 5: Apply wound care products as directed
If your veterinarian has prescribed a topical antibiotic or wound treatment, apply it exactly as instructed after cleaning.
Do not apply human antibiotic ointments without veterinary direction. Some ingredients (particularly zinc oxide) are toxic to dogs if ingested, and dogs will lick off almost anything applied to their skin.
Medical-grade honey (Manuka honey) is one of the few over-the-counter products with genuine evidence for antibacterial wound effects in veterinary settings. Some vets recommend it for specific wound types. Do not use raw grocery store honey, which does not have the same properties.
For a full breakdown of safe versus unsafe natural treatment methods, including what the evidence actually supports and which common remedies cause harm, that guide covers every category clearly.
Step 6: Cover the wound if appropriate
Not all wounds need covering. Your vet will guide this.
Wounds that benefit from coverage:
- Wounds in areas that contact dirt or debris (paws, legs)
- Wounds actively discharging where a barrier reduces contamination spread
- Wounds your dog can access even with an E-collar in some positions
Wounds often left open:
- Clean wounds with good drainage
- Wounds that heal better when exposed to air
If covering the wound, use non-adhesive wound pads secured with medical tape. Change the covering and clean the wound underneath daily or as your vet directs. Bandaging a limb or tail incorrectly can cut off circulation, so if in doubt, seek veterinary guidance before bandaging these areas.
When systemic antibiotics are needed
Surface cleaning and antiseptics address bacteria on the wound surface. They cannot reach bacteria that have penetrated into deeper tissue layers, and they cannot address a spreading infection.
Oral antibiotics prescribed by a veterinarian are required when:
- The infection involves discharge, odor, or spreading redness
- The wound is a bite or puncture wound (bacteria are already deep)
- There are systemic signs such as fever or lethargy
- The wound has not improved after 24 to 48 hours of appropriate home care
Antibiotic treatment courses for wound infections:
Surface infections typically require at least three weeks of antibiotics. Deeper infections may need four to eight weeks or longer. Completing the full course is essential. Stopping antibiotics early when the wound looks better does not mean the infection has fully cleared, and incomplete courses contribute to antimicrobial resistance.
For understanding stages of healing to track during treatment, knowing what to expect as the wound responds to treatment helps you monitor accurately.
If your dog is prescribed antibiotics, ask your vet whether a culture and sensitivity test is appropriate, particularly for wounds that are not responding to initial treatment. This identifies the specific bacteria involved and confirms which antibiotic will be effective against it.
Treating infected surgical incisions
Infected surgical incisions, including spay and neuter incisions, require specific care that differs from general wound management.
The primary differences:
- Surgical incisions have sutures or staples that can act as a nidus for bacteria if the infection develops around them
- Incision dehiscence (wound reopening) is a risk with infected surgical sites
- The surgical site may involve deeper tissue layers that need systemic treatment even when the surface looks manageable
For guidance on treating infected surgical incisions, including suture-site infections, dehiscence risk, and when systemic treatment is needed even when the surface looks manageable, consult your veterinarian for a wound-specific protocol.
Where bacterial contamination of a surgical wound is a concern, some specialist veterinary surgeons use intraoperative antiseptic lavage to reduce bacterial load at the time of closure. Simini Protect Lavage is one such option, an antiseptic lavage used at the conclusion of surgery to reduce bacteria, biofilms, and resistant organisms in the wound before it is sutured.
Treatment by wound type
Monitoring during treatment
Once treatment is underway, assess the wound at every cleaning session.
Signs the wound is responding:
- Redness reducing day by day
- Discharge decreasing in volume and becoming clearer
- Odor diminishing
- Your dog less sensitive at the wound site
- Wound edges closing
Signs requiring veterinary re-evaluation:
- No improvement after 48 hours of treatment
- Discharge increasing or becoming more purulent
- Spreading redness or new red streaks
- New swelling or fluctuant (fluid-filled) areas developing
- Your dog's systemic condition worsening
For guidance on treating infected surgical incisions specifically, including suture-site infection, dehiscence risk, and the distinct management steps for post-operative wounds, that guide covers surgical site infection in full.
During every monitoring session, note whether the wound looks better, the same, or worse than the previous check. The trend over 48 to 72 hours is more informative than any single observation. Keep a brief written log with dates if the wound is complex or slow-progressing, so you can accurately describe the trajectory to your veterinarian if a recheck is needed. A photo taken at each cleaning session is also useful for tracking subtle changes in redness, swelling, and discharge volume.
Licking behavior during the monitoring window is one of the most common reasons wound treatment fails. Dogs are persistent and will access wounds the moment supervision lapses.
For context on why preventing licking is essential during treatment and what actually happens when a dog reaches a wound, that guide covers the mechanism and consequences in detail.
Frequently asked questions
Can I treat my dog's infected wound at home without a vet?
Minor surface infections caught very early may respond to home cleaning and licking prevention. However, most infected dog wounds, particularly those with visible pus, spreading redness, odor, or systemic signs, require veterinary care and prescription antibiotics. When in doubt, contact your vet. A short phone call to describe what you are seeing can guide you on whether to come in.
What is the best thing to clean an infected dog wound with?
Sterile saline solution, used to irrigate the wound, is the safest and most appropriate cleaning agent for home wound care. If your vet has recommended a dilute antiseptic, use exactly the dilution specified. Never use hydrogen peroxide, alcohol, or undiluted iodine.
How long does it take for an infected dog wound to heal?
With appropriate treatment, mild surface infections typically improve noticeably within three to five days. Deeper infections take considerably longer, and antibiotic courses for deep wound infections may run four to eight weeks. The wound continues healing after infection clears, with scarring and tissue remodeling taking weeks to months depending on severity.
My dog keeps removing the E-collar. What can I do?
Some dogs tolerate soft recovery collars better than rigid plastic cones. Recovery suits or surgical onesies work well for abdominal wounds. The collar must extend past the dog's nose by at least two inches, which is the most common fitting error. If your dog is genuinely distressed by any barrier, discuss this with your vet, who may have additional recommendations.
Can a dog's infected wound heal without antibiotics?
Very minor surface infections may resolve with wound cleaning and licking prevention alone, particularly if caught extremely early. Most established infections require prescription antibiotics to fully clear. The risk of attempting to manage an infected wound without veterinary assessment is that deeper infection can develop out of sight, and by the time it becomes clearly apparent, it is more difficult and expensive to treat.
Treating an infected wound in a dog requires the right products, the right approach, and a realistic understanding of what home care can and cannot achieve. When in doubt, call your vet. Early professional intervention consistently produces faster, simpler, and less expensive outcomes than delayed care.
Resources
The following sources were used as reference and background for this article:
- PetMD. Dog Wound Care: How to Clean and Treat Dog Wounds at Home. petmd.com
- Bond Vet. Step-By-Step Wound Care for a Dog at Home and When to Call the Vet. bondvet.com
- UrgentVet. Dog Wound Care: How to Care For Open Wounds on Dogs. urgentvet.com
- Mahopac Veterinary Center. Dog Wound Care and Healing Stages. mahopacvet.com
- PetPlace. Infected Dog Wound: Signs, Healing Stages, and Home Care Tips. petplace.com
- PDSA. First Aid for Wounds, Cuts and Grazes. pdsa.org.uk
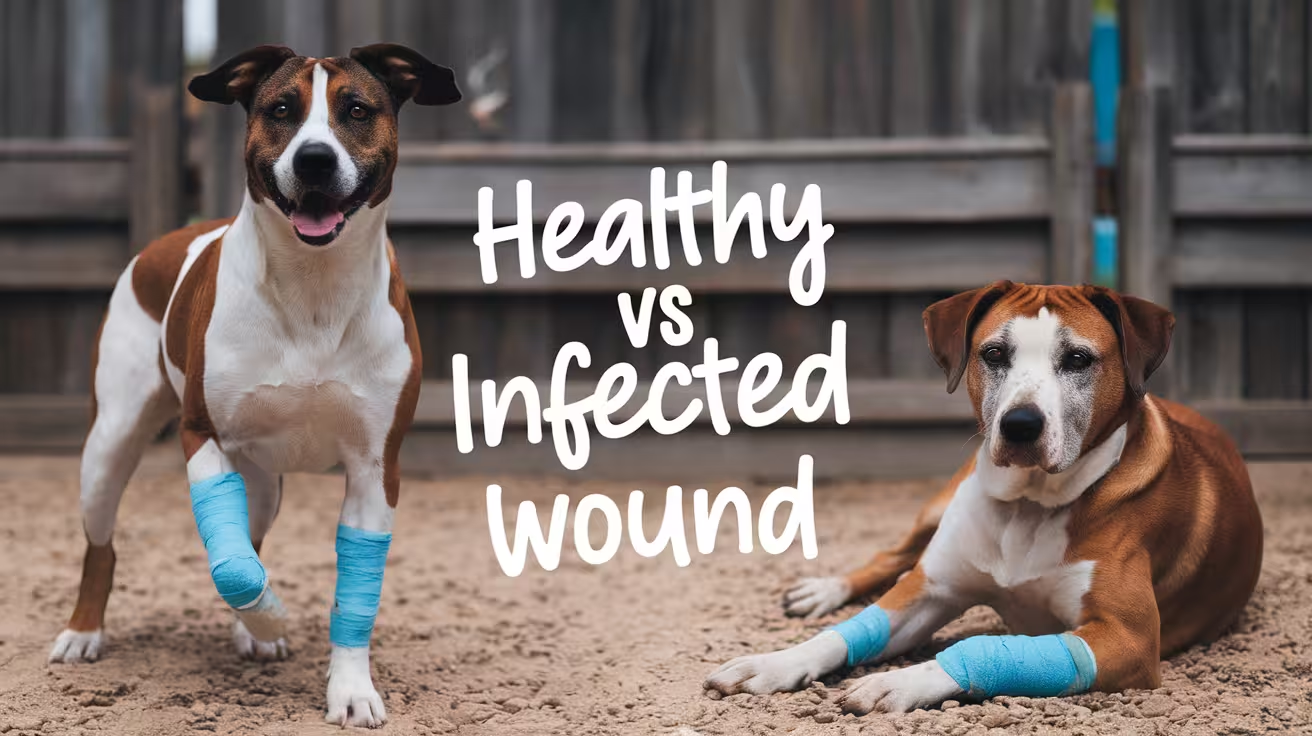
Healthy vs Infected Wound in Dogs
Learn how to spot the difference between healthy and infected wounds in dogs with clear signs, healing stages, and when to see a vet
A wound that looks alarming on day one may be healing perfectly. A wound that looks minor may be quietly becoming infected.
Knowing which is which is one of the most useful skills a dog owner can have. It determines whether you wait, watch, and clean, or call your vet immediately.
Quick answer: A healthy healing wound improves each day. Redness and swelling reduce, discharge changes from clear or faintly pink to nothing, and the edges close progressively. An infected wound gets worse: spreading redness, increasing swelling, yellow or green discharge, foul odor, heat, and often behavioral changes like lethargy or loss of appetite. Any wound trending in the wrong direction needs veterinary attention.
Key takeaways
- Healthy wounds improve daily: The visual trend is always toward less redness, less swelling, and drier edges.
- Mild early inflammation is normal: Some pinkness, slight swelling, and clear or faintly pink fluid in the first 24 to 48 hours are expected.
- Infected wounds worsen: Spreading redness, thickening discharge, and foul odor are not part of normal healing.
- Odor is a reliable early indicator: A healthy wound has no significant smell. Any foul or unusual odor warrants investigation.
- Behavioral changes signal systemic involvement: Lethargy, reduced appetite, and fever mean infection may be spreading beyond the wound.
- The trend matters as much as the snapshot: What the wound looks like today compared to yesterday tells you more than any single observation.
What healthy wound healing looks like
Understanding normal healing makes deviations immediately obvious.
Dog wound healing follows a biological sequence regardless of the type of wound. The timeline and appearance vary by wound size, depth, and location, but the progression is predictable.
Day 1 to 3: Inflammation phase
The body's immediate response to injury is inflammation. This is normal, necessary, and not a sign of infection.
For how to act once infection is confirmed, the guide on how to treat an infected wound walks through every treatment step, including which products to use, when antibiotics are needed, and how to prevent recontamination.
What you should see:
- Mild redness directly around the wound edges
- Slight swelling in the surrounding tissue
- Clear or faintly pink fluid (serum or dilute blood) that may ooze in the first day
- The wound edges touching or close together in a sutured wound
- Your dog showing some sensitivity when the area is touched
What you should not see at this stage:
- Yellow, green, or creamy discharge
- Swelling that is growing rather than stable
- Redness that is spreading away from the wound edges
- Any unpleasant odor
Day 4 to 7: Proliferation phase
By day four, visible inflammation should be clearly reducing. The wound is building new tissue.
What you should see:
- Redness fading, particularly at the outer margins
- Swelling reducing
- The wound becoming drier, with little to no discharge
- In open wounds, a pinkish-red granulation tissue beginning to fill the wound bed
- Edges beginning to pull together
Day 7 to 14 and beyond: Maturation
By the end of the first week, most wounds are visibly closing or fully closed.
What you should see:
- Closed edges in sutured wounds, dry and normal-colored skin
- Scabbing over open wounds that should be left alone
- Reduced sensitivity
- No discharge of any kind
- Normal skin color returning
What an infected wound looks like
Infection interrupts the normal healing sequence. Instead of the wound improving, it stalls or worsens.
The five primary signs of wound infection
1. Spreading redness
Some redness at the wound margin is normal early on. Redness that is expanding away from the wound, forming a widening red halo, or intensifying after day three is a warning sign.
Red streaks radiating outward from the wound may indicate lymphangitis, a sign that infection is tracking along lymphatic vessels. This requires urgent veterinary attention.
2. Discharge color change
Clear or slightly pink fluid in the first 24 hours is normal.
Yellow, green, cream-colored, or thick discharge is pus, a product of white blood cells fighting bacterial infection. Any purulent (pus-containing) discharge is abnormal and indicates active infection. One common driver of discharge worsening is persistent licking, which constantly reintroduces bacteria.
For a full explanation of why dogs lick wounds and whether it helps, understanding this instinct helps you prevent one of the most common reasons a wound becomes or stays infected.
3. Foul or unusual odor
A healthy wound has no significant smell, or at most a faint neutral or slightly metallic odor.
An infected wound often smells distinctly unpleasant, described variously as sour, rotten, or sweet-fetid. This odor comes from bacterial metabolic activity and tissue breakdown. If you can smell the wound from a normal handling distance, infection is likely.
4. Warmth and hardness
Feeling slightly warmer than surrounding tissue in the first 24 to 48 hours is a normal part of the inflammatory response.
Persistent or increasing heat, particularly accompanied by firmness or a fluctuant (fluid-filled) swelling, indicates ongoing infection. Fluctuant swelling suggests an abscess forming beneath the surface.
5. Pain and behavior changes
A dog that was tolerating wound checks may begin reacting more strongly as infection develops.
Systemic signs, including lethargy, reduced appetite, fever, shivering, and reluctance to move, suggest the infection is no longer confined to the wound surface and may be spreading. These signs require same-day veterinary contact.
Side-by-side comparison table
The most important rule: the trend
Any single observation of a wound gives you one data point. What the wound looks like compared to 24 hours earlier tells you far more.
A wound that is redder, more swollen, warmer, or producing more discharge today than it was yesterday is heading in the wrong direction. That is the signal to contact your veterinarian regardless of what the wound looks like in absolute terms.
A wound that is less red, less swollen, drier, and less tender than it was yesterday is healing correctly, even if it still looks concerning to an untrained eye.
Common mistakes that complicate the assessment
Applying hydrogen peroxide, alcohol, or iodine directly to wounds:
These damage healthy tissue and slow healing. They can cause redness and tissue death that looks like infection. Use saline or a vet-approved wound wash only.
For a clear breakdown of natural wound treatment methods to consider, including which home remedies genuinely help and which actively cause harm, that guide separates the evidence from the myths.
Interpreting normal early inflammation as infection:
Day-one redness and swelling alarm many owners. If it is mild, symmetrical, and not accompanied by discharge or odor, it is almost certainly the normal inflammatory response.
Ignoring behavioral signs:
Owners sometimes focus entirely on how the wound looks while missing that the dog is lethargic, not eating, or feverish. Systemic signs matter as much as local signs, particularly in deep wounds and bite wounds where infection can develop rapidly out of sight.
When to contact your veterinarian
Call the same day if:
- Discharge is yellow, green, or pus-like at any point
- The wound has a foul or unusual odor
- Redness is spreading visibly beyond the wound margin
- The wound area feels increasingly hot or hard
- Your dog is showing signs of systemic illness: lethargy, reduced appetite, or fever
Go to an emergency clinic immediately if:
- Gums are pale, white, or bluish
- Your dog is unresponsive or collapsed
- Red streaks are radiating from the wound
- There is severe swelling or your dog is in extreme distress
Frequently asked questions
Is some swelling normal after a dog wound?
Yes. Mild swelling in the first 24 to 48 hours is a normal part of the inflammatory healing response. The key question is whether the swelling is increasing or decreasing. Swelling that is greater on day three than on day one is not normal.
What color should wound discharge be?
Clear or very faintly pink fluid in the first 24 hours can be normal. Any yellow, green, cream, or thick discharge at any point indicates infection and requires veterinary attention.
Can a wound look infected but not be?
Yes. Aggressive cleaning with hydrogen peroxide or alcohol can cause tissue death and redness that mimics infection. Normal early inflammation can also alarm owners unfamiliar with wound healing. This is why observing the trend over 24 to 48 hours, and using appropriate cleaning agents, helps clarify the picture.
How do I check a wound on a dog with thick fur?
Part the fur carefully and use good lighting. A headlamp or phone torch is helpful. Check for odor first, as this often provides the clearest indicator even before you can see the wound clearly. If your dog resists examination or the fur is too thick to assess properly, have your veterinarian check it.
When does a wound definitely need stitches?
Wounds that are deep, gaping, over a joint, actively bleeding after ten minutes of pressure, or caused by a bite should be assessed by a veterinarian. These wounds generally need professional closure rather than home management.
For a detailed look at incision-specific infection signs that apply to sutured surgical wounds, including what distinguishes a surgical site infection from a general wound infection, that guide covers the incision picture in full.
The difference between a healing wound and an infected one is visible if you know what to look for. Check daily, track the trend, use the comparison table above, and trust your instincts. If something feels wrong, a phone call to your vet costs nothing and could prevent a minor infection from becoming a serious one.
Resources
The following sources were used as reference and background for this article:
- PetMD. Dog Wound Care: How to Clean and Treat Dog Wounds at Home. petmd.com
- Bond Vet. Step-By-Step Wound Care for a Dog at Home and When to Call the Vet. bondvet.com
- The Pet Vet. Pet Wound Infection Signs: 7 Critical Symptoms to Watch. thepetvet.com
- PetPlace. Infected Dog Wound: Signs, Healing Stages, and Home Care Tips. petplace.com
- Kainer Veterinary. Understanding the Stages of Your Dog's Infected Wound Healing. kainervet.com
- PDSA. First Aid for Wounds, Cuts and Grazes. pdsa.org.uk
Post-Operative Infection in Dogs: Symptoms and Solutions
Learn about symptoms and solutions for post-operative infections in dogs to ensure a smooth and healthy recovery after surgery
Post-operative infections are among the most common complications after surgery in dogs. The Pet Vet reports they affect approximately 5 to 10% of surgical patients. Most are preventable. When they do develop, the difference between a minor setback and a serious crisis is usually how quickly they are caught.
This guide covers the full picture: symptoms, causes, treatment, and prevention with specific guidance on what owners control versus what the vet team manages.
Quick answer: Symptoms of post-operative infection include redness after day 3, yellow or green discharge, warmth, swelling not improving, foul odor, and worsening pain. Systemic signs including fever need urgent care. Call the vet same-day.
Key takeaways
- 5 to 10% of surgical patients develop a post-operative infection despite appropriate veterinary care
- Early signs appear 3 to 5 days post-surgery: redness increasing, warmth, discharge becoming cloudy or colored
- Licking is the most common preventable cause: saliva deposits bacteria directly into the healing wound
- Surface infections respond to antibiotics and wound care; deep infections may require surgical debridement
- Complete the full antibiotic course: stopping early when the dog looks better is a leading cause of recurrent infection
- Call the vet same-day for yellow or green discharge, foul odor, increasing swelling, or systemic signs
Why post-operative infections occur
Surgery creates a wound. Even under ideal sterile conditions, some bacteria are always present on the skin surface and in the air. The immune system normally clears this low-level contamination. Infection develops when bacterial load overwhelms the local defenses either because too many bacteria entered, the wound environment favors bacterial growth, or the dog's immune response is impaired.
The Pet Vet: "When bacteria enter the surgical site, they can multiply rapidly, causing inflammation, pain, and potentially life-threatening complications if left untreated."
Key pathways:
- Self-trauma: licking introduces oral bacteria directly into the wound
- Moisture: wet wound environments dramatically accelerate bacterial multiplication
- Contaminated environment: contact with dirty bedding, soil, or other animals
- Systemic factors: hypoalbuminemia, obesity, immunosuppression, allergic skin disease, and poor perfusion all reduce wound healing capacity
Symptoms of post-operative infection
Normal healing baseline (to compare against)
- Days 1 to 2: mild redness and swelling at incision edges; possibly a small amount of clear or slightly pink serum discharge
- Days 3 to 5: redness fading, swelling reducing, discharge stopped
- Days 5 to 10: wound edges fully closed; no discharge; no odor
Early signs of infection (days 3 to 7)
Redness that is increasing rather than decreasing after day 3 is the primary early signal. Other early indicators:
- Warmth at the incision site not present or not improving in the first 3 days
- Swelling increasing after the expected peak at days 1 to 2
- Discharge changing from clear to cloudy or milky
Preventing post-op infections article (SustainableVet): "Early detection of redness, swelling, or discharge allows prompt treatment before biofilms develop extensively."
Established infection signs
- Yellow or green pus discharge from the incision at any time
- Foul or rotten odor
- Swelling clearly larger than the post-surgical baseline
- Pain increasing rather than decreasing (dog guarding more, licking more intensely despite E-collar)
- Wound edges beginning to separate (early dehiscence from infection undermining the suture line)
Systemic signs (serious requires urgent care)
The Pet Vet: "Post-surgical infection in dogs is a serious complication. If left untreated, they can cause inflammation, pain, and potentially life-threatening complications."
- Fever (rectal temperature above 103.5 degrees Fahrenheit)
- Lethargy that is worsening rather than improving after day 2 to 3
- Complete loss of appetite at day 2 or beyond
- Increased thirst and urination (can indicate systemic inflammation)
- Pale gums
These systemic signs indicate the infection may have entered the bloodstream. This requires same-day or emergency veterinary contact.
Solutions: treatment options
Local wound care and antibiotics
For superficial infections involving the skin and immediate subcutaneous tissue: the vet will prescribe systemic antibiotics (ideally culture-guided) and may direct gentle wound cleaning with dilute chlorhexidine.
SustainableVet: "Keep the incision site clean and dry at all times. Do not apply creams, ointments, or disinfectants to the incision unless specifically instructed."
The Pet Vet identifies five medication categories used in managing post-surgical infections:
- Antibiotics: to eliminate the causative bacteria; always culture-guided when available
- NSAIDs: to reduce inflammation at the infection site
- Pain medications: to maintain comfort, eating, and rest during treatment
- Topical treatments: directed antiseptic cleaning as instructed
- Immune support: nutritional support to maintain immune function during recovery
Surgical debridement
For infections extending into deeper tissue layers, forming abscesses, or failing to respond to antibiotic therapy: surgical debridement removes infected and necrotic tissue to allow healing from a clean base. Drain placement may accompany debridement.
Hospitalization
When systemic signs are present: intravenous antibiotics, intravenous fluid support, and monitoring for septic deterioration. This is intensive care territory, not outpatient management.
Prevention: the owner's role
The Pet Vet: "Proper incision care at home is perhaps the most important preventive measure."
E-collar compliance: wear at all times, including during sleep and eating, until suture removal and vet clearance. One sustained licking episode can establish infection.
Keep the wound dry: no bathing, swimming, or exposure to rain until the vet confirms healing is complete.
Complete the full antibiotic course: even if the dog appears completely well.
Daily wound checks: twice daily at minimum. Photograph the incision to track subtle changes. Call the vet for any change trending toward the infection signs described above.
Clean bedding: wash bedding before the dog returns home; prevent contact with soil, water, or other animals during recovery.
SustainableVet: "Owners and veterinary staff must work together to maintain clean wounds and detect early signs of infection."
For the full wound care protocol, see how to care for a dog wound after surgery. For the broader complications guide, see signs of complications after soft tissue surgery. For detail on infection signs and causes specifically, see dog incision infection signs causes and treatment.
Frequently asked questions
How quickly do post-operative infections develop after dog surgery?
Early signs typically appear between days 3 and 7. Bacterial growth in wound tissue takes 24 to 72 hours after contamination; visible signs follow as the immune response escalates.
Can I treat my dog's post-operative infection at home without seeing a vet?
No. Antibiotics require a prescription. Incorrect wound care can worsen the infection. Any suspected infection needs veterinary assessment to determine the depth, causative organism, and appropriate treatment.
My dog's wound was fine at day 5 but now at day 9 it looks infected. Is that possible?
Yes. Late infections can occur even after apparent initial healing. Causes include retained suture material acting as a nidus for bacteria, failure of a deep tissue layer, or a delayed E-collar compliance breach. Call the vet for assessment.
How do I know if the infection is superficial or deep?
Superficial infections affect only the skin and immediately below it; the incision edges remain intact. Deep infections cause more significant swelling, significant pain, systemic signs, and often wound breakdown. The vet uses palpation, culture, and imaging to assess depth.
What happens if a post-operative infection goes untreated?
Untreated infection progresses from localized to deep tissue, then to systemic (bloodstream). Sepsis, a life-threatening systemic inflammatory response to infection, can develop rapidly. In orthopedic cases, infection can spread to bone (osteomyelitis) or implants, requiring hardware removal.
Will a post-operative infection affect my dog's long-term recovery?
Superficial infections caught early typically resolve without lasting impact. Deep infections, osteomyelitis, or sepsis can delay recovery significantly. Early detection and prompt treatment matter for prognosis, not just comfort.
Resources
- The Pet Vet. Post-Surgical Infection in Dogs: 5 Vital Medications for Recovery. thepetvet.com
- SustainableVet. Post-Operative Infection in Dogs: Symptoms and Solutions. sustainablevet.org
- SustainableVet. Preventing Post-Operative Infections in Dogs. sustainablevet.org
- Veterinary Practice News. Exploring Surgical Site Infections. veterinarypracticenews.com
Infected Dog Wound Healing Stages Explained Clearly
Learn the 4 infected dog wound healing stages, signs of infection, and when to call the vet. Simple, clear, and vet-approved guide
A wound infection does not simply resolve on its own. It follows a biological progression that takes longer than normal healing, requires intervention at specific points, and can stall or regress if care lapses.
Understanding the stages gives you a framework. Instead of checking a wound and not knowing what you are seeing, you know exactly what should be happening and whether it is.
Quick answer: Infected dog wounds go through four healing stages: inflammation, debridement, repair, and maturation. In infected wounds, every stage takes longer than in clean wounds. Inflammation is exaggerated and prolonged. Debridement requires the body to clear bacteria alongside dead tissue. Repair is slower and more fragile. Maturation can take weeks to months. Monitoring what you see at each stage tells you whether healing is progressing or whether veterinary re-evaluation is needed.
Key takeaways
- Infected wounds follow the same four stages as clean wounds: Inflammation, debridement, repair, and maturation. Infection extends the time spent in each stage.
- Pus production is part of stage two: It signals the body is fighting bacteria, but it also means bacteria are still present and actively infecting tissue.
- The repair stage produces granulation tissue: Pink, slightly bumpy tissue in the wound bed is a positive sign. Dark, grey, or black tissue is not.
- Maturation takes far longer in infected wounds: Scars from infected wounds may take months to fully mature, and tensile strength builds slowly.
- The trend matters at every stage: A wound should progress forward through stages, not stall or regress.
- Licking or chewing resets the clock: Every episode of licking reintroduces bacteria and disrupts fragile healing tissue.
How infection changes the healing process
A clean wound heals through the four stages efficiently. The immune response is proportionate to the bacterial load, tissues heal in a predictable sequence, and the wound closes within days to two weeks.
An infected wound is different in every stage. The bacterial load is higher, the immune response is more intense and sustained, tissue damage extends beyond the original injury, and the body must work simultaneously to fight infection and rebuild tissue.
These two processes, fighting infection and repairing tissue, partially compete with each other. The inflammatory resources needed to kill bacteria are the same resources that would otherwise support tissue repair. This is why infected wounds heal more slowly, more painfully, and with a higher risk of complications at every stage.
Stage 1: Inflammation
Normal duration in clean wounds: 1 to 3 daysTypical duration in infected wounds: 5 to 10 days or longer
Inflammation is the body's immediate response to injury. Blood vessels dilate, fluid rushes into the area, and white blood cells flood the wound to attack bacteria and begin clearing debris.
What you see in an infected wound during this stage:
- Significant redness that may spread beyond the wound margin
- Marked swelling, possibly firm or hot to the touch
- Pain when the area is examined
- Yellow, cream, or green discharge if bacterial levels are high
- Possible fever or behavioral changes in your dog
In a clean wound, this stage resolves within a few days as the bacterial load is brought under control. In an infected wound, inflammation persists and intensifies as the immune system battles a bacterial population that keeps growing.
The key monitoring signal in this stage: is redness and swelling reducing from day to day, or is it expanding?
If the redness is spreading and the swelling is growing, the infection is not being controlled. This requires veterinary attention.
For a clear guide on how to tell a healing wound from an infected one during this early stage, that comparison guide walks through every sign in detail.
Stage 2: Debridement
Normal duration in clean wounds: 2 to 5 daysTypical duration in infected wounds: 5 to 14 days, sometimes longer
Debridement is the body's cleanup phase. Specialized cells called macrophages move into the wound and begin digesting dead tissue, debris, and bacteria.
What you see in an infected wound during debridement:
- Pus: the yellowish, cream, or green discharge is composed of dead white blood cells, bacterial remains, and damaged tissue
- Possible scab formation over areas where the infection is contained
- The wound may look worse before it looks better as the cleanup progresses
- Gradually reducing discharge if treatment is working
Pus during this phase means the immune system is doing its job. But it also means bacteria are still present. This is the stage where antibiotics are most critical, providing systemic backup to what the immune response is attempting to do.
Some wounds, particularly deep bite wounds and abscesses, require surgical debridement, where the veterinarian physically removes dead and infected tissue that the body's own cleanup mechanisms cannot reach efficiently.
For understanding treatment at each healing stage, including what cleaning protocols and antibiotic approaches are appropriate during debridement, that guide covers every treatment decision clearly.
Stage 3: Repair (Proliferation)
Normal duration in clean wounds: 3 to 14 daysTypical duration in infected wounds: 2 to 6 weeks or longer
Once the bacterial load is under control, the body begins rebuilding. New blood vessels form in the wound bed, and fibroblasts start producing collagen to rebuild the structural tissue.
What you see in an infected wound during repair:
- Pink, slightly raised, bumpy tissue filling the wound bed: this is granulation tissue, and it is a positive sign
- Wound edges beginning to contract inward
- Reducing discharge, becoming clearer and then absent
- The wound appearing to shrink day by day as tissue fills in
Warning signs that the repair stage is not progressing:
- Tissue in the wound bed that is dark red, purple, grey, or black: this suggests necrotic (dead) tissue and requires veterinary debridement
- Excessive exuberant granulation tissue (also called proud flesh): pinkish tissue that overgrows above the wound edge can impede epithelialization
- Discharge returning or worsening after improving: infection may have re-established, often from licking or inadequate antibiotic coverage
For understanding how infection affects the healing timeline in wounds that cannot be closed primarily and must heal from the inside out, the secondary intention healing guide covers this specific trajectory in detail.
Stage 4: Maturation
Normal duration in clean wounds: Weeks to monthsTypical duration in infected wounds: Months, occasionally longer
Maturation is the final stage, where newly formed tissue strengthens and reorganizes into proper scar tissue.
What you see during maturation:
- The wound is fully closed
- New scar tissue initially appears pink, raised, and firm
- Over weeks to months, the scar flattens, fades, and becomes less noticeable
- Tensile strength builds gradually: new scar tissue starts at approximately 20% of normal skin strength and reaches a maximum of about 80% at maturity
In infected wounds, maturation takes longer because the tissue quality laid down during the repair phase is initially lower. The inflammatory damage also means more collagen remodeling is required.
For understanding how to prevent wound breakdown during healing in the maturation phase, particularly for sutured surgical wounds where tension on the scar is a risk, that guide covers dehiscence prevention at every stage.
Stage-by-stage monitoring guide
What slows or stops healing at any stage
Several factors can arrest progression through the healing stages or cause regression to an earlier stage.
Licking and chewing: Every episode introduces oral bacteria, disrupts forming tissue, and can physically remove sutures or scabs. Activity that stalls the repair stage, particularly in cats, can set healing back by days. Consistent E-collar use is essential throughout all stages.
Inadequate antibiotic coverage: Stopping antibiotics early because the wound looks better often means bacteria are reduced but not eliminated. They can re-establish rapidly and restart the inflammatory cycle.
Underlying health conditions: Diabetes, immune suppression, poor nutrition, and obesity all slow wound healing significantly. Dogs with these conditions may require extended treatment timelines.
Wound moisture and contamination: Wounds that are too wet (from licking or bandages that trap moisture) or that are exposed to dirt and debris are harder to progress through the repair stage.
Frequently asked questions
How long does an infected dog wound take to heal?
Timeline varies significantly by wound depth, infection severity, and individual dog health. Minor surface infections can resolve in two to three weeks. Deep infections, bite wounds, or abscesses may take four to eight weeks or longer. Maturation of the scar continues for months beyond wound closure.
What does healthy granulation tissue look like?
Healthy granulation tissue is pink or bright red, slightly bumpy, and moist. It fills the wound bed and bleeds easily when touched, which is normal as it is highly vascular. If the tissue in the wound bed is dark red, brownish, grey, or black, it is likely necrotic and should be assessed by a veterinarian.
My dog's wound looks worse after a few days of treatment. Is that normal?
During the debridement stage, wounds can temporarily look worse before they look better as the body expels bacterial material and dead tissue. If discharge is reducing and systemic signs like fever or lethargy are improving, this is expected. If the wound is clearly expanding or your dog is worsening overall, contact your vet.
Can an infected wound heal without closing (secondary intention)?
Yes. Many infected wounds heal by secondary intention, where the wound fills in from the bottom up rather than closing edge to edge. This is slower and produces more scar tissue but is appropriate when the wound is too infected to suture or too large to close primarily.
Why does my dog keep licking the wound even with a cone?
Cones must extend at least two inches past the nose to be effective. This is the most common fitting error. If your dog is still accessing the wound, measure the cone extension and adjust. A recovery suit is an alternative for trunk wounds. Consistent use is essential, including overnight when you cannot supervise.
Knowing the healing stages of an infected dog wound transforms monitoring from guesswork into something systematic. At each stage, you know what you should be seeing, what the warning signs look like, and when to escalate care. Most infected wounds, given the right treatment and consistent licking prevention, progress steadily through each stage to full closure.
Resources
The following sources were used as reference and background for this article:
- Vetericyn. The Healing Stages of a Dog Wound. vetericyn.com
- Kainer Veterinary. Understanding the Stages of Your Dog's Infected Wound Healing. kainervet.com
- Zarasyl. Understanding a Dog's Wound Healing Phases. zarasyl.com
- PetPlace. Infected Dog Wound: Signs, Healing Stages, and Home Care Tips. petplace.com
- Animal Hospital at Babcock Ranch. Dog Wound Care and Healing Stages. animalhospitalbabcockranch.com
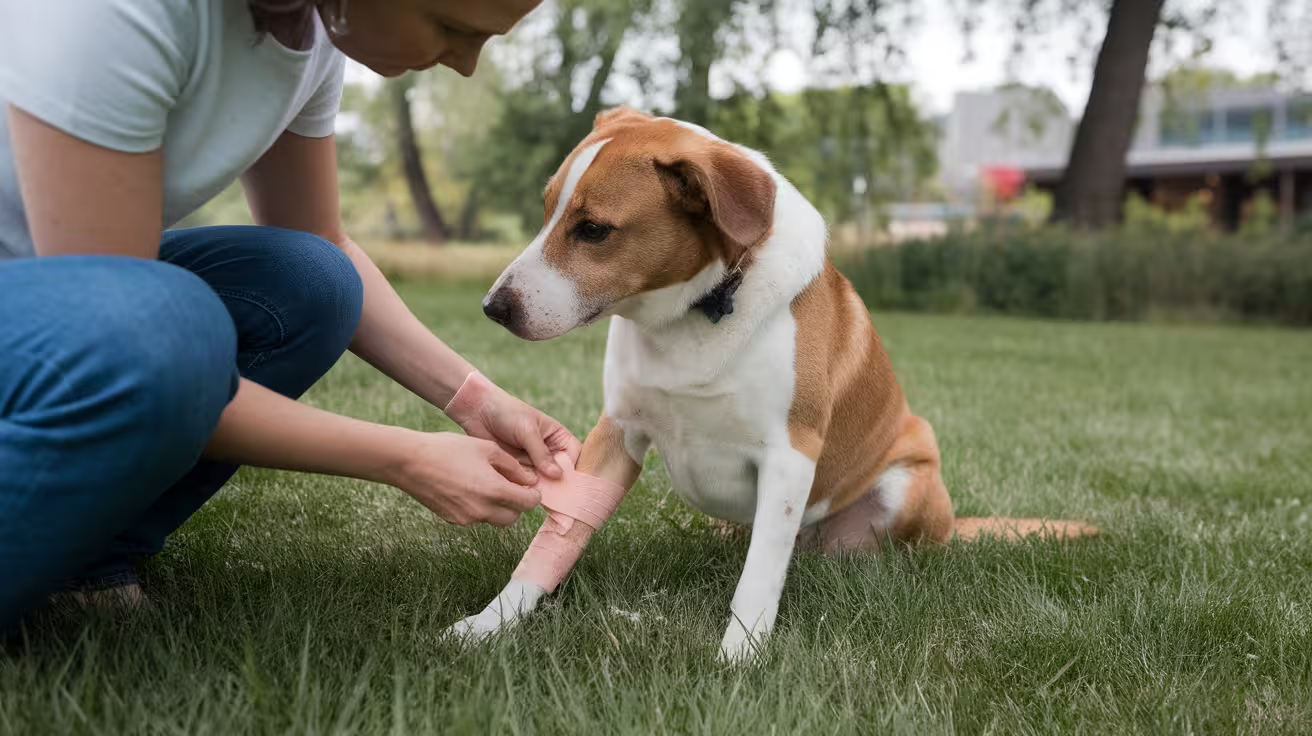
Effective Ways to Prevent Infections in Dog Wounds
Learn effective methods to prevent infections in dog wounds, ensure quick healing, and recognize signs needing veterinary care
A wound doesn't become infected instantly. There's a window the first hours and days after injury when what you do at home significantly affects whether bacteria establish or are cleared.
These are the steps that make the most difference.
Quick answer: The most effective wound infection prevention steps are: stop licking immediately with an E-collar, clean the wound with dilute chlorhexidine or sterile saline (not hydrogen peroxide or alcohol), apply a clean bandage if needed, check the wound twice daily for early infection signs, and follow all veterinary aftercare instructions exactly. Daily monitoring catches early infection when it's simplest to treat.
Key takeaways
- The E-collar is the single most important infection prevention tool licking introduces oral bacteria directly into the wound.
- Chlorhexidine or sterile saline for wound cleaning hydrogen peroxide and alcohol damage healing tissue and delay recovery.
- Change bandages daily or sooner if wet, dirty, or loose.
- Check the wound twice daily for the first two weeks minimum.
- Daily photographs track change better than memory alone.
- Early infection caught in the first 3 to 7 days responds to simpler treatment than established infection.
Step 1: Stop licking immediately
Licking is the most common way dogs infect their own wounds. The dog's mouth contains Staphylococcus pseudintermedius, Pasteurella, streptococcal species, and other bacteria that have direct access to the wound with every lick.
Bond Vet states: "A dog's licking might interfere with healing by opening the wound up again, making it worse, or introducing an infection."
E-collar (Elizabethan collar): the standard, most reliable option. Must extend past the tip of the dog's nose to prevent the dog from reaching the wound. Apply immediately even one night without the collar can allow contamination that delays healing for days.
Alternatives if the dog resists the E-collar:
- Inflatable collar (not as reliable for determined lickers)
- Recovery bodysuit or onesie (effective for trunk wounds)
- Protective wrap or boot (for paw wounds)
The E-collar must be worn at all times during sleep, during meals, and outdoors not just when you're watching.
Step 2: Clean the wound correctly
What to use
- Dilute chlorhexidine (0.05%): mix 1 part 2% chlorhexidine with 40 parts sterile water. Most effective antiseptic for wound cleaning.
- Sterile saline: safe for all wound types; no antiseptic activity but mechanically rinses bacteria.
- Prescribed antiseptic solutions: follow your vet's specific instructions if a solution was prescribed.
What not to use
- Hydrogen peroxide: damages granulation tissue (the new pink tissue forming in the wound) and slows healing
- Alcohol (rubbing alcohol): painful on open tissue and damages healing cells
- Human antibiotic ointments (Neosporin, Polysporin): may contain zinc (toxic if licked) or other ingredients not safe for dogs
How to clean
Bond Vet recommends: clean the wound 1 to 3 times daily. Use gauze or a clean cloth never bare hands. Gently irrigate the wound with the cleaning solution. If using a syringe for flushing, apply gentle pressure only high-pressure flushing can drive bacteria deeper.
Pat dry gently with clean gauze. Do not rub.
Step 3: Bandage correctly (if needed)
Not all wounds require bandaging, but wounds in high-contamination areas (paws, lower limbs), wounds that the dog can reach, and wounds with discharge benefit from protection.
Bandaging steps
- Cover the wound with a sterile, non-stick gauze pad
- Wrap with a soft, self-adhesive bandage (not too tight two fingers should slide under the wrap)
- Check for swelling or discoloration below the bandage (signs of too-tight wrapping)
- Check for moisture (a wet bandage against skin creates an infection-friendly environment)
Bandage change frequency
- Every 24 hours under normal conditions
- Sooner if wet, visibly dirty, or loose
- Use only new, sterile materials for each change
Fairview Veterinary Clinic confirms: "Change sterile bandages daily or when they become wet or dirty."
For wounds at paws, consider waterproof protective boots during short outdoor trips to prevent contamination from soil.
Step 4: Monitor twice daily
Early infection is caught by observation, not by waiting for the wound to look obviously wrong.
What to check at each observation
- Redness: staying at the wound edge (normal) or spreading outward (infection sign)
- Discharge: clear/slightly pink (normal) or yellow/green/cloudy (infection sign)
- Odor: minimal to none (normal) or foul/sour smell (infection sign)
- Wound edges: together and approximating (normal) or separating (concern)
- Warmth: mild and decreasing (normal) or increasing heat (infection sign)
- Dog behavior: returning to normal (normal) or increased wound focus and guarding (infection sign)
Practical tip: Photograph the wound at the same time each day in consistent lighting. Daily photographs allow you to compare yesterday vs. today objectively small changes that escape memory are visible in photographs.
For complete wound infection sign identification, see complete wound infection signs.
Step 5: Follow all veterinary aftercare instructions
This step prevents more infections than any home remedy. Post-operative care instructions are written for a reason: they account for the specific procedure, the dog's risk factors, and the antibiotic/antiseptic choices made during surgery.
Non-negotiable aftercare items:
- Complete the full antibiotic course: stopping early because the wound "looks better" allows surviving bacteria to re-establish. Incomplete courses are a leading driver of resistant infections.
- Attend all scheduled rechecks: even when the wound appears to be healing well. Rechecks catch developing problems before they become serious.
- Restrict activity per instructions: activity violations (jumping, running) stress the incision and can create dehiscence that opens the wound to contamination.
- Keep the wound dry: no bathing until your vet clears it. Moisture softens sutures, promotes bacterial growth, and can create wound breakdown.
For how to prevent surgical site infections specifically before and after surgery, see preventing surgical site infections.
Step 6: Environmental hygiene
The dog's environment contributes bacteria to wounds through direct surface contact.
During wound healing:
- Keep the dog's resting area clean and dry
- Wash bedding every 2 to 3 days in hot water and dry completely
- Disinfect hard surfaces the dog contacts daily (dilute bleach 1:32, rinse before use)
- Avoid grass, soil, and outdoor surfaces with open wounds unless the wound is well covered
For wound infections that have already established, see established wound infection management. For how biofilm makes wound infections harder to treat once established, see biofilm in wound infections.
When to call your vet
Call the same day for:
- Redness spreading beyond the wound margin
- Yellow, green, or cloudy discharge
- Foul odor from the wound
- Wound edges separating
- Dog not eating or drinking by day 3 post-surgery
Go to emergency for:
- Wound significantly opened with visible underlying tissue
- Bleeding not stopping within 5 minutes
- Fever and severe lethargy together
- Red streaks radiating from the wound (lymphangitis)
For monitoring by post-operative day, see post-op infection timeline.
Frequently asked questions
Can I use honey on my dog's wound to prevent infection?
Medical-grade Manuka honey has documented antibacterial properties and is being used in some veterinary wound management contexts. However, regular grocery store honey has inconsistent antibacterial activity and can attract insects. If considering honey, discuss it with your vet and use only veterinary-approved preparations.
My dog pulled off the bandage at night. What should I do?
Apply the E-collar first to prevent further access to the wound. Examine the wound for any visible contamination. Clean gently with dilute chlorhexidine or saline and re-cover with a clean gauze pad until you can contact your vet. If the wound appears significantly contaminated or damaged, call the emergency line.
How long do I need to prevent my dog from licking?
Until the wound is fully healed and your vet confirms it's safe to remove the collar not until it "looks better." For most surgical wounds, this is 10 to 14 days for suture removal, but the collar may be needed longer if healing is delayed or infection developed. Follow your vet's specific guidance for your dog's procedure.
Wound infection prevention is mostly about consistency in four things: keeping the dog away from the wound, cleaning correctly without products that harm healing tissue, monitoring attentively, and completing whatever treatment the vet prescribed. All four are owner-controlled. All four matter.
Resources
- Bond Vet. Step-By-Step Wound Care for a Dog at Home and When to Call the Vet. bondvet.com
- Fairview Veterinary Clinic. How to Clean a Dog Wound. fairviewveterinaryclinic.com
- UrgentVet. Dog Wound Care: How to Care For Open Wounds on Dogs. urgentvet.com
What Is Staph Aureus in Dogs?
Learn what Staph aureus infection means for dogs, how it spreads, symptoms to watch, and treatment options to protect your pet's health
Staphylococcus aureus is not a dog's bacteria. It's a human bacteria that dogs occasionally acquire from close contact with people who carry it.
This distinction from S. pseudintermedius, the far more common canine staph, explains almost everything about how dogs get S. aureus infections, who is most at risk, and how the infections behave.
Quick answer: Staphylococcus aureus is a bacterium primarily found on human skin and in human nasal passages. It can infect dogs through close contact with human carriers, but it is far less common in dogs than S. pseudintermedius. When it becomes methicillin-resistant (MRSA), it cannot be treated with standard beta-lactam antibiotics. Most dogs with MRSA either clear it without symptoms or develop skin, wound, or ear infections similar in appearance to MRSP. Culture and sensitivity testing is required for diagnosis and treatment guidance.
Key takeaways
- S. aureus is not normal dog flora: it colonizes humans, not dogs, and reaches dogs via human contact.
- MRSA in dogs is uncommon: S. pseudintermedius causes the majority of resistant canine staph infections.
- Therapy dogs and dogs in healthcare households have the highest MRSA exposure risk.
- MRSA symptoms in dogs are identical to MRSP: culture is the only way to distinguish them.
- Both MRSA and susceptible S. aureus can clear spontaneously in healthy dogs without causing infection.
- Treatment requires culture-guided antibiotic selection: same principle as MRSP.
S. aureus vs S. pseudintermedius: the fundamental difference
The two most clinically relevant staph species in dogs are Staphylococcus pseudintermedius and Staphylococcus aureus. They are related but biologically distinct, with very different host preferences.
Texas A&M Veterinary Medical Teaching Hospital confirms: "S. aureus (and thus MRSA) primarily causes bacterial infections in people, while S. pseudintermedius (and thus MRSP) is predominantly a bacterial pathogen of dogs and cats."
How dogs get S. aureus
Because S. aureus is not part of normal dog skin flora, dogs don't develop it independently. They acquire it from human sources.
Primary transmission routes:
- Direct contact with a human carrier or infected person: approximately 33% of healthy humans carry S. aureus in their nasal passages; of those, approximately 2% carry MRSA. Petting, hugging, or sharing sleeping spaces with a colonized person transfers bacteria.
- Healthcare-associated exposure: therapy dogs that visit hospitals, nursing homes, or rehabilitation centers are directly exposed to environments with high MRSA concentrations. WagWalking confirms: "Therapy dogs that visit hospitals and nursing homes are at a higher risk of being exposed to MRSA."
- Household healthcare workers: dogs whose owners work in hospitals, nursing homes, or clinical settings have elevated MRSA exposure through the owner's occupational carriage.
- Contaminated environments: bedding, surfaces, and objects contaminated by MRSA-positive humans can transfer bacteria to dogs.
PetMD confirms: "Dogs more commonly get methicillin-resistant S. pseudintermedius (MRSP). MRSA in dogs is rare. MRSA is much more common in people."
What S. aureus infection looks like in dogs
Colonized dogs (no symptoms)
Many dogs who acquire S. aureus from human contacts never develop clinical infection. Their immune system and skin barrier prevent the bacteria from establishing disease. These dogs are "colonized" carriers.
PetMD: "When dogs have MRSA, they may not show signs of illness. Their immune system may readily clear the bacteria without any issues. Dogs that carry the bacteria on their skin without any symptoms of infection are referred to as 'colonized.'"
Infected dogs
When S. aureus does cause clinical infection, the signs are identical to S. pseudintermedius infection:
- Non-healing or slow-healing wounds or skin lesions
- Redness, swelling, and warmth at the wound or lesion site
- Pus-like or yellow-green discharge
- Wound not improving despite antibiotic treatment
- Foul odor from the affected area
WagWalking notes: "S. aureus commonly affects the skin and other soft tissues, resulting in abscesses or skin infections. It rarely affects the joints, eyes, ears, or urinary tract."
Signs requiring emergency assessment:
- Lethargy, loss of appetite, and fever together (signs of sepsis)
- Rapid spreading of redness or swelling
- Dog is immunocompromised and any of the above
Which dogs are most at risk
Immunocompromised dogs
PetMD: "Pets who become sick from MRSA are usually those who are immunocompromised, meaning they are either very young, very old, or have underlying disease, wounds, or a recent surgery."
Healthy dogs with intact skin and functional immunity routinely clear S. aureus exposure without developing infection. The risk of clinical infection rises sharply when immune defenses are reduced.
Higher-risk groups:
- Puppies (immature immunity)
- Senior dogs (reduced immune function)
- Dogs with recent surgery or open wounds
- Dogs with diabetes, Cushing's, or chronic skin disease
- Dogs on long-term immunosuppressive medications
Dogs with human exposure routes
- Therapy dogs with regular hospital visits
- Dogs in households where someone has an active S. aureus or MRSA infection
- Dogs in households where someone works in healthcare
For the broader context of how resistant staph infections compare in dogs, see resistant staph comparison.
Diagnosis
You cannot distinguish S. aureus infection from S. pseudintermedius infection by looking at the wound or lesion. Both present identically.
Definitive diagnosis requires:
- Bacterial culture of the wound, lesion, ear canal, or skin swab
- Species identification (speciation confirms aureus vs. pseudintermedius: this requires the lab to speciate; request it specifically if not automatic)
- Methicillin resistance testing (confirms MRSA status)
- Full sensitivity panel (identifies which drugs retain activity)
For how resistant staph is diagnosed in general, see resistant staph diagnosis.
Treatment
For susceptible S. aureus
Susceptible S. aureus responds to standard beta-lactam antibiotics:
- Cephalexin
- Amoxicillin-clavulanate
- Cefpodoxime
These first-line options work well for non-resistant S. aureus skin and wound infections.
For MRSA
MRSA is resistant to all beta-lactam antibiotics. Treatment options based on sensitivity results:
- Trimethoprim-sulfonamides: often active against MRSA
- Doxycycline: commonly active; sensitivity must be confirmed
- Clindamycin: if sensitive and no inducible macrolide resistance
- Rifampicin: in combination with another active drug only
- Chloramphenicol: less commonly used for MRSA vs. MRSP but may be active
PetMD specifies options: "rifampin, clindamycin, sulfa trimethoprim, marbofloxacin, vancomycin, amikacin, chloramphenicol, and doxycycline are all examples of systemic antibiotics that may be prescribed based on culture results."
Vancomycin is a last-resort human antibiotic occasionally used in MRSA cases; its use requires infectious disease consultation.
For early-stage staph identification before speciation, see early-stage staph overview. For how dogs typically get staph infections, see how dogs get staph.
Household management when a dog has MRSA
Because MRSA is a human-adapted organism with documented bidirectional transmission, household management is particularly important.
Household precautions:
- Wash hands after every contact with the dog or wound
- Wear gloves during wound care or topical treatment
- Keep infected dogs away from young children, elderly, and immunocompromised household members
- Don't allow the dog to lick faces or open skin
- Disinfect shared surfaces and wash bedding frequently
Texas A&M Vet Hospital guidance: "Keep young children and immunocompromised people (cancer patients, HIV/AIDS, patients receiving immunosuppressive drugs) away from the affected pet."
If MRSA is confirmed, inform any household member's physician, particularly if they are immunocompromised or healthcare workers who may have contributed to transmission.
For zoonotic risk in detail, see zoonotic risk from resistant staph.
Frequently asked questions
How do I know if my dog has MRSA or MRSP?
You cannot tell from appearance alone. Both cause identical skin, wound, and ear infections. Only a bacterial culture with species identification and methicillin resistance testing confirms which organism is present. If your vet only ran cytology (looking at cells under the microscope), culture has not been performed. Ask your vet explicitly about culture and speciation if resistance is suspected.
My dog was diagnosed with MRSA. Does someone in my house have it?
Almost certainly, someone in the household or the dog's regular environment carries S. aureus, possibly MRSA. The dog received the bacteria from a human source, not from another dog or the environment independently. It may be worth discussing with your physician whether household members should be tested, particularly if any of them have had recent skin or wound infections.
Can my dog give MRSA back to me?
Yes. Bidirectional MRSA transmission between dogs and humans is documented. Dogs infected through human contact can shed MRSA back into the household through direct contact or contaminated surfaces. Standard hygiene precautions (handwashing, wound avoidance, gloves for wound care) reduce this risk substantially.
S. aureus in dogs is fundamentally a human story: a human bacterium that reaches dogs through human contact, causes identical-looking infection to S. pseudintermedius, and in its MRSA form creates the same antibiotic resistance challenge. The clinical management is parallel to MRSP: culture, sensitivity testing, targeted antibiotics, topical wound care. What differs is the source, the transmission pattern, and the household implications.*
Resources
- PetMD. Methicillin-Resistant Staphylococcus Aureus in Dogs. petmd.com
- Texas A&M Veterinary Medical Teaching Hospital. MRSA. vetmed.tamu.edu
- WagWalking. Methicillin-Resistant Staphylococcus Aureus in Dogs. wagwalking.com
- MedVet. Methicillin-Resistant Staphylococcus Pseudintermedius (MRSP) in Dogs and Cats. medvet.com
Why Do Dogs Lick Infected Wounds?
Find out why dogs lick infected wounds, the risks it causes, and how to stop it before it worsens your dog’s healing
It looks like care. It feels like instinct. But when a dog licks an infected wound, they are almost always making it worse.
Understanding why dogs do it, and what actually happens to the wound when they do, is the foundation for preventing it effectively.
Quick answer: Dogs lick wounds because of deep-rooted instinct tied to pain relief, self-cleaning, and the mild antibacterial properties of saliva. But dog saliva also contains Pasteurella, Staphylococcus, and other bacteria that worsen infections, cause tissue damage, and can reopen healing wounds. For infected wounds especially, licking is harmful and must be prevented consistently.
Key takeaways
- Licking is instinctive, not deliberate harm: Dogs are not doing something wrong. The behavior is hardwired.
- Dog saliva has mild antibacterial properties: But those properties are no match for an established wound infection.
- Dog saliva also contains harmful bacteria: Pasteurella, Staphylococcus, and E. coli are all common in dog mouths.
- Licking causes physical damage to healing tissue: The tongue is abrasive. Repeated licking reopens wounds, removes scabs, and pulls out sutures.
- Licking infected wounds spreads bacteria: To adjacent healthy skin, and in some cases, to humans.
- Prevention must be consistent: Brief unsupervised moments are all it takes to undo days of healing.
Why dogs lick wounds: the real reasons
1. Instinct and evolution
Dogs evolved to lick wounds long before veterinary care existed.
In the wild, licking removed debris from wounds and reduced surface bacterial contamination enough to prevent immediate worsening. The behavior was reinforced because it sometimes worked.
That evolutionary programming remains intact. A dog that feels pain or discomfort in any part of their body will try to reach it with their tongue.
2. Pain relief
Licking temporarily numbs the wound area.
The act of licking overstimulates sensory nerves, which can briefly override pain signals sent to the brain. It is the same mechanism behind rubbing a bruise: the sensation of the rub drowns out the pain signal.
This is why dogs with infected wounds are particularly persistent lickers. Infection causes real discomfort, and licking provides short-term relief. The problem is that each episode of relief worsens the underlying problem.
3. Scent detection
Dogs have an extraordinarily powerful sense of smell.
An infected wound produces strong, distinct odors from bacterial metabolic activity and tissue breakdown. Dogs are drawn to investigate and respond to these odors instinctively.
The worse the infection smells, the more attracted the dog is likely to be.
4. Cleaning behavior
Dogs use their mouths to groom and clean themselves and others.
Mothers lick puppies from birth. Dogs lick each other as a social bonding behavior. Licking a wound is a natural extension of this cleaning instinct.
The problem is that a dog's mouth, while somewhat self-regulating, is far from sterile.
The truth about dog saliva and wound healing
What saliva can do
Dog saliva does contain compounds with genuine antibacterial effects:
- Lysozyme: An enzyme that can damage bacterial cell walls
- Lactoferrin: A protein with mild antimicrobial properties
- Defensins: Small proteins involved in immune defense
Some studies have confirmed limited antibacterial activity against specific bacteria. Ancient cultures, including the Egyptians and Greeks, believed dog saliva had healing properties, and there was some biological basis for that belief.
What saliva cannot do
These mild antibacterial properties cannot:
- Clear an established wound infection
- Outpace the bacteria being continuously re-introduced with each lick
- Replace saline cleaning, antiseptics, or antibiotics
And critically, dog saliva also contains a long list of bacteria that can cause infection, not just fight it.
The bacteria in a dog's mouth
A dog's oral cavity contains hundreds of bacterial species. Several are particularly concerning for wound health:
Every time a dog licks an infected wound, these bacteria are deposited directly onto already-compromised tissue.
In an infected wound, the skin barrier is partially broken. Bacteria gain access not just to the surface but to deeper tissue layers.
What licking actually does to a wound
The physical and biological effects of licking on a wound:
Physically:
- The tongue is rough and abrasive, disrupting fragile granulation tissue
- Repeated licking reopens healing tissue and scabs
- Sutures can be pulled loose or removed entirely
- Wound edges that were closing are separated again
Biologically:
- New bacteria are introduced with every lick
- Moisture from saliva creates a favorable environment for bacterial growth
- The inflammatory response is repeatedly re-triggered
- Healing tissue does not progress past the early repair stage
A wound that a dog is allowed to lick does not heal. It cycles repeatedly through injury and early inflammation without ever reaching the repair stage.
The particular risk with infected wounds
A wound that is already infected has a partially disrupted skin barrier. Bacteria from the dog's saliva have a direct pathway into deeper tissue.
This matters because:
- An existing infection makes tissue more vulnerable to secondary bacterial colonization
- Different bacterial species from the mouth can establish alongside the original infection
- Antibiotic-resistant bacteria from the dog's skin and mouth, including MRSP, can be introduced
- Repeated licking prevents the immune system from getting the wound under control
The result: A wound that might have responded to a standard antibiotic course becomes polymicrobial and harder to treat.
Why licking prevention is non-negotiable
Owners sometimes underestimate how much damage a single licking session causes, or rationalize that a little licking is fine.
It is not fine on an infected wound. Here is what brief unsupervised access can do:
- Remove two to three days of granulation tissue growth
- Reopen a wound that was beginning to close
- Pull out a suture, creating an entry point for deeper infection
- Shift a manageable localized infection toward a spreading one
For proper wound treatment instead of licking, including the correct cleaning products, step-by-step home care protocol, and when to escalate to veterinary treatment, that guide covers every treatment decision clearly.
How to stop a dog from licking wounds
E-collar (cone)
The most reliable tool when fitted and used correctly.
Fitting requirements:
- Must extend at least 2 inches past the tip of the nose
- Shorter cones allow flexible dogs to still access wounds
- Must be worn at all times, including overnight
Recovery suits and body wraps
For trunk and abdominal wounds, a well-fitted recovery suit covers the wound without pressure.
Some dogs tolerate suits better than cones. The key requirement is that the suit actually prevents access. Test it by observing whether your dog can reach the wound when wearing it.
Soft recovery collars
Inflatable or padded collars are more comfortable for many dogs than rigid plastic cones.
Confirm the soft collar prevents your specific dog from accessing the specific wound. Flexibility varies by dog size and wound location.
What does not work reliably
For how to tell if a wound is infected before deciding how aggressively to prevent licking, knowing the severity of infection helps you understand the urgency of prevention.
When licking has already caused damage
Signs that licking has disrupted healing:
- Wound appears larger, rawer, or more inflamed than the previous day
- Scabbing that was forming has been removed
- Sutures appear loosened, pulled, or missing
- Discharge has returned or increased after improving
- A previously healing wound shows spreading redness
If licking has caused visible wound damage, contact your veterinarian. Depending on the extent, you may need suture repair, wound re-evaluation, or an adjusted antibiotic plan.
For understanding how licking delays wound healing stages and which healing phase is most disrupted by licking activity, that guide explains how each stage is specifically affected.
Frequently asked questions
Is it true that dog saliva heals wounds?
Partially true but significantly overstated. Dog saliva contains some antibacterial compounds. However, it also contains bacteria that cause infection, and the physical action of licking causes tissue damage. For infected wounds, the harms far outweigh any modest antibacterial benefit.
My dog seems to be licking to soothe pain. Should I let them?
No. The temporary pain relief from licking comes at the cost of worsening infection and delayed healing. Address the underlying pain through your veterinarian: appropriate pain medication manages discomfort more effectively and safely than licking.
Can my dog's licking infect me?
Yes, in some circumstances. Several bacteria common in dog saliva, including Pasteurella and Capnocytophaga, can infect humans. The risk is highest for immunocompromised individuals, elderly people, and anyone with open wounds. Avoid allowing a dog to lick open wounds on your skin.
How long does the E-collar need to stay on?
Until your veterinarian confirms at the follow-up appointment that the wound is sufficiently healed. For infected wounds, this is typically longer than for clean surgical wounds. When in doubt, leave it on.
My dog keeps removing the cone. What can I do?
Try a different style: soft inflatable collars or recovery suits are often tolerated better. If your dog is genuinely distressed by all barriers, ask your vet about mild short-term sedation for the recovery period in severe cases.
For safe alternatives to licking and what you can apply to wounds instead that genuinely supports healing, that guide covers what evidence-based home wound care actually looks like.
The instinct to lick a wound is one of the oldest behaviors in dogs. The problem is that it evolved for a world without established wound infections and without the bacterial loads modern dogs carry. On an infected wound, licking is one of the most consistent causes of prolonged healing and treatment failure. Stopping it is not optional.
Resources
The following sources were used as reference and background for this article:
- PetMD. Why Dogs Lick Their Wounds and How to Stop Them. petmd.com
- American Kennel Club. Should Dogs Lick Wounds? How Saliva Affects Wound Healing. akc.org
- AskAVet. Why Do Dogs Lick Wounds? Vet Insights and Safety Tips. askavet.com
- The Kennel Club. Why Do Dogs Lick Their Wounds? royalkennelclub.com
- Adopt A Pet. Why Does My Dog Lick My Wounds? adoptapet.com
Pseudomonas in Dogs: Symptoms, Causes & Treatment
Learn about Pseudomonas in dogs—common symptoms, causes, diagnosis, and treatment options to help your dog recover and prevent reinfection
Pseudomonas aeruginosa is one of the most challenging bacterial pathogens in veterinary medicine. It is everywhere in the environment soil, water, and surfaces but normally causes no problems in healthy dogs. When it establishes infection in the ear, a wound, or damaged skin, it is extraordinarily difficult to eliminate.
The challenge is not just that P. aeruginosa is resistant to many antibiotics. It also forms biofilm a protective matrix that shields bacteria from both antibiotics and the immune system. This combination makes Pseudomonas infections among the hardest infections to treat successfully.
Quick answer: Pseudomonas aeruginosa causes resistant infections in dogs, most commonly in the ear canal, skin, and wounds. Standard antibiotics often fail due to biofilm and intrinsic resistance. Culture testing is essential before treatment.
Key takeaways
- P. aeruginosa is an environmental opportunist: infects dogs when ear, skin, or wound defenses are compromised
- Ear infections are the most common presentation: floppy-eared and swimming breeds are most affected
- Biofilm formation makes P. aeruginosa infections far more resistant to treatment than planktonic (free-floating) bacteria
- 80 to 90% of Pseudomonas otitis cases are difficult to treat with standard antibiotic approaches per published data
- Culture and sensitivity testing is mandatory: empirical antibiotic selection without testing leads to treatment failure
- Fluoroquinolones (marbofloxacin) at high dosing are often the systemic antibiotic of choice when susceptibility testing supports it
What is Pseudomonas aeruginosa?
P. aeruginosa is a Gram-negative, aerobic rod-shaped bacterium that inhabits soil, water, and moist environments. VetInfo: "Pseudomonas aeruginosa are a gram-negative bacteria with the ability to survive in many unexpected situations. They generally thrive in oxygen-rich environments but can also survive and reproduce in anaerobic conditions."
It is ubiquitous but not part of the normal canine ear canal microbiome. MDPI (2023): "P. aeruginosa is not an obligate pathogen, and studies investigating the source of these infections often highlight environmental sources particularly water, although nosocomial infections in veterinary surgery are possible."
Two properties make P. aeruginosa uniquely difficult:
1. Intrinsic antibiotic resistance: P. aeruginosa is naturally resistant to many antibiotic classes, including most penicillins, most cephalosporins, macrolides, tetracyclines, and chloramphenicol. This leaves a narrow therapeutic window even before acquired resistance develops.
2. Biofilm formation: VetCareNews: "P. aeruginosa possesses the ability to create a biofilm a congregation of multiple organisms that adheres to the surface and is protected by a layer." Bacteria within biofilm can be up to 1,000 times more resistant to antibiotics than free-floating bacteria. Biofilm forms in chronic ear infections, on catheter surfaces, and in chronic wounds.
How dogs get Pseudomonas infections
Chronic ear disease and allergy
The most common pathway. Allergic otitis externa creates a chronically inflamed, moist ear canal environment. Normal ear canal bacteria are disrupted, and P. aeruginosa introduced from water or the environment colonizes the damaged tissue.
MDPI (2023, Pseudomonas OE review): "Dysbiosis often makes dogs more vulnerable to ear infections with Pseudomonas, particularly when accompanied by other factors, such as neglect." Allergy is the most common primary factor driving the conditions that allow P. aeruginosa to establish itself.
DVM360: "P. aeruginosa is ubiquitous in the environment but an uncommon inhabitant of the normal external ear canal and middle ear of dogs."
Water exposure
Swimming dogs are at elevated risk. P. aeruginosa thrives in water. Dogs that swim regularly introduce the organism into the ear canal repeatedly, and if the ear canal is already predisposed by allergy or conformation, infection can establish.
Wounds and surgical sites
Damaged skin and surgical incisions particularly those healing slowly or in contaminated environments can be colonized by environmental P. aeruginosa. Hospital-acquired (nosocomial) Pseudomonas wound infections occur in veterinary settings.
Compromised immune system
Dogs on immunosuppressive therapy, with diabetes, or with severe metabolic disease have impaired local and systemic defenses that allow P. aeruginosa to cause infection in sites it would normally not colonize.
Symptoms by infection type
Ear infections (otitis externa and media)
The most common and most recognizable presentation. DVM360: "Animals with P. aeruginosa ear infections typically exhibit one or more of the following clinical signs." VetCareNews lists the range: "depending on the severity, signs can range from discharge, foul odor, or head shaking to severe neurological signs such as head tilt, balance issues, or loss of hearing."
Key distinguishing features of Pseudomonas otitis:
- Extremely foul-smelling discharge often described as one of the most distinctive odors in veterinary medicine (VetInfo: "One of the leading symptoms is a strong odor. Pseudomonas ear infections are extremely smelly with lots of drainage or pus.")
- Green or blue-green discharge (P. aeruginosa can produce pyocyanin, a blue-green pigment)
- Severe pain dogs resist examination; may vocalize when the ear is touched
- Erythema and ulceration of the ear canal lining
- Progressive: if untreated, progresses to otitis media (middle ear) and potentially neurological signs
Breed predisposition: Cocker Spaniels, Basset Hounds, Labrador Retrievers, Golden Retrievers, and other drop-eared or swimming breeds. MDPI: "Certain breeds are predisposed due to factors such as long, pendulous, hairy, or V-shaped drop pinna."
Skin infections (pyoderma)
P. aeruginosa is an uncommon cause of primary pyoderma but a recognized secondary invader in damaged skin. Signs: intensely red, inflamed skin; oozing discharge; foul odor; pain. It often accompanies other bacterial infections (polymicrobial infection).
Wound infections
Post-surgical or traumatic wound infections with P. aeruginosa cause chronic, non-healing wounds with profuse purulent discharge, often with a characteristic odor.
Urinary tract infections
Less common than ear infections. Signs mirror other bacterial UTIs: pollakiuria, stranguria, hematuria. P. aeruginosa UTI typically occurs in dogs with urinary catheters, structural abnormalities, or prior antibiotic use.
Corneal ulcers
Rapid, aggressive progression distinguishes Pseudomonas corneal ulcers from other causes. The ulcer can progress to perforation within hours to days if P. aeruginosa is involved. This is an ophthalmic emergency.
Diagnosis
Ear: cytology (examining discharge under a microscope) confirms bacterial infection and Gram-negative rods suggestive of Pseudomonas. Culture and sensitivity confirms the species and guides treatment.
Wounds and skin: swab culture with sensitivity. Surface swabs may miss the true pathogen in biofilm; deep samples or tissue biopsy may be needed.
Urine: culture with sensitivity from a cystocentesis sample (directly from the bladder).
Critical principle: DVM360: "Make sure your veterinarian runs a culture to check for pseudomonas aeruginosa. If the culture is positive, expect a different treatment plan." Pseudomonas cannot be treated empirically with standard protocols.
Treatment
Why standard antibiotics fail
P. aeruginosa resists most commonly used veterinary antibiotics through multiple mechanisms: outer membrane impermeability (limits drug entry), efflux pumps (actively expel antibiotics from the cell), and beta-lactamase production (destroys beta-lactam antibiotics). Acquired resistance through mutation or gene transfer adds additional layers.
MDPI (otitis study): "The eradication of P. aeruginosa has become increasingly difficult... nearly 24% of treatments of otitis externa cases in dogs are unsuccessful and this is more pronounced if P. aeruginosa is the causative agent, as in these cases, 80 to 90% of cases are untreatable."
Systemic antibiotics
Fluoroquinolones are the primary systemic option when susceptibility is confirmed. DVM360: "I most commonly use marbofloxacin for systemic treatment of Pseudomonas otitis when susceptibility testing indicates susceptibility. I prescribe at the high end of the flexible dosing range 5.5 mg/kg once daily."
Marbofloxacin has pharmacokinetic advantages over other fluoroquinolones for Pseudomonas treatment. Ciprofloxacin has activity but poor oral bioavailability in dogs. Aminoglycosides (gentamicin, tobramycin) are effective but typically used topically due to systemic toxicity concerns.
Topical treatment for otitis
Topical aminoglycosides (gentamicin, tobramycin), polymyxin B, and topical fluoroquinolones are used directly in the ear canal. Achieving therapeutic concentrations topically is generally more feasible than systemically. Thorough ear cleaning before topical application is essential to remove biofilm and pus that would otherwise prevent drug penetration.
Biofilm disruption
Biofilm significantly impairs antibiotic efficacy. N-acetylcysteine, EDTA, and tris-EDTA are ear flush components that help disrupt biofilm structure, allowing antibiotics better access. Regular, thorough ear cleaning is not optional it is a core component of Pseudomonas otitis treatment.
Surgery: total ear canal ablation (TECA)
DVM360: "At this point, the best option is a total ear canal ablation and bulla osteotomy. Thankfully, this is rarely necessary if veterinarians pursue an aggressive diagnostic and therapeutic approach." TECA is reserved for chronic, treatment-resistant cases where the ear canal is severely damaged and stenotic.
For how Pseudomonas contributes to severe wound infections, see irrigation solutions active against Pseudomonas. For how Pseudomonas contributes alongside other resistant organisms in serious infections, see other resistant organisms alongside Pseudomonas. For how antiseptics active against Pseudomonas compare, see antiseptics effective against Pseudomonas. For how Pseudomonas features in severe deep tissue infections, see Pseudomonas in severe infections.
Prevention
- Dry ears thoroughly after swimming or bathing: moisture is the primary environmental setup for P. aeruginosa colonization
- Manage allergies aggressively: allergy is the most common underlying driver of the chronic otitis that predisposes to Pseudomonas
- Regular ear examinations for predisposed breeds before chronic damage is established
- Avoid unnecessary antibiotic use: broad-spectrum antibiotics without culture select for resistant organisms
- Prompt treatment of early otitis: shallow infections before biofilm establishes are far easier to treat than chronic, deep infections
Frequently asked questions
My dog has been treated for ear infections many times and they keep coming back. Could it be Pseudomonas?
Very possibly. Recurring ear infections that do not respond to standard antibiotics, or that initially improve but always return, are a classic Pseudomonas pattern. Ask your vet to perform cytology and culture on the next flare rather than prescribing empirically. Identifying Pseudomonas and getting susceptibility results changes the entire treatment approach.
Can Pseudomonas spread from my dog to me?
Yes, though transmission to immunocompetent adults is uncommon. MDPI (otitis study): "Multidrug-resistant P. aeruginosa can be transmitted from the pet to the owner and cause human infections in the ears, eyes, or respiratory or urinary tracts." Immunocompromised people, young children, and elderly individuals are at higher risk. Standard hygiene (handwashing after handling ear discharge, not sharing towels) significantly reduces risk.
Why does my dog's Pseudomonas ear infection smell so bad?
P. aeruginosa produces pyocyanin (a blue-green pigment with a characteristic chemical odor) and enzymes that break down tissue. The combination of pus, dying tissue, and bacterial metabolic products creates the distinctive smell. The intensity of the odor correlates with the severity of the infection and the degree of tissue destruction.
How long does Pseudomonas otitis treatment take?
Significantly longer than simple bacterial ear infections. Effective Pseudomonas otitis treatment typically requires 6 to 12 weeks of consistent topical treatment, regular ear cleaning, and often systemic antibiotics. The allergy underlying the chronic otitis must also be managed if the allergic inflammation is not controlled, the infection will recur regardless of antibiotic treatment.
Can I use human ear drops for my dog's Pseudomonas ear infection?
No. Human ear formulations are not designed for canine ear anatomy, do not achieve appropriate drug concentrations in the deeper canine ear canal, and are not labeled for veterinary use. More importantly, using any antibiotic-containing product without culture confirmation wastes time and may select for resistance. Always use veterinary-prescribed products based on culture results.
Is Pseudomonas in a dog's ear an emergency?
Not typically for uncomplicated otitis externa. However, if your dog is in severe pain, cannot open its mouth, has neurological signs (head tilt, falling, circling), or if the discharge has suddenly increased dramatically, seek same-day veterinary assessment. These signs suggest spread to the middle or inner ear (otitis media or interna), which is a more serious situation.
Resources
- DVM360. Treatment of Pseudomonas Otitis in the Dog. dvm360.com
- MDPI Microorganisms (2023). Pseudomonas spp. in Canine Otitis Externa. mdpi.com
- VetCareNews. Pseudomonas Ear Infection in Dogs: Symptoms and Treatment. vetcarenews.com
- VetInfo. Pseudomonas Infection in Dogs. vetinfo.com
- PMC (2021). Characterization of Canine Otitis Externa Pseudomonas aeruginosa Isolates. ncbi.nlm.nih.gov

Surgical Irrigation Solutions: A Complete Guide for Veterinary Surgeons
Explore safe and effective surgical irrigation solutions for dogs. Learn best practices and discover why many vets trust Simini Protect Lavage
Why Surgical Irrigation Matters in Dog Surgeries
Surgical irrigation plays a key role in keeping wounds clean during and after surgery. When a dog undergoes a procedure, blood, tissue debris, and bacteria can build up in the surgical site. Irrigation helps flush out these contaminants, lowering the risk of infection.
Clean wounds heal faster and with fewer problems. By removing bacteria early, irrigation prevents biofilm formation, which can make infections harder to treat. It also helps keep the tissue moist, which supports better healing and reduces cell damage.
In orthopedic and soft tissue surgeries, proper irrigation reduces post-op swelling, keeps the wound environment stable, and improves visibility for the surgeon. This leads to better surgical outcomes and comfort for the patient. Overall, irrigation is not just a cleaning step—it’s an important part of protecting the dog’s health and speeding up recovery.
Types of Irrigation Fluids Used in Veterinary Surgeries
Choosing the right irrigation fluid is important for reducing infection and helping tissues heal. Different fluids serve different purposes depending on the wound type, surgical procedure, and risk of contamination.
1. Sterile saline and lactated Ringer’s solution
These are the most common and safest options for routine wound irrigation. They help flush out debris without harming healthy tissues.
- Sterile saline is isotonic and non-toxic, making it ideal for general use in clean and contaminated wounds.
- Lactated Ringer’s solution contains electrolytes that support tissue health and is often used in larger wounds or longer surgeries.
Both options are gentle and effective for maintaining a clean surgical field while preserving the body’s natural healing process.
2. Antiseptic options: chlorhexidine, povidone-iodine
When infection risk is high, antiseptic fluids are sometimes used to reduce bacterial load. However, they must be used carefully.
- Chlorhexidine has strong antimicrobial effects but can irritate tissues if too concentrated.
- Povidone-iodine is broad-spectrum but can be toxic to cells if not diluted properly.
These are typically used only in contaminated wounds or during lavage after opening infected areas. Vets must weigh the benefits against the potential for tissue damage.
3. Risks of using tap water, detergents, or alcohol-based fluids
Non-sterile or harsh fluids may seem convenient but can cause more harm than good.
- Tap water may contain bacteria or minerals that irritate tissues and increase infection risk.
- Detergents are not designed for use on living tissue and may delay healing.
- Alcohol-based solutions are cytotoxic and can cause pain, especially on open wounds.
These fluids should be avoided during surgical irrigation unless no sterile alternatives are available. Even then, extreme caution is needed.
Practical Guidelines for Effective Lavage
For surgical irrigation to work well, it must be done with the right tools, fluid pressure, and technique. Proper lavage reduces bacteria, clears debris, and prepares the wound for closure or further treatment.
- Ideal pressure (7–8 psi): This range provides enough force to remove bacteria and debris without damaging healthy tissue. Pressure can be achieved using large syringe-and-catheter systems or specialized pulsatile lavage devices.
- Recommended fluid temperature (30–35°C): Using warm fluids helps maintain the dog's body temperature during surgery. Cold fluids can lower tissue temperature, slow healing, and increase anesthesia risk.
- Importance of volume and wound coverage: Adequate volume ensures that the entire wound is flushed properly. High-risk wounds may require 500–1000 mL or more to achieve proper cleaning. Every part of the wound should be irrigated, including deep pockets or joint spaces.
- Keeping the wound bed moist and debris-free: Dry tissues can die quickly. Continuous or repeated lavage keeps the wound moist and clears any clots, bone fragments, or foreign material that could delay healing.
Following these simple but essential steps leads to better healing, fewer infections, and improved surgical outcomes.
Understanding Biofilms and Resistant Bacteria
Biofilms are a major concern in veterinary surgeries. A biofilm is a layer of bacteria that sticks to a surface, like bone, tissue, or implants, and covers itself with a slimy protective coating. Once formed, it becomes very hard to remove and can block antibiotics or immune cells from reaching the bacteria inside. This leads to chronic infection, delayed healing, and sometimes surgical failure.
Resistant bacteria, such as Pseudomonas aeruginosa or MRSP (methicillin-resistant Staphylococcus pseudintermedius), are often found in surgical wounds—especially in repeat surgeries or cases with previous antibiotic use. These bacteria can survive common treatments and spread quickly in hospital settings if hygiene is poor.
Standard fluids like saline or Ringer’s solution are good at flushing out loose debris and some bacteria, but they cannot break down biofilms or kill resistant organisms. Once a biofilm forms, basic irrigation is no longer enough. This is why understanding these threats is important for every surgeon. Using advanced irrigation products or combining mechanical flushing with antiseptics may be necessary in high-risk cases to prevent long-term complications.
Limitations of Traditional Irrigation Solutions
While traditional irrigation solutions like sterile saline and antiseptics are widely used, they come with important limitations that every surgeon should understand. These solutions help with basic wound flushing, but they often fall short in dealing with deeper infection risks, especially in complex or contaminated cases.
Key limitations include:
- No active effect on bacteria or biofilms: Sterile saline and lactated Ringer’s solution are excellent for cleaning, but they don’t kill bacteria or disrupt biofilms. This limits their usefulness in high-risk or infected wounds.
- Potential tissue toxicity of some antiseptics: Antiseptic agents like chlorhexidine and povidone-iodine can harm healthy tissue if used in high concentrations or for prolonged contact. Tissue damage may delay healing or increase post-op complications.
- Inconsistent preparation or "home-brew" mixes: Some clinics mix their own solutions using various ingredients. These mixes may lack standardization in concentration, pH, or sterility, increasing the risk of irritation or infection rather than preventing it.
Because of these issues, many surgeons are now turning to advanced irrigation products specifically designed to be both tissue-safe and effective against biofilms and resistant bacteria.
Introducing Simini Protect Lavage
Simini Protect Lavage is an advanced surgical irrigation solution designed for veterinary use. Unlike basic fluids, Simini works intra-operatively to reduce biofilms and drug-resistant bacteria, without using antibiotics.
It’s non-toxic to tissue, safe for open wounds, and leaves no harmful residue. Because it’s not antibiotic-based, there’s no known risk of resistance, making it reliable even in repeated surgeries.
Simini is easy to use with standard lavage tools, so it fits smoothly into existing surgical workflows. Trusted by leading surgeon Dr. Aldo Vezzoni, it has already been used in over 30,000 veterinary surgeries worldwide with excellent results.
Why More Surgeons Are Switching to Simini
Veterinary surgeons are increasingly choosing Simini Protect Lavage because it offers better infection control right when it matters most—before wound closure. By actively targeting biofilms and resistant bacteria during surgery, Simini helps reduce post-operative complications and improves healing outcomes.
It also supports antimicrobial stewardship, a key goal in modern veterinary medicine. Since Simini is non-antibiotic and has no known resistance, it lowers the need for systemic antibiotics and helps fight the global issue of drug resistance.
Surgeons appreciate the peace of mind that comes from using a solution backed by clinical use and trusted names like Dr. Aldo Vezzoni. For clients, knowing their pet received the highest standard of surgical care builds confidence and satisfaction. Simini is a simple, science-backed upgrade to routine lavage that adds real value to every procedure.
FAQs
What does Simini Protect Lavage do?
Simini Protect Lavage is an intra-operative irrigation solution that helps reduce bacteria and biofilms, two major infection risks in veterinary surgery. It is non-antibiotic, has no known resistance, and is designed to support wound hygiene during surgery without damaging healthy tissue. It fits easily into existing surgical workflows without extra equipment.
Can Simini be used in both clean and contaminated surgeries?
Yes, Simini can be used in both routine and contaminated procedures. Many surgeons initially used it in complex or revision surgeries, then adopted it for clean cases as part of their routine surgical protocol. Its ability to reduce biofilms and resistant bacteria makes it a valuable option across various surgical scenarios.
How is Simini different from saline or povidone-iodine?
Saline helps flush debris but has no active effect on bacteria or biofilms. Povidone-iodine may cause tissue irritation or damage if not used correctly. Simini is different—it reduces bacterial load and biofilms without harming healthy tissue, and it's easy to use without mixing or dilution.
Is Simini Protect Lavage safe for surgical tissue?
Yes. Simini is tissue-compatible and does not require dilution. It has been used in over 30,000 veterinary surgeries and is based on a leading antibiofilm product used in human medicine. It does not contain antibiotics and supports antimicrobial stewardship goals in veterinary practice.
Does Simini require special tools or training?
No special tools are needed. Simini can be used with standard lavage systems such as syringes, catheters, or pulsatile lavage devices. There’s no need for new techniques or extra staff training, which makes it easy to integrate into your current surgical setup.
Why are more surgeons using Simini today?
Veterinary surgeons are choosing Simini because it helps reduce two of the biggest surgical risks—biofilms and resistant bacteria. It supports better wound hygiene, fits antimicrobial stewardship efforts, and gives surgeons more control before wound closure. With its ease of use and strong safety profile, Simini has become part of routine surgical protocols for many leading practices.

