

Bursitis in Dogs: Symptoms, Causes & Treatment
Learn about bursitis in dogs, including symptoms, causes, and effective treatments to help your pet recover comfortably.

This article is for informational purposes only and is not a substitute for professional veterinary advice. Every case is unique, so always consult your veterinarian for guidance specific to your pet.
This content is intended for veterinary professionals for educational purposes. It does not replace clinical judgment or tailored advice. Always rely on your training, expertise, and the specific context of your patients.

Bursitis is inflammation of a bursa a small, fluid-filled sac that sits between bones, tendons, and muscles to reduce friction at joints. When a bursa becomes inflamed, it fills with excess fluid, swells, and causes pain with movement. In dogs, it most commonly affects the elbow, shoulder, and hip.
The condition ranges from a minor, manageable inconvenience to a painful, chronically recurring problem that affects your dog's quality of life. Catching it early and addressing the cause is the most effective approach.
Quick answer: Bursitis is inflammation of the bursae (fluid-filled joint cushions), causing swelling and pain most commonly at the elbow or hip. Large breed and senior dogs are most affected. Treatment involves rest, NSAIDs, and soft bedding.
Key takeaways
- Bursae are fluid-filled cushions located at high-friction points around joints; inflammation of these is bursitis
- Repeated trauma from lying on hard surfaces is the most common cause in large breed dogs
- Elbow bursitis is especially common in male dogs and large/giant breeds like Great Danes, Mastiffs, and Dalmatians
- A hygroma is a type of acquired bursitis: a fluid pocket the body forms over a repeatedly traumatized bony area
- Septic bursitis (infected bursa) is more serious and requires antibiotics alongside other treatment
- Soft orthopedic bedding is the single most effective prevention measure for pressure-related bursitis
What are bursae and why do they become inflamed?
Bursae are small, synovial membrane-lined sacs filled with fluid. Their job is to reduce friction between moving structures bones, tendons, and muscles at and around joints. The Pet Vet describes them as "small, fluid-filled sacs that sit between bones, tendons, and muscles around joints. These tiny cushions reduce friction and allow smooth movement."
When the bursa is subjected to repeated trauma or sustained pressure, it responds by producing more fluid and thickening its lining. AnimalWised explains the mechanism: "When the synovial bursae are affected by inflammatory processes, the synovial membrane thickens and excess fluid is produced. This inflammation causes pain in the dog's joints."
There are two types of bursitis in dogs:
Acquired bursitis: develops in response to repeated mechanical trauma the most common type in dogs. The elbow bursa is the most frequent site because dogs repeatedly contact hard surfaces at this point when lying down.
Septic bursitis: occurs when bacteria infect the bursa, either through a puncture wound or via the bloodstream. More painful, requires antibiotic treatment, and carries a higher risk of complications.
Causes of bursitis in dogs
Repeated trauma from hard surfaces
The most common cause. Dogs that routinely lie on concrete, hardwood, or tile repeatedly traumatize the bursa over bony prominences with every impact. VIN's Veterinary Partner describes what happens: "The dog has most likely been resting on a fairly hard surface and the pressure of their weight has created tissue damage over the elbow bones. The area is not able to heal because of the repeated tissue damage from the dog simply resting on their elbows. A fluid pocket forms as the body attempts to create its own cushion."
Obesity
Excess body weight concentrates greater force at each bony contact point with every movement and impact. AnimalWised: "Obesity can put additional strain on a dog's joints and lead to greater incidence of bursitis."
Compensatory overloading
When a dog injures one limb, it shifts weight to the others. AnimalWised notes: "If a dog receives an injury to one limb, they will often over-compensate and put more weight on another. This can lead to bursitis in the latter limb."
Underlying joint disease
Dogs with existing arthritis or joint degeneration have altered movement patterns and increased local inflammation, making them more prone to secondary bursitis. The Pet Vet: "Underlying arthritis dogs with existing joint disease are more prone to bursitis."
Infection (septic bursitis)
Bacteria can enter a bursa through a puncture wound or, rarely, travel through the bloodstream from a distant infection site. Merck Veterinary Manual: "Septic bursitis is more serious and is associated with pain and lameness. Infection of a bursa may be hematogenous or follow direct penetration."
Which dogs are most affected?
- Large and giant breeds: Great Danes, Mastiffs, Saint Bernards, Dalmatians, German Shepherds more body weight, greater pressure at bony contact points
- Senior dogs: reduced muscle mass provides less natural padding; reduced activity means longer periods in one position
- Male dogs: elbow bursitis specifically shows a higher prevalence in male dogs according to AnimalWised
- Sedentary dogs: more time lying on hard surfaces means more cumulative trauma to bursae
- Overweight dogs: heavier impact forces at every bony prominence
Symptoms of bursitis in dogs
The presentation depends on whether the bursitis is acute (sudden), chronic, or septic.
Acute bursitis signs:
- Soft, fluid-filled swelling at the affected joint
- Warmth at the swelling site
- Pain on palpation (dog pulls away when the area is touched)
- Mild lameness or stiffness
Chronic bursitis signs:
- Larger, firmer swelling (the bursa wall thickens with fibrous tissue over time)
- Merck Veterinary Manual: "Excess bursal fluid accumulates, and the wall of the bursa is thickened by fibrous tissue. These bursal enlargements develop as cold, painless swellings and, unless greatly enlarged, do not severely interfere with function."
- Callus formation over the swelling site
- Hair loss over the affected area
Septic bursitis signs (more serious call the vet the same day):
- Hot, painful swelling
- Discharge from the site if it ruptures
- Dog is lame and reluctant to move
- Systemic signs: lethargy, fever, reduced appetite
For how swelling caused by bursitis overlaps with other causes of foot and joint swelling, see swelling caused by bursitis.
Bursitis vs. hygroma: what's the difference?
The terms are closely related. Merck Veterinary Manual defines it precisely: "Accumulation of fluid in acquired bursitis is termed hygroma."
In practical terms, a hygroma is a specific type of acquired bursitis: the fluid pocket that forms at the elbow or hock in response to repeated trauma. The word "bursitis" is the broader clinical term for inflammation of any bursa; "hygroma" specifically refers to the fluid-filled cavity that forms at pressure points in dogs.
How vets diagnose bursitis
A vet can usually diagnose bursitis from a physical examination alone: the characteristic location, fluctuant swelling, and history of hard surface exposure are typically sufficient. Additional tests may be ordered to:
- Rule out septic bursitis: fluid aspiration and cytology to check for bacteria and inflammatory cells
- Rule out neoplasia: if the mass is firm, growing, or atypical in appearance, fine needle aspiration or biopsy may be needed
- Confirm joint vs. extra-articular location: Merck notes that "radiography or ultrasonography can be useful to help confirm an extra-articular location of the lesion" this confirms the swelling is not within the joint itself
Treatment
Mild and early bursitis
- Soft bedding: orthopedic foam to remove the source of ongoing trauma. The Pet Vet and Pets4Homes both identify this as the cornerstone of management.
- Protective padding: donut bandages or commercially available elbow pads (DogLeggs) protect the site from further impact during healing
- NSAIDs: veterinary anti-inflammatory medications (meloxicam, carprofen) reduce pain and inflammation. Pets4Homes: "Pain and inflammation are managed with veterinary-prescribed medications such as NSAIDs."
- Activity modification: limit hard floor access and avoid activities that load the affected joint
Moderate bursitis: fluid drainage
Aspiration (needle drainage) of the bursa fluid can temporarily reduce swelling. However, VIN notes that "FNA and surgery is often not recommended, as these can introduce infection and the hygroma will return." Drainage is typically combined with protective padding and bedding changes; drainage alone without environmental correction leads to recurrence.
Septic bursitis
Antibiotics are required, ideally guided by culture of the aspirated fluid. The antibiotic course typically runs 3 to 6 weeks. Surgical drainage or debridement may be needed for severely infected bursae.
Surgical treatment for chronic or severe cases
Pets4Homes: "Surgery is rarely needed but can be considered for severe or chronic bursitis that does not respond to medical treatment." Surgical options include removal of the thickened bursa wall, debridement of chronic wounds, and reconstruction with skin flaps for large defects.
For how callus formation at the same pressure sites relates to bursitis, see calluses that develop alongside bursitis. For how pressure injuries at the same sites can progress beyond bursitis, see pressure injuries in bursitis-prone areas.
Prevention
- Orthopedic bedding: place thick foam beds in every location the dog rests, especially on hard floors
- Weight management: reducing body weight in overweight dogs directly reduces force at bony contact points
- Protective elbow/hock pads: useful for dogs that continue to use hard floors despite having soft bedding available
- Prompt treatment of joint injuries: addressing the primary injury prevents compensatory overloading of other limbs
Frequently asked questions
Is bursitis painful for dogs?
Acute bursitis is usually painful the dog shows reluctance to have the area touched and may limp. Chronic bursitis (the large, firm, cold swellings described by Merck) is often surprisingly painless unless the swelling is very large or becomes infected. Septic bursitis is reliably painful and requires urgent treatment.
Can bursitis in dogs go away on its own?
Mild early bursitis can improve with environmental changes: switching from hard floors to thick foam bedding and avoiding the source of trauma may allow the bursa to reabsorb its excess fluid. Without addressing the underlying cause, however, the condition typically recurs or worsens over time.
My dog has a soft lump on the elbow that does not seem to hurt. Should I be worried?
A soft, non-painful swelling at the elbow is the classic presentation of an elbow hygroma (acquired bursitis). It is not immediately dangerous but should be evaluated by a vet to confirm the diagnosis and rule out infection or neoplasia. Without protection from further trauma, it will typically grow larger and become more difficult to manage.
How long does bursitis take to heal in dogs?
Mild cases managed with soft bedding and NSAIDs may improve over 4 to 8 weeks. Chronic bursitis with a thickened, fibrotic bursa wall takes much longer to remodel and may never fully resolve. Septic bursitis responds to antibiotics over 3 to 6 weeks but requires consistent environmental correction to prevent recurrence.
Can bursitis become dangerous in dogs?
Yes, if it becomes septic (infected). An infected bursa can spread bacteria to surrounding tissue and, rarely, into the bloodstream. A bursitis swelling that becomes hot, painful, shows discharge, or is accompanied by systemic signs (lethargy, fever, not eating) needs same-day veterinary care.
What is the difference between bursitis and arthritis in dogs?
Arthritis is degeneration of the cartilage and bone surfaces within a joint. Bursitis is inflammation of the fluid-filled sac outside the joint. Both cause joint area swelling and pain, but they require different treatments and have different prognoses. They can and frequently do occur together in older large breed dogs, with arthritis contributing to the altered movement patterns that promote bursitis.
Resources
- AnimalWised. Bursitis in Dogs: Causes and Treatment. animalwised.com
- Merck Veterinary Manual. Hygroma in Dogs. merckvetmanual.com
- VIN Veterinary Partner. Elbow Hygromas in Dogs. veterinarypartner.vin.com
- Pets4Homes. Bursitis Infections in Dogs. pets4homes.co.uk
- The Pet Vet. Bursitis in Dogs: Best Medications and Treatment Guide. thepetvet.com

Get a Free Poster
Enhance your workspace with a high-quality radiographs reference poster, designed for veterinary professionals. This free physical poster will be shipped directly to you—just fill out the form to request your copy.




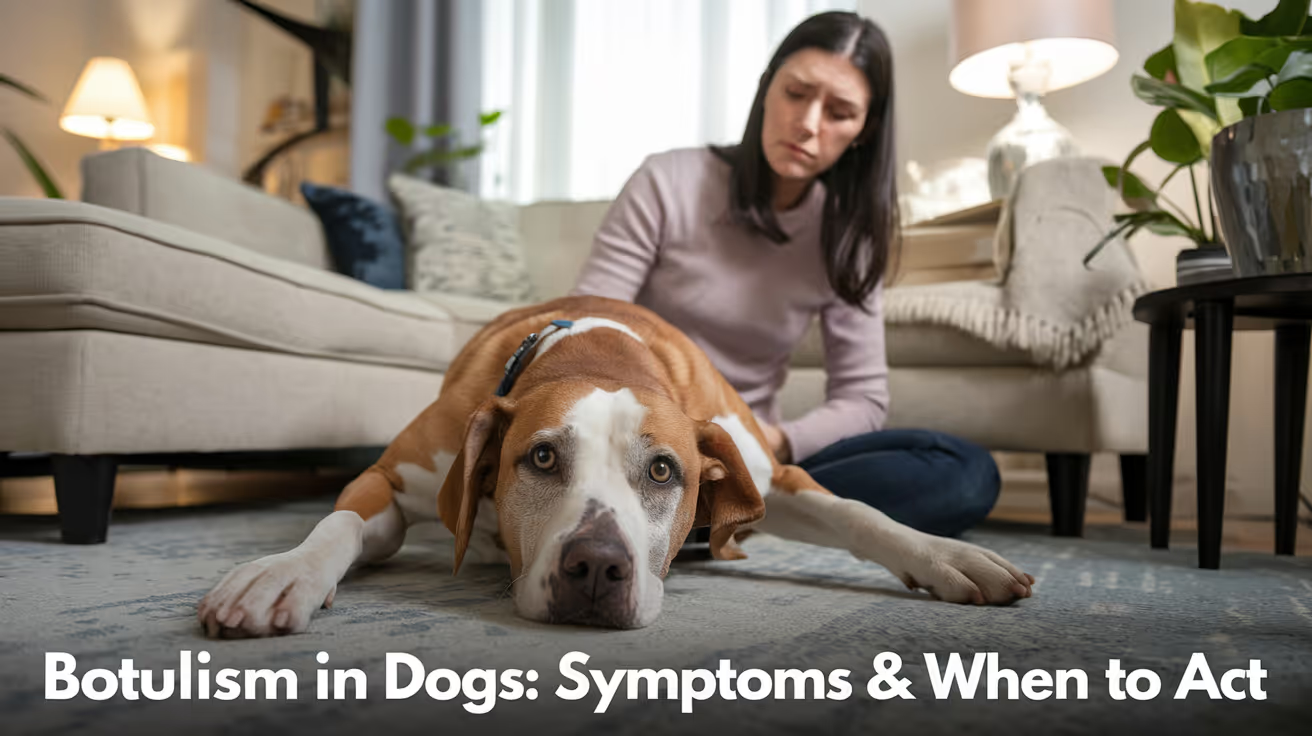


Taking Great TPLO Radiographs
Click Below to Watch Live Video Demos


We'll send you a Free Wall Poster with all the steps
Step #1
Getting Ready
Ensuring a clean surgical field starts with proper skin preparation. This video demonstrates the best practices for:
- Shaving the patient – Achieving a close, even shave while minimizing skin irritation
- The Dirty Scrub – The initial skin prep step to remove surface debris and reduce bacterial load before the sterile scrub.
Following these techniques helps reduce infection risk and improve surgical outcomes. Watch the video to see how it’s done effectively!


Step #2
Reduce Your Risks
Many surgeons are shocked to find out that their patients are not protected from biofilms and resistant bacteria when they use saline and post-op antibiotics.
That’s Where Simini Comes In.
Why leave these risks and unmanaged? Just apply Simini Protect Lavage for one minute. Biofilms and resistant bacteria can be removed, and you can reduce two significant sources of infection.
Step #3
Take the Course
Preventing surgical infections is critical for patient safety and successful outcomes. This course covers:
- Aseptic techniques – Best practices to maintain a sterile field.
- Skin prep & draping – Proper methods to minimize contamination.
- Antibiotic stewardship – When and how to use perioperative antibiotics effectively.
Stay up to date with the latest evidence-based protocols. Click the link to start learning and earn CE credits!

Things to know
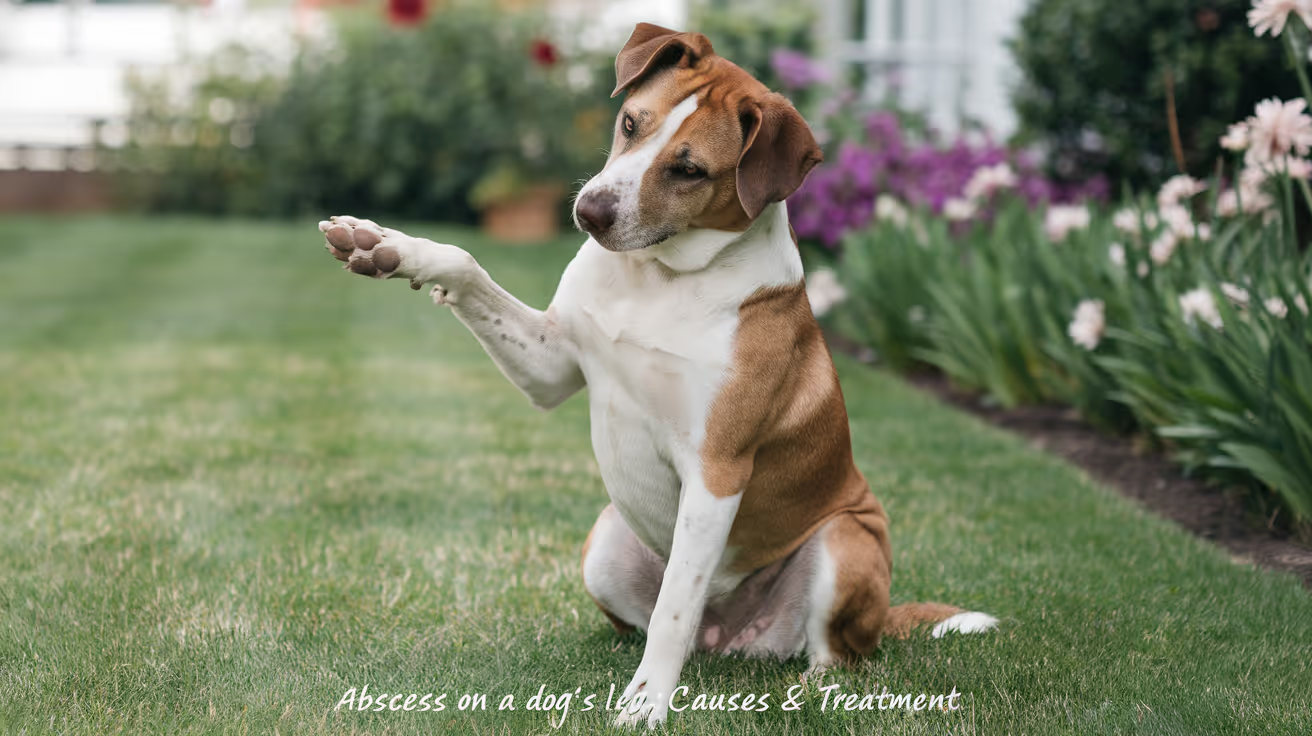
Abscess on a Dog's Leg: Causes, Signs & Treatment
Learn about causes, signs, and treatment of abscess on a dog's leg to help your pet recover quickly and safely.
An abscess is a pocket of pus trapped beneath the skin. On a dog's leg, it feels like a warm, painful swelling that appeared relatively quickly often within 24 to 72 hours of a bite, scratch, or puncture. It is not going to resolve on its own, and it should not be drained at home.
The good news is that with proper veterinary treatment, most leg abscesses heal completely within 1 to 2 weeks.
Quick answer: A dog leg abscess is a pus-filled swelling from bacterial infection, usually after a bite or puncture. Signs are warmth, pain, and rapid swelling. Treatment needs veterinary drainage and antibiotics. Most heal within 1 to 2 weeks.
Key takeaways
- An abscess is a pus pocket formed when bacteria are walled off in tissue by a fibrous capsule
- Bite wounds are the most common cause of leg abscesses; puncture wounds seal over quickly while bacteria multiply inside
- Warmth, pain, and rapid swelling are the hallmarks; the dog may limp or guard the leg
- Never drain an abscess at home inadequate drainage leaves bacteria behind and causes recurrence
- Foreign objects (foxtails, splinters) must be identified and removed or the abscess will keep recurring
- Healing takes 1 to 2 weeks with appropriate treatment; more complex cases involving surgery take longer
What is an abscess and why does it form?
VCA Animal Hospitals: "Abscesses are firm or compressible, often painful swellings that contain pus. They can develop in many areas of the body. Abscesses are caused by the introduction of bacteria through wounds, injuries, or bloodborne in the case of an internal organ abscess."
When bacteria enter tissue through a puncture or bite wound, the body's immune system responds by sending white blood cells to fight the infection. Dead white blood cells, bacteria, and tissue debris accumulate to form pus. The body walls off this material with a fibrous capsule creating the abscess cavity. As pus accumulates, pressure builds, causing pain and swelling.
Zumalka: "A fibrous capsule forms as purulent material accumulates beneath the skin, leading to increased pressure and painful swelling."
The problem with puncture wounds specifically: the entry hole seals over quickly while bacteria are still inside, trapping them in a warm, nutrient-rich environment where they multiply unchecked.
Common causes of leg abscesses in dogs
Bite wounds from other animals
The most common cause. Dog bites and cat bites puncture deep into tissue while depositing bacteria from the attacker's mouth. Cat bites are especially prone to abscess formation because their needle-sharp teeth create very deep punctures that seal over the surface rapidly.
UrgentVet: "A dog leg abscess may appear after trauma, injury, or a bite wound. Swelling, warmth, and limping are common signs. Since legs are highly mobile, abscesses here can be particularly uncomfortable."
Vetster adds an important reminder: "Bite wound abscesses are a bigger concern in unvaccinated pets due to the risk for rabies exposure." If your dog was bitten by an unknown animal, contact your vet about rabies prophylaxis recommendations regardless of abscess management.
Foreign body: foxtails, splinters, grass awns
Foxtails and similar plant material embed in the skin and migrate inward. They cannot dissolve and the body cannot expel them so bacteria colonize the tract they create, forming an abscess. Dogster: "During spring and summer, foxtails or grass seeds attach themselves to anything and everything, commonly burrowing into the feet."
VCA: "If a foreign object caused the abscess, it is critical to remove it or the abscess will return."
Recurring abscesses at the same location on the lower leg or foot, especially after outdoor activity in tall grass, strongly suggest a retained foreign body.
Puncture wounds from sharp objects
Nails, thorns, wire, and other sharp objects create deep puncture wounds that close quickly at the surface. The depth of penetration and the bacteria introduced determine whether an abscess forms.
Infected wound or laceration
Any wound that is not properly cleaned and monitored can become infected and progress to abscess formation. Deep lacerations are more prone than superficial abrasions.
Signs of an abscess on a dog's leg
Early signs (first 24 to 48 hours after injury):
- Sudden localized swelling, often appearing within 1 to 2 days of an injury
- The area is warm to the touch compared to surrounding skin
- Mild to moderate pain when the area is touched the dog pulls away or vocalizes
- Limping or reluctance to bear full weight on the leg
Established abscess signs:
- The swelling becomes fluctuant (you can feel fluid movement when pressed gently)
- The overlying skin may be reddened or discolored
- The dog may be licking, chewing, or biting at the area constantly
- Discharge (pus) appears if the abscess ruptures spontaneously at the skin surface
Signs the infection is spreading call the vet urgently:
- Increasing swelling beyond the original site
- Red streaking up or down the leg from the abscess (indicates cellulitis or lymphangitis)
- Fever, lethargy, loss of appetite, or depression
- The dog cannot bear any weight on the leg
How vets diagnose a leg abscess
Most abscesses are diagnosed on physical examination: the characteristic warm, fluctuant, painful swelling in context of an injury history or wound is usually diagnostic.
Fine needle aspiration: the vet inserts a needle into the swelling and withdraws fluid. Confirmation of purulent (pus) material confirms abscess. The sample may be sent for culture to identify the bacteria and guide antibiotic selection especially important for recurring abscesses.
Imaging: X-ray or ultrasound may be used if a foreign body is suspected, or if the abscess is very deep and its extent is unclear.
For how abscesses relate to furuncles and other deep skin infections that can progress without treatment, see furuncles as a related deep skin infection. For how abscesses cause limb swelling, see abscesses causing limb swelling. For how red lumps from abscesses appear on the leg alongside other causes, see abscesses as a cause of red lumps.
Treatment
Step 1: Drainage
The abscess must be opened and the pus removed. VCA: "The key is to remove the pocket of pus, either surgically or by draining and flushing."
How the vet drains it:
- Sedation or local anesthesia to manage pain during the procedure
- A small incision is made at the most dependent (lowest) point of the abscess to allow complete drainage
- The pus is expressed and the cavity flushed thoroughly with sterile saline or dilute antiseptic solution
Urgent Vet Care: "Depending on the size and location, we may place a drain or leave the wound partially open to encourage continued drainage."
A drain (a piece of soft tubing or rubber) may be placed through the abscess cavity and left in place for 24 to 48 hours to prevent premature closure while drainage continues. This is common for large or deep abscesses.
Step 2: Foreign body removal
If imaging or inspection reveals a foreign object (foxtail, splinter, grass awn), it is removed at this step. VCA is explicit: "If a foreign object caused the abscess, it is critical to remove it or the abscess will return." The entire tract created by the migrating foreign body may need to be surgically explored.
Step 3: Antibiotics
VCA: "Antibiotic therapy is a critical component of successful abscess treatment. The antibiotic will be chosen based on the bacteria involved, and the length of treatment will depend upon both the bacteria and the location. It is important to give the antibiotics for the entire time they are prescribed."
Common first-line choices: amoxicillin-clavulanate, cephalexin, or trimethoprim-sulfamethoxazole. Duration is typically 7 to 14 days for simple abscesses; longer for recurrent or deep cases.
Step 4: Pain management
Abscesses are painful. NSAIDs (meloxicam, carprofen) are typically prescribed for the first several days of treatment. Dogtime: "After the abscess is drained, your dog may require antibiotics and pain relievers to manage discomfort, as well as to prevent the infection from spreading."
Home care after veterinary treatment
Dogster (Dr. vet): "While warm compresses can help reduce swelling, draining the abscess without medical support may cause more harm or leave infection behind."
What to do at home:
- Apply warm compresses to the site for 10 to 15 minutes, 2 to 3 times daily, to encourage drainage and reduce swelling
- Clean the wound gently with dilute chlorhexidine or saline as directed by your vet
- Keep the area dry between cleanings
- Apply an E-collar to prevent licking licking reintroduces bacteria and delays healing
- Give all antibiotics on schedule and complete the full course
- Monitor for signs of recurrence: returning swelling, increasing discharge, or worsening pain
Signs to return to the vet:
- The swelling is not decreasing after 48 to 72 hours of treatment
- New discharge appears at the site after it appeared to be healing
- Red streaking appears around the wound
- The dog develops fever, stops eating, or becomes lethargic
For how severe infection can progress beyond an abscess to necrotizing tissue infection, see severe infection progression from abscess.
Can you treat a dog leg abscess at home?
Dogster: "While there are some aspects of treatment that can be managed at home, a dog's abscess should always be assessed by a vet. They will be able to work out an appropriate treatment plan, including medications such as antibiotics, and show you what you need to be doing at home."
Home care (warm compresses, keeping the area clean, E-collar) supports recovery but does not replace veterinary drainage and antibiotics. Attempting to squeeze or lance an abscess at home:
- May not fully drain the cavity
- Risks introducing additional contamination
- Can rupture the fibrous capsule internally, spreading infection into surrounding tissue
Frequently asked questions
How quickly does a dog leg abscess develop?
Abscesses typically develop within 24 to 72 hours of the causative injury. Some develop more slowly, particularly if the bacteria are less aggressive or the immune system has partially contained the infection. Most owners notice the swelling appearing surprisingly quickly a leg that looked normal the day before the vet visit may have a significant abscess by the appointment.
Will a dog leg abscess burst on its own?
It may. When the skin overlying the abscess thins sufficiently from internal pressure, spontaneous rupture can occur, releasing pus. This temporarily relieves pressure but does not resolve the infection the abscess often reforms unless the cavity is properly flushed and antibiotics are given. Spontaneous rupture also creates an open wound that can be contaminated from the environment. Vet assessment remains necessary even after spontaneous rupture.
My dog had an abscess treated but it came back in the same spot. Why?
Recurrence at the same site almost always means either a foreign body was not found and removed, or the antibiotic course was not completed. Dogster: foxtails in particular migrate inward over time, seeding a new abscess along their path. X-ray or ultrasound evaluation for a retained foreign object is the appropriate next step for any recurring abscess at the same site.
Is a dog leg abscess contagious to other dogs or humans?
The bacteria inside an abscess can theoretically transfer through direct contact with wound discharge, but abscess formation itself is not contagious it requires a specific combination of bacteria being introduced through a wound in that individual animal. Standard hygiene precautions (wash hands after handling discharge) are appropriate when caring for an infected wound.
Can a dog leg abscess become life-threatening?
Yes, in severe or untreated cases. If bacteria spread from the abscess into surrounding tissue (cellulitis), into the lymphatic system, or into the bloodstream (sepsis), the situation becomes life-threatening. Vetster: "Complications may occur in immunosuppressed and unvaccinated dogs." A dog with an abscess that is systemically unwell lethargic, not eating, running a fever needs emergency veterinary care.
How do I know if my dog's leg swelling is an abscess or a tumor?
An abscess typically has a rapid onset (days), is warm and painful, and is associated with an injury or wound. A tumor develops over weeks to months, is usually not painful, and does not have a history of trauma. However, infected cysts and tumors can look similar to abscesses. Fine needle aspiration by a vet provides a definitive answer when the distinction is unclear.
Resources
- VCA Animal Hospitals. Abscesses in Dogs. vcahospitals.com
- Dogster. Can I Treat My Dog's Abscess at Home? Our Vet Explains. dogster.com
- Dogtime. Abscesses in Dogs: Symptoms, Causes and Treatments. dogtime.com
- Vetster. Skin Abscesses in Dogs. vetster.com
- UrgentVet. Dog Abscesses: Causes, Symptoms and How You Treat Them. urgentvet.com
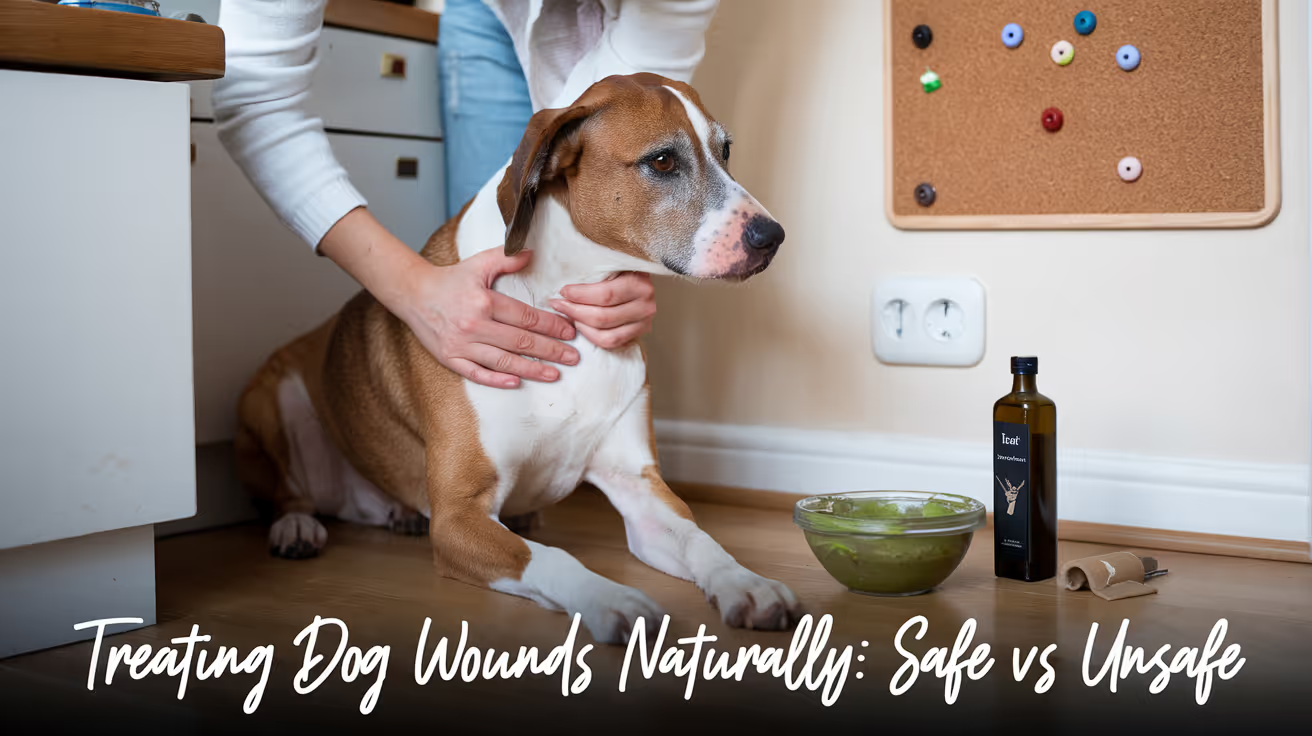
Treating Dog Wounds Naturally: Safe and Unsafe Methods
Learn safe and natural ways to treat dog wounds at home, including what remedies to avoid for your pet's health and healing.
The internet is full of natural wound remedies for dogs. Some have genuine evidence behind them. Others cause real harm to healing tissue.
Knowing which is which could mean the difference between a wound that heals well and one that becomes infected, chemically damaged, or toxic.
Quick answer: Saline solution, medical-grade Manuka honey, and dilute chlorhexidine are the safest and most effective natural or gentle home wound treatments. Hydrogen peroxide, rubbing alcohol, tea tree oil, and undiluted iodine all cause tissue damage and must be avoided. Natural treatment works for minor wounds only. Any wound with pus, spreading redness, deep tissue involvement, or systemic signs in your dog needs veterinary care, not home remedies.
Key takeaways
- Saline is the safest cleaning solution for dog wounds: Gentle, effective, no tissue damage.
- Medical-grade Manuka honey has genuine antibacterial evidence: Raw grocery store honey does not.
- Hydrogen peroxide is not safe for dog wounds: It destroys healthy cells and delays healing.
- Tea tree oil is toxic to dogs: Never use it on or near any wound.
- Natural does not mean safe: Several natural substances are harmful or toxic to dogs.
- No home remedy treats infection: Established infection requires veterinary antibiotics.
When home treatment is and is not appropriate
Before reaching for any remedy, assess the wound honestly.
Minor wounds appropriate for home care:
- Small surface scrapes and abrasions with no debris
- Shallow cuts under half an inch that have stopped bleeding
- Minor skin irritation around a healing area
Wounds that require veterinary attention regardless of home remedy interest:
- Any wound showing pus, foul odor, spreading redness, or heat
- Bite wounds and puncture wounds of any size
- Wounds that gape, are deep, or are over a joint
- Any wound accompanied by lethargy, reduced appetite, or fever
- Wounds that have not improved after 48 hours of appropriate home care
For identifying wounds that need veterinary care not home treatment, that guide covers the full range of signs that distinguish a manageable wound from one requiring professional assessment.
Safe natural and gentle wound treatments
1. Saline solution
Evidence level: Strong. Recommended by veterinarians universally.
Sterile saline (0.9% sodium chloride in water) is the gold standard for wound irrigation at home. It is gentle enough not to damage healthy tissue, effective at removing debris and reducing surface bacterial load, and widely available as pre-made wound wash.
How to use:
- Irrigate directly into the wound using gentle syringe pressure
- Do not scrub or dab: irrigation is more effective and less damaging
- Use at each wound cleaning session (typically two to three times daily for active wounds)
DIY option: 1 teaspoon of table salt dissolved in 2 cups of clean water approximates 0.9% saline. Use within 24 hours.
2. Medical-grade Manuka honey
Evidence level: Good. Multiple studies confirm antibacterial and wound-healing properties.
Manuka honey is produced from the Leptospermum scoparium plant in New Zealand and Australia. It contains methylglyoxal (MGO), a compound with potent antibacterial activity against a wide range of bacteria, including antibiotic-resistant strains such as MRSA and MRSP.
Research has confirmed Manuka honey inhibits Staphylococcus pseudintermedius, the most common cause of dog skin infections, including antibiotic-resistant strains.
Key distinctions:
How to use:
- Apply a thin layer to the wound surface
- Cover with a clean, non-stick dressing
- Change daily
- Do not use on deep wounds or established infections without veterinary guidance
- Prevent licking (most dogs find honey highly appealing)
3. Dilute chlorhexidine solution
Evidence level: Strong. Used in veterinary practice worldwide.
Chlorhexidine is technically a pharmaceutical antiseptic, not a "natural" remedy. However, it is frequently recommended as a safe home antiseptic for dog wounds when diluted correctly.
At 0.05% concentration (50 times more dilute than the standard 2.5% concentrate), chlorhexidine is safe for wound contact and effective against bacteria, yeasts, and some viruses.
How to use:
- Ask your vet for the correct dilution and product
- Do not use concentrated chlorhexidine directly on wounds
- Use diluted chlorhexidine scrub only on surrounding skin, not in open wounds
4. Coconut oil
Evidence level: Moderate. Useful as a surface moisturizer; not a primary antiseptic.
Coconut oil contains lauric acid and medium-chain fatty acids with mild antimicrobial properties. It is non-toxic, well-tolerated by most dogs, and can prevent dry skin around a healing wound from cracking.
Where it helps:
- Keeping the skin around a healing wound from drying out
- Minor superficial scratches and abrasions on intact skin
Limitations:
- Not appropriate for open, infected, or discharging wounds
- Most dogs will lick it off immediately: only useful when the wound is inaccessible to the dog
- Does not replace antiseptic cleaning
5. Chamomile tea rinse
Evidence level: Limited but low-risk for minor surface irritation.
Cooled chamomile tea applied gently to the skin around a wound may reduce mild inflammation and redness. German chamomile contains apigenin, a compound with documented anti-inflammatory properties.
Use only for:
- Minor surface redness around a nearly-healed wound
- Not for open wounds, infected wounds, or wounds with discharge
Natural treatments to avoid: what causes harm
Hydrogen peroxide
This is the most commonly misused wound treatment in both human and dog wound care.
Hydrogen peroxide feels like it should work because it bubbles, and the bubbling looks like cleaning. What it actually does:
- Destroys healthy cells: The oxidative action that kills bacteria also kills fibroblasts (healing cells) and disrupts granulation tissue
- Delays healing: Each application sets back tissue repair
- Pushes debris deeper: The bubbling action can drive contamination into deeper tissue layers rather than removing it
Verdict: Do not use hydrogen peroxide on dog wounds. At all. For any reason.
Rubbing alcohol (isopropyl alcohol)
- Causes significant pain and burning on contact with open tissue
- Destroys healing cells just as hydrogen peroxide does
- Dries wound tissue and creates a hostile environment for cell migration
- Provides no benefit over saline for wound cleaning
Verdict: Never use on dog wounds.
Tea tree oil
This is the most dangerous "natural remedy" on this list.
Tea tree oil (melaleuca oil) is toxic to dogs whether applied topically or ingested. Toxicity signs include:
- Weakness and muscle tremors
- Loss of coordination
- Drooling and vomiting
- Skin redness and irritation at application site
- In severe cases, liver damage
Tea tree oil should never be used on dogs in any concentration. This includes products marketed as pet-safe that contain any percentage of tea tree oil.
Verdict: Never, under any circumstances.
Undiluted iodine (Betadine at full concentration)
Betadine at its standard 10% concentration is too strong for open wound contact. At full concentration it:
- Causes chemical burns to exposed tissue
- Delays wound healing
- Can be absorbed and cause systemic issues if used extensively
Diluted povidone-iodine at 0.1 to 0.5% (a pale tea color when mixed with water) is safe for wound use and is sometimes recommended by vets. The undiluted product from the bottle is not.
Essential oils (most types)
Many essential oils are toxic or irritating to dogs:
- Tea tree oil: Toxic (covered above)
- Eucalyptus oil: Toxic to dogs
- Pennyroyal oil: Highly toxic
- Clove oil: Irritating and potentially toxic
- Lavender oil: Low-level concern; safer than others but still not recommended for open wounds
Verdict: Avoid all essential oils on or near dog wounds unless a veterinarian specifically recommends a particular product.
Safe vs. unsafe: quick reference table
What natural methods cannot do
This is the most important point in this guide.
Natural treatments can support the conditions for healing in minor wounds. They cannot:
- Clear an established bacterial infection
- Replace systemic antibiotics for wounds with significant infection
- Treat abscess formation or deep tissue infection
- Prevent spreading infection from reaching the bloodstream
For when natural methods are insufficient and veterinary treatment is required, that guide covers the full treatment picture including when antibiotics are necessary and what the treatment protocol looks like.
The role of licking prevention in natural wound care
No natural wound treatment works if the dog can access the wound.
Saliva introduces bacteria. Physical licking removes whatever was just applied. The mechanical trauma from the tongue disrupts healing tissue.
E-collar or recovery suit use is not optional regardless of which wound treatment approach you use.
For why licking is not a natural remedy despite the instinct behind it, that guide explains the biological mechanisms through which licking worsens infections specifically.
Tracking healing when using natural methods
If you are managing a minor wound at home with natural methods, daily monitoring determines whether you are on the right track.
Signs the wound is responding:
- Redness reducing each day
- No discharge developing beyond day one
- Wound shrinking or closing
- Your dog less interested in the area
Signs you need veterinary care:
- Discharge appears (especially yellow, green, or thick)
- Redness is spreading beyond the wound margin
- Wound is not visibly improving after 48 hours of care
- Your dog is showing systemic signs: lethargy or reduced appetite
- Any foul or unusual odor from the wound
For tracking healing when using natural methods and understanding which stage a wound is in and what progression should look like, that guide provides the stage-by-stage framework for monitoring.
Frequently asked questions
Can I use Neosporin on my dog's wound?
Use with caution. Some formulations of Neosporin contain polymyxin B, which is generally safe for topical use on dogs. However, Neosporin is designed for human skin, dogs will lick it off immediately (requiring a cone), and it provides minimal benefit over saline cleaning for most minor wounds. Ask your vet before using.
Is coconut oil antibacterial enough to use on infected wounds?
No. Coconut oil has mild surface antibacterial properties but is not strong enough to address an established wound infection. It is appropriate as a surface moisturizer around healing wounds, not as a treatment for infected ones.
What can I put on a dog wound to help it heal faster?
The most evidence-backed home approach: saline irrigation two to three times daily, E-collar to prevent licking, and monitoring. Medical-grade Manuka honey can be added for minor wounds. Everything else is less supported and some options cause harm.
My dog ate some of the honey I applied. Is that dangerous?
Medical-grade Manuka honey in small amounts is not toxic to dogs. However, honey is high in sugar. If your dog is diabetic or weight-sensitive, contact your vet. This also illustrates why E-collar use is essential when applying any topical wound treatment.
Can I use diluted apple cider vinegar on a dog wound?
No. Apple cider vinegar is acidic and causes irritation and tissue damage when applied to open wounds. Despite being widely suggested online, it is not appropriate for wound care in dogs.
The natural wound care options that genuinely help dogs are simple: saline, Manuka honey for minor wounds, and clean, consistent monitoring. The ones that harm are often the most popular. Hydrogen peroxide belongs in the "never use" category, and tea tree oil belongs nowhere near a dog. When in doubt, saline is safe. When infection is present, call your vet.
Resources
The following sources were used as reference and background for this article:
- Whole Dog Journal. Natural Antiseptics for Dog Wounds. whole-dog-journal.com
- PetMD. Dog Wound Care: How to Clean and Treat Dog Wounds at Home. petmd.com
- American Kennel Club. Should Dogs Lick Wounds? How Saliva Affects Wound Healing. akc.org
- Institute for Environmental Research and Education. What Is the Best Natural Antiseptic for Dog Wounds? iere.org
- Can Dogs Eat It. 3 Natural Antiseptics for Dog Wounds for Safe Healing. candogseatit.com
- The Natural Dog Store. Treating Dog Wounds Naturally at Home. thenaturaldogstore.com
Can Dogs Get a Staph Infection?
Learn if dogs can get staph infections, their symptoms, causes, treatment, and prevention tips to keep your pet healthy.
Yes, dogs get staph infections, and they're among the most common skin problems seen in veterinary practice.
The bacteria responsible, primarily Staphylococcus pseudintermedius, are already present on healthy dogs. They live on the skin, in the mouth, nose, and gut without causing problems in most cases. Infection happens when the skin barrier breaks down or the immune system weakens, giving bacteria the opportunity to move from normal colonizer to active pathogen.
Quick answer: Yes, dogs get staph infections. Staphylococcus pseudintermedius is the most common cause in dogs and is found on the skin of roughly 50% of healthy dogs as normal flora. Infection typically occurs when the skin is damaged or immunity is compromised. Staph infections in dogs present as skin lesions, pustules, redness, and hair loss, and are treated with topical or systemic antibiotics depending on severity.
Key takeaways
- S. pseudintermedius is the primary staph species in dogs, not S. aureus (which is more common in humans).
- Staph is normal skin flora in about 50% of dogs and only causes infection under specific conditions.
- Skin barrier disruption is the most common trigger: allergies, wounds, and scratching allow bacteria in.
- Pyoderma (staph skin infection) is the most common form dogs develop, accounting for 92% of canine dermatitis.
- MRSP is the resistant form to watch for, particularly in dogs with prior antibiotic exposure.
- Transmission to humans is possible but uncommon with basic hygiene precautions.
Which staph bacteria affects dogs?
The primary staph species in dogs is Staphylococcus pseudintermedius. This is distinct from Staphylococcus aureus, which causes most human staph infections.
MedVet explains: "S. pseudintermedius is a bacterium commonly found on the skin, mouth, nose, or in the gastrointestinal tract of approximately 50% of dogs and cats. It typically causes no problems at all but can cause opportunistic infections."
The key word is opportunistic. This bacterium waits. When conditions shift in its favor, it becomes a pathogen.
Staphylococcus aureus can also affect dogs, though it's less common than in humans. Dogs can also harbor MRSA (methicillin-resistant S. aureus), but veterinarians are more concerned about MRSP (methicillin-resistant S. pseudintermedius) because it's more prevalent in canine infections.
For the full overview of staph infections in dogs including all affected body systems, see full overview of staph infections in dogs.
For the full breakdown of what staph aureus specifically is in dogs, see what staph aureus is specifically.
What triggers a staph infection in dogs?
Staph doesn't establish infection in healthy skin. Something has to compromise the barrier first.
Skin barrier disruption
The most common triggers are anything that breaks the skin or weakens its protective function:
- Allergies: atopic dermatitis causes chronic scratching and licking, creating micro-abrasions where bacteria enter
- Wounds and abrasions: even small cuts allow surface bacteria to penetrate
- Parasites: fleas and mites damage skin integrity and cause scratching-related trauma
- Moisture: skin folds and areas that stay wet create ideal bacterial growth conditions
Immune system compromise
Dogs with conditions that impair immune function are at higher risk:
- Hypothyroidism: reduces immune response and alters skin cell turnover
- Cushing's disease (hyperadrenocorticism): excess cortisol suppresses immune defenses
- Diabetes mellitus: impairs white blood cell function and healing
- Long-term corticosteroid use: similar effect to Cushing's, suppressing local immunity
Age and breed factors
Puppies have immature immune systems and are more susceptible to staph. Elderly dogs have declining immune function. Breeds with skin folds (Bulldogs, Shar-Peis, Basset Hounds) are at higher baseline risk because the warm, moist fold environment supports bacterial overgrowth.
What does a staph infection look like in dogs?
Staph infection in dogs most commonly presents as pyoderma, literally "pus in the skin." The clinical appearance varies by depth and severity.
Surface signs (superficial pyoderma):
- Small round pustules (pimple-like lesions)
- Redness and inflammation around hair follicles
- Circular crusted lesions with a clearing center ("epidermal collarettes")
- Hair loss in affected patches
- Itching and scratching
Deep infection signs:
- Nodules or boils beneath the skin surface
- Discharge from draining tracts
- Significant swelling and pain on palpation
- Fever and lethargy in severe cases
The AKC notes: "Dogs with allergies or diseases that weaken the immune system can develop infections in their skin, ears, and respiratory, reproductive, or urinary tracts."
Staph infections can affect the ears (otitis), urinary tract, and surgical wounds, not just the skin surface.
For how early-stage staph infections look and how they progress, see early signs of staph infection in dogs.
Diagnosis
Your vet will use one or more of these methods to confirm a staph infection:
Skin cytology: tape pressed to the skin collects surface cells and bacteria, then stained and examined under a microscope. Provides rapid results and can identify bacteria and inflammatory cells.
Culture and sensitivity: a swab from the lesion is cultured in a laboratory to identify the specific species and determine which antibiotics it is and isn't resistant to. Takes 5 to 7 days but is essential when MRSP is suspected or initial treatment fails.
Skin biopsy: used in severe or unusual presentations to examine deeper tissue changes.
Treatment
Treatment depends on whether the infection is superficial or deep and whether antibiotic resistance is a concern.
Topical treatment
Superficial staph infections often respond well to topical antibacterial therapy alone:
- Antibacterial shampoos: chlorhexidine-based or benzoyl peroxide shampoos used 2 to 3 times weekly
- Topical sprays or wipes: chlorhexidine applied directly to lesion areas
- Topical antibiotics: mupirocin or fusidic acid for localized infections
Topical treatment is preferred where possible because it avoids systemic antibiotic exposure and reduces resistance pressure.
Systemic antibiotics
More extensive or deep infections require oral antibiotics. The choice must be guided by culture and sensitivity results, particularly when MRSP is possible. Commonly used antibiotics (when sensitivity allows) include:
- Cefalexin (cephalexin)
- Clindamycin
- Doxycycline
- Trimethoprim-sulfamethoxazole
Course length: typically 3 to 6 weeks for superficial infections, longer for deep pyoderma or recurrent cases.
Addressing the underlying cause
Treating the staph infection without addressing what enabled it leads to recurrence. If allergies are the root cause, allergy management must be part of the plan. If hypothyroidism is present, thyroid supplementation is needed alongside antibiotic treatment.
Can staph spread from dogs to humans or other dogs?
Transmission is possible but uncommon with basic precautions. The AKC notes: "Staphylococcus pseudintermedius can be transferred from other dogs and even the people they live with. However, transmission between dogs and humans is uncommon."
Published case reports confirm that S. pseudintermedius can cause skin and soft tissue infections in humans who have close contact with infected dogs, typically through wound exposure or direct skin contact.
Practical hygiene during your dog's staph infection:
- Wash hands after handling the dog or their bedding
- Avoid direct contact between the dog's lesions and your broken skin or mucous membranes
- Wear gloves when applying topical treatments
- Limit face-to-face contact until the infection is resolved
For whether staph spreads between dogs in a household, see whether staph spreads between dogs. For how dogs contract staph infections specifically, see how dogs contract staph infections.
Frequently asked questions
My dog has a small patch of hair loss with some redness. Could that be staph?
Possibly. Circular patches of hair loss with redness and sometimes crusting are classic signs of superficial pyoderma. They can also be caused by ringworm or other conditions. A vet visit and skin cytology will clarify the cause. Don't treat with leftover human antibiotics: appropriate diagnosis matters, and human antibiotic formulations are not appropriate for dogs.
How long does staph treatment take in dogs?
Superficial staph pyoderma typically clears with 3 to 6 weeks of appropriate treatment. Deep pyoderma may require 6 to 12 weeks. Treatment should continue for at least one week beyond complete clinical resolution to prevent relapse. Stopping early is a common cause of recurrence.
Is MRSP the same as MRSA?
No. MRSP is methicillin-resistant Staphylococcus pseudintermedius, the dog-specific staph strain. MRSA is methicillin-resistant Staphylococcus aureus, more associated with humans. Both are drug-resistant staph bacteria, but they're different species. MRSP is the more clinically significant form in dogs because S. pseudintermedius is already the dominant staph species in canine infections.
Staph infections in dogs are common, treatable, and often preventable through management of the conditions that enable them. The bacteria are already there in most dogs. The question is always what allowed them to shift from harmless resident to active infection.
Resources
- MedVet. Methicillin-Resistant Staphylococcus Pseudintermedius (MRSP) in Dogs and Cats. medvet.com
- AKC. Staph Infections in Dogs: Signs, Symptoms, Treatments. akc.org
- Paw Origins. Understanding Staph Infections in Dogs. paworigins.com

Does Dog Insurance Cover Spaying or Neutering?
Learn if dog insurance covers spaying or neutering, what policies include, and how to choose the best plan for your pet's care.
Short answer: standard pet insurance does not cover spaying or neutering. The longer answer is more useful.
Most pet insurance policies are designed for unexpected accidents and illnesses. Spaying and neutering are planned, elective procedures, which puts them in a different category entirely. But that does not mean you are on your own.
Several insurers offer optional wellness plans that reimburse part of the cost, and understanding how they work helps you decide whether buying one is actually worth it before your dog's surgery date.
Quick answer: Standard accident and illness pet insurance policies do not cover spaying or neutering. Optional wellness plan add-ons from some insurers do, typically reimbursing $100 to $150 toward the procedure. Given that surgery costs $250 to $800 depending on your dog's size and location, the math on a wellness plan only works if you will use the other covered benefits too.
Key takeaways
- Standard pet insurance excludes spay and neuter: These are classified as elective procedures, not accidents or illnesses.
- Wellness add-ons sometimes cover the procedure: Reimbursement limits typically range from $60 to $150 per procedure.
- One exception exists: If a spay is performed as emergency treatment for pyometra, some standard policies may cover it as a medical procedure.
- The math matters: Wellness plans cost $10 to $30 per month. If spay or neuter coverage is your only goal, paying out of pocket is often cheaper.
- Low-cost alternatives exist independently of insurance: ASPCA mobile clinics, humane societies, and nonprofit clinics offer the same procedure for $50 to $150.
- Buy before the procedure: Wellness plans typically have no waiting period for routine care, but you cannot retroactively claim a surgery that already happened.
Why standard pet insurance does not cover spay or neuter
Pet insurance is built around the concept of unexpected costs. A broken leg, an allergic reaction, a cancer diagnosis: these are the events standard policies are designed for.
Spaying and neutering are the opposite of unexpected. They are planned, elective, and scheduled in advance. Because no insurer treats a scheduled surgery as a surprise event, it falls outside standard accident and illness coverage.
The only exception worth knowing: if a female dog develops pyometra, a life-threatening uterine infection that requires emergency spaying, most standard policies will cover that surgery as a medical treatment for a covered illness. The key distinction is that the spay was performed to treat a disease, not for elective sterilization. Understanding risks that could lead to additional vet bills down the line, including pyometra, helps put the value of insurance coverage in context.
How wellness plan add-ons work
A wellness plan is an optional add-on to a base pet insurance policy. Some insurers also offer wellness plans as standalone products.
These plans cover routine and preventive care: vaccinations, annual exams, dental cleanings, heartworm tests, and in many cases, spaying and neutering. They work differently from standard insurance:
- No deductibles: You are reimbursed the fixed benefit amount directly, not after meeting an annual deductible.
- No waiting periods for routine care: Coverage typically starts immediately or within a very short window.
- Fixed benefit amounts: You receive a set dollar amount per procedure, not a percentage of the bill.
The practical process: you pay the clinic, submit a claim to the insurer, and receive a reimbursement check up to the plan's limit for that service.
Which insurers offer spay and neuter coverage
Coverage amounts and plan availability vary by insurer and sometimes by state. The following reflects current offerings as of 2025.
Note that Embrace is unusual in that it does not impose a sublimit for spaying and neutering specifically. The reimbursement comes from your total annual wellness allowance, which means a $300 plan could cover a larger portion of the procedure than a fixed $150 limit from another insurer.
Some insurers, including Lemonade, only offer wellness plans for puppies and kittens. If your dog is already an adult, check the age eligibility before purchasing.
Is a wellness plan worth buying for spay or neuter coverage
This requires a simple calculation.
A typical wellness add-on costs $10 to $30 per month, or $120 to $360 per year. Most plans reimburse $100 to $150 for a spay or neuter. If spaying your dog costs $455 on average, a $150 reimbursement reduces that to $305 out of pocket.
But here is the key question: will you also use the other benefits the wellness plan covers?
If the plan also reimburses vaccinations, annual exams, heartworm testing, and flea and tick prevention, the combined value of those benefits over a year may make the monthly premium worthwhile. If spay or neuter coverage is the only reason you are buying, the math usually does not work.
A single annual payment to a low-cost nonprofit clinic often costs less than one year of wellness premiums while covering the same procedure. Understanding the full breakdown of what spay or neuter costs at different types of clinics helps you compare options accurately.
Low-cost alternatives that do not require insurance
If cost is the primary concern, wellness insurance is not the only path.
These programs offer the same licensed surgical care at a fraction of private clinic prices:
- ASPCA mobile clinics: $125 or less in select US cities
- SpayUSA (North Shore Animal League America): National referral network connecting owners to reduced-cost providers
- Humane Society and SPCA programs: $0 to $250 depending on income eligibility
- State voucher programs: Many states offer subsidized spay and neuter for income-qualifying pet owners
- Local nonprofit veterinary clinics: High-volume clinics that keep costs low through streamlined processes
Availability varies by location. Contact your local animal shelter or county animal services office for programs in your area.
Before you buy: key questions to ask
If you are considering a wellness add-on for spay or neuter coverage, ask the insurer these questions before purchasing:
- Is spaying or neutering explicitly listed as a covered service?
- What is the reimbursement limit specifically for this procedure?
- Are there age restrictions on which pets qualify?
- Is there a waiting period before spay or neuter coverage activates?
- Does the plan require the surgery to be performed at a specific clinic network?
- What other routine care is covered, and what are the individual limits for each service?
The answers determine whether the plan genuinely saves money or simply shifts the expense to monthly premiums.
Frequently asked questions
Does any standard pet insurance cover spaying or neutering?
No standard accident and illness policy covers elective spaying or neutering. The exception is when the procedure is medically necessary, such as an emergency spay for pyometra. In that case, most standard policies treat it as treatment for a covered illness rather than an elective surgery.
How much do wellness plans typically pay toward a spay or neuter?
Most wellness plan add-ons reimburse between $100 and $150 for a spay or neuter procedure. Embrace is an exception, allowing the full annual wellness allowance to be applied with no sublimit. The average spay costs around $455 nationally, so most reimbursements cover roughly one third of the typical bill.
Is it worth getting a wellness plan just for spay or neuter coverage?
Usually not. Wellness plans cost $120 to $360 per year and typically reimburse $100 to $150 for this procedure. Unless you will also use the plan's other benefits, such as vaccination coverage and annual exam reimbursement, paying out of pocket or using a low-cost clinic is often cheaper overall.
Can I buy a wellness plan after my dog has already been spayed or neutered?
No. Wellness plans reimburse future expenses, not past ones. If your dog's procedure has already occurred, a wellness plan cannot be used to recoup that cost. Purchase the plan before scheduling surgery and confirm whether any waiting period applies.
What is the difference between pet insurance and a pet wellness plan?
Standard pet insurance covers unexpected accidents and illnesses. A wellness plan covers routine and preventive care. They serve different purposes and are typically sold as separate products, though many insurers offer both together. Having what the procedure involves clear in your mind before shopping for coverage helps you ask the right questions about what each plan actually covers.
Whether pet insurance covers your dog's spay or neuter comes down to what kind of plan you have and whether you planned ahead. Standard coverage will not help. A wellness add-on might, but only if the full plan value makes financial sense for your dog's overall care needs. For the procedure itself, a low-cost clinic and a wellness plan that covers other preventive care are often a more effective combination than expensive comprehensive coverage with a small spay or neuter sublimit.
Resources
The following sources were used as reference and background for this article:
- NerdWallet. Does Pet Insurance Cover Spaying or Neutering? nerdwallet.com
- Forbes Advisor. Does Pet Insurance Cover Spaying and Neutering? forbes.com
- Progressive. Does Pet Insurance Cover Spaying and Neutering? progressive.com
- US News. How Much Does It Cost To Spay or Neuter a Pet? usnews.com
- Chewy. Does Pet Insurance Cover Neutering and Spaying? chewy.com
- Spot Pet Insurance. Does Pet Insurance Cover Spaying and Neutering? spotpet.com
Do Dogs Have an Appendix?
Discover if dogs have an appendix, its function, and how it affects their health compared to humans.
It is a reasonable question, especially for anyone who has had appendicitis or knows someone who has. The short answer: dogs do not have a vermiform appendix the way humans do.
They have a cecum, which serves some overlapping functions but is anatomically and functionally distinct.
Quick answer: Dogs do not have a vermiform appendix. They have a cecum a short pouch at the small-to-large intestine junction that supports gut bacteria. Dogs cannot get appendicitis because they lack the appendix structure that becomes inflamed in humans.
Key takeaways
- Dogs do not have a vermiform appendix: this is a normal anatomical difference from humans
- Dogs have a cecum, a short pouch at the ileocolic junction that performs some similar functions to the human appendix
- Veterinary anatomy confirms: the vermiform appendix is absent in domestic animals but present in rabbits
- Dogs cannot get appendicitis: they lack the structure that becomes inflamed in humans
- The cecum can become inflamed in dogs (typhlitis) but this is rare and has different causes than human appendicitis
- No surgery is needed for a missing appendix: the cecum serves dogs adequately without a vermiform appendix
What is the human appendix?
Kenhub (anatomy): "The vermiform appendix is attached dorsomedially to the end of the cecum. It lies intraperitoneally, most commonly retrocecally."
Wikipedia: "The appendix is a finger-like, blind-ended tube connected to the cecum. The term vermiform comes from Latin and means worm-shaped."
Kenhub: "The appendix is part of the GALT (gut-associated lymphatic tissue) and fulfills immunological functions.
Furthermore, it is assumed that it serves as a 'safe house' for enterobacteria, for example in cases of diarrhea."
In humans, the appendix has historically been considered vestigial, but modern research suggests it serves a modest immune function and acts as a reservoir for beneficial gut bacteria.
When it becomes blocked and inflamed, the result is appendicitis a surgical emergency.
Do dogs have an appendix?
No. PetsCare: "Dogs do not have an appendix. This is a normal anatomical difference between humans and canines."
Veterinary anatomy lecture material (SlideShare): "Vermiform appendix of cecum of man is absent in domestic animals but presents in rabbit."
Dial A Vet: "No, dogs do not have an appendix. They have a structure called the cecum, which is functionally different from the human appendix."
Animals that do have an appendix include: humans, some primates, rabbits, and certain other mammals with more plant-heavy diets. Animals that lack it include dogs, cats, and many other carnivores.
What dogs have instead: the cecum
Dogs have a cecum a short, pouch-like structure at the junction where the small intestine meets the large intestine.
Noble Vet Clinic: "Dogs have a structure called the cecum, a pouch located at the junction where the small and large intestines meet.
The cecum plays a role in breaking down fibrous plant material and supporting healthy gut bacteria."
Veterian Key (veterinary anatomy): "Although frequently described as the first part of the large intestine, the cecum in dogs is a true diverticulum that connects to the proximal colon."
Kenhub: "The main tasks of the cecum are the absorption of water and salts and the lubrication of the feces with mucus.
Especially components from plant-rich food (e.g. cellulose) are bacterially decomposed here."
Kenhub: "This explains why herbivores have considerably larger ceca in comparison to carnivores." Dogs, as primarily carnivores, have a relatively short and simple cecum compared to herbivorous species.
Functions of the canine cecum:
- Transition zone between small and large intestine
- Some fermentation of plant-based dietary fiber
- Support for beneficial gut bacteria
- Modest immune activity (lymphoid tissue present)
SustainableVet: "The cecum in dogs performs some similar functions to the human appendix, particularly in supporting gut bacteria and digestive processes."
Can dogs get appendicitis?
No. PetsCare: "No, dogs cannot get appendicitis because they don't have an appendix."
Appendicitis is specifically the inflammation of the vermiform appendix a structure dogs lack. Therefore, the diagnosis does not exist in canine medicine.
What dogs can get instead: typhlitis (cecal inflammation)
Noble Vet Clinic: "The cecum itself can become inflamed and infected, a condition that is similar to appendicitis in humans.
It's also known as typhlitis, which can be classified under colitis since it affects a part of the large intestine."
Noble Vet Clinic: "Typhlitis can come as a result of a variety of causes, such as bacteria, parasites, dietary changes, medication, and inflammatory bowel disease.
Dogs with cecal inflammation can often experience: abdominal pain, vomiting, and loss of appetite."
Noble Vet Clinic: "Diagnosing the condition typically involves a physical exam, fecal tests, and diagnostic imaging."
Typhlitis in dogs is rare. It is not an emergency in the same way human appendicitis is, but it warrants veterinary assessment when gastrointestinal signs are present.
Why is the appendix absent in dogs?
The presence or absence of the vermiform appendix tracks broadly with diet in evolutionary terms. Carnivores and omnivores with protein-dominated diets tend to have simpler cecal anatomy.
Herbivores, which need to ferment large amounts of plant fiber, have larger and more complex ceca and often retain a functional appendix.
Noble Vet Clinic: "Think of the cecum as a digestive powerhouse, an active player in digestion."
PetsCare: dogs evolved "a shorter, simpler digestive tract that's highly efficient at processing meat-based proteins and fats, with less emphasis on the complex fiber digestion that requires additional organs in plant-eating animals."
Gastrointestinal conditions to watch for in dogs
Without an appendix to worry about, owners should be aware of the gastrointestinal conditions that actually do affect dogs:
- Gastric dilatation-volvulus (GDV/bloat): stomach rotation emergency, most common in large deep-chested breeds
- Intestinal obstruction: from foreign bodies (toys, bones, fabric)
- Inflammatory bowel disease (IBD): chronic gut inflammation causing vomiting and diarrhea
- Parvovirus: severe viral enteritis, especially in unvaccinated young dogs
- Parasites: roundworms, hookworms, giardia, and others causing variable GI signs
Dial A Vet: "Common gastrointestinal issues in dogs, unlike appendicitis, often include symptoms such as vomiting, diarrhea, significant changes in appetite, and abdominal discomfort."
For the broader context of soft tissue surgical conditions that may relate to digestive and abdominal issues, see 15 common soft tissue surgeries in dogs explained simply.
Frequently asked questions
Do cats have an appendix?
No. Like dogs, cats lack a vermiform appendix. The absence is a feature of carnivorous mammals generally.
If dogs have no appendix, can they still have abdominal pain that looks like appendicitis?
Yes. Dogs can have other causes of acute abdominal pain intestinal obstruction, bloat, pancreatitis, typhlitis that produce similar signs to human appendicitis.
Abdominal pain in a dog is always a reason to see a vet promptly.
Has a dog ever been diagnosed with appendicitis?
Not with true appendicitis, since the structure is absent. Misuse of the term in lay discussions sometimes occurs when cecal inflammation (typhlitis) is present, but these are different conditions.
Is the cecum ever surgically removed in dogs?
Rarely, and only in cases of cecal inversion or typhlocolitis that fails to respond to medical management. Cecal surgery is uncommon and performed in specialist settings.
Do rabbits have an appendix?
Yes. Rabbits have a large, well-developed cecum and a functional appendix, which relates to their high-fiber herbivorous diet requiring extensive fermentation.
Why do herbivores have an appendix but carnivores do not?
The appendix is thought to support fermentation of plant fiber and maintain beneficial gut bacteria.
Herbivores, which digest large amounts of complex plant material, benefit more from this structure. Carnivores have simpler digestive tracts optimized for protein digestion and generally lack the appendix.
Resources
- PetsCare. Do Dogs Have an Appendix? Canine Digestive Facts. petscare.com
- Noble Vet Clinic. Do Dogs Have Appendicitis? Vet-Verified Answers. noblevetclinic.com
- Dial A Vet. Do Dogs Have an Appendix Like Humans? dialavet.com
- Kenhub. Cecum and Vermiform Appendix: Anatomy and Function. kenhub.com
- Veterian Key. Colon. veteriankey.com

Can Dogs Get Keloid Scars?
Learn if dogs can develop keloid scars, how to identify them, treatment options, and prevention tips for your pet's skin health.
Owners frequently notice a raised, thickened area near a healed wound or surgical incision and worry about keloid scarring. The answer is nuanced: true keloid scars as seen in humans are extremely rare in dogs, but dogs do form abnormal raised scars and scar-like growths that need veterinary attention for a different reason.
Understanding the distinction matters because some raised scars in dogs are not scars at all they are tumors that can mimic scar tissue.
Quick answer: True keloid scars are extremely rare in dogs. Dogs most commonly form hypertrophic scars (raised, within wound boundary). Any growing raised growth at a scar site needs vet evaluation; some are fibromas or fibrosarcomas, not true scars.
Key takeaways
- True keloid scars are extremely rare in dogs: very few cases documented in veterinary literature
- Dogs most commonly form hypertrophic scars: raised, firm scars that stay within the wound boundary
- Dog skin heals differently from human skin: collagen remodeling differences make keloid formation far less likely
- A raised growth near a scar site is not always a scar: granulomas, fibromas, and fibrosarcomas can mimic scar tissue
- Intralesional corticosteroids are used to treat hypertrophic scars in dogs when they are uncomfortable or growing
- Any growing raised growth at a wound or incision site warrants veterinary evaluation
What is a keloid scar?
In humans, keloid scars are an abnormal healing response where collagen production continues far beyond the wound boundary. Cuteness explains: "A keloid scar, also called a hypertrophic scar, is a thick, raised overgrowth of collagen tissue. They are often shiny and firm to the touch and may have a flesh-colored or dark brown pigment."
More precisely, veterinary and human dermatology literature distinguishes two types of abnormal scarring:
Hypertrophic scars: raised, firm, often red or pink scars that remain within the original wound boundary. They may be uncomfortable but do not invade surrounding tissue. They can improve spontaneously over time.
Keloid scars: raised scars that grow beyond the original wound boundary, extending into surrounding normal tissue. They do not regress spontaneously and tend to recur after removal. Far more common in humans than in dogs.
PetsVetCheck: "Keloids, which are rarer in dogs, are a more extreme form of scar tissue formation where the scar tissue extends beyond the boundaries of the original wound."
Why true keloids are rare in dogs
Dog skin heals through a fundamentally different biological process than human skin. SustainableVet notes: "Dog skin has different collagen remodeling, reducing the chance of keloid formation."
The key differences:
- Collagen organization: dog skin produces and organizes collagen in ways that are less prone to the dysregulated overproduction seen in human keloids
- Wound contraction: dogs rely more heavily on wound contraction (the skin literally pulling together) as a primary healing mechanism, rather than the collagen proliferation that dominates in humans
- Immune response: the inflammatory cascade that drives keloid formation in susceptible humans appears to play a less prominent role in canine wound healing
The Veterinary Dermatology journal (Avallone et al., 2011) published one of the few documented cases of hypertrophic scarring in a dog, noting that the histological findings were similar to hypertrophic scars in humans, and concluding: "Even if uncommon, hypertrophic scar should be included among the differential diagnoses of spindle cell tumours in dogs."
What dogs actually develop: the normal scar process
When a dog's skin is injured or sutured after surgery, the healing process follows predictable stages:
Days 1 to 5 (inflammatory phase): redness, swelling, warmth at the wound site. The body sends inflammatory cells to the area and begins collagen production.
Days 5 to 21 (proliferative phase): new collagen is deposited and the wound edges are pulled together. A slightly raised, pink scar forms.
Weeks 3 onward (remodeling phase): collagen fibers are reorganized and the scar gradually flattens, softens, and fades. This process continues for months.
Dial A Vet: "It's normal for a dog's surgical incision site to appear slightly raised or bumpy during the healing process. The skin contracts as it heals, which can create a little bumpiness."
Most post-surgical or post-wound scars in dogs follow this normal course. A slightly raised, firm scar 2 to 6 weeks after surgery is not a keloid it is normal healing.
When a raised scar needs veterinary attention
Not every raised growth near a wound is a healing scar. Cuteness identifies an important concern: "Keloid scars can also be potentially malignant (cancerous) tumors. Keloidal scarring can indicate tumors, known as keloidal fibromas or fibrosarcomas, that require surgical removal and monitoring."
Call your vet if a scar or raised growth at a wound site:
- Is still growing after 6 to 8 weeks (normal scars plateau and begin to flatten)
- Is growing beyond the original wound boundary into surrounding normal tissue
- Becomes painful or causes the dog to scratch, bite, or lick at it
- Changes surface appearance becomes ulcerated, bleeds, or develops a different texture
- Feels different from surrounding tissue (harder, rubbery, or attached to underlying structures)
- Was preceded by injection at that site (injection-site sarcomas are an important consideration at previous vaccination or injection sites)
For how raised lumps at wound or scar sites compare to cysts and tumors, see keloids vs other skin growths.
Diagnosis
When a raised growth at a wound site needs investigation, a vet will:
Fine needle aspiration (FNA): a sample of cells from the lesion is examined under a microscope. This distinguishes scar tissue from tumor cells in most cases.
Biopsy: if FNA is inconclusive or the growth has atypical features, a tissue core biopsy or surgical excision with histopathology provides a definitive diagnosis.
The Avallone et al. (2011) case in Veterinary Dermatology illustrates this: a dog presented with a raised growth that was histologically confirmed as a hypertrophic scar. On initial presentation, the differential diagnosis included spindle cell tumors a reminder that scar-like growths require pathological confirmation before assuming benignity.
Treatment options for abnormal canine scars
Monitoring
For hypertrophic scars that are not growing, not painful, and are showing signs of flattening over time, watchful waiting is appropriate. Most normal and hypertrophic scars in dogs improve without intervention over 3 to 12 months.
Intralesional corticosteroid injection
The Avallone et al. (2011) case documented successful treatment of a canine hypertrophic scar with intralesional methylprednisolone acetate. The lesion regressed within 10 days of injection, though it recurred after self-trauma, highlighting that preventing licking and scratching is a critical component of scar management.
Corticosteroids reduce collagen production and inflammatory activity in the scar, allowing it to soften and flatten.
Surgical removal
If a growth is confirmed as a scar-related fibroma or is causing significant discomfort, surgical excision is appropriate. Cuteness: "Keloidal fibromas or fibrosarcomas require surgical removal and monitoring." For true fibrosarcomas (malignant), wider margins and oncological follow-up are needed.
Laser therapy and topical treatments
PetsVetCheck notes that "treatments including laser therapy, special creams, and in some cases surgical procedures" are available to reduce scar appearance. These are adjuncts to primary treatment rather than first-line options.
Nutritional support
PetsVetCheck: "A diet rich in vitamins, minerals, and omega-3 fatty acids can promote wound healing and potentially reduce scar tissue formation." Omega-3 fatty acids (found in fish oil) are anti-inflammatory and may support healthier collagen remodeling during wound healing.
For how keloid-like growths on the legs appear alongside other types of lumps that may need removal, see whether keloid scars need removal. For the range of raised lumps that appear on dogs that can be mistaken for scars, see keloid scars as a cause of lumps.
Preventing poor wound healing and scar formation
- Treat wounds promptly: wounds that become infected or heal slowly are more likely to develop abnormal scar tissue
- Prevent self-trauma: E-collar use after surgery prevents licking that disrupts healing and may drive hypertrophic scar formation
- Follow post-surgical care instructions: proper wound cleaning, dressing changes, and activity restriction support smooth healing
- Nutrition: adequate protein intake supports collagen quality during wound healing
Frequently asked questions
My dog had surgery and the incision looks raised and bumpy. Is this a keloid?
Almost certainly not. A raised, slightly bumpy incision at 1 to 6 weeks post-surgery is normal healing. The skin contracts during repair, creating a firm ridge. This should progressively flatten over the following weeks and months. If the ridge continues to grow after 6 to 8 weeks or extends beyond the original incision line, contact your vet for assessment.
Can a keloid scar in a dog become cancerous?
True keloid scars themselves are not cancerous. However, some raised growths at wound sites that owners identify as keloids are actually fibromas or fibrosarcomas tumors that arise from fibroblast cells and can resemble scar tissue. Fibrosarcomas are malignant. This is why any growing, unusual, or persistent raised growth at a wound site should be evaluated by FNA or biopsy rather than assumed to be a benign scar.
Is there anything I can apply to my dog's scar to help it heal?
Vitamin E oil is sometimes suggested by owners, but evidence for its efficacy is mixed. Petroleum-based products (plain Vaseline) keep wound surfaces moist and may improve the cosmetic outcome of small scars. Do not apply any product to a wound that has not fully closed. For any raised, abnormal, or growing scar, consult a vet before applying anything some products can cause contact dermatitis or interfere with diagnosis.
Do certain dog breeds scar more than others?
Breed predisposition to abnormal scarring in dogs is not well characterized in veterinary literature, unlike in humans where dark-skinned individuals have higher keloid rates. The Avallone case was in a mixed-breed dog. Some large breed dogs (Great Danes are mentioned in some NF literature) may have different wound healing characteristics, but breed-specific keloid predisposition in dogs remains undocumented.
How long does it take for a dog's scar to fully heal?
The visible scar typically stops changing significantly by 3 to 6 months after the original wound, though remodeling continues for up to 12 months. Scars over joints or areas of high movement may take longer to mature. During this time, the scar should progressively flatten, soften, and fade from pink or red to white or skin-colored.
My dog keeps licking at a healed scar. Is that a problem?
Yes. Chronic licking at a scar causes repeated mechanical trauma that can drive abnormal collagen deposition and hypertrophic scar formation. The Avallone et al. case documented a recurrence specifically linked to "severe self-trauma." An E-collar should be used if your dog is repeatedly accessing a scar site. If the dog is licking because the area is itchy or uncomfortable, a vet visit is appropriate to assess the scar and potentially treat with intralesional corticosteroids.
Resources
- Cuteness. Keloid Scars In Dogs. cuteness.com
- Veterinary Dermatology. Hypertrophic Scar in a Dog: Histological and Clinical Features. (Avallone et al., 2011) onlinelibrary.wiley.com
- PetsVetCheck. Hypertrophic Scarring Following Skin Trauma in Dogs. petsvetcheck.de
- Dial A Vet. Can Dogs Get Keloids or Any Type of Scarring After Surgery? dialavet.com

Bed Sores on Dogs Causes Treatment and Prevention
Learn about bed sores on dogs, including causes, treatments, and prevention tips to keep your pet healthy and comfortable.
Bed sores in dogs also called pressure sores or decubitus ulcers develop when prolonged pressure on a bony area cuts off blood supply, causing the tissue to break down. They are the same condition as bedsores in hospitalized humans, and they are just as serious when they reach advanced stages.
The good news is that early-stage bed sores are very treatable at home. The bad news is that they can progress from a small red patch to a deep infected wound within days if not caught and addressed.
Quick answer: Bed sores form over bony prominences like elbows and hips when sustained pressure blocks blood flow. Most common in senior, large-breed, and immobile dogs. Early stages respond to soft bedding and repositioning; advanced stages need veterinary care.
Key takeaways
- Bed sores form over bony prominences: elbows, hips, hocks, stifles, and sides of the knees
- Four stages exist: from mild redness to deep infected wounds reaching muscle and bone
- Senior dogs, large breeds, and post-surgical dogs are at highest risk
- Stage 1 sores reverse with home management: soft bedding and repositioning every 2 to 4 hours
- Stage 3 and 4 sores need veterinary debridement and often systemic antibiotics
- Thick orthopedic foam bedding is the single most effective prevention measure for at-risk dogs
What causes bed sores in dogs?
Bed sores develop when the weight of a dog's body continuously presses a bony prominence against a hard surface. Walkin' Pets explains the mechanism: "Decubital ulcers form when repeated pressure on an affected area constricts the blood vessels, decreasing the area's blood supply and as the skin is deprived of oxygen, it begins to die."
Once the tissue starts to die, it creates a wound that bacteria readily colonize. This is why advanced bed sores are almost always infected.
The process requires two things to come together: sustained mechanical pressure and skin that is not being repositioned or protected. Any dog that lies in the same position for hours without shifting is at risk.
Additional factors that increase risk
Incontinent dogs: urine-soaked skin breaks down much faster under pressure. Walkin' Pets advises that "reducing skin moisture from urine is important to help prevent the bacterial growth and skin degradation that contribute to pressure sores."
Thin or underweight dogs: less muscle and fat over bony prominences means the bone contacts the surface with less cushioning.
Obese dogs: more body weight concentrates greater compressive force at each contact point.
Dogs on hard floors: concrete, hardwood, and tile dramatically increase the pressure at contact points compared to soft surfaces.
Which dogs get bed sores?
Dr. Buzby's ToeGrips identifies the most at-risk groups:
- Senior dogs: reduced muscle mass, reduced mobility, longer periods in one position
- Large and giant breed dogs: more body weight, greater force at bony contact points
- Post-surgical patients: strict rest requirements limit natural repositioning
- Paralyzed or paraplegic dogs: unable to shift position at all
- Dogs with arthritis: pain limits movement and encourages sustained resting in one position
- Short-coated breeds: less coat padding between skin and hard surfaces
DogCancer.com notes that bed sores can also be a concern for dogs in late-stage cancer, where weakness and pain significantly reduce their ability to reposition.
The 4 stages of bed sores
Recognizing the stage determines the treatment approach.
Stage 1: redness and intact skin
The skin over the bony prominence is red, warm, and may have some hair loss. The surface is not broken. This is the ideal intervention point.
What to do at home: add thick orthopedic padding under the affected area, increase repositioning to every 2 hours, and monitor the site twice daily. Most Stage 1 sores reverse completely with these measures.
Stage 2: shallow open wound
The skin has partially broken down. A shallow blister or open area appears. The surrounding tissue remains inflamed and warm.
WagWalking: "Stage 1 ulcers may improve with padding, regular repositioning of the dog, and a quality moisture-wicking dog bed. Vets may instruct pet parents to regularly apply moist dressings to open pressure sores."
What to do: contact your vet. Stage 2 requires wound cleaning, appropriate dressings, and assessment for infection. Antibiotics may be started if signs of infection are present.
Stage 3: full-thickness wound
The sore extends through the full skin thickness into subcutaneous tissue. VetMobile describes what you see: "The sore becomes deeper and it may extend into the underlying tissue, such as the muscle layer. Pus or discharge may be present. At this stage, the area is surrounded by dead or dying tissue."
What to do: veterinary care is required. Treatment involves debridement of dead tissue, wound culture, and systemic antibiotics based on culture results.
Stage 4: bone or muscle involvement
The wound extends to muscle, tendon, or bone. This is a serious and potentially life-threatening stage. Bacteria can enter the bloodstream from a Stage 4 wound, causing sepsis.
What to do: emergency veterinary care. Hospitalization, IV antibiotics, surgical debridement, and reconstructive surgery may be necessary.
Treatment by stage
Home wound care for Stage 1 and 2
For Stage 1 and early Stage 2 sores, clean the area daily with dilute chlorhexidine solution (not hydrogen peroxide, which damages healing tissue). Apply a non-adherent wound dressing and change it once or twice daily. Keep the area dry between dressing changes.
Puainta recommends: "Pressure Relief: Encourage the dog to change positions frequently. Soft Bedding: Provide cushioned surfaces to reduce pressure. Cleanliness: Keep the area clean and dry."
For incontinent dogs, clean and dry the skin after every urination. Use a waterproof mattress cover that can be washed daily. Sheepskin pads are effective at wicking moisture away from skin while providing cushioning.
For how bed sores relate to callus formation at the same pressure sites, see calluses from similar pressure points.
When to call the vet
Call your vet within 24 hours if:
- The wound is open, moist, or has any discharge
- The area is warm and the dog shows signs of pain when the area is touched
- The sore is growing despite home management
- Your dog is lethargic, off food, or running a fever
These signs suggest infection is establishing. Early antibiotic treatment is significantly more effective than treating advanced infection.
WagWalking notes: "Antibiotics may be necessary if the wound is infected or at risk of becoming infected. Antibiotics have minimal risks and a high success rate when used early on."
For how the progression of pressure necrosis connects to bed sore development, see pressure necrosis in severe bed sore cases.
Prevention
Orthopedic bedding
The most effective single intervention. Memory foam or high-density egg-crate foam distributes weight across a larger surface area, reducing peak pressure at bony contact points. Petful emphasizes that "you might be more likely to notice pressure sores in dogs if you have a large breed pup or a short-haired breed" both groups where bedding choice is critical.
The foam must not fully compress under the dog's full weight. Test by pressing firmly: if it bottoms out quickly, it is not thick enough. For large dogs, minimum 4 inches of high-density foam is recommended.
Repositioning schedule
Reposition immobile dogs every 2 to 4 hours, alternating which side bears weight. Walkin' Pets advises: "Try not to let the dog rest on the hip bone on one side for very long, reposition your pet every 2 to 3 hours."
If you are not home during the day, consider whether a pet sitter or midday check can provide repositioning support for a dog with high risk.
Daily inspection
Check every bony prominence every day. Run your hand along the elbows, hips, hocks, and knees. Hair loss is the first visible sign act at Stage 1, before any skin breakdown occurs.
Moisture management for incontinent dogs
Wet skin under pressure breaks down dramatically faster than dry skin. Change diapers and male wraps frequently. Use raised mesh beds for overnight rest in incontinent dogs urine drains through rather than pooling under the dog. Walkin' Pets recommends sheepskin pads specifically for their wicking properties.
For how swelling associated with bed sores can extend to the feet and lower legs, see swelling associated with pressure injuries.
Frequently asked questions
How do I know if my dog has a bed sore starting?
The first sign is a small patch of hair loss over a bony area, sometimes with mild redness and warmth. The skin is still intact. Run your hand over the elbows, hips, and hocks daily in at-risk dogs. Acting at this point before the skin opens is far easier than treating an open wound.
Can bed sores in dogs heal on their own?
Stage 1 sores can reverse with prompt management: improved bedding, repositioning, and keeping the area dry. Stage 2 and above rarely resolve without veterinary intervention. The wound environment actively promotes bacterial growth, which prevents natural healing without treatment.
How long does a bed sore take to heal in a dog?
Stage 1 sores managed early typically show improvement within 1 to 2 weeks with good home care. Stage 2 wounds typically heal in 3 to 6 weeks with consistent veterinary wound care. Stage 3 and 4 wounds may take months and may not fully close in all cases.
My senior dog keeps getting bed sores despite soft bedding. What else can I do?
Check whether the foam has compressed over time and needs replacing. Add protective wraps (elbow pads or hock wraps) over at-risk sites. Increase repositioning frequency to every 2 hours. Consult your vet about whether the dog's underlying mobility level has declined and whether additional pain management or physiotherapy could help. Nutritional support including protein and vitamin C promotes skin healing.
Are bed sores painful for dogs?
Stage 1 sores are usually not painful. Stage 2 onward becomes progressively more painful as the wound deepens and infection sets in. Dogs with painful bed sores may lick or bite at the area, avoid lying on that side, or show behavioral changes. Pain management from your vet is an important part of treatment from Stage 2 onward.
Can bed sores become life-threatening in dogs?
Yes. Stage 3 and 4 sores can allow bacteria to enter deeper tissues and the bloodstream, causing sepsis. A dog with an advanced bed sore that is also lethargic, not eating, or running a fever is potentially septic and needs emergency veterinary care the same day.
Resources
- Dr. Buzby's ToeGrips. Pressure Sores on Dogs: Treatment and Prevention. toegrips.com
- WagWalking. Pressure Sores in Dogs. wagwalking.com
- Walkin' Pets. Pressure Sores in Pets: Treatment and Prevention. walkinpets.com
- Petful. Pressure Sores on Dogs: What You Need to Know. petful.com
- DogCancer.com. Bed Sores on Dogs: Preventing and Treating Pressure Sores. dogcancer.com

Types of Cysts and Tumors in Dogs
Explore the common types of cysts and tumors in dogs, their signs, diagnosis, and treatment options for better pet care.
Finding a lump on your dog is one of the most common reasons owners call their vet. Most lumps in dogs are benign but some are not, and it is not possible to reliably tell the difference by looking or feeling alone.
This guide covers every common type of cyst and tumor in dogs: what each one looks like, where it tends to appear, and which ones require prompt attention.
Quick answer: Dogs develop cysts (almost always benign) and tumors (benign or malignant). Common benign types include lipomas and sebaceous cysts. Mast cell tumors are the most common malignant skin tumor. All new lumps need vet assessment.
Key takeaways
- Cysts are almost always benign and consist of a sac filled with fluid, sebum, or cellular material
- Tumors can be benign or malignant; appearance and feel alone cannot reliably distinguish between them
- Lipomas are the most common benign tumor in dogs: soft, movable fatty lumps most often found in middle-aged to senior dogs
- Mast cell tumors are the most common malignant skin tumor in dogs, representing 11% of all canine skin cancers
- Fine needle aspiration (FNA) is the standard first diagnostic step for any unidentified lump it is quick, minimally invasive, and usually provides a definitive answer
- Any lump that grows rapidly, ulcerates, bleeds, or causes pain needs same-day veterinary evaluation
Cysts vs. tumors: the key distinction
A cyst is a sac-like structure with a defined wall, filled with liquid or semi-solid material. Dr. Buzby's ToeGrips explains the distinction clearly: cysts "are masses made up of a cavity that contains liquid or semi-solid material," while "tumors, whether benign or malignant, are comprised of solid tissue that forms from abnormal cell growth."
This matters for two reasons:
- Cysts are not cancerous and do not spread to other parts of the body
- Tumors vary widely a lipoma (benign fat tumor) behaves very differently from a mast cell tumor (potentially malignant)
The challenge: some malignant tumors feel soft and movable, while some benign cysts feel firm. Merck Veterinary Manual warns specifically about mast cell tumors: "These tumors vary greatly in size and rate of growth. They can mimic lipomas; therefore, visual signs alone cannot establish a diagnosis."
Common types of cysts in dogs
1. Sebaceous cysts
Formed when the opening of a sebaceous (oil) gland becomes blocked, trapping sebum inside. PetMD describes them as containing a thick material that releases "white, yellow, or brown" discharge when expressed.
- Appearance: raised bump, often with a whitish or bluish tint through the skin
- Location: anywhere on the body, but most common on the trunk, head, and limbs
- Size: usually small (under 1 cm) but can grow larger
- Behavior: slow-growing; may rupture and release pasty discharge; prone to secondary infection if ruptured
- Treatment: monitoring for small, stable cysts; surgical removal if infected, growing, or bothering the dog
- Important: Merck cautions against squeezing: "You should not attempt to remove the cysts by squeezing them because this can spread the cyst contents into the surrounding tissues."
2. Follicular cysts (epidermoid cysts)
Associated with hair follicles rather than sebaceous glands. PetMD: "Follicular cysts are large, benign bumps on the skin that grow up from the hair follicle. They may release a thick material that is white, yellow, or brown when you push on them."
- Appearance: firm, raised bump; contents are often dark, cheesy, or foul-smelling when expressed
- Location: anywhere, but legs and around the mouth are particularly common according to Bark & Whiskers
- Behavior: may become infected (folliculitis); can grow to several centimeters and become painful
- Treatment: monitoring if stable; surgical removal if growing, infected, or painful; will not regrow if fully removed
A specific subtype interdigital cysts forms between the toes. Dr. Buzby's ToeGrips explains: "These cysts develop between the toes and are often a consequence of allergies, obesity, or breed-related factors. The affected hair follicle becomes inflamed and may rupture."
3. True cysts (sweat gland cysts)
Form in the secretory lining of sweat glands, which continuously produces fluid the more fluid produced, the larger the cyst grows. True cysts are most common around the eyes and in the ear canals.
- Appearance: smooth, fluid-filled, usually bluish or translucent
- Location: eyelids, ear canals most commonly
- Behavior: slow-growing, almost always benign; can impair vision if near the eye
- Treatment: surgical removal or laser ablation if causing problems
4. Dermoid cysts
Congenital cysts that form when a piece of epidermis becomes trapped below the skin during fetal development. Merck notes they are "most commonly found in Boxers, Kerry Blue Terriers, and Rhodesian Ridgebacks. Most dermoid cysts are multiple and contain fully formed hair shafts."
- Appearance: firm, often contains hair
- Behavior: benign; can become infected
- Treatment: surgical removal is the definitive treatment
Common types of benign tumors in dogs
5. Lipoma (fatty tumor)
University of Illinois veterinary cytology department confirms: "Lipomas are a benign mesenchymal tumor and probably the most common benign tumor in dogs."
- Appearance: soft, round, movable under the skin; no overlying hair changes
- Location: trunk and upper limbs most common; can occur anywhere
- At-risk dogs: older and overweight dogs
- Behavior: slow-growing; most remain stable for years; do not spread or become malignant
- Treatment: monitoring is standard for most; surgical removal if the lipoma is in a location causing discomfort (over a joint, in the axilla, on the leg where it affects movement)
The exception is the infiltrative lipoma, which grows into surrounding muscle and fascia rather than displacing it. These require more aggressive surgical removal.
6. Histiocytoma
A benign skin tumor arising from immune (Langerhans) cells in the skin. PetMD describes them as tumors that "usually regress spontaneously over time without treatment."
- Appearance: small, round, firm, raised, often red ("button-like") on the surface; may ulcerate
- Location: most common on the head, ears, and limbs
- At-risk dogs: young dogs under 3 years; Boxers, Bulldogs, Dachshunds, Cocker Spaniels
- Behavior: hallmark feature is spontaneous regression within 1 to 3 months
- Treatment: monitoring most resolve without treatment; removal if the dog is bothering it or if it persists beyond 3 months
7. Skin tags (acrochordons)
Fleshy, pedunculated (on a stalk) growths that form where skin rubs together. Bark & Whiskers: "These are small, fleshy growths that often appear on areas where the skin rubs together, like the armpit or eyelids. They're usually harmless unless they get irritated."
- Treatment: none required unless causing irritation; simple surgical removal
8. Papillomas (warts)
Caused by the canine papillomavirus. Embrace Pet Insurance: "These are caused by a virus and are most often found in and around the mouth of young dogs."
- Appearance: cauliflower-like, pale, rough surface; clustered
- Location: mouth, lips, eyelids
- At-risk dogs: young dogs with immature immunity; immunosuppressed dogs
- Behavior: contagious between dogs; most resolve spontaneously within weeks to months
- Treatment: monitoring; antiviral treatment or surgical removal for persistent or symptomatic cases
Mast cell tumors: the most important malignant skin tumor
Mast cell tumors (MCTs) deserve special attention. The published consensus review in PMC confirms: "It is the most common malignant skin tumor in dogs, corresponding to 11% of skin cancer cases."
Why they are important:
- They are highly variable in appearance they can look like almost anything: a small firm nodule, a soft squishy mass, an ulcerated sore, or a wart
- They can change size rapidly (especially when stimulated by pressure or trauma), which is a characteristic feature called Darier's sign
- They release histamine and other chemicals, which can cause local redness and swelling
At-risk breeds: Merck Veterinary Manual identifies Boxers and Pugs (often multiple tumors), Rhodesian Ridgebacks, and Boston Terriers as especially prone.
High-risk locations: Merck: "Tumors located near mucous membranes, feet, prepuce, or on the lower surface of the body are more likely to spread than mast cell tumors in other areas."
Diagnosis: fine needle aspiration. Mast cells have a characteristic granular appearance under the microscope that is usually immediately identifiable.
Treatment: surgical removal with wide margins; grade determines whether additional treatment (chemotherapy, radiation) is needed.
For how to assess whether a lump should be removed, see how to tell which lumps need removal. For mast cell tumor removal cost specifically, see mast cell tumor as a common tumor type.
Other significant tumor types
Melanoma
Arises from pigment-producing cells. Bark & Whiskers notes that "some types can be aggressive." Oral melanomas (in the mouth) are significantly more aggressive than cutaneous (skin) melanomas. A dark, irregularly shaped growth on or around the mouth, on the nail bed, or on mucosal surfaces warrants prompt evaluation.
Perianal adenoma
PetMD: "Perianal adenomas are benign growths common in older, unneutered male dogs. They grow from oil glands near the anus but can also occur in similar glands along the abdomen, on the back, and near the tail." Neutering is both preventive and may cause regression of existing tumors.
How vets diagnose lumps: fine needle aspiration
FNA is the standard first step for any unidentified lump. A thin needle is inserted into the mass and cells are aspirated onto a slide for microscopic examination. University of Illinois veterinary cytology: this technique reliably distinguishes lipomas, cysts, mast cell tumors, and histiocytomas in most cases.
FNA is quick, minimally invasive, and can be done in a routine vet visit without anesthesia for most lumps. If FNA is inconclusive, a biopsy (removing a small tissue core) or surgical excision with histopathology provides a definitive diagnosis.
For when cysts and tumors require surgery based on diagnosis, see when cysts and tumors require surgery. For how red lumps on the leg relate to these growth types, see red lumps as a presenting sign of cysts or tumors.
When to call the vet immediately
Contact your vet the same day if a lump:
- Appeared suddenly and is growing fast
- Is ulcerated, bleeding, or has discharge
- Is warm and painful to the touch
- Changes size rapidly (getting larger then smaller mast cell feature)
- Is on a high-risk location: mouth, nail bed, foot pad, groin
- Causes your dog pain or changes their behavior
For cost context on tumor removal, see cost of removing tumors.
Frequently asked questions
Can I tell if a lump is cancerous by touching it?
No. Merck Veterinary Manual is explicit that mast cell tumors "can mimic lipomas; therefore, visual signs alone cannot establish a diagnosis." Soft, movable lumps can be malignant; firm, fixed lumps can be benign. Fine needle aspiration by a vet is the only reliable way to get an answer.
Should I wait and watch a new lump on my dog?
For lumps that are small, stable, and have been present without change for months, monitoring is reasonable. Any new lump should be evaluated by a vet within a few weeks of discovery not because every lump is dangerous, but because knowing what it is guides whether monitoring or action is appropriate.
How often do dogs get cancer?
Cancer is the leading cause of death in dogs over 10 years of age. However, many lumps found on dogs are benign. The probability of malignancy increases with age, rapid growth, ulceration, and location on or near mucous membranes.
What is fine needle aspiration and does it hurt?
FNA involves inserting a thin needle into the lump to collect a small sample of cells. Most dogs tolerate it without sedation and show little reaction. It takes a few seconds and provides very useful diagnostic information. It is much less invasive than a biopsy.
My dog has multiple lipomas. Is that a concern?
Multiple lipomas are common in older dogs, especially Labrador Retrievers and overweight dogs. Most are benign and can be monitored. Your vet will recommend FNA for any new or atypical lump in a dog with known lipomas to make sure a new growth is not a different tumor type that happens to look similar.
What is the difference between a cyst and an abscess?
Both are fluid-filled pockets but with different contents and causes. A cyst contains sebum, cellular debris, or glandular secretions and is usually not infected. An abscess contains pus the product of bacterial infection and is almost always painful, warm, and surrounded by inflamed tissue. Abscesses need antibiotic treatment; many cysts can simply be monitored.
Resources
- PetMD. Lumps, Bumps, and Cysts on Dogs. petmd.com
- Merck Veterinary Manual. Tumors of the Skin in Dogs. merckvetmanual.com
- Dr. Buzby's ToeGrips. Dog Cyst vs. Tumor: How Can You Tell? toegrips.com
- Embrace Pet Insurance. Dog Cyst vs Tumor: Understanding the Types. embracepetinsurance.com
- University of Illinois College of Veterinary Medicine. Cytology of Lumps and Bumps. vetmed.illinois.edu

Pros and Cons of Luxating Patella Surgery in Dogs
Explore the pros and cons of luxating patella surgery in dogs, including benefits, risks, recovery, and long-term outcomes.
Making a surgical decision for your dog is one of the harder things pet ownership asks of you. The stakes feel high, the information is complex, and the outcome is uncertain.
This guide gives you a clear, honest breakdown of what surgery for luxating patella genuinely offers and what it genuinely carries as risk, so you can make a decision based on the full picture rather than either the most optimistic or most alarming version of it.
The bottom line up front: For dogs with Grade 3 or 4 MPL, or Grade 2 with significant symptoms, the benefits of surgery substantially outweigh the risks for most dogs. For Grade 1 and mild Grade 2, conservative management is a reasonable path. The risks are real but manageable with a skilled surgeon and proper recovery. The biggest risk of surgery is usually lower than the long-term risk of leaving significant MPL untreated.
Key takeaways
- The primary benefit is structural correction: surgery fixes the cause, not just the symptoms.
- Arthritis risk is reduced but not eliminated by successful surgical correction.
- Complication rates range from 18 to 37% across published studies, most complications are minor.
- Overall success rate is approximately 90 to 93%, with "success" meaning acceptable or full return to function.
- Recurrence affects 5 to 21% of cases depending on grade; most recurrences are lower-grade.
- Recovery is 8 to 12 weeks of restricted activity: this is a genuine commitment for the owner.
- The cons of not treating are also real for higher-grade dogs: progressive arthritis, cruciate risk, declining quality of life.
The pros of luxating patella surgery
1. It fixes the structural problem
Conservative management manages symptoms. Surgery corrects anatomy. This is the central distinction.
Exercises, braces, and weight management reduce the mechanical load on the joint and build supporting muscle, but they don't change the shallow groove or misaligned bone that allows the kneecap to slip. Surgery does.
For Grade 3 and 4 dogs especially, this distinction determines whether the dog has a reasonable long-term quality of life. Conservative management cannot indefinitely hold back a Grade 3 joint from deteriorating.
2. Pain relief and improved mobility
The most immediately meaningful outcome for most owners: the dog stops skipping, stops limping, and begins using the leg normally again. For many dogs, the change from pre-surgery to 8 to 12 weeks post-surgery is dramatic.
Dogs that were reluctant to exercise, jump, or play often return to full normal activity levels. This is the outcome most owners describe when they reflect on the decision.
3. Reduced long-term arthritis risk
Every time the kneecap slips, it damages the cartilage lining the groove. Over time, this produces secondary arthritis that causes chronic, progressive pain independent of whether the kneecap is currently in position.
Surgical correction, by eliminating or substantially reducing luxation events, slows this cartilage damage. Dogs who have surgery before significant arthritis develops have meaningfully better long-term joint health than those who wait until secondary changes are established.
4. Reduced cruciate ligament risk
Long-standing MPL significantly increases the risk of cranial cruciate ligament (CCL) rupture. The altered mechanics from an unstable kneecap place abnormal stress on the cruciate ligament over time. CCL rupture is a separate, more serious injury requiring its own surgical repair.
Studies confirm that MPL and CCL disease coexist in approximately 25% of affected cases. Correcting the MPL earlier reduces the cumulative mechanical stress that contributes to this risk.
5. A one-time intervention rather than lifelong management
Successful surgery resolves the structural problem. Conservative management, by contrast, requires ongoing consistency in weight, exercise, and monitoring indefinitely. For owners who find this difficult to maintain, surgery may actually be the more practical long-term path.
The cons of luxating patella surgery
1. Complication rates are real and worth understanding
This is where honest information matters most.
Published complication rates for MPL surgery vary widely across studies:
- A 2019 UK study found complications in 37 of 100 surgeries in dogs under 20 kg
- A 2006 study found an 18% complication rate
- Other studies report complication rates between 22% and 51%
The variation reflects differences in how "complication" is defined (minor vs. major vs. catastrophic), the grades included, the surgical technique used, and follow-up duration.
Most complications are minor: seroma formation, suture reaction, temporary lameness, minor implant issues. Major complications (requiring revision surgery) occur in approximately 8 to 25% of cases depending on grade. Catastrophic complications (permanent impairment or limb loss) are rare.
The Dogs Naturally review notes that many veterinarians don't proactively discuss complication rates with owners. Ask specifically: "What complication rate do you see in your practice for this procedure at this grade?"
2. Recurrence
The kneecap can slip again after surgery. Recurrence rates range from 5 to 21%, with Grade 4 carrying the highest recurrence risk. Most recurrences produce a lower-grade luxation than the original, and many don't require revision surgery.
For more on what recurrence rates look like by grade, see surgery success rates to weigh.
3. Cost
MPL surgery costs $1,000 to $5,000 per knee. Bilateral cases roughly double this. Post-operative care adds $500 to $2,000 more. This is a significant financial commitment, and the cost alone is a legitimate factor in the decision.
For the full cost breakdown and financial planning options, see cost as a factor in the decision.
4. Recovery demands significant owner commitment
8 to 12 weeks of strict activity restriction is genuinely demanding. For the first two weeks, your dog needs crate rest, leash-only bathroom trips, and an E-collar at all times. The gradual return to activity over the following 6 to 10 weeks requires consistency, daily exercise management, and at least 2 to 3 vet rechecks.
Dogs don't understand why they can't run. Keeping an energetic dog at rest for two weeks requires real effort and logistics. This isn't a reason to avoid surgery if surgery is indicated, but it's a genuine consideration for timing.
5. Surgery doesn't guarantee zero arthritis
Correcting the structural problem slows arthritis development. It doesn't always prevent it entirely, particularly in dogs who already had secondary joint changes at the time of surgery, or those with higher-grade luxation.
Long-term joint care (weight management, joint-supportive supplements, appropriate exercise) remains appropriate even after successful surgery.
What the research actually says
The overall picture from published evidence:
- Overall success rate: Approximately 90 to 93% across grades. Total.vet (2025) cites the JAVMA Grade 4 study finding 93% overall success.
- Complication rate: 18 to 51% across studies, with most complications minor and most dogs achieving acceptable function regardless.
- Recurrence: 5 to 21% depending on grade and technique.
- Owner satisfaction: The ACVS reports over 90% of owners satisfied with outcomes following MPL surgery.
The complication statistics and the success statistics come from the same studies. A complication doesn't automatically mean a failure. Many dogs have minor complications and still achieve full recovery.
The cons of not operating for dogs who need surgery
An honest pros and cons article has to include the risks of the alternative for dogs who genuinely need surgery.
For Grade 3 and 4 dogs managed conservatively:
- Progressive arthritis develops as repeated luxation continues to damage cartilage. This arthritis is permanent and cumulative.
- Cruciate ligament risk rises with each passing month of altered joint mechanics.
- Muscle atrophy progresses as the dog uses the leg less.
- Surgical complexity increases as bone deformity worsens and secondary changes accumulate. Surgery done earlier is simpler than surgery done after years of damage.
- Quality of life declines as pain and limitation worsen.
For higher-grade dogs, the question isn't "surgery vs. no consequences." It's "surgery now vs. surgery later under more difficult conditions, or progressive decline."
For a detailed comparison of non-surgical alternatives, see non-surgical alternatives to consider.
For the comparison between bracing and surgery specifically, see braces vs surgery comparison.
The grade 2 decision: where the pros and cons are most balanced
For Grade 3 and 4, the pros of surgery clearly outweigh the cons for most dogs. For Grade 1, the cons of surgery outweigh the pros for most dogs. Grade 2 is where the balance is genuinely uncertain and individual.
For the specific decision framework for Grade 2 cases, see grade 2 specific decision guide.
Questions that help you weigh the decision for your specific dog
- What is my dog's grade, and what are the X-ray findings?
- How frequent and severe are the current symptoms?
- How likely is progression if we wait?
- What is the surgeon's personal complication rate for this procedure at this grade?
- What does recovery realistically involve given my work schedule and living situation?
- What happens to my dog's joint over the next 2 to 3 years if we manage conservatively?
- Is the cost manageable, and what financing options exist?
These questions won't give you a universal answer, but they'll give you the information specific to your dog's case.
For the full surgical decision framework, see when surgery is actually necessary.
For what post-surgery recovery involves, see what post-surgery recovery involves.
Frequently asked questions
Should I get a second opinion before deciding?
For any significant orthopedic surgery, a second opinion is entirely reasonable, particularly if the recommendation is for surgery and you have doubts, or if the grade is 2 and the recommendation surprises you. A board-certified veterinary surgeon's opinion (DACVS) is particularly valuable for complex cases.
Is surgery safer in younger dogs?
Generally yes. Younger dogs have less secondary joint damage at the time of surgery, heal faster, and adapt more readily. Older dogs carry higher anesthetic risk and may have more established arthritis, though surgery remains appropriate and beneficial for many older dogs with significant MPL.
How do I find a surgeon experienced in MPL correction?
Board-certified veterinary surgeons (DACVS) specialize in orthopedics and typically perform MPL surgery regularly. You can search the ACVS's online directory by location. General practitioners with MPL experience are also appropriate for straightforward Grade 2 cases in small breeds; ask about their specific experience with the procedure before proceeding.
The pros and cons of luxating patella surgery don't resolve into a clean answer. They resolve into: this is appropriate for this dog at this grade with these symptoms and this owner's capacity to support recovery. That's the real question. Get the grade, get the X-rays, understand the complication rates, and make the decision based on your dog's actual situation rather than a general rule.
Resources
- American College of Veterinary Surgeons. Patellar Luxations. acvs.org
- Total.vet. Luxating Patella in Dogs: Painful but Treatable. total.vet
- Bestie Paws Hospital. Luxating Patella Surgery for Dogs: Pros, Cons, and Expert Advice. bestiepaws.com
Abscess on a Dog's Leg: Causes, Signs & Treatment
Learn about causes, signs, and treatment of abscess on a dog's leg to help your pet recover quickly and safely.
An abscess is a pocket of pus trapped beneath the skin. On a dog's leg, it feels like a warm, painful swelling that appeared relatively quickly often within 24 to 72 hours of a bite, scratch, or puncture. It is not going to resolve on its own, and it should not be drained at home.
The good news is that with proper veterinary treatment, most leg abscesses heal completely within 1 to 2 weeks.
Quick answer: A dog leg abscess is a pus-filled swelling from bacterial infection, usually after a bite or puncture. Signs are warmth, pain, and rapid swelling. Treatment needs veterinary drainage and antibiotics. Most heal within 1 to 2 weeks.
Key takeaways
- An abscess is a pus pocket formed when bacteria are walled off in tissue by a fibrous capsule
- Bite wounds are the most common cause of leg abscesses; puncture wounds seal over quickly while bacteria multiply inside
- Warmth, pain, and rapid swelling are the hallmarks; the dog may limp or guard the leg
- Never drain an abscess at home inadequate drainage leaves bacteria behind and causes recurrence
- Foreign objects (foxtails, splinters) must be identified and removed or the abscess will keep recurring
- Healing takes 1 to 2 weeks with appropriate treatment; more complex cases involving surgery take longer
What is an abscess and why does it form?
VCA Animal Hospitals: "Abscesses are firm or compressible, often painful swellings that contain pus. They can develop in many areas of the body. Abscesses are caused by the introduction of bacteria through wounds, injuries, or bloodborne in the case of an internal organ abscess."
When bacteria enter tissue through a puncture or bite wound, the body's immune system responds by sending white blood cells to fight the infection. Dead white blood cells, bacteria, and tissue debris accumulate to form pus. The body walls off this material with a fibrous capsule creating the abscess cavity. As pus accumulates, pressure builds, causing pain and swelling.
Zumalka: "A fibrous capsule forms as purulent material accumulates beneath the skin, leading to increased pressure and painful swelling."
The problem with puncture wounds specifically: the entry hole seals over quickly while bacteria are still inside, trapping them in a warm, nutrient-rich environment where they multiply unchecked.
Common causes of leg abscesses in dogs
Bite wounds from other animals
The most common cause. Dog bites and cat bites puncture deep into tissue while depositing bacteria from the attacker's mouth. Cat bites are especially prone to abscess formation because their needle-sharp teeth create very deep punctures that seal over the surface rapidly.
UrgentVet: "A dog leg abscess may appear after trauma, injury, or a bite wound. Swelling, warmth, and limping are common signs. Since legs are highly mobile, abscesses here can be particularly uncomfortable."
Vetster adds an important reminder: "Bite wound abscesses are a bigger concern in unvaccinated pets due to the risk for rabies exposure." If your dog was bitten by an unknown animal, contact your vet about rabies prophylaxis recommendations regardless of abscess management.
Foreign body: foxtails, splinters, grass awns
Foxtails and similar plant material embed in the skin and migrate inward. They cannot dissolve and the body cannot expel them so bacteria colonize the tract they create, forming an abscess. Dogster: "During spring and summer, foxtails or grass seeds attach themselves to anything and everything, commonly burrowing into the feet."
VCA: "If a foreign object caused the abscess, it is critical to remove it or the abscess will return."
Recurring abscesses at the same location on the lower leg or foot, especially after outdoor activity in tall grass, strongly suggest a retained foreign body.
Puncture wounds from sharp objects
Nails, thorns, wire, and other sharp objects create deep puncture wounds that close quickly at the surface. The depth of penetration and the bacteria introduced determine whether an abscess forms.
Infected wound or laceration
Any wound that is not properly cleaned and monitored can become infected and progress to abscess formation. Deep lacerations are more prone than superficial abrasions.
Signs of an abscess on a dog's leg
Early signs (first 24 to 48 hours after injury):
- Sudden localized swelling, often appearing within 1 to 2 days of an injury
- The area is warm to the touch compared to surrounding skin
- Mild to moderate pain when the area is touched the dog pulls away or vocalizes
- Limping or reluctance to bear full weight on the leg
Established abscess signs:
- The swelling becomes fluctuant (you can feel fluid movement when pressed gently)
- The overlying skin may be reddened or discolored
- The dog may be licking, chewing, or biting at the area constantly
- Discharge (pus) appears if the abscess ruptures spontaneously at the skin surface
Signs the infection is spreading call the vet urgently:
- Increasing swelling beyond the original site
- Red streaking up or down the leg from the abscess (indicates cellulitis or lymphangitis)
- Fever, lethargy, loss of appetite, or depression
- The dog cannot bear any weight on the leg
How vets diagnose a leg abscess
Most abscesses are diagnosed on physical examination: the characteristic warm, fluctuant, painful swelling in context of an injury history or wound is usually diagnostic.
Fine needle aspiration: the vet inserts a needle into the swelling and withdraws fluid. Confirmation of purulent (pus) material confirms abscess. The sample may be sent for culture to identify the bacteria and guide antibiotic selection especially important for recurring abscesses.
Imaging: X-ray or ultrasound may be used if a foreign body is suspected, or if the abscess is very deep and its extent is unclear.
For how abscesses relate to furuncles and other deep skin infections that can progress without treatment, see furuncles as a related deep skin infection. For how abscesses cause limb swelling, see abscesses causing limb swelling. For how red lumps from abscesses appear on the leg alongside other causes, see abscesses as a cause of red lumps.
Treatment
Step 1: Drainage
The abscess must be opened and the pus removed. VCA: "The key is to remove the pocket of pus, either surgically or by draining and flushing."
How the vet drains it:
- Sedation or local anesthesia to manage pain during the procedure
- A small incision is made at the most dependent (lowest) point of the abscess to allow complete drainage
- The pus is expressed and the cavity flushed thoroughly with sterile saline or dilute antiseptic solution
Urgent Vet Care: "Depending on the size and location, we may place a drain or leave the wound partially open to encourage continued drainage."
A drain (a piece of soft tubing or rubber) may be placed through the abscess cavity and left in place for 24 to 48 hours to prevent premature closure while drainage continues. This is common for large or deep abscesses.
Step 2: Foreign body removal
If imaging or inspection reveals a foreign object (foxtail, splinter, grass awn), it is removed at this step. VCA is explicit: "If a foreign object caused the abscess, it is critical to remove it or the abscess will return." The entire tract created by the migrating foreign body may need to be surgically explored.
Step 3: Antibiotics
VCA: "Antibiotic therapy is a critical component of successful abscess treatment. The antibiotic will be chosen based on the bacteria involved, and the length of treatment will depend upon both the bacteria and the location. It is important to give the antibiotics for the entire time they are prescribed."
Common first-line choices: amoxicillin-clavulanate, cephalexin, or trimethoprim-sulfamethoxazole. Duration is typically 7 to 14 days for simple abscesses; longer for recurrent or deep cases.
Step 4: Pain management
Abscesses are painful. NSAIDs (meloxicam, carprofen) are typically prescribed for the first several days of treatment. Dogtime: "After the abscess is drained, your dog may require antibiotics and pain relievers to manage discomfort, as well as to prevent the infection from spreading."
Home care after veterinary treatment
Dogster (Dr. vet): "While warm compresses can help reduce swelling, draining the abscess without medical support may cause more harm or leave infection behind."
What to do at home:
- Apply warm compresses to the site for 10 to 15 minutes, 2 to 3 times daily, to encourage drainage and reduce swelling
- Clean the wound gently with dilute chlorhexidine or saline as directed by your vet
- Keep the area dry between cleanings
- Apply an E-collar to prevent licking licking reintroduces bacteria and delays healing
- Give all antibiotics on schedule and complete the full course
- Monitor for signs of recurrence: returning swelling, increasing discharge, or worsening pain
Signs to return to the vet:
- The swelling is not decreasing after 48 to 72 hours of treatment
- New discharge appears at the site after it appeared to be healing
- Red streaking appears around the wound
- The dog develops fever, stops eating, or becomes lethargic
For how severe infection can progress beyond an abscess to necrotizing tissue infection, see severe infection progression from abscess.
Can you treat a dog leg abscess at home?
Dogster: "While there are some aspects of treatment that can be managed at home, a dog's abscess should always be assessed by a vet. They will be able to work out an appropriate treatment plan, including medications such as antibiotics, and show you what you need to be doing at home."
Home care (warm compresses, keeping the area clean, E-collar) supports recovery but does not replace veterinary drainage and antibiotics. Attempting to squeeze or lance an abscess at home:
- May not fully drain the cavity
- Risks introducing additional contamination
- Can rupture the fibrous capsule internally, spreading infection into surrounding tissue
Frequently asked questions
How quickly does a dog leg abscess develop?
Abscesses typically develop within 24 to 72 hours of the causative injury. Some develop more slowly, particularly if the bacteria are less aggressive or the immune system has partially contained the infection. Most owners notice the swelling appearing surprisingly quickly a leg that looked normal the day before the vet visit may have a significant abscess by the appointment.
Will a dog leg abscess burst on its own?
It may. When the skin overlying the abscess thins sufficiently from internal pressure, spontaneous rupture can occur, releasing pus. This temporarily relieves pressure but does not resolve the infection the abscess often reforms unless the cavity is properly flushed and antibiotics are given. Spontaneous rupture also creates an open wound that can be contaminated from the environment. Vet assessment remains necessary even after spontaneous rupture.
My dog had an abscess treated but it came back in the same spot. Why?
Recurrence at the same site almost always means either a foreign body was not found and removed, or the antibiotic course was not completed. Dogster: foxtails in particular migrate inward over time, seeding a new abscess along their path. X-ray or ultrasound evaluation for a retained foreign object is the appropriate next step for any recurring abscess at the same site.
Is a dog leg abscess contagious to other dogs or humans?
The bacteria inside an abscess can theoretically transfer through direct contact with wound discharge, but abscess formation itself is not contagious it requires a specific combination of bacteria being introduced through a wound in that individual animal. Standard hygiene precautions (wash hands after handling discharge) are appropriate when caring for an infected wound.
Can a dog leg abscess become life-threatening?
Yes, in severe or untreated cases. If bacteria spread from the abscess into surrounding tissue (cellulitis), into the lymphatic system, or into the bloodstream (sepsis), the situation becomes life-threatening. Vetster: "Complications may occur in immunosuppressed and unvaccinated dogs." A dog with an abscess that is systemically unwell lethargic, not eating, running a fever needs emergency veterinary care.
How do I know if my dog's leg swelling is an abscess or a tumor?
An abscess typically has a rapid onset (days), is warm and painful, and is associated with an injury or wound. A tumor develops over weeks to months, is usually not painful, and does not have a history of trauma. However, infected cysts and tumors can look similar to abscesses. Fine needle aspiration by a vet provides a definitive answer when the distinction is unclear.
Resources
- VCA Animal Hospitals. Abscesses in Dogs. vcahospitals.com
- Dogster. Can I Treat My Dog's Abscess at Home? Our Vet Explains. dogster.com
- Dogtime. Abscesses in Dogs: Symptoms, Causes and Treatments. dogtime.com
- Vetster. Skin Abscesses in Dogs. vetster.com
- UrgentVet. Dog Abscesses: Causes, Symptoms and How You Treat Them. urgentvet.com
How Long After Neutering Is Testosterone Gone in Dogs
Learn how long testosterone stays in dogs after neutering and what to expect during recovery.
Neutering removes the testicles, which produce most of a dog's testosterone. But the hormone does not vanish from the bloodstream on surgery day.
Testosterone clears gradually as the body metabolizes what remains. Behavior follows the same curve. This is why owners who expect an immediate behavioral shift are often disappointed, and why patience in the weeks after surgery is not just advisable but necessary.
Here is the complete, evidence-based picture of the testosterone clearance timeline and what it means for your dog.
Quick answer: Testosterone levels begin declining within 24 to 72 hours of neutering. Significant reduction occurs within 2 to 3 weeks. Most testosterone is cleared from the bloodstream within 4 to 6 weeks. Full behavioral stabilization typically takes 2 to 3 months as the body and brain adjust to the new hormonal environment. Some habits shaped by testosterone may persist beyond this window and require training to address.
Key takeaways
- Testosterone production stops on surgery day: The testicles are removed, eliminating the primary production source immediately.
- Clearance from the bloodstream takes 4 to 6 weeks: Residual testosterone circulates and is metabolized gradually.
- Behavioral changes follow the hormonal decline: Most testosterone-driven behavioral improvements appear over 2 to 6 weeks.
- Full behavioral stabilization takes 2 to 3 months: Some behaviors fade slowly as hormone levels drop.
- Habits shaped by testosterone may persist: Learned behaviors continue regardless of hormone levels and require training.
- Fertility persists for up to 6 weeks: Residual sperm in the reproductive tract can still result in pregnancy.
What testosterone does in male dogs
Testosterone is produced primarily by the testicles. It drives a specific set of behaviors and physical characteristics in intact male dogs:
- Urine marking: The drive to mark territory with urine is heavily testosterone-dependent.
- Mounting behavior: Sexual and status-related mounting is driven by testosterone.
- Roaming: The drive to escape and find a mate is strongly testosterone-mediated.
- Inter-male aggression: Competition-based aggression with other intact males is often testosterone-linked.
- Dominance behaviors: Some dominant social behaviors decrease after neutering.
Beyond behavior, testosterone influences muscle mass, certain aspects of bone density, and the dog's general physical development.
The testosterone clearance timeline
Understanding this timeline is the most important practical takeaway from this article.
Hours 0 to 72: production stops, clearance begins
The testicles are removed during surgery. Testosterone production essentially stops at that moment.
However, the hormone that was already circulating in the bloodstream at the time of surgery does not disappear immediately. The body metabolizes and clears it through normal hormonal processing.
Within the first 24 to 72 hours, testosterone levels begin their decline. This is measurable but does not immediately translate into behavioral change.
Days 7 to 10: significant early reduction
By one to two weeks post-surgery, testosterone levels have dropped substantially from their pre-surgery baseline. Most of the actively circulating hormone is being metabolized.
This is still not the point at which behavioral changes are reliable. The hormonal environment is in transition, and the brain and behavior patterns are adjusting.
Weeks 4 to 6: functional clearance
By four to six weeks post-neutering, testosterone has reached very low or undetectable levels in most dogs. This is the point that veterinarians generally refer to when asked how long it takes for testosterone to "go away."
Some sources cite two weeks for functional clearance; others cite six weeks. The variation reflects individual differences in age, health, and metabolism. Younger dogs tend to clear residual testosterone faster.
Months 2 to 3: full behavioral stabilization
Even after testosterone levels have dropped to baseline, the brain and learned behavioral patterns continue adjusting to the new hormonal environment.
By two to three months post-neutering, most testosterone-driven behavioral changes have stabilized. This is the point at which you can accurately assess whether neutering has produced the behavioral improvements you were hoping for.
Timeline summary table
What behaviors improve as testosterone declines
These are the behaviors most reliably reduced as testosterone levels fall:
High likelihood of improvement:
- Urine marking indoors and outdoors
- Mounting behavior toward people, other dogs, or objects
- Roaming and escape attempts to seek females in heat
- Some forms of inter-male aggression driven by competition
Variable or uncertain improvement:
- Dominance-related behaviors that have become habitual
- Aggression toward familiar people (testosterone may contribute but is not the sole driver)
- General excitability (energy level is more breed and fitness-driven than hormonal)
Behaviors that will not improve:
- Fear-based aggression (not testosterone-driven)
- Separation anxiety (not testosterone-driven)
- Learned behaviors from training history (habits, regardless of their origin)
- Resource guarding (not testosterone-driven)
Why some behaviors persist after testosterone is gone
This is the part of the conversation that surprises many owners.
Some behaviors that appeared to be testosterone-driven become habitual through repetition. The neural pathways associated with the behavior have been reinforced many times, and they do not disappear when the hormonal fuel is removed.
A dog that has been marking territory for three years before neutering has established a behavioral habit. The testosterone-driven urge may be gone, but the habit of going to specific spots and marking may continue. This requires training to address, not just time.
The general rule: behaviors that have been performed repeatedly over time are more likely to persist after neutering than behaviors that are recent or infrequent.
For how testosterone decline affects dog behavior in the context of the full behavioral landscape after sterilization, that guide covers what the evidence says about which changes are most reliable. For the equivalent question in females, the guide on whether hormone changes calm female dogs walks through which female dogs see the calming effect and which do not.
The fertility window: keep intact females away
One important practical point that owners sometimes overlook: a neutered male can still get an unspayed female pregnant for up to six weeks after surgery.
Sperm are stored in the reproductive tract beyond the testicles, in the vas deferens and associated structures. These residual sperm remain viable for several weeks after the testicles are removed.
Keep your neutered male dog away from intact females for the full six weeks after surgery. This is not a precaution against unlikely events. It is a necessary management step.
Factors that affect how quickly testosterone clears
The 4 to 6 week timeline is a general guide. Individual variation exists.
Age: Younger dogs tend to metabolize and clear testosterone faster than older dogs. Their overall metabolic rate is higher.
Health status: Dogs with liver or kidney impairment may metabolize hormones more slowly.
Pre-surgery testosterone levels: A dog with very high testosterone levels before surgery may take longer to reach baseline.
Individual physiology: As with most biological processes, individual variation exists between dogs of the same age and breed.
None of these factors change the approach. Patience through the full two to three month window remains appropriate regardless.
How testosterone decline affects female dogs after spaying
While this article focuses on testosterone in male dogs, it is worth noting the parallel process in females.
Spaying removes the ovaries, which produce estrogen and progesterone. These hormones do not vanish on surgery day either. They decline over a similar 4 to 6 week clearance window, with behavioral stabilization taking two to three months.
The behavioral changes driven by the female hormonal cycle, including heat restlessness, roaming, false pregnancy behaviors, and cyclical mood shifts, follow the same general clearance curve as testosterone in males.
For how hormonal behavior changes in female dogs specifically, including which behaviors are most reliably reduced and over what timeline, that guide provides the female-specific detail.
Frequently asked questions
How long does it take for testosterone to fully disappear after neutering?
Most testosterone is cleared from the bloodstream within 4 to 6 weeks of neutering in healthy adult dogs. Behavioral stabilization, reflecting the brain's adjustment to the new hormonal environment, typically takes 2 to 3 months. Some habits may persist beyond this window and require training.
My dog was neutered two weeks ago and is still marking. Is something wrong?
No. Two weeks is within the normal clearance window. Testosterone is still declining. Most owners see improvements in marking behavior over 4 to 8 weeks. If marking continues at the same level beyond 3 months, it may have become a learned habit that requires training intervention.
Can my neutered dog still get a female pregnant?
Yes, for up to 6 weeks after surgery. Residual sperm in the reproductive tract remain viable after the testicles are removed. Keep your recently neutered male away from intact females for the full 6-week window.
Will my dog's behavior change immediately after neutering?
No. The first two weeks are recovery from surgery. Behavioral changes related to testosterone decline begin appearing in weeks 3 to 6, with full stabilization at 2 to 3 months. Expecting behavioral change within days of surgery leads to frustration and misattribution.
Does the age at neutering affect how quickly testosterone clears?
Somewhat. Younger dogs tend to metabolize hormones faster due to higher metabolic rates. However, the practical difference in clearance timeline is small compared to the individual variation between dogs. The 4 to 6 week clearance timeline remains a reasonable guide regardless of age. For whether lower testosterone calms dogs down and how the behavioral changes of testosterone decline manifest, that guide addresses the calming question across different dog types. For recovery timeline alongside hormonal changes, that guide places the hormonal adjustment within the broader post-surgical recovery picture.
Understanding the testosterone clearance timeline reframes the post-neutering period from a frustrating wait into an understandable process. The behavior changes are coming, but they follow the hormone. Give it four to six weeks for the hormonal shift and two to three months for the behavioral picture to stabilize. What you see at month three is an accurate reflection of what surgery has and has not changed.
Resources
The following sources were used as reference and background for this article:
- Small Dogs Heaven. Understanding the Timeline: How Long After Neutering a Dog is Testosterone Gone? smalldogsheaven.com
- The Beloved Dog. Your Dog's Testosterone: When It's Gone After Neutering. thebeloveddog.com
- Dog Hutt. How Long After Dog Neutering Is Testosterone Gone? doghutt.com
- Dogo App. How Long After Neutering Dog Is Testosterone Gone? dogo.app
- American Veterinary Medical Association (AVMA). Spaying and Neutering. avma.org
- Embrace Pet Insurance. Dog Neuter and Spay Recovery. embracepetinsurance.com
Necrotizing Fasciitis in Dogs: Early Signs & Treatment
Learn about necrotizing fasciitis in dogs, including early signs, diagnosis, and effective treatment options to protect your pet's health.
Necrotizing fasciitis is one of the most serious bacterial infections a dog can develop. Commonly called flesh-eating disease, it destroys skin, fat, and the fascia that covers muscles at a speed that overwhelms normal medical treatment. Without emergency surgery, survival rates are near zero.
The challenge is that early signs look like any other skin infection redness, swelling, pain. By the time the hallmark purple-black skin discoloration appears, the infection has already advanced significantly.
Quick answer: Necrotizing fasciitis causes rapidly spreading swelling, pain disproportionate to wound size, and skin progressing from red to purple to black. Caused by Streptococcus canis. Requires emergency surgery; survival with surgery is 80 to 90%.
Key takeaways
- Necrotizing fasciitis is a life-threatening emergency: without immediate surgical debridement, it is nearly always fatal
- Pain disproportionate to wound size is the most important early warning sign of NF
- Skin color progression from red to purple to black indicates advancing tissue death
- Streptococcus canis is the most common causative organism: a normal skin commensal that turns lethal in specific conditions
- Do not use NSAIDs or fluoroquinolones: both can worsen outcomes in confirmed or suspected NF cases
- Survival with surgery is 80 to 90%: immediate surgical intervention changes the prognosis dramatically
What is necrotizing fasciitis?
Today's Veterinary Practice (case series, 4 dogs): "Necrotizing fasciitis is a rapidly progressive, life-threatening bacterial infection of the subcutaneous tissues, fascia, and occasionally skeletal muscle."
The word "necrotizing" means tissue-killing. The bacteria destroy tissue by two mechanisms:
- Direct toxin production: bacteria release enzymes and toxins that break down tissue proteins and cell membranes
- Vascular destruction: Kinship explains: "These bacteria release toxins that restrict blood flow to the area of the infection. Without a good blood supply, the tissues begin to die off, and the infection spreads more easily."
When blood supply is cut off, antibiotics in the bloodstream cannot reach the infected tissue in effective concentrations this is why surgery to physically remove the dead tissue is non-negotiable. Antibiotics alone cannot cure established necrotizing fasciitis.
What causes it?
Kinship: "The most commonly isolated bacterial species in these infections is β-hemolytic Streptococcus canis." This is a Group G Streptococcus species that normally lives on healthy dogs' skin and in their gastrointestinal tracts without causing problems.
Today's Veterinary Practice identifies additional causative organisms: Staphylococcus pseudintermedius, Staphylococcus aureus, Pasteurella multocida, Pseudomonas aeruginosa, Escherichia coli, and Serratia marcescens.
The critical point: these bacteria are part of normal canine microbiome. There is no way to pre-treat and eliminate them. NF is not caused by unusual contamination from the environment it is caused by a normally harmless organism behaving pathologically under specific conditions.
Predisposing factors (though often none are identified):
- Minor or blunt trauma
- Any skin wound, scratch, or puncture
- Immunocompromised states
Dr. Catherine Daniel (Central Island Veterinary Emergency Hospital): "Even if it gets under the skin by a wound, it doesn't always cause necrotizing fasciitis. It's still extremely rare."
Early signs: the critical window
The earliest signs of necrotizing fasciitis are indistinguishable from a straightforward local infection. This is what makes the condition so dangerous. Kinship: "The initial signs of flesh-eating disease share symptoms with most localized infections: regional pain, swelling, and redness."
The early warning signs that should prompt immediate emergency care:
1. Pain disproportionate to wound size
This is the most important early clinical clue. A small wound a scratch, a minor bite that causes extreme, intense pain far beyond what the wound size would suggest is a red flag for NF. The pain is internal, driven by fascia destruction, not proportional to the visible surface injury.
2. Rapidly spreading swelling
Today's Veterinary Practice: "The most common signs of NF are rapidly progressive swelling, lameness, and hemorrhagic skin pigmentation." Times Colonist (Dr. Daniel): "An early sign of necrotizing fasciitis is significant swelling or edemas a build up of fluid or protein under the skin. If you push on the swelling, an indent may be left behind."
Swelling that is spreading noticeably within hours not days is not typical of a simple skin infection.
3. Skin color change: red to purple to black
Kinship: "The severity of the condition becomes more obvious when a wide area of skin turns purplish or blackish." Today's Veterinary Practice describes the progression specifically: skin pigmentation that goes from red to purple to black indicates advancing tissue death (hemorrhagic infarction) beneath the skin.
Darkened skin around a wound is an emergency not a reason to "watch it."
4. The dog is systemically unwell
WSAVA (VIN): "Dogs present with fever, swelling, erythema, disproportionate pain on palpation, draining tracts and ulcers." Systemic illness (lethargy, fever, not eating) alongside a wound, especially one that does not look dramatically abnormal on the surface, should raise suspicion.
How NF progresses without treatment
Once bacteria gain entry to the fascial plane, they spread along that plane rapidly far faster than any visible skin change. The infection races through the connective tissue well ahead of the visible zone of skin damage. By the time large areas of skin turn black, the bacteria have already destroyed a much larger volume of tissue than is visible.
Today's Veterinary Practice: "Necrotizing fasciitis has a 100% mortality rate if surgical intervention is not rapidly instituted."
Diagnosis
Diagnosis is primarily clinical and requires emergency decision-making there is no time to wait for laboratory results before operating.
Physical examination: rapidly spreading swelling, disproportionate pain, skin color changes, and systemic illness in a dog with any wound.
Imaging: Kinship: "Imaging the area with radiographs or ultrasound may indicate that the infection is serious." Gas in the tissue on radiograph (gas gangrene) is a strongly confirmatory finding but is not always present.
Tissue biopsy and bacterial culture: Today's Veterinary Practice: "A veterinarian will make a definitive diagnosis with tissue biopsies and bacterial cultures taken from deep within the infected area, but those tests take days to return. Dogs with this condition often decline before the diagnosis is confirmed."
In practice: the clinical presentation of rapidly progressive swelling with skin color changes and systemic illness is sufficient to proceed directly to surgery without waiting for biopsy confirmation. Time is the critical variable.
Treatment
Immediate surgical debridement
The core of treatment. Today's Veterinary Practice: "The stark contrast in mortality rate with and without surgical intervention is compelling evidence for immediate surgical intervention."
Surgery involves radical removal of all dead and infected tissue, including apparently normal tissue at the margins (since bacteria have spread beyond the visible zone of damage). The wound is left open after debridement it cannot be closed because the infection continues to be active. Repeat surgical debridement may be required in subsequent days.
Intravenous antibiotics
WagWalking: "Initially, intravenous antibiotics (either clindamycin or amoxicillin-clavulanate) will be administered. Once the veterinarian has sensitivity testing results, the antibiotic may be changed."
WSAVA (VIN) adds a critical warning: "Do not use fluoroquinolones, as these have been associated with possibly engendering or enhancing the extreme toxicity of these Streptococcus strains." This is an important distinction from many other bacterial infections where fluoroquinolones are a first-line choice.
NSAIDs: contraindicated
WSAVA (VIN): "NSAIDs should also be avoided, as there is some evidence they may suppress neutrophil activity and mask clinical signs." This matters in practice: a dog presenting with pain that might be NF should not receive an NSAID before evaluation, as it could mask the disproportionate pain that is the primary early warning sign.
Supportive care
IV fluids, nutritional support, and intensive monitoring throughout hospitalization. Recovery requires days to weeks of inpatient care.
Wound management post-surgery
After debridement, the open wound requires aggressive ongoing management: frequent dressing changes, possible wound VAC therapy, and eventually skin grafts or flaps to close large tissue deficits.
For how deep skin infections like abscesses can serve as entry points for serious infections, see abscess as an entry point for severe infection. For how skin infection can progress from a furuncle to severe NF, see skin infection that can progress to necrotizing fasciitis. For how Pseudomonas is involved in severe wound infections, see Pseudomonas as a causative organism. For how Enterococcus contributes to severe wound infections, see Enterococcus as a causative organism.
Prognosis
Today's Veterinary Practice: "The most recent and extensive veterinary study suggests a survivability rate of 80 to 90% for dogs that receive a combination of surgery, antibiotic therapy, and supportive care."
This is encouraging for a condition with 100% mortality without surgery. However, survival requires early intervention. Dogs that present with advanced skin necrosis, systemic sepsis, or multi-organ involvement have significantly worse prognoses.
The Times Colonist documented a cluster of 6 affected dogs at one veterinary hospital, with at least 5 dying or being euthanized. All were described as presenting with rapidly fatal progression illustrating that even with aggressive care, timing is everything.
Prevention
There is no reliable way to prevent NF in individual dogs because the causative bacteria are part of the normal microbiome. What can reduce risk:
- Prompt wound treatment: clean and disinfect any bite wound, scratch, or puncture immediately
- Veterinary evaluation for wounds that seem disproportionately painful or swollen
- Monitor healing wounds closely: any wound that is not improving by 24 to 48 hours or is worsening should be rechecked
- Maintain immune health: immunocompromised dogs may be more susceptible
Frequently asked questions
How quickly does necrotizing fasciitis progress in dogs?
Extremely quickly hours to a day or two from initial signs to life-threatening tissue destruction. WSAVA notes dogs "present with fever, swelling, erythema, disproportionate pain on palpation, draining tracts and ulcers" a picture that can develop within a day of the initial wound. This speed is what makes the condition so dangerous: by the time owners recognize that something is seriously wrong, significant tissue damage has already occurred.
Can a dog recover from necrotizing fasciitis?
Yes, with early and aggressive surgery. Today's Veterinary Practice reports 80 to 90% survivability with combined surgery, antibiotics, and supportive care. The key word is "early." Dogs that receive surgery before extensive skin necrosis and systemic sepsis have a substantially better prognosis than those presenting at a late stage.
Is necrotizing fasciitis contagious from dog to dog or to humans?
It is not directly contagious in the traditional sense. WagWalking notes that transmission of the bacteria can occur through shared bowls, bedding, or contact between dogs, but the vast majority of dogs exposed to Streptococcus canis never develop NF. The disease requires specific host susceptibility conditions to establish itself. Dr. Daniel: "It's highly unlikely that a dog could pass the disease to a human, since it's caused by an animal-specific bacteria Group G streptococcus."
Why can't antibiotics alone treat necrotizing fasciitis?
Once bacteria have destroyed the blood supply to infected tissue, antibiotics delivered through the bloodstream cannot reach the bacteria in effective concentrations. The infected zone becomes avascular without blood flow, drugs cannot penetrate it. Only physical removal of the dead tissue (surgery) eliminates the bacterial reservoir. Antibiotics are essential to prevent spread and treat systemic infection, but they cannot substitute for surgery in established NF.
My dog has a painful wound that is spreading. How do I know if it's NF?
You cannot reliably distinguish early NF from a severe cellulitis or deep abscess at home. The key signals that should prompt emergency veterinary care (not a regular appointment) are: pain that seems far worse than the wound would suggest, swelling spreading significantly within hours, skin darkening to purple or black, or a dog that is systemically unwell alongside a skin problem. Err strongly on the side of emergency evaluation when these signs are present.
Can NF affect any part of the body?
Yes. While the limbs are commonly reported sites, NF can develop anywhere on the body where bacteria gain entry to the fascial plane. Generalized cutaneous vasculitis from severe infection can also affect the paw pads, distal tail, and pressure areas. The disease follows fascial planes, so it can spread in any direction from the entry point.
Resources
- Today's Veterinary Practice. Case Series: Necrotizing Fasciitis in 4 Dogs. todaysveterinarypractice.com
- Kinship. How to Keep Your Dog Safe From Flesh-Eating Bacteria. kinship.com
- WSAVA / VIN. Dermatology Disasters Necrotizing Fasciitis. vin.com
- WagWalking. Necrotizing Fasciitis in Dogs. wagwalking.com
- Times Colonist. Flesh-Eating Disease in Dogs Prompts Warning from Nanaimo Vet. timescolonist.com

