

10 Essential TPLO Recovery Tips for Pet Owners
Help your dog heal faster after TPLO surgery with these 10 simple, vet-approved recovery tips every pet owner should know

This article is for informational purposes only and is not a substitute for professional veterinary advice. Every case is unique, so always consult your veterinarian for guidance specific to your pet.
This content is intended for veterinary professionals for educational purposes. It does not replace clinical judgment or tailored advice. Always rely on your training, expertise, and the specific context of your patients.
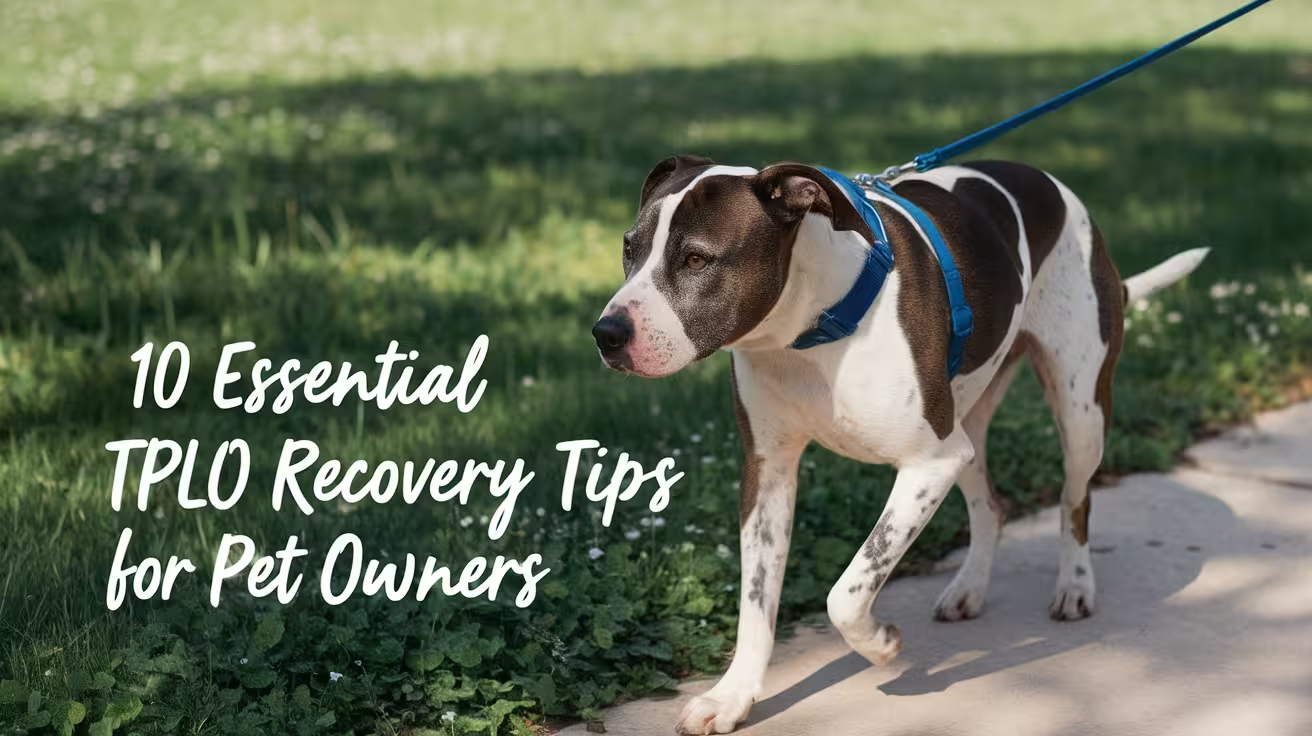
TPLO recovery takes 8 to 12 weeks of structured care. Most owners know the broad requirements -- rest, medications, vet visits -- but the specific actions that protect recovery are less obvious.
These 10 tips translate the key principles of TPLO recovery into concrete, actionable guidance.
Quick answer: The 10 most essential TPLO recovery tips: keep the e-collar on; give medications on schedule; confine in weeks 1 to 2; inspect the incision daily; apply cold therapy for 3 to 5 days; use a leash indoors; provide mental stimulation; clean bedding weekly; attend check-ups; call the vet early if something looks wrong.
Key takeaways
- E-collar compliance is the highest-priority single action: VetSurgInfo confirms most TPLO incision infections are caused by licking; the e-collar must stay on at all times for 10 to 14 days
- Medication timing matters as much as compliance: giving NSAIDs and gabapentin at the exact scheduled intervals maintains therapeutic blood levels; gaps allow pain to break through
- Strict confinement in weeks 1 to 2 prevents plate failure: jumping, slipping, or running applies forces to the plate that risk displacement before the osteotomy heals
- Daily incision inspection detects infection before it becomes deep: the window between superficial and deep infection is days; daily inspection closes that window
- Cold therapy in the first 72 hours is the most underused home tool: 10 to 15 minutes, 3 to 4 times daily, reduces swelling and pain in the acute phase
- Mental stimulation replaces physical activity: a bored dog becomes restless and moves; food puzzles, lick mats, and scent games provide neural reward without mechanical risk
Tip 1: Keep the e-collar on without exception
The e-collar is not a suggestion.
A single licking episode can inoculate the incision with S. pseudintermedius from the dog's oral cavity, introducing infection that may require antibiotics or, in the worst case, plate removal.
VetSurgInfo confirms: most incision infections are due to licking; the cone is the mainstay for avoiding incision infections.
The best test: place peanut butter on the dog's leg before surgery and check whether they can reach it with the collar on. If they can, the collar is not effective.
The e-collar must stay on during sleep, during unsupervised periods, and any time the dog is not under direct visual supervision. Remove only for supervised eating and drinking, then immediately replace it.
Tip 2: Give all medications on schedule
Pain medications work through consistent blood levels. An NSAID given 2 hours late allows a pain gap that makes the dog uncomfortable.
Discomfort leads to restlessness, inability to settle, and -- critically -- attempts to move around or adjust position that stress the plate.
Medcovet confirms: a strong TPLO surgery recovery plan includes pain management with prescribed pain medication to ensure comfort during the initial recovery phase.
Practical guidance:
- Set phone alarms for each medication
- Give NSAIDs with food to reduce gastric irritation
- Never double dose if a dose is missed -- contact your vet for guidance
- Time gabapentin/trazodone about 30 minutes before anticipated stressful periods (vet visits, times when other family members arrive home)
Tip 3: Confine strictly in weeks 1 to 2
The first 14 days are the highest-risk period for plate displacement.
The osteotomy site has the least mechanical strength at this stage and cannot tolerate the forces generated by running, jumping, or sudden twisting.
SustainableVet.org confirms: dogs typically need 6 to 8 weeks of restricted activity; strict confinement ensures the bone plate stabilizes and heals properly.
Confinement means:
- Crate or exercise pen at all times when not supervised
- Bathroom leash walks of 5 minutes maximum, 3 to 5 times daily
- No stairs, no furniture access, no running
- All other pets separated from the recovering dog
Tip 4: Inspect the incision daily
A 30-second daily inspection at the same time each day catches early infection before it progresses. Normal healing shows consistently fading redness, no discharge, and a healing incision line.
Early infection shows spreading redness, cloudy or malodorous discharge, or increasing warmth.
Medcovet confirms: a strong recovery plan includes wound care and close monitoring of the surgical site.
What to look for:
- Redness: fading daily from day 5 onward is normal; spreading is not
- Discharge: clear serum only in the first 2 to 3 days is normal; anything cloudy or malodorous at any stage is not
- Warmth: mild for the first week; increasing after day 5 is a warning sign
Tip 5: Do cold therapy in the first 3 to 5 days
Cold therapy reduces swelling, pain, and inflammation during the acute post-surgical phase. It is the most effective home intervention for managing early post-TPLO swelling and the least frequently done consistently.
SustainableVet.org confirms: cold therapy, like applying an ice pack wrapped in a towel for 10 to 15 minutes several times a day during the first 72 hours, helps reduce inflammation.
Wrap an ice pack in a thin cloth. Apply to the incision for 10 to 15 minutes, 3 to 4 times daily. Begin day 1 and continue through day 5.
Never place ice directly on skin.
Tip 6: Leash the dog indoors
A house leash held by the owner prevents sudden movements that cause plate failure: slipping, running to the door, or startling at a noise.
Every uncontrolled moment indoors is a risk. The house leash gives the owner instant control.
Tip 7: Provide mental stimulation instead of physical exercise
A dog with no cognitive engagement will self-stimulate physically. Mental stimulation provides the same dopamine reward as physical activity without mechanical impact on the healing plate.
SustainableVet.org confirms: redirect energy through mental stimulation like puzzle feeders or scent games; a mentally stimulated dog is less likely to feel the physical restrictions.
Effective options:
- Frozen Kong: stuffed with wet food or peanut butter (xylitol-free) and frozen
- Lick mat: spread wet food or peanut butter on a textured mat
- Scatter feeding: spread kibble across a towel or crate mat
- Sniff games: hide treats in a muffin tin covered with tennis balls
Tip 8: Keep bedding clean weekly
Dirty bedding accumulates S. pseudintermedius and other bacteria from the dog's skin. The healing incision is in close proximity to bedding throughout recovery.
Contaminated bedding is a low-grade but continuous source of bacteria that can reach the incision.
TPLO Info confirms: dogs do not like dirty bedding; wash crate items at least once a week to keep them clean and free of dog fur.
Wash bedding in hot water with laundry detergent. Air dry or use a hot dryer cycle. Replace immediately with clean bedding.
Tip 9: Attend all scheduled vet appointments
The 2-week, 6-week, and 12-week checkpoints each have a specific clinical purpose. Missing them means missing the opportunity to catch complications before they become serious.
Texas A&M VetMed confirms: complications are easier to manage when caught early; minor issues may be resolved with oral medications and rest, but evaluation and X-rays may still be needed.
What happens at each visit:
- 2-week: incision assessment, suture removal, pain management review
- 6-week: radiograph of osteotomy, activity level adjustment based on healing
- 12-week: final radiograph, clearance for return to full activity
Tip 10: Call the vet early, not late
The most common mistake owners make is waiting to see if something resolves on its own.
A sign that is concerning today and is still concerning tomorrow warrants a call -- not continued observation.
Texas A&M VetMed confirms: if anything seems off during recovery, it is always best to contact the surgical team immediately rather than waiting.
Call same day or immediately if:
- Any cloudy, yellow, green, or malodorous wound discharge
- Redness spreading beyond the incision line
- Fever, lethargy, or loss of appetite
- Lameness worsening after prior improvement
- Wound edges separating
For the full recovery timeline, see what to expect after TPLO surgery in dogs. For confinement setup, see how to confine your dog after TPLO surgery.
For keeping the dog calm, see how to keep a dog calm after TPLO surgery. For the infection prevention guide, see post-operative care mistakes that increase TPLO infection risk.
Frequently asked questions
How strict does the activity restriction need to be?
Very strict in weeks 1 to 2. The dog cannot run, jump, use stairs, or play with other pets. Leash walks of 5 minutes for bathroom purposes only.
This is not an exaggeration -- a single running episode in the first 2 weeks can displace the plate and require revision surgery.
My dog seems completely fine by week 2. Can I relax the restrictions?
No. Clinical improvement (the dog appears comfortable and energetic) does not mean the osteotomy is healed.
The plate holds the rotated tibial plateau in position while new bone grows across the cut -- a process that takes 8 to 12 weeks regardless of how well the dog appears.
Radiographic confirmation of healing is required before any restriction is relaxed.
Which medication side effects should I watch for?
NSAIDs: vomiting, diarrhea, reduced appetite, dark stools (suggests GI bleeding). Gabapentin: sedation (which is expected), unsteadiness (monitor and report if severe). Trazodone: sedation (expected), vomiting in some dogs.
Contact your vet if any medication appears to be causing significant side effects -- alternatives are usually available.
Can I give my dog human supplements like fish oil or turmeric during recovery?
Fish oil (omega-3 fatty acids) is generally considered safe and potentially beneficial for joint health.
However, do not add any supplement without discussing with your vet first -- some supplements interact with NSAIDs or affect bleeding. Turmeric in high doses has similar concerns. When in doubt, ask.
My dog is crying or whining a lot. Should I give extra pain medication?
No -- never give extra medication beyond what is prescribed without vet guidance. Contact your vet and describe the pain signs.
They may adjust the dosing schedule, add a medication, or ask you to bring the dog in.
Whining can also reflect anesthesia effects, anxiety, or opioid dysphoria rather than uncontrolled pain -- your vet can help distinguish these.
Resources
- VetSurgInfo. TPLO Recovery Tips. vetsurginfo.com
- Medcovet. Essential Guide to Dog Recovery TPLO Surgery. medcovet.com
- Texas A&M VetMed. TPLO Recovery: Setting Pets Up for Success. vetmed.tamu.edu
- SustainableVet. 10 Essential TPLO Recovery Tips for Pet Owners. sustainablevet.org

Get a Free Poster
Enhance your workspace with a high-quality radiographs reference poster, designed for veterinary professionals. This free physical poster will be shipped directly to you—just fill out the form to request your copy.





Taking Great TPLO Radiographs
Click Below to Watch Live Video Demos


We'll send you a Free Wall Poster with all the steps
Step #1
Getting Ready
Ensuring a clean surgical field starts with proper skin preparation. This video demonstrates the best practices for:
- Shaving the patient – Achieving a close, even shave while minimizing skin irritation
- The Dirty Scrub – The initial skin prep step to remove surface debris and reduce bacterial load before the sterile scrub.
Following these techniques helps reduce infection risk and improve surgical outcomes. Watch the video to see how it’s done effectively!


Step #2
Reduce Your Risks
Many surgeons are shocked to find out that their patients are not protected from biofilms and resistant bacteria when they use saline and post-op antibiotics.
That’s Where Simini Comes In.
Why leave these risks and unmanaged? Just apply Simini Protect Lavage for one minute. Biofilms and resistant bacteria can be removed, and you can reduce two significant sources of infection.
Step #3
Take the Course
Preventing surgical infections is critical for patient safety and successful outcomes. This course covers:
- Aseptic techniques – Best practices to maintain a sterile field.
- Skin prep & draping – Proper methods to minimize contamination.
- Antibiotic stewardship – When and how to use perioperative antibiotics effectively.
Stay up to date with the latest evidence-based protocols. Click the link to start learning and earn CE credits!

Things to know
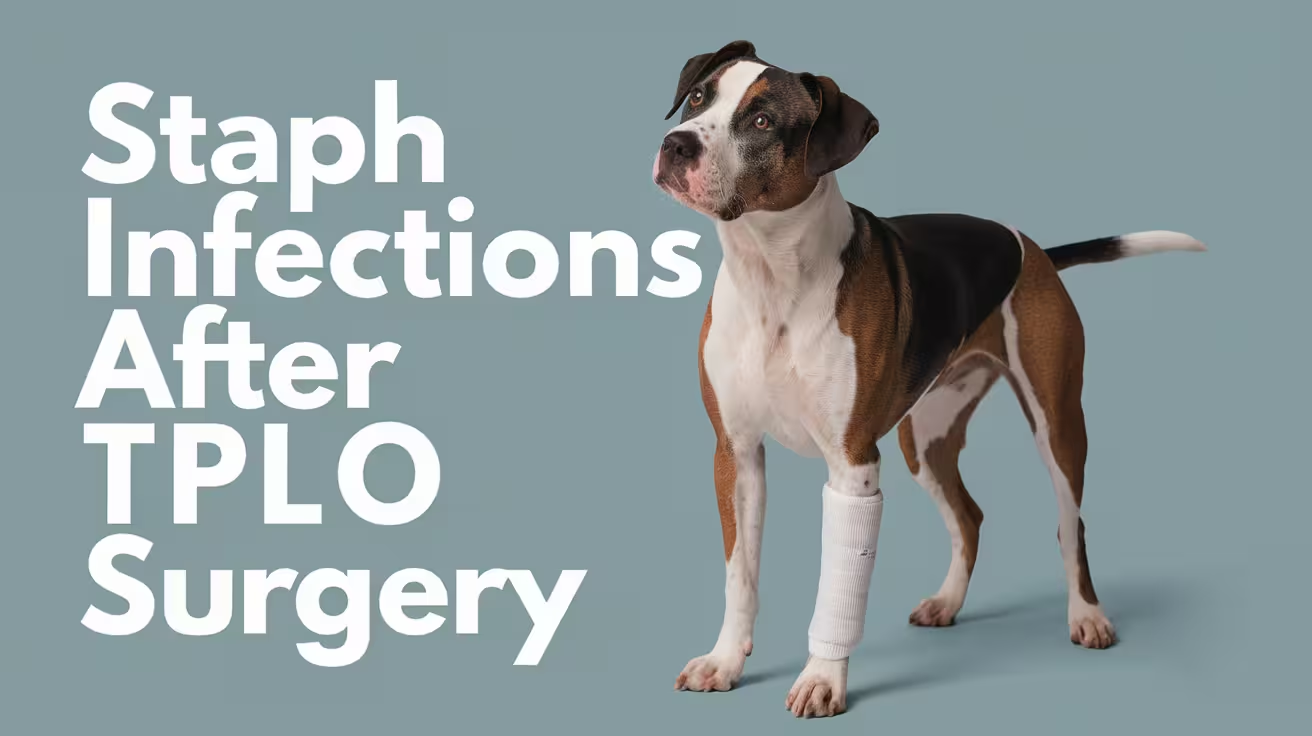
Staph Infection After TPLO Surgery: Signs & Risks
Staph infections after TPLO surgery can cause serious issues. Learn how to spot early symptoms, treat infections, and prevent complications
Staphylococcus species are the most common cause of surgical site infections (SSI) after TPLO surgery in dogs.
The primary culprit is Staphylococcus pseudintermedius -- a bacterium that normally lives on the skin, nares, and perianal area of healthy dogs.
Understanding why this organism is so prevalent, how it produces infection, and what makes methicillin-resistant strains particularly challenging is essential for owners of TPLO dogs and the veterinary professionals treating them.
Quick answer: S. pseudintermedius is the most common cause of post-TPLO infection. MRSP accounted for 28% of infections in a 659-TPLO study. Signs include redness, swelling, warmth, and discharge -- or only lameness regression and plate-site swelling for deep implant infections. Culture and sensitivity testing is required; empirical treatment risks selecting for further resistance.
Key takeaways
- S. pseudintermedius is the most frequently identified pathogen in TPLO infections: a normal skin commensal in dogs; the PMC 769-TPLO study identified it in 37 of 65 SSI cases
- MRSP accounted for 28% of infections in a 659-TPLO study: a high proportion of resistant organisms in a single surgical population; MRSP does not respond to many first-line antibiotics
- Biofilm formation on the TPLO plate makes staph infections difficult to treat: once established on the metal plate, bacteria are protected from antibiotics; deep implant infections often require plate removal
- Signs of staph infection range from visible wound changes to none: superficial infections produce redness, warmth, and discharge; implant infections may show only lameness regression and plate-site swelling
- Diagnosis requires bacterial culture and sensitivity testing: MRSP cannot be diagnosed visually; empirical antibiotic treatment without culture risks selecting for further resistance
- Pre-operative MRSP carriage significantly increases SSI risk: preoperative MRSP colonization is an independent risk factor; dogs with known carriage require enhanced perioperative protocol
Why S. pseudintermedius is so prevalent in TPLO SSI
It is a normal resident of dog skin
S. pseudintermedius colonizes the skin, nares, and perianal area of most dogs as part of their normal flora. It is present on the surgical preparation area even after antiseptic skin preparation.
The preparation reduces the bacterial load but does not sterilize the skin.
SustainableVet.org confirms: S. pseudintermedius is naturally found on a dog's skin; in healthy dogs it rarely causes issues, but after TPLO surgery it can infect the surgical incision and implants.
The TPLO plate provides a preferred colonization surface
Metal implants dramatically lower the minimum infective dose -- the number of bacteria required to establish infection. On a plate surface, S. pseudintermedius can form biofilm with far fewer organisms than required to infect soft tissue alone.
SustainableVet.org confirms: TPLO surgeries are particularly prone to infection because of the metal implants, which provide a surface for bacteria to stick to and form biofilms.
Licking introduces oral cavity organisms to the incision
The oral cavity of dogs is also colonized with S. pseudintermedius. When a dog licks the incision, it introduces additional bacteria directly to the wound.
This is the most common mechanism of avoidable post-TPLO SSI.
ResearchGate MRSA TPLO case report confirms: the dog licked the surgical site, causing dehiscence, and MRSA was detected from the purulent discharge. This underscores the critical importance of e-collar compliance.
MRSP: the resistant strain that complicates treatment
MRSP (methicillin-resistant Staphylococcus pseudintermedius) is resistant to beta-lactam antibiotics via the mecA gene -- the same mechanism as MRSA in humans. Cephalexin, amoxicillin-clavulanate, and most penicillins are ineffective.
Why MRSP is a particular challenge in TPLO
Most perioperative antibiotic protocols use cefazolin (a cephalosporin). MRSP is resistant to cephalosporins by definition.
If a dog unknowingly colonized with MRSP receives cefazolin prophylaxis, the MRSP is not suppressed. If it reaches the plate, it establishes infection against which standard first-line antibiotics are ineffective.
SustainableVet.org confirms: MRSP has developed resistance to many commonly used antibiotics, making infections harder to treat and increasing the risk of complications.
MRSP incidence in TPLO infections
ResearchGate TPLO MRSA/MRSP study (659 TPLO procedures, SSI rate 11%): MRSP accounted for 20 of 71 infections (28%). This is a high proportion of resistant organisms in a post-surgical population.
Antibiotic options for MRSP
First-line options for susceptible S. pseudintermedius (cephalexin, amoxicillin-clavulanate) do not work for MRSP. Culture and sensitivity testing is required to identify effective agents. Common options based on sensitivity results include:
- Chloramphenicol: effective against many MRSP; requires bone marrow monitoring
- Clindamycin: effective if sensitivity confirmed; not all MRSP strains
- Doxycycline: bacteriostatic; used for some superficial MRSP infections
- Rifampin (rifampicin): excellent biofilm penetration; always combined with another agent to prevent resistance; used for implant-associated MRSP
- Vancomycin: last resort; the MRSA TPLO case report describes a rifampin-vancomycin combination resolving MRSA infection that persisted despite implant removal and vancomycin alone
SustainableVet.org confirms: one of the biggest challenges in treating staph infections after TPLO is the presence of multidrug-resistant bacteria, particularly MRSP; this strain has developed resistance to many commonly used antibiotics.
Signs of post-TPLO staph infection
Superficial incisional infection (SSI-S)
- Redness spreading beyond the incision line (after day 5)
- Warmth at the incision site increasing rather than decreasing
- Swelling that is not resolving or is increasing
- Discharge: cloudy, yellow, green, or malodorous from the incision
- Wound edges that are not healing or are separating
Deep implant-associated infection (SSI-D)
- New or worsening lameness after a period of improvement
- Swelling over the plate site (not necessarily at the incision)
- Warmth specifically at the plate site on palpation
- A draining tract opening near but not at the incision (typically weeks to months post-surgery)
- No discharge from the original incision despite significant clinical signs
SustainableVet.org confirms: signs of infection include redness, swelling, warmth around the incision, pus-like discharge, an unpleasant odor, and increased pain or tenderness.
Diagnosis
Wound swab culture: taken from discharge at the incision or from the draining tract. Provides the organism identification and sensitivity profile.
Deep tissue culture: more accurate than wound swabs because it avoids surface contamination. Obtained at surgery (arthrotomy or plate removal).
Plate surface culture: the most sensitive diagnostic for implant-associated infection. Obtained when the plate is removed.
Imaging: radiographs assess peri-implant bone changes (radiolucent halos, periosteal reaction); advanced imaging (CT) may be used for complex deep infections.
The PMC 769-TPLO study confirmed: bacterial culture was positive in 72% of samples submitted when SSI was first suspected.
Treatment
Superficial infection: culture-directed oral antibiotics for 2 to 4 weeks; wound cleaning; e-collar compliance to prevent licking; local wound care.
Deep implant-associated infection: surgical debridement (lavage and debridement of the plate site); culture; culture-directed antibiotics for 4 to 8 weeks; plate retention if the osteotomy is not yet healed (with the understanding that complete resolution may require later plate removal); plate removal once the osteotomy has healed.
MRSP-specific: culture results guide antibiotic selection. Rifampin combinations are used for biofilm-associated implant infections. Veterinary infectious disease consultation is appropriate for complex MRSP cases.
For the infection prevention guide, see how can TPLO infections be prevented post-operatively?. For MRSP specifically, see can MRSP or MRSA occur after TPLO surgery?.
For the SSI rate data, see how common are infections after TPLO surgery?. For the antibiotic guide, see antibiotics commonly used for TPLO infections.
Frequently asked questions
My dog had a culture and it came back as S. pseudintermedius. Is that MRSP?
Not necessarily. S. pseudintermedius can be methicillin-susceptible (MSSP) or methicillin-resistant (MRSP). The sensitivity panel on the culture report will indicate whether the organism is susceptible to cephalexin and other beta-lactam antibiotics.
If susceptible, it is MSSP and responds to standard first-line drugs. If resistant to cephalosporins, it is MRSP and requires second-line agents.
Can I prevent staph infection after TPLO?
Licking prevention (e-collar compliance for 10 to 14 days) is the single most impactful owner-controlled prevention measure. Licking is the most common avoidable cause of post-TPLO SSI.
Wound dryness, clean bedding, limited environmental contamination, and daily wound inspection are additional preventive measures.
My dog finished the antibiotic course but the discharge came back. What does that mean?
Recurrence after antibiotic completion most commonly indicates biofilm-associated implant infection that was suppressed but not eradicated by antibiotics. Plate removal is likely needed for definitive resolution.
Contact your vet immediately -- do not wait to see if it resolves again.
Can my dog spread MRSP to other dogs or people?
MRSP is primarily a veterinary pathogen. It is less commonly transmitted to humans than MRSA, but zoonotic transmission has been documented.
Standard hygiene measures (hand washing after wound care, gloves for wound dressing changes, avoiding face contact with the infected wound) are appropriate precautions during treatment.
How long does it take to clear a deep staph infection after TPLO?
Deep implant-associated infections typically require 4 to 8 weeks of culture-directed antibiotics plus plate removal once the osteotomy is healed.
MRSP infections that involve biofilm and require rifampin combinations may take 3 to 6 months of total treatment. Osteomyelitis extends this further.
Long courses are necessary because biofilm-associated bacteria are protected from antibiotics and resistant populations can regrow when treatment stops.
Resources
- PMC. Surgical Site Infection After 769 TPLOs. pmc.ncbi.nlm.nih.gov
- ResearchGate. Treatment of MRSA Infection Following TPLO in a Dog. researchgate.net
- SustainableVet. Staph Infection After TPLO Surgery. sustainablevet.org
- SustainableVet. Is Staph the Most Common Infection After TPLO Surgery? sustainablevet.org
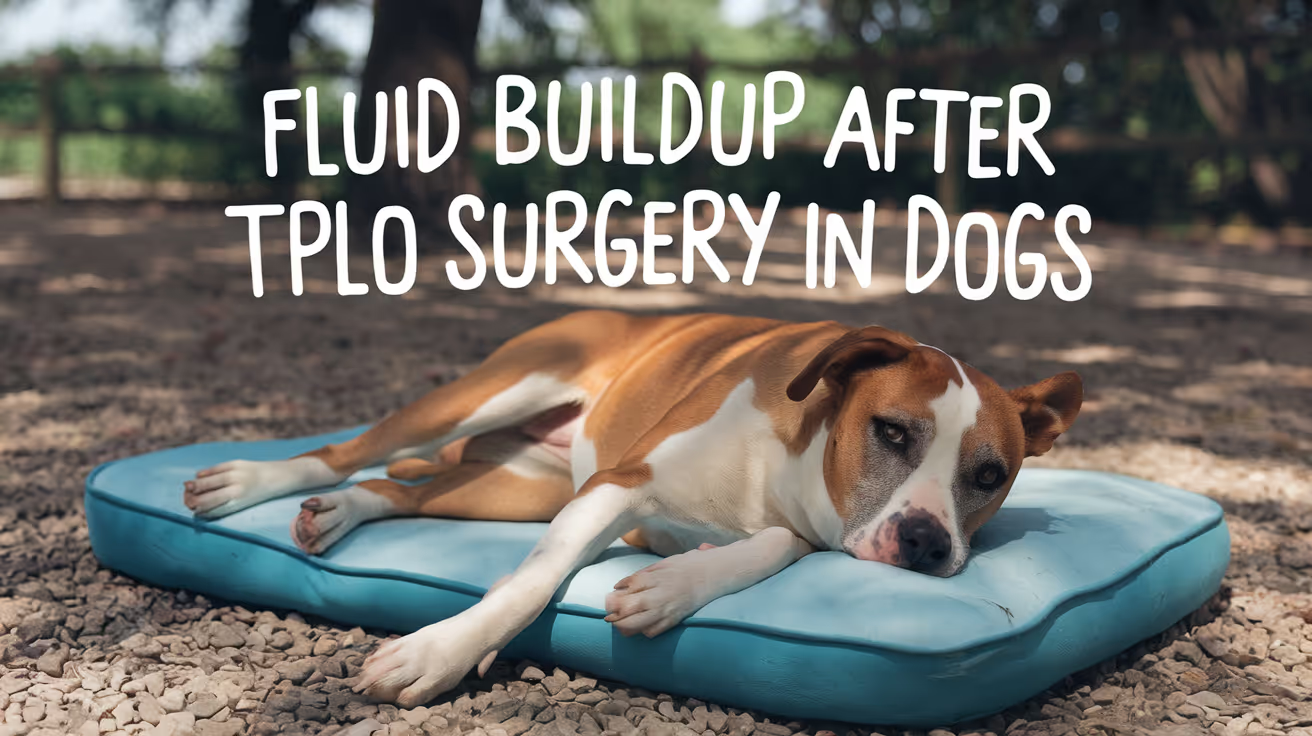
Fluid Buildup After TPLO Surgery in Dogs
Learn about fluid buildup after TPLO surgery in dogs, its causes, symptoms, treatment, and prevention to ensure your pet's smooth recovery.
Some degree of fluid accumulation after TPLO surgery is normal and expected.
The surgery involves cutting and rotating the tibia a significant tissue injury that triggers an inflammatory response, part of which is fluid production.
The question is not whether fluid will appear, but whether the fluid you are seeing is a normal healing response or a sign of something that needs attention.
Quick answer: Fluid buildup after TPLO is usually a seroma — clear serum under the skin that is not an infection. Small seromas resolve in 1 to 3 weeks with rest. Call your vet if swelling is hot, rapidly growing, producing discharge, or accompanied by fever.
Key takeaways
- Seroma is the most common fluid buildup after TPLO: clear serum under the skin, not an infection, resolving with rest in 1 to 3 weeks
- Small seromas are managed with rest: the body reabsorbs the fluid naturally; no intervention is needed for most small seromas
- Large or persistent seromas may require needle aspiration: this must be done under sterile veterinary conditions; never drain at home
- Ankle swelling at 3 to 5 days post-surgery is normal: gravity pulls post-surgical fluid downward to the ankle; TPLO Info confirms this is routine
- Warning signs requiring vet contact: rapidly increasing swelling, warmth, redness, pus, foul odor, fever, or lethargy
- Activity restriction is the most important prevention: excessive movement is the leading cause of seroma formation after TPLO
What is fluid buildup after TPLO surgery?
Fluid buildup after TPLO surgery typically takes one of two forms: seroma or post-surgical edema.
A seroma is a collection of serum the clear, protein-rich fluid component of blood that leaks from disrupted blood vessels and lymphatic channels during surgery.
It pools in the dead space beneath the skin at the surgical site. Seromas feel soft, fluctuant (squishy), and are usually not warm or painful when small. They are not infections.
Post-surgical edema is broader tissue swelling caused by the inflammatory response to surgery.
This is expected in the first few days after any major orthopedic procedure and typically peaks at 48 to 72 hours before gradually resolving.
Both are distinct from hematoma (a collection of blood) and from infectious fluid (which appears purulent, has an odor, and accompanies systemic illness signs).
Why fluid builds up after TPLO
TPLO surgery creates significant soft tissue disruption.
The curved osteotomy cut, muscle retraction, and plate placement create dead space under the skin.
Fluid accumulates in this space before the tissues close together during healing.
Key contributing factors:
Excessive activity after surgery: the most preventable cause. Every time the operated leg moves beyond gentle weight-bearing, tissue planes are disrupted and more serum leaks into the dead space. TPLO Info confirms that the most common post-surgical cause of seroma is excessive movement of the knee.
Surgical technique: a longer or more complex procedure increases tissue disruption and the resulting dead space. Most surgeons use subcutaneous sutures and tissue closure techniques to minimize this, but some seroma formation remains common even with optimal technique.
Dog size and body composition: larger dogs and those with more subcutaneous fat tend to have more dead space at the osteotomy site and are more prone to seroma formation.
Licking or chewing at the incision: disrupts the healing wound edges and can introduce bacteria into a seroma, converting a benign fluid collection into an infected abscess. The E-collar must remain on at all times.
Normal vs. abnormal fluid buildup: how to tell the difference
Treatment options
Observation and strict rest: for small seromas (under 2 to 3 cm), the standard approach is to enforce activity restriction and allow the body to reabsorb the fluid. Small seromas typically resolve within 1 to 3 weeks. Cold compresses in the first few days reduce new inflammation.
Needle aspiration: large or uncomfortable seromas may be drained by your veterinarian using a sterile needle and syringe. This is a simple outpatient procedure but must be performed aseptically to avoid introducing infection. Never drain a seroma at home.
Compression bandaging: gentle compressive bandaging reduces the dead space available for fluid accumulation and can help prevent reformation after aspiration. This is typically applied by the veterinarian.
Surgical drain placement: if fluid continues to accumulate despite aspiration, a closed suction drain can be placed temporarily. This is rarely needed but is an option for persistent, large seromas.
Antibiotics: only if bacterial infection is confirmed or strongly suspected. Most seromas do not require antibiotics. Prescribing antibiotics for a non-infected seroma is not appropriate and contributes to antimicrobial resistance.
When to contact your veterinarian
Contact your vet promptly if you notice any of the following:
- Swelling that is rapidly increasing in size, especially in the first week
- The swollen area becomes warm, red, or painful to touch
- Any discharge, pus, or unusual odor from the incision or the swollen area
- Your dog develops fever, lethargy, loss of appetite, or stops bearing weight
- The seroma persists beyond 3 to 4 weeks without improvement
For the related article on incision site complications, see seroma in dogs after TPLO surgery. For the full complications overview, see 15 common complications after TPLO surgery in dogs.
For incision infection specifics, see TPLO incision infection symptoms and prevention.
Frequently asked questions
Is it normal to have a lump under the TPLO incision?
Yes, in most cases. A soft, non-painful lump that develops within the first 1 to 2 weeks under the TPLO incision is typically a seroma.
As long as it is not hot, rapidly growing, or producing discharge, it is usually a benign post-operative finding. Monitor it daily and report any changes to your vet.
How long does post-TPLO swelling last?
Most post-surgical edema resolves within 3 to 7 days as the acute inflammatory phase subsides.
Seromas take longer typically 1 to 3 weeks for small ones, and potentially 4 to 6 weeks for larger ones if they reform after aspiration.
Can I massage the fluid away?
Gentle massage around (not directly over) the incision can encourage local circulation, but vigorous massage of a seroma risks rupturing it and introducing bacteria.
TPLO Info notes that ankle swelling that develops 3 to 5 days post-surgery can be massaged and iced. For the surgical site itself, follow your vet's specific guidance.
What happens if a seroma is left untreated?
Most small seromas reabsorb on their own without problems.
A larger seroma that is not treated may persist for weeks or months, become uncomfortable due to pressure, or rarely become infected if bacteria enter through the overlying skin.
Monitoring and reporting changes to your vet is the key strategy.
Can my dog's activity level cause more fluid to build up?
Yes. Excessive activity is the most preventable cause of seroma formation and recurrence after aspiration. Every unnecessary movement of the operated leg disrupts healing tissue planes and drives more fluid production.
Strict confinement and leash-only activity are essential.
Resources
- TPLO Info. Recovery FAQs. tploinfo.com
- Vetplayas. Understanding Swelling After TPLO Surgery. vetplayas.com
- VCA Animal Hospitals. Seroma in Dogs. vcahospitals.com
- ACVS. Cranial Cruciate Ligament Disease. acvs.org
What Causes Cruciate Ligament Tears in Dogs?
Learn what causes cruciate ligament tears in dogs, including risk factors, symptoms, and prevention tips for your pet’s joint health.
CCL rupture in dogs is not the same injury as ACL rupture in humans.
In humans, the anterior cruciate ligament typically tears during sudden trauma a pivoting fall on a ski slope, a tackle on a football field.
In dogs, the same ligament almost always fails through slow, progressive degeneration that began months or years before the day the dog comes in lame.
Understanding why the canine CCL fails and which dogs are most at risk is essential for prevention strategies and for recognizing early warning signs.
Quick answer: The canine CCL fails through progressive degeneration, not sudden trauma. Key risk factors are breed, obesity, poor fitness, tibial slope, and genetics. At least 50% of dogs that rupture one CCL will rupture the other within 1 to 2 years.
Key takeaways
- CCL rupture results from degeneration, not trauma: ACVS confirms slow, progressive degeneration rather than acute injury to a healthy ligament
- Obesity is the most modifiable risk factor: excess weight increases compressive and shear forces on the CCL with every step
- High-risk breeds include Labrador, Rottweiler, Newfoundland, Mastiff, and Akita: genetic inheritance has been demonstrated in Newfoundlands and Labradors
- Partial tears almost always progress to complete rupture: ACVS confirms this and notes progression is the rule, not the exception
- At least 50% of dogs rupture the opposite CCL within 1 to 2 years of the first rupture
- Neuter status increases CCL risk: spayed and neutered dogs show higher rates in multiple studies
Why dog CCL disease differs from human ACL injury
Colorado State University: "In humans, trauma (such as skiing, football, or soccer injuries) is the most common reason for injury of the ACL.
This 'traumatic' rupture can happen in dogs but is quite rare."
CSU: "Most commonly, CCLD is caused by a combination of many factors, including aging of the ligament (degeneration), obesity, poor physical condition, conformation, and breed."
In humans, a healthy ACL tears from a single high-energy event. In dogs, the ligament is already weakened before it ruptures.
The moment of obvious lameness is the endpoint of a months-long degenerative process.
ACVS: ligament rupture is "the result of subtle, slow degeneration that has been taking place over a period of time rather than the result of sudden trauma to an otherwise healthy ligament."
Fitzpatrick Referrals: "In the vast majority of dogs, the CrCL ruptures as a result of long-term degeneration, whereby the fibres weaken and fray over time, losing their structure and function."
The main causes and risk factors
Degeneration (aging and immune-mediated)
The underlying degenerative process in CCL disease involves progressive breakdown of collagen fibers within the ligament.
PMC (Cranial Cruciate Ligament Rupture Review): "The structural weakening of this joint due to the progressive degeneration of the ligament is the most accredited etiopathogenetic hypothesis."
The degeneration appears to involve both mechanical fatigue and immune-mediated inflammatory processes within the joint.
Synovitis (joint inflammation) often precedes complete rupture and may be detected during veterinary examination before full failure occurs.
Breed and genetics
ACVS: "Certain dog breeds are known to have a higher incidence: Rottweiler, Newfoundland, Staffordshire Terrier, Mastiff, Akita, Saint Bernard, Chesapeake Bay Retriever, and Labrador Retriever."
ACVS: "A genetic mode of inheritance has been shown for Newfoundlands and Labrador Retrievers."
Fitzpatrick Referrals: "Genetic factors are likely very important, with certain breeds being predisposed including Labradors, Rottweilers, Boxers, West Highland White Terriers, and Newfoundlands."
Breeds with low CCL disease incidence include Greyhounds, Dachshunds, Basset Hounds, and Old English Sheepdogs.
Fitzpatrick: "Supporting evidence for a genetic cause was obtained by assessment of family lines and the knowledge that many animals rupture both knees relatively early in life."
Obesity
ACVS: "Poor physical body condition and excessive body weight are risk factors for the development of CrCLD. Both of these factors can be influenced by pet owners."
PMC: "A predisposing factor is obesity, in which the concentrations of circulating inflammatory mediators increase, such as the concentrations of pro-inflammatory adipokines released from adipose tissue, which may contribute to degenerative phenomena."
Obesity matters in two ways: it increases the mechanical load on the CCL with every step, and it elevates systemic inflammation, which accelerates ligament degeneration.
A dog 10% overweight places significantly more stress on both stifle joints with every stride.
Tibial plateau angle (conformation)
The tibial plateau is the top surface of the tibia. In dogs, it slopes caudally. During weight-bearing, this slope creates a cranial shear force on the tibia that the CCL normally resists.
Fitzpatrick: "Increased tibial plateau angle (backwards slope at the top of the tibia) may play a role" in CCL disease.
Dogs with steeper tibial plateau angles experience greater cranial thrust with each step, increasing CCL load.
This is why TPLO and CBLO surgery (which reduce the tibial plateau angle) neutralize the instability rather than replacing the torn ligament.
Neuter status
Multiple studies have found that spayed and neutered dogs have higher rates of CCL disease than intact dogs. The relationship is stronger in some breeds than others.
Proposed mechanisms include the loss of sex hormones that influence joint development and ligament maturation, longer bone growth periods in dogs neutered before skeletal maturity, and altered body composition.
Contralateral (opposite knee) risk
NCBi (Radiographic Risk Factors study): "Among dogs presented with unilateral CCL rupture, a large proportion will develop contralateral CCL rupture within 12 to 24 months of initial diagnosis.
This risk is in the range of 22 to 54% at 6 to 17 months of diagnosis."
CSU: "At least half of the dogs that have a cruciate ligament problem in one knee will likely, at some future time, develop a similar problem in the other knee."
This bilateral risk reflects the systemic nature of CCL degeneration both ligaments are affected by the same genetic, hormonal, and conformation factors.
Partial tears: the warning stage
The CCL typically does not rupture all at once. Partial tears are common and produce intermittent hind limb lameness that owners sometimes attribute to a sprain.
CSU: "Partial tearing of the CCL is common in dogs and frequently precedes complete rupture."
ACVS: "Partial tearing of the CCL is common in dogs and almost always progresses to a full tear over time."
A dog with a partial CCL tear that receives cage rest and returns to activity will almost always eventually progress to complete rupture.
Surgical intervention at the partial tear stage can be considered for active dogs, though evidence on whether it prevents eventual complete rupture is limited.
Signs of CCL disease
- Hind limb lameness, especially after exercise
- Sudden onset of non-weight-bearing on a back leg
- Stiffness when getting up, especially after rest
- Muscle atrophy on the affected hind limb
- Thickening on the inside of the knee joint (medial buttress)
- Positive cranial drawer test or tibial compression test on orthopedic examination
Can CCL tears be prevented?
Risk cannot be eliminated in predisposed breeds, but it can be reduced.
ACVS: "Consistent physical conditioning with regular activity and close monitoring of food intake to maintain a lean body mass is advisable."
Evidence-based prevention strategies:
- Maintain healthy body weight (most impactful modifiable factor)
- Consistent, regular exercise rather than intermittent intense activity
- Avoid sudden load increases (the "weekend warrior" pattern)
- Discuss neutering timing with your vet, particularly in high-risk breeds
For the surgical treatment of CCL rupture, see CBLO surgery in dogs: cost, recovery, and success rate. For the surgery vs. conservative management decision, see canine cruciate injuries: surgery vs. conservative management.
For meniscal injury that often accompanies CCL tears, see torn meniscus surgery cost in dogs. For when CCL disease requires specialist referral, see when to refer for orthopedic surgery.
Frequently asked questions
My dog tore its CCL running in the yard. Wasn't that traumatic?
The event may have looked sudden, but the ligament was almost certainly already degenerated.
ACVS: the rupture is "the result of subtle, slow degeneration... rather than sudden trauma to an otherwise healthy ligament." The yard run was the last straw, not the cause.
Which dog breeds are at highest risk for CCL tears?
ACVS identifies Rottweilers, Newfoundlands, Staffordshire Terriers, Mastiffs, Akitas, Saint Bernards, Chesapeake Bay Retrievers, and Labrador Retrievers as high-incidence breeds. Fitzpatrick Referrals adds Boxers and West Highland White Terriers.
Does obesity really make that much difference?
Yes. Obesity increases both mechanical load on the CCL and systemic inflammation via adipokines from fat tissue.
It is the most modifiable risk factor maintaining healthy body weight is the single most impactful thing an owner can do for CCL disease prevention.
My dog had surgery on one knee. How long before the other goes?
NCBi data: the risk of contralateral CCL rupture is 22 to 54% within 6 to 17 months of the first diagnosis. Monitoring the other knee closely after the first diagnosis is important.
Maintaining lean body weight and avoiding abrupt increases in activity are the main protective strategies.
Can a dog with a partial CCL tear be managed without surgery?
Conservative management (rest, weight loss, physical therapy) may be attempted for partial tears, particularly in small dogs. But ACVS states partial tears "almost always progress to a full tear over time."
Discuss with an orthopedic specialist whether surgery at the partial tear stage is appropriate for your dog.
What is the difference between CCL and ACL?
CCL (cranial cruciate ligament) is the correct term in dogs; ACL (anterior cruciate ligament) is the human equivalent. They are anatomically similar structures that stabilize the knee joint.
The key clinical difference: in humans, ACL tears are usually traumatic; in dogs, CCL tears are almost always degenerative.
Resources
- ACVS. Cranial Cruciate Ligament Disease. acvs.org
- CSU Veterinary Health System. Canine Cruciate Ligament Injury. vetmedbiosci.colostate.edu
- Fitzpatrick Referrals. Cruciate Ligament Disease or Injury. fitzpatrickreferrals.co.uk
- NCBi PMC. Radiographic Risk Factors for Contralateral Rupture in Dogs with Unilateral CCL Rupture. ncbi.nlm.nih.gov
- PMC. Cranial Cruciate Ligament Rupture in Dogs: Review on Biomechanics, Etiopathogenetic Factors and Rehabilitation. ncbi.nlm.nih.gov
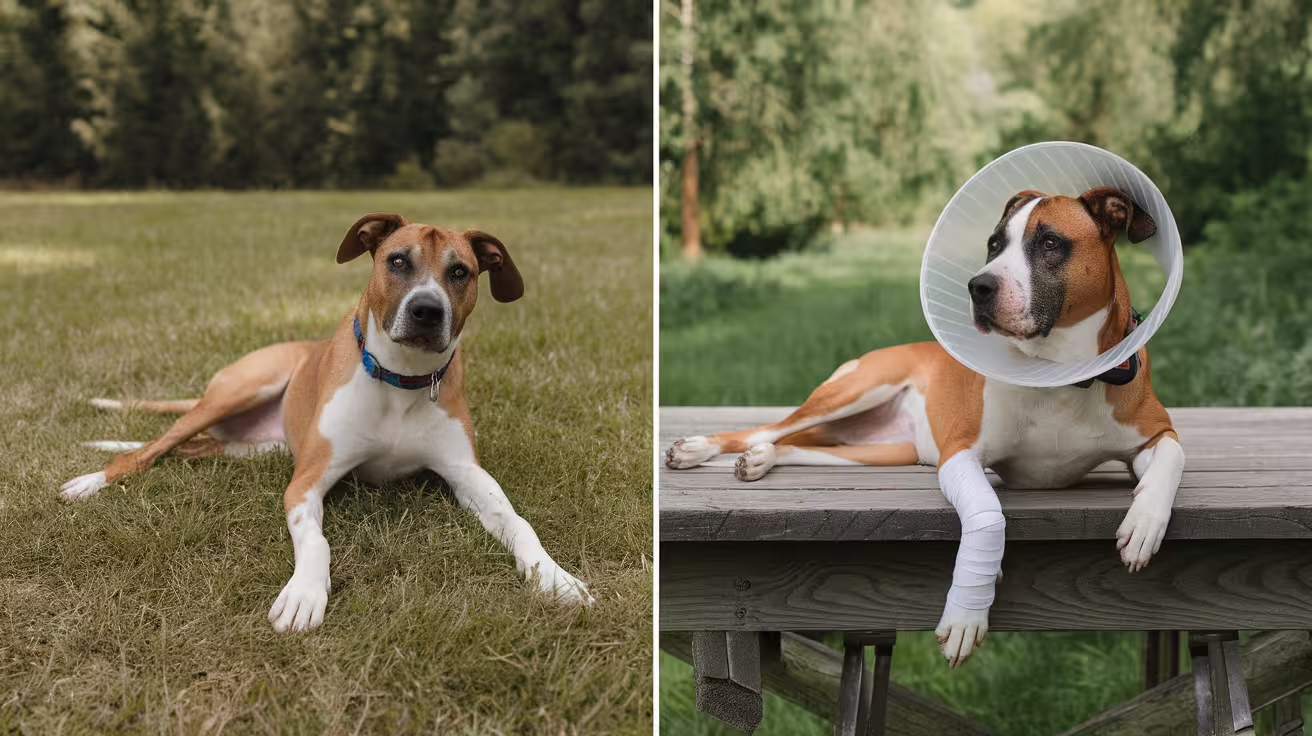
Before and After TPLO Surgery: Dog Health and Recovery Timeline
Discover how TPLO surgery restores mobility in dogs with torn CCL. Learn about recovery timelines, post-op care, and expected outcomes for your pet
TPLO surgery is a major orthopedic procedure that requires careful preparation before surgery and structured management after.
The recovery period -- 8 to 12 weeks of graduated activity restriction, multiple vet visits, and daily wound monitoring -- is as important as the surgery itself.
Most owners who struggle with recovery do so because they underestimated what the post-operative period involves. This guide walks through every phase.
Quick answer: Before TPLO surgery: complete pre-surgical bloodwork, fast 8 to 12 hours, prepare a crate and non-slip mats, fill prescriptions. After TPLO: crate rest weeks 1 to 2, progressive walking weeks 2 to 6, radiographic assessment weeks 6 to 8, activity increase after healing. Muscle recovery takes 4 to 6 months.
Key takeaways
- The home environment must be set up before surgery day: crate, non-slip mats, baby gates, low bedding, and supplies must be in place before the dog arrives home
- Fasting is required before surgery: no food for 8 to 12 hours before general anesthesia; water rules vary by facility
- The first 2 weeks are the most critical and restrictive: no running, jumping, stairs, or off-leash activity; bathroom trips on a short leash only; incision checked daily
- Radiographic assessment at 6 to 8 weeks is the gate that controls activity increase: without imaging confirmation, activity must not increase; radiographs are the only reliable confirmation
- Food intake should be reduced by approximately 30% during recovery: activity restriction rapidly leads to weight gain; extra weight stresses the healing osteotomy
- Full muscle recovery takes 4 to 6 months after bone healing is confirmed: bone healing at 12 weeks and full functional recovery are different endpoints
Before surgery: preparation checklist
Medical preparation (weeks before surgery)
Pre-surgical examination and bloodwork: your vet will perform a full physical examination and order a complete blood count and blood chemistry panel. These confirm the dog can safely handle anesthesia and healing. Senior dogs or those with health conditions may need additional testing.
Medication review: tell your vet all current medications and supplements. NSAIDs, certain supplements, and some other drugs need to be stopped before surgery. Never discontinue a prescription medication without vet instruction.
Weight management: if your dog is overweight, weight reduction before surgery reduces anesthetic and surgical risk. Even a 5 to 10% body weight reduction before surgery is beneficial.
Pre-surgical bathing: bathe 1 to 2 days before surgery if you wish; post-surgical bathing is restricted for 10 to 14 days.
Home preparation (day before surgery)
The recovery space:
- Crate (correctly sized: stand, turn, lie comfortably, not pace) in the main family living area
- Non-slip mats or yoga mats over all hard flooring in the recovery area
- Soft, washable bedding in the crate
- Water and food bowls at floor level
- Baby gates on stairs
- All furniture inaccessible to prevent jumping
Supplies to have ready:
- E-collar (confirm with the surgical facility whether one will be provided)
- Ice pack or bag of frozen peas for cold therapy
- Sling or lifting harness for larger dogs
- Short leash (4 to 6 foot, not retractable)
- Medications filled at the pharmacy before surgery day
SustainableVet.org confirms: before your dog comes home, prepare a safe and quiet recovery space with a crate or small room, soft bedding, good airflow, and away from stairs or slippery floors.
Fasting
No food for 8 to 12 hours before surgery. Water rules vary by facility -- confirm with your vet. Give no food the morning of surgery even if the dog appears hungry.
Surgery day: what to expect
Drop-off: typically early morning. The dog is admitted, weighed, examined, and an IV catheter is placed. IV antibiotics are given before the incision.
The procedure: the surgeon makes a medial incision over the proximal tibia, performs a small arthrotomy to assess the meniscus, makes the curved osteotomy cut, rotates the tibial plateau to approximately 5 degrees, and secures the plate and screws. The wound is closed in layers.
Duration: typically 1.5 to 2 hours.
Post-surgical care: the dog spends several hours in recovery before discharge (same day at some facilities; overnight at others).
Discharge: written instructions for medications, wound care, activity restrictions, and follow-up appointments are provided.
After surgery: week-by-week recovery timeline
Weeks 1 to 2: acute post-surgical phase
Activity: crate rest at all times except bathroom trips. Leash walks of 5 minutes maximum, 3 to 5 times daily. No stairs, no furniture, no off-leash time.
Weight bearing: most dogs begin toe-touching within the first few days. Some do not bear weight for the full 2 weeks -- both presentations are within normal range.
Wound care: e-collar on at all times except supervised eating. Inspect the incision daily at the same time. No bathing or wet incision exposure.
Cold therapy: 10 to 15 minutes of ice pack (wrapped in cloth) applied to the incision, 3 to 4 times daily for the first 3 to 5 days.
Medications: NSAIDs and gabapentin on the exact prescribed schedule. Give NSAIDs with food.
SustainableVet.org confirms: the first two weeks focus on rest and healing; the dog stays confined; short controlled leash walks are for bathroom breaks; check the incision daily for redness, swelling, or discharge.
2-week recheck: incision assessment, suture or staple removal if healing is confirmed, early mobility and pain management review.
Weeks 3 to 6: graduated activity phase
Activity: leash walk duration increases progressively. TPLO Info recommends increasing by up to 5 minutes per week. No off-leash activity. No stairs without guidance. No playing with other pets.
Weight bearing: most dogs should be bearing increasing weight through the operated leg. Three-legged walking during activity is still common but should be decreasing.
Passive range-of-motion exercises: gentle flexion and extension of the stifle, 5 to 10 repetitions, 2 to 3 times daily if the vet has approved.
Veterinary Healthcare Associates confirms: weeks 3 to 4, swelling should decrease; gradual increase in leash walking; passive range-of-motion exercises may begin.
Food management: Medcovet confirms reducing food intake by approximately 30% during the restriction period to prevent weight gain from inactivity.
Weeks 6 to 8: radiographic checkpoint
6-week radiograph (critical): images confirm whether the osteotomy is healing as expected. If healing is progressing, activity can be increased. If healing is delayed, restrictions continue.
If healing is confirmed: leash walks increase to 15 to 20 minutes, physiotherapy begins, short controlled hill walking may begin.
If healing is delayed: investigate for infection or non-union; extend restrictions; consider additional diagnostics.
Veterinary Healthcare Associates confirms: weeks 5 to 6, recheck X-rays may be taken to evaluate healing; improvement in weight-bearing and stability should be evident.
Weeks 8 to 12: consolidation and return to activity
8 to 10 week radiograph (in many protocols): confirms continued healing progression.
12-week radiograph (final major milestone): confirms bone union before lifting restrictions. After this confirmation:
- Running and off-leash play can gradually resume
- Stairs without support
- Normal household access
Post-12-week activity return: progressive reintroduction of activity over the following 4 to 6 weeks rather than an immediate full return.
Animal Outpatient Surgery confirms: in the final phase, your dog can return to normal activity levels, including running, jumping, and playing; continue monitoring for discomfort and maintain a balanced exercise routine.
Long-term: months 3 to 6
Full muscle recovery takes 4 to 6 months after bone healing. During this period:
- Progressive strengthening continues
- Hydrotherapy, balance work, and controlled running rebuild the atrophied operated leg
- Joint supplements (omega-3 fatty acids, glucosamine) are typically started or continued
- Weight management remains critical
Most dogs reach 90 to 95% of pre-injury function by 6 months with a compliant recovery.
For the recovery tips guide, see 10 essential TPLO recovery tips for pet owners. For confinement, see how to confine your dog after TPLO surgery.
For physical therapy, see when to start physical therapy after TPLO surgery. For long-term outcomes, see long-term outcomes of TPLO surgery.
Frequently asked questions
How strict does the activity restriction need to be in the first 2 weeks?
Very strict. No exceptions for stairs, sofa access, running, jumping, or unsupervised time without confinement.
A single running or jumping episode in the first 2 weeks can displace the plate before the osteotomy has any mechanical strength.
The restriction is designed to protect a bone that cannot yet protect itself.
My dog is eating less and seems depressed after surgery. Is this normal?
Yes, in the first 3 to 5 days. Anesthesia, post-surgical pain, and opioid medications can reduce appetite and alter behavior.
If the dog is not eating at all by day 3 or shows signs of significant distress, contact your vet.
Most dogs gradually return to normal eating and behavior within the first week.
When can my dog go swimming after TPLO?
Controlled hydrotherapy (underwater treadmill) can begin after the incision is confirmed healed at the 2-week recheck. Open water swimming (lakes, rivers) is typically not recommended until after the 12-week radiographic clearance.
Confirm with your vet in both cases.
Should I put my dog on a diet during recovery?
Reduce caloric intake rather than switching to a formal diet. Medcovet recommends approximately 30% reduction in food intake during the restriction period to prevent weight gain from inactivity.
If your dog was already at an ideal weight, a modest reduction (10 to 20%) is appropriate. Discuss with your vet.
My dog seems completely fine at week 4 and is pulling on the leash. Should I increase activity?
No. Continue the restriction protocol until the 6-week radiograph confirms bone healing progression.
The dog feeling well at week 4 is a positive sign, but bone healing lags significantly behind the dog's perceived comfort.
Dogs routinely feel ready to run before the osteotomy is safe to run on.
Resources
- SustainableVet. Before and After TPLO Surgery. sustainablevet.org
- Veterinary Healthcare Associates. TPLO Surgery in Dogs: Before and After. vhavets.com
- Medcovet. Essential Guide to Dog Recovery TPLO Surgery. medcovet.com
- TPLO Info. Preparing for Your Dog's TPLO Surgery. tploinfo.com
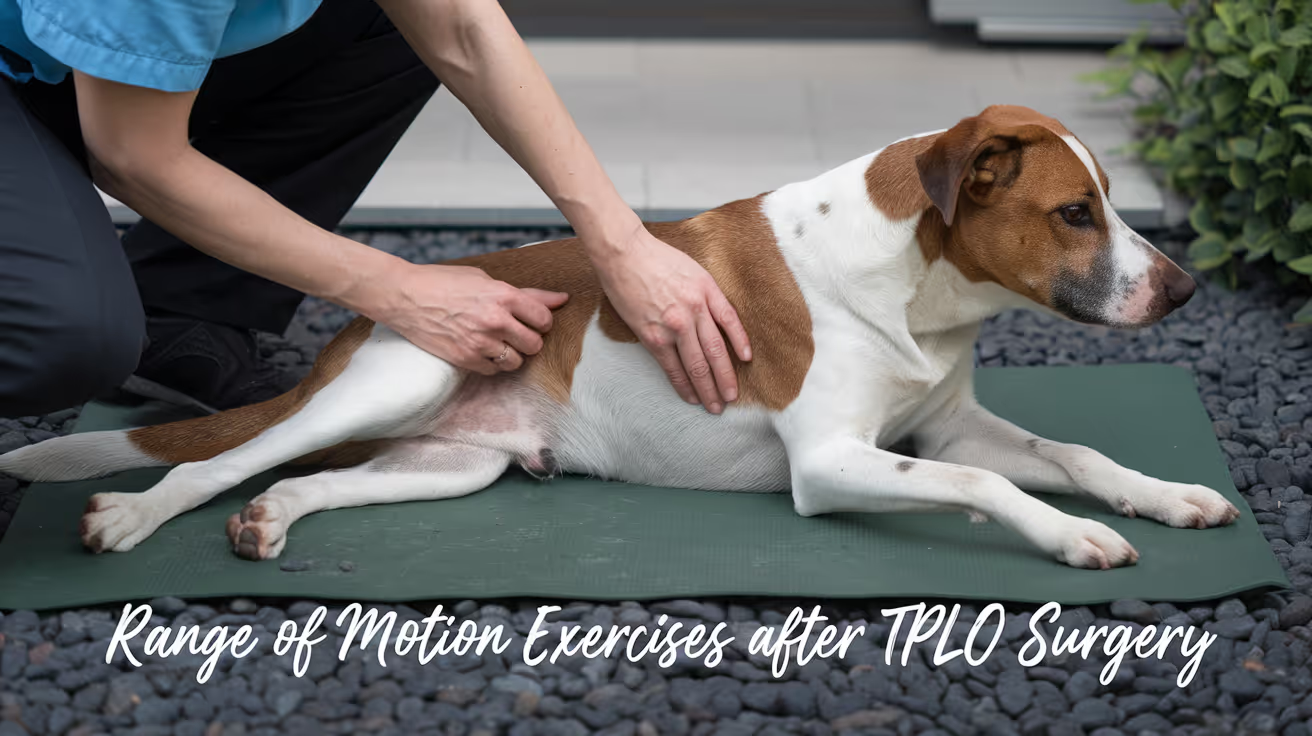
TPLO Range of Motion Exercises for Dogs
Learn effective TPLO range of motion exercises to help your dog recover safely and regain mobility after surgery.
Range of motion (ROM) exercises are one of the earliest and most consistently prescribed rehabilitation interventions after TPLO surgery.
They prevent joint stiffness, reduce scar tissue adhesion, and maintain the joint mobility that ultimately determines how well the dog walks and bears weight long-term.
A key research finding from a study of 412 TPLO patients: loss of stifle extension greater than 10 degrees was associated with significantly greater long-term lameness.
Quick answer: TPLO ROM exercises involve gently flexing and extending the stifle for 10 repetitions, 2 to 3 times daily, beginning 2 to 5 days post-surgery. Extension is critical: loss of more than 10 degrees is strongly linked to long-term lameness.
Key takeaways
- ROM exercises begin at 2 to 5 days post-TPLO: early initiation prevents scar tissue formation that progressively limits joint mobility
- Extension is more critical than flexion: loss of more than 10 degrees is strongly associated with increased long-term lameness
- Normal stifle ROM: extension 158 to 162 degrees, flexion 41 to 45 degrees; loss of more than 10 degrees warrants intervention
- Hydrotherapy significantly improves stifle ROM: 122 vs 105 degrees at week 12 in a randomized controlled trial
- Goniometry is the clinical tool: a goniometer measures joint angles and tracks ROM improvement at each rehabilitation assessment
- 10 repetitions, 2 to 3 times daily is the standard passive ROM protocol; stop if the dog vocalizes or tenses
What range of motion means after TPLO
Range of motion is the arc through which a joint can move from maximum flexion (the most bent position) to maximum extension (the most straight position).
In the stifle (knee), this is measured in degrees using a goniometer, a protractor-like device placed over the joint.
After TPLO surgery, the stifle is swollen, painful, and surrounded by muscles that have contracted to protect the injury.
Without regular movement, periarticular muscles tighten and scar tissue forms between tissue planes.
Clinical research confirms: dogs with normal stifle extension have greater weight-bearing on the operated limb at trot than those with restricted extension. ROM restoration is directly linked to functional outcome.
Normal stifle ROM values in dogs
Understanding what "normal" looks like helps set realistic goals for rehabilitation:
Extension: approximately 158 to 162 degrees (near full straightening of the joint)Flexion: approximately 41 to 45 degrees (the most bent position)
Loss of extension or flexion greater than 10 degrees from these reference values is clinically significant and associated with increased lameness (Veterian Key, 412-dog TPLO study).
Extension loss is worse than flexion loss: it is less tolerable, less amenable to rehabilitation, and more strongly correlated with osteoarthritis.
TPLO ROM exercise technique
Passive ROM (PROM) weeks 1 to 6
Passive ROM means you move the joint; the dog's muscles are relaxed.
Setup: dog lying on their side, operated leg facing up. Support the leg above and below the stifle with both hands.
Movement: gently flex the stifle (bring the lower leg toward the body), then extend it back toward neutral. Slow, smooth, continuous bicycle motion. Stay within the comfortable range do not push past resistance.
Repetitions: 10 per session, 2 to 3 sessions daily.
After: apply a cold pack for 5 to 10 minutes to reduce post-exercise inflammation.
This is identical to the PROM technique described in PROM exercises for dogs after TPLO surgery.
Active-assisted ROM weeks 4 to 8
As the dog begins bearing weight, active-assisted ROM incorporates the dog's own muscle activation:
Sit-to-stand: the dog moves from sit to stand repeatedly. Each sit flexes the stifle; each rise extends it. Begin with 5 to 10 repetitions, 2 to 3 times daily. This is one of the most effective active ROM exercises because the dog controls the movement within their own comfortable range.
Slow leash walks: controlled leash walking through a full gait cycle moves the stifle through its functional ROM repeatedly. Walking pace and surface affect how much ROM is required slow walks on level ground are most appropriate in early recovery.
Warm pack before exercise: from day 5 onward, apply a warm pack for 5 minutes before ROM sessions to relax the periarticular muscles and improve the range achieved.
Facilitated ROM weeks 6 to 12
As strength and confidence improve, exercises that challenge and expand ROM are introduced:
Cavaletti poles: stepping over poles at shoulder height (approximately 10 to 15 cm) requires active stifle flexion beyond normal walking ROM. Begin with 2 to 4 passes over 4 to 5 poles, increasing as strength improves.
Incline walking: walking up a gentle slope increases hindlimb extension demand; walking down increases flexion demand. Progress from 1 to 3 minutes per session at weeks 6 to 8 onward.
Passive stretching: gentle end-range holding of flexion and extension, 10 to 30 seconds per position, introduced at weeks 6 to 8 to address persistent stiffness. Do not force the joint; hold at comfortable resistance only.
The role of hydrotherapy in ROM recovery
A randomized controlled trial comparing hydrotherapy vs. land-based physiotherapy in post-TPLO dogs found that by week 12, hydrotherapy dogs achieved stifle ROM of 122 degrees compared to 105 degrees in land-only controls.
This is a clinically and statistically significant difference.
The underwater treadmill protocol involved twice-weekly sessions from week 3 onward, water at the level of the greater trochanter, 15 to 30 minute sessions.
Water buoyancy reduces joint load while the resistance and natural gait pattern in water challenge ROM more effectively than many land exercises at the same stage.
PMC (UWTM pilot study, 50 dogs): after 10 sessions, significant ROM improvement occurred in all joints including the stifle.
When to be concerned about ROM
Contact your veterinarian or rehabilitation therapist if:
- The dog resists or vocalizes during ROM exercises that were previously comfortable
- You notice a hard end-point to ROM (hard stop rather than soft resistance) suggesting joint capsule contracture
- ROM appears to be decreasing rather than improving at the 4- or 8-week recheck
- The dog is significantly lame and the stifle will not flex or extend near normal range
For the full PROM technique guide, see PROM exercises for dogs after TPLO surgery. For the complete rehab program that ROM fits into, see TPLO rehab exercises for dogs.
For the physical therapy guide, see when to start physical therapy after TPLO surgery. For the recovery exercises guide, see TPLO recovery exercises for dogs.
Frequently asked questions
How do I know if I'm achieving enough range of motion during home exercises?
Normal stifle flexion is approximately 41 to 45 degrees; normal extension is approximately 158 to 162 degrees.
If you are performing PROM correctly, you should feel gentle resistance at the end of each range not a hard stop, not complete looseness.
A rehabilitation practitioner can demonstrate the correct technique and measure your dog's current ROM with a goniometer at their first session.
My dog gets stiff after rest. Is this related to ROM?
Yes. Post-rest stiffness is one of the earliest signs of reduced ROM following TPLO. The joint has developed some adhesion and scar tissue that resolves partially with movement.
This is a signal to increase the frequency of ROM sessions and to ensure warm-up before walks.
If stiffness does not improve with ROM exercises over 1 to 2 weeks, contact your vet.
How long should ROM exercises continue after TPLO?
Passive ROM (PROM) is typically discontinued around weeks 6 to 8 when the dog achieves near-normal active ROM.
Active ROM exercises sit-to-stand, leash walks, cavaletti continue through weeks 8 to 16 and beyond until full function is restored. Ongoing ROM maintenance through normal activity continues for the dog's lifetime.
Can I use a goniometer at home to track progress?
Yes, but training is needed to use it accurately. Goniometers are inexpensive and available from physiotherapy suppliers. Your rehabilitation therapist can demonstrate the correct placement for the stifle joint.
Accurate home tracking provides useful objective data for your veterinarian alongside clinical assessments.
Does every TPLO dog need formal ROM therapy?
Home-based PROM performed 2 to 3 times daily produces good results for most dogs when performed correctly. Formal rehabilitation sessions add goniometric tracking, professional technique guidance, and modalities like hydrotherapy and laser.
Dogs that enter surgery with significant pre-surgical muscle atrophy or stiffness, or those not progressing at expected milestones, particularly benefit from formal rehabilitation.
Resources
- Veterian Key. Range-of-Motion and Stretching Exercises. veteriankey.com
- ScienceDirect. How Does CCL Rupture Treatment Affect Range of Motion in Dogs? sciencedirect.com
- PMC. Pilot Study on the Effects of UWTM on Canine Joint Range of Motion. ncbi.nlm.nih.gov
- TPLO Info. Rehab for Dogs After TPLO Surgery. tploinfo.com
- WM Referrals. Post-Operative Rehabilitation After TPLO. wm-referrals.com
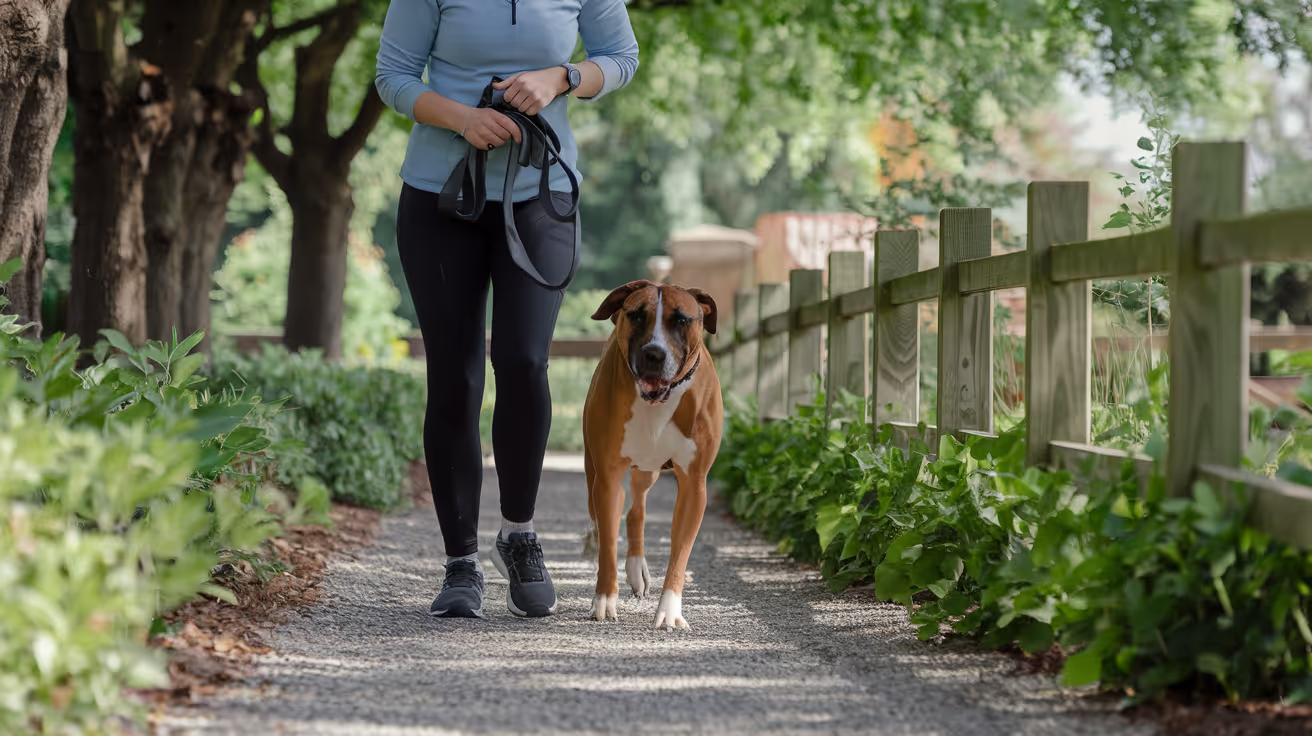
TPLO Rehab Exercises for Dogs
Learn effective TPLO rehab exercises for dogs to ensure safe recovery and regain mobility after surgery.
Rehabilitation after TPLO surgery is not optional it is one of the primary determinants of long-term outcome.
Dogs that complete a structured rehabilitation program return to function faster, develop better muscle mass, and have lower rates of long-term lameness than those managed with rest alone.
The program follows a predictable progression from passive exercises in the first days to full activity at 4 to 6 months.
Quick answer: TPLO rehab begins with PROM and cold packing in the first days, progresses to controlled leash walks and sit-to-stand from weeks 2 to 6, then adds hydrotherapy and balance work from weeks 6 to 12. Full activity returns at 4 to 6 months after surgeon approval and radiographic confirmation.
Key takeaways
- Rehabilitation follows four phases: passive exercises, active weight-bearing, strength building, and return to activity over 3 to 6 months
- Sit-to-stand is the most important active exercise: targets quadriceps and hamstrings; begins once partial weight-bearing is established
- Hydrotherapy begins once the incision is closed (3 to 4 weeks post-surgery): up to 90% joint load reduction
- Balance work begins at weeks 4 to 6: weight shifting, single leg lifts, and balance pads correct gait patterns
- All exercise increases require surgeon approval: do not advance without veterinary guidance, especially before the 8-week radiographic recheck
- Cavalletti poles and incline walks begin at weeks 8 to 12 to challenge muscle activation and range of motion
Why rehabilitation matters after TPLO
TPLO surgery stabilizes the stifle, but surgery alone does not rebuild the muscle mass lost to months of pre-surgical lameness and the early post-operative period. Without rehabilitation, dogs develop:
- Persistent muscle atrophy and asymmetric hindlimb development
- Joint stiffness from scar tissue and reduced range of motion
- Altered gait patterns that stress the contralateral knee
- Slower overall recovery and increased risk of re-injury
Veterinary Partner (VIN) divides post-TPLO rehab into three phases.
Phase 1 manages pain while encouraging limb use (days 1 to 14).
Phase 2 restores musculoskeletal function (weeks 2 to 8). Phase 3 builds core strength and returns to activity (weeks 8 to 16+).
Phase 1: Immediate post-operative (days 1 to 14)
Passive range of motion (PROM)
Begin PROM at 2 to 5 days post-surgery. Dog on their side, operated leg up gently flex and extend the stifle in a slow bicycle motion. Ten repetitions, 3 times daily.
Full guide: PROM exercises for dogs after TPLO surgery.
Cold packing
Apply ice or a cold pack wrapped in a thin towel to the surgical site for 10 to 15 minutes after each PROM session.
Repeat 3 times daily for at least the first 5 days. Cold packing reduces local inflammation and post-exercise swelling.
Short controlled leash walks
5 to 10 minutes, 2 to 3 times daily from day 10 to 14 onward (after suture removal). Slow pace on a flat, even surface.
Leash only no off-leash time at any stage during restricted recovery.
Massage
Gentle massage of the muscles above and below the stifle joint the quadriceps, hamstrings, and calf muscles improves local circulation and reduces muscle spasm.
Use palm pressure in a circular motion, not surface stroking.
Phase 2: Active weight-bearing (weeks 2 to 8)
Sit-to-stand exercises
Sit-to-stand is the most important active strengthening exercise in TPLO rehabilitation. Ask your dog to sit, then stand, repeatedly.
TPLO Info confirms that sit-to-stand action helps with range of motion in the hindlimb joints and activates the muscles that support the stifle.
Protocol:
- Begin with 5 repetitions, 2 times daily at week 2 to 3
- Progress to 10 to 20 repetitions, 2 to 3 times daily as strength improves
- Ensure the dog sits squarely, not off to one side
- Use a wall on the operated leg's side if needed to prevent kicking the leg out
Progressive leash walk duration
Week 3 to 4: 10 to 15 minutes, 3 times dailyWeek 5 to 6: 15 to 20 minutes, 3 times dailyWeek 7 to 8: 20 to 30 minutes, 2 to 3 times daily
All walks on leash. No running, jumping, or off-leash time.
Warm packs before exercise
After the first 5 post-operative days, apply warm compresses for 5 minutes before each exercise session.
Warmth relaxes muscles and improves local circulation before PROM and active exercises.
Phase 3: Strength building (weeks 6 to 12)
Hydrotherapy (underwater treadmill)
Begin hydrotherapy once the incision is fully healed typically 3 to 4 weeks post-surgery. Water buoyancy reduces joint load by up to 90% while allowing the muscles to work against water resistance.
WM Referrals' post-TPLO physiotherapy guide recommends starting hydrotherapy around week 6, with sessions of 15 to 30 minutes at progressive durations as strength improves.
For the full hydrotherapy and laser therapy guide, see laser therapy for dogs after TPLO surgery.
Balance and proprioception exercises
Begin from weeks 4 to 6 once partial weight-bearing is reliable:
Weight shifting: with the dog standing, gently nudge the hips from side to side to encourage weight transfer between limbs. TPLO Info recommends this once the dog is consistently bearing weight on the surgical limb, typically 3 to 4 weeks post-surgery.
Single leg lifts (contralateral leg): while the dog stands, lift one front or non-surgical hind leg for 10 to 15 seconds. This forces weight onto the operated limb and activates stabilizing muscles. Do not lift the operated leg.
Balance pad or wobble board: progress to standing on a soft or unstable surface from weeks 6 to 8. Begin with seconds of contact and build to 30+ seconds as confidence and strength improve.
Cavalletti poles
Slow stepping over 4 to 5 poles laid flat on the ground at shoulder-width spacing.
Introduced at weeks 6 to 8, this forces controlled hip and stifle flexion, improving range of motion and coordination. Two to four passes per session, 2 to 3 sessions daily.
Incline walking
Gentle uphill walking increases hindlimb muscle load without high joint impact.
WM Referrals recommends slow walks up and down inclines from weeks 6 to 8, starting at 1 to 3 minutes and progressing as tolerated.
Phase 4: Return to full activity (months 3 to 6)
After the 8 to 12 week radiographic recheck confirms adequate osteotomy healing, the surgeon approves progressive return to normal activity.
Madison Veterinary Specialists' rehabilitation guide notes that trotting on leash is allowed after the dog is comfortable with extended walks of 1 hour or more and sit-to-stand exercises.
Activity milestones:
- Month 3: 30 to 45 minute leash walks, light trot on leash
- Month 4: free trotting on leash, gentle play
- Month 5 to 6: off-leash play approved by surgeon, return to normal activity
High-impact activities jumping, ball chasing, agility are reintroduced last, typically at 5 to 6 months, after a final clinical assessment.
For the range of motion exercises covered in this program, see TPLO range of motion exercises for dogs. For the recovery exercises at each stage, see TPLO recovery exercises for dogs.
For the PROM technique guide, see PROM exercises for dogs after TPLO surgery. For when physical therapy begins, see when to start physical therapy after TPLO surgery.
For the full recovery tips overview, see 10 essential TPLO recovery tips for pet owners.
Frequently asked questions
When should TPLO rehabilitation begin?
Rehabilitation begins within days of surgery. PROM starts at 2 to 5 days post-surgery. Cold packing begins on day 1.
Short controlled leash walks begin at 10 to 14 days after suture removal. Formal hydrotherapy and balance exercises begin at 3 to 6 weeks depending on healing.
Can I do all the rehab exercises at home?
Many exercises PROM, sit-to-stand, controlled leash walks, balance nudging, cold and warm packing can be done at home. Hydrotherapy requires a specialist facility.
Balance boards and cavalletti poles require some equipment investment but are achievable at home.
A formal rehabilitation assessment at a certified canine rehab centre is strongly recommended for at least the first few sessions.
How do I know if I'm pushing too hard?
Signs of over-exercise: increased swelling or heat at the surgical site, markedly worse lameness the next day, or the dog refusing to perform the exercise or vocalizing during it.
Reduce exercise intensity immediately and contact your vet. Start each phase at the minimum repetitions and increase only if there is no increase in pain or swelling.
Is hydrotherapy necessary for TPLO recovery?
It is not mandatory but is highly beneficial. Studies show dogs receiving hydrotherapy alongside land-based rehabilitation recover faster and develop better muscle mass than those doing land exercises alone.
If access to a hydrotherapy facility is limited, land-based exercises performed consistently produce good outcomes.
What happens if I skip rehabilitation?
Dogs managed with rest alone after TPLO develop significant muscle atrophy, reduced range of motion, and often persistent lameness. Rehabilitation dramatically improves functional outcomes.
Even a simple home program of PROM, controlled leash walks, and sit-to-stand exercises produces substantially better results than passive rest alone.
Resources
- Veterinary Partner (VIN). Physical Rehabilitation of Dogs Following TPLO. veterinarypartner.vin.com
- TPLO Info. Rehab for Dogs After TPLO Surgery. tploinfo.com
- WM Referrals. Post-Operative Rehabilitation After TPLO. wm-referrals.com
- Madison Veterinary Specialists. TPLO Rehabilitation Home Care Instructions. mvsvets.com
- Vetplayas. TPLO Rehab Exercises: Accelerating Recovery and Restoring Mobility. vetplayas.com
How Long Does Swelling Last After TPLO Surgery
Find out how long swelling lasts after TPLO surgery, what’s normal, and when to call your vet for possible infection or complications.
Post-surgical swelling after TPLO is normal, expected, and self-limiting when managed correctly. Most incision-area swelling peaks within the first 2 to 5 days and resolves by 2 weeks.
Swelling that does not follow this trajectory -- that is not declining, or that appears new after initial improvement -- is the key indicator that requires veterinary attention.
Quick answer: Normal TPLO swelling peaks at days 2 to 5 and resolves within 1 to 2 weeks with cold therapy and rest. Ankle swelling from gravity-dependent fluid migration appears at days 3 to 5. Swelling increasing after day 5, or with warmth, redness, or discharge, warrants veterinary evaluation.
Key takeaways
- Normal TPLO swelling peaks at days 2 to 5: SustainableVet.org confirms mild incision swelling usually goes away within two weeks
- Ankle swelling is a normal gravity-dependent phenomenon: TPLO Info confirms ankle swelling typically appears at days 3 to 5; it is fluid migrating downward from the surgical site
- Cold therapy in the first 48 to 72 hours is the primary management tool: 10 to 15 minutes, 3 to 4 times daily, reduces swelling and pain
- Swelling worsening after day 5 or accompanied by warmth, redness, or discharge indicates infection, seroma, or hematoma; contact your vet within 24 hours
- Mild swelling can persist for weeks at a low level in larger dogs and those with poor activity restriction compliance; trajectory matters more than absolute level
- Nighttime swelling is common and normal: dogs move less at rest, allowing fluid to settle; this should improve by morning or after repositioning
Normal swelling: timeline and characteristics
Days 1 to 3: acute post-surgical swelling
Swelling begins within hours of surgery and results from:
- Surgical tissue trauma (incision through skin, subcutaneous tissue, and fascia)
- Bone cutting at the osteotomy site
- Inflammatory response to the metal plate and screws
- Fluid accumulating in the disrupted tissue spaces
This early swelling is diffuse, soft, and warm to the touch. It is the expected cellular response to surgery.
Days 2 to 5: peak swelling
Swelling typically peaks between days 2 and 5. The dog's leg may look noticeably larger at this stage, and some extension of swelling down the lower leg toward the ankle is normal.
Vetplayas confirms: swelling typically peaks within the first few days after surgery but should gradually subside over time.
Days 3 to 5: ankle swelling appears
A distinct swelling often appears at the ankle (tarsus) between days 3 and 5, sometimes alarming owners who notice it away from the surgical site. This is entirely normal.
TPLO Info confirms: it is completely normal for swelling to develop around the ankle approximately 3 to 5 days following surgery on the TPLO leg.
This swelling can be massaged and iced if it occurs and will resolve over a few days.
TPLO Austin confirms this finding identically. The mechanism is gravity-dependent migration of tissue fluid from the surgical site through the fascial planes of the lower leg.
Days 5 to 14: progressive resolution
From day 5 onward, swelling should consistently decrease with each daily inspection. Cold therapy, rest, and anti-inflammatory medication all contribute to this resolution.
SustainableVet.org confirms: mild swelling around the incision site usually goes away within two weeks. The trajectory must be consistently improving.
Beyond 2 weeks: residual low-level swelling
Some dogs retain mild soft swelling around the lower leg beyond 2 weeks, particularly larger dogs with greater tissue volume and dogs who have been less compliant with activity restriction.
This is usually minor and does not indicate a problem if:
- The swelling is soft and not warm
- There is no discharge or redness
- The dog is bearing weight and improving in lameness
Cold therapy: the primary management tool
Cold therapy is the evidence-based first-line intervention for post-surgical swelling.
Protocol:
- Wrap an ice pack or bag of frozen peas in a thin cloth or towel
- Apply to the incision and plate site for 10 to 15 minutes
- Repeat 3 to 4 times daily
- Begin on day 1 post-surgery
- Continue for the first 48 to 72 hours (the acute inflammatory phase)
SustainableVet.org confirms: cold therapy, like applying an ice pack wrapped in a towel for 10 to 15 minutes several times a day during the first 72 hours, helps reduce inflammation.
After the initial period, warm compresses can be used to promote circulation.
Never apply ice directly to the skin or incision -- frostbite and wound damage can result. Remove the pack immediately if the skin appears pale or very cold.
For the ankle specifically, TPLO Info confirms: ankle swelling can be massaged and iced. Gentle proximal-to-distal massage (toward the toes) applied after icing helps lymphatic drainage.
Concerning swelling: signs requiring veterinary contact
Swelling that is not declining after day 5
Normal swelling is consistently declining from day 5 onward. Swelling that is the same or larger than on day 3, measured at day 7, is not normal.
New swelling after apparent resolution
If swelling had reduced and then reappears -- particularly at the plate site rather than the incision -- this suggests a developing seroma, hematoma, or early infection.
SustainableVet.org confirms: you should be concerned if swelling increases after the first week or is accompanied by heat, redness, oozing, or a bad odor.
Warmth, firmness, redness, or discharge alongside swelling
These features distinguish infection from normal surgical edema. Normal edema is diffuse, soft, not dramatically warm, and has no discharge. Infection produces focal warmth, firmness, redness spreading beyond the incision, and discharge.
Swelling at the plate site (not the incision) weeks after surgery
This can indicate an implant-associated infection with seroma or early osteomyelitis. Requires radiographic assessment and deep sampling.
Seroma: a specific type of post-surgical swelling
A seroma is a localized collection of clear serous fluid under the skin, forming when tissue spaces fill with tissue fluid that has not been reabsorbed.
Seromas after TPLO are common and are distinct from infection.
Signs of seroma:
- A soft, fluctuant (fluid-filled) swelling at or near the incision
- Typically appears 1 to 3 weeks post-surgery
- Fluid is clear or pale yellow when aspirated
- No warmth, redness, or discharge from the incision itself
Most seromas resolve without treatment. Your vet will assess whether aspiration or monitoring is appropriate.
For the fluid buildup guide, see fluid buildup after TPLO surgery in dogs. For the ankle swelling guide, see ankle swelling after TPLO surgery in dogs.
For the infection signs guide, see TPLO plate infection signs and treatment. For the bruising guide, see bruising after TPLO surgery in dogs.
Frequently asked questions
Is it normal for the whole leg to swell after TPLO?
Yes, in the early days. Diffuse swelling of the lower leg, extending from the surgical site toward the ankle, is normal in the first 1 to 2 weeks.
Gravity and the inflammatory response both contribute. This resolves as the inflammatory process settles and the dog begins controlled weight bearing.
My dog's leg looks huge at day 3. Is that too much?
Day 3 is within the normal peak swelling period.
Unless the swelling is dramatically asymmetric compared to the other leg, is very hot, or is producing discharge, observe and continue cold therapy as directed.
If you are concerned, contact your vet to describe the swelling -- they can advise whether in-person assessment is needed.
Should I massage the swollen leg?
Gentle lymphatic massage (soft strokes toward the body, from the ankle upward) after icing can help reduce distal swelling.
Do not massage directly over the incision or plate site, and do not massage aggressively. Ask your vet or rehabilitation therapist to demonstrate the correct technique.
My dog's swelling is going up and down -- bigger in the evening, smaller in the morning. Is that normal?
Yes. SustainableVet.org confirms that mild nighttime swelling occurs because dogs move less while resting, allowing fluid to settle. Morning improvement after repositioning and movement is normal.
The concern is when the morning maximum is larger than the previous day's morning maximum -- a consistently worsening trend.
When does warm therapy replace cold therapy?
Cold therapy is most beneficial in the first 48 to 72 hours (the acute inflammatory phase). After 72 hours, warm compresses promote circulation and may help reabsorb residual fluid.
The transition is typically around days 3 to 5. Never apply warmth to an incision that looks infected or discharging -- this can worsen infection.
Resources
- TPLO Info. TPLO Recovery FAQ. tploinfo.com
- SustainableVet. Post-Surgery Recovery After TPLO in Dogs. sustainablevet.org
- TPLO Austin. TPLO Incision Care After Surgery. tploaustin.com
- VCA Animal Hospitals. Tibial Plateau Leveling Osteotomy (TPLO) in Dogs. vcahospitals.com

Post-Surgery Recovery After TPLO in Dogs
Guide to post-TPLO surgery recovery for dogs, focusing on aftercare, exercise, and managing swelling to help your pet heal successfully
TPLO recovery is a structured, staged process. The surgery corrects the mechanical cause of CCL instability, but the bone, soft tissue, and muscle need weeks to months to rebuild around that correction.
Understanding what is required at each stage -- and what signs require prompt veterinary contact -- is as important as the surgery itself.
Quick answer: Post-TPLO recovery requires 8 to 12 weeks of structured activity restriction for bone healing, followed by progressive rehabilitation. Key milestones: 2-week incision recheck; 6-week radiographic assessment; 12-week final radiograph and activity clearance. Warning signs requiring same-day contact: sudden non-weight bearing, spreading redness or discharge, fever, or worsening lameness.
Key takeaways
- The first 2 weeks are the most critical: the osteotomy has no mechanical strength; jumping, running, or slipping can displace the plate; crate rest with bathroom leash walks only is non-negotiable
- Most dogs begin toe-touching within 24 to 48 hours of surgery: early weight bearing maintains muscle mass and stimulates bone healing; it does not indicate readiness for more activity
- Cold therapy for the first 3 to 5 days significantly reduces swelling and pain: 10 to 15 minutes of wrapped ice pack applied 3 to 4 times daily is the most effective owner-administered early intervention
- The 6-week radiograph is the gate for activity increase: bone healing cannot be confirmed clinically; radiographic assessment is the only reliable confirmation of osteotomy progression
- Full muscle recovery takes 4 to 6 months: bone healing at 12 weeks and full functional recovery are different endpoints
- Reducing food intake by approximately 30% during recovery prevents weight gain that stresses the healing osteotomy; activity restriction rapidly leads to weight gain without dietary adjustment
Immediate post-operative period: the first 24 to 48 hours
Coming home
Most dogs are discharged 24 to 48 hours after TPLO, though same-day discharge protocols exist at some facilities.
The dog will be sedated, disoriented from anesthesia, and may have bandaging on the surgical leg. Expect:
- Grogginess and disorientation for 12 to 24 hours from anesthesia
- Some whining or restlessness (often anesthesia effect, not pain)
- Refusal to bear weight or toe-touching only
- Mild to moderate swelling around the incision, peaking at days 2 to 5
Setting up the recovery space
Before the dog arrives home, have in place:
- A correctly sized crate in the main living area
- Non-slip mats or yoga mats over all hard flooring
- Soft, washable bedding in the crate
- Water and food at floor level
- Baby gates blocking stairs
- Medications filled and ready
Medications: first day priorities
Give prescribed medications on the schedule provided at discharge. NSAIDs (meloxicam, carprofen) require food. Gabapentin causes sedation -- this is expected and helps with pain and anxiety in the first days.
Never skip doses or give extra without veterinary guidance.
Week-by-week recovery overview
Weeks 1 to 2: incision healing phase
Activity: crate rest except for bathroom leash walks. Maximum 5-minute walks, 3 to 5 times daily. No stairs, no furniture, no running, no off-leash time.
E-collar: must be worn at all times except supervised eating. One licking episode can introduce S. pseudintermedius from the oral cavity directly into the incision.
Cold therapy: wrap an ice pack in a thin cloth; apply to the incision for 10 to 15 minutes; 3 to 4 times daily; begin day 1 and continue through days 3 to 5.
Incision inspection: check the incision daily at a consistent time. Normal healing: redness fading from day 5, no discharge after day 3, clean approximated wound edges. Concerning: spreading redness, cloudy or malodorous discharge, wound dehiscence.
Weight management: Medcovet recommends reducing food intake by approximately 30% during the restriction period to prevent weight gain from inactivity.
2-week recheck: incision assessment, suture or staple removal if healing is confirmed, pain management review, early mobility assessment.
Weeks 3 to 6: progressive walking phase
Activity: leash walk duration increases -- by up to 5 minutes per week from the week 2 baseline. No off-leash, no running, no stairs without guidance.
Passive range-of-motion exercises: if the vet has approved, begin gentle flexion and extension of the stifle. 5 to 10 repetitions, 2 to 3 times daily. Prevents stiffness during the bone healing period.
Weight bearing: most dogs should be consistently bearing weight on the operated leg by weeks 3 to 4. Three-legged walking during activity is still common but should be decreasing.
Diet: maintain the reduced caloric intake until the vet clears increased activity.
Weeks 6 to 8: radiographic checkpoint
6-week radiograph: the single most important post-operative checkpoint. Images confirm whether the osteotomy is healing as expected. If healing is progressing, activity is increased. If healing is delayed, restrictions continue and the underlying cause is investigated.
After radiographic confirmation:
- Leash walks increase to 15 to 20 minutes
- Physiotherapy begins
- Controlled hill walking and balance work may begin
SustainableVet.org confirms: after the initial weeks of rest, swelling should decrease; gradual increase in leash walking should follow; physical therapy options include hydrotherapy, balance training, laser therapy, and massage.
Weeks 8 to 12: consolidation
10 to 12 week radiograph: confirms bone union. After radiographic confirmation of healing, activity restrictions are progressively lifted.
Return to activity: activity is reintroduced progressively over the following 4 to 6 weeks. No sudden full return to prior activity level.
Managing common post-operative issues
Swelling
Expected: peaks at days 2 to 5, resolves by 2 weeks. Ankle swelling from gravity-dependent fluid migration is normal at days 3 to 5.
Concerning: swelling that is not reducing after day 5, or that reappears after initial resolution.
Management: cold therapy in the first 3 to 5 days; elevation where possible; contact vet if swelling is not following the expected trajectory.
Pain and restlessness
Normal pain is controlled by the prescribed medication regimen and should consistently decrease over the first 2 weeks.
Uncontrolled pain (unable to settle, continuous crying, refusing all weight bearing beyond day 3) requires a vet call -- medication adjustment or a complication evaluation is needed.
Incision care
Do not clean the incision daily unless specifically instructed by your vet. Daily inspection is required; daily cleaning is not. If cleaning is needed, use only the vet-approved solution.
Constipation
Opioid pain medications commonly cause constipation in the first days. Discuss this with your vet at discharge -- they may recommend a stool softener if constipation becomes a concern.
Warning signs that require same-day veterinary contact
- Sudden complete non-weight bearing after a period of partial bearing
- Spreading redness beyond the incision margins
- Cloudy, yellow, green, or malodorous discharge from the incision
- Wound edges separating
- Fever (rectal temperature above 39.5 C / 103.1 F)
- Lameness worsening after a period of improvement (trajectory reversal)
- New swelling at the plate site (not the incision) after the second week
- Any systemic sign (lethargy, inappetence, fever) accompanying local wound changes
For the full recovery timeline overview, see what to expect after TPLO surgery in dogs. For confinement setup, see how to confine your dog after TPLO surgery.
For infection prevention, see TPLO incision infection: symptoms and prevention. For physical therapy timing, see when to start physical therapy after TPLO surgery.
Frequently asked questions
My dog is not using the leg at all 5 days after surgery. Is this normal?
Some dogs refuse to bear weight for the full first 2 weeks -- this is within the normal range.
If the dog was bearing some weight at days 2 to 3 and has now stopped completely, or shows signs of severe pain, contact your vet to rule out a complication.
Persistent non-weight bearing beyond 2 weeks warrants assessment.
When can my dog go back to sleeping in our bed?
Not during the restriction period. Jumping off the bed -- even once -- generates the same plate-failure risk as running.
The dog must sleep in the crate or on a floor-level dog bed for the full restriction period.
My dog is constantly trying to lick the incision. What can I do?
Ensure the e-collar is the correct size -- most dogs can reach their hind legs with a collar that is too small.
Try a longer cone or a recovery suit (medical pet shirt) as a supplement. Ask your vet about trazodone or gabapentin for anxiety driving the licking behavior.
Do not remove the e-collar to give the dog a break unless you are directly supervising and can prevent licking.
Can I give my dog human joint supplements during recovery?
Some human supplements (fish oil at appropriate doses) are safe. Others contain xylitol or other ingredients toxic to dogs. Never give a human supplement without explicit vet approval.
Veterinary-formulated joint supplements are the safer choice.
How do I know when recovery is complete?
Recovery is complete when: (a) the 12-week radiograph confirms bone union, (b) the vet clears full activity, and (c) the operated leg has regained near-symmetrical muscle mass (4 to 6 months).
Bone healing at 12 weeks is the legal clearance; full muscle recovery is the functional completion of recovery.
Resources
- SustainableVet. Post-Surgery Recovery After TPLO in Dogs. sustainablevet.org
- Medcovet. Essential Guide to Dog Recovery TPLO Surgery. medcovet.com
- TPLO Info. What to Expect After Your Dog's TPLO Surgery. tploinfo.com
- VCA Animal Hospitals. TPLO. vcahospitals.com
Dog Not Peeing After TPLO Surgery: Causes & Care
Learn why your dog may not pee after TPLO surgery and how to manage this common post-op issue safely and effectively.
It is common to notice changes in a dog's urination pattern in the first 24 to 48 hours after TPLO surgery.
Most of these changes are temporary and related to the effects of anesthesia, pain medications, and reduced mobility.
However, not urinating at all for more than 12 to 24 hours is a clinical concern that requires prompt veterinary contact.
Quick answer: Reduced urination in the first 12 to 24 hours after TPLO is usually caused by anesthesia effects, opioid medications, pain, or stress. Contact your vet immediately if your dog has not urinated within 12 hours post-surgery, or if you observe straining, vocalization, or abdominal distension.
Key takeaways
- Reduced urination in the first 12 to 24 hours is normal: anesthesia suppresses bladder awareness and opioids reduce the sensation of fullness
- Contact your vet if no urination occurs within 12 hours post-surgery: this is the critical threshold, per published veterinary guidance do not wait
- Straining, vocalizing, or abdominal swelling requires same-day veterinary evaluation: these signs suggest urinary retention requiring catheterization
- Opioid pain medications are the most common pharmacological cause: they reduce bladder filling sensation and sphincter tone in some dogs
- Surgical catheterization during the procedure may temporarily affect urination for 12 to 24 hours after catheter removal
- Increased water intake without urination is particularly concerning: it suggests the dog is producing urine but cannot eliminate it a potential retention emergency
Why dogs may not urinate normally after TPLO
Anesthesia effects
General anesthesia suppresses the entire nervous system, including the neural pathways that signal bladder fullness and initiate voiding.
As anesthetic agents clear over the first 12 to 24 hours, normal bladder signaling gradually returns.
Most dogs produce less urine during anesthesia because of reduced blood pressure and fluid redistribution.
When fluid therapy resumes and hydration normalizes after surgery, urine production increases but the dog must also have recovered enough neurological function to void normally.
Opioid pain medications
Opioid analgesics (hydromorphone, morphine, buprenorphine) prescribed after TPLO affect urination in two main ways.
They reduce the perception of bladder fullness, so the dog does not signal readiness to urinate as promptly as usual.
In some dogs they also increase urethral sphincter tone, making voiding more difficult.
JustAnswer veterinary consultation confirms: opioids can cause urinary retention by relaxing or altering bladder muscles, making it hard for the dog to pee.
This effect is temporary and typically resolves as opioid dosing decreases over the first 48 to 72 hours.
Pain and reluctance to posture
Urination requires the dog to posture squatting or lifting a leg both of which require hindlimb use and core stability that are painful in the first days after TPLO.
A dog that finds posturing too painful may suppress the urge to urinate or produce only small amounts.
Providing a non-slip surface, a low slung outdoor space (not steps or slopes), and supporting the dog with a belly sling during outdoor trips reduces posturing pain and encourages normal urination.
Surgical catheterization
A urinary catheter is often placed during TPLO surgery to drain the bladder, keep the surgical field dry, and prevent accidents during the procedure.
After catheter removal, some dogs take 12 to 24 hours to resume normal voiding patterns as the urethra recovers from catheter placement and the bladder regains normal tone.
Stress and unfamiliar environment
Dogs in pain, in an unfamiliar post-surgical environment, and wearing an E-collar may suppress urination due to stress.
Stress-related urinary suppression is temporary and usually resolves as the dog settles into the home recovery environment.
Normal urination expectations after TPLO
Most dogs urinate at least once within 6 to 12 hours of returning home from surgery. By 24 hours, most dogs have urinated multiple times.
The SustainableVet.org dog-not-peeing guide confirms: if your dog does not pee within 24 hours post-surgery, contact your veterinarian immediately to rule out complications.
The published veterinary guidance for emergency contact is: no urination within 12 hours post-surgery contact your vet.
Signs that require immediate veterinary contact
Contact your veterinarian same-day or go to an emergency clinic if you observe:
No urination at all for 12 or more hours after surgery: this is the key threshold do not wait to see if it resolves
Straining or crying during urination attempts: the dog is trying to urinate but cannot produce a stream classic urinary retention sign
Abdominal distension: the belly feels full or tense; this suggests a distended bladder (urinary retention emergency)
Drinking water but producing no urine: urine is being produced but cannot be eliminated urgent
Vomiting or lethargy alongside no urination: systemic signs accompanying urinary retention indicate a more serious emergency
Urinary retention: what happens and how it is treated
Urinary retention means the bladder cannot empty. The bladder fills progressively and becomes painful, distended, and eventually at risk of rupture if unrelieved. Prolonged retention also causes back-pressure on the kidneys.
Treatment depends on the cause:
- Catheterization: gentle placement of a urinary catheter to drain the bladder provides immediate relief and allows the bladder to recover normal tone
- Pain management adjustment: if opioid-induced retention is suspected, the analgesic protocol may be modified
- Bethanechol: a parasympathomimetic drug that stimulates bladder contraction; sometimes used in dogs with neurogenic urinary retention
- Urinalysis and culture: if infection is suspected alongside retention
Home care to encourage urination
- Scheduled outdoor trips every 2 to 4 hours for the first 24 to 48 hours
- Non-slip surface outdoors pain and weakness increase slipping risk
- Gentle belly-sling support to reduce posturing pain (fold a large towel under the belly and lift slightly)
- Quiet, calm outdoor environment stressed dogs suppress urination
- Adequate pain control contact your vet if your dog is vocalizing or reluctant to move; these are signs pain medication is insufficient
- Monitor and record each urination: time, approximate volume, any straining or discomfort
For the related incontinence guide (opposite problem), see dog incontinence after TPLO surgery: causes and care. For the post-surgical pain guide, see dog whining after TPLO surgery: causes and care.
For the full recovery guide, see what to expect after TPLO surgery in dogs. For the monitoring guide during early recovery, see post-operative care mistakes increasing TPLO infection risk.
Frequently asked questions
How long after TPLO surgery should my dog urinate?
Most dogs urinate within 6 to 12 hours of returning home from surgery. Contact your veterinarian if no urination has occurred within 12 hours.
Do not wait for the 24-hour mark if the dog is straining, vocalizing, or appears uncomfortable.
My dog is drinking water but not peeing at all. Is this an emergency?
Yes. A dog that is drinking and producing urine but cannot eliminate it (retention) needs same-day veterinary evaluation. A distended bladder is painful and can rupture.
Do not manage this at home contact your vet immediately.
Can opioid pain medications cause urinary retention?
Yes. Opioids are a recognized cause of urinary retention in both humans and dogs.
If your dog was urinating normally before surgery and stops after receiving opioid medications, this is likely a contributing factor.
Contact your vet the analgesic protocol may be modified without eliminating pain management.
What does a catheter placement during surgery do to urination afterward?
Urinary catheters are placed during TPLO to drain the bladder and keep the surgical field dry.
After catheter removal, some dogs take 12 to 24 hours to resume normal voiding as the urethra recovers.
This is expected and not a cause for alarm, as long as the dog urinates within the normal timeframe.
Is it safe to give my dog extra water if they're not peeing?
Normal hydration is essential and should be maintained. Do not restrict water.
However, if the dog is drinking normally and still not producing urine, this increases the urgency of veterinary contact rather than reducing it.
Resources
- VCA Animal Hospitals. Tibial Plateau Leveling Osteotomy (TPLO) in Dogs. vcahospitals.com
- TPLO Info. Recovery FAQs. tploinfo.com
- PetMD. Urinary Retention in Dogs. petmd.com
- Midwest Veterinary Specialists. Post-Operative Care Following TPLO. midwestveterinaryspecialists.com
How to Keep a Dog Calm After TPLO Surgery
Learn how to keep your dog calm after TPLO surgery using rest, crate training, and soothing techniques for safe, stress-free recovery.
Keeping a dog calm during TPLO recovery is one of the hardest parts of the process -- and one of the most important.
A dog that feels physically capable of running at week 3 is not biologically ready to run at week 3. The osteotomy has not consolidated. The plate can fail.
Activity restriction is not optional.
Quick answer: Most effective strategies for keeping a dog calm after TPLO surgery: crate confinement during unsupervised periods, food puzzles and scent games, consistent pain management, a quiet low-stimulus environment, and trazodone or gabapentin for highly anxious dogs. Keep a leash on the dog indoors.
Key takeaways
- Crate confinement is the foundation of activity control: large enough to stand and turn but not pace; prevents the spontaneous running, jumping, and spinning that cause plate failure
- Mental stimulation substitutes for physical activity: food puzzles, lick mats, frozen Kongs, and scent games provide neural reward without physical impact
- Pain management compliance directly affects calmness: uncontrolled pain causes restlessness; giving NSAIDs and gabapentin on schedule keeps the dog comfortable enough to rest
- The environment must be actively managed: loud TV, visitors, and other pets cause arousal and movement; a quiet, predictable low-stimulus space reduces arousal
- Trazodone and gabapentin can be prescribed for highly anxious dogs: VetSurgInfo confirms trazodone is inexpensive, safe, and effective for anxiety and sedation during TPLO recovery
- Always use a leash indoors during early recovery: a dog that slips or startles can displace the plate; a house leash gives the owner control at all times
The crate: foundation of confinement
A crate is the safest confinement tool for TPLO recovery.
It limits the movements that risk plate failure -- spontaneous jumping, running to the door, sudden pivoting -- and gives the dog a defined, safe space.
Crate selection:
- Large enough for the dog to stand, turn, and lie down comfortably
- Not so large the dog can pace or run inside
- Soft bedding on non-slip material
- Location in the household main area, not isolated -- isolation increases anxiety
SustainableVet.org confirms: use a crate, pen, or small room with non-slip flooring. Crates prevent jumping, running, and twisting. Choose a crate large enough to stand and turn.
Exercise pen alternative: for dogs that do not tolerate crates, an exercise pen (X-pen) provides a larger confined space while still restricting free movement. Place the X-pen in the main living area so the dog is not isolated.
Small room alternative: a bathroom, laundry room, or small bedroom with a baby gate can work. Remove furniture the dog could jump on.
Mental stimulation: the most underused tool
A dog confined physically but not cognitively engaged becomes frustrated, which leads to escape attempts and activity that risks the repair.
Mental stimulation provides the same dopamine reward as physical activity with zero mechanical risk.
Effective mental stimulation options:
Food puzzles and slow feeders: scatter meals in a puzzle feeder or across a lick mat instead of in a bowl. A meal that takes 15 minutes to eat provides significant cognitive engagement.
Frozen Kongs: stuff with wet food, peanut butter (xylitol-free), or kibble soaked in broth; freeze for several hours. A frozen Kong can occupy a dog for 20 to 30 minutes.
Sniff games: hide small treats in a folded towel, a muffin tin covered with tennis balls, or a scatter across the crate bedding. Sniffing is cognitively tiring -- it is physiologically equivalent to sustained physical exercise in terms of neural engagement.
Chew toys: long-duration chews (bully sticks, raw bones appropriate for the dog's size, frozen chicken necks) keep the dog occupied without movement.
Animal Outpatient Surgery confirms: soft music, white noise, or pheromone diffusers create a serene atmosphere. Mental engagement through food puzzles and scent games reduces frustration from limited mobility.
Environmental management
The dog's immediate environment directly controls arousal level.
Reduce auditory stimuli: loud TV, doorbell sounds, and street noise cause the dog to alert and attempt to move. White noise machines or calm background music reduce stimulus peaks.
Manage household traffic: visitors who excite the dog, children who rough-house nearby, and other pets that want to interact all cause arousal. Limit access to the dog during early recovery.
Manage other pets: other dogs and cats approaching the recovering dog cause arousal and can trigger sudden jumping or running. Keep them separated during the early weeks, particularly unsupervised.
Non-slip flooring: rugs and yoga mats in the dog's movement area prevent slipping, which generates uncontrolled leg movements that can stress the plate.
Laveen Vet Center confirms: set up a quiet, confined area free from loud noises, active children, and other pets. White noise or soft music helps create a serene atmosphere.
Pain management and its role in calmness
An undertreated dog is a restless dog. Pain creates the exact behaviors -- panting, pacing, inability to settle, licking the leg -- that also indicate anxiety.
Distinguishing pain from anxiety is important because the response is different.
Pain management checklist:
- Give NSAIDs and gabapentin on the exact schedule prescribed, not as needed
- Never skip doses because the dog appears comfortable -- the medication is maintaining that comfort
- Give medications approximately 30 minutes before walks (TPLO home recovery protocols recommend this timing)
- Contact your vet if the dog cannot settle despite correct medication administration
VetSurgInfo confirms: gabapentin provides both analgesia and sedation; the sedating effect facilitates recovery and rest, particularly in the first 7 days.
Prescribed calming medications
For dogs with high anxiety, separation anxiety, or an inability to settle despite environmental and mental stimulation management, veterinary-prescribed medications are appropriate and safe.
Trazodone: a serotonin modulator used off-label in dogs for anxiety and sedation. VetSurgInfo confirms: dogs do very well on trazodone for anxiety and sedation during TPLO recovery; it is inexpensive and can facilitate recovery, rest, and calm during vet visits.
Gabapentin: the analgesic side effect of sleepiness helps with calmness in addition to pain control.
Alprazolam or other benzodiazepines: may be appropriate for situational anxiety (specific triggers like thunder).
SustainableVet.org confirms: vets can prescribe mild sedatives or calming medications for dogs who remain overly anxious; these drugs are safe when dosed correctly and can prevent harmful overactivity.
Never give human anxiety medications to dogs. Never use human supplements without vet approval -- some contain xylitol or other ingredients toxic to dogs.
Owner behavior and management
Owners unintentionally promote activity.
Do not excitedly greet the dog: excited greetings cause the dog to jump and spin. Calm, quiet greetings reduce arousal.
Leash the dog indoors: a house leash (a short, light leash attached to the collar) gives the owner control when the dog is out of the crate. If the dog startles or tries to move suddenly, the leash prevents uncontrolled movement.
Maintain a predictable routine: dogs are routine-oriented. Predictable meal times, bathroom walk times, and crate times reduce anticipatory anxiety. Variation creates excitement; routine creates calm.
Keep visits short: sitting with the dog is good. Prolonged exciting interaction is not. Brief, calm contact several times daily is better than one long exciting session.
For the recovery timeline, see what to expect after TPLO surgery in dogs. For infection prevention, see post-operative care mistakes that increase TPLO infection risk.
For swelling management, see fluid buildup after TPLO surgery in dogs. For exercise, see TPLO recovery exercises for dogs.
Frequently asked questions
My dog screams and cries in the crate for hours. What do I do?
Contact your vet. Sustained, intense crate distress may indicate: inadequate pain control (the dog is in pain, not just anxious), genuine severe separation anxiety, or insufficient mental stimulation.
Ask about trazodone or gabapentin for anxiety management. Do not give up on crate confinement -- the alternative is uncontrolled movement that risks the repair.
Is it okay to let my dog out of the crate to sit with me on the sofa?
Only if the dog is on a leash and cannot jump. Allow the dog to lie next to you on the floor or on a low dog bed beside you.
Do not allow the dog onto the sofa -- falling or jumping off generates the same plate-failure risk as running.
My dog seems much better at 3 weeks. Can I relax the restrictions?
No. Clinical improvement does not mean bone healing is complete. The osteotomy is not confirmed healed until radiographs at 8 to 12 weeks.
Plate failure typically happens when owners relax restrictions based on the dog appearing well. Maintain full restrictions until vet clearance.
What is the best medication for a high-energy dog that can't settle?
Trazodone is the most commonly prescribed agent for activity restriction in TPLO dogs. It is effective, safe, inexpensive, and can be used for the full restriction period.
Discuss with your vet at or before surgery -- it is easier to start early than to address a crisis at week 2.
Can I take my dog to visit friends or family during recovery?
Very limited visits in controlled, quiet environments where the dog is leashed and confined.
No visits to households with other active dogs, children who will excite the dog, or any environment where the dog cannot be kept calm. Unfamiliar environments increase anxiety and exploration behavior.
Resources
- SustainableVet. How to Keep a Dog Calm After TPLO Surgery. sustainablevet.org
- VetSurgInfo. TPLO Recovery Tips. vetsurginfo.com
- Animal Outpatient Surgery. How to Keep a Dog Calm After TPLO Surgery. animaloutpatientsurgery.com
- Laveen Vet Center. How to Keep a Dog Calm After TPLO Surgery. laveenvetcenter.com
TPLO Failure Rate in Dogs Explained
Learn about TPLO failure rates in dogs, causes, prevention, and recovery tips for better surgical outcomes.
Tibial Plateau Leveling Osteotomy (TPLO) is a common surgery to fix cranial cruciate ligament injuries in dogs. Many pet owners worry about the TPLO failure rate in dogs and what it means for their pet’s recovery. Understanding the risks and outcomes can help you make informed decisions for your dog’s health.
This article explains what TPLO failure means, how often it happens, and what factors affect it. You will learn how to recognize complications, prevent failure, and support your dog after surgery for the best results.
What is the TPLO failure rate in dogs?
The TPLO failure rate in dogs varies but is generally low when performed by experienced surgeons. Failure means the surgery did not fully restore knee stability or complications occurred that affect recovery.
Studies show failure rates range from 2% to 10%, depending on factors like surgical technique and dog size. Most dogs recover well and regain normal function after TPLO.
- Low overall failure: Most dogs have successful outcomes with TPLO, with failure rates usually under 10% in clinical studies.
- Variation by surgeon: Surgeons with more experience tend to have lower failure rates due to better technique and planning.
- Dog factors matter: Larger dogs or those with severe ligament damage may have a higher risk of failure after TPLO.
- Definition of failure: Failure includes persistent lameness, implant problems, or the need for revision surgery after TPLO.
Understanding these rates helps you set realistic expectations and discuss risks with your vet before surgery.
What causes TPLO failure in dogs?
Several factors can lead to TPLO failure. Knowing these causes helps prevent problems and improve recovery chances.
Failures often result from surgical errors, infection, or poor healing. Other causes include implant issues and the dog’s activity level after surgery.
- Surgical technique errors: Incorrect bone cuts or implant placement can cause instability or implant failure after TPLO.
- Infection risk: Postoperative infections can delay healing and lead to surgery failure if not treated promptly.
- Poor bone healing: Factors like age, nutrition, or underlying disease can slow bone healing and cause failure.
- Excessive activity: Dogs that are too active too soon may damage the surgical site and cause failure.
Preventing these causes requires careful surgical planning, good postoperative care, and close monitoring.
How can TPLO failure be prevented in dogs?
Prevention of TPLO failure starts with choosing a skilled surgeon and following postoperative instructions closely. Proper care reduces complications and supports healing.
Owners play a key role in managing their dog’s activity and health during recovery to avoid failure.
- Experienced surgeon choice: Select a board-certified surgeon with extensive TPLO experience to reduce technical errors.
- Strict activity control: Limit your dog’s movement and exercise as advised to protect the surgical site during healing.
- Infection prevention: Keep the incision clean and watch for signs of infection to catch problems early.
- Follow-up visits: Regular vet check-ups help monitor healing and detect complications before failure occurs.
Following these steps improves your dog’s chance of a successful TPLO surgery and recovery.
What are the signs of TPLO failure in dogs?
Recognizing failure signs early lets you seek veterinary care promptly. Signs often involve ongoing lameness or swelling around the knee.
Not all postoperative discomfort means failure, but persistent or worsening symptoms should be evaluated by a vet.
- Persistent lameness: Continued limping or inability to bear weight on the leg weeks after surgery may indicate failure.
- Swelling or pain: Increased swelling, heat, or pain around the knee can signal infection or implant problems.
- Unusual noises: Clicking or popping sounds from the knee might mean implant loosening or joint instability.
- Reduced range of motion: Difficulty bending or extending the knee joint may suggest complications affecting recovery.
If you notice any of these signs, contact your veterinarian immediately for assessment and treatment.
How is TPLO failure treated in dogs?
Treatment depends on the cause of failure. Some cases require revision surgery, while others may respond to medical management.
Your vet will perform exams and imaging to determine the best approach to restore function and relieve pain.
- Revision surgery: Some dogs need a second surgery to fix implant issues or correct bone alignment after failure.
- Antibiotic therapy: Infections causing failure require antibiotics and sometimes implant removal to heal properly.
- Pain management: Medications and physical therapy help control pain and improve mobility during recovery.
- Supportive care: Weight management and controlled exercise support healing and reduce stress on the knee joint.
Early treatment improves outcomes and helps your dog regain normal activity levels.
What is the recovery outlook after TPLO failure in dogs?
Recovery after TPLO failure can be more challenging but is often successful with proper care. Many dogs regain good function after treatment.
Recovery time may be longer, and some dogs need ongoing management to maintain comfort and mobility.
- Longer healing time: Dogs with failure often require extended recovery periods compared to uncomplicated TPLO cases.
- Physical therapy benefits: Rehabilitation exercises improve strength and joint function after failure treatment.
- Possible chronic issues: Some dogs may develop arthritis or mild lameness despite treatment.
- Owner commitment: Consistent care and monitoring are essential for a positive recovery after failure.
With patience and veterinary support, many dogs live active, happy lives following TPLO failure treatment.
What factors affect TPLO failure rates in different dog breeds?
Breed and size influence TPLO outcomes. Larger and more active breeds may face higher failure risks due to greater joint stress.
Understanding breed-specific risks helps tailor surgical and postoperative care for better success.
- Large breed challenges: Heavy dogs put more pressure on the knee, increasing the chance of implant failure or delayed healing.
- Active breed risks: Energetic dogs may be harder to restrict post-surgery, raising failure risk from premature activity.
- Bone quality differences: Some breeds have denser or more fragile bones affecting healing after TPLO.
- Genetic predispositions: Certain breeds may be more prone to ligament injuries and complications after surgery.
Discuss your dog’s breed and lifestyle with your vet to plan the best approach for TPLO surgery and recovery.
Conclusion
The TPLO failure rate in dogs is generally low but depends on many factors like surgeon skill, dog size, and postoperative care. Understanding these helps you prepare for surgery and recovery.
By choosing an experienced surgeon, following care instructions, and watching for signs of failure, you can help your dog heal well and return to a happy, active life after TPLO surgery.
What is the typical TPLO failure rate in dogs?
TPLO failure rates usually range between 2% and 10%, with most dogs recovering successfully after surgery.
Can infection cause TPLO failure in dogs?
Yes, infections at the surgical site can lead to delayed healing and failure if not treated quickly with antibiotics and care.
How soon can dogs return to activity after TPLO?
Dogs typically need 8 to 12 weeks of restricted activity to allow proper healing and reduce the risk of failure.
Is revision surgery common after TPLO failure?
Revision surgery is sometimes necessary to correct implant or alignment issues when TPLO fails to restore knee stability.
Do larger dogs have higher TPLO failure rates?
Larger dogs often have increased failure risk due to greater joint stress and challenges in controlling postoperative activity.
How Long Does TPLO Surgery Take?
Learn how long TPLO surgery takes, what to expect during the procedure, and recovery timelines for your dog's knee surgery.
"Failure rate" is used loosely when owners discuss TPLO, which can cause significant confusion. A complication is not the same as a failure.
Understanding what the published data actually shows and distinguishing minor complications from true surgical failures gives owners a much clearer picture of what to expect.
Quick answer: The overall TPLO complication rate is 10 to 34% across studies; most are minor. Major complications requiring reoperation occur in 2 to 7%. Infection is the most common major complication. Long-term good outcomes are reported in 90 to 93% of dogs.
Key takeaways
- Overall complication rate is 10 to 34% across published studies; most complications are minor and resolve without additional surgery
- Major complication rate requiring reoperation is 2 to 7%: a 1,000-dog study found 14.8% overall with 6.6% major complications
- SSI is the most common major complication: 2.9% to 25.9% across studies; giant breeds over 50 kg are at highest risk
- Small dogs under 15 kg have significantly lower complication rates: 4.44% in one 90-dog study, with no revisions
- Good to excellent long-term outcomes in 90 to 93% of dogs: the complication rate does not equal the failure rate
- Surgeon experience is the most modifiable risk factor: complication rates are consistently lower at high-volume specialty centers with board-certified surgeons
Defining "failure" vs. "complication"
This distinction is critical for interpreting the literature and for setting owner expectations accurately.
Complication: any deviation from the expected post-operative course. This includes minor findings like superficial wound dehiscence, mild swelling, or radiographic evidence of delayed osteotomy healing with no clinical signs. Many publications include these minor events in their complication rates.
Major complication: an event requiring additional surgical intervention or causing extended lameness. Major complications represent the subset of complications that meaningfully affect recovery and outcome.
Failure: the most restrictive definition surgery that did not achieve its goal of stifle stabilization, resulting in persistent instability and requiring revision with a different technique. True failure in this sense is uncommon after TPLO.
What published complication data shows
Overall complication rates
Vetamac confirms: complication rates following TPLO surgery range from 14% to 34%, with less than 10% of cases requiring a second surgery.
PMC (intraoperative bacterial culture study) confirms: the complication rate of TPLO varies between 10% and 34%, with 2 to 4% requiring surgical revision.
Today's Veterinary Practice reports a 14.8% complication rate in 1,000 TPLO patients (6.6% major — requiring repeat surgery or extended lameness), including 2.8% late meniscal injury and 6.6% infections.
Infection rates
Infection is the most common major complication and the one with the greatest variation by dog size and surgical setting.
PMC confirms: SSI rate after TPLO is reported to be 2.9% to 25.9% across studies, which is higher than other clean orthopedic surgeries (2.0 to 6.7%).
Surgical site infection rates of 21.3% to 25.9% have been reported specifically for giant-breed dogs weighing over 50 kg.
The implant removal rate due to infection is 3 to 7.4% per published literature (PMC PRP study; ResearchGate implant removal study).
Complication rates by dog size
Dog size is a consistent predictor of complication risk.
PLOS One retrospective (90 dogs under 15 kg): overall complication rate 4.44%, with no complications requiring surgical revision.
The study confirms: the complication rate in dogs under 15 kg is less than that historically reported in heavier dogs.
PubMed retrospective (small and medium dogs, 2.0 and 2.7 mm plates): overall complication rate 36%.
The most common complications were radiographic evidence of delayed healing (9%), patellar tendon thickening (8%), and tibial tuberosity fracture (6%). Only 7% of complications were major.
PLOS One confirms: the TPLO complication rates range from 10% to 34% and vary in severity from swelling and bruising to fractures and osteomyelitis.
Implant-related complications reportedly occur in under 10% of all TPLO procedures.
Long-term success rates
Complication rates must be interpreted alongside long-term success rates.
The retrospective cohort study comparing TPLO, Tightrope, and TTA found: function greater than 1 year after surgery was 93.1% for TPLO, 92.7% for Tightrope, and 89.2% for TTA.
SustainableVet.org confirms: good to excellent long-term outcomes are achieved in 90.4% of patients up to 6.8 years after TPLO surgery; 80 to 90% of owners are satisfied with their dog's long-term recovery.
A dog can have a complication even a significant one like an infection and still achieve a good long-term outcome after the complication is resolved.
The complication rate and the long-term success rate address different aspects of the outcome.
Factors that affect complication and failure rates
Surgeon experience and volume
This is the most consistently cited modifiable risk factor. High-volume specialty centers and board-certified surgeons consistently report lower complication rates than general practitioners performing occasional TPLO procedures.
Surgical efficiency, technique precision, and post-operative protocol standardization all contribute.
Dog size and body weight
Larger dogs generate higher joint forces, have larger dead space at the surgical site, and place more mechanical demand on the implant during healing.
These factors contribute to the higher complication rates seen in large and giant breeds.
Excessive tibial plateau angle (TPA)
Dogs with TPA above 35 degrees (excessive TPA, or eTPA) have higher complication rates.
Today's Veterinary Practice notes: owner-perceived outcome was superior for eTPA group dogs when TPLO resulted in TPA of 14 degrees or less compared to those with TPA greater than 14 degrees.
Postoperative complications were more common in dogs with eTPA.
Post-operative activity restriction compliance
Dogs that are over-active during recovery have higher rates of implant complications, seroma formation, and wound complications.
Strict adherence to the prescribed restriction protocol is the owner's primary contribution to reducing complication risk.
For the complications overview, see 15 common complications after TPLO surgery in dogs. For the infection signs guide, see TPLO plate infection signs and treatment.
For the long-term outcomes guide, see long-term outcomes of TPLO surgery. For the plate removal guide, see TPLO plate removal recovery guide.
Frequently asked questions
What is the TPLO failure rate?
Depends on how "failure" is defined. If failure means any complication: 10 to 34% across studies. If failure means major complications requiring surgery or causing extended lameness: 2 to 7%.
If failure means persistent instability requiring revision with a different technique: uncommon and not consistently reported across large series.
Is TPLO safe for large breed dogs?
Yes, but with a higher complication risk than small dogs. Vetamac confirms: for large breeds, TPLO is still the gold standard, providing better long-term stability than alternatives.
The higher complication rate in large dogs reflects the greater mechanical demands and surgical challenges, not a fundamental unsafety of the procedure.
What percentage of TPLO dogs need a second surgery?
Across published studies, 2 to 10% require a second surgical intervention. Most second surgeries address infection (requiring plate removal), late meniscal tears (requiring partial meniscectomy), or implant complications.
Does my dog's vet experience affect failure rate?
Yes, substantially. Surgeons performing fewer than a set number of TPLO procedures per year have higher complication rates than high-volume specialists.
This is one reason referral to a board-certified orthopedic surgeon (ACVS diplomate) is recommended for TPLO.
If my dog has a complication, does that mean the TPLO failed?
Not necessarily. Many dogs who develop complications including infections requiring plate removal still achieve good to excellent long-term function after the complication is resolved.
The complication rate and the long-term outcome are different measures.
Resources
- Today's Veterinary Practice. Canine Cranial Cruciate Disease: Evidence-Based Look at Current Treatment Modalities. todaysveterinarypractice.com
- PLOS One. Risk Factors for Short-Term Postoperative Complications in Dogs Weighing Less Than 15 kg. journals.plos.org
- PubMed. Short-Term Complications Associated With TPLO in Dogs Using 2.0 and 2.7 mm Plates. pubmed.ncbi.nlm.nih.gov
- PMC. Clinical Relevance of Positive Intraoperative Bacterial Culture in TPLO in Dogs. ncbi.nlm.nih.gov
- Vetamac. TPLO Surgery for Dogs: Success Rates and Alternative Options. vetamac.com

