

Protecting
Pets, People & Planet
Join a group of veterinarians leveraging the latest technologies to deliver excellent care to their patients while being a responsible and positive force for their local and global communities.
100% secure. We do not share your information


Recent Articles
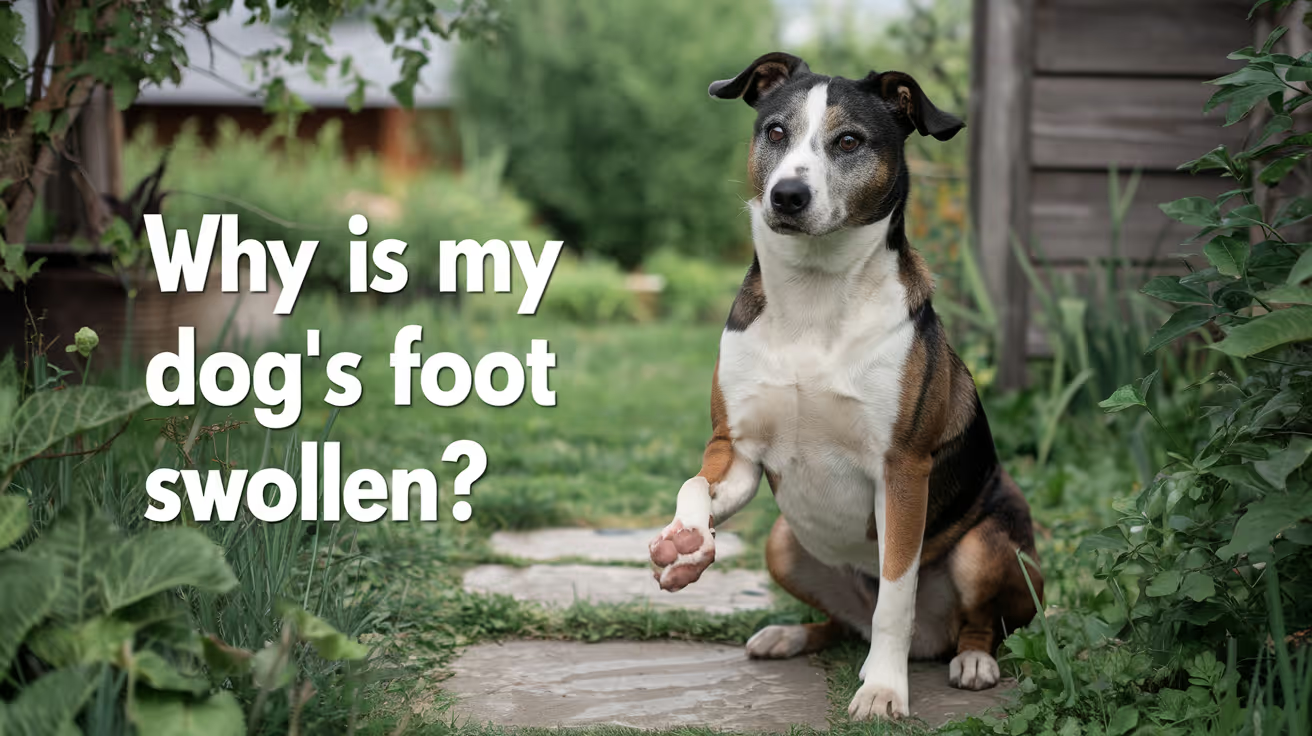
Why Is My Dog's Foot Swollen?
Discover why your dog's foot is swollen, common causes, treatments, and when to see a vet for proper care.
A swollen dog foot is one of the most common reasons owners call their vet. It can be as simple as a bee sting or as serious as a deep infection or bone tumor. The location, speed of onset, and other symptoms all help narrow down the cause.
This guide covers every common cause, how to assess severity at home, and the exact signs that mean your dog needs same-day care.
Quick answer: A swollen dog foot usually has a local cause: injury, insect sting, foreign object, or infection. Warm, increasing, or discharging swelling needs same-day vet care. Multiple swollen paws suggest allergies.
Key takeaways
- Single-paw swelling almost always has a local cause: injury, sting, foreign body, or infection
- Interdigital furunculosis (infected hair follicle cysts between toes) is among the most misidentified causes of recurring paw swelling
- Foreign objects like foxtails and glass splinters can migrate deep into tissue if left untreated
- Pododermatitis is the clinical term for inflamed paw skin; allergies are the most common underlying driver
- Swelling spreading up the leg or paired with face or neck swelling is an emergency requiring immediate care
- Most mild swelling from a sting or minor sprain improves within 24 to 48 hours with rest and monitoring
How to assess your dog's swollen foot before calling the vet
Before looking up causes, do a quick home assessment. This takes two minutes and tells you how urgent the situation is.
Step 1: Which paw?One paw = likely local cause. All four paws = likely allergic or systemic.
Step 2: Feel for heat.Warm or hot tissue means active inflammation or infection.
Step 3: Look between every toe.Redness, swelling between the digits, or visible nodules between the toes points to interdigital furunculosis or a foreign body.
Step 4: Check the pads.Burns appear as red, blistered, or peeling pad tissue. Cuts and punctures are often visible on the pad surface.
Step 5: Look at each nail.A broken nail or swollen nail bed causes localized pain and swelling at the toe tip.
VCA Animal Hospitals: "A deeper infection, like an abscess, will appear as a warm, soft to mildly firm swelling under the skin."
8 common causes of a swollen foot in dogs
1. Injury or trauma
Sprains, cuts, fractured toes, torn nails, and pad burns are the most frequent causes of sudden single-paw swelling. Dogs running on rough, hot, or icy terrain are especially prone.
PetMD notes that pad burns are particularly common in summer: check the pads after any walk on hot pavement. If your palm cannot hold against the pavement for five seconds, it is too hot for your dog's feet.
Signs: sudden lameness after activity, localized swelling, visible wound or bruising.
2. Foreign object
Thorns, glass, foxtails, and grass awns lodge between the toes or penetrate the pad. The body mounts an inflammatory response around the object, causing swelling that worsens over days.
SpectrumCare: "Foxtails and grass awns can lodge between the toes or in the pad and trigger pain, swelling, and infection."
Foxtails are particularly dangerous because they are barbed and can migrate deeper into tissue over days, eventually requiring surgical removal. If you cannot see and safely remove the object, do not probe. See a vet.
3. Insect sting or bite
Bees, wasps, fire ants, and spiders cause rapid single-paw swelling that appears within minutes of the sting. The paw may look puffy and your dog may lick or hold it up.
Dyer Animal Clinic advises watching for anaphylaxis signs: hives, difficulty breathing, excessive swelling spreading beyond the paw. These require emergency care immediately.
Localized sting swelling that stays in the paw and is not worsening can be monitored at home for 24 to 48 hours.
4. Infection: bacterial and fungal
Bacterial or fungal infections enter through cuts, puncture wounds, or damaged skin. Infected paws are typically warm, red, swollen, and often have an odor or discharge. VCA lists the visual signs: "Skin infections on the feet may result in red, moist lesions between the toes."
Pododermatitis (inflammation of the paw skin) is the umbrella clinical term. Common causes include:
- Secondary bacterial infection from chronic licking
- Yeast overgrowth in skin folds between toes
- Fungal infections (ringworm can affect paws)
- Demodectic mange (mite overgrowth)
Pododermatitis does not resolve without treatment. Antibiotics, antifungal medication, or both are typically required.
5. Interdigital furunculosis
This is one of the most commonly missed causes of recurring paw swelling. Interdigital furunculosis occurs when hair follicles between the toes become infected, forming painful reddish-purple nodules that may rupture and drain.
AKC notes that the condition is especially prevalent in short-coated, heavyset breeds: Bulldogs, Labrador Retrievers, and Chinese Shar-Pei are among the most commonly affected. Chronic licking due to allergies is a major driver.
Signs: swollen, painful nodules between the toes, draining tracts, recurrent swelling in the same location.
For how furuncles between the toes connect to abscess formation, see abscess as a cause of limb swelling.
6. Allergic reaction and pododermatitis
Environmental allergens (pollen, grass, lawn chemicals, road salt) and food allergies frequently cause paw inflammation. Dogs with allergies lick their feet chronically, creating secondary infection on top of the allergic reaction.
Wakefield Pet Vet: "Allergic reactions typically cause itching, redness, and sometimes blistering between the toes or on paw pads."
Allergic paw swelling usually affects multiple paws. It tends to recur seasonally or after contact with the trigger substance. Dogs with seasonal allergies often have their worst paw symptoms in spring and fall.
7. Bursitis
Bursae are small fluid-filled sacs that cushion joints. Repeated pressure on bony prominences, especially the elbow and hock, can cause bursitis. Affected joints may appear as soft, fluctuant swellings near a joint.
For how bursitis specifically produces foot and joint swelling, see bursitis as a common cause of foot swelling.
8. Cysts, tumors, and nail bed disease
Cysts, mast cell tumors, and subungual (under-nail) tumors can all present as localized swelling on or near the foot. Petcube notes that toenail tumors are more prevalent in large black-coated breeds such as Standard Poodles, Gordon Setters, and Schnauzers.
A lump that is growing, firm, or pigmented should always be evaluated by a vet rather than monitored at home.
For an overview of lumps that cause swelling on the legs, see lumps that can cause swelling.
Severity triage: what to do right now
Home care for mild cases
For minor swelling without infection signs:
- Keep the dog calm and limit walking
- Soak the paw in warm (not hot) water with Epsom salts for 10 minutes. PetMD recommends this as an excellent short-term measure regardless of cause.
- Gently clean any visible wound with mild soap and warm water
- Apply a cool damp cloth for 10 to 15 minutes to reduce swelling from sprains or stings
- Do not apply antibiotic ointments without vet guidance some formulations are toxic to dogs if licked
For pressure-related paw and leg swelling in dogs that rest in one position for extended periods, see pressure-related swelling in dogs.
Frequently asked questions
How do I treat my dog's swollen paw at home?
For mild swelling with no wound or discharge, rest the dog and soak the paw in warm Epsom salt water for 10 minutes. Check carefully for a foreign object or insect stinger. Do not use human antibiotic creams without vet guidance. If swelling has not reduced within 24 to 48 hours or is getting worse, contact your vet.
When should I be worried about my dog's swollen paw?
Be concerned immediately if the swelling is warm, increasing, or has discharge or odor. Call the vet the same day if your dog refuses to bear weight, if the swelling is spreading up the leg, or if there is any sign of an allergic reaction such as facial swelling or breathing difficulty.
What can I give my dog for a swollen paw?
Do not give human pain medications (ibuprofen, acetaminophen, aspirin) to dogs; many are toxic. For minor swelling, warm Epsom salt soaks are safe and effective for short-term relief. Your vet can prescribe appropriate anti-inflammatory medication if needed after examining the paw.
My dog's foot was normal this morning and is swollen now. What happened?
Sudden single-paw swelling most often means an insect sting, a foreign object picked up during activity, or a minor sprain. Check each toe carefully for a stinger, thorn, or visible wound. If swelling is mild and localized, monitor for 24 hours. If increasing or painful, call the vet the same day.
Can swelling in a dog's foot go away on its own?
Minor swelling from a bee sting or small sprain typically resolves within 24 to 48 hours with rest. Infections, foreign objects, interdigital furunculosis, and bursitis do not resolve without treatment. If swelling has not improved within 48 hours, veterinary assessment is needed.
My dog's foot smells bad and is swollen. Is that serious?
Yes. Odor from a swollen paw strongly indicates infection. A foul smell means bacteria are actively present. Common sources include interdigital furunculosis, a nail bed infection, or an abscess. This requires prompt veterinary treatment and should not be left to resolve on its own.
Resources
- PetMD. Dogs Swollen Paws: Causes and Treatments. petmd.com
- VCA Animal Hospitals. First Aid for Limping Dogs. vcahospitals.com
- AKC. Pododermatitis on Dog Paw: Causes, Symptoms and Treatment. akc.org
- SpectrumCare. Paw Swelling in Dogs. spectrumcare.pet
- Dyer Animal Clinic. Reasons Your Dog's Paw is Swollen. dyeranimalclinic.com
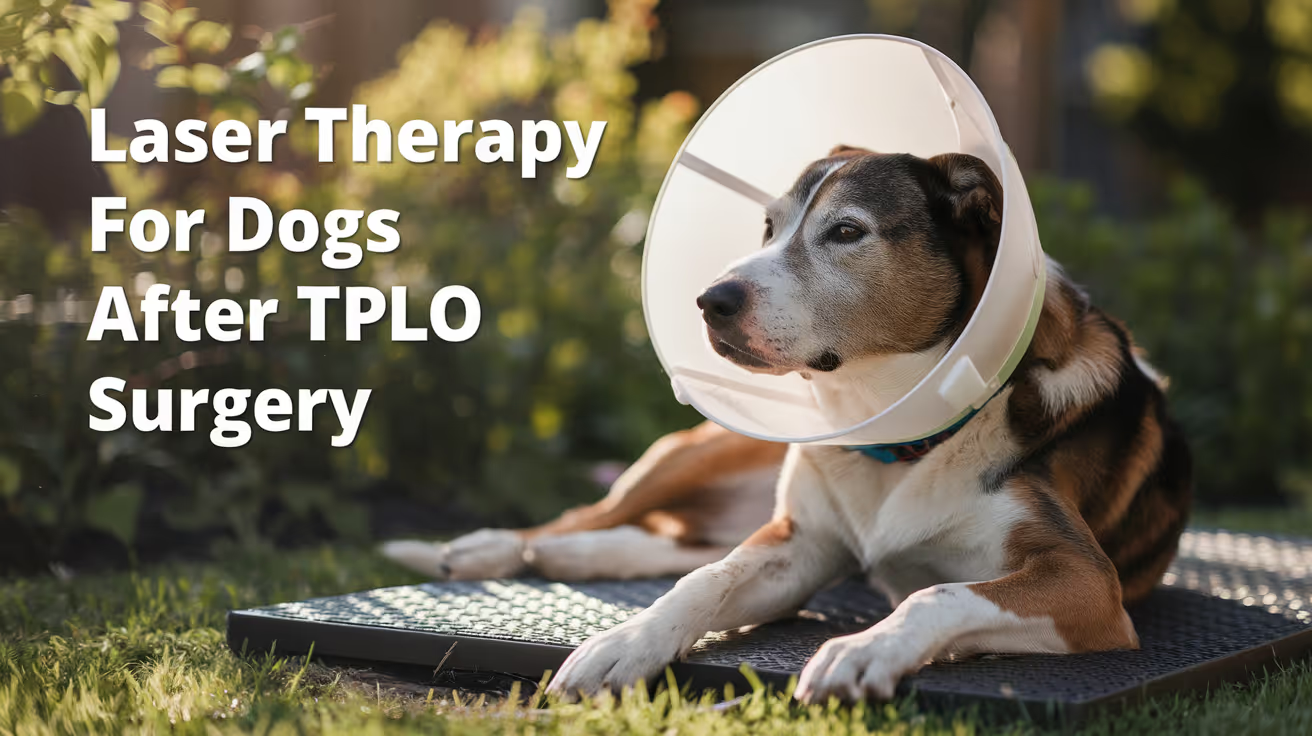
Laser Therapy for Dogs After TPLO Surgery
Learn how laser therapy helps dogs recover faster and with less pain after TPLO surgery for cruciate ligament repair.
Laser therapy also called photobiomodulation (PBMT) or low-level laser therapy (LLLT) is one of the most commonly offered adjunct treatments during TPLO recovery. Many specialist and rehabilitation centres include it routinely.
But the evidence for its benefits is more nuanced than the marketing suggests, and owners deserve an honest picture of what it does and does not reliably achieve.
Quick answer: Laser therapy after TPLO uses specific light wavelengths to reduce inflammation and support tissue healing. Evidence for early pain reduction is moderately supported; evidence for improved radiographic bone healing is weak. It is a safe adjunct but should not replace rehabilitation exercises, pain medication, or activity restriction.
Key takeaways
- Laser therapy reduces postoperative inflammation and may improve gait scores: a TPLO study found better hindlimb function at 8 weeks in treated dogs
- Evidence for improving radiographic bone healing is weak: three controlled studies found no statistically significant difference in healing time
- The 2024 AVMA randomized trial found no significant difference in CRP, weight bearing, pain scores, or SSI rates between PBMT and sham groups
- Sessions typically begin within the first few days of surgery and continue through the rehabilitation phase
- Laser therapy is safe with few contraindications: avoid eyes and active tumour sites; safe over the TPLO incision once closed
- It works best as part of a multimodal plan: exercise therapy and pain medication carry stronger evidence than laser alone
What laser therapy does
Laser therapy for dogs, also known as photobiomodulation, involves using specific wavelengths of light to penetrate tissues and promote cellular regeneration and healing. The laser light stimulates the production of ATP (adenosine triphosphate), enhancing cell repair and growth, reducing inflammation, and increasing blood circulation.
Photobiomodulation therapy has been shown to decrease inflammation, and increase analgesia, vascularization, and tissue healing after musculoskeletal injury or surgery.
The mechanism is photochemical: light energy at specific wavelengths (typically 630 to 980 nm) is absorbed by mitochondria.
This increases ATP production, modulates reactive oxygen species, and influences gene expression related to inflammation and healing.
The effects are local confined to the tissue depth the light reaches.
For post-TPLO use, the targets are: the surgical incision, the osteotomy site in the proximal tibia, and the surrounding periarticular soft tissues.
What the clinical evidence shows
Pain and function
Research following TPLO surgery showed that dogs receiving LLLT had better hindlimb function and gait scores at 8 weeks compared to controls. This is especially valuable in orthopedic recovery, where early weight-bearing can prevent muscle atrophy and joint stiffness.
In a controlled veterinary study, dogs with surgical incisions treated with laser therapy exhibited significantly less inflammatory cell infiltration and tissue necrosis within the first week post-op compared to untreated controls.
The 2024 randomized trial
54 client-owned dogs with CCL rupture undergoing unilateral TPLO surgery were enrolled. The study population was randomly assigned to either a treatment group receiving PBMT (24 dogs) or a control group (30 dogs). PBMT was performed immediately after induction, and at 6 hours, 24 hours, 48 hours, and 8 weeks postoperatively. Evaluation of CRP, pain scores, evidence of SSI, and percentage weight bearing were assessed at all time points.
The trial found the therapy showed promise but no statistically significant difference between groups on any primary outcome measure.
Bone healing
Three studies compared LLLT to a control and concluded that LLLT treatment did not make a significant difference in improving radiographic bone healing. The studies collectively provide weak evidence for this outcome.
This is an important distinction: laser therapy may support soft tissue healing, pain, and early function but it does not appear to accelerate the osteotomy healing visible on radiographs.
When to start and how often
Laser therapy uses focused light energy on the surgical site to support healing.
Most rehabilitation programmes begin laser therapy within the first 1 to 3 days after TPLO surgery, often at the surgical centre before discharge or at the first rehabilitation visit.
Typical post-TPLO laser protocol:
- Frequency: 3 to 5 sessions per week in the first 2 to 3 weeks
- Frequency: 1 to 2 sessions per week from weeks 3 to 8
- Session duration: 5 to 15 minutes depending on the laser system and dosing protocol
- Total sessions: typically 6 to 12 in the first 8-week recovery phase
The protocol varies by laser system, power output, and the individual patient's response.
Realistic expectations
Laser therapy is a useful adjunct in TPLO recovery. It is not a substitute for the treatments with stronger evidence: pain medication, activity restriction, and structured rehabilitation exercises.
Laser therapy could be particularly helpful for dogs with weight-bearing and gait issues while recovering from TPLO surgery after a cruciate injury.
Dogs with significant early swelling, wound sensitivity, or slow initial weight-bearing progress may benefit most. Dogs recovering well with standard multimodal analgesia and rehabilitation may show less measurable difference.
For the bone healing timeline that laser therapy supports during recovery, see TPLO bone healing time in dogs explained.
For the full recovery plan that laser therapy fits into, see 10 essential TPLO recovery tips for pet owners.
For the physical therapy that is the primary evidence-based adjunct, see when to start physical therapy after TPLO surgery.
For swelling management in the recovery period, see how long does swelling last after TPLO surgery.
Frequently asked questions
Is laser therapy safe over the TPLO incision?
Yes, once the incision is closed. Laser therapy is safe over sutured incisions and can be applied at the surgical site from the first post-operative day in most protocols.
Avoid direct application over open wounds or actively infected tissue.
How many laser sessions does a dog need after TPLO?
Typically 6 to 12 sessions across the first 8 weeks.
Start at 3 to 5 sessions per week for the first 2 to 3 weeks, tapering to 1 to 2 per week through the rehabilitation phase.
The exact protocol depends on the laser system and rehabilitation plan.
Does laser therapy replace pain medication after TPLO?
No. Laser therapy is an adjunct to pharmaceutical pain management, not a replacement. Post-TPLO pain management requires NSAIDs, and often gabapentin or other analgesics.
Laser therapy may reduce the pain burden and support earlier mobility but does not provide sufficient analgesia on its own.
Can I do laser therapy at home with a consumer device?
Consumer-grade red light therapy devices exist but operate at lower power densities than veterinary therapeutic lasers. The clinical evidence discussed in this article relates to veterinary-grade PBMT devices.
Home devices may offer some benefit but cannot replicate the dosing of professional equipment. Discuss with your rehabilitation veterinarian before purchasing.
Will laser therapy prevent my dog from needing more medication?
Possibly. If laser therapy reduces post-operative inflammation and pain, some dogs may need lower doses of pain medication or taper off sooner.
This should be guided by your veterinarian based on your dog's individual recovery trajectory.
Resources
- AVMA Journal. Photobiomodulation Therapy in Dogs Undergoing TPLO After Cranial Cruciate Ligament Rupture. avmajournals.avma.org
- Veterinary Evidence. Does LLLT Improve Radiographic Healing for Dogs with CCL Rupture Undergoing TPLO Surgery? veterinaryevidence.org
- AKC. Laser Therapy For Dogs: Uses, Side Effects, and Alternatives. akc.org
- Erchonia. Laser Therapy for Post-Surgical Recovery in Pets. erchonia.com
All Articles
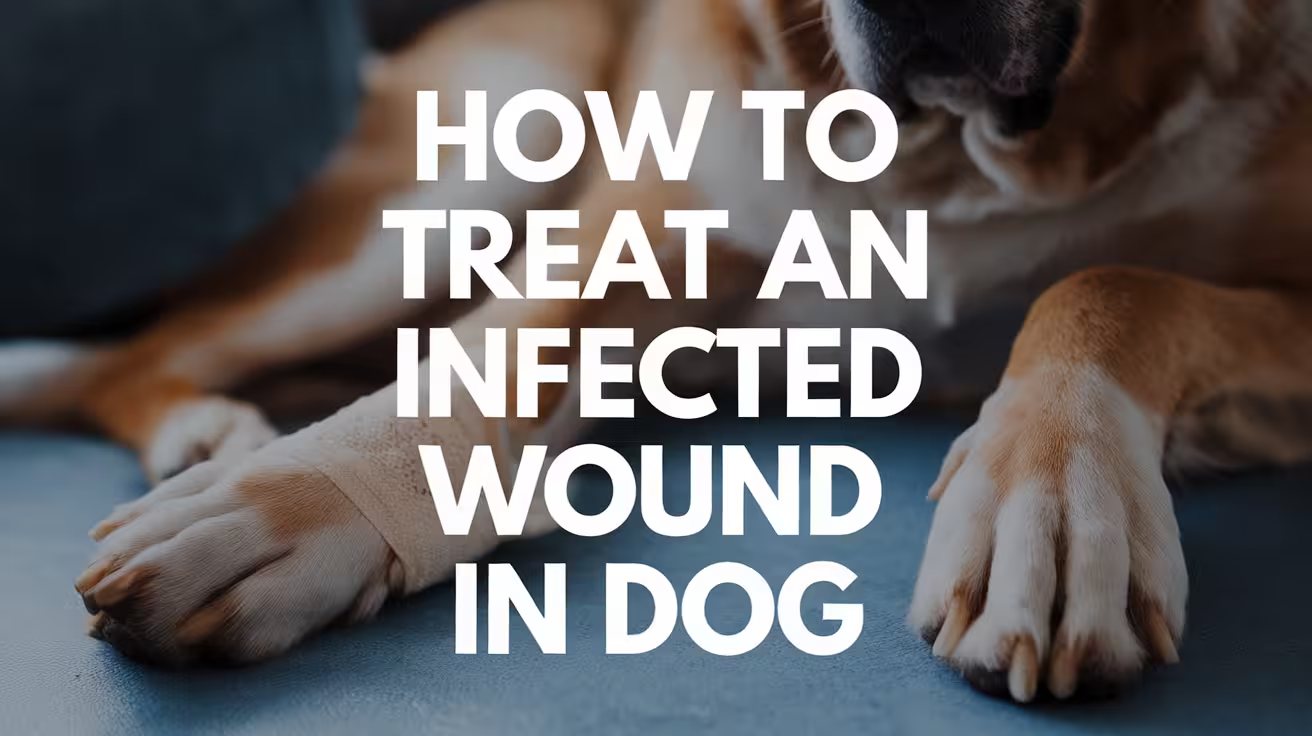
How to Treat an Infected Wound in Dog
Learn how to treat an infected wound in your dog with safe home care tips, signs to watch for, and when to see the vet
Treating an infected wound in a dog is not simply a matter of cleaning and waiting. The right approach depends on how deep the infection is, what type of wound you are dealing with, and whether the infection has moved beyond the wound surface.
Getting this wrong, using the wrong products, delaying veterinary care, or allowing your dog to lick the wound, can turn a manageable infection into a serious one quickly.
Quick answer: Minor surface infections can be managed at home with saline cleaning, vet-approved antiseptic, and strict licking prevention. Deeper infections, wounds showing pus or spreading redness, bites and puncture wounds, and any wound accompanied by systemic signs like fever or lethargy require veterinary treatment. Antibiotics are usually required to fully clear a bacterial wound infection.
Key takeaways
- Not all infected wounds can or should be treated at home: Depth of infection, wound type, and systemic signs determine whether veterinary care is needed.
- Never use hydrogen peroxide, alcohol, or undiluted iodine on wounds: These damage healthy tissue and delay healing. Saline is the safest cleaning solution.
- Antibiotics are often necessary: Most bacterial wound infections cannot be cleared with antiseptics alone, particularly if infection has penetrated beyond the surface.
- Licking prevention is non-negotiable: A dog that can reach the wound will re-contaminate it constantly. An E-collar or recovery suit must be used.
- Bite wounds and puncture wounds need same-day veterinary care: They push bacteria deep under the skin, where surface cleaning cannot reach.
- Treatment antibiotic courses must be completed in full: Stopping antibiotics early risks incomplete treatment and antimicrobial resistance development.
Step 1: Assess the wound before doing anything
Before touching the wound, decide whether it is something you can manage at home or whether your dog needs to see a vet first.
Wounds that require same-day veterinary care:
- Bite wounds from another animal, regardless of size
- Puncture wounds, which can carry bacteria deep under intact-looking skin
- Wounds with significant pus or thick colored discharge
- Wounds with spreading redness or red streaks
- Wounds that are deep, gaping, or over a joint
- Wounds accompanied by systemic signs: lethargy, fever, reduced appetite, shivering
- Wounds that have been present for more than 24 hours without being assessed
Wounds that may be appropriate for initial home care:
- Minor surface scrapes with mild early redness and no discharge
- Wounds you have already had veterinarily assessed and been instructed to care for at home
For a clear picture of how to identify infection before treating, the comparison of healthy versus infected wound appearance will help you assess correctly before proceeding.
Step 2: Gather the right supplies
Using the wrong products on a wound is one of the most common owner mistakes and can significantly delay healing.
Safe to use:
- Sterile saline solution or saline wound wash
- Vet-approved wound antiseptic (chlorhexidine diluted to 0.05%, or povidone-iodine diluted to 0.1% in saline, following your vet's instructions)
- Clean gauze or non-stick wound pads
- Medical-grade wound ointment as directed by your vet
- Disposable gloves
- Blunt-tipped scissors to trim fur around the wound if needed
Never use on dog wounds:
- Hydrogen peroxide: destroys healthy cells and significantly delays healing
- Isopropyl or rubbing alcohol: causes pain and tissue damage
- Undiluted iodine or Betadine at full concentration: too strong, causes chemical burns
- Human antiseptic creams (e.g. Neosporin): some contain ingredients harmful to dogs, particularly if licked
Step 3: Clean the wound
Wash your hands thoroughly and put on disposable gloves before touching the wound.
Cleaning steps:
- Gently restrain your dog with a calm voice and, if needed, a second person to help
- If fur is obscuring the wound, carefully trim it back with blunt scissors, removing any hair that has fallen into the wound with gauze
- Irrigate the wound with saline: use a syringe to gently flush the wound surface with saline under mild pressure. This removes debris and surface bacteria more effectively than dabbing
- If your vet has recommended a dilute antiseptic, apply it after saline irrigation as directed
- Pat dry gently with clean gauze
- Do not scrub: scrubbing removes fragile healing tissue and drives bacteria deeper
Clean the wound two to three times daily while active infection is present, or as your vet directs.
Step 4: Prevent licking and chewing
This step is not optional. A dog that can reach the wound will lick it repeatedly, re-contaminating it with oral bacteria and mechanically disrupting healing tissue.
A dog's tongue is abrasive and their saliva contains significant bacterial loads, including pathogens that can worsen wound infections. The idea that dog saliva has antibacterial properties that help wound healing is a myth. Licking worsens infections.
Effective prevention methods:
- Elizabethan collar (E-collar): The most reliable option. Must extend past the dog's nose by at least two inches to be effective. Keep it on at all times, including overnight.
- Recovery suit or surgical body suit: Can be effective for abdominal or trunk wounds. Must fully cover the wound without rubbing.
- Soft recovery collar: More comfortable than rigid cones, tolerated better by some dogs. Confirm it actually prevents access to the wound site.
Whichever method you use, check regularly that the wound has not been accessed. Even determined dogs will find angles if the barrier is insufficient.
Step 5: Apply wound care products as directed
If your veterinarian has prescribed a topical antibiotic or wound treatment, apply it exactly as instructed after cleaning.
Do not apply human antibiotic ointments without veterinary direction. Some ingredients (particularly zinc oxide) are toxic to dogs if ingested, and dogs will lick off almost anything applied to their skin.
Medical-grade honey (Manuka honey) is one of the few over-the-counter products with genuine evidence for antibacterial wound effects in veterinary settings. Some vets recommend it for specific wound types. Do not use raw grocery store honey, which does not have the same properties.
For a full breakdown of safe versus unsafe natural treatment methods, including what the evidence actually supports and which common remedies cause harm, that guide covers every category clearly.
Step 6: Cover the wound if appropriate
Not all wounds need covering. Your vet will guide this.
Wounds that benefit from coverage:
- Wounds in areas that contact dirt or debris (paws, legs)
- Wounds actively discharging where a barrier reduces contamination spread
- Wounds your dog can access even with an E-collar in some positions
Wounds often left open:
- Clean wounds with good drainage
- Wounds that heal better when exposed to air
If covering the wound, use non-adhesive wound pads secured with medical tape. Change the covering and clean the wound underneath daily or as your vet directs. Bandaging a limb or tail incorrectly can cut off circulation, so if in doubt, seek veterinary guidance before bandaging these areas.
When systemic antibiotics are needed
Surface cleaning and antiseptics address bacteria on the wound surface. They cannot reach bacteria that have penetrated into deeper tissue layers, and they cannot address a spreading infection.
Oral antibiotics prescribed by a veterinarian are required when:
- The infection involves discharge, odor, or spreading redness
- The wound is a bite or puncture wound (bacteria are already deep)
- There are systemic signs such as fever or lethargy
- The wound has not improved after 24 to 48 hours of appropriate home care
Antibiotic treatment courses for wound infections:
Surface infections typically require at least three weeks of antibiotics. Deeper infections may need four to eight weeks or longer. Completing the full course is essential. Stopping antibiotics early when the wound looks better does not mean the infection has fully cleared, and incomplete courses contribute to antimicrobial resistance.
For understanding stages of healing to track during treatment, knowing what to expect as the wound responds to treatment helps you monitor accurately.
If your dog is prescribed antibiotics, ask your vet whether a culture and sensitivity test is appropriate, particularly for wounds that are not responding to initial treatment. This identifies the specific bacteria involved and confirms which antibiotic will be effective against it.
Treating infected surgical incisions
Infected surgical incisions, including spay and neuter incisions, require specific care that differs from general wound management.
The primary differences:
- Surgical incisions have sutures or staples that can act as a nidus for bacteria if the infection develops around them
- Incision dehiscence (wound reopening) is a risk with infected surgical sites
- The surgical site may involve deeper tissue layers that need systemic treatment even when the surface looks manageable
For guidance on treating infected surgical incisions, including suture-site infections, dehiscence risk, and when systemic treatment is needed even when the surface looks manageable, consult your veterinarian for a wound-specific protocol.
Where bacterial contamination of a surgical wound is a concern, some specialist veterinary surgeons use intraoperative antiseptic lavage to reduce bacterial load at the time of closure. Simini Protect Lavage is one such option, an antiseptic lavage used at the conclusion of surgery to reduce bacteria, biofilms, and resistant organisms in the wound before it is sutured.
Treatment by wound type
Monitoring during treatment
Once treatment is underway, assess the wound at every cleaning session.
Signs the wound is responding:
- Redness reducing day by day
- Discharge decreasing in volume and becoming clearer
- Odor diminishing
- Your dog less sensitive at the wound site
- Wound edges closing
Signs requiring veterinary re-evaluation:
- No improvement after 48 hours of treatment
- Discharge increasing or becoming more purulent
- Spreading redness or new red streaks
- New swelling or fluctuant (fluid-filled) areas developing
- Your dog's systemic condition worsening
For guidance on treating infected surgical incisions specifically, including suture-site infection, dehiscence risk, and the distinct management steps for post-operative wounds, that guide covers surgical site infection in full.
During every monitoring session, note whether the wound looks better, the same, or worse than the previous check. The trend over 48 to 72 hours is more informative than any single observation. Keep a brief written log with dates if the wound is complex or slow-progressing, so you can accurately describe the trajectory to your veterinarian if a recheck is needed. A photo taken at each cleaning session is also useful for tracking subtle changes in redness, swelling, and discharge volume.
Licking behavior during the monitoring window is one of the most common reasons wound treatment fails. Dogs are persistent and will access wounds the moment supervision lapses.
For context on why preventing licking is essential during treatment and what actually happens when a dog reaches a wound, that guide covers the mechanism and consequences in detail.
Frequently asked questions
Can I treat my dog's infected wound at home without a vet?
Minor surface infections caught very early may respond to home cleaning and licking prevention. However, most infected dog wounds, particularly those with visible pus, spreading redness, odor, or systemic signs, require veterinary care and prescription antibiotics. When in doubt, contact your vet. A short phone call to describe what you are seeing can guide you on whether to come in.
What is the best thing to clean an infected dog wound with?
Sterile saline solution, used to irrigate the wound, is the safest and most appropriate cleaning agent for home wound care. If your vet has recommended a dilute antiseptic, use exactly the dilution specified. Never use hydrogen peroxide, alcohol, or undiluted iodine.
How long does it take for an infected dog wound to heal?
With appropriate treatment, mild surface infections typically improve noticeably within three to five days. Deeper infections take considerably longer, and antibiotic courses for deep wound infections may run four to eight weeks. The wound continues healing after infection clears, with scarring and tissue remodeling taking weeks to months depending on severity.
My dog keeps removing the E-collar. What can I do?
Some dogs tolerate soft recovery collars better than rigid plastic cones. Recovery suits or surgical onesies work well for abdominal wounds. The collar must extend past the dog's nose by at least two inches, which is the most common fitting error. If your dog is genuinely distressed by any barrier, discuss this with your vet, who may have additional recommendations.
Can a dog's infected wound heal without antibiotics?
Very minor surface infections may resolve with wound cleaning and licking prevention alone, particularly if caught extremely early. Most established infections require prescription antibiotics to fully clear. The risk of attempting to manage an infected wound without veterinary assessment is that deeper infection can develop out of sight, and by the time it becomes clearly apparent, it is more difficult and expensive to treat.
Treating an infected wound in a dog requires the right products, the right approach, and a realistic understanding of what home care can and cannot achieve. When in doubt, call your vet. Early professional intervention consistently produces faster, simpler, and less expensive outcomes than delayed care.
Resources
The following sources were used as reference and background for this article:
- PetMD. Dog Wound Care: How to Clean and Treat Dog Wounds at Home. petmd.com
- Bond Vet. Step-By-Step Wound Care for a Dog at Home and When to Call the Vet. bondvet.com
- UrgentVet. Dog Wound Care: How to Care For Open Wounds on Dogs. urgentvet.com
- Mahopac Veterinary Center. Dog Wound Care and Healing Stages. mahopacvet.com
- PetPlace. Infected Dog Wound: Signs, Healing Stages, and Home Care Tips. petplace.com
- PDSA. First Aid for Wounds, Cuts and Grazes. pdsa.org.uk
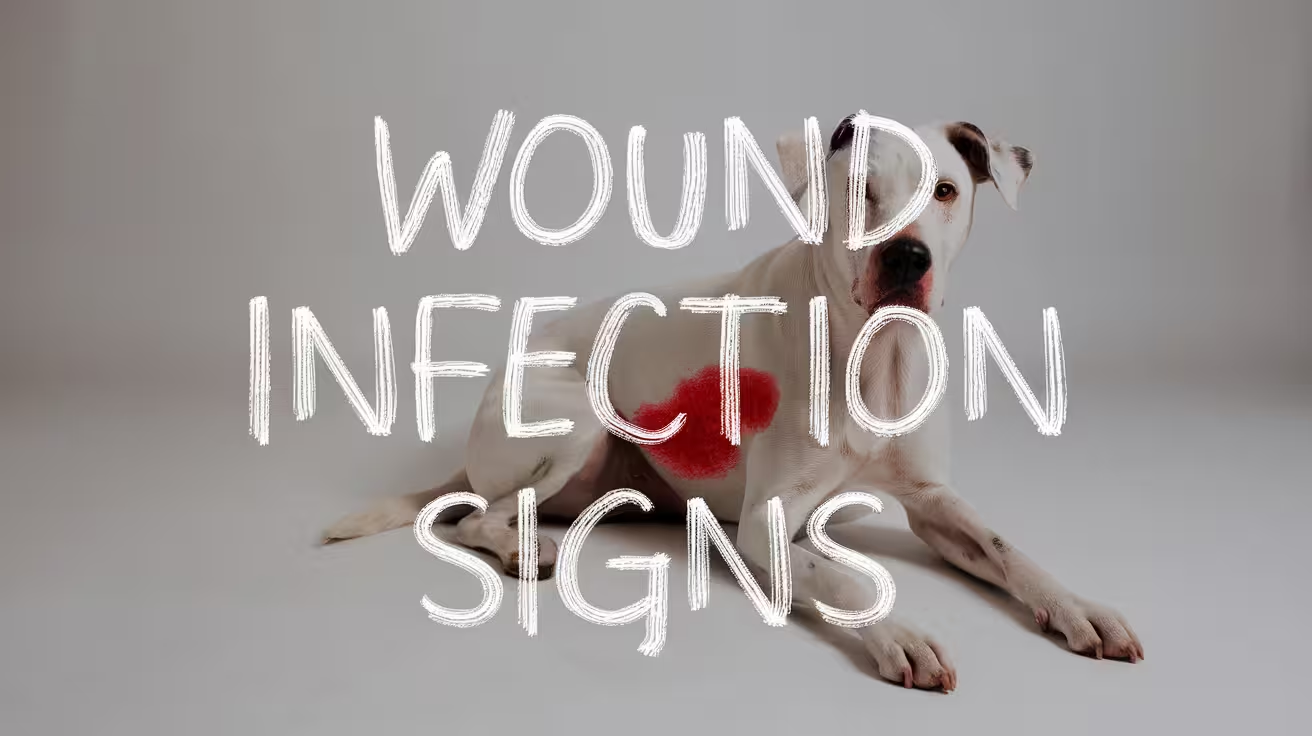
Dog Wound Infection Signs: How to Spot Early
Learn the early and serious signs of dog wound infection. Spot redness, swelling, discharge, and more before it gets worse
A healing wound and an infected wound can look remarkably similar in the first 48 hours. The difference emerges in what happens next: the healing wound improves every day, and the infected wound doesn't.
Knowing each sign, what it means, and which combination warrants urgent action is what separates a caught-early, treated-simply infection from one that escalates.
Quick answer: Signs of wound infection in dogs include redness spreading beyond the wound margin, yellow or green discharge, foul odor, increasing warmth or swelling after day 3, wound edges separating, and the dog becoming increasingly focused on the wound. Systemic signs (fever above 103°F, lethargy, appetite loss) indicate the infection is spreading and require same-day veterinary assessment. Mild redness and clear fluid in the first 48 hours are normal healing, not infection.
Key takeaways
- Mild redness and clear fluid in the first 48 hours are normal healing, not infection.
- Redness spreading outward from the wound margin after day 3 is the earliest reliable visual infection sign.
- Yellow, green, or cloudy discharge is always abnormal at any stage of healing.
- Foul odor at any stage is a red flag regardless of other signs.
- Fever above 103°F combined with wound changes requires same-day emergency assessment.
- Daily photos of the wound are the most practical monitoring tool for detecting change.
The seven infection signs explained
Sign 1: Redness spreading beyond the wound margin
Normal: mild pink or red color directly at the wound edge, fading within 3 to 5 days.
Infection: redness expanding outward from the wound boundary into surrounding skin. The infected tissue may have a brighter, "angrier" red appearance compared to normal healing pink. In more advanced cases, redness may extend centimeters from the wound or appear as red streaks tracking along the skin (lymphangitis, a sign of spreading bacterial infection requiring urgent care).
The Pet Vet: "Infected wounds often develop a hot, angry-looking halo of inflammation around them. If it grows or moves outward from the wound, it may signal infection."
Sign 2: Discharge character and color
This is one of the most diagnostic signs. Discharge character tells you a great deal about what's happening in the wound.
The Pet Vet: "Thick, yellow, green, or foul-smelling discharge is a classic sign of bacterial infection. Clear or slightly cloudy fluid in the first day or two is often normal."
Sign 3: Foul odor
A healing wound has minimal odor. Any wound that develops a noticeable smell, whether sour, sweet-rotten, or foul, has bacteria producing metabolic byproducts in the tissue.
Odor alone, even with an otherwise clean-looking wound, warrants a vet call. The odor often precedes visible discharge or color changes.
Sign 4: Increasing warmth or heat
All fresh wounds are slightly warm because of inflammation. In normal healing, wound-site warmth decreases over the first 3 to 5 days.
Infection signal: the wound becomes warmer over time rather than cooler. The skin around the wound feels noticeably hot compared to adjacent tissue.
The Kainer Veterinary Hospital: "A healing wound should appear pink or light red, indicating healthy tissue regeneration. Dark or black coloring could indicate dead tissue, while yellow or greenish discharge may suggest infection."
Sign 5: Swelling increasing after day 3
Post-operative or wound-related swelling peaks in the first 24 to 72 hours and then begins to decline.
Infection signal: swelling that increases after day 3, or swelling that returned after an initial decrease. Infected tissue fluid is different from inflammatory edema: it may feel firmer, and the skin over it may appear tense or shiny.
Cuddlytails: "If it's after hours, ask about emergency clinic options or try a telehealth consultation... Seek emergency care for heavy bleeding, strong odor, significant wound opening."
Sign 6: Wound edges separating (dehiscence)
A closed wound should stay closed. Wound edges separating, even partially, indicating that either healing tissue isn't strong enough to maintain closure (often because infection has damaged it) or physical forces (licking, activity) have pulled the edges apart.
Any dehiscence warrants same-day vet contact. Small gaps may be monitored; gaps over a quarter inch, tissue visible beneath the wound, or any dehiscence with concurrent discharge requires urgent care.
Sign 7: Dog behavior around the wound
Dogs with infected wounds often signal the problem through behavior before visual signs become obvious.
Behavioral signs of infection:
- Constant or increased licking, biting, or pawing at the wound site
- Vocalizing or flinching when the wound area is touched
- Guarding the wound (refusing to let the area be examined)
- Restlessness or inability to settle comfortably
- Reduced activity beyond what's expected from normal post-procedure recovery
The SustainableVet wound signs resource: "Stop if you see pus, deep gaps, bleeding that won't stop, or red streaks on the skin. In any of these cases, call your vet immediately."
Systemic signs: infection spreading beyond the wound
When bacteria enter the bloodstream or spread beyond the local wound, the dog shows systemic signs alongside the wound changes.
Systemic infection signs:
- Fever above 103°F (39.4°C): measure with with rectal thermometer for accuracy
- Significant lethargy unrelated to pain medication
- Loss of appetite beyond 48 hours post-surgery or injury
- Vomiting or gastrointestinal upset
- Rapid breathing or elevated heart rate
In orthopedic cases specifically:
- Lameness returning or worsening after an initial period of improvement
- Non-weight-bearing on the operated limb
Any systemic signs combined with wound changes require same-day veterinary assessment or emergency care.
For how post-surgical infections develop and when they typically appear, see post-op infection timeline.
How to examine a wound at home
SustainableVet wound examination guidance: "Start by calming your dog with a soft voice or treats. Wash your hands, then gently part the fur around the wound. Look for redness, swelling, discharge, or bad odor. Use clean gauze or tissue: never touch the wound directly with bare hands."
The home examination checklist:
- Wash hands before touching anything near the wound
- Gently move fur aside to see the full wound area
- Check the wound edges: are they together or separating?
- Assess redness: is it at the wound edge only, or spreading?
- Check for discharge: what color, how much?
- Note any odor when you're close to the wound
- Check the surrounding skin: is it warm or hot to the touch?
- Observe your dog's reaction: do they react to gentle pressure near the wound?
What not to do:
- Don't apply hydrogen peroxide or alcohol (damages healing tissue)
- Don't press or squeeze the wound to assess if it's infected
- Don't attempt to remove crusts or discharge without vet guidance
- Don't apply human antibiotic ointments without veterinary approval
For the broader context of healing vs. infection distinctions, see healing vs infection explained. For what's normal after surgery vs. what's concerning, see normal vs concerning signs after surgery.
When to call the vet: urgency tiers
Same-day call (not emergency, but don't wait)
- Redness spreading beyond wound margin
- Yellow or green discharge at any stage
- Foul odor from wound site
- Wound edges separating more than a few millimeters
- Swelling increasing after day 3
- Dog showing increased pain or guarding the wound
Emergency (go now, don't wait for morning)
- Red streaks radiating from the wound (lymphangitis)
- Wound significantly opened with visible underlying tissue
- Fever and severe lethargy together
- Bleeding not stopping within 5 minutes
- Dog collapsed or unable to stand
- Rapid spreading redness across a large skin area
- Signs of sepsis (fever, lethargy, vomiting, weakness together)
For early-stage staph infection signs specifically, see early staph infection signs. For ways to prevent wound infections from developing, see preventing wound infections.
Frequently asked questions
The wound looks fine but my dog keeps licking it obsessively. Should I be concerned?
Yes. Dogs often detect infection before the visual signs appear. Their licking behavior is driven partly by the smell and sensation of the wound, which changes with bacterial activity before pus or visible discharge appears. If licking is increasing rather than decreasing as healing progresses, treat it as an early signal and do a close examination. Consider calling your vet if other signs are present.
Is there any discharge from a wound that's always an emergency?
Red streaks radiating from the wound site (lymphangitis) paired with any discharge are a veterinary emergency. Otherwise, the color and character of discharge guide urgency: clear is normal, cloudy warrants a same-day call, yellow or green warrants same-day urgent assessment, and any discharge combined with systemic signs (fever, lethargy) warrants emergency care.
My dog's wound has a scab on it. Is that healing or infection?
A dry, brown scab that is stable and shrinking is a healing sign. A moist, yellow-crusted surface that has discharge underneath it, or a crust that is expanding rather than resolving, is an infected wound sign. Gently check what the skin looks like under the crust if your dog will allow it: pink, dry skin underneath means healing; moist, reddened, or oozing skin underneath means assess for infection.
Wound infection signs follow a recognizable pattern. The first three days are the window of normal inflammatory healing. After that, every wound should be improving, not worsening. Redness fading, discharge clearing, swelling reducing: that's healing. Redness spreading, discharge thickening, swelling growing: that's infection. Acting on the pattern, not on any single sign in isolation, gets you the right response at the right time.
Resources
- The Pet Vet. Pet Wound Infection Signs: 7 Critical Symptoms to Watch. thepetvet.com
- Cuddlytails. Dog Surgical Wound Looks Infected? Signs, Treatment, and When to See a Vet. cuddlytails.com
- Kainer Veterinary Hospital. Understanding the Stages of Your Dog's Infected Wound Healing. kainervet.com
- PetMD. Dog Surgery Aftercare: What's Normal & When To Call the Vet. petmd.com
MRSP Treatment Guidelines for Vets (2025 Update)
Learn the latest MRSP treatment guidelines for vets—diagnosis, antibiotics, topical care, and infection control, all in one practical guide
MRSP management requires a structured decision framework, not a reflexive antibiotic prescription. The ISCAID 2025 guidelines for canine pyoderma, combined with established DVM360 surgical wound infection protocols and core antimicrobial stewardship principles, provide that framework.
This is a clinical reference covering the key decision points: when to culture, which drugs to use and avoid, how long to treat, and how to prevent clinic transmission.
Quick summary: ISCAID 2025 recommends cytology before antibiotics in all cases; topical antimicrobial therapy alone for surface and superficial pyoderma; systemic antibiotics reserved for deep pyoderma and failed topical response. Bacterial culture and sensitivity (BC/AST) is required before systemic therapy whenever MRSP is suspected or resistance risk is elevated. Vancomycin and linezolid should not be used in veterinary settings.
Diagnostic framework
Cytology: first step in all cases
ISCAID 2025 (PMC12058580): "Cytology should be performed in all cases before antimicrobials are used."
Cytology confirms:
- Presence of cocci or rods (guides antibiotic class expectations)
- Inflammatory cell pattern (neutrophilic = bacterial; mixed = consider other causes)
- Yeast co-infection requiring concurrent antifungal management
- Correct interpretation of culture results (cytology and culture should be paired)
When to submit for BC/AST
ISCAID 2025 states BC/AST is "always strongly recommended" when:
- There is a history of recent or frequent antimicrobial use
- MRSP, MRSA, or MRSC has been isolated previously from this patient
- The infection is deep pyoderma or severe
- The infection has failed to respond to empirical first-choice therapy
- The clinic or region has a high local prevalence of methicillin resistance
ISCAID additionally states: "BC/AST is never contraindicated."
Practical guidance from SASH Vets: "After a positive MRSP culture, this patient, and optimally other pets in this household, will need C&S testing to guide use of systemic antibiotics for skin infections every time OR only be treated with topical therapy."
Culture technique for MRSP
- Intact pustule: highest yield; express content aseptically and swab
- Epidermal collarette: swab under the active scale edge
- Crusts: moisten and swab beneath after gentle crust removal
- Deep pyoderma: punch biopsy for macerated tissue culture; swabs are insufficient for deep infections
- Ears: swab otic exudate
- Post-culture note from DVM360: if the lab doesn't automatically test chloramphenicol, amikacin, and doxycycline, call and request they be added to the panel
Treatment framework by infection depth
Surface and superficial pyoderma: topical-first
ISCAID 2025: "Topical antimicrobial therapy alone is the treatment of choice for surface and superficial pyodermas."
First-line topical options:
Systemic antibiotics are added when:
- Topical therapy is not feasible (dog intolerant of bathing, very large surface area)
- No clinical response after 3 weeks of topical-only therapy
- Deep pyoderma is present
ISCAID: "Systemic therapy, with adjunctive topical treatment, is initially provided for 2 weeks in superficial and 3 weeks in deep pyoderma, followed by re-examination to assess progress."
Deep pyoderma: systemic antibiotics required
Systemic antibiotics are mandatory for deep pyoderma. Culture and sensitivity testing is mandatory before selection. Empirical therapy is not appropriate for deep MRSP infections.
First-choice drugs for susceptible S. pseudintermedius (ISCAID):
- Amoxicillin-clavulanate
- Cephalexin or cefpodoxime
For MRSP (all culture-guided):
SustainableVet 2025 vet guidelines note: "Fluoroquinolones should be used only if sensitivity is confirmed, as resistance can develop quickly."
Drugs to avoid in veterinary MRSP management
Beta-lactams (always ineffective):
- Amoxicillin, amoxicillin-clavulanate, cephalexin, cefpodoxime, cefovecin
- No exceptions: mecA-mediated resistance makes all beta-lactams ineffective regardless of sensitivity report labeling
Last-resort human drugs (preserve for human medicine):
- Vancomycin: last-resort glycopeptide for human MRSA; should not be used in veterinary settings
- Linezolid: oxazolidinone reserved for human last-resort use; antimicrobial stewardship rationale precludes veterinary use
SustainableVet guidelines: "Avoid using vancomycin or linezolid in veterinary settings. These are last-resort drugs for human medicine, and avoiding them supports global antimicrobial stewardship."
Treatment duration
DVM360 surgical wound guidance (Dr. Karen Tobias): "Systemic antimicrobials should be administered at least one week beyond remission of clinical disease (usually a minimum of 21 days)."
For treatment options from the owner-facing perspective, see treatment options for MRSP.
Antimicrobial stewardship principles
AAFP/AAHA stewardship guidelines endorse five core principles: commit to stewardship, prevent common diseases, select and use antimicrobials judiciously, evaluate antimicrobial use practices, and educate and build expertise.
Key stewardship actions in MRSP cases:
- Culture before every systemic course: never empirically re-prescribe after MRSP has been identified
- Topical therapy to reduce systemic antibiotic reliance: topical treatment alone resolved 65.4% of MRSP pyoderma cases in published research (PMC4204846)
- Treat only clinical infection, not carrier status: systemic antibiotics are not indicated for colonized dogs without clinical signs
- Complete the full course: incomplete courses select for resistance subpopulations
- Address the underlying disease: unmanaged atopy or endocrine disease drives perpetual antibiotic cycles
- Educate owners on hygiene, transmission risk, and the rationale for completing treatment
DVM360: "Also, teach basic hygiene practices at home, such as washing hands after handling the pet, cleaning bedding regularly, and avoiding shared items between pets."
For how resistance develops and why stewardship matters, see antibiotic resistance mechanisms.
Clinic infection control
MRSP spreads between patients via staff hands, contaminated equipment, and environmental surfaces.
Core clinic infection control protocol:
- PPE (gloves, gowns) when handling MRSP-positive animals
- Strict hand hygiene before and after each patient contact (soap and water or alcohol-based hand rub)
- Isolate MRSP-positive patients where possible; use dedicated equipment
- Disinfect exam tables, kennels, and surfaces between patients with a sporicidal or bactericidal agent
- DVM360 outbreak guidance: "If an outbreak of MRSP wound infections is detected in your hospital, evaluate your hand hygiene and surgical preparation practices."
Monitoring and re-examination
At 2 to 3 week recheck:
- Clinical progress assessment
- Cytology if new lesions are present
- Culture recheck if healing is not progressing as expected
- Compliance assessment (owner application technique, dosing)
- Identify any new resistance triggers (medication changes, new antibiotic exposures)
At treatment completion:
- Clinical resolution confirmed
- Culture recheck 2 weeks after antibiotic completion to confirm microbiological clearance
- Underlying disease management plan documented
For diagnosing MRSP before treatment begins, see diagnosis before treatment. For managing recurring cases that require ongoing intervention, see managing recurrent MRSP. For long-term outcomes and prognosis, see long-term outcomes.
Resources
- ISCAID. Antimicrobial use guidelines for canine pyoderma. Vet Dermatol, 2025. pmc.ncbi.nlm.nih.gov
- DVM360 (Dr. Karen Tobias). Surgery STAT: Managing methicillin-resistant wound infections. dvm360.com
- DVM360. Managing MRSA, MRSP, and MRSS dermatologic infections in pets. dvm360.com
- AVMA. AAFP/AAHA Antimicrobial Stewardship Guidelines. avma.org
- SASH Vets. Implications of MRSP. sashvets.com

Post-Op Home Care for Pets After Orthopedic Surgery
Learn how to care for your pet after orthopedic surgery. Tips on pain, activity, wound care, and safe recovery at home
Orthopedic surgery recovery is significantly longer and more demanding than soft tissue surgery recovery. The bone, implants, and remodeled joint need 8 to 12 weeks to reach adequate strength not 10 to 14 days. What happens at home during this period determines the outcome at least as much as what happened in the operating room.
This guide covers everything from the first hours after arriving home through the 8-week imaging recheck.
Quick answer: After orthopedic surgery, restrict activity for 8 to 12 weeks. Start 5-minute leash walks within 24 hours; increase gradually. The 8-week radiograph recheck confirms bone healing. No running, jumping, or stairs until specialist clearance.
Key takeaways
- Activity restriction for 8 to 12 weeks is non-negotiable; bone healing does not accelerate with optimism
- Short leash walks start within 24 hours of orthopedic surgery weight bearing is beneficial for bone healing
- Ice the surgical site for the first 3 to 5 days: 10 to 15 minutes, 2 to 3 times daily
- The 8-week radiograph recheck confirms bone healing; do not increase activity until imaging clears it
- TPLO has a 2 to 10% failure rate; most complications involve infection (8 to 17% of cases) or implant irritation
- Rehabilitation exercises including passive range of motion and graduated leash walking improve outcomes
Setting up the home recovery space
Orthopedic surgery patients need a confined, safe space before they arrive home.
Required:
- Crate or small room: prevents uncontrolled movement, jumping, and access to stairs
- Non-slip flooring: orthopedic surgical patients are at high risk of slipping and falling; rubber mats or yoga mats over hardwood or tile are essential
- Floor-level bedding: no couch or bed access; orthopedic bedding (memory foam or egg-crate foam) reduces pressure on the operated limb and other joints compensating for it
- Baby gates on stairs and doorways to furniture rooms
MedVet TPLO recovery guide: "Restricting activity is extremely important. This generally means confinement to a crate or small room, no jumping, no running, no stairs, no rough housing, and no playing with other dogs until recovery is well advanced."
PAW Vet Practice: "The ride home after surgery deserves more thought than it commonly receives. A large dog may need help getting into the car. Use a flat loading approach if possible. Lift with support under both the chest and hindquarters, or use a ramp."
The first 24 to 72 hours
Expect grogginess, disorientation, and significantly reduced appetite the first evening. Pain medication dispensed at discharge should be given on schedule.
Ice therapy: TPLO Info: "We advise using ice therapy directly to the incision site for the first 3 to 5 days following surgery. Icing helps to reduce inflammation and pain at surgery sites." Apply a cold pack wrapped in a thin cloth for 10 to 15 minutes, 2 to 3 times daily. Never apply ice directly to skin or the incision.
Leash walks: TPLO Info: "We recommend taking your pet for short 5-minute leash walks multiple times a day, beginning within 24 hours after surgery." This is counterintuitive for many owners, but weight bearing stimulates bone healing and maintains joint range of motion and muscle mass.
Sling support: Dogwood Veterinary Surgical Care: "A sling may be used for the first 2 to 4 weeks after orthopedic surgery until better mobility is achieved." This helps with hind-end control, slows movement, and prevents slipping particularly important on smooth floors.
Activity progression: week by week
Oakland Veterinary Referral Services: "You can anticipate that your dog will need rest and exercise restrictions for 8 to 12 weeks. This allows the incision and bone to heal and the knee function to return."
Weeks 1 to 2:
- Leash walks only; 5 minutes, 2 to 3 times daily
- No stairs, no running, no off-leash time
- Suture or staple removal recheck at day 10 to 14
- Incision checks daily (morning and evening)
Weeks 2 to 8:Dogwood Veterinary Surgical Care: "After 2 weeks (or after suture removal), gradually increase your pet's leash walks by 5 minutes each week. Do not increase walking to more than 30 minutes by week 8."
- Week 2: 10-minute walks
- Week 3: 15-minute walks
- Week 4 to 6: 20-minute walks, can begin gentle inclines/declines on leash
- Week 7 to 8: 25 to 30-minute walks as tolerated
All walks must be on leash. Dogwood: "This increase in activity should be supervised and on a leash until full function is achieved."
Week 8: radiograph recheckDogwood: "Pets with orthopedic implants and expected bone healing should have additional radiographs performed in 8 weeks from the initial surgery."
Oakland OVRS: "At 8 to 10 weeks post-operatively, your surgeon will do recheck X-rays to assess bone healing. Your dog will be able to gradually resume normal activities."
If bone healing is confirmed: controlled activity can be gradually increased. If healing is incomplete: restrictions continue and the next recheck is scheduled.
Rehabilitation exercises
TPLO Info: "Physical rehabilitation protocols benefit recovery following a TPLO. It is important to tailor a rehabilitation protocol to a specific patient, considering the pet's range of motion, strength, degree of healing, and ability to perform each exercise."
Passive range of motion (PROM): performed daily, typically from day 1 to 2 post-surgery.
Dogwood: "Please start at the toes and work up the leg performing bending and extending exercises at each joint. 10 to 15 repetitions can be performed per joint as tolerated by your pet. Please go slowly and minimize stress."
How to perform PROM:
- Position the dog lying on their side, operated limb upward
- Support the limb with both hands; one on the femur, one on the tibia
- Gently flex and extend the stifle through a comfortable range
- Do not force the joint if the dog shows pain or resistance
- 10 to 15 slow repetitions per session, 2 to 3 times daily
Leash walking: the most important rehabilitation exercise. TPLO Info: "Weight bearing is good for bone healing, maintaining range of motion in the joints of the affected limb, and maintaining muscle mass."
Water treadmill: Dogwood: "Your pet may also benefit from water treadmill therapy." Underwater treadmill allows supported weight bearing with reduced joint load excellent for pain-limited patients who need more exercise than on-land walking allows.
Oakland OVRS: "We recommend a rehabilitation program to optimize your dog's recovery. The rehabilitation facility should have experience in postoperative recovery from orthopedic injuries such as the TPLO."
At-home exercises from week 2 to 4 (if formal rehab is not available):
- Sit-to-stand exercises (5 to 10 repetitions): strengthens the quadriceps
- Slow leash walk on varied terrain: promotes proprioception
- Gentle inclines and declines on leash from week 4 onward
Incision care for orthopedic surgery patients
The incision care principles are the same as for soft tissue surgery with two additional considerations:
Implant-associated infection: infection around orthopedic implants (TPLO plate, fracture repair screws) is significantly more serious than soft tissue SSI. PAW Vet Practice cites SustainableVet's data: "TPLO has a low failure rate of 2 to 10%, and most complications relate to manageable issues such as infection, which occurs in 8 to 17% of cases, or implant irritation."
Any sign of infection near an orthopedic implant requires prompt veterinary assessment and specialist contact. Do not attempt to manage periimplant infection locally without specialist input.
E-collar compliance: orthopedic incisions are often on the limb a location dogs can reach. E-collar must be worn at all times.
Pain management
Orthopedic surgery creates more significant post-operative pain than most soft tissue procedures. Multi-modal pain management is standard:
- NSAIDs (meloxicam, carprofen, grapiprant): reduce inflammation and provide analgesia; give with food; do not skip doses
- Gabapentin: neuropathic pain component; expect additional sedation
- Tramadol or buprenorphine: for the immediate post-operative period in higher-pain patients
Signs that pain is not adequately controlled: panting at rest, inability to settle, not eating at day 2 or beyond, whimpering when the limb is touched. Call the vet for medication adjustment.
Warning signs that require a vet call
Today's Veterinary Practice: "Clinical signs include acute onset of lameness, pain on palpation of the implant, and possible bony thickening or swelling more than 1 year after surgery. Radiographic examination is indicated for patients with these clinical signs."
For the full complications guide covering what these findings mean, see post-surgical complications in referred pets. For the infection-specific guide, see dog incision infection signs causes and treatment. For the general recovery care context, see soft tissue surgery care for dogs. For when referral was appropriate, see when to refer orthopedic cases.
Frequently asked questions
My dog is already using the leg well on day 5. Can I let them off the leash?
No. Early weight bearing is expected and positive but does not indicate bone healing. Bone consolidation takes 8 to 10 weeks minimum. Off-leash activity risks implant failure or joint instability regardless of how the dog appears.
How do I know if the bone is healing correctly?
Radiographs at the 8-week recheck are the only reliable way to assess bone healing. Clinical improvement (weight bearing, reduced lameness) correlates with but does not confirm bone healing. Do not substitute clinical assessment for imaging.
My dog is still very lame at week 4. Is that normal after TPLO?
Some degree of lameness at week 4 is common, especially in large dogs. Gradual, consistent improvement is the pattern to look for. Sudden worsening, complete non-weight bearing, or no improvement at all by week 4 warrants a veterinary assessment.
Can I start swimming during the recovery period?
Open-water swimming is not permitted during the restricted activity phase. Underwater treadmill in a clinical rehabilitation setting is different and may be recommended by your vet as a controlled form of rehabilitation. Ask your vet specifically.
What is a sling and do I need one?
A sling is a soft harness under the hindquarters that partially supports the dog's weight and guides movement. Dogwood: "This helps with hind-end control and prevents slipping." Not all patients need one; ask your surgeon.
My dog had a TPLO and the opposite leg now seems lame too. What does that mean?
Contralateral limb lameness is common after TPLO. The dog shifted weight to the unaffected leg during recovery, increasing its load. Underlying CCL disease affects both legs in many dogs. Have the new lameness assessed promptly.
Resources
- MedVet. TTA and TPLO Home Recovery Guide. medvet.com
- TPLO Info. Rehab for Dogs After TPLO Surgery. tploinfo.com
- Dogwood Veterinary Surgical Care. After Care Instructions: TPLO and Fracture Repair. tplocharlotte.com
- Oakland Veterinary Referral Services. TPLO Surgery for CCL Tears: The Dog Owner's Guide. ovrs.com
- Today's Veterinary Practice. Evaluation After TPLO: A Guide for the General Practitioner. todaysveterinarypractice.com
Recognize and Manage Post-Surgical Complications in Referred Patients
Learn how to recognize and manage common post-surgical complications in referred pets with clear steps for follow-up, treatment, and communication
When a dog is discharged from a specialist after orthopedic or complex soft tissue surgery, the referring veterinarian and the owner become the first line of detection for complications. Surgeons rely on accurate observation and timely reporting from both.
Most complications after referral surgery are manageable when caught early. Missing them until they escalate is what turns a treatable problem into a crisis.
Quick answer: Common complications after referral surgery include surgical site infection, seroma, wound dehiscence, persistent pain, and behavioral changes. Implant failure, deep infection, and non-healing wounds require re-referral. Contact the surgical team promptly for anything beyond local wound care.
Key takeaways
- Referring vets are often the first to see post-surgical complications during follow-up visits and owner calls
- The discharge summary must be read in full: medication errors and missed complications often stem from incomplete review
- Suture removal rechecks begin at 10 to 14 days; orthopedic cases need imaging at 6 to 8 weeks
- Implant failure, deep infection, and non-healing wounds require re-referral rather than local management alone
- Behavioral changes (hiding, aggression, vocalizing) often signal pain before visible complications appear
- Clear documentation at every follow-up allows both the referring vet and specialist to track the case accurately
The referring vet's role after specialist discharge
SustainableVet: "The role of a referring veterinarian doesn't end when the surgery is done. The period after surgery is one of the most important times for the patient's recovery, and smooth communication between the surgical team and the referring vet is crucial."
After the specialist discharges the patient, the referring vet typically manages suture removal, post-surgical recheck examinations, medication management, client communication, and first-line detection of complications.
SustainableVet: "After the specialist performs the procedure, the referring veterinarian often monitors the patient's healing, manages medications, and supports the client with follow-up care. Without clear updates and guidance, this handoff can lead to confusion, missed issues, or delayed treatment."
Reading the discharge summary
The most preventable cause of post-referral complications is incomplete review of the discharge summary.
SustainableVet: "Skimming or missing parts of the summary can lead to medication errors, delayed care, or overlooked signs of complications. Examine the list of prescribed medications closely, noting the dosage and duration. Pay attention to any notes about potential complications the surgeon is concerned about."
What to extract from every discharge summary:
- Full medication list (drug, dose, frequency, duration)
- Recheck timeline (suture removal, imaging dates)
- Complications the surgeon flagged as possible for this specific case
- Activity restrictions and when they can be modified
- Criteria for contacting the surgical team directly
SustainableVet: "If anything in the notes is unclear, contact the surgeon before the pet's follow-up visit. It's better to clarify early than to risk confusion later."
Follow-up visit schedule
SustainableVet: "Follow-up visits usually begin 10 to 14 days after surgery for incision checks and suture removal. More complex cases, like orthopedic surgeries, may need additional visits at 6 to 8 weeks for imaging and rehab adjustments."
Soft tissue cases: day 10 to 14 for incision recheck and suture removal; further rechecks as indicated.
Orthopedic cases: day 10 to 14 for incision and medication review; week 6 to 8 for radiographs assessing bone healing and implant position; week 12 to 16 for complex cases.
SustainableVet: "During each visit, examine the incision site, check for swelling or pain, review mobility, and ensure the pet is healing as expected."
Common complications after referral surgery
Surgical site infection
SustainableVet: "Common issues include infection, swelling, bruising, wound reopening, fluid buildup, or implant-related problems in orthopedic cases."
Signs: increasing redness after day 3, yellow or green discharge, warmth, swelling not improving after day 5, foul odor, pain worsening rather than improving.
Local management: culture-guided antibiotics and wound care for shallow infections. PetPlace: "Wound infection that extends deeper into the tissues often requires surgery in addition to the antibiotic."
Re-refer for: deep infection not responding to antibiotics within 48 to 72 hours, infection near or involving an implant, implant exposure.
Seroma and hematoma
Soft fluctuant swelling beneath the incision. SustainableVet: "A seroma is usually soft, fluctuating, and not particularly hot or painful. Infection tends to produce heat, redness, and a firmer or more diffuse swelling, often with discharge."
Small seromas often resolve with strict rest. Larger seromas may need drainage. FNA confirms the nature of the fluid if clinical assessment is inconclusive.
Wound dehiscence
SustainableVet: "Wound dehiscence means the incision has come open, either partially or fully. It can happen when sutures break down, when infection weakens the tissue, when the dog is too active, or when licking has damaged the closure."
Partial dehiscence requires same-day attention. Full dehiscence with tissue exposure is a surgical emergency. Cover with a clean, damp cloth and go to the vet immediately.
Re-refer for: dehiscence of a complex closure after orthopedic or abdominal surgery.
Persistent pain or lameness
SustainableVet: "Persistent pain or lameness: ongoing discomfort beyond the expected recovery period can signal internal complications or implant issues."
In orthopedic cases, lameness persisting beyond the expected timeline may indicate implant loosening, bone healing delay, or periimplant infection. Radiograph before making treatment decisions.
Behavioral changes
SustainableVet: "Behavioral changes: hiding, aggression, vocalizing, or reluctance to move may reflect pain or anxiety." These often precede visible complications. Do not dismiss behavioral regression in a previously progressing patient.
When to contact the surgical team
SustainableVet: "If there are signs of implant failure, deep infection, or non-healing wounds, the case should be sent back to the surgeon. Immediate communication helps avoid delays in treatment and supports better outcomes."
Contact the surgical team for: any complication involving an orthopedic implant, deep infection not responding to first-line treatment, wound dehiscence of a complex closure, lameness or pain worsening at expected improvement timepoints, or any complication beyond local wound care capacity.
SustainableVet: "Timely referral prevents delays in advanced care and keeps outcomes favorable."
For the owner-facing complications guide, see signs of complications after soft tissue surgery. For the wound care protocol to review with clients, see wound care after surgery. For the full recovery care overview, see soft tissue surgery care for dogs.
Frequently asked questions
Should I treat complications locally or call the surgeon first?
For surface wound issues (minor infection, small seroma), local management with documentation is appropriate. For implant involvement, deep infection, or dehiscence of complex closures, contact the surgical team before acting.
What should I tell owners at the referral recheck appointment?
Review discharge instructions. Confirm medication compliance, E-collar use, and activity restriction. Assess and photograph the wound. Set clear expectations for the next recheck and which signs require an earlier call.
How do I distinguish a seroma from an infected pocket?
SustainableVet: "A seroma is soft, fluctuating, and not hot or painful. Infection produces heat, redness, and firmer swelling, often with discharge." FNA confirms the difference when clinical assessment is inconclusive.
The owner says the dog is fine but the incision looks concerning. Who is right?
Trust the physical examination over owner assessment. Owners naturally minimize signs. Document your findings, photograph the incision, and manage based on clinical evidence.
What imaging is needed at the 6-week orthopedic recheck?
Radiographs of the operative region in the same views as the post-operative images from the discharge summary. Compare implant position, bone healing, and periimplant margins against the surgical baseline.
How should I document follow-up findings for the surgical team?
Photograph the incision at every visit. Record date, appearance, discharge presence, pain score, and mobility assessment. If re-referral becomes necessary, this documentation allows the surgeon to assess progression without needing to reconstruct the timeline from memory.
Resources
- SustainableVet. Post-Surgical Complications in Referred Pets. sustainablevet.org
- SustainableVet. Post-Surgical Follow-Up Guide for Referring Vets. sustainablevet.org
- PetPlace. Postoperative Complications in Dogs. petplace.com
- Farmington Veterinary Hospital. Post-Surgery Complications in Pets: Warning Signs and Care Guide. farmingtonvethospital.com

Nutrition & Supplements for Orthopedic Patients: What Works and What Doesn’t
Discover which pet supplements truly support joint health, and what to avoid in orthopedic care. Vet-backed tips for better recovery and mobility
Why Nutrition Matters in Orthopedic Recovery
Nutrition plays a key role in how well a dog recovers after orthopedic surgery or injury. Bones, joints, muscles, and soft tissues all need the right nutrients to heal properly. Without enough protein, vitamins, and minerals, healing slows down and the risk of complications goes up.
Inflammation is common after surgery. Some foods can help reduce it naturally, like those rich in omega-3 fatty acids. At the same time, proper nutrition supports tissue repair, keeps muscles strong, and helps rebuild cartilage around joints.
Supplements can help, but they don’t replace a balanced diet. For example, giving glucosamine is useful, but it won’t work if the dog is eating low-quality food that lacks protein or key vitamins. Recovery works best when supplements are part of a complete nutrition plan, not the only solution.
Start with the Basics: Weight and Diet First
Importance of Weight Management
Keeping a healthy weight is one of the most important parts of orthopedic care. Extra weight puts more stress on joints, especially the knees, hips, and spine. For dogs recovering from surgery, even a few extra pounds can slow healing and increase pain.
Obesity is strongly linked to many joint problems, including arthritis, cruciate ligament injuries, and hip dysplasia. The more weight a dog carries, the harder the joints must work, leading to faster wear and tear. In overweight dogs, surgeries like TPLO or joint replacement often have slower and more difficult recoveries.
Helping a dog reach or stay at a healthy weight reduces this stress and improves mobility. It also lowers inflammation, which supports healing. Even small weight loss—just 5–10% of body weight—can make a big difference in how a dog moves and feels after orthopedic treatment.
Key Nutrients in an Orthopedic Diet
A strong orthopedic recovery starts with a diet that supports healing tissues. Protein is the most important building block—it helps repair muscles, tendons, and bones. Dogs healing from surgery need more protein than usual, especially during the first few weeks post-op.
Calcium and phosphorus are key for bone strength. They must be given in the right ratio, especially in growing dogs, to avoid bone problems. Vitamins like C and D support collagen repair and calcium absorption. Omega-3 fatty acids from fish oil can reduce inflammation in joints and help with pain.
But more isn’t always better. Over-supplementing can throw off balance. For example, too much calcium can lead to bone disorders. It’s best to provide these nutrients through a balanced, high-quality orthopedic or joint-support formula unless your vet recommends extra supplements. Good food is the foundation; supplements should fill gaps, not replace meals.
Supplements That Work: Backed by Veterinary Use
When used with the right diet and weight control, certain supplements can support healing and reduce joint pain. Here are some of the most commonly used and well-researched options in veterinary orthopedic care.
1. Omega-3 Fatty Acids (Fish Oil)
Omega-3 fatty acids, especially EPA and DHA from fish oil, are powerful anti-inflammatory agents. They help reduce joint swelling and improve mobility in dogs with arthritis or post-surgery stiffness. Studies show they can lower the need for pain medications over time.
Common sources include salmon oil, sardine oil, and anchovy oil. Veterinary-grade products are more purified and properly dosed compared to grocery store options. The usual dose is based on body weight, and your vet can guide you to avoid over-supplementation. Fish oil is often the first supplement added to a recovery plan because of its safety, long-term benefits, and ability to work well with other treatments.
2. Green-Lipped Mussel (GLM)
Green-lipped mussel is a natural anti-inflammatory that comes from shellfish native to New Zealand. It contains omega-3s, amino acids, and antioxidants that work together to ease joint pain and stiffness, especially in dogs with osteoarthritis.
GLM is often found in vet-recommended joint products and is considered safe for long-term use. Research shows it can improve comfort and mobility in both older dogs and those recovering from orthopedic surgery.
Unlike synthetic drugs, GLM has fewer side effects and provides a gentle way to support joint health. It's not a cure, but when used consistently, it may lower the need for pain meds and improve quality of life over time.
3. Glucosamine and Chondroitin
Glucosamine and chondroitin are among the most widely studied supplements for joint care in dogs. They support cartilage health, reduce inflammation, and may slow the breakdown of joint tissues. Many vets include them in post-op recovery plans or for long-term management of arthritis.
However, results vary. Some dogs show clear improvement in stiffness and mobility, while others don’t respond as well. The biggest benefits are seen with consistent use over at least 6–8 weeks.
These compounds work best in early to moderate joint disease, not as much in advanced cases. While not a magic fix, they’re still a go-to part of many joint support protocols because of their long safety history.
4. MSM (Methylsulfonylmethane)
MSM is a sulfur-based compound found in plants and animals. In orthopedic patients, it's used for its anti-inflammatory and pain-relieving effects. MSM helps reduce joint swelling and may ease muscle soreness, which is useful after surgery or injury.
This supplement is often paired with glucosamine and chondroitin for added support. It also plays a role in building healthy collagen and connective tissue, which are key during the healing phase. MSM is generally well-tolerated and safe for long-term use.
While more research is still needed, many veterinarians recommend it as part of a combined joint supplement, especially when managing pain without heavy use of NSAIDs.
5. UC-II (Undenatured Collagen Type II)
UC-II is a unique form of collagen that works differently from other joint supplements. It targets the immune system and helps reduce the inflammation that causes cartilage breakdown. Instead of adding building blocks like glucosamine, UC-II trains the immune system to stop attacking joint tissues.
This can be especially helpful in dogs with immune-driven joint problems or chronic arthritis. Some studies suggest it may work better than glucosamine in certain cases, especially for dogs who haven’t responded well to standard supplements.
UC-II is usually taken in small doses and is often combined with other anti-inflammatory agents. It's a good option for dogs needing extra immune-based joint care.
6. Avocado/Soybean Unsaponifiables (ASUs)
ASUs are a mix of natural plant extracts made from avocados and soybeans. They work by slowing cartilage breakdown and blocking enzymes that damage joint tissue. Though not as common as other supplements, ASUs have shown promising results in both human and veterinary studies.
They’re often included in high-quality veterinary joint products along with glucosamine or chondroitin. ASUs are best used when the goal is to protect cartilage and delay further joint damage.
They may also reduce pain and improve mobility in long-term joint conditions. While not a first-line supplement, they offer extra support for dogs with ongoing joint stress or after major orthopedic surgery.
Natural Options Gaining Interest
Alongside traditional supplements, some natural compounds are gaining attention for their potential to support joint health. While the research is still developing, these options may offer gentle support when used carefully and under veterinary guidance.
1. Turmeric (Curcumin)
Turmeric contains curcumin, a natural compound known for its anti-inflammatory effects. Some studies and reports suggest it may help with joint pain and stiffness in dogs, especially those with arthritis. However, curcumin has poor absorption in the body unless combined with other ingredients like black pepper extract.
Many pet supplements use enhanced formulas to improve effectiveness. While it’s a promising option, the results are mixed and more research is needed. Still, turmeric can be a helpful addition to a complete joint care plan when properly formulated.
2. Microlactin
Microlactin is a dried milk protein from cows, known for its anti-inflammatory properties. It works by blocking white blood cells that contribute to joint inflammation and tissue damage. While it's newer compared to other joint supplements, early research and some clinical use suggest it may help reduce pain and improve mobility in dogs with chronic joint issues.
It’s often used as a secondary supplement for dogs who don’t fully respond to traditional options. So far, it appears safe and well-tolerated, but long-term studies are still limited.
3. CBD Oil for Joint Pain
CBD oil has gained popularity for managing pain and anxiety in pets, including dogs with joint problems. Some owners report better mobility and reduced stiffness. Early research also supports its potential anti-inflammatory and pain-relieving effects. However, there are concerns around safety, correct dosing, and product quality.
Veterinary-approved CBD products are best, and you should always speak with your vet before starting. While it shows promise, CBD should never replace proven treatments and should only be used as part of a supervised care plan.
4. Vitamins C & E for Joint Health
Vitamins C and E are antioxidants that help protect joints from damage caused by free radicals. They don’t rebuild cartilage or stop inflammation directly, but they support overall tissue health. In orthopedic recovery, these vitamins may help reduce oxidative stress around healing joints.
Most dogs get enough of these nutrients from balanced diets, so extra supplementation is usually not needed unless advised by a vet. When used, they serve more as add-ons rather than core treatments for joint disease or post-surgery care.
What Often Doesn’t Work (or Needs Caution)
Not all joint supplements are effective—or safe—when used without proper guidance. Many products on the market make big claims but offer little real benefit, especially when not chosen carefully.
Here are common mistakes to avoid:
- Generic or low-quality supplements: Many over-the-counter joint products lack proper testing or use low-grade ingredients. They may contain less active compound than listed or have poor absorption, making them ineffective.
- Overuse of single-ingredient products: Giving high doses of one supplement, like calcium or glucosamine, without balancing it with other nutrients can cause more harm than good. It may lead to imbalances or worsen certain conditions.
- Delaying supportive care: Waiting until a dog is in severe pain or has lost mobility can limit how well supplements and nutrition work. Early support gives the best long-term results.
Supplements are most helpful when started early, chosen with care, and combined with a full recovery plan. Always consult your vet before starting anything new—what works for one dog may not suit another.
How to Choose the Right Supplements
Choosing the right joint supplements for orthopedic care isn’t just about picking a popular brand. The quality, dosage, and how the supplement works with your dog’s overall plan all matter.
Here’s what to focus on:
- Vet-recommended or clinically tested brands: Look for supplements that have veterinary backing or are used in clinical studies. These are more likely to be safe, effective, and properly dosed.
- Absorption and dosage form: Some supplements work better in liquid or chew form because they’re easier to absorb. Powder-filled capsules may not break down well, especially in sick or older dogs.
- Purity and quality control: Choose products made by trusted companies that test for contaminants like heavy metals or fillers. Avoid supplements without clear labels or dosage guidelines.
- Part of a full plan: Supplements work best when used alongside proper diet, weight management, and physical therapy. They are not magic cures on their own.
Talk to your vet to make sure the supplement fits your dog’s condition and recovery stage. Personalized support is always better than one-size-fits-all.
When to Start and How to Monitor Progress
Starting nutritional support and supplements early in the recovery process gives the best chance for healing. The goal is to reduce inflammation, protect joints, and support tissue repair before damage becomes severe. In many cases, waiting too long can limit how well these therapies work.
Early intervention helps to:
- Reduce swelling and stiffness after surgery
- Support faster healing of bones and soft tissues
- Delay or prevent long-term joint damage
Once supplements are started, it’s important to track your dog’s progress over several weeks.
Watch for signs of improvement like:
- Better mobility or ease in getting up
- Less limping or stiffness after rest
- Reduced need for pain medication
Keep a simple journal or video log to track changes. If there’s no clear improvement after 6–8 weeks, or if your dog gets worse, it’s time to re-evaluate the plan. Your vet may recommend changing the supplement, adjusting the dose, or focusing more on diet and physical therapy.
Every dog is different—regular check-ins help keep the recovery on track.
Always Work With Your Veterinarian
Supplements and nutrition can play a big role in orthopedic recovery, but they should never be used without your veterinarian’s guidance. Every dog is different. Age, breed, diagnosis, weight, and other health issues all affect which supplements are safe and effective.
Your vet can build a personalized plan that fits your dog’s specific needs. For example, a dog recovering from TPLO surgery may need different support than one with chronic arthritis or hip dysplasia. Vets also help choose the right product, dosage, and timing for each stage of recovery.
Monitoring is just as important. Some supplements can interact with medications or cause mild side effects like stomach upset. Your vet can spot these early and make changes if needed.
Veterinarians also work closely with rehab professionals. Together, they balance nutrition, medication, and physical therapy to support healing. This team approach helps avoid delays, reduces pain, and improves long-term joint health.
In short, the best results come when supplements are used as part of a full veterinary-guided plan—not in place of one. Always keep your vet in the loop.
FAQs
Do joint supplements really work for dogs with orthopedic issues?
Yes, joint supplements can help reduce inflammation, support cartilage, and improve mobility in dogs with orthopedic conditions. Results vary, but many dogs show benefits with consistent use. They work best when started early and combined with proper diet, weight control, and veterinary care.
Which supplements are best for arthritis in dogs?
The most commonly used supplements for arthritis include glucosamine, chondroitin, fish oil (omega-3s), and green-lipped mussel. UC-II and MSM are also helpful in many cases. Always choose vet-recommended products and use them as part of a complete management plan.
Can I give multiple supplements together for better results?
Yes, many joint formulas combine ingredients like glucosamine, MSM, and fish oil for a more complete effect. However, combining different products on your own may lead to overdosing. Always check with your vet before giving multiple supplements together.
When should I start my pet on joint supplements?
Start supplements at the first sign of joint issues or after orthopedic surgery. Early support can slow down joint damage, ease pain, and help your dog recover faster. Some vets even suggest starting in high-risk breeds before problems begin.
How do I know if a supplement is high quality and safe?
Look for veterinary-approved brands with clear ingredient labels and dosing instructions. Choose products that have undergone purity and safety testing. Avoid supplements without proper certification or those with vague claims. Your vet can recommend trusted options based on your dog’s needs.
Physical Therapy & Rehabilitation: How Referring Vets Can Support Recovery
Learn how referring vets can support pet recovery with timely rehab, better communication, and tailored treatment plans
Rehabilitation after orthopedic surgery is not optional it is a core component of recovery.
Dogs that receive structured rehabilitation after procedures such as TPLO, FHO, or fracture repair consistently return to function faster and more completely than those managed with rest alone.
Referring veterinarians are in a key position to set expectations, identify appropriate patients for formal rehabilitation referral, and guide owners through what they can do at home between specialist visits.
Quick answer: Rehabilitation after orthopedic surgery combines passive range-of-motion exercises, controlled leash walking, hydrotherapy, therapeutic laser, and progressive strengthening. Formal rehabilitation with a certified canine rehabilitation practitioner produces measurably better outcomes than rest alone.
Key takeaways
- Rehabilitation significantly improves post-surgical outcomes: dogs receiving post-TPLO rehab return to limb use faster than controls managed with rest alone
- Hydrotherapy is one of the most impactful modalities: water buoyancy reduces weight-bearing stress by up to 90% while building muscle
- Passive range-of-motion exercises begin within the first few days post-surgery to prevent joint stiffness and soft tissue adhesion
- Therapeutic laser can be initiated immediately after surgery to reduce inflammation and support tissue healing
- Rehabilitation referral should be considered for any orthopedic surgical patient, particularly large-breed dogs, bilateral cases, and slow-progressors
- Home exercises taught to owners at discharge sit-to-stands, controlled leash walking, passive ROM extend the benefit of formal sessions
Why rehabilitation matters after orthopedic surgery
Surgery creates a stable repair. Rehabilitation determines the quality of function that is achieved on top of that repair.
Physical rehabilitation is a specialty of veterinary medicine that focuses on strength, mobility, and comfort of pets. Rehabilitation therapy utilizes a combination of therapeutic exercises, physical modalities like laser, and hands-on techniques to alleviate pain and improve function.
Without proper rehabilitation, dogs may experience prolonged pain, stiffness, muscle atrophy, or even a decline in overall function. Physical therapy helps bridge the gap between surgery and a full return to normal activities by promoting safe and effective healing.
The referring vet's role after orthopedic surgery is threefold: enforce rest during early healing, manage pain so the dog can engage in rehab exercises, and identify patients who need formal rehabilitation referral.
Rehabilitation modalities
Passive range-of-motion exercises (PROM)
Range-of-motion and stretching exercises are vital activities to help improve joint motion and flexibility in pets after surgery. These exercises help prevent adhesions between soft tissues and bone, improve muscle extensibility, and prevent further injury to joints, ligaments, tendons, and muscles.
PROM begins within the first few days of surgery, before the dog can actively bear weight. Owners are typically taught how to perform these at discharge.
The technique involves gentle flexion and extension of the affected joint through its comfortable range, without forcing the endpoint.
Hydrotherapy (underwater treadmill)
The buoyancy effect reduces weight-bearing stress by up to 90%, allowing pets to exercise with minimal pain while still building muscle mass.
Most veterinarians recommend beginning hydrotherapy only after the surgical site is fully closed and inflammation has subsided, which usually occurs after two to four weeks but this timeline varies depending on the procedure and the individual pet.
The underwater treadmill is the most commonly used hydrotherapy tool in veterinary rehabilitation. Pool swimming is also used but provides less controlled, task-specific exercise.
Therapeutic laser (photobiomodulation)
Laser therapy can be initiated right after surgery to stimulate healing.
Therapeutic laser reduces inflammation, decreases pain, and promotes tissue repair at the cellular level. It is one of the few modalities that can begin immediately post-operatively at the surgical site.
Therapeutic exercises
Physiotherapy exercises for dogs can include things like balancing on three legs, walking on the front legs, sit-and-stand exercises, and side-hopping. These exercises can help with recovery.
Progressive land-based exercises are introduced as healing advances. Sit-to-stand exercises build hindlimb strength without high-impact loading. Balance boards, cavaletti poles, and incline walking are added as the dog progresses.
Heat and cold therapy
Cold therapy (cryotherapy) is used in the first 48 to 72 hours post-surgery to reduce inflammation and swelling. Heat is introduced later to relax muscles and increase local circulation before exercise sessions.
When to refer to a certified rehabilitation practitioner
Formal rehabilitation referral is appropriate for:
- Large and giant breed dogs after major orthopedic procedures (TPLO, THR, fracture repair)
- Any dog that is not bearing weight on the operated limb by the expected timepoint
- Bilateral cases where both limbs are affected
- Dogs with concurrent neurological signs
- Dogs with pre-existing muscle atrophy or poor baseline condition
- Cases where owners cannot reliably perform home exercises
A certified canine rehabilitation practitioner (CCRP) or diplomate of the American College of Veterinary Sports Medicine and Rehabilitation (DACVSMR) provides the most structured and evidence-based program.
Home exercises for owners
Most owners can learn and perform the following between formal sessions:
Short controlled leash walks: beginning as short as 5 minutes, three times daily, increasing progressively per the surgeon's protocol. No pulling, no running.
Passive range-of-motion: gentle flexion and extension of the surgical joint, 10 to 15 repetitions, two to three times daily. Stop at the point of resistance; never force.
Sit-to-stand exercises: asking the dog to sit and stand repeatedly encourages hindlimb muscle activation. Begin with 5 repetitions and increase over weeks.
Cold packing: 10 to 15 minutes of cold application to the surgical site after exercise sessions in the first two weeks reduces local inflammation.
For the pain management that supports engagement in rehabilitation, see orthopedic pain management in pets: multimodal approaches. For the nutrition and supplement context, see nutrition and supplements for orthopedic patients.
Frequently asked questions
How soon after orthopedic surgery can rehabilitation begin?
Passive range-of-motion and short controlled leash walks typically begin within the first few days. Hydrotherapy begins once the incision is closed and inflammation has subsided, usually at two to four weeks.
Therapeutic laser can begin immediately. The surgeon's discharge protocol sets the specific timeline for each patient.
My patient is not bearing weight at two weeks post-TPLO. Should I refer?
Yes. Persistent non-weight-bearing at two weeks warrants assessment either by the performing surgeon or a rehabilitation specialist. Causes include inadequate pain management, implant-related issues, or lack of physiotherapy engagement.
Formal rehabilitation evaluation is appropriate here.
Can owners do rehabilitation at home without formal sessions?
Home exercises taught at discharge are valuable and can significantly improve outcomes. However, formal sessions with a certified practitioner provide progression, monitoring, and modalities (laser, underwater treadmill) that owners cannot replicate.
Where resources allow, a combination is ideal.
What does a typical post-TPLO rehabilitation program look like?
Week 1 to 2: PROM, cold therapy, very short leash walks. Week 3 to 4: progressive leash walk duration, sit-to-stand exercises, hydrotherapy begins.
Week 5 to 8: increased land exercises, balance work, progressive incline walking. Month 3 to 4: gradual return to normal activity. Specific protocols vary by surgeon and practitioner.
Is rehabilitation covered by pet insurance?
Some comprehensive pet insurance plans cover rehabilitation therapy following surgery. Coverage varies significantly by policy and provider. Owners should check their policy before assuming coverage.
Resources
- AESC Parker. Physical Rehabilitation to Improve Surgical Recovery. aescparker.com
- DVM360. Physical Rehabilitation: Improving the Outcome in Dogs with Orthopedic Problems. dvm360.com
- AKC. Canine Rehabilitation Therapy: What to Know. akc.org
- PetMD. Dog Physical Therapy: Everything a Pet Parent Should Know. petmd.com
- VetGarofallo. Swimming and Physical Therapy After Surgery in Pets. vetgarofallo.com
Orthopedic Pain Management in Pets: Multimodal Approaches
Learn how multimodal pain management improves recovery in pets after orthopedic surgery using meds, rehab, and at-home care
Pain management after orthopedic surgery is not a single drug it is a strategy.
Orthopedic pain involves multiple pathways: peripheral inflammation at the surgical site, spinal sensitization, and ongoing nociceptive signals from healing tissue. Addressing all of these requires more than one type of medication.
Quick answer: Multimodal analgesia combines NSAIDs, opioids, gabapentin, local anesthetic blocks, and non-drug therapies such as cryotherapy and laser. Using multiple agents at lower doses reduces side effects while achieving better pain control than any single drug at high dose.
Key takeaways
- NSAIDs are the cornerstone of post-orthopedic pain management; they target peripheral inflammation and are the most consistently effective class
- Multimodal analgesia outperforms monotherapy: a 2026 study found local anesthetics combined with opioid and NSAID provided the best pain control
- Preemptive analgesia before surgery reduces central sensitization and lowers post-op pain scores and total drug requirements
- Gabapentin is most useful for nerve-mediated and chronic pain; evidence for acute orthopedic pain alone is limited
- Tramadol has poor evidence: studies found no clinical benefit for OA pain; it is no longer a recommended primary analgesic
- Non-drug modalities (cold therapy, laser, rehab) are additive to pharmacological control and reduce total drug burden
Why single-drug pain management falls short
Orthopedic pain in dogs is not a single signal from a single location. It involves:
- Peripheral sensitization: inflammatory mediators (prostaglandins, cytokines) at the surgical site lower the pain threshold locally
- Central sensitization: repeated pain signals cause "wind-up" in the spinal cord, amplifying the pain response
- Nociceptive pain: from tissue damage, implants, and ongoing healing
- Neuropathic components: nerve stretch or compression, particularly in fracture repairs and spinal-adjacent procedures
Managing this pain with a single drug, like an NSAID alone, is often not enough to keep pets comfortable. A multimodal approach uses a combination of medications and therapies that work on different parts of the pain pathway.
The pharmacological components
NSAIDs
NSAIDs are the cornerstone of pain management in OA patients who can take them safely. NSAIDs provide anti-inflammatory and pain-relieving effects that target affected joints, helping restore function.
Common veterinary NSAIDs: meloxicam, carprofen, robenacoxib, grapiprant. All require baseline blood work (kidney and liver function) before use and monitoring during long-term administration.
NSAIDs should not be combined with corticosteroids or with each other. A washout period of 5 to 7 days is required when switching between NSAIDs.
Preemptive analgesia
Giving pain medications before surgery reduces central sensitization, or "wind-up" pain, which makes pain harder to treat later. It leads to smoother recovery, lower drug needs post-op, and better comfort for pets during and after orthopedic procedures.
Pre-operative NSAID administration, opioid premedication, and local anesthetic blocks administered before surgical incision all reduce the total pain burden the patient experiences.
Opioids
Combinations: NSAIDs and opioids can be used together for enhanced analgesia.
Opioids (methadone, buprenorphine, hydromorphone) are used perioperatively and in the immediate post-operative period for moderate-to-severe pain. They act centrally, complementing the peripheral action of NSAIDs.
Multimodal analgesia combining local anesthetics, hydromorphone, and meloxicam provided the best pain control in small-breed dogs after orthopedic surgery across a retrospective analysis of 205 dogs.
Gabapentin
Gabapentin is sometimes used as an adjunct pain medication; its best application may be for neuropathic pain.
Gabapentin (brand names: Neurontin, Aclonium) is one of several medications used to complement NSAIDs in multimodal plans.
Gabapentin is also useful for managing the restlessness and anxiety that can accompany post-surgical pain and confinement. Its sedative properties can support rest during the critical early recovery window.
Local anesthetic blocks
Locoregional anesthesia (epidural, nerve blocks, intra-articular injection) provides targeted pain control at the surgical site. Local blocks are effective for acute pain.
For chronic pain, periodic local blocks may be considered if appropriate.
Loco-regional blocks reduce the amount of systemic opioid required and can provide hours of post-operative analgesia.
Amantadine
Amantadine is one of several medications used to complement NSAIDs in multimodal therapy plans for canine OA.
Amantadine is an NMDA receptor antagonist that reduces central sensitization.
It is particularly useful in chronic pain cases where "wind-up" is established, and in patients whose NSAIDs are not providing adequate relief alone.
Monoclonal antibodies (bedinvetmab / Librela)
Bedinvetmab (Librela) is a new option, now available in many countries. It is given as a once-a-month injection. It binds to nerve growth factor (NGF), disrupting pain signal transmission and decreasing inflammation. This medication is shown to be effective with minimal side effects.
This class represents a new approach for long-term OA pain management following orthopedic surgery.
Tramadol not recommended
Studies have shown tramadol to be ineffective in treating OA. In one study, treatment with tramadol provided no clinical benefit for dogs with OA of the elbow or stifle joint.
Tramadol's use in canine analgesia has significantly declined following clinical trial evidence showing poor efficacy. It is no longer a recommended primary analgesic for orthopedic pain in dogs.
Non-pharmacological components
Non-drug therapies include cold and heat therapy, physical rehabilitation, hydrotherapy, acupuncture, laser therapy, and massage.
Cryotherapy (cold therapy): applied for 10 to 15 minutes to the surgical site in the first 48 to 72 hours. Reduces local inflammation and provides analgesia through nerve conduction slowing.
Therapeutic laser: reduces inflammation and promotes tissue healing. Can be initiated immediately after surgery at the incision site.
Rehabilitation exercises: passive range-of-motion, controlled walking, and progressive strengthening reduce pain through improved joint mechanics and muscle support.
Acupuncture: some evidence for adjunct pain relief in OA; most useful as part of a comprehensive multimodal plan.
For the full rehabilitation guide, see physical therapy and rehabilitation: how referring vets can support recovery. For post-op home care, see post-op home care for pets after orthopedic surgery.
Frequently asked questions
What is multimodal analgesia in dogs?
Multimodal analgesia uses two or more drugs or therapies that target different parts of the pain pathway simultaneously.
The aim is better pain control at lower doses of each individual agent, which reduces side effects while improving efficacy.
It is the current standard of care for orthopedic pain management in veterinary medicine.
Can I give my dog human pain relievers like ibuprofen after orthopedic surgery?
Never. Ibuprofen and acetaminophen are toxic to dogs. Even a single dose can cause gastrointestinal hemorrhage, kidney failure, or liver failure.
Only use pain medications specifically prescribed by your veterinarian for your dog.
How long will my dog need pain medication after orthopedic surgery?
Acute pain management (opioids, high-dose NSAIDs) typically lasts 5 to 14 days post-surgery. Ongoing NSAID therapy for OA management may continue for months or long-term depending on the joint and the procedure.
Your vet will reassess at each recheck appointment.
My dog seems painful even with medication. What should I do?
Contact your vet. Pain that breaks through prescribed medication means the current protocol is insufficient.
A medication adjustment, a dose increase within safe limits, or the addition of another agent (gabapentin, amantadine) may be needed. Do not increase NSAID doses without veterinary guidance.
Is gabapentin effective for post-surgical orthopedic pain in dogs?
Gabapentin's evidence for acute orthopedic pain is limited. Its most established role is in neuropathic and chronic pain.
In the post-surgical context it is most useful for managing restlessness, anxiety, and sleep disruption, and for cases with a neuropathic component.
It is usually prescribed as an adjunct, not a primary analgesic.
Resources
- VCA Animal Hospitals. Multi-Modal Pain Management. vcahospitals.com
- Today's Veterinary Practice. Multimodal Pain Management for Canine Osteoarthritis. todaysveterinarypractice.com
- Today's Veterinary Practice. Instituting a Multimodal Pain Management Protocol. todaysveterinarypractice.com
- MDPI Animals. Multimodal Analgesia Provides Superior Postoperative Pain Control Following Orthopedic Surgery in Small-Breed Dogs. mdpi.com
- NCBI StatPearls. Multimodal Postoperative Pain Control After Orthopaedic Surgery. ncbi.nlm.nih.gov
Minimally Invasive Orthopedic Surgery: What General Practitioners Should Know
Learn when to refer, how to guide clients, and what every GP should know about minimally invasive orthopedic surgery in veterinary practice
Minimally invasive surgery (MIS) has become a significant part of veterinary orthopedics over the past two decades. Where open surgery once required large incisions and extensive tissue dissection, MIS techniques use small portals and imaging guidance to achieve the same therapeutic goals with substantially less tissue trauma.
Understanding MIS helps general practitioners recognize which patients may benefit from it, counsel owners accurately about recovery expectations, and make timely referrals to surgeons who offer it.
Quick answer: Veterinary MIS uses arthroscopy or fluoroscopy through small incisions rather than open dissection. Arthroscopy recovery takes 2 to 4 weeks vs 6 to 12 weeks for open surgery. MIS requires specialist equipment not widely available.
Key takeaways
- MIS uses small incisions and camera-based imaging instead of large open dissections, reducing tissue trauma
- Arthroscopy is the most common veterinary MIS, used for joint diagnosis and treatment including OCD, meniscal tears, and CCL
- Recovery from arthroscopy is typically 2 to 4 weeks versus 6 to 12 weeks for open joint surgery
- MIS is not available at most general practices: it requires specialized equipment and significant training
- Early referral for MIS-amenable conditions improves outcomes: arthroscopy for OCD or early joint disease before secondary arthritis develops
- Open surgery remains better for conditions requiring soft tissue reconstruction, infected fields, or complex anatomical access
What is minimally invasive surgery?
SustainableVet: "Minimally Invasive Surgery (MIS) in orthopedics involves performing procedures through small incisions using specialized tools and imaging guidance. The goal is to treat bone, joint, or soft tissue conditions while reducing tissue disruption, pain, and recovery time. Unlike traditional open surgery, MIS avoids large cuts and deep dissection. Instead, surgeons use instruments like arthroscopes or fluoroscopy to see inside the body and make precise movements."
The key tools:
- Arthroscope: a thin rigid telescope with a light source and camera, inserted into a joint through a small portal (typically 3 to 5 mm)
- Fluoroscope: real-time X-ray imaging used to guide implant placement in fracture repair without large incisions
- Laparoscope: used for abdominal MIS (laparoscopic spay, liver biopsy, adrenalectomy)
- Thoracoscope: used for chest cavity access
Arthroscopy: the most common veterinary MIS
CARE Vets: "Joints commonly scoped in canines include the shoulder, elbow, hip, stifle, and tarsus."
Arthroscopy serves both diagnostic and therapeutic functions:
Diagnostic arthroscopy
Allows direct visualization of joint surfaces, synovium, cartilage, and intra-articular structures in real-time, magnified detail. SustainableVet (arthroscopy article): "Arthroscopy provides magnified, real-time views inside the joint."
This is particularly valuable for:
- Confirming partial or complete CCL tears
- Assessing meniscal injury concurrent with CCL rupture
- Evaluating joint surface damage in elbow dysplasia
- Staging OCD lesions before deciding on open vs. arthroscopic treatment
Therapeutic arthroscopy
SustainableVet (arthroscopy indications article): "It allows for precise treatment of joint conditions like OCD, ligament injuries, and cartilage damage with smaller incisions, less pain, and faster recovery compared to traditional surgery."
Common therapeutic arthroscopic procedures:
- OCD (osteochondrosis dissecans) treatment: removal of the OCD flap and curettage of the subchondral bone bed
- Meniscal tear management: partial meniscectomy under direct vision
- Elbow fragmented coronoid process (FCP) removal
- Ununited anconeal process (UAP) removal or fixation
- Joint lavage and debridement: for early septic arthritis or inflammatory joint disease
- CCL assessment: most surgeons perform arthroscopy concurrent with TPLO to assess meniscal integrity and perform meniscectomy if needed
MIS fracture repair
Beyond arthroscopy, MIS principles are applied to fracture repair using fluoroscopic guidance. This allows implant placement (IM nails, bone plates) through small stab incisions rather than large open approaches.
SustainableVet (MIS for GPs article): "MIS is used for procedures like fracture repair, arthroscopy, joint stabilization, and implant placement. This results in less trauma to muscles, less bleeding, and fewer complications."
Minimally invasive plate osteosynthesis (MIPO) uses fluoroscopy to slide a bone plate under the skin through small incisions at each end of the fracture, without exposing the fracture site itself. This preserves the fracture hematoma (which promotes healing), reduces blood loss, and decreases infection risk.
Laparoscopy in soft tissue and oncology cases
While not strictly orthopedic, laparoscopy is increasingly used for procedures previously done open:
- Laparoscopic ovariectomy (spay): CARE Vets: "Laparoscopy is a minimally invasive technique performed in organs located in the abdomen and pelvis." Dogs undergoing laparoscopic spay return to activity significantly faster than with open spay.
- Liver, spleen, and kidney biopsy: organ sampling without large incisions
- Adrenalectomy: NCBi (MIS in oncology): "Laparoscopic adrenalectomy is a common procedure in both human and veterinary medicine for non-invasive adrenal tumors."
- Laparoscopic splenectomy: NCBi: "Proposed benefits include decreased pain and decreased rate of infection" compared to open splenectomy.
Benefits vs. limitations of MIS
Benefits
Maine Veterinary Medical Center: "Reduced trauma and pain: MIS involves smaller incisions, resulting in less tissue damage and reduced postoperative pain. This decreased trauma leads to faster recovery times and shorter hospital stays."
SustainableVet (arthroscopy vs open): "Recovery after arthroscopy is usually quicker, with most dogs returning to light activity in 2 to 4 weeks. In contrast, open joint surgery often requires 6 to 12 weeks of restricted activity."
CARE Vets: "Not only do patients experience less postoperative pain and recover more quickly, but endoscopy typically results in shorter hospitalization times and decreased financial commitment by the owners."
Maine MVMC: "Enhanced visualization and precision: MIS techniques provide superior visualization of surgical sites using advanced imaging technologies."
SustainableVet (arthroscopy indications): "May reduce progression to osteoarthritis if done early: by removing damaged tissue and flushing the joint early, arthroscopy can slow down the development of arthritis, especially in young or active dogs."
Limitations
SustainableVet (MIS for GPs): "Open surgery may be better in some cases. If soft tissue needs reconstruction, infection is present, or access to a complex area is needed, traditional open techniques may provide safer or more complete treatment."
Other limitations:
- Equipment cost: arthroscope systems represent a significant capital investment; not available at most general practices
- Learning curve: CARE Vets: "For the surgeon to be efficient at these procedures, considerable technical training is necessary." MIS requires substantial case volume before proficiency is established
- Patient size: arthroscopy in very small dogs (under 3 to 4 kg) is technically challenging due to joint size
When to refer for MIS evaluation
SustainableVet (MIS for GPs): "General practitioners (GPs) are often the first to assess dogs with orthopedic injuries. Recognizing when a patient may benefit from minimally invasive surgery helps ensure timely referral and better outcomes."
Refer early for MIS evaluation when:
- A dog has clinical signs consistent with OCD (young large-breed dog with unilateral or bilateral forelimb lameness)
- Elbow dysplasia is suspected and advanced imaging or surgical treatment is being considered
- CCL assessment is needed before TPLO to evaluate meniscal status
- Early septic arthritis where arthroscopic lavage may be preferred to open arthrotomy
- Laparoscopic spay is a client preference or medically preferred
Early referral principle: SustainableVet: "By identifying suitable candidates early and sending complete diagnostic information, GPs help surgical teams plan effectively."
For the referral decision framework in orthopedic cases, see when to refer orthopedic cases. For the fracture management referral decision, see dog fracture management splint vs refer. For the home care guide after orthopedic MIS, see orthopedic surgery home care guide.
Frequently asked questions
How does arthroscopy compare to open surgery for my dog's elbow problem?
Arthroscopy for elbow dysplasia provides direct visualization and precise fragment removal with less trauma and faster recovery than open arthrotomy. SustainableVet: "Most dogs recover well and show noticeable improvement in comfort and mobility."
Is my dog too small for arthroscopy?
Arthroscopy becomes technically challenging under approximately 3 to 4 kg due to joint size. CARE Vets: "the carpus can be successfully scoped in large dogs but is more difficult." Ask the specialist whether your dog's joint is compatible.
Will my dog still need a TPLO if arthroscopy is used?
Usually yes. Arthroscopy assesses and treats the meniscus and joint, while TPLO stabilizes the stifle mechanically by changing the joint's biomechanics. Most surgeons perform arthroscopy concurrent with TPLO. The two procedures complement rather than replace each other.
How long does recovery take after arthroscopy compared to open joint surgery?
SustainableVet: "Recovery after arthroscopy is usually quicker, with most dogs returning to light activity in 2 to 4 weeks. Open joint surgery often requires 6 to 12 weeks." The shorter recovery benefits particularly working and active dogs.
Does laparoscopic spay cost more than open spay?
Yes, typically. Equipment and specialist training costs are reflected in the fee. Faster return to activity may offset the difference for some owners. Ask the clinic for a written estimate comparing both approaches.
Can MIS be used if my dog has a joint infection?
Generally no. SustainableVet: "Open surgery may be better if infection is present." Very early septic arthritis may be managed arthroscopically, but established infection typically requires open arthrotomy for thorough debridement.
Resources
- SustainableVet. Minimally Invasive Orthopedic Surgery: What GPs Should Know. sustainablevet.org
- SustainableVet. Arthroscopy vs. Open Surgery. sustainablevet.org
- CARE Vets. Minimally Invasive Surgical Techniques. carecharlotte.com
- Maine Veterinary Medical Center. Minimally Invasive Techniques Transforming Veterinary Surgical Care. mvmc.vet
- NCBi. Use of Minimally Invasive Surgery in the Diagnosis and Treatment of Cancer in Dogs and Cats. ncbi.nlm.nih.gov

External Fixators and Internal Plating: When Are These Indicated?
When do dogs need external fixators vs. internal plating? Learn key indications, pros, and real case examples in veterinary fracture repair
When a dog breaks a bone, the surgical goal is to stabilize the fracture so it heals correctly. Two of the most common methods are external skeletal fixation and internal plate fixation.
Choosing between them depends on the fracture type, location, the dog's size and health, and the presence of any concurrent wounds or infection.
Quick answer: External fixators use pins through the skin connected to an external frame; internal plates fix directly to bone. External fixators suit open fractures and contaminated bone. Internal plating is preferred for most closed fractures and needs less daily home care.
Key takeaways
- External fixators use pins through the skin connected to external bars; preferred for open fractures and when internal implants would increase infection risk
- Internal plating fixes a plate directly to bone under the skin; it provides rigid fixation for most closed long-bone fractures
- Fracture type is the primary determinant: open or contaminated fractures favour external fixation; simple closed fractures favour internal plating
- External fixators need daily pin-site cleaning to prevent tract infections, the most common complication
- Internal plating is generally superior for most closed fractures; no direct head-to-head studies exist for all configurations
- Both methods can be combined (hybrid fixation) for complex fractures requiring biological and mechanical advantages
External skeletal fixation (ESF)
What it is
External fixation is completed using a device called an external fixator. This specialized device consists of multiple pins and external bars or rings, which hold a fractured bone in place during the healing process.
Pins are placed through the skin and bone on either side of the fracture. These pins connect to an external frame bars in linear fixators, rings in circular (Ilizarov-type) fixators.
The frame holds the fracture in alignment without directly contacting the fracture site.
Types
Type I (uniplanar, unilateral): pins exit one side of the limb only; the simplest and most commonly used type.
Type II (biplanar, bilateral): pins exit both sides of the limb; more rigid than Type I.
Circular fixators: ring-based frames that allow gradual correction of complex deformities and angular limb corrections. More technically demanding.
When external fixation is indicated
External fixation is an effective procedure to correct complex fractures and angular limb deformities in dogs.
Key indications:
- Open fractures with skin wounds communicating with the fracture site placing internal implants risks trapping contamination
- Infected or contaminated bone external fixation avoids implant-associated biofilm infection
- Soft tissue compromise severe bruising, degloving, or burn injury around the fracture
- Angular limb deformities gradual correction is possible with circular fixators
- Skeletally immature dogs where growth plates need to be protected
- Temporary stabilization before definitive repair (damage control orthopaedics)
Limitations and home care
External fixators require daily pin-site care by the owner cleaning around each pin to prevent tract infection. Pin-tract infection is the most common complication and can require early removal if severe.
The external frame can be bulky and requires the dog to avoid catching it on furniture or other dogs.
Internal plate fixation
What it is
Internal plating fixes a metal plate directly to the bone surface using cortical screws. The plate bridges the fracture and holds the bone in alignment during healing.
Everything is under the skin; no external components are visible once the wound is closed.
In all but the most minor fractures, internal fixation is superior to external fixation. Typically implants are made from inert metals such as stainless steel and take the forms of pins, plates, screws, or wires.
When internal plating is indicated
The advantages of addressing long bone fractures with internal fixation versus external coaptation include early return to function and maintenance of joint motion. Internal fixation is indicated for fractures that are subjected to compression, shearing, and/or tensile forces.
Key indications:
- Closed long-bone fractures in medium and large breeds radius/ulna, femur, tibia, humerus
- Articular fractures where precise anatomical reduction is essential
- Highly comminuted closed fractures where external fixation cannot achieve adequate stability
- Periprosthetic fractures around existing implants
- Fractures requiring early weight bearing plates provide more rigid fixation than most external frames
Plate types
Locking plates (LCP): the most commonly used system in modern veterinary orthopaedics. Screws lock into the plate, creating an angular-stable construct that does not rely on friction between the plate and bone.
Conventional dynamic compression plates (DCP): older design; still used in some straightforward fractures.
Specialty plates: T-shaped for proximal tibia, L-shaped for distal femur, curved for acetabular fractures.
Limitations
Internal plating requires open surgical access to the fracture, which temporarily disrupts the blood supply and soft tissue around the bone. In open or infected fractures, this approach increases infection risk.
Implant removal is sometimes required if pain or implant loosening develops, though many plates remain in place for life without issues.
Comparison summary
It is recommended that veterinarians base treatment choice on available orthopaedic equipment at their clinic and their personal experience with fracture stabilisation methods they are comfortable using. Both methods have potential risks and complications.
For the broader fracture management decision guide, see fracture management in dogs: when to splint or refer. For minimally invasive approaches to orthopedic repair, see minimally invasive orthopedic surgery for general practitioners.
Frequently asked questions
Which is better an external fixator or an internal plate?
Neither is universally better. The right choice depends on fracture type, whether the fracture is open or closed, the presence of contamination, the dog's size, and surgeon experience.
For most closed long-bone fractures in medium and large dogs, internal plating provides more reliable fixation. For open or infected fractures, external fixation is generally safer.
How long does a dog wear an external fixator?
Typically 6 to 10 weeks, until radiographic evidence of sufficient bone healing allows safe removal. The frame is removed under sedation or light anesthesia at the clinic.
Timeline varies by fracture severity, the dog's age, and healing rate.
Do internal plates need to be removed?
Not routinely. Most plates remain in place permanently without causing problems.
Removal is considered if the dog develops pain, implant loosening, or infection around the plate or occasionally in very young dogs where the plate may interfere with bone growth.
Can my dog bear weight with an external fixator?
Yes, often earlier than with splints or casts. One advantage of external fixation is that it allows some controlled weight bearing during healing, which promotes bone healing through mechanical stimulation.
Your vet will specify the allowed activity level.
What is hybrid fixation?
Hybrid fixation combines elements of both methods for example, a plate for primary stabilization with an external component for additional support.
It is used for very complex fractures where a single method cannot achieve adequate stability alone.
Resources
- WagWalking. External Fixation in Dogs. wagwalking.com
- WagWalking. Internal Fixation in Dogs. wagwalking.com
- Today's Veterinary Practice. A Practitioner's Guide to Fracture Management, Part 3: Selection of Internal Fixation Technique. todaysveterinarypractice.com
- PMC. Comparing Internal versus External Fixation for Diaphyseal Tibial and Fibular Fractures in Skeletally Immature Dogs. pmc.ncbi.nlm.nih.gov
- VIN / WSAVA 2016. External Skeletal Fixation: Options and Techniques. vin.com
Joint Replacement Surgery in Dogs: Success Rates and Expectations
Discover success rates, recovery time, and expectations for joint replacement surgery in dogs. Learn when it’s the right option for your pet
Joint replacement surgery is the most advanced intervention in veterinary orthopaedics.
For dogs with severe, irreversible joint disease that has not responded to medical management, it can transform quality of life in a way no medication or rehabilitation can match.
Quick answer: Total hip replacement in dogs achieves 90 to 95% good-to-excellent outcomes. It is indicated for end-stage hip OA unresponsive to conservative management. Recovery requires 8 to 12 weeks of strict rest. Cost is $4,000 to $7,000 per joint.
Key takeaways
- THR achieves 90 to 95% good-to-excellent function in appropriately selected dogs; most need no further pain medication after recovery
- THR complication rate is 5 to 10%: post-operative luxation is most common, occurring in 3 to 5% of cases
- THR is indicated for end-stage hip dysplasia OA not responding to conservative management; it is a salvage procedure, not first-line
- Total elbow replacement is available at only a few specialist centres and has higher complication rates than THR
- Strict activity restriction for 8 to 12 weeks post-surgery is essential owner compliance is one of the most important factors in outcome
- Cost is $4,000 to $7,000 per joint at specialist centres; bilateral cases require two separate procedures
Total hip replacement (THR)
What it is
Total hip replacement removes the femoral head and acetabulum and replaces both with prosthetic implants a metal femoral stem with a ball, and a metal or polyethylene acetabular cup.
The new joint provides smooth, pain-free movement without the bone-on-bone contact of advanced hip OA.
Canine joint replacement technology and surgeon expertise have advanced greatly over the past 20 years. Only a few relatively small companies worldwide supply the technology for joint replacement surgery, and a relatively low number of surgeons have the expertise to consistently perform the procedure with a high degree of proficiency.
Success rates
The success rate for total hip replacement in dogs is very high between 90% and 98%. Most dogs experience significant pain relief, improved movement, and a better quality of life.
Studies show more than 90 to 95% of dogs have good to excellent function with THR, providing years of pain-free activity that otherwise would not have been possible.
A large registry study reviewed 2,375 THRs in 1,852 dogs over 10 years. The majority of cases were hip dysplasia with osteoarthritis.
Owner-reported outcomes were strongly positive in the vast majority of cases.
Complications
The typical overall complication rate following a THR varies, with a reported overall average complication rate of 5 to 10%. The more commonly reported complications include postoperative luxation, often associated with a fall or excessive activity.
The most frequent complication is hip dislocation, occurring in approximately 3 to 5% of cases. Other potential complications include fracture, nerve injury, or infection.
Most complications are managed without losing the implant. Catastrophic failure requiring implant removal is uncommon in experienced hands.
Candidates for THR
Good candidates:
- Dogs with hip dysplasia and severe OA causing significant pain and reduced quality of life
- Dogs that have failed conservative management (weight management, NSAIDs, rehabilitation)
- Dogs with adequate bone stock to accept the implant
- Dogs whose owners can commit to strict post-operative restriction
Not candidates:
- Dogs with neurological disease affecting the same limb
- Dogs with active infection in or near the joint
- Dogs with severe muscle atrophy at time of surgery
- Dogs with other significant orthopaedic disease in the same limb
Candidates for THA must not have other orthopaedic disease in the limb to be operated, as well as clients willing to perform the postoperative care necessary for a successful outcome.
Implant systems
Two main systems exist: cemented (implant fixed with bone cement) and cementless (press-fit, relying on bone ingrowth for long-term fixation).
Cementless systems are now more widely used and have longer documented longevity in dogs.
In most cases, the replaced hip will last for your pet's lifetime.
Total elbow replacement
Total elbow replacement (TER) is significantly more complex than THR and available at only a small number of specialist centres worldwide.
Total elbow arthroplasty continues to be under development. The system is technically demanding and may be the reason it is not used more widely by veterinary surgeons.
The T.A.T.E. elbow system is the most widely used current system.
Indications include end-stage elbow OA from fragmented medial coronoid process disease or other elbow dysplasia conditions that have exhausted all other options.
Complication rates for total elbow replacement are higher than THR.
It is a salvage procedure reserved for dogs that have failed all other surgical and medical options and where FHO-equivalent (head and neck excision) is not anatomically applicable.
Cost
The cost of a total hip replacement typically ranges from $4,000 to $7,000. Elbow and knee replacements may fall within a similar or slightly higher range due to complexity. Although the upfront cost is high, joint replacement can eliminate the need for ongoing pain medications, frequent vet visits, or repeated surgeries.
Bilateral THR (both hips) nearly doubles the cost. Most surgeons stage bilateral cases 8 to 16 weeks apart rather than performing both simultaneously.
Recovery
Activity restrictions are significant during the initial 8 to 12 weeks of recovery. Your pet should not be allowed to be off leash, run, or jump. Your pet should be strictly confined to a small indoor area with non-slippery floors or in a crate. Most pets are ready to resume regular exercise and activities after 12 weeks of recovery.
Recovery milestones:
- Days 1 to 14: crate rest, leash-only bathroom walks, pain medication
- Weeks 2 to 8: progressive short leash walks, rehabilitation exercises begin
- Weeks 8 to 12: radiographic recheck, gradual activity increase if healing is confirmed
- Month 3 to 6: peak recovery; most dogs reach full or near-full function
Rapid recovery and high performance are expected not just hoped for in current veterinary orthopaedic surgery.
For the full rehabilitation guide covering the post-joint-replacement recovery period, see physical therapy and rehabilitation: how referring vets can support recovery.
For the pain management approach used alongside joint replacement recovery, see orthopedic pain management in pets: multimodal approaches. For the referral decision, see when to refer for orthopedic surgery.
Frequently asked questions
Is my dog a candidate for total hip replacement?
The key criteria are: end-stage hip OA with significant pain and failure of conservative management.
Additionally: no neurological disease or orthopaedic disease in the same limb, adequate bone stock, and an owner able to comply with strict activity restriction.
A board-certified orthopaedic surgeon will assess suitability at a specialist consultation.
How long does a dog live after hip replacement?
The implant is designed to last the dog's lifetime. Most dogs require no further pain medication after recovery and return to near-normal activity.
The procedure does not shorten lifespan and typically significantly improves quality of remaining life.
What happens if the hip dislocates after surgery?
Post-operative luxation occurs in approximately 3 to 5% of cases, usually associated with excessive activity or a fall.
It is managed by manual reduction under anesthesia, followed by a period of restricted activity. In some cases, revision surgery is needed.
This is why strict activity restriction in the first 8 weeks is critical.
Is hip replacement better than FHO (femoral head ostectomy)?
For medium and large breeds, THR generally produces superior outcomes compared to FHO better gait, less muscle atrophy, and more reliable function.
FHO is a reasonable salvage option for small and toy breeds where functional outcomes are more reliable, or when the cost of THR is prohibitive.
Can both hips be replaced at the same time?
Rarely. Most surgeons stage bilateral THR 8 to 16 weeks apart to allow recovery of one limb before stressing the other.
Operating both simultaneously significantly increases anesthetic time and complication risk, and leaves the dog with no sound limb during recovery.
Resources
- AVES. Total Hip Replacement: A Complete Information Guide. austinvets.com
- TVMF. Outcomes for Total Joint Replacement in Dogs and Cats. tvmf.org
- PMC. Outcomes and Complications Reported from a Multiuser Canine Hip Replacement Registry over a 10-Year Period. ncbi.nlm.nih.gov
- DVM360. Total Joint Replacement of the Elbow and Hip. dvm360.com
- Animal Orthopaedic Clinic. Total Joint Replacement. animalorthoclinic.com
Arthroscopy in Veterinary Orthopedics: Indications and Benefits
Discover how arthroscopy helps diagnose and treat joint issues in pets. Learn key indications, benefits, and recovery details
What Is Arthroscopy in Veterinary Orthopedics?
Arthroscopy is a minimally invasive surgical technique used to look inside your pet’s joints. It involves making small incisions to insert a tiny camera (arthroscope) and special instruments. The camera sends real-time images to a screen, allowing the surgeon to see and treat joint problems without fully opening the joint.
Unlike traditional open joint surgery, arthroscopy causes less tissue damage, smaller scars, and quicker healing. It’s especially useful for diagnosing and treating conditions like ligament damage, joint inflammation, or loose cartilage. Because it offers better visibility with less pain and swelling, more vets are using it in modern orthopedic care.
Arthroscopy is commonly performed on the shoulder, elbow, stifle (knee), and hip joints. It allows precise treatment with fewer complications, making it a preferred option for both diagnosis and surgery in many orthopedic cases.
Diagnostic Benefits of Arthroscopy
Arthroscopy gives veterinarians a clear, direct view inside the joint, which is not possible with radiographs or even CT scans. This technique helps detect issues that might be missed with imaging alone, especially soft tissue problems. Because the camera goes directly into the joint, the surgeon can see the cartilage, ligaments, and joint surfaces in real time.
Here are some key diagnostic benefits of arthroscopy:
- Direct visualization of joint interiors helps identify problems right at the source.
- Cartilage damage, such as softening, thinning, or flaking, is seen clearly.
- Ligament injuries, including partial or early tears, are more accurately diagnosed.
- Subtle abnormalities, like joint inflammation or loose fragments, are easier to detect.
- Better than radiographs or CT scans for spotting soft tissue problems like meniscal tears.
- Synovial fluid or tissue samples can be collected during the procedure for lab testing.
Overall, arthroscopy improves the accuracy of diagnosis, allows early treatment planning, and reduces the need for exploratory surgery. It helps vets make more informed decisions and improves outcomes for dogs with joint issues.
Indications: When Is Arthroscopy Used in Veterinary Orthopedics?
Arthroscopy is commonly used in veterinary orthopedics to diagnose and treat joint problems with less pain and faster recovery. It is especially helpful in joints where precision matters and where early treatment improves long-term outcomes.
1. Elbow Joint Conditions
The elbow is one of the most common joints treated with arthroscopy in dogs, especially large breeds. Common conditions include:
- Fragmented Medial Coronoid Process (FMCP): Arthroscopy allows removal of small bone fragments and smoothing of rough surfaces.
- Osteochondritis Dissecans (OCD): Loose cartilage is removed with minimal joint trauma.
- Ununited Anconeal Process (UAP): Surgeons can evaluate the extent of separation and remove or reattach the piece.
- Elbow incongruity: Arthroscopy helps detect joint mismatch early, guiding further surgical decisions.
This joint benefits from arthroscopy because of its complexity and the difficulty of seeing problems on X-rays.
2. Shoulder Joint Conditions
Shoulder arthroscopy is often used to diagnose and treat soft tissue injuries that cause lameness. Key conditions include:
- OCD of the shoulder: Cartilage flaps are easily identified and removed with minimal damage.
- Biceps tendon pathology: Allows inspection and treatment of tendon inflammation or rupture.
- Medial shoulder instability: Helps confirm ligament stretching or damage and guide surgical repair.
Because shoulder injuries can be hard to detect with imaging, arthroscopy is a valuable diagnostic and treatment tool in active dogs.
3. Stifle (Knee) Joint Conditions
Arthroscopy is useful in diagnosing and treating stifle joint problems, especially when combined with surgical repair. Common indications:
- Cranial cruciate ligament rupture: Arthroscopy can confirm partial or complete tears and assess secondary damage.
- Meniscal tears: Allows clear visualization and precise removal of torn cartilage.
- OCD of the femoral condyle: Helps detect and treat cartilage defects in the knee joint.
In many cases, arthroscopy is done before or during surgery like TPLO to evaluate joint health and improve surgical outcomes.
4. Other Joints (Selective Use)
Though less common, arthroscopy can be used in other joints when imaging is unclear or precision is needed:
- Hip joint: Occasionally used to examine cartilage damage or joint laxity in young dogs.
- Tarsus (hock): Useful in complex cases with suspected OCD or instability.
- Carpus (wrist): Allows diagnosis of ligament injuries or chronic inflammation in small breeds.
These joints are smaller and harder to access, so arthroscopy is used selectively by experienced surgeons.
Therapeutic Uses of Arthroscopy
Arthroscopy is not only helpful for diagnosing joint problems but also plays an important role in treatment. Because it uses small incisions and specialized instruments, it causes less damage than traditional surgery and speeds up recovery.
Here are key therapeutic uses of arthroscopy in veterinary orthopedics:
- Removal of loose bone or cartilage fragments: Fragments from injuries or conditions like OCD can cause pain and joint damage. Arthroscopy allows precise removal without opening the whole joint.
- Debridement of damaged cartilage: Worn or injured cartilage can be trimmed or smoothed to reduce pain and slow joint degeneration.
- Lavage in septic joints: In infected joints, arthroscopy allows joint flushing (lavage) to remove pus, bacteria, and debris, helping the joint heal faster.
- Treatment of partial ligament tears: Minor tears, such as early cruciate ligament damage, can be cleaned and evaluated to guide future treatment.
- Joint flushing to reduce inflammation: In dogs with chronic joint inflammation or immune-mediated arthritis, flushing out the joint helps decrease swelling and improve comfort.
Arthroscopy offers a way to treat problems directly with minimal trauma, which leads to faster healing, less scarring, and better long-term joint function.
Benefits of Arthroscopy Compared to Traditional Surgery
Arthroscopy has become a preferred choice in veterinary orthopedics because it offers many benefits over traditional open joint surgery. By using small incisions and a camera, it reduces trauma and improves healing outcomes.
Key benefits include:
- Smaller incisions = reduced soft tissue trauma: The small entry points cause less damage to muscles and skin, which helps with faster healing and less scarring.
- Faster post-op recovery time: Dogs often return to gentle activity sooner than with traditional surgery. This can shorten the overall rehab period.
- Lower pain levels for the patient: Less tissue damage means less pain after surgery. Many dogs show improved comfort within a few days.
- Reduced risk of infection: Smaller wounds and shorter procedure times lower the chance of bacteria entering the joint.
- Shorter anesthesia and hospital stay durations: Arthroscopy usually takes less time, which means reduced anesthesia risk and shorter clinic stays.
- Improved precision due to magnified view: The camera gives a clear, enlarged view of the joint, helping the surgeon see tiny structures and treat the exact problem.
Overall, arthroscopy allows better care with fewer risks and a smoother recovery, making it a valuable tool in modern veterinary surgery.
Limitations and Considerations
While arthroscopy offers many benefits, it’s not the right choice for every case. There are certain limitations and factors to consider before choosing this technique for your dog.
Here are key points to keep in mind:
- Not suitable for very small joints or advanced joint disease: In very small dogs or cats, the joint space may be too tight for the instruments. Arthroscopy is also less effective when the joint has severe arthritis or bone deformity.
- Requires advanced training and specialized equipment: Not all veterinary clinics offer arthroscopy. It needs a skilled surgeon with special tools and experience, which may limit availability.
- In rare cases, may need to convert to open surgery: If the problem is too complex or the joint is hard to access, the surgeon may switch to a traditional open approach during the procedure.
- Cost considerations depending on setup and expertise: Arthroscopy can be more expensive than standard surgery due to the high cost of equipment and the advanced training required.
Despite these limitations, arthroscopy remains a valuable option for many joint conditions. Your veterinarian will help you decide if it’s the right choice based on your pet’s size, diagnosis, and overall health.
Prognosis and Expected Outcomes
Arthroscopy has a high success rate when used in the right cases and performed by an experienced surgeon. Most dogs recover well and show noticeable improvement in comfort and mobility.
Here’s what you can expect from arthroscopy:
- High success rate in properly selected cases: When done for the right joint condition—such as early ligament injury, cartilage damage, or OCD—arthroscopy provides excellent results with fewer complications.
- Faster return to function and normal activity: Because the procedure is minimally invasive, dogs often regain mobility sooner than with traditional surgery. Most pets can begin light activity within a few weeks.
- Early intervention improves long-term joint health: Treating joint problems early, before there is severe damage, helps protect the joint. This can delay or prevent long-term issues like chronic pain or joint deformity.
- May reduce progression to osteoarthritis if done early: By removing damaged tissue and flushing the joint early, arthroscopy can slow down the development of arthritis, especially in young or active dogs.
Overall, arthroscopy offers a strong long-term outcome with less pain, quicker healing, and better joint function—especially when performed before the disease becomes advanced. Regular follow-up and proper rehab are key to success.
Final Thoughts
Arthroscopy is a modern, minimally invasive technique that offers both diagnostic and therapeutic benefits in veterinary orthopedics. It allows for precise treatment of joint conditions like OCD, ligament injuries, and cartilage damage with smaller incisions, less pain, and faster recovery compared to traditional surgery.
It’s especially helpful for early-stage joint problems, where quick action can protect the joint and reduce long-term damage. However, not every case is a match for arthroscopy. Factors like joint size, disease severity, and available expertise must be considered.
Early diagnosis plays a major role in successful outcomes. If your dog shows signs of joint pain, lameness, or reduced activity, don’t wait. A timely exam can make all the difference. Always consult a board-certified veterinary surgeon to determine if arthroscopy is the right choice for your dog’s condition and recovery.
FAQs About Arthroscopy in Veterinary Orthopedics
Is arthroscopy painful for dogs or cats?
Arthroscopy is less painful than traditional open joint surgery because it uses small incisions and causes less tissue damage. Most pets experience mild discomfort, which is managed with pain medication. Many animals begin walking comfortably within a few days and show steady improvement as healing progresses.
How long does recovery take after arthroscopy?
Recovery time after arthroscopy is usually shorter than open surgery. Most pets start gentle activity within 2 to 3 weeks. Full recovery takes about 6 to 8 weeks, depending on the joint treated and overall health. A structured rehab plan, including rest and controlled exercise, helps ensure the best outcome.
How much does veterinary arthroscopy cost?
The cost of arthroscopy can range from $2,000 to $4,000 or more, depending on the joint treated, clinic location, surgeon experience, and whether therapeutic procedures are done. Additional fees for diagnostics, anesthesia, and follow-up care may apply. Always ask for a full estimate before scheduling the procedure.
Can small breed dogs undergo arthroscopy?
Yes, small breed dogs can have arthroscopy, especially for shoulder, elbow, or stifle issues. However, very tiny joints may be too small for the instruments. A skilled veterinary surgeon will evaluate your dog’s size and joint structure to decide if arthroscopy is a safe and effective option.
Is arthroscopy better than MRI or CT for joint problems?
Arthroscopy gives a real-time, direct view of the inside of the joint, making it better for diagnosing cartilage, ligament, or meniscus problems. MRI and CT scans are useful for imaging bones and deeper structures, but they can miss soft tissue issues that arthroscopy can clearly reveal and treat at the same time.

Sustainable Vet | Copyright ©2026 | All Rights Reserved

