When to Refer for Orthopedic Surgery: Identifying Surgical vs. Non-Surgical Cases
Guide for identifying surgical vs. non-surgical veterinary orthopedics, enhancing patient outcomes with timely, appropriate referrals

This article is for informational purposes only and is not a substitute for professional veterinary advice. Every case is unique, so always consult your veterinarian for guidance specific to your pet.
This content is intended for veterinary professionals for educational purposes. It does not replace clinical judgment or tailored advice. Always rely on your training, expertise, and the specific context of your patients.

Early and accurate referrals are crucial for the best outcomes in veterinary orthopedic cases. Delayed or incorrect treatment can lead to chronic pain, joint instability, and reduced mobility, greatly affecting a patient's quality of life. General veterinarians need to know which conditions can be managed with non-surgical methods and which require surgery.
Some common orthopedic issues that need referral include:
- Cranial cruciate ligament (CCL) tears
- Hip dysplasia
- Patellar luxation
- Fractures
- Severe osteoarthritis
While some cases may improve with medical treatment, physical therapy, or weight management, others need surgery to restore function and prevent further joint damage.
In this guide, you will learn how to identify surgical versus non-surgical cases, helping veterinarians decide when to refer a patient to a board-certified orthopedic specialist.
TL;DR
- Timely referral for orthopedic surgery improves outcomes. Delays can lead to chronic pain, joint instability, and reduced mobility.
- Know when to refer vs. manage conservatively. Surgical cases include CCL tears, hip dysplasia, severe fractures, and progressive neurological deficits, while mild conditions may respond to rehabilitation.
- Functional assessment matters more than imaging alone. Pain scoring, gait analysis, and range of motion tests help determine surgical need beyond X-rays or CT scans.
- Conservative management includes NSAIDs, weight control, physiotherapy, and PRP therapy. Some conditions improve with rehab, but worsening signs indicate the need for surgery.
- Financial transparency helps owners make informed decisions. Comparing surgical vs. non-surgical costs, explaining long-term benefits, and offering financing options can ease financial concerns.
Recognizing Signs of Orthopedic Issues
The most common early signs include lameness, stiffness, pain when touched, and reluctance to jump or move. These symptoms may develop gradually or appear suddenly, depending on the underlying condition.
Acute vs. Chronic Signs
Acute orthopedic conditions, such as fractures or ligament tears, often show up with sudden, severe lameness, swelling, and pain. These cases usually need immediate intervention, often surgical.
On the other hand, chronic conditions like hip dysplasia or degenerative joint disease develop over time, with occasional stiffness, reduced activity, and increasing discomfort.
Knowing whether a condition is acute or chronic helps decide if conservative management or surgical correction is needed.
Breed-Specific Predispositions
Certain breeds are more prone to orthopedic issues. For example:
- Labradors and Rottweilers often suffer from cranial cruciate ligament (CCL) tears.
- Dachshunds and French Bulldogs are at high risk for intervertebral disc disease (IVDD).
Large breeds like German Shepherds frequently develop hip and elbow dysplasia, which requires early assessment for intervention.
Behavioral Changes Indicating Pain
Dogs and cats often show subtle signs of discomfort before lameness becomes obvious. Restlessness, excessive licking of joints, difficulty rising, or a stiff, altered gait can indicate underlying orthopedic pain. Some animals may become withdrawn or irritable, avoiding play and interaction.
Recognizing these signs early allows veterinarians to start appropriate diagnostics and decide whether the case can be managed conservatively or needs surgical intervention.
Assessing Pain and Function: Objective vs. Subjective Measures
As a veterinarian, you need to use both objective tools and subjective clinical observations to assess pain levels, mobility, and joint function.
Pain Scoring Tools
Objective pain assessment scales help standardize evaluations and track a patient’s response to treatment over time. Two widely used tools include:
- Glasgow Composite Pain Scale (GCPS): A structured tool that assesses vocalization, mobility, response to touch, and demeanor to determine pain severity.
- Canine Brief Pain Inventory (CBPI): A validated owner-reported questionnaire that measures pain intensity and its impact on daily activities.
These tools enhance consistency in pain assessment, aiding in treatment decisions.
Functional Assessment
Assessing lameness, weight distribution, and joint mobility helps determine whether a case requires surgery or can be managed without it:
- Weight-bearing vs. Non-weight-bearing Lameness: Non-weight-bearing lameness usually indicates severe joint instability, fractures, or ligament tears, which often need surgical correction.
- Range of Motion (ROM) Evaluation: Limited ROM, crepitus, or pain during manipulation suggests joint degeneration or soft tissue injury.
- Observation on Different Surfaces: Walking on slick floors, stairs, or uneven ground can reveal subtle mobility issues that might not be noticeable on smooth clinic floors.
Pain Tolerance Variability
Pain perception differs based on breed, size, and individual factors. For instance, Labradors and Rottweilers might endure significant pain before showing signs, while toy breeds often show discomfort sooner. Larger breeds can also compensate for lameness longer due to their muscle structure, delaying detection.
By combining pain scoring with functional assessment, veterinarians can decide when to manage conservatively or refer for surgery.
Diagnostic Tools and Techniques: Functional vs. Structural Severity
While imaging provides critical structural information, functional assessments are equally important in evaluating clinical severity.
Choosing the Right Imaging Modality
- Radiographs (Standard & Stress Views) are the first-line imaging modality for diagnosing fractures, joint abnormalities, and degenerative conditions. They provide a quick and cost-effective assessment of bone structure. Stress radiographs are particularly useful for detecting ligamentous instability, such as cranial cruciate ligament (CCL) ruptures or medial shoulder instability, by revealing abnormal joint movement under applied force.
- CT Scans (Computed Tomography) offer detailed 3D imaging, making them essential for evaluating complex fractures, elbow dysplasia, and bony malformations. They are particularly valuable for surgical planning, especially in cases involving pelvic fractures and angular limb deformities, where precise anatomical reconstruction is necessary.
- MRI (Magnetic Resonance Imaging) is the preferred modality for diagnosing soft tissue injuries, spinal conditions such as intervertebral disc disease (IVDD), and subtle ligament or meniscal damage. It is especially useful when radiographs appear normal, but clinical signs persist, indicating potential soft tissue pathology that requires deeper evaluation.
- Arthroscopy is a minimally invasive technique that allows direct visualization of joint structures, aiding in the diagnosis of cartilage defects, meniscal tears, and synovial disorders. Beyond diagnostics, it also serves as a therapeutic tool, enabling surgeons to perform precise interventions with minimal tissue disruption.
Why Imaging Alone Isn’t Enough
Radiographic findings don't always match the clinical severity. A hip dysplasia case that looks mild on an X-ray might cause severe lameness, while some dogs with significant osteophytes on radiographs may still function well. That's why a functional assessment, including lameness grading, gait analysis, and pain evaluation, is essential for a complete diagnosis.
Lab Tests for Chronic Conditions
In chronic orthopedic cases, laboratory diagnostics help differentiate degenerative diseases from immune-mediated or infectious conditions, providing a more complete clinical picture:
- C-reactive protein (CRP): Elevated levels indicate active inflammation, commonly seen in immune-mediated arthritis and chronic joint disease.
- Synovial fluid analysis: Helps assess infection, immune-mediated polyarthritis, or degenerative joint disease, guiding treatment decisions.
Combining imaging, functional assessment, and laboratory diagnostics allows veterinarians to make precise decisions on whether a case requires medical management or surgical referral.
Criteria for Surgical Intervention
While imaging findings help guide decisions, the patient's clinical function and quality of life often determine how urgently surgery is needed. Surgery is recommended when pain, joint instability, or progressive deterioration significantly impact mobility and well-being.
Full-Thickness Ligament Tears Require Stability, Not Just Pain Management
Cranial cruciate ligament (CCL) ruptures cause severe joint instability, leading to secondary osteoarthritis. Surgical stabilization, such as tibial plateau leveling osteotomy (TPLO) or tibial tuberosity advancement (TTA), is recommended for long-term function.
Similarly, Achilles tendon ruptures often require surgical repair to restore weight-bearing ability and prevent permanent dysfunction.
Joint Instability and Severe Dysplasia Progress Over Time
Young Dogs with hip dysplasia might manage well with conservative treatment in the early stages, but those with severe joint looseness benefit from juvenile pubic symphysiodesis (JPS) or triple pelvic osteotomy (TPO).
For older dogs with arthritis, total hip replacement (THR) or femoral head ostectomy (FHO) might be the best options to restore mobility.
Patellar luxation (Grades III-IV) is similar—mild cases can be managed conservatively, but if lameness persists, surgical realignment helps prevent cartilage damage and long-term joint deterioration.
Neurological Decline Requires Urgent Decision-Making
Spinal conditions like intervertebral disc disease (IVDD) can rapidly progress from mild pain to complete paralysis.
In cases with progressive weakness, loss of deep pain sensation, or significant ataxia, surgery such as hemilaminectomy or ventral slot decompression should be performed as soon as possible to maximize recovery potential. Delaying intervention in severe IVDD cases significantly reduces the chance of regaining function.
Unstable Fractures Cannot Be Left to Heal Alone
Fractures vary in severity, but displaced long bone fractures require surgical fixation to ensure proper healing and prevent malalignment. Pelvic fractures, especially those involving the acetabulum or sacroiliac joint, often require stabilization to preserve weight-bearing function.
While some stable fractures in small breeds may heal with external coaptation, improper healing in weight-bearing bones can lead to chronic pain, limb shortening, or permanent lameness.
Functional Limitations vs. Anatomical Findings
Orthopedic conditions do not always present in predictable ways. A dog with severe hip dysplasia on radiographs may show little clinical discomfort, while another with mild radiographic changes may struggle to walk.
Decision-making should focus on functional limitations, pain assessment, and future prognosis rather than relying solely on imaging findings. If lameness significantly impacts the dog’s quality of life despite medical management, surgery should be strongly considered, even if radiographic changes seem minor.
Surgery is Sometimes Needed Even Without Severe Symptoms
Some orthopedic conditions require surgical intervention even before significant lameness is evident.
Hip luxation, for example, may not seem painful in the early stages, but chronic instability leads to joint degeneration and arthritis, making procedures like toggle pin fixation, FHO, or THR necessary.
Similarly, in elbow dysplasia with a fragmented coronoid process, early arthroscopic removal of loose fragments can slow the progression of arthritis, preserving function before severe pain develops.
Veterinarians must assess pain levels, joint stability, and long-term prognosis rather than relying solely on imaging.
Red Flags for Immediate Surgical Referral
Certain orthopedic emergencies need urgent surgery to prevent permanent damage, chronic pain, or disability. Delaying treatment in these situations can greatly worsen the outcome, so immediate referral to a specialist is crucial.
Open Fractures Need Immediate Stabilization
When a fracture exposes the bone, the risk of infection and bone inflammation rises sharply. Quick wound care, intravenous antibiotics, and surgical stabilization are vital to avoid complications. Untreated open fractures can lead to severe tissue damage, failure to heal, and long-term limb problems.
Severe Joint Luxations Must Be Addressed Quickly
Traumatic dislocations of the hip, elbow, or ankle need urgent realignment to prevent cartilage damage, ligament stretching, and joint wear. If untreated, ongoing instability can cause painful arthritis, requiring procedures like femoral head ostectomy (FHO) or total hip replacement (THR). Early surgical stabilization is crucial for maintaining joint function over time.
Non-Weight-Bearing Lameness with Acute Pain Signals Serious Injury
Sudden inability to bear weight, especially with severe swelling or deformity, indicates a fracture, ligament tear, or tendon detachment. These issues often need surgical repair to restore joint stability and function. Delaying treatment increases the risk of joint misalignment, arthritis, and other complications.
Neurological Signs Indicating Spinal Cord Compression Require Immediate Attention
Conditions like intervertebral disc extrusion (IVDD), vertebral fractures, or spinal instability can lead to ataxia, weakness, or loss of deep pain sensation. Early decompression surgery (such as hemilaminectomy or ventral slot) greatly increases the chances of neurological recovery. Delaying treatment in severe cases can result in permanent paralysis, bladder problems, and loss of mobility.
Why Delaying Surgery Can Worsen Outcomes
Putting off surgery in these situations can lead to more tissue damage, increased pain, and lower success rates. Joint instability speeds up cartilage wear, fractures may heal improperly, and spinal cord compression can cause lasting neurological issues. Prompt referral ensures the best possible recovery, helping patients heal faster with fewer long-term problems.
Early vs. Late Referral: How Timing Affects Outcomes
The timing of a surgical referral in orthopedic cases can significantly impact long-term prognosis. Early intervention often preserves joint function, prevents chronic pain and mobility loss, and improves surgical outcomes. Delays, on the other hand, can lead to irreversible damage, limited treatment options, and prolonged recovery times.
Conditions Where Early Referral is Key
Hip Dysplasia in Young Dogs
- Procedures like juvenile pubic symphysiodesis (JPS) or triple pelvic osteotomy (TPO) are most effective before skeletal maturity when joint remodeling potential is highest.
- Delayed intervention increases the risk of severe osteoarthritis, limiting surgical options to salvage procedures like total hip replacement (THR) or femoral head ostectomy (FHO).
Chronic Elbow Dysplasia
- Fragmented coronoid process (FCP) and medial compartment disease lead to progressive cartilage damage and osteoarthritis if untreated.
- Early arthroscopic removal of loose fragments helps reduce joint erosion and preserves function, avoiding long-term joint deterioration.
Partial Cranial Cruciate Ligament (CCL) Tears
- Many partial tears progress to full ruptures, resulting in joint instability, chronic pain, and meniscal damage.
- Early stabilization via TPLO or TTA prevents secondary degenerative joint disease and improves mobility.
Long-Term Consequences of Delayed Referral
- Progression of osteoarthritis, which lowers the success rate of surgeries.
- Muscle wasting, resulting in longer recovery times and decreased function after surgery.
- Permanent loss of mobility, particularly in severe hip dysplasia or chronic ligament instability.
- Need for more invasive surgeries as conditions worsen and fewer conservative options are available.
How to Counsel Pet Owners on Early Intervention
- Use visual aids like X-rays, gait analysis videos, and case studies to demonstrate the effects of early versus late intervention.
- Explain cost-effectiveness, highlighting that early surgery might be costly initially but can prevent ongoing medical expenses and more expensive procedures later.
- Discuss quality of life, helping owners see that delaying treatment can lead to chronic pain, limited activity, and long-term joint damage.
- Set realistic expectations, ensuring owners understand the benefits of early referral and the potential risks of delaying treatment.
By identifying surgical candidates early and educating owners on the benefits of timely intervention, veterinarians can improve patient outcomes, enhance mobility, and reduce long-term complications.
Non-Surgical Treatment Options
Not all orthopedic cases require surgical intervention.
Conservative management can be effective in certain conditions, particularly when the patient has mild to moderate symptoms and retains adequate function. However, careful case selection and close monitoring are essential to ensure that non-surgical management remains appropriate.
When to Attempt Conservative Management
- Partial Ligament Tears: Early-stage cranial cruciate ligament (CCL) tears in small dogs and cats can sometimes be managed without surgery using strict rest, NSAIDs, and controlled rehabilitation. However, there is still a risk of the tear becoming complete.
- Mild Osteoarthritis: Dogs with early joint degeneration might benefit from medical treatment, lifestyle changes, and physiotherapy before considering surgical options like total joint replacement.
- Stable Fractures in Small Breeds: Minimally displaced fractures, especially in toy breeds, can sometimes heal with external support like splints or casts if strict rest is maintained.
Therapies Available for Conservative Management
- Medical Management
- NSAIDs (Carprofen, Meloxicam) are used to control pain and inflammation.
- Joint supplements like glucosamine, chondroitin, and omega-3 fatty acids help support cartilage health.
- Platelet-Rich Plasma (PRP) Therapy aids in regenerative joint healing for early arthritis cases.
- Weight Management
- Obesity worsens orthopedic conditions by increasing joint stress and speeding up degeneration. Controlled weight loss greatly improves mobility and reduces pain.
- Obesity worsens orthopedic conditions by increasing joint stress and speeding up degeneration. Controlled weight loss greatly improves mobility and reduces pain.
- Physiotherapy and Rehabilitation
- Hydrotherapy (underwater treadmill, swimming) helps build muscle strength with minimal impact on joints.
- Passive Range of Motion (PROM) exercises help maintain flexibility.
- Laser therapy and therapeutic ultrasound are used to reduce inflammation and promote healing.
Rehabilitation-First Approach: Cases Where Surgery Can Be Delayed
In certain orthopedic cases, targeted rehabilitation can delay or even prevent the need for surgery by strengthening supporting structures and improving joint stability. However, proper patient selection, structured rehab protocols, and regular reassessment are key to ensuring long-term success.
Conditions Where Targeted Rehab Helps
- Grade I-II Patellar Luxation: Mild luxations with minimal discomfort can be managed with strengthening exercises, especially for the quadriceps and hip stabilizers. Weight control and joint supplements also help maintain joint health.
- Mild Hip Dysplasia in Young Dogs: Controlled exercise, physiotherapy, and non-steroidal anti-inflammatory drugs (NSAIDs) can help young dogs with mild hip dysplasia stay mobile without needing immediate surgery. Hydrotherapy and core strengthening reduce stress on the hip joint and improve function.
- Partial Ligament Injuries with Strong Compensation: Early-stage cranial cruciate ligament (CCL) injuries in small, well-muscled dogs may benefit from brace support, muscle conditioning, and controlled activity. Additionally, PRP therapy (Platelet-Rich Plasma) and regenerative medicine can aid tissue healing in select cases.
When to Reassess & Escalate to Surgery
- If the patient continues to limp despite structured rehabilitation.
- When joint instability worsens, causing more pain or secondary issues like osteoarthritis.
- If imaging reveals worsening cartilage damage, meniscal injury, or subluxation.
Success Rates of Rehabilitation vs. Surgery
- Mild Patellar Luxation: About 60-70% of Grade I-II cases can be managed long-term with rehabilitation alone.
- Hip Dysplasia: Physiotherapy can delay surgery for years, but dogs with severe hip pain will eventually need total hip replacement (THR) or femoral head ostectomy (FHO).
- Partial CCL Tears: Small-breed dogs (under 10 kg) may stay functional with rehab, but larger dogs often experience worsening ligament issues, requiring TPLO or TTA surgery.
A rehabilitation-first approach can offer pain relief and functional improvement, but veterinarians should be proactive in identifying cases where surgery is ultimately necessary.
Referral Process to Specialists
A smooth referral process improves patient outcomes, ensures continuity of care, and enhances owner confidence in the treatment plan.
When to Refer & Choosing the Right Specialist
Veterinarians should refer cases when:
- The surgical procedure is beyond their expertise or requires specialized equipment (e.g., TPLO, total hip replacement).
- The case is not responding to conservative management, and surgical correction is the best option.
- The patient has a complex fracture, joint instability, or progressive neurological deficits requiring advanced intervention.
What to Include in the Referral Letter
A well-documented referral ensures a smooth transition of care. The letter should include:
- Patient history (age, breed, medical conditions).
- Clinical findings (lameness grading, pain scores, joint instability).
- Diagnostic imaging results (X-rays, CT scans, MRI).
- Previous treatments & responses (NSAIDs, rehab, injections).
- Specific referral request (e.g., TPLO for complete CCL rupture)
Client Communication: Preparing Owners for Referral
Pet Owners should understand:
- Why referral is necessary and what outcomes to expect.
- The cost implications of specialist surgery.
- The timeline for diagnostics, surgery, and recovery.
- Post-operative care responsibilities (activity restriction, rehab, follow-ups).
Financial Considerations in Referral: How to Guide Clients
Discussing the financial aspects of orthopedic referrals is essential for ensuring that pet owners understand their options and can make informed decisions. While specialized surgical procedures can be costly, they often prevent long-term expenses related to chronic pain management and reduced mobility.
Estimating Costs: Surgical vs. Non-Surgical Treatments
Veterinarians should provide both surgical and non-surgical cost estimates to help owners understand the financial impact of each option.
Surgical costs include
- TPLO for CCL rupture, which ranges from $3,000 to $6,000 and covers surgery, hospitalization, and post-op care.
- Total hip replacement (THR) costs between $5,000 and $7,000 and offers long-term function restoration.
- Fracture repair with plates or pins costs $2,500 to $5,000, depending on the case's complexity.
Non-surgical costs add up over time.
- NSAIDs and pain management typically cost $500 to $1,500 annually.
- Joint supplements and rehabilitation therapy range from $1,000 to $3,000 per year, depending on how often treatments are needed.
- Frequent veterinary visits and disease progression can increase long-term costs, often surpassing the cost of surgery.
Explaining Cost vs. Long-Term Benefits
Owners often hesitate at the upfront cost of surgery, not realizing that delaying treatment can lead to higher overall expenses and a lower quality of life.
TPLO surgery prevents chronic joint instability that would otherwise cause severe osteoarthritis, requiring lifelong NSAIDs, physical therapy, and possibly more surgeries. With surgery, most dogs regain full function within months and need minimal long-term medication.
Early surgical intervention in hip dysplasia, like Juvenile Pubic Symphysiodesis (JPS) or Triple Pelvic Osteotomy (TPO), helps maintain hip function. If surgery is delayed, joint degeneration worsens, leading to expensive procedures like femoral head ostectomy (FHO), total hip replacement (THR), or lifelong pain management.
Helping Clients Make Informed Decisions Without Financial Strain
- Transparent Cost Estimates: Provide written estimates for both surgical and non-surgical expenses to help owners plan financially.
- Pet Insurance & Financing Options: Advise owners on pet insurance policies, CareCredit, or in-house payment plans to make treatment more affordable.
- Prioritizing Treatment: If full surgical correction isn't immediately possible, discuss temporary pain management options while planning for future surgery.
By presenting surgery as an investment in long-term mobility and quality of life, veterinarians can assist clients in making the best decisions for their pets while realistically addressing financial concerns.
Conclusion
Timely and accurate referrals for orthopedic surgery in veterinary cases are crucial for achieving the best outcomes for patients. By identifying which cases require surgery and which can be managed without it, veterinarians can provide the most suitable care, whether through conservative management or surgical intervention.
Early detection of orthopedic problems, thorough pain and function assessments, and the use of diagnostic tools are vital for making informed decisions.
Furthermore, understanding the financial aspects and clearly communicating treatment options to pet owners can improve the overall care process. Ultimately, a proactive approach to managing orthopedic conditions can greatly enhance the quality of life for veterinary patients.

Get a Free Poster
Enhance your workspace with a high-quality radiographs reference poster, designed for veterinary professionals. This free physical poster will be shipped directly to you—just fill out the form to request your copy.


Taking Great TPLO Radiographs
Click Below to Watch Live Video Demos


We'll send you a Free Wall Poster with all the steps
Step #1
Getting Ready
Ensuring a clean surgical field starts with proper skin preparation. This video demonstrates the best practices for:
- Shaving the patient – Achieving a close, even shave while minimizing skin irritation
- The Dirty Scrub – The initial skin prep step to remove surface debris and reduce bacterial load before the sterile scrub.
Following these techniques helps reduce infection risk and improve surgical outcomes. Watch the video to see how it’s done effectively!


Step #2
Reduce Your Risks
Many surgeons are shocked to find out that their patients are not protected from biofilms and resistant bacteria when they use saline and post-op antibiotics.
That’s Where Simini Comes In.
Why leave these risks and unmanaged? Just apply Simini Protect Lavage for one minute. Biofilms and resistant bacteria can be removed, and you can reduce two significant sources of infection.
Step #3
Take the Course
Preventing surgical infections is critical for patient safety and successful outcomes. This course covers:
- Aseptic techniques – Best practices to maintain a sterile field.
- Skin prep & draping – Proper methods to minimize contamination.
- Antibiotic stewardship – When and how to use perioperative antibiotics effectively.
Stay up to date with the latest evidence-based protocols. Click the link to start learning and earn CE credits!

Things to know
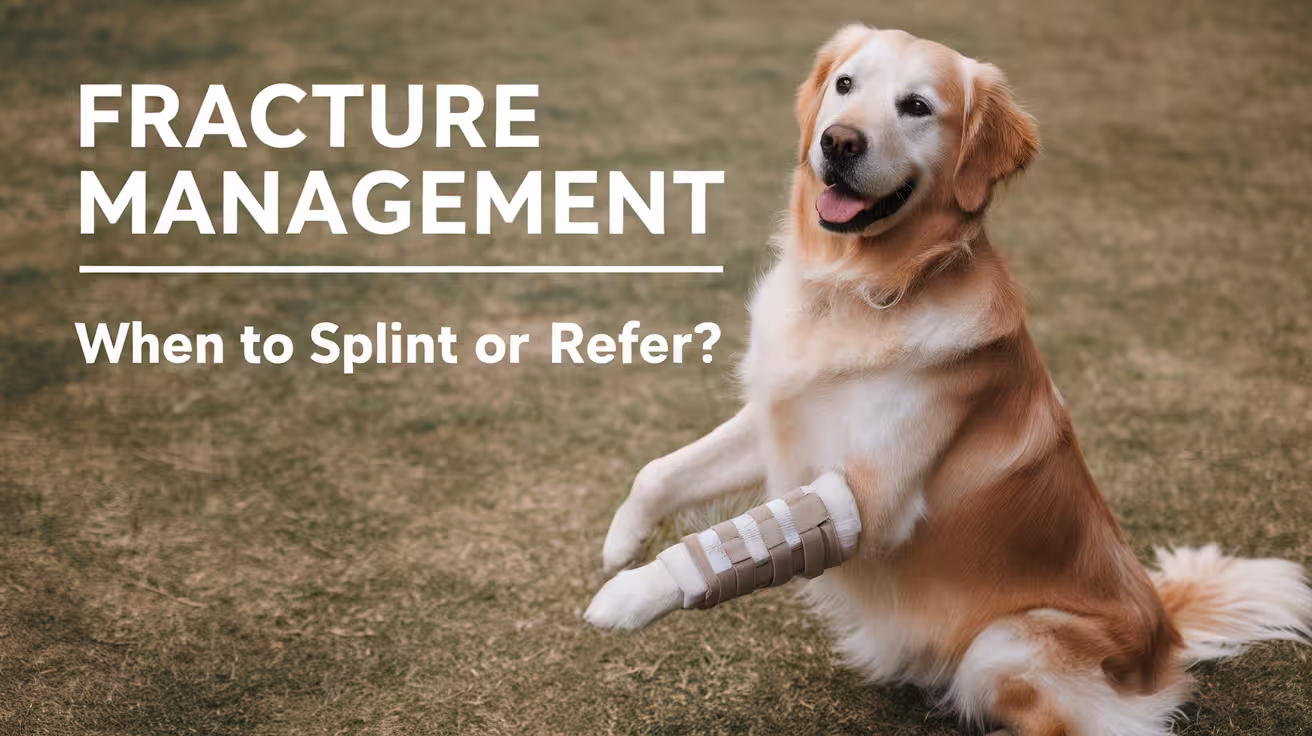
Fracture Management in Dogs: When to Splint or Refer?
Learn when to splint and when to refer dog fractures. A practical guide for vets to make the right call in canine fracture management
Understanding Canine Fracture Management
Dogs can suffer different types of fractures, such as
- simple
- comminuted (broken into many pieces)
- greenstick (partial break)
- open fractures (bone pokes through skin)
These can happen from falls, car accidents, or rough play. Each fracture needs a different treatment plan, depending on the type and location of the break.
Making the right decision early is very important. Choosing whether to splint or refer for surgery can affect how well the bone heals and how soon the dog returns to normal activity. If the wrong choice is made, the bone might not heal correctly, or the dog may have lasting pain or trouble walking.
The main goals of fracture management are to stabilize the bone, preserve limb function, and reduce pain. A careful exam, good imaging, and quick action can give the best chance for a full recovery.
When to Splint a Fracture in Dogs
Some fractures can be treated without surgery, especially when they meet certain conditions. Here’s when splinting is a good option:
Location Matters: Distal to Elbow or Stifle
Splinting works best for fractures that occur below the elbow (front leg) or below the stifle (knee in the back leg).
These lower limb areas are easier to stabilize with an external splint. The muscles are smaller, and there’s less movement, which helps the bone stay aligned during healing. Splints are less effective for fractures higher up the leg or near joints with heavy muscle forces.
In those cases, bones are more likely to shift without surgical support. So, if the fracture is in the radius/ulna (below the elbow) or tibia/fibula (below the stifle), and the bone is stable, splinting is often the right choice.
Fracture Type: Closed, Stable, Minimally Displaced
Splinting is most effective when the fracture is closed (skin is intact), stable, and minimally displaced (bone pieces haven’t moved much). These fractures usually don’t require surgery because the bone ends are still in a good position to heal.
A splint can keep them steady while the bone forms new tissue. If the break is too unstable or the bone is badly misaligned, a splint won’t hold it properly, and surgery may be needed. Proper X-rays are important to confirm the fracture type before deciding on splinting.
Age Factor: Greenstick Fractures in Puppies
Puppies often get greenstick fractures, where the bone bends and cracks but doesn’t break all the way through. These are more common because young bones are softer and more flexible. The good news is, greenstick fractures heal quickly with the right support.
A simple splint is usually enough for stabilization. Since puppies grow fast, healing can begin in just a few weeks. But regular rechecks are important because a fast-growing bone can shift if the splint isn’t applied or monitored correctly.
Specific Bones: Metacarpal and Metatarsal Fractures
Fractures of the metacarpal (front paw) and metatarsal (back paw) bones are common, especially in active dogs.
These bones are small and located in the lower limbs, making them ideal candidates for splinting—if the break is closed and the bones are not too displaced. A splint can keep the bones in place and support weight-bearing as healing begins.
However, if multiple bones are broken or the alignment is poor, surgery might be safer to protect long-term function. Splinting works best when at least one of the central bones is intact for natural support.
When Splinting May Fail or Be Risky
Not all fractures can be safely treated with a splint. In some cases, splinting may lead to poor healing or long-term damage.
Proximal Long Bone Fractures (Femur, Humerus)
Fractures in the femur (thigh bone) or humerus (upper front leg) are hard to stabilize with a splint. These bones are surrounded by large muscles that pull the broken pieces apart. External splints can’t provide enough support, which means the bone might heal crooked or not at all.
Surgery is often the best choice here, using pins or plates to hold the bone firmly. Trying to splint these upper limb fractures often leads to pain, delayed healing, and poor limb function. Immediate referral for surgical repair is recommended.
Comminuted or Unstable Fractures
A comminuted fracture means the bone is broken into multiple pieces. These are very unstable and can’t be held in place by a splint alone. The pieces move easily, and the risk of poor healing is high. If a splint is used, the bone may heal in the wrong position or form a weak union.
In these cases, surgical fixation is needed to realign and stabilize the fragments. Using metal implants helps maintain bone structure and allows faster healing. Splinting is not advised for fractures with many bone fragments or any signs of instability.
Toy Breeds and Risk of Nonunion (Distal Radius/Ulna)
Small breeds like Chihuahuas, Pomeranians, and Yorkies are at high risk of nonunion when they fracture the distal radius and ulna (lower front leg). These bones have a poor blood supply in tiny dogs, which makes healing harder. Even a clean break may not join properly with just a splint.
In many cases, the bone fails to heal, causing long-term lameness. Surgery is usually the safer and more effective option in these breeds. Splinting might delay healing or cause further complications, so careful evaluation is essential before choosing non-surgical treatment.
Open Fractures with Soft Tissue Injury
An open fracture means the bone has broken through the skin, often causing damage to the surrounding tissue. These fractures are at high risk of infection, swelling, and poor healing. A splint alone can’t protect the wound or keep the bone clean.
In fact, covering an open wound with a splint can trap bacteria and lead to serious infections. These cases need surgical cleaning, antibiotic treatment, and often internal fixation to support healing.
Leaving an open fracture untreated or trying to manage it with a splint is dangerous and should always be referred for emergency surgical care.
When to Refer for Surgical Intervention
Some fractures go beyond what splinting or basic care can handle. In these cases, timely referral improves outcomes.
Joint Involvement or Multiple Bone Fractures
When a fracture extends into a joint, or when multiple bones are broken, the risk of long-term issues increases. Joints need perfect alignment to avoid arthritis or loss of movement. Multiple fractures are harder to stabilize with external methods.
Surgery ensures the bones are correctly positioned and fixed in place. Referral is important in these cases to restore function, reduce pain, and prevent complications like joint stiffness or permanent lameness.
Fractures with Infection or Delayed Healing
If a fracture becomes infected or is not healing after several weeks, surgical help is often required. Infected bone (osteomyelitis) needs cleaning, drainage, and strong antibiotics. A splint alone won’t fix it. Delayed healing, or nonunion, may also need bone grafting or surgical stabilization.
Early referral helps prevent further damage and gives the best chance of recovery. Waiting too long can lead to permanent problems, so monitoring progress is key.
Imaging or Fixation Beyond GP Capabilities
Some fractures require advanced imaging like CT scans or special fixation tools such as locking plates or external fixators. These resources may not be available in general practice. When equipment is limited, referral ensures the dog gets the proper diagnostics and treatment plan.
Without clear images or the right tools, the fracture may not heal correctly. In complex cases, referral is not just helpful—it’s necessary for safe and effective care.
Surgeon-Level Expertise Needed
Fractures involving neurologic damage, growth plates, or reconstructive challenges often demand a skilled orthopedic surgeon. These cases require precise technique, careful planning, and experience in bone healing.
Attempting surgery without the right expertise can lead to failed repairs or long-term disability. Referring these cases early allows for better outcomes, fewer complications, and faster healing. Knowing when a case is beyond your scope is a sign of good judgment and strong patient care.
Clinical Decision Tips for General Practitioners
Before deciding between a splint or referral for surgery, it’s important to follow a clear checklist.
- First, assess the fracture location. Splinting works best for injuries below the elbow or knee.
- Next, check if the fracture is closed, stable, and minimally displaced.
- Consider the dog’s age and breed. Puppies with greenstick fractures may heal well with splints, while toy breeds may not.
- Also, evaluate the clinic’s resources. Do you have the right imaging, splinting materials, and experience to monitor healing?
Once you apply a splint, schedule frequent rechecks, especially in the first 7–10 days. Watch for swelling, pressure sores, shifting of the fracture, or signs of delayed healing. If the bone alignment worsens or healing stalls, don’t hesitate to change the plan and refer.
Good communication with a specialist is essential. Share imaging, fracture details, and your current treatment plan. Early referral improves outcomes, especially for complex or high-risk cases. Acting quickly and knowing your limits helps the dog recover better and shows clients you are prioritizing their pet's care.
Final Thoughts
Knowing when to splint and when to refer is key in fracture management. Splints work well for simple, closed, stable fractures in the lower limbs, especially in young dogs or certain paw bones. But fractures involving joints, multiple bones, or unstable patterns often need surgery to heal correctly. Toy breeds and open wounds also require extra caution.
Timely referral can make the difference between full recovery and long-term problems. Waiting too long with the wrong treatment can lead to pain, poor healing, or permanent damage.
Working together with orthopedic specialists improves outcomes and builds trust with pet owners. As general practitioners, recognizing your limits and seeking help when needed is not a weakness—it’s part of giving the best care. Collaborative care leads to better healing, happier patients, and stronger professional relationships.
FAQs
Can you splint a femur fracture in dogs?
No, femur fractures should not be splinted. The femur is surrounded by strong muscles that make it hard to keep the bone aligned. Splints won’t provide enough support, and healing may fail. Surgery with internal fixation is the best treatment for femur fractures in dogs.
How long should a dog wear a splint for a leg fracture?
Most dogs need to wear a splint for 4 to 6 weeks, depending on the fracture type and age. Puppies may heal faster. Regular rechecks and follow-up X-rays are important to check progress and avoid problems like pressure sores, swelling, or delayed healing.
What are the signs a fracture needs referral?
Signs include joint involvement, multiple bone fractures, open wounds, unstable or comminuted breaks, or no healing progress after a few weeks. Also, if proper imaging or surgical tools aren’t available, referral ensures better care and improves the dog’s chance of full recovery.
What’s the risk of nonunion with splinting in toy breeds?
Toy breeds have a high risk of nonunion, especially in distal radius/ulna fractures. Their small bones have less blood supply, which slows healing. Even simple fractures may not heal with splints alone. Surgery is often recommended early to avoid long-term lameness or permanent damage.

Feline Orthopedic Conditions: Signs of Hidden Lameness
Learn how to spot hidden lameness in cats, recognize common feline orthopedic conditions early, and keep your cat healthy and comfortable
What is Feline Orthopedic Conditions?
Feline orthopedic conditions are problems that affect a cat’s bones, joints, or muscles. These include injuries like fractures, joint diseases such as arthritis, or issues with bone development. These problems can cause pain, swelling, and difficulty moving.
Cats are experts at hiding pain. In the wild, showing weakness can make them a target. So even when they are hurting, they may still jump or move around as usual, just more carefully. This makes it hard for owners to notice something is wrong.
Also, cats are quiet and independent by nature. They don’t often limp like dogs do. Instead, they may sleep more, avoid stairs, or stop jumping onto furniture. These subtle changes can easily go unnoticed.
That’s why it’s important to know the early signs and keep an eye on your cat’s daily habits and movements. Early detection can help prevent long-term damage.
Why Recognizing Hidden Lameness Matters
Cats are very good at hiding pain due to their survival instincts. They might not cry or limp, even when they're hurt. Instead, they quietly change how they move or rest more than usual, making it easy to overlook signs of a serious problem.
Recognizing hidden lameness early is important because untreated joint or bone issues can worsen over time. What starts as mild discomfort can turn into long-term pain, arthritis, or muscle loss. If caught early, many orthopedic problems can be treated with rest, medication, or surgery.
By noticing small changes, like avoiding stairs, hesitating to jump, or licking a joint, you can help your cat get care before the condition worsens. Early detection not only improves recovery but also helps your cat live a more active, pain-free life.
Signs Your Cat May Have Hidden Orthopedic Issues
Even small changes in your cat’s behavior can be signs of pain. Here are key symptoms to watch for:
- Reluctance or hesitation to jump or climb - Cats who avoid jumping onto furniture or hesitate before climbing may be feeling joint or bone pain. This change in behavior is often one of the earliest signs of discomfort.
- Less playful or active - If your cat is no longer chasing toys or exploring as much, it may be due to soreness or reduced mobility. A drop in energy can signal an underlying orthopedic issue that needs attention.
- Noticeable stiffness or limping - Stiff walking, favoring one leg, or limping after rest may point to joint pain or injury. This is easier to notice after your cat wakes up or moves after lying down.
- Changes in grooming habits - Cats in pain may groom less or have trouble reaching certain areas. You may notice a messy or greasy coat, or excessive licking near a sore joint or limb.
- Behavioral changes, like hiding more or irritability - A normally social cat that begins hiding, avoiding contact, or reacting aggressively when touched may be in pain. These mood changes are common in cats with hidden orthopedic problems.
Common Causes Behind Feline Orthopedic Conditions
Several reasons can cause cats to develop orthopedic issues. Recognizing these helps you protect your cat’s health and mobility.
- Injuries and trauma: Cats are active and curious, often climbing or jumping from high places. This can lead to fractures, sprains, or muscle injuries, especially after falls or accidents. Even minor injuries can develop into long-term problems if not treated properly.
- Arthritis and joint degeneration: Arthritis is very common in older cats. It causes joints to become painful and swollen, limiting movement. Over time, cartilage wears away, bones rub against each other, and your cat may show signs like stiffness, limping, or avoiding movement.
- Infections affecting bones and joints: Bacterial or fungal infections can reach bones or joints through injuries or spread from other parts of the body. These infections cause inflammation, swelling, and severe pain. Early diagnosis is important to avoid permanent damage.
- Congenital conditions (present from birth): Some cats are born with joint or bone abnormalities, such as hip dysplasia or kneecap issues. These conditions may cause discomfort and movement problems from an early age, needing lifelong care or surgical intervention.
Specific Orthopedic Conditions Common in Cats
Cats can face several orthopedic conditions, each affecting their movement and comfort in unique ways. Here are some common examples:
Osteoarthritis
Osteoarthritis happens when cartilage in a cat’s joints slowly breaks down. Over time, bones rub together, causing pain and stiffness. Older cats are usually affected most. Signs include trouble jumping, moving slower, or becoming less active.
Early diagnosis helps manage pain through medication, weight control, and gentle exercise. Treatments focus on keeping cats comfortable and active so they can enjoy daily life without pain.
Hip Dysplasia
Hip dysplasia is when a cat’s hip joint doesn’t form correctly, causing poor alignment. This condition often starts early in life and leads to arthritis over time. Cats may walk strangely, have trouble jumping, or show stiffness after rest.
While mild cases can be managed with medication and lifestyle changes, severe cases might need surgery. Early detection helps provide the best options for treatment and prevents long-term pain or disability.
Patellar Luxation (slipped kneecap)
Patellar luxation means the kneecap moves out of its normal position. This condition can cause sudden limping, pain, and a strange “skipping” walk. It often starts early and can worsen if left untreated. Mild cases may only need regular vet check-ups and weight control.
But more severe cases can need surgery to reposition and stabilize the kneecap. Early management prevents more serious joint damage and helps your cat keep normal mobility.
Bone fractures
Bone fractures usually happen due to falls, accidents, or trauma. They can range from minor cracks to complete breaks. Signs include obvious limping, swelling, or refusing to use the injured leg. Quick veterinary care is important to reduce pain and help the bone heal properly.
Treatment options include casts, splints, or surgery, depending on severity. With proper care, most fractures heal well, allowing your cat to regain normal activity and comfort.
How Vets Diagnose Orthopedic Conditions in Cats
Diagnosing orthopedic issues in cats involves several careful steps. Your vet combines a detailed physical check with observing how your cat moves, followed by specific imaging tests.
- Detailed physical examination: - The vet gently checks your cat’s bones, joints, and muscles for swelling, warmth, or signs of pain. By flexing and extending joints, the vet can identify stiffness or discomfort. Your cat’s reactions help pinpoint exactly where the problem might be.
- Observing your cat’s movements and gait: - Watching your cat walk or move around the exam room provides important clues. Limping, shifting weight to avoid pressure, or hesitation before jumping can highlight specific joint or muscle problems. Even subtle changes like posture or stiffness when standing can help identify hidden issues.
- Imaging techniques (X-rays, radiographs): - X-rays are often needed to clearly see bones and joints. They show fractures, arthritis, dislocations, or abnormal bone development. Radiographs give the vet clear images of internal structures, helping confirm a diagnosis and plan treatment effectively.
Together, these methods ensure accurate diagnosis, helping your cat get the right care early.
Managing Orthopedic Conditions in Cats
Treatment for orthopedic conditions depends on your cat’s diagnosis, age, and overall health. Here’s how vets typically manage these problems:
Conservative treatments (weight management, pain relief)
Many orthopedic problems improve greatly with non-surgical care. Keeping your cat at a healthy weight reduces joint stress, making movement easier. Your vet might suggest special diets to support healthy weight loss. Pain relief medication, including anti-inflammatory drugs, can ease discomfort and swelling, improving your cat’s daily activity.
Supplements like glucosamine or omega-3 oils can also help joints move more comfortably. Gentle, controlled exercise or physical therapy keeps muscles strong, which further supports joints and eases pain over time.
Surgical options and when they're needed
Surgery might be the best choice when conservative care isn’t enough. Conditions like severe fractures, advanced hip dysplasia, or patellar luxation often need surgery to repair damaged bones or stabilize joints. Surgery can relieve pain, restore proper joint alignment, and prevent arthritis.
Vets carefully consider your cat’s age, health, and severity of the condition before recommending surgery. While recovery takes time, surgery often provides lasting relief, greatly improving your cat’s mobility and quality of life compared to ongoing medication alone.
Home care tips for cats with orthopedic conditions
Good home care can greatly improve your cat’s comfort. Provide soft, cozy beds to reduce joint pressure. Instead of letting your cat jump from high furniture, place steps or ramps nearby. Regular grooming is important for cats who have trouble with self-care due to joint pain.
Gentle massage or heating pads can soothe sore muscles. Keep food, water, and litter boxes easily accessible. Monitor your cat carefully and report any changes to your vet.
With thoughtful adjustments at home, your cat can enjoy improved comfort, reduced pain, and a happier life despite orthopedic issues.
Preventing Orthopedic Conditions in Your Cat
Preventing orthopedic conditions helps your cat stay healthy, active, and comfortable throughout life. Here are practical steps you can take:
- Maintain a healthy weight: Keeping your cat at a healthy weight reduces stress on bones and joints. Feed balanced meals in controlled amounts, and avoid too many treats. Overweight cats have a higher risk of arthritis and joint pain.
- Provide suitable physical activity: Gentle, regular exercise keeps muscles strong and joints flexible. Encourage daily play using toys or interactive games. Avoid rough activities or high jumps that might cause injury, especially in kittens or older cats.
- Regular veterinary check-ups: Routine vet visits can catch problems early, even before signs appear. Your vet can monitor joint health, check your cat’s weight, and offer guidance on nutrition or supplements to prevent joint issues.
These simple but important steps can greatly reduce your cat’s risk of developing orthopedic problems, improving their long-term health and happiness.
When Should You Visit the Vet?
Regular vet visits help spot orthopedic conditions early, even before you notice obvious signs. Routine exams allow your vet to check your cat’s bones and joints, ensuring they stay healthy and pain-free. Catching issues early can prevent permanent damage and improve your cat’s quality of life.
Watch carefully for signs that require urgent attention:
- Sudden or persistent limping or stiffness
- Difficulty jumping or climbing
- Swollen, painful, or warm joints
- Loss of appetite or unusual lethargy
- Behavioral changes like aggression or hiding due to pain
If your cat shows any of these signs, see your vet quickly. Early diagnosis and treatment greatly improve recovery chances and reduce pain.
Conclusion
Orthopedic conditions in cats can be challenging to spot, as cats naturally hide their pain. Recognizing subtle signs like stiffness, reduced activity, or changes in behavior is key to catching these issues early. Early detection helps your cat receive the right care quickly, preventing further joint damage and chronic pain.
Regular vet visits, proper diet, weight control, and gentle exercise play important roles in prevention and management. If conservative treatments aren’t enough, surgical options can greatly improve your cat’s quality of life.
Always pay attention to small changes and act promptly if your cat seems uncomfortable. With attentive care and timely veterinary help, your cat can enjoy a more comfortable, active, and pain-free life, even with orthopedic conditions.
FAQs
How can I recognize subtle pain signs in my cat?
Look for changes like hesitating to jump, reduced grooming, hiding more often, or irritability when touched. Cats rarely limp obviously; instead, they might sleep more, move slower, or avoid activities they previously enjoyed. Small behavioral shifts are important clues to hidden pain.
Do orthopedic conditions only affect older cats?
No, orthopedic conditions can affect cats of any age. Older cats often have arthritis or joint degeneration, but younger cats can suffer from issues like hip dysplasia, kneecap problems, or injuries from falls or trauma. Regular vet check-ups are important at every age.
What breeds are more prone to orthopedic conditions?
Larger breeds like Maine Coons, Persians, Ragdolls, and British Shorthairs often face higher risks of orthopedic conditions. Their heavier bodies can put extra stress on joints. However, all cats can be affected, so regular monitoring and check-ups are always recommended.
Can feline orthopedic conditions heal without surgery?
Many orthopedic conditions improve with conservative care such as weight management, pain medication, joint supplements, and rest. Mild issues often respond well to these methods. However, severe cases, like major fractures or advanced joint degeneration, typically require surgery for the best long-term outcome.
What can I do at home to ease my cat’s orthopedic pain?
Provide soft, comfortable bedding and place ramps or steps to help your cat reach higher places without jumping. Offer gentle massage, maintain a healthy weight, and encourage mild exercise. Regular grooming and keeping necessities within easy reach also reduce discomfort at home.
Joint Replacement Surgery in Dogs: Success Rates and Expectations
Discover success rates, recovery time, and expectations for joint replacement surgery in dogs. Learn when it’s the right option for your pet
What Is Joint Replacement Surgery in Dogs?
Joint replacement surgery in dogs involves removing a damaged joint and replacing it with an artificial implant. This is done to reduce pain and improve movement in dogs with severe joint disease that no longer responds to medication or less invasive treatments.
The most common joint replaced is the hip, especially in dogs with advanced hip dysplasia or arthritis. Elbow and, in rare cases, knee (stifle) replacements may also be done in certain situations.
This surgery is usually recommended when a dog has constant pain, lameness, or difficulty walking due to worn-out cartilage or joint damage. By placing a new joint, the surgeon restores normal movement and reduces discomfort. Joint replacement offers many dogs a second chance at a more active, pain-free life, especially when all other options have failed.
When Is Joint Replacement Recommended?
Joint replacement is usually considered when all other treatment options have failed to relieve pain or improve movement. It’s not the first step in care, but it can offer major benefits when your dog’s quality of life is severely affected.
Here’s when joint replacement may be recommended:
- When conservative treatments no longer work: If pain meds, joint supplements, weight control, or physical therapy no longer help, surgery may be the next step.
- Signs of daily struggle: Dogs that limp, struggle to get up, or avoid walking due to joint pain may be strong candidates.
- Early vs. late-stage intervention: In earlier stages, joint damage might be managed with less invasive care. But in later stages, when cartilage is gone and bone damage begins, replacement may be the best option.
- Irreversibility and last resort: Once joint replacement is done, it can’t be reversed. That’s why it’s considered a last resort—but often the most effective one when nothing else helps.
A full evaluation, including X-rays and physical exams, helps your vet decide if your dog is ready for joint replacement and whether it’s likely to bring long-term relief.
Is Your Dog a Good Candidate?
Not all dogs are the right fit for joint replacement surgery. A careful screening process helps decide if your dog can safely undergo the procedure and benefit from it long term.
Here are the main factors vets consider:
- Pre-surgery screening: Dogs need a full exam, bloodwork, and X-rays to check joint damage, bone health, and overall fitness for anesthesia.
- Health and age considerations: Middle-aged to older dogs can have joint replacements if they’re in otherwise good health. Very young dogs or those with serious heart, kidney, or liver problems may not be good candidates.
- Impact of other joint or nerve issues: If your dog has problems in multiple joints or spinal issues that affect movement, joint replacement may not fully restore comfort or function.
- Importance of healthy body weight: Overweight dogs have higher risks during and after surgery. A healthy weight helps support healing and protects the new joint.
Your vet or a board-certified surgeon will use all this information to decide if joint replacement is the safest and most effective option. The goal is always to improve your dog’s comfort, movement, and quality of life.
Success Rates: What the Numbers Say
Joint replacement surgery in dogs has a strong track record when performed by experienced surgeons. Success rates are high, especially for hip replacements, and most dogs enjoy a much better quality of life after recovery.
Here’s what the numbers and outcomes show:
- Reported success rate: Hip replacement surgery in dogs has a reported success rate of 90–98%. This means most dogs show clear improvement in comfort and mobility.
- Pain relief and improved gait: Many dogs stop limping and show less stiffness within weeks. Owners often report that their dog seems happier, more active, and more playful after surgery.
- Better quality of life: Dogs that were once in constant pain can return to walks, play, and even light running after full recovery.
- Comparison with FHO (Femoral Head Ostectomy): While FHO is another option for hip pain, it doesn’t restore full joint function. Joint replacement provides better stability, smoother movement, and longer-lasting relief, especially in large dogs.
Overall, joint replacement is one of the most effective surgeries for severe joint disease, offering long-term benefits when done in the right patients.
What to Expect During Recovery
Recovery after joint replacement surgery is a critical part of your dog’s success. It takes time, patience, and careful care at home. Knowing what to expect helps you support your dog through every stage.
Here’s what recovery usually involves:
- Hospital stay duration: Most dogs stay in the hospital for 1 to 3 days after surgery for close monitoring, pain control, and initial rehab exercises.
- Strict activity restriction (8–12 weeks): Your dog will need crate rest or limited movement for the first 2 to 3 months. Jumping, running, and stairs must be avoided to protect the new joint.
- Pain management and medications: Your vet will provide pain relief, anti-inflammatory drugs, and sometimes antibiotics to support healing and comfort.
- Role of physical therapy or rehab: Controlled exercises and rehab help restore strength, balance, and proper joint use. Hydrotherapy and laser therapy may also be recommended.
- How soon dogs start walking again: Most dogs can bear some weight within a few days after surgery, but full, pain-free walking takes weeks. Progress is gradual and closely monitored by your vet.
Following your vet’s post-op plan closely gives your dog the best chance for a full, healthy recovery and long-term joint function.
Risks and Possible Complications
While joint replacement surgery in dogs has a high success rate, it does come with some risks. Understanding these potential issues helps you prepare and watch for early signs of trouble during recovery.
Here are some possible complications to be aware of:
- Dislocation: One of the more serious risks, especially in the early weeks after surgery. It happens if the new joint shifts out of place, often due to too much movement too soon.
- Infection: Though rare, infections can occur at the surgical site or deep around the implant. It usually requires antibiotics and close monitoring. Severe infections may need revision surgery.
- Implant loosening: Over time, the artificial joint can loosen, especially in very active dogs or if healing does not go as expected. This may cause discomfort or reduced function.
- Limping or reduced motion post-op: Some dogs may continue to limp or have stiffness, especially if they had long-term joint damage before surgery. Physical therapy helps improve strength and movement.
- Second surgery: In some cases, a follow-up procedure may be needed to adjust or replace the implant.
Most complications are rare and manageable when surgery is done by a skilled team and post-op care is followed closely. Regular follow-ups are key to catching any problems early.
Life After Joint Replacement
Life after joint replacement can be a big improvement for many dogs. With proper recovery and care, they often return to a more active, pain-free lifestyle. Here’s what you can expect long term:
- Return to normal or even athletic activity: Many dogs regain full use of the limb and return to regular walks, play, and even light running. Athletic or working dogs may resume moderate activity with veterinary approval after full healing.
- Long-term implant durability (10+ years): Most implants last over 10 years, often for the rest of the dog’s life. The materials are strong and built to handle daily movement, even in large or active dogs.
- Need for routine follow-ups and checkups: Regular vet visits help monitor the health of the implant and surrounding joint. X-rays may be done once a year or if new symptoms appear.
- Reduction or elimination of long-term pain meds: After healing, many dogs no longer need daily pain medication. This reduces stress on the liver and kidneys and improves long-term health.
With proper post-op care and routine checkups, dogs who undergo joint replacement often enjoy a happy, mobile, and more comfortable life for many years.
Cost vs. Benefit Consideration
Joint replacement surgery can be expensive, but it’s often a life-changing procedure for dogs with severe joint damage. Understanding the balance between cost and outcome can help you make an informed decision.
- Average cost range: The cost of a total hip replacement, the most common joint replacement, typically ranges from $4,000 to $7,000. Elbow and knee replacements may fall within a similar or slightly higher range due to their complexity.
- Why it’s a long-term investment: Although the upfront cost is high, joint replacement can eliminate the need for ongoing pain medications, frequent vet visits, or repeated surgeries. In many cases, it replaces years of short-term fixes with one lasting solution.
- Quality-of-life improvement vs. financial cost: For many dogs, the improvement in daily comfort, ability to walk, and freedom from pain is dramatic. Owners often report their pets acting younger, more playful, and more engaged after recovery. That level of transformation can make the investment worthwhile.
If your dog is a good candidate, joint replacement can offer years of improved mobility and happiness, making it not just a medical choice but a quality-of-life decision for both pet and owner.
Setting Realistic Expectations
While joint replacement offers excellent results for many dogs, it’s important to understand what “success” truly means. Setting realistic expectations can help you feel more prepared and confident throughout the process.
- What "success" really looks like: Success doesn't always mean your dog will run like a puppy again. It usually means your dog walks without pain, gets up more easily, and enjoys everyday activities again. Some stiffness may still occur, especially in older dogs.
- Outcomes may vary case by case: Every dog is different. Factors like age, other joint problems, overall health, and how long the joint was damaged before surgery all affect the outcome. While most dogs improve greatly, a small number may continue to have some discomfort or need long-term management.
- Importance of owner commitment during recovery: Your role in the recovery process is critical. Strict rest, proper medication, follow-up appointments, and physical therapy all make a big difference. Dogs that follow the full rehab plan usually have better long-term results.
Joint replacement is not a quick fix, but with the right expectations and consistent care, it can give your dog a more comfortable, active, and joyful life for years to come.
Read more about:
- Hip dysplasia surgery in dogs
- Elbow dysplasia detection and referral
- Surgical vs. conservative management of cruciate injuries
Final Thoughts
Joint replacement surgery is one of the most effective solutions for dogs with severe, painful joint disease. It offers long-term pain relief, improved mobility, and a better quality of life, especially when other treatments no longer help. While it requires a serious commitment to recovery and cost, the results can be life-changing for the right patient.
If your dog struggles with joint pain, talk to a board-certified veterinary surgeon. They can evaluate your pet’s condition, discuss all options, and help decide if joint replacement is a safe and suitable choice.
Every case is unique, so making an informed decision is essential. Consider your dog’s age, health, lifestyle, and your ability to support recovery. With the right care and guidance, joint replacement can give your dog a healthier, happier, and more active future.
FAQs About Joint Replacement Surgery in Dogs
How long does recovery take after joint replacement surgery?
Recovery usually takes 8 to 12 weeks, with strict rest and controlled activity during that time. Most dogs begin walking within a few days, but full healing takes several months. Rehab exercises and follow-up visits are important to restore joint strength, prevent complications, and ensure your dog returns to normal function safely.
What’s the success rate of total hip replacement in dogs?
The success rate for total hip replacement in dogs is very high—between 90% and 98%. Most dogs experience significant pain relief, improved movement, and a better quality of life. Complications are rare when the procedure is done by a skilled surgeon and post-op care is followed closely during the recovery period.
Is joint replacement worth it for older dogs?
Yes, joint replacement can be worth it for older dogs if they are in good overall health. Age alone isn’t a reason to avoid surgery. If your dog is suffering from constant joint pain and isn’t responding to other treatments, this surgery can greatly improve comfort and mobility, even in senior pets.
What are the signs that my dog may need joint replacement?
Common signs include chronic limping, stiffness, trouble standing, or loss of interest in walks and play. If your dog doesn’t respond to medications or therapy and joint damage is severe, your vet may recommend joint replacement to restore comfort and function. X-rays help confirm the diagnosis.
How much does dog joint replacement surgery cost?
The cost of joint replacement surgery usually ranges from $4,000 to $7,000, depending on the joint, clinic, and location. This includes surgery, anesthesia, hospital stay, and post-op care. Additional costs may come from diagnostics, rehab, and follow-ups. While costly, it’s a long-term solution with strong success rates.
Are there non-surgical alternatives to joint replacement?
Yes, non-surgical options include pain medications, joint supplements, physical therapy, weight control, and injections. These can help in early or mild cases. However, in dogs with severe joint damage or constant pain, these options may not provide enough relief. In such cases, surgery is often the most effective solution.
How to Optimize Communication Between General Practitioners and Orthopedic Surgeons
Learn how to improve communication between GP and veterinary orthopedic surgeon for improved referrals, case management, and patient outcomes
Effective communication between general practitioners (GPs) and veterinary orthopedic surgeons is crucial for smooth case management and the best patient outcomes. However, miscommunication, incomplete referrals, and unclear follow-up responsibilities can lead to delays, frustration, and less effective care.
Take, for example, a dog with a CCL rupture. If referral notes lack high-quality imaging or joint stability test results, the surgeon may need additional diagnostics, which can delay surgery. Similarly, if post-op instructions are unclear, the GP may find it difficult to manage rehabilitation and pain.
By improving referral processes, information sharing, and follow-up protocols, veterinarians can collaborate more effectively, enhancing both surgical success and long-term patient care.
In this article, we will explore practical steps to improve collaboration, simplify workflows, and ensure better orthopedic outcomes for veterinary patients.
TL;DR
- Make referrals clear and complete – Provide a concise referral summary, attach high-quality imaging and lab results, and clearly state the reason for the referral to avoid delays.
- Perform essential pre-referral diagnostics – Take proper X-rays (multiple views, high quality) and run basic lab tests (CBC, chemistry, joint fluid analysis if needed) before sending the case.
- Communicate effectively with specialists – Use structured referral letters, make direct calls for urgent cases, and confirm that all records are received before the consultation.
- Clarify post-op responsibilities – Read and follow discharge instructions, ensure consistent messaging to the client, and know when to escalate concerns.
- Manage client expectations upfront – Discuss costs, timelines, recovery process, and potential complications before referral to prevent misunderstandings.
Effective Referral Communication
Make referrals clear and simple to improve patient care.
Include a Clear Referral Summary
Don’t just forward a stack of medical records – write a concise referral letter or use a standardized form. Summarize the patient’s key history, physical exam findings, relevant test results, treatments given (with outcomes), and your diagnosis or differential diagnoses.
Also clearly state the reason for referral (what question or service you need from the specialist). This focused approach ensures the surgeon quickly grasps the case without sifting through unnecessary details.
Attach Relevant Documents
Provide copies of important lab results and diagnostic images (e.g., radiographs) with the referral letter. Ensure x-rays are high quality and properly labeled. Including this upfront prevents duplication and delays, allowing the specialist to plan the next steps without waiting for more information.
- Example (for TPLO cases): Include pre-operative radiographs (craniocaudal & mediolateral views), joint stability test results (cranial drawer and tibial thrust test), and CBC/biochemistry panel results to assess surgical readiness.
- Example (for Hip Dysplasia cases): Submit pelvic radiographs (VD extended view under sedation), PennHIP or OFA evaluation reports (if available), and any prior conservative management history (NSAID use, physical therapy, or weight management interventions).
- For Any Orthopedic Surgery: If a CT scan, MRI, or arthroscopy findings exist, sharing those with the referral will significantly improve pre-surgical planning.
Be Clear and Concise
Format the referral letter for easy reading—use headings or bullet points for sections like “History,” “Findings,” “Diagnostics,” “Treatments,” and “Referral Request.” Ideally, keep it to about 1–2 pages of focused information.
Avoid long narratives or illegible handwritten notes, which are common mistakes that frustrate specialists. Clear, well-organized information helps the receiving surgeon understand the case quickly and communicate effectively with the client about next steps.
For example, a GP once faxed over 15 pages of progress notes for a chronic limping case without a summary. The orthopedic surgeon nearly missed the detail that the dog had a prior ligament surgery on that leg, which was buried in the records.
Solution: Always include a summary letter highlighting crucial history (e.g., past surgeries, medications) and the specific question for the specialist. This ensures critical details aren’t overlooked in a sea of records.
Pre-Referral Workup & Diagnostics
Do basic tests before sending patients to specialists.
Complete Basic Imaging
Perform the necessary imaging before making a referral to streamline care. For orthopedic cases, this typically involves high-quality X-rays of the affected limb or joint, with at least two different views. Sedate the patient if needed to get clear images.
Sending these images to the surgeon ahead of time allows them to assess the injury and plan for possible surgery during the initial specialist visit, rather than just performing diagnostics then.
Run Relevant Lab Tests
Include recent blood work and other important tests in the referral package. For example, a CBC/chemistry panel (and urinalysis for older patients) is often recommended before orthopedic surgery. If there's a chance of infection, consider joint fluid analysis or culture and include those results. Providing this information ensures the specialist has everything needed and won't have to repeat tests, saving the client time and money.
- For routine orthopedic surgery (e.g., TPLO, hip replacement): A CBC/chemistry panel is essential to check for underlying conditions that may affect anesthesia or healing.
- For older patients or those with systemic disease: Include a urinalysis and thyroid panel (T4), especially in geriatric cases or breeds prone to hypothyroidism.
- If infection is suspected (e.g., septic arthritis, osteomyelitis): Submit a joint fluid analysis (cytology) and bacterial culture to confirm the presence of infection before surgery.
- Example (for a dog with suspected immune-mediated polyarthritis): Provide joint fluid cytology from at least three joints to help differentiate from infectious arthritis.
Avoid Unnecessary Delays
Don’t spend too long trying to perfect the workup if it's clear a specialist is needed. Perform the basic diagnostics you can, then refer promptly. Delaying a pre-referral workup too much (or referring without any workup) can both be issues.
Aim for a balance: address straightforward tests (like X-rays for a fracture or blood tests for surgical candidates) but know when to pass the case on.
Share Everything Pertinent
Make sure all diagnostic results are sent. Missing records or images can delay treatment—if the surgeon doesn’t have the radiographs or lab results at the consultation, they might need to repeat them. Double-check that the referral hospital received the files (many have an email for sending radiographs and labs).
For example, we have seen a dog with intermittent lameness referred to an orthopedic specialist without any X-rays. The specialist had to schedule the dog for imaging on a later day, frustrating the owner and delaying diagnosis.
Solution: Always take and send initial radiographs for orthopedic cases. Even if the images aren’t definitive, they provide the surgeon with a starting point. In this case, if the GP had provided X-rays, the surgeon could have assessed them and possibly proceeded with advanced imaging or treatment during the same visit, speeding up care.
Collaborative Case Discussions
Talk with specialists early to get the best advice.
Consult Early and Specifically
If you're unsure about an orthopedic case or need advice, contact the specialist for guidance. Many orthopedic surgeons are open to discussions with referring vets and may provide phone or email consultations as a courtesy.
When reaching out, prepare a brief case summary and specific questions to focus the conversation (e.g., "Given these X-ray findings, do you recommend referral for surgery, or can we manage conservatively for now?"). This focused approach respects the specialist's time and provides more helpful advice.
Use the Right Communication Channel
Choose your communication method based on the urgency of the case. For urgent or emergency orthopedic issues (like open fractures or sudden neurological problems), call the surgeon or specialty hospital directly and mention that the case is urgent.
For non-urgent questions or updates, an email with details or an online referral portal can be effective, allowing the specialist to respond between surgeries. If you don't receive a timely reply and the matter is urgent, follow up with a phone call.
Keep an Open Dialogue
Maintain open lines of communication throughout the case. After you refer the patient, you might have additional questions or new information (e.g., a lab result that came in later) – promptly update the surgeon.
Likewise, if the specialist notes something (like an incidental finding or a client concern) that you might help with, be available to discuss it. This teamwork approach ensures continuity of care. Remember, teleconsulting tools (even sending images digitally or having a quick virtual meeting) can facilitate veterinarian-to-specialist communication when distance or schedules are an issue.
Know When to Escalate
If a communication breakdown occurs – for example, you’re not hearing back about a critical case – don’t hesitate to escalate appropriately. You might contact an alternate specialist at the practice or even a practice manager if needed.
Timely, direct communication can prevent small misunderstandings from becoming big problems. As a referring vet, you are the advocate for your patient and client; it’s okay to politely push for information or clarity when the pet’s well-being is on the line.
Scenario (Specialist Consultation): A general practitioner suspects a cranial cruciate ligament tear in a dog but isn’t 100% sure. They email an orthopedic surgeon with the case details, asking if referral for a TPLO surgery is warranted. After two days with no response, the GP notices the dog’s condition worsening.
Solution: In cases where timely advice is needed, call the specialist’s office rather than waiting on email. In this scenario, a quick phone call identified that the email had gone to spam; once connected, the surgeon reviewed the case and advised immediate referral for surgery. The lesson is to choose the fastest communication method for urgent questions – a phone call can avert delays for a deteriorating patient.
On the flip side, for routine advice, scheduling a phone consult or sending a concise email (and confirming receipt) can get you valuable guidance on next steps without an actual referral, strengthening collaborative care.
Post-Surgical Coordination
Work together after surgery for a smooth recovery.
Obtain and Read Discharge Instructions
After the orthopedic surgeon treats the patient, such as performing surgery, make sure you receive a discharge summary or report. This should include details about the surgery, any findings during the operation, medications to continue, restrictions like exercise or bandage care, and the follow-up plan.
Review this information carefully as soon as you get it. If you haven't received a report by the time the pet returns to you, call the specialist to obtain it—never guess the plan. Clear documentation from the surgeon is essential for you to continue care properly.
Clarify Follow-up Responsibilities
Discuss with the surgeon and the pet owner who will handle different parts of the aftercare. Often, the general practitioner will manage tasks like suture removal, bandage changes, routine rehab exercises, or follow-up lab work, while the specialist might want to see the patient for recheck exams or follow-up X-rays at specific intervals. Make sure these roles are clearly defined.
For example, confirm if the surgeon will re-evaluate the pet 6–8 weeks after surgery for radiographic healing, or if you should take X-rays and send them over. Having this plan in writing prevents confusion for everyone involved.
Synchronize Messaging
It's important that you and the orthopedic surgeon provide consistent advice to the owner. Reinforce the surgeon's instructions when the pet returns to you. If the surgeon said "Crate rest for 4 weeks," emphasize that same message at each GP visit.
Any changes or concerns about the plan should be discussed between vets, not by giving the owner different instructions on your own. Consistency prevents the common issue of "but my regular vet said I could start walks earlier," which can undermine trust or the pet's recovery.
Stay in the Loop on Progress
Good communication goes both ways—the specialist should keep you updated on the patient's progress, and you should inform them if there are any complications or questions during recovery. For example, if the surgical site looks inflamed during a bandage change, let the surgeon know right away and perhaps send a photo.
Early communication about concerns allows the specialist to guide you on interventions, like adjusting medications or seeing the patient sooner. This teamwork ensures any post-op issues are handled efficiently.
Plan for Emergencies or Complications
Before the patient leaves the specialty hospital, make sure you know how to contact the surgeon or facility if an emergency happens (during or after hours). Share this plan with the client and ensure your clinic staff is aware of it.
For example, if the dog re-injures its leg or has a drug reaction, should the owner go directly to the ER at the specialty center, come to you, or call first? Discussing these options in advance prevents panic and wasted time if something goes wrong.
Scenario (Post-op Follow-up): A cat has a complex orthopedic surgery at a referral center. A week later, the owner visits their GP for a check-up and to ask some questions. However, the GP hasn’t received any discharge notes and doesn’t know that the cat has external pins that need weekly cleaning.
Solution: The GP’s office immediately contacts the orthopedic surgeon to get the discharge instructions, which include pin care and a schedule for pin removal. Moving forward, the GP now calls the specialty hospital on the day of surgery to get a briefing on the outcome and expected aftercare.
This scenario highlights the need for proactive communication: don’t assume you’ll automatically receive all the information—sometimes you must actively seek it to ensure smooth post-surgical care.
Client Communication & Expectation Management
Explain the referral process clearly to clients.
Introduce the Idea of Referral Properly
When you decide to refer, explain to the pet owner why a specialist is the best choice. Discuss the specific expertise or advanced procedures the orthopedic surgeon can offer (for example, “Tibial Plateau Leveling Osteotomy for your dog’s knee”).
Present it as teamwork: you're involving a colleague to provide the best care for the pet. This helps the client understand that you're not "handing off" their pet, but rather adding a specialist to the care team.
Set Realistic Expectations
Prepare the client for what will happen at the referral. Let them know the specialist may repeat some tests or take new images to get the most accurate information—this helps prevent frustration if diagnostics are redone.
Provide a general idea of the timeline: for instance, an initial consultation might take a few hours, and surgery (if needed) could be the same day or later. If the pet might stay overnight or longer, mention that.
Also, discuss recovery time and effort: for example, "After surgery, expect several weeks of restricted activity and possibly rehab exercises—it's not an instant fix." Setting these expectations helps prevent misunderstandings about the recovery process.
Discuss Costs and Logistics Upfront
Be honest about the potential costs of specialty care. While you might not have an exact amount, you can provide an estimate or range for advanced imaging or surgery based on past cases. Clients appreciate knowing the financial commitment so they aren’t surprised by the specialist’s estimate.
Additionally, assist with logistics: provide the referral hospital’s address, phone number, and any instructions (e.g., fasting before the appointment if sedation might be needed for imaging).
Whenever possible, your clinic can help make the appointment for them or at least advise on how to schedule it. Owners feel more comfortable when you guide them through the process (e.g., “We’ll send over all of Max’s records and X-rays, and the surgeon’s office will call you to set up a time. Here’s what you should bring with you…”).
Maintain Client Trust During the Handoff
Reassure the owner that you’ll stay involved and informed. Explain that after the specialist evaluation, you will communicate with the surgeon about the findings and plan. Clients often worry they’ll "lose" you once they go to a specialist, so let them know you’ll be there for follow-up and will receive updates.
Encourage them to ask questions during the specialist consultation, but also invite them to call you if they need help understanding any recommendations. This teamwork approach can greatly boost the client’s confidence in the referral process.
Avoid Over-promising
It’s natural for pet owners to ask, “Will my dog be 100% better after this surgery?” or “Is this going to fix the problem permanently?” Be honest that while the surgeon will do their best and most pets improve, no procedure is guaranteed. Discuss the prognosis in terms of probabilities or ranges (“There’s a very good chance of significant improvement, though minor lameness could persist”).
Also, discuss possible risks in a balanced way (not to scare them, but so they aren’t surprised if a complication occurs). By managing expectations, you prevent the scenario where an owner is unhappy despite a clinically good outcome, simply because they expected a miracle.
Scenario (Client Expectations): A GP referred a Labrador with elbow dysplasia to a surgeon, describing the procedure to the owner as a “routine arthroscopy” and assuring them the dog would be running normally soon. The owner expected a quick recovery. In reality, the dog needed more extensive surgery and months of rehab, leaving the client surprised and upset.
Solution: The GP should have prepared the client with a more cautious outlook. For example, they could explain that the specialist will determine the best course of action, which might be arthroscopy or another intervention, and that elbow problems often require significant rehab. Additionally, the GP could mention the range of recovery times, such as “some dogs heal in a few weeks, while others need a few months of therapy.”
By providing a realistic picture ahead of time, the client would have been mentally and financially prepared for the longer journey. The key is to inform without inflating expectations, so the client stays committed to the treatment plan rather than feeling misled.
Common Pitfalls & Solutions
Avoid common mistakes to make referrals better.
Incomplete or Unorganized Referral Info
Important case details can be lost when a GP sends only raw medical records or a brief note. This can leave the specialist unsure of why the pet was referred or what has been done so far.
Always include a structured referral letter that highlights the main points, such as history, findings, diagnostics, treatment, and the referral request. Many specialty centers provide referral templates to ensure nothing is missed; if not, a one-page summary is much better than 20 pages of records without context. Clear and concise communication from the start prevents confusion and helps the surgeon quickly understand the case.
Missing Diagnostics at Referral
The specialist may not have access to previous test results or imaging, leading to redundant testing or delays. For example, if a blood test or X-ray was done at the GP but those results were not forwarded, the specialist might have to repeat them or delay treatment.
Solution: Double-check that all relevant lab results, radiographs, and other test reports are sent to the referral hospital (and received) before the client’s appointment.
It’s a good idea to give the client copies as a backup. By providing a complete diagnostic workup in advance, you streamline the specialist’s process and avoid wasting time re-running tests the GP has already done.
Poor Indication of Case Urgency
Sometimes, a referral is made through routine channels for a case that actually needs immediate attention, causing a delay that harms the patient. The specialist might not realize a case is an emergency if it's not clearly communicated.
Solution: If a case is urgent (like a compound fracture or suspected septic joint), call the specialist right away and inform them of the situation. Mark any written referral or email as "URGENT" and provide context (e.g., "fracture – pain not controlled, please see ASAP").
Most surgeons will accommodate true emergencies, but they need to be informed. Quick, direct communication can prevent unnecessary deterioration while waiting.
Lack of Ongoing Communication
After a pet is referred, the GP might completely step back and not stay informed, or the specialist might fail to update the GP. This gap can leave the primary vet unaware of treatments given, or the client receiving mixed messages.
Solution: Keep a feedback loop open. The specialist should send a summary of findings and treatments promptly after the consultation or surgery. If you don't receive one, reach out and request an update.
Similarly, when the pet returns to your care, inform the specialist about the patient's status, especially if any complications arise. Continuous communication ensures everyone—GP, specialist, and client—stays informed about the pet's care.
Client Left in Confusion
The pet owner may not know who to contact for specific issues or might receive different information from the GP and the specialist. For example, the client might call the GP about a post-surgery issue when the surgeon actually wanted to handle those calls, or vice versa. This miscommunication can lead to frustration and even mistrust.
Solution: From the beginning of the referral, clarify the roles: The specialist will address the specific issue and inform both the client and you of the plan, while you will handle routine care and act as a liaison. Encourage clients to keep both your contact information and the specialist’s, and assure them they can reach out anytime.
Also, show a united front—when clients see their GP and surgeon communicating and co-managing smoothly, it boosts their confidence. Clients especially appreciate when their questions are answered and their veterinarians work together; simple follow-ups (even a quick call to the client after the specialist visit) can greatly enhance their perception of care.
Unaligned Expectations or Instructions
A common mistake occurs when a client expects something unrealistic, like an outcome, cost, or timeline, or when home-care instructions aren't clearly communicated, leading the owner to unintentionally stray from the plan (e.g., letting the dog exercise too soon).
Solution: Use preventative communication. Before the referral, align expectations by discussing likely costs and recovery scenarios. After the specialist visit, make sure the client has heard and understood the discharge instructions—have them repeat key points to you, or follow up in a day or two to check in. If you notice any confusion or if the plan is complex, provide a written summary or handouts.
By anticipating misunderstandings and addressing them proactively, you can avoid issues that might affect the pet’s outcome. If something does go wrong or not as expected, timely and honest communication among the GP, specialist, and client will help resolve the situation quickly.
Conclusion
In conclusion, improving communication between general practitioners and orthopedic surgeons is key to better patient care and efficient treatment. By ensuring clear and concise referral communication, conducting necessary pre-referral diagnostics, and having collaborative case discussions, healthcare providers can make the referral process smoother.
Moreover, effective post-surgical coordination and managing client expectations are important for a smooth recovery and maintaining trust. Avoiding common mistakes through proactive communication and organization strengthens the partnership between general practitioners and specialists, benefiting the patient and enhancing overall healthcare outcomes.
What to Expect When Your Patient Sees an Orthopedic Specialist
Learn what to expect during a veterinary orthopedic referral—from diagnosis and imaging to treatment planning and follow-up care
Why a Referral to an Orthopedic Specialist Is Needed
Orthopedic referrals are often made when a pet's bone, joint, or ligament problem requires advanced care. General vets might begin with exams, X-rays, or rest plans. However, if a pet continues to show lameness, joint swelling, or pain that doesn't improve, it's time to see a specialist.
Orthopedic specialists have more training in complex conditions like cruciate ligament tears, hip dysplasia, or bone fractures that may need surgery. Referrals are common after initial imaging reveals damage or instability, or if the pet's condition worsens despite treatment. Sometimes, the vet may suspect a problem that requires special tools or surgical skills to diagnose and fix.
Referring to a specialist ensures the pet has the best chance at recovery with the right diagnosis, treatment plan, and post-op care. It's about helping the pet move comfortably again, as quickly and safely as possible.
TL;DR
- Referrals are made for complex joint, bone, or ligament issues that need specialist care.
- Orthopedic specialists review records and imaging before the appointment.
- Clients should bring medical history, medications, and movement videos.
- The first consult includes a full exam and review or request for advanced imaging.
- Clients are guided through shared decision-making based on goals and lifestyle.
- Next steps may involve diagnostics, pre-op prep, or scheduling surgery.
- Follow-up includes rehab plans, rechecks, and clear home care instructions.
- You’ll receive timely updates and remain part of the care team.
How Orthopedic Specialists Prepare Before the Consultation
Before meeting the patient, orthopedic specialists carefully review all referral notes and medical history. This includes the reason for the referral, past treatments, and how the pet has responded so far. Understanding the full background helps the specialist plan the best next steps.
They also examine any imaging or test results sent by the referring vet, such as X-rays, CT scans, or lab work. These provide clues about possible joint damage, bone fractures, or soft tissue injuries.
If any important details are missing—like unclear test results or an incomplete history—the specialist contacts the referring veterinarian. Good communication ensures that no important information is overlooked.
By preparing this way, the specialist enters the consultation ready to focus on the patient’s specific needs and decide if surgery or another treatment is the right choice.
What the Client Should Bring to the Appointment
To make the orthopedic consultation smooth and helpful, clients should bring all important records about their pet’s health. This includes any past medical history, test results, and diagnostic images like X-rays or MRI scans. These help the specialist understand the full picture and avoid repeating tests.
It’s also important to bring a list of any current medications, joint supplements, or pain relievers the pet is taking. Knowing the exact dose and schedule helps the specialist plan safe and effective treatment.

If possible, clients should also bring videos showing how the pet moves at home. These videos are useful, especially if the pet walks differently at the clinic due to stress or excitement. A short clip of the pet walking, running, or using stairs can show signs of lameness, limping, or joint stiffness more clearly.
Bringing these items gives the specialist better insight and helps them make the best decision for the pet’s care.
What Happens During the First Consultation
The first consultation with a veterinary orthopedic specialist is thorough and focused on understanding the pet’s condition. It usually starts with a discussion between the specialist and the client. The specialist asks about the pet’s medical history, when the issue began, and how it has changed over time.
Next, the pet undergoes a complete physical and orthopedic exam. This includes observing how the pet stands, walks, and moves each limb. The specialist will gently check joint movement, muscle strength, and look for signs of pain, swelling, or instability.
After the exam, the specialist reviews any X-rays or test results provided by the referring vet. If more information is needed, they might suggest advanced imaging like a CT scan or MRI. These can reveal joint damage or injuries not visible on standard X-rays.
By the end of the visit, the specialist will explain their findings and discuss possible next steps, including surgery if necessary.
Pain and Function Evaluation Techniques
Orthopedic specialists use several methods to assess a pet’s pain level and how well their joints and limbs function. The goal is to identify the cause of lameness and determine the right treatment.
One important method is gait analysis, where the specialist observes the pet walking and moving to detect uneven steps, limping, or stiffness. They may also ask the client to share videos of the pet moving at home.
Another method is palpation, where the vet gently presses on bones, joints, and muscles to check for swelling, heat, or pain. They also conduct range of motion tests to see how far each joint can bend and stretch without causing discomfort.
These hands-on techniques provide useful clues about the location and severity of the problem. They help guide the diagnosis and plan for treatment or surgery.
Establishing a Diagnosis
After the physical exam and review of medical records, the orthopedic specialist starts forming a diagnosis. This begins with creating a list of differential diagnoses—possible conditions that could be causing the pet's symptoms, such as cruciate ligament tears, hip dysplasia, or joint infections.
The specialist compares the pet's symptoms, exam findings, and any imaging results to narrow down the options. For instance, if a dog has knee pain and swelling with a drawer sign on exam, a torn cranial cruciate ligament is a likely cause.
They also consider the pet's age, breed, activity level, and past injuries. Sometimes, the diagnosis is clear from the first visit. Other times, more tests—like joint taps, CT scans, or arthroscopy—are needed to confirm the cause.
At the end of the consultation, the specialist explains the most likely diagnosis and discusses next steps. This could include surgery, further imaging, or trying conservative care first, depending on the case.
When Additional Diagnostics Are Recommended
Sometimes, a physical exam and standard X-rays don't provide enough information. In these situations, orthopedic specialists might suggest advanced diagnostics to better understand the issue.
Advanced imaging like CT scans or MRIs offers a detailed view of bones, joints, and soft tissues.
- A CT scan is helpful for complex fractures or joint deformities
- while an MRI can reveal ligament, tendon, or spinal problems
- Arthroscopy is a minimally invasive procedure where a camera is inserted into the joint to directly view and even treat the damage during the same procedure.
Laboratory tests might also be necessary. Testing synovial fluid from the joint can check for infection or inflammation. Blood tests, such as CRP (C-reactive protein) or a full blood panel, can indicate systemic infection, immune disease, or other health issues that might affect treatment.
These tools help confirm the diagnosis and guide the safest, most effective treatment plan for the pet.
How Treatment Options Are Presented
Once a diagnosis is made, the orthopedic specialist explains all available treatment options to the client. This usually includes choosing between surgical and conservative (non-surgical) management, depending on the condition's severity and the pet's overall health.
Surgical treatment may be recommended for issues like ligament tears, joint instability, or complex fractures. The specialist will explain the procedure, recovery time, risks, and expected outcomes. Surgery often offers the best long-term results for active pets or severe cases.
Conservative management might involve rest, pain medications, joint supplements, weight control, and physical therapy. It can be a good option for mild cases, older pets, or when surgery is not possible.
The specialist clearly outlines the risks and benefits of each option, including success rates and possible complications. They also discuss how the pet's lifestyle and condition might affect healing.
This open discussion helps the client make an informed decision based on what’s best for the pet’s health and comfort.
Involving Clients in the Decision-Making Process
Orthopedic specialists use a shared decision-making approach to involve clients in their pet’s care plan. This means the specialist doesn't just tell the client what to do—they clearly explain the options and help the client choose what’s best based on the pet’s needs and the family’s situation.
The specialist takes the time to explain the diagnosis, what each treatment involves, possible risks, recovery timelines, and expected outcomes. They also answer questions, listen to concerns, and consider factors like the pet’s age, lifestyle, and the owner’s ability to manage care at home.
This approach builds trust and ensures the client feels confident and supported in making the final decision. It also improves treatment success, as the chosen plan fits both the pet and the family.
Good communication and teamwork are key to finding the right path forward.
What Happens After the Consultation
After the consultation, the orthopedic specialist explains the next steps based on the diagnosis and treatment plan. If more tests are needed, like a CT scan, MRI, or joint fluid analysis, the team will schedule them and explain how to prepare your pet.
If surgery is chosen, the specialist will discuss pre-operative steps, such as fasting instructions, lab work, or medication adjustments. These steps are crucial to ensure your pet is healthy enough for anesthesia and surgery. The team will also explain what to expect on the day of surgery and during the hospital stay.
For both surgical and non-surgical plans, the specialist provides a clear timeline. This includes when treatment starts, how long recovery might take, and when follow-up visits or rechecks are needed.
Clients leave with written instructions, contact information for questions, and a clear idea of what to expect. This planning helps reduce stress and sets the pet up for the best possible outcome.
Preparing Clients for Next Steps
Before starting treatment, the orthopedic team helps clients understand what to expect. If surgery is planned, clients are asked to review and sign consent forms that explain the procedure, risks, and recovery.
A clear financial discussion also takes place, including cost estimates for surgery, anesthesia, hospitalization, and follow-up care. This helps avoid surprises and allows the family to plan.
Clients also receive pre-operative instructions to prepare their pet for surgery. This may include fasting for several hours, adjusting medications, and limiting activity. The team explains how to safely transport the pet to the clinic and what items to bring, such as current medications or comfort items.
Good preparation helps reduce anxiety for both the client and the pet. It also improves safety and surgical outcomes. The goal is to make the process smooth, informed, and supportive, ensuring the pet is well cared for every step of the way.
Communication with the Referring Veterinarian
Clear and timely communication with the referring veterinarian is an important part of orthopedic care. After the consultation, the specialist sends a detailed summary report that includes the diagnosis, exam findings, recommended treatment, and any next steps, such as surgery or further tests.
If surgery is performed, the referring vet receives updates after the procedure, including surgical notes and post-op care instructions. These updates are usually shared within 24–48 hours, depending on the clinic's protocol.
Continued collaboration is key. The orthopedic team keeps the referring vet informed about the patient’s progress during recovery and shares recheck results. If long-term management is needed, both teams may work together to monitor the pet over time.
This two-way communication ensures that the pet receives consistent, coordinated care. It also helps the referring vet answer client questions and continue care once the orthopedic treatment is complete.
Follow-Up Care and Long-Term Management
After surgery or treatment, follow-up care is crucial for healing and long-term success. Most pets need post-operative rehabilitation, which may include controlled exercise, physical therapy, cold packs, or laser therapy. These help reduce pain, improve strength, and restore normal movement.
The orthopedic specialist schedules recheck visits to monitor healing, remove sutures, and take follow-up X-rays if needed. These visits also allow the team to adjust the recovery plan based on the pet's progress.
Home care is equally important. Clients receive clear instructions on rest, medication, activity restrictions, and how to watch for signs of complications like swelling, limping, or infection. As the pet improves, the plan may gradually allow more movement and exercise.
For some pets, ongoing orthopedic monitoring is necessary, especially in cases like hip dysplasia or arthritis. The specialist may recommend joint supplements, weight management, or repeat checkups to keep the pet active and comfortable over time.
Conclusion
A referral to a veterinary orthopedic specialist is essential for providing pets with the advanced care they need for joint, bone, or ligament issues. From the initial consultation to diagnosis, treatment, and follow-up, each step aims to enhance the pet’s comfort and mobility.
Specialists collaborate closely with clients and referring vets to ensure every decision is clear, informed, and in the pet’s best interest. With expert guidance and a shared care plan, pets have the best chance for a safe recovery and improved quality of life.
FAQs
What signs suggest a pet needs to see an orthopedic specialist?
Common signs include limping, joint swelling, stiffness after rest, or pain during movement. If these symptoms don’t improve with rest or medication, or if X-rays show bone or joint issues, a referral is often the next step. Early referral helps avoid further damage and gives the pet the best chance for recovery.
How long does an orthopedic consultation usually take?
An orthopedic consultation typically takes 45 minutes to 1 hour. This allows enough time for a full physical and orthopedic exam, a review of medical records and imaging, and a detailed discussion with the client about possible diagnoses and treatment options. More time may be needed if additional tests are performed during the visit.
Is surgery always required after seeing an orthopedic specialist?
No, not all orthopedic cases require surgery. Some conditions can be managed with conservative treatments like rest, medication, and physical therapy. The specialist will explain all options, including the risks and benefits of surgery versus non-surgical care, and help the client choose the best plan based on the pet’s condition and lifestyle.
Can my regular vet continue care after the specialist visit?
Yes, in many cases, your regular veterinarian can handle ongoing care once the initial diagnosis and treatment plan are set. The orthopedic specialist shares detailed reports and recovery guidelines, so your vet can assist with medications, rechecks, or rehab. Some pets may still return to the specialist for follow-up imaging or complex recovery monitoring.
What should I do if I can’t afford advanced diagnostics or surgery?
Speak openly with the orthopedic team. They may be able to offer payment options, alternative treatments, or help prioritize which diagnostics are most important. In some cases, conservative care may be a safe option. The goal is to find the best possible outcome within the client’s comfort and financial situation.

External Fixators and Internal Plating: When Are These Indicated?
When do dogs need external fixators vs. internal plating? Learn key indications, pros, and real case examples in veterinary fracture repair
Understanding Fixation Methods in Dogs
When a dog breaks a bone, the goal of veterinary orthopedics is to stabilize the fracture so it can heal properly. This is done using fixation methods that hold the bone in place during recovery.
Two common methods are external fixators and internal plating.
- External fixators are metal rods or pins placed outside the body and connected to the bone through the skin.
- Internal plates are metal plates and screws that are attached directly to the bone during surgery, under the skin and muscle.
Choosing the right method is important. It affects how fast the bone heals, how much pain your dog feels, and how likely complications are. The location and type of fracture, your dog’s size, activity level, and overall health all play a role in deciding which method offers the best outcome.
When Are External Fixators Indicated?
External fixators are useful in many orthopedic cases where internal plating may not be the safest or most effective choice. They allow stabilization without disturbing nearby tissues and can be adjusted or removed more easily during healing.
1. Open and Comminuted Fractures
External fixators are commonly used for open fractures, where the bone is exposed due to skin damage, and comminuted fractures, where the bone is broken into multiple pieces. In these cases, placing plates inside the wound increases the risk of infection or poor healing.
External fixators stabilize the bone from outside, keeping the area open for cleaning and monitoring. They are especially helpful when the soft tissue around the bone is torn or swollen, as they avoid further trauma and support gradual healing without adding pressure to already damaged areas.
2. Soft Tissue Compromise
When soft tissue around the fracture is severely bruised, torn, or at risk of poor blood flow, external fixators are often the safest choice. They allow the bone to heal without cutting into or lifting the soft tissue.
This protects important structures like muscles, nerves, and blood vessels. Because the fixator stays outside the body, it avoids additional injury to tissue that’s already struggling to heal. This method is especially important in dogs with injuries to the lower legs, where blood supply is limited.
3. Infection or Osteomyelitis
In cases where the bone or surrounding tissue is already infected, such as with osteomyelitis, external fixators are preferred. Internal implants can trap bacteria and make infections worse. External fixators, on the other hand, stay outside the skin, allowing easier cleaning and drainage of infection.
Antibiotics can reach the area more effectively, and the wound can be monitored closely. This method also avoids further surgery in infected areas, which reduces complications and gives the dog a better chance at full recovery.
4. Distal Limb Fractures
Fractures in the lower parts of the limbs, like the radius, ulna, metacarpals, or metatarsals, are often treated with external fixators. These bones are small and close to the skin, so there’s not much muscle or soft tissue to protect internal plates.
Using an external frame avoids the need for deep dissection and gives the bone support from the outside. It also makes post-op care easier and avoids pressure on thin skin. This approach is especially helpful in small or toy breeds where space is limited.
5. Temporary Fixation in Polytrauma
In dogs with multiple injuries (polytrauma), external fixators are often used as a temporary solution to stabilize bones until the patient is strong enough for full surgery. This staged approach allows the vet to focus first on life-saving care, such as treating internal injuries or stabilizing vital signs.
Once the dog is stable, a more permanent surgical plan can be made. External fixators keep the bones in place during this critical period without needing long or complex anesthesia times.
6. Limb Deformity Corrections and Lengthening
External fixators are useful in correcting limb deformities or gradually lengthening bones. Special fixator systems allow small adjustments to be made over time, guiding the bone into the correct position as it heals.
This method is often used in cases of angular limb deformities, bone defects, or after trauma that caused uneven growth. Because the fixator can be adjusted daily, it offers great precision without needing multiple surgeries.
7. Pediatric and Growth Plate Protection
In young dogs with open growth plates, internal plating may damage growing bone or affect normal development. External fixators avoid this risk by stabilizing the fracture from the outside without interfering with growth.
They also allow flexibility for adjusting the frame if the bone grows during healing. This makes them a safer choice for puppies or growing dogs with fractures near the growth plates, especially in the lower limbs.
8. When Post-Op Access is Needed
In some cases, ongoing access to the surgical site is needed for wound care or monitoring, especially when there’s infection, open wounds, or skin grafts. External fixators keep the bone stable while leaving the area open for cleaning, bandaging, or visual checks.
This is very helpful when wounds need frequent dressing changes or when skin healing is part of the treatment plan. It also allows for better drainage, which is essential in complex trauma cases.
When Are Internal Plates Indicated?
Internal plating is a popular method for stabilizing bone fractures in dogs. Plates and screws are placed directly onto the bone under the skin to hold the fracture tightly together. This method offers rigid support and helps promote fast, clean healing in the right cases.
1. Simple, Closed Fractures
Internal plates are ideal for simple, closed fractures, where the skin remains intact and the soft tissues are healthy. These fractures have clean, straight lines and are easier to align. With no open wounds or infection risk, plates can be safely placed beneath the skin.
This method offers strong, stable fixation and encourages quick healing. It also reduces the need for bandaging or frequent wound checks, making it easier for both the pet and the owner during recovery.
2. Midshaft Long Bone Fractures
Plates are often used for midshaft fractures in long bones like the femur, humerus, and tibia. These areas have enough muscle and soft tissue to support internal fixation and protect the implant. The plate helps hold the bone firmly in place and allows for strong healing.
It’s especially useful when the bone breaks cleanly in the middle, away from joints. With proper healing, most dogs regain normal limb use within a few months.
3. Intra-Articular or Precise Reductions
When a fracture extends into a joint, precise alignment is critical to avoid arthritis or long-term stiffness. Internal plating is ideal in these cases because it allows the surgeon to reposition the bone pieces with exact accuracy.
By securing the joint surface with a rigid plate, the vet can restore normal joint shape and function. This is especially important in the elbow, hock, or stifle joints, where perfect alignment is needed for smooth movement and long-term comfort.
4. Cases Requiring Rigid Stability
Some fractures need very firm support to heal properly, especially in active dogs or weight-bearing limbs. Internal plates offer rigid fixation, reducing micromovement at the fracture site. This helps the bone heal more quickly and evenly.
The strong support also allows for earlier use of the leg, which helps prevent muscle loss and joint stiffness. This approach is ideal for dogs that need to return to function quickly, such as working or service animals.
5. Low-Maintenance Recovery
One major benefit of internal plates is that they’re buried under the skin, which means there are no external parts to clean or protect. This makes recovery easier for both the dog and the owner. There’s no risk of pin tract infection or the need for daily cleaning, as with external fixators.
Once the wound heals, the plate stays in place quietly while the bone repairs itself. This lower-maintenance option can be ideal for busy households or anxious pets.
6. When Infection Risk is Low
Internal plates are best used when the risk of infection is low. In clean, closed fractures without skin wounds or swelling, buried implants are safe and reliable. If there is no contamination and the surgical field is sterile, plates can stay in the body long-term without causing problems.
However, in cases of open wounds or previous infection, external fixation may be a safer option to avoid trapping bacteria around the implant.
How Surgeons Choose Between Fixators and Plates
Veterinary surgeons choose between external fixators and internal plates based on several key factors. The goal is always to select the method that ensures safe healing, minimal complications, and a return to function.
Here’s what guides the decision:
- Fracture type - Comminuted or open fractures are usually treated with external fixators. Simple, clean breaks are better suited for internal plates.
- Tissue health - If the soft tissue around the fracture is damaged, swollen, or has poor blood flow, external fixation avoids further disruption. Plates are preferred when tissue is healthy and strong.
- Infection risk - In cases with infection or open wounds, external fixators are safer. Plates are ideal for sterile, closed injuries.
- Dog’s size and age - Young dogs with growth plates often benefit from fixators to protect developing bones. Larger adult dogs may need the rigid support of internal plates for better long-term stability.
Pros of external fixators: Less invasive, adjustable, ideal for infection or soft tissue concerns.
Cons: Requires more cleaning and regular monitoring at home.
Pros of internal plates: Strong, stable support with hidden hardware and low daily care.
Cons: Not suitable for infected or heavily damaged tissue.
Common Case Examples in Dogs
Understanding how fixators and plates are used in real cases helps show why surgeons choose one method over the other. Each dog’s size, fracture location, and health status plays a key role in the decision.
Toy breed with radius/ulna fracture → external fixator
Small dogs, especially toy breeds, have thin bones in the forelimbs with little soft tissue coverage. When the radius or ulna breaks, an internal plate can be too large or risky.
An external fixator provides support without putting stress on the bone or nearby tissues, and it avoids complications like implant pressure or delayed healing.
Large dog with diaphyseal femur fracture → internal plate
In large breeds with a clean break in the middle of the femur (diaphysis), an internal plate offers rigid stability and excellent alignment. The strong muscle coverage in this area protects the implant, and the dog can often start light movement sooner due to the plate’s solid support.
Tibial comminution with wound → external frame
For a shattered tibia with an open wound, an external frame is the safest option. It avoids placing metal inside an infected or damaged area, allows the wound to stay open for cleaning, and holds multiple bone fragments in place while they heal gradually.
Puppy with limb deformity → fixator for correction
Growing dogs with angular limb deformities benefit from external fixators, especially adjustable ones. They allow the bone to be slowly realigned over time without damaging the growth plate, guiding proper bone development while preserving future joint function.
These examples show how the right method supports faster healing and fewer risks based on the dog’s unique condition.
Final Thoughts
When it comes to fracture repair in dogs, there is no one-size-fits-all solution. Each case needs an individualized approach based on the type of break, soft tissue condition, infection risk, and the dog’s age and size. The choice between external fixators and internal plates plays a big role in how well the bone heals and how quickly your dog returns to normal activity.
The surgeon’s experience is key in selecting the right method and performing the procedure safely. Post-operative care, including rest, follow-ups, and sometimes physical therapy, is just as important for long-term success.
As a pet owner, don’t hesitate to ask your veterinarian about all available options. Understanding the pros and cons of each method can help you make informed decisions and give your dog the best chance at a full, healthy recovery.
FAQs About Fracture Repair in Dogs
Which fractures need surgery in dogs?
Surgery is usually needed when a fracture is unstable, displaced, or involves a joint. Open fractures, comminuted breaks, or those that won’t heal well with a cast often require surgical repair using plates or fixators. The goal is to restore alignment, allow proper healing, and prevent long-term pain or poor limb function.
Are external fixators painful for dogs?
External fixators may look uncomfortable, but most dogs tolerate them well. Pain is usually managed with medications, especially in the first few days after surgery. Once the fixator is in place and the initial swelling goes down, most dogs adjust quickly and can walk comfortably with limited activity during healing.
How long does it take for a fracture to heal?
Most fractures take 6 to 12 weeks to heal, depending on the dog’s age, the type of break, and the chosen repair method. Puppies tend to heal faster, while older dogs or those with complex fractures may take longer. Regular X-rays help monitor healing progress during recovery.
Can internal plates stay in forever?
Yes, internal plates are designed to stay in the body long-term. In most cases, they do not need to be removed unless there’s an infection, irritation, or implant-related problem. Many dogs live full, active lives with plates still in place after their bones have fully healed.
What’s the success rate of each method?
Both internal plates and external fixators have high success rates when used appropriately. Success depends on fracture type, surgeon skill, and post-op care. Most dogs heal well, with success rates above 90%. Complications are rare but possible, so regular follow-ups are important to ensure smooth healing.
Is one method cheaper or safer than the other?
Costs and risks vary by case. External fixators may cost less up front but need more follow-up care. Internal plates are more expensive initially but often need fewer home-care steps. Safety depends on the dog’s condition, infection risk, and the complexity of the fracture. Your vet will recommend the best option based on all these factors.
Post-Surgical Follow-Up: What Referring Veterinarians Need to Know
Learn 11 essential post-surgical follow-up tips every referring veterinarian should know to support recovery and improve patient outcomes
The role of a referring veterinarian doesn't end when the surgery is done. In fact, the period after surgery is one of the most important times for the patient's recovery, and smooth communication between the surgical team and the referring vet is crucial.
After the specialist performs the procedure, the referring veterinarian often monitors the patient's healing, manages medications, and supports the client with follow-up care. Without clear updates and guidance, this handoff can lead to confusion, missed issues, or delayed treatment. That's why having a structured follow-up plan is just as important as the surgery itself.
In this guide, we'll cover the essentials every referring veterinarian should know—from discharge instructions and signs of complications to rehabilitation, recheck timelines, and when to contact the surgeon. A well-informed follow-up can greatly improve patient outcomes.
TL;DR – Quick Takeaways for Busy Vets
- Review discharge summaries carefully to understand meds, timelines, and red flags.
- Clarify roles for follow-up tasks like rechecks and suture removal.
- Coordinate care with the surgeon when adjusting rehab, meds, or diagnostics.
- Reinforce instructions with simple handouts or digital notes.
- Plan rechecks based on surgery type and healing stages.
- Monitor for complications and train your team to spot early signs.
- Re-refer quickly if there are signs of implant issues, wound breakdown, or infection.
- Guide long-term care with lifestyle tips and mobility advice.
- Follow up within 24–48 hours to reassure clients.
- Respond promptly to owner concerns to prevent escalation.
- Use SOPs and templates to keep communication clear and consistent.
1. Review and Understand the Surgeon’s Discharge Summary
Reading the surgeon’s discharge summary carefully is the first and most important step in providing effective follow-up care. This document contains key details about the surgery, recovery expectations, and the next steps for the referring veterinarian. Skimming or missing parts of the summary can lead to medication errors, delayed care, or overlooked signs of complications.
Examine the list of prescribed medications closely, noting the dosage and duration. Pay attention to any notes about potential complications the surgeon is concerned about, such as infection, swelling, or implant-related issues. The summary should also provide a clear timeline for recheck appointments, radiographs, suture removal, or physical therapy.
If anything in the notes is unclear, don’t wait—contact the surgeon before the pet’s follow-up visit. It’s better to clarify early than to risk confusion later. A thorough review of the discharge summary helps you stay prepared and ensures the patient receives seamless care.
2. Clarify Roles in Follow-Up Care
Clear communication between the surgeon and the referring veterinarian is crucial to avoid confusion, especially regarding follow-up tasks. It's important to know who is responsible for each part of post-surgical care, such as suture removal, bandage changes, recheck exams, and imaging. If these roles aren't clearly defined, tasks can be missed or repeated unnecessarily.
Clients also need to know exactly who to contact for each concern. For instance, if there is swelling at the incision site, should they call you or the surgeon? If they need a bandage change over the weekend, who is available? Confirming this early prevents last-minute calls and frustration for both the veterinary team and the pet owner.
Before the patient leaves the specialty hospital, ensure that you and the surgeon agree on the follow-up schedule and responsibilities. This shared understanding ensures the client receives clear instructions and the pet continues healing without delays or missteps.
3. Coordinate Care Plans with the Specialist
After surgery, ongoing care often involves physical therapy, pain management, and follow-up imaging. To keep the patient on track, the referring veterinarian and specialist need to stay aligned. If the rehab plan changes or a medication needs adjustment, both teams should be informed to ensure consistent care.
If you're unsure about a medication dose, rehab timeline, or when to schedule radiographs, reach out to the specialist. A quick phone call or email can prevent mistakes and give the client confidence in the care plan. Coordination is especially important when complications arise, such as unexpected lameness, swelling, or signs of infection.
For example, if a dog recovering from TPLO starts limping again, you’ll need to know whether this is expected or if the surgeon wants to recheck the implant. Or if a bandage slips too soon, asking the specialist about the next steps ensures proper wound protection. Ongoing communication helps the patient heal without delays or setbacks.
4. Provide Written Discharge Instructions
Even when the specialist provides detailed discharge instructions, referring veterinarians often need to reinforce or adjust them during follow-up visits. Clients may forget or misunderstand what they were told at the surgical center, especially if they were stressed or overwhelmed on discharge day.
That's why it's helpful to provide your own written instructions during follow-up care. These should be simple, clear, and easy for the client to follow. Focus on key points like medication schedules, activity restrictions, wound care, and signs that need urgent attention. Avoid using medical jargon—clients appreciate straightforward, step-by-step guidance.
You can give these instructions as printed handouts or digital summaries sent by email or text. This makes it easy for pet owners to refer back later and share the information with other caregivers at home. Reinforcing care this way helps prevent mistakes and improves the chances of a smooth recovery. Consistent communication builds trust and keeps everyone on the same page.
5. Schedule Follow-Up Appointments
Follow-up appointments should be scheduled based on the type of surgery and the pet’s condition. For orthopedic surgeries like TPLO, rechecks are often set at 2 weeks (for checking the incision and removing sutures), 6–8 weeks (for X-rays), and possibly 12 weeks for a final evaluation. Soft tissue surgeries might need fewer visits but still require close monitoring.
During each visit, examine the incision site, check for swelling or pain, review mobility, and ensure the pet is healing as expected. If X-rays or lab work are needed, confirm the timing based on the surgeon’s notes.
Consistent scheduling helps track progress and catch complications early. Clearly document each visit so both you and the specialist can follow the case. A well-planned follow-up schedule supports better outcomes and keeps care organized for both the client and the team.
6. Monitor for Complications
Post-surgical complications can happen even with the best care. As the referring veterinarian, you play a crucial role in spotting early signs during follow-up visits. Common issues include infection, swelling, bruising, wound reopening, fluid buildup, or implant-related problems in orthopedic cases. Subtle signs like increased licking, reduced appetite, stiffness, or favoring a limb can indicate early trouble.
During exams, check the incision site for redness, discharge, or warmth. Ask the owner about any behavior changes or difficulties at home, such as reluctance to walk or sudden vocalizing. Clearly record all findings, including any measurements of swelling or temperature if present.
If something seems off, notify the specialist immediately. Quick updates help prevent small issues from becoming serious. It's also helpful to train your team—especially veterinary nurses or techs—to observe and report early signs during bandage changes, laser therapy, or rehab sessions. A trained team with keen observation skills can catch complications early, giving the patient the best chance for a full recovery.
7. Know When to Re-Refer
Not all post-op concerns can be handled in a general practice. Some situations require immediate re-referral to the surgical team. Knowing when to make that call is crucial for the patient’s safety. Clear warning signs include implant failure (like sudden lameness or bone instability), wound reopening, or infections that don't respond to prescribed antibiotics.
Other signs include severe pain despite medication, drainage from the incision after the normal healing period, or unexpected changes seen on follow-up X-rays. These cases often need surgical reassessment or advanced diagnostics not available in general practice.
When re-referring, contact the surgeon directly and explain your findings with clear, concise details. Inform the client that this is a precaution to ensure the best outcome, not a sign of failure. Use firm but calm language to convey urgency without causing panic. Fast, clear communication between all parties helps the patient get the care they need—without delays that could worsen the condition.
8. Discuss Long-Term Prognosis and Lifestyle Modifications
As the patient recovers, your role shifts to guiding the client on long-term care. It's important to set realistic expectations about recovery and what life will be like after surgery. Many pets, especially those who have had orthopedic procedures, need ongoing joint support, weight management, and activity adjustments to stay healthy.
Discuss with the client the importance of maintaining a healthy diet to prevent excess weight, which can stress healing joints. Recommend joint supplements or prescription diets if necessary. Controlled exercise, short leash walks, and possibly physical therapy can support long-term function.
This is also a great opportunity to build a lasting relationship with the client. Regular check-ins for mobility assessments or arthritis care help you stay involved and support the pet's quality of life. Educating owners on long-term needs ensures the surgery's benefits last well beyond the healing period and highlights the value of continued veterinary care.
9. Understand Client Expectations for Follow-Up Communication
Clients often feel anxious after their pet has surgery and expect follow-up contact soon after discharge. Even if the specialist has given detailed instructions, hearing from their primary vet reassures them that their pet is being cared for every step of the way.
Try to check in within 24–48 hours after the procedure, using the client's preferred communication method—phone, text, or email. A quick message asking how the pet is doing, if medications are going well, or if they have any questions can greatly enhance client trust and satisfaction.
Some clients may want more frequent updates, especially if their pet has a complicated recovery. Ensure your team knows how to manage follow-up calls and alert a vet to review any issues. Being proactive shows the client you’re involved, boosts compliance with post-op care, and strengthens your long-term relationship with both the pet and the owner.
10. Address Owner Concerns Promptly
After surgery, pet owners often feel unsure or worried about what’s normal during recovery. Being available and responsive builds trust and helps prevent small concerns from becoming major problems. Encourage clients to contact you if they notice anything unusual, like minor swelling, changes in behavior, or questions about medications.
Responding quickly, even to small concerns, can lead to early intervention. For example, if an owner calls about mild redness around the incision, you can assess whether it’s part of normal healing or an early sign of infection. Acting early may prevent the need for antibiotics or a return to surgery.
Let clients know there are no “silly questions” and that you’d rather hear from them early than too late. This openness helps them feel supported and keeps the patient safer. A timely response shows professionalism, builds strong client relationships, and plays a key role in successful post-op care.
11. Ensure Clear Post-Operative Communication
Strong post-operative communication is the key to effective follow-up care. Whether reviewing discharge notes, clarifying roles, or addressing concerns, clear and consistent messaging helps both the client and the surgical team stay on the same page. Empathy is important too—owners often feel worried, so using simple and kind language makes a big difference.
To make this process smoother, consider using templates for follow-up instructions, client handouts, and internal notes. Standard operating procedures (SOPs) and regular team training can ensure that everyone—from veterinarians to technicians—communicates in the same way. This reduces errors, improves efficiency, and ensures every patient receives the same high level of care.
When communication is clear, timely, and considerate, clients feel supported, the surgical team stays informed, and pets heal better. Developing a consistent strategy helps your practice remain organized and trusted throughout every stage of the post-op process.
Conclusion
Post-surgical care doesn't end in the operating room—it continues through every follow-up visit, call, and check-in. As a referring veterinarian, your role is crucial in helping pets recover safely and completely. By reviewing discharge summaries, clarifying responsibilities, monitoring for complications, and staying in close contact with the surgical team, you create a smooth and supportive recovery path.
Clear communication, consistent scheduling, and early action on red flags all help prevent setbacks. Supporting the client with written instructions and encouraging open questions builds trust and improves compliance. When everyone—from the surgeon to the referring vet to the client—is on the same page, the outcome is almost always better.
Strong follow-up care isn't just good medicine—it's essential for long-term success. By working proactively and collaboratively, you ensure each patient has the best possible chance for a full and healthy recovery.
FAQs
What is the role of a referring vet after surgery?
A referring vet helps manage the pet’s recovery after surgery. This includes monitoring healing, giving medications, handling follow-ups, and staying in touch with the surgeon. Clear communication ensures a smooth transition from specialist to local care.
How soon should a follow-up visit be scheduled?
Follow-up visits usually begin 10–14 days after surgery for incision checks and suture removal. More complex cases, like orthopedic surgeries, may need additional visits at 6–8 weeks for imaging and rehab adjustments.
What are common post-surgical complications to watch for?
Common issues include swelling, infection, wound breakdown, limping, or implant problems. Subtle signs like licking, stiffness, or loss of appetite may also point to early complications and should be addressed quickly.
When should a case be re-referred to the surgeon?
If there are signs of implant failure, deep infection, or non-healing wounds, the case should be sent back to the surgeon. Immediate communication helps avoid delays in treatment and supports better outcomes.
How can clinics improve post-op communication?
Use templates, SOPs, and regular team training to standardize follow-up care. Clear instructions, empathy, and quick responses to client concerns build trust and reduce errors.

Hip Dysplasia Management: When Is Surgery the Best Option?
Find out when surgery is the right choice for managing hip dysplasia in dogs. Learn signs, options, and what to expect from treatment
Hip dysplasia is one of the most common orthopedic diagnoses in dogs, but it doesn't always mean surgery is coming.
Many dogs with hip dysplasia live comfortably for years on conservative management. Others reach a point where pain or mobility loss makes surgery the right path. Knowing which situation your dog is in, and which surgical option makes sense, is what this guide is for.
Quick answer: Surgery becomes the best option for hip dysplasia when conservative management no longer controls pain, when mobility is significantly impaired, or when a dog is young enough for preventive procedures. The two main surgical options are FHO (femoral head ostectomy) and THR (total hip replacement), each suited to different dogs.
Key takeaways
- Surgery isn't always necessary: many dogs manage well with medication, weight control, and physiotherapy.
- Two main surgical paths exist: FHO removes the femoral head; THR replaces the entire joint.
- FHO suits smaller dogs and tight budgets; THR delivers better function in large, active breeds.
- Early preventive surgery (DPO/TPO) is an option for puppies under 10 months with minimal joint damage.
- The trigger for surgery is quality of life, not the X-ray grade alone.
- Delaying surgery in severe cases worsens outcomes: arthritis accumulates and options narrow.
What hip dysplasia actually is
Hip dysplasia is a developmental condition in which the ball (femoral head) and socket (acetabulum) of the hip joint don't fit together correctly. Instead of a tight, smooth connection, the joint is loose, allowing abnormal movement that gradually wears down cartilage and produces bone-on-bone friction.
The result is pain, inflammation, and over time, progressive osteoarthritis.
Hip dysplasia is most common in large and giant breeds: German Shepherds, Labrador Retrievers, Golden Retrievers, Rottweilers, and Saint Bernards among the most frequently affected, but it occurs in any size dog.
The severity on X-ray does not always match the dog's visible symptoms. Some dogs with significant radiographic changes are relatively comfortable. Others with moderate findings are clearly in pain. Both the X-ray and the clinical picture matter.
When conservative management is enough
For many dogs with hip dysplasia, especially mild to moderate cases, non-surgical management controls symptoms well enough that quality of life is maintained without surgery.
Conservative management typically includes:
- Weight management: Reducing body weight is the single most impactful intervention. Every pound of excess weight adds direct mechanical load to an already unstable joint.
- Pain medication: NSAIDs (such as carprofen, meloxicam, or grapiprant) reduce inflammation and pain. Regular bloodwork monitoring is required for long-term NSAID use.
- Joint supplements: Glucosamine, chondroitin, and omega-3 fatty acids support cartilage health and reduce inflammation over time.
- Physical therapy and low-impact exercise: Controlled walking, swimming, and hydrotherapy build the muscle mass that stabilizes the joint and reduces the load on the hip.
- Environmental modifications: Ramps instead of stairs, non-slip flooring, orthopedic bedding.
Conservative management doesn't fix the underlying anatomy. It manages symptoms within the constraints of what the joint can do. When symptoms outgrow what this approach can control, surgery enters the conversation.
For non-surgical alternatives in more detail, see non-surgical alternatives to consider.
When surgery becomes the better path
According to Ask A Vet (2025), surgery is recommended when conservative management fails or when early intervention can prevent arthritis. The clinical signals include:
- Persistent limping or bunny-hopping that doesn't resolve with medication and rest
- Reluctance to stand, jump, or climb stairs that's significantly limiting daily life
- Muscle atrophy in the hindquarters from disuse
- Radiographic evidence of progressive joint damage alongside clinical decline
- Quality of life that is clearly impacted despite consistent conservative management
The decision to move to surgery is a quality-of-life decision, not purely a radiographic one. Two dogs with similar X-rays may need different approaches based on their clinical response to conservative care.
The surgical options for hip dysplasia
FHO (femoral head ostectomy)
FHO removes the head and neck of the femur: the "ball" of the ball-and-socket joint. The remaining femur is cushioned by a "false joint" of fibrous scar tissue that forms over the following weeks.
Best suited to:
- Small to medium dogs (typically under 50 lbs)
- Any size dog when THR isn't feasible (financial constraints, health contraindications)
- Cats
Limitations: The false joint doesn't provide the mechanical function of a real hip. Large breeds may have residual pain or gait abnormality. Function depends heavily on muscle mass and rehabilitation.
For a full explanation of what the procedure involves, see what FHO surgery is and how it helps.
THR (total hip replacement)
THR replaces the entire hip joint with a prosthetic implant. The femoral head and acetabulum are both replaced with precisely fitted components.
Best suited to:
- Medium to large dogs (typically over 40 to 50 lbs) who want full athletic function restored
- Skeletally mature dogs (typically over 9 to 12 months)
- Dogs in otherwise good health without significant comorbidities
Advantage over FHO: THR restores near-normal hip anatomy and function. Success rates of 80 to 98% are reported across published studies. Large active breeds return to full exercise capacity more reliably than with FHO.
For a full overview of the THR procedure, see total hip replacement as an alternative.
DPO/TPO (double or triple pelvic osteotomy)
This is a preventive surgery performed only in young dogs (typically under 10 months old) with hip laxity but minimal joint damage. The surgeon cuts and rotates the pelvic bones to improve how the socket holds the femoral head, reducing abnormal motion before cartilage damage accumulates.
Candidates: puppies with confirmed hip laxity on radiograph, little or no arthritis, and growing bones.
This window closes as the dog matures and joint damage develops.
How to know which surgical option applies to your dog
The right surgical option depends on the intersection of several variables:
For the direct comparison of FHO versus THR across all major factors, see FHO vs total hip replacement for hip dysplasia.
For the specific indications that guide the FHO recommendation, see when FHO is recommended.
The cost of waiting
For dogs with mild disease and adequate pain control, watchful waiting is entirely appropriate.
For dogs with moderate to severe disease where quality of life is declining, delay carries real costs:
- Progressive arthritis: The damaged joint continues to deteriorate. Every month of delay means more cartilage loss and more established arthritis.
- Muscle atrophy: Disuse of the painful leg causes the supporting muscle to waste away, making recovery from eventual surgery harder and longer.
- Narrowing options: As joint damage progresses, some surgical options become less appropriate. DPO/TPO is only available during a brief window in puppyhood.
Early action, when indicated, typically means simpler surgery, cleaner recovery, and better long-term outcomes.
For guidance on whether your dog is a candidate for THR specifically, see how to know if your dog is a THR candidate.
Frequently asked questions
My dog has hip dysplasia but doesn't seem to be in pain. Do they need surgery?
Not necessarily. Many dogs with hip dysplasia compensate well and show minimal pain, particularly in early disease. Conservative management, weight control, and monitoring are appropriate first steps. Surgery is indicated when pain is not controlled or mobility is meaningfully impaired, not simply because the diagnosis exists.
How old does a dog need to be for hip replacement surgery?
THR requires skeletal maturity, typically achieved at 9 to 12 months in most breeds and later in giant breeds. FHO can be performed at any age. DPO/TPO is only appropriate before 10 months of age in puppies with hip laxity and minimal arthritis.
Can hip dysplasia go away without surgery?
The underlying anatomic abnormality doesn't resolve. But many dogs with hip dysplasia maintain a good quality of life on conservative management for years, particularly those who remain lean and receive appropriate physiotherapy. "Going away" isn't the goal; managing symptoms within the joint's limits is.
Hip dysplasia doesn't come with a single right answer. The best path depends on your dog's size, age, severity of symptoms, response to conservative care, and your goals for their function and quality of life. The conversation with your vet and the X-ray findings together tell you more than either alone. Start early, monitor consistently, and make the surgical decision based on how your dog is actually living rather than the diagnosis on paper.
Resources
- PetMD. FHO Surgery in Dogs and Cats. petmd.com
- Ask A Vet. Vet-Approved 2025 Guide: Hip Dysplasia Surgery in Dogs. askavet.com
- Simon Vet Surgical. Hip Dysplasia Surgery in Dogs. simonvetsurgical.com
Elbow Dysplasia in Dogs: Early Detection and Referral Guidelines
Learn how to spot early signs of elbow dysplasia in dogs and when to refer for specialist care to prevent long-term joint damage
What Is Elbow Dysplasia in Dogs?
Elbow dysplasia is a joint problem where the bones in a dog’s elbow do not fit together the right way. This poor fit causes rubbing, pain, and damage to the joint over time. It often affects both front legs and leads to early arthritis.
The elbow is a complex joint made up of three bones—the humerus, radius, and ulna.
If these bones grow unevenly or don’t align properly, it puts stress on the joint. As the dog moves, the abnormal pressure can wear down cartilage and cause swelling and stiffness.
This condition is most common in large and fast-growing puppies. It usually shows up between 4 and 12 months of age. If left untreated, it can lead to lifelong pain and limited movement. That’s why early detection and care are very important for growing dogs.
Breeds Most at Risk
Elbow dysplasia is most common in large and giant breed dogs. Breeds like Labrador Retrievers, Golden Retrievers, Rottweilers, German Shepherds, and Bernese Mountain Dogs are often affected. These dogs grow quickly during puppyhood, and that rapid growth can cause their bones to develop unevenly, leading to joint problems.
Size and weight play a big role. Heavier dogs put more pressure on their joints, especially the front legs, where the elbows are. If the bones in the elbow grow at different speeds, they may not fit together properly. This mismatch causes pain, swelling, and damage inside the joint.
Male dogs are slightly more at risk than females, likely due to faster growth and higher body weight. Genetics also play a role; if a parent has elbow dysplasia, the chances are higher for the puppy.
Knowing your dog’s breed and growth pattern helps you spot signs early. Early screening in high-risk breeds can make a big difference in treatment success and long-term comfort.
Causes of Elbow Dysplasia
Elbow dysplasia is mainly caused by genetics. It’s a hereditary condition, which means it is passed down from parents to puppies. If a dog’s parents or close relatives had elbow dysplasia, the puppy is more likely to develop it too. The condition involves problems with bone development, such as unequal growth of the radius and ulna, or small bone fragments that don’t attach correctly.
However, environmental factors can make the condition worse. Overfeeding a puppy can lead to rapid weight gain, which puts extra pressure on growing joints. Feeding high-calorie diets or too much protein may cause the bones to grow too fast, leading to poor alignment.
Too much or intense exercise at a young age can also add stress to the elbow joints. Activities like jumping, rough play, or running on hard surfaces can damage the joints in puppies who are still developing.
So while elbow dysplasia starts with genetics, early diet, exercise, and weight management also play a big role in how severe the condition becomes.
When Does Elbow Dysplasia Start?
Elbow dysplasia often starts showing signs when a puppy is between 4 and 10 months old. This is a crucial time because the bones are still growing and need to align properly. If they don't, uneven pressure builds up in the elbow joint, causing pain, swelling, and limited movement.
Initially, the signs can be mild, like a slight limp after play or stiffness when getting up. Some puppies may only limp occasionally, especially after exercise. As the condition worsens, the limp becomes more frequent, and the dog may avoid using the affected leg.
If elbow dysplasia is not treated early, it usually worsens over time. The joint becomes more damaged, and arthritis sets in, leading to constant pain, loss of strength in the front legs, and difficulty walking or standing.
Early diagnosis and treatment are important. Detecting it during the early growth stage provides more options to manage or correct the problem before it leads to lifelong joint damage.
Signs of Elbow Dysplasia to Watch for Early
Catching elbow dysplasia early can help protect your dog's joints and prevent long-term pain. Many signs begin subtly, so it's important to know what to watch for, especially in large or fast-growing breeds.
Common early signs include:
- Limping or stiffness: You may notice your dog limping after exercise or showing stiffness after waking up. The limp may come and go at first but can get worse over time.
- Swollen elbows or pain when touched: The elbow joint may look larger than normal or feel warm. Your dog might pull away, growl, or whine when you touch the area.
- Change in gait or movement: Your dog may shift weight to the back legs to avoid pressure on the front legs. This can lead to an uneven or “bunny-hopping” gait.
- Reluctance to play or exercise: Dogs with joint pain may avoid running, jumping, or climbing stairs. They might also seem tired more quickly.
If you notice these signs, it’s best to consult your vet early. X-rays or joint exams can confirm the condition and help guide next steps.
Why Early Detection Matters
Spotting elbow dysplasia early can make a big difference in your dog’s health and comfort. Early diagnosis allows for better treatment options and helps slow or prevent joint damage.
Here’s why early detection is so important:
- Preventing permanent joint damage: When caught early, treatments can reduce stress on the joint and slow down the progression of arthritis. This protects the cartilage and bone from long-term damage.
- Improving quality of life and treatment success: Dogs treated early are more likely to remain active, playful, and free from pain. Early care, such as weight control, physical therapy, or even surgery, is often more effective before severe joint changes occur.
- Lowering long-term costs for owners: Managing advanced joint damage can be expensive. Ongoing pain medications, therapy, or advanced surgeries cost more over time. Early treatment may reduce or even avoid these costs.
Regular vet checkups, watching for early signs, and screening high-risk breeds can help catch the condition before it becomes serious. The earlier you act, the more you can do to keep your dog healthy and active.
How Vets Diagnose Elbow Dysplasia
Diagnosing elbow dysplasia requires a mix of physical checks and advanced imaging. A thorough exam helps your vet find the cause of pain and decide on the next steps.
- Physical exams and pain response: Your vet will check how the elbow moves, feel for swelling and gently press the joint to see if your dog reacts. Limping, joint stiffness, or limited range of motion are early signs.
- Imaging tests:
- X-rays are usually the first step. They help show the bone shape and signs of arthritis.
- CT scans give a clearer view of the elbow and help spot small bone fragments or joint problems not seen on X-rays.
- MRI is less common but is used when soft tissue damage is suspected.
- Arthroscopy: This is a minimally invasive procedure where a tiny camera is placed inside the joint. It helps confirm the diagnosis and can even treat the issue at the same time.
Early and accurate diagnosis leads to better treatment planning.
When to Refer to a Specialist
Referral to a veterinary orthopedic specialist is often the best step when elbow dysplasia becomes hard to manage or diagnose. Some cases need advanced tools and surgical options that general vets may not offer.
- Cases not improving with conservative care: If your dog keeps limping, feels pain, or avoids movement after weeks of non-surgical treatments like rest, medication, and therapy, it might be time to refer to a specialist. A specialist can look into surgical options or more advanced treatment plans.
- Severe lameness or joint deformity: Dogs with serious changes in movement, joint swelling, or elbow misalignment need expert care. These signs often point to deep joint damage that may require surgery.
- Young dogs showing advanced signs: If a puppy has clear signs of elbow dysplasia and advanced joint changes, early surgical care by a specialist can help prevent long-term disability.
- Diagnostic uncertainty requiring advanced tools: When X-rays don’t give clear answers, specialists can perform CT scans, MRIs, or arthroscopy to confirm the problem.
Timely referral can improve treatment success and help your dog regain comfort and mobility sooner.
When Surgery May Be Needed
Surgery may be the best option when elbow dysplasia causes constant pain or joint damage that doesn’t improve with medication, rest, or physical therapy. In some dogs, early surgical care can also prevent the condition from getting worse.
- One of the main reasons for surgery is a fragmented coronoid process (FCP)—a small bone chip that breaks off inside the elbow joint.
- Another is osteochondritis dissecans (OCD), where a piece of cartilage becomes loose.
- Both conditions cause pain, swelling, and joint damage, and often need surgery to remove the fragment or smooth the joint surface.
- Poor response to medication or therapy is another sign that surgery may be needed. If a dog continues to limp or show discomfort after several weeks of conservative care, surgical options should be considered.
Finally, dogs with progressive arthritis that keeps getting worse despite care may benefit from joint surgery to
Early vs. Late Treatment Outcomes
The timing of treatment is crucial for a dog's recovery from elbow dysplasia. Early treatment, whether through medication, rest, physical therapy, or surgery, can greatly improve your dog's joint health and comfort.
- Better mobility and function when treated early: Dogs who receive care during the early stages of elbow dysplasia often regain good movement and stay more active as they grow. Early surgery can prevent further joint damage and improve long-term use of the leg.
- Risk of arthritis and chronic pain if delayed: If treatment is postponed, the elbow joint may become more damaged. Bone rubbing, cartilage wear, and joint swelling can lead to long-term arthritis. This makes the condition harder to manage and may limit your dog’s ability to walk or play.
- Improved long-term prognosis with timely referral: Dogs referred early to a specialist often have more treatment choices and a better chance at recovery. They may also avoid the need for more invasive or expensive surgeries later on.
Treating elbow dysplasia early leads to a better outcome and helps your dog enjoy a more active, pain-free life.
Conclusion
Elbow dysplasia is a serious joint condition that can affect your dog's comfort, movement, and long-term health. It often starts in young, fast-growing dogs, especially large breeds, and may lead to lifelong problems if not treated early. Watching for signs like limping, stiffness, or swollen elbows can help catch the problem before it worsens.
Early diagnosis gives your dog the best chance at a healthy, active life. With the right care—whether that means medication, lifestyle changes, or surgery—many dogs improve and stay mobile. In more complex cases, referral to a veterinary specialist can provide advanced treatment and clearer answers.
The key is to act early. Don’t wait for pain or stiffness to become constant. Regular checkups and prompt action can make all the difference in preventing permanent damage and improving your dog's quality of life.
FAQs
How long can dogs live with elbow dysplasia?
Dogs with elbow dysplasia can live a full life if the condition is managed properly. With early diagnosis, weight control, pain medication, physical therapy, or surgery, many dogs stay active and comfortable. Lifespan is not usually affected, but joint pain may impact their daily activities.
How do you treat elbow dysplasia in dogs?
Treatment depends on the severity. Mild cases are managed with weight control, anti-inflammatory medications, joint supplements, and rest. Moderate to severe cases may need surgery to remove bone fragments or reshape the joint. Physical therapy and regular checkups also help improve joint function and reduce pain.
What is grade 1 elbow dysplasia in dogs?
Grade 1 elbow dysplasia is the mildest form of the condition. It usually shows small changes in the joint, such as slight cartilage wear or early bone changes. Dogs with grade 1 may show few signs of pain, and early treatment can help prevent further joint damage.
How do you treat an elbow hygroma on a dog?
Elbow hygromas are fluid-filled swellings over the elbow. They’re usually caused by repeated pressure on hard surfaces. Treatment includes soft bedding, padded elbow wraps, and drainage if needed. Surgery is rare but may be considered if the hygroma becomes infected or doesn't improve with conservative care.
How long is recovery from elbow dysplasia?
Recovery depends on the treatment. For surgery, healing usually takes 6 to 12 weeks, including rest and physical therapy. Dogs managed with medication and exercise changes may improve in a few weeks but need long-term care. Regular follow-ups help track progress and adjust treatment if needed.

Nutrition & Supplements for Orthopedic Patients: What Works and What Doesn’t
Discover which pet supplements truly support joint health, and what to avoid in orthopedic care. Vet-backed tips for better recovery and mobility
Why Nutrition Matters in Orthopedic Recovery
Nutrition plays a key role in how well a dog recovers after orthopedic surgery or injury. Bones, joints, muscles, and soft tissues all need the right nutrients to heal properly. Without enough protein, vitamins, and minerals, healing slows down and the risk of complications goes up.
Inflammation is common after surgery. Some foods can help reduce it naturally, like those rich in omega-3 fatty acids. At the same time, proper nutrition supports tissue repair, keeps muscles strong, and helps rebuild cartilage around joints.
Supplements can help, but they don’t replace a balanced diet. For example, giving glucosamine is useful, but it won’t work if the dog is eating low-quality food that lacks protein or key vitamins. Recovery works best when supplements are part of a complete nutrition plan, not the only solution.
Start with the Basics: Weight and Diet First
Importance of Weight Management
Keeping a healthy weight is one of the most important parts of orthopedic care. Extra weight puts more stress on joints, especially the knees, hips, and spine. For dogs recovering from surgery, even a few extra pounds can slow healing and increase pain.
Obesity is strongly linked to many joint problems, including arthritis, cruciate ligament injuries, and hip dysplasia. The more weight a dog carries, the harder the joints must work, leading to faster wear and tear. In overweight dogs, surgeries like TPLO or joint replacement often have slower and more difficult recoveries.
Helping a dog reach or stay at a healthy weight reduces this stress and improves mobility. It also lowers inflammation, which supports healing. Even small weight loss—just 5–10% of body weight—can make a big difference in how a dog moves and feels after orthopedic treatment.
Key Nutrients in an Orthopedic Diet
A strong orthopedic recovery starts with a diet that supports healing tissues. Protein is the most important building block—it helps repair muscles, tendons, and bones. Dogs healing from surgery need more protein than usual, especially during the first few weeks post-op.
Calcium and phosphorus are key for bone strength. They must be given in the right ratio, especially in growing dogs, to avoid bone problems. Vitamins like C and D support collagen repair and calcium absorption. Omega-3 fatty acids from fish oil can reduce inflammation in joints and help with pain.
But more isn’t always better. Over-supplementing can throw off balance. For example, too much calcium can lead to bone disorders. It’s best to provide these nutrients through a balanced, high-quality orthopedic or joint-support formula unless your vet recommends extra supplements. Good food is the foundation; supplements should fill gaps, not replace meals.
Supplements That Work: Backed by Veterinary Use
When used with the right diet and weight control, certain supplements can support healing and reduce joint pain. Here are some of the most commonly used and well-researched options in veterinary orthopedic care.
1. Omega-3 Fatty Acids (Fish Oil)
Omega-3 fatty acids, especially EPA and DHA from fish oil, are powerful anti-inflammatory agents. They help reduce joint swelling and improve mobility in dogs with arthritis or post-surgery stiffness. Studies show they can lower the need for pain medications over time.
Common sources include salmon oil, sardine oil, and anchovy oil. Veterinary-grade products are more purified and properly dosed compared to grocery store options. The usual dose is based on body weight, and your vet can guide you to avoid over-supplementation. Fish oil is often the first supplement added to a recovery plan because of its safety, long-term benefits, and ability to work well with other treatments.
2. Green-Lipped Mussel (GLM)
Green-lipped mussel is a natural anti-inflammatory that comes from shellfish native to New Zealand. It contains omega-3s, amino acids, and antioxidants that work together to ease joint pain and stiffness, especially in dogs with osteoarthritis.
GLM is often found in vet-recommended joint products and is considered safe for long-term use. Research shows it can improve comfort and mobility in both older dogs and those recovering from orthopedic surgery.
Unlike synthetic drugs, GLM has fewer side effects and provides a gentle way to support joint health. It's not a cure, but when used consistently, it may lower the need for pain meds and improve quality of life over time.
3. Glucosamine and Chondroitin
Glucosamine and chondroitin are among the most widely studied supplements for joint care in dogs. They support cartilage health, reduce inflammation, and may slow the breakdown of joint tissues. Many vets include them in post-op recovery plans or for long-term management of arthritis.
However, results vary. Some dogs show clear improvement in stiffness and mobility, while others don’t respond as well. The biggest benefits are seen with consistent use over at least 6–8 weeks.
These compounds work best in early to moderate joint disease, not as much in advanced cases. While not a magic fix, they’re still a go-to part of many joint support protocols because of their long safety history.
4. MSM (Methylsulfonylmethane)
MSM is a sulfur-based compound found in plants and animals. In orthopedic patients, it's used for its anti-inflammatory and pain-relieving effects. MSM helps reduce joint swelling and may ease muscle soreness, which is useful after surgery or injury.
This supplement is often paired with glucosamine and chondroitin for added support. It also plays a role in building healthy collagen and connective tissue, which are key during the healing phase. MSM is generally well-tolerated and safe for long-term use.
While more research is still needed, many veterinarians recommend it as part of a combined joint supplement, especially when managing pain without heavy use of NSAIDs.
5. UC-II (Undenatured Collagen Type II)
UC-II is a unique form of collagen that works differently from other joint supplements. It targets the immune system and helps reduce the inflammation that causes cartilage breakdown. Instead of adding building blocks like glucosamine, UC-II trains the immune system to stop attacking joint tissues.
This can be especially helpful in dogs with immune-driven joint problems or chronic arthritis. Some studies suggest it may work better than glucosamine in certain cases, especially for dogs who haven’t responded well to standard supplements.
UC-II is usually taken in small doses and is often combined with other anti-inflammatory agents. It's a good option for dogs needing extra immune-based joint care.
6. Avocado/Soybean Unsaponifiables (ASUs)
ASUs are a mix of natural plant extracts made from avocados and soybeans. They work by slowing cartilage breakdown and blocking enzymes that damage joint tissue. Though not as common as other supplements, ASUs have shown promising results in both human and veterinary studies.
They’re often included in high-quality veterinary joint products along with glucosamine or chondroitin. ASUs are best used when the goal is to protect cartilage and delay further joint damage.
They may also reduce pain and improve mobility in long-term joint conditions. While not a first-line supplement, they offer extra support for dogs with ongoing joint stress or after major orthopedic surgery.
Natural Options Gaining Interest
Alongside traditional supplements, some natural compounds are gaining attention for their potential to support joint health. While the research is still developing, these options may offer gentle support when used carefully and under veterinary guidance.
1. Turmeric (Curcumin)
Turmeric contains curcumin, a natural compound known for its anti-inflammatory effects. Some studies and reports suggest it may help with joint pain and stiffness in dogs, especially those with arthritis. However, curcumin has poor absorption in the body unless combined with other ingredients like black pepper extract.
Many pet supplements use enhanced formulas to improve effectiveness. While it’s a promising option, the results are mixed and more research is needed. Still, turmeric can be a helpful addition to a complete joint care plan when properly formulated.
2. Microlactin
Microlactin is a dried milk protein from cows, known for its anti-inflammatory properties. It works by blocking white blood cells that contribute to joint inflammation and tissue damage. While it's newer compared to other joint supplements, early research and some clinical use suggest it may help reduce pain and improve mobility in dogs with chronic joint issues.
It’s often used as a secondary supplement for dogs who don’t fully respond to traditional options. So far, it appears safe and well-tolerated, but long-term studies are still limited.
3. CBD Oil for Joint Pain
CBD oil has gained popularity for managing pain and anxiety in pets, including dogs with joint problems. Some owners report better mobility and reduced stiffness. Early research also supports its potential anti-inflammatory and pain-relieving effects. However, there are concerns around safety, correct dosing, and product quality.
Veterinary-approved CBD products are best, and you should always speak with your vet before starting. While it shows promise, CBD should never replace proven treatments and should only be used as part of a supervised care plan.
4. Vitamins C & E for Joint Health
Vitamins C and E are antioxidants that help protect joints from damage caused by free radicals. They don’t rebuild cartilage or stop inflammation directly, but they support overall tissue health. In orthopedic recovery, these vitamins may help reduce oxidative stress around healing joints.
Most dogs get enough of these nutrients from balanced diets, so extra supplementation is usually not needed unless advised by a vet. When used, they serve more as add-ons rather than core treatments for joint disease or post-surgery care.
What Often Doesn’t Work (or Needs Caution)
Not all joint supplements are effective—or safe—when used without proper guidance. Many products on the market make big claims but offer little real benefit, especially when not chosen carefully.
Here are common mistakes to avoid:
- Generic or low-quality supplements: Many over-the-counter joint products lack proper testing or use low-grade ingredients. They may contain less active compound than listed or have poor absorption, making them ineffective.
- Overuse of single-ingredient products: Giving high doses of one supplement, like calcium or glucosamine, without balancing it with other nutrients can cause more harm than good. It may lead to imbalances or worsen certain conditions.
- Delaying supportive care: Waiting until a dog is in severe pain or has lost mobility can limit how well supplements and nutrition work. Early support gives the best long-term results.
Supplements are most helpful when started early, chosen with care, and combined with a full recovery plan. Always consult your vet before starting anything new—what works for one dog may not suit another.
How to Choose the Right Supplements
Choosing the right joint supplements for orthopedic care isn’t just about picking a popular brand. The quality, dosage, and how the supplement works with your dog’s overall plan all matter.
Here’s what to focus on:
- Vet-recommended or clinically tested brands: Look for supplements that have veterinary backing or are used in clinical studies. These are more likely to be safe, effective, and properly dosed.
- Absorption and dosage form: Some supplements work better in liquid or chew form because they’re easier to absorb. Powder-filled capsules may not break down well, especially in sick or older dogs.
- Purity and quality control: Choose products made by trusted companies that test for contaminants like heavy metals or fillers. Avoid supplements without clear labels or dosage guidelines.
- Part of a full plan: Supplements work best when used alongside proper diet, weight management, and physical therapy. They are not magic cures on their own.
Talk to your vet to make sure the supplement fits your dog’s condition and recovery stage. Personalized support is always better than one-size-fits-all.
When to Start and How to Monitor Progress
Starting nutritional support and supplements early in the recovery process gives the best chance for healing. The goal is to reduce inflammation, protect joints, and support tissue repair before damage becomes severe. In many cases, waiting too long can limit how well these therapies work.
Early intervention helps to:
- Reduce swelling and stiffness after surgery
- Support faster healing of bones and soft tissues
- Delay or prevent long-term joint damage
Once supplements are started, it’s important to track your dog’s progress over several weeks.
Watch for signs of improvement like:
- Better mobility or ease in getting up
- Less limping or stiffness after rest
- Reduced need for pain medication
Keep a simple journal or video log to track changes. If there’s no clear improvement after 6–8 weeks, or if your dog gets worse, it’s time to re-evaluate the plan. Your vet may recommend changing the supplement, adjusting the dose, or focusing more on diet and physical therapy.
Every dog is different—regular check-ins help keep the recovery on track.
Always Work With Your Veterinarian
Supplements and nutrition can play a big role in orthopedic recovery, but they should never be used without your veterinarian’s guidance. Every dog is different. Age, breed, diagnosis, weight, and other health issues all affect which supplements are safe and effective.
Your vet can build a personalized plan that fits your dog’s specific needs. For example, a dog recovering from TPLO surgery may need different support than one with chronic arthritis or hip dysplasia. Vets also help choose the right product, dosage, and timing for each stage of recovery.
Monitoring is just as important. Some supplements can interact with medications or cause mild side effects like stomach upset. Your vet can spot these early and make changes if needed.
Veterinarians also work closely with rehab professionals. Together, they balance nutrition, medication, and physical therapy to support healing. This team approach helps avoid delays, reduces pain, and improves long-term joint health.
In short, the best results come when supplements are used as part of a full veterinary-guided plan—not in place of one. Always keep your vet in the loop.
FAQs
Do joint supplements really work for dogs with orthopedic issues?
Yes, joint supplements can help reduce inflammation, support cartilage, and improve mobility in dogs with orthopedic conditions. Results vary, but many dogs show benefits with consistent use. They work best when started early and combined with proper diet, weight control, and veterinary care.
Which supplements are best for arthritis in dogs?
The most commonly used supplements for arthritis include glucosamine, chondroitin, fish oil (omega-3s), and green-lipped mussel. UC-II and MSM are also helpful in many cases. Always choose vet-recommended products and use them as part of a complete management plan.
Can I give multiple supplements together for better results?
Yes, many joint formulas combine ingredients like glucosamine, MSM, and fish oil for a more complete effect. However, combining different products on your own may lead to overdosing. Always check with your vet before giving multiple supplements together.
When should I start my pet on joint supplements?
Start supplements at the first sign of joint issues or after orthopedic surgery. Early support can slow down joint damage, ease pain, and help your dog recover faster. Some vets even suggest starting in high-risk breeds before problems begin.
How do I know if a supplement is high quality and safe?
Look for veterinary-approved brands with clear ingredient labels and dosing instructions. Choose products that have undergone purity and safety testing. Avoid supplements without proper certification or those with vague claims. Your vet can recommend trusted options based on your dog’s needs.
Recognize and Manage Post-Surgical Complications in Referred Patients
Learn how to recognize and manage common post-surgical complications in referred pets with clear steps for follow-up, treatment, and communication
When a patient returns from specialist surgery, the referring practice resumes responsibility for day-to-day post-operative management. This is a routine part of veterinary practice, but it carries specific demands: interpreting discharge instructions from a procedure you didn't perform, monitoring for complications that may look unfamiliar, and knowing when to escalate back to the surgical team.
Getting this right matters as much as the surgery itself.
What this covers: The most common post-surgical complications in referred patients, how to recognize them at follow-up visits, management approaches for each, the follow-up communication structure with the surgical team, and owner support during the recovery period.Scope: Applies to soft tissue and orthopedic post-operative patients returning to primary care after specialist referral. MPL surgery recovery is used as a reference case throughout.Clinical principle: The referring veterinarian is often the first professional contact when a complication develops. Early recognition, appropriate triage, and clear communication with the surgical team are the core competencies this role requires.
Key takeaways
- The referring vet often sees complications first: owners contact their primary clinic before the specialist.
- Read the specialist's discharge instructions before the patient returns for follow-up.
- SSI, seroma, wound dehiscence, and persistent lameness are the most common post-surgical complications in referred orthopedic patients.
- Clear discharge presents normally in the first 48 hours; purulent or foul-smelling discharge warrants culture.
- Contact the surgical team for any major complication; don't manage implant or bone healing complications unilaterally.
- Owner communication within 24 to 48 hours of discharge improves compliance and early complication detection.
Your role as the referring veterinarian
The post-operative period is a shared responsibility. The specialist performed the procedure and wrote the discharge instructions. The referring vet and the owner implement them.
In practice, this means:
- Providing follow-up examinations at the intervals specified in the discharge summary
- Managing medications, dressing changes, and rehabilitation oversight locally
- Triaging complications and determining which require specialist re-evaluation
- Serving as the first contact for owner concerns and questions between scheduled rechecks
The ACVS notes that post-operative care is "a collaborative effort between the owner, primary care veterinarian, and ACVS board-certified veterinary surgeon." Your practice's contribution to that collaboration is the continuity of monitoring that the specialist can't provide at distance.
Pre-visit preparation
Before the first post-operative recheck:
Review the surgical summary:
- What procedure was performed, and are multiple procedures involved?
- What implants were placed, if any?
- What is the anticipated recovery timeline?
- Are there specific restrictions or monitoring parameters from the surgeon?
Confirm medications:
- What pain management was dispensed?
- Are there antibiotics, and for how long?
- Has the owner been administering correctly?
Prepare for the physical examination:
- Know what the operated site is expected to look like at this stage
- Have reference for normal post-operative appearance vs. expected complications
- For orthopedic cases: understand what the surgical correction involved before assessing function
Most common complications in referred patients
1. Surgical site infection (SSI)
SSI is the most frequently encountered complication in referred orthopedic patients and is particularly relevant following MPL surgery, TPLO, and other implant procedures.
Clinical signs:
- Redness extending beyond incision margins
- Local heat and swelling worsening after post-operative day 3
- Purulent (yellow, green, or creamy) discharge
- Incision odor
- Systemic signs: fever, lethargy, reduced appetite
Management:
- Culture and sensitivity testing of wound discharge before initiating antibiotics
- Empirical broad-spectrum antibiotics if culture results will be delayed and infection is clearly active
- Wound care as appropriate to the degree of involvement
- Contact the surgical team if the SSI is deep (involving fascial planes), involves implants, or is not responding to initial treatment within 48 to 72 hours
For implant-associated infection specifically, contact the surgical team promptly. Biofilm formation on implants may require implant removal, which is a specialist decision, not a primary care decision.
2. Seroma
A seroma is a sterile accumulation of serous fluid in a dead space beneath the incision. It is common after soft tissue and orthopedic surgery.
Clinical signs:
- Soft, fluctuant swelling beneath the incision
- Not hot or painful beyond mild pressure discomfort
- Typically appears in the first 1 to 2 weeks post-operatively
- No fever or systemic signs
Management:
- Conservative management first: strict rest to reduce fluid production, compression bandaging where anatomically appropriate
- Aspiration if the seroma is large, under significant tension, or causing discomfort; use sterile technique; ultrasound guidance if needed
- Aspiration does not prevent recurrence; re-accumulation is common without strict rest
- Placement of a Penrose drain only if the seroma is refractory and large; coordinate with the surgical team
When to escalate: If the seroma becomes infected (develops heat, discharge, systemic signs), or if it persists beyond 3 to 4 weeks without resolution, contact the surgical team.
3. Wound dehiscence
Wound dehiscence (partial or complete incision opening) requires prompt assessment and is sometimes a surgical emergency.
Classification:
- Superficial dehiscence: Skin only has opened; deeper layers are intact
- Full-thickness dehiscence: All wound layers have opened; tissue may be visible
Management:
- Superficial dehiscence: clean the wound, assess for infection, determine whether re-closure is needed or if second-intention healing is appropriate. Contact surgical team.
- Full-thickness dehiscence: cover exposed tissue with a clean, moist dressing immediately; contact the surgical team for guidance on re-closure approach; this may require specialist intervention
- Tissue protruding: emergency. Cover and refer immediately.
The primary cause of dehiscence in referred patients is owner non-compliance with rest restrictions or E-collar removal. Reinforce these at every interaction.
4. Persistent lameness beyond expected timeline
For orthopedic referred patients, particularly post-MPL surgery, lameness that persists beyond the expected improvement timeline warrants investigation.
Differential diagnoses:
- Re-luxation of the patella
- Implant failure (pin migration, tibial tuberosity displacement)
- Infection of the surgical site or joint
- Concurrent cruciate ligament injury
- Normal variance in healing pace
Approach:
- Radiographs of the operated limb to assess implant position and bone healing
- Orthopedic examination to assess patellar stability
- Compare to the post-operative baseline radiographs from the surgical report
- Contact the surgical team with your findings before making treatment decisions about the implant or bone healing
For reference on what normal MPL surgery recovery progression looks like and when lameness raises concern, see MPL surgery recovery as a reference case.
5. Post-operative pain beyond expected severity
Some patients experience more pain than anticipated. This is particularly relevant in bilateral cases or higher-grade corrections.
Assessment:
- Pain scoring at each visit using a standardized tool (Colorado State Pain Scale or similar)
- Distinguish surgical pain from position-related discomfort vs. complication-related pain
- Assess gait, willingness to bear weight, posture, and facial expression
Management:
- Step up analgesia within the discharge prescription parameters if available
- Contact the surgical team if pain is severe, not responding to current medications, or if you need guidance on additional agents
- NSAIDs, gabapentin, and opioid adjuncts are the most common options; the surgical team can advise on safe additions
The recheck examination for referred orthopedic patients
At each follow-up visit, perform and document:
- Incision assessment: Appearance, closure status, discharge presence and character
- Limb assessment: Weight-bearing status, gait quality, muscle mass comparison bilateral
- Joint assessment: Patellar stability if MPL; range of motion; joint effusion
- Systemic assessment: Temperature, appetite, energy level, pain score
- Radiographs: At intervals specified by the surgical team; essential at the 8 to 10 week bone healing recheck for orthopedic cases
Document findings in a format the surgical team can access if needed. Many specialists appreciate a brief update email following major rechecks.
For an owner-facing reference on the signs they should be monitoring at home between your visits, see general signs of complications after soft tissue surgery.
Communicating with the surgical team
Knowing when to contact the specialist rather than managing independently is one of the most important skills in referred patient care.
Contact the surgical team for:
- Any major complication (deep infection, dehiscence, implant concern)
- Re-luxation or suspected surgical failure
- Pain that is not responding to standard management
- Any question about modifying the rehabilitation protocol
- A patient who is significantly worse than the discharge summary's expected trajectory
Manage locally without specialist consultation for:
- Superficial incision redness that is not progressing
- Small seromas under active rest restrictions
- Mild, expected post-operative lameness on expected timeline
- Medication refills within the existing prescription
A quick call or email to the specialist prevents the most common error: managing a complication beyond the scope of primary care while the problem worsens.
Owner support and communication
Owner compliance is the single most controllable variable in post-operative outcome. Your practice's communication structure directly affects compliance.
Check in within 24 to 48 hours of the patient's discharge from the specialist:A brief call or message asking how the dog is doing, whether medications are being given correctly, and whether the incision looks normal both supports the owner and catches early compliance failures.
Reinforce restrictions at every visit:Do not assume owners have retained all information from the specialist's discharge conversation. Re-explain E-collar use, activity restriction, and the specific signs to watch for at each contact.
Address financial anxiety directly:Complications can create anxiety about cost on top of the stress of a sick pet. Be clear about which complications are manageable at your practice level vs. which would require specialist re-referral, so owners can plan accordingly.
For guidance on rehabilitation protocols for referred post-surgical patients, including the phase-based exercise approach for MPL and other orthopedic patients returning to your care, see rehab protocols for referred post-surgical patients.
Frequently asked questions
The surgical team discharged the patient with only a brief summary. How do I fill the gaps?
Contact the specialist directly. A brief call clarifying the specific procedures performed, the expected recovery milestones, and any parameters that should trigger re-referral is entirely appropriate. Most specialists welcome this communication and will provide the context their written summary couldn't fully cover.
My patient has an implant issue on radiograph. Should I manage it or refer back?
Refer back. Implant adjustments, pin removal decisions, and assessment of failed fixation are specialist decisions. Your role is to identify the problem on radiograph, stabilize the patient, and coordinate with the surgical team promptly.
How soon should I see the patient after specialist surgery?
Follow the discharge instructions. For orthopedic patients, a 10 to 14 day post-operative recheck for suture removal and incision assessment is typical. Some specialists request an additional check at 4 to 6 weeks for gait assessment, and most schedule a formal radiographic recheck at 8 to 10 weeks for bone healing confirmation. Fit your visit schedule to these milestones.
The surgery happens once. The recovery happens over months, and it mostly happens at the primary clinic and at home. Referring veterinarians who take an active, structured approach to post-operative management, communicate proactively with the surgical team, and invest in owner education consistently produce better outcomes than those who take a passive "let the owner call if there's a problem" approach. The specialist finishes the surgery. You finish the recovery.
Resources
- American College of Veterinary Surgeons. Postoperative Care After Surgery: What Animal Owners Should Expect. acvs.org
- SustainableVet. Post-Surgical Follow-Up Guide for Referring Vets. sustainablevet.org
- Allied Veterinary. How Specialty Vets Monitor Pets After Surgery. alliedervet.com
MRSP Treatment Guidelines for Vets (2025 Update)
Learn the latest MRSP treatment guidelines for vets—diagnosis, antibiotics, topical care, and infection control, all in one practical guide
MRSP management requires a structured decision framework, not a reflexive antibiotic prescription. The ISCAID 2025 guidelines for canine pyoderma, combined with established DVM360 surgical wound infection protocols and core antimicrobial stewardship principles, provide that framework.
This is a clinical reference covering the key decision points: when to culture, which drugs to use and avoid, how long to treat, and how to prevent clinic transmission.
Quick summary: ISCAID 2025 recommends cytology before antibiotics in all cases; topical antimicrobial therapy alone for surface and superficial pyoderma; systemic antibiotics reserved for deep pyoderma and failed topical response. Bacterial culture and sensitivity (BC/AST) is required before systemic therapy whenever MRSP is suspected or resistance risk is elevated. Vancomycin and linezolid should not be used in veterinary settings.
Diagnostic framework
Cytology: first step in all cases
ISCAID 2025 (PMC12058580): "Cytology should be performed in all cases before antimicrobials are used."
Cytology confirms:
- Presence of cocci or rods (guides antibiotic class expectations)
- Inflammatory cell pattern (neutrophilic = bacterial; mixed = consider other causes)
- Yeast co-infection requiring concurrent antifungal management
- Correct interpretation of culture results (cytology and culture should be paired)
When to submit for BC/AST
ISCAID 2025 states BC/AST is "always strongly recommended" when:
- There is a history of recent or frequent antimicrobial use
- MRSP, MRSA, or MRSC has been isolated previously from this patient
- The infection is deep pyoderma or severe
- The infection has failed to respond to empirical first-choice therapy
- The clinic or region has a high local prevalence of methicillin resistance
ISCAID additionally states: "BC/AST is never contraindicated."
Practical guidance from SASH Vets: "After a positive MRSP culture, this patient, and optimally other pets in this household, will need C&S testing to guide use of systemic antibiotics for skin infections every time OR only be treated with topical therapy."
Culture technique for MRSP
- Intact pustule: highest yield; express content aseptically and swab
- Epidermal collarette: swab under the active scale edge
- Crusts: moisten and swab beneath after gentle crust removal
- Deep pyoderma: punch biopsy for macerated tissue culture; swabs are insufficient for deep infections
- Ears: swab otic exudate
- Post-culture note from DVM360: if the lab doesn't automatically test chloramphenicol, amikacin, and doxycycline, call and request they be added to the panel
Treatment framework by infection depth
Surface and superficial pyoderma: topical-first
ISCAID 2025: "Topical antimicrobial therapy alone is the treatment of choice for surface and superficial pyodermas."
First-line topical options:
Systemic antibiotics are added when:
- Topical therapy is not feasible (dog intolerant of bathing, very large surface area)
- No clinical response after 3 weeks of topical-only therapy
- Deep pyoderma is present
ISCAID: "Systemic therapy, with adjunctive topical treatment, is initially provided for 2 weeks in superficial and 3 weeks in deep pyoderma, followed by re-examination to assess progress."
Deep pyoderma: systemic antibiotics required
Systemic antibiotics are mandatory for deep pyoderma. Culture and sensitivity testing is mandatory before selection. Empirical therapy is not appropriate for deep MRSP infections.
First-choice drugs for susceptible S. pseudintermedius (ISCAID):
- Amoxicillin-clavulanate
- Cephalexin or cefpodoxime
For MRSP (all culture-guided):
SustainableVet 2025 vet guidelines note: "Fluoroquinolones should be used only if sensitivity is confirmed, as resistance can develop quickly."
Drugs to avoid in veterinary MRSP management
Beta-lactams (always ineffective):
- Amoxicillin, amoxicillin-clavulanate, cephalexin, cefpodoxime, cefovecin
- No exceptions: mecA-mediated resistance makes all beta-lactams ineffective regardless of sensitivity report labeling
Last-resort human drugs (preserve for human medicine):
- Vancomycin: last-resort glycopeptide for human MRSA; should not be used in veterinary settings
- Linezolid: oxazolidinone reserved for human last-resort use; antimicrobial stewardship rationale precludes veterinary use
SustainableVet guidelines: "Avoid using vancomycin or linezolid in veterinary settings. These are last-resort drugs for human medicine, and avoiding them supports global antimicrobial stewardship."
Treatment duration
DVM360 surgical wound guidance (Dr. Karen Tobias): "Systemic antimicrobials should be administered at least one week beyond remission of clinical disease (usually a minimum of 21 days)."
For treatment options from the owner-facing perspective, see treatment options for MRSP.
Antimicrobial stewardship principles
AAFP/AAHA stewardship guidelines endorse five core principles: commit to stewardship, prevent common diseases, select and use antimicrobials judiciously, evaluate antimicrobial use practices, and educate and build expertise.
Key stewardship actions in MRSP cases:
- Culture before every systemic course: never empirically re-prescribe after MRSP has been identified
- Topical therapy to reduce systemic antibiotic reliance: topical treatment alone resolved 65.4% of MRSP pyoderma cases in published research (PMC4204846)
- Treat only clinical infection, not carrier status: systemic antibiotics are not indicated for colonized dogs without clinical signs
- Complete the full course: incomplete courses select for resistance subpopulations
- Address the underlying disease: unmanaged atopy or endocrine disease drives perpetual antibiotic cycles
- Educate owners on hygiene, transmission risk, and the rationale for completing treatment
DVM360: "Also, teach basic hygiene practices at home, such as washing hands after handling the pet, cleaning bedding regularly, and avoiding shared items between pets."
For how resistance develops and why stewardship matters, see antibiotic resistance mechanisms.
Clinic infection control
MRSP spreads between patients via staff hands, contaminated equipment, and environmental surfaces.
Core clinic infection control protocol:
- PPE (gloves, gowns) when handling MRSP-positive animals
- Strict hand hygiene before and after each patient contact (soap and water or alcohol-based hand rub)
- Isolate MRSP-positive patients where possible; use dedicated equipment
- Disinfect exam tables, kennels, and surfaces between patients with a sporicidal or bactericidal agent
- DVM360 outbreak guidance: "If an outbreak of MRSP wound infections is detected in your hospital, evaluate your hand hygiene and surgical preparation practices."
Monitoring and re-examination
At 2 to 3 week recheck:
- Clinical progress assessment
- Cytology if new lesions are present
- Culture recheck if healing is not progressing as expected
- Compliance assessment (owner application technique, dosing)
- Identify any new resistance triggers (medication changes, new antibiotic exposures)
At treatment completion:
- Clinical resolution confirmed
- Culture recheck 2 weeks after antibiotic completion to confirm microbiological clearance
- Underlying disease management plan documented
For diagnosing MRSP before treatment begins, see diagnosis before treatment. For managing recurring cases that require ongoing intervention, see managing recurrent MRSP. For long-term outcomes and prognosis, see long-term outcomes.
Resources
- ISCAID. Antimicrobial use guidelines for canine pyoderma. Vet Dermatol, 2025. pmc.ncbi.nlm.nih.gov
- DVM360 (Dr. Karen Tobias). Surgery STAT: Managing methicillin-resistant wound infections. dvm360.com
- DVM360. Managing MRSA, MRSP, and MRSS dermatologic infections in pets. dvm360.com
- AVMA. AAFP/AAHA Antimicrobial Stewardship Guidelines. avma.org
- SASH Vets. Implications of MRSP. sashvets.com

