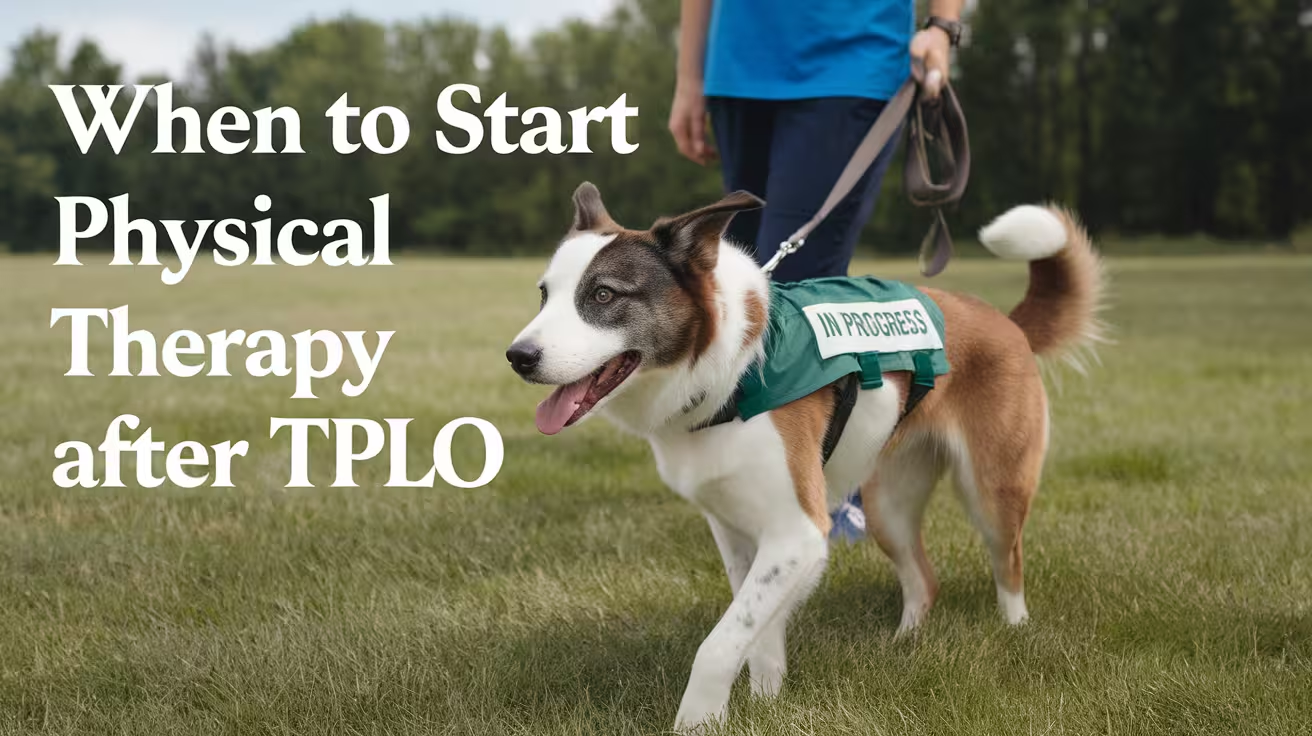
When to Start Physical Therapy After TPLO Surgery
Learn when to start physical therapy after TPLO surgery, which exercises help recovery, and how to avoid early-stage complications.

This article is for informational purposes only and is not a substitute for professional veterinary advice. Every case is unique, so always consult your veterinarian for guidance specific to your pet.
This content is intended for veterinary professionals for educational purposes. It does not replace clinical judgment or tailored advice. Always rely on your training, expertise, and the specific context of your patients.
Understanding the Role of Physical Therapy After TPLO Surgery
Physical therapy plays a critical role in helping dogs recover safely after TPLO surgery. It supports joint healing, improves muscle strength, and restores normal walking patterns without stressing the repaired tibia. A structured therapy plan, guided by your vet, ensures controlled progress and prevents complications.
- Promotes Recovery and Strength: Gentle exercises improve circulation, prevent stiffness, and rebuild muscle mass lost during rest.
- Restores Flexibility and Motion: Controlled movements help the stifle joint regain its natural range of motion over time.
- Reduces Pain and Swelling: Physical therapy techniques like passive motion and hydrotherapy aid healing while minimizing inflammation.
- Prevents Long-Term Weakness: Without therapy, muscle loss or uneven weight-bearing may delay full recovery.
Properly timed therapy ensures balanced healing, reducing risks of reinjury or joint strain.
Typical Timeline: When to Start Physical Therapy After TPLO Surgery
Starting physical therapy at the right time is crucial for a dog’s recovery after TPLO surgery. Most dogs can begin gentle rehab once the incision is healed and swelling has reduced, typically around 7–14 days post-surgery. However, every case differs depending on age, breed, and healing progress.
- Vet-Guided Start: Physical therapy should always begin under your veterinarian’s guidance to avoid stressing the surgical site too soon.
- Early Readiness Signs: Once the incision is dry, pain is controlled, and your dog bears limited weight on the operated leg, it’s usually safe to start mild exercises.
- Customized Timing: Puppies and smaller breeds often heal faster than older or larger dogs, so rehab schedules should match individual recovery speeds.
- Progress-Based Approach: Therapy intensity increases gradually—from passive motion to active exercises—based on how your dog responds to early movements.
- Avoiding Setbacks: Starting too early or overexerting the limb can cause inflammation or jeopardize the bone plate’s stability.
Proper timing ensures muscles strengthen safely, the joint regains mobility, and your dog avoids complications during recovery.
Early Recovery Phase (Days 1–14) After TPLO Surgery
The first two weeks after TPLO surgery focus entirely on rest, incision care, and controlled movement. This period allows bone and tissue healing to begin without strain on the surgical plate or sutures.
- Strict Rest and Confinement: Dogs should remain in a confined, quiet area with minimal movement to avoid accidental slips or jumps.
- Short Leash Walks: Only brief walks for bathroom breaks—less than five minutes at a time—are allowed under full supervision.
- Cold Compresses: Applying ice packs to the knee for 10–15 minutes several times a day reduces swelling and pain.
- Incision Monitoring: Owners should check the surgical site daily for redness, discharge, or swelling before therapy begins.
- Avoid Exercise or Play: Running, jumping, or climbing stairs can delay bone healing and increase inflammation.
During this phase, the goal is to protect the repair site while maintaining comfort. Once the incision fully heals, your vet may approve gentle range-of-motion therapy.
Intermediate Phase (Weeks 2–6): Gentle Physical Therapy Begins
Between weeks two and six, structured physical therapy typically starts. The focus shifts from passive healing to controlled movement that encourages flexibility, strength, and improved limb use.
- Passive Range-of-Motion (PROM): Gentle joint movement helps prevent stiffness and promotes healthy cartilage recovery when done under professional supervision.
- Assisted Standing: Supported standing exercises help dogs gradually bear weight on the surgical leg without stressing the joint.
- Short Leash Walks: Walks of 5–10 minutes, two to three times daily, build muscle endurance safely.
- Hydrotherapy Option: Underwater treadmill therapy, when approved by your vet, provides resistance without joint strain, improving strength faster.
- Pain and Swelling Checks: Each session should be followed by light icing and monitoring for signs of fatigue or discomfort.
This stage is where progress becomes visible. Regular consistency ensures a steady transition from limited movement to controlled mobility without risking re-injury.
Advanced Recovery Phase (Weeks 6–12): Strength and Balance Work
By the 6–12 week mark, most dogs regain stable bone healing, allowing more advanced exercises to rebuild strength, coordination, and balance. The aim is to restore natural gait and confidence in limb use.
- Active Strength Exercises: Sit-to-stand drills and slow, controlled walking help rebuild thigh and core muscles.
- Balance and Coordination Work: Balance pads or gentle inclines improve proprioception and even weight distribution across all legs.
- Stair Climbing (Controlled): Supervised, slow stair work helps develop joint stability and flexibility.
- Hydrotherapy or Swimming: Low-impact water exercises maintain endurance without stressing healing tissues.
- Ongoing Vet Evaluation: Regular X-rays or physical assessments confirm proper bone union before increasing intensity.
This phase focuses on steady muscle recovery and posture correction to prepare the dog for normal daily movement. Patience and consistency are key to safe progress.
Late Phase (After 12 Weeks): Return to Normal Activity
After three months, most dogs are ready to transition toward normal life. However, this final stage must be gradual to prevent relapse or strain on the healing knee.
- Resuming Normal Walks: Begin with short, consistent outdoor walks before returning to pre-surgery activity levels.
- Gradual Play Reintroduction: Controlled play sessions on soft ground help test endurance without risking overexertion.
- Agility and Sports: Dogs involved in sports or agility should reintroduce jumps and running only after veterinary clearance.
- Muscle Conditioning: Continued exercises like swimming or uphill walking maintain muscle tone and joint flexibility.
- Final Vet Check: A full assessment ensures bone healing, muscle symmetry, and joint stability before releasing all restrictions.
By this stage, your dog should move comfortably and confidently. Continued low-impact exercise helps preserve joint health and prevent future ligament strain.
Signs You May Need to Delay Physical Therapy After TPLO Surgery
Starting physical therapy too soon after TPLO can cause more harm than good. The body needs time for bone healing and incision recovery before introducing movement. Recognizing warning signs early helps prevent complications and ensures your dog’s safety during rehabilitation.
- Redness or Swelling Around the Incision: Any inflammation, heat, or discharge from the surgical site means healing isn’t complete. Physical activity could reopen the wound or cause infection.
- Pain During or After Mild Activity: Whimpering, licking the surgical area, or avoiding movement signals discomfort and may indicate tissue irritation or joint inflammation.
- Limping or Sudden Lameness: If your dog starts limping after short walks, it’s a sign the leg isn’t ready for increased activity yet.
- Fluid or Seroma Formation: Swelling under the incision may suggest fluid buildup, which requires veterinary attention before resuming exercises.
- Reluctance to Bear Weight: Dogs that hesitate to use the operated leg may still be in the early recovery phase and need more rest.
Pausing therapy until your vet confirms readiness helps protect bone healing, avoid reinjury, and ensure long-term recovery success.
Benefits of Starting Physical Therapy at the Right Time After TPLO Surgery
Starting physical therapy at the correct stage makes all the difference in how quickly and effectively your dog regains normal function. Proper timing promotes muscle recovery, strengthens the joint, and enhances overall mobility without risking surgical damage.
- Accelerated Muscle Recovery: Gentle, timely exercises prevent muscle atrophy and help rebuild strength lost during the rest phase.
- Better Joint Stability: Controlled movements restore balance between supporting muscles, protecting the stifle joint from future strain or instability.
- Reduced Risk of Complications: Appropriate rehab timing prevents swelling, incision reopening, and plate stress while improving blood circulation to healing tissues.
- Improved Range of Motion: Gradual stretching and weight-bearing help regain flexibility and prevent long-term stiffness or gait imbalance.
- Enhanced Long-Term Mobility: Well-timed therapy strengthens both legs, minimizing compensation-related injuries and supporting lifelong mobility.
Physical therapy started under veterinary guidance not only speeds recovery but also ensures your dog regains strength, comfort, and confidence safely.
Working With a Certified Canine Rehabilitation Specialist After TPLO Surgery
Professional canine rehabilitation offers a safer, structured, and evidence-based approach to TPLO recovery compared to unsupervised home exercises. A certified specialist customizes therapy to match your dog’s condition, age, and progress.
- Customized Recovery Plans: Specialists assess your dog’s muscle tone, joint movement, and surgical healing to create personalized exercises for safe progression.
- Advanced Equipment and Techniques: Clinics may use underwater treadmills, laser therapy, or balance tools that provide resistance training without joint stress.
- Supervised Progress Tracking: Each session is monitored for pain response, mobility improvement, and healing consistency to prevent overexertion.
- Education for Owners: Rehabilitation professionals teach correct exercise techniques so owners can safely continue therapy at home between visits.
- Comprehensive Evaluation: Regular assessments help modify the plan based on progress, ensuring efficient recovery and reduced reinjury risk.
Working with a certified canine rehab specialist ensures your dog receives expert-guided therapy, improving outcomes, safety, and confidence during every phase of recovery.
Conclusion
Physical therapy is essential for restoring your dog’s strength, balance, and confidence after TPLO surgery. When started at the right time, it prevents stiffness, builds muscle, and protects the joint from future injury.
- Ideal Timeline: Begin light exercises around 7–14 days post-surgery once the incision heals and your vet confirms readiness.
- Gradual Progression: Each rehab phase—passive motion, gentle walking, and strength building—should progress slowly to avoid setbacks.
- Professional Guidance: Always consult your veterinarian or a certified rehab specialist before changing activity levels or adding new exercises.
- Long-Term Benefit: Consistent, structured physical therapy not only speeds recovery but also ensures lifelong joint health and improved mobility.
A patient, guided approach to physical therapy ensures your dog heals stronger, moves better, and enjoys a full, active life after TPLO surgery.
FAQs
When should I start exercises after TPLO surgery?
Most dogs begin gentle physical therapy 7–14 days after TPLO surgery, once the incision is fully healed and swelling has subsided. Your vet will assess bone stability before clearing you to start. Beginning too early can strain the surgical plate or cause inflammation, so always follow veterinary advice.
What type of therapy helps my dog recover faster?
Hydrotherapy, passive range-of-motion exercises, and short, controlled leash walks are most effective during early rehab. As recovery progresses, balance training, strengthening drills, and swimming improve muscle tone and stability without stressing the joint.
Can I do therapy at home or should I visit a rehab center?
Simple exercises like gentle walking and passive stretching can be done at home under veterinary guidance. However, a certified canine rehabilitation specialist offers professional monitoring, hydrotherapy access, and advanced modalities for faster, safer progress.
How long does TPLO physical therapy last?
Most dogs complete a structured therapy plan within 8–12 weeks, but recovery time varies with age, size, and healing rate. Some high-energy or large breeds may need continued conditioning for up to four months before returning to full activity.
What signs show my dog is ready for more activity?
Improved weight-bearing, smoother walking, and equal use of both hind legs indicate readiness for advanced exercises. Your vet may also perform stability checks or follow-up X-rays before approving increased activity or off-leash play.

Get a Free Poster
Enhance your workspace with a high-quality radiographs reference poster, designed for veterinary professionals. This free physical poster will be shipped directly to you—just fill out the form to request your copy.


Taking Great TPLO Radiographs
Click Below to Watch Live Video Demos


We'll send you a Free Wall Poster with all the steps
Step #1
Getting Ready
Ensuring a clean surgical field starts with proper skin preparation. This video demonstrates the best practices for:
- Shaving the patient – Achieving a close, even shave while minimizing skin irritation
- The Dirty Scrub – The initial skin prep step to remove surface debris and reduce bacterial load before the sterile scrub.
Following these techniques helps reduce infection risk and improve surgical outcomes. Watch the video to see how it’s done effectively!


Step #2
Reduce Your Risks
Many surgeons are shocked to find out that their patients are not protected from biofilms and resistant bacteria when they use saline and post-op antibiotics.
That’s Where Simini Comes In.
Why leave these risks and unmanaged? Just apply Simini Protect Lavage for one minute. Biofilms and resistant bacteria can be removed, and you can reduce two significant sources of infection.
Step #3
Take the Course
Preventing surgical infections is critical for patient safety and successful outcomes. This course covers:
- Aseptic techniques – Best practices to maintain a sterile field.
- Skin prep & draping – Proper methods to minimize contamination.
- Antibiotic stewardship – When and how to use perioperative antibiotics effectively.
Stay up to date with the latest evidence-based protocols. Click the link to start learning and earn CE credits!

Things to know
What Causes Cruciate Ligament Tears in Dogs?
Learn what causes cruciate ligament tears in dogs, including risk factors, symptoms, and prevention tips for your pet’s joint health.
Cruciate ligament tears in dogs are a common and painful injury affecting their knee joints. This problem often causes limping, pain, and difficulty walking. Understanding what causes these tears can help you protect your dog and seek timely treatment.
In this article, you will learn the main causes of cruciate ligament tears in dogs, including risk factors, symptoms, and how to prevent this injury. This knowledge can help you keep your dog active and healthy for years to come.
What is a cruciate ligament tear in dogs?
A cruciate ligament tear happens when one of the ligaments in a dog’s knee joint is damaged or ruptured. This ligament helps stabilize the knee and allows smooth movement. When it tears, the joint becomes unstable and painful.
There are two cruciate ligaments in each knee: the cranial and caudal cruciate ligaments. The cranial cruciate ligament (CCL) is the one most commonly injured in dogs. This injury is similar to an ACL tear in humans.
- Knee instability: A torn cruciate ligament causes the knee joint to lose stability, making it painful and difficult for your dog to walk or run normally.
- Common injury: Cruciate ligament tears are one of the most frequent orthopedic problems in dogs, especially in active or overweight pets.
- Ligament function: The cruciate ligament connects the thigh bone to the shin bone, helping control knee movement and preventing excessive motion.
- Partial or complete tear: The ligament can be partially damaged or fully ruptured, with complete tears causing more severe symptoms and requiring surgery.
Recognizing this injury early is important to prevent worsening damage and arthritis in your dog’s knee joint.
What are the main causes of cruciate ligament tears in dogs?
Cruciate ligament tears in dogs usually happen due to a combination of factors. These include sudden trauma, chronic wear and tear, and genetic predisposition. Knowing these causes helps you understand how to reduce your dog’s risk.
Most tears occur when the ligament is weakened and then stressed by abnormal movement or injury. Some breeds are more prone to this problem due to their anatomy or genetics.
- Sudden trauma: Quick twisting or awkward landing during running or jumping can overstretch or rupture the ligament suddenly.
- Chronic degeneration: Over time, the ligament can weaken from repeated stress or inflammation, making it more likely to tear even with minor injury.
- Obesity risk: Excess weight puts extra pressure on the knee joints, increasing the chance of ligament damage and tears.
- Breed predisposition: Certain breeds like Labradors, Rottweilers, and Newfoundlands have a higher risk due to genetic and anatomical factors.
Understanding these causes can help you watch for signs and take steps to protect your dog’s knees.
How does a dog’s age affect cruciate ligament tears?
Age plays a significant role in cruciate ligament injuries. Younger dogs may tear the ligament due to trauma, while older dogs often suffer from degeneration and weakening of the ligament over time.
As dogs age, their ligaments lose elasticity and strength. This makes them more vulnerable to injury even during normal activities. Age-related arthritis can also contribute to ligament problems.
- Younger dogs: Active young dogs may tear the ligament suddenly during play or accidents involving twisting motions.
- Older dogs: Ligament fibers weaken with age, making tears more likely from minor stresses or chronic wear.
- Degenerative changes: Aging causes inflammation and breakdown of ligament tissue, reducing its ability to support the knee joint.
- Arthritis impact: Joint inflammation in older dogs can affect ligament health and increase the risk of tears.
Knowing how age affects ligament health helps you adjust your dog’s activity and monitor for early signs of injury.
What role does obesity play in cruciate ligament tears?
Obesity is a major risk factor for cruciate ligament tears in dogs. Extra body weight increases the load on the knee joints, causing more stress on the ligaments. This added pressure can lead to ligament weakening and eventual rupture.
Maintaining a healthy weight reduces the risk of ligament injuries and improves overall joint health. Overweight dogs are also more prone to arthritis, which worsens ligament problems.
- Increased joint stress: Excess weight forces the knee ligaments to support more pressure, raising the chance of injury.
- Reduced mobility: Obese dogs often move less, leading to weaker muscles that normally support the knee joint.
- Higher inflammation: Fat tissue produces inflammatory chemicals that can damage ligaments and joints over time.
- Weight management: Controlling your dog’s diet and exercise helps protect ligaments and prevent tears.
Keeping your dog at a healthy weight is one of the best ways to avoid cruciate ligament injuries.
Can certain activities increase the risk of cruciate ligament tears?
Yes, some activities put more strain on a dog’s knees and increase the risk of cruciate ligament tears. High-impact sports, sudden twisting motions, and repetitive jumping can all contribute to ligament damage.
Dogs that participate in agility, flyball, or other fast-paced activities may be more vulnerable. However, regular controlled exercise strengthens muscles and ligaments, reducing injury risk.
- High-impact sports: Activities like agility or frisbee involve quick turns and jumps that stress the knee ligaments.
- Sudden twisting: Abrupt changes in direction can overstretch or tear the cruciate ligament unexpectedly.
- Repetitive jumping: Frequent jumping from heights or over obstacles can cause chronic ligament wear and eventual rupture.
- Controlled exercise: Regular, low-impact exercise helps build strong muscles that support the knee and protect ligaments.
Balancing activity with rest and avoiding risky movements can help reduce ligament injury risk.
Are there genetic factors that cause cruciate ligament tears in dogs?
Genetics play a key role in cruciate ligament tears. Some dog breeds inherit traits that make their ligaments weaker or their knee joints less stable. This genetic predisposition increases the likelihood of ligament injuries.
Breeders and owners should be aware of these risks and take preventive measures for susceptible breeds. Early diagnosis and management can improve outcomes.
- Breed susceptibility: Breeds like Labradors, Rottweilers, and Newfoundlands have higher rates of cruciate ligament tears due to inherited joint traits.
- Joint conformation: Genetic factors affect knee shape and ligament strength, influencing injury risk.
- Family history: Dogs with relatives who had ligament tears are more likely to develop the problem.
- Preventive care: Genetic risk requires careful weight control, exercise, and early veterinary checkups to catch problems early.
Understanding genetic risks helps you provide the best care for your dog’s joint health.
How can you prevent cruciate ligament tears in dogs?
Preventing cruciate ligament tears involves managing risk factors and promoting joint health. While not all injuries can be avoided, you can reduce the chance of tears by following some simple steps.
Good nutrition, weight control, and safe exercise habits are key. Regular veterinary exams help detect early signs of ligament problems before they worsen.
- Maintain healthy weight: Keep your dog fit to reduce stress on knee ligaments and prevent obesity-related risks.
- Safe exercise: Provide controlled, low-impact activities to strengthen muscles without overloading the knees.
- Joint supplements: Use vet-recommended supplements like glucosamine to support ligament and cartilage health.
- Early veterinary care: Regular checkups help identify ligament weakness or injury early for prompt treatment.
Taking these steps can help your dog enjoy an active life with fewer joint problems.
Conclusion
Cruciate ligament tears in dogs are a common injury caused by trauma, chronic wear, obesity, genetics, and certain activities. Understanding these causes helps you protect your dog’s knee health and recognize early signs of injury.
Maintaining a healthy weight, providing safe exercise, and seeking prompt veterinary care are the best ways to prevent and manage cruciate ligament tears. With proper care, your dog can stay active and comfortable for years.
What are the first signs of a cruciate ligament tear in dogs?
The first signs include limping, difficulty putting weight on the leg, swelling around the knee, and reluctance to jump or run. Early veterinary evaluation is important for diagnosis.
Can cruciate ligament tears heal without surgery?
Partial tears may improve with rest and medical management, but complete ruptures usually require surgery for proper healing and joint stability.
How is a cruciate ligament tear diagnosed in dogs?
Diagnosis involves a physical exam, checking for knee instability, and imaging like X-rays to assess ligament damage and joint condition.
What treatments are available for cruciate ligament tears?
Treatments include surgery to repair or stabilize the knee, pain management, physical therapy, and weight control to support recovery.
Can cruciate ligament tears lead to arthritis in dogs?
Yes, ligament tears often cause joint instability that leads to arthritis over time. Early treatment helps reduce arthritis risk and improve joint health.
Why Is My Dog's Leg Clicking After TPLO Surgery?
Wondering why your dog’s leg is clicking after TPLO surgery? Learn common causes, when to worry, and what to expect during recovery
Is Clicking Normal After TPLO Surgery?
Yes, clicking is a common sign after TPLO (Tibial Plateau Leveling Osteotomy) surgery. Many dogs experience this during the healing process. The clicking sound often happens when your dog walks, especially in the early weeks after surgery. It usually comes from the knee joint or nearby soft tissues adjusting to the new implant and bone alignment.
In most cases, the clicking is not painful or harmful. It may be due to muscle weakness, swelling, or the movement of healing tissues around the surgical site. As your dog builds strength and the joint stabilizes, the clicking often goes away on its own.
However, while it is usually harmless, clicking that gets worse or lasts longer than expected should be checked by your vet. It’s important to track any changes in your dog’s walking, behavior, or comfort level during recovery to rule out complications.
Common Reasons Behind the Clicking Sound
Several factors can cause a clicking sound in your dog’s leg after TPLO surgery. One of the most common reasons is scar tissue formation around the joint. As the tissues heal, they can tighten or shift slightly, creating a clicking noise when your dog moves.
Another reason is muscle or tendon movement over the joint. After surgery, the muscles and tendons may not glide smoothly due to inflammation or changes in joint structure. This can lead to a clicking or popping sound during certain motions.
The bone healing and remodeling process also plays a role. As the bone heals and reshapes around the implant, small adjustments happen within the joint that can produce sounds. This is usually temporary and improves as healing continues.
Sometimes, the implants—such as the plate or screws—may shift slightly or settle into position, especially in the early stages of healing. This minor movement can also cause clicking but is often not serious.
Lastly, natural joint movement itself can create a clicking noise. As your dog regains strength and mobility, the knee may make sounds during stretching, walking, or sudden turns. Most of these causes are harmless, but it's always good to consult your vet if the clicking is persistent or paired with pain.
When Should You Be Concerned?
Clicking sounds are usually harmless after TPLO surgery, but in some cases, they can point to a problem. Contact your vet if you notice any of the following:
- Clicking is new or getting louder - If the clicking sound wasn't there before or is increasing over time, it could mean something has shifted in the joint or implant.
- Swelling around the surgical site - Mild swelling early on is normal, but swelling that appears later or keeps growing may be a sign of infection or poor healing.
- Signs of pain, limping, or stiffness - If your dog starts limping again, avoids putting weight on the leg, or shows stiffness when moving, it may indicate discomfort or complications.
- Decreased activity or appetite - Dogs often hide pain, so a sudden drop in energy, playfulness, or appetite should raise concern.
- Clicking with joint instability - If the knee feels wobbly or your dog’s leg gives out when walking, this could mean the implant has loosened or the bone isn’t healing well.
In any of these cases, it’s best to have your vet check your dog’s leg to make sure the recovery is going as planned.
Could It Be a Complication?
In some cases, clicking after TPLO surgery may point to a complication. One possible cause is meniscus damage that wasn’t found or treated during surgery. The meniscus is a small piece of cartilage that cushions the knee. If it tears or becomes damaged later, it can cause pain, limping, and clicking sounds.
Another rare but serious issue is implant failure. Plates or screws can loosen, shift, or break, especially if the dog is too active too soon after surgery. This can lead to discomfort and joint noises.
Joint instability is also a concern if the bone hasn’t fully healed or if the implant isn’t holding the bone tightly. In this case, the knee may move abnormally, causing clicking or popping sounds.
Larger dogs are more likely to make joint sounds during recovery. Their extra weight puts more pressure on the healing leg, which can make clicking more noticeable. While this doesn’t always mean there’s a problem, it’s important to monitor them closely.
If the clicking is paired with pain, swelling, or limping, it’s best to have your vet check for complications and take X-rays to confirm that everything is healing as it should.
What Can Help Reduce the Clicking?
To help reduce clicking sounds after TPLO surgery, focus on proper recovery care. Here are some helpful steps:
- Limit activity and allow proper rest - Too much movement early on can cause stress on the joint. Keep your dog’s activity low during the first 8–10 weeks after surgery.
- Use physical therapy or controlled exercises - Gentle rehab movements can strengthen muscles around the joint, reduce instability, and help the leg move more smoothly. Ask your vet for a safe exercise plan.
- Give anti-inflammatory medications if prescribed - These help reduce swelling and irritation in the joint, making movement more comfortable and quiet. Only use medications approved by your vet.
- Manage your dog’s weight - Extra weight puts more stress on the healing leg, especially in large breeds. Keeping your dog at a healthy weight supports smoother recovery and fewer joint sounds.
By following these steps and staying in touch with your vet, the clicking sound usually fades over time. Most dogs heal well with rest, patience, and proper care.
What to Expect During Recovery
During recovery from TPLO surgery, it’s common to hear clicking sounds in your dog’s leg, especially in the first few weeks. In most cases, this clicking fades over time as the bone heals, muscles strengthen, and the joint stabilizes. For many dogs, the sound goes away completely within a few months.
However, some dogs may still have a soft clicking sound even after full healing. This is often not painful and doesn’t affect how they walk or play. Many dogs adapt well, and the clicking becomes less noticeable over time.
Healing timelines can vary depending on your dog’s size, age, and overall health. Larger dogs or those with other joint issues may take longer to recover. Regular follow-ups, controlled activity, and proper rest are key during this time.
Always keep an eye on any changes and check with your vet if anything feels off during recovery.
When to Visit the Vet
While clicking after TPLO surgery is often harmless, there are times when a vet visit is necessary. You should contact your vet if the clicking sound is persistent or getting worse over time. A mild clicking early in recovery is normal, but it should improve as healing progresses.
If the clicking is accompanied by other symptoms—like pain, swelling, limping, stiffness, or your dog avoiding the leg—this could signal a problem. These signs may point to joint instability, implant issues, or even a torn meniscus that needs attention.
It’s also important to follow up with your vet for scheduled post-op checks. These visits often include physical exams and sometimes X-rays to confirm that the bone is healing properly and the implant is stable. Don’t skip these checkups, even if your dog seems fine.
If you notice anything unusual, it’s always safer to have your vet take a look. Early care can prevent bigger problems later in recovery.
Conclusion
Clicking after TPLO surgery is common and usually not a cause for concern. It often happens during the healing phase and may come from scar tissue, joint movement, or muscle adjustment. In most cases, the sound fades over time as your dog regains strength and the joint stabilizes.
However, it’s important to watch for any changes. If the clicking gets louder, doesn’t go away, or comes with pain, swelling, or limping, don’t wait—contact your vet. Regular rest, controlled exercise, and follow-up visits play a big role in a smooth recovery.
Every dog heals at a different pace, and some may adapt even if mild clicking remains. With proper care and attention, most dogs return to normal activity and enjoy a pain-free life after TPLO surgery. Stay patient, stay observant, and always follow your vet’s guidance.
Redness After TPLO Surgery in Dogs: Causes & Care
Learn why redness occurs after TPLO surgery in dogs, how to recognize normal healing versus complications, and when to seek veterinary care.
Redness after TPLO surgery in dogs is a common concern for pet owners. TPLO, or Tibial Plateau Leveling Osteotomy, is a surgical procedure to repair a torn cranial cruciate ligament. After surgery, some redness around the incision site can be normal, but it can also signal infection or other complications.
This article explains what causes redness after TPLO surgery, how to tell if it is normal or problematic, and what steps you should take to ensure your dog heals properly. Understanding these signs helps you protect your dog’s health and comfort during recovery.
What causes redness after TPLO surgery in dogs?
Redness after TPLO surgery usually comes from the body’s natural healing process. Surgery causes trauma to the skin and tissues, which triggers inflammation. This inflammation brings blood and immune cells to the area, causing redness and swelling.
However, redness can also come from infection or irritation. Knowing the difference is important to avoid complications.
- Inflammation response: The body sends blood to the surgical site to start healing, causing mild redness that usually peaks within 3 days and then fades.
- Surgical trauma: Cutting skin and bone causes tissue damage, which naturally leads to redness as part of the repair process.
- Infection risk: Bacteria can enter the incision and cause redness that worsens, along with discharge or odor, signaling a problem.
- Allergic reaction: Some dogs react to sutures or bandages, causing redness and itching around the wound.
Understanding these causes helps you monitor your dog’s recovery carefully and know when to contact your veterinarian.
How can you tell if redness after TPLO surgery is normal?
Normal redness after TPLO surgery is usually mild and limited to the incision area. It should improve daily as the wound heals. Other signs like swelling and warmth are common but should not get worse over time.
Recognizing normal healing signs helps you avoid unnecessary worry and focus on proper care.
- Mild redness: Slight pink or red color around the incision is expected and shows good blood flow for healing.
- Stable swelling: Some swelling is normal but should not increase after the first few days post-surgery.
- No discharge: Clear or no fluid from the wound means healing is progressing well without infection.
- Improving warmth: The incision may feel warm initially but should cool down as healing continues.
Monitoring these signs daily helps you track your dog’s recovery and catch any problems early.
When does redness after TPLO surgery indicate infection?
Redness that worsens or spreads after TPLO surgery can indicate infection. Infections require prompt veterinary treatment to prevent serious complications like implant failure or systemic illness.
Knowing the warning signs of infection helps you act quickly and protect your dog’s health.
- Increasing redness: Redness that grows larger or becomes bright red over several days suggests infection is developing.
- Pus or discharge: Yellow, green, or foul-smelling fluid from the incision is a clear sign of infection needing veterinary care.
- Excessive swelling: Swelling that worsens, especially with pain or heat, often accompanies infection.
- Systemic signs: Fever, lethargy, or loss of appetite along with redness indicate the infection may be spreading.
If you notice these signs, contact your veterinarian immediately for evaluation and treatment.
How should you care for redness after TPLO surgery?
Proper care after TPLO surgery helps reduce redness and supports healing. Following your veterinarian’s instructions for wound care, medication, and activity restriction is essential.
Good care lowers the risk of infection and speeds recovery.
- Keep incision clean: Gently clean around the wound as directed, avoiding harsh chemicals or excessive moisture that can irritate the skin.
- Prevent licking: Use an Elizabethan collar or other devices to stop your dog from licking or biting the incision, which can worsen redness and cause infection.
- Administer medications: Give all prescribed antibiotics and pain medications exactly as directed to control infection and inflammation.
- Limit activity: Restrict your dog’s movement to prevent strain on the surgical site, which can increase redness and delay healing.
Following these care steps helps your dog heal comfortably and reduces complications related to redness.
What are common complications related to redness after TPLO surgery?
While mild redness is normal, some complications can cause persistent or worsening redness. Recognizing these problems early helps prevent serious outcomes.
Knowing common complications prepares you to seek timely veterinary care.
- Wound infection: Infection causes redness, swelling, discharge, and pain, requiring antibiotics or surgery to resolve.
- Seroma formation: Fluid buildup under the skin can cause redness and swelling, sometimes needing drainage by a vet.
- Suture reaction: Some dogs develop redness and irritation from sutures, which may need removal or treatment.
- Implant exposure: If redness worsens and the implant becomes visible, urgent veterinary care is needed to prevent failure.
Early detection and treatment of these complications improve outcomes and reduce recovery time.
When should you contact your veterinarian about redness after TPLO surgery?
Contact your veterinarian if redness after TPLO surgery worsens, spreads, or is accompanied by other concerning signs. Prompt veterinary evaluation ensures proper treatment and prevents serious complications.
Knowing when to seek help protects your dog’s health and comfort during recovery.
- Redness spreading: If redness extends beyond the incision area or grows rapidly, it needs veterinary assessment.
- Discharge or odor: Any pus, blood, or bad smell from the wound requires immediate veterinary attention.
- Increased pain or swelling: If your dog shows more pain, swelling, or heat around the incision, contact your vet promptly.
- Systemic illness: Signs like fever, lethargy, or loss of appetite along with redness mean urgent veterinary care is needed.
Timely communication with your veterinarian helps manage redness-related issues effectively and supports your dog’s full recovery.
Conclusion
Redness after TPLO surgery in dogs is usually a normal part of healing but can sometimes signal infection or other complications. Understanding the causes and signs of redness helps you monitor your dog’s recovery carefully.
Proper wound care, preventing licking, and following your veterinarian’s instructions reduce risks. Contact your vet promptly if redness worsens or is accompanied by discharge, swelling, or systemic signs. This vigilance ensures your dog heals safely and comfortably after TPLO surgery.
FAQs
Is some redness normal after TPLO surgery?
Yes, mild redness around the incision is normal as part of the healing process and usually improves within a few days.
How long does redness last after TPLO surgery?
Redness typically peaks within 2 to 3 days after surgery and gradually fades over 1 to 2 weeks as the wound heals.
When should I worry about redness after TPLO surgery?
Worry if redness spreads, worsens, or is accompanied by discharge, swelling, pain, or your dog shows fever or lethargy.
Can I clean the redness area myself?
Only clean the area as directed by your vet, usually with mild saline or prescribed solutions, avoiding harsh chemicals or excessive moisture.
What treatments help reduce redness after TPLO surgery?
Following medication instructions, preventing licking, keeping the wound clean, and limiting activity help reduce redness and support healing.
Common Causes of Limping in Dogs Post-TPLO Surgery
Discover common causes of dog limping post-TPLO surgery and explore solutions for regaining your dog's comfort and mobility a year later
A year after TPLO surgery, most dogs regain full mobility. However, if your dog is still limping, it means something is wrong. Some stiffness or mild discomfort might happen after intense activity, but ongoing limping is not normal during recovery.
TPLO (Tibial Plateau Leveling Osteotomy) is a very effective procedure for cranial cruciate ligament (CCL) injuries. It stabilizes the knee and restores function. Most dogs fully recover within six months, though there can be minor differences. If limping continues beyond a year, it might be due to issues like implant problems, arthritis, or muscle atrophy.
While this can be worrying, the good news is that most causes can be diagnosed and treated. Finding out why your dog is limping is the first step to helping them regain comfort and mobility. Let’s look at potential causes and the best solutions.
Common Causes of Limping 1 Year After TPLO Surgery
If your dog is still limping a year after TPLO surgery, there could be several underlying reasons. Here are the most common causes, their symptoms, and how to address them.
1. Arthritis Development in the Affected Joint
Arthritis is a common long-term issue after TPLO surgery due to changes in joint mechanics and natural wear over time. Although TPLO stabilizes the knee, it cannot completely prevent degenerative joint disease (DJD). Inflammation from surgery, altered weight distribution, and existing cartilage damage can lead to arthritis after surgery.
Dogs with arthritis often show stiffness, especially after resting or waking up. They may be reluctant to run, jump, or climb stairs, and their discomfort often worsens in cold or damp weather.
To manage arthritis, veterinarians usually prescribe
- NSAIDs (e.g., carprofen or meloxicam) to reduce inflammation and pain.
- Joint supplements, like glucosamine, chondroitin, and omega-3 fatty acids, can help slow cartilage degeneration.
- Controlled exercise, such as short walks and swimming, strengthens muscles while reducing joint strain.
2. Implant Failure or Loosening
TPLO implants, including plates and screws, are meant to provide lifelong stability, but sometimes they can loosen over time. Too much activity during recovery, improper bone healing, or an unnoticed infection can weaken the implant's hold, causing joint instability and discomfort.
Signs of implant failure include persistent swelling, worsening lameness, and clicking sounds from the knee when the dog moves.
A veterinarian will confirm the diagnosis using X-rays, which can show shifting hardware or bone resorption around the implant. If instability is found, revision surgery may be needed to replace or remove the implant. In mild cases, managing pain and limiting activity might be enough.
3. Meniscal Tears Occurring After Surgery
The meniscus is an important cartilage in the knee that absorbs shock and helps stabilize movement. After TPLO surgery, the meniscus can still tear, especially if there was existing damage or too much stress on the joint during recovery.
Dogs with a meniscal tear often show:
- sudden limping
- reluctance to put weight on the leg
- a distinct clicking sound when walking
A veterinarian will diagnose the condition through joint palpation and confirm it using MRI or arthroscopy.
Treatment depends on the severity. For significant tears, surgical trimming (partial meniscectomy) is the preferred option, while mild cases may be managed with pain relief and restricted activity.
4. Infection at the Surgical Site or Within the Joint
Though rare, infections can develop months after TPLO surgery due to lingering bacteria or implant-related issues. Dogs with an infection may show:
- Swelling around the surgical site
- Increased warmth in the affected area
- Discharge from the incision
- Lethargy or decreased activity
- Fever and overall discomfort
To confirm an infection, vets perform blood tests and a joint fluid culture to identify the bacteria causing it. Treatment usually involves long-term antibiotics, but in severe cases where the implant is affected, surgical removal of the plate and screws may be needed.
To minimize the risk of infection, many surgeons use Simini Protect Lavage during surgery. This non-antibiotic solution helps reduce biofilm formation and bacterial contamination, lowering the likelihood of post-operative infections. Early intervention remains crucial to prevent further joint damage and ensure a smooth recovery.
5. Compensatory Issues Due to Overuse of Other Limbs
After TPLO surgery, dogs often shift their weight to the opposite leg, which can lead to strain and eventually cause lameness in that limb. This overcompensation may result in secondary joint problems, muscle imbalances, and even early arthritis.
Signs include:
- New limping in the opposite leg
- An unusual gait or stiffness after activity
Treatment focuses on physical therapy to strengthen both hind legs evenly, pain management, and adjusting exercise routines to avoid excessive strain.
Using weight distribution tools, like balance exercises and underwater treadmill therapy, can help correct movement imbalances.
6. Swelling and Inflammation Around the Surgical Area
Persistent swelling near the TPLO site may indicate chronic inflammation due to improper healing, excessive scar tissue, or low-grade irritation around the implant.
Symptoms include:
- visible swelling,
- warmth around the joint, and
- discomfort when touched.
To reduce inflammation, cold therapy (ice packs), laser therapy, NSAIDs (carprofen, meloxicam), and gentle massage therapy are effective. If inflammation continues despite treatment, a vet may check for underlying issues like implant irritation or soft tissue damage.
7. Degenerative Joint Disease Progression
Post-surgical joint degeneration (DJD) can occur if cartilage keeps wearing down after TPLO surgery. Unlike normal aging, DJD leads to a gradual loss of mobility due to ongoing joint damage.
Dogs with DJD show signs like slowly developing limping, joint stiffness, and trouble standing up after resting. Managing DJD involves a long-term joint care plan, which includes weight control, joint supplements (glucosamine, MSM, omega-3s), and prescribed pain medications. Alternative therapies such as acupuncture or hydrotherapy may also help improve mobility.
8. Muscle Weakness or Atrophy Due to Limited Activity
If rehabilitation after TPLO surgery was insufficient, muscle loss (atrophy) can occur, causing the affected leg to look thinner and weaker. This imbalance leads to fatigue, poor joint support, and ongoing limping.
Signs include:
- early exhaustion during walks
- uneven muscle mass
- hesitation to fully use the operated leg
The best treatments include hydrotherapy (such as swimming or using an underwater treadmill), strength training exercises, and controlled walks. Gradual rehabilitation helps rebuild lost muscle, ensuring better joint stability and reducing limping in the long term. These should be recommended by your vet.
Recommended Actions & Treatments to Fix Limping
Identifying the root cause of limping is the first step toward effective treatment and long-term mobility improvement. Here are a few possible treatments to address limping:
1. Consultation with a Veterinarian for Proper Diagnosis
Before assuming the cause of limping, it's important to consult a veterinarian. Many post-TPLO complications have similar symptoms, so a thorough examination is needed to ensure the right treatment.
Vets use X-rays to check for implant loosening or arthritis, and joint fluid analysis to detect infections. If a meniscal tear is suspected, an MRI or arthroscopy can provide a clear diagnosis.
For ongoing or severe cases, an orthopedic specialist might be needed, especially if revision surgery is being considered. Early diagnosis helps prevent further joint damage and ensures the best recovery plan.
2. Implementation of Physical Therapy or Rehabilitation Exercises
Physical therapy is crucial for regaining strength and mobility after TPLO surgery. Hydrotherapy, such as swimming or using an underwater treadmill, is a great low-impact exercise that builds muscle while reducing joint stress. Walking on a treadmill under controlled conditions strengthens the leg without too much strain.
Passive stretching helps maintain flexibility and prevents stiffness, especially in older dogs. A veterinary rehabilitation therapist can create a customized program based on the dog's mobility level. Regular, structured movement supports long-term recovery and lowers the risk of compensatory injuries.
3. Use of Medications Such as Anti-Inflammatories or Pain Relievers
Medication is often needed to manage pain and inflammation, especially if arthritis or joint degeneration occurs. NSAIDs like Carprofen and Meloxicam are commonly prescribed to reduce inflammation. If nerve pain is present, Gabapentin or Tramadol might be recommended.
For dogs with ongoing arthritis, Cartrophen injections (Pentosan Polysulfate Sodium) can help slow the disease and improve joint function. Always discuss long-term medication plans with a vet to minimize potential side effects.
4. Weight Management to Reduce Joint Strain
Excess weight puts extra stress on joints, making limping worse and slowing recovery. Keeping an ideal body weight is essential for dogs after TPLO surgery. If weight loss is needed, a low-calorie prescription diet like Royal Canin Satiety or Hill’s Metabolic can be beneficial.
Controlling portions, measuring food intake, and limiting high-calorie treats help prevent unnecessary weight gain. A low-impact exercise plan, including short, controlled walks and swimming, helps maintain muscle without straining the joints. Regular weight checks during vet visits help track progress.
5. Consideration of Joint Supplements Like Glucosamine and Chondroitin
Joint supplements support long-term mobility and help reduce inflammation in dogs after TPLO surgery. Glucosamine and Chondroitin assist in repairing cartilage, while MSM (Methylsulfonylmethane) has anti-inflammatory properties.
Omega-3 fatty acids (fish oil) help lubricate joints and reduce stiffness, and Green-lipped mussel extract offers natural anti-inflammatory benefits. These supplements are not quick fixes but provide long-term support when used with medication and therapy.
Veterinary guidance ensures the right dosage and effectiveness.
6. Regular Veterinary Check-Ups to Monitor Progress
Routine veterinary check-ups help monitor recovery and catch early signs of complications like arthritis, muscle loss, or implant issues. Regular assessments allow for adjustments to pain management, physical therapy, and diet plans.
During each visit, owners should discuss changes in mobility, pain levels, and any new symptoms with the vet.
When to Consider Additional Surgery or Alternative Treatments
In some cases, additional surgery may be needed if the initial TPLO procedure didn't fully solve the problem. Implant failure (loose plates or screws), severe arthritis, or a meniscal tear that wasn't addressed can cause ongoing pain and instability, requiring revision surgery.
Before considering another operation, alternative therapies can help manage pain and improve joint function:
- Stem cell therapy promotes tissue repair and reduces inflammation.
- PRP (Platelet-Rich Plasma) injections enhance healing and support cartilage health.
- Acupuncture is another option that helps with pain relief and improves circulation.
These treatments can be effective in delaying or even avoiding surgery. A consultation with a vet or specialist can help determine the best approach based on your dog's condition.
Read more about:
- TPLO incision infection symptoms & prevention
- Signs of TPLO failure in dogs
- Staph infection after TPLO surgery
- MRSP infection in dogs: Causes & symptoms
- How to Treat MRSP in Dogs: Best Practices
- Bilateral TPLO Surgery Explained
Conclusion
Limping a year after TPLO surgery isn't normal, but the good news is it's treatable. As we discussed, the cause could be arthritis, implant issues, muscle weakness, or even a meniscal tear. The sooner you identify the problem, the better your dog's chances of returning to normal.
There are many ways to help, from physical therapy and medications to alternative treatments like PRP injections or acupuncture. But the best first step? A vet visit. They can identify the issue and recommend the right treatment plan.
With proper care, most dogs recover well and stay active for years. So don't wait—your dog's comfort and mobility are worth it.
FAQs
Is it normal for a dog to still limp a year after TPLO surgery?
No, it's not normal for a dog to keep limping a year after TPLO surgery. While minor stiffness can happen, ongoing limping usually points to issues like arthritis, implant problems, or muscle weakness. A vet check-up is recommended to find the cause and decide on the right treatment. Early action can prevent more joint damage and improve long-term mobility.
How do I know if my dog’s TPLO implant is failing?
Signs of implant failure include worsening limping, swelling around the surgery area, and clicking or grinding noises when moving. Sometimes, dogs may feel discomfort when the area is touched. A vet can check implant stability with X-rays. If the implant has shifted or loosened, revision surgery might be needed to restore joint function and relieve pain.
Can physical therapy still help if my dog is limping a year later?
Yes, physical therapy can still help even a year after TPLO surgery. Strengthening exercises, hydrotherapy, and controlled treadmill walking can improve muscle function and joint support. A rehab specialist can create a custom plan based on the cause of the limping. Regular therapy can reduce discomfort, improve mobility, and prevent other injuries.
Are there long-term risks if I don’t address the limping?
Yes, ignoring ongoing limping can lead to worsening arthritis, muscle loss, and more stress on other joints. Dogs might start putting too much weight on the opposite leg, which increases the risk of more injuries. Untreated joint instability can also cause chronic pain and reduced mobility over time. Seeking veterinary advice early can help prevent complications and improve your dog’s long-term quality of life.
What home remedies can I try before going to the vet?
While seeing a vet is best, you can try cold therapy (ice packs) for swelling, gentle massage to ease stiffness, and controlled exercise like short walks. Joint supplements with glucosamine and omega-3s may support joint health. Keeping your dog at a healthy weight also reduces joint strain. However, if the limping continues or gets worse, a vet visit is necessary for proper diagnosis and treatment.
Fluid Buildup After TPLO Surgery in Dogs
Learn about fluid buildup after TPLO surgery in dogs, its causes, symptoms, treatment, and prevention to ensure your pet's smooth recovery.
Fluid buildup after TPLO surgery in dogs is a common concern for pet owners. This condition can cause swelling and discomfort around the surgical site, making recovery more challenging. Understanding why this happens and how to manage it is essential for your dog's health.
This article explains what fluid buildup is, why it occurs after TPLO surgery, how to recognize it, and what treatments are available. You will also learn tips to prevent complications and support your dog's healing process effectively.
What causes fluid buildup after TPLO surgery in dogs?
Fluid buildup, also called seroma or edema, often occurs after TPLO surgery due to the body's natural response to tissue injury. The surgery involves cutting and repositioning bones, which can trigger inflammation and fluid accumulation.
Several factors can increase the risk of fluid buildup, including surgical technique, post-operative care, and the dog's individual health. Recognizing these causes helps you understand the condition better.
- Surgical trauma: The cutting and manipulation of tissues during TPLO surgery cause inflammation, leading to fluid leaking into surrounding spaces.
- Dead space formation: Surgery can create pockets where fluid collects because tissues are separated or removed, making fluid accumulation more likely.
- Inflammatory response: The body reacts to surgery by sending immune cells and fluids to the area, which can cause swelling and fluid buildup.
- Excessive movement: If the dog moves too much soon after surgery, it can worsen tissue damage and increase fluid leakage.
Understanding these causes helps you follow your vet's advice carefully to reduce fluid buildup risks after surgery.
How can you recognize fluid buildup after TPLO surgery?
Recognizing fluid buildup early is important to prevent complications. Fluid accumulation usually appears as swelling near the surgical site and may feel soft or squishy to the touch.
Other signs can include discomfort, warmth, or changes in the dog's behavior. Monitoring your dog closely after surgery helps you spot these symptoms quickly.
- Visible swelling: A noticeable lump or puffiness near the incision site often indicates fluid accumulation under the skin.
- Soft texture: The swollen area may feel soft or fluctuant, which means it moves slightly when pressed, typical of fluid pockets.
- Discomfort or pain: Your dog might lick, bite, or show sensitivity around the swollen area due to irritation or pressure.
- Warmth and redness: The skin over the fluid buildup can feel warmer or appear red, signaling inflammation or possible infection.
If you notice these signs, contact your veterinarian promptly for evaluation and treatment recommendations.
What treatments are available for fluid buildup after TPLO surgery?
Treatment depends on the severity and cause of the fluid buildup. Mild cases may resolve with conservative care, while more significant accumulations might require veterinary intervention.
Your vet will assess the swelling and decide the best approach to help your dog heal safely and comfortably.
- Cold compresses: Applying cold packs can reduce swelling and inflammation in the early days after surgery.
- Drainage procedures: For large fluid pockets, your vet may use a needle to remove fluid safely under sterile conditions.
- Compression bandages: These can help prevent further fluid accumulation by applying gentle pressure around the surgical site.
- Medications: Anti-inflammatory drugs or antibiotics may be prescribed if infection or severe inflammation is present.
Following your vet’s instructions carefully ensures the best outcome and reduces the risk of complications from fluid buildup.
How can you prevent fluid buildup after TPLO surgery in your dog?
Preventing fluid buildup starts with good surgical care and proper post-operative management. You play a key role in helping your dog recover smoothly.
Taking precautions and following your veterinarian’s advice can minimize swelling and support healing after TPLO surgery.
- Limit activity: Restrict your dog's movement during recovery to avoid stressing the surgical site and causing excess fluid leakage.
- Use an Elizabethan collar: Prevent your dog from licking or biting the incision, which can irritate tissues and increase fluid buildup risk.
- Follow wound care instructions: Keep the incision clean and dry as directed to reduce infection and inflammation chances.
- Attend follow-up visits: Regular veterinary check-ups allow early detection and management of any fluid accumulation or other complications.
By taking these steps, you help your dog heal faster and avoid problems related to fluid buildup.
When should you contact your veterinarian about fluid buildup after TPLO?
Not all swelling after surgery is serious, but some signs require prompt veterinary attention. Knowing when to seek help protects your dog from worsening conditions.
Contact your vet if you observe any unusual or severe symptoms related to fluid buildup after TPLO surgery.
- Rapidly increasing swelling: Sudden or large growth of the swollen area may indicate excessive fluid or bleeding that needs urgent care.
- Signs of infection: Redness, warmth, pus, or foul odor around the incision suggest infection requiring medical treatment.
- Severe pain or distress: If your dog shows intense discomfort, limps excessively, or refuses to bear weight, seek veterinary advice immediately.
- Fever or lethargy: General signs of illness alongside fluid buildup can signal systemic infection or complications.
Early intervention improves outcomes and prevents more serious problems after TPLO surgery.
What are the long-term effects of fluid buildup after TPLO surgery?
Most fluid buildups resolve without lasting harm if treated properly. However, untreated or severe cases can lead to complications affecting your dog’s recovery.
Understanding potential long-term effects helps you appreciate the importance of monitoring and managing fluid accumulation after surgery.
- Delayed healing: Excess fluid can stretch tissues and slow down the normal repair process around the surgical site.
- Infection risk: Fluid pockets can become infected, leading to abscess formation or systemic illness if not addressed promptly.
- Scar tissue formation: Chronic swelling may cause fibrosis, which can reduce joint mobility or cause discomfort.
- Need for additional surgery: In some cases, persistent fluid buildup requires surgical drainage or revision to correct the problem.
Timely treatment and good post-operative care minimize these risks and support your dog’s full recovery after TPLO surgery.
Conclusion
Fluid buildup after TPLO surgery in dogs is a common but manageable issue. It results from the body's response to surgery and can cause swelling and discomfort around the knee.
By recognizing the signs early, following your veterinarian’s advice, and providing proper care, you can help your dog recover smoothly. Preventive measures and prompt treatment reduce complications and support your pet’s long-term joint health.
What is fluid buildup after TPLO surgery in dogs?
Fluid buildup is swelling caused by excess fluid collecting near the surgical site after TPLO, often due to inflammation or tissue trauma.
How long does fluid buildup last after TPLO surgery?
Fluid buildup usually decreases within a few weeks but may last longer depending on severity and treatment effectiveness.
Can fluid buildup cause infection after TPLO surgery?
Yes, fluid pockets can become infected if bacteria enter the area, requiring prompt veterinary care to prevent serious complications.
Is it safe to drain fluid buildup at home after TPLO surgery?
No, draining fluid should only be done by a veterinarian under sterile conditions to avoid infection and injury.
How can I reduce swelling after TPLO surgery in my dog?
Limit activity, use cold compresses, follow wound care instructions, and give prescribed medications to help reduce swelling safely.
TPLO Rehab Exercises for Dogs
Learn effective TPLO rehab exercises for dogs to ensure safe recovery and regain mobility after surgery.
TPLO rehab exercises for dogs are essential after tibial plateau leveling osteotomy surgery. This surgery helps fix a torn cranial cruciate ligament, but recovery requires careful rehabilitation. Without proper exercises, dogs may face stiffness, muscle loss, or delayed healing.
This article explains the best rehab exercises for dogs after TPLO surgery. You will learn how to support your dog's recovery safely and improve their strength and mobility step-by-step.
What is TPLO surgery and why is rehab important?
TPLO surgery stabilizes a dog's knee joint after a ligament tear. It changes the angle of the tibia bone to reduce joint instability. While surgery fixes the problem, rehab helps the dog regain normal function.
Rehab exercises reduce pain, prevent muscle loss, and improve joint flexibility. They also help dogs return to normal activity faster and avoid future injuries.
- Joint stabilization: Rehab strengthens muscles around the knee to support the joint and prevent abnormal movement after surgery.
- Pain management: Controlled exercises reduce inflammation and discomfort, helping dogs feel better during recovery.
- Muscle preservation: Rehab prevents muscle wasting by encouraging safe movement and weight bearing on the leg.
- Improved mobility: Exercises restore range of motion, allowing dogs to walk, run, and jump normally again.
Starting rehab early, under veterinary guidance, is key to a successful outcome after TPLO surgery.
When can I start TPLO rehab exercises for my dog?
Timing for rehab depends on your dog's surgery and healing progress. Usually, gentle exercises begin within days after surgery. More active rehab starts after the initial healing phase.
Your vet or rehab specialist will create a schedule based on your dog's condition. Following this plan helps avoid complications like re-injury or delayed healing.
- Immediate post-op phase: Gentle passive range of motion and restricted leash walks start within 3-5 days after surgery.
- Early rehab phase: Controlled weight bearing and simple standing exercises begin around 2 weeks post-op.
- Active rehab phase: Strengthening and balance exercises start 4-6 weeks after surgery, depending on healing.
- Full activity phase: Gradual return to normal running and jumping usually occurs after 8-12 weeks with vet approval.
Always follow your vet’s advice and do not rush exercises to protect your dog’s recovery.
What are the best passive TPLO rehab exercises for dogs?
Passive rehab exercises do not require your dog to move independently. You help move their leg gently to maintain joint flexibility and reduce stiffness. These exercises are safe early after surgery.
Passive range of motion exercises keep the knee joint moving without weight bearing. They help prevent scar tissue buildup and maintain circulation.
- Flexion and extension: Gently bend and straighten your dog’s knee slowly, repeating 10-15 times per session to maintain joint mobility.
- Massage therapy: Light massage around the thigh and calf muscles improves blood flow and reduces muscle tension.
- Cold therapy: Applying ice packs after exercises reduces swelling and pain in the operated leg.
- Elevation: Keeping the leg elevated when resting helps decrease inflammation and promotes healing.
Perform passive exercises several times daily as recommended by your vet for best results.
Which active TPLO rehab exercises help build strength?
Active rehab exercises involve your dog using their muscles and bearing weight on the leg. These exercises build strength and improve balance as healing progresses.
Start active exercises only when your vet confirms it is safe. These exercises help your dog regain normal walking and running ability.
- Controlled leash walking: Short, slow walks on a leash encourage weight bearing and muscle use without overloading the joint.
- Sit to stand: Encouraging your dog to sit and then stand repeatedly strengthens thigh muscles and improves coordination.
- Balance board: Standing on an unstable surface challenges muscles and improves joint stability and proprioception.
- Hill walking: Gentle uphill walking increases muscle strength while reducing joint stress compared to flat surfaces.
Progress exercises gradually and monitor your dog for signs of pain or fatigue during active rehab.
How can hydrotherapy help in TPLO rehab for dogs?
Hydrotherapy uses water to support your dog’s weight while exercising. This reduces joint stress and allows safe movement early in rehab. Many vets recommend hydrotherapy for TPLO recovery.
Water buoyancy helps dogs move without pain. Water resistance also strengthens muscles gently. Hydrotherapy can speed up recovery and improve outcomes.
- Water treadmill: Controlled walking in a water treadmill supports the leg and encourages proper gait and muscle use.
- Swimming: Swimming builds strength and endurance without weight bearing, ideal for early rehab stages.
- Reduced joint load: Water buoyancy decreases pressure on the knee, allowing longer exercise sessions safely.
- Improved circulation: Warm water increases blood flow, promoting healing and reducing stiffness.
Consult a certified canine hydrotherapist to ensure safe and effective water rehab sessions.
What precautions should I take during TPLO rehab exercises?
Rehab exercises after TPLO surgery must be done carefully to avoid setbacks. Monitoring your dog and following guidelines helps protect the surgical repair and promotes healing.
Some signs require immediate veterinary attention. Knowing precautions ensures your dog’s rehab is safe and effective.
- Avoid overexertion: Excessive exercise can cause swelling, pain, or damage to the healing ligament and bone.
- Watch for limping: Increased limping or reluctance to use the leg signals pain or injury needing vet evaluation.
- Use proper support: Use slings or harnesses if recommended to assist your dog during walking or standing exercises.
- Follow vet instructions: Adhere strictly to exercise duration, frequency, and type as prescribed by your veterinary team.
Careful rehab with attention to your dog’s responses leads to the best recovery after TPLO surgery.
How long does TPLO rehab take for dogs to fully recover?
Recovery time after TPLO surgery varies by dog size, age, and health. Most dogs need 8 to 12 weeks of rehab before returning to full activity. Some may take longer for complete healing.
Patience and consistent rehab exercises are essential for success. Rushing recovery can cause complications or re-injury.
- Initial healing: Bone and ligament healing typically take 6 to 8 weeks after surgery.
- Muscle rebuilding: Strength and endurance improve gradually over 8 to 12 weeks with regular rehab.
- Return to activity: Most dogs resume normal walking and light running by 12 weeks post-op.
- Full recovery: High-impact activities like jumping or agility may require 4 to 6 months depending on individual progress.
Regular follow-up with your vet ensures your dog’s recovery stays on track and adjusts rehab as needed.
Conclusion
TPLO rehab exercises for dogs are vital to restore strength, mobility, and joint stability after surgery. Starting with gentle passive movements and progressing to active strengthening helps dogs heal safely and effectively.
Following a vet-approved rehab plan and watching for signs of problems ensures your dog recovers well. With patience and care, most dogs return to happy, active lives after TPLO surgery.
FAQs
How soon after TPLO surgery can I start rehab exercises?
Gentle passive exercises usually start within 3-5 days post-surgery, while active strengthening begins around 2-4 weeks depending on your vet’s advice.
Can I do TPLO rehab exercises at home?
Many rehab exercises can be done at home with guidance from your vet or rehab specialist. Proper technique and timing are important to avoid injury.
Is hydrotherapy safe for all dogs after TPLO?
Hydrotherapy is generally safe and beneficial but should be done under professional supervision to match your dog’s healing stage and avoid complications.
What signs mean I should stop rehab exercises?
Stop exercises if your dog shows increased limping, swelling, pain, or reluctance to use the leg, and contact your vet immediately.
How long does full recovery take after TPLO surgery?
Most dogs recover fully within 8 to 12 weeks, but some may need up to 4 to 6 months for high-impact activities depending on individual healing.

Long-Term Outcomes of TPLO Surgery
Explore the long-term outcomes of TPLO surgery, its effectiveness, potential risks, and benefits for maintaining canine mobility and quality of life
Many pet owners choose Tibial Plateau Leveling Osteotomy (TPLO) to help their dogs regain mobility, but years later, they may question if it was the right decision. The main concerns are about arthritis, implant issues, and long-term joint function.
Studies show that over 90% of dogs regain full limb function within a year, and the long-term results are generally positive. However, mild arthritis is expected, even in successful cases.
Some owners reconsider TPLO because of implant rejection or ongoing lameness, but these cases are rare with proper post-op care. When combined with weight management and physical therapy, TPLO offers lasting relief, often keeping dogs active well into their senior years.
Understanding TPLO Surgery and Its Long-Term Impact
TPLO surgery is designed to stabilize the knee and restore mobility after a cranial cruciate ligament (CCL) tear. Unlike traditional repairs, TPLO permanently changes the knee’s biomechanics by altering the tibial plateau angle, which reduces strain on the joint.
While most dogs regain almost normal function, there are long-term factors to consider. Arthritis develops in nearly all cases, but its severity can vary. Implant wear or loosening is rare but can happen, especially in very active dogs. Another concern is compensatory injury; dogs that undergo TPLO on one leg have up to a 50% chance of tearing the CCL in the opposite knee within a few years.
Despite these risks, long-term studies confirm TPLO’s effectiveness in maintaining mobility and reducing chronic pain. With proper care, many dogs remain active for 8–10 years after surgery.
Long-Term Success Rates and Mobility
For most dogs, TPLO isn't just a short-term solution—it offers long-lasting improvements in mobility, keeping them active well into their senior years.
How Well Do Dogs Recover 5–10 Years After TPLO?
Long-term studies indicate that over 90% of dogs undergoing TPLO surgery regain normal limb function within a year, with sustained mobility for up to 6.8 years post-surgery. Younger dogs (under 5 years) often experience full recovery with minimal arthritis, while older dogs may develop mild stiffness but continue to lead active lives.
A long-term study on large breeds found that 76% showed no significant lameness a decade after surgery.
As Dr. David Dycus, DVM, highlights, managing weight and caring for joints are vital for the best results. He supports a patient-focused approach, stressing the importance of communication and personalized treatment plans to ensure the best quality of life for dogs.
Gait and Limb Function Studies
Long-term studies show that most dogs undergoing TPLO surgery regain almost normal gait and weight distribution within a year, with continued improvements over time. For example, research comparing TPLO to extracapsular repair found that dogs achieved normal limb loading faster after TPLO, with the operated limb functioning similarly to control groups by one year after surgery.
However, subtle changes can persist. Some dogs may slightly favor the surgical leg, especially in colder weather or after long periods of rest. A study evaluating recovery of limb function post-TPLO noted that while significant improvements were observed, certain gait changes could remain, particularly under specific conditions.
These findings suggest that while TPLO effectively restores function, individual variations in recovery and gait adaptations can occur.
Does TPLO Prevent Arthritis in the Long Run?
Arthritis is a common concern after any knee surgery. TPLO helps slow down arthritis by stabilizing the joint and reducing abnormal movement, but it doesn't completely remove the risk. Over time, most dogs develop some arthritis, but it's usually less severe than in knees that are untreated or not properly repaired.
TPLO vs. Other Procedures (TTA, Lateral Suture) for Arthritis Prevention
When comparing surgical options, TPLO has a lower rate of arthritis progression than lateral suture surgeries, which depend on external stabilization that can stretch over time. Studies show that dogs undergoing TPLO have better long-term mobility and less joint inflammation.
When comparing TTA (Tibial Tuber osity Advancement) to TPLO, research suggests similar long-term arthritis outcomes, but TPLO patients usually recover faster and regain function sooner.
No matter the procedure, managing weight, using joint supplements, and engaging in regular low-impact exercise are crucial for slowing arthritis progression.
TPLO Implant Longevity & Failure Rates
One of the main concerns with TPLO surgery is the long-term durability of the metal plate and screws used to stabilize the knee. Although TPLO is meant to be a permanent solution, implant-related issues can occur in a small number of cases.
Do TPLO Plates & Screws Last a Lifetime?
For 90–95% of dogs, TPLO implants stay intact and functional for life. The titanium or stainless steel plates are biocompatible and rarely cause problems. However, implant failure happens in 5–10% of cases, often due to:
- Screw loosening from too much activity or poor bone healing
- Irritation from cold weather or pressure on the plate
- Infection, which may develop months or years after surgery
Signs of implant failure include ongoing limping, localized swelling, or heat around the knee. If problems occur, implant removal or replacement might be needed.
Risk of TPLO on the Opposite Leg
One of the most significant long-term concerns after TPLO surgery is the risk of a cranial cruciate ligament (CCL) tear in the opposite leg. As dogs rely on their healthy leg during recovery, it often takes on more stress, which can speed up ligament wear.
What Are the Chances of Needing TPLO on the Other Leg?
Studies show that 30–50% of dogs need TPLO on the opposite leg within 2–5 years. Risk factors include:
- Obesity, which puts extra strain on joints
- High activity levels, causing wear and tear
- Poor muscle balance, affecting joint stability
To lower the risk, controlled exercise, muscle-strengthening therapy, and strict weight management are crucial. Joint supplements and physical therapy can also help maintain long-term knee health. While a second TPLO might be needed, early intervention and proper care can delay or prevent another surgery.
Long-Term Satisfaction: Are Owners Happy Years After TPLO?
For most pet owners, TPLO surgery is a valuable investment in their dog's mobility and quality of life. Years after the surgery, most report significant improvements in their pet's activity levels, with only a few long-term concerns.
What Pet Owners Say About TPLO Years Later
Studies show that 80–90% of owners are satisfied with their dog's long-term recovery. Many dogs return to running, hiking, and playing without noticeable lameness. However, some owners have concerns, particularly due to:
- Arthritis development, which is common but varies in severity
- Implant issues, such as irritation or the rare need for removal
- A second TPLO surgery, as 30–50% of dogs eventually need the procedure on the other knee
Dogs that undergo structured rehabilitation, maintain an ideal weight, and stay active with controlled exercise tend to have the best long-term results. Proper post-op care and regular vet checkups can maximize mobility and minimize complications, ensuring TPLO remains a lasting solution.
Late-onset lameness & Joint Stiffness
While TPLO provides excellent long-term outcomes, some dogs develop mild lameness or stiffness years after surgery. This can occur due to arthritis progression, muscle imbalances, or implant irritation, even in otherwise successful cases.
Why Do Some Dogs Develop Lameness Years Later?
Several factors contribute to late-onset lameness after TPLO:
- Arthritis progression: TPLO slows but doesn't stop joint degeneration. Over time, cartilage wear leads to stiffness, especially in older dogs.
- Scar tissue formation: Some dogs develop fibrotic tissue around the knee, which reduces flexibility and changes movement patterns.
- Muscle weakness from inadequate rehab: A lack of structured post-surgery rehabilitation can lead to ongoing muscle imbalances, putting strain on the joint.
Solutions for Maintaining Mobility
To reduce long-term stiffness, consistent low-impact exercise (like swimming or controlled walking) is crucial. Joint supplements (glucosamine, omega-3s) can help slow arthritis progression, and regular vet check-ups ensure early detection of any issues.
For dogs showing signs of discomfort, physical therapy and anti-inflammatory management can greatly improve their quality of life.
How Well Does TPLO Hold Up in Active & Working Dogs?
For working dogs, agility competitors, and high-energy breeds, long-term durability is a major concern after TPLO surgery. While the procedure restores knee stability, the intense physical activity these dogs engage in can increase the risk of re-injury and joint strain over time.
Can Working & Sporting Dogs Perform Well After TPLO?
Many agility, service, and hunting dogs successfully return to full activity after TPLO. A study on sporting breeds found that over 80% regained their pre-injury performance levels with proper rehabilitation. However, working dogs face a higher risk of reinjury or implant stress, especially if they resume activity too soon.
Key factors for long-term success include:
- Gradual reconditioning with structured rehab
- Hydrotherapy for low-impact muscle strengthening
- Targeted strength training to prevent imbalances
While some stiffness or mild arthritis may develop over time, most active dogs remain highly functional for 5–10+ years post-surgery with proper care. Regular joint supplements, vet check-ups, and monitored exercise can help protect their long-term mobility.
Comparing TPLO to No Surgery: Is It Worth It?
Some pet owners wonder if TPLO is truly necessary or if their dog could recover naturally. While there are non-surgical options, studies consistently show that dogs undergoing TPLO have better long-term outcomes in terms of mobility, pain management, and quality of life.
What Happens to Dogs Who Don’t Get TPLO?
Without surgery, a cranial cruciate ligament (CCL) tear leads to chronic instability, causing:
- Severe arthritis due to ongoing joint wear
- Chronic pain that worsens over time
- Progressive loss of mobility, often requiring lifelong pain management
Alternatives like bracing, physical therapy, and pain medications can provide some relief but rarely restore full function. A study comparing TPLO to non-surgical treatment found that over 90% of TPLO dogs regained normal mobility, while non-surgical cases had a much higher risk of long-term lameness and reduced activity levels.
When comparing lifespan and activity, TPLO-treated dogs remain more active for longer, often enjoying 5–10+ years of quality mobility post-surgery. For most dogs, TPLO remains the gold standard for CCL injuries.
Does TPLO Surgery Help Dogs Live Longer?
While TPLO is mainly done to restore mobility, its long-term effects can affect a dog’s overall lifespan by improving their quality of life and reducing chronic joint pain.
Longevity & Lifespan Impact
There are no direct studies showing TPLO extends lifespan, but research indicates that dogs with untreated CCL tears have higher risks of arthritis, chronic pain, and reduced activity levels—factors that can indirectly affect longevity. Chronic joint pain leads to less exercise, weight gain, and muscle loss, which may contribute to other health issues like heart disease or metabolic disorders.
In contrast, TPLO restores stable movement, allowing dogs to stay active for years. With proper weight control, joint supplements, and post-surgical rehab, TPLO-treated dogs enjoy a higher quality of life well into their senior years. While the surgery itself doesn’t guarantee a longer lifespan, it significantly improves mobility and comfort, contributing to better long-term health.
Final Thoughts
TPLO is widely seen as the gold standard for CCL injuries, providing strong, lasting mobility improvements for most dogs. Studies show that 85–90% of dogs regain near-normal function after surgery, with benefits lasting well into their senior years.
However, arthritis remains a common concern, even in successful TPLO cases. Implant-related issues, like irritation or screw loosening, happen in a small percentage of dogs (5–10%), but these can often be managed with proper care.
Dogs that undergo structured rehabilitation, maintain a healthy weight, and receive joint supplements tend to have the best long-term results. Regular vet check-ups help detect and address potential issues early.
While TPLO doesn’t eliminate every risk, it significantly improves mobility and quality of life, making it the preferred choice for long-term knee stability. Lifelong joint care is essential for maximizing success.

13 Long-Term Effects of TPLO Surgery on Dogs
Discover the 13 long-term effects of TPLO surgery in dogs, including benefits, risks, and care tips for optimal recovery and joint health
Tibial Plateau Leveling Osteotomy (TPLO) surgery is a common procedure used to treat a torn cranial cruciate ligament (CCL) in dogs. This ligament is crucial for stabilizing the knee joint, and when it's damaged, it can cause pain, lameness, and arthritis.
TPLO surgery is very effective in restoring mobility, but many pet owners are curious about its long-term effects. Knowing what to expect years after the surgery can help you provide better care for your dog and make informed health decisions.
In this article, we’ll discuss the potential long-term effects of TPLO surgery, including the benefits, risks, and challenges. By the end, you’ll have a clear understanding of how this surgery affects your dog’s quality of life and what you can do to help them thrive.
1. Improved Mobility and Quality of Life
One of the biggest long-term benefits of TPLO surgery is improved mobility. After recovery, most dogs regain full use of the affected leg and return to activities they enjoyed before the injury. This improvement usually lasts a long time, and many dogs stay active for years after the surgery.
If your dog has trouble walking or playing because of a torn CCL, TPLO surgery can often make a big difference. With less pain and more stability, they can move comfortably. However, it's important to keep an eye on their activity levels, as too much exertion can lead to other joint issues. You might also notice your dog slightly favoring the surgical leg less than the other one as they age, which is completely normal.
2. Risk of Arthritis in the Affected Joint
Arthritis is a common concern after TPLO surgery. While the procedure stabilizes the knee and slows down the progression of arthritis, it doesn't completely eliminate the risk. Dogs with a history of CCL tears often develop arthritis in the affected joint over time, which can lead to stiffness, discomfort, and reduced flexibility.
To reduce the impact of arthritis, it's important to manage your dog's weight, provide joint supplements like glucosamine, and ensure they get regular, low-impact exercise. Activities like swimming or gentle walks can help keep their joints healthy without putting too much stress on the repaired knee.
You can also discuss long-term pain management options with your veterinarian, such as anti-inflammatory medications or physical therapy.
3. Potential for Opposite Leg Injuries
A less-discussed long-term effect of TPLO surgery is the increased risk of a CCL tear in the opposite leg. Studies suggest that up to 50% of dogs who have had TPLO surgery on one leg may experience a similar injury on the other leg within a few years. This often happens because the opposite leg compensates for the injured one during recovery, leading to extra strain.
To reduce this risk, focus on balanced physical therapy and muscle-strengthening exercises after surgery. Keeping your dog at a healthy weight is also important, as extra weight puts more stress on the joints. If your dog does tear the other CCL, the good news is that TPLO surgery can also be performed on the second leg with similar success rates.
4. Long-Term Scar Tissue and Stiffness
Scar tissue formation is a natural part of healing after TPLO surgery. Usually, this tissue helps stabilize the joint and doesn't cause major problems. However, some dogs might feel stiff occasionally, especially in colder weather or after being inactive for a long time.
You can help reduce stiffness by keeping your dog warm in the winter and encouraging gentle movement throughout the day. Joint massages and passive range-of-motion exercises can also improve flexibility. If the stiffness continues or gets worse, consult your veterinarian to check for any complications.
5. Implant-Related Complications
During TPLO surgery, a metal plate and screws are used to stabilize the knee. These implants are meant to stay in place permanently, but in rare cases, they can cause problems. For example, some dogs may develop infections around the implant or experience loosening of the hardware over time.
Signs of implant-related issues include swelling, redness, or limping long after the surgery has healed. If you notice any of these symptoms, it’s important to have your dog checked by a veterinarian. In some cases, the implant may need to be removed, but this is uncommon when the surgery is done correctly.
6. Weight Management Challenges
As we discussed in the sections above, maintaining your dog’s ideal weight is one of the most important long-term considerations after TPLO surgery. Excess weight can strain the repaired knee and increase the risk of arthritis and other joint problems. Unfortunately, some dogs become less active during their recovery, which can lead to weight gain.
To manage this, ensure your dog has a balanced diet with controlled portions. Your veterinarian can recommend a weight management plan tailored to your dog’s needs. Regular exercise, such as swimming or short walks, can also help keep them fit without putting too much pressure on their joints.
7. Joint Mechanics and Biomechanics Over Time
After TPLO surgery, the way your dog's knee joint works changes a lot. The surgery changes the angle of the tibial plateau to stop instability, which can affect how your dog moves. Over time, these changes might lead to different posture or walking patterns.
While these adjustments are usually well-tolerated, it's important to keep an eye on your dog's movement. Any noticeable changes in walking or weight distribution should be checked by a veterinarian to catch potential issues early.
8. Age-Related Factors
Your dog's age at the time of TPLO surgery significantly affects their recovery and long-term outcomes. Younger dogs usually heal faster and regain full mobility more easily. Their bodies are more resilient, making them less likely to develop complications like arthritis or stiffness.
Older dogs, however, may heal more slowly and have a higher chance of developing age-related conditions such as arthritis or joint issues. If your dog is older, your veterinarian might suggest additional pre-surgical tests to check their overall health and customize the recovery plan.
Supplements, weight management, and ongoing physical therapy can further enhance their long-term quality of life, even if they encounter age-related challenges.
9. Infection Risks and Chronic Inflammation
Infections after TPLO surgery are rare but can happen, especially around the surgical implants. Chronic or delayed infections may cause inflammation, discomfort, and even joint instability if not treated.
However, many surgeons now use surgical lavage solutions like Simini Protect Lavage to significantly reduce the risk of infections. These advanced solutions help keep the surgical area sterile, resulting in safer outcomes.
Signs of infection include redness, swelling, warmth, or ongoing limping near the surgical site. If you see any of these symptoms, contact your veterinarian right away. Early treatment can stop infections from getting worse and help ensure a smoother recovery.
10. Ongoing Rehabilitation Needs
TPLO surgery is just the first step in your dog’s recovery. Long-term success often relies on regular rehabilitation and strengthening exercises. Physiotherapy and hydrotherapy are especially effective for improving mobility, rebuilding muscle mass, and reducing joint stiffness.
Your veterinarian might suggest a customized rehabilitation plan that includes specific exercises like sit-to-stand repetitions, controlled leash walks, or underwater treadmill sessions. These activities can help restore muscle strength and balance, ensuring your dog fully uses the affected leg.
Regular follow-ups with a canine physical therapist or vet will ensure the plan adjusts to your dog’s changing needs.
11. Nutritional Considerations for Joint Health
Nutrition is crucial for supporting your dog's joints after TPLO surgery. Veterinarians often suggest adding supplements like glucosamine, chondroitin, and omega-3 fatty acids to your dog's diet. These supplements help maintain cartilage health, improve joint lubrication, and reduce inflammation.
A balanced diet with high-quality protein is also important for rebuilding muscle and supporting overall recovery. If your dog is overweight, a weight management plan guided by a veterinarian is essential to reduce stress on the repaired knee. Always consult your vet before adding any new supplements to make sure they are suitable for your dog's specific needs.
12. Behavioral Adjustments and Anxiety
It's common for dogs to experience behavioral changes, like anxiety or reduced activity levels, after TPLO surgery. Limited mobility during recovery can cause frustration, boredom, or even depression. Dogs that were very active before may find it hard to adjust to temporary restrictions.
To keep your dog mentally engaged, try using puzzle toys, treat-dispensing games, or gentle training exercises that don't strain their knee. Spending quality time with your dog during recovery can also help reduce anxiety. If your dog shows signs of ongoing stress or behavioral changes, consult your veterinarian for advice or consider working with an animal behaviorist.
13. Genetic Predispositions
Certain breeds are genetically more prone to joint problems, which can affect their long-term outcomes after TPLO surgery. For example, large breeds like Labrador Retrievers, Golden Retrievers, and Rottweilers often have a higher risk of developing arthritis or degenerative joint issues as they age. These genetic factors can impact their recovery and increase the chance of future joint instability.
If your dog is a high-risk breed, taking preventive steps is crucial. These include keeping a healthy weight, providing joint supplements, and following a regular, low-impact exercise routine. Regular check-ups with your vet will help detect potential issues early, ensuring your dog remains active and comfortable for as long as possible.
Conclusion
That's all you need to know about the long-term effects of TPLO surgery, which include both benefits and challenges, such as improved mobility and the risk of arthritis or joint degeneration. By actively managing your dog's care—through weight control, balanced exercise, and regular vet visits—you can help them enjoy a high quality of life.
Although challenges like implant wear, muscle loss, or age-related changes may occur, ongoing care and rehabilitation can significantly help in keeping your dog happy and active for years to come.
Sources:
- Six Risk Factors for Arthritis in Dogs - Dog Arthritis Aware
- Arthritis in Dogs: Information and Advice - Guide Dogs UK
Dog Whining After TPLO Surgery: Causes and Care
Learn why your dog may whine after TPLO surgery, what it means, and how to help your pet recover comfortably and safely.
After your dog undergoes TPLO surgery, you might notice whining behavior that can worry you. Dog whining after TPLO surgery is common and can signal pain, discomfort, or anxiety during recovery. Understanding why your dog whines helps you provide better care and support during this critical healing phase.
This article explains the main reasons dogs whine after TPLO surgery, how to recognize when it is normal or concerning, and what steps you can take to ease your dog's discomfort. You will learn practical tips for managing pain, preventing complications, and promoting a smooth recovery.
Why is my dog whining after TPLO surgery?
Whining after TPLO surgery usually relates to pain or discomfort from the operation. Dogs cannot tell us how they feel, so whining is one way they express distress. It can also be a sign of anxiety or frustration due to restricted movement during recovery.
Recognizing the cause of whining helps you respond appropriately to your dog's needs and avoid unnecessary stress or complications.
- Postoperative pain: Pain from the surgical site is the most common reason for whining and usually peaks in the first few days after surgery.
- Restricted mobility: Limited ability to move or walk can cause frustration and whining as your dog adjusts to the recovery process.
- Anxiety or stress: Changes in routine, confinement, and discomfort can make your dog anxious, leading to vocalization like whining.
- Need for attention: Your dog may whine to seek comfort, reassurance, or physical contact from you during recovery.
Understanding these causes allows you to provide better comfort and care to your dog after TPLO surgery.
How can I tell if my dog’s whining is normal or a sign of a problem?
Not all whining after TPLO surgery is cause for alarm. Normal whining is usually mild and occurs during movement or when your dog is settling down. However, excessive or persistent whining may indicate complications or uncontrolled pain.
Knowing the difference helps you decide when to contact your veterinarian for advice or intervention.
- Normal whining: Occurs intermittently, especially when your dog tries to move or change position, and decreases over time.
- Signs of severe pain: Loud, continuous whining combined with limping, restlessness, or refusal to bear weight may signal uncontrolled pain.
- Signs of infection: Whining with swelling, redness, discharge, or foul odor at the surgical site requires immediate veterinary attention.
- Behavioral changes: Excessive whining with aggression, lethargy, or loss of appetite may indicate complications or distress.
Monitoring your dog closely and noting changes in whining patterns helps ensure timely care and prevents worsening conditions.
What pain management options are available after TPLO surgery?
Effective pain control is essential to reduce whining and promote healing after TPLO surgery. Your veterinarian will prescribe medications and suggest supportive measures to keep your dog comfortable.
Following the prescribed pain management plan closely improves your dog's recovery experience and reduces stress for both of you.
- Prescription painkillers: Non-steroidal anti-inflammatory drugs (NSAIDs) or opioids are commonly used to control postoperative pain safely.
- Cold therapy: Applying cold packs to the surgical area can reduce swelling and numb pain during the first 48 hours after surgery.
- Physical support: Using slings or harnesses helps your dog move without putting full weight on the operated leg, reducing pain during walking.
- Environmental comfort: Providing a quiet, soft resting area minimizes discomfort and encourages rest, which reduces whining.
Always follow your veterinarian's instructions on medication dosage and duration to avoid side effects or complications.
How should I care for my dog’s surgical site to reduce discomfort?
Proper wound care after TPLO surgery helps prevent infection and reduces pain that can cause whining. Keeping the surgical site clean and protected is vital during recovery.
Regular inspection and gentle care promote healing and comfort for your dog.
- Keep the incision dry: Avoid bathing or allowing water on the surgical site until your vet confirms it is safe to do so.
- Prevent licking or chewing: Use an Elizabethan collar or protective clothing to stop your dog from irritating the wound.
- Check for signs of infection: Look for redness, swelling, discharge, or foul smell and report concerns to your vet promptly.
- Follow dressing instructions: Change bandages as directed by your veterinarian to maintain cleanliness and support healing.
Consistent care of the surgical site reduces pain and helps your dog feel more comfortable during recovery.
What activity restrictions should I follow to help my dog heal?
Limiting your dog's activity after TPLO surgery is crucial to prevent injury and reduce pain that causes whining. Controlled movement supports proper healing and avoids complications.
Understanding and enforcing these restrictions ensures your dog recovers safely and comfortably.
- Strict confinement: Keep your dog in a small area or crate to limit running, jumping, or climbing for at least 6 to 8 weeks post-surgery.
- Leash walks only: Allow short, slow leash walks for bathroom breaks, avoiding off-leash activity or rough surfaces.
- Avoid stairs: Prevent stair climbing to reduce strain on the healing leg and minimize pain.
- Gradual reintroduction: Follow your veterinarian’s guidance to slowly increase activity as healing progresses, monitoring for any signs of discomfort.
Adhering to activity restrictions helps reduce whining caused by pain or injury during recovery.
When should I contact my veterinarian about my dog’s whining?
Knowing when to seek veterinary help is important if your dog’s whining signals a problem after TPLO surgery. Prompt attention can prevent complications and improve outcomes.
Being proactive about your dog’s symptoms ensures timely care and peace of mind.
- Persistent severe whining: If your dog whines continuously and shows signs of severe pain or distress, contact your vet immediately.
- Signs of infection: Whining accompanied by swelling, redness, discharge, or fever requires urgent veterinary evaluation.
- Changes in mobility: Sudden inability to bear weight or worsening lameness with whining should be assessed by a professional.
- Behavioral or appetite changes: Excessive whining with lethargy, aggression, or loss of appetite may indicate complications needing veterinary care.
Timely communication with your veterinarian helps ensure your dog’s recovery stays on track and reduces unnecessary suffering.
Conclusion
Dog whining after TPLO surgery is a common way your pet expresses pain, discomfort, or anxiety during recovery. Understanding the reasons behind the whining helps you provide better care and comfort to your dog.
By managing pain effectively, caring for the surgical site, restricting activity, and monitoring for complications, you can support your dog's healing and reduce distress. Always consult your veterinarian if you are concerned about your dog's whining or recovery progress.
FAQs
How long does whining usually last after TPLO surgery?
Whining typically decreases within the first two weeks as pain and discomfort lessen. Persistent or worsening whining beyond this period should be evaluated by a veterinarian.
Can I give my dog over-the-counter pain medication for TPLO recovery?
Do not give over-the-counter pain medications without veterinary approval, as some can be toxic to dogs or interfere with prescribed treatments.
Is it normal for my dog to whine at night after TPLO surgery?
Yes, dogs may whine at night due to discomfort or anxiety. Providing a comfortable, quiet space and following pain management helps reduce nighttime whining.
How can I comfort my dog when it whines after surgery?
Offer gentle petting, speak softly, and stay close to reassure your dog. Avoid excessive stimulation that may increase anxiety or pain.
When can my dog start physical therapy after TPLO surgery?
Physical therapy usually begins 1 to 2 weeks post-surgery, depending on healing progress. Follow your veterinarian’s recommendations for timing and exercises.

Arthrex TPLO Plate Overview and Use
Learn about the Arthrex TPLO plate, its design, surgical use, and benefits for canine cruciate ligament repair.
The Arthrex TPLO plate is a specialized orthopedic implant designed to stabilize the tibia after a tibial plateau leveling osteotomy (TPLO) surgery in dogs. TPLO surgery is a common procedure to treat cranial cruciate ligament (CCL) rupture, which causes lameness and pain in dogs. Understanding the Arthrex TPLO plate helps pet owners and veterinarians appreciate how this device supports bone healing and restores limb function.
This article explains what the Arthrex TPLO plate is, how it is used during surgery, its design features, and the benefits it offers. You will learn about the surgical technique, implant materials, and postoperative care to ensure the best outcomes for dogs undergoing TPLO surgery.
What is the Arthrex TPLO plate?
The Arthrex TPLO plate is a metal implant used to fix the tibia after cutting and rotating the bone during TPLO surgery. It holds the bone segments securely to allow proper healing and restore normal joint mechanics. The plate is contoured to fit the shape of the canine tibia and is available in various sizes to match different dog breeds and sizes.
The plate works together with locking screws that provide stable fixation without compressing the bone excessively. This design helps reduce complications and promotes faster recovery.
- Purpose of the plate: It stabilizes the tibia after osteotomy, maintaining the new bone angle to prevent joint instability and lameness.
- Material composition: Made from medical-grade stainless steel or titanium, ensuring strength, biocompatibility, and corrosion resistance.
- Plate design: Anatomically contoured to match the tibial shape, minimizing soft tissue irritation and improving fit.
- Locking screw system: Uses locking screws that lock into the plate, providing angular stability and reducing screw loosening risks.
These features make the Arthrex TPLO plate a reliable choice for TPLO surgeries in veterinary orthopedics.
How is the Arthrex TPLO plate used in surgery?
During TPLO surgery, the surgeon makes a curved cut in the tibia and rotates the bone segment to change the slope of the tibial plateau. The Arthrex TPLO plate is then applied to hold the bone in its new position. Proper placement and fixation are critical for successful healing and restoring limb function.
The surgical steps include precise measurement, plate selection, and screw placement to ensure stability and avoid complications.
- Osteotomy procedure: The tibia is cut using a saw guided by a jig to create a controlled curved osteotomy.
- Plate positioning: The Arthrex TPLO plate is aligned over the osteotomy site to match the bone contour and rotated segment.
- Screw insertion: Locking screws are placed through the plate holes into the bone, securing the plate firmly.
- Verification of stability: The surgeon checks the fixation and limb alignment before closing the surgical site.
Following these steps ensures the plate supports the bone during healing and helps the dog regain normal limb use.
What are the advantages of using the Arthrex TPLO plate?
The Arthrex TPLO plate offers several benefits compared to traditional fixation methods. Its design and materials improve surgical outcomes and reduce postoperative complications. These advantages contribute to faster recovery and better function for dogs after TPLO surgery.
Understanding these benefits helps veterinarians choose the best implant for their patients.
- Enhanced stability: Locking screw technology provides rigid fixation, reducing micromotion and promoting bone healing.
- Reduced soft tissue damage: Anatomical contouring minimizes irritation and inflammation around the implant site.
- Corrosion resistance: High-quality materials prevent implant degradation and inflammatory reactions over time.
- Versatility in sizes: Multiple plate sizes accommodate different dog breeds, ensuring proper fit and function.
These features make the Arthrex TPLO plate a preferred choice for many veterinary surgeons performing TPLO surgeries.
What materials are used in the Arthrex TPLO plate?
The Arthrex TPLO plate is manufactured from biocompatible metals that provide strength and durability while minimizing adverse tissue reactions. The choice of materials affects the plate’s performance and long-term safety.
Knowing the materials helps veterinarians and pet owners understand implant behavior inside the body.
- Stainless steel: Commonly used for its strength, corrosion resistance, and affordability in orthopedic implants.
- Titanium alloy: Offers excellent biocompatibility, lighter weight, and reduced risk of allergic reactions.
- Surface finish: Smooth, polished surfaces reduce tissue irritation and bacterial adhesion risks.
- Radiopacity: Materials allow clear X-ray visualization to monitor implant position during follow-up.
These material properties ensure the Arthrex TPLO plate performs well during the healing process and remains safe long term.
How does the Arthrex TPLO plate support postoperative recovery?
Postoperative care is essential for successful healing after TPLO surgery using the Arthrex TPLO plate. The implant provides stable fixation, but proper management of the dog’s activity and monitoring are critical to prevent complications.
Understanding the role of the plate in recovery helps owners follow veterinary instructions effectively.
- Early weight bearing: Stable fixation allows controlled limb use soon after surgery, promoting muscle strength and joint mobility.
- Reduced risk of implant failure: Locking screws and plate design minimize loosening or breakage during recovery.
- Radiographic monitoring: Regular X-rays check bone healing and implant position to detect issues early.
- Physical therapy support: Rehabilitation exercises complement implant stability to restore normal gait and function.
Following these guidelines helps dogs recover faster and return to normal activity safely.
What complications can occur with the Arthrex TPLO plate?
While the Arthrex TPLO plate is designed to reduce complications, some risks remain. Awareness of potential problems helps veterinarians and owners recognize signs early and take action.
Most complications relate to surgical technique, implant placement, or postoperative care.
- Infection risk: Surgical site infections can occur, requiring antibiotics or implant removal in severe cases.
- Implant loosening: Poor screw fixation or excessive activity may cause the plate to loosen, affecting stability.
- Delayed bone healing: Factors like poor blood supply or infection can slow osteotomy healing despite stable fixation.
- Soft tissue irritation: Improper plate positioning may cause discomfort or swelling around the implant.
Close follow-up and adherence to postoperative instructions minimize these risks and improve outcomes.
Conclusion
The Arthrex TPLO plate is a vital implant in veterinary orthopedics for treating cranial cruciate ligament injuries in dogs. Its specialized design and locking screw system provide stable fixation, promote bone healing, and support early recovery.
Understanding the plate’s features, surgical use, and postoperative care helps pet owners and veterinarians ensure the best results after TPLO surgery. Proper implant selection and management reduce complications and help dogs regain normal limb function safely.
What sizes does the Arthrex TPLO plate come in?
The Arthrex TPLO plate is available in multiple sizes ranging from small to large to fit different dog breeds and tibial dimensions accurately.
Can the Arthrex TPLO plate be removed after healing?
Implant removal is not routinely required but may be performed if the dog experiences irritation, infection, or implant-related complications after bone healing.
How long does it take for the bone to heal with the Arthrex TPLO plate?
Bone healing typically takes 8 to 12 weeks, depending on the dog's age, health, and postoperative care quality.
Is the Arthrex TPLO plate MRI compatible?
Plates made from titanium alloys are generally MRI compatible, while stainless steel plates may cause artifacts or interference during imaging.
What postoperative care is recommended after TPLO surgery with this plate?
Recommended care includes restricted activity, pain management, physical therapy, and regular veterinary check-ups with radiographic monitoring to ensure proper healing.
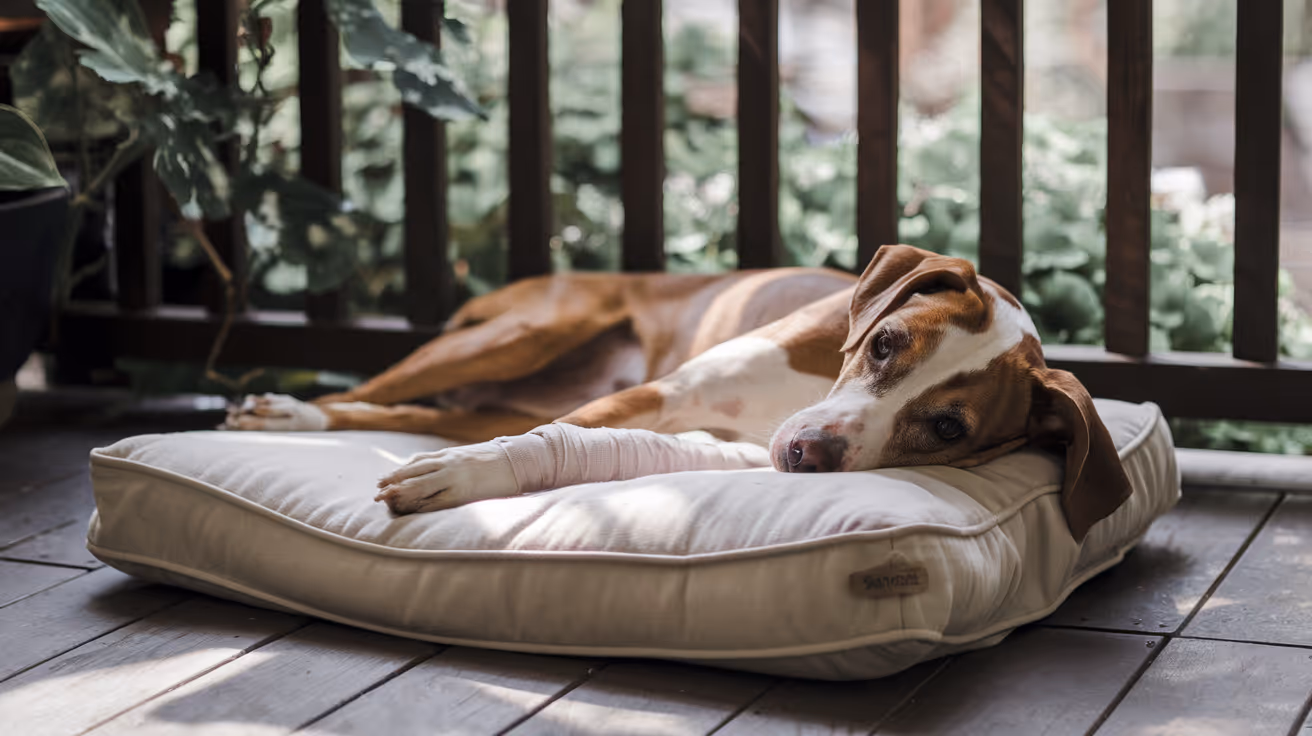
Bruising After TPLO Surgery in Dogs
Learn about bruising after TPLO surgery in dogs, its causes, care tips, and when to seek veterinary help.
Bruising after TPLO surgery in dogs is a common concern for many pet owners. TPLO, or Tibial Plateau Leveling Osteotomy, is a surgical procedure to stabilize a dog's knee after a cruciate ligament injury. After surgery, owners often notice bruising around the incision site or leg, which can be alarming.
This article explains why bruising happens after TPLO surgery, how to care for your dog during recovery, and when to contact your veterinarian. Understanding bruising helps you support your dog's healing process effectively.
Why Does Bruising Occur After TPLO Surgery in Dogs?
Bruising happens when blood vessels under the skin break and leak blood into surrounding tissues. After TPLO surgery, bruising is usually due to the trauma of surgery and tissue manipulation. The surgical area may show discoloration as part of normal healing.
It is important to recognize that some bruising is expected, but excessive or worsening bruising may indicate complications. Knowing the causes helps you monitor your dog’s recovery closely.
- Surgical trauma: The cutting and repositioning of bone and soft tissue during TPLO can cause small blood vessels to rupture, leading to bruising around the surgical site.
- Inflammation response: The body’s natural healing process causes inflammation, which can increase blood flow and cause visible bruising and swelling near the incision.
- Blood thinning medications: If your dog is on medications like aspirin or NSAIDs, these can increase bruising risk by affecting clotting mechanisms.
- Movement after surgery: Excessive activity or pressure on the leg soon after surgery can worsen bruising by disrupting healing tissues and blood vessels.
Understanding these causes helps you differentiate normal bruising from signs of complications that need veterinary attention.
What Does Normal Bruising Look Like After TPLO Surgery?
Normal bruising after TPLO surgery usually appears as a purple, blue, or reddish discoloration around the incision or leg. It often develops within 24 to 48 hours post-surgery and gradually fades over 1 to 2 weeks.
Knowing the typical appearance and timeline of bruising helps you track your dog’s healing and identify abnormal changes early.
- Color changes: Bruises typically start dark purple or blue, then change to green, yellow, and finally fade as healing progresses over days to weeks.
- Size and spread: Normal bruising is usually localized near the incision and does not spread extensively to other parts of the leg or body.
- Swelling presence: Mild swelling often accompanies bruising but should not cause severe discomfort or limb deformity.
- Pain level: Some tenderness is expected, but your dog should not show signs of severe pain or limping beyond normal post-surgical recovery.
Monitoring these signs helps ensure bruising is part of normal healing and not a sign of infection or bleeding complications.
How Should You Care for Bruising After TPLO Surgery?
Proper care reduces bruising severity and supports healing after TPLO surgery. Following your veterinarian’s instructions and providing gentle care helps your dog recover comfortably and safely.
Simple steps at home can minimize bruising and swelling while preventing complications.
- Rest and restricted activity: Limit your dog’s movement to prevent pressure on the surgical site and avoid worsening bruising or swelling.
- Cold compress application: Applying a cold pack wrapped in cloth for 10–15 minutes several times daily during the first 48 hours can reduce swelling and bruising.
- Proper bandage care: Keep any surgical bandages clean and dry, and follow your vet’s instructions on changing or removing them to avoid irritation.
- Medication adherence: Administer all prescribed painkillers and anti-inflammatory drugs exactly as directed to control pain and reduce inflammation.
Consistent care helps your dog heal faster and reduces the risk of bruising-related complications.
When Should You Be Concerned About Bruising After TPLO Surgery?
While bruising is normal, certain signs indicate that your dog may need urgent veterinary evaluation. Recognizing these warning signs early can prevent serious complications.
If you notice any of the following, contact your veterinarian promptly for advice or examination.
- Rapidly expanding bruises: Bruising that spreads quickly or becomes very large may signal active bleeding or hematoma formation requiring medical attention.
- Excessive swelling and heat: Swelling that worsens with warmth and redness around the incision could indicate infection or inflammation needing treatment.
- Severe pain or lameness: If your dog shows intense pain, refuses to bear weight, or has a limp worsening over time, this may suggest complications.
- Discharge or foul odor: Any pus, bleeding, or bad smell from the surgical site is a sign of infection and requires immediate veterinary care.
Early detection of problems helps ensure timely treatment and better recovery outcomes.
Can Bruising Affect Your Dog’s Recovery After TPLO Surgery?
Bruising itself usually does not affect the overall success of TPLO surgery if it is mild and managed properly. However, severe bruising or related complications can delay healing and cause discomfort.
Understanding the impact of bruising helps you provide better care and communicate effectively with your veterinarian during recovery.
- Minor bruising benefits: Mild bruising is a normal sign of healing and usually resolves without affecting joint stability or function.
- Severe bruising risks: Large bruises or hematomas can increase pain, limit mobility, and sometimes require drainage or additional treatment.
- Infection risk: Bruised tissue is more vulnerable to infection, so keeping the area clean and monitoring closely is essential.
- Physical therapy considerations: Bruising may limit early physical therapy, so adjusting rehabilitation plans based on your dog’s condition is important.
Working closely with your vet ensures bruising does not interfere with your dog’s full recovery and return to normal activity.
How Can You Prevent Bruising After TPLO Surgery in Dogs?
While some bruising is unavoidable due to surgery, certain steps can reduce its severity and support smooth healing. Prevention focuses on careful handling and following veterinary guidance.
Taking precautions before and after surgery helps protect your dog’s tissues and blood vessels from excessive damage.
- Pre-surgery health check: Ensuring your dog is healthy and not on blood-thinning medications before surgery reduces bruising risk.
- Gentle post-op handling: Avoid rough play, jumping, or excessive pressure on the leg during recovery to prevent new bruises.
- Follow medication instructions: Use prescribed drugs properly and avoid over-the-counter medications without vet approval to prevent clotting issues.
- Regular veterinary follow-up: Attend all scheduled check-ups so your vet can monitor healing and address bruising or other concerns early.
Prevention and careful management promote a safer, faster recovery with minimal bruising complications.
Conclusion
Bruising after TPLO surgery in dogs is a common and usually normal part of the healing process. It results from surgical trauma and inflammation, appearing as discoloration near the incision site. Mild bruising typically resolves within two weeks without affecting recovery.
Proper care, including rest, cold compresses, and medication adherence, helps reduce bruising and supports healing. However, owners should watch for signs of excessive bruising, swelling, pain, or infection and contact their veterinarian promptly if these occur. Understanding bruising after TPLO surgery allows you to care for your dog confidently and ensure a smooth recovery.
FAQs
Is bruising after TPLO surgery normal for all dogs?
Yes, mild bruising is common after TPLO surgery due to tissue trauma and inflammation. However, the amount varies by individual and surgical factors.
How long does bruising last after TPLO surgery?
Bruising usually appears within 1–2 days after surgery and fades over 1 to 2 weeks as the tissues heal naturally.
Can I use cold packs on my dog’s bruising after surgery?
Yes, applying cold compresses wrapped in cloth for 10–15 minutes several times daily during the first 48 hours helps reduce swelling and bruising.
When should I call the vet about bruising after TPLO?
Contact your vet if bruising spreads rapidly, swelling worsens, pain is severe, or if there is discharge or foul odor from the incision.
Does bruising affect my dog’s ability to walk after TPLO surgery?
Mild bruising usually does not affect walking, but severe bruising or pain may cause limping and require veterinary evaluation.
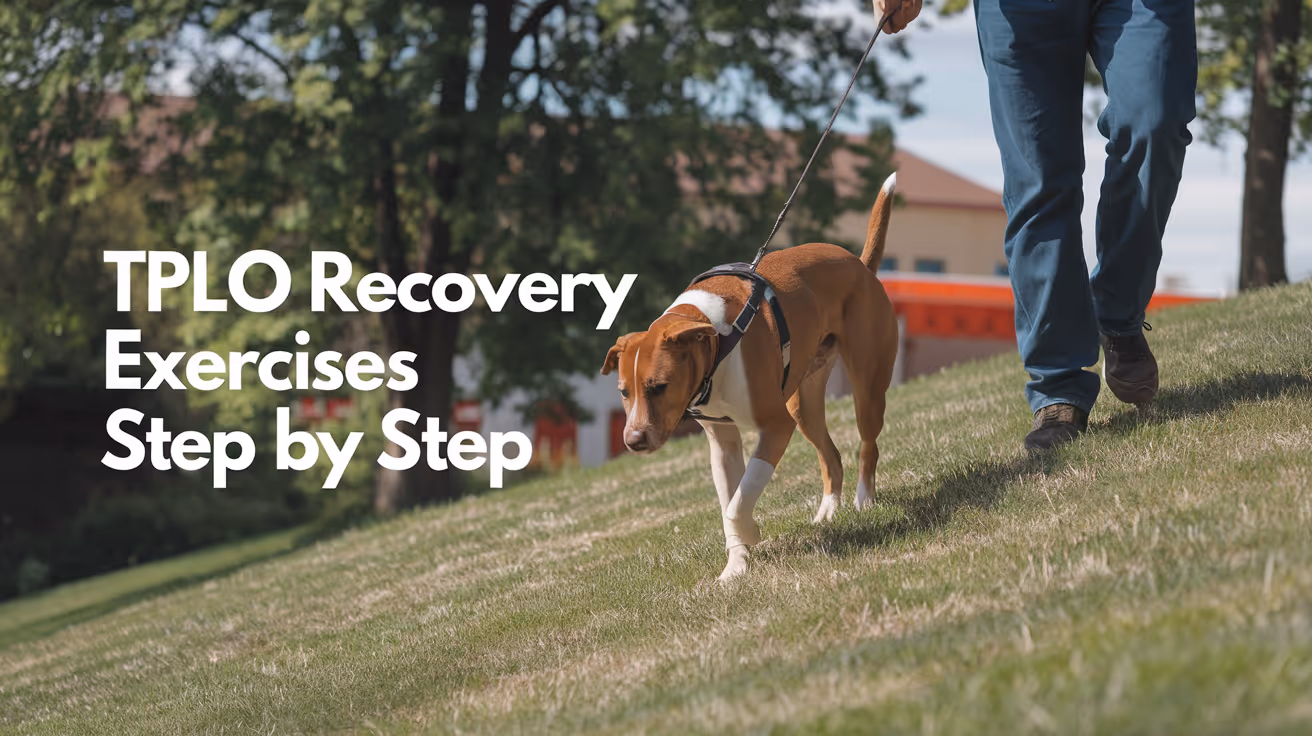
TPLO Recovery Exercises for Dogs
Learn effective TPLO recovery exercises for dogs to ensure safe healing and regain mobility after surgery.
TPLO recovery exercises for dogs are essential to help your pet regain strength and mobility after surgery. Tibial Plateau Leveling Osteotomy (TPLO) is a common procedure to repair cruciate ligament injuries, but proper rehabilitation is key to success.
This article explains the best exercises for dogs recovering from TPLO surgery. You will learn safe ways to support your dog's healing, improve joint function, and avoid complications during recovery.
What is TPLO surgery and why is recovery important?
TPLO surgery stabilizes a dog's knee joint after a torn cranial cruciate ligament. The procedure changes the angle of the tibia to reduce stress on the ligament. Recovery is critical because the joint needs time to heal and regain normal function.
Without proper recovery exercises, dogs may develop stiffness, muscle loss, or abnormal gait. Controlled rehabilitation helps restore strength and prevents long-term problems.
- TPLO purpose: TPLO surgery corrects knee instability caused by ligament tears, allowing dogs to walk and run without pain.
- Healing time: Bone healing after TPLO usually takes 8 to 12 weeks, during which exercises must be carefully managed.
- Muscle maintenance: Recovery exercises prevent muscle wasting and improve joint support for better mobility.
- Preventing stiffness: Gentle movement reduces joint stiffness and promotes healthy cartilage and ligament healing.
Following a structured exercise plan after TPLO surgery is essential for your dog's full recovery and long-term joint health.
When can I start TPLO recovery exercises for my dog?
Starting recovery exercises depends on your veterinarian's advice and your dog's healing progress. Typically, gentle exercises begin within a few days after surgery, progressing gradually over weeks.
Early movement helps reduce swelling and maintain circulation, but high-impact activities must be avoided until the bone fully heals.
- Initial rest period: Dogs usually require strict rest for the first 1 to 2 weeks to allow initial bone healing.
- Vet approval: Always consult your vet before starting any exercise to ensure it is safe for your dog's stage of recovery.
- Gradual progression: Exercises increase in intensity and duration over 8 to 12 weeks based on healing and pain levels.
- Signs to watch: Stop exercises if your dog shows limping, swelling, or pain, and contact your vet immediately.
Following a vet-approved timeline for exercises ensures your dog recovers safely and avoids setbacks.
What are the best passive TPLO recovery exercises for dogs?
Passive exercises involve moving your dog's leg without active muscle use. These help maintain joint flexibility and reduce stiffness early in recovery.
They are safe to perform soon after surgery and do not stress the healing bone or ligament.
- Range of motion: Gently bend and straighten the knee joint within a pain-free range to keep it flexible.
- Massage therapy: Light massage around the surgical site improves circulation and reduces swelling.
- Cold therapy: Applying cold packs after passive exercises reduces inflammation and discomfort.
- Leg lifts: Carefully lift and lower the leg to encourage gentle movement without weight bearing.
These passive exercises prepare your dog for more active rehabilitation phases while protecting the surgical repair.
Which active exercises help dogs regain strength after TPLO?
Active exercises require your dog to use muscles and support weight on the operated leg. These are introduced gradually to rebuild strength and coordination.
They improve muscle tone, joint stability, and overall limb function as healing progresses.
- Leash walking: Short, controlled walks on a leash encourage weight bearing and muscle use without overexertion.
- Sit-to-stand: Encouraging your dog to sit and stand repeatedly strengthens thigh muscles supporting the knee.
- Balance exercises: Using a wobble board or soft surface challenges your dog's balance and joint control.
- Controlled stairs: Slowly climbing and descending stairs helps improve joint range and muscle power.
Active exercises should be supervised and adjusted based on your dog's comfort and recovery stage.
How can hydrotherapy support TPLO recovery in dogs?
Hydrotherapy uses water to provide low-impact exercise that supports healing after TPLO surgery. The buoyancy reduces joint stress while allowing muscle strengthening.
This therapy is often recommended by vets and rehabilitation specialists to speed recovery and improve outcomes.
- Water treadmill: Walking on a submerged treadmill helps build strength with less pain and swelling.
- Swimming sessions: Swimming provides full-body exercise without weight bearing on the knee joint.
- Hydro massage: Water jets can massage muscles and reduce stiffness around the surgical area.
- Temperature control: Warm water improves circulation and relaxes muscles during therapy.
Hydrotherapy is a safe and effective way to enhance recovery when combined with other rehabilitation exercises.
What precautions should I take during TPLO recovery exercises?
Safety is critical when performing recovery exercises after TPLO surgery. Incorrect or excessive activity can cause pain, swelling, or damage to the surgical repair.
Following guidelines and monitoring your dog closely helps prevent complications and ensures steady progress.
- Follow vet instructions: Always adhere to your veterinarian's exercise plan and timelines for safe recovery.
- Monitor pain signs: Watch for limping, whining, or reluctance to move, which indicate discomfort or injury.
- Limit off-leash activity: Avoid running, jumping, or rough play until fully healed to protect the knee joint.
- Use supportive devices: Consider braces or slings if recommended to assist mobility and reduce strain.
Taking these precautions helps your dog heal efficiently and return to normal activity safely.
How long does full TPLO recovery take with exercises?
Full recovery from TPLO surgery usually takes 3 to 6 months with proper rehabilitation exercises. The timeline varies depending on the dog's age, size, and overall health.
Consistent exercise and veterinary follow-up are essential to achieve the best outcome and prevent future injuries.
- Bone healing: The bone typically heals within 8 to 12 weeks, allowing gradual increase in exercise intensity.
- Muscle rebuilding: Muscle strength improves over several months with regular active exercises.
- Joint function: Full joint mobility and stability may take up to 6 months to restore completely.
- Long-term care: Maintaining a healthy weight and regular low-impact exercise helps prevent re-injury after recovery.
Patience and commitment to the exercise plan are key to your dog's successful TPLO recovery and long-term mobility.
Conclusion
TPLO recovery exercises for dogs are vital to help your pet heal safely and regain full function after surgery. Starting with passive movements and progressing to active exercises supports bone healing and muscle strength.
Consult your veterinarian regularly and follow a structured rehabilitation plan to ensure the best outcome. With proper care and patience, your dog can enjoy a healthy, active life after TPLO surgery.
FAQs
How soon after TPLO surgery can my dog start walking?
Most dogs begin short, controlled leash walks within 1 to 2 weeks after surgery, depending on veterinary advice and healing progress.
Can I do TPLO recovery exercises at home?
Yes, many passive and active exercises can be safely done at home following your vet's instructions and supervision.
Is hydrotherapy necessary for TPLO recovery?
Hydrotherapy is not mandatory but highly beneficial for low-impact strengthening and faster recovery when available.
What signs mean I should stop exercises and call my vet?
Stop exercises if your dog shows increased limping, swelling, pain, or reluctance to move and contact your veterinarian promptly.
How long do I need to restrict my dog's activity after TPLO?
Activity restriction usually lasts 8 to 12 weeks, gradually easing as bone healing progresses and exercises increase.

