
Protecting
Pets, People & Planet
Join a group of veterinarians leveraging the latest technologies to deliver excellent care to their patients while being a responsible and positive force for their local and global communities.
100% secure. We do not share your information
Recent Articles
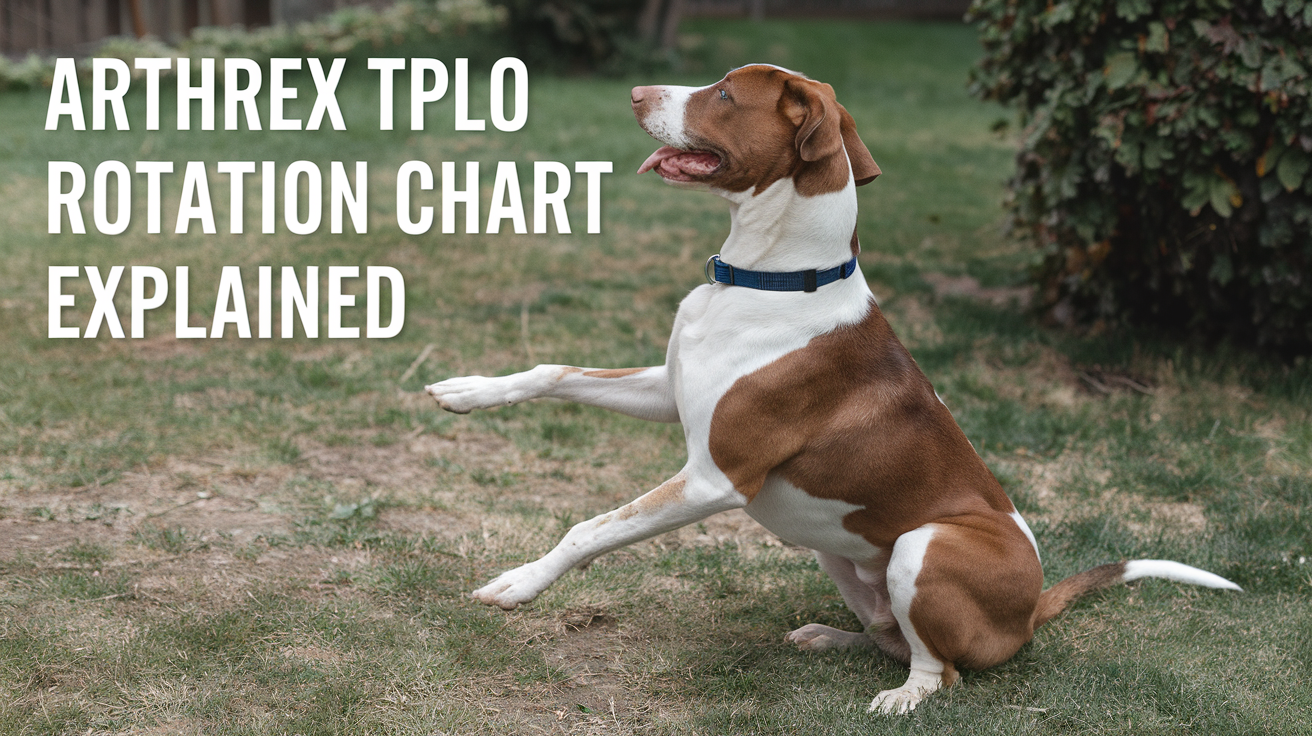
Arthrex TPLO Rotation Chart Explained
Learn how to read and use the Arthrex TPLO rotation chart for precise tibial plateau leveling osteotomy surgery in dogs.
Performing a tibial plateau leveling osteotomy (TPLO) is a common surgical procedure to treat cranial cruciate ligament injuries in dogs. The Arthrex TPLO rotation chart is a vital tool that helps veterinary surgeons determine the exact amount of tibial rotation needed during surgery. Understanding this chart ensures accurate bone alignment and improves surgical outcomes.
This article explains the Arthrex TPLO rotation chart in detail. You will learn how to interpret the chart, why it matters for your pet’s surgery, and how it guides surgeons in achieving the correct tibial plateau angle. This knowledge helps pet owners understand the surgical process better and supports informed discussions with your veterinary surgeon.
What is the Arthrex TPLO rotation chart?
The Arthrex TPLO rotation chart is a reference guide used during TPLO surgery. It shows the degrees of rotation needed to achieve a target tibial plateau angle based on the preoperative measurement. This chart helps surgeons plan and execute the bone cut and rotation precisely.
Using this chart reduces guesswork and improves the accuracy of the surgical correction. It is designed specifically for the Arthrex TPLO surgical system, which includes specialized plates and instruments.
- Rotation guidance: The chart provides exact degrees of tibial rotation required to reach the desired postoperative tibial plateau angle, ensuring surgical precision.
- Preoperative planning: It uses the measured preoperative tibial plateau angle to determine how much rotation is necessary during surgery.
- Standardization tool: The chart standardizes the surgical approach, reducing variability between different surgeons and cases.
- Integration with Arthrex system: It is designed to work with Arthrex-specific implants and instruments for seamless surgical workflow.
Understanding this chart is essential for surgeons performing TPLO with Arthrex equipment and benefits pet owners by improving surgical success rates.
How does the Arthrex TPLO rotation chart improve surgical accuracy?
Accurate rotation of the tibial plateau is critical to restore normal joint mechanics after TPLO surgery. The rotation chart helps surgeons avoid under- or over-rotation, which can lead to poor outcomes or complications.
By providing a clear reference, the chart minimizes errors during the procedure. It also supports consistent results across different patients and surgeons.
- Precise angle correction: The chart ensures the tibial plateau angle is corrected to the target, improving joint stability post-surgery.
- Reduces complications: Proper rotation lowers risks of implant failure, arthritis progression, and abnormal gait after surgery.
- Improves recovery: Accurate alignment supports better healing and faster return to normal activity for dogs.
- Supports training: The chart helps less experienced surgeons perform TPLO with confidence and accuracy.
Using the Arthrex TPLO rotation chart is a key step in achieving the best surgical outcomes for dogs undergoing cruciate ligament repair.
What measurements are needed before using the Arthrex TPLO rotation chart?
Before referencing the rotation chart, the surgeon must measure the tibial plateau angle on preoperative radiographs. This angle indicates how sloped the tibial plateau is, which influences the degree of rotation needed.
Accurate measurement is essential for the chart to provide correct rotation values. The process involves specific radiographic positioning and angle calculation techniques.
- Radiographic positioning: Proper lateral X-rays of the stifle joint are required to visualize the tibial plateau accurately.
- Angle measurement: The tibial plateau angle is measured using anatomical landmarks on the radiograph, typically with digital tools.
- Recording values: The measured angle is noted and used as the input for the rotation chart to find the corresponding rotation degree.
- Repeatability: Consistent measurement technique ensures reliable data for surgical planning and chart use.
Accurate preoperative measurements are the foundation for effective use of the Arthrex TPLO rotation chart during surgery.
How do surgeons use the Arthrex TPLO rotation chart during surgery?
During TPLO surgery, the surgeon references the rotation chart after measuring the tibial plateau angle. The chart indicates how many degrees to rotate the tibial segment after the osteotomy cut.
This rotation changes the slope of the tibial plateau to a safer angle, reducing strain on the cruciate ligament. The chart guides the surgeon to achieve this precisely.
- Osteotomy planning: The surgeon plans the bone cut location and angle based on the chart’s rotation recommendations.
- Rotation execution: After cutting the tibia, the surgeon rotates the bone segment by the degree indicated on the chart.
- Verification: Intraoperative imaging or jigs may be used to confirm the rotation matches the chart’s guidance.
- Plate fixation: The Arthrex TPLO plate is applied to stabilize the rotated tibia, maintaining the corrected angle during healing.
Following the rotation chart during surgery helps ensure the tibial plateau angle is corrected accurately and consistently.
What are the benefits of using the Arthrex TPLO rotation chart for pet owners?
For pet owners, the Arthrex TPLO rotation chart contributes to safer surgeries and better recovery for dogs with cruciate ligament injuries. It supports precise surgical correction, which improves joint function.
Understanding the chart can help owners feel more confident about the procedure and its outcomes.
- Improved surgical outcomes: Accurate rotation reduces complications and improves joint stability after surgery.
- Faster recovery: Correct alignment supports quicker healing and return to normal activity for pets.
- Reduced arthritis risk: Proper tibial plateau angle correction lowers the chance of arthritis development later.
- Enhanced surgeon confidence: The chart helps surgeons perform the procedure with precision, benefiting your pet’s health.
Knowing that the surgeon uses tools like the Arthrex TPLO rotation chart can reassure owners about the quality of care their pet receives.
Are there limitations or challenges with the Arthrex TPLO rotation chart?
While the Arthrex TPLO rotation chart is a valuable tool, it has some limitations. Surgeons must combine chart data with clinical judgment and experience for best results.
Variations in anatomy or measurement errors can affect the chart’s accuracy. Understanding these challenges helps set realistic expectations.
- Measurement variability: Inaccurate preoperative angle measurement can lead to incorrect rotation recommendations.
- Anatomical differences: Individual dog anatomy may require adjustments beyond the chart’s standardized values.
- Technical skill required: Proper use of the chart depends on surgeon experience and surgical technique.
- Not a standalone tool: The chart should be used alongside other surgical planning methods and intraoperative assessments.
Awareness of these limitations ensures the Arthrex TPLO rotation chart is used effectively as part of comprehensive surgical care.
Conclusion
The Arthrex TPLO rotation chart is an essential tool for veterinary surgeons performing tibial plateau leveling osteotomy in dogs. It provides clear guidance on the degree of tibial rotation needed to correct the tibial plateau angle accurately.
By understanding and using this chart, surgeons can improve surgical precision, reduce complications, and support better recovery for pets. Pet owners benefit from knowing their dog’s surgery is planned with advanced, reliable tools like the Arthrex TPLO rotation chart.
What is the Arthrex TPLO rotation chart used for?
The Arthrex TPLO rotation chart is used to determine the exact degrees of tibial rotation needed during TPLO surgery to achieve the desired tibial plateau angle correction.
How do you measure the tibial plateau angle before surgery?
The tibial plateau angle is measured on a properly positioned lateral radiograph of the stifle using anatomical landmarks and digital tools to ensure accuracy.
Can the Arthrex TPLO rotation chart prevent surgical complications?
Yes, by guiding precise tibial rotation, the chart helps reduce risks like implant failure and arthritis progression after TPLO surgery.
Is the Arthrex TPLO rotation chart suitable for all dog breeds?
The chart is designed for general use but surgeons may adjust rotation based on individual anatomical differences in certain breeds.
Do surgeons use imaging during TPLO surgery with the rotation chart?
Yes, intraoperative imaging or jigs are often used to verify that the tibial rotation matches the chart’s recommendations for accuracy.

Why Is My Dog's Foot Swollen?
Discover why your dog's foot is swollen, common causes, treatments, and when to see a vet for proper care.
Seeing your dog's foot swollen can be worrying. Swelling in a dog's foot can happen for many reasons, from injuries to infections. Understanding why this happens helps you act quickly and keep your dog comfortable.
This article explains common causes of swollen dog feet, how to spot serious problems, and what treatments work best. You will learn when to treat at home and when to visit a vet for urgent care.
What Causes Swelling in a Dog's Foot?
Swelling in a dog's foot can come from many different problems. It often shows as puffiness, redness, or heat in the paw area. Knowing the cause helps you decide the right care.
Common causes include injuries, infections, allergies, and insect bites. Each cause needs a different approach to treatment.
- Injury or trauma: A cut, sprain, or broken bone can cause swelling due to inflammation and fluid buildup in the foot tissues.
- Infections: Bacterial or fungal infections can cause swelling, redness, and pain, often needing antibiotics or antifungal treatment.
- Allergic reactions: Allergies to plants, chemicals, or insect stings can cause sudden swelling and itching in the foot.
- Foreign objects: Thorns, splinters, or glass stuck in the paw can cause swelling and discomfort until removed.
Identifying the cause early helps prevent complications and speeds healing.
How Can I Tell If My Dog's Foot Swelling Is Serious?
Not all swelling is an emergency, but some signs mean you should see a vet quickly. Serious swelling can affect your dog's ability to walk or cause severe pain.
Look for symptoms like severe limping, open wounds, or signs of infection. These require prompt veterinary care.
- Severe limping or inability to walk: Indicates pain or serious injury needing urgent veterinary evaluation.
- Open wounds or bleeding: Risk of infection and need for cleaning and possibly stitches.
- Fever or lethargy: Signs that infection may have spread and requires medical treatment.
- Rapidly increasing swelling: Could signal an allergic reaction or deep infection needing emergency care.
When in doubt, it is safer to consult your vet to avoid worsening problems.
What Home Treatments Can Help a Swollen Dog Foot?
For mild swelling without serious signs, you can try some home care steps. These help reduce swelling and keep your dog comfortable.
Always watch your dog closely and stop home treatment if symptoms worsen or do not improve.
- Rest and limit activity: Keep your dog from running or jumping to reduce stress on the swollen foot.
- Cold compress application: Apply a cold pack wrapped in cloth for 10-15 minutes to reduce swelling and pain.
- Clean the paw gently: Use warm water to clean dirt or debris, especially if there are small cuts or irritations.
- Prevent licking or chewing: Use an Elizabethan collar if your dog tries to lick or bite the swollen area, which can worsen irritation.
These steps can help minor swelling but do not replace veterinary care for serious cases.
When Should I Take My Dog to the Vet for a Swollen Foot?
Knowing when to seek professional help is important. Some swelling needs medical treatment to avoid complications.
If your dog's swelling is severe, painful, or lasts more than a day or two, a vet visit is necessary. Early treatment can prevent infections or permanent damage.
- Persistent swelling over 48 hours: Indicates that the problem may not resolve without medical intervention.
- Signs of infection: Pus, foul odor, or heat around the swollen area require antibiotics or cleaning by a vet.
- Suspected broken bone or sprain: Needs X-rays and pain management from a veterinary professional.
- Severe allergic reactions: Swelling with difficulty breathing or collapse needs emergency veterinary care immediately.
Your vet can diagnose the cause and recommend the right treatment plan for your dog's recovery.
How Do Vets Diagnose the Cause of a Swollen Dog Foot?
Veterinarians use several methods to find the cause of swelling. A correct diagnosis is key to effective treatment.
They will examine your dog’s foot carefully and may use tests to look deeper into the problem.
- Physical examination: Checking for wounds, foreign objects, and signs of pain or infection in the foot.
- X-rays: Used to detect fractures, bone infections, or foreign bodies inside the paw.
- Skin scrapings or cultures: To identify infections caused by bacteria, fungi, or parasites.
- Blood tests: To check for systemic infection or allergic reactions affecting the swelling.
These tools help your vet create a treatment plan tailored to your dog's needs.
What Treatments Do Vets Use for Swollen Dog Feet?
Treatment depends on the cause of the swelling. Your vet may use medications, procedures, or supportive care to help your dog heal.
Some treatments can be done at home under vet guidance, while others require clinic visits.
- Antibiotics or antifungals: Prescribed to treat infections causing swelling and prevent spread.
- Anti-inflammatory drugs: Help reduce pain and swelling, improving your dog's comfort.
- Wound care and bandaging: Cleaning and protecting open wounds to promote healing and prevent infection.
- Surgery: May be needed to remove foreign objects or repair fractures causing swelling.
Follow your vet’s instructions carefully to ensure the best outcome for your dog.
How Can I Prevent My Dog's Foot from Swelling?
Preventing foot swelling involves protecting your dog from injuries and infections. Regular care and attention can reduce risks.
Simple habits help keep your dog's paws healthy and avoid painful swelling episodes.
- Regular paw inspections: Check your dog's feet daily for cuts, thorns, or swelling to catch problems early.
- Keep nails trimmed: Prevents nails from breaking or causing injury to the foot pads.
- Avoid walking on rough surfaces: Protect paws from sharp objects or hot pavement that can cause injuries.
- Use protective booties: Especially in harsh weather or rough terrain to shield paws from damage.
Good paw care supports your dog’s overall health and comfort.
Conclusion
Swelling in your dog's foot can have many causes, from minor injuries to serious infections. Understanding why your dog's foot is swollen helps you provide the right care quickly.
Always watch for signs of pain, infection, or worsening symptoms. When in doubt, seek veterinary advice to protect your dog's health and comfort. Early treatment can prevent complications and get your dog back on their feet faster.
Why is my dog's foot swollen after walking?
Your dog's foot may swell after walking due to minor injuries, irritation from rough surfaces, or allergic reactions. Rest and paw care usually help reduce swelling quickly.
Can a swollen dog foot heal without a vet?
Mild swelling from minor injuries or irritations can heal at home with rest and care. However, persistent or severe swelling needs veterinary evaluation to avoid complications.
How long does it take for a dog's swollen foot to go down?
Swelling may reduce within a few days with proper care. If swelling lasts more than 48 hours or worsens, consult a vet for treatment.
Is a swollen dog foot painful?
Yes, swelling often causes pain and discomfort. Your dog may limp, lick, or avoid putting weight on the swollen foot.
Can allergies cause a dog's foot to swell?
Yes, allergies to insect bites, plants, or chemicals can cause sudden swelling and itching in a dog's foot, sometimes requiring veterinary treatment.
All Articles

History and Evolution of Asepsis in Veterinary Surgery
Explore the history and evolution of asepsis in veterinary surgery, from early practices to modern sterile techniques.
Asepsis in veterinary surgery is crucial to prevent infections and ensure successful outcomes. Understanding its history helps appreciate how far veterinary medicine has advanced in protecting animal patients during surgical procedures.
This article explains the development of aseptic techniques in veterinary surgery, highlighting key milestones and modern practices. You will learn how asepsis evolved from basic cleanliness to sophisticated sterilization methods used today.
What was the state of veterinary surgery before asepsis?
Before asepsis, veterinary surgery was risky due to high infection rates. Surgeons had limited knowledge about germs, and surgical environments were often dirty.
Animals frequently suffered from post-surgical infections, leading to poor recovery or death. Hygiene was not a priority, and instruments were reused without cleaning.
- Limited germ theory: Early veterinary surgeons did not understand microbes caused infections, so they neglected sterilization.
- Unclean environments: Operating areas were often outdoors or in barns, exposing wounds to dirt and bacteria.
- Reuse of instruments: Surgical tools were reused without proper cleaning, increasing infection risk.
- Lack of anesthesia: Without anesthesia, surgeries were rushed, increasing tissue damage and infection chances.
These factors made veterinary surgery dangerous and unpredictable before aseptic methods were introduced.
When did aseptic principles start influencing veterinary surgery?
Aseptic principles began influencing veterinary surgery in the late 19th century. This period saw growing awareness of germ theory and antiseptic methods in human medicine.
Veterinary surgeons started adopting similar practices to reduce infections. Early antiseptics like carbolic acid were used to clean wounds and instruments.
- Germ theory acceptance: Louis Pasteur's work in the 1860s proved microbes cause infection, influencing veterinary practices.
- Joseph Lister's antisepsis: Lister introduced carbolic acid to sterilize wounds and tools, inspiring veterinary surgeons.
- Early antiseptic use: Veterinary surgeons began applying antiseptics to surgical sites to kill bacteria.
- Improved surgical techniques: Surgeons started cleaning hands and instruments before operations to reduce contamination.
This era marked the beginning of safer veterinary surgeries through infection control.
How did asepsis evolve from antisepsis in veterinary surgery?
Asepsis evolved as a step beyond antisepsis by focusing on preventing contamination rather than just killing germs after contact. This shift improved surgical outcomes significantly.
Veterinary surgeons began using sterilized instruments, gloves, and clean environments to maintain sterility throughout surgery.
- Sterilization methods: Techniques like steam autoclaving were introduced to sterilize instruments before use.
- Use of surgical gloves: Gloves protected both animals and surgeons from cross-contamination.
- Operating room design: Dedicated clean rooms reduced airborne contamination during procedures.
- Strict protocols: Surgeons adopted handwashing, gowning, and draping to maintain aseptic fields.
These changes transformed veterinary surgery into a controlled, sterile process minimizing infection risks.
What are the modern aseptic techniques used in veterinary surgery?
Modern veterinary surgery uses advanced aseptic techniques to ensure maximum sterility and safety. These methods are standard in clinics and hospitals worldwide.
They combine sterilization technology, protective equipment, and strict protocols to prevent infections effectively.
- Autoclaving instruments: High-pressure steam sterilizes surgical tools, eliminating all microbes.
- Surgical attire: Surgeons wear sterile gowns, gloves, masks, and caps to reduce contamination.
- Disinfected environments: Operating rooms undergo regular cleaning with hospital-grade disinfectants.
- Use of sterile drapes: Drapes isolate the surgical site from surrounding skin and surfaces.
These practices help maintain a sterile field and protect animal patients during surgery.
Why is asepsis important in veterinary surgery today?
Asepsis is vital in veterinary surgery to prevent infections that can cause complications, prolonged recovery, or death. It improves surgical success and animal welfare.
Maintaining aseptic conditions reduces the need for antibiotics and lowers treatment costs by avoiding infections.
- Infection prevention: Asepsis stops bacteria from entering surgical wounds, reducing infection rates.
- Improved healing: Sterile conditions promote faster tissue repair and recovery.
- Reduced antibiotic use: Preventing infections lowers reliance on antibiotics, helping combat resistance.
- Better outcomes: Animals experience less pain, fewer complications, and higher survival rates.
Thus, asepsis is a cornerstone of quality veterinary surgical care today.
How has technology influenced asepsis in veterinary surgery?
Technology has greatly enhanced aseptic techniques in veterinary surgery by improving sterilization, monitoring, and surgical tools.
Innovations help maintain sterility and reduce human error, making surgeries safer and more efficient.
- Advanced sterilizers: Modern autoclaves and gas sterilizers ensure thorough instrument sterilization.
- Disposable supplies: Single-use gloves, gowns, and drapes reduce contamination risks.
- Antimicrobial materials: Surgical instruments and surfaces now use materials that inhibit bacterial growth.
- Monitoring systems: Sensors and indicators verify sterilization cycles and environmental cleanliness.
These technologies support strict aseptic standards in veterinary surgical practice.
What challenges remain in maintaining asepsis in veterinary surgery?
Despite advances, challenges remain in consistently maintaining asepsis in veterinary surgery, especially in resource-limited settings.
Issues include cost, training, and environmental factors that can compromise sterility and increase infection risks.
- Cost constraints: High-quality sterilization equipment and disposables can be expensive for some clinics.
- Staff training: Proper aseptic technique requires ongoing education and compliance by all surgical team members.
- Environmental control: Maintaining clean operating rooms can be difficult in older or rural facilities.
- Emergency surgeries: Urgent procedures may limit time for full aseptic preparation, increasing risks.
Addressing these challenges is essential to improve surgical safety for all veterinary patients.
Conclusion
The history and evolution of asepsis in veterinary surgery show a remarkable journey from basic cleanliness to advanced sterile techniques. Understanding this progress highlights the importance of infection control in animal care.
Modern aseptic practices, supported by technology and strict protocols, have greatly improved surgical outcomes and animal welfare. Continuing education and investment in asepsis are vital to meet ongoing challenges and ensure safe veterinary surgeries worldwide.
What is asepsis in veterinary surgery?
Asepsis in veterinary surgery means keeping the surgical area free from harmful microbes to prevent infections during operations.
When did antiseptic techniques start in veterinary surgery?
Antiseptic techniques began influencing veterinary surgery in the late 1800s after germ theory was accepted and antiseptics like carbolic acid were introduced.
How do modern veterinary surgeons maintain asepsis?
They use sterilized instruments, wear sterile gloves and gowns, clean operating rooms, and apply sterile drapes to keep the surgical field free of contamination.
Why is asepsis important for animal surgery?
Asepsis prevents infections, promotes faster healing, reduces antibiotic use, and improves overall surgical success and animal welfare.
What challenges affect asepsis in veterinary surgery?
Challenges include cost of equipment, staff training, maintaining clean environments, and managing emergencies that limit preparation time.

Closing Bite Wounds in Cats: Expert Care Guide
Learn how to safely close bite wounds in cats with expert tips on treatment, healing, and preventing infection.
Bite wounds in cats are common injuries that can lead to serious infections if not treated properly. These wounds often appear small but can be deep and contaminated, making proper closure and care essential for healing. Understanding how to close bite wounds in cats helps prevent complications and promotes faster recovery.
This article explains the best practices for closing bite wounds in cats, including when to close wounds, cleaning techniques, suturing methods, and aftercare. You will learn how to recognize which wounds need professional treatment and how to support your cat’s healing process effectively.
When Should You Close Bite Wounds in Cats?
Not all bite wounds in cats require closure. Deciding when to close a wound depends on factors like wound age, size, and infection risk. Immediate closure of fresh wounds can help healing, but older or infected wounds may need different care.
- Fresh wounds only: Close bite wounds within 6 to 8 hours to reduce infection risk and promote better healing outcomes.
- Assess wound depth: Deep puncture wounds often need closure, but superficial scratches may heal better if left open.
- Signs of infection: Avoid closing wounds showing redness, swelling, pus, or foul odor to prevent trapping bacteria inside.
- Location matters: Wounds on areas with loose skin or high movement may require special closure techniques or be left open.
Proper timing and assessment are critical to decide if closing a bite wound is safe and effective for your cat.
How Do You Clean Bite Wounds Before Closing?
Cleaning bite wounds thoroughly before closure reduces bacteria and debris, lowering infection risk. Proper cleaning prepares the wound for suturing and speeds healing.
- Use sterile saline: Flush the wound gently with sterile saline to remove dirt and bacteria without damaging tissue.
- Avoid harsh chemicals: Do not use hydrogen peroxide or alcohol as they can harm healthy cells and delay healing.
- Debride dead tissue: Remove any dead or damaged tissue carefully to prevent infection and promote healthy regrowth.
- Control bleeding: Apply gentle pressure with sterile gauze to stop bleeding before closing the wound.
Cleaning bite wounds properly is the first step toward safe and successful closure.
What Are the Best Suturing Techniques for Cat Bite Wounds?
Suturing bite wounds in cats requires skill to close the wound securely while minimizing tissue damage. The technique depends on wound size, location, and tension on the skin.
- Simple interrupted sutures: Commonly used for small to medium wounds, allowing precise closure and easy removal if infection occurs.
- Subcutaneous sutures: Placed under the skin to reduce tension and improve healing in larger wounds.
- Use absorbable sutures: Absorbable materials reduce the need for suture removal and lower stress for your cat.
- Avoid tight sutures: Sutures should be snug but not too tight to prevent cutting into the skin and causing necrosis.
Choosing the right suturing method helps wounds heal cleanly and reduces complications.
How Do You Manage Pain and Infection After Closing?
Post-closure care is vital to keep your cat comfortable and prevent infection. Pain control and antibiotics may be necessary depending on the wound severity.
- Administer pain relief: Use veterinarian-prescribed pain medications to keep your cat comfortable during healing.
- Prescribe antibiotics: Antibiotics help prevent or treat infection, especially in deep or contaminated wounds.
- Monitor for swelling: Watch for increased redness or swelling as signs of infection needing prompt veterinary attention.
- Limit activity: Restrict your cat’s movement to avoid stress on the wound and allow proper healing.
Careful management after closure supports recovery and reduces risks of complications.
What Are the Risks of Closing Bite Wounds in Cats?
While closing bite wounds can aid healing, it also carries risks if done improperly. Understanding these risks helps you make informed decisions about your cat’s care.
- Infection risk: Closing infected wounds can trap bacteria inside, worsening infection and delaying healing.
- Wound dehiscence: Sutures may break or pull out if the cat is too active or if closure is too tight.
- Scarring: Improper closure can lead to excessive scarring or skin necrosis affecting appearance and function.
- Allergic reactions: Some cats may react to suture materials or medications used during treatment.
Veterinary guidance is essential to minimize risks and ensure safe wound closure.
How Can You Support Healing After Closing a Bite Wound?
After closing a bite wound, ongoing care is crucial to promote healing and prevent complications. You play a key role in your cat’s recovery.
- Keep wound clean: Follow vet instructions to clean the area gently and prevent dirt or bacteria buildup.
- Use an Elizabethan collar: Prevent your cat from licking or biting the wound, which can cause infection or suture damage.
- Schedule follow-ups: Regular vet visits ensure the wound is healing properly and sutures can be removed on time.
- Watch for changes: Report any swelling, discharge, or behavioral changes to your vet immediately.
Consistent care and monitoring help your cat heal quickly and comfortably after bite wound closure.
What Are Common Complications After Closing Bite Wounds?
Even with proper care, some cats may experience complications after bite wound closure. Knowing what to expect helps you act quickly if problems arise.
- Infection signs: Increased redness, heat, swelling, or pus indicate infection needing veterinary treatment.
- Wound reopening: Sutures may fail if the cat is too active or if the wound was not closed properly.
- Abscess formation: Pockets of pus can develop under the skin requiring drainage and antibiotics.
- Delayed healing: Poor nutrition, underlying illness, or improper care can slow wound recovery.
Early detection and treatment of complications ensure the best outcome for your cat’s health.
Conclusion
Closing bite wounds in cats requires careful assessment, cleaning, and suturing to prevent infection and promote healing. Not all wounds should be closed immediately, and veterinary evaluation is essential for best results.
Proper aftercare, including pain management, wound monitoring, and preventing your cat from disturbing the site, supports a smooth recovery. Understanding how to close bite wounds safely helps protect your cat’s health and comfort.
FAQs
Can I close my cat’s bite wound at home?
It is not recommended to close bite wounds at home. Professional veterinary care ensures proper cleaning, assessment, and suturing to avoid infection and complications.
How long does it take for a bite wound to heal in cats?
Bite wounds typically heal within 10 to 14 days with proper treatment, but deeper wounds may take longer depending on severity and aftercare.
When should I take my cat to the vet for a bite wound?
Seek veterinary care immediately if the wound is deep, bleeding heavily, swollen, or shows signs of infection like redness or discharge.
Are antibiotics always needed for cat bite wounds?
Antibiotics are often prescribed for bite wounds due to high infection risk, especially for deep or contaminated wounds, but your vet will decide based on the wound condition.
How can I prevent my cat from getting bite wounds?
Keeping your cat indoors, supervising outdoor time, and avoiding fights with other animals can reduce the risk of bite wounds and related infections.

Closure Technique for Cesarean Section in Dogs
Learn the best closure techniques for cesarean section in dogs to ensure safe healing and reduce complications.
What is the closure technique for cesarean section in dogs?
The closure technique for cesarean section in dogs involves carefully suturing the uterus, abdominal muscles, and skin after delivering puppies. This technique is crucial to promote healing and prevent infection or complications.
Proper closure helps restore the integrity of the uterus and abdominal wall, minimizing risks such as bleeding, uterine rupture, or wound dehiscence. It requires knowledge of anatomy and appropriate suture materials.
- Uterine closure layers: The uterus is closed in two layers to ensure a strong seal and reduce the risk of leakage or infection after surgery.
- Suture material choice: Absorbable sutures like polyglycolic acid are preferred to avoid long-term irritation and eliminate the need for removal.
- Muscle and fascia repair: The abdominal muscles and fascia are sutured with strong, tension-relieving patterns to support healing and prevent hernias.
- Skin closure method: Skin can be closed with interrupted or continuous sutures or staples to protect the incision and promote cosmetic healing.
Each step in the closure technique is designed to optimize recovery and reduce postoperative complications in canine cesarean sections.
Why is proper uterine closure important after a dog cesarean section?
Proper uterine closure is essential to prevent serious complications such as uterine rupture, hemorrhage, or infection. The uterus is a highly vascular organ, so secure closure minimizes bleeding and promotes healing.
Failure to close the uterus correctly can lead to leakage of uterine contents into the abdomen, causing peritonitis, a life-threatening condition. Therefore, the closure technique must be meticulous and use appropriate sutures.
- Hemostasis control: Proper closure helps stop bleeding from the uterine incision, reducing the risk of hemorrhagic shock post-surgery.
- Infection prevention: A secure uterine seal prevents bacteria from entering the abdominal cavity, lowering infection risk.
- Tissue healing: Correct suture placement aligns tissue edges, promoting faster and stronger healing of the uterus.
- Future fertility: Good closure preserves uterine integrity, which is important if the dog is to breed again.
In summary, uterine closure is a critical step that directly impacts the dog's recovery and long-term reproductive health.
What suture materials and patterns are best for cesarean section closure in dogs?
Choosing the right suture material and pattern is key for effective closure after a cesarean section in dogs. Absorbable sutures are preferred to avoid the need for removal and reduce tissue reaction.
Commonly used materials include polyglycolic acid and polydioxanone, which maintain strength during healing and then safely dissolve. The suture pattern should provide secure tissue apposition without causing ischemia.
- Absorbable sutures: Materials like polyglycolic acid are ideal because they maintain tensile strength and dissolve over time, reducing irritation.
- Uterine closure pattern: A continuous or interrupted inverting pattern, such as Cushing or Lembert, is used to seal the uterus without exposing suture ends inside.
- Muscle and fascia sutures: Simple interrupted or continuous patterns with strong absorbable sutures provide durable support to the abdominal wall.
- Skin closure options: Non-absorbable sutures or staples can be used for skin; however, absorbable sutures reduce the need for removal and are often preferred.
Proper selection of suture material and pattern helps ensure a strong, infection-resistant closure that supports healing.
How do surgeons prevent complications during closure of a dog cesarean section?
Preventing complications during closure involves careful surgical technique, sterile conditions, and proper suture handling. Surgeons must avoid excessive tension and tissue damage to promote healing.
Monitoring for bleeding and ensuring all layers are closed securely reduces risks such as hemorrhage, infection, or wound dehiscence. Using appropriate suture materials also helps minimize tissue reaction.
- Gentle tissue handling: Minimizing trauma to tissues during closure reduces inflammation and speeds recovery.
- Layered closure: Closing each anatomical layer separately restores normal anatomy and provides strength to the incision.
- Suture tension control: Avoiding overly tight sutures prevents tissue necrosis and allows proper blood flow for healing.
- Sterile technique: Maintaining sterility during closure lowers the chance of postoperative infections.
By following these principles, surgeons can reduce complications and improve outcomes for dogs undergoing cesarean sections.
What post-operative care is needed after cesarean section closure in dogs?
Post-operative care is vital to support healing after cesarean section closure. This includes monitoring the incision site, managing pain, and preventing infection.
Owners should observe for signs of swelling, discharge, or opening of the wound. Restricting activity and providing a clean environment help prevent complications.
- Incision monitoring: Regularly check the surgical site for redness, swelling, or discharge that could indicate infection or dehiscence.
- Pain management: Administer prescribed analgesics to keep the dog comfortable and reduce stress on the incision.
- Activity restriction: Limit running, jumping, or strenuous activity to avoid tension on the healing tissues.
- Antibiotic therapy: Follow veterinary instructions for antibiotics to prevent or treat infections after surgery.
Proper post-operative care ensures the closure heals well and the dog recovers safely from surgery.
How does closure technique affect future breeding in dogs after cesarean?
The closure technique used during a cesarean section can impact a dog's ability to breed again. A strong, well-healed uterine closure maintains uterine integrity for future pregnancies.
Poor closure or complications like uterine rupture or adhesions can reduce fertility or cause pregnancy loss. Therefore, surgical technique must prioritize tissue preservation and healing.
- Preserving uterine tissue: Gentle handling and proper suturing prevent scarring that could interfere with embryo implantation.
- Maintaining uterine strength: Secure closure reduces the risk of rupture during future pregnancies or labor.
- Reducing adhesions: Using appropriate suture materials and techniques minimizes internal scar tissue formation.
- Monitoring recovery: Follow-up exams ensure the uterus heals properly before attempting breeding again.
Good closure technique supports the dog's reproductive health and increases the chances of successful future litters.
Conclusion
Closure technique for cesarean section in dogs is a critical surgical step that affects healing, recovery, and future fertility. Proper uterine, muscle, and skin closure using suitable sutures and patterns reduces complications and promotes strong tissue repair.
Following meticulous surgical principles and providing attentive post-operative care helps ensure the best outcomes for both the mother dog and her puppies. Understanding these techniques empowers owners to support their pets through cesarean recovery safely.
What is the best suture pattern for uterine closure in dogs?
The best suture patterns for uterine closure are continuous inverting patterns like Cushing or Lembert, which provide a secure seal and minimize exposure of suture material inside the uterus.
How long does it take for a cesarean incision to heal in dogs?
Cesarean incisions typically heal within 10 to 14 days, but full internal healing may take several weeks. Restricting activity during this time is important to prevent complications.
Can dogs have multiple cesarean sections safely?
Yes, dogs can have multiple cesarean sections if previous closures healed well without complications. Each surgery requires careful technique to preserve uterine health.
What signs indicate infection after cesarean closure in dogs?
Signs include redness, swelling, discharge, foul odor, fever, or lethargy. Prompt veterinary evaluation is needed if any of these symptoms appear.
Should skin be closed with staples or sutures after cesarean in dogs?
Both staples and sutures are effective. Sutures, especially absorbable ones, reduce the need for removal and may cause less irritation, but staples can be quicker to apply.

Suture Removal Timing in Dogs
Learn when and how to safely remove sutures in dogs to ensure proper healing and avoid complications.
Sutures are commonly used in dogs to close wounds or surgical incisions. Knowing the right time for suture removal is crucial to avoid infection, wound reopening, or delayed healing. Many dog owners worry about when and how to remove sutures safely.
This article explains the ideal timing for suture removal in dogs, factors affecting healing, and best practices to ensure your pet recovers well. You will learn how to recognize when sutures can be removed and what signs to watch for that might require veterinary attention.
What is the ideal time to remove sutures in dogs?
The timing for suture removal depends on the wound location and the dog's healing speed. Generally, sutures are removed between 10 to 14 days after placement. Removing sutures too early can cause the wound to reopen, while leaving them too long may cause irritation or infection.
Different body areas heal at different rates, so the timing can vary. Your veterinarian will recommend the best time based on your dog's specific case.
- Standard removal period: Most sutures are removed 10 to 14 days post-surgery to allow adequate wound healing and strength.
- Location-dependent timing: Sutures on the face or ears may be removed earlier, around 7 days, due to faster healing in these areas.
- Delayed removal risks: Leaving sutures beyond 14 days can cause skin irritation, suture abscesses, or scarring.
- Early removal risks: Removing sutures before 7 days can lead to wound dehiscence or reopening, risking infection.
Always follow your veterinarian's advice on suture removal timing to ensure safe healing.
How does wound location affect suture removal timing?
Different parts of a dog's body heal at different speeds. Areas with more blood supply and less tension heal faster, allowing earlier suture removal. Conversely, areas under tension or with less blood flow need longer healing time.
Understanding these differences helps you know when to expect suture removal and why your vet may adjust timing accordingly.
- Face and ears: These areas have good blood flow and heal quickly, so sutures are often removed after 7 days.
- Limbs and joints: High movement and tension require sutures to stay for 10 to 14 days for proper healing.
- Body and trunk: Moderate healing speed means sutures are usually removed around 10 to 14 days post-operation.
- Areas with poor blood supply: Locations like the paw pads may need longer suture retention due to slower healing.
Knowing the wound location helps you anticipate the healing process and suture removal schedule.
What signs indicate sutures can be safely removed?
Before removing sutures, it is important to check the wound for proper healing. The skin should be closed, without redness, swelling, or discharge. The wound edges should be sealed and strong enough to stay closed without sutures.
Recognizing these signs helps prevent premature removal and complications.
- Closed wound edges: The skin around the sutures should be fully sealed without gaps or openings.
- No redness or swelling: Absence of inflammation indicates the wound is healing well and ready for suture removal.
- Dry wound surface: The wound should be dry, with no discharge, pus, or bleeding present.
- Minimal scabbing or crusting: Light scabs are normal, but heavy crusting or scabs may delay removal.
If you notice any signs of infection or poor healing, consult your veterinarian before attempting suture removal.
How should sutures be removed safely at home?
While veterinarians usually remove sutures, some owners may need to do it at home under guidance. Proper technique and hygiene are essential to avoid infection or injury during removal.
Follow these steps carefully to ensure safe suture removal.
- Prepare clean tools: Use sterilized scissors and tweezers to prevent introducing bacteria into the wound.
- Clean the wound area: Gently clean around the sutures with antiseptic solution before removal to reduce infection risk.
- Cut sutures close to skin: Cut each suture near the knot on one side to avoid pulling contaminated thread through the skin.
- Gently pull sutures out: Use tweezers to slowly and carefully pull the suture out without causing pain or skin damage.
If your dog shows signs of pain, bleeding, or distress during removal, stop and seek veterinary assistance immediately.
What complications can arise from improper suture removal timing?
Removing sutures too early or too late can cause several problems. These complications may delay healing, cause infections, or require additional treatment.
Understanding these risks helps you avoid mistakes and keep your dog safe.
- Wound reopening: Early suture removal can cause the wound to open, increasing infection risk and healing time.
- Infection development: Leaving sutures too long may trap bacteria, leading to abscesses or cellulitis around the wound.
- Skin irritation: Prolonged suture presence can cause redness, itching, or suture granulomas requiring veterinary care.
- Scarring and delayed healing: Improper timing can result in excessive scarring or slow tissue repair.
Always follow professional advice to minimize these complications and promote smooth recovery.
When should you contact a veterinarian about suture removal?
Some situations require veterinary evaluation before suture removal. If you notice any unusual signs or have concerns, it is best to seek professional help.
Timely veterinary intervention can prevent complications and ensure proper wound care.
- Signs of infection: Redness, swelling, pus, or foul odor around the wound need immediate veterinary attention.
- Excessive bleeding: If the wound bleeds heavily during or after suture removal, contact your vet promptly.
- Wound reopening: If the wound opens after suture removal, professional care is necessary to close it again.
- Uncertainty about timing: When unsure about the right time to remove sutures, always ask your veterinarian for guidance.
Prompt veterinary care helps avoid serious complications and supports your dog's healing process.
How can you support your dog's healing after suture removal?
After removing sutures, the wound still needs care to heal completely. Protecting the area and monitoring for problems helps your dog recover faster and more comfortably.
Follow these tips to support healing post-suture removal.
- Keep the area clean: Gently clean the wound daily with mild antiseptic to prevent infection.
- Prevent licking or chewing: Use an Elizabethan collar or protective covering to stop your dog from irritating the wound.
- Limit activity: Avoid strenuous exercise or jumping to reduce stress on the healing skin.
- Watch for complications: Monitor for redness, swelling, or discharge and contact your vet if any appear.
Proper aftercare ensures your dog’s wound heals fully and reduces the chance of problems after suture removal.
Conclusion
Knowing the correct timing for suture removal in dogs is essential for safe healing. Most sutures come out between 10 and 14 days, but this varies by wound location and healing progress.
Always look for signs of proper healing before removal and follow your veterinarian’s instructions closely. Proper suture care and timely removal help prevent complications and support your dog’s recovery.
FAQs
How long do sutures stay in a dog after surgery?
Sutures typically stay in place for 10 to 14 days after surgery, depending on the wound location and healing speed. Your vet will advise the exact timing.
Can I remove my dog's sutures at home?
Removing sutures at home is possible with proper tools and guidance, but it is safer to have a veterinarian perform the removal to avoid complications.
What signs show a dog’s wound is ready for suture removal?
Signs include closed wound edges, no redness or swelling, dry wound surface, and minimal scabbing. These indicate the wound has healed enough for suture removal.
What happens if sutures are removed too early in dogs?
Removing sutures too early can cause the wound to reopen, increasing infection risk and delaying healing. Always follow vet advice on timing.
When should I contact a vet about my dog’s sutures?
Contact a vet if you see redness, swelling, discharge, excessive bleeding, wound reopening, or if you are unsure about when to remove sutures.

Cosmetic Skin Closure in Veterinary Surgery
Learn about cosmetic skin closure techniques in veterinary surgery to improve healing and appearance in pets.
Cosmetic skin closure in veterinary surgery is an important technique that helps pets heal with minimal scarring and better skin appearance. When pets undergo surgery, the way the skin is closed can affect healing speed, infection risk, and the final look of the wound. Many pet owners worry about their animal's scars and want the best cosmetic outcome.
This article explains what cosmetic skin closure means in veterinary surgery and how it benefits your pet. You will learn about different closure methods, materials used, and how to care for your pet’s wound after surgery to ensure the best healing and cosmetic results.
What is cosmetic skin closure in veterinary surgery?
Cosmetic skin closure refers to surgical techniques that aim to close wounds with minimal scarring and good skin alignment. It focuses on both function and appearance. Unlike simple closure, cosmetic closure uses special suturing methods and materials to reduce tension and promote smooth healing.
Veterinary surgeons use these techniques to help pets recover faster and with better skin appearance. This is especially important for visible areas like the face, limbs, or areas with thin skin.
- Definition and goal: Cosmetic skin closure aims to align skin edges precisely to minimize scar formation and improve healing quality in pets.
- Importance in pets: Pets benefit from cosmetic closure as it reduces discomfort, infection risk, and improves wound strength and appearance.
- Difference from standard closure: Cosmetic closure uses finer sutures and special patterns to reduce tension and skin trauma compared to routine closure.
- Common uses: It is often used in surgeries on the face, limbs, or areas where skin movement is high and cosmetic outcome matters.
Understanding cosmetic skin closure helps pet owners appreciate the care taken during surgery to ensure the best recovery and appearance for their pets.
What types of sutures are used for cosmetic skin closure in pets?
Suture choice is key to cosmetic skin closure. The right suture material and size reduce tissue reaction and support healing. Veterinary surgeons select sutures based on wound location, skin thickness, and expected healing time.
Using fine, absorbable or non-absorbable sutures helps reduce scarring and irritation. The suture pattern also affects how well the skin edges stay together.
- Absorbable sutures: These dissolve over time, reducing the need for removal and minimizing irritation in delicate skin areas.
- Non-absorbable sutures: Used when longer support is needed; they require removal but provide strong wound support.
- Monofilament sutures: Single-strand sutures cause less tissue reaction and are preferred for cosmetic closure.
- Fine suture sizes: Smaller diameter sutures (e.g., 4-0 to 6-0) reduce skin trauma and improve cosmetic results.
Choosing the proper suture material and size is essential for good cosmetic outcomes and faster healing in pets.
What suturing techniques improve cosmetic outcomes in veterinary skin closure?
Suturing technique impacts how well the skin edges align and heal. Cosmetic closure uses patterns that reduce tension and avoid skin bunching. These techniques help wounds heal flat and smooth, minimizing scar visibility.
Veterinary surgeons select suturing methods based on wound type and location to optimize healing and appearance.
- Simple interrupted sutures: Commonly used; allow precise edge alignment and easy removal but may cause slight skin puckering.
- Continuous subcuticular sutures: Placed under the skin surface, they hide sutures and reduce scarring, ideal for cosmetic closure.
- Vertical mattress sutures: Provide strong wound edge eversion and tension relief, improving healing in high-movement areas.
- Horizontal mattress sutures: Spread tension across the wound edges, preventing skin strangulation and improving cosmetic results.
Using these suturing techniques helps achieve smooth, well-aligned wounds that heal with minimal scarring in pets.
How does wound care affect cosmetic skin closure healing in pets?
Proper wound care after cosmetic skin closure is vital to prevent infection and support healing. Owners must follow veterinary instructions carefully to protect the wound and avoid complications.
Good wound care helps maintain skin edge alignment and promotes faster, cleaner healing with better cosmetic outcomes.
- Keeping wound clean: Regular gentle cleaning prevents infection and reduces inflammation that can worsen scarring.
- Preventing licking or scratching: Using e-collars or bandages stops pets from disturbing sutures and damaging the wound.
- Monitoring for infection: Early detection of redness, swelling, or discharge allows prompt treatment and protects healing.
- Follow-up visits: Scheduled veterinary checks ensure sutures are removed timely and healing is progressing well.
Following these wound care steps helps your pet heal with minimal scarring and discomfort after cosmetic skin closure.
When is cosmetic skin closure recommended in veterinary surgery?
Not all wounds need cosmetic closure, but it is recommended in cases where appearance and function are important. Your veterinary surgeon will decide based on wound location, size, and pet factors.
Cosmetic closure is often chosen for visible areas or wounds under tension that may heal poorly without special techniques.
- Facial surgeries: Cosmetic closure is preferred to minimize visible scars on the pet’s face and improve appearance.
- Extremity wounds: Areas like legs and paws benefit from tension-relieving closure to prevent wound reopening and scarring.
- Large or irregular wounds: Cosmetic techniques help align edges and reduce scar size in complex wounds.
- Pets with thin skin: Animals with delicate skin need gentle closure to avoid tearing and improve healing.
Your veterinary surgeon will recommend cosmetic skin closure when it best supports your pet’s healing and appearance goals.
What are the risks and complications of cosmetic skin closure in pets?
While cosmetic skin closure aims to improve healing, some risks exist. Understanding these helps you watch for problems and seek timely care.
Most complications relate to infection, suture reactions, or wound tension. Proper technique and care reduce these risks significantly.
- Infection risk: Bacteria can infect the wound if hygiene is poor, delaying healing and causing scarring.
- Suture reactions: Some pets may have allergic or inflammatory responses to suture material, affecting healing.
- Wound dehiscence: Excessive tension or trauma can cause the wound to reopen, requiring additional treatment.
- Excessive scarring: Poor alignment or infection can lead to thick or unsightly scars despite cosmetic closure.
Close monitoring and following veterinary advice help minimize complications and ensure the best outcome for your pet.
Conclusion
Cosmetic skin closure in veterinary surgery plays a key role in helping pets heal with minimal scarring and better skin appearance. Using special sutures and techniques, veterinary surgeons improve wound healing and reduce complications.
As a pet owner, understanding these methods and following proper wound care instructions supports your pet’s recovery and cosmetic outcome. Always consult your veterinarian about the best closure options for your pet’s surgery.
What materials are best for cosmetic skin closure in pets?
Fine monofilament sutures, either absorbable or non-absorbable, are best as they reduce tissue reaction and support smooth healing in cosmetic closures.
How long does it take for cosmetic skin closure wounds to heal?
Healing usually takes 10 to 14 days, but full cosmetic healing may take weeks depending on wound size, location, and pet health.
Can I bathe my pet after cosmetic skin closure?
Bathing should be avoided until sutures are removed and the wound is fully healed to prevent infection and wound opening.
When should I remove sutures after cosmetic skin closure?
Sutures are typically removed 10 to 14 days post-surgery, but your vet will advise the best timing based on healing progress.
Is cosmetic skin closure more expensive than regular closure?
Cosmetic closure may cost more due to finer sutures and longer surgery time, but it offers better healing and appearance benefits for your pet.

Use of Barbed Sutures in Veterinary Surgery
Explore the benefits, uses, and considerations of barbed sutures in veterinary surgery for improved healing and efficiency.
Barbed sutures are becoming popular in veterinary surgery due to their unique design that allows tissue closure without knots. Many veterinarians face challenges with traditional sutures, such as knot slippage and longer surgery times. Barbed sutures offer a solution by improving surgical efficiency and wound healing.
This article explains what barbed sutures are, their advantages, and how they are used in veterinary procedures. You will learn about the types of barbed sutures, their safety, and best practices for use in animals.
What are barbed sutures in veterinary surgery?
Barbed sutures are special threads with tiny barbs along their length. These barbs catch the tissue and hold it in place without needing knots. This design helps close wounds evenly and securely.
In veterinary surgery, barbed sutures reduce the time needed to tie knots and distribute tension along the wound. They are made from absorbable or non-absorbable materials depending on the surgery type.
- Barb design: Barbs are angled projections on the suture that grip tissue, preventing suture slippage and maintaining wound closure without knots.
- Material types: Barbed sutures come in absorbable forms like polydioxanone or non-absorbable materials, chosen based on healing needs and tissue type.
- Knotless closure: The barbs eliminate the need for knots, which can reduce bulk and irritation in the surgical site.
- Tension distribution: Barbs spread tension evenly along the wound, helping to reduce localized stress and improve healing.
Understanding these features helps veterinarians select the right suture for each procedure and animal.
How do barbed sutures improve surgical outcomes in animals?
Barbed sutures can enhance surgical outcomes by providing secure wound closure with less tissue trauma. They help reduce surgery time and may lower infection risks by minimizing foreign material like knots.
Studies in veterinary medicine show that barbed sutures support good healing and reduce complications in soft tissue surgeries.
- Reduced surgery time: Knotless design speeds up suturing, decreasing anesthesia duration and improving patient safety during surgery.
- Even wound tension: Barbs distribute tension along the incision, promoting better tissue approximation and faster healing.
- Lower infection risk: Fewer knots mean less bulk and fewer places for bacteria to hide, potentially reducing infection rates.
- Improved cosmetic results: Smooth closure without knots can lead to less scarring and better appearance post-surgery.
These benefits make barbed sutures a valuable tool in veterinary surgical practice.
What types of veterinary surgeries use barbed sutures?
Barbed sutures are versatile and used in various veterinary surgeries, especially where soft tissue closure is critical. They are common in orthopedic, abdominal, and skin surgeries.
Choosing barbed sutures depends on the tissue type, surgery complexity, and healing requirements of the animal.
- Orthopedic surgery: Barbed sutures help close joint capsules and tendons securely, supporting healing in bone and soft tissue repairs.
- Abdominal surgery: Used for closing fascia and muscle layers, barbed sutures ensure strong closure of the abdominal wall in spays or tumor removals.
- Skin closure: In some cases, barbed sutures are used for skin layers to reduce tension and improve cosmetic outcomes.
- Soft tissue repair: Barbed sutures assist in closing organs like the bladder or uterus, providing secure and even tissue approximation.
Veterinarians select barbed sutures based on the specific needs of each surgery and patient.
Are barbed sutures safe for all animal species?
Barbed sutures are generally safe for many animal species, including dogs, cats, horses, and exotic pets. However, safety depends on proper technique and suture selection.
Some species or tissues may require special consideration due to differences in healing or tissue strength.
- Species compatibility: Barbed sutures are effective in common pets like dogs and cats, and also in large animals such as horses with proper technique.
- Tissue sensitivity: Some tissues may react differently to barbs; veterinarians must assess tissue type before use.
- Proper handling: Correct suture placement and tension are essential to avoid tissue damage or suture failure.
- Material choice: Selecting absorbable or non-absorbable barbed sutures based on species and surgery type ensures safety and healing.
Consulting with a veterinary surgeon experienced in barbed sutures helps ensure safe use across species.
How do barbed sutures compare to traditional sutures in veterinary surgery?
Barbed sutures differ from traditional smooth sutures by eliminating knots and providing self-anchoring closure. This can improve efficiency but requires different handling skills.
Comparing both types helps veterinarians decide when barbed sutures offer advantages.
- Knot elimination: Barbed sutures do not require knots, reducing bulk and saving time compared to traditional sutures.
- Learning curve: Surgeons need training to use barbed sutures effectively, as technique differs from traditional knot tying.
- Tissue holding: Barbs provide continuous grip along the suture line, unlike traditional sutures that rely on knots for tension.
- Cost considerations: Barbed sutures may be more expensive but can reduce overall surgery time and complications.
Choosing between barbed and traditional sutures depends on the procedure, surgeon experience, and patient needs.
What are the best practices for using barbed sutures in veterinary surgery?
Successful use of barbed sutures requires attention to technique, suture selection, and post-operative care. Proper handling ensures optimal healing and reduces complications.
Veterinarians should follow guidelines and manufacturer instructions when using barbed sutures.
- Proper suture selection: Choose the correct size, material, and barb direction based on the tissue and surgery requirements.
- Technique training: Surgeons should practice barbed suture techniques to avoid tissue tearing or improper tension.
- Wound monitoring: Post-surgery, monitor the wound for signs of infection or dehiscence to intervene early if needed.
- Patient comfort: Minimize tension and suture irritation to reduce pain and promote faster recovery.
Following these practices helps maximize the benefits of barbed sutures in veterinary patients.
Can barbed sutures reduce post-operative complications in pets?
Barbed sutures may help reduce some post-operative complications by providing secure closure and minimizing knot-related issues. However, they are not a guarantee against all problems.
Proper surgical technique and post-operative care remain essential for the best outcomes.
- Lower infection risk: Fewer knots reduce places for bacteria, potentially decreasing surgical site infections in pets.
- Reduced wound dehiscence: Even tension distribution helps prevent wound opening after surgery.
- Less suture irritation: Knotless design can reduce inflammation and discomfort around the incision.
- Faster healing: Secure tissue approximation supports quicker recovery and less scarring.
While barbed sutures offer advantages, they should be part of a comprehensive surgical and care plan.
Conclusion
Barbed sutures are an innovative option in veterinary surgery that can improve wound closure, reduce surgery time, and enhance healing. Their knotless design and tension distribution offer clear benefits over traditional sutures in many cases.
Veterinarians should consider barbed sutures for appropriate surgeries and species, following best practices to ensure safety and success. With proper use, barbed sutures can help pets recover faster and with fewer complications.
What materials are barbed sutures made from?
Barbed sutures are made from absorbable materials like polydioxanone or non-absorbable polymers, chosen based on the surgery type and tissue healing requirements.
Can barbed sutures be used in emergency veterinary surgeries?
Yes, barbed sutures can be used in emergencies to speed closure, but surgeons must be skilled to avoid complications from improper technique.
Do barbed sutures cause more tissue damage than traditional sutures?
When used correctly, barbed sutures do not cause more tissue damage; their design helps distribute tension evenly, reducing localized trauma.
Are barbed sutures more expensive than regular sutures?
Barbed sutures usually cost more than traditional sutures, but savings in surgery time and improved outcomes can offset the price difference.
How long do barbed sutures take to absorb in animals?
Absorbable barbed sutures typically dissolve over weeks to months, depending on the material, supporting tissue healing during this time.

Medical Asepsis During Routine Veterinary Exams
Learn how medical asepsis protects pets during routine veterinary exams with practical steps and expert tips.
Medical asepsis is crucial during routine veterinary exams to prevent infections and keep your pet safe. It involves practices that reduce the number of harmful microbes and stop their spread. Understanding medical asepsis helps you appreciate the care your pet receives and why cleanliness matters so much in veterinary clinics.
This article explains what medical asepsis means in veterinary exams, why it is important, and how veterinarians apply it daily. You will learn key aseptic techniques used during exams and how you can support these efforts at home and in the clinic.
What is medical asepsis in veterinary exams?
Medical asepsis refers to steps taken to reduce or eliminate harmful microorganisms during medical procedures. In veterinary exams, it helps prevent infections in pets by controlling germs on hands, instruments, and surfaces. This practice differs from surgical asepsis, which aims for complete sterility.
Veterinary clinics use medical asepsis to keep routine exams safe and clean. It protects both animals and staff from disease transmission.
- Hand hygiene importance: Proper handwashing or sanitizing removes germs that could infect pets during exams or treatments.
- Surface cleaning role: Disinfecting exam tables and equipment reduces microbial contamination between patients.
- Instrument sterilization use: Cleaning and sterilizing tools prevent cross-contamination when used on different animals.
- Barrier precautions: Gloves and gowns create physical barriers to block germ transfer during contact with pets.
Medical asepsis is a fundamental part of veterinary care that minimizes infection risks during routine visits.
Why is medical asepsis important during routine veterinary exams?
Routine exams may seem simple but can expose pets to germs if aseptic measures are not followed. Medical asepsis lowers the chance of infections that can complicate health or delay recovery. It also protects veterinary staff and other animals in the clinic.
Infections acquired during exams can cause serious illness, increase treatment costs, and stress pets and owners. Maintaining asepsis ensures a safer environment for everyone.
- Infection prevention: Reducing germs stops common infections like skin or respiratory diseases in pets.
- Cross-contamination control: Proper asepsis prevents germs from spreading between animals in the clinic.
- Staff safety: Protecting veterinary workers from zoonotic diseases transmitted by animals during exams.
- Client confidence: Clean and safe exams build trust and encourage regular veterinary visits for pet health.
Medical asepsis is essential to maintain high standards of care and protect all involved in veterinary visits.
How do veterinarians practice medical asepsis during exams?
Veterinarians follow strict protocols to maintain asepsis during routine exams. These include hand hygiene, cleaning equipment, and using protective gear. Staff training ensures everyone understands and applies these practices consistently.
Attention to detail in cleaning and preparation helps reduce infection risks and improves exam outcomes.
- Handwashing protocols: Washing hands with soap and water or using alcohol-based sanitizers before and after each patient contact.
- Equipment disinfection: Cleaning stethoscopes, thermometers, and other tools with approved disinfectants between uses.
- Use of gloves: Wearing disposable gloves during exams involving body fluids or broken skin to prevent germ transfer.
- Environmental cleaning: Regularly disinfecting exam rooms, floors, and surfaces to maintain a hygienic setting.
These practices form the backbone of medical asepsis in veterinary clinics and protect pets during exams.
What are common aseptic techniques used in veterinary exams?
Several aseptic techniques help reduce contamination during routine veterinary exams. These techniques are simple but effective in controlling the spread of microbes and maintaining a clean environment.
Veterinary teams use these methods routinely to ensure safe handling and examination of pets.
- Hand hygiene: Frequent handwashing or sanitizer use to remove or kill germs before and after patient contact.
- Glove use: Wearing gloves when touching mucous membranes, wounds, or bodily fluids to block germ transmission.
- Surface disinfection: Applying disinfectants to exam tables and instruments to kill pathogens between patients.
- Proper waste disposal: Safely discarding used gloves, swabs, and other contaminated materials to prevent environmental contamination.
Consistent use of these techniques helps maintain medical asepsis and reduces infection risks during exams.
How can pet owners support medical asepsis during veterinary visits?
Pet owners play a key role in supporting medical asepsis by following clinic guidelines and preparing their pets properly. Cooperation helps keep the clinic environment clean and safe for all animals.
Simple actions by owners can enhance infection control efforts and improve exam experiences.
- Arriving clean: Bathing pets before visits reduces dirt and microbes brought into the clinic.
- Following clinic rules: Complying with mask policies, hand sanitizing stations, and appointment schedules helps maintain asepsis.
- Informing staff: Reporting any recent illnesses or infections in pets allows staff to take extra precautions.
- Limiting contact: Avoiding touching other animals or surfaces in the clinic reduces cross-contamination risks.
Owner cooperation strengthens medical asepsis and supports veterinary teams in protecting pet health.
What challenges exist in maintaining medical asepsis in veterinary clinics?
Maintaining medical asepsis in busy veterinary clinics can be challenging due to high patient volume, varied animal behavior, and resource limits. Staff must balance thorough cleaning with efficient patient flow.
Understanding these challenges helps clinics develop better protocols and training to uphold aseptic standards.
- High patient turnover: Frequent exams increase the risk of contamination if cleaning is rushed or incomplete.
- Animal behavior: Stress or fear in pets can make handling and aseptic procedures more difficult.
- Resource constraints: Limited staff or supplies may impact the ability to maintain strict asepsis consistently.
- Environmental factors: Clinic layout and ventilation affect germ spread and cleaning effectiveness.
Addressing these challenges requires ongoing staff education, adequate resources, and clinic design focused on infection control.
What are the risks of poor medical asepsis during veterinary exams?
Poor medical asepsis can lead to infections, delayed healing, and spread of contagious diseases among pets and humans. It undermines the quality of care and can cause serious health problems.
Recognizing these risks highlights the importance of strict aseptic practices in veterinary medicine.
- Increased infections: Germs introduced during exams can cause skin, ear, or systemic infections in pets.
- Cross-species transmission: Zoonotic diseases can spread from animals to veterinary staff or owners if asepsis fails.
- Prolonged illness: Infection delays recovery and may require additional treatments or hospitalization.
- Clinic reputation damage: Outbreaks linked to poor asepsis reduce client trust and business.
Maintaining medical asepsis protects pet health, clinic staff, and the wider community from preventable infections.
Conclusion
Medical asepsis during routine veterinary exams is essential to prevent infections and protect pets, staff, and owners. It involves careful hand hygiene, cleaning, and use of protective barriers to reduce harmful microbes.
By understanding and supporting these practices, you help ensure your pet receives safe, high-quality care. Medical asepsis is a shared responsibility that keeps veterinary visits healthy and stress-free.
What is the difference between medical asepsis and surgical asepsis?
Medical asepsis reduces germs to prevent infection, while surgical asepsis aims for complete sterility during invasive procedures. Both protect pets but differ in strictness and application.
How often should veterinary staff wash their hands during exams?
Staff should wash or sanitize hands before and after each patient contact, after touching contaminated surfaces, and before procedures to maintain asepsis.
Can medical asepsis prevent all infections in veterinary clinics?
While it greatly reduces infection risk, medical asepsis cannot prevent all infections due to environmental and biological factors but remains critical for control.
Are gloves always necessary during routine veterinary exams?
Gloves are recommended when contact with body fluids, wounds, or mucous membranes occurs but may not be needed for all routine exams.
How can veterinary clinics improve medical asepsis practices?
Clinics can improve by providing staff training, ensuring adequate supplies, enforcing protocols, and designing clean, well-ventilated spaces.

Asepsis During Abscess Drainage
Learn how to maintain asepsis during abscess drainage to prevent infection and ensure safe healing for your pet.
An abscess is a painful collection of pus that forms under the skin or within tissues due to infection. Draining an abscess is a common veterinary procedure, but it must be done carefully to avoid spreading infection or causing complications. Asepsis during abscess drainage is critical to protect your pet's health and promote proper healing.
This article explains what asepsis means, why it is important during abscess drainage, and how veterinary professionals maintain sterile conditions. You will learn the step-by-step process and best practices to ensure safe abscess treatment for your pet.
What is asepsis and why is it important during abscess drainage?
Asepsis means preventing contamination by harmful bacteria or microorganisms during medical procedures. It is essential during abscess drainage because the area contains infectious material that can spread if not handled properly. Maintaining asepsis reduces the risk of further infection and promotes faster healing.
Without aseptic technique, bacteria from the abscess or surrounding skin can enter deeper tissues or the bloodstream, causing serious health problems. Proper asepsis protects both the pet and the veterinary staff.
- Definition of asepsis: Asepsis involves methods to keep an area free from harmful microbes during surgery or wound care to prevent infection.
- Risk of contamination: Abscesses contain pus and bacteria that can easily spread if the site is not kept sterile during drainage.
- Prevention of secondary infection: Using aseptic techniques lowers the chance of new infections developing after drainage.
- Protection of pet and staff: Asepsis safeguards the animal’s health and reduces exposure risks for veterinary personnel.
Understanding asepsis helps pet owners appreciate the care taken during abscess drainage and the importance of following post-procedure instructions.
What are the key steps to maintain asepsis during abscess drainage?
Several important steps ensure asepsis during abscess drainage. These include preparing the site, using sterile instruments, and following strict hygiene protocols. Each step minimizes the chance of contamination and promotes safe treatment.
Veterinary teams follow a systematic approach to maintain asepsis from start to finish of the procedure.
- Site preparation: The skin around the abscess is clipped and cleaned with antiseptic solutions to remove dirt and bacteria.
- Sterile gloves and gowns: Staff wear sterile gloves and protective clothing to avoid introducing microbes during drainage.
- Sterile instruments: All tools used, such as scalpels and forceps, are sterilized before the procedure to ensure no bacteria are present.
- Controlled environment: The procedure is performed in a clean area, often a surgical suite, to reduce airborne contamination.
Following these steps carefully helps maintain a sterile field and reduces infection risks during abscess drainage.
How do veterinarians prepare the abscess site before drainage?
Preparing the abscess site is a critical part of asepsis. The goal is to remove hair, dirt, and surface bacteria that could contaminate the wound. Proper preparation sets the stage for safe drainage and healing.
Veterinarians use specific techniques and antiseptics to clean the area thoroughly before making any incision.
- Hair clipping: The fur around the abscess is clipped to expose the skin and prevent hair from falling into the wound.
- Antiseptic scrubbing: The skin is scrubbed with antiseptic solutions like chlorhexidine or povidone-iodine to kill bacteria on the surface.
- Repeated cleaning: The area is cleaned multiple times to ensure maximum reduction of microbes before incision.
- Drying the site: The skin is allowed to dry to enhance antiseptic effectiveness and reduce slipping during incision.
Proper site preparation is essential to reduce bacterial load and create a clean environment for drainage.
What sterile instruments and materials are used during abscess drainage?
Using sterile instruments is mandatory to maintain asepsis. These tools must be free from microbes to prevent introducing new infections into the abscess site. Veterinary clinics use specialized equipment designed for safe abscess drainage.
Each instrument is carefully sterilized and handled to preserve its sterility throughout the procedure.
- Sterile scalpel blades: Sharp, sterile blades are used to make precise incisions without contaminating the wound.
- Forceps and scissors: Sterile forceps help hold tissues, and scissors assist in enlarging the incision if needed.
- Syringes and needles: Sterile syringes may be used to flush the abscess cavity with antiseptic solutions after drainage.
- Sterile gauze and dressings: Used to absorb pus and protect the wound after drainage, these materials are kept sterile to avoid infection.
Proper handling and disposal of instruments after use further ensure asepsis is maintained during and after the procedure.
How is the drainage procedure performed to ensure asepsis?
The drainage procedure itself must be done carefully to avoid spreading infection. Veterinarians use aseptic technique throughout the process to keep the area clean and control pus release safely.
Each step is designed to minimize contamination and promote healing.
- Incision under sterile conditions: The skin is incised with a sterile scalpel after site preparation to open the abscess cavity.
- Gentle pus evacuation: Pus is carefully expressed or suctioned out to avoid forcing bacteria into surrounding tissues.
- Flushing the cavity: The abscess is flushed with sterile saline or antiseptic to remove debris and reduce bacterial load.
- Placement of drains: If needed, sterile drains are inserted to allow continuous drainage and prevent fluid buildup.
Following these steps with strict aseptic technique reduces complications and supports effective abscess resolution.
What post-drainage care ensures continued asepsis and healing?
After drainage, maintaining asepsis is vital to prevent reinfection. Proper wound care and hygiene help the abscess heal quickly and safely. Veterinary staff provide detailed instructions for home care.
Owners play a key role in monitoring the wound and preventing contamination during recovery.
- Clean dressing changes: Dressings should be changed regularly using sterile materials to keep the wound clean and dry.
- Wound monitoring: Watch for signs of infection such as redness, swelling, or discharge and report concerns to your vet promptly.
- Medication administration: Follow prescribed antibiotics or pain medications exactly to support healing and control infection.
- Preventing licking or scratching: Use an Elizabethan collar or other methods to stop the pet from disturbing the wound and introducing bacteria.
Consistent post-procedure care is essential to maintain asepsis and ensure a smooth recovery from abscess drainage.
What are the risks of poor asepsis during abscess drainage?
Failing to maintain asepsis can lead to serious complications. Infection can spread deeper into tissues or enter the bloodstream, causing systemic illness. Understanding these risks highlights why aseptic technique is critical.
Veterinary teams take every precaution to avoid these outcomes and protect your pet’s health.
- Secondary infection: Contamination can cause new infections, worsening the abscess or creating additional abscesses.
- Delayed healing: Infection slows tissue repair, prolonging recovery time and increasing discomfort.
- Sepsis risk: Bacteria entering the bloodstream can cause life-threatening systemic infection requiring intensive treatment.
- Increased veterinary costs: Complications from poor asepsis often require more extensive care and longer hospital stays.
Maintaining asepsis during abscess drainage is essential to avoid these risks and promote the best possible outcome for your pet.
Conclusion
Asepsis during abscess drainage is a vital part of safe veterinary care. It prevents infection spread, supports healing, and protects both your pet and the medical team. Understanding the importance of aseptic technique helps you appreciate the care involved in this common procedure.
By following strict hygiene, using sterile instruments, and providing proper post-drainage care, veterinarians ensure abscesses heal quickly and safely. If your pet needs abscess drainage, trust the process and follow your vet’s instructions closely to maintain asepsis and promote recovery.
FAQs
How long does it take for an abscess to heal after drainage?
Most abscesses heal within 7 to 14 days after proper drainage and care, but healing time varies depending on size and infection severity.
Can I clean my pet’s abscess wound at home?
Only clean the wound as directed by your vet using recommended antiseptics and sterile materials to avoid contamination and promote healing.
Is anesthesia required for abscess drainage?
Local or general anesthesia is often used to keep your pet comfortable and still during the procedure, depending on abscess size and location.
What signs indicate infection after abscess drainage?
Watch for increased redness, swelling, foul odor, pus discharge, or fever, and contact your vet immediately if these occur.
Can abscesses recur after drainage?
Yes, abscesses can recur if the underlying cause is not addressed or if asepsis is not maintained during treatment and healing.

Asepsis for Urinary Catheterization in Dogs
Learn essential asepsis techniques for urinary catheterization in dogs to prevent infections and ensure safe catheter use.
Urinary catheterization in dogs is a common veterinary procedure used to relieve urinary obstruction or collect sterile urine samples. However, improper technique can introduce bacteria into the urinary tract, leading to infections. Understanding asepsis for urinary catheterization in dogs is crucial to protect your pet's health and ensure the procedure's success.
This article provides a clear guide on aseptic techniques during urinary catheterization in dogs. You will learn why asepsis matters, how to prepare equipment and the patient, and best practices to minimize infection risks during catheter insertion and maintenance.
What is asepsis in urinary catheterization for dogs?
Asepsis means preventing contamination by harmful microorganisms during medical procedures. In urinary catheterization, asepsis involves techniques to keep the catheter and urinary tract free from bacteria. This reduces the chance of urinary tract infections (UTIs), which can cause pain and serious complications in dogs.
Maintaining asepsis requires careful preparation, sterile equipment, and clean handling throughout the catheterization process. It is a critical part of veterinary care for dogs needing catheter placement.
- Definition of asepsis: Asepsis is the practice of preventing infection by eliminating bacteria and other microbes during catheterization.
- Importance in catheterization: Proper asepsis lowers the risk of introducing bacteria into the urinary tract, preventing UTIs.
- Common infections prevented: Asepsis helps avoid cystitis, pyelonephritis, and other urinary infections in dogs.
- Role in veterinary practice: Aseptic technique is a standard of care to protect animal health during invasive procedures.
Understanding asepsis sets the foundation for safe urinary catheterization and improves outcomes for your dog.
How do you prepare for aseptic urinary catheterization in dogs?
Preparation is key to maintaining asepsis during catheterization. This includes gathering sterile equipment, cleaning the dog's genital area, and ensuring a clean environment. Proper preparation reduces contamination risks before catheter insertion.
Veterinarians and veterinary technicians follow strict protocols to prepare both the patient and the workspace for aseptic catheterization.
- Equipment sterilization: Use sterile catheters, gloves, lubricant, and drapes to prevent bacterial contamination.
- Patient cleaning: Thoroughly clean the dog's genital area with antiseptic solutions to reduce skin bacteria.
- Environment control: Perform the procedure in a clean, controlled area to limit airborne contaminants.
- Personnel hygiene: Wear sterile gloves and wash hands properly before handling the catheter and patient.
Proper preparation helps create a sterile field and minimizes infection risks during catheter placement.
What are the steps to maintain asepsis during catheter insertion in dogs?
Maintaining asepsis during catheter insertion involves careful technique and attention to detail. Each step must avoid introducing bacteria into the urinary tract. This requires sterile handling of the catheter and minimizing contact with non-sterile surfaces.
Following a step-by-step aseptic protocol ensures safe catheter placement and reduces infection chances.
- Use sterile gloves: Always wear sterile gloves to handle the catheter and avoid touching non-sterile surfaces.
- Lubricate catheter with sterile lubricant: This reduces friction and prevents trauma while maintaining sterility.
- Avoid catheter contamination: Do not let the catheter touch the dog's fur or skin outside the cleaned area.
- Insert catheter gently: Carefully advance the catheter into the urethra without forcing to prevent tissue damage and infection.
Adhering to these steps protects the urinary tract from contamination and supports successful catheterization.
How should you care for the catheter to maintain asepsis after placement?
After catheter placement, ongoing care is essential to maintain asepsis and prevent infections. This includes regular cleaning, monitoring for signs of infection, and proper handling during urine collection or catheter changes.
Good catheter care helps keep the urinary tract sterile and reduces complications.
- Secure catheter placement: Fix the catheter to prevent movement that can introduce bacteria or cause injury.
- Keep insertion site clean: Regularly clean the area around the catheter with antiseptic solutions to prevent bacterial growth.
- Use closed collection systems: Closed urine collection bags reduce exposure to environmental bacteria.
- Monitor for infection signs: Watch for redness, swelling, discharge, or discomfort indicating possible infection.
Proper catheter care after insertion is vital for maintaining asepsis and your dog's comfort.
What are common complications from poor asepsis in dog catheterization?
Poor aseptic technique during urinary catheterization can lead to several complications. The most common is urinary tract infection, which can cause pain, fever, and more serious kidney infections. Other complications include urethral trauma and catheter blockage.
Recognizing these risks highlights why asepsis is critical in catheter procedures.
- Urinary tract infection: Bacteria introduced during catheterization can cause bladder and kidney infections.
- Urethral injury: Improper technique or contamination can cause tissue damage and inflammation.
- Catheter blockage: Infection or debris can block urine flow, requiring catheter replacement.
- Systemic infection risk: Severe infections can spread, leading to sepsis if untreated.
Preventing these complications depends largely on strict aseptic technique throughout catheter use.
How can pet owners support asepsis during and after catheterization?
Pet owners play an important role in supporting asepsis during and after urinary catheterization. Following veterinary instructions carefully and maintaining hygiene at home helps prevent infections and complications.
Understanding your role improves your dog's recovery and comfort.
- Follow veterinary care instructions: Adhere to all cleaning and catheter care guidelines provided by your vet.
- Maintain hygiene: Wash hands before touching the catheter or urinary area to avoid contamination.
- Monitor your dog: Watch for signs of discomfort, swelling, or discharge and report concerns promptly.
- Keep follow-up appointments: Regular veterinary checks ensure the catheter remains clean and functioning properly.
Active owner involvement supports asepsis and promotes your dog's health during catheterization.
What are the best antiseptic agents for urinary catheterization in dogs?
Choosing the right antiseptic agents is important for effective asepsis in urinary catheterization. These agents clean the skin and reduce bacteria without causing irritation. Veterinary professionals select antiseptics based on safety and efficacy.
Using appropriate antiseptics helps maintain a sterile field and protects the urinary tract.
- Chlorhexidine gluconate: A broad-spectrum antiseptic effective against bacteria and safe for canine skin.
- Povidone-iodine: Commonly used antiseptic that kills bacteria but may cause mild skin irritation in some dogs.
- Alcohol-based solutions: Used for rapid disinfection but can be drying and should be used carefully.
- Sterile saline: Used for rinsing after antiseptic application to remove residues and debris.
Proper antiseptic choice and application improve asepsis and reduce infection risk during catheterization.
Conclusion
Asepsis for urinary catheterization in dogs is essential to prevent infections and ensure safe catheter use. Proper preparation, sterile technique during insertion, and careful catheter care reduce the risk of urinary tract infections and other complications.
Pet owners and veterinary professionals must work together to maintain asepsis throughout the catheterization process. Understanding and following aseptic principles protect your dog's health and promote a smooth recovery.
FAQs
How often should the catheter be changed to maintain asepsis?
Catheter change frequency depends on the dog's condition and catheter type but typically occurs every 3 to 7 days to reduce infection risk and maintain sterility.
Can I clean the catheter insertion site at home?
Yes, you can clean the site using sterile wipes or antiseptic solutions recommended by your vet, ensuring your hands are clean before touching the area.
What signs indicate a urinary tract infection in my dog?
Signs include frequent urination, straining, blood in urine, foul odor, licking the genital area, and discomfort. Contact your vet if these occur.
Is it safe to use over-the-counter antiseptics for catheter care?
Only use antiseptics approved or recommended by your veterinarian, as some human products can irritate or harm your dog’s skin.
What should I do if the catheter becomes blocked?
If blockage occurs, do not attempt to fix it yourself. Contact your veterinarian immediately for assessment and safe catheter management.

Suture Size Selection in Small Animal Surgery
Learn how to choose the right suture size for small animal surgery to ensure optimal healing and minimize complications.
Suture size selection is a critical decision in small animal surgery. Choosing the wrong suture size can lead to poor wound healing, increased infection risk, or tissue damage. Understanding how to select the correct suture size helps improve surgical outcomes for your pet.
This article explains the principles behind suture size choice in small animal surgery. You will learn what factors influence suture selection and how to apply this knowledge in clinical practice.
What is suture size and why does it matter in small animal surgery?
Suture size refers to the diameter or thickness of the suture material used to close wounds. It is usually indicated by a number, such as 3-0 or 5-0, where higher numbers mean thinner sutures. The correct suture size balances strength and tissue trauma.
Choosing the right suture size is important because it affects wound healing quality and complication rates. Too large a suture can cause excessive tissue damage, while too small may not hold the tissue securely.
- Suture diameter definition: Suture size indicates the thickness of the thread, which determines its strength and handling properties during surgery.
- Tissue compatibility: Matching suture size to tissue type reduces trauma and supports proper healing without excessive inflammation.
- Wound strength needs: Larger sutures provide more tensile strength needed for high-tension areas, preventing wound dehiscence.
- Minimizing infection risk: Smaller sutures reduce foreign material load, lowering the chance of bacterial colonization and infection.
Understanding suture size helps you select the best material for each surgical case, improving your pet’s recovery.
How do tissue type and location influence suture size choice?
Different tissues in small animals have varying strength and healing characteristics. The suture size must suit the tissue to avoid damage or inadequate support. Skin, muscle, and internal organs each require different suture considerations.
Location also matters because areas under tension or movement need stronger sutures. For example, limb wounds require more robust sutures than facial wounds.
- Skin suturing: Use finer sutures like 3-0 to 5-0 to minimize scarring and allow delicate tissue healing.
- Muscle closure: Medium-sized sutures such as 2-0 to 3-0 provide enough strength for muscle layers under tension.
- Internal organs: Smaller sutures like 4-0 to 5-0 reduce tissue trauma in delicate organs such as intestines or bladder.
- High-movement areas: Larger sutures may be needed where joints or limbs move frequently to maintain wound integrity.
Considering tissue type and location ensures the suture size supports healing without causing harm.
What are the common suture sizes used in small animal surgery?
Small animal surgeons commonly use suture sizes ranging from 0 to 6-0. The choice depends on the animal’s size and the surgical site. Larger animals and tougher tissues require thicker sutures, while smaller animals and delicate tissues need finer sutures.
Understanding the typical uses of each suture size helps guide your selection during surgery.
- Size 0 and 1 sutures: Used for large dogs or thick tissues needing high tensile strength, such as fascia or tendons.
- Size 2-0 and 3-0 sutures: Common for muscle, subcutaneous tissue, and skin in medium-sized animals.
- Size 4-0 and 5-0 sutures: Ideal for delicate skin closure and internal organs in small dogs and cats.
- Size 6-0 sutures: Reserved for very fine tissues like eyelids or microsurgery in small or toy breeds.
Knowing these common sizes helps you prepare the correct suture material before surgery.
How does suture material affect size selection?
Suture material type influences how the suture behaves in tissue. Materials can be absorbable or non-absorbable, monofilament or multifilament. Each type has different strength and handling characteristics that affect size choice.
Matching suture size with material properties ensures adequate wound support and reduces complications.
- Absorbable sutures: Often used internally; size must balance strength and absorption rate to maintain wound support during healing.
- Non-absorbable sutures: Used for skin or long-term support; size should minimize tissue irritation while providing strength.
- Monofilament sutures: Thinner and smoother, allowing smaller sizes with good strength and less tissue drag.
- Multifilament sutures: Thicker and more flexible, sometimes requiring larger sizes to maintain tensile strength.
Understanding material effects helps you choose the best suture size for each surgical need.
What are the risks of using incorrect suture sizes in small animal surgery?
Using the wrong suture size can cause many complications. Too large a suture may cause excessive tissue trauma, inflammation, or delayed healing. Too small a suture may break or fail to hold tissues properly, risking wound dehiscence.
Recognizing these risks emphasizes the importance of careful suture size selection.
- Tissue necrosis risk: Oversized sutures can strangulate tissue, leading to cell death and poor healing outcomes.
- Wound dehiscence risk: Undersized sutures may not hold wound edges securely, causing the wound to reopen.
- Infection risk: Improper suture size can increase foreign material exposure, promoting bacterial growth.
- Delayed healing: Incorrect suture size may cause excessive inflammation or mechanical irritation, slowing recovery.
Choosing the correct suture size minimizes these risks and supports smooth healing.
How can you determine the best suture size for your small animal patient?
Determining the best suture size involves assessing the animal’s size, tissue type, wound location, and surgical goals. Experience and guidelines help inform your choice. Always consider the balance between strength and minimizing tissue trauma.
Using proper suture size selection techniques improves surgical success and patient comfort.
- Assess animal size: Larger animals generally require thicker sutures, while smaller animals need finer sutures for delicate tissues.
- Evaluate tissue type: Choose suture size based on tissue strength and healing properties to avoid damage or failure.
- Consider wound location: High-tension areas need stronger sutures, while low-tension sites can use finer sutures.
- Follow surgical guidelines: Use published recommendations and manufacturer instructions to guide suture size selection.
Careful evaluation and planning ensure the best suture size for each surgical case.
Conclusion
Suture size selection in small animal surgery is a vital skill that directly impacts healing and complication rates. Understanding how suture size relates to tissue type, location, and material helps you make informed choices during surgery.
By carefully assessing each patient and wound, you can select the optimal suture size to promote strong, healthy healing and reduce risks. Proper suture size selection supports better outcomes for your small animal patients.
What suture size is best for skin closure in small dogs?
Sizes 4-0 or 5-0 are typically best for skin closure in small dogs to minimize scarring and provide adequate wound support.
Can using too large sutures cause complications?
Yes, oversized sutures can cause tissue strangulation, necrosis, and increased inflammation, delaying wound healing.
Are absorbable sutures always preferred internally?
Absorbable sutures are commonly used internally because they dissolve over time, reducing the need for removal and minimizing long-term foreign material.
How does animal size affect suture size choice?
Larger animals usually require thicker sutures for strength, while smaller animals need finer sutures to avoid tissue damage.
Is monofilament or multifilament suture better for delicate tissues?
Monofilament sutures are better for delicate tissues due to their smooth surface, causing less tissue drag and irritation.

Asepsis During Wound Management
Learn essential asepsis techniques during wound management to prevent infections and promote healing in pets.
Wound management is a critical part of veterinary care, and maintaining asepsis during this process is vital to prevent infections. Asepsis means keeping the wound and surrounding area free from harmful bacteria and other microorganisms that can delay healing or cause complications.
This article explains what asepsis is, why it matters in wound care, and how you can ensure proper aseptic techniques when managing your pet's wounds. You will learn practical steps to protect your pet’s health and promote faster recovery.
What is asepsis in wound management?
Asepsis refers to the practice of preventing contamination by pathogens during medical procedures. In wound management, asepsis helps avoid infection and supports the natural healing process.
Keeping wounds clean and sterile reduces the risk of complications and improves outcomes for your pet.
- Definition of asepsis: Asepsis means the absence of harmful microorganisms that can cause infection during wound care.
- Difference from antisepsis: Asepsis prevents contamination, while antisepsis involves killing germs on living tissue.
- Importance in wound healing: Maintaining asepsis reduces infection risk and speeds up tissue repair.
- Common aseptic techniques: These include hand hygiene, sterile gloves, and clean instruments during wound treatment.
Understanding asepsis is the first step to effective wound management and better pet health.
Why is asepsis critical during wound management?
Wounds are vulnerable to bacterial invasion, which can lead to infections and delayed healing. Asepsis minimizes this risk by controlling the environment around the wound.
Infections can cause pain, swelling, and more serious health problems, so preventing them is essential.
- Infection prevention: Asepsis stops bacteria from entering the wound and causing infections.
- Faster healing: Clean wounds heal more quickly without complications from germs.
- Reduced complications: Avoids abscesses, sepsis, and chronic wounds that require more treatment.
- Better treatment outcomes: Pets recover faster and with less discomfort when aseptic techniques are used.
Using aseptic methods during wound care helps protect your pet’s overall health and comfort.
How do you maintain asepsis during wound cleaning?
Wound cleaning is a key step where asepsis must be strictly observed. Proper cleaning removes debris and bacteria without introducing new contaminants.
Following the right steps ensures the wound stays as sterile as possible during treatment.
- Hand hygiene: Always wash hands thoroughly with soap or use an alcohol-based sanitizer before touching the wound.
- Use sterile gloves: Wearing sterile gloves prevents transferring germs from your hands to the wound.
- Clean instruments: Use sterilized scissors, forceps, and dressings to avoid contamination.
- Gentle cleaning solutions: Use sterile saline or approved antiseptics to clean the wound without damaging tissue.
Maintaining asepsis during cleaning reduces infection risk and supports healing.
What are the best practices for dressing wounds aseptically?
Proper wound dressing protects the injury from dirt and bacteria while allowing it to heal. Aseptic dressing techniques are essential to keep the wound clean.
Choosing the right materials and applying them correctly helps prevent infection and promotes recovery.
- Sterile dressings: Use only sterile gauze or pads to cover the wound and avoid introducing germs.
- Secure dressings properly: Use clean tape or bandages to keep dressings in place without causing pressure or irritation.
- Change dressings regularly: Replace dressings as recommended to prevent moisture buildup and bacterial growth.
- Monitor for signs of infection: Check for redness, swelling, or discharge and consult a vet if these appear.
Following these practices ensures your pet’s wound stays protected and clean.
How can you prevent contamination during wound management at home?
Home care is often necessary after initial veterinary treatment. Maintaining asepsis at home requires careful attention to hygiene and wound care routines.
Simple steps can greatly reduce the risk of infection and support healing outside the clinic.
- Clean environment: Keep the wound area free from dirt, dust, and pet hair to avoid contamination.
- Wash hands before care: Always clean your hands before touching or treating the wound.
- Use clean supplies: Prepare fresh, sterile dressings and avoid reusing materials that may harbor bacteria.
- Limit pet activity: Prevent your pet from licking or scratching the wound to reduce infection risk.
By following these guidelines, you can help your pet heal safely at home.
What are common mistakes to avoid in aseptic wound management?
Even with good intentions, some errors can compromise asepsis and lead to infections. Being aware of these mistakes helps you avoid them.
Correcting these habits improves wound care quality and your pet’s recovery.
- Skipping hand hygiene: Not washing hands before wound care increases the chance of introducing bacteria.
- Using non-sterile materials: Reusing or using dirty dressings can contaminate the wound.
- Touching the wound directly: Handling the wound without gloves or sterile tools spreads germs.
- Ignoring signs of infection: Delaying veterinary care when infection appears worsens outcomes.
Avoiding these mistakes protects your pet and supports effective healing.
When should you seek veterinary help for wound infections?
Some wounds may become infected despite careful aseptic management. Recognizing when to get professional help is important.
Early veterinary intervention can prevent serious complications and ensure proper treatment.
- Persistent redness: If the wound area remains red or spreads, it may indicate infection.
- Swelling and heat: Increased swelling or warmth around the wound signals inflammation or infection.
- Pus or discharge: Yellow, green, or foul-smelling discharge is a clear sign of infection needing vet care.
- Fever or lethargy: If your pet shows signs of illness, seek veterinary attention promptly.
Timely veterinary care ensures infections are treated effectively and healing continues.
Conclusion
Asepsis during wound management is essential to prevent infections and promote healing in pets. Understanding and applying aseptic techniques protects your pet’s health and comfort.
By following proper hand hygiene, using sterile materials, and monitoring wounds closely, you can support safe and effective wound care. Always seek veterinary advice if you notice signs of infection or if you are unsure about wound management steps.
What is the difference between asepsis and antisepsis?
Asepsis means preventing contamination by germs, while antisepsis involves killing or removing germs on living tissues like skin during wound care.
How often should wound dressings be changed?
Dressings should be changed daily or as directed by your vet to keep the wound clean and dry, preventing bacterial growth.
Can I use household disinfectants to clean my pet’s wound?
No, household disinfectants can damage tissue. Use only sterile saline or vet-approved antiseptics for wound cleaning.
Why is hand hygiene important in wound care?
Hand hygiene removes germs from your hands, preventing them from entering the wound and causing infections during treatment.
When should I contact my vet about a wound?
Contact your vet if the wound shows redness, swelling, discharge, foul smell, or if your pet is lethargic or has a fever.
Asepsis vs Sterilization in Veterinary Clinics
Learn the key differences between asepsis and sterilization in veterinary clinics to ensure your pet's safety during treatment.
Maintaining a clean and safe environment in veterinary clinics is essential to protect pets from infections. Two important concepts in infection control are asepsis and sterilization. Understanding the difference between these terms helps veterinary staff provide better care and reduce the risk of disease transmission.
This article explains what asepsis and sterilization mean, how they differ, and why both are crucial in veterinary practice. You will learn how each method is applied and how they contribute to safer surgeries and treatments for your pet.
What is asepsis in veterinary clinics?
Asepsis refers to practices that prevent contamination by harmful microorganisms. It aims to keep an area or object free from infection-causing germs but does not always kill all microbes. Veterinary clinics use aseptic techniques to reduce the chance of infection during procedures.
These techniques include hand hygiene, using sterile gloves, and preparing the surgical site carefully. Asepsis is about creating a clean environment where bacteria and viruses cannot easily spread.
- Hand hygiene importance: Proper handwashing or sanitizing removes germs from veterinary staff hands, lowering infection risks during pet care.
- Surgical site preparation: Cleaning and disinfecting the area on the animal before surgery helps prevent microbes from entering wounds.
- Use of sterile gloves: Wearing gloves that are free from germs protects both the pet and the veterinary team during procedures.
- Controlled environment: Keeping the clinic and operating rooms clean and limiting access reduces contamination chances.
By following aseptic techniques, veterinary clinics minimize the presence of pathogens and protect pets from infections during medical treatments.
What does sterilization mean in veterinary practice?
Sterilization is a process that destroys all forms of microbial life, including bacteria, viruses, fungi, and spores. It ensures that surgical instruments and equipment are completely free of any living organisms. This is critical for invasive procedures where any contamination can cause serious infections.
Veterinary clinics use various sterilization methods to prepare tools and supplies. These methods guarantee that instruments used in surgeries or wound care are safe and do not introduce harmful microbes.
- Autoclaving method: Using pressurized steam at high temperatures kills all microorganisms on surgical instruments effectively.
- Chemical sterilants: Liquid chemicals like glutaraldehyde are used to sterilize heat-sensitive equipment that cannot go in autoclaves.
- Dry heat sterilization: Hot air ovens destroy microbes on instruments that tolerate high heat without moisture.
- Packaging and storage: Sterilized tools are kept in sealed packages to maintain sterility until use.
Sterilization is a vital step in veterinary clinics to ensure all surgical instruments are safe and free from infection risks.
How do asepsis and sterilization differ?
While both asepsis and sterilization aim to reduce infection risks, they differ in scope and application. Asepsis focuses on preventing contamination, while sterilization kills all microorganisms on objects.
Understanding these differences helps veterinary staff apply the right methods in various situations to protect pets effectively.
- Scope of action: Asepsis prevents germs from entering a clean area; sterilization eliminates all microbes from instruments.
- Application areas: Asepsis applies to hands, surfaces, and surgical fields; sterilization applies mainly to surgical tools and equipment.
- Level of microbial control: Asepsis reduces contamination but may not remove all microbes; sterilization completely destroys all microbial life.
- Techniques used: Asepsis involves cleaning, disinfecting, and barrier methods; sterilization uses physical or chemical methods to kill microbes.
Both asepsis and sterilization are complementary and essential in veterinary clinics to maintain a safe environment for pets and staff.
Why is asepsis important during veterinary surgeries?
Asepsis is critical during surgeries to prevent infections that can complicate healing or cause serious illness. Surgical wounds are vulnerable to bacteria, so maintaining aseptic conditions protects the pet’s health.
Veterinary teams follow strict aseptic protocols to reduce contamination risks and improve surgical outcomes.
- Infection prevention: Aseptic techniques reduce the chance of bacteria entering surgical wounds and causing infections.
- Faster recovery: Minimizing contamination helps wounds heal more quickly and with fewer complications.
- Reduced antibiotic use: Preventing infections lowers the need for antibiotics, reducing resistance risks.
- Improved surgical success: Clean environments and sterile tools increase the chances of successful procedures.
Maintaining asepsis during surgery is a key factor in ensuring your pet recovers safely and comfortably.
How do veterinary clinics sterilize surgical instruments?
Veterinary clinics use several methods to sterilize surgical instruments depending on the tool type and material. Proper sterilization ensures instruments are safe for use in invasive procedures.
Each method has specific steps and requirements to achieve complete microbial destruction.
- Autoclave process: Instruments are cleaned, wrapped, and placed in an autoclave where steam under pressure sterilizes them thoroughly.
- Chemical sterilization: Heat-sensitive tools are soaked in chemical solutions for a set time to kill all microbes.
- Dry heat sterilization: Instruments are exposed to high temperatures in a dry heat oven for sterilization without moisture.
- Storage protocols: Sterilized instruments are stored in sealed, sterile packaging to keep them germ-free until use.
Following these sterilization protocols protects pets from infections and ensures safe veterinary care.
Can asepsis alone prevent infections in veterinary clinics?
Asepsis is essential but cannot fully prevent infections without sterilization. While aseptic techniques reduce contamination, some microbes may survive on instruments or surfaces.
Combining asepsis with sterilization provides the best protection against infections in veterinary settings.
- Limitations of asepsis: It reduces but does not eliminate all microbes, so some infection risk remains without sterilization.
- Role of sterilization: Sterilization kills all microorganisms on tools, preventing infections from contaminated instruments.
- Importance of combined methods: Using both aseptic techniques and sterilized instruments offers comprehensive infection control.
- Continuous monitoring: Veterinary clinics must regularly check and update protocols to maintain effective infection prevention.
Relying on both asepsis and sterilization ensures the highest safety standards for pets undergoing treatment.
Conclusion
Understanding the difference between asepsis and sterilization is vital for safe veterinary care. Asepsis focuses on preventing contamination, while sterilization kills all microbes on instruments.
Both methods work together to protect pets from infections during surgeries and treatments. Veterinary clinics that apply strict aseptic techniques and proper sterilization protocols provide safer environments and better outcomes for your pet’s health.
What are the main goals of asepsis in veterinary clinics?
Asepsis aims to prevent contamination by harmful microbes during procedures, reducing infection risks and protecting pets from disease transmission.
How does sterilization differ from disinfection in veterinary practice?
Sterilization kills all microbial life including spores, while disinfection reduces microbes but may not eliminate all, especially resistant spores.
What sterilization methods are commonly used in veterinary clinics?
Common methods include autoclaving with steam, chemical sterilants for heat-sensitive tools, and dry heat sterilization for certain instruments.
Why is hand hygiene important for asepsis?
Proper hand hygiene removes germs from veterinary staff hands, preventing the spread of infections to pets during care and procedures.
Can surgical instruments be reused without sterilization?
No, surgical instruments must be sterilized before reuse to ensure they are free from all microbes and safe for the next patient.
Sustainable Vet | Copyright ©2026 | All Rights Reserved

