

Protecting
Pets, People & Planet
Join a group of veterinarians leveraging the latest technologies to deliver excellent care to their patients while being a responsible and positive force for their local and global communities.
100% secure. We do not share your information


Recent Articles
Why Is My Dog's Foot Swollen?
Discover why your dog's foot is swollen, common causes, treatments, and when to see a vet for proper care.
A swollen dog foot is one of the most common reasons owners call their vet. It can be as simple as a bee sting or as serious as a deep infection or bone tumor. The location, speed of onset, and other symptoms all help narrow down the cause.
This guide covers every common cause, how to assess severity at home, and the exact signs that mean your dog needs same-day care.
Quick answer: A swollen dog foot usually has a local cause: injury, insect sting, foreign object, or infection. Warm, increasing, or discharging swelling needs same-day vet care. Multiple swollen paws suggest allergies.
Key takeaways
- Single-paw swelling almost always has a local cause: injury, sting, foreign body, or infection
- Interdigital furunculosis (infected hair follicle cysts between toes) is among the most misidentified causes of recurring paw swelling
- Foreign objects like foxtails and glass splinters can migrate deep into tissue if left untreated
- Pododermatitis is the clinical term for inflamed paw skin; allergies are the most common underlying driver
- Swelling spreading up the leg or paired with face or neck swelling is an emergency requiring immediate care
- Most mild swelling from a sting or minor sprain improves within 24 to 48 hours with rest and monitoring
How to assess your dog's swollen foot before calling the vet
Before looking up causes, do a quick home assessment. This takes two minutes and tells you how urgent the situation is.
Step 1: Which paw?One paw = likely local cause. All four paws = likely allergic or systemic.
Step 2: Feel for heat.Warm or hot tissue means active inflammation or infection.
Step 3: Look between every toe.Redness, swelling between the digits, or visible nodules between the toes points to interdigital furunculosis or a foreign body.
Step 4: Check the pads.Burns appear as red, blistered, or peeling pad tissue. Cuts and punctures are often visible on the pad surface.
Step 5: Look at each nail.A broken nail or swollen nail bed causes localized pain and swelling at the toe tip.
VCA Animal Hospitals: "A deeper infection, like an abscess, will appear as a warm, soft to mildly firm swelling under the skin."
8 common causes of a swollen foot in dogs
1. Injury or trauma
Sprains, cuts, fractured toes, torn nails, and pad burns are the most frequent causes of sudden single-paw swelling. Dogs running on rough, hot, or icy terrain are especially prone.
PetMD notes that pad burns are particularly common in summer: check the pads after any walk on hot pavement. If your palm cannot hold against the pavement for five seconds, it is too hot for your dog's feet.
Signs: sudden lameness after activity, localized swelling, visible wound or bruising.
2. Foreign object
Thorns, glass, foxtails, and grass awns lodge between the toes or penetrate the pad. The body mounts an inflammatory response around the object, causing swelling that worsens over days.
SpectrumCare: "Foxtails and grass awns can lodge between the toes or in the pad and trigger pain, swelling, and infection."
Foxtails are particularly dangerous because they are barbed and can migrate deeper into tissue over days, eventually requiring surgical removal. If you cannot see and safely remove the object, do not probe. See a vet.
3. Insect sting or bite
Bees, wasps, fire ants, and spiders cause rapid single-paw swelling that appears within minutes of the sting. The paw may look puffy and your dog may lick or hold it up.
Dyer Animal Clinic advises watching for anaphylaxis signs: hives, difficulty breathing, excessive swelling spreading beyond the paw. These require emergency care immediately.
Localized sting swelling that stays in the paw and is not worsening can be monitored at home for 24 to 48 hours.
4. Infection: bacterial and fungal
Bacterial or fungal infections enter through cuts, puncture wounds, or damaged skin. Infected paws are typically warm, red, swollen, and often have an odor or discharge. VCA lists the visual signs: "Skin infections on the feet may result in red, moist lesions between the toes."
Pododermatitis (inflammation of the paw skin) is the umbrella clinical term. Common causes include:
- Secondary bacterial infection from chronic licking
- Yeast overgrowth in skin folds between toes
- Fungal infections (ringworm can affect paws)
- Demodectic mange (mite overgrowth)
Pododermatitis does not resolve without treatment. Antibiotics, antifungal medication, or both are typically required.
5. Interdigital furunculosis
This is one of the most commonly missed causes of recurring paw swelling. Interdigital furunculosis occurs when hair follicles between the toes become infected, forming painful reddish-purple nodules that may rupture and drain.
AKC notes that the condition is especially prevalent in short-coated, heavyset breeds: Bulldogs, Labrador Retrievers, and Chinese Shar-Pei are among the most commonly affected. Chronic licking due to allergies is a major driver.
Signs: swollen, painful nodules between the toes, draining tracts, recurrent swelling in the same location.
For how furuncles between the toes connect to abscess formation, see abscess as a cause of limb swelling.
6. Allergic reaction and pododermatitis
Environmental allergens (pollen, grass, lawn chemicals, road salt) and food allergies frequently cause paw inflammation. Dogs with allergies lick their feet chronically, creating secondary infection on top of the allergic reaction.
Wakefield Pet Vet: "Allergic reactions typically cause itching, redness, and sometimes blistering between the toes or on paw pads."
Allergic paw swelling usually affects multiple paws. It tends to recur seasonally or after contact with the trigger substance. Dogs with seasonal allergies often have their worst paw symptoms in spring and fall.
7. Bursitis
Bursae are small fluid-filled sacs that cushion joints. Repeated pressure on bony prominences, especially the elbow and hock, can cause bursitis. Affected joints may appear as soft, fluctuant swellings near a joint.
For how bursitis specifically produces foot and joint swelling, see bursitis as a common cause of foot swelling.
8. Cysts, tumors, and nail bed disease
Cysts, mast cell tumors, and subungual (under-nail) tumors can all present as localized swelling on or near the foot. Petcube notes that toenail tumors are more prevalent in large black-coated breeds such as Standard Poodles, Gordon Setters, and Schnauzers.
A lump that is growing, firm, or pigmented should always be evaluated by a vet rather than monitored at home.
For an overview of lumps that cause swelling on the legs, see lumps that can cause swelling.
Severity triage: what to do right now
Home care for mild cases
For minor swelling without infection signs:
- Keep the dog calm and limit walking
- Soak the paw in warm (not hot) water with Epsom salts for 10 minutes. PetMD recommends this as an excellent short-term measure regardless of cause.
- Gently clean any visible wound with mild soap and warm water
- Apply a cool damp cloth for 10 to 15 minutes to reduce swelling from sprains or stings
- Do not apply antibiotic ointments without vet guidance some formulations are toxic to dogs if licked
For pressure-related paw and leg swelling in dogs that rest in one position for extended periods, see pressure-related swelling in dogs.
Frequently asked questions
How do I treat my dog's swollen paw at home?
For mild swelling with no wound or discharge, rest the dog and soak the paw in warm Epsom salt water for 10 minutes. Check carefully for a foreign object or insect stinger. Do not use human antibiotic creams without vet guidance. If swelling has not reduced within 24 to 48 hours or is getting worse, contact your vet.
When should I be worried about my dog's swollen paw?
Be concerned immediately if the swelling is warm, increasing, or has discharge or odor. Call the vet the same day if your dog refuses to bear weight, if the swelling is spreading up the leg, or if there is any sign of an allergic reaction such as facial swelling or breathing difficulty.
What can I give my dog for a swollen paw?
Do not give human pain medications (ibuprofen, acetaminophen, aspirin) to dogs; many are toxic. For minor swelling, warm Epsom salt soaks are safe and effective for short-term relief. Your vet can prescribe appropriate anti-inflammatory medication if needed after examining the paw.
My dog's foot was normal this morning and is swollen now. What happened?
Sudden single-paw swelling most often means an insect sting, a foreign object picked up during activity, or a minor sprain. Check each toe carefully for a stinger, thorn, or visible wound. If swelling is mild and localized, monitor for 24 hours. If increasing or painful, call the vet the same day.
Can swelling in a dog's foot go away on its own?
Minor swelling from a bee sting or small sprain typically resolves within 24 to 48 hours with rest. Infections, foreign objects, interdigital furunculosis, and bursitis do not resolve without treatment. If swelling has not improved within 48 hours, veterinary assessment is needed.
My dog's foot smells bad and is swollen. Is that serious?
Yes. Odor from a swollen paw strongly indicates infection. A foul smell means bacteria are actively present. Common sources include interdigital furunculosis, a nail bed infection, or an abscess. This requires prompt veterinary treatment and should not be left to resolve on its own.
Resources
- PetMD. Dogs Swollen Paws: Causes and Treatments. petmd.com
- VCA Animal Hospitals. First Aid for Limping Dogs. vcahospitals.com
- AKC. Pododermatitis on Dog Paw: Causes, Symptoms and Treatment. akc.org
- SpectrumCare. Paw Swelling in Dogs. spectrumcare.pet
- Dyer Animal Clinic. Reasons Your Dog's Paw is Swollen. dyeranimalclinic.com
Laser Therapy for Dogs After TPLO Surgery
Learn how laser therapy helps dogs recover faster and with less pain after TPLO surgery for cruciate ligament repair.
Laser therapy also called photobiomodulation (PBMT) or low-level laser therapy (LLLT) is one of the most commonly offered adjunct treatments during TPLO recovery. Many specialist and rehabilitation centres include it routinely.
But the evidence for its benefits is more nuanced than the marketing suggests, and owners deserve an honest picture of what it does and does not reliably achieve.
Quick answer: Laser therapy after TPLO uses specific light wavelengths to reduce inflammation and support tissue healing. Evidence for early pain reduction is moderately supported; evidence for improved radiographic bone healing is weak. It is a safe adjunct but should not replace rehabilitation exercises, pain medication, or activity restriction.
Key takeaways
- Laser therapy reduces postoperative inflammation and may improve gait scores: a TPLO study found better hindlimb function at 8 weeks in treated dogs
- Evidence for improving radiographic bone healing is weak: three controlled studies found no statistically significant difference in healing time
- The 2024 AVMA randomized trial found no significant difference in CRP, weight bearing, pain scores, or SSI rates between PBMT and sham groups
- Sessions typically begin within the first few days of surgery and continue through the rehabilitation phase
- Laser therapy is safe with few contraindications: avoid eyes and active tumour sites; safe over the TPLO incision once closed
- It works best as part of a multimodal plan: exercise therapy and pain medication carry stronger evidence than laser alone
What laser therapy does
Laser therapy for dogs, also known as photobiomodulation, involves using specific wavelengths of light to penetrate tissues and promote cellular regeneration and healing. The laser light stimulates the production of ATP (adenosine triphosphate), enhancing cell repair and growth, reducing inflammation, and increasing blood circulation.
Photobiomodulation therapy has been shown to decrease inflammation, and increase analgesia, vascularization, and tissue healing after musculoskeletal injury or surgery.
The mechanism is photochemical: light energy at specific wavelengths (typically 630 to 980 nm) is absorbed by mitochondria.
This increases ATP production, modulates reactive oxygen species, and influences gene expression related to inflammation and healing.
The effects are local confined to the tissue depth the light reaches.
For post-TPLO use, the targets are: the surgical incision, the osteotomy site in the proximal tibia, and the surrounding periarticular soft tissues.
What the clinical evidence shows
Pain and function
Research following TPLO surgery showed that dogs receiving LLLT had better hindlimb function and gait scores at 8 weeks compared to controls. This is especially valuable in orthopedic recovery, where early weight-bearing can prevent muscle atrophy and joint stiffness.
In a controlled veterinary study, dogs with surgical incisions treated with laser therapy exhibited significantly less inflammatory cell infiltration and tissue necrosis within the first week post-op compared to untreated controls.
The 2024 randomized trial
54 client-owned dogs with CCL rupture undergoing unilateral TPLO surgery were enrolled. The study population was randomly assigned to either a treatment group receiving PBMT (24 dogs) or a control group (30 dogs). PBMT was performed immediately after induction, and at 6 hours, 24 hours, 48 hours, and 8 weeks postoperatively. Evaluation of CRP, pain scores, evidence of SSI, and percentage weight bearing were assessed at all time points.
The trial found the therapy showed promise but no statistically significant difference between groups on any primary outcome measure.
Bone healing
Three studies compared LLLT to a control and concluded that LLLT treatment did not make a significant difference in improving radiographic bone healing. The studies collectively provide weak evidence for this outcome.
This is an important distinction: laser therapy may support soft tissue healing, pain, and early function but it does not appear to accelerate the osteotomy healing visible on radiographs.
When to start and how often
Laser therapy uses focused light energy on the surgical site to support healing.
Most rehabilitation programmes begin laser therapy within the first 1 to 3 days after TPLO surgery, often at the surgical centre before discharge or at the first rehabilitation visit.
Typical post-TPLO laser protocol:
- Frequency: 3 to 5 sessions per week in the first 2 to 3 weeks
- Frequency: 1 to 2 sessions per week from weeks 3 to 8
- Session duration: 5 to 15 minutes depending on the laser system and dosing protocol
- Total sessions: typically 6 to 12 in the first 8-week recovery phase
The protocol varies by laser system, power output, and the individual patient's response.
Realistic expectations
Laser therapy is a useful adjunct in TPLO recovery. It is not a substitute for the treatments with stronger evidence: pain medication, activity restriction, and structured rehabilitation exercises.
Laser therapy could be particularly helpful for dogs with weight-bearing and gait issues while recovering from TPLO surgery after a cruciate injury.
Dogs with significant early swelling, wound sensitivity, or slow initial weight-bearing progress may benefit most. Dogs recovering well with standard multimodal analgesia and rehabilitation may show less measurable difference.
For the bone healing timeline that laser therapy supports during recovery, see TPLO bone healing time in dogs explained.
For the full recovery plan that laser therapy fits into, see 10 essential TPLO recovery tips for pet owners.
For the physical therapy that is the primary evidence-based adjunct, see when to start physical therapy after TPLO surgery.
For swelling management in the recovery period, see how long does swelling last after TPLO surgery.
Frequently asked questions
Is laser therapy safe over the TPLO incision?
Yes, once the incision is closed. Laser therapy is safe over sutured incisions and can be applied at the surgical site from the first post-operative day in most protocols.
Avoid direct application over open wounds or actively infected tissue.
How many laser sessions does a dog need after TPLO?
Typically 6 to 12 sessions across the first 8 weeks.
Start at 3 to 5 sessions per week for the first 2 to 3 weeks, tapering to 1 to 2 per week through the rehabilitation phase.
The exact protocol depends on the laser system and rehabilitation plan.
Does laser therapy replace pain medication after TPLO?
No. Laser therapy is an adjunct to pharmaceutical pain management, not a replacement. Post-TPLO pain management requires NSAIDs, and often gabapentin or other analgesics.
Laser therapy may reduce the pain burden and support earlier mobility but does not provide sufficient analgesia on its own.
Can I do laser therapy at home with a consumer device?
Consumer-grade red light therapy devices exist but operate at lower power densities than veterinary therapeutic lasers. The clinical evidence discussed in this article relates to veterinary-grade PBMT devices.
Home devices may offer some benefit but cannot replicate the dosing of professional equipment. Discuss with your rehabilitation veterinarian before purchasing.
Will laser therapy prevent my dog from needing more medication?
Possibly. If laser therapy reduces post-operative inflammation and pain, some dogs may need lower doses of pain medication or taper off sooner.
This should be guided by your veterinarian based on your dog's individual recovery trajectory.
Resources
- AVMA Journal. Photobiomodulation Therapy in Dogs Undergoing TPLO After Cranial Cruciate Ligament Rupture. avmajournals.avma.org
- Veterinary Evidence. Does LLLT Improve Radiographic Healing for Dogs with CCL Rupture Undergoing TPLO Surgery? veterinaryevidence.org
- AKC. Laser Therapy For Dogs: Uses, Side Effects, and Alternatives. akc.org
- Erchonia. Laser Therapy for Post-Surgical Recovery in Pets. erchonia.com
All Articles
Closure Around Surgical Drains in Dogs and Cats
Learn how closure around surgical drains in dogs and cats helps prevent infection and promotes healing after surgery.
Surgical drains are not a sign that something went wrong. They are a deliberate clinical decision a way of managing fluid that the body will inevitably produce in response to dead space, contamination, or tissue injury, before that fluid becomes a seroma, abscess, or infection.
The closure decisions made around a drain placement site are as important as the drain itself. Where the drain exits, how it is secured, and how the primary wound is closed relative to the drain all affect whether the drain works as intended.
Quick answer: Surgical drains exit through a separate stab incision at least 1 cm from the primary wound closure never through the primary incision itself, as this increases wound dehiscence risk. Passive Penrose drains are secured with 1 to 2 simple interrupted nonabsorbable sutures at the exit site. Active closed-suction drains (Jackson-Pratt) are secured with a purse-string suture at the exit and a Chinese finger-trap suture to prevent migration. The primary wound is closed normally in layers above and around the drain.
Key takeaways
- Drains exit through a separate stab incision, not through the primary wound this protects the primary closure from dehiscence.
- Passive Penrose drains are secured at the exit with 1 to 2 simple interrupted nonabsorbable sutures.
- Active Jackson-Pratt drains use a purse-string exit seal and Chinese finger-trap suture for secure fixation.
- The exit site is not sutured closed at removal it heals by second intention.
- Drains typically remain 2 to 7 days depending on output volume and color.
- Never fenestrate a Penrose drain this reduces surface area for capillary drainage and increases tearing risk at removal.
When drains are placed
Drains are placed when the surgeon cannot eliminate dead space through suturing alone, or when significant contamination or fluid production is expected post-closure.
Common indications:
- Large dead space after mass excision (tumor removal, extensive soft tissue dissection)
- Contaminated wounds where seroma infection risk is high
- Seroma or abscess drainage after established fluid pockets
- Abdominal drainage after peritonitis, bile peritonitis, or uroabdomen
For how dead space elimination through suturing reduces the need for drains, see dead space management and when drains are needed. For how proper drain placement prevents seroma formation, see seroma prevention with drain placement.
Passive vs. active drains
Passive drains (Penrose)
A flat latex tube that relies on gravity and capillary action to draw fluid from the wound to the external exit. Fluid seeps along the outer surface of the tube.
Properties:
- Works by gravity and capillary action must exit at the most dependent (lowest) part of the wound pocket
- Requires an open exit (not sealed) to function
- Simple, inexpensive, easily placed
- Higher risk of retrograde bacterial contamination than active drains keep the exit covered with a sterile bandage
DVM360: "Passive drains need to exit at the most dependent part of the wound or abscess pocket and must be covered at all times."
Active drains (Jackson-Pratt, closed-suction)
A perforated tube connected to a sealed collection reservoir that maintains gentle negative pressure, actively pulling fluid from the wound.
Properties:
- Works independently of gravity can be positioned in locations where passive drainage would fail
- Closed system lower bacterial contamination risk
- More expensive; requires a functional reservoir
- Better for high-volume drainage or wounds in areas of high movement (axilla, groin)
Clinician's Brief: "Active drains are secured with a purse-string suture to create a seal and a finger-trap suture to hold it in place."
Drain placement technique: where the exit goes
The drain exit site is not through the primary incision. It must be separate.
Clinician's Brief (Wound Drain Placement): "Exit the drain through a separate incision at least 1 cm from the primary suture line. Exiting drains through the primary incision line increases the risk for wound dehiscence."
DVM360 (Surgical Drains in Small Animal Wound Management): "It should not exit along the lines or within the plane of wound closure, as this may provide an entry point for bacteria or may result in dehiscence and additional drainage along the suture line."
Stab incision technique:
- With the primary wound fully closed, the surgeon uses hemostatic forceps to tunnel subcutaneously from the wound cavity to the planned exit point
- A scalpel stab incision is made over the tip of the forceps at the exit site
- The drain is pulled through the stab incision to the external surface
- The drain is secured with exit sutures
The stab incision is sized to match the drain diameter tight enough that the drain does not slide freely but not so tight that it impedes drainage.
How drains are secured: suture technique at the exit
Penrose drain
DVM360: "1 or 2 simple interrupted nonabsorbable sutures are placed through the drain and into the skin at the exit hole."
The suture passes through the drain material itself and through the skin, holding the drain at the correct depth. The suture should be placed through the last 1 mm of the drain on one side securing it without impeding drainage flow or making removal difficult.
Important: tacking the proximal (deep, internal) end of the Penrose drain inside the wound is done cautiously. DVM360 cautions: "Tacking the proximal aspect of the Penrose drain can only be considered with caution, as this can create a natural tension causing potential for drain breakage deep inside the wound."
Do not fenestrate the Penrose drain. Vettimes: "The drain should not be fenestrated as this will reduce the surface area for capillary flow and increase the risk of tearing at the time of removal."
Jackson-Pratt drain (closed suction)
Two-suture fixation:
- Purse-string suture at exit: a circular suture around the drain at the exit site, tightened to create a seal around the drain and prevent leakage
- Chinese finger-trap suture: a wrapping pattern along the external portion of the drain tubing, providing robust fixation that resists the pull of the collection reservoir
Clinician's Brief notes the Chinese finger-trap suture should be easily distinguishable from the primary wound sutures, so it is not accidentally cut at suture removal time.
Primary wound closure around the drain
The primary wound is closed normally in layers subcutaneous closure, then skin above and around the drain, which runs out to its separate exit site.
Key principle: the drain does not pass through any of the primary closure layers. The wound closes completely around the drain, which then tunnels subcutaneously to its separate exit.
For how drain placement relates to the layered closure sequence, see drain placement in layered closure context.
Monitoring drain output at home
VCA Animal Hospitals: "Fluid should be draining from the Penrose drain's end, but the fluid amount should decrease every day. There should not be excessive fresh blood, active bleeding, or increasingly unpleasant, thick, or smelly discharge."
Normal drain output progression:
- Days 1 to 2: serosanguinous (blood-tinged watery fluid), moderate volume
- Days 2 to 4: decreasing volume, clearing toward serous (pale yellow or clear)
- Days 4 to 7: minimal volume, fully serous drain is ready for removal
Signs requiring same-day vet contact:
- Volume increasing rather than decreasing after day 2
- Output becoming purulent (thick, green, or yellow) or foul-smelling
- Fresh active bleeding from the drain
- Drain pulled inward (disappearing under the skin) or pulled outward (partially extruded)
For the post-operative monitoring protocol that includes drain assessment, see post-operative monitoring with drain in place.
Drain removal
Timing: VCA: "Drains should be removed as soon as possible, usually within 2 to 4 days. For larger, more extensive wounds, drains may need to stay in place longer."
Most soft tissue drains are removed at 2 to 7 days. Abdominal drains after peritonitis may remain longer depending on drainage character.
Removal technique:
- Penrose: cut the exit suture(s), pull the drain out with a swift, smooth traction
- Jackson-Pratt: cut the Chinese finger-trap suture, disconnect the reservoir, slide the drain out
Vettimes: "Penrose drains are removed by cutting the single external simple interrupted suture, then swiftly tugging the drain to release the tube from its internal anchorage point."
After removal: the exit hole is not sutured. It heals by second intention typically within 3 to 5 days. Keep the area clean with saline until sealed.
Verify complete removal: count the drain length removed against the length inserted. A retained drain fragment is a serious complication requiring surgical retrieval.
Frequently asked questions
My dog has a drain coming from a separate hole next to the incision. Is that normal?
Yes that is the intended placement. The drain exits through a stab incision separate from the primary wound closure. Having the drain exit away from the main incision protects the primary wound from dehiscence and contamination. Both the main incision and the drain exit site should be monitored.
Can my cat remove the drain at home?
Cats frequently attempt to remove drains. An E-collar must be worn at all times until the drain is removed by the vet. Even with an E-collar, some cats are agile enough to reach wounds check drain integrity twice daily. If the drain has been dislodged, contact your vet the same day.
Why doesn't the vet just suture the drain hole closed after the drain comes out?
The exit tract is left to heal by second intention because suturing it closed traps any residual fluid or bacteria that may be present in the tract. Healing open allows this to drain and epithelialize naturally. The resulting healed site is typically a small, flat scar.
Surgical drains work only when the closure around them maintains what the drain is trying to accomplish: fluid exits through the drain, not through a compromised wound closure. The separate exit site, the correct fixation sutures, and the correct coverage all of these protect both the drain's function and the primary wound's integrity simultaneously.
Resources
- Clinician's Brief. Wound Drain Placement: Step-by-Step Veterinary Guide. cliniciansbrief.com
- DVM360. Surgical Drains Are Useful in Small Animal Wound Management. dvm360.com
- Today's Veterinary Practice. Surgical Drains: Placement, Management, and Removal. todaysveterinarypractice.com
- VCA Animal Hospitals. Penrose Drain Discharge Instructions for Dogs. vcahospitals.com
Common Aseptic Errors in Small Animal Surgery
Learn about common aseptic errors in small animal surgery and how to prevent infections for safer pet care.
Aseptic errors are not rare occurrences in poorly run clinics. They are common events in every surgical environment, including well-run ones.
Published data from the American Journal of Veterinary Research (2025) found that 46.3% of observed veterinary surgical procedures involved at least one aseptic protocol breach during scrubbing, gowning, and gloving alone. These breaches frequently went undetected without trained observers.
The implication is clear: errors are not primarily a training problem. They are a monitoring and culture problem.
What this covers: The most frequent categories of aseptic error in small animal surgery, the mechanisms through which each leads to SSI, and the evidence-based prevention strategies for each category.Evidence base: AJVR 2025 breach data; Veterian Key surgical asepsis principles; WSAVA sterile field maintenance guidelines.Key distinction: An aseptic error is any departure from correct technique. An aseptic break is a specific breach of sterility during a procedure. Errors can occur without an immediate break; breaks always constitute an error. Both matter.Clinical relevance: SSI risk increases 3.5-fold when there are lapses in aseptic principles during surgery, even for non-obvious contamination events such as general movement and OR visitors (AJVR 2025, citing human surgical data).
Key takeaways
- The most common errors occur during scrubbing, gowning, and gloving: These are the highest-traffic steps for human-origin contamination and the least reliably monitored.
- Instrument contamination is the highest-consequence single-error category: A contaminated instrument delivers bacteria directly to the wound.
- Patient preparation errors are frequently underestimated: Inadequate clip margins and reversed antiseptic technique recontaminate the surgical site before incision.
- Most errors are not detected by the person making them: Self-monitoring is unreliable. External observation and structured checklists are required.
- Errors accumulate: SSI is rarely caused by one catastrophic failure. The literature describes a pattern of recurring minor infractions that collectively exceed the infection threshold.
- Team culture determines error rates more than individual skill: Environments where errors are named and corrected immediately maintain better asepsis than those where naming a breach feels confrontational.
Error category 1: Surgical hand antisepsis failures
What happens
Inadequate scrub technique leaves transient and resident flora at counts sufficient to contaminate the surgical field through glove micro-perforations or breaches during gloving.
Specific errors
- Insufficient scrub duration (under 3 minutes for first case of day)
- Substandard nail hygiene (dirt or debris under fingernails)
- Failure to scrub all surfaces of fingers, interdigital spaces, and forearm
- Touching the faucet, sink edge, or scrub brush holder with scrubbed hands before gloving
- Sterile towel dripping onto the gown or gloves during hand drying
- Using ABHR without allowing full manufacturer-specified contact time
Published incidence
The AJVR 2025 study of 96 veterinary surgical procedures identified improper scrubbing technique in 17.4% of observed cases. This was one of the four most frequent breach categories.
Prevention
- Standardize scrub protocol with a posted visual guide at each scrub sink
- Require first-case scrubs of minimum 3 to 5 minutes, timed
- Conduct periodic competency observation of scrub technique for all team members
- Confirm ABHR contact time with timer when transitioning from traditional scrub
Error category 2: Gowning and gloving violations
What happens
Incorrect gowning or gloving technique introduces hand or body-surface contamination onto the exterior sterile surface of the gown or glove before the procedure begins.
Specific errors
- Contacting non-sterile surfaces with the exterior gown surface during donning
- Pushing hands through gown cuffs before gloving (precluding closed technique)
- Touching the exterior glove surface with ungloved skin during open gloving
- Sterile towel contacting the gown or gloves before drying is complete
- Gown back tie touching the front sterile zone during wrapping
Published incidence
AJVR 2025 found contact of the sterile towel onto non-sterile surfaces in 17.7% of procedures, and contact of the gown with non-sterile surfaces in another 17.7%. Touching sterile objects with bare hands occurred in 12.5% of procedures.
The total aseptic protocol breach rate during this single preparation phase was 46.3% of all observed procedures.
Prevention
- Train closed gloving technique as the default method for all scrub personnel
- Conduct observed gowning and gloving competency assessments at orientation and periodically thereafter
- Assign a circulating nurse specifically to monitor the gowning/gloving phase and name any breach immediately
- Designate a second sterile towel for redundancy if the first is compromised
For the correct technique these errors violate, including the step-by-step standards for surgical hand antisepsis, gowning, and gloving with closed technique, that guide provides the technical reference.
Error category 3: Patient preparation errors
What happens
Inadequate clipping or incorrect antiseptic application leaves residual bacteria on the surgical site that are inoculated into the wound at incision.
Specific errors
Clipping errors:
- Clipping performed the night before surgery rather than immediately pre-operatively
- Clip margins too narrow (inadequate buffer around anticipated incision)
- Use of a razor rather than clippers (creates micro-abrasions; increases recolonization)
- Clipper blades contaminated with debris from previous patient
Antiseptic scrub errors:
- Scrub direction reversed (scrubbing outward then back inward recontaminates the center)
- Insufficient number of scrub applications (minimum two applications is standard)
- Wrong antiseptic agent for body location (chlorhexidine in contact with ear canal, open peritoneal cavity, or cornea)
- Allowing antiseptic to dry incompletely before draping
- Alcohol pooling under the patient, creating fire risk with electrosurgery
Prevention
- Establish a standardized clip-to-incision interval policy (immediate preoperative only)
- Post visual guides showing correct centrifugal scrub technique in every prep area
- Confirm agent selection in the pre-incision time-out for body location-specific risks
- Verify alcohol is fully evaporated before electrosurgery or laser use
Error category 4: Instrument and sterile supply errors
What happens
Instruments or supplies that are not sterile, or that become contaminated during handling, introduce bacteria directly to the surgical site.
Specific errors
- Pack used despite failed chemical indicator (indicator not checked before use)
- Pack used past expiry date
- Instrument pack with compromised seal, moisture penetration, or tear used
- Non-sterile item introduced to sterile field without sterile opening technique
- Instrument passed across non-sterile surface during transfer to surgeon
- Instrument falling below table level and returned to use without replacement
- Biological indicators not used or results not reviewed before using autoclave batch
Consequence severity
This error category carries the highest direct contamination consequence. A contaminated instrument transfers organisms directly into deep tissue, bypassing the skin defense layer entirely.
For errors to avoid that compromise instrument sterility, the surgical asepsis checklist includes specific verification steps for pack indicators, expiry dates, and seal integrity at each use.
Error category 5: Sterile field maintenance errors
What happens
Actions or events during the procedure that introduce non-sterile material into the established sterile field.
Specific errors
- Non-gowned personnel reaching over or across the sterile field
- Drapes displaced and not replaced or covered
- Gowned personnel turning their back to the sterile field or stepping below table level
- Glove perforation undetected and not replaced
- Items introduced to the field without sterile opening technique
- OR door opened repeatedly during procedure, increasing airborne contamination
- Talking or sneezing across the sterile field by personnel without masks
The role of the field monitor
The most important structural prevention for this error category is a designated, named field monitor: one team member whose explicit responsibility during the procedure is to observe the sterile field and name breaches immediately.
Without designation, field monitoring becomes everyone's responsibility, which in practice means no one's.
For the breaks in asepsis that lead to errors and how to categorize, respond to, and prevent them within a systematic approach to sterile field management, that guide covers the break taxonomy in detail.
Error category 6: Environmental and behavioral errors
What happens
OR environment or team behavior creates conditions that elevate airborne or surface contamination beyond what the sterile field can absorb without risk.
Specific errors
- Excessive personnel in OR during procedure
- Frequent OR door openings during active surgery
- Personnel movement that generates air currents across the sterile field
- Failure to disinfect OR surfaces between cases
- Use of fans or non-surgical forced air systems in the OR
- Wet floors or surfaces that aerosolize bacteria with foot traffic
Prevention framework
Why errors persist despite training
The evidence is consistent: error rates in surgical asepsis do not correlate with experience or length of training. The AJVR 2025 study found no association between aseptic protocol breaches and previous scrub experience or rotation stage.
This finding has a direct operational implication: training alone is not sufficient to maintain aseptic standards. What reduces error rates is:
- Structured external observation rather than self-monitoring
- Checklists actively used rather than assumed
- Team culture that expects and normalizes immediate, non-judgmental error correction
- Audit programs that identify recurring patterns rather than isolated incidents
For training that prevents common errors, including the evidence-based elements of effective asepsis training programs in veterinary practice and how to build competency assessment into staff development, that guide covers the training design component.
Training that addresses the cultural dimension of error correction, not just the technical components of correct technique, consistently produces better long-term asepsis performance than skills-only curricula. The combination of observed competency assessment and ongoing peer monitoring is the most supported approach in the veterinary surgical literature.
For auditing to identify repeated errors, including the structured audit methods that identify systematic versus individual error patterns, that guide provides the compliance monitoring framework.
Frequently asked questions
Are experienced surgeons as likely to make aseptic errors as trainees?
The published data suggest yes. Error rates in human surgical literature are consistently high across experience levels. In veterinary surgery, the AJVR 2025 study found no significant association between breach rates and prior experience. Complacency may actually elevate risk in experienced practitioners, since automatic behavior bypasses deliberate checking.
Should a procedure be halted when an aseptic error is identified?
Not necessarily halted, but addressed immediately. The correct response depends on what was contaminated and whether it can be corrected. A contaminated glove is changed. A contaminated instrument is replaced. A significantly compromised sterile field may require reopening sterile supplies before continuing. The decision rests with the primary surgeon, informed by the field monitor's observation.
How should aseptic errors be documented?
Every identified intraoperative aseptic breach should be documented in the surgical record, including the nature of the breach, what corrective action was taken, and whether the sterile field was considered compromised. This documentation serves quality improvement, regulatory compliance, and medicolegal purposes if SSI develops post-operatively.
Aseptic errors are the rule in surgical practice, not the exception. The surgical team that acts as though errors are impossible is the team most likely to miss them. The team that builds external monitoring, immediate correction, and audit feedback into its standard operation is the one that keeps error consequences minimal.
Resources
The following sources were used as reference and background for this article:
- AVMA Journals. Aseptic protocol breaches are common among veterinary students. AJVR, 2025. avmajournals.avma.org
- PubMed. Aseptic protocol breaches during SGG in veterinary students. pubmed.ncbi.nlm.nih.gov
- Veterian Key. Principles of Surgical Asepsis. veteriankey.com
- WSAVA 2014. Maintaining a Sterile Operating Environment. vin.com
Needle Selection for Veterinary Surgical Closure
Learn how to select the right needle for veterinary surgical closure to ensure safe, effective wound healing in pets.
Needle selection is the last element of suture selection that most owners hear about if they hear about it at all. But the wrong needle for the tissue causes unnecessary trauma at every suture pass, increasing inflammation, infection risk, and healing time.
The needle must match the tissue it is asked to penetrate. This principle is as consistent as the one that governs suture material and size.
Quick answer: The four main needle types in veterinary surgery are: taper-point (round body tapering to a sharp tip for soft internal tissues: muscle, subcutaneous tissue, viscera), cutting (triangular cross-section with cutting edge on the concave inner curve for tough tissues), reverse cutting (triangular with cutting edge on the convex outer curve the standard for skin closure), and taper-cut (round body with reverse cutting tip for dense but delicate tissue like fascia and periosteum). A 2026 JAVMA study found taper-point needles non-inferior to reverse cutting needles for intradermal skin closure in TPLO cases.
Key takeaways
- Taper-point needles are used for all soft internal tissues muscle, subcutaneous fat, viscera, and mucous membranes.
- Reverse cutting needles are the standard for skin closure; the convex cutting edge reduces cut-through risk.
- Cutting needles create the largest holes; reserved for the toughest, most resistant tissues only.
- Taper-cut needles combine a round shaft with a reverse cutting tip useful for dense fibrous tissue like fascia and tendon.
- Blunt needles are used for friable, highly vascular organs (liver, kidney, spleen) to push tissue aside rather than cut.
- A 2026 JAVMA study found taper needles non-inferior to reverse cutting for intradermal TPLO closure.
The four main needle types
1. Taper-point needle
A round-bodied needle that tapers smoothly to a sharp point. No cutting edges on the body the needle creates a hole by displacing tissue to the sides rather than cutting through.
How it works: tissue fibers are pushed aside as the needle passes. The resulting hole is smaller than the needle diameter, and the tissue closes snugly around the suture.
Best for: all soft internal tissues where cutting is not needed:
- Muscle belly
- Subcutaneous fat
- Hollow viscera (stomach, intestine, bladder, uterus)
- Oral and mucous membranes
- Peritoneum
Veterian Key: "Non-cutting needles are designed to suture muscle, subcutaneous tissue, fat, and viscera."
Veterinary Surgery Online: "Tapered needle points are used when minimal effort is required to penetrate the tissues as they produce the smallest holes."
2. Reverse cutting needle
A triangular cross-section needle with the cutting edge on the convex (outer) surface of the curve. The two side cutting edges cut outward, and the base of the triangle faces inward toward the wound.
The clinical advantage over conventional cutting: in a conventional cutting needle, the inner cutting edge faces the wound margin. Under tension, sutures naturally pull toward the wound and the inner cutting edge creates a line of weakness exactly where the force is directed, predisposing to suture cut-through. In reverse cutting, the cutting edge faces away from the wound, so the suture line lies within the hole rather than at its edge.
Veterian Key: "The reverse curved cutting needle, the cutting edge of which lies on the needle's convex surface, so that the suture lies within the hole created by the needle and is less likely to cut through tissue."
Best for: external skin closure across all species and wound types. The standard skin closure needle in small animal surgery.
3. Conventional cutting needle
Triangular cross-section with cutting edge on the concave (inner) surface. All three sides of the triangular body are cutting edges.
Properties: creates the largest hole of any needle type. Maximum cutting efficiency but maximum tissue disruption.
Veterinary Surgery Online: "Cutting needles produce the largest holes when passed through tissues."
Best for: very tough, highly keratinized tissues where penetration is genuinely difficult. In small animal practice, reverse cutting has largely replaced conventional cutting for skin because it produces the same penetration with less cut-through risk.
4. Taper-cut needle
A round shaft (like taper-point) with a reverse cutting tip. This hybrid design provides the cutting efficiency needed to initiate penetration through dense tissue, while the tapered round body follows through with minimal additional tissue disruption.
Veterian Key: "The tapered cutting needle combines a round shaft with a reverse cutting point to make the needle useful for suturing delicate yet dense tissue (e.g., fascia, periosteum, tendons)."
Best for:
- Dense connective tissue (fascia, linea alba in thicker patients)
- Periosteum
- Tendon and ligament (when absorbable suture is used for repair)
5. Blunt needle
No cutting edge of any kind. A rounded, blunt tip pushes tissue apart without puncturing.
MedCrave (Choosing Sutures in Small Animal Surgery): "Synthetic absorbable monofilament suture material 2-0 to 5-0 on a blunt needle is recommended" for liver and kidney parenchyma, where conventional needle points would tear the friable tissue.
Best for:
- Liver biopsy or repair
- Kidney parenchyma
- Any highly vascular, friable organ where a cutting point would tear tissue
Needle selection by tissue layer
2026 JAVMA study: taper vs. reverse cutting for intradermal closure
A prospective JAVMA 2026 study (264 TPLO patients, 96 assessed) compared SH (taper-point) and FS (reverse cutting) needles for intradermal skin closure in dogs:
"Taper suture needles are noninferior to reverse cutting needles for intradermal skin closures in tibial plateau leveling osteotomies."
Implication: for intradermal (subcuticular) skin closure where the needle passes through dermis rather than tough epidermis the taper-point needle produces clinically equivalent wound healing outcomes to the reverse cutting needle. The assumption that cutting-type needles are always required at the skin layer does not hold for buried intradermal closure.
For conventional external skin sutures (where the needle must penetrate the full epidermis), reverse cutting remains appropriate.
For how needle selection integrates with the full suture material decision, see needle choice alongside suture material selection. For how needle size relates to suture size, see suture size and needle size together. For how needle and suture selection map to each tissue layer, see needle selection by tissue type in layered closure. For the suture material selection guide in cats, see needle and material selection in cats.
Needle curve: an additional selection factor
Beyond needle point type, the curve (or shape) of the needle is also selected based on anatomical access:
Most internal tissue closure in small animal surgery uses 1/2 circle needles. The 5/8 circle is used in confined abdominal or orthopedic work.
Swaged vs. eyed needles
Virtually all modern surgical needles are swaged (eyeless) the suture material is pre-attached at the factory in the needle's shaft. This creates a smooth junction with no suture doubling at the eye, producing the smallest possible needle-entry hole.
Eyed needles (where the suture is threaded through an eye like a sewing needle) are still available but rarely used in modern veterinary surgery. Threading requires time, and the doubled suture at the eye creates a larger hole than the needle.
Frequently asked questions
My dog had surgery and the vet used different needles for different layers. Is that standard?
Yes this is correct practice. Each tissue layer has different properties and requires a different needle type for optimal closure with minimal trauma. The vet is not over-complicating the procedure; they are matching the tool to the tissue at each step.
Does needle choice affect scarring?
Indirectly. The reverse cutting needle reduces suture cut-through risk at external skin suture sites, which reduces the channel left when the suture is removed and reduces the perpendicular marks associated with external skin closure. Intradermal closure with taper needles (as confirmed by the 2026 JAVMA study) produces equivalent outcomes to reverse cutting in that specific application.
What is a "FS-2" or "SH" needle designation?
These are manufacturer codes (primarily Ethicon) for needle type and size. FS = For Skin (reverse cutting); SH = Small Half-circle (taper, small). These codes are printed on suture packaging the vet or technician selects the appropriate combination of suture material, size, and needle code for each closure layer.
Needle selection follows the same logic as suture material and size selection: match the tool to the tissue's specific needs. Cutting where no cut is needed adds trauma. Not cutting where resistance is real produces torn tissue. The right needle for each layer is the one that penetrates cleanly, creates the smallest appropriate hole, and sets the suture in the tissue with the minimum disruption.
Resources
- JAVMA (2026). Taper Suture Needles Are Noninferior to Reverse Cutting Needles for Intradermal Skin Closures in TPLO. avmajournals.avma.org
- Veterian Key. Selection of Suture Materials, Suture Patterns, and Drains for Wound Closure. veteriankey.com
- Veterinary Surgery Online. Suture Needles. vetsurgeryonline.com
- Veterinary Practice News. The Must-Read Guide to Selecting Sutures (Dr. Kendra Freeman, DACVS). veterinarypracticenews.com
Dental Surgical Asepsis in Cats
Learn essential steps and tips for maintaining dental surgical asepsis in cats to ensure safe and effective oral surgery outcomes.
Dental surgical asepsis in cats is crucial to prevent infections during and after oral surgeries. Cats often require dental procedures for issues like tooth extractions, gingivitis, or oral tumors. Maintaining a sterile environment helps protect your cat’s health and promotes faster healing.
This article explains what dental surgical asepsis means for cats, why it matters, and how veterinary teams achieve it. You will learn the key steps to keep the surgical area clean and safe, what instruments and techniques are used, and how you can support your cat’s recovery at home.
What is dental surgical asepsis in cats?
Dental surgical asepsis refers to the methods used to keep the surgical site free from harmful bacteria and contaminants during dental procedures on cats. It involves sterilizing instruments, preparing the cat’s mouth, and maintaining a clean environment throughout surgery.
Proper asepsis reduces the risk of post-surgical infections, which can cause pain, delayed healing, or more serious complications. It is a standard part of veterinary dental care to ensure the best outcomes for feline patients.
- Definition clarity: Dental surgical asepsis means preventing bacteria and germs from entering the surgical site during cat dental procedures to avoid infections.
- Importance explained: Keeping the surgical area sterile helps reduce pain and speeds up healing after dental surgery in cats.
- Scope of asepsis: It includes sterilizing tools, cleaning the cat’s mouth, and controlling the environment where surgery happens.
- Common procedures: Tooth extractions, gum surgery, and oral tumor removals all require strict aseptic techniques in cats.
Understanding the basics of dental surgical asepsis helps pet owners appreciate the care involved in feline dental surgeries and the importance of following veterinary advice.
Why is dental surgical asepsis critical for cats?
Cats have sensitive oral tissues that can easily become infected if bacteria enter during surgery. Dental surgical asepsis protects against these infections, which can cause serious health issues beyond the mouth.
Infections can lead to pain, swelling, and systemic illness in cats. Maintaining asepsis also helps reduce the need for additional treatments and improves surgical success rates.
- Infection prevention: Asepsis stops harmful bacteria from causing infections in the cat’s mouth after surgery, preventing complications.
- Pain reduction: Avoiding infections reduces post-operative pain and discomfort for your cat, improving recovery quality.
- Faster healing: A sterile surgical field promotes quicker tissue repair and less inflammation in feline dental surgeries.
- Overall health protection: Preventing oral infections helps avoid spread to other organs, safeguarding your cat’s general health.
Dental surgical asepsis is a vital part of veterinary care that directly impacts your cat’s wellbeing and recovery after oral procedures.
How do veterinarians prepare cats for dental surgical asepsis?
Preparing a cat for dental surgery involves several steps to ensure the mouth and surrounding area are clean and ready. This preparation minimizes bacteria and contaminants before the procedure begins.
Veterinarians carefully examine the cat, clean the oral cavity, and use antiseptic rinses. They also ensure the cat is properly anesthetized to prevent movement and contamination during surgery.
- Pre-surgical exam: Vets check the cat’s overall health and oral condition to plan safe and effective dental surgery.
- Oral cleaning: Removing plaque and debris from the cat’s teeth reduces bacterial load before surgery starts.
- Antiseptic rinses: Applying chlorhexidine or similar solutions in the mouth helps kill bacteria and disinfect the surgical site.
- Anesthesia use: Proper sedation keeps the cat still, preventing contamination and allowing precise surgical work.
These preparation steps are essential to create a safe environment for dental surgery and protect your cat from infection risks.
What sterilization methods are used for dental instruments in cats?
Dental instruments must be sterile to prevent introducing bacteria into the cat’s mouth during surgery. Veterinary clinics use strict sterilization protocols to clean and disinfect tools.
Common methods include autoclaving, chemical sterilants, and ultrasonic cleaning. Each step ensures instruments are free of microbes before use.
- Autoclaving process: Using high-pressure steam sterilizes dental tools effectively by killing all bacteria, viruses, and spores.
- Chemical sterilants: Soaking instruments in approved disinfectants removes microbes when heat sterilization isn’t suitable.
- Ultrasonic cleaning: Vibrations remove debris and biofilm from instruments before sterilization, enhancing cleanliness.
- Packaging and storage: Sterilized tools are kept in sealed packaging to maintain sterility until the dental procedure.
Proper instrument sterilization is a cornerstone of dental surgical asepsis, ensuring no harmful germs enter the cat’s mouth during surgery.
How is the surgical environment controlled during feline dental surgery?
The surgical environment must remain clean and controlled to maintain asepsis throughout the dental procedure. This includes the surgical room, equipment, and personnel.
Veterinary teams follow strict hygiene protocols, wear sterile gloves and gowns, and use sterile drapes to isolate the surgical site. Air quality and surface cleanliness are also managed carefully.
- Clean surgical room: The operating area is disinfected before and after each procedure to reduce environmental bacteria.
- Sterile attire: Veterinarians and assistants wear gloves, masks, and gowns to prevent contamination of the surgical site.
- Surgical draping: Sterile drapes cover the cat’s body except the mouth, isolating the area and reducing infection risk.
- Air control: Some clinics use filtered air systems to minimize airborne microbes during dental surgery.
Maintaining a controlled environment helps keep the cat safe and supports the success of dental surgical asepsis protocols.
What post-operative care supports dental surgical asepsis in cats?
After dental surgery, proper care helps prevent infections and promotes healing. Owners play a key role in maintaining asepsis at home by following veterinary instructions carefully.
This includes monitoring the surgical site, managing pain, and preventing your cat from disturbing the area. Good oral hygiene and follow-up visits are also important.
- Wound monitoring: Check the cat’s mouth daily for redness, swelling, or discharge that may indicate infection.
- Pain management: Administer prescribed pain medications to keep your cat comfortable and reduce stress on healing tissues.
- Preventing trauma: Use an Elizabethan collar if needed to stop your cat from licking or scratching the surgical site.
- Follow-up visits: Return to the vet for rechecks to ensure the surgical site is healing properly and no infection is present.
Careful post-operative management supports the aseptic environment established during surgery and helps your cat recover fully and comfortably.
Conclusion
Dental surgical asepsis in cats is essential for preventing infections and ensuring successful oral surgeries. It involves careful preparation, sterilization, and environmental control by veterinary teams.
As a cat owner, understanding these steps helps you appreciate the care involved and follow post-operative instructions to support your cat’s healing. Maintaining asepsis protects your cat’s health and comfort during dental treatment.
FAQs
How long does dental surgical asepsis take in cats?
Preparation and sterilization steps usually take 30 to 60 minutes before surgery. The actual dental procedure time depends on the complexity but asepsis is maintained throughout.
Can dental surgical asepsis prevent all infections in cats?
While asepsis greatly reduces infection risk, some infections can still occur due to individual factors. Prompt veterinary care is important if signs of infection appear.
Is anesthesia safe for cats during dental surgery?
Yes, anesthesia is generally safe when administered by trained veterinarians who monitor your cat closely during the procedure.
How can I help maintain asepsis after my cat’s dental surgery?
Follow all veterinary instructions, keep the surgical site clean, prevent your cat from licking wounds, and attend follow-up appointments.
Are there risks if dental surgical asepsis is not followed?
Yes, poor asepsis can lead to infections, delayed healing, pain, and more serious health complications requiring additional treatment.
Principles of Wound Closure in Veterinary Surgery
Learn the key principles of wound closure in veterinary surgery to ensure optimal healing and reduce complications in your pet's recovery.
Every closure decision which material, which pattern, which timing can be traced back to a small set of principles that apply universally across tissue types, species, and procedures.
Understanding these principles is what separates wound closure from a protocol list. A surgeon who understands why a principle exists can adapt it correctly when the case does not fit the textbook exactly.
Quick answer: The core principles of wound closure in veterinary surgery are: (1) tissue apposition without inversion or eversion where it is not desired, (2) tension avoidance at wound edges, (3) dead space elimination, (4) aseptic technique throughout, (5) minimum suture material consistent with wound strength requirements, and (6) closure timing matched to wound contamination level. These principles apply at every layer and in every tissue type.
Key takeaways
- Tissue apposition means wound edges are brought into contact, not compressed, inverted, or everted (except where eversion is specifically indicated).
- Tension avoidance is achieved through layered closure, undermining, walking sutures, and tension-relieving patterns not by pulling skin edges harder.
- Dead space elimination prevents seroma formation, which creates the conditions for bacterial growth.
- Aseptic technique throughout the closure phase is as important as during the procedure itself.
- Minimum suture is the guiding size principle every suture is a foreign body and a potential nidus for bacteria.
- Closure timing determines whether immediate primary, delayed primary, or secondary closure is used.
Principle 1: Tissue apposition
Apposition means the wound edges are brought into contact touching, aligned, and at the same plane. It is not compression, not eversion (turning edges outward), and not inversion (turning edges inward), unless those specific outcomes are indicated.
Veterian Key (Primary Wound Closure, Fahie): "In primarily closed wounds with ideal apposition of subcutaneous tissues, the dermis, and the epidermis, healing may occur simply by reepithelialization at a rate of approximately 1 mm/day. A wound with perfect apposition may therefore have an epithelial seal within 24 hours."
What disrupts apposition:
- Sutures tied too tight: wound edges are compressed, not apposed blood supply is compromised
- Sutures too far apart: gaps remain between sutures where the edges are not touching
- Wound edges at different depths: one edge is deeper than the other, creating a step that cannot close by surface healing
Where eversion is specifically desired:
- Skin closure patterns that produce slight eversion (vertical mattress) help prevent the tendency of skin closures to invert, which would sink the wound surface below the surrounding skin and delay healing
Veterinary Surgery Online: "The arrangement that creates the least amount of tension and often the smallest dog ears is the one to pick."
For how apposition applies in each layer, see apposition in the layered closure context.
Principle 2: Tension avoidance
Tension at wound edges reduces blood flow. A suture that creates ischemia at the tissue-suture interface creates conditions for infection and necrosis the opposite of healing.
Today's Veterinary Practice (Wound Care Principles): "Wounds that are deemed healthy and can be closed without tension indicate primary closure."
Tension reduction strategies:
- Layered closure: closing deep layers first removes tension from the superficial skin closure
- Undermining: releasing skin from subcutaneous attachments to provide additional reach
- Walking sutures: advancing skin subcutaneously before placing skin closure sutures
- Tension-relieving patterns: horizontal mattress, vertical mattress, NFFN
- Releasing incisions: parallel cuts in adjacent skin to allow closure without tension
- Incision orientation: Veterinary Surgery Online: "Aim to close wounds along tension lines of skin where possible."
For how tension is managed when it cannot be eliminated, see tension-relieving techniques in wound closure.
Principle 3: Dead space elimination
Any gap remaining between tissue planes after closure fills with serum. Serum is protein-rich and warm an excellent bacterial growth medium. Seromas that become infected are far more serious than the wound they formed in.
DVM360 (Wound Management Basic Principles): "Primary closure should eliminate dead space and provide good anatomical apposition of tissue."
Dead space elimination strategies:
- Subcutaneous closure to approximate fat layers
- Walking sutures to tack skin to fascia
- Drain placement when suturing alone cannot eliminate the space
For how dead space connects to surgical drain placement decisions, see dead space elimination and drain use.
Principle 4: Aseptic technique
The surgical site is at maximum vulnerability during closure. All instruments, suture material, gloves, and draping that contact the wound during closure must be sterile.
DVM360: "Sterile gloves are required to manipulate the wound. Pain medication should be delivered appropriately to the animal."
Closure-phase asepsis risks:
- Glove contamination during the procedure (re-glove before closure if contamination is suspected)
- Suture material package contamination (inspect packaging before opening)
- Instrument contamination through contact with non-sterile surfaces
Infection transmission during closure:
- Braided suture materials wick bacteria along their strands monofilament is preferred in contaminated cases
- Each suture is a foreign body that reduces the local bacterial count needed to establish infection
For how suture material type affects infection risk at closure, see suture material infection risk at closure.
Principle 5: Minimum suture material
Every suture left in the body is a foreign body. It provokes a local inflammatory response. If it is braided, it provides shelter for bacteria. If it is non-absorbable, it remains as a permanent nidus unless removed.
DVM360 (Basic Principles of Wound Management): "The amount of suture should be maintained to a minimum because it can act as a nidus for bacteria. Monofilament absorbable sutures of a small size are recommended."
Practical application:
- Use the smallest suture size that provides adequate tensile strength for the tissue
- Use monofilament rather than braided in internal layers whenever possible
- Use absorbable rather than non-absorbable in all buried layers
- Avoid using a larger suture "for security" the additional foreign material outweighs the benefit
For how suture size selection implements this principle, see suture size selection to minimize foreign material.
Principle 6: Closure timing matched to wound condition
Not every wound should be closed immediately. The contamination level, wound age, tissue viability, and patient condition all determine whether immediate primary, delayed primary, or secondary closure is appropriate.
Veterinary Surgery Online: "If a wound is contaminated or dirty, primary closure should not be performed. It is best to perform daily bandaging until debridement is complete, then reassess and close if indicated."
For the full delayed primary and secondary closure decision process, see closure timing decisions in wound management.
How the principles interact
These principles do not operate in isolation. Each one depends on the others being met:
- Apposition without tension: you cannot achieve good apposition if tension is pulling the edges apart tension management precedes the final apposition step
- Dead space elimination while minimizing suture: more sutures close more dead space but add more foreign material the right number is the minimum that achieves elimination
- Asepsis protects all the others: contamination during closure can undermine perfect apposition, ideal dead space management, and correct suture selection simultaneously
Understanding the interactions is what allows a surgeon to make correct closure decisions in cases that do not fit a standard protocol.
For the surgical closure protocol checklist that applies these principles in sequence, see closure checklist implementing these principles.
Frequently asked questions
The vet said my dog's wound needs to "close without tension." What does that actually mean?
It means the wound edges can be approximated without pulling the surrounding skin under significant mechanical force. A wound that closes "under tension" has visible stretching of the skin, pale or blanching edges, and sutures that are clearly under load. A wound that closes without tension has the edges meeting with minimal force the skin comes together naturally rather than being pulled together.
If dead space is so dangerous, why doesn't the vet always put in a drain?
Drains have their own risks they create an entry pathway for bacteria and require management and a removal visit. The decision to use a drain is made when the dead space cannot be adequately managed by suturing alone, or when the expected fluid production is too great for sutures to control. For most routine procedures, appropriate subcutaneous closure is sufficient to eliminate dead space without a drain.
Can these principles be overridden in an emergency?
Some can be adapted under emergency conditions closure timing may be abbreviated, suture material choices may be based on what is available, aseptic technique may be difficult to maintain perfectly. The damage control principle applies: do what is necessary to manage the immediate threat, then revisit the other principles at definitive surgery. The principles are not abandoned; they are reprioritized.
These six principles are not a checklist they are a framework. Apposition, tension avoidance, dead space elimination, asepsis, minimum suture, and appropriate timing are the reasons behind every specific technique and material choice in surgical wound closure. Understanding the reasons allows the decisions to be made correctly even when the situation is unfamiliar.
Resources
- Veterian Key. Primary Wound Closure (Fahie). veteriankey.com
- DVM360. Basic Principles of Wound Management. dvm360.com
- Veterinary Surgery Online. Wound Closure Continued. vetsurgeryonline.com
- Today's Veterinary Practice. Principles of Wound Care and Bandaging Techniques. todaysveterinarypractice.com
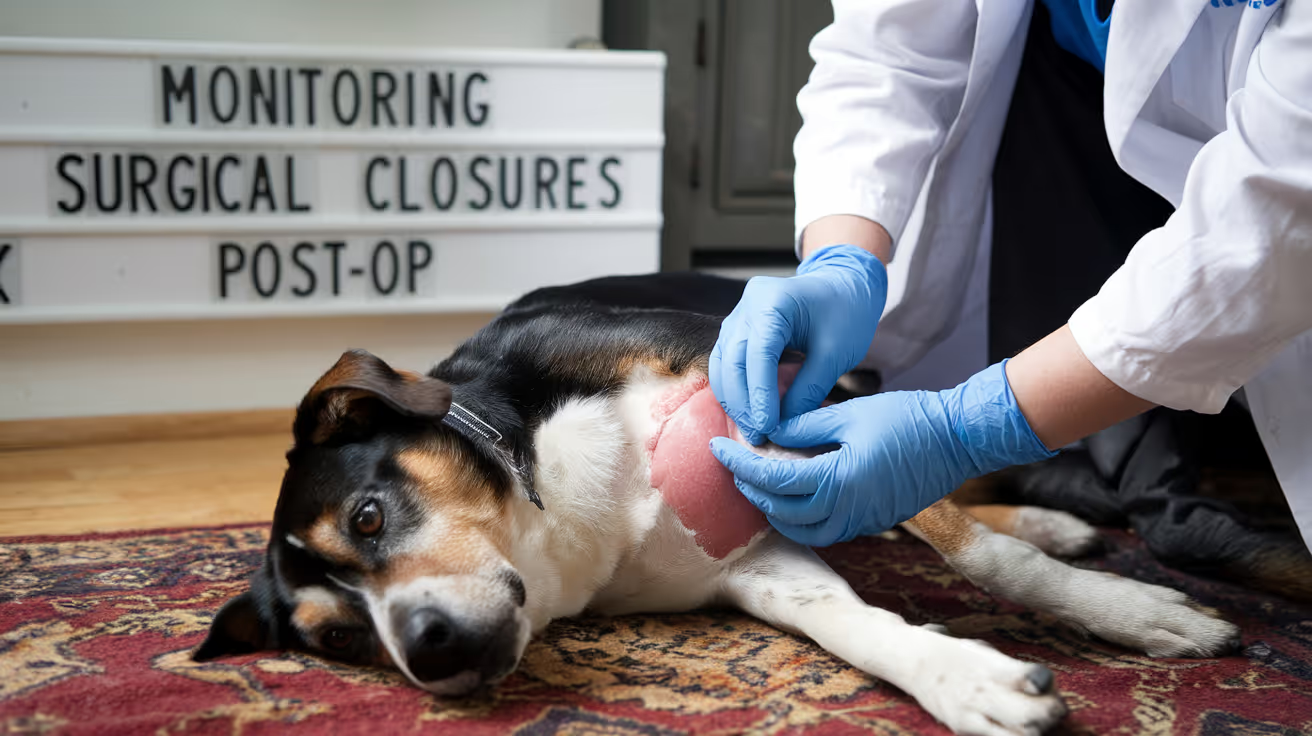
Post-Operative Monitoring of Surgical Closures
Learn essential steps for post-operative monitoring of surgical closures to ensure healing and prevent complications in pets.
What happens at home in the two weeks after surgery determines as much about healing outcomes as what happened in the operating room. The wound that closes perfectly can still fail through licking, jumping, or unrecognized infection.
Owners who know what to check, how often, and what each finding means are far more likely to catch complications early when they are still manageable.
Quick answer: Check the surgical wound twice daily for the first 10 to 14 days. Normal findings: mild swelling and redness for 2 to 3 days, a thin dry crust at the wound margins, gradual improvement day by day. Abnormal findings requiring same-day contact: yellow or green discharge, foul odor, worsening redness beyond the wound margin, increasing swelling after day 3 to 4, wound opening (dehiscence), or any tissue protruding from the wound. Licking is the most preventable cause of post-operative closure failure.
Key takeaways
- Twice-daily wound checks for the full 10 to 14 days are the monitoring standard.
- Normal post-operative swelling and redness peaks at days 2 to 3, then progressively decreases.
- Seroma (soft fluctuant swelling) differs from infection and is usually harmless.
- Dehiscence (wound opening) is a same-day emergency cover with a clean cloth and call immediately.
- Licking is the most common owner-controllable cause of suture failure E-collar compliance is not optional.
- Pale gums, open wound with tissue protruding, or collapse require immediate emergency care.
What to check at each monitoring session
Twice-daily monitoring takes less than two minutes. The same checks, performed consistently, provide the trend data needed to distinguish normal healing from early complication.
Five things to assess at each check:
- Wound edges: closed and apposed at all points? No visible gaps between suture sites?
- Swelling: decreasing compared to the last check? Or increasing?
- Color: pink and normalizing? Or reddening, darkening, or developing pale areas?
- Discharge: none, or only a small amount of dried serous crust at the wound margins?
- Odor: none, or any smell from the wound area?
Metropolitan Veterinary Associates: "The incision should be monitored for redness, swelling, oozing, heat or pain to the touch. Any of these signs may indicate an incisional infection."
Normal findings by timeline
Days 1 to 2
- Mild swelling around the incision: normal the body's inflammatory response is at its peak
- Mild redness at the wound margins: normal
- Small amount of dried bloody crust at suture sites: normal
- Pet may be quiet, less active than usual: normal effect of anesthesia and post-operative pain management
MedVet: "It is normal to see mild lethargy, reduced appetite, or slight discomfort during the first 24 to 72 hours."
Days 3 to 5
- Swelling should begin to decrease from its peak
- Redness should be stabilizing or reducing not spreading
- A small firm ridge along the wound line is normal: this is early collagen deposition
- Pet appetite should be returning toward normal
Days 5 to 10
- Progressive improvement day by day
- The wound surface should look drier, flatter, and less reactive
- Sutures remain intact and wound edges remain fully apposed
Days 10 to 14
- Wound should be fully closed, dry, and healed at the surface
- Suture removal recheck visit (for external sutures)
- Vet assesses wound before removing sutures removal may be deferred if healing is incomplete
For how suture removal timing is assessed at the recheck in dogs, see suture removal timing at the day 10-14 recheck. For cats, see suture removal timing at the feline recheck.
Distinguishing seroma from infection
Both seroma and infection produce swelling near the surgical site. They require different responses.
Liberty Animal Hospital: "Seroma: fluid accumulation at the incision site due to tissue irritation this is normal. Continue with cold compress only until the swelling has gone down. The body will absorb it over time."
If you cannot confidently distinguish a seroma from an early infection, contact your vet. Assessment may require palpation or aspiration to determine fluid character.
For how seromas are prevented at the closure stage, see seroma prevention during closure.
Dehiscence: when the wound opens
Wound dehiscence is the partial or complete opening of a sutured wound. It is a same-day emergency not a wait-and-see situation.
PetPlace: "When sutures break down, the underlying tissues have the potential to protrude through the incision and be exposed to the exterior. This can lead to serious infections, which may be fatal."
What to do if the wound opens:
- Apply a clean towel or cloth gently over the wound
- Do not attempt to replace protruding tissue
- Do not apply ointments, disinfectants, or saline without vet guidance
- Transport to the vet or emergency clinic immediately
Common causes of dehiscence:
- Licking or chewing the sutures
- Jumping, running, or abrupt activity
- Sutures removed too early
- Infection undermining the closure from within
- Underlying tension that was not adequately managed at surgery
For how common closure errors produce dehiscence, see closure errors that lead to dehiscence.
Infection: what to look for
Early surgical site infection typically presents between days 3 and 7. The signs progress from mild to severe as the infection establishes.
Early signs (days 3 to 5):
- Redness extending beyond the immediate wound margin
- Increased warmth at the wound site
- Mild increase in discharge (serous becoming slightly cloudy)
Established infection (days 5 to 10):
- Purulent discharge (yellow, green, or brown)
- Foul odor
- Wound swelling increasing rather than decreasing
- Pet showing systemic signs: lethargy, reduced appetite, fever
Contact your vet the same day if you notice any of the early signs. Do not wait for the established infection stage early treatment is significantly simpler than treating an established surgical site infection.
Activity restriction: enforcing it at home
Metropolitan Veterinary: "Dogs and cats should be kept from jumping up/down on/from high surfaces, running up steps or any other activity that puts tension on the incision. Excess tension can lead to dehiscence."
Practical activity restriction strategies:
- Dogs: leash-only outdoor activity for 10 to 14 days; confine to one room or use a pen when unsupervised
- Cats: confine to a room without high furniture; prevent stair access
- Both: separate from other pets who may play with or groom the wound
The challenge is that pets often feel better before the wound has adequate tensile strength. A dog that seems completely normal at day 5 does not have a day-5 wound the tissue is still in the active repair phase and cannot tolerate the same forces the dog is willing to exert.
E-collar compliance: non-negotiable
Licking introduces oral bacteria directly to the wound surface, mechanically disrupts suture lines, and can remove external sutures within minutes of unsupervised access.
MedVet: "To prevent licking, which can delay healing, cause infection, or lead to the incision opening, use an Elizabethan collar (cone), a cervical collar, or cover the incision with a T-shirt or bandage."
The E-collar must be worn:
- At all times, including during sleep
- When the owner is in the room but not actively watching the pet
- When the pet is in its crate or confined space
Alternatives to the standard E-collar if compliance is difficult: inflatable donut collar (cats often tolerate better), surgical recovery suit, or soft fabric cone.
Emergency signs: call immediately
Some findings do not wait for a scheduled call to the vet. Seek care immediately for:
- Pale or white gums: indicates blood loss or cardiovascular compromise
- Blue-tinged gums or rapid breathing: respiratory distress
- Wound fully open with tissue protruding: cover and transport immediately
- Collapse or inability to stand
- Bright red active bleeding that does not stop within 5 minutes of gentle pressure
MedVet: "Pale gums, which can indicate potential blood loss or poor circulation seek veterinary care immediately, regardless of the time of day."
For the full closure checklist that precedes this monitoring period, see closure checklist prior to discharge. For how drain monitoring integrates with wound monitoring, see monitoring wounds with drains in place.
Frequently asked questions
My dog's wound looks fine but she keeps trying to lick it. Should I be worried?
The licking attempt is the warning sign the wound does not need to look damaged yet for the E-collar to be essential. Licking can remove sutures or disrupt healing within minutes. The fact that she is attempting to lick means the E-collar must be worn consistently, not just when she actively succeeds. Wounds that look fine often look that way because the E-collar has been working.
There is a small bump near the wound that appeared on day 4. How do I know if it is a seroma or infection?
Gently palpate (press softly) the bump. A seroma feels soft and fluid-filled, like a water balloon under the skin. An early infection usually feels firmer, is warmer to the touch, and the pet shows some discomfort when you touch it. If the bump is soft and the pet is otherwise well and eating, a seroma is more likely. Either way, contact your vet at the next business opportunity and immediately if the bump is warm, the pet seems unwell, or discharge is present.
My cat won't eat after surgery. Is that a complication?
Reduced appetite for 24 to 72 hours is common and expected. Cats that refuse to eat for more than 72 hours after surgery require prompt veterinary assessment. Metropolitan Veterinary: "Cats, in particular, cannot tolerate anorexia for long periods. They are predisposed to developing severe liver disease (hepatic lipidosis/fatty liver) within days of complete anorexia."
Post-operative monitoring is owner-controlled quality control for the surgeon's work. The wound that closes well can still fail but usually only if something external disrupts it. Every day of consistent monitoring, E-collar compliance, and activity restriction protects the closure that was placed and gives it the environment it needs to heal.
Resources
- Metropolitan Veterinary Associates. Abdominal Surgery: Post-Operative and Incisional Care. metro-vet.com
- MedVet. Caring for Your Cat or Dog After Surgery. medvet.com
- PetPlace. Postoperative Complications in Dogs. petplace.com
- Liberty Animal Hospital. Post-Surgery Guidelines. libertyanimalhospital.com
Closure Protocol for Spay Surgery in Dogs
Learn the detailed closure protocol for spay surgery in dogs, including step-by-step suturing techniques and post-op care tips.
The spay incision is one of the most commonly performed surgical wounds in veterinary practice. The closure is routine, but "routine" does not mean it can be done carelessly inadequate linea alba closure is the leading cause of post-spay incisional hernia, and insufficient skin closure is the most common source of early post-operative complications owners observe at home.
Understanding the three-layer protocol helps you know what your dog received and what to expect during recovery.
Quick answer: Canine spay closure proceeds in three layers: (1) linea alba PDS or polyglyconate 0 to 2-0, simple continuous, bites 5 to 10 mm from the incision edge and 5 to 10 mm apart; (2) subcutaneous tissue Monocryl or Vicryl 2-0 to 3-0, simple continuous; (3) skin interrupted nylon 3-0 to 4-0 or intradermal Monocryl 4-0. Secure knots are critical for continuous patterns: minimum 4 throws at the start of the continuous, additional throws at the end knot.
Key takeaways
- Linea alba is the structural layer inadequate closure here causes hernia, not just a surface wound problem.
- Bite dimensions matter: 5 to 10 mm from the incision edge; 5 to 10 mm between bites.
- Knot security is essential in continuous patterns published evidence links terminal knot failure to body wall dehiscence.
- Subcutaneous closure eliminates dead space and reduces skin tension for better wound healing.
- Intradermal skin closure is increasingly standard for routine spays, with no removal visit needed.
- Suture size varies with patient size: small dogs use 2-0 to 3-0; large dogs use 0 to 2-0.
Why the spay closure protocol matters
An ovariohysterectomy creates a ventral midline laparotomy. The linea alba is incised, the abdominal cavity is entered, the ovaries and uterus are removed, and the abdomen is closed in layers.
The closure is not just sealing the skin it is restoring the mechanical integrity of the abdominal wall. A dog that hernias through a spay incision has not had a skin problem; she has had a linea alba failure.
Veterinary Evidence (systematic review, linea alba closure): knot security is significantly affected by suture type, number of throws per knot, and surgeon experience and these factors should all be considered when performing surgery.
Layer 1: Linea alba closure
What the linea alba is
The linea alba is the midline aponeurosis a band of fibrous tissue created where the left and right abdominal wall muscles join. It is the primary mechanical structure of the ventral abdominal wall. The spay incision passes through this tissue to access the abdomen.
Technique
Pattern: simple continuous (preferred for speed and even tension distribution) or simple interrupted (preferred when tissue quality is questionable or infection is a concern).
WVS Academy (canine OVH surgical procedure guide): "Suture bites should be placed in the fascia and muscle 5 to 10 mm from the incision, and 5 to 10 mm apart. Place your first knot in the intact muscle directly adjacent to the incision. This ensures that the knot does not sit within the linea alba creating a gap. Tie a surgeon's knot and then 4 to 5 single-throw knots."
WCVM (University of Saskatchewan, Lab 6): "Take adequate bite (5 to 10 mm) of external rectus fascia or linea alba on either side of abdominal incision. Avoid large amounts of muscle as adds minimal strength and decreases apposition. Avoid fat as prevents healing."
Key principle: bites must be perpendicular to the wound not oblique. Oblique bites create longer bites with a wider gap between the incorporated tissue and the wound edge, reducing the mechanical strength of the closure.
Material
Preferred: PDS (polydioxanone) or polyglyconate (Maxon)
- Both are monofilament absorbable materials that retain strength for 4 to 6 weeks while the linea alba heals
- Monofilament surface minimizes bacterial adhesion compared to braided alternatives
- Size: 0 to 2-0 in most dogs; 2-0 to 3-0 in dogs under 10 kg
Alternative: Vicryl (polyglactin 910), size 0 to 2-0 acceptable for clean spay in a healthy dog; braided structure means slightly higher bacterial adhesion risk but clinically acceptable in routine clean surgery.
Knot security reminder
For continuous patterns, the end knot must be tied with additional throws beyond the start knot. WCVM: "Place appropriate number of throws for material and pattern (e.g., one extra throw at beginning and 2 to 3 throws extra at end of a simple continuous pattern) to ensure knot security."
For how the linea alba closure relates to the layered closure principle, see linea alba closure in the layered closure context.
Layer 2: Subcutaneous closure
Subcutaneous closure serves two functions: eliminating dead space beneath the skin, and reducing the tension on the skin closure.
Pattern: simple continuous absorbable
Material:
- Monocryl (poliglecaprone 25) 2-0 to 3-0: preferred for low tissue reaction
- Vicryl (polyglactin 910) 2-0 to 3-0: acceptable alternative
Technique: bites engage the subcutaneous fat perpendicular to the wound. Each loop draws the fat layers together, eliminating the space below the skin where serum would otherwise accumulate.
For how subcutaneous closure prevents seroma formation, see subcutaneous closure and seroma prevention.
Layer 3: Skin closure
Option 1: Interrupted external sutures (nylon or Prolene 3-0 to 4-0)
Best when:
- Post-operative wound monitoring is a priority
- The dog cannot reliably wear an E-collar (external sutures allow the vet to assess the wound directly at the removal visit)
- Any wound tension exists that exceeds what intradermal can hold
Spacing: 4 to 6 mm between sutures, placed 4 to 5 mm from the wound edge.
Removal: day 10 to 14, at the post-operative recheck.
Option 2: Intradermal (subcuticular) Monocryl 4-0
Increasingly the standard for routine canine spay closure in many practices.
WCVM: "For the intradermal, an absorbable suture material is indicated. A monofilament is typically preferred because of decreased tissue drag. The skin heals rapidly so a rapidly absorbable suture, like poliglecaprone 25, can be used."
Advantages:
- No external material for the dog to lick or chew
- No removal visit required
- Fine, less visible scar
- Knots are buried WCVM notes that "poorly buried knots are frequently associated with excess licking, irritation and increased infection rates"
For the full intradermal technique in the context of canine spay closure, see intradermal closure for spay incisions. For the cat spay closure comparison, see cat spay closure compared to dog spay.
Size-adjusted material guide
Post-operative care: what owners do
Activity restriction: leash walks only for 10 to 14 days. No running, jumping, or rough play. Metropolitan Veterinary Associates: "Dogs should be kept from jumping up/down on/from high surfaces, running up steps or any other activity that puts tension on the incision. Excess tension can lead to dehiscence."
E-collar compliance: non-negotiable, regardless of whether external or intradermal sutures were placed. A dog can disrupt an intradermal closure through licking before the dermal healing is complete.
Wound monitoring: twice daily. Normal: mild swelling and redness for 2 to 3 days, then progressive improvement. Abnormal: increasing redness, swelling after day 3, discharge, wound opening, or odor.
For the full post-operative monitoring protocol applicable to spay recovery, see monitoring the spay closure at home. For suture removal timing, see suture removal at the post-spay recheck.
Frequently asked questions
My dog has no visible stitches after her spay. Does that mean no stitches were used?
No it means intradermal closure was used. The suture runs inside the dermis, is completely buried, and dissolves on its own. There is nothing to remove and no external material to lick. A thin incision line is all that is visible.
The vet said my dog's spay used a "continuous pattern." Is that different from separate stitches?
Yes. Continuous (running) suture means a single thread runs the length of the closure in a sequence of loops. It is faster to place and distributes tension evenly along the entire closure. Separate (interrupted) sutures are placed and tied individually. Both are standard the choice reflects surgeon preference and patient factors.
How do I know if the linea alba closure is holding?
You cannot assess the linea alba directly it is the internal fascial layer below the skin. The external sign that the linea alba has failed is a soft, doughy bulge near the incision that appears weeks to months after surgery this is an incisional hernia. More immediate signs of early closure failure: the incision opening (dehiscence), abdominal contents visible, or your dog showing signs of significant pain or abdominal discomfort. Any of these require immediate veterinary assessment.
The spay closure protocol is a specific instance of the general layered closure principle applied to a clean ventral midline laparotomy. Linea alba for structure, subcutaneous for dead space elimination and skin tension reduction, skin for external protection. Getting each layer right material, bite dimensions, pattern, and knot security is what makes a routine spay a reliably routine recovery.
Resources
- WVS Academy. Canine OVH: Surgical Procedure. wvs.academy
- WCVM University of Saskatchewan. Lab 6 Part 4: Incision Closure. wcvm.usask.ca
- Veterinary Evidence (2017). Choice of Suture Pattern for Linea Alba Closure. veterinaryevidence.org
- Metropolitan Veterinary Associates. Abdominal Surgery: Post-Operative and Incisional Care. metro-vet.com
Closure Protocol Checklist for Veterinary Surgeons
Comprehensive closure protocol checklist for veterinary surgeons to ensure safe, effective surgical outcomes and patient care.
A protocol checklist exists for the same reason a preflight checklist does: the steps are well known, the consequences of skipping them are serious, and cognitive load under pressure increases the probability of omission.
This checklist is the practical translation of closure principles into sequential, verifiable steps from the moment the primary procedure is complete to the moment discharge instructions are given.
Quick answer: A complete veterinary surgical closure checklist covers five phases: (1) pre-close assessment (hemorrhage control, irrigation, tissue viability, dead space identification), (2) deep layer closure (appropriate material, correct bite dimensions, knot security), (3) subcutaneous closure (dead space elimination confirmed), (4) skin closure (method appropriate to wound and patient), and (5) discharge instructions (E-collar, activity restriction, twice-daily monitoring, recheck timing). Verification at each phase prevents the errors that produce post-operative complications.
Key takeaways
- Pre-close hemorrhage control must be confirmed before any sutures are placed active bleeding under a closed wound produces hematoma.
- Irrigation before closure reduces bacterial count at the wound margin.
- Bite dimensions and knot security should be verified at the deep layer before moving to subcutaneous.
- Dead space confirmation at subcutaneous closure prevents seroma formation.
- Skin closure method selection should be matched to wound tension, patient compliance risk, and removal feasibility.
- Discharge instructions are part of the closure protocol incomplete instructions produce avoidable post-operative complications.
Phase 1: Pre-close assessment
Before the first closure suture is placed, the following must be confirmed:
Hemorrhage control
- No active bleeding points remain
- All ligatures on ovarian and uterine stumps (spay) or vascular pedicles are intact and secure
- Lap sponge or pad count matches none retained in the abdomen
Active bleeding under a closed wound does not stop it produces a hematoma that can become infected, place pressure on the closure, and obscure the wound assessment during monitoring.
Irrigation
- Abdominal or wound lavage with warm sterile saline has been performed
- If peritoneal contamination occurred: copious irrigation (multiple warm saline flushes)
- No lavage fluid pools remaining before closure
DVM360 (Basic Principles of Wound Management): "Primary closure should eliminate dead space and provide good anatomical apposition of tissue."
Tissue viability
- All tissue edges are pink and bleeding when cut (viable)
- No devitalized (grey, brown, or non-bleeding) tissue remains at the margins
- If contamination was significant: wound suitable for primary closure or decision made for delayed primary
Foreign body / instrument check
- Instrument count complete
- No suture material loops, clamp caps, or other items retained in the wound
For the principles that underpin each pre-close verification step, see closure principles that pre-close assessment implements.
Phase 2: Deep layer closure
Linea alba / fascia
- [ ] Material selected: PDS or Biosyn for most patients; size matched to patient weight (0 to 2-0 for medium-large dogs; 2-0 to 3-0 for cats and small dogs)
- [ ] Pattern: simple continuous or interrupted based on tissue quality and contamination status
- [ ] Bite dimensions: 5 to 10 mm from incision edge; 5 to 10 mm between bites
- [ ] Bites perpendicular to wound (not oblique)
- [ ] Fascia engaged in every bite not just muscle belly
- [ ] No fat incorporated in bites (prevents healing)
- [ ] Start knot secured with adequate throws (minimum 4 for PDS; 5 for feline linea alba per published guidance)
- [ ] End knot secured with additional throws (continuous pattern end knots require extra throws)
- [ ] No gaps visible when forceps are run along the closed linea alba
Joint capsule (orthopedic cases)
- [ ] Full-thickness bites through capsule wall
- [ ] Inverting or appositional pattern as appropriate for the joint
- [ ] No suture material crosses the joint space
For how the deep layer closure relates to overall wound closure principles, see layered closure in the deep layer context.
Phase 3: Subcutaneous closure
- [ ] Material: Monocryl 2-0 to 3-0 or Vicryl 2-0 to 3-0
- [ ] Pattern: simple continuous
- [ ] Dead space confirmed eliminated: wound edges at subcutaneous level are in contact
- [ ] No fluid pocket remains between the deep closure and the skin
- [ ] Drain placement assessed: if dead space cannot be eliminated by suturing, drain has been placed and exits through a separate stab incision (not the primary wound)
- [ ] Knots buried
For common subcutaneous closure errors that produce dead space, see subcutaneous errors and dead space.
Phase 4: Skin closure
Method selection (complete one)
External interrupted (nylon or Prolene):
- [ ] 3-0 to 4-0 for most dogs; 4-0 for cats
- [ ] Sutures 4 to 6 mm apart, placed 4 to 5 mm from wound edge
- [ ] No blanching at wound margins after tying
- [ ] Removal planned for day 10 to 14
Intradermal (Monocryl 4-0):
- [ ] Start and end knots buried
- [ ] No suture material crosses the epidermis
- [ ] Wound edges fully apposed without puckering
- [ ] No removal visit required communicate this to owner
Staples:
- [ ] Staple remover available at discharge or removal visit
- [ ] Not used in cats or dogs under 15 kg unless specifically indicated
- [ ] Not used over high-tension incisions
Post-skin closure inspection
- [ ] All wound margins apposed no gaps
- [ ] No suture marks from overtightened knots
- [ ] No inversion of wound edges
- [ ] Skin color normal no blanching or dark discoloration at wound margins
For how skin closure method selection is made, see skin closure method selection for this patient.
Phase 5: Pre-discharge verification
Wound dressing (if applicable)
- [ ] Clean, non-adherent primary dressing applied if needed
- [ ] Drain exit covered with sterile absorbent bandage if drain is in place
Discharge instructions (verbal and written)
E-collar:
- [ ] E-collar fitted and in place before the patient goes home
- [ ] Owner instructed: worn at all times, including overnight
- [ ] Alternative explained if owner expects compliance issues (inflatable collar, surgical suit)
Activity restriction:
- [ ] Leash-only walks; no running, jumping, or rough play for 10 to 14 days
- [ ] Confined when unsupervised (crate, single room)
Wound monitoring:
- [ ] Owner instructed to check the wound twice daily
- [ ] Normal findings explained: mild swelling and redness for 2 to 3 days, thin serous crust at wound margins
- [ ] Abnormal findings explained with clear same-day action: purulent discharge, increasing swelling after day 3, wound opening, odor, pale gums
Suture removal:
- [ ] If external sutures: recheck scheduled at day 10 to 14
- [ ] If intradermal: recheck still scheduled (wound assessment) but no suture removal needed communicate clearly
Medications:
- [ ] Pain management dispensed and instructions given
- [ ] Antibiotics dispensed (if indicated) with full course completion emphasized
For the post-operative monitoring protocol owners follow from discharge, see post-operative monitoring from discharge.
Common errors the checklist catches
Frequently asked questions
Does every surgery have a formal closure checklist?
Many clinics use informal mental checklists; fewer use formal written protocols. Published evidence from human surgery (and increasingly from veterinary practice) shows that formal written checklists reduce surgical complications the same principle applies to closure. The value of a formal checklist is that it does not depend on the surgeon remembering every step under the cognitive load of a busy operating list.
Can owners access this kind of checklist information?
Not in surgical detail the linea alba bite dimensions and knot throw counts are for surgical teams. What owners can access is the discharge instruction section (Phase 5) and understanding what those instructions are designed to prevent makes owners more likely to follow them precisely.
What should I do if I notice a step was missed at home?
If you discover that an E-collar was not provided, that the wound is showing early signs of a problem, or that activity restriction was not maintained, contact your vet the same day. Earlier intervention for any closure problem produces better outcomes than waiting.
A checklist is only as useful as the discipline to use it. The value is not in the list itself but in the consistent verification it provides ensuring that none of the steps that determine post-operative outcomes are left to chance or tired recall.
Resources
- WCVM University of Saskatchewan. Lab 6 Part 4: Incision Closure. wcvm.usask.ca
- DVM360. Basic Principles of Wound Management. dvm360.com
- Veterinary Evidence (2017). Choice of Suture Pattern for Linea Alba Closure. veterinaryevidence.org
- Metropolitan Veterinary Associates. Abdominal Surgery: Post-Operative and Incisional Care. metro-vet.com
Intradermal Closure in Cats: Techniques and Care
Learn about intradermal closure in cats, including techniques, benefits, risks, and aftercare for optimal healing.
Intradermal closure is the default skin closure method for most feline elective procedures at many practices. That is not coincidence it is the result of feline-specific factors that make buried sutures significantly preferable to external sutures in cats.
Cats lick aggressively. Their skin is thin and marks easily at suture entry points. And they tolerate E-collars with varying degrees of resentment. Intradermal closure addresses all three issues simultaneously.
Quick answer: Intradermal (subcuticular) closure in cats places a continuous horizontal suture within the dermis, below the epidermis. No external material is visible or accessible to lick. The material of choice is 4-0 Monocryl (poliglecaprone 25) because of its smooth surface, minimal tissue reaction, and appropriate absorption timeline (90 to 119 days well after skin healing is complete). No removal visit is required. Published data (PMC2885123) confirms absorbable sutures are equivalent to non-absorbable for intradermal closure in cats.
Key takeaways
- No external material is visible or accessible the suture runs entirely within the dermis.
- 4-0 Monocryl is the preferred material: minimal tissue reaction, smooth monofilament, appropriate absorption.
- No removal visit required with absorbable intradermal closure reduces stress for cat and owner.
- Knots must be buried in subcutaneous tissue poorly buried knots cause licking, irritation, and increased infection rates.
- Published evidence confirms absorbable and non-absorbable sutures are equivalent for intradermal closure in cats (PMC2885123).
- E-collar still required for 10 to 14 days the incision surface can be disrupted by licking even without external sutures.
Why intradermal closure is preferred in cats
Cats lick wounds aggressively
Cats will access abdominal spay incisions with their hind legs even with a properly fitted standard E-collar. Their grooming behavior is persistent, systematic, and effective at removing sutures. External sutures which protrude above the skin surface are significantly more accessible to licking than buried intradermal sutures.
WCVM (University of Saskatchewan): "Knots are buried at the beginning and the end of the pattern. Poorly buried knots are frequently associated with excess licking, irritation and increased infection rates."
Feline skin is thin and marks easily
Suture entry points in feline skin create more pronounced tracks and marks than in most dog breeds. External suture patterns whether interrupted or cruciate leave visible marks at removal that become permanent scars. Intradermal closure creates no percutaneous tracks.
E-collar compliance challenge
Many cats resist standard E-collars. Owners may remove collars prematurely. Intradermal closure reduces the critical window during which self-trauma can remove sutures there are no external sutures to remove. Licking can still disrupt epidermal healing, but the damage threshold is higher.
The technique
Preparation
The dermis must be well exposed before starting. After subcutaneous closure, the wound is assessed at the dermal level not just the skin surface.
Needle entry at the commissure (start)
- The first bite enters the subcutaneous tissue at one end of the wound, 3 to 4 mm from the commissure (wound end)
- A square knot is tied in the subcutaneous tissue (start knot this buries the knot below the dermis)
- The suture is redirected toward the wound
PMC9960444 (Comparison of Absorbable and Nonabsorbable Sutures for Intradermal Closure in Dogs): "The initial knot of the suture material was buried in the subcutaneous tissue at a distance of 4 mm from the commissure of the wound with a square knot (5 throws), and then the suture material was directed towards the start of the incision in the middle of the dermis."
Running dermal bites
- The needle takes horizontal bites through the dermis, alternating sides left dermis, then right dermis, advancing 3 to 4 mm with each pass
- Each bite enters and exits within the dermis, well below the epidermis the suture never crosses the skin surface
- Tension is maintained so each bite draws the wound edges into apposition as the suture is placed
End knot
- At the wound end, an Aberdeen knot (or standard buried square knot) terminates the suture in the subcutaneous tissue again buried below the dermis
- The wound surface should show no suture material only a thin, clean incision line
WCVM: "For the intradermal, an absorbable suture material is indicated. A monofilament is typically preferred because of decreased tissue drag. The skin heals rapidly so a rapidly absorbable suture, like poliglecaprone 25, can be used."
Material selection
Preferred: 4-0 Monocryl (poliglecaprone 25)
- Rapidly absorbable monofilament
- Loses 50% of tensile strength by 7 to 14 days, 100% by 21 days well matched to feline skin healing timeline
- Smooth surface: minimal tissue drag during placement, minimal inflammatory reaction
- Fully absorbed by 90 to 119 days
Published evidence on material choice in cats
PMC2885123 (Comparison of Absorbable and Nonabsorbable Sutures for Intradermal Skin Closure in Cats, 6 cats): Compared Monosyn (absorbable) to polypropylene (non-absorbable). Conclusion: both produced equivalent healing outcomes. Absorbable was preferred because it eliminates the need for later suture removal.
This publication is a feline-specific study confirming what the canine literature (PMC9960444) similarly demonstrated: both material types work; absorbable eliminates the removal visit and is therefore the preferred choice.
For how intradermal material selection compares in dogs, see intradermal material in dogs vs cats.
Where intradermal closure is used in cats
- Spay (OVH): the most common application; routine skin layer closure for the ventral midline incision
- Lateral flank spay: some practitioners use an intradermal closure for the flank approach spay as well
- Mass removal: any small-to-medium sized mass removal where primary closure is achievable without tension
- Biopsy sites
- Traumatic lacerations: only if fresh, clean, and low-tension
For how intradermal closure fits within the full cat spay closure protocol, see intradermal closure in the cat spay protocol. For the full skin closure method comparison including how intradermal ranks, see skin closure methods that include intradermal. For cosmetic closure outcomes that intradermal achieves in cats, see cosmetic outcomes of intradermal closure in cats.
What owners should expect
Immediately after surgery
- No visible sutures or knots
- A thin, clean incision line may have a tiny sealed wound at each end where the buried knots were placed
- Mild swelling and redness at the incision for 2 to 3 days: normal
Under the skin
A faint, firm ridge may be palpable along the incision line for the first 3 to 4 weeks. This is the suture material within the dermis it is normal and will resolve as the suture absorbs.
E-collar
Still required. The E-collar is not for removing sutures there are none to remove. It prevents licking that would disrupt epidermal healing before the wound surface has adequate strength.
No removal visit (for wound)
There is no suture removal appointment. A post-operative recheck is still recommended at 10 to 14 days to assess healing, but the visit does not involve suture removal.
For how suture removal timing applies when external sutures are used instead, see suture removal timing context in cats.
Complications specific to intradermal closure in cats
Suture reaction: if the suture material provokes a localized inflammatory response, a small firm nodule may develop along the incision in the first few weeks. This is usually self-resolving but should be assessed if it is growing or the cat is uncomfortable.
Knot protrusion: if the start or end knot was not adequately buried, the suture ends may emerge through the wound commissure. This creates a licking target contact your vet if you notice a small loop of suture appearing at the wound end.
Wound gaping: if the intradermal suture does not achieve adequate tension throughout the closure, a small gap may appear at the wound surface. This is uncommon with correctly placed technique but may require one or two interrupted sutures at the gap site.
Frequently asked questions
My cat had her spay done and has no visible sutures. The vet said she has "dissolvable" sutures inside. How long do they last?
The intradermal suture is 4-0 Monocryl, which loses its strength by 21 days (well after skin healing is complete) and fully absorbs by 90 to 119 days. You will not feel it dissolve the process is gradual and internal. By around 3 months post-surgery, there is no foreign material remaining at the incision site.
Does intradermal closure hurt more when healing?
No. The absence of external sutures actually reduces discomfort compared to external interrupted sutures, which can cause local irritation and pull as the skin swells slightly during healing. The buried intradermal pattern is well tolerated.
My cat's incision has a small bump at one end. Is that the knot?
Possibly the start and end knots are placed in the subcutaneous tissue just beyond the wound ends. A small, firm bump in those locations is the buried knot dissolving over the first few weeks. If the bump is growing, soft and fluid-filled, or the cat shows signs of discomfort around it, contact your vet.
Intradermal closure in cats is the right technique for the right patient: a species that will self-trauma external sutures, whose skin marks easily, and whose owners struggle with E-collar compliance. By burying everything the cat might otherwise access, intradermal closure removes the most predictable source of post-operative closure complications in feline surgery.
Resources
- WCVM University of Saskatchewan. Lab 6 Part 4: Incision Closure. wcvm.usask.ca
- PMC2885123. Comparison of Absorbable and Nonabsorbable Sutures for Intradermal Skin Closure in Cats. pmc.ncbi.nlm.nih.gov
- PMC9960444. Comparison of Absorbable and Nonabsorbable Sutures for Intradermal Skin Closure in Dogs. ncbi.nlm.nih.gov
Interrupted vs Continuous Suturing in Dogs
Learn the differences between interrupted and continuous suturing in dogs, including techniques, benefits, and when to use each method.
When your vet describes "how the incision was closed," they are referring to the suture pattern the specific technique used to bring wound edges together and hold them while tissue heals. Different patterns have different mechanical properties, different risks, and different appropriate indications.
This guide explains the main suture patterns used in dogs, when each is appropriate, how suture material is chosen, and what owners should know about the closure they see (or don't see) on their dog.
Quick answer: Interrupted sutures are individual stitches; if one fails, others hold. Continuous sutures run in a loop; faster but one break risks the whole line. Intradermal sutures sit beneath the skin with no external stitches required.
Key takeaways
- Simple interrupted sutures are the most common skin closure pattern; each stitch is independent
- Continuous (running) sutures close faster and distribute tension more evenly but one break risks the entire line
- Intradermal sutures are placed beneath the skin surface, providing cosmetic closure with no external sutures requiring removal
- Suture material matters: monofilament sutures carry less infection risk than braided multifilament; absorbable sutures dissolve over time; non-absorbable require removal
- Mattress sutures are used for high-tension closures where interrupted sutures would cut through tissue
- The closure pattern does not change owner responsibilities: E-collar, activity restriction, and monitoring apply regardless
Why suture pattern selection matters
SustainableVet (wound closure principles): "The role of sutures in primary wound closure is to approximate tissue edges in order to achieve a functional and cosmetically acceptable scar."
The right pattern for a given location depends on:
- Tension at the wound edges: high-tension closures need patterns that distribute force across a wider area
- Tissue type: skin, subcutaneous tissue, fascia, and internal organs each have different mechanical properties
- Location on the body: areas with movement (over joints, near the perineum) have different requirements than stable trunk locations
- Cosmetic priority: visible areas may favor intradermal patterns; perineal or axillary locations prioritize security over cosmesis
- Time constraints: running patterns are faster; interrupted patterns require more time
Interrupted suture patterns
Simple interrupted
The most commonly used technique for skin closure. Each suture is a separate unit placed, tied, and cut before the next suture is placed.
SustainableVet (interrupted vs continuous article): "Simple interrupted sutures: provide strong closure and allow precise wound edge alignment."
ScienceDirect (comparative study): "The most commonly used technique for skin closure is the simple interrupted suture pattern (SI)."
Advantages:
- If one suture fails, adjacent sutures hold the wound closed
- Individual tension adjustment at each stitch
- Easy to remove individual sutures if an infection develops at one point
- Precise edge-to-edge alignment
Disadvantages:
- More time-consuming than continuous patterns
- More suture knots, each of which is a potential tissue reaction site
Horizontal mattress sutures
The suture passes through tissue on one side, crosses horizontally, passes through the other side, returns, and is tied creating a rectangular pattern that bridges the wound.
SustainableVet: "Cruciate sutures: crossed pattern sutures that distribute tension evenly and reduce skin edge inversion, improving healing."
When used: high-tension closures where standard interrupted sutures would cause tissue necrosis from excessive focal pressure; also used when wound edges tend to invert (fold inward).
Disadvantages: can compromise blood supply to the wound edge if tied too tightly; should not be the primary pattern for routine low-tension skin closure.
Vertical mattress sutures
Similar to horizontal mattress but the loop goes through tissue at two depths one deep bite and one superficial bite on each side. Particularly good at everting (turning outward) wound edges, which promotes primary healing.
Continuous suture patterns
Simple continuous (running)
A single suture is placed from one end of the wound to the other in a running pattern, tied at each end.
SustainableVet: "Continuous sutures: faster to place and distribute tension evenly but risk wound opening if one suture breaks."
SustainableVet (wound closure principles): "Continuous sutures role: Running stitches provide quick closure and distribute tension evenly, reducing tissue trauma."
Advantages:
- Significantly faster than placing individual interrupted sutures
- More even tension distribution along the wound length
- Fewer knots overall
Disadvantages: A failure at any point in the line (suture breakage, knot failure) can lead to the entire closure unzipping. For this reason, simple continuous patterns are less common for primary skin closure where security is paramount.
Ford interlocking (locking continuous)
A variation of the continuous pattern where each bite is locked before proceeding. This prevents the entire line from running if one segment fails each segment is anchored.
When used: closure of fascia and body wall where a running pattern's speed advantage is important but security is still needed.
Intradermal (subcuticular) suture
The most cosmetically appealing closure technique. The suture is placed within the dermis (the layer just beneath the outer epidermis), running horizontally from one end of the wound to the other without penetrating the skin surface.
SustainableVet (intradermal closure article): "Hidden sutures: sutures are placed beneath the skin surface, preventing your dog from licking or scratching them, which promotes safer healing. Cosmetic benefit: intradermal closure results in less visible scarring compared to traditional external stitches. Reduced suture removal: because sutures are buried, they often do not require removal."
ScienceDirect (comparative study): "The continuous intradermal suture pattern (ID) has been lately popularized as a superior method of cosmetic skin closure. It is generally assumed that the intradermal suture pattern has superior cosmetic results, mainly because the epidermis is not penetrated and therefore inflammation is minimal, and a fine approximation of wound edges can be achieved, resulting in minimal scarring."
Suture material used: absorbable monofilament (poliglecaprone 25 or polidioxanone) in a fine gauge (3/0 or 4/0). ScienceDirect: "Intradermal pattern with 4/0 poliglecaprone 25 was superior in terms of cosmetic, clinical, and histologic appearance compared to simple interrupted pattern."
Disadvantages: requires more surgical skill to execute correctly; not appropriate for contaminated wounds or locations where wound tension is high.
Suture material: what it means for healing
Absorbable vs. non-absorbable
Absorbable sutures dissolve over time through hydrolysis (synthetic) or enzymatic digestion (natural materials). They are used for internal layers (subcutaneous tissue, fascia, body wall, internal organs) and for intradermal skin closure. No removal required.
SustainableVet (subcutaneous closure article): "Absorbable sutures like polyglycolic acid are preferred for internal layers to avoid the need for suture removal and reduce irritation risk."
Non-absorbable sutures remain in place indefinitely unless removed. Used for skin closure when suture removal at 10 to 14 days is planned. Examples: nylon (monofilament), polypropylene, polyester.
Monofilament vs. multifilament
Monofilament sutures are single-strand; they move through tissue smoothly and have minimal surface area for bacteria to adhere to.
SustainableVet (wound closure principles): "Monofilament sutures reduce infection risk due to less bacterial trapping compared to braided multifilament sutures."
Multifilament (braided) sutures are stronger and easier to handle but have a greater surface area where bacteria can colonize and form biofilm. For this reason, braided sutures are generally avoided for skin closure of contaminated or infection-prone wounds.
Tissue layers and closure sequence
Most surgical wounds are closed in layers, not just at the skin surface. A typical soft tissue closure:
- Deep layer (fascia or body wall): absorbable suture in a continuous or simple interrupted pattern
- Subcutaneous layer: absorbable suture, often continuous; this eliminates dead space where fluid collects and bacteria proliferate
- Skin: interrupted or intradermal with absorbable (for intradermal) or non-absorbable (for interrupted with planned removal)
SustainableVet (subcutaneous closure): "The subcutaneous tissue is closed first to reduce dead space, followed by skin closure to protect the wound from contamination."
Closing dead space is critical. Dead space is the empty volume left when tissue layers are not approximated it fills with serum, creating a perfect environment for bacterial growth and seroma formation.
What this means for owners
The suture pattern does not change the owner's responsibilities:
- E-collar compliance is required regardless of whether external stitches are visible
- Activity restriction applies regardless of pattern
- Wound monitoring (twice daily, with photographs) is required regardless of pattern
If your dog has an intradermal closure, there are no external sutures to count or check but you still look at the incision line itself for signs of infection or dehiscence.
For the wound care protocol, see wound care after surgery. For signs of complications including wound breakdown, see signs of complications after soft tissue surgery. For the SSI prevention context, see how to prevent surgical site infections in dogs.
Frequently asked questions
My dog has no visible stitches. Is the wound still closed?
Yes. Intradermal or subcuticular closure places sutures beneath the skin surface. The wound is closed; no external sutures are visible. The E-collar is still required, and the wound still needs daily monitoring.
Do intradermal sutures need to be removed?
Not typically. Absorbable intradermal sutures dissolve over 60 to 90 days without requiring a suture removal appointment. If non-absorbable material was used intradermally, your vet will advise on removal.
My dog's sutures look red around the knots. Is that infection?
Mild redness around suture entry points in the first 3 to 5 days is a normal tissue reaction. Yellow or green discharge, redness spreading beyond the knot area, or warmth after day 5 are signs of infection.
What happens if one suture falls out?
For simple interrupted patterns, losing one suture does not typically compromise the closure if wound edges remain apposed. Contact the vet to assess whether replacement is needed. For continuous patterns, any suture failure warrants same-day veterinary assessment.
Why are some incisions closed with staples instead of sutures?
Staples provide fast, secure closure used in orthopedic cases where speed and high tension matter. SustainableVet: "Staples: quick to apply but may cause more skin irritation and require removal after healing."
My dog had internal sutures placed. Can I feel them under the skin?
Absorbable internal sutures are sometimes palpable as small firm knots under the skin, particularly in lean dogs. This is normal and not a sign of complication; they dissolve over 60 to 90 days.
Resources
- SustainableVet. Interrupted vs. Continuous Suturing in Dogs. sustainablevet.org
- SustainableVet. Intradermal Closure in Dogs: Techniques and Benefits. sustainablevet.org
- ScienceDirect. Comparison of Continuous Intradermal with Simple Interrupted Suture Pattern in Dogs. sciencedirect.com
- SustainableVet. Subcutaneous Closure Techniques in Dogs. sustainablevet.org
- SustainableVet. Principles of Wound Closure in Veterinary Surgery. sustainablevet.org
Surgical Site Preparation in Dogs: Complete Guide
Learn essential steps and tips for surgical site preparation in dogs to ensure safe and infection-free surgeries.
Surgical site preparation is the first line of defense against surgical site infection (SSI).
The goal is to reduce the bacterial load on the skin to the lowest achievable level before the incision is made.
Every step in the preparation protocol matters a single shortcut can undermine the entire chain.
Quick answer: Canine surgical site preparation follows a fixed sequence: clip a wide area in the prep room, perform an initial scrub for gross decontamination, then in the OR perform the aseptic scrub center-to-periphery using chlorhexidine or povidone-iodine, then drape. Never clip or scrub in the OR.
Key takeaways
- Clip a wide margin around the incision site: at minimum 5 to 10 cm on each side; more is better
- Clip in the prep room, not the OR: loose hair and dander are OR contaminants
- Initial scrub removes gross contamination (oils, bacteria, debris) before the aseptic scrub begins in the OR
- Aseptic scrub technique: target pattern center to periphery, discard gauze after each pass, never return toward center
- Chlorhexidine and povidone-iodine are both acceptable: do not mix them on the same patient due to potential chemical incompatibility
- Alcohol rinsing between antiseptic applications improves bacterial kill; contact time for each application must be respected
Why site preparation matters
Translocation of endogenous microbial flora is the most common route of surgical site infection. Skin preparation and aseptic techniques aim to reduce or eliminate the growth of resident and transient flora at the wound site, thereby reducing the morbidity and mortality rates from SSIs.
The skin surface harbors resident flora (permanently colonizing microorganisms) and transient flora (recently deposited organisms). Both can contaminate the wound at the moment of incision if not adequately reduced by preparation.
The preparation protocol addresses both.
Step 1: Pre-clipping assessment
Before clipping, assess the skin in the intended surgical field:
- Note any existing wounds, abrasions, or skin conditions
- Identify regional lymph nodes for palpation
- Confirm the surgical site with the team before hair removal
Step 2: Hair clipping
Clipping is performed in the designated preparation area, not in the operating room. Loose hair shed into the OR environment is a contamination source.
Technique:
- Use electric clippers with a surgical blade (size 40 preferred: finer cut, closer to skin)
- Clip the direction of hair growth first, then against it for a closer result
- Clip a wide field minimum 5 to 10 cm beyond the proposed incision on all sides
- Do not clip the skin itself guard against clipper trauma which creates skin breaks and increases SSI risk
Blade size evidence: studies have evaluated different blade sizes for SSI risk. A size 40 blade (finer cut) has been associated with more SSIs in some studies due to skin microtrauma; a size 10 blade (less close) may reduce this risk. Practice varies; the key is avoiding visible skin irritation.
Male dog prepuce management: if the surgical field includes or borders the prepuce, flush it with 0.05% chlorhexidine diacetate solution for 2 minutes and displace it laterally in the field before draping.
Step 3: Initial scrub (gross decontamination)
Wear examination gloves and remove gross debris from the surgical site using gauze sponges and an antiseptic solution such as chlorhexidine gluconate 4% or povidone-iodine. Scrub the site gently until little to no gross debris remains. The use of clean, but not sterile, supplies for initial surgical site cleaning does not affect infection rates when the skin is intact.
The initial scrub is performed in the prep room before the patient enters the OR. It removes surface oils, organic matter, and loose debris.
This is not the aseptic scrub it prepares the skin for it.
Step 4: Patient transfer to OR
The patient is moved to the OR and positioned on the surgical table. The prepared site must not contact non-sterile surfaces during transfer.
Limbs may be loosely wrapped or positioned to avoid contact.
Step 5: Aseptic scrub in the OR
Once the patient is properly positioned, secured to the operating room table, and connected to all anesthetic monitoring equipment, the aseptic scrub can be performed.
The target pattern:
Begin scrubbing at the center of the proposed incision site, working outward in a circular target pattern until the edge of the clipped area is reached. Use a gentle motion to produce a lather. Discard the gauze and repeat the scrub as needed to allow for the appropriate contact time recommended by the scrub solution manufacturer.
Critical rules:
- Always work center to periphery never return toward the incision center with a used gauze
- Discard each gauze after a single outward pass
- The scrubbing team wears sterile gloves
- Contact time must be respected do not wipe off prematurely
Number of scrub cycles: typically three alternating cycles of antiseptic scrub and alcohol rinse (for chlorhexidine-based protocols) or antiseptic scrub and saline rinse (for povidone-iodine). Confirm your specific protocol with your clinic's surgical guidelines.
Antiseptic selection
Chlorhexidine gluconate (CHG)
Chlorhexidine kills a wide range of bacteria and has residual activity, meaning it continues working after application.
Chlorhexidine gluconate is often considered superior to povidone-iodine because of its longer residual action.
CHG is the more commonly recommended agent for veterinary surgical site preparation based on human medicine data showing superiority over PI, particularly with alcoholic formulations.
Povidone-iodine (PI)
Povidone-iodine is effective against bacteria, viruses, and fungi, and is commonly used in veterinary surgery.
Povidone-iodine has an excellent immediate antimicrobial effect. Most samples collected at post-asepsis did not present bacterial growth, both for animals subjected to povidone-iodine (74%) or chlorhexidine (70%) protocols.
PI has excellent immediate kill but minimal residual activity once dry.
Do not mix antiseptics
There is some evidence to suggest it is important not to mix the two on the same patient do not use chlorhexidine gluconate for initial prep and then povidone-iodine for the final prep. Chlorhexidine gluconate is cationic and povidone-iodine is anionic, which together are chemically unsuited. There is concern that when used together, they may provide limited or no skin antisepsis as the iodine inactivates the chlorhexidine.
Choose one antiseptic and use it throughout the entire preparation protocol.
Step 6: Draping
After the aseptic scrub, the sterile team applies four corner drapes secured with towel clamps, followed by a large fenestrated drape over the patient and table.
Draping rules: drapes can only be moved away from the incision site. A drape moved toward the incision contaminates the sterile field.
For the full draping guide, see draping techniques in small animal surgery. For the surgical hand scrub that precedes site preparation, see veterinary surgical hand scrub protocol guide.
For the SSI prevention overview, see how to prevent surgical site infections in dogs.
Frequently asked questions
Can I clip and scrub in the operating room?
No. Clipping should always be performed in a designated prep area separate from the OR. Loose hair contaminated with skin bacteria sheds into the OR environment and settles on sterile surfaces.
Clipping in the OR is a recognized SSI risk factor.
How wide should the clip area be?
At minimum 5 to 10 cm beyond the proposed incision on all sides.
In practice, clip wider than you think you need running out of prepared skin during surgery is worse than clipping a little more than necessary.
Should I use chlorhexidine or povidone-iodine?
Both are acceptable. Chlorhexidine has longer residual activity; povidone-iodine has excellent immediate kill. Do not mix them.
Most current guidance leans toward chlorhexidine (ideally in alcoholic formulation) based on human surgery data showing superior SSI reduction, though veterinary-specific evidence is more limited.
How many scrub cycles are required?
Protocol varies by clinic. A typical approach is three antiseptic scrub cycles with alcohol rinse between each.
The key is achieving the required contact time for your chosen antiseptic and removing each gauze after a single outward pass. Follow the antiseptic manufacturer's contact time recommendation.
Can I scrub toward the incision center if I see a missed area?
Never. Once a gauze has passed outward, it is contaminated with the organisms it picked up from the skin periphery.
A new gauze must be used for any additional scrubbing of the central area. Returning inward with a used gauze violates the core principle of aseptic scrub technique.
Resources
- Clinician's Brief. Preoperative Surgical Site Preparation in Veterinary Medicine. cliniciansbrief.com
- PMC. Comparative Clinical Effectiveness of Preoperative Skin Antiseptic Preparations of CHG and PI for Preventing SSIs in Dogs. pmc.ncbi.nlm.nih.gov
- PMC. Skin Asepsis Protocols as a Preventive Measure of SSI in Dogs: Chlorhexidine-Alcohol versus Povidone-Iodine. pmc.ncbi.nlm.nih.gov
- The Veterinary Nurse. Surgical Site Infections: Preparation, Technique and Perioperative Prevention. theveterinarynurse.com
- VetNurse. Surgical Skin Preparation: Best Practice Protocol. vetnurse.com.au
Closure Protocol for TPLO Surgery
Learn the detailed closure protocol for TPLO surgery to ensure optimal healing and reduce complications in your pet's recovery.
TPLO surgery creates one of the most mechanically demanding wound closure environments in small animal surgery. The incision is placed over a joint that the dog begins loading within days. The underlying repair involves bone cutting and plate fixation. And the patient is often a large, active dog whose energy level returns faster than the tissues heal.
Getting the closure right every layer, the right material, the right tension is what keeps the infection risk low and the repair protected through the critical 8 to 12 week healing period.
Quick answer: TPLO closure proceeds in four layers: (1) joint capsule PDS 0 to 2-0, simple continuous or interrupted pattern to restore synovial seal; (2) deep fascia / muscle fascia PDS 0 to 2-0, continuous or interrupted; (3) subcutaneous tissue Monocryl or Vicryl 2-0 to 3-0, simple continuous; (4) skin interrupted nylon 3-0 to 4-0 or staples (staples are widely used for TPLO skin closure for speed). External sutures or staples are removed at 10 to 14 days. Activity restriction continues for 8 to 12 weeks regardless of wound appearance.
Key takeaways
- Joint capsule closure is the most critical TPLO layer: restores synovial seal and protects the implant.
- PDS 0 to 2-0 is standard for joint capsule and fascial closure; long retention matches healing timeline.
- Staples are commonly used for TPLO skin closure because they are fast to place and tolerate some movement.
- The underlying plate and bone are permanent implants infection at the closure site can reach them, making aseptic technique non-negotiable.
- Activity restriction through 8 to 12 weeks protects both the closure and the osteotomy healing regardless of wound appearance.
- Infection risk at TPLO sites is higher due to implant presence; monofilament in all buried layers is essential.
Why TPLO closure differs from standard orthopedic incisions
TPLO creates a unique closure environment because of what lies directly beneath the incision:
- A stainless steel or titanium plate with multiple screws, fixed to the tibia
- A tibial osteotomy site (bone cut) healing under controlled load
- The lateral joint capsule opened for surgical access
- Implants that cannot mount an immune response if bacteria reach them
Any closure failure whether from suture material choice, inadequate dead space elimination, or post-operative licking creates a direct pathway toward implant-associated infection. This is a significantly more serious consequence than infection after a routine spay or skin mass removal.
For the general principles of orthopedic incision closure that apply here, see orthopedic incision closure principles.
Layer 1: Joint capsule
Why this layer matters most
The joint capsule closure restores the synovial seal. Failure here allows:
- Synovial fluid leakage into the subcutaneous tissue
- External bacteria to access the joint space and implant surface
- Loss of the pressure environment that supports bone healing
Technique and material
Pattern: simple continuous or interrupted, based on capsule length and tissue quality.
Material: PDS (polydioxanone) 0 to 2-0 on a taper-point needle
- PDS retains approximately 70% of tensile strength at 2 weeks and 50% at 4 to 6 weeks
- Monofilament surface: minimal bacterial adhesion
- Absorbed over 180 to 210 days long after joint capsule healing is complete
Bite technique: full-thickness bites through the capsule wall, ensuring every bite incorporates the fibrous capsule layer. Partial-thickness bites fail under joint motion.
What not to use: braided absorbable sutures (Vicryl) in this layer the braided structure wicks bacteria from the joint environment along the suture strand, creating a direct infection pathway to the implant.
Layer 2: Deep fascia and muscle fascia
After joint capsule closure, the deep fascial layers overlying the surgical field are closed.
Pattern: simple continuous or interrupted absorbable
Material: PDS 0 to 2-0, sized to patient
Key principle: the fascial layer must be engaged in each bite not just the muscle belly. Muscle tissue is not load-bearing in this context and tears through under the repetitive mechanical load of the dog's movement.
Dead space: the space created by elevating the muscle and retracting the patellar tendon must be managed at this layer. Inadequate closure here leads to hematoma or seroma formation directly over the implant.
For how the fascial layer closure relates to infection risk in orthopedic cases, see infection risk in orthopedic closure.
Layer 3: Subcutaneous tissue
Pattern: simple continuous absorbable
Material: Monocryl 2-0 to 3-0, or Vicryl 2-0 to 3-0
Purpose: eliminate dead space between the deep closure and the skin. In large breed dogs with significant subcutaneous fat, this layer requires careful attention inadequately closed dead space over a TPLO plate creates a seroma risk that can progress to implant contamination.
Drain consideration: if significant dead space cannot be eliminated by suturing common after TPLO in obese patients drain placement is indicated. The drain exits through a stab incision separate from the primary wound.
For the full post-operative monitoring checklist that begins from this closure, see post-operative monitoring after TPLO closure.
Layer 4: Skin closure
Why staples are common for TPLO skin closure
Staples are placed in 2 to 3 seconds each, compared to 15 to 30 seconds per interrupted suture. For a 10 to 15 cm TPLO incision, this difference is clinically meaningful reducing anesthesia time in a procedure that is already longer than routine soft tissue surgery.
Published research (PMC9913468) confirms equivalent healing outcomes between staples and interrupted external sutures in dogs. Staples require a specific removal tool at the 10 to 14 day recheck.
The one specific TPLO caution: MSPCA-Angell notes that staples are prone to deforming and opening under sustained high tension. For TPLO closures where significant wound tension exists (large, heavily muscled dogs), interrupted sutures or tension-relieving patterns may be more appropriate.
Intradermal closure as an alternative
For TPLO patients where E-collar compliance is uncertain or the owner preference is for no removal visit, 4-0 Monocryl intradermal closure is appropriate. Published data (JAVMA 2026, 96 TPLO patients) specifically confirms that taper-point needles are non-inferior to reverse cutting needles for intradermal TPLO skin closure.
Suture size guide by patient
For the suture size selection framework that underpins these choices, see suture size selection for orthopedic cases.
Post-operative monitoring after TPLO closure
The TPLO closure is subject to the same monitoring principles as any orthopedic closure but with higher stakes because of the implant below.
Twice-daily checks for 14 days:
- Wound edges apposed; no gaps
- Swelling decreasing from peak (days 2 to 4) increasing swelling after day 5 is a concern
- No discharge, or only a small amount of serous crust at suture sites
- No odor
Suture/staple removal: day 10 to 14 at the post-operative recheck.
Activity restriction continues regardless of wound healing: the wound surface may look healed at 2 weeks, but the osteotomy site and the joint capsule are still in the early repair phase. Activity restriction (leash walks only, no running or jumping) continues for 8 to 12 weeks.
For the full closure protocol checklist applicable to TPLO, see closure checklist for TPLO procedures.
Frequently asked questions
My dog had TPLO and the vet used staples on the skin. Is that standard?
Yes. Staples are widely used for TPLO skin closure because they are fast to place, handle movement well, and produce equivalent cosmetic outcomes to external sutures in published veterinary research. The staple remover visit at day 10 to 14 is a brief, low-stress procedure.
The skin around my dog's TPLO site looks healed at day 10. Can activity restriction end now?
No. Surface healing does not indicate complete repair at any layer below the skin. At day 10, the joint capsule is in the early repair phase, the fascial layers are at 30 to 50% of original tensile strength, and the tibial osteotomy is still consolidating. Activity restriction continues for 8 to 12 weeks from surgery the wound appearance at day 10 is not the relevant endpoint.
What are signs of infection at a TPLO site that require urgent care?
Early: increasing redness or warmth beyond the wound margin, excessive swelling appearing after day 4 to 5, any purulent discharge. These require same-day veterinary contact. Later signs: fever, lethargy, inappetence combined with wound changes these may indicate implant-associated infection and require immediate assessment. Do not wait for the scheduled recheck if these signs appear.
TPLO closure carries high stakes because the implant beneath the wound is unforgiving of infection. Every closure decision monofilament in buried layers, adequate dead space elimination, correct skin closure method, strict activity restriction is made to protect both the wound and the surgical repair it covers. A closure that holds for 10 days is not enough; it must hold for 12 weeks.
Resources
- Clinician's Brief. How to Fine-Tune Suture Choices for Today's Veterinarian. cliniciansbrief.com
- JAVMA 2026 (Kieves et al.). Taper Suture Needles Are Noninferior to Reverse Cutting Needles for Intradermal Skin Closures in TPLO. avmajournals.avma.org
- PMC9913468 (University of Thessaly). Evaluation of Incisional Wound Healing in Dogs after Closure with Staples or Tissue Glue vs. Intradermal Suture. ncbi.nlm.nih.gov
- VCA Animal Hospitals. Care of Surgical Incisions in Dogs. vcahospitals.com

Sustainable Vet | Copyright ©2026 | All Rights Reserved

