

Needle Selection for Veterinary Surgical Closure
Learn how to select the right needle for veterinary surgical closure to ensure safe, effective wound healing in pets.

This article is for informational purposes only and is not a substitute for professional veterinary advice. Every case is unique, so always consult your veterinarian for guidance specific to your pet.
This content is intended for veterinary professionals for educational purposes. It does not replace clinical judgment or tailored advice. Always rely on your training, expertise, and the specific context of your patients.
Needle selection is the last element of suture selection that most owners hear about if they hear about it at all. But the wrong needle for the tissue causes unnecessary trauma at every suture pass, increasing inflammation, infection risk, and healing time.
The needle must match the tissue it is asked to penetrate. This principle is as consistent as the one that governs suture material and size.
Quick answer: The four main needle types in veterinary surgery are: taper-point (round body tapering to a sharp tip for soft internal tissues: muscle, subcutaneous tissue, viscera), cutting (triangular cross-section with cutting edge on the concave inner curve for tough tissues), reverse cutting (triangular with cutting edge on the convex outer curve the standard for skin closure), and taper-cut (round body with reverse cutting tip for dense but delicate tissue like fascia and periosteum). A 2026 JAVMA study found taper-point needles non-inferior to reverse cutting needles for intradermal skin closure in TPLO cases.
Key takeaways
- Taper-point needles are used for all soft internal tissues muscle, subcutaneous fat, viscera, and mucous membranes.
- Reverse cutting needles are the standard for skin closure; the convex cutting edge reduces cut-through risk.
- Cutting needles create the largest holes; reserved for the toughest, most resistant tissues only.
- Taper-cut needles combine a round shaft with a reverse cutting tip useful for dense fibrous tissue like fascia and tendon.
- Blunt needles are used for friable, highly vascular organs (liver, kidney, spleen) to push tissue aside rather than cut.
- A 2026 JAVMA study found taper needles non-inferior to reverse cutting for intradermal TPLO closure.
The four main needle types
1. Taper-point needle
A round-bodied needle that tapers smoothly to a sharp point. No cutting edges on the body the needle creates a hole by displacing tissue to the sides rather than cutting through.
How it works: tissue fibers are pushed aside as the needle passes. The resulting hole is smaller than the needle diameter, and the tissue closes snugly around the suture.
Best for: all soft internal tissues where cutting is not needed:
- Muscle belly
- Subcutaneous fat
- Hollow viscera (stomach, intestine, bladder, uterus)
- Oral and mucous membranes
- Peritoneum
Veterian Key: "Non-cutting needles are designed to suture muscle, subcutaneous tissue, fat, and viscera."
Veterinary Surgery Online: "Tapered needle points are used when minimal effort is required to penetrate the tissues as they produce the smallest holes."
2. Reverse cutting needle
A triangular cross-section needle with the cutting edge on the convex (outer) surface of the curve. The two side cutting edges cut outward, and the base of the triangle faces inward toward the wound.
The clinical advantage over conventional cutting: in a conventional cutting needle, the inner cutting edge faces the wound margin. Under tension, sutures naturally pull toward the wound and the inner cutting edge creates a line of weakness exactly where the force is directed, predisposing to suture cut-through. In reverse cutting, the cutting edge faces away from the wound, so the suture line lies within the hole rather than at its edge.
Veterian Key: "The reverse curved cutting needle, the cutting edge of which lies on the needle's convex surface, so that the suture lies within the hole created by the needle and is less likely to cut through tissue."
Best for: external skin closure across all species and wound types. The standard skin closure needle in small animal surgery.
3. Conventional cutting needle
Triangular cross-section with cutting edge on the concave (inner) surface. All three sides of the triangular body are cutting edges.
Properties: creates the largest hole of any needle type. Maximum cutting efficiency but maximum tissue disruption.
Veterinary Surgery Online: "Cutting needles produce the largest holes when passed through tissues."
Best for: very tough, highly keratinized tissues where penetration is genuinely difficult. In small animal practice, reverse cutting has largely replaced conventional cutting for skin because it produces the same penetration with less cut-through risk.
4. Taper-cut needle
A round shaft (like taper-point) with a reverse cutting tip. This hybrid design provides the cutting efficiency needed to initiate penetration through dense tissue, while the tapered round body follows through with minimal additional tissue disruption.
Veterian Key: "The tapered cutting needle combines a round shaft with a reverse cutting point to make the needle useful for suturing delicate yet dense tissue (e.g., fascia, periosteum, tendons)."
Best for:
- Dense connective tissue (fascia, linea alba in thicker patients)
- Periosteum
- Tendon and ligament (when absorbable suture is used for repair)
5. Blunt needle
No cutting edge of any kind. A rounded, blunt tip pushes tissue apart without puncturing.
MedCrave (Choosing Sutures in Small Animal Surgery): "Synthetic absorbable monofilament suture material 2-0 to 5-0 on a blunt needle is recommended" for liver and kidney parenchyma, where conventional needle points would tear the friable tissue.
Best for:
- Liver biopsy or repair
- Kidney parenchyma
- Any highly vascular, friable organ where a cutting point would tear tissue
Needle selection by tissue layer
2026 JAVMA study: taper vs. reverse cutting for intradermal closure
A prospective JAVMA 2026 study (264 TPLO patients, 96 assessed) compared SH (taper-point) and FS (reverse cutting) needles for intradermal skin closure in dogs:
"Taper suture needles are noninferior to reverse cutting needles for intradermal skin closures in tibial plateau leveling osteotomies."
Implication: for intradermal (subcuticular) skin closure where the needle passes through dermis rather than tough epidermis the taper-point needle produces clinically equivalent wound healing outcomes to the reverse cutting needle. The assumption that cutting-type needles are always required at the skin layer does not hold for buried intradermal closure.
For conventional external skin sutures (where the needle must penetrate the full epidermis), reverse cutting remains appropriate.
For how needle selection integrates with the full suture material decision, see needle choice alongside suture material selection. For how needle size relates to suture size, see suture size and needle size together. For how needle and suture selection map to each tissue layer, see needle selection by tissue type in layered closure. For the suture material selection guide in cats, see needle and material selection in cats.
Needle curve: an additional selection factor
Beyond needle point type, the curve (or shape) of the needle is also selected based on anatomical access:
Most internal tissue closure in small animal surgery uses 1/2 circle needles. The 5/8 circle is used in confined abdominal or orthopedic work.
Swaged vs. eyed needles
Virtually all modern surgical needles are swaged (eyeless) the suture material is pre-attached at the factory in the needle's shaft. This creates a smooth junction with no suture doubling at the eye, producing the smallest possible needle-entry hole.
Eyed needles (where the suture is threaded through an eye like a sewing needle) are still available but rarely used in modern veterinary surgery. Threading requires time, and the doubled suture at the eye creates a larger hole than the needle.
Frequently asked questions
My dog had surgery and the vet used different needles for different layers. Is that standard?
Yes this is correct practice. Each tissue layer has different properties and requires a different needle type for optimal closure with minimal trauma. The vet is not over-complicating the procedure; they are matching the tool to the tissue at each step.
Does needle choice affect scarring?
Indirectly. The reverse cutting needle reduces suture cut-through risk at external skin suture sites, which reduces the channel left when the suture is removed and reduces the perpendicular marks associated with external skin closure. Intradermal closure with taper needles (as confirmed by the 2026 JAVMA study) produces equivalent outcomes to reverse cutting in that specific application.
What is a "FS-2" or "SH" needle designation?
These are manufacturer codes (primarily Ethicon) for needle type and size. FS = For Skin (reverse cutting); SH = Small Half-circle (taper, small). These codes are printed on suture packaging the vet or technician selects the appropriate combination of suture material, size, and needle code for each closure layer.
Needle selection follows the same logic as suture material and size selection: match the tool to the tissue's specific needs. Cutting where no cut is needed adds trauma. Not cutting where resistance is real produces torn tissue. The right needle for each layer is the one that penetrates cleanly, creates the smallest appropriate hole, and sets the suture in the tissue with the minimum disruption.
Resources
- JAVMA (2026). Taper Suture Needles Are Noninferior to Reverse Cutting Needles for Intradermal Skin Closures in TPLO. avmajournals.avma.org
- Veterian Key. Selection of Suture Materials, Suture Patterns, and Drains for Wound Closure. veteriankey.com
- Veterinary Surgery Online. Suture Needles. vetsurgeryonline.com
- Veterinary Practice News. The Must-Read Guide to Selecting Sutures (Dr. Kendra Freeman, DACVS). veterinarypracticenews.com

Get a Free Poster
Enhance your workspace with a high-quality radiographs reference poster, designed for veterinary professionals. This free physical poster will be shipped directly to you—just fill out the form to request your copy.






Taking Great TPLO Radiographs
Click Below to Watch Live Video Demos


We'll send you a Free Wall Poster with all the steps
Step #1
Getting Ready
Ensuring a clean surgical field starts with proper skin preparation. This video demonstrates the best practices for:
- Shaving the patient – Achieving a close, even shave while minimizing skin irritation
- The Dirty Scrub – The initial skin prep step to remove surface debris and reduce bacterial load before the sterile scrub.
Following these techniques helps reduce infection risk and improve surgical outcomes. Watch the video to see how it’s done effectively!


Step #2
Reduce Your Risks
Many surgeons are shocked to find out that their patients are not protected from biofilms and resistant bacteria when they use saline and post-op antibiotics.
That’s Where Simini Comes In.
Why leave these risks and unmanaged? Just apply Simini Protect Lavage for one minute. Biofilms and resistant bacteria can be removed, and you can reduce two significant sources of infection.
Step #3
Take the Course
Preventing surgical infections is critical for patient safety and successful outcomes. This course covers:
- Aseptic techniques – Best practices to maintain a sterile field.
- Skin prep & draping – Proper methods to minimize contamination.
- Antibiotic stewardship – When and how to use perioperative antibiotics effectively.
Stay up to date with the latest evidence-based protocols. Click the link to start learning and earn CE credits!

Things to know
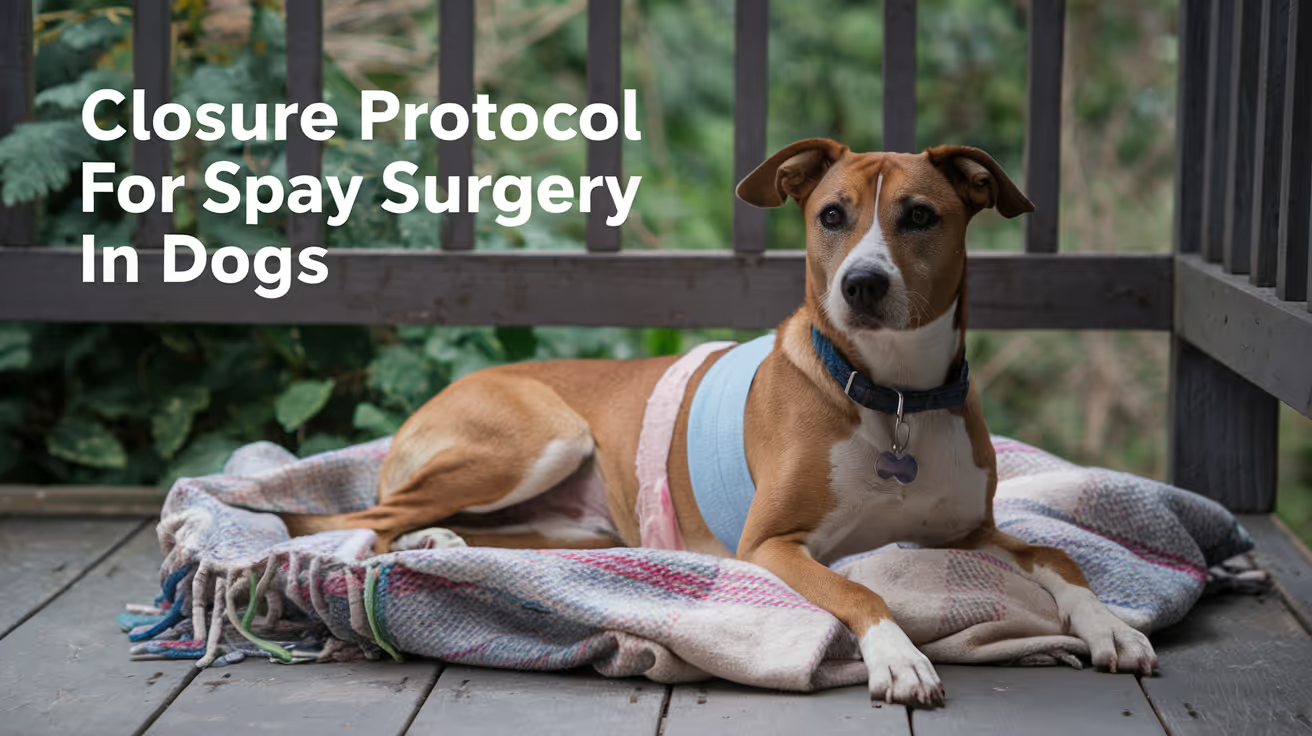
Closure Protocol for Spay Surgery in Dogs
Learn the detailed closure protocol for spay surgery in dogs, including step-by-step suturing techniques and post-op care tips.
The spay incision is one of the most commonly performed surgical wounds in veterinary practice. The closure is routine, but "routine" does not mean it can be done carelessly inadequate linea alba closure is the leading cause of post-spay incisional hernia, and insufficient skin closure is the most common source of early post-operative complications owners observe at home.
Understanding the three-layer protocol helps you know what your dog received and what to expect during recovery.
Quick answer: Canine spay closure proceeds in three layers: (1) linea alba PDS or polyglyconate 0 to 2-0, simple continuous, bites 5 to 10 mm from the incision edge and 5 to 10 mm apart; (2) subcutaneous tissue Monocryl or Vicryl 2-0 to 3-0, simple continuous; (3) skin interrupted nylon 3-0 to 4-0 or intradermal Monocryl 4-0. Secure knots are critical for continuous patterns: minimum 4 throws at the start of the continuous, additional throws at the end knot.
Key takeaways
- Linea alba is the structural layer inadequate closure here causes hernia, not just a surface wound problem.
- Bite dimensions matter: 5 to 10 mm from the incision edge; 5 to 10 mm between bites.
- Knot security is essential in continuous patterns published evidence links terminal knot failure to body wall dehiscence.
- Subcutaneous closure eliminates dead space and reduces skin tension for better wound healing.
- Intradermal skin closure is increasingly standard for routine spays, with no removal visit needed.
- Suture size varies with patient size: small dogs use 2-0 to 3-0; large dogs use 0 to 2-0.
Why the spay closure protocol matters
An ovariohysterectomy creates a ventral midline laparotomy. The linea alba is incised, the abdominal cavity is entered, the ovaries and uterus are removed, and the abdomen is closed in layers.
The closure is not just sealing the skin it is restoring the mechanical integrity of the abdominal wall. A dog that hernias through a spay incision has not had a skin problem; she has had a linea alba failure.
Veterinary Evidence (systematic review, linea alba closure): knot security is significantly affected by suture type, number of throws per knot, and surgeon experience and these factors should all be considered when performing surgery.
Layer 1: Linea alba closure
What the linea alba is
The linea alba is the midline aponeurosis a band of fibrous tissue created where the left and right abdominal wall muscles join. It is the primary mechanical structure of the ventral abdominal wall. The spay incision passes through this tissue to access the abdomen.
Technique
Pattern: simple continuous (preferred for speed and even tension distribution) or simple interrupted (preferred when tissue quality is questionable or infection is a concern).
WVS Academy (canine OVH surgical procedure guide): "Suture bites should be placed in the fascia and muscle 5 to 10 mm from the incision, and 5 to 10 mm apart. Place your first knot in the intact muscle directly adjacent to the incision. This ensures that the knot does not sit within the linea alba creating a gap. Tie a surgeon's knot and then 4 to 5 single-throw knots."
WCVM (University of Saskatchewan, Lab 6): "Take adequate bite (5 to 10 mm) of external rectus fascia or linea alba on either side of abdominal incision. Avoid large amounts of muscle as adds minimal strength and decreases apposition. Avoid fat as prevents healing."
Key principle: bites must be perpendicular to the wound not oblique. Oblique bites create longer bites with a wider gap between the incorporated tissue and the wound edge, reducing the mechanical strength of the closure.
Material
Preferred: PDS (polydioxanone) or polyglyconate (Maxon)
- Both are monofilament absorbable materials that retain strength for 4 to 6 weeks while the linea alba heals
- Monofilament surface minimizes bacterial adhesion compared to braided alternatives
- Size: 0 to 2-0 in most dogs; 2-0 to 3-0 in dogs under 10 kg
Alternative: Vicryl (polyglactin 910), size 0 to 2-0 acceptable for clean spay in a healthy dog; braided structure means slightly higher bacterial adhesion risk but clinically acceptable in routine clean surgery.
Knot security reminder
For continuous patterns, the end knot must be tied with additional throws beyond the start knot. WCVM: "Place appropriate number of throws for material and pattern (e.g., one extra throw at beginning and 2 to 3 throws extra at end of a simple continuous pattern) to ensure knot security."
For how the linea alba closure relates to the layered closure principle, see linea alba closure in the layered closure context.
Layer 2: Subcutaneous closure
Subcutaneous closure serves two functions: eliminating dead space beneath the skin, and reducing the tension on the skin closure.
Pattern: simple continuous absorbable
Material:
- Monocryl (poliglecaprone 25) 2-0 to 3-0: preferred for low tissue reaction
- Vicryl (polyglactin 910) 2-0 to 3-0: acceptable alternative
Technique: bites engage the subcutaneous fat perpendicular to the wound. Each loop draws the fat layers together, eliminating the space below the skin where serum would otherwise accumulate.
For how subcutaneous closure prevents seroma formation, see subcutaneous closure and seroma prevention.
Layer 3: Skin closure
Option 1: Interrupted external sutures (nylon or Prolene 3-0 to 4-0)
Best when:
- Post-operative wound monitoring is a priority
- The dog cannot reliably wear an E-collar (external sutures allow the vet to assess the wound directly at the removal visit)
- Any wound tension exists that exceeds what intradermal can hold
Spacing: 4 to 6 mm between sutures, placed 4 to 5 mm from the wound edge.
Removal: day 10 to 14, at the post-operative recheck.
Option 2: Intradermal (subcuticular) Monocryl 4-0
Increasingly the standard for routine canine spay closure in many practices.
WCVM: "For the intradermal, an absorbable suture material is indicated. A monofilament is typically preferred because of decreased tissue drag. The skin heals rapidly so a rapidly absorbable suture, like poliglecaprone 25, can be used."
Advantages:
- No external material for the dog to lick or chew
- No removal visit required
- Fine, less visible scar
- Knots are buried WCVM notes that "poorly buried knots are frequently associated with excess licking, irritation and increased infection rates"
For the full intradermal technique in the context of canine spay closure, see intradermal closure for spay incisions. For the cat spay closure comparison, see cat spay closure compared to dog spay.
Size-adjusted material guide
Post-operative care: what owners do
Activity restriction: leash walks only for 10 to 14 days. No running, jumping, or rough play. Metropolitan Veterinary Associates: "Dogs should be kept from jumping up/down on/from high surfaces, running up steps or any other activity that puts tension on the incision. Excess tension can lead to dehiscence."
E-collar compliance: non-negotiable, regardless of whether external or intradermal sutures were placed. A dog can disrupt an intradermal closure through licking before the dermal healing is complete.
Wound monitoring: twice daily. Normal: mild swelling and redness for 2 to 3 days, then progressive improvement. Abnormal: increasing redness, swelling after day 3, discharge, wound opening, or odor.
For the full post-operative monitoring protocol applicable to spay recovery, see monitoring the spay closure at home. For suture removal timing, see suture removal at the post-spay recheck.
Frequently asked questions
My dog has no visible stitches after her spay. Does that mean no stitches were used?
No it means intradermal closure was used. The suture runs inside the dermis, is completely buried, and dissolves on its own. There is nothing to remove and no external material to lick. A thin incision line is all that is visible.
The vet said my dog's spay used a "continuous pattern." Is that different from separate stitches?
Yes. Continuous (running) suture means a single thread runs the length of the closure in a sequence of loops. It is faster to place and distributes tension evenly along the entire closure. Separate (interrupted) sutures are placed and tied individually. Both are standard the choice reflects surgeon preference and patient factors.
How do I know if the linea alba closure is holding?
You cannot assess the linea alba directly it is the internal fascial layer below the skin. The external sign that the linea alba has failed is a soft, doughy bulge near the incision that appears weeks to months after surgery this is an incisional hernia. More immediate signs of early closure failure: the incision opening (dehiscence), abdominal contents visible, or your dog showing signs of significant pain or abdominal discomfort. Any of these require immediate veterinary assessment.
The spay closure protocol is a specific instance of the general layered closure principle applied to a clean ventral midline laparotomy. Linea alba for structure, subcutaneous for dead space elimination and skin tension reduction, skin for external protection. Getting each layer right material, bite dimensions, pattern, and knot security is what makes a routine spay a reliably routine recovery.
Resources
- WVS Academy. Canine OVH: Surgical Procedure. wvs.academy
- WCVM University of Saskatchewan. Lab 6 Part 4: Incision Closure. wcvm.usask.ca
- Veterinary Evidence (2017). Choice of Suture Pattern for Linea Alba Closure. veterinaryevidence.org
- Metropolitan Veterinary Associates. Abdominal Surgery: Post-Operative and Incisional Care. metro-vet.com
Closure Technique for Cesarean Section in Dogs
Learn the best closure techniques for cesarean section in dogs to ensure safe healing and reduce complications.
A canine cesarean section is different from most abdominal surgeries in one critical way: time. The longer the uterus remains open, the more risk to the puppies. Closure decisions are made with efficiency in mind but also with the mother's recovery and future reproductive potential foremost.
The closure sequence moves from the deepest structure outward, with each layer serving a specific mechanical purpose.
Quick answer: Canine C-section closure proceeds in four stages: uterotomy closure (1 or 2 layers, 3-0 or 4-0 monofilament absorbable suture with taper needle), abdominal wall closure (3 layers: rectus sheath, subcutaneous tissue, and skin), using PDS or Maxon for the linea alba and Monocryl for subcutaneous closure, with subcuticular Monocryl preferred for skin. DVM360 recommends subcuticular skin closure as the preferred technique. Antibiotics are not needed in uncomplicated cesarean sections.
Key takeaways
- Uterotomy is closed in 1 or 2 layers using 3-0 or 4-0 absorbable monofilament on a taper needle.
- Inverting patterns (Cushing, Lembert) are used for uterine closure to prevent suture ends from contacting uterine contents.
- Abdominal wall closes in three layers: rectus sheath, subcutaneous tissue, and skin.
- Subcuticular Monocryl is the preferred skin closure method after canine C-section.
- Antibiotics are not indicated in uncomplicated cases they are given only when mastitis or metritis is present.
- Intradermal skin closure reduces self-trauma risk in a nursing mother who cannot wear an E-collar easily.
Why C-section closure is different
A cesarean section creates a uterotomy an incision into the uterus that must be closed before the abdominal wall. This adds a critical intermediate step not present in routine abdominal surgery.
The uterus is a highly vascular organ with a mucosa that must not be penetrated by suture ends. The closure must be watertight to prevent leakage of uterine contents into the abdominal cavity. And it must support the mother's reproductive integrity for future litters if breeding is planned.
After uterine closure, the abdominal wall follows the standard three-layer laparotomy protocol. But with puppies and a nursing mother to consider, some closure decisions shift particularly at the skin.
Stage 1: Uterotomy closure
Suture material and needle selection
Clinician's Brief (Canine Cesarean Section step-by-step guide) specifies: "Use 3-0 or 4-0 monofilament absorbable suture (PDS, Maxon, or Monocryl) with a taper needle for uterine closure."
The taper needle is essential. Cutting needles create larger tissue tracks and are inappropriate for the delicate uterine wall.
Material comparison at the uterine layer:
Single-layer vs. two-layer uterine closure
DVM360 (Cesarean section in dogs: indications, techniques) notes: "A variety of techniques have been employed to close the hysterotomy, and all seem equally efficacious. It can be closed in one or two layers."
Single-layer closure:
- Appositional continuous pattern through full myometrial thickness
- Faster important in C-section where surgical time affects puppy outcomes
- Acceptable in uncomplicated, clean uterotomy sites
Two-layer closure:
- First layer: appositional closure of the mucosa and submucosa
- Second layer: inverting pattern (Cushing or Lembert) in the seromuscular layers
- Luminal penetration of the inner layer should be avoided
Clinician's Brief specifies: "Myometrium and submucosa should be included in the closure, and luminal penetration should be avoided."
Inverting patterns (Cushing, Lembert): both turn the wound edges inward toward the lumen, burying the suture line within the seromuscular layer and preventing suture ends from contacting uterine contents. These are inverting patterns appropriate for hollow organ closure where leakage must be prevented.
Local lavage after uterine closure
After uterine closure, the uterus is lavaged with sterile saline while still isolated from the abdominal cavity with laparotomy pads. Clinician's Brief: "Local lavage is generally sufficient, unless gross contamination of the abdomen with uterine contents has occurred."
For how the layered closure technique applies in this abdominal context, see layered technique applied in C-section closure.
Stage 2: Abdominal wall closure
After the uterus is replaced in the abdomen, closure follows the standard three-layer laparotomy protocol.
Layer 1: Rectus sheath / linea alba
- Material: PDS or Maxon, size 0 to 2-0 depending on patient size
- Pattern: simple continuous
- Key principle: sutures must engage the fascial sheath, not just the muscle belly
Layer 2: Subcutaneous tissue
- Material: Monocryl 2-0 to 3-0
- Pattern: simple continuous
- Goal: eliminate dead space and reduce tension on skin closure
For how muscle and fascial layer closure applies in this context, see uterine and muscle layer closure in C-section.
Layer 3: Skin
DVM360 states: "It is preferential to close the skin with a subcuticular suture pattern with a synthetic absorbable monofilament suture material (such as Monocryl)."
Why subcuticular closure is preferred for canine C-section:
- The nursing mother will lick the incision area
- An E-collar interferes with nursing and puppy care
- Buried intradermal sutures give no external material for the mother to lick out
- No removal visit required
Alternative skin closure options:
- Simple interrupted (nylon or Prolene): requires removal at 10 to 14 days; more reliable monitoring of skin healing
- Staples: fast to place; require removal visit; can catch in puppy fur during nursing
For intradermal skin closure technique applied in this context, see intradermal skin closure after C-section.
Antibiotics: when they are and aren't needed
Clinician's Brief is clear: "Antibiotics are not necessary after uncomplicated cesarean section. When antibiotics are indicated (eg, mastitis, metritis), beta lactams (eg, ampicillin, cephalexin, amoxicillin-clavulanate) are most often used."
Routine prophylactic antibiotic courses after uncomplicated C-section are not evidence-based practice and may expose nursing puppies to antibiotic residues through milk.
Oxytocin and uterine contraction
After all fetuses and placentas are removed, oxytocin is administered to facilitate uterine contraction:
- Dogs: 1 to 5 units IM or IV
- Purpose: reduces uterine blood flow, aids in placental site involution, reduces post-operative hemorrhage risk
If the uterus does not contract adequately before closure, bleeding risk increases. This is assessed before beginning the uterine suture line.
For suture removal timing that applies to any external skin sutures placed at this incision, see suture removal timing after C-section.
Post-operative care for the nursing mother
The nursing mother presents a unique challenge: she needs to care for puppies while her incision heals.
Critical considerations:
- Subcuticular skin closure eliminates the need for an E-collar
- If external sutures were placed, monitor closely for licking even intermittent licking can remove sutures within hours
- Keep the whelping area clean and dry to reduce wound contamination from the environment
- Puppies nursing on the ventral abdomen place mild pressure on the incision monitor for any swelling or discharge at nurse contact points
- Activity restriction is complicated by puppy care the mother will stand, lay, and reposition frequently
For the closure checklist applicable to C-section procedures, see checklist for C-section closure.
Frequently asked questions
Will my dog be able to nurse puppies after a C-section?
Yes. The incision does not affect the mammary glands. Nursing can begin as soon as the mother is awake and the puppies are warmed and vigorous. The main challenge is preventing the mother from licking the incision while nursing is in progress.
My dog had a C-section and still needs spaying. Can it be done at the same time?
Yes. If the owner does not plan future litters, an ovariohysterectomy can be performed after the hysterotomy (a procedure called en bloc ovariohysterectomy) or as a separate procedure after uterine closure. Clinician's Brief notes: "If the owners do not plan future breedings, an ovariohysterectomy can be performed after hysterotomy. Alternatively, an en bloc ovariohysterectomy can be performed, with puppies removed from the uterus by the recovery team."
When should my dog return to the vet after a C-section?
Your vet will provide specific guidance, but typical rechecks are at 3 to 5 days post-surgery (wound assessment) and 10 to 14 days (suture removal if non-absorbable skin sutures were placed). Any concern before these scheduled visits wound discharge, swelling, fever, or puppies not nursing warrants same-day contact.
Cesarean section closure in dogs is rapid, sequenced, and purpose-built for a nursing mother. Every closure decision taper needle at the uterus, subcuticular skin closure, no routine antibiotics reflects the dual goal of the procedure: deliver healthy puppies and return an intact, functional mother to her litter as quickly as possible.
Resources
- Clinician's Brief. Cesarean Section in Dogs: Step-by-Step Veterinary Guide. cliniciansbrief.com
- DVM360. Cesarean Section in Dogs: Indications and Techniques. dvm360.com
- Veterian Key. Suturing Techniques and Common Surgical Procedures. veteriankey.com

Subcutaneous Closure Techniques in Cats
Learn about subcutaneous closure techniques in cats, including methods, materials, and best practices for optimal healing and minimal complications.
Subcutaneous closure techniques in cats are essential for proper wound healing after surgery or injury. These methods help reduce tension on the skin, minimize infection risk, and improve cosmetic outcomes. Understanding these techniques can help you care better for your cat post-operation.
This article explains the most common subcutaneous closure methods, the materials used, and tips for ensuring your cat recovers well. You will learn how veterinarians choose the right technique and what to expect during healing.
What is subcutaneous closure in cats?
Subcutaneous closure refers to stitching the tissue layer just beneath the skin in cats. This layer contains fat and connective tissue and helps support the skin edges during healing.
Closing this layer properly reduces tension on the skin surface and promotes faster, cleaner healing. It is a standard step in many feline surgeries.
- Definition of subcutaneous closure: It is the suturing of the tissue layer under the skin to support wound edges and reduce skin tension during healing.
- Purpose in surgery: It stabilizes the wound, decreases dead space, and helps prevent skin suture line complications like dehiscence or infection.
- Common in feline surgeries: Used in spays, tumor removals, and trauma repairs to improve healing and cosmetic results.
- Difference from skin closure: Subcutaneous closure is beneath the skin, while skin closure involves suturing the outer skin layer for final wound sealing.
Proper subcutaneous closure is critical for successful wound healing in cats. It supports the skin and reduces complications.
What materials are used for subcutaneous closure in cats?
Choosing the right suture material is important for subcutaneous closure in cats. The material must be strong enough to hold tissue but absorbable to avoid removal.
Veterinarians typically use absorbable sutures that break down safely inside the body over time.
- Absorbable sutures preferred: Materials like poliglecaprone or polydioxanone dissolve naturally, eliminating the need for suture removal.
- Suture size selection: Sizes 3-0 or 4-0 are common to balance strength and minimal tissue reaction in cats.
- Monofilament vs. multifilament: Monofilament sutures reduce infection risk due to less bacterial trapping compared to braided multifilament sutures.
- Suture needle type: Taper-point needles are used to minimize tissue trauma when passing through delicate subcutaneous tissue.
Using appropriate suture materials helps ensure the closure holds during healing and reduces complications like irritation or infection.
What are the common subcutaneous closure techniques in cats?
Several stitching techniques are used for subcutaneous closure in cats. The choice depends on wound size, location, and surgeon preference.
Each technique aims to approximate tissue edges securely while minimizing tension and trauma.
- Simple continuous suture: A single running stitch that is fast and distributes tension evenly along the wound.
- Interrupted sutures: Individual stitches placed separately, allowing precise tension control and easier adjustment if one fails.
- Subcuticular suture: Placed just under the skin surface, this technique provides excellent cosmetic results with minimal scarring.
- Mattress sutures: Horizontal or vertical mattress stitches provide strong tissue apposition and are useful for wounds under tension.
Veterinarians select the technique based on wound characteristics and the cat’s condition to optimize healing.
How does subcutaneous closure benefit wound healing in cats?
Subcutaneous closure plays a key role in supporting the skin and promoting faster recovery after surgery or injury in cats.
It reduces complications and improves the overall healing process.
- Tension reduction: By closing the deeper tissue, it lowers tension on the skin edges, preventing wound opening or tearing.
- Dead space elimination: It closes gaps under the skin that could fill with fluid and cause infection or delayed healing.
- Improved cosmetic outcome: Proper closure results in less scarring and a smoother skin surface after healing.
- Lower infection risk: Stabilizing tissues reduces movement and irritation, which helps prevent bacterial invasion.
These benefits make subcutaneous closure a standard practice in feline surgery to ensure the best healing results.
What are the risks or complications of subcutaneous closure in cats?
While subcutaneous closure is generally safe, some risks exist if the technique or materials are not used properly.
Understanding these helps you recognize problems early and seek veterinary care if needed.
- Suture reaction: Some cats may develop inflammation or irritation around the suture material causing swelling or discomfort.
- Wound dehiscence: If sutures fail or are too loose, the wound can reopen, requiring additional treatment or surgery.
- Infection risk: Improper technique or contamination can introduce bacteria leading to abscess or delayed healing.
- Seroma formation: Fluid accumulation under the skin can occur if dead space is not adequately closed during suturing.
Close monitoring and proper surgical technique reduce these risks significantly.
How should you care for your cat after subcutaneous closure?
Post-operative care is vital to ensure your cat’s wound heals well after subcutaneous closure. You play an important role in this process.
Following veterinary instructions and monitoring the wound helps prevent complications.
- Limit activity: Restrict your cat’s movement to avoid stress on the wound and allow proper healing.
- Prevent licking: Use an Elizabethan collar or other methods to stop your cat from licking or biting the sutures.
- Keep wound clean: Follow your vet’s advice on cleaning the area and avoid bathing until fully healed.
- Watch for signs: Monitor for redness, swelling, discharge, or opening of the wound and contact your vet if noticed.
Good aftercare supports the surgical closure and helps your cat recover quickly and comfortably.
What alternatives exist to traditional subcutaneous suturing in cats?
Besides traditional sutures, some alternative closure methods are available for subcutaneous tissue in cats. These may offer benefits in certain cases.
Understanding these options can help you discuss the best approach with your veterinarian.
- Absorbable staples: Used occasionally for faster closure but may cause more tissue reaction than sutures.
- Tissue adhesives: Medical glues can close small wounds but are less common for deep subcutaneous layers.
- Barbed sutures: These self-anchoring sutures eliminate knots and may reduce closure time and tissue trauma.
- Combination techniques: Some surgeons combine sutures with adhesives or staples to optimize closure strength and healing.
While traditional suturing remains the most common, alternatives may be suitable depending on the wound and cat’s needs.
Conclusion
Subcutaneous closure techniques in cats are crucial for successful surgical wound healing. They support the skin, reduce tension, and minimize complications like infection or wound opening.
Choosing the right suture materials and closure methods, along with proper aftercare, ensures your cat recovers well. Understanding these techniques helps you support your cat’s healing and recognize any issues early.
What suture materials are best for subcutaneous closure in cats?
Absorbable monofilament sutures like poliglecaprone or polydioxanone in sizes 3-0 or 4-0 are preferred for strength and minimal tissue reaction.
How long does it take for subcutaneous sutures to absorb in cats?
Absorbable sutures typically dissolve within 2 to 4 weeks, depending on the material, allowing the tissue to heal without suture removal.
Can cats remove subcutaneous sutures by licking?
Cats cannot remove subcutaneous sutures by licking because they are beneath the skin, but licking can irritate the skin closure and cause complications.
When should I contact a vet after my cat’s subcutaneous closure?
Contact your vet if you notice redness, swelling, discharge, wound opening, or if your cat shows signs of pain or lethargy near the surgical site.
Are there risks if subcutaneous closure is not done properly?
Improper closure can lead to wound dehiscence, infection, seroma formation, and delayed healing, increasing the need for further treatment.

Closing High-Tension Surgical Wounds in Dogs
Learn effective methods for closing high-tension surgical wounds in dogs to promote healing and reduce complications.
High-tension wounds are not just technically harder to close they fail by a different mechanism than standard wounds. The force that causes problems is not bacterial but mechanical: the skin pulls apart before tissue healing has created intrinsic strength to replace the suture.
Understanding how surgeons address this before closure begins is the key to understanding what your dog's procedure involved and what to watch for during recovery.
Quick answer: High-tension closure in dogs addresses the underlying tension problem before or alongside placing skin sutures. The main techniques are: undermining (freeing skin from underlying tissue to mobilize it), walking sutures (advancing skin subcutaneously toward the defect), tension-relieving suture patterns (horizontal mattress, vertical mattress, far-near-near-far), and releasing incisions or skin flaps (for defects that cannot be closed with the skin available). Pre-surgical tension assessment with the dog in standing position is essential wounds that look closable under anesthesia may be too tight once the dog is ambulatory.
Key takeaways
- Assess tension before the skin is incised, not after assess with the dog standing if possible.
- Undermining frees skin from underlying tissue to provide additional reach without requiring skin from elsewhere.
- Walking sutures advance skin toward the defect at the subcutaneous level before skin closure begins.
- Tension-relieving suture patterns (horizontal mattress, NFFN) distribute load across more tissue.
- Releasing incisions create parallel cuts in adjacent skin to allow closure without tension on the primary wound.
- Staples are not recommended over high-tension incisions they deform and open under prolonged tension.
Why tension causes wound failure
When skin edges are pulled together under more force than the tissue can support at the suture entry points, two things happen:
- Sutures cut through: the suture loop creates a linear tear perpendicular to the wound line at each entry point
- Ischemia at wound margins: compression from tight sutures reduces blood flow to the tissue between the entry points and the wound edge
MSPCA-Angell (Incisional Tension Relief: Simple Intraoperative Options): "From my clinical experience, the caudal-lateral thigh region is prone to dehiscence when the surgeon does not properly assess the skin tension prior to surgery. In this region, skin tension is best assessed with the dog standing on the rear legs. When standing, the muscles contract and exert tension to the overlying skin. In contrast, when the patient is under anesthesia, the muscles relax and the skin may appear deceptively pliable."
The practical consequence: a wound closed under anesthesia with apparent adequate skin can dehisce once the dog is ambulatory and muscle tension is restored.
Pre-surgical tension assessment
The standing test: for limb and caudal body wounds where muscular tension significantly affects skin mobility, the surgeon or technician assesses skin mobility before anesthesia with the dog weight-bearing.
The pinch test: at the proposed excision site, two fingers approximate where the wound edges would sit post-closure. If the skin pulls tight or blanches, tension-relief strategies must be planned before the first incision is made.
MSPCA-Angell: "Prior to surgery, manually assessing the regional skin's natural or inherent elasticity will give the veterinary surgeon an idea of which area(s) of adjacent elastic skin can be recruited to close the surgical defect."
Technique 1: Undermining
Undermining is the first-line tension reduction approach freeing the skin from the underlying subcutaneous tissue and fascia by blunt and sharp dissection, allowing the skin to slide toward the defect.
Veterinary Surgery Online: "Undermining the surrounding tissues may be required to release the skin and allow closure of skin edges without tension. This can be performed in a 360-degree fashion with combination of blunt and sharp dissection. Attempt to preserve arteries and veins, and only undermine as necessary to close the wound."
Key principle: undermine only as much as needed. Excessive undermining creates dead space, which fills with serum and provides a bacterial growth medium. Preserve the subcutaneous blood vessels that supply the skin flap created by undermining devascularized skin dies.
Technique 2: Walking sutures
Walking sutures anchor the dermis to the fascia at intervals, advancing the skin progressively toward the defect at the subcutaneous level. By the time skin closure sutures are placed, the edges are already close together with minimal remaining tension.
Veterinary Surgery Online: "Walking sutures can be used to tack down the dermis to the underlying fascia. These also help decrease tension on the wound edges. After placement, the wound edges should be in close proximity and under minimal tension."
Material: 2-0 PDS or Biosyn for the walking sutures themselves (3-0 in patients under 15 kg).
For full walking suture technique detail, see walking sutures for large skin defects.
Technique 3: Tension-relieving suture patterns
When skin edges can be approximated but closure tension is high, tension-relieving patterns distribute the load across more tissue surface area.
Horizontal mattress: placed parallel to the wound, distributing tension 8 to 10 mm from each edge. Can be used as a temporary stay stitch, then removed after 3 to 4 days once the appositional closure is secure.
Vertical mattress: takes a deep bite far from the wound edge, returns with a shallow bite close to it. Provides deep tissue purchase and everts the wound edges important in high-tension wounds that tend to invert.
Far-near-near-far (FNFN): appositional and tension-relieving simultaneously. Stays in through full healing. Appropriate when both cosmesis and tension distribution are required.
What to avoid: simple interrupted sutures alone across a high-tension wound. They cannot distribute the load adequately and are the most common pattern associated with suture cut-through.
For the full tension-relieving suture pattern guide, see tension-relieving patterns for high-tension wounds.
Technique 4: Releasing incisions
When neither undermining nor tension-relief patterns provide enough skin to close the primary defect, a parallel incision is made in adjacent skin. This incision relaxes the full skin sheet, allowing the primary wound to close without tension.
The releasing incision itself is left to heal by second intention (contraction and epithelialization). Releasing incisions are most useful in:
- Trunk and lateral body wounds
- Wounds where linear advancement of adjacent skin is adequate
DVM360: "Releasing incisions, advancement and rotational flaps, or punch grafts can be used to close difficult wounds."
Technique 5: Skin flaps
When the defect is too large for any of the above approaches, a skin flap recruits skin from an adjacent or distant region. The flap maintains its blood supply through a pedicle attachment.
Advancement flap: the adjacent skin is incised and slid forward to fill the defect without rotation.
Rotation flap: a semicircular area of skin is rotated on a pivot point to fill a triangular or irregular defect.
Transposition flap: skin is moved from an adjacent or nearby area by creating a pedicle.
MSPCA-Angell: "For more challenging defects in this area, a transposition flap can effectively close the surgical defect and eliminate the risk of tension-induced dehiscence."
For how high-tension wound closure management compares to error-prone closure, see high-tension errors in wound closure. In obese dogs, high skin tension combines with poor wound vascularity to make these techniques especially critical; see high-tension closure in obese dogs.
Skin staples in high-tension wounds: a specific caution
MSPCA-Angell makes an important clinical observation: "It is the author's experience to avoid the use of skin staples to close incisions under tension. There is a risk that the staples will deform and open when subject to prolonged incisional tension."
Skin staples are appropriate for standard-tension wounds but are mechanically inferior to sutures in sustained high-tension situations. Use vertical or horizontal mattress sutures instead, potentially supplemented by walking sutures for the subcutaneous layer.
What to monitor at home
High-tension wounds carry more post-operative risk than standard closures. Owner monitoring is more important, not less.
Check twice daily:
- Suture lines remaining intact with no cut-through (look for linear tears at suture entry points)
- No gap opening between sutures
- No purulent or foul-smelling discharge
- Swelling progressing to decrease, not increase, after day 3 to 4
Activity restriction is non-negotiable: every movement applies tension to the closure. Even brief unsupervised activity can open a closure that held through the first several days. Leash-only, calm walks only until the recheck.
For the post-operative monitoring protocol applicable to high-tension wounds, see post-op monitoring after high-tension closure.
Frequently asked questions
My dog had a large tumor removed and the vet mentioned using a "flap." Does that mean the wound is more serious?
A flap is a technique, not a complication. It means the tumor was large enough that adjacent skin needed to be recruited to close the defect without tension. Flap closures heal very well when the flap's blood supply is preserved during surgery. The extra complexity is in the operating room; the recovery is not necessarily harder than a standard closure.
The wound looks tight and bunched after surgery. Is that normal?
Some gathering or bunching at the wound is expected when skin has been advanced toward a defect. This redistributes as the skin stretches slightly and the subcutaneous adhesions form over the first 5 to 10 days. If the bunching is accompanied by pale or dark discoloration at the wound edge, contact your vet that can indicate vascular compromise.
Can tension-related dehiscence be repaired?
Yes, often. If caught within 24 to 48 hours of opening, the wound can be re-closed after debridement of the edges. If the wound has been open long enough for infection to establish, delayed primary or secondary closure protocols apply. The key is calling your vet the same day the wound opens, not waiting.
High-tension wounds require planning before the first incision, not problem-solving after the last suture. The techniques that manage tension successfully all work by reducing the load before asking the skin to bear it through mobilization (undermining), advancement (walking sutures), load distribution (tension-relieving patterns), or supplemental skin recruitment (releasing incisions and flaps).
Resources
- MSPCA-Angell. Incisional Tension Relief: Simple Intraoperative Options. mspca.org
- Veterinary Surgery Online. Wound Closure Continued. vetsurgeryonline.com
- DVM360. Wound Management: Proceedings. dvm360.com
- Veterian Key. Selection of Suture Materials, Suture Patterns, and Drains for Wound Closure. veteriankey.com

Choosing Closure Technique Based on Tissue Type
Learn how to choose the best closure technique based on different tissue types for optimal healing and minimal complications.
No single closure technique works for every tissue. Skin needs edge apposition with minimal tension. Fascia needs mechanical strength. Hollow organs need watertight inverting patterns that prevent luminal contamination. Subcutaneous tissue needs dead space elimination.
Each tissue layer requires a different approach and matching the technique to the tissue is one of the most fundamental principles in wound closure.
Quick answer: Closure technique is matched to tissue type based on three factors: mechanical load (how much tension the tissue bears), healing timeline (how long the tissue needs support), and contamination risk (whether luminal contents or bacteria can compromise the closure). Fascia uses continuous or interrupted patterns with large-gauge long-retaining material. Hollow organs use inverting patterns (Cushing, Lembert, Connell) to prevent luminal contact. Subcutaneous tissue uses continuous or interrupted absorbable patterns to eliminate dead space. Skin uses interrupted, continuous, intradermal, or staple methods based on tension, cosmetics, and patient factors.
Key takeaways
- Fascia (linea alba) requires continuous or interrupted patterns with PDS or Biosyn the most mechanically critical closure layer.
- Hollow organs use inverting patterns (Cushing, Lembert) to prevent suture ends from contacting luminal contents.
- Muscle belly is generally not sutured fascia closure provides the structural support.
- Subcutaneous tissue uses simple continuous patterns to eliminate dead space and support skin.
- Skin closure technique is chosen based on wound tension, cosmetic needs, and removal feasibility.
- Needle type matches tissue: cutting needles for skin, taper-point for viscera and muscle.
Layer 1: Fascia and linea alba
Why this layer is the most mechanically critical
The linea alba is the aponeurotic junction where the abdominal wall muscles insert. It is the primary load-bearing structure in abdominal wall closure not the muscle itself.
If the fascial closure fails, the muscle bellies on either side retract and the entire abdominal wall opens. This creates incisional hernia at minimum, and evisceration at worst.
Technique
Pattern: simple continuous or simple interrupted.
Continuous is faster and equally strong when the suture material is intact. Interrupted is safer if suture integrity is uncertain failure of one suture does not open the entire closure.
Bite depth and spacing: bites must engage the full fascial thickness. Clinician's Brief (spay closure guide): "Take bites 5 to 10 mm from the incision edge and 5 to 10 mm apart to ensure adequate tissue purchase and tension distribution."
Material: PDS (polydioxanone) or Biosyn (glycomer 631) both monofilament absorbable materials that retain strength for 4 to 6 weeks while the linea alba heals. Size 0 to 2-0 depending on patient size.
For the full fascial closure technique, see fascial layer closure technique.
Layer 2: Muscle belly
In most small animal surgeries, the muscle belly itself is not sutured separately. The fascia that sheathes the muscle provides the structural closure muscle fibers do not hold suture well under load and can tear through.
Exception: deep epaxial muscle closure in dorsal spinal approaches, where muscle belly approximation is performed to reduce dead space. In these cases, a simple continuous pattern with absorbable suture is used, with tension kept minimal.
For how muscle layer closure relates to the layered sequence, see muscle layer as part of layered closure.
Layer 3: Hollow organs (stomach, intestine, bladder, uterus)
Why inverting patterns are used
Hollow organ closures face a unique problem: the luminal surface is in contact with bacteria (intestine), acidic contents (stomach), or urine (bladder). If the suture line protrudes into the lumen, these contents contaminate the closure from the inside. Inverting patterns bury the suture line beneath the seromuscular layer.
Common inverting patterns:
- Cushing: a continuous pattern that takes seromuscular bites parallel to the wound; the bites invert the tissue as the suture is tightened
- Lembert: an interrupted inverting pattern; similar seromuscular bites, tied individually
- Connell: a full-thickness inverting continuous pattern used when complete wall penetration is needed (e.g., some uterine closures)
Material: 3-0 to 4-0 monofilament absorbable on a taper-point needle. Vicryl (braided) should be avoided in the urinary bladder it can lose tensile strength prematurely in an alkaline urine environment.
Two-layer vs. one-layer closure: most enterotomy and gastrotomy closures use two layers a full-thickness first layer followed by an inverting seromuscular second layer for maximum leakage protection.
Layer 4: Subcutaneous tissue
Purpose of this layer
Subcutaneous closure eliminates dead space the gaps between tissue planes that fill with serum and create the ideal environment for seroma formation and bacterial growth.
Pattern: simple continuous absorbable. Bites are placed in the subcutaneous fat perpendicular to the wound, with each loop drawing the fat planes together.
Material: Monocryl (poliglecaprone 25) 2-0 to 3-0, or Vicryl of equivalent size. Monocryl is preferred in contaminated or high-infection-risk cases because its smooth monofilament surface resists bacterial adhesion.
For the full subcutaneous closure technique in dogs, see subcutaneous closure technique in dogs. For cats, see subcutaneous closure technique in cats.
Layer 5: Skin
Skin closure technique is the most variable of all layers influenced by wound tension, cosmetic requirements, patient size, and whether a removal visit is feasible.
For the complete skin closure method comparison, see skin closure methods compared by indication.
Needle selection by tissue type
The needle type must match the tissue. The wrong needle creates unnecessary trauma.
For full needle selection guidance, see needle selection alongside tissue type.
Frequently asked questions
Why did the vet use a different suture for each layer of my dog's surgery?
Because each layer has different mechanical needs and healing timelines. The linea alba needs long-lasting structural support. The subcutaneous layer needs dead space elimination and moderate short-term support. The skin needs surface apposition with or without cosmetic consideration. Using the same material and technique everywhere would mean either overengineering some layers or underprotecting others.
What happens if the wrong pattern is used for a hollow organ?
Using an appositional (non-inverting) pattern on a hollow organ for example, simple interrupted on an enterotomy leaves the full-thickness suture line exposed to the intestinal contents on the luminal side. This increases leakage risk and bacterial contamination of the suture material itself. Inverting patterns are specifically designed to prevent this by burying the closure.
Does tissue type change for cats versus dogs?
The tissue types are the same. The differences are in size cats use finer sutures (typically one size smaller than equivalent-weight dogs), and their thin skin tolerates less tension. Intradermal closure is particularly common in cats because their skin does not tolerate the suture-mark scarring that larger dogs accept.
Closure technique selection is not a preference it is a requirement that each tissue layer imposes on the surgeon. Fascia demands structural strength. Viscera demands contamination prevention. Subcutaneous tissue demands dead space closure. Skin demands surface apposition under the appropriate tension. Meeting each demand with the appropriate technique is what separates reliable healing from unpredictable complications.
Resources
- Clinician's Brief. How to Fine-Tune Suture Choices for Today's Veterinarian. cliniciansbrief.com
- Veterian Key. Selection of Suture Materials, Suture Patterns, and Drains for Wound Closure. veteriankey.com
- Veterinary Practice News. The Must-Read Guide to Selecting Sutures (Dr. Kendra Freeman, DACVS). veterinarypracticenews.com
- AAHA. Oh, Sew Easy: A Guide to Sutures. aaha.org
Closure Protocol Checklist for Veterinary Surgeons
Comprehensive closure protocol checklist for veterinary surgeons to ensure safe, effective surgical outcomes and patient care.
A protocol checklist exists for the same reason a preflight checklist does: the steps are well known, the consequences of skipping them are serious, and cognitive load under pressure increases the probability of omission.
This checklist is the practical translation of closure principles into sequential, verifiable steps from the moment the primary procedure is complete to the moment discharge instructions are given.
Quick answer: A complete veterinary surgical closure checklist covers five phases: (1) pre-close assessment (hemorrhage control, irrigation, tissue viability, dead space identification), (2) deep layer closure (appropriate material, correct bite dimensions, knot security), (3) subcutaneous closure (dead space elimination confirmed), (4) skin closure (method appropriate to wound and patient), and (5) discharge instructions (E-collar, activity restriction, twice-daily monitoring, recheck timing). Verification at each phase prevents the errors that produce post-operative complications.
Key takeaways
- Pre-close hemorrhage control must be confirmed before any sutures are placed active bleeding under a closed wound produces hematoma.
- Irrigation before closure reduces bacterial count at the wound margin.
- Bite dimensions and knot security should be verified at the deep layer before moving to subcutaneous.
- Dead space confirmation at subcutaneous closure prevents seroma formation.
- Skin closure method selection should be matched to wound tension, patient compliance risk, and removal feasibility.
- Discharge instructions are part of the closure protocol incomplete instructions produce avoidable post-operative complications.
Phase 1: Pre-close assessment
Before the first closure suture is placed, the following must be confirmed:
Hemorrhage control
- No active bleeding points remain
- All ligatures on ovarian and uterine stumps (spay) or vascular pedicles are intact and secure
- Lap sponge or pad count matches none retained in the abdomen
Active bleeding under a closed wound does not stop it produces a hematoma that can become infected, place pressure on the closure, and obscure the wound assessment during monitoring.
Irrigation
- Abdominal or wound lavage with warm sterile saline has been performed
- If peritoneal contamination occurred: copious irrigation (multiple warm saline flushes)
- No lavage fluid pools remaining before closure
DVM360 (Basic Principles of Wound Management): "Primary closure should eliminate dead space and provide good anatomical apposition of tissue."
Tissue viability
- All tissue edges are pink and bleeding when cut (viable)
- No devitalized (grey, brown, or non-bleeding) tissue remains at the margins
- If contamination was significant: wound suitable for primary closure or decision made for delayed primary
Foreign body / instrument check
- Instrument count complete
- No suture material loops, clamp caps, or other items retained in the wound
For the principles that underpin each pre-close verification step, see closure principles that pre-close assessment implements.
Phase 2: Deep layer closure
Linea alba / fascia
- [ ] Material selected: PDS or Biosyn for most patients; size matched to patient weight (0 to 2-0 for medium-large dogs; 2-0 to 3-0 for cats and small dogs)
- [ ] Pattern: simple continuous or interrupted based on tissue quality and contamination status
- [ ] Bite dimensions: 5 to 10 mm from incision edge; 5 to 10 mm between bites
- [ ] Bites perpendicular to wound (not oblique)
- [ ] Fascia engaged in every bite not just muscle belly
- [ ] No fat incorporated in bites (prevents healing)
- [ ] Start knot secured with adequate throws (minimum 4 for PDS; 5 for feline linea alba per published guidance)
- [ ] End knot secured with additional throws (continuous pattern end knots require extra throws)
- [ ] No gaps visible when forceps are run along the closed linea alba
Joint capsule (orthopedic cases)
- [ ] Full-thickness bites through capsule wall
- [ ] Inverting or appositional pattern as appropriate for the joint
- [ ] No suture material crosses the joint space
For how the deep layer closure relates to overall wound closure principles, see layered closure in the deep layer context.
Phase 3: Subcutaneous closure
- [ ] Material: Monocryl 2-0 to 3-0 or Vicryl 2-0 to 3-0
- [ ] Pattern: simple continuous
- [ ] Dead space confirmed eliminated: wound edges at subcutaneous level are in contact
- [ ] No fluid pocket remains between the deep closure and the skin
- [ ] Drain placement assessed: if dead space cannot be eliminated by suturing, drain has been placed and exits through a separate stab incision (not the primary wound)
- [ ] Knots buried
For common subcutaneous closure errors that produce dead space, see subcutaneous errors and dead space.
Phase 4: Skin closure
Method selection (complete one)
External interrupted (nylon or Prolene):
- [ ] 3-0 to 4-0 for most dogs; 4-0 for cats
- [ ] Sutures 4 to 6 mm apart, placed 4 to 5 mm from wound edge
- [ ] No blanching at wound margins after tying
- [ ] Removal planned for day 10 to 14
Intradermal (Monocryl 4-0):
- [ ] Start and end knots buried
- [ ] No suture material crosses the epidermis
- [ ] Wound edges fully apposed without puckering
- [ ] No removal visit required communicate this to owner
Staples:
- [ ] Staple remover available at discharge or removal visit
- [ ] Not used in cats or dogs under 15 kg unless specifically indicated
- [ ] Not used over high-tension incisions
Post-skin closure inspection
- [ ] All wound margins apposed no gaps
- [ ] No suture marks from overtightened knots
- [ ] No inversion of wound edges
- [ ] Skin color normal no blanching or dark discoloration at wound margins
For how skin closure method selection is made, see skin closure method selection for this patient.
Phase 5: Pre-discharge verification
Wound dressing (if applicable)
- [ ] Clean, non-adherent primary dressing applied if needed
- [ ] Drain exit covered with sterile absorbent bandage if drain is in place
Discharge instructions (verbal and written)
E-collar:
- [ ] E-collar fitted and in place before the patient goes home
- [ ] Owner instructed: worn at all times, including overnight
- [ ] Alternative explained if owner expects compliance issues (inflatable collar, surgical suit)
Activity restriction:
- [ ] Leash-only walks; no running, jumping, or rough play for 10 to 14 days
- [ ] Confined when unsupervised (crate, single room)
Wound monitoring:
- [ ] Owner instructed to check the wound twice daily
- [ ] Normal findings explained: mild swelling and redness for 2 to 3 days, thin serous crust at wound margins
- [ ] Abnormal findings explained with clear same-day action: purulent discharge, increasing swelling after day 3, wound opening, odor, pale gums
Suture removal:
- [ ] If external sutures: recheck scheduled at day 10 to 14
- [ ] If intradermal: recheck still scheduled (wound assessment) but no suture removal needed communicate clearly
Medications:
- [ ] Pain management dispensed and instructions given
- [ ] Antibiotics dispensed (if indicated) with full course completion emphasized
For the post-operative monitoring protocol owners follow from discharge, see post-operative monitoring from discharge.
Common errors the checklist catches
Frequently asked questions
Does every surgery have a formal closure checklist?
Many clinics use informal mental checklists; fewer use formal written protocols. Published evidence from human surgery (and increasingly from veterinary practice) shows that formal written checklists reduce surgical complications the same principle applies to closure. The value of a formal checklist is that it does not depend on the surgeon remembering every step under the cognitive load of a busy operating list.
Can owners access this kind of checklist information?
Not in surgical detail the linea alba bite dimensions and knot throw counts are for surgical teams. What owners can access is the discharge instruction section (Phase 5) and understanding what those instructions are designed to prevent makes owners more likely to follow them precisely.
What should I do if I notice a step was missed at home?
If you discover that an E-collar was not provided, that the wound is showing early signs of a problem, or that activity restriction was not maintained, contact your vet the same day. Earlier intervention for any closure problem produces better outcomes than waiting.
A checklist is only as useful as the discipline to use it. The value is not in the list itself but in the consistent verification it provides ensuring that none of the steps that determine post-operative outcomes are left to chance or tired recall.
Resources
- WCVM University of Saskatchewan. Lab 6 Part 4: Incision Closure. wcvm.usask.ca
- DVM360. Basic Principles of Wound Management. dvm360.com
- Veterinary Evidence (2017). Choice of Suture Pattern for Linea Alba Closure. veterinaryevidence.org
- Metropolitan Veterinary Associates. Abdominal Surgery: Post-Operative and Incisional Care. metro-vet.com
Closing Bite Wounds in Dogs: Expert Guide
Learn how to safely close bite wounds in dogs with expert tips on treatment, healing, and prevention of infection.
Bite wounds look smaller than they are. The surface puncture from a canine tooth may be half an inch wide, but the tissue damage underneath can extend several inches in every direction.
That's what makes bite wounds one of the more complex wound types in veterinary surgery. Whether and how to close them depends on contamination level, location, time since injury, and how much tissue was crushed.
Quick answer: All dog bite wounds are considered contaminated and require veterinary evaluation. Fresh, minimally contaminated wounds may be closed primarily after thorough lavage and debridement. Heavily contaminated, infected, or complex wounds are typically left open or treated with delayed closure. Antibiotics are routinely used. Most dogs require sedation or anesthesia for proper wound assessment and treatment.
Key takeaways
- All bite wounds are contaminated regardless of how small they appear on the surface.
- Immediate primary closure is appropriate only for clean, fresh wounds after debridement.
- Delayed primary closure is used for contaminated or infected wounds once the tissue stabilizes.
- Drains are often placed in closed bite wounds to prevent seroma and abscess formation.
- Antibiotics are typically prescribed to control or prevent infection in all bite wound cases.
- Surface size is misleading: puncture wounds can hide serious underlying damage to muscle, fascia, or organs.
Why bite wounds are different from other lacerations
A dog bite delivers two forces simultaneously: penetration and crushing. The teeth pierce the skin while the jaw compresses surrounding tissue. This creates tissue damage that extends far beyond the visible wound margins.
VCA Animal Hospitals explains: "Wounds that appear to be minor on the surface can be deceptive and may be life-threatening, depending on the location of the injury."
The American Animal Hospital Association (AAHA) emphasizes: "A clean fresh wound can be closed primarily, after appropriate lavage, debridement, and assessment of the potential need for a drain."
The key word is clean. Most bite wounds are not clean when they arrive.
When vets choose immediate (primary) closure
Primary closure means suturing the wound shut at the initial visit. This is appropriate when:
- The wound is less than 6 to 8 hours old
- The wound has been thoroughly lavaged and debrided
- There is minimal contamination (no gross debris, necrotic tissue, or obvious infection)
- The wound is in a cosmetically significant area (face) where open healing causes more problems than closure risk
Even primary closures in bite wounds are typically performed with drains placed to allow fluid escape. This reduces the risk of seroma and abscess formation.
For how drains interact with closure, see drains used in bite wound closure.
When vets delay closure
Delayed primary closure (waiting 3 to 5 days before suturing) is used when:
- The wound is heavily contaminated with debris, saliva, or infected material
- Tissue viability is uncertain after the initial crushing injury
- Infection is already established at presentation
- The wound is older than 6 to 8 hours with no prior treatment
The Merck Veterinary Manual states: "The time between initial debridement and final closure varies according to the extent of contamination or infection. Minimally contaminated wounds may be closed after 24 to 72 hours. Longer periods may be required for heavily infected wounds."
During the delay, the wound is treated as an open wound: cleaned, debrided, and bandaged daily. Once the tissue looks healthy and viable, closure is performed.
For broader guidance on the delayed closure decision, see delayed closure often used for bite wounds.
The closure procedure step by step
When the wound is ready for closure, your veterinarian will follow this sequence:
- Clip and clean the wound margins to create a sterile operating field
- Irrigate the wound under pressure with sterile saline to flush remaining bacteria
- Debride any remaining necrotic or non-viable tissue
- Assess depth: check for involvement of muscle, fascia, body cavities, or bones
- Place a drain if dead space is present or infection risk is high
- Close in layers: suture deep tissue first, then subcutaneous tissue, then skin
- Skin closure using interrupted or simple sutures or staples
For bite wounds on the head or face, the same process applies, but cosmetic outcome is a higher priority and skin flaps may be used to cover defects.
Infection risk in bite wound closure
Bite wounds carry significant infection risk from the bacteria in the biting animal's mouth. Common organisms include Pasteurella, Staphylococcus, Streptococcus, and various anaerobes.
VCA Animal Hospitals states: "Left untreated, the bacteria in an infected bite wound will cause a localized abscess or more generalized cellulitis that spreads through the surrounding area."
In rare cases, deep bite wounds can cause:
- Septic arthritis if near a joint
- Osteomyelitis if penetrating bone
- Pyothorax if penetrating the chest
Any of these requires hospitalization and intensive treatment beyond routine closure.
For how infection risk varies with closure technique, see infection risk in bite wound closure.
Owner care after bite wound closure
Your vet will provide specific instructions, but standard care after bite wound closure includes:
- Keep the E-collar on at all times to prevent licking, which rapidly introduces bacteria
- Limit activity to leash walks only during healing
- Check the wound twice daily for redness, swelling, discharge, or odor
- Complete the full antibiotic course even if the wound looks fine early
- Do not soak or bathe the wound area until the vet clears it
- Attend all scheduled rechecks so drain removal or suture removal can be performed safely
For how bite wound closure compares to cat bite wound management, see bite wound closure in cats for comparison. For how bite wounds are classified as contaminated wounds, see bite wounds as contaminated wounds.
Frequently asked questions
My dog was bitten but the wounds look small. Does it still need vet care?
Yes, always. Small puncture wounds from canine teeth close over quickly on the surface while bacteria are already tracking through the underlying tissue. VCA notes that minor-appearing wounds can be life-threatening depending on location. All bite wounds warrant prompt veterinary evaluation.
Will my dog need to be anesthetized to treat the wound?
Most bite wounds require at minimum heavy sedation for proper assessment. Complete wound exploration, irrigation, debridement, and closure all require the dog to be still and comfortable. Your vet will recommend the appropriate level of anesthesia for your dog's specific wounds.
How long does healing take after bite wound closure?
Uncomplicated closed bite wounds typically heal in 10 to 14 days. Wounds managed open, with delayed closure, or complicated by infection may take 3 to 6 weeks or longer. Your vet will monitor healing at recheck appointments.
Bite wounds demand more respect than their surface appearance suggests. The crush injury, contamination, and hidden tissue damage make them fundamentally different from simple lacerations. Early evaluation, thorough debridement, and appropriate closure timing are what keep a manageable wound from becoming a serious infection.
Resources
- VCA Animal Hospitals. Bite Wounds in Dogs. vcahospitals.com
- Merck Veterinary Manual. Management of Specific Wounds in Small Animals. merckvetmanual.com
- AAHA. Bite Wound Treatment Refresher. aaha.org
- Merck Veterinary Manual. Initial Wound Management in Small Animals. merckvetmanual.com

Closure Protocol for Spay Surgery in Cats
Learn the detailed closure protocol for spay surgery in cats, including step-by-step wound closure and post-op care tips.
Spay surgery in cats is a common procedure that requires careful closure to ensure proper healing and prevent complications. The closure protocol involves multiple layers of suturing to close the abdominal wall, subcutaneous tissue, and skin. Proper technique reduces infection risk and promotes faster recovery.
This article explains the step-by-step closure protocol for feline spay surgery. You will learn the types of sutures used, the order of closure, and tips for post-operative care to keep your cat safe and comfortable.
What is the standard closure protocol for spay surgery in cats?
The standard closure protocol for feline spay surgery involves closing three main layers: the abdominal wall, the subcutaneous tissue, and the skin. Each layer requires specific suture materials and techniques to ensure strength and minimize irritation.
Following the correct closure sequence helps prevent wound dehiscence and infection. It also supports proper healing and reduces discomfort for your cat.
- Abdominal wall closure: Use absorbable sutures like polydioxanone (PDS) in a simple continuous or interrupted pattern to securely close the linea alba.
- Subcutaneous layer closure: Close with absorbable sutures such as polyglactin 910 (Vicryl) in a simple continuous pattern to reduce dead space and support skin edges.
- Skin closure: Use non-absorbable sutures like nylon or absorbable monofilaments in interrupted or cruciate patterns for skin apposition.
- Suture removal timing: Remove skin sutures 10 to 14 days post-surgery to allow adequate healing.
Each closure layer plays a vital role in wound integrity and healing after spay surgery.
Why is multilayer closure important in cat spay surgeries?
Multilayer closure distributes tension evenly across the wound, reducing the risk of suture pull-through or wound opening. It also minimizes dead space where fluid can accumulate, lowering infection risk.
Each tissue layer has different strength and healing properties. Closing them separately supports natural tissue repair and reduces complications.
- Tension distribution: Closing multiple layers prevents excessive tension on skin sutures, reducing wound dehiscence risk.
- Dead space elimination: Subcutaneous closure reduces spaces where fluid or blood can collect, preventing seromas or hematomas.
- Layer-specific healing: Abdominal wall closure restores strength to the linea alba, essential for internal organ support.
- Infection prevention: Proper closure limits bacterial entry and promotes faster tissue recovery.
Multilayer closure is a surgical best practice that improves outcomes in feline spay procedures.
What suture materials are best for each closure layer in cat spays?
Choosing the right suture material is critical for effective closure and healing. Absorbable sutures are preferred for internal layers, while skin closure can use absorbable or non-absorbable sutures depending on surgeon preference.
Material choice affects tissue reaction, strength duration, and ease of removal.
- Abdominal wall sutures: Polydioxanone (PDS) or polyglyconate provide long-lasting strength and minimal tissue reaction for linea alba closure.
- Subcutaneous sutures: Polyglactin 910 (Vicryl) or poliglecaprone 25 (Monocryl) absorb within 2-3 weeks, suitable for soft tissue support.
- Skin sutures: Nylon or polypropylene offer good tensile strength and are easy to remove; absorbable monofilaments reduce the need for removal.
- Suture size: Typically 3-0 or 4-0 sutures balance strength and minimal tissue trauma for cats.
Using appropriate suture materials tailored to each layer supports optimal healing and reduces complications.
How should the abdominal wall be closed during a cat spay surgery?
The abdominal wall closure is the most critical step to restore the integrity of the linea alba and prevent herniation. It requires precise technique and strong sutures.
Surgeons usually use absorbable monofilament sutures in a simple continuous or interrupted pattern to ensure secure closure.
- Linea alba identification: Accurately identify and align the linea alba edges before suturing to avoid muscle incorporation.
- Suture pattern: Simple continuous sutures provide even tension and faster closure, while interrupted sutures allow better tension adjustment.
- Suture bite size: Take 5-7 mm bites from the edge to ensure strong tissue purchase without tearing.
- Suture spacing: Place sutures 4-6 mm apart to maintain wound strength and prevent gaps.
Proper abdominal wall closure is essential to prevent post-operative complications like hernias or wound breakdown.
What is the recommended technique for subcutaneous tissue closure in cats?
Subcutaneous closure reduces dead space and supports skin edges, promoting better healing and minimizing fluid accumulation. It uses absorbable sutures placed in a simple continuous pattern.
Careful handling of tissue and appropriate suture tension are important to avoid tissue strangulation or necrosis.
- Tissue handling: Gently handle subcutaneous tissue to avoid trauma and preserve blood supply for healing.
- Suture pattern: Simple continuous sutures evenly close the layer and reduce operative time.
- Suture tension: Apply moderate tension to approximate tissue without causing ischemia or puckering.
- Dead space closure: Ensure all pockets are closed to prevent seroma or hematoma formation.
Effective subcutaneous closure enhances overall wound strength and comfort for your cat.
How should the skin be closed after a cat spay surgery?
Skin closure is the final step and important for wound protection and cosmetic appearance. The choice of suture and pattern affects healing and ease of post-op care.
Options include interrupted sutures, cruciate patterns, or skin staples depending on surgeon preference.
- Suture type: Non-absorbable nylon sutures are common for easy removal; absorbable monofilaments reduce the need for suture removal visits.
- Suture pattern: Interrupted or cruciate sutures provide good skin edge apposition and allow drainage if needed.
- Suture spacing: Place sutures 4-6 mm apart to balance wound strength and minimize scarring.
- Suture removal: Remove skin sutures 10-14 days post-op to prevent irritation and allow full healing.
Proper skin closure protects the wound and helps your cat recover comfortably.
What post-operative care is needed after spay surgery closure in cats?
After closure, proper post-operative care is vital to ensure healing and reduce complications. Monitoring the incision and preventing self-trauma are key.
Follow your veterinarian’s instructions carefully to support your cat’s recovery.
- Incision monitoring: Check daily for redness, swelling, discharge, or opening that may indicate infection or dehiscence.
- Prevent licking: Use an Elizabethan collar or alternative to stop your cat from licking or biting the incision site.
- Limit activity: Restrict jumping and running for 10-14 days to avoid stress on the wound closure.
- Follow-up visits: Attend scheduled veterinary checks for suture removal and wound assessment.
Good post-op care helps your cat heal quickly and comfortably after spay surgery.
Conclusion
The closure protocol for spay surgery in cats involves careful multilayer suturing of the abdominal wall, subcutaneous tissue, and skin. Each layer requires specific suture types and patterns to ensure strong, secure closure.
Following proper closure techniques and post-operative care reduces complications and promotes fast healing. Understanding this protocol helps you support your cat’s recovery after spay surgery.
FAQs
How long does it take for a cat’s spay incision to heal?
Typically, the skin incision heals within 10 to 14 days, but internal healing may take several weeks. Follow-up care is essential to monitor healing progress.
Can I bathe my cat after spay surgery?
Avoid bathing your cat until the incision is fully healed and sutures are removed, usually after 10-14 days, to prevent infection and wound opening.
What signs indicate a spay incision infection?
Signs include redness, swelling, discharge, foul odor, warmth, or your cat showing pain when the area is touched. Contact your vet if these occur.
Is it normal for a small lump to form near the incision?
A small lump or swelling can be normal due to tissue reaction or fluid accumulation but should be monitored. Persistent or worsening lumps need veterinary evaluation.
When should skin sutures be removed after spay surgery?
Skin sutures are usually removed 10 to 14 days after surgery, once the incision has healed sufficiently to maintain closure without support.
Closure Technique for Cesarean Section in Dogs
Learn the best closure techniques for cesarean section in dogs to ensure safe healing and reduce complications.
A canine cesarean section is different from most abdominal surgeries in one critical way: time. The longer the uterus remains open, the more risk to the puppies. Closure decisions are made with efficiency in mind but also with the mother's recovery and future reproductive potential foremost.
The closure sequence moves from the deepest structure outward, with each layer serving a specific mechanical purpose.
Quick answer: Canine C-section closure proceeds in four stages: uterotomy closure (1 or 2 layers, 3-0 or 4-0 monofilament absorbable suture with taper needle), abdominal wall closure (3 layers: rectus sheath, subcutaneous tissue, and skin), using PDS or Maxon for the linea alba and Monocryl for subcutaneous closure, with subcuticular Monocryl preferred for skin. DVM360 recommends subcuticular skin closure as the preferred technique. Antibiotics are not needed in uncomplicated cesarean sections.
Key takeaways
- Uterotomy is closed in 1 or 2 layers using 3-0 or 4-0 absorbable monofilament on a taper needle.
- Inverting patterns (Cushing, Lembert) are used for uterine closure to prevent suture ends from contacting uterine contents.
- Abdominal wall closes in three layers: rectus sheath, subcutaneous tissue, and skin.
- Subcuticular Monocryl is the preferred skin closure method after canine C-section.
- Antibiotics are not indicated in uncomplicated cases they are given only when mastitis or metritis is present.
- Intradermal skin closure reduces self-trauma risk in a nursing mother who cannot wear an E-collar easily.
Why C-section closure is different
A cesarean section creates a uterotomy an incision into the uterus that must be closed before the abdominal wall. This adds a critical intermediate step not present in routine abdominal surgery.
The uterus is a highly vascular organ with a mucosa that must not be penetrated by suture ends. The closure must be watertight to prevent leakage of uterine contents into the abdominal cavity. And it must support the mother's reproductive integrity for future litters if breeding is planned.
After uterine closure, the abdominal wall follows the standard three-layer laparotomy protocol. But with puppies and a nursing mother to consider, some closure decisions shift particularly at the skin.
Stage 1: Uterotomy closure
Suture material and needle selection
Clinician's Brief (Canine Cesarean Section step-by-step guide) specifies: "Use 3-0 or 4-0 monofilament absorbable suture (PDS, Maxon, or Monocryl) with a taper needle for uterine closure."
The taper needle is essential. Cutting needles create larger tissue tracks and are inappropriate for the delicate uterine wall.
Material comparison at the uterine layer:
Single-layer vs. two-layer uterine closure
DVM360 (Cesarean section in dogs: indications, techniques) notes: "A variety of techniques have been employed to close the hysterotomy, and all seem equally efficacious. It can be closed in one or two layers."
Single-layer closure:
- Appositional continuous pattern through full myometrial thickness
- Faster important in C-section where surgical time affects puppy outcomes
- Acceptable in uncomplicated, clean uterotomy sites
Two-layer closure:
- First layer: appositional closure of the mucosa and submucosa
- Second layer: inverting pattern (Cushing or Lembert) in the seromuscular layers
- Luminal penetration of the inner layer should be avoided
Clinician's Brief specifies: "Myometrium and submucosa should be included in the closure, and luminal penetration should be avoided."
Inverting patterns (Cushing, Lembert): both turn the wound edges inward toward the lumen, burying the suture line within the seromuscular layer and preventing suture ends from contacting uterine contents. These are inverting patterns appropriate for hollow organ closure where leakage must be prevented.
Local lavage after uterine closure
After uterine closure, the uterus is lavaged with sterile saline while still isolated from the abdominal cavity with laparotomy pads. Clinician's Brief: "Local lavage is generally sufficient, unless gross contamination of the abdomen with uterine contents has occurred."
For how the layered closure technique applies in this abdominal context, see layered technique applied in C-section closure.
Stage 2: Abdominal wall closure
After the uterus is replaced in the abdomen, closure follows the standard three-layer laparotomy protocol.
Layer 1: Rectus sheath / linea alba
- Material: PDS or Maxon, size 0 to 2-0 depending on patient size
- Pattern: simple continuous
- Key principle: sutures must engage the fascial sheath, not just the muscle belly
Layer 2: Subcutaneous tissue
- Material: Monocryl 2-0 to 3-0
- Pattern: simple continuous
- Goal: eliminate dead space and reduce tension on skin closure
For how muscle and fascial layer closure applies in this context, see uterine and muscle layer closure in C-section.
Layer 3: Skin
DVM360 states: "It is preferential to close the skin with a subcuticular suture pattern with a synthetic absorbable monofilament suture material (such as Monocryl)."
Why subcuticular closure is preferred for canine C-section:
- The nursing mother will lick the incision area
- An E-collar interferes with nursing and puppy care
- Buried intradermal sutures give no external material for the mother to lick out
- No removal visit required
Alternative skin closure options:
- Simple interrupted (nylon or Prolene): requires removal at 10 to 14 days; more reliable monitoring of skin healing
- Staples: fast to place; require removal visit; can catch in puppy fur during nursing
For intradermal skin closure technique applied in this context, see intradermal skin closure after C-section.
Antibiotics: when they are and aren't needed
Clinician's Brief is clear: "Antibiotics are not necessary after uncomplicated cesarean section. When antibiotics are indicated (eg, mastitis, metritis), beta lactams (eg, ampicillin, cephalexin, amoxicillin-clavulanate) are most often used."
Routine prophylactic antibiotic courses after uncomplicated C-section are not evidence-based practice and may expose nursing puppies to antibiotic residues through milk.
Oxytocin and uterine contraction
After all fetuses and placentas are removed, oxytocin is administered to facilitate uterine contraction:
- Dogs: 1 to 5 units IM or IV
- Purpose: reduces uterine blood flow, aids in placental site involution, reduces post-operative hemorrhage risk
If the uterus does not contract adequately before closure, bleeding risk increases. This is assessed before beginning the uterine suture line.
For suture removal timing that applies to any external skin sutures placed at this incision, see suture removal timing after C-section.
Post-operative care for the nursing mother
The nursing mother presents a unique challenge: she needs to care for puppies while her incision heals.
Critical considerations:
- Subcuticular skin closure eliminates the need for an E-collar
- If external sutures were placed, monitor closely for licking even intermittent licking can remove sutures within hours
- Keep the whelping area clean and dry to reduce wound contamination from the environment
- Puppies nursing on the ventral abdomen place mild pressure on the incision monitor for any swelling or discharge at nurse contact points
- Activity restriction is complicated by puppy care the mother will stand, lay, and reposition frequently
For the closure checklist applicable to C-section procedures, see checklist for C-section closure.
Frequently asked questions
Will my dog be able to nurse puppies after a C-section?
Yes. The incision does not affect the mammary glands. Nursing can begin as soon as the mother is awake and the puppies are warmed and vigorous. The main challenge is preventing the mother from licking the incision while nursing is in progress.
My dog had a C-section and still needs spaying. Can it be done at the same time?
Yes. If the owner does not plan future litters, an ovariohysterectomy can be performed after the hysterotomy (a procedure called en bloc ovariohysterectomy) or as a separate procedure after uterine closure. Clinician's Brief notes: "If the owners do not plan future breedings, an ovariohysterectomy can be performed after hysterotomy. Alternatively, an en bloc ovariohysterectomy can be performed, with puppies removed from the uterus by the recovery team."
When should my dog return to the vet after a C-section?
Your vet will provide specific guidance, but typical rechecks are at 3 to 5 days post-surgery (wound assessment) and 10 to 14 days (suture removal if non-absorbable skin sutures were placed). Any concern before these scheduled visits wound discharge, swelling, fever, or puppies not nursing warrants same-day contact.
Cesarean section closure in dogs is rapid, sequenced, and purpose-built for a nursing mother. Every closure decision taper needle at the uterus, subcuticular skin closure, no routine antibiotics reflects the dual goal of the procedure: deliver healthy puppies and return an intact, functional mother to her litter as quickly as possible.
Resources
- Clinician's Brief. Cesarean Section in Dogs: Step-by-Step Veterinary Guide. cliniciansbrief.com
- DVM360. Cesarean Section in Dogs: Indications and Techniques. dvm360.com
- Veterian Key. Suturing Techniques and Common Surgical Procedures. veteriankey.com

Subcutaneous Closure Techniques in Dogs
Explore effective subcutaneous closure techniques in dogs, including methods, benefits, and best practices for optimal healing.
When your dog comes out of surgery, the incision you see on the surface is not where the work ended. The subcutaneous layer the fat and connective tissue just below the skin was closed first, before the skin was touched.
That subcutaneous closure is doing two critical jobs: eliminating the dead space where seromas form, and reducing the tension on the skin edges above it. When it is done correctly, the skin closure sits in a stable environment with far less mechanical stress on it.
Quick answer: Subcutaneous closure in dogs uses absorbable sutures (typically 2-0 or 3-0 Monocryl or Vicryl) placed in a simple continuous or interrupted pattern to bring the fat and connective tissue layer back into contact after surgery. This eliminates dead space, reduces skin edge tension, and lowers seroma risk. It precedes and supports all forms of skin closure. In obese dogs, additional walking sutures or multiple passes may be needed to fully manage the larger dead space.
Key takeaways
- Subcutaneous closure eliminates dead space directly beneath the skin where seromas most commonly form.
- Simple continuous pattern is the most efficient choice for subcutaneous closure in most canine surgeries.
- 2-0 or 3-0 absorbable monofilament (Monocryl or PDS) is the standard material in medium-sized dogs.
- The layer supports skin edge apposition, reducing tension that would otherwise fall on the skin sutures.
- No removal is needed because absorbable sutures dissolve naturally over 60 to 120 days.
- Subcuticular closure (intradermal) is a distinct technique placed shallower, just below the epidermis.
What the subcutaneous layer is
The subcutaneous layer sits between the muscle fascia and the skin. In dogs it contains adipose (fat) tissue, loose connective tissue, blood vessels, and lymphatics.
When surgery creates an incision through it, the two sides separate. The gap left behind is the dead space that fluid fills. Subcutaneous closure brings those two sides back together.
Subcutaneous vs. subcuticular an important distinction:
These are different layers, different suture techniques, and different outcomes. For intradermal closure specifically, see subcuticular vs subcutaneous closure decision.
Suture materials for subcutaneous closure in dogs
Absorbable materials are always used at this layer. The suture must hold through the healing period, then dissolve without leaving permanent foreign material in the fat tissue.
Suture size by dog size:
Monofilament materials (Monocryl, PDS, Biosyn) cause less tissue drag and carry lower infection risk in contaminated wounds compared to braided Vicryl. In clean elective surgeries, either is appropriate.
Closure patterns
Simple continuous (most common)
A single running suture placed along the entire length of the subcutaneous layer.
Advantages:
- Fast to place
- Even tension distribution along the wound length
- Efficient use of suture material
When to consider interrupted instead:
- Wound with variable tissue thickness along its length
- Contaminated or infected wounds where individual suture failure is preferable to complete line failure
Published guidance from the University of Saskatchewan WCVM confirms: "The simple continuous pattern provides quick, even tension distribution and good tissue apposition" for subcutaneous closure.
Interrupted
Individual sutures placed separately every 0.5 to 1 cm. Failure of one suture does not compromise the others.
Used when:
- Tissue quality is poor (chronic steroid use, malnutrition, geriatric patients)
- Wound contamination is present and selective drainage may be needed
- Variable tissue depth requires individual tension adjustment at each stitch
Multiple passes in obese dogs
Thick fat layers in obese dogs may require two passes of subcutaneous sutures one deep and one superficial to bring all tissue planes into contact. A single pass may close the deep portion but leave a superficial dead space that fills with fluid.
For additional walking sutures used in obese patients, see subcutaneous closure to eliminate dead space.
Subcutaneous closure in specific procedures
For how this layer connects to the complete layered technique, see subcutaneous layer within layered closure.
For comparison with subcutaneous closure in cats, see subcutaneous closure in cats for comparison.
What owners see and need to know
You will not see the subcutaneous sutures. They are entirely internal and dissolve on their own.
What is normal during healing:
- Mild firmness along the incision line in the first 1 to 2 weeks (normal suture reaction)
- Gradual softening of any initial firmness over 3 to 4 weeks
- No external suture material visible at the subcutaneous level
Signs that something may be wrong:
- Soft, fluctuant (water-balloon-like) swelling: possible seroma
- Hard, warm, tender lump: possible infection or suture reaction
- Wound edges visibly separating despite intact skin sutures: subcutaneous layer may have failed
For how to prevent fluid accumulation in the healing period, see seroma prevention through subcutaneous closure.
Frequently asked questions
Will I feel the subcutaneous sutures under my dog's skin?
Possibly in the first 2 to 4 weeks. A slight ridge or firmness under the incision is normal and reflects the suture material plus the normal inflammatory response. It gradually resolves. If the area is painful to light touch or becomes warm, contact your vet.
My dog's subcutaneous layer had to be closed twice. Is that a concern?
Not at all. In dogs with significant body fat or wide tissue dissection, multiple passes of subcutaneous sutures are a technique choice, not a sign of complication. More passes mean more thorough dead space elimination, which is desirable.
How long until the subcutaneous sutures dissolve?
For Monocryl (the most common choice), full absorption takes approximately 90 to 120 days. The sutures lose most of their tensile strength within 3 to 4 weeks well after the wound has healed sufficiently to maintain itself. You will not feel them surface or emerge through the skin.
The subcutaneous closure layer is invisible, internal, and does most of the structural work that the skin closure gets credit for. When it is placed well, dead space is gone, skin tension is low, and healing proceeds without the fluid accumulation that is responsible for most post-operative wound swelling in dogs.
Resources
- Veterinary Surgery Online. Wound Closure: Continued. vetsurgeryonline.com
- WCVM University of Saskatchewan. Lab 6 Part 4: Incision Closure. wcvm.usask.ca
- Veterian Key. Selection of Suture Materials, Suture Patterns, and Drains. veteriankey.com
- Great Pet Care. Seroma in Dogs: Causes, Symptoms, and Treatment. greatpetcare.com

Delayed Primary Closure in Veterinary Surgery
Learn about delayed primary closure in veterinary surgery, its benefits, procedures, and care for your pet's wound healing.
Not every wound should be closed immediately. When bacteria are already present in significant numbers, when tissue viability is uncertain, or when contamination cannot be fully cleared at the first visit, closing the wound traps the problem inside.
Delayed primary closure is the planned alternative. The wound is left open, cleaned and bandaged for a defined period, then closed surgically once the wound bed is healthy enough to support suture healing.
Quick answer: Delayed primary closure means closing a wound 3 to 5 days after injury, after open management has reduced bacterial counts and confirmed tissue viability, but before granulation tissue forms. It is used for contaminated wounds that cannot be safely closed at first presentation. The wound is cleaned with daily bandage changes, then closed surgically with standard suture techniques. It produces significantly lower infection rates than immediate closure of contaminated wounds.
Key takeaways
- Delayed primary closure occurs 3 to 5 days after injury, before granulation tissue forms.
- Used for contaminated wounds where immediate closure would trap bacteria.
- Daily wound care is required during the open phase: debridement, lavage, and bandage changes.
- Closure is performed surgically with standard suturing once the wound bed is healthy.
- Wounds closed after 5 days (once granulation tissue forms) are classified as secondary closure, not delayed primary.
- Second intention healing (leaving the wound to close on its own) is different from both no surgical closure is performed.
The four closure options: where delayed primary fits
Veterian Key (Open Wounds chapter) defines four strategies:
Today's Veterinary Practice (Wound Care Principles): "Third intention describes tertiary wound healing or delayed primary closure; it is best for infected or unhealthy wounds that are too contaminated for primary closure, but appear clean and well vascularized after approximately 2 to 5 days."
Wounds appropriate for delayed primary closure
Delayed primary closure is indicated when:
- Wound is 6 to 24 hours old with moderate contamination (too old or dirty for immediate primary closure)
- Bite wounds (animal bites are considered contaminated regardless of appearance see closing bite wounds for species-specific details)
- Traumatic wounds from road accidents, punctures, or foreign body penetration
- Moderately contaminated surgical wounds where complete debridement could not be achieved at first presentation
- Wounds with borderline tissue viability where it is unclear at first presentation which tissue will remain viable
Today's Veterinary Practice: "Wounds that fit in this category are: mildly contaminated wounds that require some debridement and those initially treated by open wound management for a short period of time."
The key qualification: the wound must be manageable within 3 to 5 days. If contamination is too severe or tissue necrosis is extensive, delayed primary closure is not achievable and secondary closure is used instead.
For how contaminated wound management determines whether delayed primary or alternative closure is needed, see contaminated wounds that require delayed closure.
The open wound management phase (days 1 to 5)
Day 1: initial wound assessment and debridement
- Sedate or anesthetize the patient
- Clip hair widely around the wound
- Lavage copiously with sterile saline under pressure to remove gross contamination
- Debride devitalized tissue (scalpel, scissors, or wet-to-dry dressings)
- Assess which tissue is viable and which requires further management
Merck Veterinary Manual: "The time between initial debridement and final closure varies according to the extent of contamination or infection. Minimally contaminated wounds may be closed after 24 to 72 hours. Longer periods may be required for heavily infected wounds."
Days 1 to 5: open wound care
- Bandage changes: daily, or more frequently if the bandage becomes soaked
- Wound lavage: each bandage change includes gentle lavage
- Debridement technique: wet-to-dry dressings remove necrotic tissue mechanically when pulled off; sugar or honey dressings draw fluid and provide antibacterial properties
- Assessment: each bandage change assesses whether the wound is ready for closure or needs continued open management
Veterinary Surgery Online: "Wounds are treated open for a few days with regular lavage, debridement (e.g. sugar, honey, wet-to-dry) and bandage changes to clean them in preparation for closure."
Ready for closure: what "healthy enough" looks like
- No visible purulent discharge
- Healthy granulation tissue beginning but not fully formed (healthy pink-red surface, not yellow or grey)
- Wound edges viable no necrotic margins
- Dog systemically well (no fever, normal appetite)
- Bacterial culture (if performed) shows reduced count
University of Minnesota (Clinical Skills Compendium): Secondary closure applies when delayed primary closure was "not sufficient enough due to persistent inflammation or infection" or "persistence of necrotic tissue that required serial debridement past 5 days."
The surgical closure at day 3 to 5
When the wound bed is ready, closure follows the same principles as any surgical wound:
- Debride wound edges: fresh edges improve healing; remove any epithelium that has begun forming along the wound margins
- Lavage: one final irrigation before closure
- Evaluate for dead space: place drains if needed
- Close in layers: subcutaneous layer, then skin
- Suture material: monofilament absorbable for internal layers; monofilament non-absorbable or absorbable for skin
Note: the wound at this stage is typically less amenable to primary tension-free closure than a fresh wound the edges may have retracted, and tension-relieving patterns may be needed.
For how infection risk reduction is achieved through delayed closure compared to immediate closure of dirty wounds, see infection risk reduction through delayed closure.
Delayed primary closure in emergency contexts
In emergency surgery (GI obstruction, hemoabdomen, uroabdomen), the closure decision is complicated by patient instability and abdominal contamination.
For severely contaminated abdominal cases (fecal peritonitis, bile peritonitis), the abdomen may be left partially open (open abdominal management) for repeated lavage and re-exploration before delayed closure is performed.
For how closure decisions adapt in emergency surgical contexts, see delayed closure in emergency surgery contexts.
Second intention healing vs. delayed primary closure
These are often confused but are fundamentally different:
Delayed primary closure:
- Wound is cleaned and bandaged open for 3 to 5 days
- Surgical closure is performed once wound bed is healthy
- No granulation tissue at time of closure
Second intention healing:
- No surgical closure is performed
- The wound heals on its own by granulation, contraction, and epithelialization
- Used when closure is impossible or not indicated
For the full framework covering how delayed closure fits within wound closure principles, see delayed closure within wound closure principles.
Frequently asked questions
My dog has an open wound with daily bandage changes. When will it be closed?
Your vet is monitoring the wound through each bandage change. Closure is performed when the wound looks healthy no purulent discharge, viable tissue margins, and the wound bed is pink and moist. That typically occurs at day 3 to 5 in uncomplicated cases. More severe contamination may extend this timeline.
Will delayed closure heal as well as immediate closure?
Yes, when the conditions warrant it. Delayed primary closure applied appropriately produces equivalent or better healing outcomes than immediate closure of contaminated wounds. The additional healing time allows bacterial counts to drop to levels the wound can manage.
My dog's wound was left open after surgery. Is that a complication?
Not necessarily. In contaminated wounds, intentional open management is the correct choice. It is a planned step, not a failure of closure. The goal is to clean the wound bed adequately before surgical closure a process that produces better outcomes than forcing premature closure over a contaminated field.
Delayed primary closure is patience applied surgically. The 3-to-5-day window exists because bacterial counts in contaminated wounds fall to manageable levels in that timeframe when the wound is properly managed. Closing too early traps the problem; closing too late allows granulation tissue to form and changes the surgical approach entirely. The window is specific, and the daily wound management within it is what makes delayed closure succeed.
Resources
- Veterian Key. Open Wounds. veteriankey.com
- Veterinary Surgery Online. Wound Closure. vetsurgeryonline.com
- Merck Veterinary Manual. Initial Wound Management in Small Animals. merckvetmanual.com
- Today's Veterinary Practice. Basic Principles of Wound Care and Bandaging Techniques. todaysveterinarypractice.com
Closure Protocol for Laparotomy in Cats
Learn the detailed closure protocol for laparotomy in cats, including step-by-step surgical techniques and post-op care.
Feline laparotomy closure follows the same layered sequence as dogs linea alba, subcutaneous tissue, skin but with meaningful differences in material selection, suture sizing, and the specific risks that matter most in cats.
The feline linea alba is narrower than in dogs. The skin is thinner. And the risk of suture sinus formation from non-absorbable fascial sutures is higher in cats than the equivalent canine procedure.
Quick answer: Feline laparotomy closure proceeds in three layers: (1) linea alba PDS or Vicryl in simple continuous pattern, 2-0 or 3-0 depending on cat size; (2) subcutaneous tissue Monocryl or Vicryl 3-0 to 4-0 in simple continuous; (3) skin intradermal Monocryl 4-0 (preferred) or interrupted nylon. Non-absorbable monofilament sutures for fascial closure are discouraged in cats published evidence links them to increased suture sinus formation and infection.
Key takeaways
- PDS or absorbable monofilament is preferred for feline linea alba non-absorbable sutures carry increased sinus formation risk.
- Simple continuous is as reliable as interrupted for feline linea alba with correct knot security.
- Intradermal Monocryl 4-0 is the preferred skin closure in cats because feline skin tolerates external sutures poorly.
- Suture bite size matters: 3 to 5 mm from the edge, 3 to 5 mm between bites.
- The postumbilical region achieves lower loads to failure an anatomical consideration for feline linea alba repair.
- Tissue glue can supplement intradermal skin closure for small, clean cat incisions.
Why feline laparotomy closure differs from dogs
Narrower linea alba: the feline linea alba is anatomically smaller than in a similar-weight dog. Bites must be precise too far from the incision edge risks missing the linea entirely; too close risks inadequate tissue purchase.
Published evidence against non-absorbable fascial sutures in cats: Feline Gastrointestinal Surgery (Williams, 2014): "Non-absorbable monofilament suture material (nylon or polypropylene) has been used for fascial closure in cats, but it reportedly leads to an increased risk of suture sinus formation and infection, and thus its use cannot be recommended."
Thinner, more reactive skin: feline skin tolerates external suture material less well than canine skin. Suture marks, irritation, and self-trauma are more common and more pronounced in cats.
Postumbilical anatomy: published cadaveric biomechanical data (PMC5813137) found: "The postumbilical region achieved lower loads to failure" in feline linea alba testing. This suggests the caudal linea requires at least equivalent, if not greater, care than the cranial region.
For how laparotomy closure in dogs compares on the same layered structure, see laparotomy closure in dogs.
Layer 1: Linea alba
Pattern
Simple continuous or simple interrupted. Published evidence (Veterinary Evidence, systematic review): "Incidence of complications using either a simple continuous or simple interrupted suture pattern in the linea alba is low if appropriate suture material is chosen and appropriate surgical technique is used."
Simple continuous is faster and distributes tension evenly. The security of a continuous closure depends entirely on the end knots both must be tied with the correct number of throws.
Feline Gastrointestinal Surgery: "Polydioxanone requires five throws for the start knot and seven for the end knot."
Material and size
Preferred: PDS (polydioxanone) 2-0 to 3-0
Alternative: Vicryl (polyglactin 910) 2-0 to 3-0. Vicryl provides adequate holding strength and is acceptable for feline fascial closure in most clean procedures.
V-Loc 180 (barbed, extended absorption): Feline Gastrointestinal Surgery notes this can also be considered for feline fascial closure. The knotless design eliminates the knot-security concern of continuous patterns.
Not recommended: nylon or polypropylene for buried fascial closure in cats (suture sinus formation risk).
Bite dimensions
Veterinary Evidence (systematic review, 550 dogs and cats): "Suture bites were placed 3 to 5 mm from the incised edges."
This is narrower than human abdominal closure guidelines reflecting the smaller fascial width available in cats.
Layer 2: Subcutaneous tissue
Pattern: simple continuous absorbable
Material: Monocryl 3-0 to 4-0 (preferred for low tissue reaction) or Vicryl 3-0 to 4-0 (acceptable in clean cases)
Purpose: eliminate dead space below the skin, reduce skin closure tension, reduce seroma risk
Cats have relatively little subcutaneous fat compared to most dogs, which means the subcutaneous layer is thin and the closure bites are shallow. The surgeon takes care not to incorporate dermis in this layer, which would distort skin apposition at the next layer.
For muscle layer context within the feline laparotomy closure, see muscle layer in feline laparotomy.
Layer 3: Skin
Preferred method: intradermal Monocryl 4-0
Intradermal closure eliminates all external suture material no external knots, no suture tracks, no removal visit. In cats, this is the preferred method for routine laparotomy closure because:
- Cats lick and chew external sutures aggressively
- Feline skin reacts more visibly to suture-track scarring
- The E-collar compliance challenge is greater in cats
Tissue adhesive supplementation: for small, clean feline laparotomy incisions, cyanoacrylate tissue adhesive can be applied over the intradermal closure to seal the wound ends. This supplements, does not replace, the intradermal layer.
Alternative: interrupted nylon or Prolene 4-0
Used when:
- The wound has any tension that exceeds what intradermal closure can hold
- The surgeon prefers external sutures for post-operative monitoring
- The skin is irregular or intradermal closure is technically difficult
External sutures require a removal visit at 10 to 14 days. In cats, this visit may require sedation or very calm restraint.
For suture removal timing in cats, see suture removal timing for feline laparotomy closure.
Post-operative care: feline-specific considerations
E-collar: mandatory regardless of skin closure method. Cats can reach abdominal incisions with their hind legs even with an intradermal closure. A self-inflicted wound through licking disrupts the intradermal layer before it has healed.
Activity restriction: cats jump. A cat returning to jumping after laparotomy closure subjects the linea alba to significant dynamic loading before it has healed. Strict activity restriction (keep in small room or large crate) for 10 to 14 days minimum.
Monitoring: check twice daily for redness, discharge, swelling, or any separation at the wound line. A small amount of dried serous crust at the intradermal wound ends is normal; purulent or growing discharge is not.
For the closure protocol checklist applicable to feline laparotomy, see closure checklist for feline laparotomy.
Frequently asked questions
The vet used Vicryl for my cat's abdominal layer. Is that appropriate?
Yes. Vicryl (polyglactin 910) is an absorbable material that provides adequate holding strength for feline fascial closure in clean, elective procedures. It is a braided suture, which means slightly higher infection risk than monofilament in contaminated cases, but for routine laparotomy in a healthy cat, it is within the standard of care.
Why is my cat's incision just a thin line with no visible stitches?
Your vet used intradermal closure the suture runs inside the dermis and is not visible externally. There is nothing to remove. The incision line should narrow and flatten over the first 10 to 14 days as the dermis heals.
My cat keeps trying to lick the incision despite the E-collar. What should I do?
Try an inflatable collar (donut collar) if a standard E-collar is causing distress some cats tolerate these better. Surgical recovery suits (body wraps) are another option, though they are harder to keep clean. The goal is preventing licking, not choosing a specific collar type. Contact your vet if the cat is distressed enough to injure itself trying to remove the collar.
Feline laparotomy closure is not simply a smaller version of canine closure. The published evidence against non-absorbable fascial sutures in cats, the anatomical differences in linea alba width and regional strength, and the behavioral challenges of managing a cat during recovery all require protocol adjustments specific to the species.
Resources
- Feline Gastrointestinal Surgery (Williams, 2014). Journal of Feline Medicine and Surgery. journals.sagepub.com
- PMC5813137. Biomechanical Properties of Feline Ventral Abdominal Wall and Celiotomy Closure Techniques. ncbi.nlm.nih.gov
- Veterinary Evidence (2017). Choice of Suture Pattern for Linea Alba Closure Knowledge Summary. veterinaryevidence.org
- VCA Animal Hospitals. Care of Surgical Incisions in Cats. vcahospitals.com

