

TPLO Surgery Cost in Ballarat
Explore TPLO surgery cost in Ballarat, including price ranges and factors like dog size, surgeon skill, and rehab needs affecting pricing.

This article is for informational purposes only and is not a substitute for professional veterinary advice. Every case is unique, so always consult your veterinarian for guidance specific to your pet.
This content is intended for veterinary professionals for educational purposes. It does not replace clinical judgment or tailored advice. Always rely on your training, expertise, and the specific context of your patients.

TPLO surgery is a specialized procedure to repair a torn cranial cruciate ligament (CCL) in dogs. This surgery stabilizes the knee joint, allowing dogs to regain mobility and reduce pain. Understanding the cost of TPLO surgery is important for pet owners facing this decision.
Costs vary widely based on location, surgeon experience, diagnostic tests, dog size, implants used, and rehabilitation. In Ballarat, this article covers typical price ranges, what is included or excluded, key cost drivers, and helpful tips for owners planning TPLO surgery.
Typical TPLO Surgery Cost in Ballarat
Pricing for TPLO surgery in Ballarat varies by veterinary clinic, surgeon expertise, and the size of the dog. These factors influence the final cost significantly.
- Low estimate in Ballarat — Some clinics offer TPLO surgery at lower prices, often due to less experienced surgeons or fewer included services. These options may compromise on advanced diagnostics or post-op care, so owners should weigh cost versus quality carefully.
- Average cost range in Ballarat — Most pet owners in Ballarat pay between $3,500 and $5,000 for TPLO surgery. This range typically includes surgery, anesthesia, implants, and basic post-operative care, reflecting the standard level of service and expertise.
- High-end TPLO specialists in Ballarat — Premium clinics with board-certified surgeons and advanced surgical equipment may charge $5,000 to $7,000 or more. These providers often offer comprehensive diagnostics, superior implants, and extensive rehabilitation programs.
What the Cost Usually Covers
TPLO surgery packages generally include several key components that contribute to the overall price. Understanding these helps owners know what to expect.
- Surgery itself — The procedure involves cutting and rotating the tibia to stabilize the knee. This complex surgery requires skilled surgeons and specialized tools, which contributes to the cost.
- Anaesthesia + monitoring — Safe anesthesia administration and continuous monitoring during surgery are critical to prevent complications, justifying their share of the total cost.
- Implants/plates — Surgical implants such as plates and screws secure the bone in place. Options include stainless steel or titanium, with titanium implants generally costing more due to durability and biocompatibility.
- Post-op care and follow-up exams — Follow-up visits to monitor healing and manage pain are typically included, ensuring the dog recovers properly after surgery.
What Might Not Be Included
Some costs are often overlooked by pet owners but can add significantly to the final bill. Being aware helps with budgeting.
- Pre-surgical diagnostics — X-rays, blood tests, and other diagnostics before surgery may be billed separately, increasing upfront costs.
- Post-surgical rehab therapy — Physical therapy and rehabilitation sessions are usually optional and charged extra, but they can improve recovery outcomes significantly. More on physical therapy after TPLO.
- Medications beyond standard pain control — Additional medications for infection or inflammation may not be included in the initial quote.
- Additional cost if both legs need surgery — Bilateral TPLO surgeries nearly double the cost and require separate planning and budgeting.
Key Cost Drivers in Ballarat
Even within Ballarat, TPLO surgery prices vary due to several important factors. Understanding these helps owners make informed choices.
- Dog size/weight — Larger dogs require bigger implants and longer surgery times, increasing costs compared to smaller breeds.
- General vet vs board-certified surgeon — Board-certified surgeons often charge more for their expertise and advanced skills, but this can improve outcomes.
- City living costs + overhead in Ballarat — Clinic rent, staff salaries, and equipment maintenance in Ballarat influence pricing structures.
- Implant brand and surgical technology used — Premium implant brands and modern surgical tools raise costs but may offer better durability and healing.
- Complication or infection risk — Cases with higher complication risks may require additional care and expenses, impacting total cost.
Tips for Pet Owners in Ballarat
Careful financial planning and asking the right questions can help Ballarat pet owners manage TPLO surgery costs effectively.
- Ask for a detailed itemised estimate — Request a breakdown of all costs to understand what you are paying for and avoid surprises.
- Clarify if quote is for one leg or both — Confirm whether the price covers unilateral or bilateral surgery to plan your budget accurately.
- Explore pet insurance or financing options — Some pet insurance plans cover TPLO surgery, and financing can spread out payments. Learn more about pet insurance and TPLO coverage.
- Compare multiple clinics and ask about success rates — Getting several quotes and understanding each clinic’s outcomes helps choose the best value care.
- Ask about rehab or physiotherapy packages — Some clinics offer bundled rehab services that can improve recovery and may save money overall. See TPLO recovery tips for guidance.
Conclusion
TPLO surgery is a significant financial commitment for pet owners in Ballarat. Costs vary widely depending on clinic, surgeon, and dog-specific factors. Planning ahead and understanding pricing details helps avoid unexpected expenses.
Comparing quotes and confirming what is included before choosing a clinic ensures you get the best care for your dog’s needs and budget. Thoughtful preparation supports a smoother surgery and recovery journey.
Frequently Asked Questions
How much does TPLO surgery cost in Ballarat?
TPLO surgery in Ballarat typically costs between $3,500 and $7,000. Prices vary based on clinic, surgeon experience, dog size, and included services. Lower-cost options exist but may offer fewer services or less experienced surgeons.
Is TPLO worth the cost for dogs with CCL tears?
TPLO surgery is often considered the best option for active dogs with CCL tears, providing improved stability and long-term joint health. While costly, it can prevent arthritis and improve quality of life.
Can pet insurance cover TPLO surgery in Ballarat?
Many pet insurance plans cover TPLO surgery, but coverage varies. It’s important to check your policy details and pre-authorization requirements to understand benefits and out-of-pocket costs.
How do I know if a TPLO quote is reasonable?
A reasonable TPLO quote includes a detailed breakdown of surgery, anesthesia, implants, and post-op care. Comparing multiple estimates and checking surgeon credentials helps ensure fair pricing.

Get a Free Poster
Enhance your workspace with a high-quality radiographs reference poster, designed for veterinary professionals. This free physical poster will be shipped directly to you—just fill out the form to request your copy.






Taking Great TPLO Radiographs
Click Below to Watch Live Video Demos


We'll send you a Free Wall Poster with all the steps
Step #1
Getting Ready
Ensuring a clean surgical field starts with proper skin preparation. This video demonstrates the best practices for:
- Shaving the patient – Achieving a close, even shave while minimizing skin irritation
- The Dirty Scrub – The initial skin prep step to remove surface debris and reduce bacterial load before the sterile scrub.
Following these techniques helps reduce infection risk and improve surgical outcomes. Watch the video to see how it’s done effectively!


Step #2
Reduce Your Risks
Many surgeons are shocked to find out that their patients are not protected from biofilms and resistant bacteria when they use saline and post-op antibiotics.
That’s Where Simini Comes In.
Why leave these risks and unmanaged? Just apply Simini Protect Lavage for one minute. Biofilms and resistant bacteria can be removed, and you can reduce two significant sources of infection.
Step #3
Take the Course
Preventing surgical infections is critical for patient safety and successful outcomes. This course covers:
- Aseptic techniques – Best practices to maintain a sterile field.
- Skin prep & draping – Proper methods to minimize contamination.
- Antibiotic stewardship – When and how to use perioperative antibiotics effectively.
Stay up to date with the latest evidence-based protocols. Click the link to start learning and earn CE credits!

Things to know
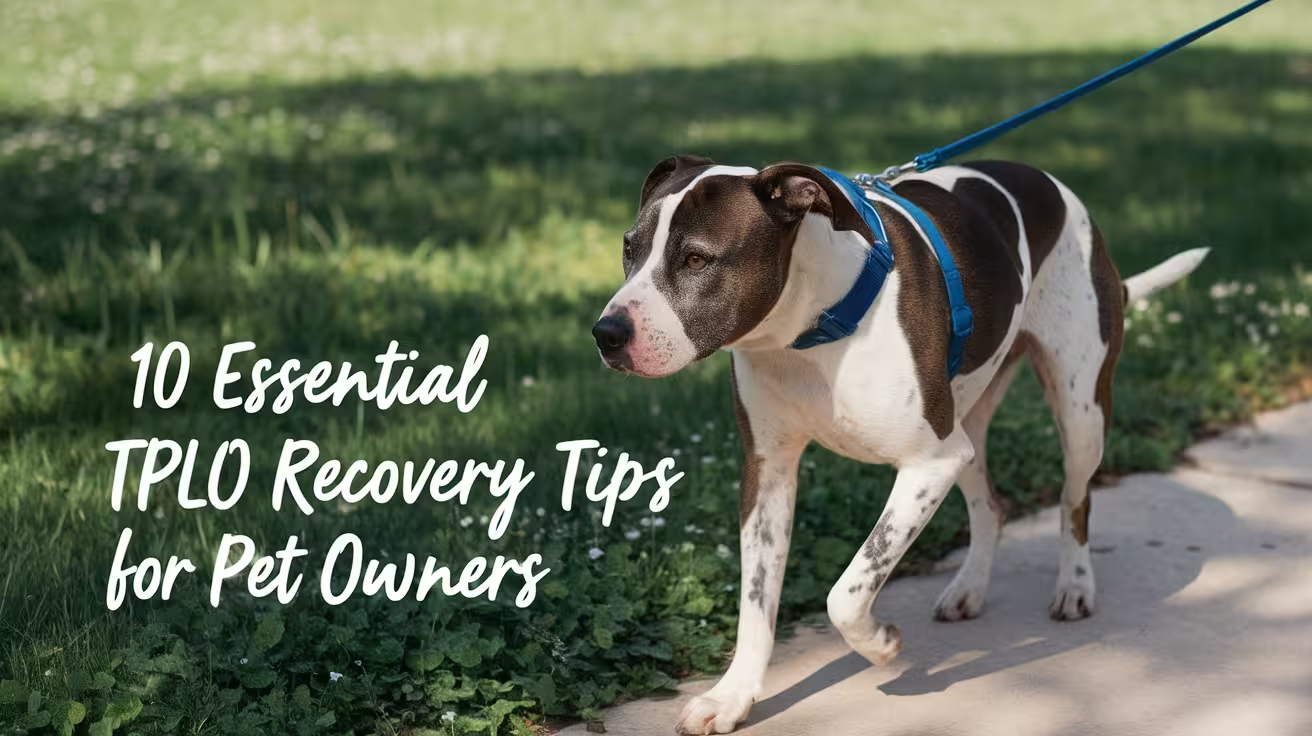
10 Essential TPLO Recovery Tips for Pet Owners
Help your dog heal faster after TPLO surgery with these 10 simple, vet-approved recovery tips every pet owner should know
TPLO recovery takes 8 to 12 weeks of structured care. Most owners know the broad requirements -- rest, medications, vet visits -- but the specific actions that protect recovery are less obvious.
These 10 tips translate the key principles of TPLO recovery into concrete, actionable guidance.
Quick answer: The 10 most essential TPLO recovery tips: keep the e-collar on; give medications on schedule; confine in weeks 1 to 2; inspect the incision daily; apply cold therapy for 3 to 5 days; use a leash indoors; provide mental stimulation; clean bedding weekly; attend check-ups; call the vet early if something looks wrong.
Key takeaways
- E-collar compliance is the highest-priority single action: VetSurgInfo confirms most TPLO incision infections are caused by licking; the e-collar must stay on at all times for 10 to 14 days
- Medication timing matters as much as compliance: giving NSAIDs and gabapentin at the exact scheduled intervals maintains therapeutic blood levels; gaps allow pain to break through
- Strict confinement in weeks 1 to 2 prevents plate failure: jumping, slipping, or running applies forces to the plate that risk displacement before the osteotomy heals
- Daily incision inspection detects infection before it becomes deep: the window between superficial and deep infection is days; daily inspection closes that window
- Cold therapy in the first 72 hours is the most underused home tool: 10 to 15 minutes, 3 to 4 times daily, reduces swelling and pain in the acute phase
- Mental stimulation replaces physical activity: a bored dog becomes restless and moves; food puzzles, lick mats, and scent games provide neural reward without mechanical risk
Tip 1: Keep the e-collar on without exception
The e-collar is not a suggestion.
A single licking episode can inoculate the incision with S. pseudintermedius from the dog's oral cavity, introducing infection that may require antibiotics or, in the worst case, plate removal.
VetSurgInfo confirms: most incision infections are due to licking; the cone is the mainstay for avoiding incision infections.
The best test: place peanut butter on the dog's leg before surgery and check whether they can reach it with the collar on. If they can, the collar is not effective.
The e-collar must stay on during sleep, during unsupervised periods, and any time the dog is not under direct visual supervision. Remove only for supervised eating and drinking, then immediately replace it.
Tip 2: Give all medications on schedule
Pain medications work through consistent blood levels. An NSAID given 2 hours late allows a pain gap that makes the dog uncomfortable.
Discomfort leads to restlessness, inability to settle, and -- critically -- attempts to move around or adjust position that stress the plate.
Medcovet confirms: a strong TPLO surgery recovery plan includes pain management with prescribed pain medication to ensure comfort during the initial recovery phase.
Practical guidance:
- Set phone alarms for each medication
- Give NSAIDs with food to reduce gastric irritation
- Never double dose if a dose is missed -- contact your vet for guidance
- Time gabapentin/trazodone about 30 minutes before anticipated stressful periods (vet visits, times when other family members arrive home)
Tip 3: Confine strictly in weeks 1 to 2
The first 14 days are the highest-risk period for plate displacement.
The osteotomy site has the least mechanical strength at this stage and cannot tolerate the forces generated by running, jumping, or sudden twisting.
SustainableVet.org confirms: dogs typically need 6 to 8 weeks of restricted activity; strict confinement ensures the bone plate stabilizes and heals properly.
Confinement means:
- Crate or exercise pen at all times when not supervised
- Bathroom leash walks of 5 minutes maximum, 3 to 5 times daily
- No stairs, no furniture access, no running
- All other pets separated from the recovering dog
Tip 4: Inspect the incision daily
A 30-second daily inspection at the same time each day catches early infection before it progresses. Normal healing shows consistently fading redness, no discharge, and a healing incision line.
Early infection shows spreading redness, cloudy or malodorous discharge, or increasing warmth.
Medcovet confirms: a strong recovery plan includes wound care and close monitoring of the surgical site.
What to look for:
- Redness: fading daily from day 5 onward is normal; spreading is not
- Discharge: clear serum only in the first 2 to 3 days is normal; anything cloudy or malodorous at any stage is not
- Warmth: mild for the first week; increasing after day 5 is a warning sign
Tip 5: Do cold therapy in the first 3 to 5 days
Cold therapy reduces swelling, pain, and inflammation during the acute post-surgical phase. It is the most effective home intervention for managing early post-TPLO swelling and the least frequently done consistently.
SustainableVet.org confirms: cold therapy, like applying an ice pack wrapped in a towel for 10 to 15 minutes several times a day during the first 72 hours, helps reduce inflammation.
Wrap an ice pack in a thin cloth. Apply to the incision for 10 to 15 minutes, 3 to 4 times daily. Begin day 1 and continue through day 5.
Never place ice directly on skin.
Tip 6: Leash the dog indoors
A house leash held by the owner prevents sudden movements that cause plate failure: slipping, running to the door, or startling at a noise.
Every uncontrolled moment indoors is a risk. The house leash gives the owner instant control.
Tip 7: Provide mental stimulation instead of physical exercise
A dog with no cognitive engagement will self-stimulate physically. Mental stimulation provides the same dopamine reward as physical activity without mechanical impact on the healing plate.
SustainableVet.org confirms: redirect energy through mental stimulation like puzzle feeders or scent games; a mentally stimulated dog is less likely to feel the physical restrictions.
Effective options:
- Frozen Kong: stuffed with wet food or peanut butter (xylitol-free) and frozen
- Lick mat: spread wet food or peanut butter on a textured mat
- Scatter feeding: spread kibble across a towel or crate mat
- Sniff games: hide treats in a muffin tin covered with tennis balls
Tip 8: Keep bedding clean weekly
Dirty bedding accumulates S. pseudintermedius and other bacteria from the dog's skin. The healing incision is in close proximity to bedding throughout recovery.
Contaminated bedding is a low-grade but continuous source of bacteria that can reach the incision.
TPLO Info confirms: dogs do not like dirty bedding; wash crate items at least once a week to keep them clean and free of dog fur.
Wash bedding in hot water with laundry detergent. Air dry or use a hot dryer cycle. Replace immediately with clean bedding.
Tip 9: Attend all scheduled vet appointments
The 2-week, 6-week, and 12-week checkpoints each have a specific clinical purpose. Missing them means missing the opportunity to catch complications before they become serious.
Texas A&M VetMed confirms: complications are easier to manage when caught early; minor issues may be resolved with oral medications and rest, but evaluation and X-rays may still be needed.
What happens at each visit:
- 2-week: incision assessment, suture removal, pain management review
- 6-week: radiograph of osteotomy, activity level adjustment based on healing
- 12-week: final radiograph, clearance for return to full activity
Tip 10: Call the vet early, not late
The most common mistake owners make is waiting to see if something resolves on its own.
A sign that is concerning today and is still concerning tomorrow warrants a call -- not continued observation.
Texas A&M VetMed confirms: if anything seems off during recovery, it is always best to contact the surgical team immediately rather than waiting.
Call same day or immediately if:
- Any cloudy, yellow, green, or malodorous wound discharge
- Redness spreading beyond the incision line
- Fever, lethargy, or loss of appetite
- Lameness worsening after prior improvement
- Wound edges separating
For the full recovery timeline, see what to expect after TPLO surgery in dogs. For confinement setup, see how to confine your dog after TPLO surgery.
For keeping the dog calm, see how to keep a dog calm after TPLO surgery. For the infection prevention guide, see post-operative care mistakes that increase TPLO infection risk.
Frequently asked questions
How strict does the activity restriction need to be?
Very strict in weeks 1 to 2. The dog cannot run, jump, use stairs, or play with other pets. Leash walks of 5 minutes for bathroom purposes only.
This is not an exaggeration -- a single running episode in the first 2 weeks can displace the plate and require revision surgery.
My dog seems completely fine by week 2. Can I relax the restrictions?
No. Clinical improvement (the dog appears comfortable and energetic) does not mean the osteotomy is healed.
The plate holds the rotated tibial plateau in position while new bone grows across the cut -- a process that takes 8 to 12 weeks regardless of how well the dog appears.
Radiographic confirmation of healing is required before any restriction is relaxed.
Which medication side effects should I watch for?
NSAIDs: vomiting, diarrhea, reduced appetite, dark stools (suggests GI bleeding). Gabapentin: sedation (which is expected), unsteadiness (monitor and report if severe). Trazodone: sedation (expected), vomiting in some dogs.
Contact your vet if any medication appears to be causing significant side effects -- alternatives are usually available.
Can I give my dog human supplements like fish oil or turmeric during recovery?
Fish oil (omega-3 fatty acids) is generally considered safe and potentially beneficial for joint health.
However, do not add any supplement without discussing with your vet first -- some supplements interact with NSAIDs or affect bleeding. Turmeric in high doses has similar concerns. When in doubt, ask.
My dog is crying or whining a lot. Should I give extra pain medication?
No -- never give extra medication beyond what is prescribed without vet guidance. Contact your vet and describe the pain signs.
They may adjust the dosing schedule, add a medication, or ask you to bring the dog in.
Whining can also reflect anesthesia effects, anxiety, or opioid dysphoria rather than uncontrolled pain -- your vet can help distinguish these.
Resources
- VetSurgInfo. TPLO Recovery Tips. vetsurginfo.com
- Medcovet. Essential Guide to Dog Recovery TPLO Surgery. medcovet.com
- Texas A&M VetMed. TPLO Recovery: Setting Pets Up for Success. vetmed.tamu.edu
- SustainableVet. 10 Essential TPLO Recovery Tips for Pet Owners. sustainablevet.org
Bruising After TPLO Surgery in Dogs
Learn about bruising after TPLO surgery in dogs, its causes, care tips, and when to seek veterinary help.
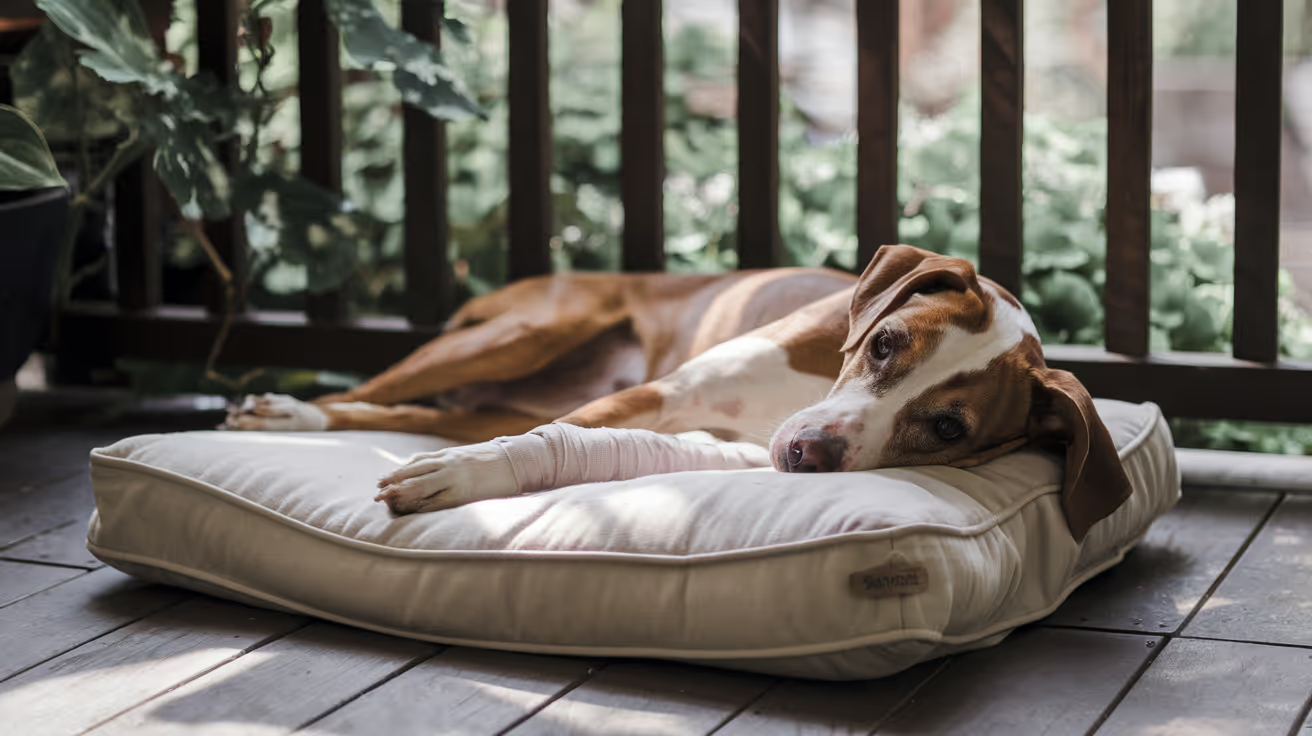
Bruising after TPLO surgery in dogs is a common concern for many pet owners. TPLO, or Tibial Plateau Leveling Osteotomy, is a surgical procedure to stabilize a dog's knee after a cruciate ligament injury. After surgery, owners often notice bruising around the incision site or leg, which can be alarming.
This article explains why bruising happens after TPLO surgery, how to care for your dog during recovery, and when to contact your veterinarian. Understanding bruising helps you support your dog's healing process effectively.
Why Does Bruising Occur After TPLO Surgery in Dogs?
Bruising happens when blood vessels under the skin break and leak blood into surrounding tissues. After TPLO surgery, bruising is usually due to the trauma of surgery and tissue manipulation. The surgical area may show discoloration as part of normal healing.
It is important to recognize that some bruising is expected, but excessive or worsening bruising may indicate complications. Knowing the causes helps you monitor your dog’s recovery closely.
- Surgical trauma: The cutting and repositioning of bone and soft tissue during TPLO can cause small blood vessels to rupture, leading to bruising around the surgical site.
- Inflammation response: The body’s natural healing process causes inflammation, which can increase blood flow and cause visible bruising and swelling near the incision.
- Blood thinning medications: If your dog is on medications like aspirin or NSAIDs, these can increase bruising risk by affecting clotting mechanisms.
- Movement after surgery: Excessive activity or pressure on the leg soon after surgery can worsen bruising by disrupting healing tissues and blood vessels.
Understanding these causes helps you differentiate normal bruising from signs of complications that need veterinary attention.
What Does Normal Bruising Look Like After TPLO Surgery?
Normal bruising after TPLO surgery usually appears as a purple, blue, or reddish discoloration around the incision or leg. It often develops within 24 to 48 hours post-surgery and gradually fades over 1 to 2 weeks.
Knowing the typical appearance and timeline of bruising helps you track your dog’s healing and identify abnormal changes early.
- Color changes: Bruises typically start dark purple or blue, then change to green, yellow, and finally fade as healing progresses over days to weeks.
- Size and spread: Normal bruising is usually localized near the incision and does not spread extensively to other parts of the leg or body.
- Swelling presence: Mild swelling often accompanies bruising but should not cause severe discomfort or limb deformity.
- Pain level: Some tenderness is expected, but your dog should not show signs of severe pain or limping beyond normal post-surgical recovery.
Monitoring these signs helps ensure bruising is part of normal healing and not a sign of infection or bleeding complications.
How Should You Care for Bruising After TPLO Surgery?
Proper care reduces bruising severity and supports healing after TPLO surgery. Following your veterinarian’s instructions and providing gentle care helps your dog recover comfortably and safely.
Simple steps at home can minimize bruising and swelling while preventing complications.
- Rest and restricted activity: Limit your dog’s movement to prevent pressure on the surgical site and avoid worsening bruising or swelling.
- Cold compress application: Applying a cold pack wrapped in cloth for 10–15 minutes several times daily during the first 48 hours can reduce swelling and bruising.
- Proper bandage care: Keep any surgical bandages clean and dry, and follow your vet’s instructions on changing or removing them to avoid irritation.
- Medication adherence: Administer all prescribed painkillers and anti-inflammatory drugs exactly as directed to control pain and reduce inflammation.
Consistent care helps your dog heal faster and reduces the risk of bruising-related complications.
When Should You Be Concerned About Bruising After TPLO Surgery?
While bruising is normal, certain signs indicate that your dog may need urgent veterinary evaluation. Recognizing these warning signs early can prevent serious complications.
If you notice any of the following, contact your veterinarian promptly for advice or examination.
- Rapidly expanding bruises: Bruising that spreads quickly or becomes very large may signal active bleeding or hematoma formation requiring medical attention.
- Excessive swelling and heat: Swelling that worsens with warmth and redness around the incision could indicate infection or inflammation needing treatment.
- Severe pain or lameness: If your dog shows intense pain, refuses to bear weight, or has a limp worsening over time, this may suggest complications.
- Discharge or foul odor: Any pus, bleeding, or bad smell from the surgical site is a sign of infection and requires immediate veterinary care.
Early detection of problems helps ensure timely treatment and better recovery outcomes.
Can Bruising Affect Your Dog’s Recovery After TPLO Surgery?
Bruising itself usually does not affect the overall success of TPLO surgery if it is mild and managed properly. However, severe bruising or related complications can delay healing and cause discomfort.
Understanding the impact of bruising helps you provide better care and communicate effectively with your veterinarian during recovery.
- Minor bruising benefits: Mild bruising is a normal sign of healing and usually resolves without affecting joint stability or function.
- Severe bruising risks: Large bruises or hematomas can increase pain, limit mobility, and sometimes require drainage or additional treatment.
- Infection risk: Bruised tissue is more vulnerable to infection, so keeping the area clean and monitoring closely is essential.
- Physical therapy considerations: Bruising may limit early physical therapy, so adjusting rehabilitation plans based on your dog’s condition is important.
Working closely with your vet ensures bruising does not interfere with your dog’s full recovery and return to normal activity.
How Can You Prevent Bruising After TPLO Surgery in Dogs?
While some bruising is unavoidable due to surgery, certain steps can reduce its severity and support smooth healing. Prevention focuses on careful handling and following veterinary guidance.
Taking precautions before and after surgery helps protect your dog’s tissues and blood vessels from excessive damage.
- Pre-surgery health check: Ensuring your dog is healthy and not on blood-thinning medications before surgery reduces bruising risk.
- Gentle post-op handling: Avoid rough play, jumping, or excessive pressure on the leg during recovery to prevent new bruises.
- Follow medication instructions: Use prescribed drugs properly and avoid over-the-counter medications without vet approval to prevent clotting issues.
- Regular veterinary follow-up: Attend all scheduled check-ups so your vet can monitor healing and address bruising or other concerns early.
Prevention and careful management promote a safer, faster recovery with minimal bruising complications.
Conclusion
Bruising after TPLO surgery in dogs is a common and usually normal part of the healing process. It results from surgical trauma and inflammation, appearing as discoloration near the incision site. Mild bruising typically resolves within two weeks without affecting recovery.
Proper care, including rest, cold compresses, and medication adherence, helps reduce bruising and supports healing. However, owners should watch for signs of excessive bruising, swelling, pain, or infection and contact their veterinarian promptly if these occur. Understanding bruising after TPLO surgery allows you to care for your dog confidently and ensure a smooth recovery.
FAQs
Is bruising after TPLO surgery normal for all dogs?
Yes, mild bruising is common after TPLO surgery due to tissue trauma and inflammation. However, the amount varies by individual and surgical factors.
How long does bruising last after TPLO surgery?
Bruising usually appears within 1–2 days after surgery and fades over 1 to 2 weeks as the tissues heal naturally.
Can I use cold packs on my dog’s bruising after surgery?
Yes, applying cold compresses wrapped in cloth for 10–15 minutes several times daily during the first 48 hours helps reduce swelling and bruising.
When should I call the vet about bruising after TPLO?
Contact your vet if bruising spreads rapidly, swelling worsens, pain is severe, or if there is discharge or foul odor from the incision.
Does bruising affect my dog’s ability to walk after TPLO surgery?
Mild bruising usually does not affect walking, but severe bruising or pain may cause limping and require veterinary evaluation.
TPLO Plate Removal Recovery Guide
Learn about TPLO plate removal recovery, including healing time, care tips, risks, and what to expect after surgery.
The TPLO plate is designed to stay in permanently. TPLO Info confirms that implants are designed to stay in for life they only need to be removed if a problem develops.
When plate removal is necessary, it is generally a less complex procedure than the original TPLO, and most dogs recover well.
Understanding when removal is needed, what recovery involves, and what to watch for helps owners navigate this phase confidently.
Quick answer: TPLO plate removal is performed when the plate causes infection, chronic pain, or implant failure. Recovery takes 6 to 12 weeks: 2 weeks for wound healing, 6 to 8 weeks for bone remodeling at the screw holes. Activity restriction for at least 6 weeks is required.
Key takeaways
- The TPLO plate does not routinely need to be removed: designed for permanent placement; removal is only indicated when it causes a problem
- The three main reasons for plate removal are: infection, chronic implant-associated pain causing ongoing lameness, and implant failure requiring revision
- Removal is only safe after the osteotomy has healed: typically 6 to 12 months post-TPLO once radiographs confirm bone union
- Recovery after plate removal takes 6 to 12 weeks: 2 weeks for wound healing; 6 to 8 weeks for bone remodeling
- Screw holes take 6 to 8 weeks to remodel: cortical defects temporarily weaken the bone; activity restriction prevents fracture
- Most dogs improve significantly after plate removal: implant irritation-related lameness typically resolves within weeks of removal
When is TPLO plate removal necessary?
Infection involving the implant (most common indication)
Bacterial biofilm colonizing the implant surface is the most common reason for plate removal.
Implant-associated infections often fail to resolve with antibiotics alone because bacteria form protective biofilms on the metal surface that antibiotics cannot penetrate adequately.
Once the osteotomy has healed typically at 6 to 12 months post-TPLO the plate can be safely removed, the bone is debrided, and the infection treated without the implant present.
Veterinary Orthopaedic and Mobility Center (VOMC) confirms that infection is the most common reason for implant removal.
For the full infection guide, see TPLO plate infection signs and treatment and when does a TPLO implant need to be removed due to infection.
Implant-associated pain without infection
Some dogs develop chronic lameness caused by the plate irritating surrounding soft tissues rather than infection.
The plate may irritate the periosteum, cause a local inflammatory reaction to the metal, or become symptomatic once the dog returns to activity.
TPLO Austin confirms: in rare instances, patients may simply be uncomfortable with the presence of the plate. In these cases, removal of the plate after bone healing will typically resolve the lameness.
Implant failure
If the plate bends, breaks, or screws loosen or fail, structural revision may be required.
Depending on the degree of bone healing at the time of failure, revision may involve plate removal and replacement, or removal alone once healing is sufficient.
TPLO Austin notes this is a very rare complication (under 1%) when activity restriction protocols are followed.
When is plate removal safe?
Plate removal requires confirmed radiographic bone healing the osteotomy must be fully bridged before the plate is removed.
The plate is the only structure holding the osteotomy in place; removing it before healing is complete risks the bone segments displacing.
Sustainablevet.org confirms: the plate can be removed once the bone is fully healed, typically 6 to 12 months after the operation.
SustainableVet's clinical guide for post-removal recovery confirms: removing hardware too early or in cases with incomplete healing increases the risk of delayed union or fracture. Careful radiographic assessment before surgery is essential.
The plate removal procedure
Plate removal is performed under general anesthesia. The original incision is reopened, the plate and screws are removed, and the wound is closed.
The procedure is significantly shorter and simpler than the original TPLO there is no bone cutting or rotation involved.
Vetplayas explains that the procedure involves removing the metal plate and screws from the tibia, with the wound closed in layers after removal.
If the indication was infection, the bone surface around the screw holes is debrided and the area flushed thoroughly. Bacterial culture is obtained to guide antibiotic selection.
Recovery timeline after TPLO plate removal
Weeks 1 to 2: wound healing
The incision heals similarly to the original TPLO incision. Pain management with NSAIDs and, in many cases, gabapentin is prescribed. The dog is confined and leash-walked only. Cold packing reduces post-surgical swelling.
SustainableVet's recovery guide confirms: the first 2 weeks focus on wound healing and pain management after surgery.
Weeks 2 to 8: bone remodeling
The primary recovery challenge after plate removal is the screw holes left in the tibia. These cortical defects temporarily reduce bone strength at those sites.
The bone requires 6 to 8 weeks to remodel and fill in these defects before normal activity loads can be tolerated.
SustainableVet's clinical guide confirms: bone typically requires 6 to 8 weeks post-plate removal to regain sufficient strength; high-impact activities must be limited during this critical period to prevent fracture.
Activity restrictions during recovery
- Leash walks only for the first 6 weeks minimum
- No running, jumping, stairs, or off-leash activity
- Rehabilitation exercises (PROM, sit-to-stand, controlled leash walks) as prescribed
- 8-week radiographs typically required to confirm screw hole remodeling before return to normal activity
Weeks 8 to 12: return to activity
If radiographs at week 8 confirm adequate bone remodeling, the surgeon approves progressive return to normal activity. Most dogs return to full activity by 10 to 12 weeks post-removal.
Complications of plate removal
Infection: the surgical site can develop a new infection during the removal procedure. Strict aseptic technique and sometimes antibiotic prophylaxis reduce this risk.
Fracture through screw holes: the cortical defects from screw removal temporarily weaken the bone. Activity restriction during the remodeling phase is essential to prevent fracture through these sites.
Delayed union: rare, but can occur if the bone at the surgical site is already compromised by chronic infection.
Incomplete resolution: if implant irritation was the indication and lameness persists after removal, additional investigation (nerve involvement, joint pathology) is warranted.
For related guides, see TPLO plate rejection symptoms in dogs, can a dog heal normally after TPLO plate removal, and TPLO implant loosening causes and treatment.
For the cost of plate removal, see TPLO plate removal cost.
Frequently asked questions
Does every TPLO dog eventually need the plate removed?
No. Most dogs retain the plate for life without problems. TPLO Info confirms that implants are designed to stay in place permanently.
Plate removal is only performed when there is a clinical indication: infection, persistent lameness from implant irritation, or implant failure.
How long does it take to recover from plate removal?
Generally 6 to 12 weeks, depending on the indication and the individual dog. Infection cases may take longer because bone debridement and antibiotic treatment add complexity.
Straightforward irritation-related removals with no infection typically have the shorter end of this timeline.
Is plate removal surgery serious?
It is a general anesthetic procedure and carries the standard risks of any surgical intervention, but it is significantly simpler than the original TPLO.
The main specific risk is fracture through the screw holes if activity restriction is not followed. Most dogs do well with appropriate post-operative care.
Can the plate be removed too early?
Yes, and this is dangerous. Removing the plate before the osteotomy has fully healed causes the bone segments to lose their only structural support, potentially leading to displacement or fracture.
Radiographic confirmation of bone healing is mandatory before plate removal is scheduled.
Will my dog need another round of rehabilitation after plate removal?
Typically a milder version, yes controlled leash walks, PROM if stiffness is present, and gradual return to activity over 6 to 12 weeks.
Dogs that had ongoing lameness from implant irritation often improve quickly once the plate is removed, but the bone still requires the restricted activity period regardless of how well the dog feels.
Resources
- TPLO Info. Step 6: TPLO Surgery Recovery Process. tploinfo.com
- TPLO Austin. Step 6: TPLO Surgery Recovery. tploaustin.com
- Vetplayas. Ensuring a Successful TPLO Plate Removal Recovery. vetplayas.com
- VOMC. TPLO Veterinary Orthopaedic and Mobility Center. vomcvet.com
- VCA Animal Hospitals. Tibial Plateau Leveling Osteotomy (TPLO) in Dogs. vcahospitals.com
Bilateral TPLO Surgery Explained
Comprehensive guide to bilateral TPLO surgery for dogs, covering procedure, recovery, benefits, risks, and cost considerations for better mobility
Bilateral CCL (cranial cruciate ligament) disease -- affecting both stifle joints -- is common in dogs.
Midvalley Animal Clinic confirms 30 to 40% of dogs with unilateral CCL rupture will eventually develop rupture of the contralateral CCL.
When both stifles are significantly affected, the decision between simultaneous bilateral TPLO and staged TPLO is one of the most important surgical planning discussions an owner will have.
Quick answer: Simultaneous bilateral TPLO operates on both stifles in one anesthetic event, offering a single recovery period and lower total cost. Staged TPLO operates on one leg at a time, reducing anesthetic risk. Simultaneous is preferred for healthy, large dogs with both stifles unstable. Staged is preferred for older, smaller, or compromised dogs.
Key takeaways
- 30 to 40% of dogs with unilateral CCL disease develop contralateral CCL rupture: bilateral TPLO may be planned proactively at presentation or urgently when the second CCL ruptures during recovery
- Simultaneous bilateral TPLO offers a single anesthetic event and shorter overall recovery: both knees heal together; total cost is lower than two staged surgeries
- Staged bilateral TPLO reduces surgical risk: each surgery is shorter; the dog has one functional leg during recovery; preferred for older or medically compromised dogs
- The critical challenge of simultaneous bilateral TPLO is recovery: with both rear legs restricted, owners must provide intensive physical support (slings) for the first 2 to 3 weeks
- PubMed research (176 bilateral TPLO cases) found no significant difference in overall complication rates between simultaneous and staged approaches in appropriately selected patients
- Large dogs with strong front limbs handle simultaneous TPLO better: smaller or weaker dogs benefit from the staged approach due to greater difficulty bearing weight on two compromised rear legs
Why bilateral CCL disease is common
CCL disease in dogs is degenerative, not purely traumatic.
The same factors that caused one CCL to rupture -- degenerative fiber changes, abnormal tibial plateau angle, breed predisposition, obesity, and mechanical overload -- are typically present in both stifles.
When a dog ruptures one CCL, it often shifts weight onto the contralateral leg, increasing the load on the already-compromised contralateral CCL. This accelerates degeneration and the timeline to rupture.
The clinical implication: even when only one stifle is symptomatic at presentation, the surgeon will typically assess both stifles.
Pre-operative radiographs of both stifles help determine whether the contralateral joint shows early instability, effusion, or an elevated TPA that warrants planning for bilateral surgery.
Simultaneous bilateral TPLO
Overview
Both stifles are operated on during a single general anesthetic event. The dog is positioned, the first TPLO is performed, the dog is repositioned, and the second TPLO is performed.
Total surgical time is approximately 3 to 4 hours.
Advantages
Single anesthetic event: the dog is exposed to general anesthesia once rather than twice. Each anesthetic event carries inherent risk; eliminating one event reduces cumulative anesthetic risk.
Faster total recovery: both legs heal simultaneously. Rather than 8 to 12 weeks of restriction for the first leg, then a second 8 to 12 week restriction for the second leg, the dog completes one restriction period covering both.
SustainableVet.org confirms: when both knees are corrected in a single surgery, the dog undergoes just one healing phase rather than two separate ones, returning to normal activity sooner.
Lower total cost: while the simultaneous surgery costs more than a single TPLO, it is less than two completely separate procedures with individual hospitalization, anesthesia fees, and post-operative care expenses.
SustainableVet.org confirms: simultaneous TPLO often reduces overall costs by avoiding duplicate anesthesia, hospitalization, and post-operative care fees.
Risks and challenges
Both rear legs are compromised simultaneously: the dog cannot transfer weight to a strong rear leg during the recovery period. All rear-limb support requires either front-limb loading (difficult for large breeds) or active owner assistance via sling.
Increased owner demand: SustainableVet.org confirms post-surgical care is more challenging because the dog cannot rely on a strong leg for support, requiring owners to provide intensive assistance.
Longer anesthetic duration: total surgical time of 3 to 4 hours for bilateral vs. 1.5 to 2 hours for unilateral increases the physiological burden of anesthesia and surgery.
Potentially higher complication rate in some populations: the PubMed 176-case study compared simultaneous and staged TPLO complications and found no significant overall difference, but the study population was highly selected.
Staged bilateral TPLO
Overview
The more significantly affected stifle is operated on first. After a full recovery (typically 8 to 12 weeks until bone healing is confirmed), the second stifle is operated on.
Advantages
Reduced surgical risk per event: each procedure is a standard unilateral TPLO, carrying the same risk profile as any single TPLO.
One functional rear leg during recovery: the dog can weight-bear on the unoperated leg immediately after the first surgery. This simplifies nursing care significantly and allows most dogs to stand and toilet independently.
Better option for older or compromised dogs: SustainableVet.org confirms older dogs or those with other health issues benefit from a staged approach to reduce surgical risk. Dogs with cardiac, renal, hepatic, or respiratory disease may not tolerate a 3 to 4 hour bilateral procedure safely.
Disadvantages
Two separate anesthetic events: two exposures to general anesthesia over a 3 to 6 month period.
Longer total recovery timeline: the dog may not reach full bilateral function for 6 to 9 months or longer from the date of the first surgery.
Higher total cost: two separate surgeries, two hospitalizations, two sets of post-operative medications and supplies.
Risk of contralateral rupture during the first recovery: the contralateral leg bears additional load during the first recovery period, accelerating degeneration. In some dogs, the second CCL ruptures acutely during the first recovery -- this forces an emergency decision about timing of the second surgery.
Which approach is right for a given dog?
Generally prefer simultaneous bilateral TPLO when:
- Both stifles are confirmed significantly unstable at presentation
- The dog is young, healthy, and large with strong front limb musculature
- The owner is able to provide intensive physical support during the bilateral recovery period
- The surgeon is experienced with bilateral TPLO technique
- Financial considerations favor the single-event approach
Generally prefer staged bilateral TPLO when:
- Only one stifle is currently significantly symptomatic (the second may be monitored and staged only if it progresses)
- The dog is older, small, or has significant concurrent health conditions
- The owner's ability to provide intensive bilateral recovery support is limited
- The anesthetic risk for a prolonged bilateral procedure is elevated
SustainableVet.org confirms: large dogs with strong front limbs may handle simultaneous TPLO better, while smaller or weaker dogs may benefit from a staged approach.
Bilateral TPLO recovery: what to expect
Simultaneous recovery
Weeks 1 to 2: the most demanding period. Both rear legs are compromised. The dog requires a sling for all mobility. Bathroom trips require active owner support.
Crate rest at all other times.
Weeks 2 to 6: gradual improvement. Both legs begin partial weight bearing. Sling use may reduce but is still needed for most dogs on stairs or uneven surfaces.
Weeks 6 to 12: radiographic assessment of both osteotomies. Activity increases based on healing of both legs.
Key equipment for bilateral TPLO recovery
- Lifting harness or rear-end sling (essential, not optional)
- Non-slip mats throughout the house
- Ramps for car access (no jumping in or out)
- Low dog beds at floor level
For the standard TPLO recovery timeline, see what to expect after TPLO surgery in dogs. For confinement advice, see how to confine your dog after TPLO surgery.
For post-op tips, see 10 essential TPLO recovery tips for pet owners. For the cost guide, see TPLO surgery cost in dogs.
Frequently asked questions
How will I know if my dog needs bilateral TPLO?
Your vet will assess both stifles during the physical examination.
Signs that the contralateral stifle is also affected include drawer sign or tibial thrust on the second side, joint effusion on radiographs, or intermittent lameness on both rear legs.
Both stifles are typically radiographed at the pre-operative planning visit.
Can the second CCL rupture while my dog is recovering from the first TPLO?
Yes. This is one of the main risks of staged TPLO. The unoperated leg bears more weight during recovery, accelerating degeneration.
If the second CCL ruptures acutely, the dog becomes bilateral suddenly and the timing of the second surgery must be reassessed with your vet.
Is bilateral TPLO safe for large breeds?
Yes, when appropriately selected. Large dogs with good front limb strength typically handle the bilateral recovery better than small dogs.
The challenge is the nursing care requirement, which is significant regardless of size. Ensure you have the physical ability to support a large dog in a sling before committing to simultaneous surgery.
My dog needs bilateral TPLO but I can only afford one surgery now. What should I do?
This is a common situation. Staged TPLO is appropriate and legitimate. Operate on the more severely affected stifle first and monitor the second closely.
Discuss weight management and controlled activity to reduce load on the second stifle during the first recovery. Plan financially for the second surgery.
Do both TPLO plates stay in permanently?
Yes, unless a complication (infection, implant failure) necessitates removal.
If both plates require removal, it can be done as a single procedure or staged, depending on the reason for removal and the healing status of each osteotomy.
Resources
- SustainableVet. Bilateral TPLO Surgery. sustainablevet.org
- PubMed. Comparison of Intra- and Postoperative Complications Between Bilateral Simultaneous and Staged TPLO. pubmed.ncbi.nlm.nih.gov
- Midvalley Animal Clinic. Pre-Op Instructions for TPLO. midvalleyanimalclinic.com
- ACVS. Cranial Cruciate Ligament Disease. acvs.org
Zlig vs TPLO: Which Surgery Is Better for Dogs?
Compare Zlig and TPLO surgeries for dogs to understand which is better for cruciate ligament injuries and recovery outcomes.
Zlig (STIF-VETLIG) is an intra-articular synthetic implant used to reconstruct the cranial cruciate ligament inside the joint a conceptually different approach from TPLO, which changes joint mechanics rather than replacing the ligament.
Both are valid surgical options for CCL rupture in dogs, and the evidence base for Zlig, while smaller than for TPLO, is growing.
Quick answer: Zlig replaces the torn CCL inside the joint using a synthetic fiber implant through small bone tunnels. A 107-case prospective study reported good to excellent results in 97 cases. TPLO has a much larger evidence base and is the ACVS first-choice for large dogs.
Key takeaways
- Zlig reconstructs the CCL inside the joint using a synthetic fiber implant through small bone tunnels; TPLO changes joint geometry instead
- A 107-case prospective study reported good to excellent results in 97 cases: the largest Zlig dataset, single-centre, without controlled TPLO comparison
- TPLO has a significantly larger evidence base: 25+ years of RCTs and ACVS first-choice status for dogs over 60 lbs
- Zlig requires only small bone tunnels, no osteotomy: bone-cutting complications such as delayed union are not relevant
- Implant failure is the primary Zlig-specific risk: the synthetic ligament may stretch or fail over time in large or very active dogs
- Zlig suits bilateral CCL cases in small to medium dogs: both knees can sometimes be addressed in one procedure
How Zlig works
Zlig stands for Z-Ligament. The procedure uses a synthetic fiber implant (marketed as STIF-VETLIG GLOBAL) placed intra-articularly inside the joint capsule to replace the torn CCL.
Unlike extracapsular techniques (lateral suture, Tightrope) which place material outside the joint, Zlig anatomically reproduces the CCL's position within the joint.
The procedure involves drilling small bone tunnels through the femur and tibia at the anatomical insertion points of the CCL.
The synthetic implant is passed through these tunnels and secured, providing immediate mechanical stability similar to the original ligament.
Because there is no bone cutting or tibial rotation, Zlig is less invasive than TPLO and significantly faster to perform.
Recovery may be faster in the early post-operative period for the same reason.
The hund-kreuzbandriss.de clinical commentary (German veterinary reference site) notes: TPLO is a fairly invasive technique that causes irreversible changes.
Intra-articular reconstruction with synthetic fibers only requires small bone tunnels, and complications from osteotomy when they occur are not always easy to correct.
Who makes the Zlig implant?
The Zlig system uses the STIF-VETLIG GLOBAL implant, manufactured in France.
The procedure was developed primarily in France and Germany. It is gaining awareness in other countries but remains far less available than the major TPLO systems.
The highly porous intra-articular fiber design promotes fibroblast penetration and collagen fiber ingrowth over time, which the manufacturers propose increases implant longevity by improving resistance to flexion and torsional forces.
What the evidence shows
Primary Zlig outcome study
A prospective study by Le Doze, Paris, and Pages (2012 to 2021, 107 cases) found good to excellent results in 97 of 107 cases.
The study was conducted at two veterinary clinics in France. This is the most comprehensive Zlig-specific outcome dataset in the veterinary literature.
The hund-kreuzbandriss.de review confirms: Reconstruction of the CCL using the intra-articular synthetic implant STIF-VETLIG GLOBAL leads to good to excellent results in 97 cases in this prospective study from 2012 to 2021.
Limitations of current Zlig evidence
- The primary study is single-centre, non-randomized, and lacks a direct comparison control group
- Long-term data beyond the study's follow-up period is limited
- The procedure has not been evaluated in large-scale randomized controlled trials comparable to those available for TPLO and TTA
- The evidence base is substantially smaller than for TPLO (25+ years of multi-centre data)
TPLO evidence in context
TPLO has been evaluated in prospective randomized studies, force plate gait analysis trials, and multi-year cohort studies across dozens of institutions.
The ACVS recommends TPLO as the most commonly performed procedure for dogs over 60 lbs based on this evidence base.
Zlig vs TPLO: key differences
Patient selection
Zlig may be preferred when:
- Small to medium breed dogs (primary candidate group in current evidence)
- Bilateral CCL rupture in a small dog where simultaneous correction in one anaesthesia event is desired
- Dog owner prefers to avoid the irreversible tibial changes of an osteotomy
- The surgeon is specifically trained in the Zlig technique
TPLO is typically recommended when:
- Dogs over 30 to 40 lbs, especially large and giant breeds
- Dogs with steep tibial plateau angle (TPA) some are not suitable candidates for Zlig due to concurrent patellar luxation or excessive tibial ridge concavity
- The ACVS first-choice recommendation is preferred, with the largest evidence base
- General specialty practice context where Zlig expertise is not available
Hund-kreuzbandriss.de notes: dogs with a steep tibial plateau angle, concurrent patellar luxation, or excessive concavity of the tibial ridge are not good candidates for Zlig.
In these cases, TPLO represents an excellent and often the only alternative.
For the full surgical alternatives overview, see alternatives to TPLO surgery for dogs. For the TPLO vs Tightrope comparison, see Tightrope vs TPLO surgery for dogs.
Frequently asked questions
Is Zlig as effective as TPLO?
For small to medium dogs, the single-centre prospective study shows good to excellent results in the majority of cases.
A direct head-to-head randomized comparison with TPLO in matched patient populations has not been published, so direct effectiveness comparison is not currently possible.
TPLO has a much stronger and broader evidence base overall.
Can large dogs have Zlig surgery?
The current evidence base for Zlig is strongest in small to medium dogs. Large dogs generate higher joint forces that place more demand on the synthetic implant over time.
Many surgeons with Zlig experience reserve it for smaller patients, though there is no absolute size cutoff in the literature.
What happens if the Zlig implant fails?
The synthetic ligament can stretch or rupture over time. If this occurs, the stifle returns to instability and lameness.
Revision surgery would typically involve a different approach TPLO or TTA since the anatomy has not been altered by the Zlig procedure, making revision more straightforward than after an osteotomy.
How long does Zlig surgery take?
Shorter than TPLO in most cases, because no osteotomy is performed.
The exact duration varies by surgeon experience and patient anatomy, but the minimally invasive nature of the procedure is one of its practical advantages.
Where can I find a surgeon who performs Zlig?
Zlig is performed by veterinary surgeons specifically trained in the technique, primarily in France and Germany where the procedure was developed, and increasingly in other countries.
Board-certified veterinary orthopedic surgeons can advise whether the technique is available in your region.
Resources
- Hund-Kreuzbandriss. Zlig Method: A Study. (Le Doze et al., 2012 to 2021 prospective study summary.) hund-kreuzbandriss.de
- Hund-Kreuzbandriss. TPLO vs TTA vs ZLig vs Suture Retraction: 6 Methods. hund-kreuzbandriss.de
- ACVS. Cranial Cruciate Ligament Disease. acvs.org
- Vetamac. TPLO Surgery for Dogs: Success Rates and Alternative Options. vetamac.com
Tightrope vs TPLO Surgery: Which Is Right for Your Dog?
Compare Tightrope and TPLO surgeries to find the best option for your dog's cruciate ligament injury treatment.
When a dog tears its cranial cruciate ligament (CCL), the two most commonly discussed surgical options in the US are TPLO (Tibial Plateau Leveling Osteotomy) and the Tightrope procedure.
Both have strong clinical support. The right choice depends on the dog's size, activity level, the surgeon's experience, and the clinical details of the injury.
Quick answer: TPLO and Tightrope achieve similar outcomes: 93.1% and 92.7% functional restoration respectively at over 1 year. Tightrope has shorter surgery time and lower reported complications. TPLO provides more durable stability for large, active dogs. Most orthopedic surgeons recommend TPLO for dogs over 30 to 40 lbs.
Key takeaways
- Both procedures achieve comparable outcomes: 93.1% good function for TPLO vs 92.7% for Tightrope at over 1 year
- Tightrope has shorter surgery and anesthesia times and a lower complication rate than TPLO in comparative studies
- TPLO provides more durable long-term stability for large, active dogs because it changes joint mechanics, not a synthetic material
- Tightrope uses bone tunnels to anchor a synthetic fiber-tape; it is distinct from extracapsular repair despite both being suture-based
- TPLO costs more: $3,000 to $6,000 vs $1,500 to $3,500 for Tightrope depending on location and surgeon type
- Neither procedure is designated superior by the ACVS: choice depends on dog size, activity level, surgeon expertise, and clinical factors
How each procedure works
TPLO (Tibial Plateau Leveling Osteotomy)
TPLO changes the mechanics of the stifle joint by rotating the tibial plateau the top surface of the tibia to a flatter angle.
This eliminates the need for a functioning CCL to resist the cranial thrust that occurs during weight-bearing. The osteotomy is held in place with a bone plate and screws.
TPLO does not replace the torn ligament. Instead, it renders the ligament biomechanically unnecessary by altering joint geometry.
The stability it provides does not depend on any synthetic material that could fail over time.
Tightrope procedure
Tightrope uses a strong synthetic fiber-tape (FiberTape) passed through bone tunnels drilled in the femur and tibia to mimic the function of the torn CCL.
Unlike extracapsular repair (lateral suture), which anchors to bone surfaces, Tightrope anchors through the bone, allowing more accurate anatomic placement.
Dispomed notes that the Tightrope method uses a suture placed into the bone, allowing more accurate placement than standard extracapsular repair. It is a minimally invasive procedure performed through small incisions.
Success rates and clinical evidence
Functional outcomes
A comparative study reviewing TPLO (n=65), Tightrope (n=79), and TTA (n=18) found:
- TPLO: 93.1% good function at over 1 year
- Tightrope: 92.7% good function at over 1 year
- TTA: 89.2% good function (with significantly higher major complications than the other two)
Sunnyside Veterinary Clinic's review of the 2010 comparative study found no difference between Tightrope and TPLO at 6 months for OA progression or client-evaluated function.
Tightrope had shorter anesthesia and surgery times and a lower complication rate.
Complication rates
The same study showed TTA had significantly higher major complication rates than both TPLO and Tightrope. TPLO had higher major complications and meniscal tear rates than Tightrope in the study population.
However, these findings vary across studies, and TPLO has a much larger body of evidence accumulated over 25+ years.
The overall TPLO complication rate across the literature ranges from 14 to 34%, with most complications being minor.
Key differences: head-to-head comparison
Which dogs is each procedure best for?
TPLO is typically recommended for:
- Dogs over 30 to 40 lbs especially large and giant breeds
- Highly active dogs (working dogs, sport dogs, hunting dogs)
- Dogs where long-term mechanical durability is the priority
- Cases where a board-certified orthopedic surgeon is performing the procedure
Most orthopedic surgeons at US veterinary specialty hospitals recommend TPLO as the first-choice procedure for large-breed dogs.
The ACVS lists TPLO as the most commonly recommended procedure for CCL rupture in medium-to-large dogs.
Tightrope is often chosen for:
- Small to medium dogs (under 30 to 40 lbs)
- Dogs in which a shorter procedure and anesthesia time is clinically important
- Cases where cost is a significant factor
- General practice surgeons experienced in the technique
PetMD notes that Tightrope CCL repair involves bone tunnels in both tibia and femur with a strong fiber-tape suture a safe and effective option for many CCL cases.
Cost comparison
TPLO typically costs $3,000 to $6,000 per leg at specialist centres in the US. Tightrope is generally $1,500 to $3,500, with some practices charging as low as $1,500 for smaller dogs.
The lower cost of Tightrope may make it accessible when TPLO is financially out of reach, particularly for dogs where the functional difference between the two procedures is likely to be small.
For the TPLO surgical alternatives comparison, see alternatives to TPLO surgery for dogs. For the complete guide to TPLO pros and cons, see TPLO surgery pros and cons for dogs.
Frequently asked questions
Is Tightrope as good as TPLO for dogs?
For small and medium dogs, the outcomes are comparable. A published comparative study found no significant difference in 6-month outcomes between Tightrope and TPLO.
For large, highly active dogs, most specialists prefer TPLO because of its superior long-term mechanical stability and larger evidence base.
Can a large dog have Tightrope surgery instead of TPLO?
Technically yes, but most board-certified orthopedic surgeons advise against Tightrope for dogs over 30 to 40 lbs.
Concerns center on long-term stability under the high joint forces generated by large, active dogs.
How much cheaper is Tightrope than TPLO?
Typically $1,000 to $3,000 less per leg. Tightrope is generally $1,500 to $3,500 compared to $3,000 to $6,000 for TPLO. The cost difference is meaningful, especially for bilateral cases.
Does Tightrope have fewer complications than TPLO?
Some comparative studies show a lower complication rate for Tightrope than TPLO in the same study population.
However, TPLO has a much larger evidence base, making complication rate comparisons difficult to interpret definitively. Both are considered safe procedures when performed by experienced surgeons.
How quickly does a dog recover from Tightrope compared to TPLO?
Tightrope recovery is generally faster: 6 to 10 weeks of restricted activity compared to 8 to 12 weeks for TPLO.
Since Tightrope does not involve a bone osteotomy, there is no bone healing phase to wait for before increasing activity.
Resources
- Sunnyside Veterinary Clinic. Tightrope Studies. sunnysidevetclinic.com
- Dog Knee Injury. Dog Knee Surgery Success Rates for TPLO, Tightrope and More. dogkneeinjury.com
- Dispomed. TPLO Surgery in Dogs: Success Rates and Alternatives. dispomed.com
- PetMD. Dog ACL (CCL) Surgery: Cost and Recovery Timeline. petmd.com
- ACVS. Cranial Cruciate Ligament Disease. acvs.org
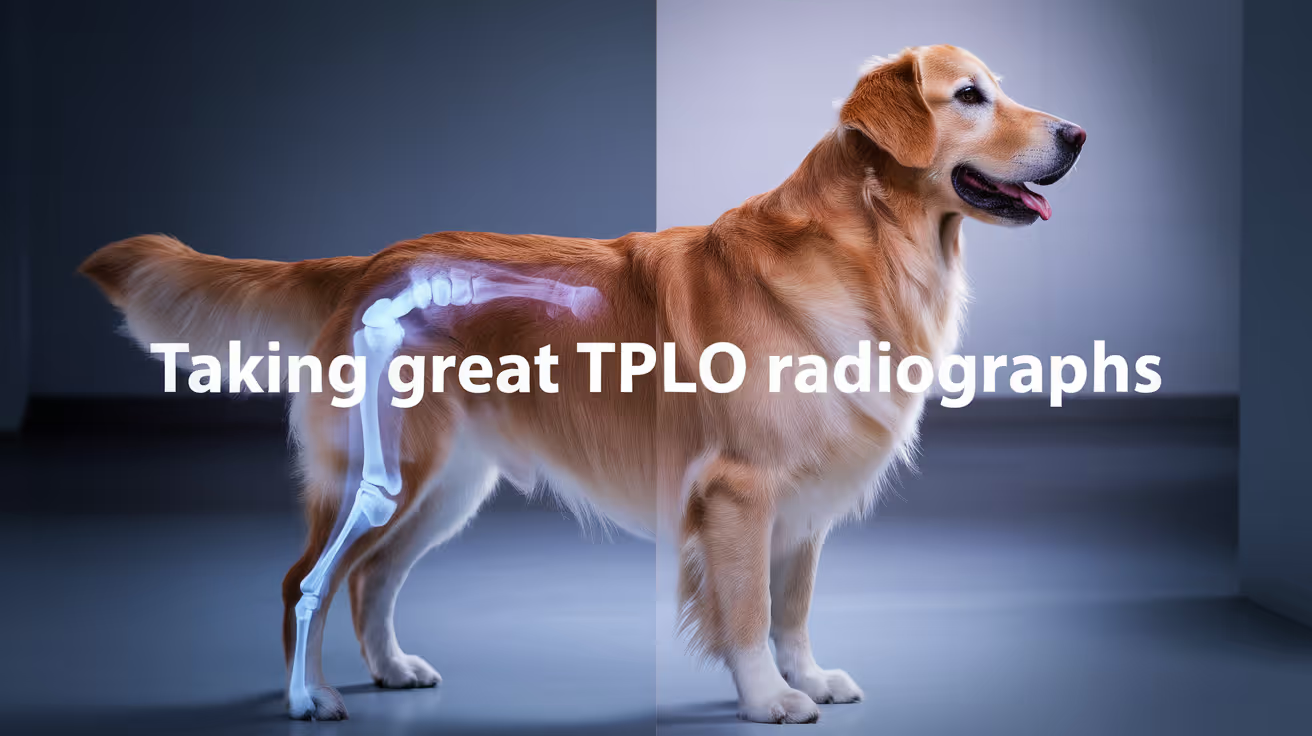
Taking Great TPLO Radiographs
Learn how to take great TPLO radiographs with proper positioning, imaging tips, & techniques. Watch videos to improve accuracy for better surgical planning
High-quality radiographs are the foundation of TPLO planning and post-operative assessment. The tibial plateau angle (TPA) measurement that determines plate size, osteotomy arc, and rotation amount depends entirely on image quality.
A poorly positioned radiograph produces inaccurate TPA measurements, which can lead to undercorrection, overcorrection, or incorrect implant selection.
Understanding what makes a TPLO radiograph diagnostically reliable is essential for any veterinary professional involved in TPLO cases.
Quick answer: A diagnostic TPLO lateral radiograph requires: stifle and hock at approximately 90 degrees; tibia and fibula superimposed throughout; femoral condyles superimposed; the entire tibia visible; and the beam centered over the stifle. Femoral condyle non-superimposition is the most common cause of TPA measurement error.
Key takeaways
- Limb positioning is the single most important variable for TPA accuracy: limb positioning affects the appearance of anatomic landmarks used for TPA determination
- The femoral condyles must be superimposed on the lateral view: MDPI research confirms 3 mm non-superimposition produces 90.6% of measurements within 1 degree of true TPA; error increases substantially beyond 3 mm
- The stifle and hock should both be at approximately 90 degrees for the lateral view: this is required for accurate tibial plateau angle measurement
- Sedation is recommended: a sedated dog allows accurate limb placement without motion artifact; an unsedated dog in pain cannot maintain the required positioning
- The TPA averages 23 to 29 degrees in most dogs: some small breeds average higher; dogs with TPA over 30 degrees may be poor candidates for extracapsular repair or TTA
- Post-operative TPA target is 5 to 6.5 degrees: achieving this angle eliminates cranial tibial thrust; post-operative radiographs confirm whether the target was achieved
Why radiograph quality matters for TPLO
TPLO planning is based entirely on the pre-operative lateral stifle radiograph. From this image, the surgeon:
- Measures the TPA (tibial plateau angle)
- Selects the appropriate osteotomy saw blade radius
- Plans the rotation amount needed to achieve the target post-operative TPA (5 to 6.5 degrees)
- Selects the implant size (plate and screw dimensions)
A 2-degree error in TPA measurement from a poorly positioned radiograph can result in a plate one size too small or large, or an osteotomy rotation that undercorrects or overcorrects the joint.
Today's Veterinary Practice confirms: a well-positioned lateral stifle radiograph is essential for accurate diagnostic interpretation and TPA measurement; correct tibial alignment is most important for TPA measurement.
The lateral (mediolateral) projection
This is the critical image for TPA measurement.
Patient positioning
Body position: the dog is placed in lateral recumbency with the limb of interest (affected stifle) closest to the table. The limb is extended slightly away from the body.
Stifle angle: the stifle is positioned at approximately 90 degrees of flexion.
Hock angle: the hock (tarsus) is positioned at approximately 90 degrees of flexion.
Cave Vet Specialists confirms: ensure the stifle and hock are collimated into the area of interest; keep the leg in a natural position; place an appropriate-sized plate under the limb.
Femoral condyles: both femoral hemicondyles should be precisely superimposed. This is the most technically demanding aspect of lateral stifle radiography. To achieve superimposition, the opposite limb is elevated with foam wedges or a triangular positioning aid to allow the limb of interest to lie flat and parallel to the table.
Cave Vet Specialists confirms: place the non-interest limb onto wedges to tilt the limb of interest centrally; place a triangular wedge or sandbag on the opposite side.
Tibia-fibula superimposition: the tibia and fibula should be superimposed throughout their full length. If the tibia and fibula are not superimposed, the tibia is rotated relative to the plate -- and this same rotation is captured in the TPA measurement.
What to include
The radiograph must include the entire tibia from the tibial plateau (top) to at least the distal metaphysis (ideally the entire bone).
Today's Veterinary Practice confirms: the x-ray beam should be centered over the stifle joint with collimation to include the entire tibia.
The most common positioning errors
Femoral condyle non-superimposition: the most frequent and most impactful error. Caused by the hindquarters tilting, the contralateral limb not elevated sufficiently, or the dog being unsedated and shifting position.
The MDPI Animals research quantified the impact: 3 mm of non-superimposition produces about 1 degree of TPA error; errors increase substantially beyond 3 mm.
Tibial rotation: the tibia is internally or externally rotated relative to the true mediolateral plane. This occurs when the hock is not held in a natural position. Rotation changes the apparent slope of the tibial plateau and produces a falsely high or low TPA.
Today's Veterinary Practice confirms: the tibia can easily be rotated with CCL injury even when the femur appears straight.
Incomplete tibia: if the distal tibia is cut off by collimation, the surgeon cannot assess the full tibial axis -- which is required for TPA measurement.
The caudocranial (CrCd or AP) projection
The caudocranial view assesses limb alignment, varus and valgus deformity, and tibial torsion. It is a standard part of the pre-operative TPLO radiograph set.
Patient positioning
The dog is placed in sternal recumbency or dorsal recumbency with the affected limb extended caudally (toward the x-ray plate). The stifle and hock should be visible.
Rita Leibinger confirms: the AP projection must have the stifle and tarsus included for the attending surgeon to assess limb alignment.
DVM360 confirms: on the caudocranial view, the medial margin of the tuber calcis should align with the center of the distal tibia, confirming the absence of tibial torsion.
Calibration for surgical planning
When radiographs will be used for surgical planning (plate size selection), a calibration marker must be placed at the same level as the stifle joint.
This allows the surgeon to scale the digital image to real-world measurements.
Rita Leibinger confirms: image calibration does not alter TPA measurement (the angle is size-independent), but it enables radiographs to be used for surgical plate-size planning.
Post-operative radiographs
After TPLO, radiographs are taken:
- Immediately post-surgery: to confirm osteotomy position, plate position, screw placement, and achieved post-operative TPA
- At 6 to 8 weeks: to assess early bone healing and callus formation
- At 12 weeks: to confirm bone union before lifting activity restrictions
What a good post-operative radiograph shows
- Post-operative TPA of approximately 5 to 6.5 degrees
- No screws violating the joint space
- Plate in correct medial position on the tibia
- Osteotomy gap that is progressively narrowing on follow-up films (callus formation)
Warning signs on post-operative radiographs
- Screw tip in the joint space (requires removal of that screw)
- Plate migration from original position
- Peri-implant radiolucent halos (suggests implant loosening or infection)
- Osteotomy gap not narrowing by 8 weeks (suggests delayed union or infection)
For the TPA measurement guide, see what causes TPLO surgery in dogs. For post-operative complications, see 15 common complications after TPLO surgery.
For the plate infection guide, see TPLO plate infection signs and treatment. For bone healing information, see TPLO bone healing time in dogs.
Frequently asked questions
Does the dog need to be sedated for TPLO radiographs?
Sedation is strongly recommended and preferred. An unsedated dog -- particularly one in pain from CCL disease -- cannot maintain the precise positioning required for accurate TPA measurement.
Even minor position changes between preparation and exposure produce significant error. Sedation allows the technician to position the limb correctly and hold it in place without the dog shifting.
Why does the hock position matter for the lateral view?
The hock angle affects the position of the tibia relative to the table and the imaging plate.
When the hock deviates from approximately 90 degrees, the tibia is either elevated or depressed at the distal end, which changes the apparent angle of the tibial plateau.
This error is captured in the TPA measurement.
What is a normal TPA range and when should TPLO be recommended?
Today's Veterinary Practice confirms the average TPA in most dogs is 23 to 29 degrees. Some small breeds have higher averages.
Dogs with TPA greater than 30 degrees may be poor candidates for extracapsular repair or TTA.
TPLO is appropriate for dogs of all TPA values -- the procedure specifically corrects whatever TPA angle the dog presents with.
Can the same radiograph be used for both diagnosis and surgical planning?
Yes, if it is of adequate quality and includes a calibration marker.
Diagnostic-only radiographs taken without a calibration marker can confirm CCL disease and measure TPA, but cannot be used for plate-size surgical planning.
Including a calibration marker at the time of acquisition allows a single radiograph to serve both purposes.
What happens if the TPA is measured incorrectly pre-operatively?
If the pre-operative TPA is underestimated, the surgeon may under-rotate the osteotomy and fail to reach the target 5 to 6.5 degree post-operative TPA.
This results in residual cranial tibial thrust and potentially ongoing instability. If overestimated, overcorrection is possible.
This underscores why positioning accuracy at the time of radiography is critical -- errors propagate through the entire surgical plan.
Resources
- Cave Vet Specialists. Tips for TPLO Radiographs. cave-vet-specialists.co.uk
- Today's Veterinary Practice. Cruciate Disease: How and Why to Measure Tibial Plateau Angle. todaysveterinarypractice.com
- MDPI Animals. The Effect of Femur Positioning on Measurement of Tibial Plateau Angle. ncbi.nlm.nih.gov
- Rita Leibinger. TPLO Surgical Technique. leibinger.vet
Arthrex TPLO Weight Chart Explained
Understand the Arthrex TPLO weight chart and how it guides post-op care for dogs after TPLO surgery.
After TPLO surgery, one of the most important questions owners and rehabilitation teams ask is: how much weight should my dog be putting on the operated leg right now?
The Arthrex TPLO weight chart provides a structured, week-by-week answer to that question, giving both surgeons and owners a shared reference point for tracking recovery progress.
Quick answer: The Arthrex TPLO weight chart tracks the percentage of body weight a dog bears on the operated leg at each recovery stage — from 0 to 10% in the first weeks to 100% by 8 to 12 weeks post-surgery.
Key takeaways
- The weight chart tracks weight-bearing percentage at each stage, from 0 to 10% in weeks 1 to 2 to 100% by weeks 8 to 12
- It is a rehabilitation monitoring tool, not a surgical planning tool: the rotation chart governs intraoperative correction; this tracks recovery
- Progression must be gradual: advancing too fast risks implant failure; too slow leads to atrophy and stiffness
- The chart integrates with clinical examination: 8-week radiographs, gait assessment, and muscle mass evaluation are considered alongside chart milestones
- Individual dogs vary: the chart provides population-level benchmarks; your surgeon's instructions take precedence
- The chart is used alongside the plate size and rotation charts: together they form the Arthrex TPLO system framework
What the weight chart is and what it is not
The Arthrex TPLO weight chart is a post-operative rehabilitation tool.
It shows recommended weight-bearing percentages at specific time points after surgery a reference guide that helps veterinarians, rehabilitation therapists, and owners track whether a dog's recovery is progressing appropriately.
It is not the same as the rotation chart (which guides intraoperative tibial rotation) or the plate size chart (which guides implant selection before surgery).
These three charts together form the Arthrex TPLO planning and monitoring system.
For the rotation chart guide, see Arthrex TPLO rotation chart explained. For the plate overview, see Arthrex TPLO plate overview and use.
Understanding the weight-bearing percentages
The chart uses percentage of body weight as its unit of measurement.
This is a more useful measure than time alone because it relates directly to the mechanical load placed on the healing osteotomy and implant.
0 to 10% weight-bearing (weeks 1 to 2): toe-touching and minimal contact only. The dog is not actively loading the leg during this phase. Bathroom trips on leash are permitted, but no sustained weight-bearing.
10 to 30% (weeks 2 to 4): the dog begins placing meaningful weight on the leg during slow leash walks. This corresponds to the short 5 to 10 minute leash walks prescribed at this stage. The healing osteotomy is starting to consolidate but is not yet ready for full load.
30 to 60% (weeks 4 to 8): progressive loading during longer walks, sit-to-stand exercises, and early rehabilitation activities. Most dogs are visibly improving in gait symmetry during this phase.
60 to 100% (weeks 8 to 12): full weight-bearing is approached and typically achieved after the radiographic recheck at week 8 confirms adequate osteotomy healing. Activity levels increase under veterinary guidance.
How to use the chart in practice
As a clinical benchmark
Surgeons use the weight chart to assess whether a dog is progressing as expected at each recheck visit.
A dog that is well below the expected weight-bearing percentage for their stage may have inadequate pain control, implant complications, or infection.
A dog exceeding the expected percentage may be at risk of mechanical overload if the bone has not yet consolidated enough to tolerate the load.
As an owner reference
Owners are not expected to measure exact weight-bearing percentages at home this requires force plate analysis or pressure-sensitive walkway equipment.
The chart provides a conceptual framework: early recovery shows only toe-touching; by weeks 4 to 6, the dog places meaningful weight during walks; by weeks 10 to 12, gait symmetry improves steadily.
What affects weight-bearing progress
Bone healing rate: younger dogs and smaller breeds typically consolidate the osteotomy faster than older or giant breed dogs.
Pain control: inadequate analgesia is the most common cause of delayed weight-bearing. A dog in pain will protect the operated leg regardless of how well the surgery went. Contact your surgeon if your dog is significantly below expected weight-bearing benchmarks.
Muscle atrophy: dogs that enter surgery with significant muscle atrophy from prolonged pre-surgical lameness progress more slowly and benefit most from structured rehabilitation.
Body weight: heavier dogs place more absolute load on the healing osteotomy at any given percentage. This is one reason weight management is emphasized throughout the TPLO recovery period.
Rehabilitation: dogs receiving structured rehabilitation (PROM, sit-to-stand, hydrotherapy) consistently achieve better weight-bearing progression than those managed with rest alone.
When the chart says one thing and your dog does another
The weight chart represents population-level expectations. Individual dogs routinely deviate from the expected timeline for reasons that are often identifiable and manageable.
If your dog is significantly under-progressing: contact your surgeon to rule out infection, implant problems, or inadequate pain management before assuming slow healing.
If your dog appears to be weight-bearing well ahead of schedule: this does not mean the osteotomy is healed faster than expected.
Radiographic confirmation at week 8 is still required regardless of how the dog looks clinically. Apparent early function does not mean the bone has consolidated enough to withstand full unrestricted activity.
For the full weight-bearing recovery timeline guide, see how soon can a dog walk after TPLO surgery.
For the rotation chart that is used alongside the weight chart in the Arthrex system, see Arthrex TPLO rotation chart explained.
For the plate size chart used in conjunction with both, see TPLO plate size chart explained.
Frequently asked questions
Is the Arthrex TPLO weight chart the same as a standard recovery timeline?
Not exactly. A recovery timeline tells you what activities to do and avoid at each stage.
The weight chart specifically tracks how much weight the dog is placing on the operated leg at each stage, expressed as a percentage of body weight.
The two are related but provide different information.
Can I measure my dog's weight-bearing at home?
Not precisely. Force plate and pressure-sensitive walkway systems that measure actual weight distribution require specialist veterinary equipment.
At home, you can observe whether the dog is toe-touching, placing the foot flat, and walking with increasing symmetry which approximates the chart's progression categories without exact percentages.
What if my dog refuses to use the leg at all two weeks after TPLO?
Non-weight-bearing at two weeks is a warning sign. TPLO Austin confirms that if your pet is not bearing weight within two weeks of surgery, contact your veterinarian.
The most common causes are inadequate pain control, infection, or implant positioning concerns all of which are addressable if caught early.
Do all TPLO surgeons use the Arthrex weight chart?
No. The Arthrex system is one of the two major TPLO implant systems in the US (alongside Synthes). Surgeons using Synthes implants use Synthes-specific planning tools.
Some surgeons use individualized rehabilitation protocols rather than system-specific charts. The underlying recovery milestones are similar regardless of which chart or system is used.
What happens at the 8-week recheck in terms of weight-bearing?
At the 8-week recheck, radiographs assess osteotomy healing. If healing is adequate, the surgeon approves increased activity typically 20 to 30 minute leash walks and the beginning of return-to-normal activity.
The weight chart at this point expects the dog to be approaching or achieving 100% weight-bearing on the operated leg.
Resources
- Arthrex Veterinary. TPLO Surgical Technique. arthrex.com
- VCA Animal Hospitals. Tibial Plateau Leveling Osteotomy (TPLO) in Dogs. vcahospitals.com
- TPLO Austin. Step 6: TPLO Surgery Recovery. tploaustin.com
- ACVS. Cranial Cruciate Ligament Disease. acvs.org
When Can Dogs Resume Agility Training Post-TPLO?
Learn when and how to safely resume dog agility training after TPLO surgery. Get expert-backed recovery tips, rehab steps, and risk precautions
Returning an agility dog to sport after TPLO surgery requires more than standard recovery. The standard 8 to 12 week bone healing protocol restores a dog to normal household function.
Returning to agility -- a high-impact sport involving jumping, sharp turns, weave poles, and contact obstacles -- requires a further 4 to 6 months of structured conditioning on top of that foundation.
Quick answer: Most agility dogs return to training 7 to 9 months post-TPLO. The Balanced Dog confirms 80% returned before 9 months (average 7.5 months). Bone healing at 8 to 12 weeks is the starting point. Return to sport requires muscle symmetry, pain-free movement, and a graduated protocol with vet clearance.
Key takeaways
- The return-to-agility timeline averages 7 to 9 months: The Balanced Dog confirms 80% returned before 9 months, average 7.5 months; 3 to 6 months reflects light training, not full competition
- Bone healing at 8 to 12 weeks is the starting point, not the endpoint: high-impact agility may require 4 to 6 more months; healed bone does not mean rebuilt muscle
- Agility-specific demands require agility-specific conditioning: jumping, tight turns, weave poles, and contacts generate forces far greater than walking; the dog must be conditioned for these before returning
- All dogs with agility return goals need a return-to-sport protocol: it adds sport-specific movement, progressive jumping, and fitness benchmarks beyond the standard recovery protocol
- Veterinary clearance at each phase is non-negotiable: vet or surgeon clearance is required before resuming training; no benchmark should be self-assessed
- Not all dogs will reach pre-surgery performance: most regain significant function but some need training changes to reduce joint stress
Why agility is a higher bar than normal recovery
Normal TPLO recovery targets return to household mobility: walking, light running, stairs, and play. Agility sport involves:
- Jumping: impact forces on landing of 2 to 3 times body weight
- Tight turns at speed: high lateral shear forces on the stifle
- Weave poles: rapid lateral flexion and extension
- Contact obstacles (A-frame, dog walk, teeter): climbing and controlled descent under dynamic loading
Each of these demands requires not just healed bone but fully rebuilt muscle, coordinated neuromuscular control, and joint proprioception. These take months to restore after TPLO.
SustainableVet.org confirms: dogs in sports or agility should reintroduce jumps and running only after veterinary clearance; swimming or uphill walking maintains muscle tone during the conditioning phase.
The return-to-sport timeline
Phase 1: bone healing (weeks 0 to 12)
Standard TPLO recovery. Strict confinement, graduated leash walking, and passive range-of-motion exercises. No running, jumping, or agility activity of any kind.
Radiographic bone healing is confirmed at the 8 to 12 week recheck. This is the gate that opens Phase 2.
Phase 2: rebuilding foundation fitness (months 3 to 5)
After bone healing is confirmed, the focus shifts to rebuilding the muscle mass and neuromuscular coordination that atrophied during the restriction period.
Activities during Phase 2:
- Progressive leash walking with duration increasing weekly
- Hydrotherapy (underwater treadmill) for muscle building without joint impact
- Hill walking (controlled inclines) to load the hip extensors and stifle stabilizers
- Balance and proprioception work (wobble boards, cavaletti poles)
- Core strengthening exercises
TPLO Info confirms: overall return to agility takes around 3 to 6 months; this period of rebuilding is what fills the gap between bone healing and sport re-entry.
Phase 3: sport-specific conditioning (months 5 to 7)
Once the dog has rebuilt baseline fitness, sport-specific conditioning begins. This is distinct from the standard recovery protocol.
Activities:
- Controlled jumping starting very low (4 inches for a dog that jumps 24 inches in competition) and increasing progressively over 6 to 8 weeks
- Slow figure-8 work and curved running to restore stifle lateral mechanics
- Individual weave pole work at slow speed before full weave sequence
- Contact obstacle approach and exit work at slow, controlled speed
- Video gait assessment to identify any asymmetry or compensation patterns
Petcarepartners.co confirms: most vets suggest a waiting period of 4 to 6 months for running and fetch; for agility, add a further structured sport-specific phase on top of this.
Phase 4: return to full competition (months 7 to 9+)
Full competition resumption follows veterinary clearance of the sport-specific conditioning phase. The criteria for clearance include:
- Pain-free movement through full range of stifle motion
- Muscle symmetry (thigh circumference equal bilaterally)
- Confident single-leg weight bearing during agility-specific movements
- No lameness following a full practice session
- Surgeon clearance based on physical and radiographic assessment
The Balanced Dog confirms: it typically takes 7 to 9 months to return to sport; 80% of dogs returned to agility before 9 months with a good rehabilitation and return-to-sport program.
Factors that affect the return timeline
Dog's age: younger dogs (under 4 years) typically rebuild muscle faster than older dogs. Senior dogs may take 10 to 12 months or longer.
Dog's pre-surgical fitness: well-conditioned sport dogs with strong baseline muscle mass rebuild faster than deconditioned dogs. Body condition score at the time of surgery matters.
Adherence to the restriction protocol: dogs that were overactive during weeks 1 to 6 may have developed micro-complications or delayed healing that shifts the timeline.
Concurrent meniscal tear: dogs that had a meniscal tear treated at the time of TPLO may need additional time, particularly if a late meniscal tear occurs during the return-to-sport phase.
Bilateral CCL disease: dogs with CCL rupture on the second side during or after recovery for the first require the full protocol on the second side before bilateral agility work resumes.
SustainableVet.org confirms: average recovery time to agility is about seven months; some dogs start controlled activity at six months, while others take up to two years.
Using a certified canine rehabilitation therapist
For agility dogs, professional rehabilitation is strongly recommended rather than a home-only protocol. Certified canine rehabilitation practitioners (CCRPs) provide:
- Biomechanical gait analysis to detect compensatory movement patterns before return to sport
- Underwater treadmill protocols calibrated to the specific demands of agility
- Sport-specific functional testing to determine readiness
- Individualized return-to-sport programs
The Balanced Dog confirms: surgery is just the start; a good-quality rehabilitation and return-to-sport program is instrumental in giving the dog the best chance at returning to competitive agility.
For the recovery timeline, see what to expect after TPLO surgery in dogs. For physical therapy timing, see when to start physical therapy after TPLO surgery.
For recovery exercises, see TPLO recovery exercises for dogs. For the failure rate overview, see TPLO failure rate in dogs.
Frequently asked questions
My agility dog had TPLO 6 months ago and is moving well. Can she start jumping?
Six months is within the average return-to-sport window but requires veterinary assessment before starting jumping.
The criteria -- muscle symmetry, pain-free full range of motion, confident single-leg weight bearing -- must be met and confirmed by your vet or rehabilitation therapist before any jumping begins.
Do not self-assess readiness.
Will my dog ever compete at the same level as before TPLO?
Many dogs do return to pre-injury competitive levels, especially those with strong pre-surgical conditioning and an excellent rehabilitation program.
SustainableVet.org confirms most dogs regain significant function and can participate in agility, though not all will reach pre-injury performance levels. The Balanced Dog study confirms 80% returned before 9 months.
Should I lower my dog's jump height after TPLO?
Discuss with your vet. Some dogs perform best at a jump height one level below their pre-surgery height to reduce cumulative joint loading. Others return to their full height without adjustment.
This is an individual decision based on the dog's age, size, arthritis level, and post-recovery movement quality.
Can I use a FitPaws or conditioning equipment at home?
Yes -- proprioception and balance equipment (wobble boards, FitPaws equipment, balance pads) is appropriate during Phase 2 and Phase 3 under the direction of your rehabilitation therapist.
These tools help rebuild the neuromuscular coordination needed for agility-specific movements. Always use on non-slip flooring.
What happens if my dog tears the other CCL during agility return?
Bilateral CCL disease is common (30 to 40% of dogs develop it). If the second stifle becomes symptomatic during the return-to-agility phase, the rehabilitation program pauses and the second stifle is assessed.
The return-to-agility timeline resets based on the second surgery date. Most dogs with bilateral TPLO can still return to agility.
Resources
- The Balanced Dog. Returning to Dog Agility After TPLO Surgery. the-balanced-dog.com
- TPLO Info. Can You Resume Dog Agility Training After TPLO Surgery? tploinfo.com
- SustainableVet. When Can Dogs Resume Agility Training Post-TPLO? sustainablevet.org
- ACVS. Cranial Cruciate Ligament Disease. acvs.org
TPLO Recovery Exercises for Dogs
Learn effective TPLO recovery exercises for dogs to ensure safe healing and regain mobility after surgery.
TPLO recovery exercises for dogs are essential to help your pet regain strength and mobility after surgery. Tibial Plateau Leveling Osteotomy (TPLO) is a common procedure to repair cruciate ligament injuries, but proper rehabilitation is key to success.
This article explains the best exercises for dogs recovering from TPLO surgery. You will learn safe ways to support your dog's healing, improve joint function, and avoid complications during recovery.
What is TPLO surgery and why is recovery important?
TPLO surgery stabilizes a dog's knee joint after a torn cranial cruciate ligament. The procedure changes the angle of the tibia to reduce stress on the ligament. Recovery is critical because the joint needs time to heal and regain normal function.
Without proper recovery exercises, dogs may develop stiffness, muscle loss, or abnormal gait. Controlled rehabilitation helps restore strength and prevents long-term problems.
- TPLO purpose: TPLO surgery corrects knee instability caused by ligament tears, allowing dogs to walk and run without pain.
- Healing time: Bone healing after TPLO usually takes 8 to 12 weeks, during which exercises must be carefully managed.
- Muscle maintenance: Recovery exercises prevent muscle wasting and improve joint support for better mobility.
- Preventing stiffness: Gentle movement reduces joint stiffness and promotes healthy cartilage and ligament healing.
Following a structured exercise plan after TPLO surgery is essential for your dog's full recovery and long-term joint health.
When can I start TPLO recovery exercises for my dog?
Starting recovery exercises depends on your veterinarian's advice and your dog's healing progress. Typically, gentle exercises begin within a few days after surgery, progressing gradually over weeks.
Early movement helps reduce swelling and maintain circulation, but high-impact activities must be avoided until the bone fully heals.
- Initial rest period: Dogs usually require strict rest for the first 1 to 2 weeks to allow initial bone healing.
- Vet approval: Always consult your vet before starting any exercise to ensure it is safe for your dog's stage of recovery.
- Gradual progression: Exercises increase in intensity and duration over 8 to 12 weeks based on healing and pain levels.
- Signs to watch: Stop exercises if your dog shows limping, swelling, or pain, and contact your vet immediately.
Following a vet-approved timeline for exercises ensures your dog recovers safely and avoids setbacks.
What are the best passive TPLO recovery exercises for dogs?
Passive exercises involve moving your dog's leg without active muscle use. These help maintain joint flexibility and reduce stiffness early in recovery.
They are safe to perform soon after surgery and do not stress the healing bone or ligament.
- Range of motion: Gently bend and straighten the knee joint within a pain-free range to keep it flexible.
- Massage therapy: Light massage around the surgical site improves circulation and reduces swelling.
- Cold therapy: Applying cold packs after passive exercises reduces inflammation and discomfort.
- Leg lifts: Carefully lift and lower the leg to encourage gentle movement without weight bearing.
These passive exercises prepare your dog for more active rehabilitation phases while protecting the surgical repair.
Which active exercises help dogs regain strength after TPLO?
Active exercises require your dog to use muscles and support weight on the operated leg. These are introduced gradually to rebuild strength and coordination.
They improve muscle tone, joint stability, and overall limb function as healing progresses.
- Leash walking: Short, controlled walks on a leash encourage weight bearing and muscle use without overexertion.
- Sit-to-stand: Encouraging your dog to sit and stand repeatedly strengthens thigh muscles supporting the knee.
- Balance exercises: Using a wobble board or soft surface challenges your dog's balance and joint control.
- Controlled stairs: Slowly climbing and descending stairs helps improve joint range and muscle power.
Active exercises should be supervised and adjusted based on your dog's comfort and recovery stage.
How can hydrotherapy support TPLO recovery in dogs?
Hydrotherapy uses water to provide low-impact exercise that supports healing after TPLO surgery. The buoyancy reduces joint stress while allowing muscle strengthening.
This therapy is often recommended by vets and rehabilitation specialists to speed recovery and improve outcomes.
- Water treadmill: Walking on a submerged treadmill helps build strength with less pain and swelling.
- Swimming sessions: Swimming provides full-body exercise without weight bearing on the knee joint.
- Hydro massage: Water jets can massage muscles and reduce stiffness around the surgical area.
- Temperature control: Warm water improves circulation and relaxes muscles during therapy.
Hydrotherapy is a safe and effective way to enhance recovery when combined with other rehabilitation exercises.
What precautions should I take during TPLO recovery exercises?
Safety is critical when performing recovery exercises after TPLO surgery. Incorrect or excessive activity can cause pain, swelling, or damage to the surgical repair.
Following guidelines and monitoring your dog closely helps prevent complications and ensures steady progress.
- Follow vet instructions: Always adhere to your veterinarian's exercise plan and timelines for safe recovery.
- Monitor pain signs: Watch for limping, whining, or reluctance to move, which indicate discomfort or injury.
- Limit off-leash activity: Avoid running, jumping, or rough play until fully healed to protect the knee joint.
- Use supportive devices: Consider braces or slings if recommended to assist mobility and reduce strain.
Taking these precautions helps your dog heal efficiently and return to normal activity safely.
How long does full TPLO recovery take with exercises?
Full recovery from TPLO surgery usually takes 3 to 6 months with proper rehabilitation exercises. The timeline varies depending on the dog's age, size, and overall health.
Consistent exercise and veterinary follow-up are essential to achieve the best outcome and prevent future injuries.
- Bone healing: The bone typically heals within 8 to 12 weeks, allowing gradual increase in exercise intensity.
- Muscle rebuilding: Muscle strength improves over several months with regular active exercises.
- Joint function: Full joint mobility and stability may take up to 6 months to restore completely.
- Long-term care: Maintaining a healthy weight and regular low-impact exercise helps prevent re-injury after recovery.
Patience and commitment to the exercise plan are key to your dog's successful TPLO recovery and long-term mobility.
Conclusion
TPLO recovery exercises for dogs are vital to help your pet heal safely and regain full function after surgery. Starting with passive movements and progressing to active exercises supports bone healing and muscle strength.
Consult your veterinarian regularly and follow a structured rehabilitation plan to ensure the best outcome. With proper care and patience, your dog can enjoy a healthy, active life after TPLO surgery.
FAQs
How soon after TPLO surgery can my dog start walking?
Most dogs begin short, controlled leash walks within 1 to 2 weeks after surgery, depending on veterinary advice and healing progress.
Can I do TPLO recovery exercises at home?
Yes, many passive and active exercises can be safely done at home following your vet's instructions and supervision.
Is hydrotherapy necessary for TPLO recovery?
Hydrotherapy is not mandatory but highly beneficial for low-impact strengthening and faster recovery when available.
What signs mean I should stop exercises and call my vet?
Stop exercises if your dog shows increased limping, swelling, pain, or reluctance to move and contact your veterinarian promptly.
How long do I need to restrict my dog's activity after TPLO?
Activity restriction usually lasts 8 to 12 weeks, gradually easing as bone healing progresses and exercises increase.

Does Pet Insurance Cover TPLO Surgery in Dogs?
Find out if pet insurance covers TPLO surgery, what affects eligibility, and how to get reimbursed for your dog’s treatment.
Understanding TPLO Surgery and Why It’s Needed
Tibial Plateau Leveling Osteotomy (TPLO) is a surgical procedure used to repair a torn cranial cruciate ligament (CCL) in dogs — a common injury that causes pain and hind limb instability. The surgery reshapes the tibia bone to restore stable joint movement without depending on the damaged ligament.
- Purpose of TPLO Surgery: Recommended for active or large-breed dogs where conservative treatments cannot restore function.
- Recovery Period: Most dogs need 8–12 weeks for bone healing, followed by controlled physical therapy for full recovery.
- Cost Overview: TPLO surgery is one of the more expensive orthopedic procedures, often ranging from $3,000 to $6,000 depending on clinic and location.
Understanding these basics sets the stage for evaluating insurance coverage options.
Average Cost of TPLO Surgery for Dogs
TPLO surgery is a complex orthopedic procedure, and its cost varies widely based on case difficulty, hospital standards, and regional pricing. Understanding the range helps owners plan financially before exploring insurance options.
- National Cost Range: In the U.S., TPLO surgery typically costs between $3,000 and $6,000 for a single leg. In some specialty hospitals or metropolitan areas, costs can exceed $7,000, especially for large breeds.
- Simple vs. Complex Cases: Minor ligament tears with minimal complications are less costly, while complex fractures, bilateral surgeries, or infections increase total expenses significantly.
- Influence of Dog Size: Larger dogs require stronger plates, longer anesthesia, and extended recovery monitoring, leading to higher bills.
- Hospital and Surgeon Type: Referral centers and board-certified surgeons charge more due to specialized equipment and experience.
- Follow-Up and Rehabilitation: Post-surgical care, including X-rays and physiotherapy, can add $500–$1,500.
Because of these high expenses, many pet owners consider insurance coverage essential to make TPLO surgery affordable without compromising care quality.
Does Pet Insurance Cover TPLO Surgery?
Most modern pet insurance plans do cover TPLO surgery, but eligibility depends on policy terms and your dog’s medical history. The key factor is whether the cruciate ligament injury is considered pre-existing.
- General Coverage Rule: If your dog’s CCL injury occurs after the waiting period and is not pre-existing, TPLO surgery is usually included under accident or illness coverage.
- Waiting Periods: Many insurers enforce a 6–12 month waiting period for cruciate ligament coverage to prevent claims on undiagnosed injuries.
- Plan Type Differences: Comprehensive plans with illness and injury coverage are most likely to include TPLO, while accident-only policies may exclude it.
- Common Exclusions: Some policies do not cover congenital joint disorders or prior CCL injuries in the opposite leg.
- Importance of Documentation: Detailed veterinary records proving the injury is new are often required for claim approval.
In most cases, TPLO is covered when the policy is active before the injury, making early insurance enrollment a smart preventive decision.
How Pre-Existing Conditions Affect TPLO Coverage
Pre-existing conditions are the most common reason pet insurance denies TPLO-related claims. Understanding what qualifies as “pre-existing” helps you protect your dog’s future eligibility.
- Definition of Pre-Existing Conditions: Any medical issue diagnosed or showing symptoms before policy activation or during the waiting period is considered pre-existing.
- Prior Cruciate Ligament Injuries: If your dog previously tore a CCL or ACL in either leg, many insurers exclude future coverage for both knees under a bilateral condition clause.
- Breed Predisposition: Large or active breeds prone to ligament tears may face stricter review before approval.
- Importance of Early Enrollment: Getting insurance while your dog is young and injury-free ensures eligibility for full cruciate coverage later in life.
- Proof of Clean Health Record: Regular vet visits and medical documentation help verify no pre-existing issues existed at policy start.
Early planning and transparent medical history are crucial for securing TPLO coverage when unexpected injuries occur.
What Pet Insurance Typically Covers for TPLO Surgery
When TPLO surgery is approved under your insurance, most plans cover a wide range of medical services related to diagnosis, treatment, and recovery. This support can significantly reduce financial stress.
- Diagnostic Imaging: X-rays, CT scans, or MRIs used to confirm ligament rupture are usually included in coverage.
- Surgery and Hospitalization: The main surgical procedure, anesthesia, and hospitalization costs are covered up to policy limits.
- Post-Surgery Medications: Pain relievers, antibiotics, and anti-inflammatories prescribed during recovery are typically reimbursable.
- Physical Therapy: Many plans include hydrotherapy or physiotherapy sessions for rehabilitation under extended recovery benefits.
- Follow-Up Visits and Complications: Recheck exams, wound care, or treatment of infections that occur after surgery are generally included within your policy’s time and cost caps.
Comprehensive coverage ensures your dog’s TPLO treatment is managed safely from diagnosis through recovery, minimizing both physical and financial strain.
What’s Not Covered by Pet Insurance for TPLO Surgery
Even though many pet insurance plans include TPLO coverage, certain conditions and costs fall outside standard policies. Knowing these exclusions helps prevent surprises during reimbursement.
- Pre-Existing Injuries: If your dog showed signs of a cruciate tear before enrollment or during the waiting period, TPLO surgery won’t be covered.
- Bilateral Exclusion Clauses: Some insurers exclude the second knee once one cruciate injury occurs, even if it happens years later.
- Preventive or Elective Procedures: Pre-surgical screenings, optional rehab sessions, or supplements are often excluded from reimbursement.
- Rehabilitation Limits: Physiotherapy or hydrotherapy may only be covered for a set number of weeks or up to a cost cap.
- Deductibles and Co-Pays: Owners are responsible for annual deductibles, coinsurance percentages, and any charges beyond policy limits.
- Waiting Period Restrictions: Claims made before the orthopedic waiting period ends are automatically denied.
Understanding these exclusions helps you plan better and choose insurance that aligns with your dog’s long-term orthopedic needs.
Best Pet Insurance Providers That Cover TPLO Surgery
Several leading pet insurance companies offer coverage for TPLO surgery, but each has unique rules for cruciate ligament injuries. Comparing policies ensures you find the best fit for your dog’s medical and financial needs.
- Healthy Paws: Covers TPLO if the injury occurs after enrollment and the waiting period. Offers unlimited annual payouts but no coverage for pre-existing conditions.
- Trupanion: Known for 90% reimbursement on eligible costs and direct vet payments, but has a 30-day waiting period for orthopedic claims.
- Embrace: Includes TPLO surgery under illness coverage, with the option to reduce or waive the orthopedic waiting period through a vet exam.
- Spot and Fetch: Both cover cruciate ligament injuries after the waiting period, with flexible reimbursement and deductible options.
- ASPCA Pet Health Insurance: Offers comprehensive coverage but applies a 14-day illness waiting period for orthopedic procedures.
Selecting a provider with transparent cruciate coverage and high reimbursement rates ensures better financial protection for major surgeries like TPLO.
How to File a TPLO Surgery Claim
Filing a TPLO surgery claim correctly helps speed up reimbursement and avoids processing delays. Most insurers require detailed veterinary documentation and itemized invoices.
- Collect Required Documents: Obtain a full medical report, diagnostic imaging results, itemized invoices, and proof of payment from your veterinarian.
- Submit Through the Portal: Most insurance providers allow online submissions through their official portals or mobile apps for faster review.
- Attach Medical History: Include your dog’s previous health records to confirm the cruciate injury isn’t pre-existing.
- Timeline for Reimbursement: Claims are typically processed within 10–15 business days, though some complex cases may take longer.
- Follow Up Promptly: Contact your insurer if documentation requests arise or delays occur. Keeping communication open prevents claim rejection.
- Save Copies: Always keep digital or printed copies of every document for future claims.
Timely, organized submission of records ensures smoother claim approval and quicker financial relief after TPLO surgery.
Tips for Choosing the Right Pet Insurance for Orthopedic Coverage
Choosing the right insurance plan can make a major difference in managing expensive orthopedic procedures like TPLO surgery. Understanding policy details beforehand prevents financial stress later.
- Avoid Bilateral Exclusions: Choose insurers that cover both knees even if one is previously injured. This is critical for breeds prone to cruciate tears.
- Check Waiting Periods: Some plans have 6–12 month orthopedic waiting periods. Early enrollment ensures coverage is active when needed.
- Customizable Reimbursement Options: Plans allowing flexible deductibles and payout percentages help control monthly premiums.
- Understand Policy Limits: Review annual and lifetime caps to ensure coverage remains adequate for long-term orthopedic care.
- Read Fine Print Carefully: Always confirm whether physical therapy, imaging, and post-surgical complications are included.
- Ask About Direct Payments: Some insurers pay veterinarians directly, saving you from covering full costs upfront.
Selecting a policy that combines comprehensive coverage with transparency ensures peace of mind when facing orthopedic surgeries like TPLO.
Conclusion
TPLO surgery is one of the costliest orthopedic procedures for dogs, making strong insurance coverage essential. While most insurers cover the operation for non-pre-existing injuries, exclusions and waiting periods can greatly affect eligibility.
- Coverage Essentials: Understand plan inclusions, orthopedic waiting times, and bilateral condition policies.
- Early Enrollment: Starting coverage before injuries occur ensures full eligibility for TPLO claims.
- Policy Comparison: Review reimbursement rates, deductibles, and annual caps to choose the best protection for your dog’s long-term health.
- Consultation: Discuss all coverage details with your insurer before scheduling surgery to avoid claim denial or hidden costs.
With the right pet insurance plan and proper timing, you can manage TPLO expenses confidently while securing the best surgical outcome for your dog.
FAQs
Will insurance cover both legs if both cruciate ligaments tear?
Most pet insurance plans cover both legs only if the policy doesn’t include a bilateral exclusion clause. Some insurers consider cruciate injuries as linked conditions, meaning if one leg tears before enrollment, the other may not be covered. Always confirm your insurer’s bilateral coverage terms in writing before surgery.
Can I get coverage if my dog already tore one ligament?
If your dog had a previous cruciate ligament injury before the policy began, most insurers will treat future TPLO claims as pre-existing and deny coverage. However, enrolling early or choosing a plan without bilateral exclusions ensures future injuries can still qualify for reimbursement.
How long is the waiting period for TPLO coverage?
Orthopedic waiting periods vary by provider, typically ranging from 6 to 12 months after policy activation. Some companies allow a vet exam waiver to shorten this period. Starting insurance early ensures your dog’s coverage is active before any ligament injury occurs.
What if my dog needs a second TPLO later?
If both legs require TPLO surgery and your policy includes bilateral coverage, the second operation is usually covered as long as it occurs after the waiting period. Keep consistent records and ensure premiums remain active to avoid claim rejection for the second procedure.
Which pet insurance companies cover TPLO the best?
Top-rated providers for TPLO coverage include Trupanion, Embrace, Healthy Paws, and Fetch. These plans typically offer 80–90% reimbursement on approved orthopedic claims with clear terms for cruciate ligament injuries. Always compare waiting periods, bilateral rules, and annual payout limits before finalizing your plan.
When Can I Bathe My Dog After TPLO Surgery?
Learn when it is safe to bathe your dog after TPLO surgery and how to care for their incision during recovery.
After your dog undergoes TPLO surgery, you may wonder when it is safe to bathe them. TPLO surgery is a common procedure to repair a torn cranial cruciate ligament in dogs. Proper post-operative care, including bathing, is essential to ensure a smooth recovery and avoid complications.
This article explains when you can bathe your dog after TPLO surgery, how to protect the surgical site, and what precautions to take during the healing process. You will learn practical tips to keep your dog clean without risking infection or delayed healing.
When Can I Bathe My Dog After TPLO Surgery?
The general recommendation is to avoid bathing your dog for at least 10 to 14 days after TPLO surgery. This time allows the incision to begin healing and reduces the risk of infection. Bathing too early can expose the wound to moisture and bacteria, which can cause complications.
Once the incision is fully closed and your veterinarian gives the go-ahead, you can bathe your dog carefully. It is important to keep the surgical site dry and clean during the initial healing phase.
- Healing time frame: Most veterinarians advise waiting 10 to 14 days before bathing to allow the incision to close properly and reduce infection risk.
- Veterinary approval: Always consult your vet before bathing to ensure the wound has healed enough for water exposure.
- Incision protection: Keep the surgical site dry and avoid direct water contact until fully healed to prevent complications.
- Signs of healing: Look for a dry, closed incision without redness or discharge before considering a bath.
Following these guidelines helps protect your dog’s surgical site and supports a healthy recovery.
How Should I Protect My Dog’s Incision When Bathing?
When your vet approves bathing, protecting the incision is crucial. You want to avoid water, soap, or shampoo reaching the surgical site. Using gentle methods can keep your dog clean without risking infection or irritation.
Proper protection also helps prevent your dog from licking or scratching the incision, which can delay healing.
- Use waterproof covers: Apply a waterproof bandage or plastic wrap over the incision to keep it dry during baths.
- Gentle cleaning: Use a damp cloth to clean areas away from the incision instead of full baths initially.
- Mild shampoos: Choose vet-recommended, gentle shampoos to avoid skin irritation around the surgery site.
- Dry thoroughly: After bathing, dry your dog carefully, especially near the incision, to prevent moisture buildup.
These steps help maintain cleanliness while protecting the surgical site during recovery.
What Are the Risks of Bathing Too Soon After TPLO Surgery?
Bathing your dog too soon after TPLO surgery can lead to several complications. The main concern is infection, which can delay healing or require additional treatment. Moisture can also weaken the incision and cause the sutures or staples to loosen.
Understanding these risks helps you avoid mistakes that could harm your dog’s recovery.
- Infection risk: Water exposure can introduce bacteria into the incision, causing infection and inflammation.
- Delayed healing: Moisture can soften the skin and slow the natural healing process of the wound.
- Suture damage: Wet sutures or staples may loosen or fall out prematurely, risking wound reopening.
- Increased discomfort: Bathing too early can cause pain or irritation at the surgery site, stressing your dog.
Waiting the recommended time and following vet advice reduces these risks significantly.
How Can I Keep My Dog Clean Without Bathing After Surgery?
Since full baths are not recommended immediately after TPLO surgery, there are alternative ways to keep your dog clean. These methods help maintain hygiene without exposing the incision to water.
Using gentle cleaning techniques and monitoring your dog’s activity can keep them comfortable and clean during recovery.
- Spot cleaning: Use a damp cloth or pet wipes to clean dirty areas away from the incision gently.
- Dry shampoo: Apply vet-approved dry shampoo powders or sprays to absorb oils and dirt without water.
- Limit outdoor exposure: Avoid muddy or wet areas to keep your dog cleaner between cleanings.
- Regular brushing: Brush your dog’s coat to remove dirt and loose hair, promoting cleanliness without bathing.
These alternatives help maintain hygiene while protecting the surgical site during healing.
What Signs Should I Watch for Around the Incision?
Monitoring your dog’s incision daily is important to catch any problems early. Knowing what signs indicate infection or delayed healing can help you seek veterinary care promptly.
Early detection of issues can prevent complications and support a faster recovery.
- Redness and swelling: Persistent or worsening redness and swelling around the incision may signal infection.
- Discharge or odor: Any pus, blood, or foul smell from the wound requires immediate veterinary attention.
- Excessive licking: If your dog licks or chews the incision excessively, it can cause damage and delay healing.
- Opening of the wound: If the incision starts to open or bleed, contact your vet right away.
Keeping a close eye on these signs ensures timely care and prevents serious complications.
How Can I Help My Dog Stay Comfortable During Recovery?
Comfort is key to a smooth recovery after TPLO surgery. Managing pain, limiting activity, and protecting the incision all contribute to your dog’s well-being.
Taking simple steps can reduce stress and support healing during this critical time.
- Pain management: Follow your vet’s instructions on pain medications to keep your dog comfortable.
- Restricted activity: Limit running, jumping, and rough play to prevent strain on the surgery site.
- Use an Elizabethan collar: Prevent your dog from licking or biting the incision with a cone or collar.
- Provide a clean resting area: Keep your dog’s bedding clean and dry to avoid contamination of the wound.
These measures help your dog heal faster and reduce the chance of complications.
Conclusion
Bathing your dog after TPLO surgery requires careful timing and protection of the surgical site. Waiting at least 10 to 14 days before bathing helps prevent infection and supports proper healing. Always follow your veterinarian’s advice and watch the incision closely for any signs of problems.
Using alternative cleaning methods and protecting the incision during baths ensures your dog stays clean and comfortable throughout recovery. With proper care, your dog can heal well and return to normal activities safely.
FAQs
Can I use a wet cloth to clean my dog before the incision heals?
Yes, you can use a damp cloth to gently clean areas away from the incision, but avoid touching or wetting the surgical site until fully healed.
When can my dog swim again after TPLO surgery?
Swimming should be avoided until the incision is fully healed and your vet approves, usually several weeks after surgery to prevent infection and injury.
What should I do if the incision gets wet accidentally?
If the incision gets wet, dry it gently with a clean towel and contact your vet for advice to prevent infection or complications.
Are there special shampoos recommended after TPLO surgery?
Use mild, vet-approved shampoos that are gentle on sensitive skin and avoid harsh chemicals that could irritate the incision area.
How often should I check my dog’s incision during recovery?
Check the incision at least once daily for redness, swelling, discharge, or other signs of infection to catch problems early and seek veterinary care if needed.

