Does Pet Insurance Cover TPLO Surgery in Dogs?
Find out if pet insurance covers TPLO surgery, what affects eligibility, and how to get reimbursed for your dog’s treatment.

This article is for informational purposes only and is not a substitute for professional veterinary advice. Every case is unique, so always consult your veterinarian for guidance specific to your pet.
This content is intended for veterinary professionals for educational purposes. It does not replace clinical judgment or tailored advice. Always rely on your training, expertise, and the specific context of your patients.

Understanding TPLO Surgery and Why It’s Needed
Tibial Plateau Leveling Osteotomy (TPLO) is a surgical procedure used to repair a torn cranial cruciate ligament (CCL) in dogs — a common injury that causes pain and hind limb instability. The surgery reshapes the tibia bone to restore stable joint movement without depending on the damaged ligament.
- Purpose of TPLO Surgery: Recommended for active or large-breed dogs where conservative treatments cannot restore function.
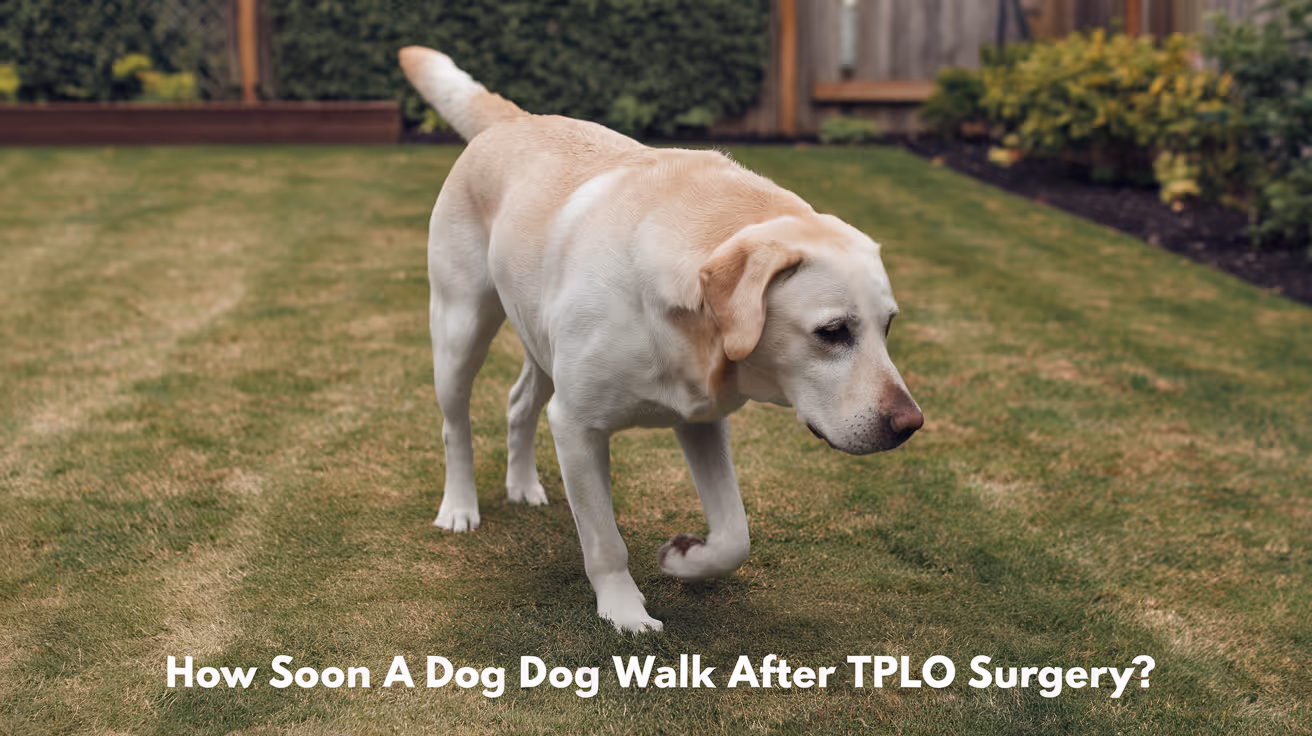
- Recovery Period: Most dogs need 8–12 weeks for bone healing, followed by controlled physical therapy for full recovery.
- Cost Overview: TPLO surgery is one of the more expensive orthopedic procedures, often ranging from $3,000 to $6,000 depending on clinic and location.
Understanding these basics sets the stage for evaluating insurance coverage options.
Average Cost of TPLO Surgery for Dogs
TPLO surgery is a complex orthopedic procedure, and its cost varies widely based on case difficulty, hospital standards, and regional pricing. Understanding the range helps owners plan financially before exploring insurance options.
- National Cost Range: In the U.S., TPLO surgery typically costs between $3,000 and $6,000 for a single leg. In some specialty hospitals or metropolitan areas, costs can exceed $7,000, especially for large breeds.
- Simple vs. Complex Cases: Minor ligament tears with minimal complications are less costly, while complex fractures, bilateral surgeries, or infections increase total expenses significantly.
- Influence of Dog Size: Larger dogs require stronger plates, longer anesthesia, and extended recovery monitoring, leading to higher bills.
- Hospital and Surgeon Type: Referral centers and board-certified surgeons charge more due to specialized equipment and experience.
- Follow-Up and Rehabilitation: Post-surgical care, including X-rays and physiotherapy, can add $500–$1,500.
Because of these high expenses, many pet owners consider insurance coverage essential to make TPLO surgery affordable without compromising care quality.
Does Pet Insurance Cover TPLO Surgery?
Most modern pet insurance plans do cover TPLO surgery, but eligibility depends on policy terms and your dog’s medical history. The key factor is whether the cruciate ligament injury is considered pre-existing.
- General Coverage Rule: If your dog’s CCL injury occurs after the waiting period and is not pre-existing, TPLO surgery is usually included under accident or illness coverage.
- Waiting Periods: Many insurers enforce a 6–12 month waiting period for cruciate ligament coverage to prevent claims on undiagnosed injuries.
- Plan Type Differences: Comprehensive plans with illness and injury coverage are most likely to include TPLO, while accident-only policies may exclude it.
- Common Exclusions: Some policies do not cover congenital joint disorders or prior CCL injuries in the opposite leg.
- Importance of Documentation: Detailed veterinary records proving the injury is new are often required for claim approval.
In most cases, TPLO is covered when the policy is active before the injury, making early insurance enrollment a smart preventive decision.
How Pre-Existing Conditions Affect TPLO Coverage
Pre-existing conditions are the most common reason pet insurance denies TPLO-related claims. Understanding what qualifies as “pre-existing” helps you protect your dog’s future eligibility.
- Definition of Pre-Existing Conditions: Any medical issue diagnosed or showing symptoms before policy activation or during the waiting period is considered pre-existing.
- Prior Cruciate Ligament Injuries: If your dog previously tore a CCL or ACL in either leg, many insurers exclude future coverage for both knees under a bilateral condition clause.
- Breed Predisposition: Large or active breeds prone to ligament tears may face stricter review before approval.
- Importance of Early Enrollment: Getting insurance while your dog is young and injury-free ensures eligibility for full cruciate coverage later in life.
- Proof of Clean Health Record: Regular vet visits and medical documentation help verify no pre-existing issues existed at policy start.
Early planning and transparent medical history are crucial for securing TPLO coverage when unexpected injuries occur.
What Pet Insurance Typically Covers for TPLO Surgery
When TPLO surgery is approved under your insurance, most plans cover a wide range of medical services related to diagnosis, treatment, and recovery. This support can significantly reduce financial stress.
- Diagnostic Imaging: X-rays, CT scans, or MRIs used to confirm ligament rupture are usually included in coverage.
- Surgery and Hospitalization: The main surgical procedure, anesthesia, and hospitalization costs are covered up to policy limits.
- Post-Surgery Medications: Pain relievers, antibiotics, and anti-inflammatories prescribed during recovery are typically reimbursable.
- Physical Therapy: Many plans include hydrotherapy or physiotherapy sessions for rehabilitation under extended recovery benefits.
- Follow-Up Visits and Complications: Recheck exams, wound care, or treatment of infections that occur after surgery are generally included within your policy’s time and cost caps.
Comprehensive coverage ensures your dog’s TPLO treatment is managed safely from diagnosis through recovery, minimizing both physical and financial strain.
What’s Not Covered by Pet Insurance for TPLO Surgery
Even though many pet insurance plans include TPLO coverage, certain conditions and costs fall outside standard policies. Knowing these exclusions helps prevent surprises during reimbursement.
- Pre-Existing Injuries: If your dog showed signs of a cruciate tear before enrollment or during the waiting period, TPLO surgery won’t be covered.
- Bilateral Exclusion Clauses: Some insurers exclude the second knee once one cruciate injury occurs, even if it happens years later.
- Preventive or Elective Procedures: Pre-surgical screenings, optional rehab sessions, or supplements are often excluded from reimbursement.
- Rehabilitation Limits: Physiotherapy or hydrotherapy may only be covered for a set number of weeks or up to a cost cap.
- Deductibles and Co-Pays: Owners are responsible for annual deductibles, coinsurance percentages, and any charges beyond policy limits.
- Waiting Period Restrictions: Claims made before the orthopedic waiting period ends are automatically denied.
Understanding these exclusions helps you plan better and choose insurance that aligns with your dog’s long-term orthopedic needs.
Best Pet Insurance Providers That Cover TPLO Surgery
Several leading pet insurance companies offer coverage for TPLO surgery, but each has unique rules for cruciate ligament injuries. Comparing policies ensures you find the best fit for your dog’s medical and financial needs.
- Healthy Paws: Covers TPLO if the injury occurs after enrollment and the waiting period. Offers unlimited annual payouts but no coverage for pre-existing conditions.
- Trupanion: Known for 90% reimbursement on eligible costs and direct vet payments, but has a 30-day waiting period for orthopedic claims.
- Embrace: Includes TPLO surgery under illness coverage, with the option to reduce or waive the orthopedic waiting period through a vet exam.
- Spot and Fetch: Both cover cruciate ligament injuries after the waiting period, with flexible reimbursement and deductible options.
- ASPCA Pet Health Insurance: Offers comprehensive coverage but applies a 14-day illness waiting period for orthopedic procedures.
Selecting a provider with transparent cruciate coverage and high reimbursement rates ensures better financial protection for major surgeries like TPLO.
How to File a TPLO Surgery Claim
Filing a TPLO surgery claim correctly helps speed up reimbursement and avoids processing delays. Most insurers require detailed veterinary documentation and itemized invoices.
- Collect Required Documents: Obtain a full medical report, diagnostic imaging results, itemized invoices, and proof of payment from your veterinarian.
- Submit Through the Portal: Most insurance providers allow online submissions through their official portals or mobile apps for faster review.
- Attach Medical History: Include your dog’s previous health records to confirm the cruciate injury isn’t pre-existing.
- Timeline for Reimbursement: Claims are typically processed within 10–15 business days, though some complex cases may take longer.
- Follow Up Promptly: Contact your insurer if documentation requests arise or delays occur. Keeping communication open prevents claim rejection.
- Save Copies: Always keep digital or printed copies of every document for future claims.
Timely, organized submission of records ensures smoother claim approval and quicker financial relief after TPLO surgery.
Tips for Choosing the Right Pet Insurance for Orthopedic Coverage
Choosing the right insurance plan can make a major difference in managing expensive orthopedic procedures like TPLO surgery. Understanding policy details beforehand prevents financial stress later.
- Avoid Bilateral Exclusions: Choose insurers that cover both knees even if one is previously injured. This is critical for breeds prone to cruciate tears.
- Check Waiting Periods: Some plans have 6–12 month orthopedic waiting periods. Early enrollment ensures coverage is active when needed.
- Customizable Reimbursement Options: Plans allowing flexible deductibles and payout percentages help control monthly premiums.
- Understand Policy Limits: Review annual and lifetime caps to ensure coverage remains adequate for long-term orthopedic care.
- Read Fine Print Carefully: Always confirm whether physical therapy, imaging, and post-surgical complications are included.
- Ask About Direct Payments: Some insurers pay veterinarians directly, saving you from covering full costs upfront.
Selecting a policy that combines comprehensive coverage with transparency ensures peace of mind when facing orthopedic surgeries like TPLO.
Conclusion
TPLO surgery is one of the costliest orthopedic procedures for dogs, making strong insurance coverage essential. While most insurers cover the operation for non-pre-existing injuries, exclusions and waiting periods can greatly affect eligibility.
- Coverage Essentials: Understand plan inclusions, orthopedic waiting times, and bilateral condition policies.
- Early Enrollment: Starting coverage before injuries occur ensures full eligibility for TPLO claims.
- Policy Comparison: Review reimbursement rates, deductibles, and annual caps to choose the best protection for your dog’s long-term health.
- Consultation: Discuss all coverage details with your insurer before scheduling surgery to avoid claim denial or hidden costs.
With the right pet insurance plan and proper timing, you can manage TPLO expenses confidently while securing the best surgical outcome for your dog.
FAQs
Will insurance cover both legs if both cruciate ligaments tear?
Most pet insurance plans cover both legs only if the policy doesn’t include a bilateral exclusion clause. Some insurers consider cruciate injuries as linked conditions, meaning if one leg tears before enrollment, the other may not be covered. Always confirm your insurer’s bilateral coverage terms in writing before surgery.
Can I get coverage if my dog already tore one ligament?
If your dog had a previous cruciate ligament injury before the policy began, most insurers will treat future TPLO claims as pre-existing and deny coverage. However, enrolling early or choosing a plan without bilateral exclusions ensures future injuries can still qualify for reimbursement.
How long is the waiting period for TPLO coverage?
Orthopedic waiting periods vary by provider, typically ranging from 6 to 12 months after policy activation. Some companies allow a vet exam waiver to shorten this period. Starting insurance early ensures your dog’s coverage is active before any ligament injury occurs.
What if my dog needs a second TPLO later?
If both legs require TPLO surgery and your policy includes bilateral coverage, the second operation is usually covered as long as it occurs after the waiting period. Keep consistent records and ensure premiums remain active to avoid claim rejection for the second procedure.
Which pet insurance companies cover TPLO the best?
Top-rated providers for TPLO coverage include Trupanion, Embrace, Healthy Paws, and Fetch. These plans typically offer 80–90% reimbursement on approved orthopedic claims with clear terms for cruciate ligament injuries. Always compare waiting periods, bilateral rules, and annual payout limits before finalizing your plan.

Get a Free Poster
Enhance your workspace with a high-quality radiographs reference poster, designed for veterinary professionals. This free physical poster will be shipped directly to you—just fill out the form to request your copy.

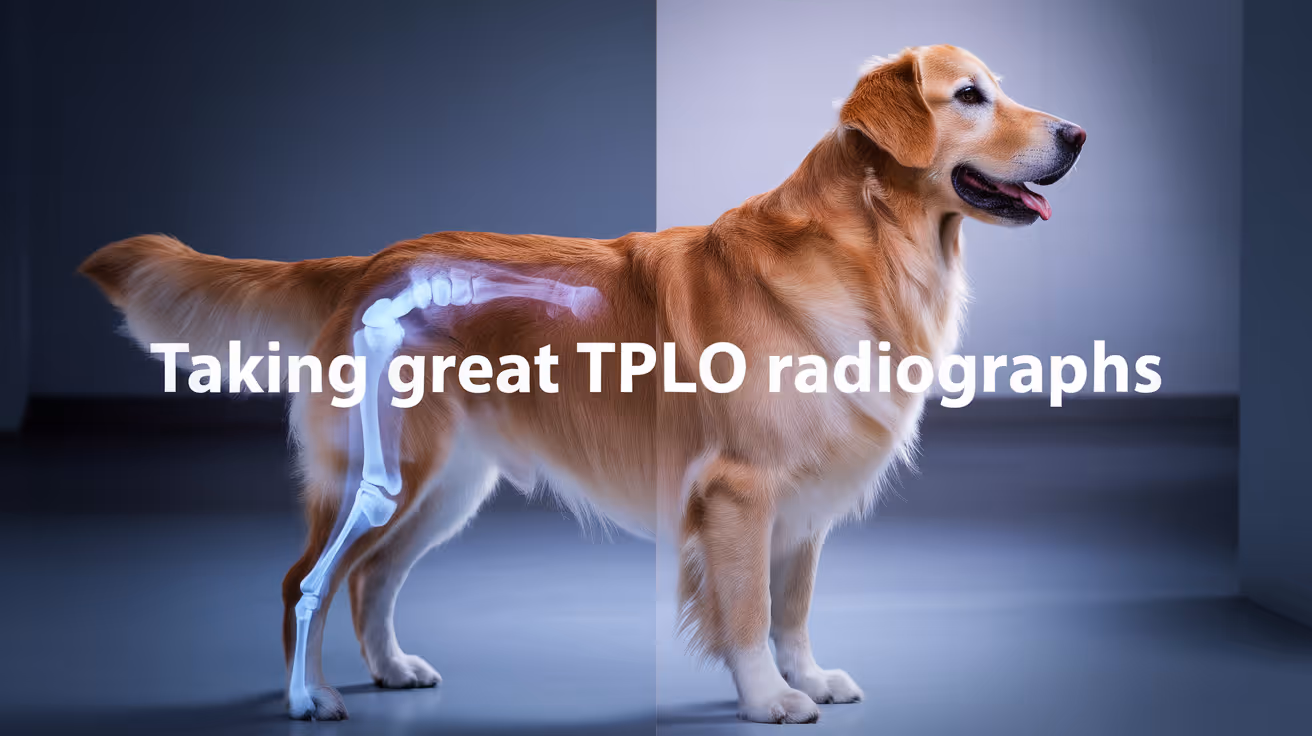
Taking Great TPLO Radiographs
Click Below to Watch Live Video Demos


We'll send you a Free Wall Poster with all the steps
Step #1
Getting Ready
Ensuring a clean surgical field starts with proper skin preparation. This video demonstrates the best practices for:
- Shaving the patient – Achieving a close, even shave while minimizing skin irritation
- The Dirty Scrub – The initial skin prep step to remove surface debris and reduce bacterial load before the sterile scrub.
Following these techniques helps reduce infection risk and improve surgical outcomes. Watch the video to see how it’s done effectively!


Step #2
Reduce Your Risks
Many surgeons are shocked to find out that their patients are not protected from biofilms and resistant bacteria when they use saline and post-op antibiotics.
That’s Where Simini Comes In.
Why leave these risks and unmanaged? Just apply Simini Protect Lavage for one minute. Biofilms and resistant bacteria can be removed, and you can reduce two significant sources of infection.
Step #3
Take the Course
Preventing surgical infections is critical for patient safety and successful outcomes. This course covers:
- Aseptic techniques – Best practices to maintain a sterile field.
- Skin prep & draping – Proper methods to minimize contamination.
- Antibiotic stewardship – When and how to use perioperative antibiotics effectively.
Stay up to date with the latest evidence-based protocols. Click the link to start learning and earn CE credits!

Things to know
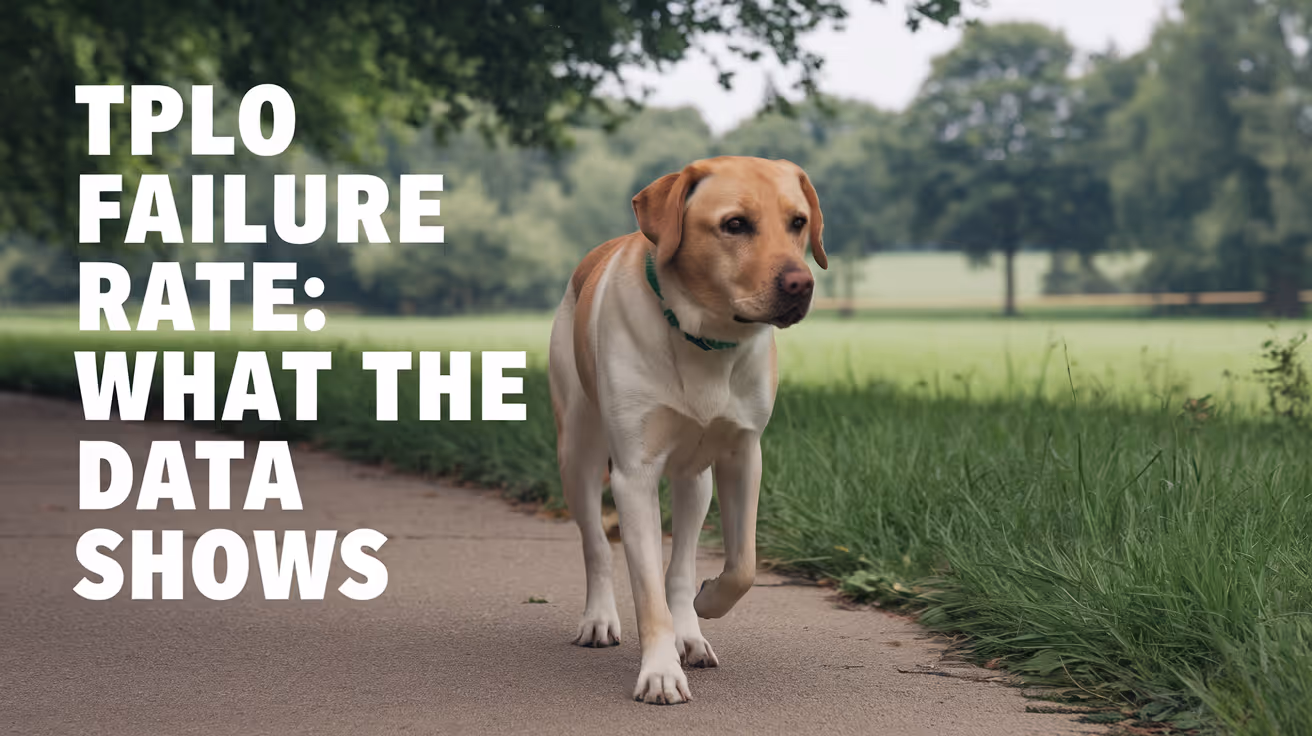
TPLO Failure Rate in Dogs Explained
Learn about TPLO failure rates in dogs, causes, prevention, and recovery tips for better surgical outcomes.
Tibial Plateau Leveling Osteotomy (TPLO) is a common surgery to fix cranial cruciate ligament injuries in dogs. Many pet owners worry about the TPLO failure rate in dogs and what it means for their pet’s recovery. Understanding the risks and outcomes can help you make informed decisions for your dog’s health.
This article explains what TPLO failure means, how often it happens, and what factors affect it. You will learn how to recognize complications, prevent failure, and support your dog after surgery for the best results.
What is the TPLO failure rate in dogs?
The TPLO failure rate in dogs varies but is generally low when performed by experienced surgeons. Failure means the surgery did not fully restore knee stability or complications occurred that affect recovery.
Studies show failure rates range from 2% to 10%, depending on factors like surgical technique and dog size. Most dogs recover well and regain normal function after TPLO.
- Low overall failure: Most dogs have successful outcomes with TPLO, with failure rates usually under 10% in clinical studies.
- Variation by surgeon: Surgeons with more experience tend to have lower failure rates due to better technique and planning.
- Dog factors matter: Larger dogs or those with severe ligament damage may have a higher risk of failure after TPLO.
- Definition of failure: Failure includes persistent lameness, implant problems, or the need for revision surgery after TPLO.
Understanding these rates helps you set realistic expectations and discuss risks with your vet before surgery.
What causes TPLO failure in dogs?
Several factors can lead to TPLO failure. Knowing these causes helps prevent problems and improve recovery chances.
Failures often result from surgical errors, infection, or poor healing. Other causes include implant issues and the dog’s activity level after surgery.
- Surgical technique errors: Incorrect bone cuts or implant placement can cause instability or implant failure after TPLO.
- Infection risk: Postoperative infections can delay healing and lead to surgery failure if not treated promptly.
- Poor bone healing: Factors like age, nutrition, or underlying disease can slow bone healing and cause failure.
- Excessive activity: Dogs that are too active too soon may damage the surgical site and cause failure.
Preventing these causes requires careful surgical planning, good postoperative care, and close monitoring.
How can TPLO failure be prevented in dogs?
Prevention of TPLO failure starts with choosing a skilled surgeon and following postoperative instructions closely. Proper care reduces complications and supports healing.
Owners play a key role in managing their dog’s activity and health during recovery to avoid failure.
- Experienced surgeon choice: Select a board-certified surgeon with extensive TPLO experience to reduce technical errors.
- Strict activity control: Limit your dog’s movement and exercise as advised to protect the surgical site during healing.
- Infection prevention: Keep the incision clean and watch for signs of infection to catch problems early.
- Follow-up visits: Regular vet check-ups help monitor healing and detect complications before failure occurs.
Following these steps improves your dog’s chance of a successful TPLO surgery and recovery.
What are the signs of TPLO failure in dogs?
Recognizing failure signs early lets you seek veterinary care promptly. Signs often involve ongoing lameness or swelling around the knee.
Not all postoperative discomfort means failure, but persistent or worsening symptoms should be evaluated by a vet.
- Persistent lameness: Continued limping or inability to bear weight on the leg weeks after surgery may indicate failure.
- Swelling or pain: Increased swelling, heat, or pain around the knee can signal infection or implant problems.
- Unusual noises: Clicking or popping sounds from the knee might mean implant loosening or joint instability.
- Reduced range of motion: Difficulty bending or extending the knee joint may suggest complications affecting recovery.
If you notice any of these signs, contact your veterinarian immediately for assessment and treatment.
How is TPLO failure treated in dogs?
Treatment depends on the cause of failure. Some cases require revision surgery, while others may respond to medical management.
Your vet will perform exams and imaging to determine the best approach to restore function and relieve pain.
- Revision surgery: Some dogs need a second surgery to fix implant issues or correct bone alignment after failure.
- Antibiotic therapy: Infections causing failure require antibiotics and sometimes implant removal to heal properly.
- Pain management: Medications and physical therapy help control pain and improve mobility during recovery.
- Supportive care: Weight management and controlled exercise support healing and reduce stress on the knee joint.
Early treatment improves outcomes and helps your dog regain normal activity levels.
What is the recovery outlook after TPLO failure in dogs?
Recovery after TPLO failure can be more challenging but is often successful with proper care. Many dogs regain good function after treatment.
Recovery time may be longer, and some dogs need ongoing management to maintain comfort and mobility.
- Longer healing time: Dogs with failure often require extended recovery periods compared to uncomplicated TPLO cases.
- Physical therapy benefits: Rehabilitation exercises improve strength and joint function after failure treatment.
- Possible chronic issues: Some dogs may develop arthritis or mild lameness despite treatment.
- Owner commitment: Consistent care and monitoring are essential for a positive recovery after failure.
With patience and veterinary support, many dogs live active, happy lives following TPLO failure treatment.
What factors affect TPLO failure rates in different dog breeds?
Breed and size influence TPLO outcomes. Larger and more active breeds may face higher failure risks due to greater joint stress.
Understanding breed-specific risks helps tailor surgical and postoperative care for better success.
- Large breed challenges: Heavy dogs put more pressure on the knee, increasing the chance of implant failure or delayed healing.
- Active breed risks: Energetic dogs may be harder to restrict post-surgery, raising failure risk from premature activity.
- Bone quality differences: Some breeds have denser or more fragile bones affecting healing after TPLO.
- Genetic predispositions: Certain breeds may be more prone to ligament injuries and complications after surgery.
Discuss your dog’s breed and lifestyle with your vet to plan the best approach for TPLO surgery and recovery.
Conclusion
The TPLO failure rate in dogs is generally low but depends on many factors like surgeon skill, dog size, and postoperative care. Understanding these helps you prepare for surgery and recovery.
By choosing an experienced surgeon, following care instructions, and watching for signs of failure, you can help your dog heal well and return to a happy, active life after TPLO surgery.
What is the typical TPLO failure rate in dogs?
TPLO failure rates usually range between 2% and 10%, with most dogs recovering successfully after surgery.
Can infection cause TPLO failure in dogs?
Yes, infections at the surgical site can lead to delayed healing and failure if not treated quickly with antibiotics and care.
How soon can dogs return to activity after TPLO?
Dogs typically need 8 to 12 weeks of restricted activity to allow proper healing and reduce the risk of failure.
Is revision surgery common after TPLO failure?
Revision surgery is sometimes necessary to correct implant or alignment issues when TPLO fails to restore knee stability.
Do larger dogs have higher TPLO failure rates?
Larger dogs often have increased failure risk due to greater joint stress and challenges in controlling postoperative activity.
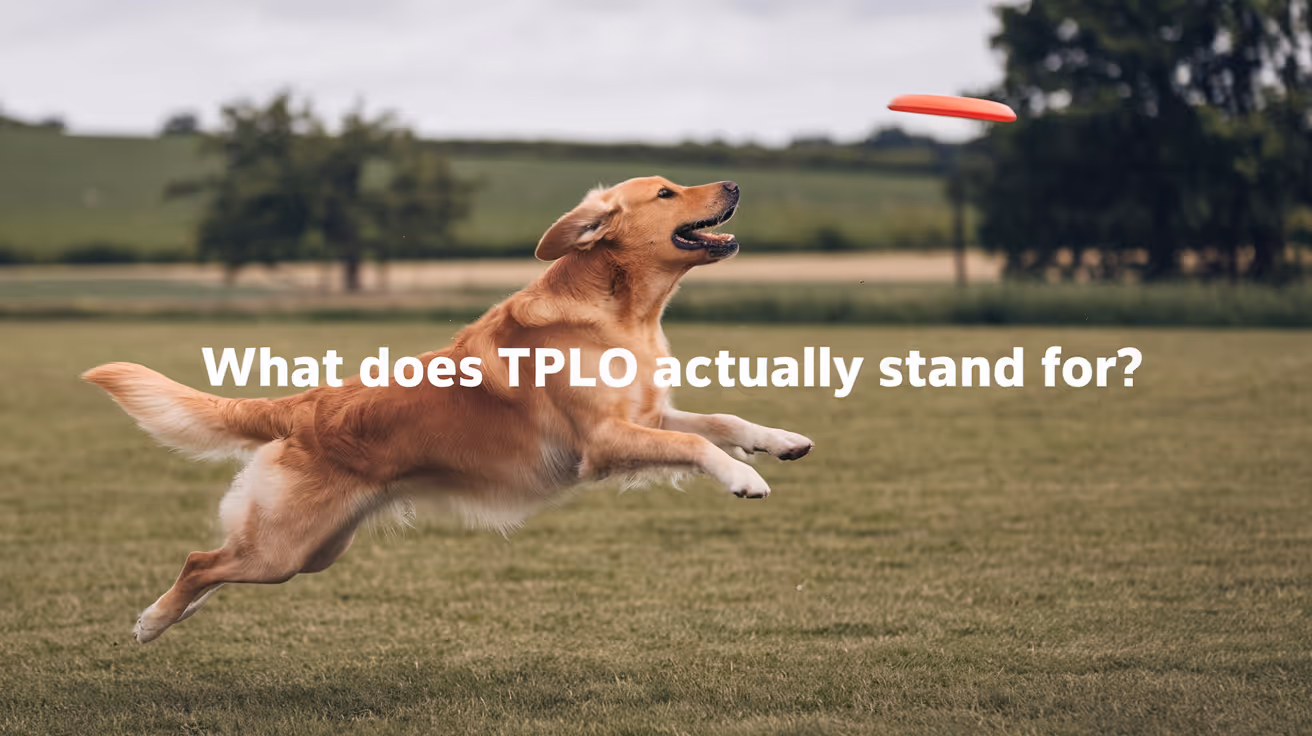
What Does TPLO Stand For in Veterinary Medicine?
Learn what TPLO stands for in veterinary medicine and how this surgical procedure helps dogs with cruciate ligament injuries.
When your dog suffers a knee injury, you might hear the term TPLO from your veterinarian. But what does TPLO stand for in veterinary medicine? Understanding this term is important if your pet needs surgery for a torn cruciate ligament.
TPLO stands for Tibial Plateau Leveling Osteotomy. It is a common surgical procedure used to stabilize the knee joint in dogs after a cranial cruciate ligament (CCL) rupture. This article explains what TPLO means, why it is used, and what you can expect if your dog needs this surgery.
What Does TPLO Stand For and What Is Its Purpose?
TPLO stands for Tibial Plateau Leveling Osteotomy. It is a surgical technique designed to change the angle of the tibial plateau, which is the top part of the shin bone that forms the knee joint.
The purpose of TPLO surgery is to stabilize the dog's knee after the cranial cruciate ligament is torn. This ligament normally prevents the tibia from sliding forward under the femur. When it ruptures, the knee becomes unstable and painful.
- Tibial Plateau: The flat surface at the top of the tibia bone that forms part of the knee joint and affects joint stability.
- Leveling Osteotomy: A surgical cut made in the tibia to rotate and flatten the tibial plateau angle, reducing joint instability.
- Stabilization Goal: TPLO aims to stabilize the knee without relying on the damaged ligament, allowing normal movement.
- Pain Reduction: By stabilizing the joint, TPLO reduces pain and improves mobility in affected dogs.
After TPLO surgery, the altered tibial plateau angle stops the tibia from sliding forward during weight-bearing. This helps dogs regain normal knee function and reduces arthritis progression.
Why Is TPLO Surgery Recommended for Dogs?
TPLO surgery is often recommended for dogs with cranial cruciate ligament tears because it offers better long-term outcomes compared to other treatments.
Dogs with CCL injuries experience pain, lameness, and joint instability. TPLO surgery addresses these issues by mechanically stabilizing the knee, which helps dogs return to normal activity faster.
- Effective Stabilization: TPLO provides strong mechanical stability, improving joint function better than some non-surgical options.
- Faster Recovery: Dogs often regain mobility quicker after TPLO compared to conservative management or other surgeries.
- Reduced Arthritis: TPLO can slow down arthritis development by stabilizing the joint and reducing abnormal wear.
- Suitable for Active Dogs: TPLO is ideal for medium to large dogs that need durable knee stability for active lifestyles.
Veterinarians usually recommend TPLO for dogs weighing over 15 kg or those with severe ligament damage. It is considered the gold standard for treating CCL ruptures in many cases.
How Is TPLO Surgery Performed?
TPLO surgery involves making a precise cut in the tibia bone and rotating it to change the slope of the tibial plateau. This procedure requires specialized surgical skills and equipment.
The surgeon first makes an incision over the knee, exposes the tibia, and uses a saw to cut the bone. Then the tibial plateau is rotated to a more level position and fixed with a metal plate and screws.
- Bone Cut: A curved cut is made in the tibia to allow rotation of the tibial plateau to a new angle.
- Plate Fixation: A specially designed metal plate and screws hold the rotated bone segment securely in place.
- Joint Inspection: The surgeon inspects the knee joint for cartilage damage or meniscal tears during surgery.
- Postoperative Care: Proper wound closure and pain management are critical after surgery for healing.
TPLO surgery typically takes 1 to 2 hours and requires general anesthesia. After surgery, dogs need restricted activity and rehabilitation to recover fully.
What Are the Benefits of TPLO Surgery for Dogs?
TPLO surgery offers several benefits for dogs suffering from cruciate ligament injuries. It improves their quality of life by restoring knee function and reducing pain.
Compared to other treatments, TPLO has higher success rates and better long-term outcomes in many cases.
- Improved Mobility: Dogs regain normal walking and running ability after recovery from TPLO surgery.
- Reduced Pain: Stabilizing the knee joint decreases pain caused by ligament instability and inflammation.
- Long-Term Joint Health: TPLO slows arthritis progression by restoring joint stability and normal biomechanics.
- High Success Rate: Most dogs experience significant improvement and return to normal activity after TPLO surgery.
Owners should follow postoperative instructions carefully to maximize the benefits and ensure a smooth recovery for their pets.
What Are the Risks and Complications of TPLO Surgery?
Like any surgery, TPLO carries some risks and potential complications. Understanding these helps owners make informed decisions and prepare for postoperative care.
Complications can include infection, implant failure, or delayed bone healing, but they are relatively uncommon with experienced surgeons.
- Infection Risk: Surgical site infections can occur but are minimized with sterile technique and antibiotics.
- Implant Problems: Plates or screws may loosen or break, requiring revision surgery in rare cases.
- Delayed Healing: Some dogs may experience slower bone healing, needing extended recovery time.
- Meniscal Injury: Damage to knee cartilage may require additional treatment during or after surgery.
Regular follow-up visits and monitoring help detect and address complications early to ensure the best outcome.
How Should You Care for Your Dog After TPLO Surgery?
Postoperative care is crucial for a successful recovery after TPLO surgery. Owners must follow veterinary instructions closely to support healing.
Recovery involves restricted activity, pain management, and gradual rehabilitation exercises to restore strength and mobility.
- Activity Restriction: Limit running, jumping, and stairs for 6 to 8 weeks to protect the surgical site during healing.
- Pain Control: Administer prescribed pain medications and anti-inflammatory drugs as directed by your vet.
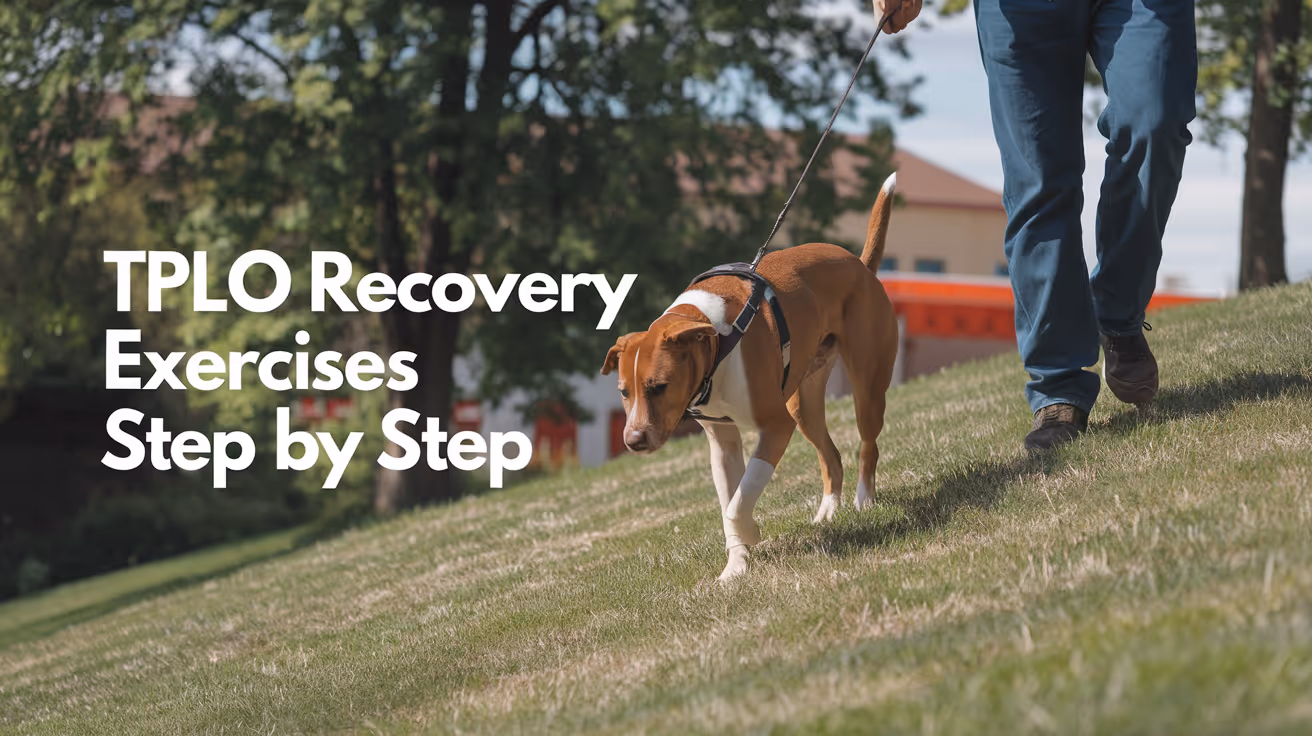
- Physical Therapy: Gentle range-of-motion exercises and controlled leash walks help rebuild muscle and joint function.
- Follow-Up Visits: Regular veterinary check-ups and X-rays monitor bone healing and implant position.
Providing a safe, calm environment and preventing your dog from licking or chewing the incision site also supports recovery.
Conclusion
TPLO stands for Tibial Plateau Leveling Osteotomy, a surgical procedure that stabilizes the knee in dogs with cruciate ligament injuries. It changes the tibial plateau angle to prevent joint instability and pain.
This surgery offers many benefits, including improved mobility and reduced arthritis risk. While there are some risks, careful postoperative care helps ensure a successful recovery. Understanding TPLO can help you make informed decisions for your dog's health and wellbeing.
What does TPLO stand for in veterinary medicine?
TPLO stands for Tibial Plateau Leveling Osteotomy, a surgery to stabilize a dog's knee after cruciate ligament injury.
Why is TPLO surgery recommended for dogs?
TPLO is recommended because it stabilizes the knee effectively, reduces pain, and helps dogs return to normal activity faster.
How is TPLO surgery performed?
The surgeon cuts and rotates the tibia bone, then fixes it with a metal plate to level the tibial plateau and stabilize the knee.
What are the risks of TPLO surgery?
Risks include infection, implant failure, delayed bone healing, and meniscal injury, but these are uncommon with proper care.
How should I care for my dog after TPLO surgery?
Limit activity, give pain medication, follow physical therapy advice, and attend follow-up vet visits to ensure proper healing.
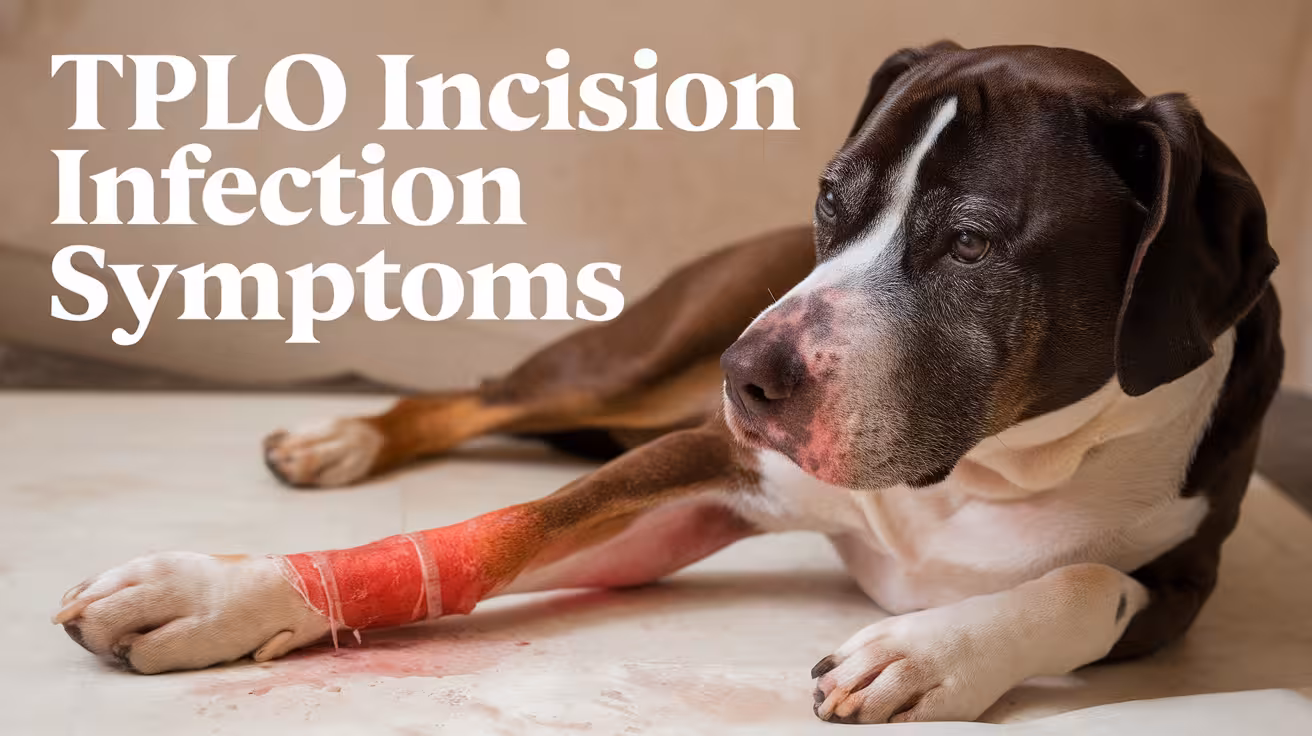
TPLO Incision Infection? Symptoms & Prevention
Worried about a TPLO incision infection? Learn the symptoms, causes, and best prevention tips to keep your dog’s recovery smooth and infection-free
TPLO (Tibial Plateau Leveling Osteotomy) surgery is a common procedure to stabilize a dog's knee after a cranial cruciate ligament (CCL) rupture. It involves cutting and repositioning the tibia to reduce strain on the ligament, allowing for better joint function. Like any surgery, TPLO has a risk of complications, with incision infections being a primary concern.
Infections can happen due to bacterial contamination during surgery, improper post-op care, excessive licking or chewing of the incision, or underlying conditions like diabetes or a weakened immune system. Signs of infection include redness, swelling, warmth, discharge, and delayed healing.
The risk of infection after TPLO is relatively low, occurring in about 3-10% of cases. Factors like surgical technique, sterile conditions, and strict post-operative management greatly affect the outcome. Early detection and quick treatment with antibiotics and wound care are crucial to prevent complications and ensure a successful recovery.
Symptoms and Warning Signs of TPLO Incision Infection
Recognizing the symptoms of an infection early is crucial for preventing complications after TPLO (Tibial Plateau Leveling Osteotomy) surgery. Infections can range from mild to severe, potentially affecting healing and the long-term success of the procedure. Understanding the difference between early and advanced signs can help ensure timely intervention.
Early Signs of Infection
In the initial stages, an infection may present with mild symptoms that can sometimes be mistaken for normal healing. These include:
- Redness and swelling around the incision site, which may be slightly warm to the touch.
- Mild pain or tenderness, which persists beyond the expected post-surgical discomfort.
- Clear or slightly yellow discharge, which may indicate the presence of bacteria.
If detected at this stage, infections are often manageable with topical treatments, antibiotics, and proper wound care.
Advanced Signs of Infection
As an infection worsens, more severe symptoms may develop, indicating deeper tissue involvement and potential systemic infection. These include:
- Thick, pus-like discharge from the incision, often accompanied by a foul odor.
- Significant swelling and warmth, which may extend beyond the incision area.
- Fever and lethargy, as the body mounts an immune response.
- Increased lameness or reluctance to bear weight, signaling pain or joint involvement.
Advanced infections require urgent veterinary care, as untreated cases can lead to delayed healing, implant complications, or systemic illness. Immediate intervention, such as antibiotics, wound debridement, or even surgical revision, may be necessary.
Monitoring the incision closely in the weeks following TPLO surgery is essential. Any changes in the wound’s appearance, excessive discomfort, or behavioral changes in your dog should be reported to a veterinarian promptly to prevent complications.
Causes of TPLO Incision Infection
A TPLO (Tibial Plateau Leveling Osteotomy) incision infection can occur due to various factors, either during the surgery or in the post-operative recovery period. Identifying and minimizing these risks is essential for ensuring a smooth healing process.
Bacterial Contamination During or After Surgery
Despite strict sterile protocols, bacteria can sometimes enter the surgical site during the procedure. This can happen due to contamination from the skin, surgical instruments, or even the surrounding environment. Post-operatively, improper wound care or exposure to unclean surfaces can introduce bacteria, increasing infection risk.
Poor Post-Op Wound Care
Proper post-operative care is critical to prevent infection. Failure to keep the incision clean and dry, skipping prescribed antibiotics, or neglecting follow-up visits can allow bacteria to proliferate. Owners must follow all veterinary instructions carefully, including cleaning protocols and medication administration.
Licking or Chewing the Incision Site
Dogs instinctively lick their wounds, which can introduce bacteria from their mouths into the incision. Excessive licking or chewing can also cause trauma to the site, delaying healing. The use of an Elizabethan collar (E-collar) or medical pet shirt is essential to prevent self-inflicted wound contamination.
Moisture Buildup Around the Incision
A damp environment around the incision can promote bacterial growth. Moisture can accumulate from bathing, wet bedding, or excessive sweating, making it essential to keep the area dry until fully healed.
Underlying Health Conditions
Dogs with pre-existing conditions such as diabetes, Cushing’s disease, or immune disorders have a higher risk of infection due to impaired wound healing. Such cases require extra vigilance in monitoring for signs of infection.
Implants and Their Role in Infection Risk
The metal implants used in TPLO surgery can serve as a surface for bacterial adhesion. If bacteria form a biofilm on the implant, it can lead to a deep-seated infection that may require implant removal or surgical revision.
To minimize this risk, many surgeons use Simini Protect Lavage, a non-antibiotic surgical lavage designed to reduce bacterial contamination and prevent biofilm formation. Unlike traditional solutions, Simini Protect Lavage actively disrupts bacterial adhesion, helping to lower infection risks without contributing to antibiotic resistance. Its use in TPLO and other orthopedic procedures has shown promising results in enhancing post-surgical outcomes.
Preventing infection requires a combination of strict surgical protocols, diligent post-op care, and close monitoring of the incision site for any signs of complications.
How TPLO Infections Are Diagnosed
Diagnosing a TPLO incision infection requires a thorough evaluation by a veterinarian to determine the severity and appropriate treatment plan. Early detection is key to preventing complications such as delayed healing, deep tissue infections, or implant failure.
Physical Examination
The first step in diagnosing an infection is a detailed physical examination of the incision site. The veterinarian will check for common signs of infection, including:
- Redness and swelling around the incision.
- Abnormal discharge (pus, thick yellow fluid, or foul-smelling secretions).
- Increased warmth in the surrounding tissue.
- Pain response when the area is gently palpated.
- Signs of systemic illness, such as fever or lethargy.
Diagnostic Tests
If an infection is suspected, further diagnostic tests help confirm the presence and extent of the infection.
- Wound Culture and Sensitivity Test - A swab of the incision site is collected to identify the specific bacterial strain causing the infection. This helps determine the most effective antibiotic treatment.
- Complete Blood Count (CBC) - Blood tests check for elevated white blood cell counts (WBCs), which indicate an immune response to infection. Other markers, such as increased neutrophils, may suggest a bacterial infection.
- X-rays or Advanced Imaging - If the infection has progressed or involves the surgical implants, X-rays or ultrasound imaging may be used to assess deep tissue involvement. In some cases, an infection can lead to osteomyelitis (bone infection) or implant loosening, requiring further surgical intervention.
Prompt and accurate diagnosis ensures that treatment is initiated quickly, reducing the risk of complications and improving the chances of a full recovery.
Potential Complications of an Untreated TPLO Incision Infection
If a TPLO incision infection is left untreated, it can lead to serious complications that may jeopardize the success of the surgery and the dog’s long-term mobility. Early intervention is crucial to prevent these risks.
Implant Failure and the Need for Removal or Revision Surgery
TPLO surgery involves the placement of metal implants (plates and screws) to stabilize the tibia. If bacteria colonize the implant, they can form a biofilm, making the infection difficult to treat with antibiotics alone. This can lead to implant loosening or failure, requiring removal or revision surgery to replace the affected hardware. A second surgery increases recovery time and risk of further complications.
Read more about - Signs of TPLO Failure in Dogs & When to See a Vet
Deep Bone Infection (Osteomyelitis)
When an infection spreads beyond the incision site into the bone tissue, it can cause osteomyelitis, a severe and persistent infection. Bone infections are challenging to treat and often require long-term antibiotics, surgical debridement, or even partial bone removal in extreme cases. Osteomyelitis can significantly delay healing and may compromise limb function.
Delayed Healing, Prolonged Pain, and Lameness
An untreated infection slows down wound healing, leading to persistent inflammation, chronic pain, and prolonged lameness. Infections interfere with the body’s natural healing process, increasing the risk of poor scar formation and weakening the stability of the joint. This can result in long-term mobility issues, affecting the dog’s quality of life.
Risk of Systemic Infection (Sepsis)
If bacteria enter the bloodstream, the infection can become systemic, leading to sepsis, a life-threatening condition. Sepsis causes widespread inflammation, organ dysfunction, and severe illness. Immediate hospitalization, intravenous antibiotics, and aggressive supportive care are required in such cases.
Preventing complications requires early diagnosis, strict post-op care, and immediate treatment of any signs of infection to ensure a smooth recovery.
Treatment Options for TPLO Incision Infections
A TPLO incision infection requires prompt and appropriate treatment to prevent complications and ensure proper healing. The treatment plan depends on the severity of the infection, the presence of bacterial colonization on the implants, and the dog’s overall health.
Antibiotic Therapy
Antibiotics are the first line of treatment for a TPLO incision infection. The choice of antibiotic depends on wound culture and sensitivity testing, ensuring effective targeting of the bacteria.
- Oral antibiotics (e.g., cephalexin, clindamycin, or enrofloxacin) are commonly prescribed for mild to moderate infections.
- Topical antibiotics (e.g., silver sulfadiazine or mupirocin) may be used to manage surface-level infections.
- If the infection is deep-seated or spreading, intravenous (IV) antibiotics may be required for better systemic control.
Wound Cleaning and Care
Proper wound care helps clear bacteria and promote healing. This includes:
- Cleaning the incision with veterinary-approved antiseptic solutions (chlorhexidine or diluted povidone-iodine).
- Avoiding excessive moisture buildup around the wound.
- Preventing licking or chewing with an Elizabethan collar (E-collar) or medical pet shirt.
- Ensuring the bandage (if used) is clean and changed as recommended by the veterinarian.
Pain Management
Infections cause inflammation and discomfort, so pain relief is an important part of treatment.
- Non-steroidal anti-inflammatory drugs (NSAIDs) such as carprofen or meloxicam may be prescribed to reduce pain and swelling.
- If severe discomfort persists, stronger pain relievers may be necessary.
Surgical Intervention
For infections that do not respond to antibiotics or involve the implants, surgical intervention may be needed:
- Flushing and debridement – The vet may clean and remove infected tissue under anesthesia to prevent further bacterial spread.
- Implant removal or revision – If bacteria have colonized the TPLO plate and screws, implant removal may be necessary, followed by a prolonged course of antibiotics to clear the infection.
Timely and appropriate treatment is essential to prevent long-term complications and ensure a smooth recovery. Close veterinary supervision and adherence to post-op care instructions significantly improve outcomes.
When to Call Your Veterinarian
Recognizing the signs of a TPLO incision infection early and seeking veterinary care promptly can prevent serious complications. Certain symptoms indicate the need for immediate medical attention:
- Excessive swelling, redness, or warmth around the incision.
- Thick, pus-like discharge or a foul odor from the wound.
- Persistent pain or worsening lameness beyond the expected healing period.
- Fever, lethargy, or loss of appetite, which may indicate a systemic infection.
- Sudden changes in behavior, such as reluctance to move or increased sensitivity around the incision.
How Quickly Should an Infection Be Addressed?
If you notice any signs of infection, contact your veterinarian immediately. Mild infections caught early may be treated with antibiotics and wound care, but delays in treatment can lead to deeper infections, increasing the risk of implant failure or systemic illness.
What to Expect During a Vet Visit
Your veterinarian will:
- Perform a physical examination of the incision.
- Conduct diagnostic tests (wound cultures, blood tests, or X-rays) if needed.
- Prescribe antibiotics or pain medication based on the infection’s severity.
- Recommend wound cleaning protocols or, in severe cases, surgical intervention to remove infected tissue or implants.
Prompt veterinary care ensures a smoother recovery and reduces the risk of long-term complications.
Preventing TPLO Incision Infections
Preventing infection after TPLO surgery is crucial for ensuring a smooth recovery and avoiding complications. Proper post-operative care significantly reduces the risk of infection and promotes faster healing.
Proper At-Home Wound Care Routine
A clean and well-maintained incision site is essential for preventing bacterial growth. Follow these steps to ensure proper wound care:
- Inspect the incision daily for redness, swelling, or discharge.
- Use vet-approved antiseptic solutions if cleaning is necessary.
- Avoid touching the wound with unclean hands to prevent contamination.
- Follow the prescribed antibiotic regimen to eliminate any potential bacterial infections.
Importance of E-Collars to Prevent Licking
Dogs instinctively lick wounds, but their mouths contain bacteria that can introduce infection.
- An Elizabethan collar (E-collar) or medical pet shirt should be used at all times until the incision fully heals.
- Even brief periods of licking can introduce bacteria, delaying healing and increasing infection risk.
Keeping the Incision Dry and Clean
Moisture creates an ideal environment for bacterial growth, so it’s important to:
- Prevent the incision from getting wet—no bathing or swimming until cleared by the vet.
- Keep the bedding clean and dry to avoid contamination.
- If the incision gets wet, gently pat it dry with a clean, soft cloth.
Following Post-Op Care Instructions Strictly
Veterinary post-op guidelines should be followed precisely, including:
- Restricted activity to prevent excessive movement that could stress the incision.
- Proper medication schedules, including antibiotics and pain relievers.
- Scheduled follow-up visits to monitor healing progress.
Monitoring for Any Early Signs of Infection
Even with proper care, infections can still develop. Watch for:
- Redness, swelling, or discharge from the incision.
- Excessive licking or signs of discomfort around the area.
- Changes in behavior, such as lethargy or reluctance to move.
By taking proactive steps in at-home care, pet owners can significantly reduce the chances of post-operative infections and support a successful TPLO recovery.
Read more about:
- TPLO Failure Symptoms
- TPLO Surgery Cost Guide
- Long-Term Outcomes of TPLO Surgery
- Common Causes of Limping in Dogs Post-TPLO Surgery
Conclusion
A TPLO incision infection can slow down healing and cause serious problems if not treated. It's important to notice early signs of infection, like redness, swelling, discharge, or increased pain, to prevent further issues. Quick veterinary care can greatly improve recovery results.
Proper post-operative wound care, such as keeping the incision clean and dry, using an E-collar to prevent licking, and following all prescribed medications, helps reduce the risk of infection. Watching for any changes in the incision site or behavior allows for early action if needed.
If an infection happens, quick diagnosis and treatment with antibiotics, wound care, or surgery ensure the best recovery possible. By being watchful and proactive in post-op care, pet owners can support a smooth healing process and help their dog regain mobility safely.
FAQs
How do I know if my TPLO incision is infected?
A TPLO incision infection may show signs such as redness, swelling, warmth, and abnormal discharge (yellow, pus-like, or foul-smelling fluid). The incision may become painful, and your dog might show increased licking, lethargy, fever, or reluctance to walk. If you notice any of these symptoms, contact your veterinarian immediately for evaluation and treatment.
How do you treat a TPLO infection?
Treatment depends on the severity of the infection. Mild cases may be managed with oral antibiotics and wound cleaning, while severe infections might require intravenous antibiotics, wound flushing, or even implant removal if bacteria form a biofilm. Pain management and restricted movement are also essential for recovery. Early treatment ensures the best outcomes and prevents complications like deep bone infections or implant failure.
What to do if my dog's incision is infected?
If you suspect an infection, contact your veterinarian immediately. Avoid cleaning the wound with unapproved solutions, and prevent your dog from licking the incision by using an E-collar or protective covering. The vet may prescribe antibiotics, pain relief, or wound debridement depending on the infection's severity. Delaying treatment can worsen the infection and lead to complications.
How common is infection after TPLO surgery?
Infections after TPLO surgery are relatively uncommon, occurring in about 3-10% of cases. The risk increases with factors like poor post-op care, excessive licking, moisture exposure, or underlying health issues such as diabetes or immune suppression. Following strict wound care protocols and monitoring for early signs of infection significantly reduces the risk.
What is the infection rate for TPLO?
The infection rate for TPLO surgery ranges from 3-10%, depending on factors such as surgical technique, sterility, and post-operative care. Using advanced infection prevention methods, such as Simini Protect Lavage, proper antibiotic use, and strict wound monitoring, can help minimize infection risks. Prompt intervention at the first sign of infection is essential.
What does the start of an infected incision look like?
The early signs of an infected TPLO incision include increased redness, mild swelling, warmth, and clear to yellow discharge. The area may become more painful than expected during normal healing, and your dog may lick or chew the incision excessively. If left untreated, symptoms can worsen, leading to pus formation, odor, and systemic illness. Any suspicious changes should be evaluated by a veterinarian immediately.
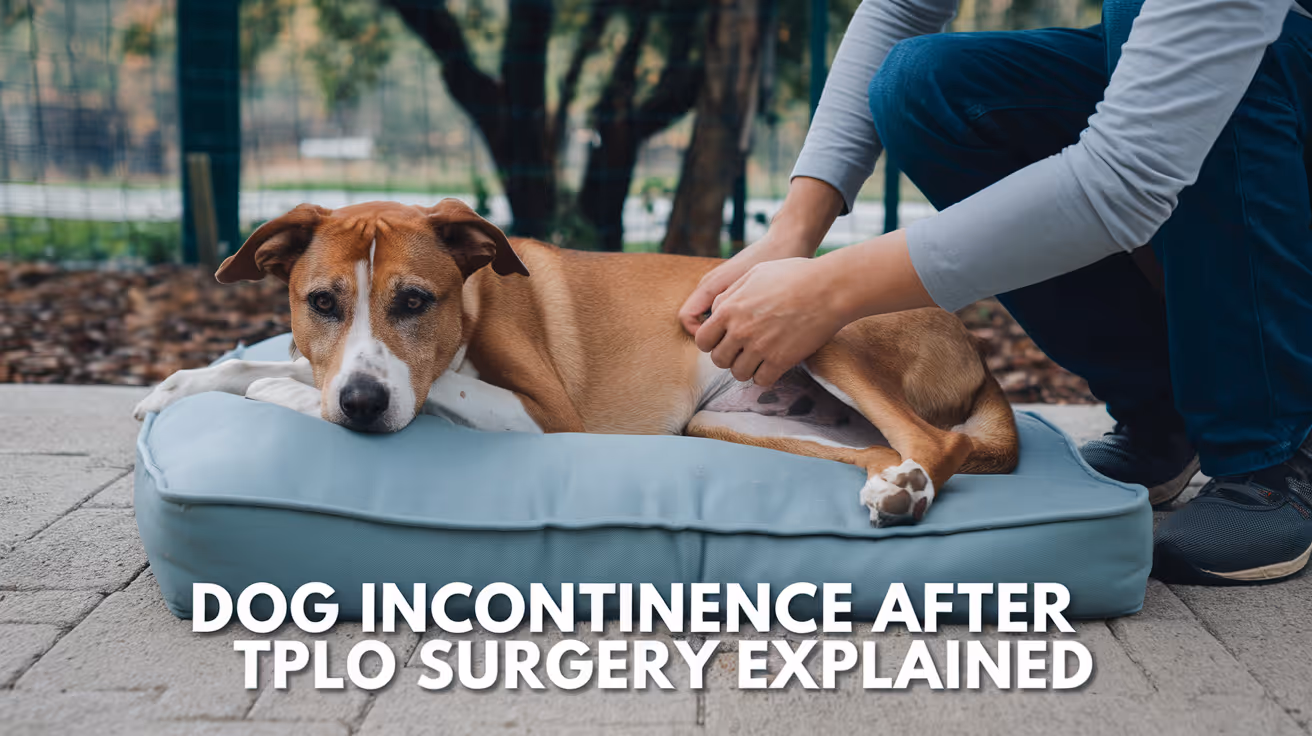
Dog Incontinence After TPLO Surgery: Causes & Care
Learn about dog incontinence after TPLO surgery, its causes, treatment options, and recovery tips for your pet’s comfort and health.
Dog incontinence after TPLO surgery is a common concern for many pet owners. TPLO, or Tibial Plateau Leveling Osteotomy, is a surgical procedure to repair a torn cruciate ligament in dogs. While it helps restore mobility, some dogs may experience urinary incontinence during recovery.
This article explains why incontinence happens after TPLO surgery, what signs to watch for, and how you can help your dog recover comfortably. You will learn about causes, diagnosis, treatment, and prevention strategies to support your pet’s health after surgery.
What causes dog incontinence after TPLO surgery?
Incontinence after TPLO surgery can result from several factors related to the surgery or the dog’s condition. Understanding these causes helps you recognize if your dog needs veterinary attention.
Some causes are temporary and resolve with healing, while others may require treatment.
- Nerve trauma during surgery: Surgery near the knee can sometimes affect nearby nerves controlling bladder function, causing temporary loss of control.
- Postoperative swelling: Swelling around the surgical site may irritate nerves or muscles involved in urination, leading to incontinence.
- Medication side effects: Pain medications or anesthesia can affect bladder control temporarily after surgery.
- Pre-existing urinary issues: Dogs with bladder infections or weak sphincter muscles before surgery may show worsened incontinence after TPLO.
Knowing these causes helps you monitor your dog closely and seek veterinary advice if incontinence persists beyond normal recovery time.
How soon after TPLO surgery does incontinence appear?
Incontinence can appear immediately after surgery or develop during the recovery period. Timing varies depending on the underlying cause.
Early detection is important to manage symptoms and prevent complications like skin irritation or infections.
- Immediate postoperative incontinence: Often due to anesthesia effects or nerve irritation, usually resolves within days to weeks.
- Delayed onset incontinence: May appear as swelling subsides or if infection develops, requiring veterinary evaluation.
- Chronic incontinence: If incontinence lasts beyond six weeks, it may indicate nerve damage or other complications.
- Behavioral changes: Stress or pain post-surgery can cause urination accidents unrelated to physical nerve damage.
Regular monitoring and communication with your veterinarian ensure timely intervention if incontinence does not improve.
What are the signs of incontinence in dogs after TPLO surgery?
Recognizing incontinence signs helps you provide prompt care and comfort for your dog. Some signs may be subtle, so careful observation is key.
Early identification can prevent skin problems and improve your dog’s quality of life during recovery.
- Uncontrolled urine leakage: Noticeable dribbling or wet spots when your dog is resting or sleeping.
- Frequent urination attempts: Your dog may try to urinate often but produce little urine due to weak control.
- Soiled bedding or furniture: Unexpected wet areas where your dog lies down indicate loss of bladder control.
- Excessive licking: Dogs may lick their genital area more due to irritation from urine leakage.
If you observe these signs, keep a record of frequency and amount to share with your veterinarian for accurate diagnosis.
How is dog incontinence diagnosed after TPLO surgery?
Diagnosing incontinence involves a thorough veterinary examination to identify the cause and guide treatment. Your vet will consider your dog’s history, surgery details, and current symptoms.
Diagnostic tests help rule out infections or other medical conditions contributing to incontinence.
- Physical examination: Checking neurological function and surgical site to assess nerve damage or swelling.
- Urinalysis: Testing urine for infection, crystals, or blood that may worsen incontinence.
- Imaging studies: X-rays or ultrasound to evaluate bladder and urinary tract health post-surgery.
- Neurological tests: Assessing reflexes and muscle tone related to bladder control.
Accurate diagnosis is essential to choose the best treatment plan and improve your dog’s recovery outcome.
What treatment options are available for incontinence after TPLO surgery?
Treatment depends on the cause and severity of incontinence. Many dogs improve with conservative care, while others may need medications or further interventions.
Your veterinarian will tailor treatment to your dog’s specific needs and monitor progress closely.
- Medications: Drugs like phenylpropanolamine or estrogen can strengthen bladder muscles and improve control.
- Physical therapy: Exercises and massage may help restore nerve function and muscle tone after surgery.
- Environmental management: Using dog diapers or waterproof bedding to keep your home clean and comfortable.
- Surgical revision: In rare cases, additional surgery may be needed if nerve damage is severe or persistent.
Early treatment improves chances of recovery and reduces complications related to incontinence.
How can you support your dog’s recovery from incontinence after TPLO?
Supporting your dog during recovery involves both medical care and home management. Your attention and patience help your dog heal comfortably and regain bladder control.
Simple steps can make a big difference in your dog’s well-being during this time.
- Maintain hygiene: Clean your dog’s genital area regularly to prevent skin irritation from urine leakage.
- Provide frequent bathroom breaks: Take your dog outside often to encourage voluntary urination and reduce accidents.
- Follow veterinary instructions: Administer all prescribed medications and attend follow-up appointments for progress checks.
- Limit activity: Prevent excessive movement that could stress the surgical site and worsen symptoms.
With proper care, most dogs recover bladder control within weeks to months after TPLO surgery.
When should you contact your veterinarian about incontinence after TPLO?
Knowing when to seek veterinary help ensures your dog receives timely care and avoids complications. Some signs indicate the need for prompt medical attention.
Do not hesitate to contact your vet if you notice worsening or persistent symptoms.
- Incontinence lasting over six weeks: Persistent symptoms may require further evaluation and treatment adjustments.
- Signs of infection: Fever, foul-smelling urine, or increased licking suggest urinary tract infection needing antibiotics.
- Severe discomfort or pain: If your dog shows signs of pain or distress, immediate veterinary care is necessary.
- Sudden loss of mobility: New or worsening leg weakness after surgery requires urgent assessment.
Timely veterinary consultation helps your dog recover safely and comfortably from TPLO surgery complications.
Conclusion
Dog incontinence after TPLO surgery is a manageable condition that often improves with proper care and treatment. Understanding the causes and signs helps you support your pet’s recovery effectively.
Regular veterinary follow-up and attentive home care are key to restoring bladder control and ensuring your dog’s comfort after surgery. If incontinence persists or worsens, seek veterinary advice promptly to protect your dog’s health and quality of life.
What is TPLO surgery in dogs?
TPLO surgery stabilizes the knee joint by altering the tibial plateau angle, helping dogs recover from cruciate ligament tears and regain mobility.
Can incontinence after TPLO surgery resolve on its own?
Yes, mild incontinence caused by swelling or medication often resolves within weeks as your dog heals from surgery.
Are there risks of nerve damage during TPLO surgery?
While rare, nerve damage can occur during TPLO surgery due to the proximity of nerves controlling bladder function, causing temporary or permanent incontinence.
How can physical therapy help with post-TPLO incontinence?
Physical therapy improves muscle strength and nerve function, which can aid bladder control recovery after TPLO surgery.
Is urinary tract infection common after TPLO surgery?
Urinary tract infections can occur after surgery and worsen incontinence, so monitoring and treating infections promptly is important.

Ankle Swelling After TPLO Surgery in Dogs
Learn about causes, symptoms, and treatment of ankle swelling after TPLO surgery in dogs to ensure proper recovery and care.
After TPLO surgery in dogs, ankle swelling is a common concern for many pet owners. This swelling can cause discomfort and worry, especially when you want your dog to heal quickly and safely. Understanding why ankle swelling happens and how to manage it is important for your dog’s recovery.
This article explains the main reasons for ankle swelling after TPLO surgery, how to recognize signs of complications, and what treatments or care steps you should follow. You will learn practical tips to help your dog heal well and avoid further problems.
What causes ankle swelling after TPLO surgery in dogs?
Swelling around the ankle after TPLO surgery can result from several factors. It is often part of the normal healing process but can also indicate complications. Knowing the causes helps you decide when to seek veterinary advice.
Swelling usually happens because of inflammation or fluid buildup near the surgical site. The ankle may swell due to changes in blood flow or tissue response after surgery.
- Surgical trauma: The surgery causes tissue damage that triggers inflammation, leading to fluid accumulation and swelling around the ankle area.
- Lymphatic disruption: Surgery can affect lymph vessels, slowing fluid drainage and causing localized swelling in the lower leg and ankle.
- Immobilization effects: Limited movement after surgery reduces muscle pumping action, which normally helps return fluid to circulation, causing swelling.
- Infection risk: If bacteria enter the surgical site, infection can cause increased swelling, redness, and pain around the ankle.
Understanding these causes helps you monitor your dog’s recovery and identify when swelling is normal or needs veterinary attention.
How can you identify normal versus abnormal ankle swelling?
Not all swelling after TPLO surgery is a sign of a problem. Some swelling is expected as part of healing. However, abnormal swelling may indicate infection or other complications that require treatment.
Knowing the difference helps you act quickly and protect your dog’s health.
- Normal swelling signs: Mild to moderate swelling that gradually decreases over 1 to 3 weeks with no increased pain or redness.
- Abnormal swelling signs: Rapidly increasing swelling, severe pain, heat, redness, or discharge from the surgical site.
- Systemic symptoms: Fever, lethargy, or loss of appetite alongside swelling may indicate infection or serious complications.
- Swelling location: Swelling limited to the ankle and lower leg is common; swelling spreading above the knee or to other limbs needs evaluation.
Careful observation and communication with your veterinarian ensure proper management of swelling after surgery.
What treatments help reduce ankle swelling after TPLO surgery?
Treating ankle swelling focuses on reducing inflammation and supporting healing. Your veterinarian may recommend several approaches based on the cause and severity of swelling.
Proper treatment helps your dog recover faster and prevents complications.
- Cold therapy: Applying ice packs to the swollen area for 10-15 minutes several times daily reduces inflammation and fluid buildup.
- Elevation and rest: Keeping the leg elevated and limiting activity helps fluid drain and reduces swelling.
- Compression bandages: Using a veterinary-approved compression wrap supports circulation and controls swelling when applied correctly.
- Medications: Anti-inflammatory drugs or antibiotics prescribed by your vet address inflammation or infection causing swelling.
Following your veterinarian’s instructions carefully is essential to manage swelling and promote healing after TPLO surgery.
How should you monitor your dog’s ankle swelling at home?
Regular monitoring of your dog’s ankle after TPLO surgery helps detect changes early. You can track swelling and other signs to report to your veterinarian if needed.
Consistent care and observation improve outcomes and reduce risks of complications.
- Daily inspection: Check the ankle for size, color, temperature, and any discharge or wounds every day during recovery.
- Measure swelling: Use a soft measuring tape to record ankle circumference at the same spot daily to track changes objectively.
- Note behavior changes: Watch for limping, licking, or signs of pain that may indicate worsening swelling or discomfort.
- Keep a recovery journal: Write down swelling observations, medication times, and activity levels to share with your vet during follow-ups.
Good home monitoring supports timely veterinary care and helps your dog heal safely after surgery.
When should you contact your veterinarian about ankle swelling?
Knowing when to seek veterinary help for ankle swelling after TPLO surgery is critical. Some swelling is normal, but certain signs require prompt attention to prevent serious problems.
Contact your vet immediately if you notice any concerning symptoms or changes in your dog’s condition.
- Rapid swelling increase: Sudden or severe swelling that worsens quickly needs urgent veterinary evaluation.
- Signs of infection: Redness, warmth, pus, or foul odor at the surgical site indicate infection requiring treatment.
- Severe pain or lameness: If your dog shows intense pain or cannot bear weight on the leg, seek veterinary care promptly.
- Systemic illness signs: Fever, vomiting, or lethargy combined with swelling are emergencies needing immediate attention.
Timely veterinary intervention can prevent complications and improve your dog’s recovery after TPLO surgery.
What are the long-term effects of ankle swelling after TPLO surgery?
Most dogs recover well from ankle swelling after TPLO surgery with proper care. However, prolonged or untreated swelling can cause lasting problems affecting mobility and quality of life.
Understanding potential long-term effects encourages proactive management and follow-up care.
- Chronic lymphedema: Persistent swelling due to lymphatic damage can cause discomfort and skin changes if not treated early.
- Joint stiffness: Swelling and inflammation may lead to reduced ankle joint flexibility and movement limitations.
- Delayed healing: Excess fluid and inflammation can slow tissue repair and increase risk of surgical complications.
- Secondary infections: Long-term swelling may increase vulnerability to skin infections or wound breakdown around the ankle.
Regular veterinary check-ups and following post-operative care instructions reduce the risk of long-term issues from ankle swelling after TPLO surgery.
Conclusion
Ankle swelling after TPLO surgery in dogs is a common but manageable issue. It usually results from inflammation and fluid buildup during healing. Knowing the causes and signs helps you support your dog’s recovery effectively.
Monitoring swelling carefully, using recommended treatments, and contacting your veterinarian when needed ensure your dog heals safely and comfortably. Proper care reduces complications and helps your dog return to normal activity after surgery.
FAQs
How long does ankle swelling last after TPLO surgery?
Swelling typically lasts 1 to 3 weeks after surgery but should gradually decrease. Persistent or worsening swelling needs veterinary evaluation.
Can I use ice on my dog’s swollen ankle?
Yes, applying ice packs for 10-15 minutes several times daily can reduce swelling and inflammation safely if done correctly.
Is ankle swelling a sign of infection after TPLO surgery?
Swelling alone is not always infection, but if accompanied by redness, heat, pain, or discharge, it may indicate infection requiring vet care.
Should my dog rest completely to reduce ankle swelling?
Rest is important to limit swelling, but gentle movement as advised by your vet helps circulation and prevents stiffness.
When can my dog start walking normally after TPLO surgery?
Most dogs begin weight-bearing within weeks, but full normal walking may take several months depending on healing and swelling resolution.
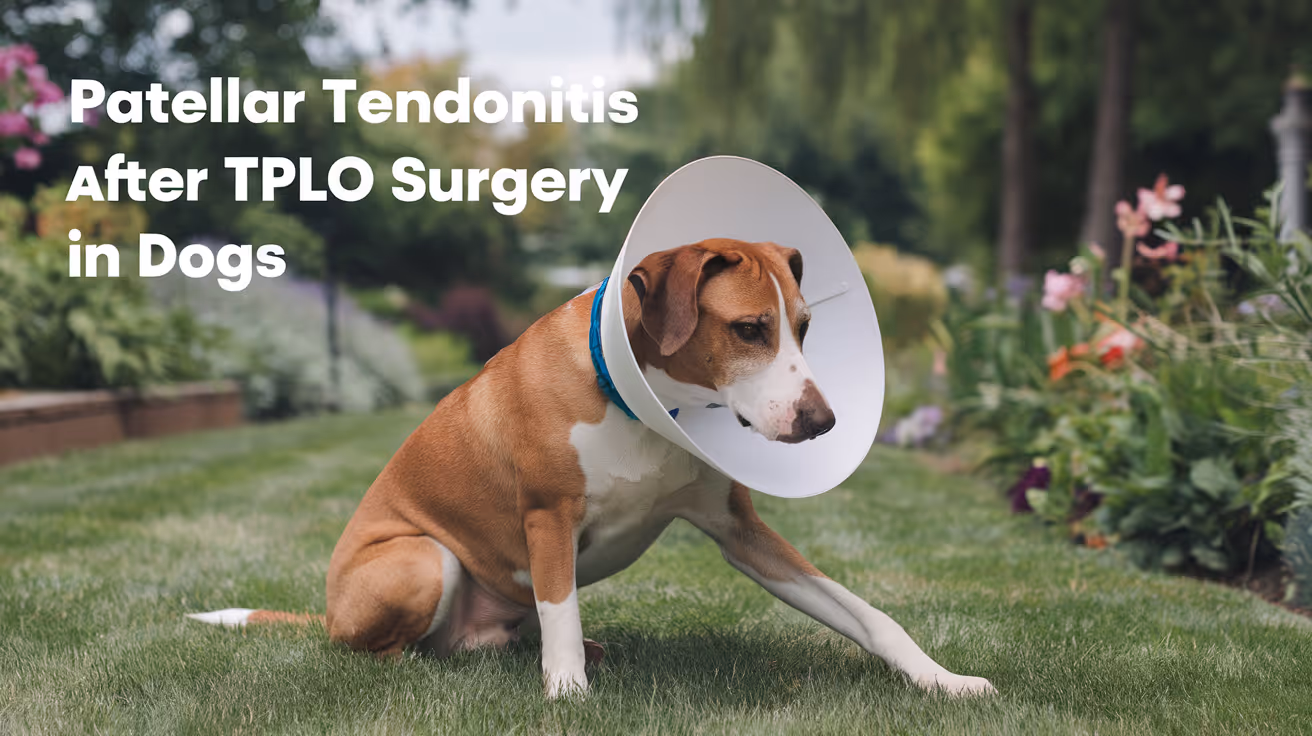
Patellar Tendonitis After TPLO Surgery in Dogs
Learn about patellar tendonitis after TPLO surgery in dogs, including causes, symptoms, treatment, and recovery tips for pet owners.
Patellar tendonitis after TPLO surgery in dogs is a common complication that pet owners should understand. This condition involves inflammation of the tendon connecting the kneecap to the shin bone, which can cause pain and affect mobility after surgery.
In this article, you will learn what patellar tendonitis is, why it happens after TPLO surgery, how to recognize its symptoms, and the best ways to treat and manage it to help your dog recover comfortably.
What is patellar tendonitis after TPLO surgery in dogs?
Patellar tendonitis is inflammation or irritation of the patellar tendon, which connects the patella (kneecap) to the tibia (shin bone). After TPLO surgery, this tendon can become stressed or injured during healing.
This condition causes pain and swelling around the knee joint, making it difficult for dogs to walk or bear weight on the leg.
- Definition of tendonitis: It is the inflammation of a tendon due to overuse, injury, or surgical stress, leading to pain and reduced function in the affected area.
- Role of the patellar tendon: This tendon stabilizes the knee joint and helps in leg extension, which is vital for walking and running.
- TPLO surgery impact: TPLO changes knee mechanics, which can increase strain on the patellar tendon during recovery.
- Common in post-TPLO dogs: Dogs recovering from TPLO are at risk because of altered gait and healing tissues around the knee.
Understanding this condition helps owners recognize early signs and seek veterinary care promptly to avoid worsening symptoms.
Why does patellar tendonitis occur after TPLO surgery?
Patellar tendonitis after TPLO surgery happens because the surgery changes the forces around the knee joint. The tendon may become overloaded or irritated during healing.
Other factors like improper rehabilitation, excessive activity, or pre-existing conditions can also contribute to tendon inflammation.
- Altered knee biomechanics: TPLO surgery changes the angle of the tibia, which can increase tension on the patellar tendon during movement.
- Post-surgical inflammation: Surgery causes swelling and tissue irritation that may extend to the tendon area.
- Overuse during recovery: Dogs that are too active too soon can strain the tendon before it fully heals.
- Muscle weakness: Weak thigh muscles after surgery can increase stress on the tendon as they fail to support the joint properly.
Recognizing these causes helps in planning proper post-operative care to reduce the risk of tendonitis.
What are the symptoms of patellar tendonitis in dogs after TPLO?
Symptoms of patellar tendonitis in dogs after TPLO surgery include signs of pain and difficulty using the affected leg. Early detection is important to prevent chronic problems.
Owners should watch for changes in their dog’s movement and behavior that indicate discomfort around the knee.
- Limping or lameness: Dogs may avoid putting weight on the operated leg due to pain in the tendon.
- Swelling near the knee: Visible swelling or thickening around the patellar tendon area is common.
- Heat and tenderness: The skin over the tendon may feel warm and sensitive when touched.
- Reluctance to move: Dogs might show stiffness, difficulty rising, or unwillingness to jump or run.
If you notice these signs, contact your veterinarian for an evaluation to confirm the diagnosis and start treatment early.
How is patellar tendonitis diagnosed after TPLO surgery?
Diagnosing patellar tendonitis after TPLO surgery involves a physical exam and imaging tests. Your vet will assess the knee for pain, swelling, and function.
Imaging helps rule out other problems like ligament damage or implant issues that can mimic tendonitis symptoms.
- Physical examination: The vet checks for pain on palpation, swelling, and range of motion limitations in the knee joint.
- X-rays: Radiographs show bone healing and implant position but may not show tendon inflammation directly.
- Ultrasound imaging: This test can visualize tendon swelling and detect tears or thickening in the patellar tendon.
- MRI scans: In some cases, MRI provides detailed images of soft tissues to confirm tendonitis and exclude other injuries.
Early and accurate diagnosis allows for targeted treatment to improve your dog’s recovery and comfort.
What treatment options are available for patellar tendonitis after TPLO?
Treatment for patellar tendonitis after TPLO focuses on reducing inflammation, relieving pain, and supporting tendon healing. A combination of rest, medication, and therapy is often used.
Your veterinarian will design a treatment plan based on the severity of the tendonitis and your dog’s overall health.
- Strict rest and activity restriction: Limiting movement helps reduce tendon stress and allows healing without further injury.
- Anti-inflammatory medications: NSAIDs prescribed by the vet reduce pain and swelling in the tendon area.
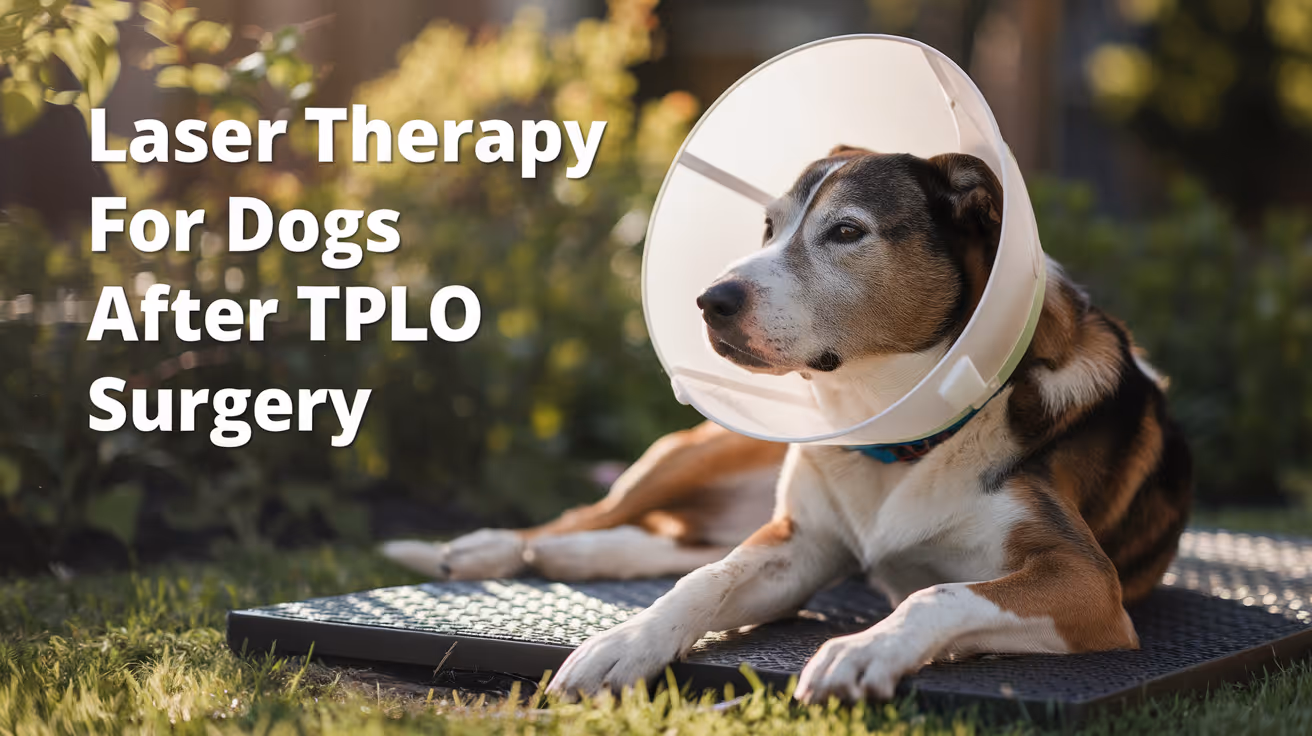
- Physical therapy: Controlled exercises and therapies like cold laser or massage improve tendon strength and flexibility.
- Supportive devices: Knee braces or wraps may be recommended to stabilize the joint and reduce tendon strain during recovery.
Following the treatment plan closely and attending follow-up visits are essential for a successful outcome.
How can you prevent patellar tendonitis after TPLO surgery?
Preventing patellar tendonitis after TPLO surgery involves careful post-operative care and monitoring. Proper rehabilitation and avoiding overexertion are key.
Owners play a vital role in helping their dogs heal safely and reduce the risk of tendon inflammation.
- Follow veterinary instructions: Adhere strictly to activity limits and medication schedules provided by your vet.
- Gradual rehabilitation: Introduce physical therapy exercises slowly to rebuild muscle strength without overloading the tendon.
- Weight management: Keep your dog at a healthy weight to reduce extra stress on the knee joint and tendon.
- Regular check-ups: Schedule follow-up visits to monitor healing and catch any early signs of tendonitis.
Taking these steps helps ensure your dog recovers well and maintains good knee health after TPLO surgery.
What is the recovery outlook for dogs with patellar tendonitis after TPLO?
With proper treatment, most dogs recover well from patellar tendonitis after TPLO surgery. Recovery time varies depending on severity and care quality.
Owners should expect gradual improvement and maintain communication with their veterinarian throughout the healing process.
- Recovery duration: Mild cases may improve within weeks, while severe tendonitis can take several months to heal fully.
- Importance of compliance: Strict rest and therapy adherence greatly improve chances of full recovery without chronic issues.
- Possible complications: Untreated tendonitis can lead to chronic pain, tendon rupture, or impaired limb function.
- Long-term prognosis: Most dogs regain normal mobility and comfort with timely care and proper rehabilitation.
Patience and consistent care are essential to help your dog return to an active, pain-free life after TPLO surgery.
Conclusion
Patellar tendonitis after TPLO surgery in dogs is a challenging but manageable condition. It results from tendon inflammation caused by surgical changes and recovery stresses.
Recognizing symptoms early, seeking veterinary diagnosis, and following a tailored treatment plan can help your dog heal well. Proper post-operative care and rehabilitation reduce the risk and support a smooth recovery.
FAQs
How soon after TPLO surgery can patellar tendonitis develop?
Patellar tendonitis can develop within days to weeks after TPLO surgery, often during the early healing phase when inflammation and altered knee mechanics are present.
Can physical therapy worsen patellar tendonitis after TPLO?
If done improperly or too aggressively, physical therapy can worsen tendonitis. It should be guided by a veterinary professional to ensure safe, gradual rehabilitation.
Is surgery ever needed to treat patellar tendonitis after TPLO?
Surgery is rarely needed. Most cases respond well to rest, medication, and therapy. Surgery is considered only if tendon rupture or severe damage occurs.
What signs indicate patellar tendonitis is improving?
Improvement signs include reduced limping, less swelling and pain, increased willingness to move, and better knee function during activity.
Can patellar tendonitis cause long-term lameness in dogs?
Yes, if untreated, patellar tendonitis can lead to chronic pain and lameness. Early treatment helps prevent long-term mobility problems.
Dog Incontinence After TPLO Surgery: Causes & Care
Learn about dog incontinence after TPLO surgery, its causes, treatment options, and recovery tips for your pet’s comfort and health.
Dog incontinence after TPLO surgery is a common concern for many pet owners. TPLO, or Tibial Plateau Leveling Osteotomy, is a surgical procedure to repair a torn cruciate ligament in dogs. While it helps restore mobility, some dogs may experience urinary incontinence during recovery.
This article explains why incontinence happens after TPLO surgery, what signs to watch for, and how you can help your dog recover comfortably. You will learn about causes, diagnosis, treatment, and prevention strategies to support your pet’s health after surgery.
What causes dog incontinence after TPLO surgery?
Incontinence after TPLO surgery can result from several factors related to the surgery or the dog’s condition. Understanding these causes helps you recognize if your dog needs veterinary attention.
Some causes are temporary and resolve with healing, while others may require treatment.
- Nerve trauma during surgery: Surgery near the knee can sometimes affect nearby nerves controlling bladder function, causing temporary loss of control.
- Postoperative swelling: Swelling around the surgical site may irritate nerves or muscles involved in urination, leading to incontinence.
- Medication side effects: Pain medications or anesthesia can affect bladder control temporarily after surgery.
- Pre-existing urinary issues: Dogs with bladder infections or weak sphincter muscles before surgery may show worsened incontinence after TPLO.
Knowing these causes helps you monitor your dog closely and seek veterinary advice if incontinence persists beyond normal recovery time.
How soon after TPLO surgery does incontinence appear?
Incontinence can appear immediately after surgery or develop during the recovery period. Timing varies depending on the underlying cause.
Early detection is important to manage symptoms and prevent complications like skin irritation or infections.
- Immediate postoperative incontinence: Often due to anesthesia effects or nerve irritation, usually resolves within days to weeks.
- Delayed onset incontinence: May appear as swelling subsides or if infection develops, requiring veterinary evaluation.
- Chronic incontinence: If incontinence lasts beyond six weeks, it may indicate nerve damage or other complications.
- Behavioral changes: Stress or pain post-surgery can cause urination accidents unrelated to physical nerve damage.
Regular monitoring and communication with your veterinarian ensure timely intervention if incontinence does not improve.
What are the signs of incontinence in dogs after TPLO surgery?
Recognizing incontinence signs helps you provide prompt care and comfort for your dog. Some signs may be subtle, so careful observation is key.
Early identification can prevent skin problems and improve your dog’s quality of life during recovery.
- Uncontrolled urine leakage: Noticeable dribbling or wet spots when your dog is resting or sleeping.
- Frequent urination attempts: Your dog may try to urinate often but produce little urine due to weak control.
- Soiled bedding or furniture: Unexpected wet areas where your dog lies down indicate loss of bladder control.
- Excessive licking: Dogs may lick their genital area more due to irritation from urine leakage.
If you observe these signs, keep a record of frequency and amount to share with your veterinarian for accurate diagnosis.
How is dog incontinence diagnosed after TPLO surgery?
Diagnosing incontinence involves a thorough veterinary examination to identify the cause and guide treatment. Your vet will consider your dog’s history, surgery details, and current symptoms.
Diagnostic tests help rule out infections or other medical conditions contributing to incontinence.
- Physical examination: Checking neurological function and surgical site to assess nerve damage or swelling.
- Urinalysis: Testing urine for infection, crystals, or blood that may worsen incontinence.
- Imaging studies: X-rays or ultrasound to evaluate bladder and urinary tract health post-surgery.
- Neurological tests: Assessing reflexes and muscle tone related to bladder control.
Accurate diagnosis is essential to choose the best treatment plan and improve your dog’s recovery outcome.
What treatment options are available for incontinence after TPLO surgery?
Treatment depends on the cause and severity of incontinence. Many dogs improve with conservative care, while others may need medications or further interventions.
Your veterinarian will tailor treatment to your dog’s specific needs and monitor progress closely.
- Medications: Drugs like phenylpropanolamine or estrogen can strengthen bladder muscles and improve control.
- Physical therapy: Exercises and massage may help restore nerve function and muscle tone after surgery.
- Environmental management: Using dog diapers or waterproof bedding to keep your home clean and comfortable.
- Surgical revision: In rare cases, additional surgery may be needed if nerve damage is severe or persistent.
Early treatment improves chances of recovery and reduces complications related to incontinence.
How can you support your dog’s recovery from incontinence after TPLO?
Supporting your dog during recovery involves both medical care and home management. Your attention and patience help your dog heal comfortably and regain bladder control.
Simple steps can make a big difference in your dog’s well-being during this time.
- Maintain hygiene: Clean your dog’s genital area regularly to prevent skin irritation from urine leakage.
- Provide frequent bathroom breaks: Take your dog outside often to encourage voluntary urination and reduce accidents.
- Follow veterinary instructions: Administer all prescribed medications and attend follow-up appointments for progress checks.
- Limit activity: Prevent excessive movement that could stress the surgical site and worsen symptoms.
With proper care, most dogs recover bladder control within weeks to months after TPLO surgery.
When should you contact your veterinarian about incontinence after TPLO?
Knowing when to seek veterinary help ensures your dog receives timely care and avoids complications. Some signs indicate the need for prompt medical attention.
Do not hesitate to contact your vet if you notice worsening or persistent symptoms.
- Incontinence lasting over six weeks: Persistent symptoms may require further evaluation and treatment adjustments.
- Signs of infection: Fever, foul-smelling urine, or increased licking suggest urinary tract infection needing antibiotics.
- Severe discomfort or pain: If your dog shows signs of pain or distress, immediate veterinary care is necessary.
- Sudden loss of mobility: New or worsening leg weakness after surgery requires urgent assessment.
Timely veterinary consultation helps your dog recover safely and comfortably from TPLO surgery complications.
Conclusion
Dog incontinence after TPLO surgery is a manageable condition that often improves with proper care and treatment. Understanding the causes and signs helps you support your pet’s recovery effectively.
Regular veterinary follow-up and attentive home care are key to restoring bladder control and ensuring your dog’s comfort after surgery. If incontinence persists or worsens, seek veterinary advice promptly to protect your dog’s health and quality of life.
What is TPLO surgery in dogs?
TPLO surgery stabilizes the knee joint by altering the tibial plateau angle, helping dogs recover from cruciate ligament tears and regain mobility.
Can incontinence after TPLO surgery resolve on its own?
Yes, mild incontinence caused by swelling or medication often resolves within weeks as your dog heals from surgery.
Are there risks of nerve damage during TPLO surgery?
While rare, nerve damage can occur during TPLO surgery due to the proximity of nerves controlling bladder function, causing temporary or permanent incontinence.
How can physical therapy help with post-TPLO incontinence?
Physical therapy improves muscle strength and nerve function, which can aid bladder control recovery after TPLO surgery.
Is urinary tract infection common after TPLO surgery?
Urinary tract infections can occur after surgery and worsen incontinence, so monitoring and treating infections promptly is important.
Alternatives to TPLO Surgery for Dogs
Explore safe and effective alternatives to TPLO surgery for dogs with knee injuries, including treatments, benefits, and recovery options.
When your dog suffers a torn cranial cruciate ligament (CCL), TPLO surgery often comes up as a common treatment option. However, many pet owners want to know if there are alternatives to TPLO surgery for dogs that can help their pets recover without invasive procedures. Understanding these options can guide you to the best care for your furry friend.
This article explains what TPLO surgery is and explores other treatments available. You will learn about non-surgical methods, different surgical techniques, and how to decide the best approach for your dog's knee injury.
What is TPLO surgery and why is it used for dogs?
TPLO stands for Tibial Plateau Leveling Osteotomy. It is a surgical procedure designed to stabilize the knee joint after a cranial cruciate ligament tear. This injury is common in active dogs and causes pain and lameness.
The surgery changes the angle of the tibia bone to prevent the knee from slipping forward during movement. This helps dogs regain mobility and reduces arthritis risk.
- Purpose of TPLO: TPLO surgery stabilizes the knee by altering bone alignment, which helps dogs walk without pain after ligament injury.
- Common candidates: Medium to large breed dogs with complete CCL tears often benefit most from TPLO surgery due to their size and activity level.
- Recovery time: Dogs usually need 8 to 12 weeks of restricted activity and physical therapy after TPLO to heal properly.
- Success rate: TPLO has a high success rate, with most dogs returning to normal activity within months after surgery.
While TPLO is effective, it is not the only option for treating CCL injuries in dogs. Other alternatives may suit different dogs depending on their size, age, and health.
What non-surgical treatments can help dogs with CCL injuries?
Not all dogs require surgery for a torn CCL. Some dogs, especially smaller or less active ones, may improve with conservative management. This approach focuses on reducing pain and improving joint function without surgery.
Non-surgical treatments can be a good choice for dogs with partial tears, older dogs, or those with other health issues that make surgery risky.
- Rest and restricted activity: Limiting your dog’s movement helps reduce inflammation and prevents further injury during healing.
- Weight management: Maintaining a healthy weight reduces stress on the injured knee and supports recovery.
- Physical therapy: Controlled exercises and hydrotherapy improve muscle strength and joint stability without surgery.
- Pain medications: Anti-inflammatory drugs and pain relievers help manage discomfort during healing.
Non-surgical care requires patience and close monitoring. Your vet will guide you on the best plan and watch for signs that surgery might become necessary.
What other surgical options exist besides TPLO for dogs?
Besides TPLO, veterinarians offer several other surgical techniques to treat CCL injuries. Each has its advantages and is chosen based on the dog's size, activity, and specific injury.
Understanding these alternatives can help you discuss the best surgical plan with your vet.
- Tibial Tuberosity Advancement (TTA): This surgery changes the knee mechanics by moving the tibial tuberosity forward to stabilize the joint, suitable for medium to large dogs.
- Extracapsular Repair: A less invasive surgery using sutures outside the joint to mimic ligament function, often used in small or less active dogs.
- TPLO vs TTA comparison: Both surgeries stabilize the knee but use different bone cuts; your vet will recommend based on your dog’s anatomy and lifestyle.
- Arthroscopy-assisted repair: Minimally invasive technique that allows better visualization and treatment of joint damage during surgery.
Each surgical option has different recovery times and risks. Discuss these thoroughly with your veterinary surgeon to choose the best fit for your dog.
How do rehabilitation and physical therapy support recovery without TPLO?
Rehabilitation plays a vital role in helping dogs recover from CCL injuries, whether or not they have surgery. Physical therapy strengthens muscles, improves joint function, and reduces pain.
Therapy can be tailored to your dog’s needs and helps speed up recovery while preventing future injuries.
- Hydrotherapy benefits: Swimming or underwater treadmill exercises reduce weight on joints while building muscle strength safely.
- Controlled exercises: Specific movements improve range of motion and stabilize the knee joint during healing.
- Massage therapy: Helps reduce muscle tension and improve circulation around the injured area.
- Home exercise plans: Simple daily exercises you can do at home to maintain progress and support recovery.
Working with a certified canine rehabilitation therapist ensures your dog receives the right therapy plan and progresses safely.
When should you consider alternatives to TPLO surgery for your dog?
Choosing alternatives to TPLO depends on your dog’s condition, age, and lifestyle. Some dogs do well without surgery, while others need surgical stabilization for a good quality of life.
Knowing when to consider other options helps you make informed decisions with your vet.
- Partial ligament tears: Dogs with incomplete tears may recover well with rest and therapy without surgery.
- Small or older dogs: These dogs often tolerate less invasive treatments better than major surgery.
- Health risks: Dogs with other medical conditions may face higher risks from anesthesia and surgery.
- Owner preference and budget: Surgery costs and recovery demands may influence choosing non-surgical or alternative surgical options.
Discuss all factors with your vet to find the safest and most effective treatment for your dog’s knee injury.
What are the long-term outcomes of non-TPLO treatments for dogs?
Long-term results vary depending on the treatment chosen and the dog’s individual response. Some dogs recover fully without surgery, while others may develop arthritis or chronic lameness.
Understanding these outcomes helps set realistic expectations for your dog’s recovery and quality of life.
- Non-surgical success rates: Many small dogs improve with conservative care but may need surgery if symptoms worsen over time.
- Arthritis risk: Untreated or partially treated CCL injuries can lead to joint degeneration and arthritis later in life.
- Activity limitations: Dogs treated without surgery may need ongoing activity restrictions to prevent re-injury.
- Regular monitoring: Follow-up exams and imaging help track joint health and guide adjustments in care plans.
With proper management, many dogs live happy, active lives even without TPLO surgery. Your vet will help you monitor progress and adjust treatment as needed.
Conclusion
Alternatives to TPLO surgery for dogs offer a range of options depending on your dog’s size, injury severity, and health. Non-surgical treatments, other surgical techniques, and rehabilitation can all support recovery from CCL injuries.
Choosing the best treatment requires careful discussion with your veterinarian. Understanding these options helps you make informed decisions to keep your dog comfortable and active for years to come.
FAQs
Can small dogs recover from CCL tears without TPLO surgery?
Yes, small dogs often respond well to non-surgical treatments like rest, physical therapy, and extracapsular repair, avoiding the need for TPLO surgery.
How long does recovery take after alternative surgeries like TTA?
Recovery from TTA surgery usually takes 8 to 12 weeks, similar to TPLO, with restricted activity and physical therapy recommended during this time.
Is physical therapy effective without surgery for CCL injuries?
Physical therapy can improve strength and joint function in dogs with partial tears or those not undergoing surgery, but results vary based on injury severity.
What are the risks of choosing non-surgical treatment for a torn CCL?
Non-surgical treatment may lead to ongoing instability, pain, and arthritis if the ligament tear is complete or the dog is very active.
Can older dogs safely undergo TPLO surgery?
Older dogs can have TPLO surgery safely if they are otherwise healthy, but vets assess risks carefully before recommending surgery.

Dog Meniscus Tear After TPLO: Symptoms and Solutions
Learn the causes, symptoms, and treatment options for dog meniscus tears after TPLO surgery. Find out how to aid recovery and prevent complications
The meniscus is a C-shaped cartilage in a dog's knee (stifle) joint that cushions and stabilizes movement. It absorbs shock and spreads weight evenly across the joint, preventing excessive wear on the bones. Each knee has two menisci—medial (inner) and lateral (outer). The medial meniscus is more prone to injury because it is firmly attached to the tibia.
After TPLO (Tibial Plateau Leveling Osteotomy) surgery, meniscal tears can still happen, even though the procedure stabilizes the knee. This can occur due to ongoing joint instability before surgery, direct trauma, or degenerative changes. In some cases, the meniscus was already damaged before TPLO but went unnoticed.
Meniscal tears often cause pain, limping, and clicking sounds in the knee. Some surgeons perform a meniscal release during TPLO to lower post-op risks, but this may affect joint function. Early detection and treatment are crucial to prevent long-term mobility issues.
Causes of Meniscal Tears After TPLO Surgery
Meniscal tears after TPLO surgery can happen due to several reasons, even though the knee is surgically stabilized. While TPLO aims to prevent further damage, certain conditions can still stress the meniscus, causing injury.
- Excessive or abnormal force during healing – After TPLO surgery, the knee joint still bears weight. If a dog is too active too soon, too much stress on the meniscus can lead to tearing. Sudden movements, slipping, or jumping before full recovery can put abnormal pressure on the cartilage.
- Pre-existing meniscal damage – Sometimes, the meniscus is already torn before TPLO but isn't visible during surgery. A partial tear can become a full tear over time, especially if the joint stays irritated or inflamed.
- Abnormal tibial alignment after surgery – If the tibia isn't properly aligned during TPLO, leftover instability may continue, causing repeated stress on the meniscus. Poor surgical technique or individual anatomical differences can lead to this problem, resulting in ongoing joint damage even after the procedure.
Symptoms of a Meniscal Tear in Dogs
A meniscal tear after TPLO surgery can cause significant discomfort and mobility issues. While some symptoms overlap with general knee problems, certain signs strongly suggest meniscal damage.
- Limping or lameness – A dog with a torn meniscus often shows a sudden return of limping after initial TPLO recovery. The lameness may come and go, worsening after activity.
- Difficulty bearing weight on the affected leg – Dogs may hesitate to put full weight on the injured leg, sometimes lifting it when standing still. Some dogs shift weight to the opposite leg, leading to uneven posture.
- Swelling around the knee joint – Inflammation in the stifle joint can occur, making the area around the knee appear swollen or warm to the touch. This often indicates irritation or internal damage.
- Pain or sensitivity when the joint is touched – Affected dogs may react when the knee is examined, showing discomfort by pulling away, whining, or licking the joint.
- Reluctance to engage in physical activity – A previously active dog may become less willing to walk, run, or climb stairs due to pain. If untreated, this can lead to muscle loss and further joint complications.
Diagnosing a Meniscus Tear After TPLO Surgery
Identifying a meniscal tear after TPLO surgery involves a combination of clinical examination and advanced diagnostic tools. Since symptoms can mimic other knee issues, a thorough assessment is essential for an accurate diagnosis.
- Physical Examination and Manual Manipulation – A veterinarian will evaluate the affected limb by observing gait, joint swelling, and pain response. A key test is the "meniscal click" sign, where a clicking or popping sound is felt when flexing and extending the knee. However, not all tears produce this sign, so further diagnostics may be needed.
- Arthrotomy or Arthroscopy (Direct Visualization) – If a meniscal tear is highly suspected, direct visualization is the most reliable way to confirm it. Arthrotomy involves surgically opening the joint, while arthroscopy is a minimally invasive technique using a small camera. Arthroscopy allows for greater precision and faster recovery, making it the preferred method in many cases.
- Advanced Imaging Techniques (MRI, CT Scans) – While X-rays do not show soft tissues, MRI or CT scans can help detect meniscal injuries. MRI provides the best soft tissue detail, though its availability in veterinary medicine is limited. CT scans with contrast can sometimes help but are less effective than MRI for diagnosing meniscal damage.
Treatment Options for a Meniscal Tear
The treatment for a meniscal tear after TPLO surgery depends on how severe the injury is. Mild cases might improve with conservative management, but severe tears often need surgery to restore joint function and relieve pain.
Conservative Management (For Mild Cases)
For minor meniscal injuries, non-surgical treatments can help manage pain and prevent further damage:
- Rest and restricted activity – Strict crate rest or controlled leash walking for several weeks prevents the tear from getting worse.
- Physical therapy and rehabilitation – Gentle exercises, hydrotherapy, and laser therapy improve mobility without putting stress on the joint.
- Pain management (NSAIDs, joint supplements) – Nonsteroidal anti-inflammatory drugs (NSAIDs) reduce swelling, while glucosamine and chondroitin support cartilage health.
This approach works best for small, stable tears and requires close monitoring for any worsening symptoms.
Surgical Treatment (For Severe Cases)
Severe meniscal tears often need surgery to restore function and prevent chronic pain:
- Partial meniscectomy – The damaged part of the meniscus is removed to eliminate pain and mechanical obstruction.
- Meniscal repair – In rare cases, suturing the tear is possible, though outcomes are less predictable.
- Expected recovery timeline after surgery – Most dogs recover within 8–12 weeks, with physical therapy helping to improve mobility and muscle strength.
Postoperative Care and Recovery
Proper postoperative care is crucial for a successful recovery after meniscal tear surgery. A structured rehabilitation plan helps reduce pain, restore mobility, and prevent further joint damage.
- Controlled Leash Walks and Restricted Movement – Dogs should avoid running, jumping, or rough play for several weeks after surgery. Short, leashed walks on flat surfaces help maintain circulation while preventing too much stress on the knee. Crate rest or a confined space is recommended when unsupervised.
- Passive Range of Motion Exercises – Once approved by the veterinarian, gentle bending and straightening of the knee help maintain joint flexibility. This should be done slowly and without forcing movement to avoid discomfort.
- Ice and Heat Therapy for Pain Relief – Applying ice packs (wrapped in a towel) to the knee for 10–15 minutes several times a day reduces swelling in the first few weeks. Later, warm compresses can be used to improve blood flow and relax stiff muscles.
- Gradual Return to Normal Activity – Around 8–12 weeks after surgery, supervised activity can increase. Hydrotherapy, slow stair climbing, and controlled treadmill walking are beneficial. A full return to normal activity typically takes 3–4 months, depending on healing progress.
Signs to Watch for During Recovery
Monitoring your dog’s recovery after meniscal tear surgery is crucial to ensure proper healing. While some discomfort is expected, certain signs may indicate complications that require veterinary attention.
- Swelling Lasting Longer Than 5–7 Days – Mild swelling around the knee is normal after surgery, but it should gradually decrease. Persistent or worsening swelling beyond a week may indicate inflammation, infection, or fluid buildup in the joint.
- Persistent Pain Despite Medication – Pain should decrease over time with prescribed NSAIDs and other pain relief medications. If your dog continues to show signs of discomfort, such as whining, excessively licking the knee, or avoiding movement, it may suggest ongoing joint irritation or surgical complications.
- Inability to Bear Weight 5–7 Days Post-Surgery – While some dogs may take a few days to regain full weight-bearing ability, complete reluctance to use the affected leg beyond a week could signal continued meniscal issues, improper healing, or implant complications.
- Any Unusual or Concerning Symptoms – Signs like discharge from the incision, fever, or a sudden increase in limping warrant immediate veterinary attention. Catching these issues early can prevent long-term mobility problems and ensure a smooth recovery.
How to Prevent Meniscal Tears After TPLO
Preventing a meniscal tear after TPLO surgery involves careful post-surgery management and ongoing joint care. While TPLO stabilizes the knee, extra precautions help protect the meniscus and support full recovery.
- Proper Post-Surgical Rehabilitation – A structured rehab plan is essential to avoid putting too much stress on the knee. Controlled leash walks, passive range-of-motion exercises, and hydrotherapy strengthen the joint without overloading the meniscus. Sudden, unapproved activities can increase the risk of injury.
- Avoiding High-Impact Activities Too Soon – Running, jumping, or playing too early in recovery can strain the healing knee and harm the meniscus. Gradually reintroducing activity, based on veterinary advice, reduces the risk of re-injury.
- Regular Vet Checkups to Monitor Healing – Follow-up visits allow the vet to check joint stability, swelling, and pain levels. If instability or discomfort continues, early intervention can prevent further meniscal damage.
- Supplements or Therapies to Support Joint Health – Glucosamine, chondroitin, and omega-3 fatty acids help maintain cartilage health and reduce inflammation. Physical therapy, including laser treatment or acupuncture, can improve mobility and prevent additional joint issues. Proper joint care ensures long-term knee function and minimizes re-injury risks.
Also Read about:
- TPLO surgery complications
- Bilateral TPLO surgery
- How to treat MRSP in dogs
- Staph infection after TPLO surgery
Conclusion
Early detection and treatment of a meniscal tear after TPLO surgery are crucial for preventing long-term joint damage and ensuring a successful recovery. Recognizing symptoms like limping, pain, and difficulty bearing weight allows for timely intervention, reducing the risk of further complications.
A structured rehabilitation plan is essential for recovery. Controlled leash walks, physical therapy, and gradually reintroducing activity help protect the knee joint and prevent additional injuries. Proper post-operative care, including pain management, restricted movement, and joint-supporting supplements, contributes to long-term stability and comfort.
If your dog shows persistent pain, swelling, or reluctance to use the affected leg beyond the expected healing period, consult a veterinarian immediately. Unaddressed meniscal damage can lead to chronic discomfort and reduced mobility. With careful monitoring, rehabilitation, and veterinary guidance, dogs can regain full function and enjoy an active, pain-free life after TPLO surgery.
FAQs
What happens if a dog tears the meniscus after TPLO?
If a dog tears the meniscus after TPLO, it can cause pain, lameness, and joint instability. The knee may produce a clicking sound when moving. If left untreated, it can lead to chronic discomfort and arthritis. Treatment options include pain management, restricted activity, or surgery to remove the damaged meniscus.
Can a torn meniscus in a dog heal on its own?
No, a torn meniscus does not heal on its own because it has limited blood supply, preventing natural regeneration. Small tears may be managed with rest, NSAIDs, and joint supplements, but severe cases often require surgical intervention, such as a partial meniscectomy, to remove the damaged portion and restore knee function.
How to know if a dog ruined TPLO surgery?
Signs of a failed TPLO surgery include persistent limping, swelling, reluctance to bear weight, and worsening pain beyond the expected recovery period. A sudden decline in mobility or unusual clicking sounds may indicate complications like implant failure, infection, or a meniscal tear. A veterinary exam, X-rays, or arthroscopy can confirm the issue.
How to fix a meniscus tear in dogs?
Treatment depends on severity. Mild tears may be managed with pain relief, restricted activity, and joint therapy. Severe tears often require surgery, such as a partial meniscectomy, where the damaged meniscal portion is removed. In rare cases, meniscal repair may be attempted, though its success rate is lower than removal.
Why is my dog limping 4 months after TPLO?
Limping four months post-TPLO could indicate a meniscal tear, incomplete healing, implant issues, or arthritis. While mild stiffness is normal, worsening lameness, pain, or joint clicking requires veterinary evaluation. X-rays or arthroscopy can help identify complications, and treatment may involve physical therapy, pain management, or additional surgery if needed.
TPLO Anesthesia Protocol in Dogs Explained
Learn about the TPLO anesthesia protocol in dogs, including preparation, drugs used, monitoring, and recovery steps for safe surgery.
Tibial Plateau Leveling Osteotomy (TPLO) is a common surgical procedure to treat cranial cruciate ligament injuries in dogs. Proper anesthesia management is crucial to ensure the safety and comfort of your dog during this surgery. Understanding the TPLO anesthesia protocol helps pet owners know what to expect before, during, and after the procedure.
This article explains the anesthesia steps used in TPLO surgery, including pre-anesthetic preparation, drug choices, monitoring during surgery, and recovery care. You will learn how veterinarians keep your dog safe and pain-free throughout the process.
What is the TPLO anesthesia protocol in dogs?
The TPLO anesthesia protocol is a set of guidelines veterinarians follow to safely sedate and anesthetize dogs undergoing TPLO surgery. It includes pre-anesthetic assessment, drug selection, intraoperative monitoring, and post-operative pain control.
This protocol aims to minimize risks and ensure smooth anesthesia tailored to each dog's health status and surgical needs.
- Pre-anesthetic evaluation: A thorough physical exam and blood tests help assess your dog's health and identify any anesthesia risks before surgery.
- Premedication drugs: Sedatives and analgesics are given to calm your dog and reduce pain before anesthesia induction.
- Anesthetic induction: Injectable drugs are used to quickly and safely induce unconsciousness for intubation.
- Maintenance anesthesia: Inhalant anesthetics keep your dog unconscious and pain-free during surgery, with continuous monitoring.
- Intraoperative monitoring: Vital signs like heart rate, blood pressure, oxygen levels, and temperature are closely watched to detect any problems early.
- Post-operative analgesia: Pain relief medications are administered to ensure comfort during recovery.
Following this protocol helps reduce anesthesia complications and supports a successful TPLO surgery outcome.
What pre-anesthetic preparations are needed for TPLO surgery?
Before TPLO surgery, your dog needs careful preparation to ensure anesthesia safety. This includes health checks and fasting instructions.
Proper preparation reduces anesthesia risks and helps the veterinary team plan the best anesthesia approach.
- Physical examination: A complete exam checks your dog's heart, lungs, and overall condition to detect any issues that may affect anesthesia.
- Blood work: Tests evaluate organ function and detect hidden diseases that could increase anesthesia risks.
- Fasting guidelines: Dogs should fast for 8-12 hours before anesthesia to prevent vomiting and aspiration during surgery.
- Hydration status: Ensuring your dog is well-hydrated helps maintain blood pressure and organ perfusion during anesthesia.
Following these steps prepares your dog’s body for anesthesia and surgery, improving safety and recovery.
Which drugs are commonly used in TPLO anesthesia protocols?
Veterinarians select drugs based on your dog's health, size, and surgical needs. The protocol usually involves several drug classes for sedation, induction, maintenance, and pain control.
Each drug plays a specific role to ensure your dog remains calm, unconscious, and pain-free throughout the procedure.
- Premedication agents: Drugs like acepromazine or dexmedetomidine calm your dog and provide mild pain relief before anesthesia induction.
- Opioids: Medications such as morphine or methadone offer strong pain relief and sedation during premedication and post-op phases.
- Induction agents: Propofol or alfaxalone are commonly used to induce anesthesia quickly and smoothly for intubation.
- Maintenance anesthetics: Isoflurane or sevoflurane gases keep your dog unconscious and pain-free during surgery with easy control over anesthesia depth.
Using a combination of these drugs ensures balanced anesthesia with minimal side effects and good pain management.
How is anesthesia monitored during TPLO surgery in dogs?
Continuous monitoring during TPLO surgery is vital to detect any anesthesia complications early. The veterinary team uses specialized equipment and clinical signs to track your dog's status.
Monitoring helps adjust anesthesia depth and supports your dog’s vital functions throughout the operation.
- Heart rate and rhythm: Electrocardiogram (ECG) monitors detect abnormal heartbeats or arrhythmias during anesthesia.
- Blood pressure: Non-invasive or invasive methods measure blood pressure to ensure adequate organ perfusion.
- Oxygen saturation: Pulse oximetry tracks oxygen levels in the blood, preventing hypoxia.
- Respiratory rate and CO2: Capnography measures breathing rate and carbon dioxide levels to assess ventilation quality.
These monitoring tools allow the anesthetist to respond quickly to any changes and maintain stable anesthesia.
What pain management strategies are used after TPLO surgery?
Effective pain control after TPLO surgery is essential for your dog's comfort and faster recovery. Veterinarians use a multimodal approach combining different medications and techniques.
Managing pain well reduces stress, improves mobility, and helps prevent complications.
- Opioid analgesics: Drugs like buprenorphine or fentanyl patches provide strong pain relief during the immediate post-op period.
- Non-steroidal anti-inflammatory drugs (NSAIDs): Medications such as carprofen reduce inflammation and pain after surgery.
- Local anesthetics: Nerve blocks or local infiltration with lidocaine or bupivacaine numb the surgical area for targeted pain relief.
- Physical therapy: Controlled exercises and cold therapy help reduce pain and swelling during recovery.
Combining these methods ensures your dog remains comfortable and heals well after TPLO surgery.
What are the risks and complications of anesthesia in TPLO surgery?
While anesthesia is generally safe, it carries some risks, especially in older or sick dogs. Knowing potential complications helps you prepare and recognize warning signs.
Veterinarians minimize risks by thorough evaluation, monitoring, and careful drug selection.
- Cardiovascular issues: Anesthesia can cause low blood pressure or arrhythmias, which require prompt treatment to avoid organ damage.
- Respiratory problems: Breathing difficulties or low oxygen levels may occur, needing oxygen support or ventilation.
- Hypothermia: Body temperature can drop during surgery, so warming devices are used to maintain normal temperature.
- Delayed recovery: Some dogs may take longer to wake up or show signs of pain, requiring additional monitoring and care.
Understanding these risks helps you work with your vet to ensure the safest anesthesia experience for your dog.
How should dogs be cared for after TPLO anesthesia?
Post-anesthesia care is critical to help your dog recover smoothly from TPLO surgery. This includes monitoring, pain management, and gradual return to activity.
Proper care after anesthesia reduces complications and supports healing.
- Close monitoring: Watch for breathing, heart rate, and responsiveness as your dog wakes from anesthesia.
- Pain assessment: Regularly check for signs of pain and give prescribed analgesics as directed by your vet.
- Hydration and nutrition: Offer water and small meals once fully awake to prevent dehydration and support recovery.
- Restricted activity: Limit running and jumping to protect the surgical site until cleared by your veterinarian.
Following these care steps helps your dog regain strength and return to normal activities safely after TPLO surgery.
Conclusion
The TPLO anesthesia protocol in dogs is a carefully designed process to ensure safe sedation, pain control, and monitoring during this important orthopedic surgery. Understanding the steps involved can ease your concerns and help you prepare your dog for surgery.
From pre-anesthetic evaluation to post-operative care, each phase plays a vital role in minimizing risks and promoting a smooth recovery. Working closely with your veterinary team ensures the best outcome for your dog’s TPLO procedure and overall health.
FAQs
How long does anesthesia last during TPLO surgery?
Anesthesia typically lasts 1 to 2 hours during TPLO surgery, depending on the procedure length and your dog's response to anesthetic drugs.
Is TPLO anesthesia safe for older dogs?
Yes, with proper pre-anesthetic evaluation and monitoring, anesthesia can be safely managed in older dogs undergoing TPLO surgery.
What signs indicate pain after TPLO surgery?
Signs include whining, limping, reluctance to move, panting, and restlessness. Report these to your vet for pain management adjustments.
Can dogs eat before TPLO surgery?
No, dogs should fast for 8-12 hours before anesthesia to reduce the risk of vomiting and aspiration during surgery.
How soon can dogs walk after TPLO surgery?
Most dogs begin gentle walking within a few days post-surgery, but strict activity restriction is essential for 6-8 weeks to allow healing.
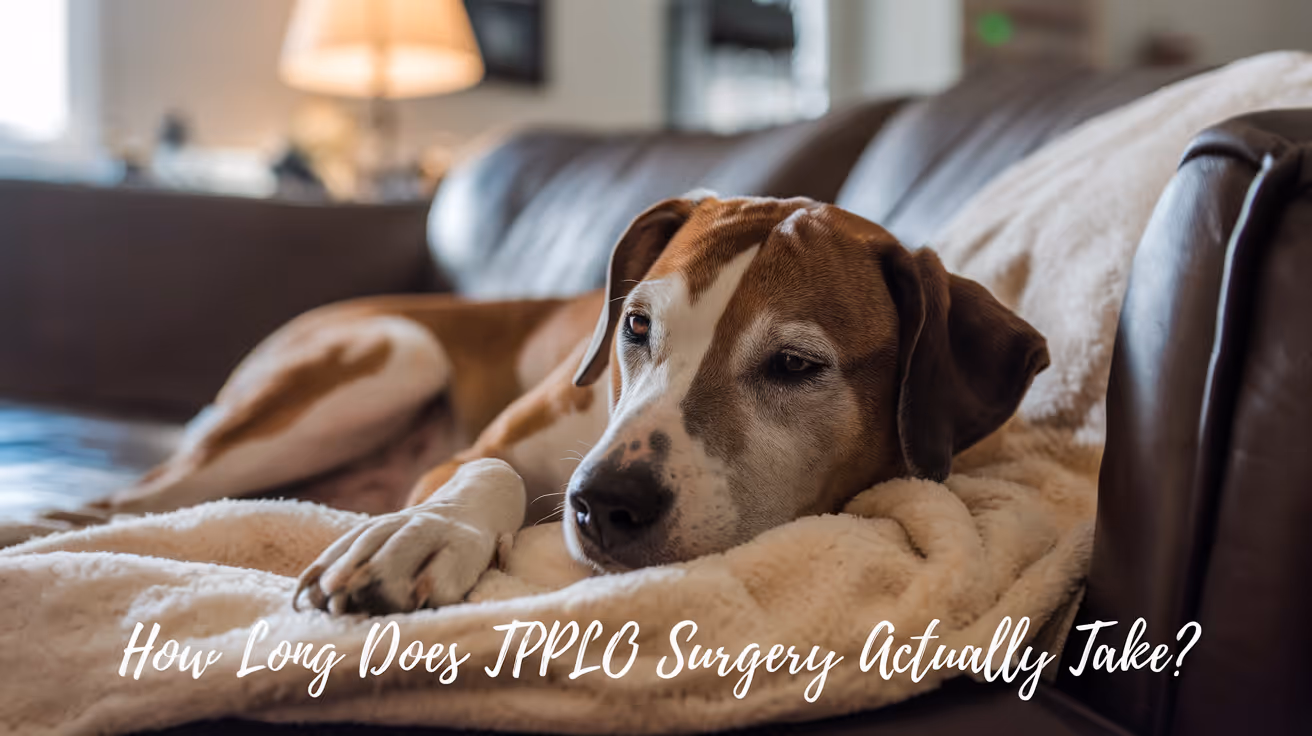
How Long Does TPLO Surgery Take?
Learn how long TPLO surgery takes, what to expect during the procedure, and recovery timelines for your dog's knee surgery.
TPLO surgery is a common procedure to fix a torn cranial cruciate ligament (CCL) in dogs. Many pet owners wonder how long this surgery takes and what to expect during the process. Understanding the surgery duration helps you prepare for your dog's treatment and recovery.
In short, TPLO surgery usually takes between 1 to 2 hours. This article explains the factors affecting surgery time, the steps involved, and what happens after the operation. You will learn about anesthesia, recovery, and how to support your dog through healing.
What is TPLO surgery and why is it done?
TPLO stands for Tibial Plateau Leveling Osteotomy. It is a surgical technique used to stabilize the knee joint after a cranial cruciate ligament tear. This injury is common in active dogs and causes pain and lameness.
The surgery changes the angle of the tibia bone to reduce strain on the damaged ligament. This helps the dog regain normal leg function and reduces arthritis risk.
- Purpose of TPLO: TPLO surgery stabilizes the knee by altering the tibial plateau angle, allowing dogs to walk without pain after CCL injury.
- Common candidates: Dogs with partial or complete CCL tears, especially medium to large breeds, often benefit most from TPLO surgery.
- Alternatives exist: Other surgeries like lateral suture or TTA may be options, but TPLO is preferred for active dogs needing strong joint stability.
- Post-surgery benefits: TPLO often leads to faster recovery and better long-term joint health compared to non-surgical treatment.
Understanding the surgery’s purpose helps you appreciate why timing and technique matter during the procedure.
How long does the TPLO surgery procedure usually take?
The actual TPLO surgery typically lasts between 60 to 120 minutes. This time includes making the bone cut, rotating the tibial plateau, and securing it with a metal plate and screws.
Several factors influence the exact duration, such as the dog's size, surgeon experience, and any complications during surgery.
- Average surgery time: Most TPLO surgeries take about 1 to 2 hours from first incision to closure, depending on complexity.
- Dog size impact: Larger dogs may require more time due to bigger bones and more tissue to manage during surgery.
- Surgeon skill level: Experienced surgeons often perform the procedure faster and with fewer complications, reducing surgery time.
- Unexpected issues: Complications like abnormal bone shape or bleeding can extend the surgery duration beyond typical times.
Knowing the typical surgery length helps you plan for the day and understand what your dog experiences in the operating room.
What happens before and after the TPLO surgery?
Preparation and aftercare are key parts of the TPLO surgery process. Before surgery, your dog will undergo exams and blood tests to ensure fitness for anesthesia.
After surgery, careful monitoring and pain management are vital. Your dog will stay in the hospital for observation before going home.
- Pre-surgery tests: Blood work and physical exams confirm your dog’s health and suitability for anesthesia and surgery.
- Anesthesia preparation: Dogs are fasted and given premedication to reduce anxiety and pain before general anesthesia.
- Post-op monitoring: After surgery, your dog is closely watched for pain, bleeding, or complications during recovery.
- Hospital stay length: Most dogs stay 1 to 2 days post-surgery for observation before discharge with home care instructions.
Understanding these steps helps you prepare your dog and yourself for the surgery day and recovery period.
How long is the recovery period after TPLO surgery?
Recovery from TPLO surgery takes several weeks to months. Most dogs start walking with support within days, but full healing requires strict rest and controlled activity.
Physical therapy and follow-up visits are important to ensure the bone heals correctly and the joint regains strength.
- Initial recovery phase: The first 2 weeks require strict rest and limited movement to allow bone healing to begin.
- Gradual activity increase: Controlled leash walks start after 2 to 4 weeks, avoiding running or jumping to protect the surgical site.
- Physical therapy role: Rehab exercises improve muscle strength and joint mobility, aiding faster and better recovery.
- Full recovery timeline: Most dogs regain normal function by 8 to 12 weeks, but some may take up to 6 months for complete healing.
Following your vet’s recovery plan closely improves your dog’s chances of a successful outcome after TPLO surgery.
What factors can affect the length of TPLO surgery?
Several factors influence how long TPLO surgery takes. These include the dog’s anatomy, surgeon experience, and any unexpected challenges during the procedure.
Knowing these factors helps you understand why surgery times vary and what your vet considers during the operation.
- Dog’s size and weight: Larger dogs often require longer surgery times due to bigger bones and more tissue to manage.
- Severity of injury: Complex or chronic ligament tears may need more surgical steps, extending the procedure length.
- Surgeon expertise: Experienced surgeons usually perform TPLO faster and with fewer complications, reducing overall surgery time.
- Equipment and team: Availability of specialized tools and a skilled surgical team can speed up the procedure safely.
Discussing these factors with your vet can give you a clearer expectation of your dog’s surgery duration.
How should you prepare your dog for TPLO surgery day?
Proper preparation before TPLO surgery helps reduce risks and ensures a smooth procedure. Your vet will provide specific instructions to follow closely.
Preparation includes fasting, medication adjustments, and arranging post-surgery care to support your dog’s recovery.
- Fasting instructions: Your dog should not eat or drink for 8 to 12 hours before surgery to prevent anesthesia complications.
- Medication guidance: Inform your vet about all medications; some may need to be stopped or adjusted before surgery.
- Arrange transport: Plan safe transport to and from the vet clinic, minimizing stress on your dog on surgery day.
- Prepare recovery space: Set up a quiet, comfortable area at home with easy access to water and bedding for post-op rest.
Following these steps helps your dog stay safe and comfortable before and after TPLO surgery.
What are the risks and complications related to TPLO surgery duration?
Longer TPLO surgeries may increase risks such as anesthesia complications, infection, or delayed healing. Understanding these risks helps you discuss concerns with your vet.
Most surgeries proceed without problems, but awareness of potential issues is important for informed consent.
- Anesthesia risks: Longer anesthesia times can increase the chance of breathing or heart complications during surgery.
- Infection risk: Extended surgery duration may raise the risk of bacterial infection at the surgical site.
- Delayed healing: Complicated surgeries might affect bone healing speed and require longer recovery periods.
- Increased pain: Longer procedures can cause more tissue trauma, leading to increased post-op pain and swelling.
Discussing these risks with your veterinary surgeon helps you prepare and manage expectations for your dog’s TPLO surgery.
Conclusion
TPLO surgery usually takes between 1 to 2 hours, depending on factors like dog size and surgeon experience. This time covers the bone cut, repositioning, and fixation needed to stabilize the knee after a CCL tear.
Proper preparation, careful post-op care, and following your vet’s recovery plan are essential for your dog’s successful healing. Understanding the surgery duration and recovery helps you support your dog every step of the way.
FAQs
How long does anesthesia last during TPLO surgery?
Anesthesia typically lasts 2 to 3 hours, covering pre-surgery preparation, the procedure itself, and initial recovery monitoring.
When can my dog walk after TPLO surgery?
Most dogs can start short, supported walks within 1 to 2 weeks, but full weight-bearing may take several weeks with restricted activity.
Is TPLO surgery painful for dogs?
Dogs experience some pain after surgery, but vets provide pain relief medications to keep them comfortable during recovery.
Can TPLO surgery fail or need revision?
While rare, complications like implant failure or infection can occur, sometimes requiring additional surgery or treatment.
How much does TPLO surgery cost on average?
TPLO surgery costs vary but typically range from $3,000 to $5,000, depending on location, surgeon, and hospital fees.

Arthrex TPLO Plate Overview and Use
Learn about the Arthrex TPLO plate, its design, surgical use, and benefits for canine cruciate ligament repair.
The Arthrex TPLO plate is a specialized orthopedic implant designed to stabilize the tibia after a tibial plateau leveling osteotomy (TPLO) surgery in dogs. TPLO surgery is a common procedure to treat cranial cruciate ligament (CCL) rupture, which causes lameness and pain in dogs. Understanding the Arthrex TPLO plate helps pet owners and veterinarians appreciate how this device supports bone healing and restores limb function.
This article explains what the Arthrex TPLO plate is, how it is used during surgery, its design features, and the benefits it offers. You will learn about the surgical technique, implant materials, and postoperative care to ensure the best outcomes for dogs undergoing TPLO surgery.
What is the Arthrex TPLO plate?
The Arthrex TPLO plate is a metal implant used to fix the tibia after cutting and rotating the bone during TPLO surgery. It holds the bone segments securely to allow proper healing and restore normal joint mechanics. The plate is contoured to fit the shape of the canine tibia and is available in various sizes to match different dog breeds and sizes.
The plate works together with locking screws that provide stable fixation without compressing the bone excessively. This design helps reduce complications and promotes faster recovery.
- Purpose of the plate: It stabilizes the tibia after osteotomy, maintaining the new bone angle to prevent joint instability and lameness.
- Material composition: Made from medical-grade stainless steel or titanium, ensuring strength, biocompatibility, and corrosion resistance.
- Plate design: Anatomically contoured to match the tibial shape, minimizing soft tissue irritation and improving fit.
- Locking screw system: Uses locking screws that lock into the plate, providing angular stability and reducing screw loosening risks.
These features make the Arthrex TPLO plate a reliable choice for TPLO surgeries in veterinary orthopedics.
How is the Arthrex TPLO plate used in surgery?
During TPLO surgery, the surgeon makes a curved cut in the tibia and rotates the bone segment to change the slope of the tibial plateau. The Arthrex TPLO plate is then applied to hold the bone in its new position. Proper placement and fixation are critical for successful healing and restoring limb function.
The surgical steps include precise measurement, plate selection, and screw placement to ensure stability and avoid complications.
- Osteotomy procedure: The tibia is cut using a saw guided by a jig to create a controlled curved osteotomy.
- Plate positioning: The Arthrex TPLO plate is aligned over the osteotomy site to match the bone contour and rotated segment.
- Screw insertion: Locking screws are placed through the plate holes into the bone, securing the plate firmly.
- Verification of stability: The surgeon checks the fixation and limb alignment before closing the surgical site.
Following these steps ensures the plate supports the bone during healing and helps the dog regain normal limb use.
What are the advantages of using the Arthrex TPLO plate?
The Arthrex TPLO plate offers several benefits compared to traditional fixation methods. Its design and materials improve surgical outcomes and reduce postoperative complications. These advantages contribute to faster recovery and better function for dogs after TPLO surgery.
Understanding these benefits helps veterinarians choose the best implant for their patients.
- Enhanced stability: Locking screw technology provides rigid fixation, reducing micromotion and promoting bone healing.
- Reduced soft tissue damage: Anatomical contouring minimizes irritation and inflammation around the implant site.
- Corrosion resistance: High-quality materials prevent implant degradation and inflammatory reactions over time.
- Versatility in sizes: Multiple plate sizes accommodate different dog breeds, ensuring proper fit and function.
These features make the Arthrex TPLO plate a preferred choice for many veterinary surgeons performing TPLO surgeries.
What materials are used in the Arthrex TPLO plate?
The Arthrex TPLO plate is manufactured from biocompatible metals that provide strength and durability while minimizing adverse tissue reactions. The choice of materials affects the plate’s performance and long-term safety.
Knowing the materials helps veterinarians and pet owners understand implant behavior inside the body.
- Stainless steel: Commonly used for its strength, corrosion resistance, and affordability in orthopedic implants.
- Titanium alloy: Offers excellent biocompatibility, lighter weight, and reduced risk of allergic reactions.
- Surface finish: Smooth, polished surfaces reduce tissue irritation and bacterial adhesion risks.
- Radiopacity: Materials allow clear X-ray visualization to monitor implant position during follow-up.
These material properties ensure the Arthrex TPLO plate performs well during the healing process and remains safe long term.
How does the Arthrex TPLO plate support postoperative recovery?
Postoperative care is essential for successful healing after TPLO surgery using the Arthrex TPLO plate. The implant provides stable fixation, but proper management of the dog’s activity and monitoring are critical to prevent complications.
Understanding the role of the plate in recovery helps owners follow veterinary instructions effectively.
- Early weight bearing: Stable fixation allows controlled limb use soon after surgery, promoting muscle strength and joint mobility.
- Reduced risk of implant failure: Locking screws and plate design minimize loosening or breakage during recovery.
- Radiographic monitoring: Regular X-rays check bone healing and implant position to detect issues early.
- Physical therapy support: Rehabilitation exercises complement implant stability to restore normal gait and function.
Following these guidelines helps dogs recover faster and return to normal activity safely.
What complications can occur with the Arthrex TPLO plate?
While the Arthrex TPLO plate is designed to reduce complications, some risks remain. Awareness of potential problems helps veterinarians and owners recognize signs early and take action.
Most complications relate to surgical technique, implant placement, or postoperative care.
- Infection risk: Surgical site infections can occur, requiring antibiotics or implant removal in severe cases.
- Implant loosening: Poor screw fixation or excessive activity may cause the plate to loosen, affecting stability.
- Delayed bone healing: Factors like poor blood supply or infection can slow osteotomy healing despite stable fixation.
- Soft tissue irritation: Improper plate positioning may cause discomfort or swelling around the implant.
Close follow-up and adherence to postoperative instructions minimize these risks and improve outcomes.
Conclusion
The Arthrex TPLO plate is a vital implant in veterinary orthopedics for treating cranial cruciate ligament injuries in dogs. Its specialized design and locking screw system provide stable fixation, promote bone healing, and support early recovery.
Understanding the plate’s features, surgical use, and postoperative care helps pet owners and veterinarians ensure the best results after TPLO surgery. Proper implant selection and management reduce complications and help dogs regain normal limb function safely.
What sizes does the Arthrex TPLO plate come in?
The Arthrex TPLO plate is available in multiple sizes ranging from small to large to fit different dog breeds and tibial dimensions accurately.
Can the Arthrex TPLO plate be removed after healing?
Implant removal is not routinely required but may be performed if the dog experiences irritation, infection, or implant-related complications after bone healing.
How long does it take for the bone to heal with the Arthrex TPLO plate?
Bone healing typically takes 8 to 12 weeks, depending on the dog's age, health, and postoperative care quality.
Is the Arthrex TPLO plate MRI compatible?
Plates made from titanium alloys are generally MRI compatible, while stainless steel plates may cause artifacts or interference during imaging.
What postoperative care is recommended after TPLO surgery with this plate?
Recommended care includes restricted activity, pain management, physical therapy, and regular veterinary check-ups with radiographic monitoring to ensure proper healing.

