

Modified Maquet Procedure vs TPLO Surgery
Compare Modified Maquet Procedure and TPLO surgery for canine cruciate ligament rupture treatment, including benefits, risks, and recovery.

This article is for informational purposes only and is not a substitute for professional veterinary advice. Every case is unique, so always consult your veterinarian for guidance specific to your pet.
This content is intended for veterinary professionals for educational purposes. It does not replace clinical judgment or tailored advice. Always rely on your training, expertise, and the specific context of your patients.
The Modified Maquet Procedure (MMP) is an evolution of the Tibial Tuberosity Advancement (TTA) that uses a titanium foam wedge instead of a cage to advance the tibial tuberosity.
It has been positioned as a less invasive, faster-to-perform alternative to TPLO for dogs with CCL rupture.
Published clinical evidence shows both procedures produce good outcomes, with TPLO demonstrating a slight advantage in objective gait analysis at 3 months.
Quick answer: A prospective randomized study found TPLO achieves 93.9% of normal peak vertical force vs 89.4% for MMP at 6 months — no significant difference in complications or OA progression. MMP is less invasive, faster, and generally less expensive. Both are appropriate for medium-to-large breed dogs.
Key takeaways
- TPLO achieves 93.9% of normal ground reaction force at 6 months vs 89.4% for MMP — numerically superior but not statistically significant
- No significant difference in major complications or OA progression was found between TPLO and MMP in the comparative study
- MMP is less invasive and faster to perform: a titanium foam wedge and partial osteotomy instead of TPLO's full proximal tibial cut
- MMP is generally less expensive than TPLO: shorter surgical time and different implant costs reduce the procedure price
- Early partial weight-bearing may occur sooner after MMP due to less invasive fixation and the partial osteotomy
- TPLO has a much larger evidence base: 25+ years of data vs limited MMP evidence
How each procedure works
TPLO (Tibial Plateau Leveling Osteotomy)
TPLO addresses CCL rupture by making a curved osteotomy through the proximal tibia and rotating the tibial plateau to approximately 5 degrees.
This changes joint biomechanics so the stifle is stable during weight-bearing without a functioning CCL. The osteotomy is held in place with a bone plate and screws.
Modified Maquet Procedure (MMP)
MMP is an adaptation of TTA in which the tibial tuberosity is advanced cranially by making a partial osteotomy in the tibial crest.
A porous titanium foam wedge is inserted into the gap and a fixation staple holds the construct in position.
The cranial advancement of the tuberosity repositions the patellar tendon to neutralize the cranial thrust that occurs in the CCL-deficient stifle the same biomechanical principle as TTA, with different implants.
Animal Works Veterinary Surgery describes MMP as using improved implants and surgical techniques designed to reduce operating time and minimize complications compared to standard TTA.
The titanium foam wedge promotes bone ingrowth and healing without the need for a cage or plate system. Bone healing in the MMP osteotomy site is typically complete at 90 days radiographically.
Clinical evidence: TPLO vs MMP
Primary comparative study
PubMed (prospective randomized controlled study, 61 dogs, 76 joints): dogs were treated with TPLO (n=30, 41 joints) or MMP (n=31, 35 joints) and compared with healthy controls.
Outcomes were assessed by clinical examination, radiography, and treadmill force plate gait analysis at 6 weeks, 3 months, and 6 months.
Results at 6 months:
- TPLO: 93.9% of normal peak vertical force (PVF), 85.9% of normal vertical impulse (VI)
- MMP: 89.4% of normal PVF, 79.9% of normal VI
At 3 months, significantly more TPLO patients were within the reference range for healthy dogs on peak vertical force. By 6 months, the difference was not statistically significant.
No significant difference was found in major complications or OA progression at any time point.
Conclusion from the study: "Although no significant differences were found between the surgical methods, TPLO patients showed superiority with regard to clinical outcome."
MMP standalone study
PMC (35 dogs, unilateral CCL rupture, MMP): significant improvement in ground reaction forces at all time intervals. At 90 days, 54.2% of patients had a Symmetry Index suggesting normal gait.
Complete bone healing on radiographs at 90 days. Major complication rate: 8.5% (3 of 35), minor complication rate: 2.8%.
Practical comparison
Which dogs are best suited to each?
MMP is often chosen for:
- Medium and large breed dogs where a less invasive approach is preferred
- Cases where surgical time is a clinical consideration
- Practices experienced in MMP technique
- Dogs where cost is a factor
TPLO is typically recommended for:
- Large and giant breed dogs with high joint loads
- Dogs with steep tibial plateau angles where TPLO provides more precise biomechanical correction
- Cases where the largest available evidence base is preferred
- Surgeons with established TPLO experience
Animal Hospital of Adel notes that both surgeries are effective, with MMP being less invasive, less expensive, and quicker to perform.
Walkerville Vet's evidence review concludes that TPLO gives slightly better objective results and that MMP is expected to outperform standard TTA, though more evidence is needed.
For the full TPLO pros and cons, see TPLO surgery pros and cons for dogs. For the full alternatives overview, see alternatives to TPLO surgery for dogs.
Frequently asked questions
Is MMP as effective as TPLO for large dogs?
The evidence suggests TPLO has a slight advantage at 3 months, with equivalent outcomes by 6 months in the primary comparative study.
Most surgeons still prefer TPLO for large and giant breeds due to the larger evidence base and slightly superior short-term objective results. MMP is appropriate for many large dogs in experienced hands.
How much cheaper is MMP than TPLO?
MMP is generally less expensive than TPLO due to shorter surgical time and different implant costs. The specific difference varies by practice, region, and surgeon.
Ask your veterinarian for a direct cost comparison for your dog's specific case.
What is the complication rate for MMP compared to TPLO?
The MMP standalone study reported an 8.5% major complication rate. TPLO complication rates across the literature range from 14 to 34%.
However, these figures come from different study populations and settings, making direct comparison difficult. Neither procedure is free of risk.
How long does MMP recovery take compared to TPLO?
Both procedures require 8 to 12 weeks of restricted activity, though MMP's less invasive partial osteotomy may allow earlier partial weight-bearing in some dogs.
Full activity return for both procedures is typically at 4 to 6 months.
Can a dog have TPLO if MMP fails?
Yes. TPLO can be performed as a revision if MMP results in ongoing instability or poor function. The converse is less common.
Discuss revision options with an orthopedic specialist if your dog is not progressing as expected after MMP.
Resources
- PubMed. Outcome after Tibial Plateau Levelling Osteotomy and Modified Maquet Procedure in Dogs with CCL Rupture. pubmed.ncbi.nlm.nih.gov
- PMC. Outcome after Modified Maquet Procedure in Dogs: Force Plate Gait Analysis. ncbi.nlm.nih.gov
- Animal Works Veterinary Surgery. MMP vs TPLO. animalworksvets.com
- Dog Knee Injury. Modified Maquet Procedure (MMP Surgery) for Dogs. dogkneeinjury.com
- Walkerville Vet. Which ACL Surgery Is Best for Dogs? walkervillevet.com.au

Get a Free Poster
Enhance your workspace with a high-quality radiographs reference poster, designed for veterinary professionals. This free physical poster will be shipped directly to you—just fill out the form to request your copy.




Taking Great TPLO Radiographs
Click Below to Watch Live Video Demos


We'll send you a Free Wall Poster with all the steps
Step #1
Getting Ready
Ensuring a clean surgical field starts with proper skin preparation. This video demonstrates the best practices for:
- Shaving the patient – Achieving a close, even shave while minimizing skin irritation
- The Dirty Scrub – The initial skin prep step to remove surface debris and reduce bacterial load before the sterile scrub.
Following these techniques helps reduce infection risk and improve surgical outcomes. Watch the video to see how it’s done effectively!


Step #2
Reduce Your Risks
Many surgeons are shocked to find out that their patients are not protected from biofilms and resistant bacteria when they use saline and post-op antibiotics.
That’s Where Simini Comes In.
Why leave these risks and unmanaged? Just apply Simini Protect Lavage for one minute. Biofilms and resistant bacteria can be removed, and you can reduce two significant sources of infection.
Step #3
Take the Course
Preventing surgical infections is critical for patient safety and successful outcomes. This course covers:
- Aseptic techniques – Best practices to maintain a sterile field.
- Skin prep & draping – Proper methods to minimize contamination.
- Antibiotic stewardship – When and how to use perioperative antibiotics effectively.
Stay up to date with the latest evidence-based protocols. Click the link to start learning and earn CE credits!

Things to know

Common Myths About TPLO Surgery Explained
Discover the truth about TPLO surgery for dogs as we debunk common myths and provide evidence-based insights for informed pet care decisions
TPLO is the most commonly performed surgery for CCL rupture in dogs and the most commonly misunderstood.
Misconceptions about TPLO cause unnecessary hesitation, lead some owners to choose inferior alternatives, and create unrealistic expectations about recovery.
This guide addresses the 10 most common myths directly -- with evidence-based clarification for each.
Quick answer: The most persistent TPLO myths: that dogs can manage without surgery, that TPLO is only for large breeds, that recovery takes a few weeks, that the plate must be removed after healing, and that TPLO prevents arthritis. All are false. TPLO has a 90 to 95% success rate.
Key takeaways
- Myth: "My dog can heal without surgery": dog knee anatomy differs fundamentally from human; without surgery, severe OA, meniscal tearing, and chronic lameness are expected in most dogs over 15 kg
- Myth: "TPLO is only for large dogs": SustainableVet.org confirms TPLO is just as effective for small and toy breeds; the biomechanical correction is appropriate regardless of size
- Myth: "Recovery only takes a few weeks": bone healing takes 8 to 12 weeks; full muscle recovery takes 4 to 6 months; 8 to 12 weeks is the minimum restriction period
- Myth: "The plate needs to be removed after healing": the TPLO plate is designed to be permanent; removal is only performed when complications arise
- Myth: "TPLO prevents arthritis": all CCL-affected stifles develop progressive OA regardless of surgical technique; TPLO reduces OA progression but does not prevent it
- Myth: "Dogs are in severe pain after TPLO": SustainableVet.org confirms this is a misconception; modern multi-modal pain management controls post-surgical pain effectively
Myth 1: "My dog can heal without surgery"
The truth: dogs and humans have fundamentally different knee anatomy. In humans, the flat tibial plateau and strong surrounding musculature allow some CCL tears to be managed conservatively with physical therapy and bracing. In dogs, the tibial plateau slopes steeply downward, generating a cranial shear force that the absent CCL cannot resist. Without surgical correction of this force, the joint remains mechanically unstable with every weight-bearing step.
TPLO Info confirms: dogs and humans respond very differently to CCL tears. Without surgery, severe OA can develop, meniscal tearing can occur, and other side effects may be present.
Conservative management (strict rest, weight management, joint supplements, physical therapy) can provide temporary improvement, particularly in small dogs and partial tears.
For most dogs over 15 kg with complete CCL rupture, conservative management does not restore normal joint stability, and progressive lameness, OA, and joint deterioration are the expected outcome.
Who can be managed conservatively?
- Very small dogs (under 10 to 15 kg) with partial tears and low activity levels
- Dogs with significant comorbidities where anesthetic risk outweighs surgical benefit
- Owners who decline surgery after being fully informed of expected outcomes
For all other dogs -- medium and large breeds, young dogs, active dogs, complete ruptures -- surgery produces substantially better outcomes than conservative management.
Myth 2: "TPLO is only for large dogs"
The truth: TPLO was originally developed for large and giant breeds because they were the most severely affected by CCL disease and the most poorly served by lateral suture stabilization. But TPLO corrects the underlying biomechanical problem (excessive tibial plateau angle) in any dog, regardless of size.
SustainableVet.org confirms: TPLO was initially developed for large dogs due to biomechanical challenges, but has been found just as effective for small and toy breeds.
For small dogs, both TPLO and lateral suture stabilization can achieve good outcomes.
The decision for a small dog should be based on the dog's TPA, activity level, and individual assessment -- not a blanket assumption that TPLO is unnecessary.
Myth 3: "TPLO recovery only takes a few weeks"
The truth: bone healing takes 8 to 12 weeks. This is the period of activity restriction. But bone healing and functional recovery are not the same thing. Full muscle rebuilding and joint function restoration takes 4 to 6 months from surgery.
Canada Vet Express confirms: recovery is gradual; most dogs begin walking within a few days and return to normal activity within 3 to 4 months with proper care.
The 8 to 12 week bone healing timeline means:
- Activity restrictions are in place for 8 to 12 weeks minimum
- Radiographic confirmation of healing is required before restrictions are lifted
- Progressive return to full activity follows the radiographic clearance
After restrictions are lifted, the operated leg continues to rebuild strength and coordination for months. For sport dogs and working dogs, the return-to-sport protocol extends to 7 to 9 months from surgery.
Myth 4: "The TPLO plate needs to be removed after the bone heals"
The truth: the plate is designed to remain in place permanently. It does not need to be removed when the osteotomy heals. Routine plate removal is not standard practice in veterinary orthopedics.
SustainableVet.org confirms: these implants are meant to stay in place permanently, but in rare cases they can cause problems; removal is only performed when complications arise.
When plate removal is performed:
- Deep implant-associated infection requiring source removal
- Implant failure (breakage, loosening causing instability)
- Persistent implant irritation producing clinical lameness specifically attributable to the plate
In the vast majority of dogs, the plate is never removed. It remains in place for life with no adverse effects.
Myth 5: "TPLO prevents arthritis"
The truth: TPLO reduces and slows arthritis progression. It does not prevent it. All CCL-affected stifles develop progressive OA regardless of surgical technique or outcome.
SustainableVet.org confirms: mild arthritis is expected even in successful cases.
Published long-term data (TPLO Info, citing long-term retrospective studies) confirms moderate but significant OA progression in all TPLO cohorts with follow-up extending to 6.8 years.
TPLO produces substantially less OA progression than TTA or lateral suture stabilization, but OA progression is universal.
The appropriate expectation: TPLO minimizes OA development and clinical impact. Long-term management (weight management, exercise modification, joint supplements, and periodic NSAID use for flares) is required in all TPLO dogs.
Myth 6: "Dogs are in severe pain after TPLO"
The truth: modern veterinary anesthesia and pain management protocols produce well-controlled post-operative pain in TPLO dogs. Dogs typically begin bearing some weight within 24 to 48 hours. Pain that is not controlled is a clinical problem requiring medication adjustment -- not an expected feature of TPLO recovery.
SustainableVet.org confirms: it is a misconception that dogs experience severe pain after TPLO surgery; modern multi-modal pain management controls post-surgical pain effectively.
Post-operative pain management typically includes: NSAIDs (carprofen, meloxicam), gabapentin, opioids during hospitalization, local anesthetic nerve blocks at surgery.
Dogs in adequate pain control rest comfortably, bear some weight within days, and show appetite by day 3.
Uncontrolled post-operative pain (dog cannot settle, crying, refuses all weight bearing beyond day 3) indicates a need for pain medication adjustment -- contact your vet rather than accepting it as inevitable.
Myth 7: "TPLO is too risky for most dogs"
The truth: TPLO has a 90 to 95% success rate. The complication rate across all studies is 10 to 34%, but the vast majority of complications are minor (superficial infection, seroma, mild swelling). Serious complications requiring revision surgery occur in fewer than 10% of cases.
Dispomed confirms: overall complication rates are 14 to 34%, but a second surgery is required in less than 10% of cases.
No surgery is without risk.
But for a dog with a torn CCL, the risk of TPLO is substantially lower than the certainty of progressive joint deterioration, pain, and reduced quality of life without surgical treatment.
Myth 8: "TPLO is only for show dogs or working dogs"
The truth: TPLO is appropriate for any dog with CCL rupture that will benefit from restored joint stability -- including middle-aged household pets with no competitive goals.
SustainableVet.org confirms: some pet owners mistakenly believe that TPLO surgery is only for show dogs or high-performance athletes; this is not true; TPLO benefits any dog with CCL disease.
The goal of TPLO is freedom from joint pain and restored ability to perform normal daily activities -- walking, playing, using stairs, sitting and rising comfortably.
These are benefits for every dog, not just sport dogs.
Myth 9: "All dogs with CCL tears need TPLO immediately"
The truth: TPLO is not always an emergency. The timing of surgery should be guided by the veterinary assessment. Partial tears in small dogs may be monitored with conservative management. Dogs with significant concurrent illness may benefit from medical optimization before surgery. The appropriate goal is surgical timing that optimizes anesthetic risk and surgical conditions, not surgical urgency at any cost.
SustainableVet.org confirms: while TPLO surgery is the best treatment for CCL tears, it isn't necessary for every case; for mild or partial tears in less active dogs, alternatives can be effective.
However, in dogs with complete rupture, particularly larger breeds, delay generally produces worse outcomes as OA progresses and the meniscus is exposed to ongoing mechanical insult from the unstable joint.
Myth 10: "If TPLO fails, the dog will never recover"
The truth: most TPLO complications are treatable. Superficial infections resolve with antibiotics. Late meniscal tears are treated with partial meniscectomy. Implant failures can be revised. Osteomyelitis, the most challenging complication, requires prolonged treatment but is often successfully managed.
SustainableVet.org confirms: revision TPLO surgery can be performed if the initial procedure fails; this may involve removing or replacing implants, repositioning the tibial cut, or addressing infections.
The critical factor in outcome from a complication is early detection and prompt treatment. Most complications that are identified and treated early resolve without long-term sequelae.
For the full TPLO overview, see what is TPLO surgery in dogs?. For the success rate data, see TPLO failure rate in dogs. For recovery, see what to expect after TPLO surgery.
For alternatives, see alternatives to TPLO surgery for dogs.
Frequently asked questions
Is TPLO actually the best treatment for CCL rupture?
For most dogs over 15 to 20 kg, TPLO is the most evidence-supported surgical option, producing the highest rates of long-term function and owner satisfaction in the published literature.
For small dogs, lateral suture stabilization achieves comparable results at lower cost. The choice depends on the individual dog's size, activity level, TPA, and health status.
Can I wait and see how my dog does without surgery?
You can choose conservative management.
The expected outcome in most dogs over 15 kg with complete CCL rupture who do not have surgery is progressive lameness, rapidly advancing OA, ongoing meniscal damage, and reduced quality of life.
Early surgical intervention consistently produces better long-term outcomes than delayed or non-surgical management.
Is the recovery really as strict as described?
Yes. The restriction protocol exists because the plate holds the osteotomy until new bone consolidates -- a process that takes 8 to 12 weeks regardless of how well the dog appears.
A single running or jumping episode before healing is confirmed can displace the plate and require revision surgery.
Will my dog be the same dog after TPLO?
Most owners report their dog is effectively the same dog -- or better than before the CCL rupture -- within 6 to 12 months of surgery.
The 90 to 95% success rate reflects a high proportion of dogs returning to their previous activity level.
Some dogs develop mild age-related stiffness years later as OA progresses, but this is manageable with appropriate care.
Does TPLO cure the CCL problem permanently?
TPLO permanently corrects the biomechanical cause of CCL-related instability in the operated stifle. It does not repair or replace the CCL -- it makes the CCL unnecessary.
It does not prevent CCL disease in the contralateral stifle.
Resources
- SustainableVet. Common Myths About TPLO Surgery Explained. sustainablevet.org
- TPLO Info. 5 Misconceptions About TPLO Surgery. tploinfo.com
- Dispomed. TPLO Surgery in Dogs: Success Rates and Alternatives. dispomed.com
- ACVS. Cranial Cruciate Ligament Disease. acvs.org
Dog Not Peeing After TPLO Surgery: Causes & Care
Learn why your dog may not pee after TPLO surgery and how to manage this common post-op issue safely and effectively.
It is common to notice changes in a dog's urination pattern in the first 24 to 48 hours after TPLO surgery.
Most of these changes are temporary and related to the effects of anesthesia, pain medications, and reduced mobility.
However, not urinating at all for more than 12 to 24 hours is a clinical concern that requires prompt veterinary contact.
Quick answer: Reduced urination in the first 12 to 24 hours after TPLO is usually caused by anesthesia effects, opioid medications, pain, or stress. Contact your vet immediately if your dog has not urinated within 12 hours post-surgery, or if you observe straining, vocalization, or abdominal distension.
Key takeaways
- Reduced urination in the first 12 to 24 hours is normal: anesthesia suppresses bladder awareness and opioids reduce the sensation of fullness
- Contact your vet if no urination occurs within 12 hours post-surgery: this is the critical threshold, per published veterinary guidance do not wait
- Straining, vocalizing, or abdominal swelling requires same-day veterinary evaluation: these signs suggest urinary retention requiring catheterization
- Opioid pain medications are the most common pharmacological cause: they reduce bladder filling sensation and sphincter tone in some dogs
- Surgical catheterization during the procedure may temporarily affect urination for 12 to 24 hours after catheter removal
- Increased water intake without urination is particularly concerning: it suggests the dog is producing urine but cannot eliminate it a potential retention emergency
Why dogs may not urinate normally after TPLO
Anesthesia effects
General anesthesia suppresses the entire nervous system, including the neural pathways that signal bladder fullness and initiate voiding.
As anesthetic agents clear over the first 12 to 24 hours, normal bladder signaling gradually returns.
Most dogs produce less urine during anesthesia because of reduced blood pressure and fluid redistribution.
When fluid therapy resumes and hydration normalizes after surgery, urine production increases but the dog must also have recovered enough neurological function to void normally.
Opioid pain medications
Opioid analgesics (hydromorphone, morphine, buprenorphine) prescribed after TPLO affect urination in two main ways.
They reduce the perception of bladder fullness, so the dog does not signal readiness to urinate as promptly as usual.
In some dogs they also increase urethral sphincter tone, making voiding more difficult.
JustAnswer veterinary consultation confirms: opioids can cause urinary retention by relaxing or altering bladder muscles, making it hard for the dog to pee.
This effect is temporary and typically resolves as opioid dosing decreases over the first 48 to 72 hours.
Pain and reluctance to posture
Urination requires the dog to posture squatting or lifting a leg both of which require hindlimb use and core stability that are painful in the first days after TPLO.
A dog that finds posturing too painful may suppress the urge to urinate or produce only small amounts.
Providing a non-slip surface, a low slung outdoor space (not steps or slopes), and supporting the dog with a belly sling during outdoor trips reduces posturing pain and encourages normal urination.
Surgical catheterization
A urinary catheter is often placed during TPLO surgery to drain the bladder, keep the surgical field dry, and prevent accidents during the procedure.
After catheter removal, some dogs take 12 to 24 hours to resume normal voiding patterns as the urethra recovers from catheter placement and the bladder regains normal tone.
Stress and unfamiliar environment
Dogs in pain, in an unfamiliar post-surgical environment, and wearing an E-collar may suppress urination due to stress.
Stress-related urinary suppression is temporary and usually resolves as the dog settles into the home recovery environment.
Normal urination expectations after TPLO
Most dogs urinate at least once within 6 to 12 hours of returning home from surgery. By 24 hours, most dogs have urinated multiple times.
The SustainableVet.org dog-not-peeing guide confirms: if your dog does not pee within 24 hours post-surgery, contact your veterinarian immediately to rule out complications.
The published veterinary guidance for emergency contact is: no urination within 12 hours post-surgery contact your vet.
Signs that require immediate veterinary contact
Contact your veterinarian same-day or go to an emergency clinic if you observe:
No urination at all for 12 or more hours after surgery: this is the key threshold do not wait to see if it resolves
Straining or crying during urination attempts: the dog is trying to urinate but cannot produce a stream classic urinary retention sign
Abdominal distension: the belly feels full or tense; this suggests a distended bladder (urinary retention emergency)
Drinking water but producing no urine: urine is being produced but cannot be eliminated urgent
Vomiting or lethargy alongside no urination: systemic signs accompanying urinary retention indicate a more serious emergency
Urinary retention: what happens and how it is treated
Urinary retention means the bladder cannot empty. The bladder fills progressively and becomes painful, distended, and eventually at risk of rupture if unrelieved. Prolonged retention also causes back-pressure on the kidneys.
Treatment depends on the cause:
- Catheterization: gentle placement of a urinary catheter to drain the bladder provides immediate relief and allows the bladder to recover normal tone
- Pain management adjustment: if opioid-induced retention is suspected, the analgesic protocol may be modified
- Bethanechol: a parasympathomimetic drug that stimulates bladder contraction; sometimes used in dogs with neurogenic urinary retention
- Urinalysis and culture: if infection is suspected alongside retention
Home care to encourage urination
- Scheduled outdoor trips every 2 to 4 hours for the first 24 to 48 hours
- Non-slip surface outdoors pain and weakness increase slipping risk
- Gentle belly-sling support to reduce posturing pain (fold a large towel under the belly and lift slightly)
- Quiet, calm outdoor environment stressed dogs suppress urination
- Adequate pain control contact your vet if your dog is vocalizing or reluctant to move; these are signs pain medication is insufficient
- Monitor and record each urination: time, approximate volume, any straining or discomfort
For the related incontinence guide (opposite problem), see dog incontinence after TPLO surgery: causes and care. For the post-surgical pain guide, see dog whining after TPLO surgery: causes and care.
For the full recovery guide, see what to expect after TPLO surgery in dogs. For the monitoring guide during early recovery, see post-operative care mistakes increasing TPLO infection risk.
Frequently asked questions
How long after TPLO surgery should my dog urinate?
Most dogs urinate within 6 to 12 hours of returning home from surgery. Contact your veterinarian if no urination has occurred within 12 hours.
Do not wait for the 24-hour mark if the dog is straining, vocalizing, or appears uncomfortable.
My dog is drinking water but not peeing at all. Is this an emergency?
Yes. A dog that is drinking and producing urine but cannot eliminate it (retention) needs same-day veterinary evaluation. A distended bladder is painful and can rupture.
Do not manage this at home contact your vet immediately.
Can opioid pain medications cause urinary retention?
Yes. Opioids are a recognized cause of urinary retention in both humans and dogs.
If your dog was urinating normally before surgery and stops after receiving opioid medications, this is likely a contributing factor.
Contact your vet the analgesic protocol may be modified without eliminating pain management.
What does a catheter placement during surgery do to urination afterward?
Urinary catheters are placed during TPLO to drain the bladder and keep the surgical field dry.
After catheter removal, some dogs take 12 to 24 hours to resume normal voiding as the urethra recovers.
This is expected and not a cause for alarm, as long as the dog urinates within the normal timeframe.
Is it safe to give my dog extra water if they're not peeing?
Normal hydration is essential and should be maintained. Do not restrict water.
However, if the dog is drinking normally and still not producing urine, this increases the urgency of veterinary contact rather than reducing it.
Resources
- VCA Animal Hospitals. Tibial Plateau Leveling Osteotomy (TPLO) in Dogs. vcahospitals.com
- TPLO Info. Recovery FAQs. tploinfo.com
- PetMD. Urinary Retention in Dogs. petmd.com
- Midwest Veterinary Specialists. Post-Operative Care Following TPLO. midwestveterinaryspecialists.com
What to Expect After TPLO Surgery in Dogs
Learn what to expect after TPLO surgery, including pain, swelling, healing time, and care tips for your dog’s smooth recovery.
TPLO recovery is a structured 8 to 12 week process. The surgery takes 1.5 to 2 hours; the recovery takes months.
Understanding what is normal at each stage allows owners to support recovery confidently, recognize complications early, and avoid mistakes that extend recovery or cause setbacks.
Quick answer: After TPLO surgery, expect 8 to 12 weeks of graduated activity restriction. Weeks 1 to 2: crate rest, short walks, e-collar on. Weeks 3 to 8: progressive walks and range-of-motion exercises. Weeks 8 to 12: confirm bone healing and resume normal activity. Full muscle recovery takes 6 months.
Key takeaways
- The 8 to 12 week bone healing period is non-negotiable: the plate holds the osteotomy until new bone consolidates; premature high-impact activity before radiographic healing can cause plate failure
- Weeks 1 and 2 are highest-risk for infection and wound complications: the incision is healing; activity and wound management must be strictly controlled
- Most dogs begin partial weight bearing within the first few days: early weight bearing maintains muscle mass and supports bone healing per TPLO Info
- The 2-week recheck, 6-week radiograph, and 12-week radiograph are essential milestones: each has a specific purpose; missing them risks missing early complications
- Full muscle recovery takes up to 6 months after bone healing is confirmed; bone union and functional recovery are not the same endpoint
- The e-collar must stay on for 10 to 14 days without exception: licking is the leading owner-controlled cause of TPLO surgical site infection
Immediately after surgery: days 1 to 3
Coming home
Dogs are typically discharged 24 to 48 hours after TPLO surgery, or sometimes the same day at facilities with same-day discharge protocols.
The dog will be sedated, disoriented from anesthesia, and may have bandaging on the surgical leg.
Expect:
- Groggy, disoriented behavior for 12 to 24 hours from anesthesia
- Some whining or restlessness (normal -- from anesthesia, not necessarily pain)
- Refusal to bear weight on the operated leg
- Mild to moderate swelling around the incision, peaking at days 2 to 3
Pain management
Give prescribed medications on the exact schedule provided. Typical medications include NSAIDs (meloxicam, carprofen, or similar) and gabapentin. Give NSAIDs with food to reduce gastric irritation.
TPLO Info confirms: dogs may experience slight discomfort from surgical inflammation in the days following surgery; this should be managed with appropriate pain medications given on schedule.
Confinement
Strict crate rest or confinement in a small, non-slippery room. No stairs, no jumping, no access to furniture. Leash walks outdoors for bathroom purposes only, 3 to 5 minutes, multiple times daily.
Weeks 1 to 2: incision healing phase
This is the highest-risk period for wound complications and infection.
Incision care:
- E-collar must be on at all times except supervised eating and drinking
- Keep the incision dry -- no baths, no wet grass walks
- Inspect the incision daily for spreading redness, cloudy or malodorous discharge, or wound dehiscence
- Normal: a small amount of clear serum discharge in the first 2 to 3 days; mild redness at the incision line fading from day 5 onward
- Abnormal: spreading redness, cloudy discharge, increasing warmth, or wound edges separating -- contact your vet immediately
Activity:
- Leash walks only, 5 minutes maximum, multiple times daily
- No running, jumping, stairs, or playing with other pets
- No unsupervised time without the e-collar
Weight bearing:
- Many dogs begin toe-touching within the first few days
- Some dogs refuse weight bearing for the full two weeks -- this is also normal
- Encouraging gentle, slow walking on a leash helps maintain muscle mass
2-week recheck:SustainableVet.org confirms: the 2-week visit confirms incision healing, removes sutures or staples if healing is complete, and reviews pain management and early mobility status.
Weeks 3 to 6: progressive walking phase
The incision is closed; the focus shifts to controlled progressive activity increase and gentle range of motion.
Activity:
- Increase leash walk duration gradually -- TPLO Info recommends increasing by up to 5 minutes per week from the week 2 baseline
- No off-leash activity, no running, no jumping, no stairs without a ramp
- No playing with other pets
Range-of-motion exercises:
- Passive range-of-motion (PROM) exercises can begin in most dogs at weeks 2 to 4 if the vet approves
- Gentle flexion and extension of the stifle for 5 to 10 repetitions, 2 to 3 times daily
- Supports joint flexibility and prevents stiffness during the bone healing period
Weight bearing:
- By weeks 3 to 4, most dogs are consistently bearing weight on the operated leg
- Occasional toe-touching or three-legged walking during activity is still normal
What to watch for:
- Lameness that worsens after a period of improvement (trajectory reversal)
- New swelling at the plate site, separate from the healed incision
- Any discharge from the healed wound area
Weeks 6 to 8: early consolidation phase
6-week radiograph (critical milestone):SustainableVet.org confirms: the 6-week visit includes follow-up radiographs to evaluate bone alignment and early plate stability; if healing looks good, limited physical therapy or short walks may begin.
If the radiograph shows good progression of bone healing, activity is increased. If healing is delayed, restrictions continue with a re-radiograph at 8 weeks.
Activity (if healing is confirmed):
- Leash walks increasing to 15 to 20 minutes twice daily
- Rehabilitation exercises as directed
- Hydrotherapy (if available) is an excellent low-impact option for muscle building
Weeks 8 to 12: bone consolidation and return to activity
Follow-up radiograph at 8 to 10 weeks:Medcovet confirms: a follow-up radiograph is commonly performed at weeks 8 to 10 to assess bone healing; if healing is good, the vet may approve a gradual increase in activity.
12-week visit (major milestone):SustainableVet.org confirms: the 12-week visit includes final radiographs to confirm bone fusion and plate integrity; the vet may lift most activity restrictions at this stage.
Activity (if healing confirmed at 12 weeks):
- Progressive return to normal activity
- Running, jumping, and play can gradually resume over weeks 12 to 16
- Supervised play and controlled activity continue until full muscle recovery
Animal Outpatient Surgery confirms: full muscle recovery takes up to 6 months to restore full strength and coordination in the operated leg.
Medications and supplements
NSAIDs: given for 2 to 4 weeks post-surgery or as directed. Never exceed the prescribed dose; never use human NSAIDs (ibuprofen, aspirin) -- they are toxic to dogs.
Gabapentin: helps with pain and anxiety in the early recovery period; typically tapered off after 2 to 4 weeks.
Joint supplements: glucosamine and omega-3 fatty acids are commonly recommended for long-term joint health. Starting them at surgery is reasonable; discuss with your vet.
Signs requiring immediate veterinary contact
At any stage of recovery, contact your vet immediately if you see:
- Spreading redness or warmth at the incision or plate site
- Cloudy, yellow, green, or malodorous discharge from the wound
- Wound edges separating
- Severe worsening of lameness
- Fever, lethargy, or loss of appetite beyond the first 2 to 3 days
- Any draining tract opening near the surgical site
For the week-by-week rehabilitation exercises guide, see TPLO recovery exercises for dogs. For the infection prevention guide, see how can TPLO infections be prevented post-operatively?.
For the PROM exercises guide, see PROM exercises for dogs after TPLO surgery. For the earliest infection signs, see earliest signs of TPLO infection.
Frequently asked questions
When will my dog be back to normal after TPLO?
Bone healing is typically confirmed by radiograph at 8 to 12 weeks. Most activity restrictions are lifted at the 12-week mark.
Full muscle recovery and functional normalization takes up to 6 months from surgery.
TPLO has a high success rate (more than 90%) and most dogs return to their pre-injury activity level after full recovery.
My dog is not using the leg at all after surgery. Is that normal?
Some dogs refuse to bear weight for the full first 2 weeks. This is within normal range.
If the dog was bearing some weight and has now stopped completely after day 5, contact your vet to rule out a complication.
PROM exercises and gentle encouraged walking help prompt early weight bearing.
Can my dog go up stairs during recovery?
Not during weeks 1 to 6. Stairs generate impact and torsion on the healing osteotomy. Carry small dogs over stairs or use a ramp.
Larger dogs may need a sling or harness to assist navigating a small number of essential steps.
When can my dog swim or do hydrotherapy?
Hydrotherapy (underwater treadmill or controlled pool swimming) typically begins after incision healing is confirmed at 2 weeks. Check with your vet.
Swimming in open water (lakes, rivers) is not appropriate until the vet explicitly clears the dog, typically after the 12-week radiograph.
When should I be concerned about my dog's pain during recovery?
Increasing pain after initial improvement -- the dog more lame or more distressed today than yesterday -- is the key warning sign. Normal recovery pain decreases progressively.
Worsening pain warrants veterinary assessment to rule out infection, implant complication, or late meniscal injury.
Resources
- TPLO Info. What to Expect After Your Dog's TPLO Surgery. tploinfo.com
- Animal Outpatient Surgery. What to Expect After Your Dog's TPLO Surgery. animaloutpatientsurgery.com
- Medcovet. Essential Guide to Dog Recovery TPLO Surgery. medcovet.com
- VCA Animal Hospitals. Tibial Plateau Leveling Osteotomy (TPLO) in Dogs. vcahospitals.com
TPLO Plate Size Chart Explained
Detailed guide on TPLO plate size chart, helping pet owners understand implant options for canine knee surgery.
Before performing TPLO surgery, the veterinary surgeon selects the appropriate bone plate from a range of sizes specific to the implant system being used.
The plate size chart is the reference tool that guides this selection.
Choosing the correct plate is as important as the surgical technique itself an undersized plate risks mechanical failure, and an oversized plate may not fit the tibial anatomy correctly.
Quick answer: The TPLO plate size chart matches body weight and tibial bone dimensions to the appropriate implant. Arthrex plates range from 2.0 mm to 4.5 mm; Synthes covers a similar range. Tibial width is measured on preoperative radiographs and used alongside body weight to select the plate and screw configuration.
Key takeaways
- The plate size chart is a preoperative planning tool that matches body weight and bone dimensions to the appropriate implant
- Arthrex offers TPLO plates from 2.0 mm to 4.5 mm: the small sizes are purpose-designed for small breed anatomy, not scaled-down large plates
- Tibial width is measured on preoperative radiographs: a primary determinant of plate selection alongside body weight
- Plate selection is system-specific: Arthrex plates require Arthrex instruments and screws; Synthes requires Synthes-specific tools
- The plate is single-use sterile: a new plate must be available if a different size is needed intraoperatively
- Correct plate selection directly affects outcomes: undersized plates risk fatigue fracture; oversized plates cause soft tissue irritation
What the plate size chart does
The TPLO plate size chart is a lookup reference similar in function to the rotation chart and weight chart that are part of the Arthrex and Synthes TPLO planning systems.
It takes known inputs (primarily body weight and tibial dimensions measured on radiographs) and outputs the recommended plate size from the manufacturer's product range.
SustainableVet.org explains: a TPLO plate size chart is a reference guide used by veterinary surgeons to select the appropriate implant size for stabilizing the tibia after TPLO surgery.
Plates come in various lengths and hole numbers to fit different dog breeds and bone sizes.
The chart removes the guesswork from a decision that significantly affects the mechanical performance of the repair.
A plate that is correctly sized distributes load evenly across all screw holes and lies flush against the cortical bone surface, minimizing stress risers and soft tissue irritation.
Key variables in plate size selection
Body weight
Body weight is the primary initial filter. Heavier dogs generate higher joint forces and require larger, stiffer plates to withstand the loads applied during weight-bearing and normal activity.
General size categories used across Arthrex and Synthes product lines:
- Small breed (under 10 to 15 kg): 2.0 mm or 2.4 mm plates
- Medium breed (15 to 30 kg): 3.5 mm plates
- Large breed (30 to 50 kg): 3.5 mm or 4.5 mm plates
- Giant breed (over 50 kg): 4.5 mm plates; locking systems particularly important
These ranges are approximate and surgeon-dependent. The specific manufacturer chart values take precedence over general categories.
Tibial width and bone dimensions
The plate must span the osteotomy site with at least 2 screws proximal and 2 screws distal to the cut for adequate fixation.
The tibial width at the planned osteotomy level measured in millimeters on a mediolateral radiograph determines which plate length and screw configuration provides sufficient purchase without overhanging the bone margins.
Number of screw holes
Plates are available with different numbers of holes (typically 4, 5, or 6 holes for standard sizes).
More holes provide more screw fixation points, which is important in larger dogs or those expected to be highly active during recovery.
SustainableVet.org notes: plates come in various lengths and hole numbers to fit different dog breeds and bone sizes, allowing surgeons to select the configuration that best matches each individual patient's anatomy.
Arthrex TPLO plate system
Arthrex produces the most widely used TPLO locking plate system in the United States. The Arthrex TPLO Locking Plate System is designed with specific anatomical features to facilitate consistent plate placement.
From Arthrex Vet Systems documentation: the 2.0 mm and 2.4 mm TPLO locking plates are not simply shrunken versions of larger TPLO plates.
The smaller plates were purpose-designed for small breed bone anatomy.
Small dogs have proportionally different tibial geometry, and scaling down a large plate does not optimize screw angle or load distribution.
Arthrex's 4.5 mm plate incorporates a caudal tilt designed for improved screw purchase in the proximal tibial segment, with a proximal screw trajectory directed to avoid the osteotomy line.
This is an important design feature: screws that inadvertently cross the osteotomy reduce fixation quality and risk creating a stress concentration at the cut.
The Arthrex system includes an InternalBrace ligament augmentation option for dogs with severe stifle instability. This knotless lateral stabilization technique is not part of standard TPLO.
For the Arthrex plate overview, see Arthrex TPLO plate overview and use. For the Synthes plate overview, see Synthes TPLO plate overview and use.
How the plate size chart integrates with other planning tools
The plate size chart is used in concert with two other charts in the preoperative planning sequence:
Rotation chart: determines how many degrees the tibial segment must be rotated to achieve the target postoperative TPA of approximately 5 degrees. This is completed using the preoperative TPA measurement from radiographs.
Weight chart: guides post-operative weight-bearing expectations during rehabilitation.
All three charts together form the complete preoperative planning and post-operative monitoring framework. For the rotation chart, see Arthrex TPLO rotation chart explained.
For the weight chart, see Arthrex TPLO weight chart explained.
Why correct plate size matters
Mechanical adequacy: the plate must be strong enough to withstand the bending forces applied across the osteotomy during recovery typically equivalent to body weight or more during brief dynamic loading events (jumping down from a bed despite restrictions). An undersized plate risks fatigue fracture if the osteotomy takes longer to heal than expected.
Biological fit: the plate must lie flush against the bone surface. A plate that sits proud causes soft tissue irritation and can lead to the implant-associated pain and lameness that eventually requires plate removal.
Screw purchase quality: screws that are too short for the bone depth, or too long and penetrating the far cortex inappropriately, compromise fixation quality. Plate size selection is linked to the specific screw lengths that are compatible with each plate variant.
Frequently asked questions
Can the surgeon change the plate size during surgery?
Yes. If the preoperatively planned plate size does not fit correctly once the osteotomy is made and the bone is positioned, the surgeon may open a different plate size.
This is why surgical teams keep a range of plate sizes available in the sterile field or immediately accessible.
The plate is a single-use sterile item it cannot be resterilized if opened and unused.
Are Arthrex and Synthes plates interchangeable?
No. Each manufacturer's plates require that manufacturer's specific screws, instruments, and jigs.
Using Synthes screws in an Arthrex plate (or vice versa) risks stripped screw heads, incorrect screw purchase geometry, and compromised fixation. The systems are entirely separate.
How does the surgeon know which plate to order before surgery?
The surgeon measures the tibial width and records body weight at the preoperative planning appointment.
Based on these measurements and the manufacturer's size chart, a specific plate and screw set is ordered or identified from the implant inventory before surgery.
Is a larger plate always better for a big dog?
Not necessarily.
The plate must fit the tibial anatomy. A plate longer than the available cortical surface overhangs the bone, creating soft tissue irritation and stress concentration at the plate ends.
The goal is the smallest plate that provides adequate mechanical fixation for the dog's body weight and expected activity level.
What happens if the wrong plate size is used?
An undersized plate risks fatigue fracture under repetitive loading. An oversized plate may not conform to the bone surface, reducing screw fixation quality and potentially causing soft tissue irritation.
Plate failure or malposition requiring revision is a recognized complication of poor implant selection.
Resources
- Arthrex Vet Systems. TPLO Locking Plate System. arthrexvetsystems.com
- Arthrex Vet Systems. 4.5 mm TPLO Plates and Screws. arthrexvetsystems.com
- PMC. Influence of Fixation Systems on Complications After TPLO in Dogs Greater Than 45 kg. ncbi.nlm.nih.gov
- VCA Animal Hospitals. Tibial Plateau Leveling Osteotomy (TPLO) in Dogs. vcahospitals.com

TPLO Anesthesia Protocol in Dogs Explained
Learn about the TPLO anesthesia protocol in dogs, including preparation, drugs used, monitoring, and recovery steps for safe surgery.
TPLO surgery requires general anesthesia that is tailored to the individual patient. For most healthy adult dogs, TPLO anesthesia is straightforward and low-risk.
For older dogs, obese dogs, or those with concurrent medical conditions, the anesthetic plan requires additional planning.
Understanding what the protocol involves helps owners know what to expect and how to prepare their dog.
Quick answer: TPLO anesthesia includes a preoperative blood panel; premedication with an opioid and sedative; induction with propofol or alfaxalone; maintenance with isoflurane or sevoflurane; continuous monitoring; and multimodal pain management including NSAIDs, nerve blocks (sciatic/femoral or epidural), and post-operative opioids.
Key takeaways
- Preoperative blood work is standard for all TPLO patients: CBC and biochemistry identify organ dysfunction and conditions that increase anesthetic risk
- TPLO anesthesia is multimodal: combining opioids, NSAIDs, nerve blocks, and inhalant anesthetic reduces total drug doses and improves pain control
- Nerve blocks are now standard in TPLO anesthesia: femoral and sciatic blocks with bupivacaine reduce post-operative opioid requirements
- A published feasibility study achieved total opioid-free post-operative analgesia in TPLO dogs using nerve blocks, ketamine, isoflurane, and meloxicam
- Epidural analgesia reduces post-operative opioid requirements by 36% compared to no epidural, per PMC study data
- Food is withheld 8 to 12 hours before surgery to reduce aspiration risk; water restriction is typically shorter
Pre-anesthetic assessment
Every dog undergoing TPLO is evaluated before anesthesia to identify risk factors and optimize the anesthetic plan.
Physical examination: body weight, cardiovascular and respiratory status, mucous membrane color and capillary refill, hydration status, and assessment of concurrent conditions.
Blood work: complete blood count (CBC) detects anaemia, infection, and platelet abnormalities. Biochemistry panel assesses kidney function (creatinine, BUN), liver function (ALT, ALP, bilirubin), blood glucose, and electrolytes. These results determine anesthetic drug selection and guide fluid therapy.
ASA classification: anesthesiologists use the American Society of Anesthesiologists (ASA) physical status classification (1 to 5) to communicate overall health status. Most TPLO patients are ASA class 1 (healthy) or 2 (mild systemic disease). Dogs with significant cardiac, renal, or hepatic disease may be ASA 3 or higher and require additional monitoring or modified protocols.
Premedication
Premedication is given 20 to 40 minutes before induction.
It serves to calm the dog, reduce anxiety, provide early analgesia (preemptive analgesia), reduce the amount of induction and maintenance agent required, and make induction smoother.
Opioids (most common premedication component for TPLO):
- Hydromorphone: commonly used as a premedication; the PubMed perioperative analgesia study used hydromorphone plus acepromazine as premedication in all 56 TPLO dogs
- Methadone: provides both opioid analgesia and NMDA receptor antagonism; commonly used as a premedication in many European centres
- Morphine: used in some protocols, particularly when combined with epidural administration
Sedatives:
- Acepromazine: a phenothiazine tranquilizer that provides reliable sedation; use is reduced in patients with cardiovascular compromise due to vasodilatory effects
- Medetomidine or dexmedetomidine: alpha-2 agonists providing sedation, analgesia, and muscle relaxation; used in the opioid-free feasibility protocol (PMC 2024)
- Midazolam: benzodiazepine used particularly in geriatric or debilitated dogs for its minimal cardiovascular effects
Anesthetic induction
Induction agents produce rapid unconsciousness, allowing placement of an endotracheal tube for airway control.
Propofol: the most commonly used induction agent in healthy dogs. Provides smooth, rapid induction with a short duration, making induction-to-intubation management easy.
Alfaxalone: a neuroactive steroid with a similar profile to propofol. Used in some protocols as an alternative, particularly in smaller dogs or where propofol is not available.
Ketamine + midazolam: used in some protocols as an alternative induction combination, particularly when some degree of analgesia is desired at induction. Also used in opioid-sparing protocols.
Intraoperative maintenance
Inhalant anesthetics (isoflurane or sevoflurane) are delivered via endotracheal tube to maintain unconsciousness throughout the surgery.
Isoflurane is the most widely used agent in veterinary anaesthesia for TPLO. Sevoflurane provides faster recovery but is more expensive. Both are effective.
IV constant rate infusions (CRI) during surgery augment inhalant anesthesia and reduce inhalant requirements:
- Ketamine CRI: used in opioid-sparing protocols; the PMC feasibility study used ketamine CRI at 0.6 mg/kg/h throughout surgery
- Morphine-lidocaine-ketamine (MLK CRI): a well-established combination providing balanced intraoperative analgesia with reduced inhalant requirements
- Fentanyl CRI: an opioid CRI providing titratable intraoperative analgesia
Regional analgesia (nerve blocks)
Nerve blocks have become a key component of TPLO anesthesia because they provide superior post-operative pain control compared to systemic opioids alone.
Femoral and sciatic nerve blocks (FSNB): block the main sensory nerves to the stifle joint and hind limb. Performed before surgery with bupivacaine. PMC research comparing nerve blockade approaches for TPLO confirms that femoral and sciatic nerve blocks provide superior postoperative analgesia compared to IV CRI alone.
Lumbosacral epidural: injection of morphine and bupivacaine into the epidural space. PMC data (epidural + liposomal bupivacaine study) found epidural analgesia produced 36% fewer post-operative opioid injections compared to no epidural.
Intra-articular injection: bupivacaine injected directly into the stifle joint before or after surgery. Used as an alternative or supplement to nerve blocks in some protocols.
Intraoperative monitoring
Standard TPLO monitoring includes:
- ECG: continuous heart rate and rhythm monitoring
- Pulse oximetry (SpO2): peripheral oxygen saturation
- Capnography (end-tidal CO2): assesses ventilation adequacy; dogs are often placed on mechanical ventilation during TPLO
- Blood pressure: direct arterial or indirect Doppler/oscillometric
- Temperature: hypothermia is a common complication of long anesthetic events; warming devices are used routinely
- Depth of anesthesia assessment: clinical signs including eye position, jaw tone, and response to surgical stimulation
Post-operative pain management
TPLO is a significant orthopedic procedure and post-operative pain management directly affects recovery quality and rate of return to function.
NSAIDs: meloxicam or carprofen are administered in the peri-operative period and continued at home for 7 to 14 days minimum. The PMC opioid-free protocol administered meloxicam 0.2 mg/kg IV intraoperatively.
Opioids: hydromorphone or buprenorphine for 24 to 48 hours post-operatively, reducing as the nerve block wears off and NSAID analgesia covers the residual pain.
Gabapentin: increasingly prescribed for the first 1 to 2 weeks post-operatively to address neuropathic pain components associated with the surgical trauma and healing nerve tissues.
For the full recovery guide and what to expect after waking up, see what to expect after TPLO surgery in dogs.
For the leg shaking guide that often relates to anesthetic recovery, see dog leg shaking after TPLO surgery.
For the incontinence guide related to catheterization and anesthesia effects, see dog incontinence after TPLO surgery. For the post-surgical pain guide, see dog whining after TPLO surgery: causes and care.
Frequently asked questions
Is TPLO anesthesia safe for dogs?
For healthy adult dogs, TPLO anesthesia is considered low-risk. The most significant risks involve cardiovascular depression from the anesthetic agents and hypothermia during the procedure.
These are managed through continuous monitoring and supportive care. Pre-anesthetic blood work identifies dogs with conditions that increase risk.
How long is the dog under anesthesia for TPLO?
Total anesthesia time typically ranges from 1.5 to 2.5 hours for a standard TPLO, depending on the surgeon's experience and any complications.
Dogs are usually extubated within 15 to 30 minutes of the end of surgery as they recover consciousness.
What happens if my dog is in pain when it wakes up from TPLO?
Post-operative pain assessment is performed by the veterinary team as the dog recovers. Rescue analgesia (additional opioid doses) is given if pain scores exceed defined thresholds.
The goal of the multimodal protocol is to prevent pain peaks rather than treat pain after it occurs.
Contact the surgical team if your dog appears to be in significant pain after discharge.
My dog is older. Is anesthesia more dangerous?
Age increases anesthetic risk because older dogs are more likely to have subclinical cardiac, renal, or hepatic disease, slower drug metabolism, and reduced physiological reserve.
Thorough pre-anesthetic bloodwork and cardiac assessment (chest X-ray, echocardiogram in selected cases) helps quantify risk. The anesthetic team adjusts protocols for older patients with reduced drug doses and enhanced monitoring.
What does fasting before TPLO mean?
Food is typically withheld for 8 to 12 hours before anesthesia to reduce the risk of vomiting and aspiration during induction or recovery.
Water restriction is typically shorter often until the night before or only 2 to 4 hours before surgery.
Follow your surgeon's specific instructions, which are tailored to your dog's size and health status.
Resources
- PMC. Postoperative Opioid-Free Analgesia in Dogs Undergoing TPLO: A Feasibility Study. pmc.ncbi.nlm.nih.gov
- PMC. Incidence of Postoperative Opioids in TPLO Dogs After Liposomal Bupivacaine With or Without Morphine Epidural. ncbi.nlm.nih.gov
- PubMed. Comparison of Perioperative Analgesic Protocols for Dogs Undergoing TPLO. pubmed.ncbi.nlm.nih.gov
- PMC. Effects of Saphenous and Sciatic Nerve Blocks, Lumbosacral Epidural or MLK CRI on Postoperative Pain in TPLO Dogs. pmc.ncbi.nlm.nih.gov
- VCA Animal Hospitals. Tibial Plateau Leveling Osteotomy (TPLO) in Dogs. vcahospitals.com
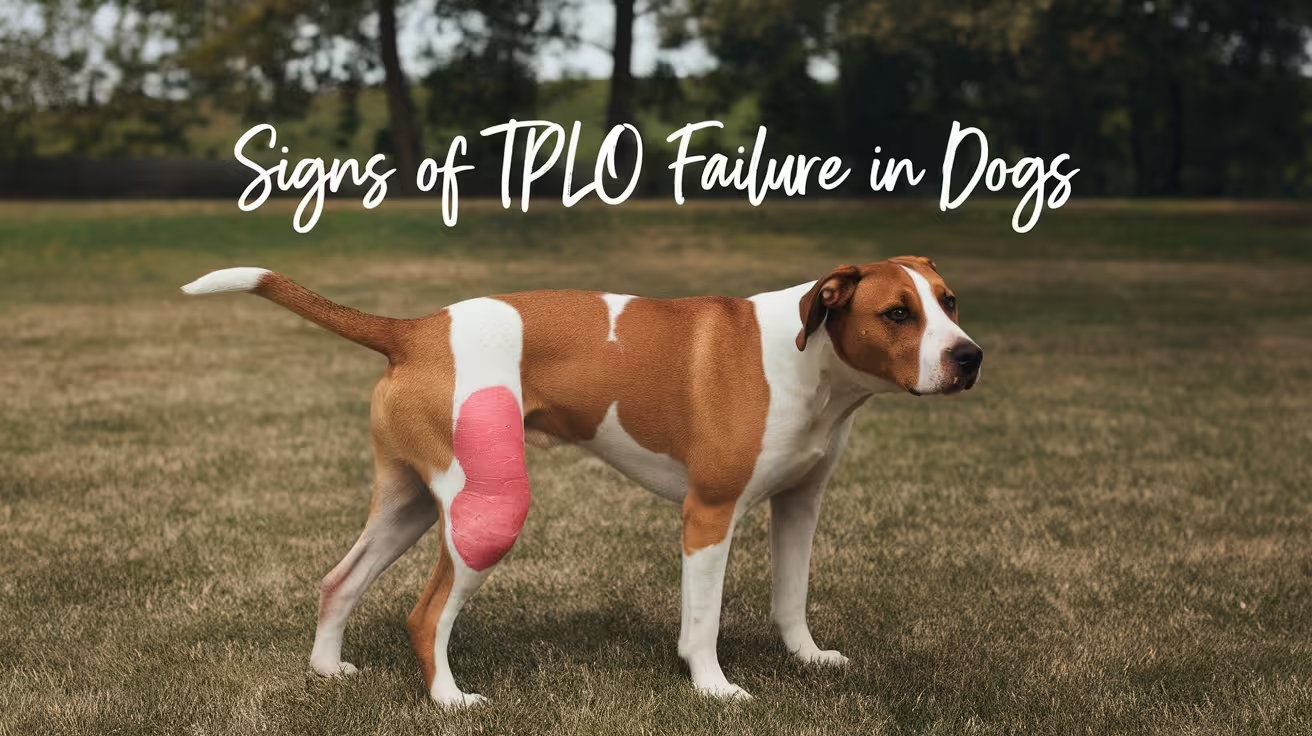
Signs of TPLO Failure in Dogs & When to See a Vet
Learn the key symptoms of TPLO failure in dogs, from limping to implant issues. Spot warning signs early and know when to seek veterinary care
TPLO failure is not a single event -- it is a spectrum of complications that can occur at different stages of recovery. Some signs are emergencies requiring same-day veterinary contact.
Others are patterns that require evaluation at the next scheduled appointment.
Understanding which signs fall into which category -- and what each sign most likely indicates -- allows owners to respond appropriately rather than either ignoring a serious complication or panicking unnecessarily.
Quick answer: Key signs of TPLO failure: persistent or worsening lameness beyond the expected trajectory; sudden acute non-weight bearing; swelling, warmth, or discharge at the plate site; clicking or popping with pain; and radiographic changes at follow-up. Call your vet the same day for sudden acute lameness, spreading infection signs, or systemic illness.
Key takeaways
- The key diagnostic principle is trajectory: normal TPLO recovery shows steady week-over-week improvement; any reversal -- worsening lameness, new swelling, returning pain -- signals a problem
- Persistent lameness beyond expected recovery is the most common sign of TPLO failure: continued limping or inability to bear weight beyond the expected level weeks after surgery is the hallmark symptom
- Sudden acute non-weight bearing after improvement is a same-day emergency call: causes include plate failure, tibial fracture, late meniscal tear, or acute infection; radiographs are required urgently
- Swelling at the plate site weeks after surgery indicates deep implant infection: this is distinct from normal post-surgical swelling and represents a late-developing implant-associated SSI
- Clicking or popping with pain or lameness indicates meniscal injury: isolated early clicking without lameness is usually benign; clicking with pain or worsening lameness indicates meniscal tear
- Radiographic confirmation is required to diagnose most causes of TPLO failure: X-rays confirm the specific mechanism and guide management
The recovery trajectory principle
The single most useful concept for identifying TPLO failure is trajectory.
Recovery from TPLO is not linear -- there are good days and less good days -- but the overall trend over weeks should be consistently improving.
Normal trajectory: each week, the dog uses the leg a little more freely, lameness is slightly less obvious, weight bearing is more consistent.
Abnormal trajectory: lameness worsens after a period of improvement; the dog is using the leg less at week 4 than at week 2; the dog that was consistently toe-touching now holds the leg entirely off the ground.
Trajectory reversal is the key signal. Single-day fluctuations can occur with activity and weather. Week-over-week regression cannot be dismissed.
Signs of TPLO failure: by type
1. Persistent or progressive lameness
What it means: the dog is limping beyond the expected level for the stage of recovery. At 4 weeks, some lameness is expected. At 8 weeks, most dogs should be consistently bearing significant weight. At 12 weeks, most are nearly normal.
Differential: implant loosening, delayed bone healing, non-union, deep infection, late meniscal tear, progressive arthritis.
When to call: if lameness has not improved for 2 or more weeks at any stage, or has worsened compared to the previous week -- contact your vet for evaluation before the next scheduled appointment.
SustainableVet.org confirms: persistent lameness is the hallmark symptom of TPLO failure; continued limping or inability to bear weight weeks after surgery may indicate failure.
2. Sudden acute non-weight bearing
What it means: the dog was bearing weight adequately and suddenly stops using the leg entirely. This is a distinct clinical event, not a gradual worsening.
Differential: acute plate failure (plate bending or screw pullout), acute tibial tuberosity fracture, acute late meniscal tear, acute hematogenous implant infection.
When to call: same-day emergency veterinary contact. Radiographs are required urgently to determine the cause.
SustainableVet.org confirms: a failed TPLO often presents as persistent pain, joint instability, swelling, or difficulty bearing weight; dogs may show progressive lameness or reluctance to move.
3. Swelling at the plate site (not the incision)
What it means: a distinct swelling appearing over the medial tibial surface at the plate location, separate from and later than the normal post-surgical incision swelling. This is a late-developing sign, often appearing weeks to months after surgery.
Differential: deep implant-associated infection (SSI-D) with abscess formation; rarely, a non-infectious reaction to the implant material.
When to call: same-day if accompanied by warmth, redness, or discharge. Within 24 hours if soft and non-painful but new and increasing.
4. Wound discharge or draining tract
What it means: a draining tract opening near (but not necessarily at) the original incision, often appearing weeks or months after surgery in a wound that appeared fully healed. This is a classic sign of deep implant-associated infection with sinus tract formation.
When to call: same-day. Do not wait.
5. Clicking or popping with pain or lameness
What it means: a meniscal click -- the torn meniscal flap being displaced by the femoral condyle during movement. Distinguished from benign joint adjustment clicking by the presence of pain on stifle manipulation and lameness.
Differential: late meniscal tear (2 to 22% incidence after TPLO).
When to call: same-day if acute lameness accompanies the click. Within 24 to 48 hours for new clicking with mild lameness.
See the dedicated meniscal tear article for full detail on diagnosis and treatment.
6. Radiographic findings at follow-up imaging
What it means: the 6-week and 12-week radiographs may show: peri-implant radiolucent halos (implant loosening or infection), widened osteotomy gap without callus formation (delayed union or non-union), plate migration from original position, screw in joint space, or cortical erosion (osteomyelitis).
When to call: your vet interprets these radiographs and will advise on urgency. Do not wait for the next scheduled appointment if the vet identifies a significant radiographic abnormality.
7. Systemic signs of infection
What it means: fever (rectal temperature above 39.5 C / 103.1 F), lethargy, reduced appetite, or behavioral changes. These indicate the infection has systemic involvement.
When to call: same-day emergency contact. Systemic infection from an implant site is a serious condition.
What is not TPLO failure
Not every deviation from ideal recovery represents failure.
Normal: gradual lameness that is slowly improving week over week.
Normal: mild swelling at the incision that peaks at days 2 to 5 and resolves.
Normal: mild stiffness in the morning that improves with movement.
Normal: intermittent toe-touching or three-legged walking during high-activity periods in the first 4 weeks.
Normal: a dog that is more lame on a day after increased activity compared to a day of rest.
The distinguishing feature is trajectory and pattern. Gradual improvement with day-to-day variation is normal. Reversal of the improvement trend is not.
Revision TPLO: when failure requires re-operation
SustainableVet.org confirms: revision TPLO may involve removing or replacing implants, repositioning the tibial cut, or addressing infections; revision surgery is more complex and requires strict post-op care.
The specific revision approach depends on the cause:
- Implant failure without infection: plate replacement or addition of a fixation device
- Non-union: bone grafting, implant revision, and extended restriction
- Deep infection with healed osteotomy: plate removal, surgical debridement, prolonged antibiotics
- Osteomyelitis: plate removal, debridement, 4 to 6 months of culture-directed antibiotics
For the complication list, see 15 common complications after TPLO surgery. For the implant failure guide, see TPLO implant failure signs and causes.
For the infection guide, see TPLO plate infection signs and treatment. For the meniscal tear guide, see dog meniscus tear after TPLO surgery.
Frequently asked questions
My dog is limping at week 6 but the 6-week radiograph was normal. Is this TPLO failure?
Not necessarily.
Normal radiographs at 6 weeks with persistent lameness suggests the issue is soft-tissue rather than bone or implant related -- meniscal injury, muscle atrophy, scar tissue, or rehabilitation lagging behind bone healing.
Discuss with your vet: physiotherapy and pain management are typically the next step for this presentation.
What happens if TPLO failure is not recognized early?
Delayed recognition of implant infection leads to establishment of deeper infection and biofilm, requiring more complex treatment. Delayed recognition of non-union leads to fibrous union or permanent instability.
Delayed recognition of meniscal tear allows progressive joint damage. Early action is consistently associated with better outcomes across all causes of TPLO failure.
Is TPLO failure common?
Overall TPLO complication rates are 10 to 34%, but most complications are minor (superficial infection, seroma). Serious failure requiring revision surgery is uncommon.
The 2013 study confirmed 93% limb function restoration at 1 year -- meaning the vast majority of TPLO dogs recover successfully.
Can TPLO failure happen years after surgery?
Yes. Late implant-associated infection (hematogenous seeding from dental disease, UTI, or skin infection) can occur years after surgery. The hallmark is sudden lameness regression in a dog with previously normal function.
Any unexplained lameness in a TPLO dog warrants radiographic assessment.
Should I ask for radiographs at every sign of lameness?
Not necessarily for every minor fluctuation.
Radiographs are indicated for: sudden acute lameness, lameness that has not improved for 2 or more weeks, new swelling at the plate site, a draining tract, or any systemic sign of infection.
Your vet will advise on imaging timing based on clinical presentation.
Resources
- SustainableVet. TPLO Failure Symptoms. sustainablevet.org
- Clinician's Brief. Common Tibial Plateau-Leveling Osteotomy Complications. cliniciansbrief.com
- SustainableVet. TPLO Failure Rate in Dogs. sustainablevet.org
- ACVS. Cranial Cruciate Ligament Disease. acvs.org

Zlig vs TPLO: Which Surgery Is Better for Dogs?
Compare Zlig and TPLO surgeries for dogs to understand which is better for cruciate ligament injuries and recovery outcomes.
Zlig (STIF-VETLIG) is an intra-articular synthetic implant used to reconstruct the cranial cruciate ligament inside the joint a conceptually different approach from TPLO, which changes joint mechanics rather than replacing the ligament.
Both are valid surgical options for CCL rupture in dogs, and the evidence base for Zlig, while smaller than for TPLO, is growing.
Quick answer: Zlig replaces the torn CCL inside the joint using a synthetic fiber implant through small bone tunnels. A 107-case prospective study reported good to excellent results in 97 cases. TPLO has a much larger evidence base and is the ACVS first-choice for large dogs.
Key takeaways
- Zlig reconstructs the CCL inside the joint using a synthetic fiber implant through small bone tunnels; TPLO changes joint geometry instead
- A 107-case prospective study reported good to excellent results in 97 cases: the largest Zlig dataset, single-centre, without controlled TPLO comparison
- TPLO has a significantly larger evidence base: 25+ years of RCTs and ACVS first-choice status for dogs over 60 lbs
- Zlig requires only small bone tunnels, no osteotomy: bone-cutting complications such as delayed union are not relevant
- Implant failure is the primary Zlig-specific risk: the synthetic ligament may stretch or fail over time in large or very active dogs
- Zlig suits bilateral CCL cases in small to medium dogs: both knees can sometimes be addressed in one procedure
How Zlig works
Zlig stands for Z-Ligament. The procedure uses a synthetic fiber implant (marketed as STIF-VETLIG GLOBAL) placed intra-articularly inside the joint capsule to replace the torn CCL.
Unlike extracapsular techniques (lateral suture, Tightrope) which place material outside the joint, Zlig anatomically reproduces the CCL's position within the joint.
The procedure involves drilling small bone tunnels through the femur and tibia at the anatomical insertion points of the CCL.
The synthetic implant is passed through these tunnels and secured, providing immediate mechanical stability similar to the original ligament.
Because there is no bone cutting or tibial rotation, Zlig is less invasive than TPLO and significantly faster to perform.
Recovery may be faster in the early post-operative period for the same reason.
The hund-kreuzbandriss.de clinical commentary (German veterinary reference site) notes: TPLO is a fairly invasive technique that causes irreversible changes.
Intra-articular reconstruction with synthetic fibers only requires small bone tunnels, and complications from osteotomy when they occur are not always easy to correct.
Who makes the Zlig implant?
The Zlig system uses the STIF-VETLIG GLOBAL implant, manufactured in France.
The procedure was developed primarily in France and Germany. It is gaining awareness in other countries but remains far less available than the major TPLO systems.
The highly porous intra-articular fiber design promotes fibroblast penetration and collagen fiber ingrowth over time, which the manufacturers propose increases implant longevity by improving resistance to flexion and torsional forces.
What the evidence shows
Primary Zlig outcome study
A prospective study by Le Doze, Paris, and Pages (2012 to 2021, 107 cases) found good to excellent results in 97 of 107 cases.
The study was conducted at two veterinary clinics in France. This is the most comprehensive Zlig-specific outcome dataset in the veterinary literature.
The hund-kreuzbandriss.de review confirms: Reconstruction of the CCL using the intra-articular synthetic implant STIF-VETLIG GLOBAL leads to good to excellent results in 97 cases in this prospective study from 2012 to 2021.
Limitations of current Zlig evidence
- The primary study is single-centre, non-randomized, and lacks a direct comparison control group
- Long-term data beyond the study's follow-up period is limited
- The procedure has not been evaluated in large-scale randomized controlled trials comparable to those available for TPLO and TTA
- The evidence base is substantially smaller than for TPLO (25+ years of multi-centre data)
TPLO evidence in context
TPLO has been evaluated in prospective randomized studies, force plate gait analysis trials, and multi-year cohort studies across dozens of institutions.
The ACVS recommends TPLO as the most commonly performed procedure for dogs over 60 lbs based on this evidence base.
Zlig vs TPLO: key differences
Patient selection
Zlig may be preferred when:
- Small to medium breed dogs (primary candidate group in current evidence)
- Bilateral CCL rupture in a small dog where simultaneous correction in one anaesthesia event is desired
- Dog owner prefers to avoid the irreversible tibial changes of an osteotomy
- The surgeon is specifically trained in the Zlig technique
TPLO is typically recommended when:
- Dogs over 30 to 40 lbs, especially large and giant breeds
- Dogs with steep tibial plateau angle (TPA) some are not suitable candidates for Zlig due to concurrent patellar luxation or excessive tibial ridge concavity
- The ACVS first-choice recommendation is preferred, with the largest evidence base
- General specialty practice context where Zlig expertise is not available
Hund-kreuzbandriss.de notes: dogs with a steep tibial plateau angle, concurrent patellar luxation, or excessive concavity of the tibial ridge are not good candidates for Zlig.
In these cases, TPLO represents an excellent and often the only alternative.
For the full surgical alternatives overview, see alternatives to TPLO surgery for dogs. For the TPLO vs Tightrope comparison, see Tightrope vs TPLO surgery for dogs.
Frequently asked questions
Is Zlig as effective as TPLO?
For small to medium dogs, the single-centre prospective study shows good to excellent results in the majority of cases.
A direct head-to-head randomized comparison with TPLO in matched patient populations has not been published, so direct effectiveness comparison is not currently possible.
TPLO has a much stronger and broader evidence base overall.
Can large dogs have Zlig surgery?
The current evidence base for Zlig is strongest in small to medium dogs. Large dogs generate higher joint forces that place more demand on the synthetic implant over time.
Many surgeons with Zlig experience reserve it for smaller patients, though there is no absolute size cutoff in the literature.
What happens if the Zlig implant fails?
The synthetic ligament can stretch or rupture over time. If this occurs, the stifle returns to instability and lameness.
Revision surgery would typically involve a different approach TPLO or TTA since the anatomy has not been altered by the Zlig procedure, making revision more straightforward than after an osteotomy.
How long does Zlig surgery take?
Shorter than TPLO in most cases, because no osteotomy is performed.
The exact duration varies by surgeon experience and patient anatomy, but the minimally invasive nature of the procedure is one of its practical advantages.
Where can I find a surgeon who performs Zlig?
Zlig is performed by veterinary surgeons specifically trained in the technique, primarily in France and Germany where the procedure was developed, and increasingly in other countries.
Board-certified veterinary orthopedic surgeons can advise whether the technique is available in your region.
Resources
- Hund-Kreuzbandriss. Zlig Method: A Study. (Le Doze et al., 2012 to 2021 prospective study summary.) hund-kreuzbandriss.de
- Hund-Kreuzbandriss. TPLO vs TTA vs ZLig vs Suture Retraction: 6 Methods. hund-kreuzbandriss.de
- ACVS. Cranial Cruciate Ligament Disease. acvs.org
- Vetamac. TPLO Surgery for Dogs: Success Rates and Alternative Options. vetamac.com

Arthrex TPLO Plate Overview and Use
Learn about the Arthrex TPLO plate, its design, surgical use, and benefits for canine cruciate ligament repair.
The Arthrex TPLO plate is a specialized orthopedic implant designed to stabilize the tibia after a tibial plateau leveling osteotomy (TPLO) surgery in dogs. TPLO surgery is a common procedure to treat cranial cruciate ligament (CCL) rupture, which causes lameness and pain in dogs. Understanding the Arthrex TPLO plate helps pet owners and veterinarians appreciate how this device supports bone healing and restores limb function.
This article explains what the Arthrex TPLO plate is, how it is used during surgery, its design features, and the benefits it offers. You will learn about the surgical technique, implant materials, and postoperative care to ensure the best outcomes for dogs undergoing TPLO surgery.
What is the Arthrex TPLO plate?
The Arthrex TPLO plate is a metal implant used to fix the tibia after cutting and rotating the bone during TPLO surgery. It holds the bone segments securely to allow proper healing and restore normal joint mechanics. The plate is contoured to fit the shape of the canine tibia and is available in various sizes to match different dog breeds and sizes.
The plate works together with locking screws that provide stable fixation without compressing the bone excessively. This design helps reduce complications and promotes faster recovery.
- Purpose of the plate: It stabilizes the tibia after osteotomy, maintaining the new bone angle to prevent joint instability and lameness.
- Material composition: Made from medical-grade stainless steel or titanium, ensuring strength, biocompatibility, and corrosion resistance.
- Plate design: Anatomically contoured to match the tibial shape, minimizing soft tissue irritation and improving fit.
- Locking screw system: Uses locking screws that lock into the plate, providing angular stability and reducing screw loosening risks.
These features make the Arthrex TPLO plate a reliable choice for TPLO surgeries in veterinary orthopedics.
How is the Arthrex TPLO plate used in surgery?
During TPLO surgery, the surgeon makes a curved cut in the tibia and rotates the bone segment to change the slope of the tibial plateau. The Arthrex TPLO plate is then applied to hold the bone in its new position. Proper placement and fixation are critical for successful healing and restoring limb function.
The surgical steps include precise measurement, plate selection, and screw placement to ensure stability and avoid complications.
- Osteotomy procedure: The tibia is cut using a saw guided by a jig to create a controlled curved osteotomy.
- Plate positioning: The Arthrex TPLO plate is aligned over the osteotomy site to match the bone contour and rotated segment.
- Screw insertion: Locking screws are placed through the plate holes into the bone, securing the plate firmly.
- Verification of stability: The surgeon checks the fixation and limb alignment before closing the surgical site.
Following these steps ensures the plate supports the bone during healing and helps the dog regain normal limb use.
What are the advantages of using the Arthrex TPLO plate?
The Arthrex TPLO plate offers several benefits compared to traditional fixation methods. Its design and materials improve surgical outcomes and reduce postoperative complications. These advantages contribute to faster recovery and better function for dogs after TPLO surgery.
Understanding these benefits helps veterinarians choose the best implant for their patients.
- Enhanced stability: Locking screw technology provides rigid fixation, reducing micromotion and promoting bone healing.
- Reduced soft tissue damage: Anatomical contouring minimizes irritation and inflammation around the implant site.
- Corrosion resistance: High-quality materials prevent implant degradation and inflammatory reactions over time.
- Versatility in sizes: Multiple plate sizes accommodate different dog breeds, ensuring proper fit and function.
These features make the Arthrex TPLO plate a preferred choice for many veterinary surgeons performing TPLO surgeries.
What materials are used in the Arthrex TPLO plate?
The Arthrex TPLO plate is manufactured from biocompatible metals that provide strength and durability while minimizing adverse tissue reactions. The choice of materials affects the plate’s performance and long-term safety.
Knowing the materials helps veterinarians and pet owners understand implant behavior inside the body.
- Stainless steel: Commonly used for its strength, corrosion resistance, and affordability in orthopedic implants.
- Titanium alloy: Offers excellent biocompatibility, lighter weight, and reduced risk of allergic reactions.
- Surface finish: Smooth, polished surfaces reduce tissue irritation and bacterial adhesion risks.
- Radiopacity: Materials allow clear X-ray visualization to monitor implant position during follow-up.
These material properties ensure the Arthrex TPLO plate performs well during the healing process and remains safe long term.
How does the Arthrex TPLO plate support postoperative recovery?
Postoperative care is essential for successful healing after TPLO surgery using the Arthrex TPLO plate. The implant provides stable fixation, but proper management of the dog’s activity and monitoring are critical to prevent complications.
Understanding the role of the plate in recovery helps owners follow veterinary instructions effectively.
- Early weight bearing: Stable fixation allows controlled limb use soon after surgery, promoting muscle strength and joint mobility.
- Reduced risk of implant failure: Locking screws and plate design minimize loosening or breakage during recovery.
- Radiographic monitoring: Regular X-rays check bone healing and implant position to detect issues early.
- Physical therapy support: Rehabilitation exercises complement implant stability to restore normal gait and function.
Following these guidelines helps dogs recover faster and return to normal activity safely.
What complications can occur with the Arthrex TPLO plate?
While the Arthrex TPLO plate is designed to reduce complications, some risks remain. Awareness of potential problems helps veterinarians and owners recognize signs early and take action.
Most complications relate to surgical technique, implant placement, or postoperative care.
- Infection risk: Surgical site infections can occur, requiring antibiotics or implant removal in severe cases.
- Implant loosening: Poor screw fixation or excessive activity may cause the plate to loosen, affecting stability.
- Delayed bone healing: Factors like poor blood supply or infection can slow osteotomy healing despite stable fixation.
- Soft tissue irritation: Improper plate positioning may cause discomfort or swelling around the implant.
Close follow-up and adherence to postoperative instructions minimize these risks and improve outcomes.
Conclusion
The Arthrex TPLO plate is a vital implant in veterinary orthopedics for treating cranial cruciate ligament injuries in dogs. Its specialized design and locking screw system provide stable fixation, promote bone healing, and support early recovery.
Understanding the plate’s features, surgical use, and postoperative care helps pet owners and veterinarians ensure the best results after TPLO surgery. Proper implant selection and management reduce complications and help dogs regain normal limb function safely.
What sizes does the Arthrex TPLO plate come in?
The Arthrex TPLO plate is available in multiple sizes ranging from small to large to fit different dog breeds and tibial dimensions accurately.
Can the Arthrex TPLO plate be removed after healing?
Implant removal is not routinely required but may be performed if the dog experiences irritation, infection, or implant-related complications after bone healing.
How long does it take for the bone to heal with the Arthrex TPLO plate?
Bone healing typically takes 8 to 12 weeks, depending on the dog's age, health, and postoperative care quality.
Is the Arthrex TPLO plate MRI compatible?
Plates made from titanium alloys are generally MRI compatible, while stainless steel plates may cause artifacts or interference during imaging.
What postoperative care is recommended after TPLO surgery with this plate?
Recommended care includes restricted activity, pain management, physical therapy, and regular veterinary check-ups with radiographic monitoring to ensure proper healing.
Synthes TPLO Plate Overview and Use
Learn about Synthes TPLO plates, their design, surgical use, and benefits in canine cruciate ligament repair.
Cruciate ligament injuries are common in dogs, often requiring surgical repair to restore joint stability. The Synthes TPLO plate is a specialized orthopedic implant designed to support tibial plateau leveling osteotomy (TPLO) surgeries, which correct knee joint mechanics in affected dogs.
This article explains what the Synthes TPLO plate is, how it works, and why it is widely used in veterinary orthopedic surgery. You will learn about its design features, surgical application, and postoperative care to understand its role in successful cruciate ligament repair.
What is a Synthes TPLO Plate?
The Synthes TPLO plate is a metal implant used in veterinary surgery to stabilize the tibia after a TPLO procedure. It is specifically designed to fit the anatomy of a dog's tibia and support the bone during healing.
This plate helps maintain the new angle of the tibial plateau after osteotomy, allowing the knee to function without abnormal stress on the cruciate ligament.
- Purpose-built design: The plate is contoured to match the shape of the canine tibia, ensuring a precise fit and optimal stability during healing.
- Material strength: Made from stainless steel or titanium, the plate provides durable support to withstand the forces on the knee joint during recovery.
- Locking screw technology: It uses locking screws that secure the plate firmly to the bone, reducing the risk of loosening or shifting after surgery.
- Varied sizes: Available in multiple sizes to accommodate different dog breeds and sizes, allowing customized surgical repair.
These features make the Synthes TPLO plate a reliable choice for orthopedic surgeons treating cruciate ligament injuries in dogs.
How Does the Synthes TPLO Plate Work in Surgery?
During a TPLO surgery, the tibial plateau is cut and rotated to change its slope, reducing the strain on the cruciate ligament. The Synthes TPLO plate is then applied to stabilize the bone segments.
The plate holds the bone in the new position while it heals, allowing the dog to regain normal knee function without instability.
- Osteotomy stabilization: The plate bridges the cut bone, maintaining alignment and preventing movement during healing.
- Load distribution: It evenly distributes mechanical forces across the bone to reduce stress concentration and promote bone growth.
- Secure fixation: Locking screws anchor the plate firmly, preventing micromovements that could delay healing or cause implant failure.
- Facilitates early mobility: By stabilizing the joint, the plate allows controlled weight-bearing soon after surgery, aiding recovery.
Proper placement and fixation of the Synthes TPLO plate are critical for surgical success and long-term joint health.
What Are the Benefits of Using Synthes TPLO Plates?
The Synthes TPLO plate offers several advantages over other fixation methods in TPLO surgery. These benefits contribute to improved outcomes and faster recovery for dogs.
Understanding these benefits helps pet owners appreciate why this implant is often recommended by veterinary surgeons.
- Enhanced stability: The plate provides rigid fixation, reducing the risk of postoperative complications like implant loosening or bone displacement.
- Improved healing: Stable fixation promotes faster bone healing and reduces inflammation around the surgical site.
- Reduced pain: By stabilizing the joint, the plate minimizes abnormal joint movement that causes pain during recovery.
- Long-term joint function: Proper alignment and healing help restore normal knee mechanics, reducing the chance of arthritis development.
These benefits make the Synthes TPLO plate a preferred choice for treating cranial cruciate ligament rupture in dogs.
What Are the Surgical Steps for Using a Synthes TPLO Plate?
Successful use of the Synthes TPLO plate requires careful surgical technique. The procedure involves precise bone cutting, plate selection, and screw placement.
Following these steps helps ensure the implant functions correctly and the dog recovers well.
- Preoperative planning: Surgeons measure the tibial plateau and select the appropriate plate size to match the dog's anatomy.
- Performing osteotomy: The tibial plateau is cut using specialized saws to allow rotation and slope adjustment.
- Plate application: The Synthes TPLO plate is positioned on the bone and temporarily fixed with screws to confirm alignment.
- Final fixation: Locking screws are inserted to secure the plate firmly, ensuring stable fixation of the bone segments.
Each step requires precision and experience to minimize complications and optimize healing.
What Are the Postoperative Care Guidelines After Synthes TPLO Plate Surgery?
After surgery, proper care is essential to support healing and prevent implant-related problems. Owners must follow veterinary instructions closely.
Postoperative care focuses on activity restriction, pain management, and monitoring for complications.
- Restricted activity: Limit the dog's movement to prevent stress on the surgical site and allow bone healing.
- Pain control: Administer prescribed analgesics to keep the dog comfortable during recovery.
- Wound monitoring: Check the incision regularly for signs of infection such as redness, swelling, or discharge.
- Follow-up visits: Schedule regular veterinary appointments for X-rays to assess bone healing and implant position.
Adhering to these guidelines improves the chances of a successful outcome and full return to function.
What Are the Potential Complications of Synthes TPLO Plate Use?
While the Synthes TPLO plate is effective, some complications can occur. Awareness of these risks helps owners and surgeons manage them promptly.
Most complications relate to surgical technique, implant issues, or postoperative care.
- Infection risk: Surgical site infections can occur, requiring antibiotics or implant removal in severe cases.
- Implant failure: Plate or screw loosening or breakage may happen if the dog is too active or bone healing is poor.
- Delayed healing: Factors like poor blood supply or infection can slow bone repair, prolonging recovery time.
- Joint stiffness: Inadequate rehabilitation may cause reduced knee mobility and muscle wasting.
Close monitoring and timely intervention reduce the impact of these complications on the dog's recovery.
Conclusion
The Synthes TPLO plate is a key tool in veterinary orthopedic surgery for repairing cruciate ligament injuries in dogs. Its design and locking screw technology provide stable fixation that supports effective bone healing and joint function.
Understanding the plate's use, benefits, and care requirements helps pet owners support their dog's recovery and improve surgical outcomes. With proper surgical technique and postoperative management, the Synthes TPLO plate offers a reliable solution for restoring knee stability and mobility in affected dogs.
FAQs
How long does it take for a dog to heal after TPLO surgery with a Synthes plate?
Healing typically takes 8 to 12 weeks, depending on the dog's size and health. Regular veterinary check-ups monitor bone healing and implant stability during this period.
Can the Synthes TPLO plate be removed after healing?
Plate removal is usually not necessary unless complications arise. Most dogs keep the implant permanently without issues once healing is complete.
Is the Synthes TPLO plate suitable for all dog breeds?
The plate comes in various sizes to fit most breeds, but very small or very large dogs may require customized implants or alternative treatments.
What signs indicate complications after TPLO surgery?
Watch for swelling, redness, discharge, increased pain, or lameness worsening. These signs warrant prompt veterinary evaluation to address possible infection or implant problems.
How soon can a dog bear weight on the leg after Synthes TPLO plate surgery?
Most dogs begin partial weight-bearing within days after surgery, progressing to full weight-bearing over weeks as healing advances under veterinary guidance.
Why Is My Dog's Leg Clicking After TPLO Surgery?
Wondering why your dog’s leg is clicking after TPLO surgery? Learn common causes, when to worry, and what to expect during recovery
A clicking or popping sound from the stifle after TPLO surgery is a common observation that owners report, especially during the first weeks of recovery.
It is not automatically a sign of a problem.
The clinical significance depends on what accompanies the click: is the dog bearing weight and recovering normally, or is clicking associated with lameness, pain, or a trajectory reversal?
Quick answer: Post-TPLO clicking most often reflects normal joint adjustment, soft tissue movement, or cavitation. The most clinically important cause is a meniscal tear, producing a meniscal click with pain and returning lameness. Clicking without lameness or pain in early recovery is usually benign.
Key takeaways
- Most post-TPLO clicking is benign: the click typically comes from joint adjustment to new mechanics; the dog usually feels fine even when a sound is present
- The meniscal click is the clinically significant type: dogs with meniscal tears exhibit a meniscal click accompanied by lameness and pain
- Clicking with lameness or pain warrants prompt veterinary evaluation: clicking with swelling, limping, or avoiding the leg could signal instability, implant issues, or a torn meniscus
- Clicking that is isolated, early in recovery, and not associated with lameness is usually normal and improves as healing progresses
- Late-onset clicking in a previously normal recovery is more concerning than early clicking; it suggests a new event such as meniscal tear or implant loosening
- Implant loosening is a rare but serious cause of clicking: abnormal joint mechanics from loosened screws or plate produce clicking accompanied by pain and radiographic changes
What causes clicking after TPLO surgery
Normal joint adjustment
After TPLO, the tibial plateau is repositioned to a new angle. The soft tissues, tendons, and joint capsule require weeks to adapt to this new geometry.
During this adaptation period, movement can produce audible sounds as structures slide over each other or snap slightly over new contours.
TPLO Info confirms: after CCL repair, the joints adjust to new motion. The click comes from the knees. The dog usually feels fine even when a sound is present.
Soft tissue movement over the implant
The TPLO plate sits against the medial tibial surface. Tendons and fascial layers that previously moved over the normal tibial contour now move over a plate with a different profile.
This can produce audible snapping or clicking sounds during flexion and extension, particularly in the first weeks before soft tissue accommodation occurs.
Gas bubble release (cavitation)
Joint capsule distension from post-surgical effusion can trap gas in the joint space. Movement releases this gas in small pops -- the same mechanism as knuckle cracking in humans.
This is painless and harmless.
Meniscal click (most significant cause)
The medial meniscus is vulnerable to injury in CCL disease. At the time of TPLO, the surgeon assesses the meniscus and removes damaged tissue.
However, meniscal injury can occur after TPLO -- either from previously undetected damage that progresses, or from new injury in a joint that has not yet fully stabilized.
Laguna Woods Vets confirms: dogs with meniscal tears frequently exhibit a meniscal click. If damage is noted during TPLO, the meniscus is removed. If not removed, it may tear later.
SustainableVet.org confirms: symptoms of meniscal damage include clicking when the dog moves, lameness, reluctance to use the affected leg, and discomfort when bending the knee.
The meniscal click is distinguished from benign clicking by:
- Accompanying lameness (often a sudden return of limping after initial improvement)
- Pain when the stifle is manipulated on examination
- Worsening trajectory rather than improvement
Implant-related clicking (uncommon)
Plate or screw loosening generates abnormal tibial motion during weight bearing, which can produce clicking.
This is uncommon in an uncomplicated TPLO but more likely if the dog has been overactive during recovery.
Signs include pain localized to the plate site and radiographic evidence of implant migration or peri-implant bone changes.
SustainableVet.org confirms: implant failure is rare but serious; plates or screws can loosen or break if the dog is too active early, leading to discomfort and joint noises.
Normal vs. concerning clicking: a practical guide
Likely normal (benign):
- Clicking present from the first days after surgery
- No lameness associated with the click
- Dog is bearing weight and improving week by week
- Click is quiet and intermittent
- Dog does not react (wince, pull back, vocalize) when the stifle is manipulated
Warrants veterinary evaluation:
- Clicking that appears new after a period of recovery without clicking
- Clicking accompanied by lameness or reluctance to bear weight
- Dog flinches or vocalizes when the stifle is flexed
- Clicking that is getting louder or more frequent over time
- Lameness that had been improving and then reverses
SustainableVet.org confirms: contact your vet if the clicking sound is persistent or getting worse over time; a mild clicking early in recovery is normal but it should improve as healing progresses.
Meniscal tear after TPLO: what happens next
If a meniscal tear is suspected or confirmed, management depends on severity.
Mild cases: pain management with NSAIDs, joint supplements, and controlled exercise restriction. The meniscus may stabilize with conservative management if the tear is small and the joint is otherwise stable.
Cases with ongoing pain or lameness: partial meniscectomy (surgical removal of the torn portion of the meniscus) is required. This is a second surgical procedure requiring general anesthesia and a repeat recovery period.
SustainableVet.org confirms: if a meniscal tear causes ongoing pain and instability, surgery is often needed; this may involve a partial meniscectomy.
Larger dogs and clicking
Larger dogs are more likely to produce audible joint sounds during recovery. Greater body mass means greater joint loading forces, which amplify soft tissue and implant movement sounds.
SustainableVet.org confirms: larger dogs are more likely to make joint sounds during recovery; their extra weight puts more pressure on the healing leg, which can make clicking more noticeable.
This does not mean clicking in large dogs is more likely to be pathological -- only that it is more audible when it occurs.
When to contact your vet about clicking
Contact your vet promptly (same day or within 24 hours) if:
- Clicking is accompanied by lameness or non-weight bearing
- A dog that was improving begins to worsen (trajectory reversal)
- The click is producing a visible pain response
- The click appears late in recovery (after weeks of silent healing)
Contact at your next scheduled appointment (can wait):
- Intermittent clicking early in recovery without lameness
- Click that is quieter week by week
- Dog is bearing full weight and improving in function
For the full TPLO complications guide, see common complications after TPLO surgery. For the toe-tapping guide, see dog toe tapping after TPLO surgery.
For the lameness guide, see lameness after TPLO surgery in dogs. For the leg shaking guide, see dog leg shaking after TPLO surgery.
Frequently asked questions
My dog's knee has been clicking for 3 weeks but she is not limping at all. Should I be worried?
Three weeks of clicking with no lameness and a normal, improving recovery trajectory is most likely benign joint adjustment. Monitor for lameness, pain on stifle palpation, or worsening of the click.
Mention it at your next scheduled vet appointment -- this is not an emergency call.
My dog's leg clicked once loudly while getting up, and then she held the leg up. What do I do?
Contact your vet the same day. A sudden loud click followed by acute lameness may indicate a meniscal injury event. This presentation warrants veterinary examination and likely radiographs.
Can clicking after TPLO get better on its own?
Yes -- benign mechanical clicking from joint adjustment and soft tissue accommodation typically resolves or reduces significantly over the first 4 to 8 weeks.
A meniscal click does not resolve without treatment of the meniscal tear.
Does clicking mean the plate is failing?
Not typically. Implant failure clicking is accompanied by pain and worsening lameness. Benign clicking in a comfortable, normally-recovering dog does not indicate implant failure.
Radiographs at the scheduled 6-week and 12-week appointments assess implant integrity.
My dog clicks on every step. Is that different from occasional clicking?
Consistent clicking on every step, particularly if it has a regular, reproducible pattern during weight bearing, is more likely to have a structural cause (meniscal click) than intermittent clicking.
Mention this to your vet and assess whether lameness is present.
Resources
- TPLO Info. Why Is My Dog's Leg Clicking After TPLO Surgery? tploinfo.com
- SustainableVet. Why Is My Dog's Leg Clicking After TPLO Surgery? sustainablevet.org
- Laguna Woods Vets (LHAH). TPLO Surgery Complications. lhah.com
- ACVS. Cranial Cruciate Ligament Disease. acvs.org
How Long Does TPLO Surgery Take?
Learn how long TPLO surgery takes, what to expect during the procedure, and recovery timelines for your dog's knee surgery.
"Failure rate" is used loosely when owners discuss TPLO, which can cause significant confusion. A complication is not the same as a failure.
Understanding what the published data actually shows and distinguishing minor complications from true surgical failures gives owners a much clearer picture of what to expect.
Quick answer: The overall TPLO complication rate is 10 to 34% across studies; most are minor. Major complications requiring reoperation occur in 2 to 7%. Infection is the most common major complication. Long-term good outcomes are reported in 90 to 93% of dogs.
Key takeaways
- Overall complication rate is 10 to 34% across published studies; most complications are minor and resolve without additional surgery
- Major complication rate requiring reoperation is 2 to 7%: a 1,000-dog study found 14.8% overall with 6.6% major complications
- SSI is the most common major complication: 2.9% to 25.9% across studies; giant breeds over 50 kg are at highest risk
- Small dogs under 15 kg have significantly lower complication rates: 4.44% in one 90-dog study, with no revisions
- Good to excellent long-term outcomes in 90 to 93% of dogs: the complication rate does not equal the failure rate
- Surgeon experience is the most modifiable risk factor: complication rates are consistently lower at high-volume specialty centers with board-certified surgeons
Defining "failure" vs. "complication"
This distinction is critical for interpreting the literature and for setting owner expectations accurately.
Complication: any deviation from the expected post-operative course. This includes minor findings like superficial wound dehiscence, mild swelling, or radiographic evidence of delayed osteotomy healing with no clinical signs. Many publications include these minor events in their complication rates.
Major complication: an event requiring additional surgical intervention or causing extended lameness. Major complications represent the subset of complications that meaningfully affect recovery and outcome.
Failure: the most restrictive definition surgery that did not achieve its goal of stifle stabilization, resulting in persistent instability and requiring revision with a different technique. True failure in this sense is uncommon after TPLO.
What published complication data shows
Overall complication rates
Vetamac confirms: complication rates following TPLO surgery range from 14% to 34%, with less than 10% of cases requiring a second surgery.
PMC (intraoperative bacterial culture study) confirms: the complication rate of TPLO varies between 10% and 34%, with 2 to 4% requiring surgical revision.
Today's Veterinary Practice reports a 14.8% complication rate in 1,000 TPLO patients (6.6% major — requiring repeat surgery or extended lameness), including 2.8% late meniscal injury and 6.6% infections.
Infection rates
Infection is the most common major complication and the one with the greatest variation by dog size and surgical setting.
PMC confirms: SSI rate after TPLO is reported to be 2.9% to 25.9% across studies, which is higher than other clean orthopedic surgeries (2.0 to 6.7%).
Surgical site infection rates of 21.3% to 25.9% have been reported specifically for giant-breed dogs weighing over 50 kg.
The implant removal rate due to infection is 3 to 7.4% per published literature (PMC PRP study; ResearchGate implant removal study).
Complication rates by dog size
Dog size is a consistent predictor of complication risk.
PLOS One retrospective (90 dogs under 15 kg): overall complication rate 4.44%, with no complications requiring surgical revision.
The study confirms: the complication rate in dogs under 15 kg is less than that historically reported in heavier dogs.
PubMed retrospective (small and medium dogs, 2.0 and 2.7 mm plates): overall complication rate 36%.
The most common complications were radiographic evidence of delayed healing (9%), patellar tendon thickening (8%), and tibial tuberosity fracture (6%). Only 7% of complications were major.
PLOS One confirms: the TPLO complication rates range from 10% to 34% and vary in severity from swelling and bruising to fractures and osteomyelitis.
Implant-related complications reportedly occur in under 10% of all TPLO procedures.
Long-term success rates
Complication rates must be interpreted alongside long-term success rates.
The retrospective cohort study comparing TPLO, Tightrope, and TTA found: function greater than 1 year after surgery was 93.1% for TPLO, 92.7% for Tightrope, and 89.2% for TTA.
SustainableVet.org confirms: good to excellent long-term outcomes are achieved in 90.4% of patients up to 6.8 years after TPLO surgery; 80 to 90% of owners are satisfied with their dog's long-term recovery.
A dog can have a complication even a significant one like an infection and still achieve a good long-term outcome after the complication is resolved.
The complication rate and the long-term success rate address different aspects of the outcome.
Factors that affect complication and failure rates
Surgeon experience and volume
This is the most consistently cited modifiable risk factor. High-volume specialty centers and board-certified surgeons consistently report lower complication rates than general practitioners performing occasional TPLO procedures.
Surgical efficiency, technique precision, and post-operative protocol standardization all contribute.
Dog size and body weight
Larger dogs generate higher joint forces, have larger dead space at the surgical site, and place more mechanical demand on the implant during healing.
These factors contribute to the higher complication rates seen in large and giant breeds.
Excessive tibial plateau angle (TPA)
Dogs with TPA above 35 degrees (excessive TPA, or eTPA) have higher complication rates.
Today's Veterinary Practice notes: owner-perceived outcome was superior for eTPA group dogs when TPLO resulted in TPA of 14 degrees or less compared to those with TPA greater than 14 degrees.
Postoperative complications were more common in dogs with eTPA.
Post-operative activity restriction compliance
Dogs that are over-active during recovery have higher rates of implant complications, seroma formation, and wound complications.
Strict adherence to the prescribed restriction protocol is the owner's primary contribution to reducing complication risk.
For the complications overview, see 15 common complications after TPLO surgery in dogs. For the infection signs guide, see TPLO plate infection signs and treatment.
For the long-term outcomes guide, see long-term outcomes of TPLO surgery. For the plate removal guide, see TPLO plate removal recovery guide.
Frequently asked questions
What is the TPLO failure rate?
Depends on how "failure" is defined. If failure means any complication: 10 to 34% across studies. If failure means major complications requiring surgery or causing extended lameness: 2 to 7%.
If failure means persistent instability requiring revision with a different technique: uncommon and not consistently reported across large series.
Is TPLO safe for large breed dogs?
Yes, but with a higher complication risk than small dogs. Vetamac confirms: for large breeds, TPLO is still the gold standard, providing better long-term stability than alternatives.
The higher complication rate in large dogs reflects the greater mechanical demands and surgical challenges, not a fundamental unsafety of the procedure.
What percentage of TPLO dogs need a second surgery?
Across published studies, 2 to 10% require a second surgical intervention. Most second surgeries address infection (requiring plate removal), late meniscal tears (requiring partial meniscectomy), or implant complications.
Does my dog's vet experience affect failure rate?
Yes, substantially. Surgeons performing fewer than a set number of TPLO procedures per year have higher complication rates than high-volume specialists.
This is one reason referral to a board-certified orthopedic surgeon (ACVS diplomate) is recommended for TPLO.
If my dog has a complication, does that mean the TPLO failed?
Not necessarily. Many dogs who develop complications including infections requiring plate removal still achieve good to excellent long-term function after the complication is resolved.
The complication rate and the long-term outcome are different measures.
Resources
- Today's Veterinary Practice. Canine Cranial Cruciate Disease: Evidence-Based Look at Current Treatment Modalities. todaysveterinarypractice.com
- PLOS One. Risk Factors for Short-Term Postoperative Complications in Dogs Weighing Less Than 15 kg. journals.plos.org
- PubMed. Short-Term Complications Associated With TPLO in Dogs Using 2.0 and 2.7 mm Plates. pubmed.ncbi.nlm.nih.gov
- PMC. Clinical Relevance of Positive Intraoperative Bacterial Culture in TPLO in Dogs. ncbi.nlm.nih.gov
- Vetamac. TPLO Surgery for Dogs: Success Rates and Alternative Options. vetamac.com
TPLO Plate Removal Recovery Guide
Learn about TPLO plate removal recovery, including healing time, care tips, risks, and what to expect after surgery.
The TPLO plate is designed to stay in permanently. TPLO Info confirms that implants are designed to stay in for life they only need to be removed if a problem develops.
When plate removal is necessary, it is generally a less complex procedure than the original TPLO, and most dogs recover well.
Understanding when removal is needed, what recovery involves, and what to watch for helps owners navigate this phase confidently.
Quick answer: TPLO plate removal is performed when the plate causes infection, chronic pain, or implant failure. Recovery takes 6 to 12 weeks: 2 weeks for wound healing, 6 to 8 weeks for bone remodeling at the screw holes. Activity restriction for at least 6 weeks is required.
Key takeaways
- The TPLO plate does not routinely need to be removed: designed for permanent placement; removal is only indicated when it causes a problem
- The three main reasons for plate removal are: infection, chronic implant-associated pain causing ongoing lameness, and implant failure requiring revision
- Removal is only safe after the osteotomy has healed: typically 6 to 12 months post-TPLO once radiographs confirm bone union
- Recovery after plate removal takes 6 to 12 weeks: 2 weeks for wound healing; 6 to 8 weeks for bone remodeling
- Screw holes take 6 to 8 weeks to remodel: cortical defects temporarily weaken the bone; activity restriction prevents fracture
- Most dogs improve significantly after plate removal: implant irritation-related lameness typically resolves within weeks of removal
When is TPLO plate removal necessary?
Infection involving the implant (most common indication)
Bacterial biofilm colonizing the implant surface is the most common reason for plate removal.
Implant-associated infections often fail to resolve with antibiotics alone because bacteria form protective biofilms on the metal surface that antibiotics cannot penetrate adequately.
Once the osteotomy has healed typically at 6 to 12 months post-TPLO the plate can be safely removed, the bone is debrided, and the infection treated without the implant present.
Veterinary Orthopaedic and Mobility Center (VOMC) confirms that infection is the most common reason for implant removal.
For the full infection guide, see TPLO plate infection signs and treatment and when does a TPLO implant need to be removed due to infection.
Implant-associated pain without infection
Some dogs develop chronic lameness caused by the plate irritating surrounding soft tissues rather than infection.
The plate may irritate the periosteum, cause a local inflammatory reaction to the metal, or become symptomatic once the dog returns to activity.
TPLO Austin confirms: in rare instances, patients may simply be uncomfortable with the presence of the plate. In these cases, removal of the plate after bone healing will typically resolve the lameness.
Implant failure
If the plate bends, breaks, or screws loosen or fail, structural revision may be required.
Depending on the degree of bone healing at the time of failure, revision may involve plate removal and replacement, or removal alone once healing is sufficient.
TPLO Austin notes this is a very rare complication (under 1%) when activity restriction protocols are followed.
When is plate removal safe?
Plate removal requires confirmed radiographic bone healing the osteotomy must be fully bridged before the plate is removed.
The plate is the only structure holding the osteotomy in place; removing it before healing is complete risks the bone segments displacing.
Sustainablevet.org confirms: the plate can be removed once the bone is fully healed, typically 6 to 12 months after the operation.
SustainableVet's clinical guide for post-removal recovery confirms: removing hardware too early or in cases with incomplete healing increases the risk of delayed union or fracture. Careful radiographic assessment before surgery is essential.
The plate removal procedure
Plate removal is performed under general anesthesia. The original incision is reopened, the plate and screws are removed, and the wound is closed.
The procedure is significantly shorter and simpler than the original TPLO there is no bone cutting or rotation involved.
Vetplayas explains that the procedure involves removing the metal plate and screws from the tibia, with the wound closed in layers after removal.
If the indication was infection, the bone surface around the screw holes is debrided and the area flushed thoroughly. Bacterial culture is obtained to guide antibiotic selection.
Recovery timeline after TPLO plate removal
Weeks 1 to 2: wound healing
The incision heals similarly to the original TPLO incision. Pain management with NSAIDs and, in many cases, gabapentin is prescribed. The dog is confined and leash-walked only. Cold packing reduces post-surgical swelling.
SustainableVet's recovery guide confirms: the first 2 weeks focus on wound healing and pain management after surgery.
Weeks 2 to 8: bone remodeling
The primary recovery challenge after plate removal is the screw holes left in the tibia. These cortical defects temporarily reduce bone strength at those sites.
The bone requires 6 to 8 weeks to remodel and fill in these defects before normal activity loads can be tolerated.
SustainableVet's clinical guide confirms: bone typically requires 6 to 8 weeks post-plate removal to regain sufficient strength; high-impact activities must be limited during this critical period to prevent fracture.
Activity restrictions during recovery
- Leash walks only for the first 6 weeks minimum
- No running, jumping, stairs, or off-leash activity
- Rehabilitation exercises (PROM, sit-to-stand, controlled leash walks) as prescribed
- 8-week radiographs typically required to confirm screw hole remodeling before return to normal activity
Weeks 8 to 12: return to activity
If radiographs at week 8 confirm adequate bone remodeling, the surgeon approves progressive return to normal activity. Most dogs return to full activity by 10 to 12 weeks post-removal.
Complications of plate removal
Infection: the surgical site can develop a new infection during the removal procedure. Strict aseptic technique and sometimes antibiotic prophylaxis reduce this risk.
Fracture through screw holes: the cortical defects from screw removal temporarily weaken the bone. Activity restriction during the remodeling phase is essential to prevent fracture through these sites.
Delayed union: rare, but can occur if the bone at the surgical site is already compromised by chronic infection.
Incomplete resolution: if implant irritation was the indication and lameness persists after removal, additional investigation (nerve involvement, joint pathology) is warranted.
For related guides, see TPLO plate rejection symptoms in dogs, can a dog heal normally after TPLO plate removal, and TPLO implant loosening causes and treatment.
For the cost of plate removal, see TPLO plate removal cost.
Frequently asked questions
Does every TPLO dog eventually need the plate removed?
No. Most dogs retain the plate for life without problems. TPLO Info confirms that implants are designed to stay in place permanently.
Plate removal is only performed when there is a clinical indication: infection, persistent lameness from implant irritation, or implant failure.
How long does it take to recover from plate removal?
Generally 6 to 12 weeks, depending on the indication and the individual dog. Infection cases may take longer because bone debridement and antibiotic treatment add complexity.
Straightforward irritation-related removals with no infection typically have the shorter end of this timeline.
Is plate removal surgery serious?
It is a general anesthetic procedure and carries the standard risks of any surgical intervention, but it is significantly simpler than the original TPLO.
The main specific risk is fracture through the screw holes if activity restriction is not followed. Most dogs do well with appropriate post-operative care.
Can the plate be removed too early?
Yes, and this is dangerous. Removing the plate before the osteotomy has fully healed causes the bone segments to lose their only structural support, potentially leading to displacement or fracture.
Radiographic confirmation of bone healing is mandatory before plate removal is scheduled.
Will my dog need another round of rehabilitation after plate removal?
Typically a milder version, yes controlled leash walks, PROM if stiffness is present, and gradual return to activity over 6 to 12 weeks.
Dogs that had ongoing lameness from implant irritation often improve quickly once the plate is removed, but the bone still requires the restricted activity period regardless of how well the dog feels.
Resources
- TPLO Info. Step 6: TPLO Surgery Recovery Process. tploinfo.com
- TPLO Austin. Step 6: TPLO Surgery Recovery. tploaustin.com
- Vetplayas. Ensuring a Successful TPLO Plate Removal Recovery. vetplayas.com
- VOMC. TPLO Veterinary Orthopaedic and Mobility Center. vomcvet.com
- VCA Animal Hospitals. Tibial Plateau Leveling Osteotomy (TPLO) in Dogs. vcahospitals.com

