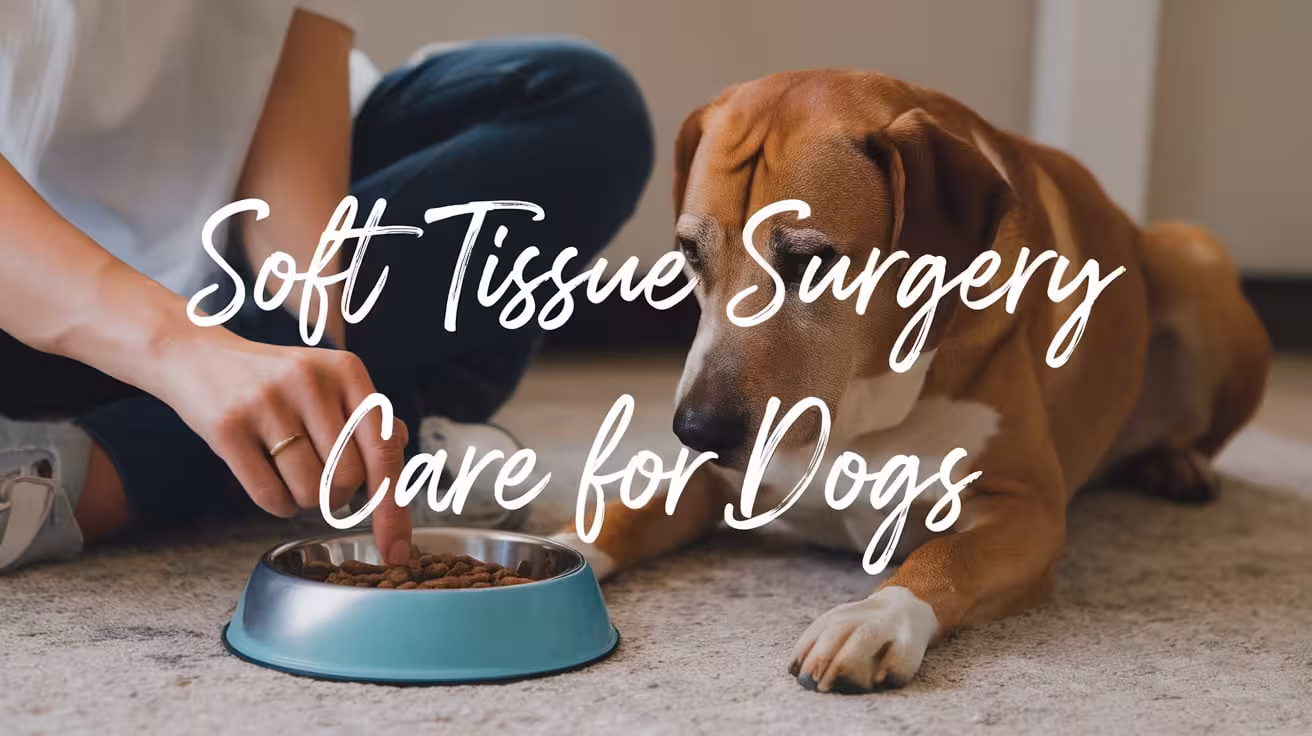
Soft tissue Surgery Care for Dogs: Feeding, Wounds & Rest
Learn how to care for your dog after soft tissue surgery with simple tips on feeding, wound care, activity limits, and signs to watch during recovery

This article is for informational purposes only and is not a substitute for professional veterinary advice. Every case is unique, so always consult your veterinarian for guidance specific to your pet.
Why Post-Op Care Matters for Soft Tissue Recovery
Proper care after soft tissue surgery is key to your dog’s full recovery. These procedures may involve the skin, muscles, or internal organs. After surgery, your dog’s body needs time and support to heal. If the wound is not protected or the care routine is missed, it can lead to serious problems like infection, swelling, or pain. That’s why post-op care is just as important as the surgery itself.
Good aftercare lowers your dog’s discomfort and helps the wound heal faster. It also keeps stress low—for both your dog and you. When you follow the vet’s care plan, your dog stays safe, calm, and on track to heal well.
- Speeds up healing by protecting the wound
- Prevents infections and other problems
- Keeps your dog’s pain levels under control
- Reduces the risk of costly complications
- Gives peace of mind to both pet and owner
Feeding Your Dog After Soft Tissue Surgery
Help your dog regain strength and stay comfortable by managing food and water carefully.
First Meal After Surgery
Your dog may feel groggy or slightly nauseous after surgery due to anesthesia. That’s why the first meal should be light and easy to digest. A bland diet like boiled chicken and white rice is ideal. Wait 3 to 4 hours after getting home before offering food. This gives your dog’s stomach time to settle.
Start with half the usual portion to avoid upset stomach or vomiting. Don’t be alarmed if your dog isn’t very hungry right away. Appetite usually returns slowly. Make sure the food is plain—no salt, oils, or seasonings.
- Offer the first meal 3–4 hours after returning home
- Choose bland, vet-recommended options (e.g., boiled chicken and rice)
- Give half the normal portion to prevent nausea
- Remove uneaten food after 20 minutes
- Stay calm and don’t force-feed
If your dog eats well, you can continue with small meals through the day. Always check with your vet before introducing any treats or supplements too soon.
Gradually Return to Regular Food
Most dogs can return to their normal diet within 24 to 48 hours after surgery, but only if there are no signs of vomiting or discomfort. Once your dog finishes bland meals without issues, you can slowly reintroduce their usual food. Mix a small portion of regular kibble with the bland food at first. Increase the amount over 1–2 days.
If your vet has prescribed a special recovery diet, follow that plan strictly. Don’t give new foods or treats during this time, as they might upset your dog’s stomach. Watch for signs like loose stool or reduced appetite.
- Begin mixing regular food 24–48 hours after surgery
- Transition slowly over 1–2 days
- Avoid rich treats or table scraps during recovery
- Follow any vet-prescribed diet closely
- Watch for changes in stool, energy, or behavior
Stick to a feeding schedule and measure meals carefully. This helps avoid overeating or bloating, which can slow healing. If your dog struggles to eat or shows new symptoms, contact your vet right away.
Keep Water Available at All Times
Water is just as important as food—maybe even more so after surgery. Anesthesia, medications, or stress can reduce your dog’s desire to drink. But dehydration can delay healing, cause fatigue, or worsen nausea. Make sure your dog always has access to clean, fresh water.
Place the bowl near your dog’s resting area and check it often. If they are unwilling to drink, try offering ice cubes or adding water to their food. You can also offer a small amount of low-sodium chicken broth, but only if your vet approves.
- Keep water bowls full and clean
- Use shallow or wide bowls for easier access
- Offer ice cubes or broth for extra encouragement
- Add water to meals to increase fluid intake
- Monitor how much your dog drinks each day
If your dog drinks too little or shows signs like dry gums, panting, or dark yellow urine, reach out to your vet. Hydration plays a big role in your dog’s comfort and wound healing after surgery.
When to Call the Vet About Feeding
It’s normal for your dog to eat a little less for the first day, but ongoing refusal to eat could mean something more serious. If your dog hasn’t eaten anything for more than 24 to 48 hours, call your vet right away. Lack of appetite, vomiting, or diarrhea may be signs of pain, infection, or a reaction to medication.
Always monitor how your dog eats and drinks during recovery. If they show discomfort while eating, seem nauseous, or throw up after meals, these need to be addressed. Never give over-the-counter medications without vet guidance.
- Call the vet if your dog refuses food for 24–48 hours
- Report vomiting or diarrhea after eating
- Watch for signs of pain while chewing or swallowing
- Note if water intake drops or your dog avoids the bowl
- Avoid guessing—early action prevents bigger problems
Feeding issues can be early signs of complications. Keep a simple log of meals, water intake, and any changes in behavior. This helps your vet respond quickly if something is wrong.
Wound Care After Soft Tissue Procedures
Protecting the incision site is key to safe healing and preventing infection.
Daily Wound Checks
It’s important to check your dog’s wound at least once a day. Look closely at the skin around the incision. Mild redness, slight swelling, and light bruising are common and usually not a concern. But signs like pus, foul smell, or gaping skin should be reported to your vet.
Try to check the wound when your dog is calm, such as after a walk or meal. Use soft lighting and talk gently while you inspect. If your dog seems bothered or won’t stay still, ask for help or wait until they relax.
- Look for redness, swelling, or warm skin
- Mild bruising is normal, but pus or blood is not
- Watch for gaps in the incision or torn stitches
- Sniff gently—bad odor may mean infection
- Take a daily photo to track healing
Daily checks help you spot early warning signs. If you’re unsure whether something is normal, don’t wait—call your vet for advice.
Keep the Area Clean and Dry
Cleanliness is vital for preventing infection. After surgery, do not bathe your dog until your vet says it’s safe—usually 10 to 14 days later. Water can soften the skin and disturb the healing wound. Dirt or moisture can also allow bacteria to grow.
If your dog has a bandage, keep it dry when outdoors. Use a clean plastic cover or dog boot. Indoors, remove the cover so air can reach the wound. Never apply ointments, creams, or sprays unless your vet tells you to.
- Avoid baths or swimming until approved by your vet
- Keep outdoor walks short and dry
- Use a cover only when outside; remove indoors
- Clean around the area gently if needed—never scrub
- Contact your vet if bandage gets wet or smells bad
A dry, well-ventilated wound area promotes faster healing and lowers the risk of complications.
Prevent Licking or Scratching
Licking or scratching can reopen the wound or introduce bacteria. Your dog may try to groom the area because of itchiness or discomfort as it heals. That’s why it’s important to block access to the incision site.
An Elizabethan collar (e-collar), inflatable collar, or recovery shirt are common tools used to stop licking. Choose the one your dog tolerates best. Always check that the wound is protected, even during sleep or rest.
- Use an e-collar for full protection
- Try inflatable collars for comfort if vet-approved
- Recovery shirts work well for body or belly wounds
- Watch for pawing, chewing, or rubbing the area
- Redirect behavior with a toy or gentle distraction
Some dogs may need time to adjust to wearing a collar. Be patient, and offer rewards for calm behavior. Preventing access to the wound is one of the most effective ways to avoid setbacks.
When to Call the Vet About the Wound
If something about the wound doesn’t look right, it’s always safer to call your vet. Don’t wait for things to worsen. Signs like active bleeding, thick yellow discharge, or a strong odor can point to an infection or wound breakdown.
Also call your vet if the stitches look loose, if the incision opens up, or if swelling increases after the third day. Quick action can prevent further damage and save your dog from added pain.
- Bleeding that soaks through a bandage
- Foul smell or thick discharge from the site
- Redness that spreads or feels hot to touch
- Gaping stitches or loose sutures
- Swelling that gets worse instead of better
It’s okay to be cautious—better one extra call than missing a serious issue. Your vet is there to help guide the recovery process and make sure healing stays on track.
Activity and Movement Restrictions
Limiting your dog’s movement helps protect the surgical site and avoid setbacks.
Limit Movement for 1–2 Weeks
After soft tissue surgery, your dog must rest. This helps the wound heal and keeps stitches or internal repairs from tearing. Active movements like jumping, running, or rough play can cause swelling, bleeding, or even open the wound.
Keep walks short and only for potty breaks. Always use a leash, even in fenced yards. Your dog may seem full of energy after a few days, but healing is still in progress inside the body. Stick to your vet’s timeline even if your dog looks normal.
- No running, jumping, or play for 1–2 weeks
- Only allow short leash walks for bathroom breaks
- Avoid visits from other pets or children
- Watch for sudden movements like shaking or rolling
- Use calming tools if your dog gets too excited
Even small activities can cause problems during early healing. Controlled rest is the best support you can give your dog after surgery.
Use Crate Rest or Small Room Confinement
Some dogs struggle with staying calm, especially puppies or high-energy breeds. In these cases, crate rest or confining them to a small room is essential. It limits their space and helps prevent sudden, harmful movements.
Choose a quiet space without stairs or furniture. Line the area with soft bedding and keep food, water, and toys nearby. Avoid overuse of toys that encourage too much excitement or chewing. If your dog is crate-trained, this method feels natural and safe.
- Use crate rest if your dog won’t stay still
- Block off a small room if crates are too stressful
- Keep the space calm and distraction-free
- Provide enrichment toys that don’t require movement
- Visit often for comfort and care without overstimulation
Restricted spaces create a calm healing zone and make it easier for you to monitor your dog’s wound, appetite, and bathroom habits.
Block Access to Stairs and Furniture
Your dog should not climb stairs or jump onto furniture during recovery. These actions put too much pressure on the surgery site and may cause tearing or bleeding. Even one wrong jump can undo days of healing.
Use baby gates to block stairways and close doors to rooms with beds, sofas, or chairs. If your dog normally sleeps on furniture, prepare a cozy space on the floor to avoid confusion. Keep the area well-padded to reduce pressure on joints.
- Use pet gates to block stairs and elevated areas
- Keep doors closed to limit wandering
- Create a low, soft sleeping space
- Remove tempting furniture from your dog’s rest zone
- Supervise constantly if furniture access is possible
It only takes one leap or slip to cause serious issues. Keeping your dog grounded ensures the wound stays safe and stable.
When to Reintroduce Activity
Your dog may seem ready to play again after a few days, but true healing takes time. Never restart activity without your vet’s approval. Internal tissues often need more healing time than what we see on the outside.
At your dog’s follow-up visit, your vet will check the incision and may recommend light activity. This usually starts with longer leash walks or slow movement indoors. Avoid dog parks, stairs, or off-leash areas until your vet gives the go-ahead.
- Reintroduce movement slowly and only with vet approval
- Start with short, gentle walks on a leash
- Monitor your dog closely for limping or fatigue
- Avoid play with other dogs until fully healed
- Report any signs of pain or swelling right away
Pushing too fast can undo healing progress. Be patient—it’s better to go slow than risk a setback that extends recovery.
Daily Recovery Routine Example
A simple, steady routine helps your dog heal comfortably and reduces stress for both of you.
Creating a calm, predictable schedule makes recovery smoother. Dogs feel safer when they know what to expect each day. Keeping the same times for meals, rest, walks, and wound care helps them stay relaxed and cooperative. You don’t need a complex plan—just consistency and quiet time.
Try to do medical tasks like giving medicine or checking the wound when your dog is already calm. Keep all supplies nearby to avoid stress or delays. Praise your dog gently and offer a small treat after care time to build trust.
- Morning: Take your dog out on a short leash for a potty break → Give any prescribed medications → Offer a small meal
- Midday: Check the wound for swelling, redness, or discharge → Quiet rest time in a crate or safe room → Refill clean water
- Evening: Short walk for bathroom → Feed dinner → Light cuddle time or sit quietly together
This basic routine keeps things manageable while allowing your dog to heal safely and comfortably.
Supporting Your Dog Emotionally
Recovery isn’t just physical—your dog needs comfort and emotional support too.
Comforting During Wound Checks
Wound checks can feel scary or uncomfortable for your dog. Even calm pets may become anxious when touched near the incision. To make this process easier, use a soft voice and slow, gentle hands. If your dog is nervous, have another person help hold or distract them.
Choose a quiet time for checks—after meals or walks. Let your dog see and smell any supplies before you start. Praise them during and after care, and offer a small treat once it’s over. This helps build a positive connection to the routine.
- Use a calm voice and steady hands
- Ask for help if your dog is jumpy or large
- Do checks when your dog is relaxed
- Reward cooperation with gentle praise or treats
- Stop if your dog shows pain and call your vet
A kind approach can turn a stressful task into a bonding moment, helping your dog trust you through the healing process.
Preventing Boredom with Safe Enrichment
Rest doesn’t have to be boring. Mental stimulation is a great way to help your dog stay calm and happy during recovery. While physical activity is limited, you can offer low-energy brain games and gentle enrichment activities that won’t risk the surgical site.
Puzzle toys, snuffle mats, and frozen KONGs are great for keeping your dog busy while they rest. Always choose toys that don’t involve jumping, tugging, or lots of movement. Ask your vet before offering any chew treats, especially if your dog had oral surgery or stomach-related procedures.
- Use snuffle mats for slow, scent-based feeding
- Offer frozen treats or filled toys for quiet fun
- Rotate toys to keep things interesting
- Play calming music or use white noise for relaxation
- Avoid toys that require running, pulling, or climbing
Keeping your dog mentally engaged during healing helps reduce restlessness and stress, making the recovery period smoother for both of you.
Monitoring Bathroom Habits and Hydration
Daily tracking helps catch signs of dehydration or digestive issues early.
After surgery, your dog’s bathroom habits may change. Some dogs may urinate less due to reduced water intake or may become constipated due to medication and inactivity. It’s important to watch for these changes so you can act early if something goes wrong.
Check the color of your dog’s urine—it should be pale yellow. If it’s dark or if your dog strains to pee, call your vet. Bowel movements may be slower in the first few days. If your dog hasn’t pooped after 48 hours, or if you see straining or blood, let your vet know.
- Track urine output and color each day
- Watch for constipation, straining, or diarrhea
- Encourage hydration by offering fresh water often
- Add water to meals if needed
- Report changes that last more than 24–48 hours
Monitoring these small daily habits can help prevent dehydration, pain, or infection during recovery.
When to Call the Vet Immediately
Fast action prevents small problems from becoming serious.
Some signs mean you should call your vet right away. Refusing food or water for more than 24 hours is a red flag. Vomiting, diarrhea, or signs of pain—like yelping or panting—need quick attention. If your dog seems “off” or not like themselves, trust your gut.
Always keep your vet’s number nearby and know their after-hours plan. If you’re ever unsure whether something is urgent, it’s better to ask than wait.
- No eating or drinking for 24+ hours
- Vomiting, diarrhea, or straining that doesn’t improve
- Bleeding, swelling, or bad-smelling discharge at the wound
- Shaking, yelping, or refusing to move
- Sudden change in behavior or energy
Early care can prevent infections, wound issues, and longer recovery times. When in doubt, reach out to your vet for advice.
Final Thoughts
Stick to your vet’s instructions and daily routines
Your dog’s healing depends on your care, patience, and attention.
Soft tissue surgery recovery takes time, but most dogs heal well with the right support. Following your vet’s plan, giving medications on time, and keeping activity low all help your dog recover safely.
Remember to check the wound daily, track feeding and bathroom habits, and offer emotional comfort along the way. If you’re unsure about anything, don’t wait—reach out to your vet.
- Be consistent with rest, feeding, and meds
- Watch for small signs before they become big issues
- Offer love, calm, and reassurance every day
- Celebrate small wins, like eating well or walking calmly
- Keep your vet involved throughout recovery
Your care makes a real difference. With time and attention, your dog will be back to normal and happy again.
FAQs
What should I feed my dog after soft tissue surgery?
Start with bland food like boiled chicken and rice about 3–4 hours after returning home. Offer half a portion at first. If your dog eats without vomiting, continue small meals. Most dogs can return to their normal diet within 1–2 days unless your vet says otherwise.
How do I know if my dog’s wound is infected?
Check the wound daily. Signs of infection include redness, swelling, yellow or green discharge, a foul smell, or gaping skin. Mild bruising is normal, but pus or bleeding is not. If you see any of these signs, contact your vet as soon as possible.
Can my dog walk after soft tissue surgery?
Yes, but only short leash walks for potty breaks. Avoid running, jumping, or stairs for at least 1–2 weeks. Too much movement can slow healing or open the wound. Your vet will tell you when it’s safe to allow more activity again.
Is it normal if my dog doesn’t eat right after surgery?
It’s common for dogs to have a low appetite the first day after surgery due to anesthesia and stress. Offer bland food and fresh water. If your dog refuses food or water for more than 24–48 hours, or shows other signs like vomiting, call your vet.
How can I stop my dog from licking the incision?
Use an e-collar, inflatable collar, or recovery shirt to block access to the wound. Licking can reopen stitches and cause infection. Watch your dog closely, especially when resting or alone. If they remove the collar or continue licking, contact your vet for advice.
When should I call the vet during recovery?
Call your vet if your dog won’t eat or drink for over 24 hours, vomits, has diarrhea, shows pain, or if the wound is bleeding, smells bad, or has pus. Any behavior that feels unusual or worrying should be checked by your vet right away.

Get a Free Poster
Enhance your workspace with a high-quality radiographs reference poster, designed for veterinary professionals. This free physical poster will be shipped directly to you—just fill out the form to request your copy.

Taking Great TPLO Radiographs
Click Below to Watch Live Video Demos


We'll send you a Free Wall Poster with all the steps
Step #1
Getting Ready
Ensuring a clean surgical field starts with proper skin preparation. This video demonstrates the best practices for:
- Shaving the patient – Achieving a close, even shave while minimizing skin irritation
- The Dirty Scrub – The initial skin prep step to remove surface debris and reduce bacterial load before the sterile scrub.
Following these techniques helps reduce infection risk and improve surgical outcomes. Watch the video to see how it’s done effectively!


Step #2
Reduce Your Risks
Many surgeons are shocked to find out that their patients are not protected from biofilms and resistant bacteria when they use saline and post-op antibiotics.
That’s Where Simini Comes In.
Why leave these risks and unmanaged? Just apply Simini Protect Lavage for one minute. Biofilms and resistant bacteria can be removed, and you can reduce two significant sources of infection.
Step #3
Take the Course
Preventing surgical infections is critical for patient safety and successful outcomes. This course covers:
- Aseptic techniques – Best practices to maintain a sterile field.
- Skin prep & draping – Proper methods to minimize contamination.
- Antibiotic stewardship – When and how to use perioperative antibiotics effectively.
Stay up to date with the latest evidence-based protocols. Click the link to start learning and earn CE credits!

Things to know
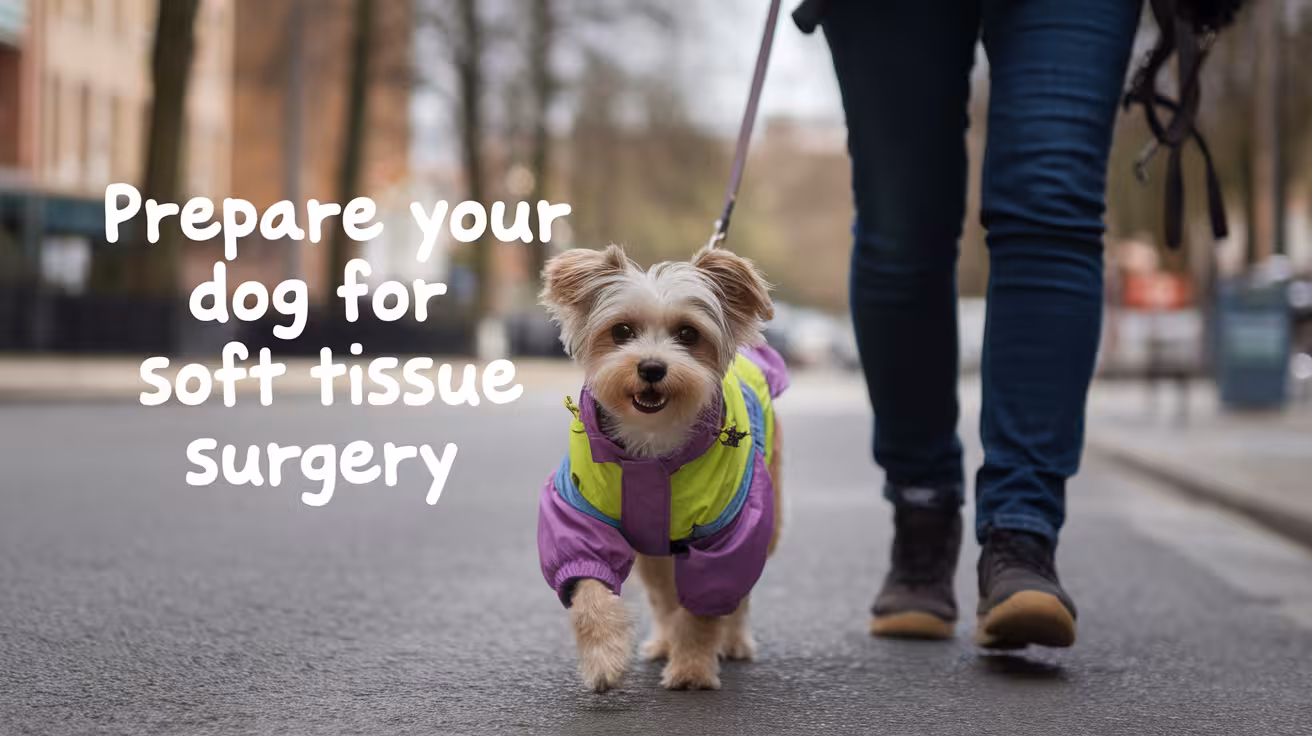
How to Prepare Your Dog for Soft Tissue Surgery
Learn how to prepare your dog for soft tissue surgery with this simple guide. Get tips on fasting, home setup, checklists, and questions to ask your vet
Why Preparation Matters Before Soft Tissue Surgery
A little planning can make a big difference. Preparing your dog before soft tissue surgery helps avoid problems and makes healing faster and smoother.
Here’s why it matters:
- Reduces complications: A calm, healthy dog is less likely to have trouble with anesthesia or recovery.
- Lowers stress: When your dog is relaxed and familiar with their routine, they stay calmer during vet visits.
- Helps you feel ready: Knowing what to expect helps you make clear decisions and feel more in control.
Whether it’s a simple lump removal or a more serious internal surgery, good preparation improves the outcome. It also makes things easier for the veterinary team.
Your dog can’t understand what’s happening, but your support, planning, and care make all the difference. Preparing ahead shows love, and gives your dog the safest path to recovery.
Questions to Ask Your Vet Before Surgery
Talking to your vet before surgery helps you avoid confusion and keeps your dog safer and more comfortable.
Ask these important questions during your pre-surgery visit:
- What time should my dog stop eating and drinking? Most dogs fast the night before surgery. Confirm exact times for food and water.
- Should I adjust any medications before surgery? Some drugs need to be skipped, while others must be given. Ask what applies to your dog.
- What tests or exams will be done before the procedure? Bloodwork, x-rays, or a physical exam may be required to check your dog’s health.
- Will my dog go home the same day or stay overnight? Knowing the plan helps you prepare the home and your schedule.
- What do I need to bring on surgery day? Some clinics ask for paperwork, medicine, or protective gear like an e-collar.
Writing these answers down helps you feel confident on the day of surgery and ensures your dog gets the best care.
The Day Before Surgery
The day before surgery is important for both your dog’s safety and your peace of mind. These steps help prevent delays and reduce risks during the procedure.
1. Stop Food and Water at the Right Time
Follow your vet’s fasting instructions exactly. Most dogs should not eat after 8–10 p.m. the night before. Water may be allowed until early morning, but always confirm with your vet.
- Remove food bowls before bedtime.
- Watch for sneaky eaters—keep trash and food off the floor.
- Ask your vet about fasting rules for puppies or diabetic dogs.
2. Keep Your Dog Calm and Rested
Avoid rough play, visitors, or anything that gets your dog too excited.
- Take a short walk before bed to help them relax.
- Create a quiet space where they can sleep undisturbed.
- Extra rest supports a smoother recovery later.
3. Pre-Surgery Grooming Tips
Your vet may ask you to brush your dog or trim long nails.
- Skip baths unless the vet suggests one.
- Clean ears or paws gently if needed.
4. Watch for Signs of Illness Before Surgery
Call your vet if your dog seems off.
- Vomiting, diarrhea, coughing, or unusual behavior could delay surgery.
- Better to reschedule than risk complications.
Getting Ready at Home
Your home should be ready before your dog returns from surgery. A safe, calm space helps with smooth healing and prevents accidents.
1. Set Up a Calm Resting Area
After surgery, your dog needs a clean, quiet place to rest.
- Choose a room away from noise, kids, or other pets.
- Use soft bedding on the floor to avoid jumping.
- Block stairs or high furniture with a gate or cushions.
- Dim lighting and calming scents like lavender may help reduce anxiety.
2. Prepare the Car for a Safe Ride Home
After surgery, your dog may be groggy or sore. A comfortable car setup keeps them safe.
- Use a crate or secure harness for the trip.
- Line the seat with clean towels or puppy pads in case of nausea or accidents.
- Keep the car cool and drive gently.
- Bring a blanket to cover them if it’s cold.
Preparing your home and car in advance helps reduce stress on surgery day and makes recovery easier from the moment your dog returns.
What to Pack and Bring on Surgery Day
A simple checklist helps make surgery day smooth for both you and the vet team.
Bring these items to the clinic:
1. Medical Records or Past Test Results
If you are visiting a new clinic, bring printed or digital copies of your dog’s health history.
- Include vaccination records and any bloodwork results.
- Mention allergies or past surgery reactions.
2. E-Collar or Protective Gear if Provided
Some clinics provide cones or recovery suits. If your vet gave one earlier, bring it.
- Ask if your dog will wear it right away or later at home.
- Label the gear with your dog’s name if needed.
3. List of Questions or Instructions from Vet
Keep a printed or written copy of what your vet told you.
- Include fasting times, medications, and drop-off instructions.
- Write down any last-minute questions.
4. Emergency Contact Info and Payment Method
Be sure to provide your phone number and a backup contact.
- Ask what payment types are accepted and if you can prepay or use a plan.
- Bring your ID and insurance info if needed.
Surgery Day Checklist
A good morning routine helps your dog feel calm and keeps the clinic running smoothly.
Follow these steps:
1. Remove Collar or Accessories Before Drop-Off
Take off tags, harnesses, or any tight clothing.
- Your dog will get a clinic collar or ID bracelet.
- Leave toys or blankets at home unless the clinic allows them.
2. Short Bathroom Break Before Leaving Home
Let your dog relieve themselves before heading to the vet.
- A short walk helps reduce anxiety.
- Avoid parks or playtime with other dogs.
3. Arrive on Time for Check-In
Be early or on time. Late arrivals can delay the schedule.
- Bring all your documents and items.
- Give staff any updates on your dog’s behavior or health.
4. Sign Consent Forms and Confirm Procedure Details
Read the forms carefully and ask about anything unclear.
- Confirm the surgery type, any extra procedures, and aftercare plans.
5. Leave Calmly and Don’t Over-Reassure
Try to stay relaxed so your dog stays calm too.
- Avoid long goodbyes. A short, cheerful exit works best.
Bonus Tips Most Owners Miss
Some small steps make a big difference, especially in last-minute situations.
1. What to Do If Your Dog Accidentally Eats Before Surgery
Tell your vet right away. They may need to delay the surgery to keep your dog safe.
- Never try to make your dog vomit at home.
- Be honest about what and how much they ate.
2. Can I Give Calming Treats or Meds Before the Vet Visit?
Ask your vet first. Some calming products are safe, but others can interfere with anesthesia.
- Avoid giving anything without approval.
- If your dog takes anxiety meds, ask when to give the dose.
3. Will I Get a Call After Surgery is Done?
Most clinics call when your dog is in recovery.
- Ask when and how you’ll get updates.
- Keep your phone nearby and answer unknown numbers that day.
4. Who to Contact if I’m Running Late?
Save the clinic’s number in your phone.
- Call right away if there’s traffic or an emergency.
- Some clinics have a time limit before they reschedule.
Final Thoughts
Preparing well for your dog's surgery helps both you and your vet provide the best care possible. Every small step, from fasting to packing, contributes to a safer, smoother experience.
Follow your vet’s instructions closely and do not be afraid to ask questions if anything is unclear. Preparation helps reduce anxiety, prevent mistakes, and support faster healing. Your dog depends on you for comfort and safety. Taking time to plan shows how much you care.
With a calm routine, the right supplies, and open communication, you and your dog will be ready to face surgery day with confidence.
FAQs
Can my dog eat or drink on the day of surgery?
No. Most dogs should stop eating 8 to 12 hours before surgery. Water may be allowed until early morning. Always follow your vet’s exact fasting instructions to avoid problems during anesthesia.
What if my dog is sick the night before surgery?
Call your vet right away. Vomiting, diarrhea, coughing, or acting very tired may mean surgery should be delayed. It is safer to reschedule than risk complications during or after the procedure.
Can I give my dog medication before surgery?
Only give medicine if your vet says it is safe. Some drugs must be stopped before surgery. Others, like heart or seizure medications, may still be needed. Always double-check with your vet.
Will my dog be scared or anxious at the clinic?
Some dogs feel nervous, which is normal. Staying calm yourself helps your dog feel secure. Ask your vet if calming sprays, treats, or mild medication are safe before the visit.
Do I need to stay at the clinic during the surgery?
No, most clinics ask you to leave and return later. This keeps the area quiet and reduces your dog’s stress. The clinic will call once your dog is awake and stable.
What should I do if my dog ate something by accident?
Tell your vet immediately. Eating before anesthesia can be dangerous. Do not try to treat it at home. The clinic may delay the surgery to protect your dog’s safety.

28 Questions to Ask Your Vet Before Your Dog’s Soft Tissue Surgery
Discover 28 must-ask questions to discuss with your vet before your dog's surgery. Get clear on safety, recovery, costs, and how to prepare with confidence
Why Asking the Right Questions Matters
It’s normal to feel anxious when your dog needs surgery. You want to do what’s best but may not know what to expect. That’s why asking the right questions is so important—it helps you feel more in control and gives your dog the safest experience possible.
Clear communication with your vet can help you:
- Understand the reason for surgery and if it’s truly necessary now.
- Know the risks involved and how they’ll be managed.
- Prepare for recovery so you can give the best home care.
- Plan for the cost, including any follow-up needs.
Even routine surgeries carry some risks. But with proper planning, most dogs recover very well. Your vet is there to help, and asking questions doesn’t bother them—it shows you care. When you’re informed, you can make calm and confident decisions for your dog’s health.
Questions to Understand the Surgery Itself
Before you agree to surgery, it’s important to fully understand what’s being done and why. These questions help you get clear, direct answers from your vet.
1. What is the exact diagnosis and why is surgery needed?
Ask your vet for a clear explanation of what condition your dog has and why surgery is the best choice. Understanding the diagnosis helps you make the right decision.
- What is the medical name of the condition?
- How was it diagnosed—exam, x-rays, lab tests?
- What happens if we delay or avoid surgery?
The more you understand, the better you can care for your dog before and after surgery.
2. Is this surgery urgent or can it wait?
Not all surgeries must happen right away. Ask if your dog is stable or if waiting might cause harm.
- Is there a health risk in delaying the procedure?
- Will symptoms worsen without surgery?
- Can we try monitoring for a few days first?
Some surgeries, like pyometra, need fast action. Others, like lump removals, can sometimes be scheduled later.
3. Are there any non-surgical treatment options?
Before going forward with surgery, it’s fair to ask if there are other ways to treat your dog’s condition.
- Can medication, diet, or rest help instead?
- Are non-surgical treatments less effective or only temporary?
- What risks come with skipping surgery?
Your vet can explain all your choices so you can pick what feels best for your dog.
4. What type of surgery do you recommend and why?
Some conditions can be treated in more than one way. Ask which procedure your vet suggests and why they believe it’s the best option.
- Are there different techniques available?
- Is this a common surgery for my dog’s breed or condition?
- How often does your clinic perform this type of surgery?
This helps you feel confident in the care your dog will receive.
5. What exactly will happen during the surgery?
Knowing what the surgery involves helps ease worry and prepares you to care for your dog afterward.
- How long will the surgery take?
- Will any organs or tissue be removed?
- Will my dog be under general anesthesia the whole time?
Ask your vet to explain it in simple steps. A short walkthrough builds trust and understanding.
6. Can this surgery be combined with other procedures (like microchipping)?
If your dog needs more than one procedure, ask if they can be done at the same time to avoid extra anesthesia.
- Can you spay/neuter, remove a lump, or place a microchip together?
- Will combining procedures affect recovery?
- Is there any added risk or cost?
Combining treatments can save time, money, and stress for both you and your dog.
Questions About the Veterinary Team and Safety
It’s important to know who will care for your dog and how they’ll keep your pet safe during and after surgery.
7. Who will perform the surgery and what is their experience?
You have the right to know who will operate on your dog and what training they have.
- Is the surgeon a licensed veterinarian or a specialist?
- How often do they perform this type of surgery?
- Have they handled similar cases with good outcomes?
Knowing your vet’s experience can give you peace of mind before the procedure.
8. Will someone be monitoring my dog during anesthesia and recovery?
Monitoring is key for safety. Ask how your dog will be watched during and after surgery.
- Will a trained technician monitor heart rate, breathing, and oxygen?
- How often are vital signs checked?
- Is someone present during recovery?
Constant monitoring reduces risk and helps catch problems early.
9. How safe is anesthesia for my dog’s age and health?
Anesthesia is usually safe, but risks can go up with age or illness. Ask how your vet plans to manage this.
- Has bloodwork or heart testing been done?
- Will the anesthesia be adjusted for my dog’s size or condition?
- Are special precautions taken for senior or sick dogs?
Understanding the safety plan helps you feel more confident.
10. What are the risks and possible complications?
Every surgery has some risk. Asking about this helps you prepare and make informed choices.
- What are the most common complications for this surgery?
- What signs should I watch for at home?
- What happens if there’s a problem during surgery?
A good vet will always explain both the benefits and the risks.
11. Will lab tests or imaging be done before surgery?
Pre-surgery tests help your vet plan a safer procedure. Ask what’s recommended for your dog.
- Will you do bloodwork or a complete blood count (CBC)?
- Are x-rays or ultrasound needed?
- How do these tests help reduce risk?
Testing helps spot hidden problems that could affect surgery or recovery.
12. Will someone be with my dog while they wake up from anesthesia?
The recovery period is sensitive. Your dog should not be left alone as they wake up.
- Will a technician stay with my dog during recovery?
- How is pain or nausea managed while waking up?
- Will you call me once my dog is stable?
Knowing someone will be there gives you peace of mind.
Questions to Prepare for the Day of Surgery
Getting ready at home is just as important as what happens at the clinic. These questions will help you prepare your dog safely and avoid last-minute surprises.
13. How should I prepare my dog the day before surgery?
Ask your vet for clear steps to follow before surgery day.
- Should I give a bath or clean the wound area?
- Should my dog avoid rough play or long walks?
- When should I bring my dog to the clinic?
Planning ahead ensures your dog arrives calm, clean, and ready for a smooth procedure.
14. Do I need to withhold food or medication?
Most dogs need to fast before surgery, but always ask for specific guidance.
- When should I stop feeding food and water?
- Should I give or skip morning medications?
- What if my dog has diabetes or a special condition?
Clear instructions help avoid complications under anesthesia.
15. Can I stay with my dog before or after the procedure?
Some clinics allow limited time with your pet, but rules vary.
- Can I be with my dog before they go in?
- Will I get an update right after surgery?
- When can I pick them up?
Knowing what to expect helps you plan your own day too.
16. How long will the surgery take and will my dog stay overnight?
Not all surgeries are quick, and some dogs need monitoring afterward.
- What is the expected length of surgery?
- Is this an outpatient procedure or will my dog stay overnight?
- Will someone watch them if they stay overnight?
Understanding the timeline helps you stay calm and prepared.
17. What kind of stitches or bandages will my dog come home with?
Ask what you’ll see when your dog comes home—so nothing surprises you.
- Will there be external stitches or ones that dissolve?
- Will a bandage or dressing cover the wound?
- How do I keep the area clean and dry?
Knowing this helps you give the best home care from day one.
Questions About Recovery and Home Care
Good recovery starts with good planning. These questions will help you give your dog the best care once they return home.
18. What will recovery look like in the first 24–48 hours?
The first two days after surgery are important for healing. Ask what to expect.
- Will my dog be sleepy or act differently?
- Should I expect swelling or bruising near the surgery site?
- When should I offer food and water?
Understanding normal signs vs. warning signs helps you act quickly if something isn’t right.
19. How will pain be managed at home?
Pain control is key to comfort and healing. Your vet will give you a plan.
- What medications should I give and when?
- Should I watch for side effects like vomiting or sleepiness?
- Can I use cold packs or other methods for relief?
Never guess with pain meds—follow the vet’s exact instructions.
20. Will my dog need a cone or any protective gear?
Most dogs need a cone (e-collar) or similar protection to prevent licking.
- How long will my dog need to wear the cone?
- Are there softer or more comfortable options?
- Can I take it off during meals?
Keeping the wound protected helps prevent infection or damage to stitches.
21. What should I feed my dog after surgery, and when?
After anesthesia, your dog’s stomach may be sensitive. Ask what’s safe to give.
- When should I give the first meal?
- Should I offer a bland diet like boiled chicken and rice?
- Should I avoid any treats or hard kibble?
Feeding the right food supports healing and avoids upset stomachs.
22. Can you show me how to give medications or change bandages?
Don’t feel shy—ask your vet to show you the correct steps before heading home.
- How do I give pills or liquid meds safely?
- How often should I clean the bandage, if needed?
- What should I do if my dog resists?
Practicing at the clinic can make home care easier and safer.
23. How long before my dog can return to normal activity?
Your dog may feel better fast—but don’t let them do too much too soon.
- How many days of crate rest or limited walks are needed?
- When can my dog play or go up stairs again?
- Can they return to daycare or long walks soon?
Ask your vet for a step-by-step plan to prevent setbacks.
24. What signs of complications should I watch for?
Catching problems early helps prevent serious issues. Know what’s normal and what’s not.
- Should I watch for swelling, bleeding, or bad smells?
- Is a small lump at the stitch site okay?
- What if my dog stops eating or seems too tired?
Report anything that worries you—better safe than sorry.
25. Who should I call if something goes wrong—day or night?
Emergency care should always be available. Get contact info before you leave the clinic.
- Is there an emergency number after clinic hours?
- Should I go to a 24/7 emergency hospital if I can’t reach you?
- Can I text or send pictures if I’m unsure?
Keep the contact info in your phone or on your fridge just in case.
Questions About Cost and Follow-Up
Understanding the financial side of surgery helps you plan better and avoid surprise bills. Don’t be afraid to ask—your vet expects it.
26. How much will the surgery and aftercare cost?
Ask for a written estimate that includes all expected fees.
- Does the cost include anesthesia, medications, and supplies?
- Are recheck appointments or follow-ups included in the price?
- Are there extra fees for emergencies or extended care?
Knowing the total cost helps you budget and decide if pet insurance or payment plans are needed.
27. Are there follow-up visits or extra treatments I should expect?
Most surgeries need at least one follow-up. Ask what’s planned.
- Will my dog need a recheck to remove stitches or check healing?
- Are repeat bandage changes or x-rays needed?
- Will further tests be done if the results come back abnormal?
Planning ahead keeps your dog’s recovery smooth and stress-free.
28. Do I need to sign a consent form for this procedure?
A surgical consent form protects both you and the clinic.
- What information does the form include?
- Will it list possible risks and complications?
- Can I take time to read it before signing?
Always read forms carefully and ask if anything is unclear before signing.
Final Thoughts
Asking questions before your dog’s surgery shows that you care, and it helps you stay informed, calm, and ready. Surgery can feel scary, but when you understand what’s happening, it becomes easier to manage. Your vet wants you to ask questions, so don’t hold back.
Write down the answers during your appointment or ask for printed instructions. If you forget something later, call the clinic, it’s okay to ask again. Clear communication leads to safer surgery and better recovery for your dog. Whether it’s a routine spay or an emergency procedure, being involved helps you give the best care possible.
FAQs
Is it okay to ask my vet the same question twice?
Yes, absolutely. Vets understand that surgery can be stressful. They expect you to ask again if something isn’t clear. Repeating questions helps avoid mistakes and ensures your dog gets the safest care.
What if I feel nervous asking certain questions?
It’s normal to feel nervous, but remember—there are no “silly” questions. Your vet wants you to feel confident. Asking helps avoid confusion later and shows that you’re an attentive, caring pet owner.
Can I request a second opinion before surgery?
Yes, you can. If you're unsure, it's fine to get a second opinion. Most vets support this, especially for major or costly procedures. It helps you feel more confident in your decision.
Should I stay at the clinic during my dog’s surgery?
Most clinics prefer owners to go home and return later. This keeps the space calm for pets and staff. Ask your vet when to return and how you’ll be updated during the procedure.
How soon after surgery will my dog feel better?
Some dogs feel better within 24–48 hours, while others take longer. Pain meds help a lot. Your dog may act tired or quiet at first—this is normal. Watch for signs of pain or infection.
What if I can’t afford the surgery cost upfront?
Ask your vet about payment plans, CareCredit, or pet insurance options. Some clinics offer help or refer you to financial support groups. Don’t hesitate to ask—they want your dog to get needed care.

15 Common Soft Tissue Surgeries in Dogs Explained Simply
Learn about 15 common soft tissue surgeries in dogs, explained in simple terms for pet owners. Understand signs, treatments, and recovery basics
What Are Soft Tissue Surgeries in Dogs?
Soft tissue surgeries in dogs are procedures that focus on areas of the body not involving bones or joints. These include the skin, muscles, internal organs, and body cavities. Unlike orthopedic surgeries, which treat bone fractures or joint problems like cruciate ligament tears, soft tissue surgeries handle issues like tumors, wounds, or organ problems.
Veterinarians may recommend soft tissue surgery for many reasons, such as:
- Tumor removal - To take out benign or cancerous growths on the skin or inside organs.
- Wound repair - To treat deep cuts, abscesses, or bite wounds that won’t heal on their own.
- Organ surgeries - Like spleen removal, bladder stone removal, or stomach surgery in emergencies.
- Ear and eye surgeries - To correct infections, deformities, or injuries.
These procedures can improve your dog’s comfort, prevent further illness, and sometimes save their life.
Signs Your Dog Might Need Soft Tissue Surgery
Some health problems in dogs can’t be solved with medicine alone. In these cases, your vet may suggest soft tissue surgery. Here are some signs that may point to a deeper problem needing surgical care:
- Vomiting or not eating - If your dog suddenly stops eating or keeps vomiting, it could be a sign of a blockage, stomach twist, or internal problem that needs surgery.
- Lumps or bumps under the skin - A growing lump could be a tumor, cyst, or abscess. Not all are dangerous, but many need to be removed for testing or treatment.
- Trouble peeing or pooping - Straining, blood in urine, or hard stools can mean bladder stones, infections, or rectal issues.
- Red or swollen eyes - Eye swelling or discharge may need surgery to treat problems like cherry eye or eyelid growths.
- Swollen belly or breathing problems - A large belly or labored breathing can point to fluid buildup, organ damage, or tumors.
- Pregnancy issues or discharge - Trouble giving birth or unusual discharge may mean an emergency like a stuck puppy or uterine infection.
Always see a vet if these signs appear.
Common Soft Tissue Surgeries in Dogs
Many soft tissue surgeries are common in general practice and can treat a wide range of health issues in dogs. Below are some of the most frequently performed ones.
1. Spay (Ovariohysterectomy)
Spaying removes the ovaries and uterus in female dogs. It helps prevent pregnancy and protects against serious health problems like pyometra and mammary tumors.
- Why it’s done: To prevent reproduction and reduce the risk of life-threatening uterine infections.
- Age recommendation: Usually done at 6–12 months, before the first heat cycle.
- Recovery: Most dogs heal within 7–10 days with rest, pain meds, and cone use.
This is a routine surgery done under general anesthesia. Your dog may feel tired for a day or two but usually returns to normal quickly. Spaying also reduces behaviors linked to heat cycles like mood swings or escaping. While some people worry about weight gain, regular exercise and diet control keep your dog healthy. Always consult your vet about the right age and timing for spaying.
2. Neuter (Castration)
Neutering removes both testicles in male dogs. It’s a common surgery that controls breeding and reduces risks of testicular cancer and hormone-driven behavior.
- Why it’s done: To prevent unwanted litters and lower aggressive or roaming behaviors.
- Health benefits: Prevents testicular tumors and may reduce prostate issues.
- Post-op care: Dogs need to rest, wear a cone, and avoid licking for about 10 days.
Neutering is usually done around 6–12 months of age, depending on the dog’s breed and size. It is performed under anesthesia, and most dogs go home the same day. Some behavioral changes may take a few weeks to show.
This surgery does not affect your dog’s personality or ability to play. It’s also an important step in preventing pet overpopulation. Speak with your vet if you’re unsure about the best time to neuter your dog.
3. Lump or Mass Removal
Many dogs develop lumps under or on their skin. These can be harmless or cancerous, so removal and testing are often recommended.
- Common reasons: Lipomas (fatty tumors), cysts, skin tags, or cancerous growths.
- Diagnosis: A needle test or biopsy may be done before or during surgery.
- Goal: Remove the mass completely and test it in a lab if needed.
The surgery is usually straightforward. The vet removes the lump and closes the wound with stitches. Dogs typically recover in 7–14 days, depending on the size and location of the mass. If the lump is cancerous, further treatment like chemotherapy may be needed.
Early removal helps reduce pain, irritation, or the risk of spreading if the growth is malignant. Always check with your vet if you notice any new or fast-growing lumps.
4. Foreign Object Removal (GI Surgery)
Dogs often chew or swallow things they shouldn’t. When an object gets stuck in the stomach or intestines, it needs to be removed with surgery.
- Warning signs: Vomiting, not eating, belly pain, or straining to poop.
- Common items: Toys, socks, bones, corn cobs, or string.
- Emergency: Delayed treatment can lead to ruptures or infections.
The surgery involves opening the stomach or intestines to remove the object. Recovery takes about 10–14 days and includes rest, fluids, pain control, and a special diet. In some cases, a portion of the intestine may need to be removed if damaged. To avoid repeat surgeries, keep small objects away from your dog and provide safe chew toys. If your dog shows any signs of blockage, call your vet immediately.
5. Bladder Stone Removal (Cystotomy)
Cystotomy is a surgery to open the bladder and remove stones that block urine flow. These stones can cause pain, infection, or even kidney damage if not treated.
- Symptoms: Straining to pee, blood in urine, frequent urination, or accidents in the house.
- Diagnosis: X-rays or ultrasound help find and size the stones.
- Surgical goal: Remove all stones and flush the bladder to prevent more blockages.
The surgery is done under anesthesia. Most dogs recover in 7–10 days with rest, pain medication, and antibiotics. After surgery, your vet may suggest a special diet to prevent new stones. Regular follow-ups are also important. Some breeds are more prone to forming bladder stones, so early signs should never be ignored. If your dog has trouble urinating, see a vet right away to avoid serious complications.
6. Hernia Repair (Umbilical, Inguinal)
Hernias happen when fat or organs push through a weak spot in the body wall. In dogs, they often appear near the belly button or groin area.
- Common hernias: Umbilical (belly button) and inguinal (groin).
- Symptoms: Soft swelling, pain, or trouble moving.
- Risks: If tissue gets trapped, it can lose blood supply and become an emergency.
Hernia repair surgery moves the tissue back in place and closes the gap with stitches. Small umbilical hernias are often fixed during spay or neuter. Larger hernias may need separate surgery. Recovery takes about 10 days with limited activity to let the muscles heal.
Some hernias in puppies may close on their own, but it’s best to have your vet examine any swelling. Quick treatment helps avoid serious problems like tissue death or infection.
7. Pyometra Surgery (Infected Uterus)
Pyometra is a life-threatening infection of the uterus in unspayed female dogs. It requires emergency surgery to save the dog’s life.
- Signs to watch for: Lethargy, vomiting, bloated belly, and pus coming from the vulva.
- Timing: Usually happens a few weeks after heat.
- Treatment: Immediate ovariohysterectomy (spay surgery) to remove the infected uterus.
This surgery is more risky than a routine spay because of the infection and toxins. Dogs are put on IV fluids, antibiotics, and pain medication before and after surgery. Recovery takes longer than a standard spay, often 10–14 days. If left untreated, pyometra can cause sepsis and death within days.
This is one reason many vets recommend spaying early in life to prevent this emergency. Always see your vet right away if you see these symptoms.
8. Gastropexy (Bloat Prevention or GDV Treatment)
Gastropexy is a surgery that attaches the stomach to the body wall. It prevents or treats gastric dilatation-volvulus (GDV), a deadly condition where the stomach flips.
- Why it’s done: Large, deep-chested breeds are prone to bloat and GDV.
- Signs of GDV: Swollen belly, non-productive retching, restlessness, and collapse.
- Prevention: Some owners choose preventive gastropexy during spay or neuter.
If GDV has already occurred, emergency surgery untwists the stomach and then tacks it in place. Without treatment, GDV is fatal in hours. After gastropexy, most dogs recover in 10–14 days. Special feeding routines can help reduce bloat risk.
This surgery has saved many dogs’ lives, especially Great Danes, Weimaraners, and similar breeds. If your dog shows sudden belly swelling or distress, seek emergency care immediately.
9. Cherry Eye Surgery
Cherry eye happens when the tear gland in the third eyelid pops out and looks like a red lump. Surgery is needed to move the gland back into place.
- Affected dogs: Young dogs, especially Bulldogs, Cocker Spaniels, and Beagles.
- Symptoms: Red swelling in the corner of the eye, irritation, or discharge.
- Treatment: Gland replacement surgery, not removal, to keep tear production.
During surgery, the vet makes a pocket in the eyelid to hold the gland securely. Recovery usually takes 1–2 weeks. Dogs may need eye drops to reduce swelling and prevent infection. Without treatment, cherry eye can lead to chronic dry eye, which causes pain and vision loss. Early surgery gives the best chance to restore function and appearance. Always see your vet if you notice a red lump in your dog’s eye.
10. Entropion Repair (Eyelid Surgery)
Entropion is when a dog’s eyelid rolls inward, causing the lashes to rub against the eye. It can lead to pain, ulcers, or scarring if untreated.
- Common breeds: Shar-Pei, Chow Chow, Bulldogs, and Retrievers.
- Signs: Squinting, tearing, eye redness, or pawing at the face.
- Treatment: Surgery to remove a small part of the eyelid so it sits normally.
The procedure is done under anesthesia. Recovery takes about 10–14 days, with an e-collar to protect the eye and antibiotic ointment to help healing. Some dogs, especially puppies, may need a second surgery as they grow.
Entropion repair can greatly improve comfort and prevent permanent eye damage. If your dog has chronic eye irritation or discharge, have their eyelids checked by a veterinarian to see if surgery is needed.
11. Anal Gland Removal (Anal Sacculectomy)
Some dogs have constant problems with their anal glands, which can get infected or impacted. In severe or repeated cases, surgical removal is the best solution.
- Why it’s done: Chronic infection, abscess, tumors, or constant scooting.
- Symptoms: Scooting, licking the rear, pain, or swelling near the anus.
- Other options: If manual expression or meds don’t help, surgery is considered.
Anal sacculectomy removes the small glands near the rectum that produce scent-marking fluid. Surgery is done under anesthesia, and dogs go home the same day. Recovery includes pain medicine, a cone, and stool softeners for 10–14 days.
Minor incontinence can happen in rare cases, but most dogs recover without problems. Removing these glands improves quality of life when infections or blockages keep coming back. Always consult your vet if your dog has repeated anal gland trouble.
12. Laceration or Wound Repair
Dogs can get deep cuts from fights, accidents, or sharp objects. When the skin and tissues are badly damaged, surgery is often needed to clean and close the wound.
- Common causes: Dog bites, car accidents, or sharp metal.
- Treatment steps: Cleaning, removing dead tissue, and stitching the wound.
- Infection risk: Open wounds can lead to serious infection without quick care.
The vet uses anesthesia or sedation to safely treat the injury. The wound is flushed and closed with stitches or staples. Drains may be placed for deeper wounds. Most dogs heal in 7–14 days, with rest, pain control, and possibly antibiotics. A cone prevents licking, which can slow healing or cause infection. If your dog has a deep or dirty wound, don’t wait—see your vet right away.
13. Cesarean Section (C-section)
A C-section is a surgery to deliver puppies when a dog cannot give birth naturally. It’s common in certain breeds and can be planned or done in an emergency.
- When it’s needed: Labor is too long, puppies are too big, or the mother is too tired.
- Planned cases: Often done in Bulldogs, Pugs, or dogs with small pelvises.
- Emergency signs: Weak contractions, no puppy after 2+ hours, or green discharge.
The surgery is done under anesthesia, and the vet removes the puppies quickly and safely. The mother wakes up while the pups are cleaned and warmed. Aftercare includes pain relief, rest, and help with nursing. Recovery usually takes 10–14 days. Owners should watch for signs of infection or nursing issues. A C-section can save both the mother and her puppies if labor doesn’t go as expected.
14. Enucleation (Eye Removal)
Sometimes an eye must be removed to relieve pain or treat disease. Enucleation is done when the eye is blind, painful, or damaged beyond repair.
- Common reasons: Glaucoma, cancer, injury, or severe infection.
- Signs to watch: Constant squinting, discharge, swelling, or bulging.
- Goal of surgery: Remove the eye to stop pain and prevent future problems.
Dogs do very well with one eye. The surgery is done under anesthesia, and the eyelids are stitched closed after the eye is removed. Most dogs recover in 10–14 days with pain meds and a cone. They quickly adjust to life with one eye and continue to enjoy normal activities.
While it may sound extreme, enucleation often improves a dog’s comfort and quality of life. If your dog has a painful, non-functional eye, this may be the kindest option.
15. Amputation
Amputation is the removal of a limb, usually due to severe injury, infection, or cancer. Though it sounds dramatic, many dogs adapt well and live full lives on three legs.
- When it’s needed: Bone tumors, non-healing fractures, or loss of blood flow.
- Legs and toes: Front or back limbs, or just toes, may be removed depending on the issue.
- Recovery: Most dogs walk within days and adjust over time.
The surgery is done under anesthesia, followed by pain management, rest, and sometimes physical therapy. Healing usually takes 10–14 days. Tripod dogs (three-legged dogs) can still run, play, and live happily, especially if they are not overweight.
Owners often feel unsure at first, but most are amazed by how quickly dogs bounce back. If your dog has a condition where saving the limb isn’t possible, amputation can give them a pain-free and active life.
What to Expect Before and After Surgery
Knowing what to expect helps reduce stress for both you and your dog. Here’s a simple breakdown of how to prepare and what happens during and after surgery.
Before surgery:
- Fasting: No food 8–12 hours before surgery (ask your vet about water).
- Pre-op tests: Bloodwork and sometimes x-rays to check overall health.
- Medication check: Let your vet know about any ongoing medicines.
On surgery day:
- Your dog is checked in and given anesthesia.
- The vet performs the surgery and monitors vital signs closely.
- You’ll be updated once your dog is in recovery.
After surgery:
- Take-home instructions include rest, pain meds, cone use, and limited activity.
- Stitches usually come out in 10–14 days unless dissolvable.
Follow all instructions carefully and keep the wound clean. Your vet will tell you when to return for follow-ups. Contact them if anything looks wrong.
Are These Surgeries Safe for Older Dogs?
Age alone does not decide surgical safety. Many senior dogs recover well from soft tissue surgeries when they are otherwise healthy.
How vets assess risk:
- Health check: Vets run bloodwork, heart tests, and sometimes x-rays or ultrasounds.
- Anesthesia plan: Special care is taken to use safer drugs and monitor older dogs closely.
- Surgical need: If the surgery prevents pain or a life-threatening issue, it’s often worth doing.
Recovery in seniors:
- Healing may take a bit longer, but older dogs often rest more, which helps healing.
- Vets often use extra pain relief and anti-nausea drugs to support smooth recovery.
- Extra care at home, including padded beds and support for walking, helps seniors heal.
Always ask your vet about the risks and benefits based on your dog’s age and condition. Many older dogs bounce back just as well as younger ones when managed properly.
Recovery Time and Healing Basics
Recovery after soft tissue surgery depends on the type of procedure, but most dogs heal well with good care.
Typical healing time:
- Most dogs take 10–14 days to heal. Some major surgeries may need 3–4 weeks.
- Stitches or staples are removed unless they dissolve on their own.
Aftercare essentials:
- E-collar (cone): Prevents licking, which can open stitches or cause infection.
- Pain meds and antibiotics: Must be given exactly as instructed.
- Rest and restriction: Keep your dog calm and avoid running or jumping.
When to call the vet:
- Redness, swelling, bleeding, or discharge at the surgery site.
- Your dog won’t eat or seems very tired after 24–48 hours.
- Stitches come out too early or your dog gets the cone off.
Always follow your vet’s aftercare instructions closely and return for check-ups.
Soft Tissue Surgery: Elective or Emergency?
Some soft tissue surgeries are planned, while others must be done quickly to save your dog’s life.
Planned (elective) surgeries:
- Spay/neuter
- Lump removals
- Cherry eye or entropion correction
- Hernia repairs
These are usually scheduled ahead and done when your dog is healthy.
Emergency surgeries:
- Pyometra (infected uterus)
- Foreign object removal
- C-section during a hard birth
- GDV (bloat/twisted stomach)
How to act fast:
- Know signs of an emergency: vomiting, collapse, bloody discharge, or sudden belly swelling.
- Call your vet or go to an emergency clinic immediately—don’t wait.
Quick action can save your dog’s life. If you’re unsure, always call your vet for advice.
Questions to Ask Your Vet Before Surgery
It’s important to be informed before your dog has surgery. Here are key questions to ask your vet:
- Is this surgery necessary now?
Can we wait or try medicine first? - What are the risks and benefits?
Will this surgery prevent pain or save my dog’s life? - What will recovery look like?
How long will it take, and what care will my dog need? - What will it cost?
Are there payment plans or insurance options?
Write your questions down before your visit so you don’t forget. Open, honest talks with your vet help you make the best decision for your dog’s health.
Final Thoughts
Soft tissue surgeries are a regular part of veterinary care. They treat everything from minor skin lumps to life-threatening emergencies. When done at the right time, these procedures can ease pain, fix serious problems, and even save lives.
Each dog is different, so always discuss your options with a trusted vet. Ask questions, understand the risks and benefits, and follow all aftercare steps closely. Most dogs recover well and return to their happy selves.
The best care comes from being informed and prepared. Whether it’s a routine lump removal or an emergency like GDV, your vet is there to guide you every step of the way.
FAQs
What is the most common soft tissue surgery in dogs?
Spay and neuter surgeries are the most common soft tissue procedures. They are done to prevent unwanted breeding and reduce health risks like infections or cancers. These surgeries are routine, safe, and often performed when a dog is young, usually around 6–12 months of age.
How long does it take a dog to recover from soft tissue surgery?
Most dogs recover in 10 to 14 days after soft tissue surgery. Some may need more time, especially if the surgery was major or involved internal organs. During recovery, dogs need rest, wound care, and possibly medication. Always follow your vet’s aftercare instructions closely to help healing.
Can my dog eat before surgery?
No. Dogs should not eat for at least 8–12 hours before surgery. This helps prevent vomiting during anesthesia, which can be dangerous. Your vet will give you exact instructions. Some dogs may be allowed water, but food should always be withheld unless your vet says otherwise.
Is anesthesia safe for my dog?
Anesthesia is generally safe, especially with modern drugs and equipment. Vets check your dog’s health before surgery using blood tests and sometimes x-rays. For older or sick dogs, the vet may use special anesthesia plans. Monitoring during surgery helps keep your dog safe throughout the procedure.
What should I do if my dog licks the stitches?
Licking can cause the wound to open or get infected. Always use the cone (e-collar) your vet provides. If your dog still reaches the area, contact your vet. They might suggest a larger cone or a recovery suit to protect the stitches and help proper healing.
How do I know if something’s wrong after surgery?
Watch for swelling, redness, bleeding, discharge, or a bad smell from the wound. Other warning signs include no appetite, vomiting, or acting very tired after the first day. If you see any of these, call your vet right away. It’s better to ask early than risk complications.
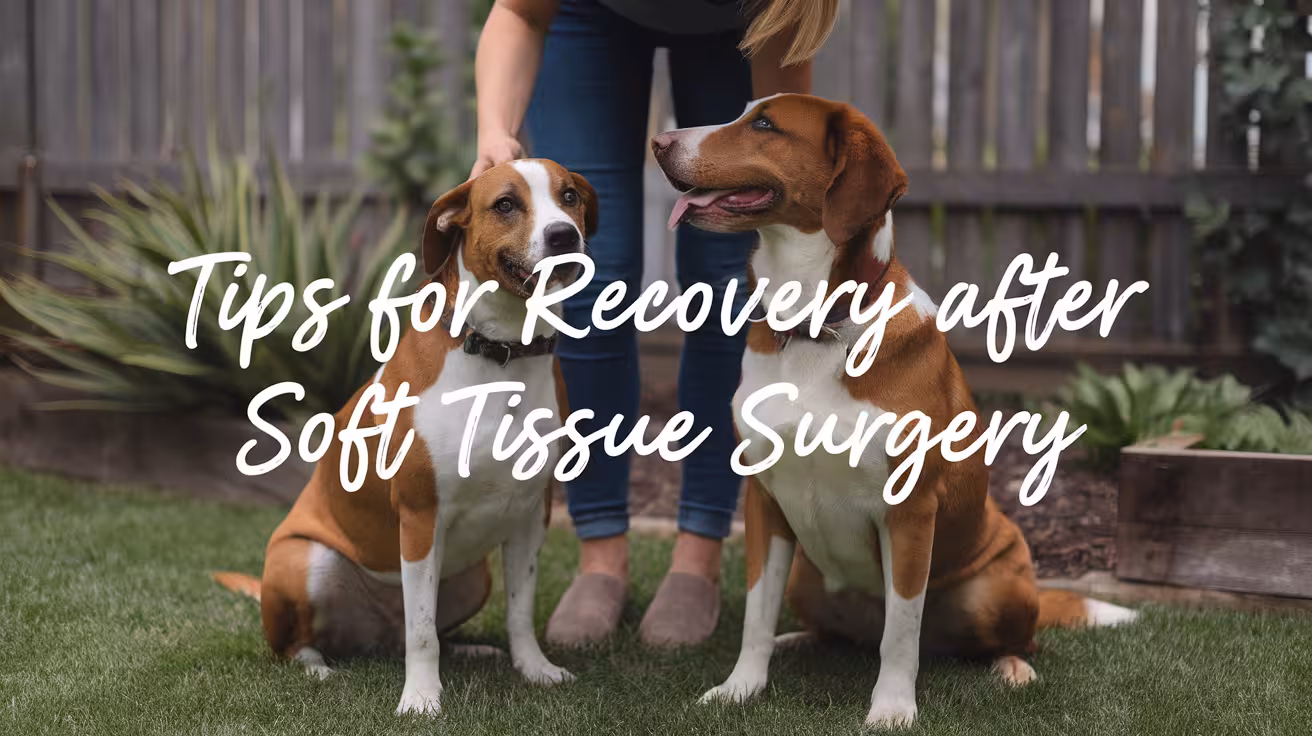
Tips for Managing Pain and Recovery After Dog Soft Tissue Surgery
Discover simple tips to manage pain and support your dog’s recovery after surgery. Learn signs of pain, safe care methods, and when to call your vet
Why Managing Pain Matters After Soft Tissue Surgery
Soft tissue surgeries often involve internal organs, skin, or muscles. While they don’t affect bones or joints, they can still cause soreness, swelling, and stress. If your dog’s pain is not well managed, it can slow healing, reduce appetite, and affect behavior.
Here’s why pain control after soft tissue surgery is so important:
- Helps tissues heal faster by reducing tension and inflammation.
- Keeps your dog eating and drinking, which is vital for recovery.
- Prevents stress-related issues like whining, panting, or pacing.
- Reduces the risk of self-trauma, such as licking or biting the incision.
Most dogs hide their pain, so don’t wait for crying or limping. Instead, watch for changes like restlessness, heavy panting, or avoiding movement.
Good pain control with vet-approved medication, a quiet space, and gentle care helps your dog feel better and heal properly. Always follow your vet’s instructions and speak up if anything feels off.
How to Tell If Your Dog Is in Pain
Recognizing pain early helps prevent complications and keeps recovery on track.
After soft tissue surgery, pain signs are often subtle. Dogs rarely cry or limp unless pain is severe. Instead, they may show small behavior changes. Knowing what to watch for can help you take quick action and adjust care as needed.
Common signs your dog may be in pain include:
- Whining, panting, or restlessness: Your dog may seem unsettled or unable to sleep comfortably.
- Hunched back or reluctance to move: Pain can cause stiffness, especially near the incision site.
- Licking or biting the surgical area: This may be your dog’s way of soothing discomfort.
- Loss of appetite or hiding behavior: Pain often reduces interest in food or social interaction.
Other signs may include trembling, tucked tail, pinned ears, or slow movement. If your dog shows any of these behaviors despite medication, contact your vet. Early adjustments in pain relief can lead to better healing. Never assume your dog is fine just because they are quiet.
Safe Pain Relief Options for Soft Tissue Recovery
Pain relief is more than just medication—it is a full care plan approved by your vet.
Vet-Prescribed Medications
Vet-approved pain medications are the foundation of soft tissue surgery recovery. Your vet will prescribe one or more drugs based on your dog’s age, weight, and the type of surgery.
Common medications include:
- NSAIDs (non-steroidal anti-inflammatory drugs): These reduce pain and swelling. Examples include carprofen or meloxicam.
- Gabapentin: Used for nerve pain or general discomfort.
- Opioids: Sometimes prescribed for short-term pain management after major surgery.
Follow your vet’s instructions exactly.
- Give medications at the same time each day.
- Use food or treats to help with swallowing pills.
- Do not skip doses, even if your dog seems fine.
Never increase the dose without vet approval. Overdosing can lead to kidney or liver problems. Keep a written schedule so you don’t miss any doses. Store medications safely, out of reach of pets and children.
If you notice vomiting, diarrhea, or unusual tiredness after giving meds, call your vet. Adjustments can often be made to improve comfort and avoid side effects. Pain control works best when given consistently and under supervision.
Avoid Human Medications
One of the biggest mistakes dog owners make is giving human painkillers without asking the vet. Many over-the-counter medications that are safe for people are toxic to dogs and can lead to serious illness or even death.
Never give your dog:
- Ibuprofen or naproxen (found in Advil, Aleve)
- Acetaminophen (found in Tylenol)
- Aspirin unless specifically prescribed
- Muscle relaxers or sedatives for humans
These drugs can cause internal bleeding, liver damage, kidney failure, or stomach ulcers in dogs. Even a small dose of some painkillers can be dangerous for small breeds.
Instead of guessing, always ask your vet what’s safe.
- Write down the name and strength of any human medicine you’re considering.
- Let your vet decide if there’s an animal-safe version.
Remember, even natural products like essential oils or herbal pain relief should be cleared by your vet first. Soft tissue recovery requires gentle, targeted care—not general pain relief meant for humans.
Cold Therapy in the First 48 Hours
Cold therapy can be helpful in the first two days after soft tissue surgery. It reduces swelling, numbs pain, and helps slow inflammation at the incision site.
How to apply cold packs safely:
- Use a soft, wrapped ice pack or frozen veggie bag.
- Apply to the area for 10–15 minutes at a time, 2–3 times a day.
- Always place a towel between the cold pack and your dog’s skin.
Ask your vet before using ice, especially if your dog had abdominal or internal surgery. Cold packs are typically more helpful for surface-level procedures, such as lump removals or wound repairs.
Do not use cold therapy if:
- Your vet has advised against it
- The incision is deep or near the organs
- Your dog seems anxious or reacts negatively
Stay with your dog during cold therapy to prevent chewing or discomfort. Used correctly, cold packs can help reduce the need for extra medication and make the first few days more manageable.
Sedatives or Anxiety Relief (If Needed)
Some dogs struggle to stay calm during recovery. This can be a problem, especially after soft tissue surgery, where movement must be limited to protect stitches and healing tissues. If your dog is pacing, jumping, or barking non-stop, speak to your vet about temporary calming options.
Your vet may recommend:
- Trazodone or acepromazine: Light sedatives that help your dog rest.
- Gabapentin: Offers both pain relief and mild sedation.
- Anti-anxiety supplements: Only with vet approval.
Never give human sleeping pills or CBD oil without professional advice. These can cause dangerous side effects in dogs.
Tips to support calm behavior:
- Keep your dog in a quiet room away from visitors.
- Use a covered crate or pen for security.
- Play soft music or white noise to reduce outside triggers.
Dogs that are too active risk pulling stitches or reopening wounds. When activity control is difficult, mild sedation can protect both your dog’s comfort and surgical success.
Making Your Dog Comfortable at Home
Creating a calm, safe space is one of the best ways to support your dog’s recovery after soft tissue surgery. Your dog needs plenty of rest, limited movement, and a space where they feel secure and protected. Small adjustments at home can make a big difference in healing.
Start with a recovery area:
- Choose a quiet room away from stairs, kids, and other pets.
- Use soft, washable bedding that keeps your dog off hard floors.
- Keep water nearby in a shallow, non-spill bowl.
Prevent licking or biting the incision:
- Use an e-collar (cone) or a soft recovery shirt as directed by your vet.
- Make sure the cone fits well and doesn't rub or fall off.
Avoid slips and overexertion:
- Block access to stairs and remove rugs that slide.
- Limit movement by closing doors or using baby gates.
A calm environment reduces stress, keeps your dog from hurting themselves, and supports faster healing. Keep noise levels low, keep routines simple, and supervise any time your dog is out of their rest space.
Feeding and Digestion During Recovery
After soft tissue surgery, your dog’s digestive system may take a little time to return to normal. Anesthesia and pain medications can cause temporary appetite loss, nausea, or constipation. Providing gentle meals and watching your dog’s bowel habits helps prevent setbacks during recovery.
Feeding tips for the first few days:
- Offer bland meals like boiled chicken and rice if your vet recommends it.
- Keep portions small and increase gradually as appetite returns.
- Transition slowly back to your dog’s regular food after 24 to 48 hours.
Monitor digestion closely:
- Make sure fresh water is always available.
- Watch for constipation or straining when pooping.
- Report vomiting, diarrhea, or refusal to eat after the first day.
If needed, ask your vet about adding canned pumpkin or a stool softener to help with constipation. Avoid giving any over-the-counter digestive aids without approval. A calm feeding routine supports steady recovery and keeps your dog comfortable as they heal.
Managing Activity and Movement
Movement should be limited during the first 1 to 2 weeks after surgery. Even though your dog might seem energetic, soft tissue wounds need time to close and strengthen. Too much activity can reopen stitches or slow healing.
Here’s how to keep movement safe:
- No running, jumping, or rough play until your vet says it’s okay.
- Avoid stairs, slippery floors, and high furniture.
- Use short leash walks only for bathroom breaks.
Support weak or wobbly dogs:
- Use a towel sling or rear-end harness under the belly for support.
- Keep walks short and always stay close.
- Don’t allow off-leash time, even in a fenced yard.
Supervise your dog during rest time. Crates or playpens are great for limiting movement, especially if your dog is young or energetic. Follow your vet’s timeline for slowly returning to regular walks and play. A few quiet days now can prevent weeks of delay later.
Incision and Wound Care
Caring for the surgical site is one of the most important parts of recovery. The goal is to keep the area clean, dry, and undisturbed until it heals completely. Your vet will tell you what to expect and when to come back for a check-up.
Check the incision daily for:
- Swelling, redness, or warmth around the area
- Yellow or green discharge, bad odor, or bleeding
- Any missing stitches or skin pulling apart
Basic care guidelines:
- Do not bathe your dog unless your vet says it’s okay.
- Keep the area dry and free from dirt, grass, or hair.
- Prevent licking or scratching with an e-collar or recovery suit.
Gently lift the fur to look at the wound. Use calm praise or treats to keep your dog still. Call your vet if anything looks worse instead of better. Early action prevents infection and supports faster healing.
Supporting Your Dog Emotionally
After surgery, your dog may not act like their usual self. Many dogs become more clingy, anxious, or withdrawn as they recover. These emotional changes are normal, especially in the first few days.
What your dog may show:
- Restlessness or following you everywhere
- Whining when left alone
- Sleeping more or hiding in corners
How to help emotionally:
- Give calm affection and stay nearby for comfort
- Stick to a routine with feeding, meds, and short walks
- Offer soft blankets, quiet music, and low lighting
- Use puzzle feeders or frozen treats for light mental activity
Avoid visitors or loud activity during recovery. Let your dog settle at their own pace. Emotional support is just as important as physical care. A calm environment builds trust and helps your dog feel safe while healing.
When to Call Your Vet
Even with proper care, some signs mean your dog needs a vet check right away. Always trust your instincts. If something feels off, don’t wait.
Call your vet if you notice:
- Crying, limping, or yelping even with pain meds
- Refusal to eat or drink after 24 hours
- Vomiting, diarrhea, or constipation lasting more than two days
- Trouble peeing, straining, or signs of discomfort when going to the bathroom
- Redness, heat, bleeding, or pus around the incision
- Lethargy, disorientation, or behavior that’s unusual for your dog
Keep your vet’s contact info and emergency clinic number easily available. The sooner problems are caught, the easier they are to treat. Post-surgical problems can develop quickly, so never hesitate to call.
Signs That Your Dog Is Recovering Well
Recovery progress may look different for each dog, but certain signs show your dog is healing as expected. These small improvements usually happen within the first week and continue with time.
Signs of good recovery include:
- Eating and drinking normally
- Sleeping well and waking up alert
- Walking short distances with more confidence
- Calm behavior and less whining or shaking
- Incision is dry, clean, and slowly closing
As the days go by, your dog should seem more comfortable and return to familiar habits. Appetite should improve, bathroom routines become regular, and the surgical site should look better each day. Keep following your vet’s timeline and instructions, and attend all follow-up visits.
Final Thoughts
Managing pain and recovery after soft tissue surgery takes time, but your efforts make all the difference. With proper care, most dogs heal well and return to their normal lives.
Keep these core steps in mind:
- Follow your vet’s instructions closely
- Stay on track with medications and incision checks
- Provide rest, calm, and comfort each day
- Watch for warning signs and act early when needed
Every dog is different. Some bounce back quickly, while others take more time. Your job is to stay patient, consistent, and alert. Comfort, routine, and gentle support will help your dog feel safe and heal smoothly at home.
FAQs
How long should my dog take pain medicine after soft tissue surgery?
Most dogs take pain medicine for 5 to 7 days, depending on the procedure. Your vet will guide the exact duration. Don’t stop early, even if your dog looks better. Pain can return once meds wear off. Always complete the full course unless your vet says otherwise.
Is it normal if my dog seems restless after surgery?
Yes. Restlessness is common during the first 24–48 hours, especially as anesthesia wears off. It may also be a sign of pain. Make sure your dog is calm, warm, and has taken prescribed meds. If restlessness continues or worsens, contact your vet to adjust the recovery plan.
What if my dog won’t eat after surgery?
A low appetite is normal for the first day. Offer bland food like boiled chicken and rice in small amounts. Make sure water is available. If your dog still refuses to eat or drink after 24 hours, or vomits, call your vet to check for post-op complications.
Can I let my dog walk freely indoors?
No. Even indoors, your dog’s movement should be restricted. Jumping, running, or climbing stairs can damage healing tissues or stitches. Keep your dog in a small, quiet room or use a crate. Leash walks should be short and only for bathroom breaks during the early recovery phase.
When can I stop using the cone or recovery shirt?
You can stop using the cone or recovery suit when the incision is fully closed, dry, and your vet confirms it’s safe. This usually takes 10 to 14 days. Never remove it early—even one lick or scratch can reopen the wound or lead to infection.
How do I know if my dog is healing well?
Healing is going well if your dog is eating, resting comfortably, peeing and pooping normally, and the incision is clean and dry. Each day, your dog should seem slightly more relaxed and alert. If anything looks worse instead of better, schedule a follow-up visit with your vet.

Signs of Complications After Any Soft Tissue Surgery
Learn how to care for your dog after soft tissue surgery with simple tips on feeding, wound care, activity limits, and signs to watch during recovery
What’s Normal and What’s Not After Soft Tissue Surgery
After soft tissue surgery, it’s normal for your dog to act a bit tired and quiet. You might see mild bruising or swelling near the incision site. This is a normal part of healing and should improve over a few days. Your dog may eat less and sleep more during the first 24 to 48 hours.
Some redness and scabbing around the stitches can also be expected. The area should stay clean and dry, and the swelling should not get worse. If your dog is calm, walking slowly, and showing interest in food or water by the second day, that’s a good sign.
- Normal signs: Mild swelling, scabbing, slight redness, low energy, reduced appetite
- Watch closely: Any changes that worsen or don’t improve after two days
Knowing what’s normal helps you catch complications early.
Red Flags to Watch for at the Incision Site
Even small changes at the incision site can signal serious problems—knowing what to look for makes a difference.
Signs of Infection or Poor Healing
An incision should improve a little every day. If it starts to look worse instead of better, that’s a red flag. Infection often begins with redness that spreads or becomes brighter. Swelling that feels hot or painful can also be a sign. If you notice thick discharge—especially yellow, green, or foul-smelling—call your vet right away. Other warning signs include a bad odor from the bandage, dark or blackened skin near the wound, or excess bleeding or pus.
Poor healing may happen if your dog is licking, scratching, or too active. Keep the incision dry, clean, and protected. Take photos daily to track progress and catch early changes.
- Redness that worsens or spreads
- Swelling that feels warm, painful, or keeps growing
- Yellow, green, or smelly discharge
- Pus, blood, or moisture leaking from the wound
- Skin turning dark, cold, or dry around the incision
- Bad smell coming from the bandage
These signs usually mean the wound needs medical attention right away.
When the Incision Opens Up
A healing incision should stay closed and dry. If the wound splits or opens, this is called dehiscence—and it needs urgent vet care. You might see the skin gaping, with tissue, fat, or fluid bulging through. This often happens when a dog licks, chews, or moves too much. Some wounds may look wet or shiny before opening fully.
Loose or missing stitches, especially those that seem chewed out, should never be ignored. The skin might look pulled apart, with less redness around the edges due to tension. If the incision opens, keep your dog calm and prevent more movement until you can reach the vet.
- Stitches that come loose or fall out early
- Skin that looks pulled open or stretched
- Bulging fat or soft tissue under the skin
- Wet, shiny, or sticky surface over the incision
- Gaping wound with pink or yellow tissue showing
If the wound opens, cover it gently with a clean cloth and contact your vet right away. Avoid pressure, creams, or cleaning until you get professional advice.
Unusual Behavior and Physical Signs of Complications
Behavioral changes often appear before visible symptoms—watch your dog closely during recovery.
Whining, Pacing, or Hiding
If your dog begins to act differently after surgery, pay close attention. Whining, pacing, or hiding can be early signs of pain, stress, or infection. Some dogs may act restless and can’t seem to get comfortable. Others might isolate themselves or avoid touch. While a little discomfort is normal, a sudden change in behavior usually signals that something isn’t right.
You may also notice panting without heat or exercise, looking anxious, or constantly shifting positions. These behaviors often mean your dog is uncomfortable and may need pain relief or a wound check.
- Whining or crying without reason
- Pacing around or unable to settle
- Hiding under beds or in closets
- Avoiding people or eye contact
- Trouble sleeping or lying still
These behavior shifts should not be ignored. If your dog shows new or worsening signs after the first two days, call your vet. Pain or discomfort left untreated can delay healing or lead to other complications.
Systemic or Internal Complications
Not all complications are visible—some affect your dog’s entire body and require fast action.
Internal Bleeding or Shock
Internal bleeding is rare but serious. It can happen if a blood vessel wasn’t sealed properly or if your dog became too active too soon. One of the first signs is pale gums or tongue—normal gums should be pink. Your dog may also appear very weak, unsteady, or collapse suddenly. Cold limbs, shaking, or low body temperature are also red flags.
These signs may appear suddenly or come on slowly over several hours. If you notice more than one of them, get emergency help right away. Internal bleeding can quickly become life-threatening if not treated.
- Pale or white gums or tongue
- Sudden weakness or collapse
- Shaking or trembling for no reason
- Cold paws, ears, or limbs
- Fast breathing or rapid heart rate
If you suspect internal bleeding, do not wait. Carry your dog gently and call your vet or the nearest emergency clinic immediately.
Infection or Fever
A fever is your dog’s way of fighting off infection—but it’s also a sign something may be wrong. After surgery, your dog should slowly gain energy. If they seem more tired after the second day or feel hot to the touch, this may signal an internal infection.
Fever can come with body aches, decreased appetite, or changes in breathing. Touch your dog’s ears, paws, or armpits—if they feel much warmer than usual, it’s a warning sign. In some cases, dogs may limp or show pain even if the surgical site looks okay.
- Body feels hot, especially ears and paws
- Lethargy that worsens instead of improving
- Refusal to eat or drink
- Shivering or acting cold in a warm room
- Limping or guarding part of the body
Don’t give fever-reducing medicine meant for humans. Call your vet if you notice these signs—they’ll check for infection and may prescribe antibiotics or further testing.
Digestive or Urinary Issues
After surgery, your dog’s bathroom habits might change slightly—but major changes can signal deeper problems. If your dog hasn’t urinated for more than 24 hours, that’s a concern. Straining to pee, leaking urine, or crying while urinating are also red flags.
Digestive issues like constipation, diarrhea, or belly swelling could mean the medications are affecting your dog’s system—or worse, that an internal issue is developing. A swollen belly could also mean fluid buildup or gas that needs immediate care.
- No urination in 24 hours
- Straining, crying, or leaking while urinating
- Constipation lasting over 48 hours
- Pain when pooping or signs of bloating
- Hard, swollen belly or visible discomfort
Keep a close eye on bathroom patterns and tell your vet about any problems. The earlier you catch internal issues, the easier they are to treat.
Rare but Serious Signs to Know
Some complications are uncommon—but when they happen, they need urgent care.
Seromas and Fluid Pockets
A seroma is a soft, fluid-filled swelling near the incision. It often looks like a small balloon under the skin. These usually form when fluid collects in the empty space created during surgery, especially if your dog moved too much early on. Seromas aren’t usually painful, but they can grow if not monitored.
In most cases, your vet may just observe it and let the fluid absorb on its own. But if it becomes red, warm, or starts leaking, it may need to be drained. Never try to pop or press on a seroma at home.
- Soft swelling near the incision site
- Usually not warm or painful at first
- May jiggle when touched
- Can appear several days after surgery
- Needs vet attention if it grows, leaks, or changes color
If you suspect a seroma, keep your dog calm and call your vet. It may not be an emergency—but it does need professional review.
Crepitus or Skin Necrosis
Crepitus is a crackling or popping sound under the skin. It happens when gas builds up in the tissues, sometimes from bacteria. It’s rare, but dangerous. If you feel this when touching near the wound, it must be reported to your vet immediately.
Skin necrosis is when tissue starts dying. It can happen if the blood flow to the area is reduced—often due to infection, pressure, or tight stitches. The skin may turn gray, cold, flaky, or begin peeling. This condition is serious and may require wound cleaning, new sutures, or even surgery.
- Crackling under the skin (crepitus)
- Skin turns gray, purple, or cold
- Dry, flaky, or peeling wound edges
- Loss of skin around the incision
- Strong odor or deep darkening of tissue
These signs mean urgent tissue damage is happening. Call your vet or go to the nearest emergency center right away—this is not something that can wait.
When to Call Your Vet Immediately
Some symptoms can’t wait; quick action could save your dog’s life or prevent major complications.
During recovery, there are certain signs that require immediate veterinary help. Bleeding from the incision, especially if it soaks through a bandage, is always urgent. Pus or fluid leaking from the wound can signal a serious infection. Gums that look pale, blue, or gray may indicate internal bleeding or lack of oxygen, both are emergencies.
Other signs like collapse, refusal to move, or extreme pain should never be ignored. Vomiting, diarrhea, or a high fever that doesn't improve within 12–24 hours may point to infection or a reaction to medication. Finally, if your dog hasn't urinated or had any interest in water for more than 24 hours, it’s time to call the vet.
- Bleeding or pus from the incision
- Gums that appear pale, gray, or blue
- Sudden collapse or extreme stiffness
- Refusing to move, eat, or drink
- Vomiting, diarrhea, or fever not improving
- No urination in 24+ hours
These signs mean something serious may be happening. Don’t wait—get help from your vet or an emergency clinic right away.
Final Thoughts
Some swelling or bruising is normal—but trust your gut when something feels wrong.
Recovering from soft tissue surgery takes time, patience, and close observation. While many signs like mild bruising, sleepiness, or low appetite are normal in the first day or two, it’s important to watch for changes that go beyond typical healing. Trust what you see and feel—if your dog’s condition seems off or getting worse, you’re probably right to be concerned.
Taking clear photos of the incision site every day can help you compare healing progress and spot problems early. If you’re unsure whether something is normal, it’s always better to call your vet. Most complications can be managed well when caught early.
- Mild swelling, scabbing, or bruising is usually normal
- Keep a consistent routine and check the wound daily
- Use photos to track healing and catch red flags
- Watch behavior closely, changes often appear before visible signs
- Never wait if something feels wrong; call your vet
Your care plays a big role in how well your dog heals. With attention and quick action, most dogs recover smoothly.
FAQs
How do I know if my dog’s incision is healing properly?
A healing incision should look dry, closed, and slightly pink. Mild bruising or swelling is normal in the first few days. It should not be redder, smell bad, or leak fluid. If you're unsure, take daily photos to track progress and call your vet if anything looks worse.
What are warning signs of infection after soft tissue surgery?
Infection signs include redness that spreads, hot or swollen areas, yellow or green discharge, foul odor, or increased pain. Your dog may also act more tired or refuse food. Any of these signs should be reported to your vet immediately.
Is it okay if my dog is not eating after surgery?
It's normal for dogs to have low appetite for 24–48 hours. Offer bland food and fresh water. If your dog refuses to eat or drink beyond that time, or shows vomiting or diarrhea, call your vet.
How can I tell if my dog is in pain during recovery?
Signs of pain include whining, panting, shaking, pacing, or not wanting to move. Some dogs hide or become aggressive when they hurt. If you see any of these behaviors, speak to your vet about pain relief options.
What does it mean if the incision opens?
If the incision splits or gapes, this is called dehiscence. You might see loose stitches, bulging tissue, or shiny wet areas. Cover it gently and call your vet right away. Do not clean or apply anything to the wound without guidance.
When should I go to the emergency vet after soft tissue surgery?
Go immediately if your dog collapses, has pale gums, strong bleeding, a foul-smelling wound, or can’t walk or pee. Sudden changes in behavior, vomiting that won’t stop, or signs of shock also need emergency care.
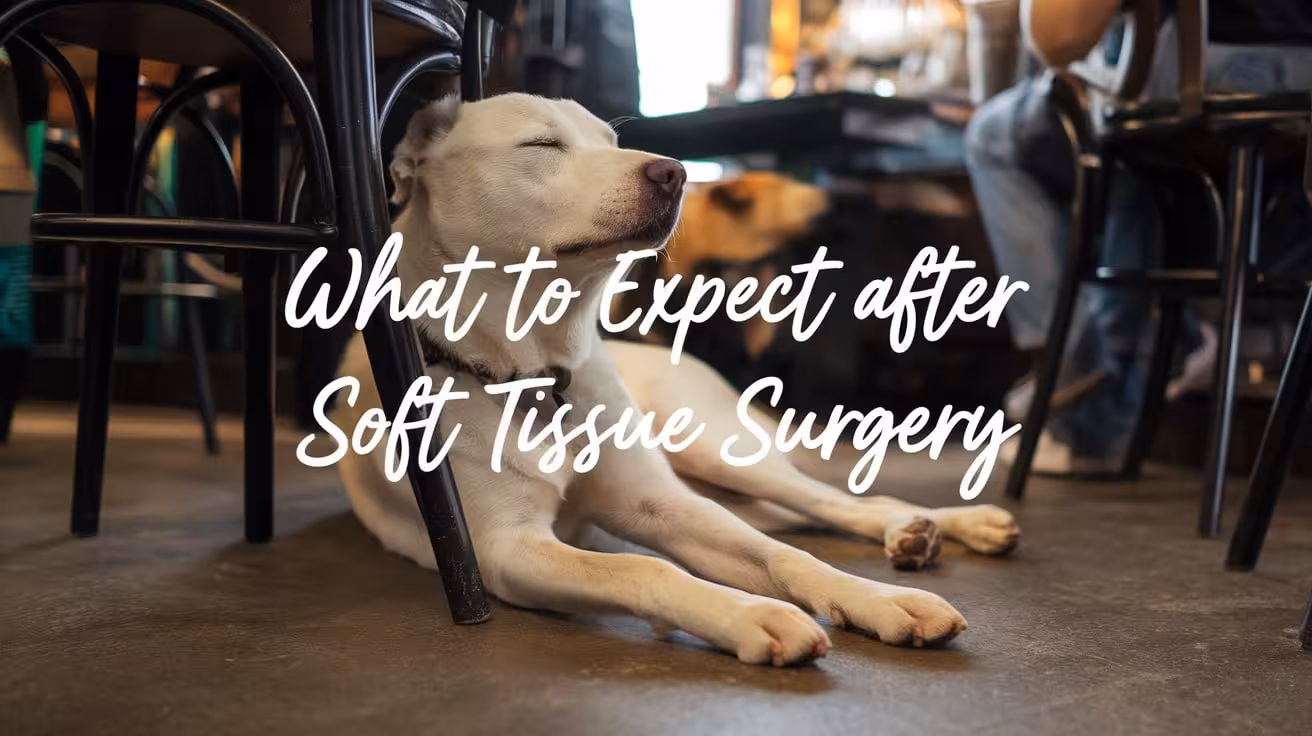
What to Expect After Your Dog’s Soft Tissue Surgery
Find out what to expect after your dog’s soft tissue surgery—recovery tips, incision care, feeding, rest, and signs that may need your vet’s attention
The First 24–48 Hours After Soft Tissue Surgery
The first two days after your dog’s soft tissue surgery are a critical part of recovery. This is when the body starts healing, and your dog adjusts to pain medicine and the effects of anesthesia. Knowing what to expect helps you stay calm and catch any problems early.
Here’s what’s normal during this time:
- Grogginess or sleepiness: Many dogs sleep for long periods or seem out of it. This usually fades within 12 to 24 hours.
- Mild coughing: The breathing tube used during anesthesia can cause a light cough for a day or two.
- Low appetite: Your dog may not eat much after coming home. Offer small, soft meals and ensure water is available.
What to monitor closely:
- Vomiting, diarrhea, or refusing food after 24 hours
- Constipation or straining that lasts more than two days
- Whining, panting, or signs of pain even after medication
Let your dog rest in a quiet space and call your vet if anything seems unusual.
Managing Pain and Medication
Managing pain is one of the most important parts of your dog’s recovery. After surgery, your vet will prescribe pain medicine and possibly antibiotics to support healing and prevent infection. Always follow dosing instructions exactly.
Here’s how to manage it safely:
- Give all medications on schedule, even if your dog seems fine
- Don’t skip doses or stop early without your vet’s advice
- Use food or pill pockets to help with swallowing pills
- Store meds in a safe, dry place, out of reach
If your dog refuses medication:
- Hide pills in soft food like xylitol-free peanut butter
- Ask your vet if a liquid version is available
- Gently place pills at the back of the tongue if safe to do so
Never give over-the-counter pain relief or calming treats unless your vet says it’s safe. Many human medications are toxic to dogs. If your dog shows signs of pain like whining, shaking, or restlessness even after medication, contact your vet right away.
Taking Care of the Surgical Site
The incision area needs daily attention to ensure proper healing. While mild swelling or bruising is normal in the first few days, monitor the site closely.
What’s normal:
- Light swelling, small scabs, or pink skin
- Mild bruising around the stitches
- A closed incision with no discharge
Watch for signs of infection:
- Redness that spreads or deepens in color
- Yellow or green discharge
- A strong, unpleasant odor
- Bleeding or loose stitches
How to check the site safely:
- Gently lift fur to view the area without pulling skin
- Keep your dog calm during checks using treats or soft voices
- Avoid touching the incision unless instructed
Cleaning the area:
- Only clean if your vet tells you to
- Use vet-approved solutions and sterile gauze
- Never apply alcohol, hydrogen peroxide, or ointments unless advised
An e-collar or recovery shirt will help keep the area protected. Call your vet before trying any home treatment.
Keeping Your Dog Safe and Comfortable at Home
After surgery, your dog needs a quiet and safe place to rest. This helps healing and prevents injury.
Create a comfortable setup:
- Choose a room away from noise, stairs, or other pets
- Use soft, washable bedding on the floor
- Keep water in a spill-proof dish
- Use gates or doors to block off areas
Prevent licking or biting the incision:
- Use a cone or recovery shirt at all times
- Check that the collar fits properly and doesn’t rub the skin
Limit movement to prevent strain:
- No jumping, running, or playing
- Avoid stairs, couches, or beds
- Use a short leash for bathroom breaks only
A crate or padded playpen works well for safe rest.
Feeding and Bathroom Habits
After surgery, appetite and bathroom habits may change. Anesthesia and pain medication can affect digestion and energy.
- Offer small portions of food. Use a bland diet like boiled chicken and rice if your vet recommends.
- Keep fresh water available and encourage slow drinking.
Watch for the following:
- Low appetite for 24–48 hours is normal; report anything longer
- Vomiting or diarrhea may occur once but should not continue
- Constipation or straining due to pain or inactivity
- Changes in urination, especially after abdominal or bladder surgery
If your dog has trouble walking, use a towel sling under the belly for support. Keep bathroom trips short and on-leash.
Emotional Recovery and Mental Stimulation
Healing is not just physical. Dogs may feel anxious, clingy, or confused after surgery. This behavior is common and usually improves with time.
Support emotional recovery:
- Keep the environment calm and quiet
- Use a simple daily routine with feeding and medication at the same time
- Offer comfort items like soft blankets or a favorite toy (if approved)
- Provide mental stimulation with puzzle toys or lick mats
Avoid physical games or rough play. Choose safe, low-energy activities to reduce stress and keep your dog gently engaged during crate rest.
Follow-Up Visits and Healing Timeline
Recovery is not complete until your vet confirms healing. Follow-up visits are important to monitor the incision, remove stitches, and check progress.
Typical timeline:
- Day 1–2: Rest, pain management, reduced appetite
- Day 3–7: Appetite returns; incision remains closed with minor swelling
- Day 10–14: Vet recheck for stitches or wound check
- After 2 weeks: Light walks and activity may resume if approved
Your vet will guide you on when to allow stairs, play, or off-leash time. Healing speed varies based on surgery type, age, and overall health.
When to Call the Vet: Warning Signs to Watch
Even with proper care, complications can happen. Know what to watch for and call your vet if you see any of the following:
- Bleeding or discharge from the incision
- Redness, swelling, or bad smell around stitches
- Vomiting, diarrhea, or no eating for over 24 hours
- Difficulty urinating or defecating
- Panting, whining, or restlessness at rest
- Unusual behavior not explained by medication
If your dog seems off in any way, do not wait. Early care prevents bigger problems.
Final Thoughts
Every dog heals at their own pace, depending on the surgery, age, and overall health. Your role at home makes a big difference in recovery.
Key reminders:
- Stick to a calm routine
- Check the incision daily
- Give all medications on time
- Limit movement until cleared by your vet
If anything concerns you, reach out to your vet. With care, rest, and patience, your dog will be on the path to full recovery.
FAQs
How long will my dog be in pain after surgery?
Most dogs feel sore for a few days. Pain medication helps. If your dog still seems uncomfortable after three days or shows signs like whining or shaking, call your vet.
When can I take my dog for a walk again?
Short bathroom walks on a leash are okay after a day or two. Longer walks or play should wait until your vet approves, usually after the incision is fully healed.
What should the incision look like as it heals?
Mild swelling or bruising is normal. The area should be closed, with no bad smell or pus. If the site looks worse instead of better, call your vet.
Is it okay if my dog is not eating much after surgery?
Yes. A reduced appetite for 24 to 48 hours is common. If your dog refuses all food or vomits more than once, contact your vet.
Can I bathe my dog after surgery?
No. Wait 10 to 14 days before bathing unless your vet says otherwise. Keeping the area dry helps prevent infection.
What if my dog keeps licking the stitches?
Licking can cause infection or pull out stitches. Use a cone (e-collar) or recovery shirt at all times unless supervised. If the cone seems uncomfortable, ask your vet about softer alternatives. Never allow even “a little” licking, as it can quickly damage healing tissue.
How to Prepare Your Dog for Soft Tissue Surgery
Learn how to prepare your dog for soft tissue surgery with this simple guide. Get tips on fasting, home setup, checklists, and questions to ask your vet
Why Preparation Matters Before Soft Tissue Surgery
A little planning can make a big difference. Preparing your dog before soft tissue surgery helps avoid problems and makes healing faster and smoother.
Here’s why it matters:
- Reduces complications: A calm, healthy dog is less likely to have trouble with anesthesia or recovery.
- Lowers stress: When your dog is relaxed and familiar with their routine, they stay calmer during vet visits.
- Helps you feel ready: Knowing what to expect helps you make clear decisions and feel more in control.
Whether it’s a simple lump removal or a more serious internal surgery, good preparation improves the outcome. It also makes things easier for the veterinary team.
Your dog can’t understand what’s happening, but your support, planning, and care make all the difference. Preparing ahead shows love, and gives your dog the safest path to recovery.
Questions to Ask Your Vet Before Surgery
Talking to your vet before surgery helps you avoid confusion and keeps your dog safer and more comfortable.
Ask these important questions during your pre-surgery visit:
- What time should my dog stop eating and drinking? Most dogs fast the night before surgery. Confirm exact times for food and water.
- Should I adjust any medications before surgery? Some drugs need to be skipped, while others must be given. Ask what applies to your dog.
- What tests or exams will be done before the procedure? Bloodwork, x-rays, or a physical exam may be required to check your dog’s health.
- Will my dog go home the same day or stay overnight? Knowing the plan helps you prepare the home and your schedule.
- What do I need to bring on surgery day? Some clinics ask for paperwork, medicine, or protective gear like an e-collar.
Writing these answers down helps you feel confident on the day of surgery and ensures your dog gets the best care.
The Day Before Surgery
The day before surgery is important for both your dog’s safety and your peace of mind. These steps help prevent delays and reduce risks during the procedure.
1. Stop Food and Water at the Right Time
Follow your vet’s fasting instructions exactly. Most dogs should not eat after 8–10 p.m. the night before. Water may be allowed until early morning, but always confirm with your vet.
- Remove food bowls before bedtime.
- Watch for sneaky eaters—keep trash and food off the floor.
- Ask your vet about fasting rules for puppies or diabetic dogs.
2. Keep Your Dog Calm and Rested
Avoid rough play, visitors, or anything that gets your dog too excited.
- Take a short walk before bed to help them relax.
- Create a quiet space where they can sleep undisturbed.
- Extra rest supports a smoother recovery later.
3. Pre-Surgery Grooming Tips
Your vet may ask you to brush your dog or trim long nails.
- Skip baths unless the vet suggests one.
- Clean ears or paws gently if needed.
4. Watch for Signs of Illness Before Surgery
Call your vet if your dog seems off.
- Vomiting, diarrhea, coughing, or unusual behavior could delay surgery.
- Better to reschedule than risk complications.
Getting Ready at Home
Your home should be ready before your dog returns from surgery. A safe, calm space helps with smooth healing and prevents accidents.
1. Set Up a Calm Resting Area
After surgery, your dog needs a clean, quiet place to rest.
- Choose a room away from noise, kids, or other pets.
- Use soft bedding on the floor to avoid jumping.
- Block stairs or high furniture with a gate or cushions.
- Dim lighting and calming scents like lavender may help reduce anxiety.
2. Prepare the Car for a Safe Ride Home
After surgery, your dog may be groggy or sore. A comfortable car setup keeps them safe.
- Use a crate or secure harness for the trip.
- Line the seat with clean towels or puppy pads in case of nausea or accidents.
- Keep the car cool and drive gently.
- Bring a blanket to cover them if it’s cold.
Preparing your home and car in advance helps reduce stress on surgery day and makes recovery easier from the moment your dog returns.
What to Pack and Bring on Surgery Day
A simple checklist helps make surgery day smooth for both you and the vet team.
Bring these items to the clinic:
1. Medical Records or Past Test Results
If you are visiting a new clinic, bring printed or digital copies of your dog’s health history.
- Include vaccination records and any bloodwork results.
- Mention allergies or past surgery reactions.
2. E-Collar or Protective Gear if Provided
Some clinics provide cones or recovery suits. If your vet gave one earlier, bring it.
- Ask if your dog will wear it right away or later at home.
- Label the gear with your dog’s name if needed.
3. List of Questions or Instructions from Vet
Keep a printed or written copy of what your vet told you.
- Include fasting times, medications, and drop-off instructions.
- Write down any last-minute questions.
4. Emergency Contact Info and Payment Method
Be sure to provide your phone number and a backup contact.
- Ask what payment types are accepted and if you can prepay or use a plan.
- Bring your ID and insurance info if needed.
Surgery Day Checklist
A good morning routine helps your dog feel calm and keeps the clinic running smoothly.
Follow these steps:
1. Remove Collar or Accessories Before Drop-Off
Take off tags, harnesses, or any tight clothing.
- Your dog will get a clinic collar or ID bracelet.
- Leave toys or blankets at home unless the clinic allows them.
2. Short Bathroom Break Before Leaving Home
Let your dog relieve themselves before heading to the vet.
- A short walk helps reduce anxiety.
- Avoid parks or playtime with other dogs.
3. Arrive on Time for Check-In
Be early or on time. Late arrivals can delay the schedule.
- Bring all your documents and items.
- Give staff any updates on your dog’s behavior or health.
4. Sign Consent Forms and Confirm Procedure Details
Read the forms carefully and ask about anything unclear.
- Confirm the surgery type, any extra procedures, and aftercare plans.
5. Leave Calmly and Don’t Over-Reassure
Try to stay relaxed so your dog stays calm too.
- Avoid long goodbyes. A short, cheerful exit works best.
Bonus Tips Most Owners Miss
Some small steps make a big difference, especially in last-minute situations.
1. What to Do If Your Dog Accidentally Eats Before Surgery
Tell your vet right away. They may need to delay the surgery to keep your dog safe.
- Never try to make your dog vomit at home.
- Be honest about what and how much they ate.
2. Can I Give Calming Treats or Meds Before the Vet Visit?
Ask your vet first. Some calming products are safe, but others can interfere with anesthesia.
- Avoid giving anything without approval.
- If your dog takes anxiety meds, ask when to give the dose.
3. Will I Get a Call After Surgery is Done?
Most clinics call when your dog is in recovery.
- Ask when and how you’ll get updates.
- Keep your phone nearby and answer unknown numbers that day.
4. Who to Contact if I’m Running Late?
Save the clinic’s number in your phone.
- Call right away if there’s traffic or an emergency.
- Some clinics have a time limit before they reschedule.
Final Thoughts
Preparing well for your dog's surgery helps both you and your vet provide the best care possible. Every small step, from fasting to packing, contributes to a safer, smoother experience.
Follow your vet’s instructions closely and do not be afraid to ask questions if anything is unclear. Preparation helps reduce anxiety, prevent mistakes, and support faster healing. Your dog depends on you for comfort and safety. Taking time to plan shows how much you care.
With a calm routine, the right supplies, and open communication, you and your dog will be ready to face surgery day with confidence.
FAQs
Can my dog eat or drink on the day of surgery?
No. Most dogs should stop eating 8 to 12 hours before surgery. Water may be allowed until early morning. Always follow your vet’s exact fasting instructions to avoid problems during anesthesia.
What if my dog is sick the night before surgery?
Call your vet right away. Vomiting, diarrhea, coughing, or acting very tired may mean surgery should be delayed. It is safer to reschedule than risk complications during or after the procedure.
Can I give my dog medication before surgery?
Only give medicine if your vet says it is safe. Some drugs must be stopped before surgery. Others, like heart or seizure medications, may still be needed. Always double-check with your vet.
Will my dog be scared or anxious at the clinic?
Some dogs feel nervous, which is normal. Staying calm yourself helps your dog feel secure. Ask your vet if calming sprays, treats, or mild medication are safe before the visit.
Do I need to stay at the clinic during the surgery?
No, most clinics ask you to leave and return later. This keeps the area quiet and reduces your dog’s stress. The clinic will call once your dog is awake and stable.
What should I do if my dog ate something by accident?
Tell your vet immediately. Eating before anesthesia can be dangerous. Do not try to treat it at home. The clinic may delay the surgery to protect your dog’s safety.
15 Common Soft Tissue Surgeries in Dogs Explained Simply
Learn about 15 common soft tissue surgeries in dogs, explained in simple terms for pet owners. Understand signs, treatments, and recovery basics
What Are Soft Tissue Surgeries in Dogs?
Soft tissue surgeries in dogs are procedures that focus on areas of the body not involving bones or joints. These include the skin, muscles, internal organs, and body cavities. Unlike orthopedic surgeries, which treat bone fractures or joint problems like cruciate ligament tears, soft tissue surgeries handle issues like tumors, wounds, or organ problems.
Veterinarians may recommend soft tissue surgery for many reasons, such as:
- Tumor removal - To take out benign or cancerous growths on the skin or inside organs.
- Wound repair - To treat deep cuts, abscesses, or bite wounds that won’t heal on their own.
- Organ surgeries - Like spleen removal, bladder stone removal, or stomach surgery in emergencies.
- Ear and eye surgeries - To correct infections, deformities, or injuries.
These procedures can improve your dog’s comfort, prevent further illness, and sometimes save their life.
Signs Your Dog Might Need Soft Tissue Surgery
Some health problems in dogs can’t be solved with medicine alone. In these cases, your vet may suggest soft tissue surgery. Here are some signs that may point to a deeper problem needing surgical care:
- Vomiting or not eating - If your dog suddenly stops eating or keeps vomiting, it could be a sign of a blockage, stomach twist, or internal problem that needs surgery.
- Lumps or bumps under the skin - A growing lump could be a tumor, cyst, or abscess. Not all are dangerous, but many need to be removed for testing or treatment.
- Trouble peeing or pooping - Straining, blood in urine, or hard stools can mean bladder stones, infections, or rectal issues.
- Red or swollen eyes - Eye swelling or discharge may need surgery to treat problems like cherry eye or eyelid growths.
- Swollen belly or breathing problems - A large belly or labored breathing can point to fluid buildup, organ damage, or tumors.
- Pregnancy issues or discharge - Trouble giving birth or unusual discharge may mean an emergency like a stuck puppy or uterine infection.
Always see a vet if these signs appear.
Common Soft Tissue Surgeries in Dogs
Many soft tissue surgeries are common in general practice and can treat a wide range of health issues in dogs. Below are some of the most frequently performed ones.
1. Spay (Ovariohysterectomy)
Spaying removes the ovaries and uterus in female dogs. It helps prevent pregnancy and protects against serious health problems like pyometra and mammary tumors.
- Why it’s done: To prevent reproduction and reduce the risk of life-threatening uterine infections.
- Age recommendation: Usually done at 6–12 months, before the first heat cycle.
- Recovery: Most dogs heal within 7–10 days with rest, pain meds, and cone use.
This is a routine surgery done under general anesthesia. Your dog may feel tired for a day or two but usually returns to normal quickly. Spaying also reduces behaviors linked to heat cycles like mood swings or escaping. While some people worry about weight gain, regular exercise and diet control keep your dog healthy. Always consult your vet about the right age and timing for spaying.
2. Neuter (Castration)
Neutering removes both testicles in male dogs. It’s a common surgery that controls breeding and reduces risks of testicular cancer and hormone-driven behavior.
- Why it’s done: To prevent unwanted litters and lower aggressive or roaming behaviors.
- Health benefits: Prevents testicular tumors and may reduce prostate issues.
- Post-op care: Dogs need to rest, wear a cone, and avoid licking for about 10 days.
Neutering is usually done around 6–12 months of age, depending on the dog’s breed and size. It is performed under anesthesia, and most dogs go home the same day. Some behavioral changes may take a few weeks to show.
This surgery does not affect your dog’s personality or ability to play. It’s also an important step in preventing pet overpopulation. Speak with your vet if you’re unsure about the best time to neuter your dog.
3. Lump or Mass Removal
Many dogs develop lumps under or on their skin. These can be harmless or cancerous, so removal and testing are often recommended.
- Common reasons: Lipomas (fatty tumors), cysts, skin tags, or cancerous growths.
- Diagnosis: A needle test or biopsy may be done before or during surgery.
- Goal: Remove the mass completely and test it in a lab if needed.
The surgery is usually straightforward. The vet removes the lump and closes the wound with stitches. Dogs typically recover in 7–14 days, depending on the size and location of the mass. If the lump is cancerous, further treatment like chemotherapy may be needed.
Early removal helps reduce pain, irritation, or the risk of spreading if the growth is malignant. Always check with your vet if you notice any new or fast-growing lumps.
4. Foreign Object Removal (GI Surgery)
Dogs often chew or swallow things they shouldn’t. When an object gets stuck in the stomach or intestines, it needs to be removed with surgery.
- Warning signs: Vomiting, not eating, belly pain, or straining to poop.
- Common items: Toys, socks, bones, corn cobs, or string.
- Emergency: Delayed treatment can lead to ruptures or infections.
The surgery involves opening the stomach or intestines to remove the object. Recovery takes about 10–14 days and includes rest, fluids, pain control, and a special diet. In some cases, a portion of the intestine may need to be removed if damaged. To avoid repeat surgeries, keep small objects away from your dog and provide safe chew toys. If your dog shows any signs of blockage, call your vet immediately.
5. Bladder Stone Removal (Cystotomy)
Cystotomy is a surgery to open the bladder and remove stones that block urine flow. These stones can cause pain, infection, or even kidney damage if not treated.
- Symptoms: Straining to pee, blood in urine, frequent urination, or accidents in the house.
- Diagnosis: X-rays or ultrasound help find and size the stones.
- Surgical goal: Remove all stones and flush the bladder to prevent more blockages.
The surgery is done under anesthesia. Most dogs recover in 7–10 days with rest, pain medication, and antibiotics. After surgery, your vet may suggest a special diet to prevent new stones. Regular follow-ups are also important. Some breeds are more prone to forming bladder stones, so early signs should never be ignored. If your dog has trouble urinating, see a vet right away to avoid serious complications.
6. Hernia Repair (Umbilical, Inguinal)
Hernias happen when fat or organs push through a weak spot in the body wall. In dogs, they often appear near the belly button or groin area.
- Common hernias: Umbilical (belly button) and inguinal (groin).
- Symptoms: Soft swelling, pain, or trouble moving.
- Risks: If tissue gets trapped, it can lose blood supply and become an emergency.
Hernia repair surgery moves the tissue back in place and closes the gap with stitches. Small umbilical hernias are often fixed during spay or neuter. Larger hernias may need separate surgery. Recovery takes about 10 days with limited activity to let the muscles heal.
Some hernias in puppies may close on their own, but it’s best to have your vet examine any swelling. Quick treatment helps avoid serious problems like tissue death or infection.
7. Pyometra Surgery (Infected Uterus)
Pyometra is a life-threatening infection of the uterus in unspayed female dogs. It requires emergency surgery to save the dog’s life.
- Signs to watch for: Lethargy, vomiting, bloated belly, and pus coming from the vulva.
- Timing: Usually happens a few weeks after heat.
- Treatment: Immediate ovariohysterectomy (spay surgery) to remove the infected uterus.
This surgery is more risky than a routine spay because of the infection and toxins. Dogs are put on IV fluids, antibiotics, and pain medication before and after surgery. Recovery takes longer than a standard spay, often 10–14 days. If left untreated, pyometra can cause sepsis and death within days.
This is one reason many vets recommend spaying early in life to prevent this emergency. Always see your vet right away if you see these symptoms.
8. Gastropexy (Bloat Prevention or GDV Treatment)
Gastropexy is a surgery that attaches the stomach to the body wall. It prevents or treats gastric dilatation-volvulus (GDV), a deadly condition where the stomach flips.
- Why it’s done: Large, deep-chested breeds are prone to bloat and GDV.
- Signs of GDV: Swollen belly, non-productive retching, restlessness, and collapse.
- Prevention: Some owners choose preventive gastropexy during spay or neuter.
If GDV has already occurred, emergency surgery untwists the stomach and then tacks it in place. Without treatment, GDV is fatal in hours. After gastropexy, most dogs recover in 10–14 days. Special feeding routines can help reduce bloat risk.
This surgery has saved many dogs’ lives, especially Great Danes, Weimaraners, and similar breeds. If your dog shows sudden belly swelling or distress, seek emergency care immediately.
9. Cherry Eye Surgery
Cherry eye happens when the tear gland in the third eyelid pops out and looks like a red lump. Surgery is needed to move the gland back into place.
- Affected dogs: Young dogs, especially Bulldogs, Cocker Spaniels, and Beagles.
- Symptoms: Red swelling in the corner of the eye, irritation, or discharge.
- Treatment: Gland replacement surgery, not removal, to keep tear production.
During surgery, the vet makes a pocket in the eyelid to hold the gland securely. Recovery usually takes 1–2 weeks. Dogs may need eye drops to reduce swelling and prevent infection. Without treatment, cherry eye can lead to chronic dry eye, which causes pain and vision loss. Early surgery gives the best chance to restore function and appearance. Always see your vet if you notice a red lump in your dog’s eye.
10. Entropion Repair (Eyelid Surgery)
Entropion is when a dog’s eyelid rolls inward, causing the lashes to rub against the eye. It can lead to pain, ulcers, or scarring if untreated.
- Common breeds: Shar-Pei, Chow Chow, Bulldogs, and Retrievers.
- Signs: Squinting, tearing, eye redness, or pawing at the face.
- Treatment: Surgery to remove a small part of the eyelid so it sits normally.
The procedure is done under anesthesia. Recovery takes about 10–14 days, with an e-collar to protect the eye and antibiotic ointment to help healing. Some dogs, especially puppies, may need a second surgery as they grow.
Entropion repair can greatly improve comfort and prevent permanent eye damage. If your dog has chronic eye irritation or discharge, have their eyelids checked by a veterinarian to see if surgery is needed.
11. Anal Gland Removal (Anal Sacculectomy)
Some dogs have constant problems with their anal glands, which can get infected or impacted. In severe or repeated cases, surgical removal is the best solution.
- Why it’s done: Chronic infection, abscess, tumors, or constant scooting.
- Symptoms: Scooting, licking the rear, pain, or swelling near the anus.
- Other options: If manual expression or meds don’t help, surgery is considered.
Anal sacculectomy removes the small glands near the rectum that produce scent-marking fluid. Surgery is done under anesthesia, and dogs go home the same day. Recovery includes pain medicine, a cone, and stool softeners for 10–14 days.
Minor incontinence can happen in rare cases, but most dogs recover without problems. Removing these glands improves quality of life when infections or blockages keep coming back. Always consult your vet if your dog has repeated anal gland trouble.
12. Laceration or Wound Repair
Dogs can get deep cuts from fights, accidents, or sharp objects. When the skin and tissues are badly damaged, surgery is often needed to clean and close the wound.
- Common causes: Dog bites, car accidents, or sharp metal.
- Treatment steps: Cleaning, removing dead tissue, and stitching the wound.
- Infection risk: Open wounds can lead to serious infection without quick care.
The vet uses anesthesia or sedation to safely treat the injury. The wound is flushed and closed with stitches or staples. Drains may be placed for deeper wounds. Most dogs heal in 7–14 days, with rest, pain control, and possibly antibiotics. A cone prevents licking, which can slow healing or cause infection. If your dog has a deep or dirty wound, don’t wait—see your vet right away.
13. Cesarean Section (C-section)
A C-section is a surgery to deliver puppies when a dog cannot give birth naturally. It’s common in certain breeds and can be planned or done in an emergency.
- When it’s needed: Labor is too long, puppies are too big, or the mother is too tired.
- Planned cases: Often done in Bulldogs, Pugs, or dogs with small pelvises.
- Emergency signs: Weak contractions, no puppy after 2+ hours, or green discharge.
The surgery is done under anesthesia, and the vet removes the puppies quickly and safely. The mother wakes up while the pups are cleaned and warmed. Aftercare includes pain relief, rest, and help with nursing. Recovery usually takes 10–14 days. Owners should watch for signs of infection or nursing issues. A C-section can save both the mother and her puppies if labor doesn’t go as expected.
14. Enucleation (Eye Removal)
Sometimes an eye must be removed to relieve pain or treat disease. Enucleation is done when the eye is blind, painful, or damaged beyond repair.
- Common reasons: Glaucoma, cancer, injury, or severe infection.
- Signs to watch: Constant squinting, discharge, swelling, or bulging.
- Goal of surgery: Remove the eye to stop pain and prevent future problems.
Dogs do very well with one eye. The surgery is done under anesthesia, and the eyelids are stitched closed after the eye is removed. Most dogs recover in 10–14 days with pain meds and a cone. They quickly adjust to life with one eye and continue to enjoy normal activities.
While it may sound extreme, enucleation often improves a dog’s comfort and quality of life. If your dog has a painful, non-functional eye, this may be the kindest option.
15. Amputation
Amputation is the removal of a limb, usually due to severe injury, infection, or cancer. Though it sounds dramatic, many dogs adapt well and live full lives on three legs.
- When it’s needed: Bone tumors, non-healing fractures, or loss of blood flow.
- Legs and toes: Front or back limbs, or just toes, may be removed depending on the issue.
- Recovery: Most dogs walk within days and adjust over time.
The surgery is done under anesthesia, followed by pain management, rest, and sometimes physical therapy. Healing usually takes 10–14 days. Tripod dogs (three-legged dogs) can still run, play, and live happily, especially if they are not overweight.
Owners often feel unsure at first, but most are amazed by how quickly dogs bounce back. If your dog has a condition where saving the limb isn’t possible, amputation can give them a pain-free and active life.
What to Expect Before and After Surgery
Knowing what to expect helps reduce stress for both you and your dog. Here’s a simple breakdown of how to prepare and what happens during and after surgery.
Before surgery:
- Fasting: No food 8–12 hours before surgery (ask your vet about water).
- Pre-op tests: Bloodwork and sometimes x-rays to check overall health.
- Medication check: Let your vet know about any ongoing medicines.
On surgery day:
- Your dog is checked in and given anesthesia.
- The vet performs the surgery and monitors vital signs closely.
- You’ll be updated once your dog is in recovery.
After surgery:
- Take-home instructions include rest, pain meds, cone use, and limited activity.
- Stitches usually come out in 10–14 days unless dissolvable.
Follow all instructions carefully and keep the wound clean. Your vet will tell you when to return for follow-ups. Contact them if anything looks wrong.
Are These Surgeries Safe for Older Dogs?
Age alone does not decide surgical safety. Many senior dogs recover well from soft tissue surgeries when they are otherwise healthy.
How vets assess risk:
- Health check: Vets run bloodwork, heart tests, and sometimes x-rays or ultrasounds.
- Anesthesia plan: Special care is taken to use safer drugs and monitor older dogs closely.
- Surgical need: If the surgery prevents pain or a life-threatening issue, it’s often worth doing.
Recovery in seniors:
- Healing may take a bit longer, but older dogs often rest more, which helps healing.
- Vets often use extra pain relief and anti-nausea drugs to support smooth recovery.
- Extra care at home, including padded beds and support for walking, helps seniors heal.
Always ask your vet about the risks and benefits based on your dog’s age and condition. Many older dogs bounce back just as well as younger ones when managed properly.
Recovery Time and Healing Basics
Recovery after soft tissue surgery depends on the type of procedure, but most dogs heal well with good care.
Typical healing time:
- Most dogs take 10–14 days to heal. Some major surgeries may need 3–4 weeks.
- Stitches or staples are removed unless they dissolve on their own.
Aftercare essentials:
- E-collar (cone): Prevents licking, which can open stitches or cause infection.
- Pain meds and antibiotics: Must be given exactly as instructed.
- Rest and restriction: Keep your dog calm and avoid running or jumping.
When to call the vet:
- Redness, swelling, bleeding, or discharge at the surgery site.
- Your dog won’t eat or seems very tired after 24–48 hours.
- Stitches come out too early or your dog gets the cone off.
Always follow your vet’s aftercare instructions closely and return for check-ups.
Soft Tissue Surgery: Elective or Emergency?
Some soft tissue surgeries are planned, while others must be done quickly to save your dog’s life.
Planned (elective) surgeries:
- Spay/neuter
- Lump removals
- Cherry eye or entropion correction
- Hernia repairs
These are usually scheduled ahead and done when your dog is healthy.
Emergency surgeries:
- Pyometra (infected uterus)
- Foreign object removal
- C-section during a hard birth
- GDV (bloat/twisted stomach)
How to act fast:
- Know signs of an emergency: vomiting, collapse, bloody discharge, or sudden belly swelling.
- Call your vet or go to an emergency clinic immediately—don’t wait.
Quick action can save your dog’s life. If you’re unsure, always call your vet for advice.
Questions to Ask Your Vet Before Surgery
It’s important to be informed before your dog has surgery. Here are key questions to ask your vet:
- Is this surgery necessary now?
Can we wait or try medicine first? - What are the risks and benefits?
Will this surgery prevent pain or save my dog’s life? - What will recovery look like?
How long will it take, and what care will my dog need? - What will it cost?
Are there payment plans or insurance options?
Write your questions down before your visit so you don’t forget. Open, honest talks with your vet help you make the best decision for your dog’s health.
Final Thoughts
Soft tissue surgeries are a regular part of veterinary care. They treat everything from minor skin lumps to life-threatening emergencies. When done at the right time, these procedures can ease pain, fix serious problems, and even save lives.
Each dog is different, so always discuss your options with a trusted vet. Ask questions, understand the risks and benefits, and follow all aftercare steps closely. Most dogs recover well and return to their happy selves.
The best care comes from being informed and prepared. Whether it’s a routine lump removal or an emergency like GDV, your vet is there to guide you every step of the way.
FAQs
What is the most common soft tissue surgery in dogs?
Spay and neuter surgeries are the most common soft tissue procedures. They are done to prevent unwanted breeding and reduce health risks like infections or cancers. These surgeries are routine, safe, and often performed when a dog is young, usually around 6–12 months of age.
How long does it take a dog to recover from soft tissue surgery?
Most dogs recover in 10 to 14 days after soft tissue surgery. Some may need more time, especially if the surgery was major or involved internal organs. During recovery, dogs need rest, wound care, and possibly medication. Always follow your vet’s aftercare instructions closely to help healing.
Can my dog eat before surgery?
No. Dogs should not eat for at least 8–12 hours before surgery. This helps prevent vomiting during anesthesia, which can be dangerous. Your vet will give you exact instructions. Some dogs may be allowed water, but food should always be withheld unless your vet says otherwise.
Is anesthesia safe for my dog?
Anesthesia is generally safe, especially with modern drugs and equipment. Vets check your dog’s health before surgery using blood tests and sometimes x-rays. For older or sick dogs, the vet may use special anesthesia plans. Monitoring during surgery helps keep your dog safe throughout the procedure.
What should I do if my dog licks the stitches?
Licking can cause the wound to open or get infected. Always use the cone (e-collar) your vet provides. If your dog still reaches the area, contact your vet. They might suggest a larger cone or a recovery suit to protect the stitches and help proper healing.
How do I know if something’s wrong after surgery?
Watch for swelling, redness, bleeding, discharge, or a bad smell from the wound. Other warning signs include no appetite, vomiting, or acting very tired after the first day. If you see any of these, call your vet right away. It’s better to ask early than risk complications.
28 Questions to Ask Your Vet Before Your Dog’s Soft Tissue Surgery
Discover 28 must-ask questions to discuss with your vet before your dog's surgery. Get clear on safety, recovery, costs, and how to prepare with confidence
Why Asking the Right Questions Matters
It’s normal to feel anxious when your dog needs surgery. You want to do what’s best but may not know what to expect. That’s why asking the right questions is so important—it helps you feel more in control and gives your dog the safest experience possible.
Clear communication with your vet can help you:
- Understand the reason for surgery and if it’s truly necessary now.
- Know the risks involved and how they’ll be managed.
- Prepare for recovery so you can give the best home care.
- Plan for the cost, including any follow-up needs.
Even routine surgeries carry some risks. But with proper planning, most dogs recover very well. Your vet is there to help, and asking questions doesn’t bother them—it shows you care. When you’re informed, you can make calm and confident decisions for your dog’s health.
Questions to Understand the Surgery Itself
Before you agree to surgery, it’s important to fully understand what’s being done and why. These questions help you get clear, direct answers from your vet.
1. What is the exact diagnosis and why is surgery needed?
Ask your vet for a clear explanation of what condition your dog has and why surgery is the best choice. Understanding the diagnosis helps you make the right decision.
- What is the medical name of the condition?
- How was it diagnosed—exam, x-rays, lab tests?
- What happens if we delay or avoid surgery?
The more you understand, the better you can care for your dog before and after surgery.
2. Is this surgery urgent or can it wait?
Not all surgeries must happen right away. Ask if your dog is stable or if waiting might cause harm.
- Is there a health risk in delaying the procedure?
- Will symptoms worsen without surgery?
- Can we try monitoring for a few days first?
Some surgeries, like pyometra, need fast action. Others, like lump removals, can sometimes be scheduled later.
3. Are there any non-surgical treatment options?
Before going forward with surgery, it’s fair to ask if there are other ways to treat your dog’s condition.
- Can medication, diet, or rest help instead?
- Are non-surgical treatments less effective or only temporary?
- What risks come with skipping surgery?
Your vet can explain all your choices so you can pick what feels best for your dog.
4. What type of surgery do you recommend and why?
Some conditions can be treated in more than one way. Ask which procedure your vet suggests and why they believe it’s the best option.
- Are there different techniques available?
- Is this a common surgery for my dog’s breed or condition?
- How often does your clinic perform this type of surgery?
This helps you feel confident in the care your dog will receive.
5. What exactly will happen during the surgery?
Knowing what the surgery involves helps ease worry and prepares you to care for your dog afterward.
- How long will the surgery take?
- Will any organs or tissue be removed?
- Will my dog be under general anesthesia the whole time?
Ask your vet to explain it in simple steps. A short walkthrough builds trust and understanding.
6. Can this surgery be combined with other procedures (like microchipping)?
If your dog needs more than one procedure, ask if they can be done at the same time to avoid extra anesthesia.
- Can you spay/neuter, remove a lump, or place a microchip together?
- Will combining procedures affect recovery?
- Is there any added risk or cost?
Combining treatments can save time, money, and stress for both you and your dog.
Questions About the Veterinary Team and Safety
It’s important to know who will care for your dog and how they’ll keep your pet safe during and after surgery.
7. Who will perform the surgery and what is their experience?
You have the right to know who will operate on your dog and what training they have.
- Is the surgeon a licensed veterinarian or a specialist?
- How often do they perform this type of surgery?
- Have they handled similar cases with good outcomes?
Knowing your vet’s experience can give you peace of mind before the procedure.
8. Will someone be monitoring my dog during anesthesia and recovery?
Monitoring is key for safety. Ask how your dog will be watched during and after surgery.
- Will a trained technician monitor heart rate, breathing, and oxygen?
- How often are vital signs checked?
- Is someone present during recovery?
Constant monitoring reduces risk and helps catch problems early.
9. How safe is anesthesia for my dog’s age and health?
Anesthesia is usually safe, but risks can go up with age or illness. Ask how your vet plans to manage this.
- Has bloodwork or heart testing been done?
- Will the anesthesia be adjusted for my dog’s size or condition?
- Are special precautions taken for senior or sick dogs?
Understanding the safety plan helps you feel more confident.
10. What are the risks and possible complications?
Every surgery has some risk. Asking about this helps you prepare and make informed choices.
- What are the most common complications for this surgery?
- What signs should I watch for at home?
- What happens if there’s a problem during surgery?
A good vet will always explain both the benefits and the risks.
11. Will lab tests or imaging be done before surgery?
Pre-surgery tests help your vet plan a safer procedure. Ask what’s recommended for your dog.
- Will you do bloodwork or a complete blood count (CBC)?
- Are x-rays or ultrasound needed?
- How do these tests help reduce risk?
Testing helps spot hidden problems that could affect surgery or recovery.
12. Will someone be with my dog while they wake up from anesthesia?
The recovery period is sensitive. Your dog should not be left alone as they wake up.
- Will a technician stay with my dog during recovery?
- How is pain or nausea managed while waking up?
- Will you call me once my dog is stable?
Knowing someone will be there gives you peace of mind.
Questions to Prepare for the Day of Surgery
Getting ready at home is just as important as what happens at the clinic. These questions will help you prepare your dog safely and avoid last-minute surprises.
13. How should I prepare my dog the day before surgery?
Ask your vet for clear steps to follow before surgery day.
- Should I give a bath or clean the wound area?
- Should my dog avoid rough play or long walks?
- When should I bring my dog to the clinic?
Planning ahead ensures your dog arrives calm, clean, and ready for a smooth procedure.
14. Do I need to withhold food or medication?
Most dogs need to fast before surgery, but always ask for specific guidance.
- When should I stop feeding food and water?
- Should I give or skip morning medications?
- What if my dog has diabetes or a special condition?
Clear instructions help avoid complications under anesthesia.
15. Can I stay with my dog before or after the procedure?
Some clinics allow limited time with your pet, but rules vary.
- Can I be with my dog before they go in?
- Will I get an update right after surgery?
- When can I pick them up?
Knowing what to expect helps you plan your own day too.
16. How long will the surgery take and will my dog stay overnight?
Not all surgeries are quick, and some dogs need monitoring afterward.
- What is the expected length of surgery?
- Is this an outpatient procedure or will my dog stay overnight?
- Will someone watch them if they stay overnight?
Understanding the timeline helps you stay calm and prepared.
17. What kind of stitches or bandages will my dog come home with?
Ask what you’ll see when your dog comes home—so nothing surprises you.
- Will there be external stitches or ones that dissolve?
- Will a bandage or dressing cover the wound?
- How do I keep the area clean and dry?
Knowing this helps you give the best home care from day one.
Questions About Recovery and Home Care
Good recovery starts with good planning. These questions will help you give your dog the best care once they return home.
18. What will recovery look like in the first 24–48 hours?
The first two days after surgery are important for healing. Ask what to expect.
- Will my dog be sleepy or act differently?
- Should I expect swelling or bruising near the surgery site?
- When should I offer food and water?
Understanding normal signs vs. warning signs helps you act quickly if something isn’t right.
19. How will pain be managed at home?
Pain control is key to comfort and healing. Your vet will give you a plan.
- What medications should I give and when?
- Should I watch for side effects like vomiting or sleepiness?
- Can I use cold packs or other methods for relief?
Never guess with pain meds—follow the vet’s exact instructions.
20. Will my dog need a cone or any protective gear?
Most dogs need a cone (e-collar) or similar protection to prevent licking.
- How long will my dog need to wear the cone?
- Are there softer or more comfortable options?
- Can I take it off during meals?
Keeping the wound protected helps prevent infection or damage to stitches.
21. What should I feed my dog after surgery, and when?
After anesthesia, your dog’s stomach may be sensitive. Ask what’s safe to give.
- When should I give the first meal?
- Should I offer a bland diet like boiled chicken and rice?
- Should I avoid any treats or hard kibble?
Feeding the right food supports healing and avoids upset stomachs.
22. Can you show me how to give medications or change bandages?
Don’t feel shy—ask your vet to show you the correct steps before heading home.
- How do I give pills or liquid meds safely?
- How often should I clean the bandage, if needed?
- What should I do if my dog resists?
Practicing at the clinic can make home care easier and safer.
23. How long before my dog can return to normal activity?
Your dog may feel better fast—but don’t let them do too much too soon.
- How many days of crate rest or limited walks are needed?
- When can my dog play or go up stairs again?
- Can they return to daycare or long walks soon?
Ask your vet for a step-by-step plan to prevent setbacks.
24. What signs of complications should I watch for?
Catching problems early helps prevent serious issues. Know what’s normal and what’s not.
- Should I watch for swelling, bleeding, or bad smells?
- Is a small lump at the stitch site okay?
- What if my dog stops eating or seems too tired?
Report anything that worries you—better safe than sorry.
25. Who should I call if something goes wrong—day or night?
Emergency care should always be available. Get contact info before you leave the clinic.
- Is there an emergency number after clinic hours?
- Should I go to a 24/7 emergency hospital if I can’t reach you?
- Can I text or send pictures if I’m unsure?
Keep the contact info in your phone or on your fridge just in case.
Questions About Cost and Follow-Up
Understanding the financial side of surgery helps you plan better and avoid surprise bills. Don’t be afraid to ask—your vet expects it.
26. How much will the surgery and aftercare cost?
Ask for a written estimate that includes all expected fees.
- Does the cost include anesthesia, medications, and supplies?
- Are recheck appointments or follow-ups included in the price?
- Are there extra fees for emergencies or extended care?
Knowing the total cost helps you budget and decide if pet insurance or payment plans are needed.
27. Are there follow-up visits or extra treatments I should expect?
Most surgeries need at least one follow-up. Ask what’s planned.
- Will my dog need a recheck to remove stitches or check healing?
- Are repeat bandage changes or x-rays needed?
- Will further tests be done if the results come back abnormal?
Planning ahead keeps your dog’s recovery smooth and stress-free.
28. Do I need to sign a consent form for this procedure?
A surgical consent form protects both you and the clinic.
- What information does the form include?
- Will it list possible risks and complications?
- Can I take time to read it before signing?
Always read forms carefully and ask if anything is unclear before signing.
Final Thoughts
Asking questions before your dog’s surgery shows that you care, and it helps you stay informed, calm, and ready. Surgery can feel scary, but when you understand what’s happening, it becomes easier to manage. Your vet wants you to ask questions, so don’t hold back.
Write down the answers during your appointment or ask for printed instructions. If you forget something later, call the clinic, it’s okay to ask again. Clear communication leads to safer surgery and better recovery for your dog. Whether it’s a routine spay or an emergency procedure, being involved helps you give the best care possible.
FAQs
Is it okay to ask my vet the same question twice?
Yes, absolutely. Vets understand that surgery can be stressful. They expect you to ask again if something isn’t clear. Repeating questions helps avoid mistakes and ensures your dog gets the safest care.
What if I feel nervous asking certain questions?
It’s normal to feel nervous, but remember—there are no “silly” questions. Your vet wants you to feel confident. Asking helps avoid confusion later and shows that you’re an attentive, caring pet owner.
Can I request a second opinion before surgery?
Yes, you can. If you're unsure, it's fine to get a second opinion. Most vets support this, especially for major or costly procedures. It helps you feel more confident in your decision.
Should I stay at the clinic during my dog’s surgery?
Most clinics prefer owners to go home and return later. This keeps the space calm for pets and staff. Ask your vet when to return and how you’ll be updated during the procedure.
How soon after surgery will my dog feel better?
Some dogs feel better within 24–48 hours, while others take longer. Pain meds help a lot. Your dog may act tired or quiet at first—this is normal. Watch for signs of pain or infection.
What if I can’t afford the surgery cost upfront?
Ask your vet about payment plans, CareCredit, or pet insurance options. Some clinics offer help or refer you to financial support groups. Don’t hesitate to ask—they want your dog to get needed care.
Tips for Managing Pain and Recovery After Dog Soft Tissue Surgery
Discover simple tips to manage pain and support your dog’s recovery after surgery. Learn signs of pain, safe care methods, and when to call your vet
Why Managing Pain Matters After Soft Tissue Surgery
Soft tissue surgeries often involve internal organs, skin, or muscles. While they don’t affect bones or joints, they can still cause soreness, swelling, and stress. If your dog’s pain is not well managed, it can slow healing, reduce appetite, and affect behavior.
Here’s why pain control after soft tissue surgery is so important:
- Helps tissues heal faster by reducing tension and inflammation.
- Keeps your dog eating and drinking, which is vital for recovery.
- Prevents stress-related issues like whining, panting, or pacing.
- Reduces the risk of self-trauma, such as licking or biting the incision.
Most dogs hide their pain, so don’t wait for crying or limping. Instead, watch for changes like restlessness, heavy panting, or avoiding movement.
Good pain control with vet-approved medication, a quiet space, and gentle care helps your dog feel better and heal properly. Always follow your vet’s instructions and speak up if anything feels off.
How to Tell If Your Dog Is in Pain
Recognizing pain early helps prevent complications and keeps recovery on track.
After soft tissue surgery, pain signs are often subtle. Dogs rarely cry or limp unless pain is severe. Instead, they may show small behavior changes. Knowing what to watch for can help you take quick action and adjust care as needed.
Common signs your dog may be in pain include:
- Whining, panting, or restlessness: Your dog may seem unsettled or unable to sleep comfortably.
- Hunched back or reluctance to move: Pain can cause stiffness, especially near the incision site.
- Licking or biting the surgical area: This may be your dog’s way of soothing discomfort.
- Loss of appetite or hiding behavior: Pain often reduces interest in food or social interaction.
Other signs may include trembling, tucked tail, pinned ears, or slow movement. If your dog shows any of these behaviors despite medication, contact your vet. Early adjustments in pain relief can lead to better healing. Never assume your dog is fine just because they are quiet.
Safe Pain Relief Options for Soft Tissue Recovery
Pain relief is more than just medication—it is a full care plan approved by your vet.
Vet-Prescribed Medications
Vet-approved pain medications are the foundation of soft tissue surgery recovery. Your vet will prescribe one or more drugs based on your dog’s age, weight, and the type of surgery.
Common medications include:
- NSAIDs (non-steroidal anti-inflammatory drugs): These reduce pain and swelling. Examples include carprofen or meloxicam.
- Gabapentin: Used for nerve pain or general discomfort.
- Opioids: Sometimes prescribed for short-term pain management after major surgery.
Follow your vet’s instructions exactly.
- Give medications at the same time each day.
- Use food or treats to help with swallowing pills.
- Do not skip doses, even if your dog seems fine.
Never increase the dose without vet approval. Overdosing can lead to kidney or liver problems. Keep a written schedule so you don’t miss any doses. Store medications safely, out of reach of pets and children.
If you notice vomiting, diarrhea, or unusual tiredness after giving meds, call your vet. Adjustments can often be made to improve comfort and avoid side effects. Pain control works best when given consistently and under supervision.
Avoid Human Medications
One of the biggest mistakes dog owners make is giving human painkillers without asking the vet. Many over-the-counter medications that are safe for people are toxic to dogs and can lead to serious illness or even death.
Never give your dog:
- Ibuprofen or naproxen (found in Advil, Aleve)
- Acetaminophen (found in Tylenol)
- Aspirin unless specifically prescribed
- Muscle relaxers or sedatives for humans
These drugs can cause internal bleeding, liver damage, kidney failure, or stomach ulcers in dogs. Even a small dose of some painkillers can be dangerous for small breeds.
Instead of guessing, always ask your vet what’s safe.
- Write down the name and strength of any human medicine you’re considering.
- Let your vet decide if there’s an animal-safe version.
Remember, even natural products like essential oils or herbal pain relief should be cleared by your vet first. Soft tissue recovery requires gentle, targeted care—not general pain relief meant for humans.
Cold Therapy in the First 48 Hours
Cold therapy can be helpful in the first two days after soft tissue surgery. It reduces swelling, numbs pain, and helps slow inflammation at the incision site.
How to apply cold packs safely:
- Use a soft, wrapped ice pack or frozen veggie bag.
- Apply to the area for 10–15 minutes at a time, 2–3 times a day.
- Always place a towel between the cold pack and your dog’s skin.
Ask your vet before using ice, especially if your dog had abdominal or internal surgery. Cold packs are typically more helpful for surface-level procedures, such as lump removals or wound repairs.
Do not use cold therapy if:
- Your vet has advised against it
- The incision is deep or near the organs
- Your dog seems anxious or reacts negatively
Stay with your dog during cold therapy to prevent chewing or discomfort. Used correctly, cold packs can help reduce the need for extra medication and make the first few days more manageable.
Sedatives or Anxiety Relief (If Needed)
Some dogs struggle to stay calm during recovery. This can be a problem, especially after soft tissue surgery, where movement must be limited to protect stitches and healing tissues. If your dog is pacing, jumping, or barking non-stop, speak to your vet about temporary calming options.
Your vet may recommend:
- Trazodone or acepromazine: Light sedatives that help your dog rest.
- Gabapentin: Offers both pain relief and mild sedation.
- Anti-anxiety supplements: Only with vet approval.
Never give human sleeping pills or CBD oil without professional advice. These can cause dangerous side effects in dogs.
Tips to support calm behavior:
- Keep your dog in a quiet room away from visitors.
- Use a covered crate or pen for security.
- Play soft music or white noise to reduce outside triggers.
Dogs that are too active risk pulling stitches or reopening wounds. When activity control is difficult, mild sedation can protect both your dog’s comfort and surgical success.
Making Your Dog Comfortable at Home
Creating a calm, safe space is one of the best ways to support your dog’s recovery after soft tissue surgery. Your dog needs plenty of rest, limited movement, and a space where they feel secure and protected. Small adjustments at home can make a big difference in healing.
Start with a recovery area:
- Choose a quiet room away from stairs, kids, and other pets.
- Use soft, washable bedding that keeps your dog off hard floors.
- Keep water nearby in a shallow, non-spill bowl.
Prevent licking or biting the incision:
- Use an e-collar (cone) or a soft recovery shirt as directed by your vet.
- Make sure the cone fits well and doesn't rub or fall off.
Avoid slips and overexertion:
- Block access to stairs and remove rugs that slide.
- Limit movement by closing doors or using baby gates.
A calm environment reduces stress, keeps your dog from hurting themselves, and supports faster healing. Keep noise levels low, keep routines simple, and supervise any time your dog is out of their rest space.
Feeding and Digestion During Recovery
After soft tissue surgery, your dog’s digestive system may take a little time to return to normal. Anesthesia and pain medications can cause temporary appetite loss, nausea, or constipation. Providing gentle meals and watching your dog’s bowel habits helps prevent setbacks during recovery.
Feeding tips for the first few days:
- Offer bland meals like boiled chicken and rice if your vet recommends it.
- Keep portions small and increase gradually as appetite returns.
- Transition slowly back to your dog’s regular food after 24 to 48 hours.
Monitor digestion closely:
- Make sure fresh water is always available.
- Watch for constipation or straining when pooping.
- Report vomiting, diarrhea, or refusal to eat after the first day.
If needed, ask your vet about adding canned pumpkin or a stool softener to help with constipation. Avoid giving any over-the-counter digestive aids without approval. A calm feeding routine supports steady recovery and keeps your dog comfortable as they heal.
Managing Activity and Movement
Movement should be limited during the first 1 to 2 weeks after surgery. Even though your dog might seem energetic, soft tissue wounds need time to close and strengthen. Too much activity can reopen stitches or slow healing.
Here’s how to keep movement safe:
- No running, jumping, or rough play until your vet says it’s okay.
- Avoid stairs, slippery floors, and high furniture.
- Use short leash walks only for bathroom breaks.
Support weak or wobbly dogs:
- Use a towel sling or rear-end harness under the belly for support.
- Keep walks short and always stay close.
- Don’t allow off-leash time, even in a fenced yard.
Supervise your dog during rest time. Crates or playpens are great for limiting movement, especially if your dog is young or energetic. Follow your vet’s timeline for slowly returning to regular walks and play. A few quiet days now can prevent weeks of delay later.
Incision and Wound Care
Caring for the surgical site is one of the most important parts of recovery. The goal is to keep the area clean, dry, and undisturbed until it heals completely. Your vet will tell you what to expect and when to come back for a check-up.
Check the incision daily for:
- Swelling, redness, or warmth around the area
- Yellow or green discharge, bad odor, or bleeding
- Any missing stitches or skin pulling apart
Basic care guidelines:
- Do not bathe your dog unless your vet says it’s okay.
- Keep the area dry and free from dirt, grass, or hair.
- Prevent licking or scratching with an e-collar or recovery suit.
Gently lift the fur to look at the wound. Use calm praise or treats to keep your dog still. Call your vet if anything looks worse instead of better. Early action prevents infection and supports faster healing.
Supporting Your Dog Emotionally
After surgery, your dog may not act like their usual self. Many dogs become more clingy, anxious, or withdrawn as they recover. These emotional changes are normal, especially in the first few days.
What your dog may show:
- Restlessness or following you everywhere
- Whining when left alone
- Sleeping more or hiding in corners
How to help emotionally:
- Give calm affection and stay nearby for comfort
- Stick to a routine with feeding, meds, and short walks
- Offer soft blankets, quiet music, and low lighting
- Use puzzle feeders or frozen treats for light mental activity
Avoid visitors or loud activity during recovery. Let your dog settle at their own pace. Emotional support is just as important as physical care. A calm environment builds trust and helps your dog feel safe while healing.
When to Call Your Vet
Even with proper care, some signs mean your dog needs a vet check right away. Always trust your instincts. If something feels off, don’t wait.
Call your vet if you notice:
- Crying, limping, or yelping even with pain meds
- Refusal to eat or drink after 24 hours
- Vomiting, diarrhea, or constipation lasting more than two days
- Trouble peeing, straining, or signs of discomfort when going to the bathroom
- Redness, heat, bleeding, or pus around the incision
- Lethargy, disorientation, or behavior that’s unusual for your dog
Keep your vet’s contact info and emergency clinic number easily available. The sooner problems are caught, the easier they are to treat. Post-surgical problems can develop quickly, so never hesitate to call.
Signs That Your Dog Is Recovering Well
Recovery progress may look different for each dog, but certain signs show your dog is healing as expected. These small improvements usually happen within the first week and continue with time.
Signs of good recovery include:
- Eating and drinking normally
- Sleeping well and waking up alert
- Walking short distances with more confidence
- Calm behavior and less whining or shaking
- Incision is dry, clean, and slowly closing
As the days go by, your dog should seem more comfortable and return to familiar habits. Appetite should improve, bathroom routines become regular, and the surgical site should look better each day. Keep following your vet’s timeline and instructions, and attend all follow-up visits.
Final Thoughts
Managing pain and recovery after soft tissue surgery takes time, but your efforts make all the difference. With proper care, most dogs heal well and return to their normal lives.
Keep these core steps in mind:
- Follow your vet’s instructions closely
- Stay on track with medications and incision checks
- Provide rest, calm, and comfort each day
- Watch for warning signs and act early when needed
Every dog is different. Some bounce back quickly, while others take more time. Your job is to stay patient, consistent, and alert. Comfort, routine, and gentle support will help your dog feel safe and heal smoothly at home.
FAQs
How long should my dog take pain medicine after soft tissue surgery?
Most dogs take pain medicine for 5 to 7 days, depending on the procedure. Your vet will guide the exact duration. Don’t stop early, even if your dog looks better. Pain can return once meds wear off. Always complete the full course unless your vet says otherwise.
Is it normal if my dog seems restless after surgery?
Yes. Restlessness is common during the first 24–48 hours, especially as anesthesia wears off. It may also be a sign of pain. Make sure your dog is calm, warm, and has taken prescribed meds. If restlessness continues or worsens, contact your vet to adjust the recovery plan.
What if my dog won’t eat after surgery?
A low appetite is normal for the first day. Offer bland food like boiled chicken and rice in small amounts. Make sure water is available. If your dog still refuses to eat or drink after 24 hours, or vomits, call your vet to check for post-op complications.
Can I let my dog walk freely indoors?
No. Even indoors, your dog’s movement should be restricted. Jumping, running, or climbing stairs can damage healing tissues or stitches. Keep your dog in a small, quiet room or use a crate. Leash walks should be short and only for bathroom breaks during the early recovery phase.
When can I stop using the cone or recovery shirt?
You can stop using the cone or recovery suit when the incision is fully closed, dry, and your vet confirms it’s safe. This usually takes 10 to 14 days. Never remove it early—even one lick or scratch can reopen the wound or lead to infection.
How do I know if my dog is healing well?
Healing is going well if your dog is eating, resting comfortably, peeing and pooping normally, and the incision is clean and dry. Each day, your dog should seem slightly more relaxed and alert. If anything looks worse instead of better, schedule a follow-up visit with your vet.
Signs of Complications After Any Soft Tissue Surgery
Learn how to care for your dog after soft tissue surgery with simple tips on feeding, wound care, activity limits, and signs to watch during recovery
What’s Normal and What’s Not After Soft Tissue Surgery
After soft tissue surgery, it’s normal for your dog to act a bit tired and quiet. You might see mild bruising or swelling near the incision site. This is a normal part of healing and should improve over a few days. Your dog may eat less and sleep more during the first 24 to 48 hours.
Some redness and scabbing around the stitches can also be expected. The area should stay clean and dry, and the swelling should not get worse. If your dog is calm, walking slowly, and showing interest in food or water by the second day, that’s a good sign.
- Normal signs: Mild swelling, scabbing, slight redness, low energy, reduced appetite
- Watch closely: Any changes that worsen or don’t improve after two days
Knowing what’s normal helps you catch complications early.
Red Flags to Watch for at the Incision Site
Even small changes at the incision site can signal serious problems—knowing what to look for makes a difference.
Signs of Infection or Poor Healing
An incision should improve a little every day. If it starts to look worse instead of better, that’s a red flag. Infection often begins with redness that spreads or becomes brighter. Swelling that feels hot or painful can also be a sign. If you notice thick discharge—especially yellow, green, or foul-smelling—call your vet right away. Other warning signs include a bad odor from the bandage, dark or blackened skin near the wound, or excess bleeding or pus.
Poor healing may happen if your dog is licking, scratching, or too active. Keep the incision dry, clean, and protected. Take photos daily to track progress and catch early changes.
- Redness that worsens or spreads
- Swelling that feels warm, painful, or keeps growing
- Yellow, green, or smelly discharge
- Pus, blood, or moisture leaking from the wound
- Skin turning dark, cold, or dry around the incision
- Bad smell coming from the bandage
These signs usually mean the wound needs medical attention right away.
When the Incision Opens Up
A healing incision should stay closed and dry. If the wound splits or opens, this is called dehiscence—and it needs urgent vet care. You might see the skin gaping, with tissue, fat, or fluid bulging through. This often happens when a dog licks, chews, or moves too much. Some wounds may look wet or shiny before opening fully.
Loose or missing stitches, especially those that seem chewed out, should never be ignored. The skin might look pulled apart, with less redness around the edges due to tension. If the incision opens, keep your dog calm and prevent more movement until you can reach the vet.
- Stitches that come loose or fall out early
- Skin that looks pulled open or stretched
- Bulging fat or soft tissue under the skin
- Wet, shiny, or sticky surface over the incision
- Gaping wound with pink or yellow tissue showing
If the wound opens, cover it gently with a clean cloth and contact your vet right away. Avoid pressure, creams, or cleaning until you get professional advice.
Unusual Behavior and Physical Signs of Complications
Behavioral changes often appear before visible symptoms—watch your dog closely during recovery.
Whining, Pacing, or Hiding
If your dog begins to act differently after surgery, pay close attention. Whining, pacing, or hiding can be early signs of pain, stress, or infection. Some dogs may act restless and can’t seem to get comfortable. Others might isolate themselves or avoid touch. While a little discomfort is normal, a sudden change in behavior usually signals that something isn’t right.
You may also notice panting without heat or exercise, looking anxious, or constantly shifting positions. These behaviors often mean your dog is uncomfortable and may need pain relief or a wound check.
- Whining or crying without reason
- Pacing around or unable to settle
- Hiding under beds or in closets
- Avoiding people or eye contact
- Trouble sleeping or lying still
These behavior shifts should not be ignored. If your dog shows new or worsening signs after the first two days, call your vet. Pain or discomfort left untreated can delay healing or lead to other complications.
Systemic or Internal Complications
Not all complications are visible—some affect your dog’s entire body and require fast action.
Internal Bleeding or Shock
Internal bleeding is rare but serious. It can happen if a blood vessel wasn’t sealed properly or if your dog became too active too soon. One of the first signs is pale gums or tongue—normal gums should be pink. Your dog may also appear very weak, unsteady, or collapse suddenly. Cold limbs, shaking, or low body temperature are also red flags.
These signs may appear suddenly or come on slowly over several hours. If you notice more than one of them, get emergency help right away. Internal bleeding can quickly become life-threatening if not treated.
- Pale or white gums or tongue
- Sudden weakness or collapse
- Shaking or trembling for no reason
- Cold paws, ears, or limbs
- Fast breathing or rapid heart rate
If you suspect internal bleeding, do not wait. Carry your dog gently and call your vet or the nearest emergency clinic immediately.
Infection or Fever
A fever is your dog’s way of fighting off infection—but it’s also a sign something may be wrong. After surgery, your dog should slowly gain energy. If they seem more tired after the second day or feel hot to the touch, this may signal an internal infection.
Fever can come with body aches, decreased appetite, or changes in breathing. Touch your dog’s ears, paws, or armpits—if they feel much warmer than usual, it’s a warning sign. In some cases, dogs may limp or show pain even if the surgical site looks okay.
- Body feels hot, especially ears and paws
- Lethargy that worsens instead of improving
- Refusal to eat or drink
- Shivering or acting cold in a warm room
- Limping or guarding part of the body
Don’t give fever-reducing medicine meant for humans. Call your vet if you notice these signs—they’ll check for infection and may prescribe antibiotics or further testing.
Digestive or Urinary Issues
After surgery, your dog’s bathroom habits might change slightly—but major changes can signal deeper problems. If your dog hasn’t urinated for more than 24 hours, that’s a concern. Straining to pee, leaking urine, or crying while urinating are also red flags.
Digestive issues like constipation, diarrhea, or belly swelling could mean the medications are affecting your dog’s system—or worse, that an internal issue is developing. A swollen belly could also mean fluid buildup or gas that needs immediate care.
- No urination in 24 hours
- Straining, crying, or leaking while urinating
- Constipation lasting over 48 hours
- Pain when pooping or signs of bloating
- Hard, swollen belly or visible discomfort
Keep a close eye on bathroom patterns and tell your vet about any problems. The earlier you catch internal issues, the easier they are to treat.
Rare but Serious Signs to Know
Some complications are uncommon—but when they happen, they need urgent care.
Seromas and Fluid Pockets
A seroma is a soft, fluid-filled swelling near the incision. It often looks like a small balloon under the skin. These usually form when fluid collects in the empty space created during surgery, especially if your dog moved too much early on. Seromas aren’t usually painful, but they can grow if not monitored.
In most cases, your vet may just observe it and let the fluid absorb on its own. But if it becomes red, warm, or starts leaking, it may need to be drained. Never try to pop or press on a seroma at home.
- Soft swelling near the incision site
- Usually not warm or painful at first
- May jiggle when touched
- Can appear several days after surgery
- Needs vet attention if it grows, leaks, or changes color
If you suspect a seroma, keep your dog calm and call your vet. It may not be an emergency—but it does need professional review.
Crepitus or Skin Necrosis
Crepitus is a crackling or popping sound under the skin. It happens when gas builds up in the tissues, sometimes from bacteria. It’s rare, but dangerous. If you feel this when touching near the wound, it must be reported to your vet immediately.
Skin necrosis is when tissue starts dying. It can happen if the blood flow to the area is reduced—often due to infection, pressure, or tight stitches. The skin may turn gray, cold, flaky, or begin peeling. This condition is serious and may require wound cleaning, new sutures, or even surgery.
- Crackling under the skin (crepitus)
- Skin turns gray, purple, or cold
- Dry, flaky, or peeling wound edges
- Loss of skin around the incision
- Strong odor or deep darkening of tissue
These signs mean urgent tissue damage is happening. Call your vet or go to the nearest emergency center right away—this is not something that can wait.
When to Call Your Vet Immediately
Some symptoms can’t wait; quick action could save your dog’s life or prevent major complications.
During recovery, there are certain signs that require immediate veterinary help. Bleeding from the incision, especially if it soaks through a bandage, is always urgent. Pus or fluid leaking from the wound can signal a serious infection. Gums that look pale, blue, or gray may indicate internal bleeding or lack of oxygen, both are emergencies.
Other signs like collapse, refusal to move, or extreme pain should never be ignored. Vomiting, diarrhea, or a high fever that doesn't improve within 12–24 hours may point to infection or a reaction to medication. Finally, if your dog hasn't urinated or had any interest in water for more than 24 hours, it’s time to call the vet.
- Bleeding or pus from the incision
- Gums that appear pale, gray, or blue
- Sudden collapse or extreme stiffness
- Refusing to move, eat, or drink
- Vomiting, diarrhea, or fever not improving
- No urination in 24+ hours
These signs mean something serious may be happening. Don’t wait—get help from your vet or an emergency clinic right away.
Final Thoughts
Some swelling or bruising is normal—but trust your gut when something feels wrong.
Recovering from soft tissue surgery takes time, patience, and close observation. While many signs like mild bruising, sleepiness, or low appetite are normal in the first day or two, it’s important to watch for changes that go beyond typical healing. Trust what you see and feel—if your dog’s condition seems off or getting worse, you’re probably right to be concerned.
Taking clear photos of the incision site every day can help you compare healing progress and spot problems early. If you’re unsure whether something is normal, it’s always better to call your vet. Most complications can be managed well when caught early.
- Mild swelling, scabbing, or bruising is usually normal
- Keep a consistent routine and check the wound daily
- Use photos to track healing and catch red flags
- Watch behavior closely, changes often appear before visible signs
- Never wait if something feels wrong; call your vet
Your care plays a big role in how well your dog heals. With attention and quick action, most dogs recover smoothly.
FAQs
How do I know if my dog’s incision is healing properly?
A healing incision should look dry, closed, and slightly pink. Mild bruising or swelling is normal in the first few days. It should not be redder, smell bad, or leak fluid. If you're unsure, take daily photos to track progress and call your vet if anything looks worse.
What are warning signs of infection after soft tissue surgery?
Infection signs include redness that spreads, hot or swollen areas, yellow or green discharge, foul odor, or increased pain. Your dog may also act more tired or refuse food. Any of these signs should be reported to your vet immediately.
Is it okay if my dog is not eating after surgery?
It's normal for dogs to have low appetite for 24–48 hours. Offer bland food and fresh water. If your dog refuses to eat or drink beyond that time, or shows vomiting or diarrhea, call your vet.
How can I tell if my dog is in pain during recovery?
Signs of pain include whining, panting, shaking, pacing, or not wanting to move. Some dogs hide or become aggressive when they hurt. If you see any of these behaviors, speak to your vet about pain relief options.
What does it mean if the incision opens?
If the incision splits or gapes, this is called dehiscence. You might see loose stitches, bulging tissue, or shiny wet areas. Cover it gently and call your vet right away. Do not clean or apply anything to the wound without guidance.
When should I go to the emergency vet after soft tissue surgery?
Go immediately if your dog collapses, has pale gums, strong bleeding, a foul-smelling wound, or can’t walk or pee. Sudden changes in behavior, vomiting that won’t stop, or signs of shock also need emergency care.
What to Expect After Your Dog’s Soft Tissue Surgery
Find out what to expect after your dog’s soft tissue surgery—recovery tips, incision care, feeding, rest, and signs that may need your vet’s attention
The First 24–48 Hours After Soft Tissue Surgery
The first two days after your dog’s soft tissue surgery are a critical part of recovery. This is when the body starts healing, and your dog adjusts to pain medicine and the effects of anesthesia. Knowing what to expect helps you stay calm and catch any problems early.
Here’s what’s normal during this time:
- Grogginess or sleepiness: Many dogs sleep for long periods or seem out of it. This usually fades within 12 to 24 hours.
- Mild coughing: The breathing tube used during anesthesia can cause a light cough for a day or two.
- Low appetite: Your dog may not eat much after coming home. Offer small, soft meals and ensure water is available.
What to monitor closely:
- Vomiting, diarrhea, or refusing food after 24 hours
- Constipation or straining that lasts more than two days
- Whining, panting, or signs of pain even after medication
Let your dog rest in a quiet space and call your vet if anything seems unusual.
Managing Pain and Medication
Managing pain is one of the most important parts of your dog’s recovery. After surgery, your vet will prescribe pain medicine and possibly antibiotics to support healing and prevent infection. Always follow dosing instructions exactly.
Here’s how to manage it safely:
- Give all medications on schedule, even if your dog seems fine
- Don’t skip doses or stop early without your vet’s advice
- Use food or pill pockets to help with swallowing pills
- Store meds in a safe, dry place, out of reach
If your dog refuses medication:
- Hide pills in soft food like xylitol-free peanut butter
- Ask your vet if a liquid version is available
- Gently place pills at the back of the tongue if safe to do so
Never give over-the-counter pain relief or calming treats unless your vet says it’s safe. Many human medications are toxic to dogs. If your dog shows signs of pain like whining, shaking, or restlessness even after medication, contact your vet right away.
Taking Care of the Surgical Site
The incision area needs daily attention to ensure proper healing. While mild swelling or bruising is normal in the first few days, monitor the site closely.
What’s normal:
- Light swelling, small scabs, or pink skin
- Mild bruising around the stitches
- A closed incision with no discharge
Watch for signs of infection:
- Redness that spreads or deepens in color
- Yellow or green discharge
- A strong, unpleasant odor
- Bleeding or loose stitches
How to check the site safely:
- Gently lift fur to view the area without pulling skin
- Keep your dog calm during checks using treats or soft voices
- Avoid touching the incision unless instructed
Cleaning the area:
- Only clean if your vet tells you to
- Use vet-approved solutions and sterile gauze
- Never apply alcohol, hydrogen peroxide, or ointments unless advised
An e-collar or recovery shirt will help keep the area protected. Call your vet before trying any home treatment.
Keeping Your Dog Safe and Comfortable at Home
After surgery, your dog needs a quiet and safe place to rest. This helps healing and prevents injury.
Create a comfortable setup:
- Choose a room away from noise, stairs, or other pets
- Use soft, washable bedding on the floor
- Keep water in a spill-proof dish
- Use gates or doors to block off areas
Prevent licking or biting the incision:
- Use a cone or recovery shirt at all times
- Check that the collar fits properly and doesn’t rub the skin
Limit movement to prevent strain:
- No jumping, running, or playing
- Avoid stairs, couches, or beds
- Use a short leash for bathroom breaks only
A crate or padded playpen works well for safe rest.
Feeding and Bathroom Habits
After surgery, appetite and bathroom habits may change. Anesthesia and pain medication can affect digestion and energy.
- Offer small portions of food. Use a bland diet like boiled chicken and rice if your vet recommends.
- Keep fresh water available and encourage slow drinking.
Watch for the following:
- Low appetite for 24–48 hours is normal; report anything longer
- Vomiting or diarrhea may occur once but should not continue
- Constipation or straining due to pain or inactivity
- Changes in urination, especially after abdominal or bladder surgery
If your dog has trouble walking, use a towel sling under the belly for support. Keep bathroom trips short and on-leash.
Emotional Recovery and Mental Stimulation
Healing is not just physical. Dogs may feel anxious, clingy, or confused after surgery. This behavior is common and usually improves with time.
Support emotional recovery:
- Keep the environment calm and quiet
- Use a simple daily routine with feeding and medication at the same time
- Offer comfort items like soft blankets or a favorite toy (if approved)
- Provide mental stimulation with puzzle toys or lick mats
Avoid physical games or rough play. Choose safe, low-energy activities to reduce stress and keep your dog gently engaged during crate rest.
Follow-Up Visits and Healing Timeline
Recovery is not complete until your vet confirms healing. Follow-up visits are important to monitor the incision, remove stitches, and check progress.
Typical timeline:
- Day 1–2: Rest, pain management, reduced appetite
- Day 3–7: Appetite returns; incision remains closed with minor swelling
- Day 10–14: Vet recheck for stitches or wound check
- After 2 weeks: Light walks and activity may resume if approved
Your vet will guide you on when to allow stairs, play, or off-leash time. Healing speed varies based on surgery type, age, and overall health.
When to Call the Vet: Warning Signs to Watch
Even with proper care, complications can happen. Know what to watch for and call your vet if you see any of the following:
- Bleeding or discharge from the incision
- Redness, swelling, or bad smell around stitches
- Vomiting, diarrhea, or no eating for over 24 hours
- Difficulty urinating or defecating
- Panting, whining, or restlessness at rest
- Unusual behavior not explained by medication
If your dog seems off in any way, do not wait. Early care prevents bigger problems.
Final Thoughts
Every dog heals at their own pace, depending on the surgery, age, and overall health. Your role at home makes a big difference in recovery.
Key reminders:
- Stick to a calm routine
- Check the incision daily
- Give all medications on time
- Limit movement until cleared by your vet
If anything concerns you, reach out to your vet. With care, rest, and patience, your dog will be on the path to full recovery.
FAQs
How long will my dog be in pain after surgery?
Most dogs feel sore for a few days. Pain medication helps. If your dog still seems uncomfortable after three days or shows signs like whining or shaking, call your vet.
When can I take my dog for a walk again?
Short bathroom walks on a leash are okay after a day or two. Longer walks or play should wait until your vet approves, usually after the incision is fully healed.
What should the incision look like as it heals?
Mild swelling or bruising is normal. The area should be closed, with no bad smell or pus. If the site looks worse instead of better, call your vet.
Is it okay if my dog is not eating much after surgery?
Yes. A reduced appetite for 24 to 48 hours is common. If your dog refuses all food or vomits more than once, contact your vet.
Can I bathe my dog after surgery?
No. Wait 10 to 14 days before bathing unless your vet says otherwise. Keeping the area dry helps prevent infection.
What if my dog keeps licking the stitches?
Licking can cause infection or pull out stitches. Use a cone (e-collar) or recovery shirt at all times unless supervised. If the cone seems uncomfortable, ask your vet about softer alternatives. Never allow even “a little” licking, as it can quickly damage healing tissue.

