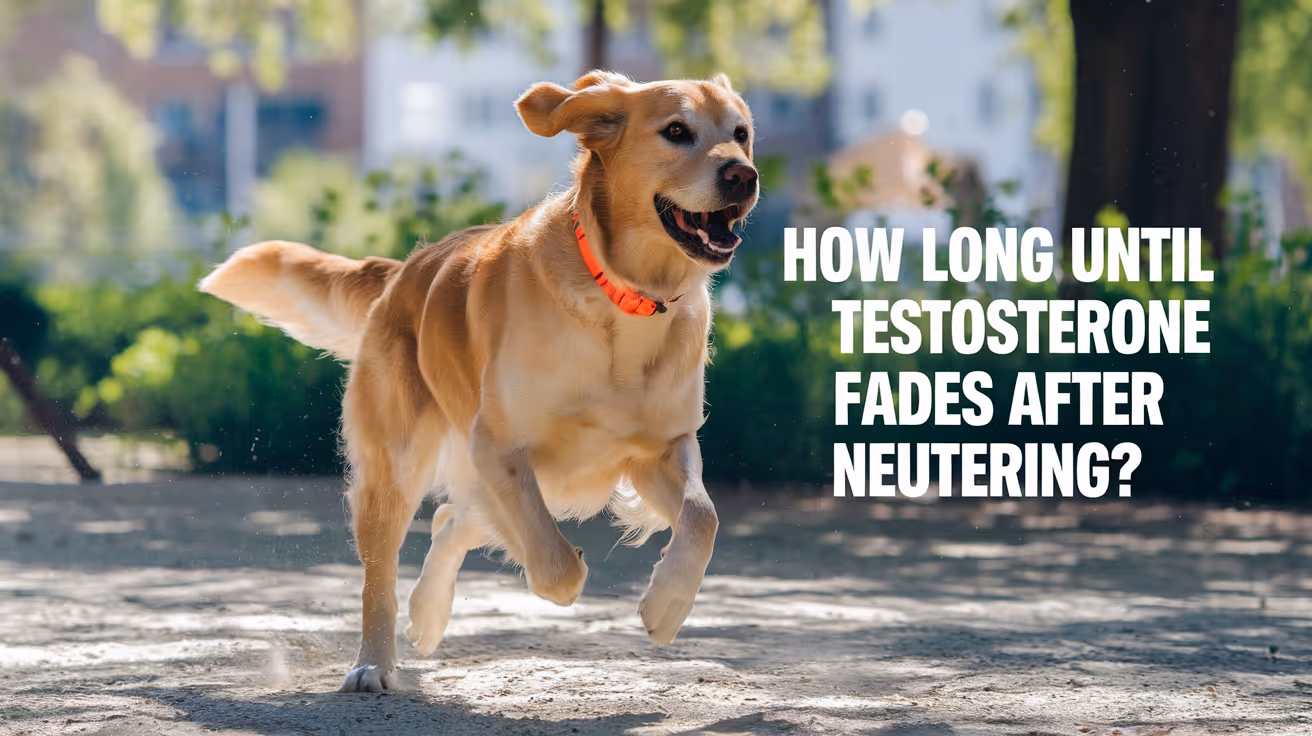
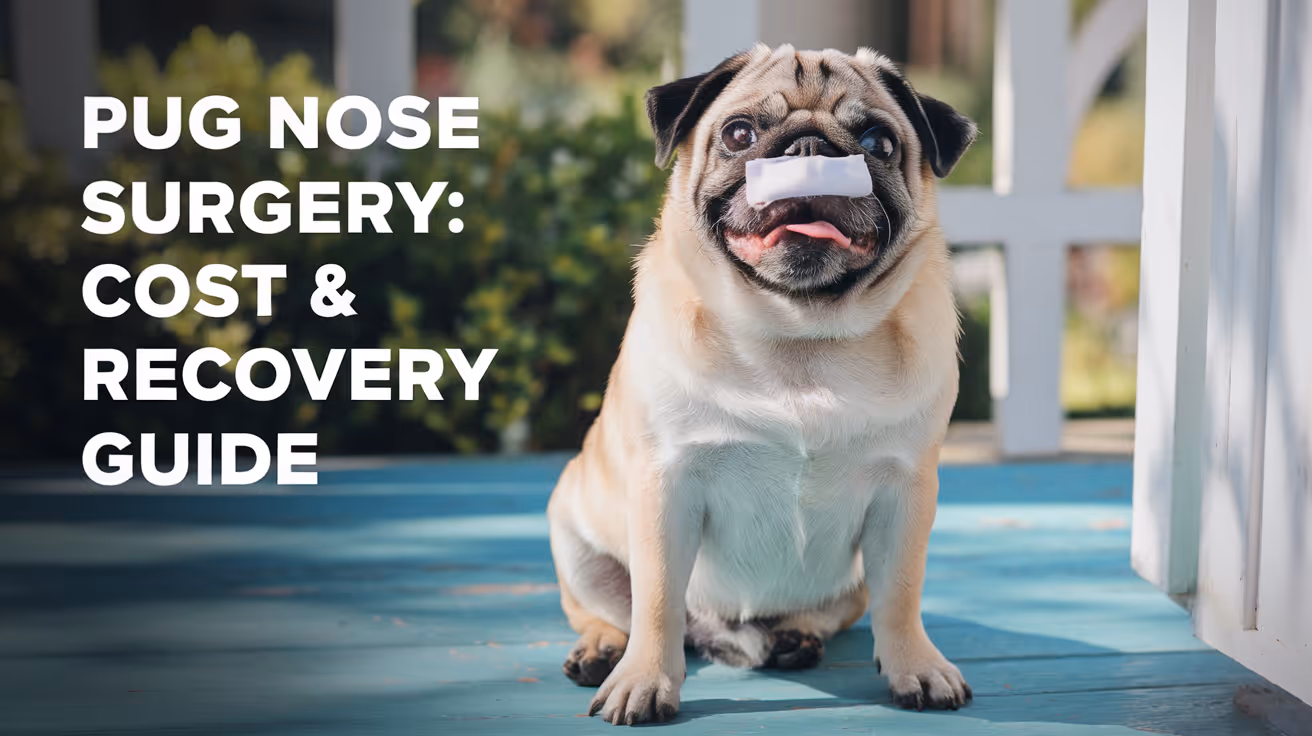
How Long After Neutering Is Testosterone Gone in Dogs
Learn how long testosterone stays in dogs after neutering and what to expect during recovery.

This article is for informational purposes only and is not a substitute for professional veterinary advice. Every case is unique, so always consult your veterinarian for guidance specific to your pet.
This content is intended for veterinary professionals for educational purposes. It does not replace clinical judgment or tailored advice. Always rely on your training, expertise, and the specific context of your patients.
Neutering removes the testicles, which produce most of a dog's testosterone. But the hormone does not vanish from the bloodstream on surgery day.
Testosterone clears gradually as the body metabolizes what remains. Behavior follows the same curve. This is why owners who expect an immediate behavioral shift are often disappointed, and why patience in the weeks after surgery is not just advisable but necessary.
Here is the complete, evidence-based picture of the testosterone clearance timeline and what it means for your dog.
Quick answer: Testosterone levels begin declining within 24 to 72 hours of neutering. Significant reduction occurs within 2 to 3 weeks. Most testosterone is cleared from the bloodstream within 4 to 6 weeks. Full behavioral stabilization typically takes 2 to 3 months as the body and brain adjust to the new hormonal environment. Some habits shaped by testosterone may persist beyond this window and require training to address.
Key takeaways
- Testosterone production stops on surgery day: The testicles are removed, eliminating the primary production source immediately.
- Clearance from the bloodstream takes 4 to 6 weeks: Residual testosterone circulates and is metabolized gradually.
- Behavioral changes follow the hormonal decline: Most testosterone-driven behavioral improvements appear over 2 to 6 weeks.
- Full behavioral stabilization takes 2 to 3 months: Some behaviors fade slowly as hormone levels drop.
- Habits shaped by testosterone may persist: Learned behaviors continue regardless of hormone levels and require training.
- Fertility persists for up to 6 weeks: Residual sperm in the reproductive tract can still result in pregnancy.
What testosterone does in male dogs
Testosterone is produced primarily by the testicles. It drives a specific set of behaviors and physical characteristics in intact male dogs:
- Urine marking: The drive to mark territory with urine is heavily testosterone-dependent.
- Mounting behavior: Sexual and status-related mounting is driven by testosterone.
- Roaming: The drive to escape and find a mate is strongly testosterone-mediated.
- Inter-male aggression: Competition-based aggression with other intact males is often testosterone-linked.
- Dominance behaviors: Some dominant social behaviors decrease after neutering.
Beyond behavior, testosterone influences muscle mass, certain aspects of bone density, and the dog's general physical development.
The testosterone clearance timeline
Understanding this timeline is the most important practical takeaway from this article.
Hours 0 to 72: production stops, clearance begins
The testicles are removed during surgery. Testosterone production essentially stops at that moment.
However, the hormone that was already circulating in the bloodstream at the time of surgery does not disappear immediately. The body metabolizes and clears it through normal hormonal processing.
Within the first 24 to 72 hours, testosterone levels begin their decline. This is measurable but does not immediately translate into behavioral change.
Days 7 to 10: significant early reduction
By one to two weeks post-surgery, testosterone levels have dropped substantially from their pre-surgery baseline. Most of the actively circulating hormone is being metabolized.
This is still not the point at which behavioral changes are reliable. The hormonal environment is in transition, and the brain and behavior patterns are adjusting.
Weeks 4 to 6: functional clearance
By four to six weeks post-neutering, testosterone has reached very low or undetectable levels in most dogs. This is the point that veterinarians generally refer to when asked how long it takes for testosterone to "go away."
Some sources cite two weeks for functional clearance; others cite six weeks. The variation reflects individual differences in age, health, and metabolism. Younger dogs tend to clear residual testosterone faster.
Months 2 to 3: full behavioral stabilization
Even after testosterone levels have dropped to baseline, the brain and learned behavioral patterns continue adjusting to the new hormonal environment.
By two to three months post-neutering, most testosterone-driven behavioral changes have stabilized. This is the point at which you can accurately assess whether neutering has produced the behavioral improvements you were hoping for.
Timeline summary table
What behaviors improve as testosterone declines
These are the behaviors most reliably reduced as testosterone levels fall:
High likelihood of improvement:
- Urine marking indoors and outdoors
- Mounting behavior toward people, other dogs, or objects
- Roaming and escape attempts to seek females in heat
- Some forms of inter-male aggression driven by competition
Variable or uncertain improvement:
- Dominance-related behaviors that have become habitual
- Aggression toward familiar people (testosterone may contribute but is not the sole driver)
- General excitability (energy level is more breed and fitness-driven than hormonal)
Behaviors that will not improve:
- Fear-based aggression (not testosterone-driven)
- Separation anxiety (not testosterone-driven)
- Learned behaviors from training history (habits, regardless of their origin)
- Resource guarding (not testosterone-driven)
Why some behaviors persist after testosterone is gone
This is the part of the conversation that surprises many owners.
Some behaviors that appeared to be testosterone-driven become habitual through repetition. The neural pathways associated with the behavior have been reinforced many times, and they do not disappear when the hormonal fuel is removed.
A dog that has been marking territory for three years before neutering has established a behavioral habit. The testosterone-driven urge may be gone, but the habit of going to specific spots and marking may continue. This requires training to address, not just time.
The general rule: behaviors that have been performed repeatedly over time are more likely to persist after neutering than behaviors that are recent or infrequent.
For how testosterone decline affects dog behavior in the context of the full behavioral landscape after sterilization, that guide covers what the evidence says about which changes are most reliable. For the equivalent question in females, the guide on whether hormone changes calm female dogs walks through which female dogs see the calming effect and which do not.
The fertility window: keep intact females away
One important practical point that owners sometimes overlook: a neutered male can still get an unspayed female pregnant for up to six weeks after surgery.
Sperm are stored in the reproductive tract beyond the testicles, in the vas deferens and associated structures. These residual sperm remain viable for several weeks after the testicles are removed.
Keep your neutered male dog away from intact females for the full six weeks after surgery. This is not a precaution against unlikely events. It is a necessary management step.
Factors that affect how quickly testosterone clears
The 4 to 6 week timeline is a general guide. Individual variation exists.
Age: Younger dogs tend to metabolize and clear testosterone faster than older dogs. Their overall metabolic rate is higher.
Health status: Dogs with liver or kidney impairment may metabolize hormones more slowly.
Pre-surgery testosterone levels: A dog with very high testosterone levels before surgery may take longer to reach baseline.
Individual physiology: As with most biological processes, individual variation exists between dogs of the same age and breed.
None of these factors change the approach. Patience through the full two to three month window remains appropriate regardless.
How testosterone decline affects female dogs after spaying
While this article focuses on testosterone in male dogs, it is worth noting the parallel process in females.
Spaying removes the ovaries, which produce estrogen and progesterone. These hormones do not vanish on surgery day either. They decline over a similar 4 to 6 week clearance window, with behavioral stabilization taking two to three months.
The behavioral changes driven by the female hormonal cycle, including heat restlessness, roaming, false pregnancy behaviors, and cyclical mood shifts, follow the same general clearance curve as testosterone in males.
For how hormonal behavior changes in female dogs specifically, including which behaviors are most reliably reduced and over what timeline, that guide provides the female-specific detail.
Frequently asked questions
How long does it take for testosterone to fully disappear after neutering?
Most testosterone is cleared from the bloodstream within 4 to 6 weeks of neutering in healthy adult dogs. Behavioral stabilization, reflecting the brain's adjustment to the new hormonal environment, typically takes 2 to 3 months. Some habits may persist beyond this window and require training.
My dog was neutered two weeks ago and is still marking. Is something wrong?
No. Two weeks is within the normal clearance window. Testosterone is still declining. Most owners see improvements in marking behavior over 4 to 8 weeks. If marking continues at the same level beyond 3 months, it may have become a learned habit that requires training intervention.
Can my neutered dog still get a female pregnant?
Yes, for up to 6 weeks after surgery. Residual sperm in the reproductive tract remain viable after the testicles are removed. Keep your recently neutered male away from intact females for the full 6-week window.
Will my dog's behavior change immediately after neutering?
No. The first two weeks are recovery from surgery. Behavioral changes related to testosterone decline begin appearing in weeks 3 to 6, with full stabilization at 2 to 3 months. Expecting behavioral change within days of surgery leads to frustration and misattribution.
Does the age at neutering affect how quickly testosterone clears?
Somewhat. Younger dogs tend to metabolize hormones faster due to higher metabolic rates. However, the practical difference in clearance timeline is small compared to the individual variation between dogs. The 4 to 6 week clearance timeline remains a reasonable guide regardless of age. For whether lower testosterone calms dogs down and how the behavioral changes of testosterone decline manifest, that guide addresses the calming question across different dog types. For recovery timeline alongside hormonal changes, that guide places the hormonal adjustment within the broader post-surgical recovery picture.
Understanding the testosterone clearance timeline reframes the post-neutering period from a frustrating wait into an understandable process. The behavior changes are coming, but they follow the hormone. Give it four to six weeks for the hormonal shift and two to three months for the behavioral picture to stabilize. What you see at month three is an accurate reflection of what surgery has and has not changed.
Resources
The following sources were used as reference and background for this article:
- Small Dogs Heaven. Understanding the Timeline: How Long After Neutering a Dog is Testosterone Gone? smalldogsheaven.com
- The Beloved Dog. Your Dog's Testosterone: When It's Gone After Neutering. thebeloveddog.com
- Dog Hutt. How Long After Dog Neutering Is Testosterone Gone? doghutt.com
- Dogo App. How Long After Neutering Dog Is Testosterone Gone? dogo.app
- American Veterinary Medical Association (AVMA). Spaying and Neutering. avma.org
- Embrace Pet Insurance. Dog Neuter and Spay Recovery. embracepetinsurance.com

Get a Free Poster
Enhance your workspace with a high-quality radiographs reference poster, designed for veterinary professionals. This free physical poster will be shipped directly to you—just fill out the form to request your copy.


Taking Great TPLO Radiographs
Click Below to Watch Live Video Demos


We'll send you a Free Wall Poster with all the steps
Step #1
Getting Ready
Ensuring a clean surgical field starts with proper skin preparation. This video demonstrates the best practices for:
- Shaving the patient – Achieving a close, even shave while minimizing skin irritation
- The Dirty Scrub – The initial skin prep step to remove surface debris and reduce bacterial load before the sterile scrub.
Following these techniques helps reduce infection risk and improve surgical outcomes. Watch the video to see how it’s done effectively!


Step #2
Reduce Your Risks
Many surgeons are shocked to find out that their patients are not protected from biofilms and resistant bacteria when they use saline and post-op antibiotics.
That’s Where Simini Comes In.
Why leave these risks and unmanaged? Just apply Simini Protect Lavage for one minute. Biofilms and resistant bacteria can be removed, and you can reduce two significant sources of infection.
Step #3
Take the Course
Preventing surgical infections is critical for patient safety and successful outcomes. This course covers:
- Aseptic techniques – Best practices to maintain a sterile field.
- Skin prep & draping – Proper methods to minimize contamination.
- Antibiotic stewardship – When and how to use perioperative antibiotics effectively.
Stay up to date with the latest evidence-based protocols. Click the link to start learning and earn CE credits!

Things to know

Red Lump on Dog's Leg: Common Causes Explained
Learn about common causes of a red lump on a dog's leg, symptoms, diagnosis, and treatment options to keep your pet healthy.
A red lump on a dog's leg can be worrying for any pet owner. This symptom may indicate a range of health issues, from minor irritations to serious conditions. Understanding the common causes helps you act promptly and seek the right care for your dog.
This article explains the typical reasons behind a red lump on a dog's leg, how to recognize them, and what treatment options are available. You will learn how to identify signs that need urgent veterinary attention and how to care for your dog at home.
What are the common causes of a red lump on a dog's leg?
Red lumps on a dog's leg can arise from various causes. Some are harmless, while others require medical intervention. Knowing the common causes helps you decide when to visit the vet.
These lumps may result from infections, allergic reactions, injuries, or growths. Each cause has distinct features and treatment needs.
- Insect bites or stings: Bites from fleas, ticks, or mosquitoes often cause red, swollen lumps that can be itchy or painful for your dog.
- Abscess formation: An abscess is a painful, pus-filled lump caused by bacterial infection, usually from a wound or bite.
- Allergic reactions: Allergies to food, plants, or chemicals can cause red lumps or hives on the skin, including the legs.
- Benign tumors: Non-cancerous growths like lipomas or cysts appear as soft or firm lumps and are usually not painful.
Identifying the cause early helps in managing the lump effectively and prevents complications.
How can you tell if the red lump is an infection?
Infections are a frequent cause of red lumps on a dog's leg. They often develop after a cut, scratch, or insect bite. Recognizing infection signs is important for timely treatment.
Infected lumps may feel warm and be tender to touch. Your dog might lick or chew the area excessively.
- Swelling and redness: The lump appears inflamed, with surrounding skin showing redness and puffiness.
- Discharge presence: Pus or fluid may ooze from the lump if the infection is severe or an abscess forms.
- Foul odor: Infected lumps sometimes emit a bad smell due to bacterial growth.
- Fever and lethargy: Your dog may show signs of illness like reduced energy or appetite if the infection spreads.
If you notice these symptoms, consult your veterinarian promptly to prevent worsening of the infection.
What role do allergies play in causing red lumps on a dog's leg?
Allergies can cause skin reactions that appear as red lumps or bumps. Dogs can be allergic to many substances in their environment or diet.
Allergic lumps often itch and may appear suddenly. They can be accompanied by other symptoms like hair loss or skin dryness.
- Contact allergies: Exposure to plants, chemicals, or fabrics can trigger localized red lumps on the legs.
- Food allergies: Certain ingredients in your dog's diet may cause skin inflammation and lumps.
- Flea allergy dermatitis: A common allergy to flea saliva causing intense itching and red bumps.
- Seasonal allergies: Pollen and dust mites can cause lumps and skin irritation during specific times of the year.
Managing allergies often requires identifying and avoiding triggers, along with veterinary-prescribed treatments.
Could the red lump be a tumor or cyst?
Not all lumps are infections or allergies. Some red lumps on a dog's leg may be tumors or cysts. These growths can be benign or malignant.
Early veterinary evaluation is essential to determine the nature of the lump and decide on treatment.
- Benign lipomas: Soft, movable lumps made of fat cells, usually harmless and painless.
- Cysts: Fluid-filled sacs that can become red if irritated or infected.
- Malignant tumors: Cancerous growths that may grow quickly and cause pain or ulceration.
- Skin histiocytomas: Common benign tumors in young dogs that often resolve without treatment.
Your vet may perform tests like fine needle aspiration or biopsy to diagnose the lump accurately.
When should you seek veterinary care for a red lump on your dog's leg?
Knowing when to visit the vet can save your dog from complications. Some lumps require urgent attention, while others can be monitored at home.
Prompt veterinary care ensures proper diagnosis and treatment, improving your dog's recovery chances.
- Rapid growth: If the lump grows quickly within days, it needs immediate veterinary evaluation.
- Pain or discomfort: Lumps causing your dog to limp, lick, or bite the area should be checked by a vet.
- Discharge or bleeding: Any lump that oozes pus, blood, or has an open sore requires medical attention.
- Systemic signs: Symptoms like fever, lethargy, or loss of appetite alongside the lump indicate a serious problem.
Regular monitoring and early vet visits help manage your dog's health effectively.
What treatment options are available for red lumps on a dog's leg?
Treatment depends on the cause of the red lump. Your veterinarian will recommend the best approach after diagnosis.
Some lumps heal with simple care, while others need medication or surgery.
- Antibiotics: Used to treat bacterial infections and abscesses causing red lumps on the leg.
- Anti-inflammatory drugs: Help reduce swelling and pain associated with allergic reactions or injuries.
- Surgical removal: Necessary for tumors, cysts, or persistent lumps that do not respond to medication.
- Topical treatments: Creams or ointments may be applied to soothe irritated skin and promote healing.
Follow your vet’s instructions carefully to ensure your dog recovers fully and avoids complications.
How can you prevent red lumps from developing on your dog's legs?
Prevention is key to keeping your dog healthy and comfortable. Many causes of red lumps can be avoided with proper care.
Regular grooming and health checks help detect problems early before lumps develop or worsen.
- Flea and tick control: Use vet-recommended products to prevent bites that cause lumps and infections.
- Skin hygiene: Keep your dog's skin clean and dry to reduce the risk of infections and irritations.
- Balanced diet: Provide nutritious food to support healthy skin and immune function.
- Regular vet visits: Routine check-ups help catch lumps early and maintain overall health.
By taking these steps, you can reduce the chances of your dog developing red lumps and other skin problems.
Conclusion
A red lump on a dog's leg can have many causes, ranging from minor irritations to serious health issues. Recognizing the common causes helps you respond appropriately and seek veterinary care when needed.
Early diagnosis and treatment improve your dog's comfort and health. Regular monitoring and preventive care are essential to avoid complications and keep your dog happy and active.
FAQs
What does a red lump on a dog's leg usually mean?
It often indicates an infection, allergic reaction, insect bite, or growth like a cyst or tumor. Proper diagnosis by a vet is important for treatment.
Can a red lump on my dog's leg go away on its own?
Some lumps from minor irritations or insect bites may resolve without treatment, but persistent or worsening lumps need veterinary evaluation.
Is a red lump on a dog's leg always painful?
Not always. Some lumps are painless, like lipomas, while infections or abscesses can cause pain and discomfort.
How do vets diagnose red lumps on dogs?
Vets use physical exams, fine needle aspiration, biopsies, and sometimes imaging to identify the lump's cause accurately.
What should I do if my dog has a red lump on its leg?
Monitor the lump for changes, avoid irritating it, and schedule a vet visit if it grows, bleeds, or causes pain to your dog.
Do Dogs Calm Down After Being Spayed?
Learn how dogs behave after being spayed and when to expect them to calm down post-surgery.
It is one of the most common reasons owners choose to spay their female dog. The expectation of a calmer, more settled companion afterward.
Sometimes that is exactly what happens. Sometimes it does not. And in a small subset of cases, anxiety or excitability actually increases.
Understanding why gives you a more accurate picture of what to expect, which makes the outcome less surprising in either direction.
Quick answer: Many dogs do become calmer after spaying, but the effect is specific to hormone-driven behaviors, not overall temperament. Dogs that were restless, anxious, or excitable due to heat cycles typically show significant improvement. Dogs whose energy or anxiety has non-hormonal causes will not reliably calm down. Most behavioral changes, if they occur, appear over two to three months.
Key takeaways
- The calming effect is real but specific: It applies to behaviors driven by reproductive hormones, not all behaviors.
- Heat cycle behaviors disappear: Restlessness, roaming, frequent urination, and cyclical mood shifts all stop after spaying.
- Core energy level and personality do not change: A high-energy dog will still be high-energy after spaying.
- Breed and individual temperament matter: Some breeds retain high energy regardless of hormone status.
- The timeline is weeks to months, not days: Hormone levels decline gradually, so behavioral changes are gradual too.
- A small subset of dogs show increased fearfulness: This is documented in research and worth knowing about before surgery.
What "calming down" actually means after spaying
When people say they want their dog to calm down, they usually mean one of two things:
- They want heat cycle behaviors to stop: the roaming, the restlessness, the vocalization, the constant male attention.
- They want a generally more settled dog overall.
Spaying reliably delivers the first. The second is less predictable.
This distinction is the core of the honest answer to this question.
What spaying removes: the hormonal layer
Spaying removes the ovaries, which are the primary source of estrogen and progesterone. These hormones regulate the reproductive cycle and influence behaviors tied to it.
During heat cycles, which typically occur every six to eight months in adult dogs, estrogen surges create a set of predictable behaviors:
- Restlessness and inability to settle
- Increased vocalization
- Frequent urination in small amounts to signal reproductive status
- Strong drive to escape and find a mate
- Attracting intact male dogs
- Cyclical irritability or anxiety
All of these stop after spaying. The hormonal trigger is permanently removed.
Which dogs calm down most noticeably after spaying
Dogs whose difficult behaviors are primarily or significantly driven by the reproductive cycle show the most consistent improvement after spaying.
Dogs most likely to become calmer:
- Female dogs that showed significant behavior changes during heat cycles, including restlessness, anxiety, and clinginess
- Dogs prone to false pregnancies, with associated nesting, object guarding, and protective behavior
- Dogs that attempted to escape or roam during heat periods
- Dogs whose cyclical mood swings were disruptive to daily life
For these dogs, spaying removes a recurring source of behavioral disruption. The result is often a more predictable, stable dog.
Which dogs may not calm down after spaying
Dogs whose energy level, excitability, or anxiety comes from sources other than reproductive hormones will not reliably settle after spaying.
Dogs less likely to show a calming effect:
- High-energy working or sport breeds where drive is genetic, not hormonal
- Dogs with established anxiety, fearfulness, or reactivity from non-hormonal causes
- Dogs with learned problematic behaviors from their history and environment
- Dogs whose excitability comes from insufficient exercise or mental stimulation
A Border Collie that is highly energetic before spaying will still be highly energetic after. A Labrador that pulls on the leash before spaying will still pull after. These behaviors are not driven by estrogen.
The timeline: when does calming happen?
Behavioral changes from spaying do not happen within days of surgery. The immediate post-surgery period reflects recovery from anesthesia and pain, not hormonal adjustment.
Realistic timeline:
Owners who expect a noticeably calmer dog within days of surgery are working with an inaccurate timeline. The changes are gradual and unfold over weeks to months.
What research says about calming after spaying
The evidence is genuinely mixed, which is worth knowing rather than glossing over.
Supporting the calming effect:
A study of 591 dogs found behavioral problems reduced or eliminated in 59% of spayed females. Heat cycle-related behaviors showed the most consistent improvement. Many owners of females that were particularly difficult during heat cycles report significant positive changes after spaying.
Complicating the picture:
Two large-scale studies using the Canine Behavioral Assessment and Research Questionnaire (C-BARQ) found that sterilization was associated with a roughly 31% increase in fearfulness and a 33% increase in touch sensitivity in some dogs. These findings apply to both males and females.
What does this mean in practice? For a meaningful subset of dogs, spaying does not produce a calmer animal. It may even produce a more anxious one, particularly in dogs that had pre-existing fearfulness or were sterilized at a young age.
This does not mean spaying is wrong for these dogs. It means the behavioral outcome cannot be guaranteed, and expectations should be calibrated accordingly.
For the full picture of all the behavior changes to expect after spaying, including the research on unexpected outcomes, that guide covers the complete behavioral landscape across both sexes.
Does calming depend on the dog's age at spaying?
Yes, and this is one of the most important variables.
Dogs spayed before their first heat cycle:
The hormonal disruption of heat cycles is never established. Many owners report these dogs are consistently more settled than intact females across their lifetime, without ever having the difficult heat cycle period.
Dogs spayed after several heat cycles:
The calming effect from eliminating heat cycles is still real and significant. However, any behaviors that have become habitual through repetition during heat cycles may persist longer or require training to address.
Dogs spayed very young (before 6 months):
Research suggests a higher association with fearfulness in dogs sterilized very early, before hormonal maturity. For whether this applies specifically to puppies, the guide on calming effects specific to female dogs addresses this age-specific question in detail. For the puppy-specific picture, the guide on whether puppies calm down after being spayed covers the developmental nuances unique to younger dogs.
When the expected calming does not happen
If your dog does not seem noticeably calmer after spaying, consider these factors before concluding the surgery did not work.
Check the timeline: Have two to three months passed since surgery? If not, the hormonal adjustment may still be in progress.
Identify the behavior source: Is the behavior you wanted to address actually hormone-driven? If it is not, spaying was never going to address it.
Consider habituation: Some behaviors that started as hormone-driven become habitual over time. The hormone is removed but the habit persists. Consistent training addresses habituated behavior.
Consider an underlying anxiety: If your dog became more fearful or anxious post-surgery, this is a documented outcome in some dogs. A veterinary behaviorist or your regular vet can help evaluate what is happening and what options exist.
Understanding the truth behind the calming effect myth, including why the expectation of calming is sometimes oversold, helps put the variable outcomes in context.
What actually makes dogs calmer long-term
Whether or not spaying produces a calming effect, these factors reliably influence how settled and manageable a dog is:
- Adequate physical exercise: A dog that is genuinely tired is a calmer dog. Exercise needs are determined by breed and individual temperament.
- Mental stimulation: Breed-appropriate mental work, puzzle feeders, training sessions, and enrichment activities reduce restless, problematic behavior.
- Consistent training: Clear, reinforced expectations give dogs a behavioral framework. This is the single most reliable path to a calmer dog.
- Routine and predictability: Dogs settle more easily in stable, predictable environments.
Spaying contributes one element to this picture. It is not a standalone solution.
Frequently asked questions
How long after being spayed will my dog calm down?
If the calming effect is going to occur, most hormone-driven behavioral changes become apparent within two to six weeks as hormone levels decline. Full stabilization typically takes two to three months. Dogs that are still showing challenging behaviors three to four months after surgery are unlikely to improve further from the hormonal change alone.
Will spaying make my high-energy dog less active?
Probably not significantly. Energy level in dogs is primarily determined by breed, genetics, and conditioning. Spaying can cause a modest metabolic slowdown, but it does not reduce drive or enthusiasm. A high-energy breed will still need the same amount of exercise after spaying.
My dog got more anxious after being spayed. Why?
Research has documented increased fearfulness in a subset of dogs after sterilization, associated with a roughly 31% increase in fearfulness in some studies. This appears to occur more often in dogs sterilized at a young age and in dogs with pre-existing anxiety. If your dog shows increased anxiety after spaying, speak to your vet. A referral to a certified veterinary behaviorist may be helpful.
Will spaying help with aggression?
It depends on the type of aggression. Aggression linked to the heat cycle, competition with other female dogs, or false pregnancy guarding often decreases. Fear-based aggression, learned aggression, and resource guarding are not hormone-driven and are not reliably improved by spaying. For whether lower testosterone calms dogs down in the male counterpart to this question, that guide covers the testosterone-behavior link specifically.
Does breed affect whether spaying calms a dog down?
Yes. Breed temperament significantly influences baseline energy and anxiety levels. High-drive working breeds such as Border Collies, Australian Shepherds, and Belgian Malinois have energy and drive that is genetic, not hormonal. Removing reproductive hormones does not change these fundamental breed characteristics. Whether your specific dog falls into a calmer range after spaying depends on what was driving any difficult behavior in the first place.
The calming effect of spaying is real for dogs whose difficult behaviors are hormone-driven. For those dogs, eliminating the heat cycle and its associated hormonal disruption produces a meaningfully more stable animal. For dogs whose energy or anxiety comes from other sources, spaying is still beneficial for health reasons but should not be expected to produce behavioral transformation. The most accurate prediction is not based on "spaying calms dogs" but on "removing a specific hormonal influence changes the behaviors that influence drives."
Resources
The following sources were used as reference and background for this article:
- Stanley Coren, Psychology Today. Are There Behavior Changes When Dogs Are Spayed or Neutered? psychologytoday.com
- PubMed. Changes in the behavior of dogs after castration. pubmed.ncbi.nlm.nih.gov
- ManyPets. Do Dogs Change After Being Neutered or Spayed? manypets.com
- American Veterinary Medical Association (AVMA). Spaying and Neutering. avma.org
- Houndsy. How Spaying Affects Dog Behavior. houndsy.com
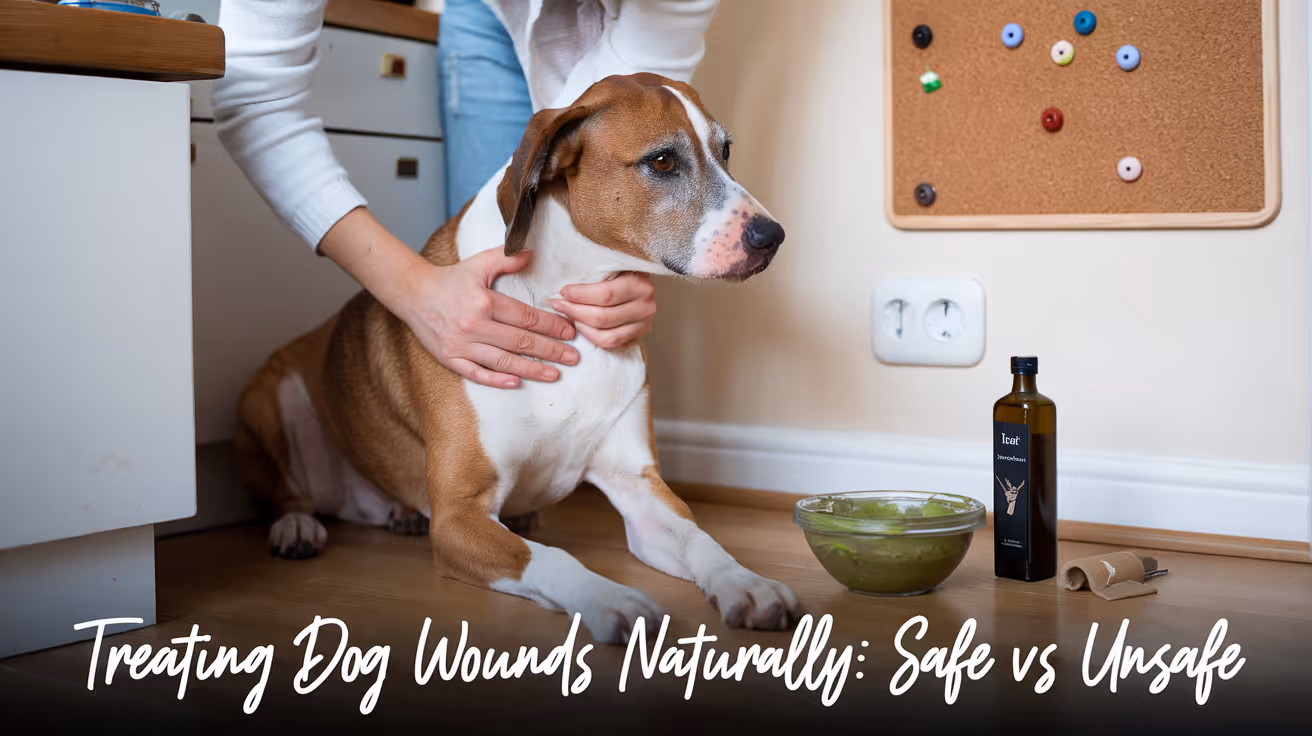
Treating Dog Wounds Naturally: Safe and Unsafe Methods
Learn safe and natural ways to treat dog wounds at home, including what remedies to avoid for your pet's health and healing.
The internet is full of natural wound remedies for dogs. Some have genuine evidence behind them. Others cause real harm to healing tissue.
Knowing which is which could mean the difference between a wound that heals well and one that becomes infected, chemically damaged, or toxic.
Quick answer: Saline solution, medical-grade Manuka honey, and dilute chlorhexidine are the safest and most effective natural or gentle home wound treatments. Hydrogen peroxide, rubbing alcohol, tea tree oil, and undiluted iodine all cause tissue damage and must be avoided. Natural treatment works for minor wounds only. Any wound with pus, spreading redness, deep tissue involvement, or systemic signs in your dog needs veterinary care, not home remedies.
Key takeaways
- Saline is the safest cleaning solution for dog wounds: Gentle, effective, no tissue damage.
- Medical-grade Manuka honey has genuine antibacterial evidence: Raw grocery store honey does not.
- Hydrogen peroxide is not safe for dog wounds: It destroys healthy cells and delays healing.
- Tea tree oil is toxic to dogs: Never use it on or near any wound.
- Natural does not mean safe: Several natural substances are harmful or toxic to dogs.
- No home remedy treats infection: Established infection requires veterinary antibiotics.
When home treatment is and is not appropriate
Before reaching for any remedy, assess the wound honestly.
Minor wounds appropriate for home care:
- Small surface scrapes and abrasions with no debris
- Shallow cuts under half an inch that have stopped bleeding
- Minor skin irritation around a healing area
Wounds that require veterinary attention regardless of home remedy interest:
- Any wound showing pus, foul odor, spreading redness, or heat
- Bite wounds and puncture wounds of any size
- Wounds that gape, are deep, or are over a joint
- Any wound accompanied by lethargy, reduced appetite, or fever
- Wounds that have not improved after 48 hours of appropriate home care
For identifying wounds that need veterinary care not home treatment, that guide covers the full range of signs that distinguish a manageable wound from one requiring professional assessment.
Safe natural and gentle wound treatments
1. Saline solution
Evidence level: Strong. Recommended by veterinarians universally.
Sterile saline (0.9% sodium chloride in water) is the gold standard for wound irrigation at home. It is gentle enough not to damage healthy tissue, effective at removing debris and reducing surface bacterial load, and widely available as pre-made wound wash.
How to use:
- Irrigate directly into the wound using gentle syringe pressure
- Do not scrub or dab: irrigation is more effective and less damaging
- Use at each wound cleaning session (typically two to three times daily for active wounds)
DIY option: 1 teaspoon of table salt dissolved in 2 cups of clean water approximates 0.9% saline. Use within 24 hours.
2. Medical-grade Manuka honey
Evidence level: Good. Multiple studies confirm antibacterial and wound-healing properties.
Manuka honey is produced from the Leptospermum scoparium plant in New Zealand and Australia. It contains methylglyoxal (MGO), a compound with potent antibacterial activity against a wide range of bacteria, including antibiotic-resistant strains such as MRSA and MRSP.
Research has confirmed Manuka honey inhibits Staphylococcus pseudintermedius, the most common cause of dog skin infections, including antibiotic-resistant strains.
Key distinctions:
How to use:
- Apply a thin layer to the wound surface
- Cover with a clean, non-stick dressing
- Change daily
- Do not use on deep wounds or established infections without veterinary guidance
- Prevent licking (most dogs find honey highly appealing)
3. Dilute chlorhexidine solution
Evidence level: Strong. Used in veterinary practice worldwide.
Chlorhexidine is technically a pharmaceutical antiseptic, not a "natural" remedy. However, it is frequently recommended as a safe home antiseptic for dog wounds when diluted correctly.
At 0.05% concentration (50 times more dilute than the standard 2.5% concentrate), chlorhexidine is safe for wound contact and effective against bacteria, yeasts, and some viruses.
How to use:
- Ask your vet for the correct dilution and product
- Do not use concentrated chlorhexidine directly on wounds
- Use diluted chlorhexidine scrub only on surrounding skin, not in open wounds
4. Coconut oil
Evidence level: Moderate. Useful as a surface moisturizer; not a primary antiseptic.
Coconut oil contains lauric acid and medium-chain fatty acids with mild antimicrobial properties. It is non-toxic, well-tolerated by most dogs, and can prevent dry skin around a healing wound from cracking.
Where it helps:
- Keeping the skin around a healing wound from drying out
- Minor superficial scratches and abrasions on intact skin
Limitations:
- Not appropriate for open, infected, or discharging wounds
- Most dogs will lick it off immediately: only useful when the wound is inaccessible to the dog
- Does not replace antiseptic cleaning
5. Chamomile tea rinse
Evidence level: Limited but low-risk for minor surface irritation.
Cooled chamomile tea applied gently to the skin around a wound may reduce mild inflammation and redness. German chamomile contains apigenin, a compound with documented anti-inflammatory properties.
Use only for:
- Minor surface redness around a nearly-healed wound
- Not for open wounds, infected wounds, or wounds with discharge
Natural treatments to avoid: what causes harm
Hydrogen peroxide
This is the most commonly misused wound treatment in both human and dog wound care.
Hydrogen peroxide feels like it should work because it bubbles, and the bubbling looks like cleaning. What it actually does:
- Destroys healthy cells: The oxidative action that kills bacteria also kills fibroblasts (healing cells) and disrupts granulation tissue
- Delays healing: Each application sets back tissue repair
- Pushes debris deeper: The bubbling action can drive contamination into deeper tissue layers rather than removing it
Verdict: Do not use hydrogen peroxide on dog wounds. At all. For any reason.
Rubbing alcohol (isopropyl alcohol)
- Causes significant pain and burning on contact with open tissue
- Destroys healing cells just as hydrogen peroxide does
- Dries wound tissue and creates a hostile environment for cell migration
- Provides no benefit over saline for wound cleaning
Verdict: Never use on dog wounds.
Tea tree oil
This is the most dangerous "natural remedy" on this list.
Tea tree oil (melaleuca oil) is toxic to dogs whether applied topically or ingested. Toxicity signs include:
- Weakness and muscle tremors
- Loss of coordination
- Drooling and vomiting
- Skin redness and irritation at application site
- In severe cases, liver damage
Tea tree oil should never be used on dogs in any concentration. This includes products marketed as pet-safe that contain any percentage of tea tree oil.
Verdict: Never, under any circumstances.
Undiluted iodine (Betadine at full concentration)
Betadine at its standard 10% concentration is too strong for open wound contact. At full concentration it:
- Causes chemical burns to exposed tissue
- Delays wound healing
- Can be absorbed and cause systemic issues if used extensively
Diluted povidone-iodine at 0.1 to 0.5% (a pale tea color when mixed with water) is safe for wound use and is sometimes recommended by vets. The undiluted product from the bottle is not.
Essential oils (most types)
Many essential oils are toxic or irritating to dogs:
- Tea tree oil: Toxic (covered above)
- Eucalyptus oil: Toxic to dogs
- Pennyroyal oil: Highly toxic
- Clove oil: Irritating and potentially toxic
- Lavender oil: Low-level concern; safer than others but still not recommended for open wounds
Verdict: Avoid all essential oils on or near dog wounds unless a veterinarian specifically recommends a particular product.
Safe vs. unsafe: quick reference table
What natural methods cannot do
This is the most important point in this guide.
Natural treatments can support the conditions for healing in minor wounds. They cannot:
- Clear an established bacterial infection
- Replace systemic antibiotics for wounds with significant infection
- Treat abscess formation or deep tissue infection
- Prevent spreading infection from reaching the bloodstream
For when natural methods are insufficient and veterinary treatment is required, that guide covers the full treatment picture including when antibiotics are necessary and what the treatment protocol looks like.
The role of licking prevention in natural wound care
No natural wound treatment works if the dog can access the wound.
Saliva introduces bacteria. Physical licking removes whatever was just applied. The mechanical trauma from the tongue disrupts healing tissue.
E-collar or recovery suit use is not optional regardless of which wound treatment approach you use.
For why licking is not a natural remedy despite the instinct behind it, that guide explains the biological mechanisms through which licking worsens infections specifically.
Tracking healing when using natural methods
If you are managing a minor wound at home with natural methods, daily monitoring determines whether you are on the right track.
Signs the wound is responding:
- Redness reducing each day
- No discharge developing beyond day one
- Wound shrinking or closing
- Your dog less interested in the area
Signs you need veterinary care:
- Discharge appears (especially yellow, green, or thick)
- Redness is spreading beyond the wound margin
- Wound is not visibly improving after 48 hours of care
- Your dog is showing systemic signs: lethargy or reduced appetite
- Any foul or unusual odor from the wound
For tracking healing when using natural methods and understanding which stage a wound is in and what progression should look like, that guide provides the stage-by-stage framework for monitoring.
Frequently asked questions
Can I use Neosporin on my dog's wound?
Use with caution. Some formulations of Neosporin contain polymyxin B, which is generally safe for topical use on dogs. However, Neosporin is designed for human skin, dogs will lick it off immediately (requiring a cone), and it provides minimal benefit over saline cleaning for most minor wounds. Ask your vet before using.
Is coconut oil antibacterial enough to use on infected wounds?
No. Coconut oil has mild surface antibacterial properties but is not strong enough to address an established wound infection. It is appropriate as a surface moisturizer around healing wounds, not as a treatment for infected ones.
What can I put on a dog wound to help it heal faster?
The most evidence-backed home approach: saline irrigation two to three times daily, E-collar to prevent licking, and monitoring. Medical-grade Manuka honey can be added for minor wounds. Everything else is less supported and some options cause harm.
My dog ate some of the honey I applied. Is that dangerous?
Medical-grade Manuka honey in small amounts is not toxic to dogs. However, honey is high in sugar. If your dog is diabetic or weight-sensitive, contact your vet. This also illustrates why E-collar use is essential when applying any topical wound treatment.
Can I use diluted apple cider vinegar on a dog wound?
No. Apple cider vinegar is acidic and causes irritation and tissue damage when applied to open wounds. Despite being widely suggested online, it is not appropriate for wound care in dogs.
The natural wound care options that genuinely help dogs are simple: saline, Manuka honey for minor wounds, and clean, consistent monitoring. The ones that harm are often the most popular. Hydrogen peroxide belongs in the "never use" category, and tea tree oil belongs nowhere near a dog. When in doubt, saline is safe. When infection is present, call your vet.
Resources
The following sources were used as reference and background for this article:
- Whole Dog Journal. Natural Antiseptics for Dog Wounds. whole-dog-journal.com
- PetMD. Dog Wound Care: How to Clean and Treat Dog Wounds at Home. petmd.com
- American Kennel Club. Should Dogs Lick Wounds? How Saliva Affects Wound Healing. akc.org
- Institute for Environmental Research and Education. What Is the Best Natural Antiseptic for Dog Wounds? iere.org
- Can Dogs Eat It. 3 Natural Antiseptics for Dog Wounds for Safe Healing. candogseatit.com
- The Natural Dog Store. Treating Dog Wounds Naturally at Home. thenaturaldogstore.com
Bed Sores on Dogs Causes Treatment and Prevention
Learn about bed sores on dogs, including causes, treatments, and prevention tips to keep your pet healthy and comfortable.
Bed sores on dogs are painful skin injuries that develop when a dog lies in one position for too long. These sores, also called pressure ulcers, happen when constant pressure cuts off blood flow to the skin. Bed sores can cause discomfort and lead to serious infections if not treated promptly.
This article explains what causes bed sores in dogs, how to recognize them, and the best ways to treat and prevent these painful wounds. Understanding this condition helps you keep your dog safe and comfortable, especially if they have limited mobility or health issues.
What causes bed sores on dogs?
Bed sores in dogs happen mainly because of prolonged pressure on certain body parts. When blood flow is blocked, the skin and underlying tissues start to break down. Dogs with limited movement or health problems are at higher risk.
Several factors contribute to bed sores in dogs. Knowing these helps you identify if your dog is at risk and take early action.
- Immobility risk: Dogs that cannot move well due to age, injury, or illness are more likely to develop pressure sores from staying in one position too long.
- Thin skin: Older dogs or those with poor nutrition may have fragile skin that breaks down more easily under pressure.
- Hard surfaces: Lying on rough or hard floors increases pressure points, causing sores to form faster than on soft bedding.
- Moisture buildup: Wet or dirty fur from urine or saliva can weaken skin and increase the chance of sores developing.
Understanding these causes helps you watch for early signs and protect your dog from bed sores.
How can you recognize bed sores on your dog?
Spotting bed sores early is important to prevent worsening damage. These sores usually appear on bony areas like elbows, hips, and hocks where pressure is greatest. They start as red, irritated patches and can progress to open wounds.
Look carefully for these signs to catch bed sores early:
- Redness and swelling: The skin over pressure points looks red, swollen, or warm, showing early irritation.
- Hair loss: Fur may fall out around the sore area due to skin damage or constant licking.
- Open wounds: Bed sores can break through the skin, creating painful ulcers that may bleed or ooze.
- Behavior changes: Your dog may lick, bite, or avoid lying down because of discomfort or pain.
If you notice any of these signs, consult your veterinarian quickly to prevent infection and further damage.
What treatments are available for bed sores on dogs?
Treating bed sores in dogs requires cleaning the wound, relieving pressure, and supporting healing. Early treatment improves recovery and reduces the risk of infection.
Your vet will guide you through the best treatment options based on the sore’s severity and your dog’s health.
- Wound cleaning: Regular gentle cleaning with vet-approved solutions removes dirt and bacteria to promote healing.
- Pressure relief: Using soft bedding and repositioning your dog often reduces pressure on sore areas.
- Medications: Antibiotics or pain relievers may be prescribed to treat infection and reduce discomfort.
- Surgical care: Severe sores might need surgery to remove dead tissue and close wounds for proper healing.
Following your vet’s instructions carefully is key to successful treatment and recovery.
How can you prevent bed sores in dogs?
Preventing bed sores is easier than treating them. Keeping your dog comfortable and moving reduces pressure on vulnerable skin. Good hygiene and nutrition also support skin health.
Here are practical steps to prevent bed sores in dogs:
- Regular repositioning: Change your dog’s lying position every two hours to avoid prolonged pressure on one spot.
- Soft bedding: Provide thick, cushioned bedding to protect bony areas from hard surfaces.
- Skin care: Keep your dog’s skin clean and dry to prevent irritation and breakdown.
- Healthy diet: Feed a balanced diet rich in vitamins and minerals to maintain strong skin and tissue repair.
These simple measures help keep your dog’s skin healthy and prevent painful sores.
When should you see a vet for your dog’s bed sores?
It is important to seek veterinary care as soon as you notice any signs of bed sores. Early treatment prevents complications and speeds healing.
Visit your vet if your dog shows:
- Open wounds: Any ulcer or sore that breaks the skin needs professional cleaning and care.
- Signs of infection: Redness, swelling, pus, or foul odor around the sore indicate infection requiring antibiotics.
- Persistent pain: If your dog shows ongoing discomfort or refuses to lie down, prompt evaluation is needed.
- Underlying illness: Dogs with mobility issues or chronic diseases should have regular skin checks to catch sores early.
Timely veterinary care improves outcomes and prevents serious health problems.
What home care can support healing of bed sores?
Along with veterinary treatment, you can help your dog heal faster at home. Proper care reduces pain and prevents new sores from forming.
Follow these home care tips:
- Keep wounds clean: Follow your vet’s instructions for gentle wound cleaning and dressing changes to avoid infection.
- Encourage movement: Help your dog change positions often and take short walks if possible to improve circulation.
- Maintain hygiene: Regularly clean bedding and keep your dog’s fur dry to prevent moisture buildup.
- Monitor progress: Check sores daily for signs of healing or worsening and report concerns to your vet.
Consistent home care is essential for a smooth recovery and your dog’s comfort.
Conclusion
Bed sores on dogs are painful wounds caused by prolonged pressure and poor circulation. They mostly affect dogs with limited mobility or health issues. Recognizing early signs and seeking veterinary care quickly can prevent serious complications.
Treatment involves wound care, pressure relief, and sometimes medication or surgery. Preventing bed sores with regular repositioning, soft bedding, and good hygiene is the best approach. With proper care, your dog can heal comfortably and avoid these painful sores.
What are the first signs of bed sores in dogs?
Early signs include redness, swelling, and warmth over bony areas. You may also notice hair loss or your dog licking the affected spot frequently.
Can bed sores on dogs heal without treatment?
Minor sores may improve with pressure relief, but most need veterinary care to prevent infection and promote proper healing.
How often should I reposition my dog to prevent bed sores?
Reposition your dog at least every two hours to reduce pressure on vulnerable skin and improve blood flow.
Is soft bedding enough to prevent bed sores in dogs?
Soft bedding helps but should be combined with regular repositioning and skin care for effective prevention.
When is surgery needed for dog bed sores?
Surgery is necessary for deep or infected sores that do not heal with medical treatment to remove damaged tissue and close wounds.
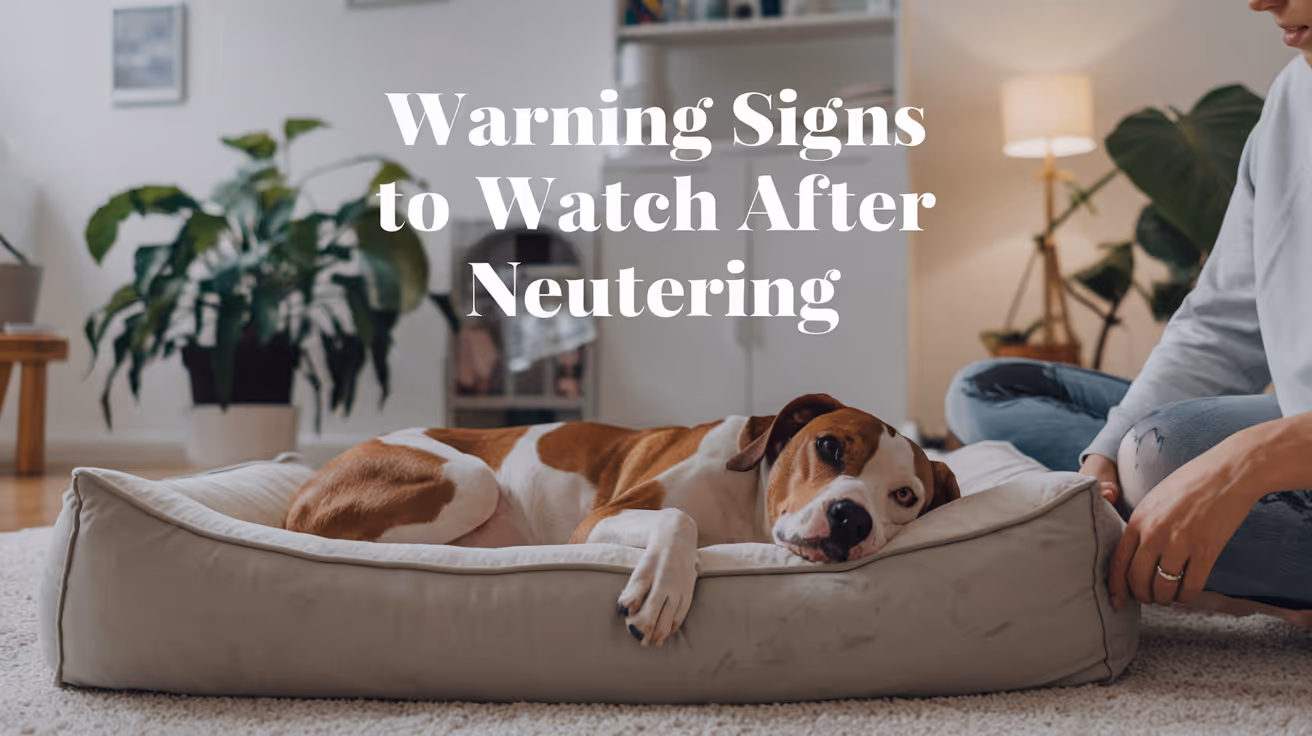
Warning Signs to Watch for After Neutering a Dog
Learn the key warning signs to watch for after neutering your dog to ensure a safe recovery and when to seek veterinary care.
Most dogs recover from neutering without a hitch. But some do not, and the difference between a minor complication and a serious one often comes down to how quickly you notice it.
The tricky part is that some things that look alarming are completely normal, and some things that look minor are not.
This guide gives you a clear, symptom-by-symptom breakdown of what is expected, what to monitor, and what requires an immediate call to your vet.
Quick answer: Mild grogginess, reduced appetite, and slight redness at the incision are all normal in the first 24 to 48 hours. Ongoing bleeding, yellow or green discharge, swelling that grows after day three, lethargy lasting more than 48 hours, or a wound that appears to be opening are all warning signs that need veterinary attention promptly.
Key takeaways
- Normal recovery includes mild grogginess, slight swelling, and reduced appetite for 24 to 48 hours.
- Warning signs that need a vet call include discharge, increasing swelling, continuous bleeding, and persistent lethargy.
- Emergency signs require immediate action: pale gums, collapse, or abdomen that appears bloated.
- Licking is the most preventable complication: the cone prevents most infection and wound problems.
- Daily incision checks catch problems early, when they are still easy to treat.
- When in doubt, call your vet. It is always better to check than to wait.
What normal recovery looks like
Understanding normal first makes it easier to spot abnormal.
In the first 24 to 48 hours after surgery, expect:
- Grogginess, drowsiness, or mild disorientation from anesthesia
- Reduced appetite or no interest in food
- Mild redness or slight puffiness at the incision site
- A small amount of clear or very faintly pink fluid at the wound in the first 24 to 72 hours
- Quieter behavior and preference for rest
- Possible shivering or restlessness as anesthesia wears off
All of these resolve on their own. By day two or three, your dog should be more alert, eating normally, and showing interest in their surroundings again.
Warning signs: incision and wound
The incision site is where most post-surgical problems show up first. Check it morning and evening throughout the recovery period.
Discharge
Swelling
Some swelling in the first two to three days is expected. The body's inflammatory response is part of normal healing.
Swelling that increases after day three, feels warm and firm to the touch, or is accompanied by redness and discharge is not normal. This pattern points to infection or hematoma and needs veterinary evaluation.
In large breed male dogs, scrotal swelling is a specific concern. Moderate scrotal swelling that resolves within a week is often normal. Swelling that grows, becomes hot, or is accompanied by pain or discharge is not.
Wound opening
The incision edges should be staying together, not pulling apart.
If you see any gap in the wound, exposed pink or red tissue beneath the skin, or sutures that appear to have pulled through, contact your vet immediately. This is called dehiscence and requires prompt attention.
Do not attempt to close an open wound yourself. Keep your dog calm, prevent licking, and get to your vet.
Warning signs: behavior and general health
Lethargy
Mild tiredness for the first 24 to 48 hours is expected. Anesthesia and surgery are taxing on the body.
Lethargy that persists beyond 48 hours, or a dog that is completely unresponsive, unable to stand, or does not improve over the first two days, is a warning sign. Call your vet.
Loss of appetite
Not wanting to eat on surgery day and the following morning is normal.
A dog that still refuses food at 48 hours after surgery, particularly if also vomiting, may be experiencing a complication. Call your vet if appetite has not returned by day two.
Vomiting
One or two episodes of vomiting the evening of surgery can be a side effect of anesthesia. This is within normal range.
Vomiting that continues beyond 24 hours after surgery, or that contains blood, requires a vet call. Persistent vomiting can indicate a reaction to pain medication, an obstruction, or another post-surgical issue.
Difficulty urinating or defecating
Some dogs take a day or two to have a bowel movement after surgery. This is usually due to fasting before the procedure and reduced activity afterward.
No bowel movement after three to five days is worth reporting. Difficulty or pain during urination, especially in male dogs, can indicate inflammation near the surgical site and should be checked promptly.
Warning signs: pain
Your dog will have been sent home with pain medication. Use it on schedule.
Signs that pain is not being adequately controlled include:
- Whining, yelping, or crying that persists beyond the first day
- Hunched posture or reluctance to sit or lie down
- Guarding the incision site by flinching or snapping when touched
- Panting excessively without exertion
- Trembling or shivering beyond the first few hours post-anesthesia
Contact your vet if pain seems severe after day three, or if prescribed medication does not appear to be working. Do not give human pain medications. Aspirin, ibuprofen, and acetaminophen are toxic to dogs and can cause serious harm or death.
Emergency warning signs: act immediately
These signs require emergency veterinary care, not a wait-and-see approach.
Call your vet or go to an emergency clinic immediately if you observe:
- Pale, white, or bluish gums
- Sudden collapse or inability to stand
- Abdomen that appears bloated, distended, or hard
- Heavy bleeding that does not stop
- Rapid or labored breathing
- Signs of extreme pain: screaming, freezing in place, inability to move
These can indicate internal bleeding, systemic infection, or other serious complications that are time-sensitive.
The most preventable warning sign: licking
Most of the infection and wound-breakdown cases that end up back at the vet have one thing in common: the cone came off.
Licking introduces bacteria directly into the wound, softens the tissue, and can pull sutures loose. A dog that licks its incision even once can undo days of clean healing.
The E-collar stays on for the full 10 to 14 days. If your dog refuses the hard plastic cone, soft inflatable collars or recovery suits are legitimate alternatives, provided they reliably prevent the dog from reaching the wound site.
For a full guide on what normal recovery looks like day by day and how to distinguish healing progress from early complications, tracking the incision against a clear timeline makes daily monitoring more actionable.
When to call vs. when to go straight to emergency care
Use this as a quick decision guide.
When in doubt, call. Most veterinary practices would rather hear from you about something minor than have you wait too long on something serious.
The role of aftercare in preventing complications
Most warning signs are preventable, not inevitable.
The dogs most likely to develop post-surgical complications are those given too much freedom too soon, or whose cones were removed early. Following a complete aftercare plan covering rest, incision monitoring, medications, and the cone is the most effective way to keep your dog out of trouble during recovery.
For a complete, step-by-step plan on full post-surgery care covering each day of the recovery window, what to feed, how to check the wound, and how to keep your dog calm, having that reference from day one prevents most of the issues covered in this article. Understanding surgical risks that can cause complications beyond the routine is also worth reading before surgery if you have a large breed or older dog.
Frequently asked questions
Is it normal for my dog to be lethargic after neutering?
Yes, for the first 24 to 48 hours. Anesthesia causes genuine fatigue, and your dog needs rest. Lethargy that does not improve by day two or three, or a dog that is completely unresponsive, warrants a call to your veterinarian.
What does an infected incision look like?
An infected incision typically shows yellow or green discharge, increasing redness and swelling after the first few days, warmth around the wound, and often a foul odor. Any of these signs alone justify a same-day call to your vet. For a detailed visual guide to signs of an infected incision, knowing what to look for at each stage of healing helps you act at the right time.
My dog is licking the incision despite wearing a cone. What should I do?
Check that the cone extends at least two inches past your dog's nose. If it is too short, your dog can still reach the incision. Consider switching to a soft inflatable collar or recovery suit if the hard cone is not fitting properly. Contact your vet if there are signs the wound has been compromised.
Should I be worried about scrotal swelling after neutering?
Some scrotal swelling in the first few days is normal. The scrotum fills with fluid as part of the healing response. Swelling that increases after day three, feels hot or very firm, or is accompanied by discharge or pain is abnormal and should be evaluated by your vet.
When should I go to an emergency vet after neutering?
Go immediately if your dog has pale or white gums, collapses, has a bloated or hard abdomen, or is bleeding heavily and continuously. These signs can indicate internal bleeding or systemic infection and are time-sensitive emergencies.
The difference between a smooth recovery and a complication is usually not bad luck. It is usually the cone coming off too early, too much activity on day four, or a wound check that was skipped. Pay attention for two weeks, and most dogs sail through without a single issue.
Resources
The following sources were used as reference and background for this article:
- Ace of Spays. Signs of Complications After Spay/Neuter Surgery: When to Contact Your Veterinarian. aceofspays.com
- Animal Humane Society. Spay/Neuter Post-Surgical Care and Recovery Instructions. animalhumanesociety.org
- Homeaglow. 10 Warning Signs After Spaying or Neutering Your Dog. homeaglow.com
- American Kennel Club. Post-Surgical Care for Dogs Following a Spay or Neuter. akc.org
- Union Hill Animal Hospital. Neutering Recovery Guide for Male Dogs. unionhillvet.com
- Rivergate Veterinary Clinic. Signs of Infection After Spaying or Neutering a Dog. rivergateveterinaryclinic.com
Necrotizing Fasciitis in Dogs: Early Signs & Treatment
Learn about necrotizing fasciitis in dogs, including early signs, diagnosis, and effective treatment options to protect your pet's health.
Necrotizing fasciitis in dogs is a rare but serious bacterial infection that destroys skin, fat, and tissue covering the muscles. This condition progresses rapidly and can be life-threatening if not treated promptly. Recognizing early signs is critical to saving your dog's life and preventing severe complications.
This article explains the early symptoms of necrotizing fasciitis in dogs, how veterinarians diagnose it, and the best treatment options available. You will learn how to act quickly and what to expect during your dog's recovery.
What are the early signs of necrotizing fasciitis in dogs?
Early detection of necrotizing fasciitis can be challenging because initial symptoms may resemble less severe infections. However, certain signs should raise concern and prompt immediate veterinary attention.
Recognizing these early signs helps prevent the infection from spreading and causing extensive tissue damage.
- Rapid swelling: Sudden and severe swelling around a wound or skin area indicates aggressive infection progression requiring urgent care.
- Severe pain: Dogs often show intense pain disproportionate to the wound’s appearance, signaling deep tissue involvement.
- Skin discoloration: Early skin changes like redness, purple patches, or darkening suggest tissue death and infection spread.
- Fever and lethargy: Systemic signs such as high fever and weakness indicate the infection is affecting the whole body.
These symptoms usually develop within hours to a few days after the initial injury or bacterial entry. Immediate veterinary evaluation is essential if you notice any of these signs.
How is necrotizing fasciitis diagnosed in dogs?
Diagnosing necrotizing fasciitis involves a combination of clinical examination, laboratory tests, and imaging studies. Early diagnosis improves treatment success and survival rates.
Your veterinarian will carefully assess your dog’s history and symptoms to differentiate necrotizing fasciitis from other infections or skin conditions.
- Physical exam findings: Veterinarians look for rapid tissue swelling, skin changes, and signs of systemic illness during the clinical exam.
- Blood tests: Blood work helps detect infection markers like elevated white blood cells and organ function abnormalities.
- Wound cultures: Samples from the infected area identify the specific bacteria causing the infection to guide antibiotic therapy.
- Imaging studies: X-rays or ultrasound can reveal gas in tissues or fluid collections, which are typical in necrotizing infections.
Prompt and accurate diagnosis allows your vet to start aggressive treatment quickly, improving your dog’s chances of recovery.
What causes necrotizing fasciitis in dogs?
Necrotizing fasciitis is caused by bacterial infection that rapidly destroys soft tissues. Several factors increase a dog’s risk of developing this condition.
Understanding the causes helps pet owners prevent infections and recognize when to seek veterinary care.
- Wound contamination: Open wounds or surgical sites exposed to bacteria can become infected if not cleaned and treated properly.
- Trauma or bites: Injuries like dog fights, punctures, or cuts provide entry points for bacteria to invade deep tissues.
- Immunosuppression: Dogs with weakened immune systems from illness or medications are more susceptible to severe infections.
- Mixed bacterial infection: Necrotizing fasciitis often involves multiple bacteria, including anaerobic and aerobic species working together.
Preventing wounds and promptly treating any skin injuries reduces the risk of this dangerous infection.
What treatment options are available for necrotizing fasciitis in dogs?
Treatment of necrotizing fasciitis requires aggressive and immediate veterinary intervention. The goal is to stop infection spread, remove dead tissue, and support your dog’s recovery.
Delays in treatment can lead to severe complications or death.
- Emergency surgery: Surgical removal of dead and infected tissue is critical to control the infection and prevent further spread.
- Intravenous antibiotics: Broad-spectrum antibiotics are started immediately and adjusted based on culture results to fight the bacteria.
- Supportive care: Fluids, pain relief, and nutritional support help stabilize your dog during recovery.
- Wound management: Frequent cleaning, dressing changes, and sometimes skin grafts are needed to promote healing after surgery.
Close monitoring in a veterinary hospital is often necessary to manage complications and ensure the best outcome.
How can you prevent necrotizing fasciitis in dogs?
Preventing necrotizing fasciitis focuses on reducing infection risks and maintaining your dog’s skin health. Early care of wounds is essential.
Pet owners play a key role in preventing this serious infection through proper hygiene and prompt veterinary care.
- Prompt wound care: Clean all cuts, scrapes, and punctures immediately with antiseptic to reduce bacterial contamination.
- Regular veterinary check-ups: Routine exams help detect skin infections early before they worsen.
- Keep dogs indoors or supervised: Limiting exposure to fights or injuries lowers the chance of wounds becoming infected.
- Monitor immune health: Manage chronic illnesses and avoid unnecessary immunosuppressive drugs to maintain strong defenses.
By following these steps, you can reduce the risk of necrotizing fasciitis and protect your dog’s health.
What is the prognosis for dogs with necrotizing fasciitis?
The prognosis depends on how quickly treatment starts and the infection’s severity. Early intervention greatly improves survival chances.
Dogs treated promptly can recover fully, but delays increase the risk of complications and death.
- Early treatment success: Dogs receiving surgery and antibiotics within hours of symptom onset have the best outcomes.
- Complications risk: Delayed care can lead to sepsis, organ failure, or extensive tissue loss requiring amputation.
- Long recovery time: Healing may take weeks to months, with ongoing wound care and monitoring needed.
- Possible recurrences: Rarely, infections can recur if bacteria persist or immune function is impaired.
Close follow-up with your veterinarian ensures timely management of any complications and supports full recovery.
Conclusion
Necrotizing fasciitis in dogs is a medical emergency that requires immediate recognition and treatment. Early signs like rapid swelling, severe pain, and skin changes should prompt urgent veterinary evaluation.
With quick diagnosis and aggressive treatment including surgery and antibiotics, many dogs recover well. Preventing wounds and caring for injuries promptly helps reduce the risk of this life-threatening infection. Always seek veterinary care if you suspect necrotizing fasciitis to give your dog the best chance at recovery.
What should I do if I suspect my dog has necrotizing fasciitis?
If you notice sudden swelling, severe pain, or skin discoloration on your dog, seek emergency veterinary care immediately to start treatment and improve survival chances.
Can necrotizing fasciitis be cured in dogs?
Yes, with prompt surgical removal of infected tissue and appropriate antibiotics, many dogs recover fully from necrotizing fasciitis.
How fast does necrotizing fasciitis progress in dogs?
This infection can progress within hours to days, making early detection and treatment critical to prevent severe tissue damage.
Are certain dog breeds more prone to necrotizing fasciitis?
No specific breeds are predisposed, but dogs with weakened immune systems or frequent skin injuries have higher risk.
Is necrotizing fasciitis contagious to other pets or humans?
Necrotizing fasciitis itself is not contagious, but the bacteria causing it can spread through open wounds, so hygiene is important.
Do Dogs Calm Down After Being Spayed?
Learn how dogs behave after being spayed and when to expect them to calm down post-surgery.
It is one of the most common reasons owners choose to spay their female dog. The expectation of a calmer, more settled companion afterward.
Sometimes that is exactly what happens. Sometimes it does not. And in a small subset of cases, anxiety or excitability actually increases.
Understanding why gives you a more accurate picture of what to expect, which makes the outcome less surprising in either direction.
Quick answer: Many dogs do become calmer after spaying, but the effect is specific to hormone-driven behaviors, not overall temperament. Dogs that were restless, anxious, or excitable due to heat cycles typically show significant improvement. Dogs whose energy or anxiety has non-hormonal causes will not reliably calm down. Most behavioral changes, if they occur, appear over two to three months.
Key takeaways
- The calming effect is real but specific: It applies to behaviors driven by reproductive hormones, not all behaviors.
- Heat cycle behaviors disappear: Restlessness, roaming, frequent urination, and cyclical mood shifts all stop after spaying.
- Core energy level and personality do not change: A high-energy dog will still be high-energy after spaying.
- Breed and individual temperament matter: Some breeds retain high energy regardless of hormone status.
- The timeline is weeks to months, not days: Hormone levels decline gradually, so behavioral changes are gradual too.
- A small subset of dogs show increased fearfulness: This is documented in research and worth knowing about before surgery.
What "calming down" actually means after spaying
When people say they want their dog to calm down, they usually mean one of two things:
- They want heat cycle behaviors to stop: the roaming, the restlessness, the vocalization, the constant male attention.
- They want a generally more settled dog overall.
Spaying reliably delivers the first. The second is less predictable.
This distinction is the core of the honest answer to this question.
What spaying removes: the hormonal layer
Spaying removes the ovaries, which are the primary source of estrogen and progesterone. These hormones regulate the reproductive cycle and influence behaviors tied to it.
During heat cycles, which typically occur every six to eight months in adult dogs, estrogen surges create a set of predictable behaviors:
- Restlessness and inability to settle
- Increased vocalization
- Frequent urination in small amounts to signal reproductive status
- Strong drive to escape and find a mate
- Attracting intact male dogs
- Cyclical irritability or anxiety
All of these stop after spaying. The hormonal trigger is permanently removed.
Which dogs calm down most noticeably after spaying
Dogs whose difficult behaviors are primarily or significantly driven by the reproductive cycle show the most consistent improvement after spaying.
Dogs most likely to become calmer:
- Female dogs that showed significant behavior changes during heat cycles, including restlessness, anxiety, and clinginess
- Dogs prone to false pregnancies, with associated nesting, object guarding, and protective behavior
- Dogs that attempted to escape or roam during heat periods
- Dogs whose cyclical mood swings were disruptive to daily life
For these dogs, spaying removes a recurring source of behavioral disruption. The result is often a more predictable, stable dog.
Which dogs may not calm down after spaying
Dogs whose energy level, excitability, or anxiety comes from sources other than reproductive hormones will not reliably settle after spaying.
Dogs less likely to show a calming effect:
- High-energy working or sport breeds where drive is genetic, not hormonal
- Dogs with established anxiety, fearfulness, or reactivity from non-hormonal causes
- Dogs with learned problematic behaviors from their history and environment
- Dogs whose excitability comes from insufficient exercise or mental stimulation
A Border Collie that is highly energetic before spaying will still be highly energetic after. A Labrador that pulls on the leash before spaying will still pull after. These behaviors are not driven by estrogen.
The timeline: when does calming happen?
Behavioral changes from spaying do not happen within days of surgery. The immediate post-surgery period reflects recovery from anesthesia and pain, not hormonal adjustment.
Realistic timeline:
Owners who expect a noticeably calmer dog within days of surgery are working with an inaccurate timeline. The changes are gradual and unfold over weeks to months.
What research says about calming after spaying
The evidence is genuinely mixed, which is worth knowing rather than glossing over.
Supporting the calming effect:
A study of 591 dogs found behavioral problems reduced or eliminated in 59% of spayed females. Heat cycle-related behaviors showed the most consistent improvement. Many owners of females that were particularly difficult during heat cycles report significant positive changes after spaying.
Complicating the picture:
Two large-scale studies using the Canine Behavioral Assessment and Research Questionnaire (C-BARQ) found that sterilization was associated with a roughly 31% increase in fearfulness and a 33% increase in touch sensitivity in some dogs. These findings apply to both males and females.
What does this mean in practice? For a meaningful subset of dogs, spaying does not produce a calmer animal. It may even produce a more anxious one, particularly in dogs that had pre-existing fearfulness or were sterilized at a young age.
This does not mean spaying is wrong for these dogs. It means the behavioral outcome cannot be guaranteed, and expectations should be calibrated accordingly.
For the full picture of all the behavior changes to expect after spaying, including the research on unexpected outcomes, that guide covers the complete behavioral landscape across both sexes.
Does calming depend on the dog's age at spaying?
Yes, and this is one of the most important variables.
Dogs spayed before their first heat cycle:
The hormonal disruption of heat cycles is never established. Many owners report these dogs are consistently more settled than intact females across their lifetime, without ever having the difficult heat cycle period.
Dogs spayed after several heat cycles:
The calming effect from eliminating heat cycles is still real and significant. However, any behaviors that have become habitual through repetition during heat cycles may persist longer or require training to address.
Dogs spayed very young (before 6 months):
Research suggests a higher association with fearfulness in dogs sterilized very early, before hormonal maturity. For whether this applies specifically to puppies, the guide on calming effects specific to female dogs addresses this age-specific question in detail. For the puppy-specific picture, the guide on whether puppies calm down after being spayed covers the developmental nuances unique to younger dogs.
When the expected calming does not happen
If your dog does not seem noticeably calmer after spaying, consider these factors before concluding the surgery did not work.
Check the timeline: Have two to three months passed since surgery? If not, the hormonal adjustment may still be in progress.
Identify the behavior source: Is the behavior you wanted to address actually hormone-driven? If it is not, spaying was never going to address it.
Consider habituation: Some behaviors that started as hormone-driven become habitual over time. The hormone is removed but the habit persists. Consistent training addresses habituated behavior.
Consider an underlying anxiety: If your dog became more fearful or anxious post-surgery, this is a documented outcome in some dogs. A veterinary behaviorist or your regular vet can help evaluate what is happening and what options exist.
Understanding the truth behind the calming effect myth, including why the expectation of calming is sometimes oversold, helps put the variable outcomes in context.
What actually makes dogs calmer long-term
Whether or not spaying produces a calming effect, these factors reliably influence how settled and manageable a dog is:
- Adequate physical exercise: A dog that is genuinely tired is a calmer dog. Exercise needs are determined by breed and individual temperament.
- Mental stimulation: Breed-appropriate mental work, puzzle feeders, training sessions, and enrichment activities reduce restless, problematic behavior.
- Consistent training: Clear, reinforced expectations give dogs a behavioral framework. This is the single most reliable path to a calmer dog.
- Routine and predictability: Dogs settle more easily in stable, predictable environments.
Spaying contributes one element to this picture. It is not a standalone solution.
Frequently asked questions
How long after being spayed will my dog calm down?
If the calming effect is going to occur, most hormone-driven behavioral changes become apparent within two to six weeks as hormone levels decline. Full stabilization typically takes two to three months. Dogs that are still showing challenging behaviors three to four months after surgery are unlikely to improve further from the hormonal change alone.
Will spaying make my high-energy dog less active?
Probably not significantly. Energy level in dogs is primarily determined by breed, genetics, and conditioning. Spaying can cause a modest metabolic slowdown, but it does not reduce drive or enthusiasm. A high-energy breed will still need the same amount of exercise after spaying.
My dog got more anxious after being spayed. Why?
Research has documented increased fearfulness in a subset of dogs after sterilization, associated with a roughly 31% increase in fearfulness in some studies. This appears to occur more often in dogs sterilized at a young age and in dogs with pre-existing anxiety. If your dog shows increased anxiety after spaying, speak to your vet. A referral to a certified veterinary behaviorist may be helpful.
Will spaying help with aggression?
It depends on the type of aggression. Aggression linked to the heat cycle, competition with other female dogs, or false pregnancy guarding often decreases. Fear-based aggression, learned aggression, and resource guarding are not hormone-driven and are not reliably improved by spaying. For whether lower testosterone calms dogs down in the male counterpart to this question, that guide covers the testosterone-behavior link specifically.
Does breed affect whether spaying calms a dog down?
Yes. Breed temperament significantly influences baseline energy and anxiety levels. High-drive working breeds such as Border Collies, Australian Shepherds, and Belgian Malinois have energy and drive that is genetic, not hormonal. Removing reproductive hormones does not change these fundamental breed characteristics. Whether your specific dog falls into a calmer range after spaying depends on what was driving any difficult behavior in the first place.
The calming effect of spaying is real for dogs whose difficult behaviors are hormone-driven. For those dogs, eliminating the heat cycle and its associated hormonal disruption produces a meaningfully more stable animal. For dogs whose energy or anxiety comes from other sources, spaying is still beneficial for health reasons but should not be expected to produce behavioral transformation. The most accurate prediction is not based on "spaying calms dogs" but on "removing a specific hormonal influence changes the behaviors that influence drives."
Resources
The following sources were used as reference and background for this article:
- Stanley Coren, Psychology Today. Are There Behavior Changes When Dogs Are Spayed or Neutered? psychologytoday.com
- PubMed. Changes in the behavior of dogs after castration. pubmed.ncbi.nlm.nih.gov
- ManyPets. Do Dogs Change After Being Neutered or Spayed? manypets.com
- American Veterinary Medical Association (AVMA). Spaying and Neutering. avma.org
- Houndsy. How Spaying Affects Dog Behavior. houndsy.com

How to Keep an Energetic Dog Calm After Surgery
Learn effective ways to keep your energetic dog calm after surgery with practical tips and expert advice for smooth recovery.
After surgery, energetic dogs can be a challenge to manage because their natural activity may interfere with healing. Keeping your dog calm is crucial to prevent complications and ensure a smooth recovery. This article explains how to handle your dog's energy safely after surgery.
You will learn practical strategies to reduce your dog's activity, create a comfortable environment, and support healing. These tips help you balance your dog's need for rest with their natural energy levels.
Why is it important to keep an energetic dog calm after surgery?
After surgery, your dog's body needs time to heal. Excessive activity can cause pain, reopen wounds, or delay recovery. Energetic dogs may struggle to stay still, increasing the risk of injury.
Understanding the importance of calmness helps you take steps to protect your dog's health during this vulnerable time.
- Prevents wound damage: Limiting movement reduces the chance of stitches tearing or wounds reopening, which can cause infections or require more surgery.
- Reduces pain and swelling: Rest helps control inflammation and discomfort, making recovery smoother and faster.
- Supports medication effectiveness: Calm behavior ensures your dog responds well to pain relief and antibiotics, improving healing outcomes.
- Prevents complications: Overexertion can lead to bleeding, bruising, or internal injuries, which are dangerous after surgery.
Keeping your dog calm is essential to avoid setbacks and promote a healthy recovery process.
What are the best ways to restrict your dog's activity safely?
Restricting activity after surgery requires careful planning. You want to limit movement without causing stress or anxiety. Using physical barriers and controlled routines helps manage your dog's energy safely.
Here are effective methods to keep your dog calm while preventing injury.
- Use a crate or small room: Confine your dog to a safe, comfortable space to limit running and jumping while allowing rest.
- Leash walks only: Take short, slow walks on a leash to allow bathroom breaks without overexertion or excitement.
- Remove toys and distractions: Avoid giving your dog balls or chew toys that encourage active play during recovery.
- Provide comfortable bedding: A soft, supportive bed encourages your dog to lie down and relax instead of moving around.
These steps help control your dog's activity level while keeping them safe and comfortable.
How can you create a calming environment for your dog after surgery?
A calm environment reduces stress and helps your dog rest better. Noise, bright lights, and busy areas can excite your dog and increase activity. Creating a peaceful space supports healing.
Consider these tips to make your dog's recovery area soothing and quiet.
- Choose a quiet room: Place your dog in a low-traffic area away from loud noises and household activity to minimize stimulation.
- Dim the lights: Soft lighting helps your dog relax and signals it is time to rest.
- Use calming scents: Lavender or chamomile diffusers can soothe anxiety and promote sleep in dogs.
- Play soft music: Gentle classical or specially designed pet relaxation music can reduce stress and encourage calmness.
A peaceful environment helps your dog stay calm and recover faster after surgery.
What role does diet and hydration play in calming an energetic dog after surgery?
Proper nutrition and hydration support healing and can influence your dog's energy levels. Feeding the right diet and ensuring water intake helps your dog feel comfortable and less restless.
Here are ways diet and hydration contribute to calming your dog post-surgery.
- Feed easily digestible food: Soft, bland diets reduce stomach upset and encourage eating during recovery.
- Maintain hydration: Fresh water availability prevents dehydration, which can cause irritability and restlessness.
- Limit treats: Avoid high-energy or sugary treats that may increase hyperactivity during healing.
- Follow vet dietary advice: Use prescribed diets or supplements that support tissue repair and immune function.
Balanced nutrition and hydration help your dog stay calm and heal efficiently after surgery.
How can you use mental stimulation to keep your dog calm without physical activity?
Mental stimulation can tire your dog’s mind and reduce restlessness without physical exertion. This approach helps energetic dogs stay calm while respecting activity restrictions.
Try these mental activities to keep your dog engaged safely.
- Use puzzle feeders: Food-dispensing toys challenge your dog’s brain and slow eating, providing calm focus.
- Teach simple commands: Short training sessions with basic commands keep your dog mentally active without movement.
- Offer scent games: Hide treats for your dog to find using smell, which stimulates the brain gently.
- Provide chew toys: Safe chew toys satisfy natural urges and promote relaxation without running or jumping.
Mental exercises help reduce boredom and energy, supporting calmness during recovery.
When should you contact your vet about your dog's activity after surgery?
Monitoring your dog’s behavior after surgery is important. If your dog is too active or shows signs of pain or complications, contact your vet promptly. Early intervention prevents serious problems.
Watch for these warning signs and know when to seek veterinary advice.
- Excessive licking or biting: Persistent attention to the surgical site may indicate pain or irritation needing vet evaluation.
- Swelling or bleeding: Any unusual swelling, redness, or bleeding around the wound requires immediate veterinary care.
- Restlessness or whining: Signs of discomfort or anxiety that do not improve with medication should be reported.
- Difficulty walking or limping: Changes in mobility may signal complications needing professional assessment.
Timely communication with your vet ensures your dog’s recovery stays on track and complications are minimized.
How can medication help keep an energetic dog calm after surgery?
Medications prescribed by your vet play a key role in managing pain and anxiety after surgery. Proper use of these drugs helps keep your dog comfortable and less active, aiding recovery.
Understand how medication supports calmness and what to expect.
- Pain relief drugs: Analgesics reduce discomfort, making your dog less likely to move excessively due to pain.
- Anti-anxiety medications: In some cases, vets prescribe mild sedatives to help overly energetic dogs relax safely.
- Follow dosage instructions: Administer medications exactly as directed to avoid side effects or underdosing.
- Monitor for reactions: Watch for adverse effects like drowsiness or vomiting and report concerns to your vet promptly.
Medication is a valuable tool for controlling activity and ensuring your dog’s comfort during healing.
Conclusion
Keeping an energetic dog calm after surgery is vital for a smooth and safe recovery. By restricting activity, creating a calming environment, and using mental stimulation, you can help your dog heal without stress or injury.
Following veterinary advice on diet, medication, and monitoring signs of complications ensures your dog stays comfortable and recovers well. With patience and care, your energetic dog can return to normal activity safely after surgery.
What should I do if my dog refuses to rest after surgery?
Try increasing mental stimulation with puzzle toys and short training sessions. If restlessness continues, consult your vet about possible anxiety medications or pain management adjustments.
Can I let my dog go outside to play after surgery?
Limit outdoor time to short, slow leash walks for bathroom breaks only. Avoid running, jumping, or playing until your vet confirms it is safe.
How long does it usually take for a dog to calm down after surgery?
Most dogs begin to calm within 7 to 14 days, depending on the surgery type and individual energy levels. Follow your vet’s recovery timeline closely.
Are there natural remedies to help calm my dog after surgery?
Calming scents like lavender and chamomile, as well as gentle massage, can help reduce anxiety. Always check with your vet before using supplements or herbal remedies.
What signs indicate my dog is too active after surgery?
Signs include excessive licking of the wound, swelling, bleeding, restlessness, whining, or difficulty walking. Contact your vet immediately if you notice these symptoms.

Types of Cysts and Tumors in Dogs
Explore the common types of cysts and tumors in dogs, their signs, diagnosis, and treatment options for better pet care.
Dogs can develop various cysts and tumors that may affect their health and quality of life. Understanding these growths is important for early detection and treatment. Many dog owners worry when they find lumps or bumps on their pets, but not all growths are dangerous.
This article explains the different types of cysts and tumors in dogs, how to recognize them, and what steps to take. You will learn about benign and malignant growths, common locations, and treatment options to keep your dog healthy and comfortable.
What are the common types of cysts found in dogs?
Cysts are fluid-filled sacs that can form under the skin or inside the body. They are usually benign but can cause discomfort or infection if they grow large or rupture. Knowing the common cyst types helps you identify when to seek veterinary care.
- Sebaceous cysts: These form from blocked oil glands and appear as small, round lumps under the skin, often on the neck or back.
- Epidermoid cysts: These develop from skin cells and contain keratin; they are usually slow-growing and painless.
- Follicular cysts: Originating from hair follicles, these cysts can cause hair loss and irritation around the lump.
- Mucoid cysts: Filled with mucus-like fluid, these cysts often occur near joints and can affect mobility if large.
Most cysts do not require emergency treatment but should be monitored for changes in size, color, or signs of infection. Your veterinarian can diagnose cysts through physical exams and sometimes fine needle aspiration.
What types of tumors commonly affect dogs?
Tumors are abnormal growths of cells that can be benign or malignant (cancerous). Dogs can develop tumors in various tissues, including skin, mammary glands, and internal organs. Early detection improves treatment success.
- Lipomas: These are benign fatty tumors that feel soft and movable under the skin, common in older dogs.
- Melanomas: Tumors arising from pigment cells, often found on the skin or in the mouth, some types can be aggressive.
- Mast cell tumors: These skin tumors can vary in appearance and may release chemicals causing swelling or itching.
- Osteosarcoma: A malignant bone tumor that causes lameness and pain, mostly in large breed dogs.
Knowing tumor types helps guide diagnostics like biopsies and imaging. Treatment varies from surgery to chemotherapy depending on the tumor’s nature and location.
How can you recognize cysts and tumors on your dog?
Detecting lumps early is key to managing cysts and tumors effectively. Regularly checking your dog’s body helps you notice any new or changing growths. Some signs may indicate a need for veterinary evaluation.
- New lumps: Any new bump or swelling on your dog’s skin should be checked, especially if it grows quickly.
- Changes in size or shape: Rapid growth or irregular edges may suggest a tumor rather than a cyst.
- Ulceration or bleeding: Open sores or bleeding from a lump require prompt veterinary attention.
- Discomfort or pain: If your dog shows pain when touching a lump, it could indicate inflammation or malignancy.
Not all lumps are harmful, but early veterinary assessment ensures proper diagnosis and treatment planning.
What diagnostic methods do veterinarians use for cysts and tumors?
Veterinarians use several tools to diagnose cysts and tumors accurately. These tests help determine the type of growth and the best treatment approach. Early diagnosis improves outcomes for your dog.
- Physical examination: The vet will feel the lump’s size, shape, and texture to assess its characteristics.
- Fine needle aspiration (FNA): A small needle collects cells from the lump for microscopic examination to distinguish cysts from tumors.
- Biopsy: Surgical removal of a tissue sample provides a definitive diagnosis and tumor grading.
- Imaging tests: X-rays, ultrasound, or CT scans help evaluate internal tumors and check for spread.
These diagnostic steps guide treatment decisions and help predict the prognosis for your dog’s condition.
What treatment options are available for cysts and tumors in dogs?
Treatment depends on the type, size, and location of the cyst or tumor. Some cysts may only need monitoring, while tumors often require more active management. Your veterinarian will recommend the best plan.
- Surgical removal: The most common treatment for both cysts and tumors to prevent growth or spread.
- Medication: Antibiotics or anti-inflammatory drugs may be used if cysts become infected or inflamed.
- Chemotherapy: Used for malignant tumors to slow cancer growth and improve survival.
- Radiation therapy: Sometimes combined with surgery or chemotherapy for certain tumor types.
Early treatment improves the chances of a full recovery and reduces discomfort for your dog.
How can you prevent cysts and tumors in your dog?
While not all cysts and tumors can be prevented, some steps reduce risk and support your dog’s health. Regular veterinary care and healthy habits play a key role in prevention.
- Regular check-ups: Annual exams help detect lumps early before they cause problems.
- Spaying/neutering: Reduces the risk of mammary and testicular tumors in dogs.
- Healthy diet and exercise: Maintaining a healthy weight lowers the chance of some tumors.
- Avoiding toxins: Limit exposure to chemicals and pollutants that may increase cancer risk.
Staying vigilant and proactive helps keep your dog safe from serious health issues related to cysts and tumors.
When should you see a veterinarian about a lump on your dog?
Not every lump is an emergency, but some signs mean you should seek veterinary care quickly. Prompt attention can save your dog’s life in cases of malignant tumors.
- Rapid growth: A lump that grows quickly over days or weeks needs immediate evaluation.
- Pain or discomfort: If your dog reacts negatively when the lump is touched, see a vet promptly.
- Ulceration or bleeding: Open wounds on lumps can lead to infection and require treatment.
- Changes in behavior: Lethargy, loss of appetite, or weight loss alongside lumps warrant urgent care.
Early veterinary assessment ensures the best possible outcome for your dog’s health and comfort.
Conclusion
Understanding the types of cysts and tumors in dogs helps you recognize potential health issues early. While many cysts are harmless, some tumors can be serious and require prompt treatment.
Regular checks and veterinary visits are essential to detect lumps early. Knowing when to seek care and what treatments are available supports your dog’s well-being and longevity.
What causes cysts to form in dogs?
Cysts form when glands or hair follicles become blocked, leading to fluid buildup. Causes include infections, inflammation, or genetic factors that affect skin health.
Are all tumors in dogs cancerous?
No, tumors can be benign or malignant. Benign tumors do not spread, while malignant tumors can invade tissues and require aggressive treatment.
Can cysts turn into tumors in dogs?
Most cysts remain benign and do not become tumors. However, some cyst-like growths may need biopsy to rule out cancer.
How is a lipoma different from a malignant tumor?
Lipomas are soft, fatty, benign tumors that grow slowly and do not spread, unlike malignant tumors which can invade and metastasize.
What is the recovery time after tumor removal surgery in dogs?
Recovery varies but usually takes 2 to 4 weeks. Your vet will provide care instructions to ensure healing and monitor for complications.
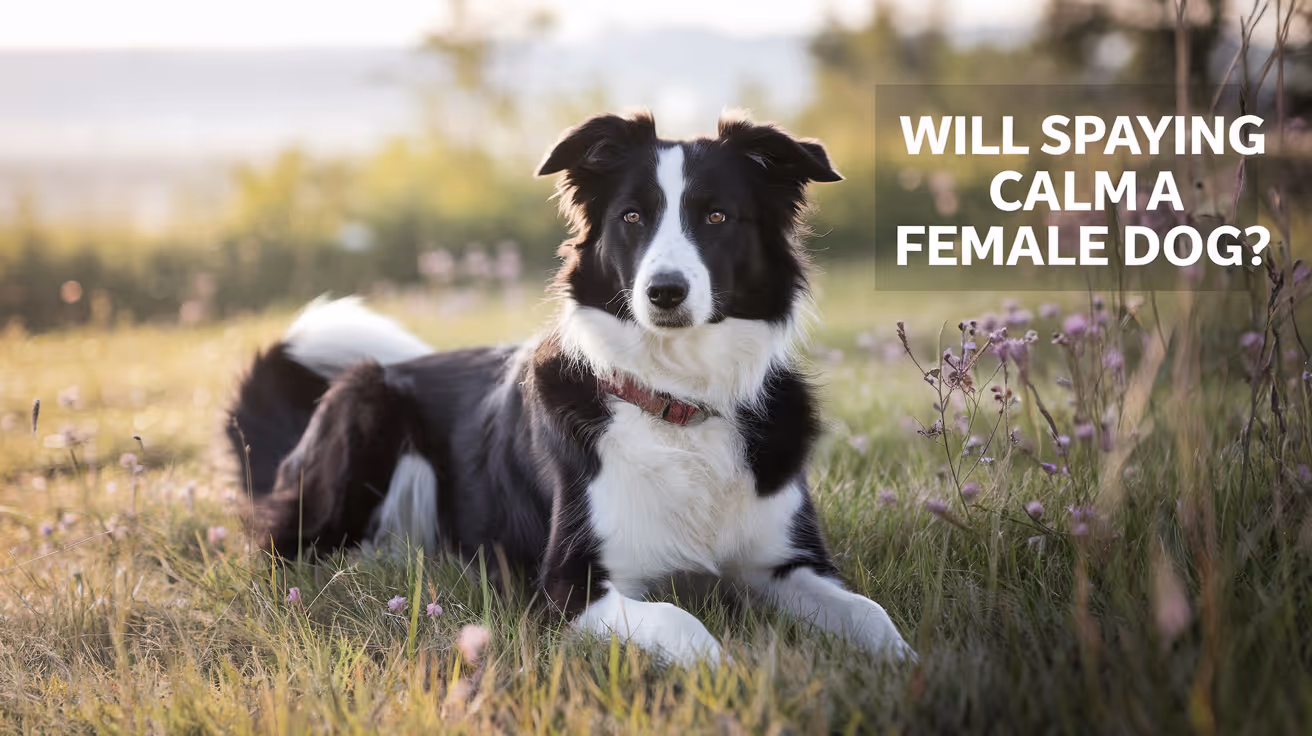
Will Spaying Calm a Female Dog?
Learn if spaying a female dog can calm her behavior and what changes to expect after surgery.
It is one of the most searched questions before booking a spay appointment. And the answer most owners get is a confident yes.
The complete answer is more qualified than that.
For female dogs whose difficult behavior is driven by heat cycles and reproductive hormones, spaying produces a real and often significant calming effect. For dogs whose energy, anxiety, or behavior problems come from other sources, the effect may be minimal or absent.
This guide gives you the specific, evidence-based answer so you know what to expect before and after surgery.
Quick answer: Spaying will calm a female dog if the behaviors you want to reduce are driven by reproductive hormones: heat cycle restlessness, roaming, urine marking, cyclical mood swings, and false pregnancy behaviors. It will not calm a dog whose energy, anxiety, or behavioral issues come from genetics, learned habits, or non-hormonal sources. The calming effect, when it occurs, develops gradually over two to three months.
Key takeaways
- The calming effect is hormone-specific: It applies to heat cycle behaviors, not all behaviors.
- Heat cycles cause real behavioral disruption: Restlessness, roaming, cyclical aggression, and false pregnancies are all eliminated by spaying.
- Core temperament does not change: A high-energy dog remains high-energy. A shy dog remains shy.
- The timeline is two to three months: Hormones decline gradually. Behavioral changes follow the same curve.
- Spaying is not a training substitute: Learned behaviors require training regardless of hormone status.
- A small subset of dogs may become more anxious: This documented outcome is worth discussing with your vet before surgery.
What drives difficult behavior in intact female dogs
Before answering whether spaying will calm your dog, it helps to understand what is making her difficult in the first place.
Intact female dogs experience cyclical hormonal changes driven by estrogen and progesterone. These cycles occur every six to eight months and create predictable but often exhausting behavioral patterns for owners.
During heat cycles, female dogs typically show:
- Restlessness, inability to settle, pacing
- Increased vocalization and whining
- Frequent urination in small amounts (urine marking to attract males)
- Strong, persistent drive to escape and find a mate
- Attracting intact male dogs from significant distances
- Cyclical irritability or clinginess
Between cycles, some dogs also experience pseudopregnancy, where they nest, guard objects as imaginary puppies, produce milk, and sometimes become aggressive when the "nest" is approached.
All of these behaviors are hormone-driven. Spaying eliminates the source of those hormones.
When spaying will calm a female dog
The answer is yes, clearly, for dogs whose difficult behaviors are primarily driven by the reproductive cycle.
Spaying reliably calms females who show:
- Significant behavioral changes during heat cycles
- Restlessness or inability to settle in the days and weeks of estrus
- Strong escape or roaming drive when in heat
- Cyclical mood swings, irritability, or clinginess linked to the hormonal cycle
- False pregnancy behaviors including nesting, object guarding, or milk production
- Heat-related aggression toward other dogs
For these dogs, removing the hormonal cycling removes the behavioral disruption. What remains is a more consistent, predictable dog whose mood and energy are not subject to the peaks and troughs of the reproductive cycle.
Many owners of females that were particularly challenging during heat cycles describe the post-spay result as dramatically positive.
When spaying may not calm a female dog
The answer is less certain for dogs whose behavior comes from sources other than reproductive hormones.
Spaying is less likely to produce a calming effect in dogs who show:
- High energy due to breed genetics (working breeds, sporting breeds, terriers)
- Anxiety or fearfulness unrelated to the heat cycle
- Learned behavioral problems from history or environment
- Reactivity or aggression toward people or dogs that is fear-based
- Restlessness caused by insufficient exercise or mental stimulation
Removing estrogen does not reduce a Border Collie's herding drive. It does not calm a dog whose anxiety comes from under-socialization. It does not fix pulling on the leash, jumping on visitors, or barking at the doorbell.
These behaviors require training and environmental management, not surgery.
The specific behaviors spaying eliminates vs. those it does not
What the research says
Most veterinary guidance presents the calming effect of spaying as reliable and universal. The research picture is somewhat more nuanced.
Studies of intact versus spayed females consistently show that heat-related behaviors are reliably reduced. This part of the conventional guidance is well-supported.
However, two large-scale studies using the Canine Behavioral Assessment and Research Questionnaire (C-BARQ) found that spayed females showed increased fearfulness compared to intact females in some analyses. The research found approximately a 31% increase in fearfulness in sterilized dogs of both sexes.
This does not mean spaying makes most dogs more anxious. But it means the outcome is not uniformly calming for every female, and in a subset of dogs, particularly those sterilized at a very young age or those with pre-existing anxiety, the behavioral outcome may be less positive than expected.
Understanding all the behavior changes to expect after spaying or neutering across both sexes gives this specific female question the broader research context it deserves. For the full picture of all behavior changes specific to female dogs after spaying, including the distinction between what spaying reliably changes and what requires training, that guide covers the female picture in full detail.
The timeline: when does calming happen?
Owners who expect a calmer dog within days of surgery are working with an inaccurate timeline.
Estrogen and progesterone do not disappear on surgery day. The ovaries are removed, but residual hormones still circulate in the bloodstream and take time to clear.
What to expect:
- Days 1 to 14: Recovery period. Any behavioral changes relate to pain and anesthesia, not hormonal adjustment.
- Weeks 2 to 6: Hormone levels declining. Early signs of reduced heat-driven behaviors may begin to appear.
- Weeks 6 to 12: Most hormonal behavioral changes are apparent.
- Months 2 to 3: Full hormonal stabilization. This is the point at which you can accurately assess your dog's post-spay behavioral baseline.
For the hormonal mechanism and why it takes this long, the guide on how long before hormone-driven behavior settles covers the clearance timeline in detail, including how this applies to the female hormonal system.
What else helps a female dog become calmer
Whether or not spaying produces a calming effect, these factors reliably influence how settled a female dog is:
Consistent daily exercise: Appropriate to her breed and age. A dog that has adequately burned physical energy is a calmer dog at rest.
Mental stimulation: Puzzle feeders, training sessions, scent work, and enrichment activities address the cognitive drive that underlies a lot of restless behavior.
Predictable routine: Dogs settle more easily in stable, consistent environments. Unpredictable schedules increase ambient anxiety.
Training: The most reliable long-term path to a calmer, more manageable dog. Clear expectations, consistently reinforced, shape behavior more durably than surgery.
Spaying contributes one element. It removes the hormonal disruption of the reproductive cycle. The rest of these factors remain under your control regardless of whether your dog is intact or spayed.
Frequently asked questions
Will my dog be noticeably calmer right after spaying?
Not immediately. The first week is recovery from surgery. Behavioral changes related to hormonal adjustment happen over weeks to months, not days. Two to three months after surgery is when you can accurately assess your dog's post-spay behavioral baseline.
My female dog is anxious and reactive. Will spaying help?
If her anxiety and reactivity are linked to the heat cycle, spaying may help. If they come from other sources, including under-socialization, fearful temperament, or learned responses, spaying is unlikely to make a meaningful difference. Consult your vet and consider a referral to a certified veterinary behaviorist if anxiety is a significant concern.
My female dog is aggressive. Will spaying calm her down?
It depends on the type of aggression. Aggression linked specifically to heat cycles, competition with other females, or false pregnancy guarding is often reduced. Fear-based aggression, territorial aggression, and resource guarding are not reliably improved by spaying and require behavioral intervention.
Will spaying calm a high-energy female dog?
Probably not significantly. High energy in female dogs is primarily determined by breed genetics and individual temperament, not reproductive hormones. A high-drive sporting breed will still need the same amount of exercise and engagement after spaying. For whether calming effects in adult dogs after spaying apply to your specific situation, that guide covers the nuances of the calming question across different dog types.
Are there female dogs that get worse after spaying?
Yes, in a subset. Some research documents increased fearfulness in spayed females compared to intact females, particularly in dogs spayed at a young age or those with pre-existing anxiety. If your dog becomes more anxious after spaying, speak to your vet. A referral to a certified veterinary behaviorist may be appropriate.
The honest answer to whether spaying will calm your female dog: probably yes, if what is making her difficult is her heat cycle. Probably not, if what is making her difficult is her breed, her upbringing, or her learned behaviors. Understanding which category your dog falls into before surgery sets accurate expectations for the result.
Resources
The following sources were used as reference and background for this article:
- Anasazi Veterinary. How Will Spaying Change My Dog? anasazivet.com
- RexiPets. Will Spaying Calm a Female Dog? rexipets.com
- Bliss Animal Hospital. Do Dogs Change After Spay or Neuter? blissanimalhospital.com
- Kainer Veterinary. Understanding the Health and Behavior Benefits of Spaying a Dog. kainervet.com
- Stanley Coren, Psychology Today. Are There Behavior Changes When Dogs Are Spayed or Neutered? psychologytoday.com
Warning Signs to Watch for After Neutering a Dog
Learn the key warning signs to watch for after neutering your dog to ensure a safe recovery and when to seek veterinary care.
Most dogs recover from neutering without a hitch. But some do not, and the difference between a minor complication and a serious one often comes down to how quickly you notice it.
The tricky part is that some things that look alarming are completely normal, and some things that look minor are not.
This guide gives you a clear, symptom-by-symptom breakdown of what is expected, what to monitor, and what requires an immediate call to your vet.
Quick answer: Mild grogginess, reduced appetite, and slight redness at the incision are all normal in the first 24 to 48 hours. Ongoing bleeding, yellow or green discharge, swelling that grows after day three, lethargy lasting more than 48 hours, or a wound that appears to be opening are all warning signs that need veterinary attention promptly.
Key takeaways
- Normal recovery includes mild grogginess, slight swelling, and reduced appetite for 24 to 48 hours.
- Warning signs that need a vet call include discharge, increasing swelling, continuous bleeding, and persistent lethargy.
- Emergency signs require immediate action: pale gums, collapse, or abdomen that appears bloated.
- Licking is the most preventable complication: the cone prevents most infection and wound problems.
- Daily incision checks catch problems early, when they are still easy to treat.
- When in doubt, call your vet. It is always better to check than to wait.
What normal recovery looks like
Understanding normal first makes it easier to spot abnormal.
In the first 24 to 48 hours after surgery, expect:
- Grogginess, drowsiness, or mild disorientation from anesthesia
- Reduced appetite or no interest in food
- Mild redness or slight puffiness at the incision site
- A small amount of clear or very faintly pink fluid at the wound in the first 24 to 72 hours
- Quieter behavior and preference for rest
- Possible shivering or restlessness as anesthesia wears off
All of these resolve on their own. By day two or three, your dog should be more alert, eating normally, and showing interest in their surroundings again.
Warning signs: incision and wound
The incision site is where most post-surgical problems show up first. Check it morning and evening throughout the recovery period.
Discharge
Swelling
Some swelling in the first two to three days is expected. The body's inflammatory response is part of normal healing.
Swelling that increases after day three, feels warm and firm to the touch, or is accompanied by redness and discharge is not normal. This pattern points to infection or hematoma and needs veterinary evaluation.
In large breed male dogs, scrotal swelling is a specific concern. Moderate scrotal swelling that resolves within a week is often normal. Swelling that grows, becomes hot, or is accompanied by pain or discharge is not.
Wound opening
The incision edges should be staying together, not pulling apart.
If you see any gap in the wound, exposed pink or red tissue beneath the skin, or sutures that appear to have pulled through, contact your vet immediately. This is called dehiscence and requires prompt attention.
Do not attempt to close an open wound yourself. Keep your dog calm, prevent licking, and get to your vet.
Warning signs: behavior and general health
Lethargy
Mild tiredness for the first 24 to 48 hours is expected. Anesthesia and surgery are taxing on the body.
Lethargy that persists beyond 48 hours, or a dog that is completely unresponsive, unable to stand, or does not improve over the first two days, is a warning sign. Call your vet.
Loss of appetite
Not wanting to eat on surgery day and the following morning is normal.
A dog that still refuses food at 48 hours after surgery, particularly if also vomiting, may be experiencing a complication. Call your vet if appetite has not returned by day two.
Vomiting
One or two episodes of vomiting the evening of surgery can be a side effect of anesthesia. This is within normal range.
Vomiting that continues beyond 24 hours after surgery, or that contains blood, requires a vet call. Persistent vomiting can indicate a reaction to pain medication, an obstruction, or another post-surgical issue.
Difficulty urinating or defecating
Some dogs take a day or two to have a bowel movement after surgery. This is usually due to fasting before the procedure and reduced activity afterward.
No bowel movement after three to five days is worth reporting. Difficulty or pain during urination, especially in male dogs, can indicate inflammation near the surgical site and should be checked promptly.
Warning signs: pain
Your dog will have been sent home with pain medication. Use it on schedule.
Signs that pain is not being adequately controlled include:
- Whining, yelping, or crying that persists beyond the first day
- Hunched posture or reluctance to sit or lie down
- Guarding the incision site by flinching or snapping when touched
- Panting excessively without exertion
- Trembling or shivering beyond the first few hours post-anesthesia
Contact your vet if pain seems severe after day three, or if prescribed medication does not appear to be working. Do not give human pain medications. Aspirin, ibuprofen, and acetaminophen are toxic to dogs and can cause serious harm or death.
Emergency warning signs: act immediately
These signs require emergency veterinary care, not a wait-and-see approach.
Call your vet or go to an emergency clinic immediately if you observe:
- Pale, white, or bluish gums
- Sudden collapse or inability to stand
- Abdomen that appears bloated, distended, or hard
- Heavy bleeding that does not stop
- Rapid or labored breathing
- Signs of extreme pain: screaming, freezing in place, inability to move
These can indicate internal bleeding, systemic infection, or other serious complications that are time-sensitive.
The most preventable warning sign: licking
Most of the infection and wound-breakdown cases that end up back at the vet have one thing in common: the cone came off.
Licking introduces bacteria directly into the wound, softens the tissue, and can pull sutures loose. A dog that licks its incision even once can undo days of clean healing.
The E-collar stays on for the full 10 to 14 days. If your dog refuses the hard plastic cone, soft inflatable collars or recovery suits are legitimate alternatives, provided they reliably prevent the dog from reaching the wound site.
For a full guide on what normal recovery looks like day by day and how to distinguish healing progress from early complications, tracking the incision against a clear timeline makes daily monitoring more actionable.
When to call vs. when to go straight to emergency care
Use this as a quick decision guide.
When in doubt, call. Most veterinary practices would rather hear from you about something minor than have you wait too long on something serious.
The role of aftercare in preventing complications
Most warning signs are preventable, not inevitable.
The dogs most likely to develop post-surgical complications are those given too much freedom too soon, or whose cones were removed early. Following a complete aftercare plan covering rest, incision monitoring, medications, and the cone is the most effective way to keep your dog out of trouble during recovery.
For a complete, step-by-step plan on full post-surgery care covering each day of the recovery window, what to feed, how to check the wound, and how to keep your dog calm, having that reference from day one prevents most of the issues covered in this article. Understanding surgical risks that can cause complications beyond the routine is also worth reading before surgery if you have a large breed or older dog.
Frequently asked questions
Is it normal for my dog to be lethargic after neutering?
Yes, for the first 24 to 48 hours. Anesthesia causes genuine fatigue, and your dog needs rest. Lethargy that does not improve by day two or three, or a dog that is completely unresponsive, warrants a call to your veterinarian.
What does an infected incision look like?
An infected incision typically shows yellow or green discharge, increasing redness and swelling after the first few days, warmth around the wound, and often a foul odor. Any of these signs alone justify a same-day call to your vet. For a detailed visual guide to signs of an infected incision, knowing what to look for at each stage of healing helps you act at the right time.
My dog is licking the incision despite wearing a cone. What should I do?
Check that the cone extends at least two inches past your dog's nose. If it is too short, your dog can still reach the incision. Consider switching to a soft inflatable collar or recovery suit if the hard cone is not fitting properly. Contact your vet if there are signs the wound has been compromised.
Should I be worried about scrotal swelling after neutering?
Some scrotal swelling in the first few days is normal. The scrotum fills with fluid as part of the healing response. Swelling that increases after day three, feels hot or very firm, or is accompanied by discharge or pain is abnormal and should be evaluated by your vet.
When should I go to an emergency vet after neutering?
Go immediately if your dog has pale or white gums, collapses, has a bloated or hard abdomen, or is bleeding heavily and continuously. These signs can indicate internal bleeding or systemic infection and are time-sensitive emergencies.
The difference between a smooth recovery and a complication is usually not bad luck. It is usually the cone coming off too early, too much activity on day four, or a wound check that was skipped. Pay attention for two weeks, and most dogs sail through without a single issue.
Resources
The following sources were used as reference and background for this article:
- Ace of Spays. Signs of Complications After Spay/Neuter Surgery: When to Contact Your Veterinarian. aceofspays.com
- Animal Humane Society. Spay/Neuter Post-Surgical Care and Recovery Instructions. animalhumanesociety.org
- Homeaglow. 10 Warning Signs After Spaying or Neutering Your Dog. homeaglow.com
- American Kennel Club. Post-Surgical Care for Dogs Following a Spay or Neuter. akc.org
- Union Hill Animal Hospital. Neutering Recovery Guide for Male Dogs. unionhillvet.com
- Rivergate Veterinary Clinic. Signs of Infection After Spaying or Neutering a Dog. rivergateveterinaryclinic.com

Why Your Dog Won't Drink Water After Surgery
Learn why your dog won't drink water after surgery and how to help them recover safely with practical tips and expert advice.
After surgery, it is common for dogs to refuse water. This can worry any pet owner because hydration is vital for healing. Understanding why your dog won't drink water after surgery helps you support their recovery better.
This article explains the main reasons dogs avoid water post-surgery. You will learn what signs to watch for and how to encourage your dog to drink safely. Knowing these facts can prevent complications and keep your dog comfortable.
Why does my dog refuse water after surgery?
Dogs may refuse water after surgery due to pain, nausea, or medication effects. These factors can reduce their desire to drink and make swallowing uncomfortable.
It is important to identify the cause to provide proper care. Sometimes, refusal is temporary, but other times it signals a problem needing veterinary attention.
- Pain and discomfort: Surgical pain can make your dog reluctant to move or swallow, reducing their interest in drinking water during recovery.
- Nausea from anesthesia: Anesthesia can cause nausea or vomiting, which lowers your dog's urge to drink and may make water unappealing.
- Medication side effects: Some painkillers or antibiotics cause dry mouth or upset stomach, affecting your dog's willingness to drink water.
- Stress and anxiety: Being in a new environment or feeling unwell can cause stress, leading to decreased water intake after surgery.
Recognizing these reasons helps you monitor your dog closely and take steps to encourage hydration safely.
How can I encourage my dog to drink water after surgery?
Encouraging your dog to drink water after surgery requires patience and gentle methods. You want to avoid forcing water but still keep them hydrated.
Using appealing techniques can stimulate their interest and make drinking easier during recovery.
- Offer fresh water frequently: Change the water often to keep it fresh and appealing, which can encourage your dog to drink more willingly.
- Use a syringe or dropper: Gently offer small amounts of water with a syringe if your dog refuses to drink on their own, avoiding stress or choking.
- Add flavor to water: Mixing a little low-sodium broth or water from wet food can make water tastier and more inviting for your dog.
- Provide ice cubes or wet treats: Some dogs prefer licking ice cubes or moist treats, which helps increase fluid intake without forcing them to drink.
These methods can help maintain hydration while respecting your dog's comfort and recovery pace.
When should I worry if my dog won’t drink water after surgery?
Not drinking water for a short time after surgery can be normal. However, prolonged refusal may lead to dehydration and complications.
You should watch for warning signs that indicate your dog needs veterinary care promptly.
- Signs of dehydration: Dry gums, sunken eyes, and lethargy are signs your dog may be dehydrated and need immediate attention.
- Persistent vomiting or diarrhea: These symptoms can worsen dehydration and indicate underlying problems requiring treatment.
- Refusal to eat or drink beyond 24 hours: If your dog avoids all fluids and food for more than a day, it is a serious concern needing veterinary evaluation.
- Excessive panting or weakness: These signs may indicate pain, stress, or dehydration that needs prompt management.
If you notice any of these signs, contact your veterinarian immediately to prevent serious health issues.
What are the risks of dehydration after surgery in dogs?
Dehydration after surgery can slow healing and cause serious health problems. It affects blood flow, organ function, and overall recovery.
Understanding these risks helps you prioritize hydration and seek help if your dog refuses water.
- Delayed wound healing: Lack of fluids reduces blood flow, slowing tissue repair and increasing infection risk after surgery.
- Kidney damage: Dehydration stresses the kidneys, potentially causing acute injury or worsening existing kidney problems.
- Electrolyte imbalance: Fluids maintain electrolyte balance; dehydration can cause dangerous imbalances affecting heart and muscle function.
- Increased risk of complications: Dehydration can lead to weakness, shock, or other complications that prolong hospital stays and recovery time.
Keeping your dog hydrated supports faster healing and reduces the chance of these serious complications.
How does anesthesia affect my dog’s thirst after surgery?
Anesthesia impacts your dog's body in ways that reduce thirst and water intake temporarily. Understanding these effects helps you manage hydration better.
Most dogs regain normal thirst within 24 hours, but some may need extra encouragement.
- Dry mouth sensation: Anesthesia can cause dry mouth, making swallowing uncomfortable and reducing the desire to drink water.
- Slowed digestive system: Anesthesia slows gut movement, causing nausea or bloating that discourages drinking.
- Altered thirst signals: Anesthesia affects brain centers controlling thirst, temporarily lowering your dog's urge to drink.
- Temporary weakness: Post-anesthesia weakness can make your dog less active and less interested in drinking water.
Monitoring your dog closely after anesthesia and offering water gently can help them recover normal hydration habits.
What veterinary treatments help dogs drink water after surgery?
If your dog refuses water after surgery, veterinarians have treatments to support hydration and comfort. These treatments aim to prevent dehydration and promote healing.
Knowing these options prepares you to seek timely help if home care is insufficient.
- Intravenous fluids: IV fluids provide immediate hydration when your dog cannot drink, supporting vital organ function during recovery.
- Anti-nausea medications: These drugs reduce vomiting and nausea, making your dog more willing to drink water and eat.
- Pain management: Adjusting pain medications can reduce discomfort that prevents drinking and improve your dog's willingness to hydrate.
- Appetite stimulants: In some cases, vets may prescribe medications to encourage eating and drinking if your dog remains reluctant.
Veterinary intervention ensures your dog stays hydrated and comfortable, reducing risks during the critical post-surgery period.
Conclusion
Understanding why your dog won't drink water after surgery is key to supporting their recovery. Causes like pain, nausea, and medication effects often reduce thirst temporarily.
Using gentle encouragement methods and watching for warning signs helps keep your dog hydrated and safe. If refusal to drink persists, seek veterinary care promptly to prevent dehydration and complications.
FAQs
How long after surgery should my dog start drinking water?
Most dogs begin drinking water within 12 to 24 hours after surgery. If your dog refuses water beyond this period, contact your veterinarian for advice.
Can I give my dog ice chips instead of water after surgery?
Yes, offering ice chips can help increase fluid intake gently and may be more appealing to dogs reluctant to drink water directly.
Is it safe to add flavor to my dog’s water after surgery?
Adding low-sodium broth or water from wet food can make water tastier and encourage drinking, but avoid salty or sugary additives.
When should I call the vet if my dog won’t drink after surgery?
Call your vet if your dog refuses water for more than 24 hours or shows signs of dehydration, vomiting, or weakness after surgery.
Can dehydration after surgery cause serious health problems in dogs?
Yes, dehydration can delay healing, cause kidney damage, and lead to electrolyte imbalances, making it a serious concern after surgery.

