

Bed Sores on Dogs Causes Treatment and Prevention
Learn about bed sores on dogs, including causes, treatments, and prevention tips to keep your pet healthy and comfortable.

This article is for informational purposes only and is not a substitute for professional veterinary advice. Every case is unique, so always consult your veterinarian for guidance specific to your pet.
This content is intended for veterinary professionals for educational purposes. It does not replace clinical judgment or tailored advice. Always rely on your training, expertise, and the specific context of your patients.
Bed sores in dogs also called pressure sores or decubitus ulcers develop when prolonged pressure on a bony area cuts off blood supply, causing the tissue to break down. They are the same condition as bedsores in hospitalized humans, and they are just as serious when they reach advanced stages.
The good news is that early-stage bed sores are very treatable at home. The bad news is that they can progress from a small red patch to a deep infected wound within days if not caught and addressed.
Quick answer: Bed sores form over bony prominences like elbows and hips when sustained pressure blocks blood flow. Most common in senior, large-breed, and immobile dogs. Early stages respond to soft bedding and repositioning; advanced stages need veterinary care.
Key takeaways
- Bed sores form over bony prominences: elbows, hips, hocks, stifles, and sides of the knees
- Four stages exist: from mild redness to deep infected wounds reaching muscle and bone
- Senior dogs, large breeds, and post-surgical dogs are at highest risk
- Stage 1 sores reverse with home management: soft bedding and repositioning every 2 to 4 hours
- Stage 3 and 4 sores need veterinary debridement and often systemic antibiotics
- Thick orthopedic foam bedding is the single most effective prevention measure for at-risk dogs
What causes bed sores in dogs?
Bed sores develop when the weight of a dog's body continuously presses a bony prominence against a hard surface. Walkin' Pets explains the mechanism: "Decubital ulcers form when repeated pressure on an affected area constricts the blood vessels, decreasing the area's blood supply and as the skin is deprived of oxygen, it begins to die."
Once the tissue starts to die, it creates a wound that bacteria readily colonize. This is why advanced bed sores are almost always infected.
The process requires two things to come together: sustained mechanical pressure and skin that is not being repositioned or protected. Any dog that lies in the same position for hours without shifting is at risk.
Additional factors that increase risk
Incontinent dogs: urine-soaked skin breaks down much faster under pressure. Walkin' Pets advises that "reducing skin moisture from urine is important to help prevent the bacterial growth and skin degradation that contribute to pressure sores."
Thin or underweight dogs: less muscle and fat over bony prominences means the bone contacts the surface with less cushioning.
Obese dogs: more body weight concentrates greater compressive force at each contact point.
Dogs on hard floors: concrete, hardwood, and tile dramatically increase the pressure at contact points compared to soft surfaces.
Which dogs get bed sores?
Dr. Buzby's ToeGrips identifies the most at-risk groups:
- Senior dogs: reduced muscle mass, reduced mobility, longer periods in one position
- Large and giant breed dogs: more body weight, greater force at bony contact points
- Post-surgical patients: strict rest requirements limit natural repositioning
- Paralyzed or paraplegic dogs: unable to shift position at all
- Dogs with arthritis: pain limits movement and encourages sustained resting in one position
- Short-coated breeds: less coat padding between skin and hard surfaces
DogCancer.com notes that bed sores can also be a concern for dogs in late-stage cancer, where weakness and pain significantly reduce their ability to reposition.
The 4 stages of bed sores
Recognizing the stage determines the treatment approach.
Stage 1: redness and intact skin
The skin over the bony prominence is red, warm, and may have some hair loss. The surface is not broken. This is the ideal intervention point.
What to do at home: add thick orthopedic padding under the affected area, increase repositioning to every 2 hours, and monitor the site twice daily. Most Stage 1 sores reverse completely with these measures.
Stage 2: shallow open wound
The skin has partially broken down. A shallow blister or open area appears. The surrounding tissue remains inflamed and warm.
WagWalking: "Stage 1 ulcers may improve with padding, regular repositioning of the dog, and a quality moisture-wicking dog bed. Vets may instruct pet parents to regularly apply moist dressings to open pressure sores."
What to do: contact your vet. Stage 2 requires wound cleaning, appropriate dressings, and assessment for infection. Antibiotics may be started if signs of infection are present.
Stage 3: full-thickness wound
The sore extends through the full skin thickness into subcutaneous tissue. VetMobile describes what you see: "The sore becomes deeper and it may extend into the underlying tissue, such as the muscle layer. Pus or discharge may be present. At this stage, the area is surrounded by dead or dying tissue."
What to do: veterinary care is required. Treatment involves debridement of dead tissue, wound culture, and systemic antibiotics based on culture results.
Stage 4: bone or muscle involvement
The wound extends to muscle, tendon, or bone. This is a serious and potentially life-threatening stage. Bacteria can enter the bloodstream from a Stage 4 wound, causing sepsis.
What to do: emergency veterinary care. Hospitalization, IV antibiotics, surgical debridement, and reconstructive surgery may be necessary.
Treatment by stage
Home wound care for Stage 1 and 2
For Stage 1 and early Stage 2 sores, clean the area daily with dilute chlorhexidine solution (not hydrogen peroxide, which damages healing tissue). Apply a non-adherent wound dressing and change it once or twice daily. Keep the area dry between dressing changes.
Puainta recommends: "Pressure Relief: Encourage the dog to change positions frequently. Soft Bedding: Provide cushioned surfaces to reduce pressure. Cleanliness: Keep the area clean and dry."
For incontinent dogs, clean and dry the skin after every urination. Use a waterproof mattress cover that can be washed daily. Sheepskin pads are effective at wicking moisture away from skin while providing cushioning.
For how bed sores relate to callus formation at the same pressure sites, see calluses from similar pressure points.
When to call the vet
Call your vet within 24 hours if:
- The wound is open, moist, or has any discharge
- The area is warm and the dog shows signs of pain when the area is touched
- The sore is growing despite home management
- Your dog is lethargic, off food, or running a fever
These signs suggest infection is establishing. Early antibiotic treatment is significantly more effective than treating advanced infection.
WagWalking notes: "Antibiotics may be necessary if the wound is infected or at risk of becoming infected. Antibiotics have minimal risks and a high success rate when used early on."
For how the progression of pressure necrosis connects to bed sore development, see pressure necrosis in severe bed sore cases.
Prevention
Orthopedic bedding
The most effective single intervention. Memory foam or high-density egg-crate foam distributes weight across a larger surface area, reducing peak pressure at bony contact points. Petful emphasizes that "you might be more likely to notice pressure sores in dogs if you have a large breed pup or a short-haired breed" both groups where bedding choice is critical.
The foam must not fully compress under the dog's full weight. Test by pressing firmly: if it bottoms out quickly, it is not thick enough. For large dogs, minimum 4 inches of high-density foam is recommended.
Repositioning schedule
Reposition immobile dogs every 2 to 4 hours, alternating which side bears weight. Walkin' Pets advises: "Try not to let the dog rest on the hip bone on one side for very long, reposition your pet every 2 to 3 hours."
If you are not home during the day, consider whether a pet sitter or midday check can provide repositioning support for a dog with high risk.
Daily inspection
Check every bony prominence every day. Run your hand along the elbows, hips, hocks, and knees. Hair loss is the first visible sign act at Stage 1, before any skin breakdown occurs.
Moisture management for incontinent dogs
Wet skin under pressure breaks down dramatically faster than dry skin. Change diapers and male wraps frequently. Use raised mesh beds for overnight rest in incontinent dogs urine drains through rather than pooling under the dog. Walkin' Pets recommends sheepskin pads specifically for their wicking properties.
For how swelling associated with bed sores can extend to the feet and lower legs, see swelling associated with pressure injuries.
Frequently asked questions
How do I know if my dog has a bed sore starting?
The first sign is a small patch of hair loss over a bony area, sometimes with mild redness and warmth. The skin is still intact. Run your hand over the elbows, hips, and hocks daily in at-risk dogs. Acting at this point before the skin opens is far easier than treating an open wound.
Can bed sores in dogs heal on their own?
Stage 1 sores can reverse with prompt management: improved bedding, repositioning, and keeping the area dry. Stage 2 and above rarely resolve without veterinary intervention. The wound environment actively promotes bacterial growth, which prevents natural healing without treatment.
How long does a bed sore take to heal in a dog?
Stage 1 sores managed early typically show improvement within 1 to 2 weeks with good home care. Stage 2 wounds typically heal in 3 to 6 weeks with consistent veterinary wound care. Stage 3 and 4 wounds may take months and may not fully close in all cases.
My senior dog keeps getting bed sores despite soft bedding. What else can I do?
Check whether the foam has compressed over time and needs replacing. Add protective wraps (elbow pads or hock wraps) over at-risk sites. Increase repositioning frequency to every 2 hours. Consult your vet about whether the dog's underlying mobility level has declined and whether additional pain management or physiotherapy could help. Nutritional support including protein and vitamin C promotes skin healing.
Are bed sores painful for dogs?
Stage 1 sores are usually not painful. Stage 2 onward becomes progressively more painful as the wound deepens and infection sets in. Dogs with painful bed sores may lick or bite at the area, avoid lying on that side, or show behavioral changes. Pain management from your vet is an important part of treatment from Stage 2 onward.
Can bed sores become life-threatening in dogs?
Yes. Stage 3 and 4 sores can allow bacteria to enter deeper tissues and the bloodstream, causing sepsis. A dog with an advanced bed sore that is also lethargic, not eating, or running a fever is potentially septic and needs emergency veterinary care the same day.
Resources
- Dr. Buzby's ToeGrips. Pressure Sores on Dogs: Treatment and Prevention. toegrips.com
- WagWalking. Pressure Sores in Dogs. wagwalking.com
- Walkin' Pets. Pressure Sores in Pets: Treatment and Prevention. walkinpets.com
- Petful. Pressure Sores on Dogs: What You Need to Know. petful.com
- DogCancer.com. Bed Sores on Dogs: Preventing and Treating Pressure Sores. dogcancer.com

Get a Free Poster
Enhance your workspace with a high-quality radiographs reference poster, designed for veterinary professionals. This free physical poster will be shipped directly to you—just fill out the form to request your copy.






Taking Great TPLO Radiographs
Click Below to Watch Live Video Demos


We'll send you a Free Wall Poster with all the steps
Step #1
Getting Ready
Ensuring a clean surgical field starts with proper skin preparation. This video demonstrates the best practices for:
- Shaving the patient – Achieving a close, even shave while minimizing skin irritation
- The Dirty Scrub – The initial skin prep step to remove surface debris and reduce bacterial load before the sterile scrub.
Following these techniques helps reduce infection risk and improve surgical outcomes. Watch the video to see how it’s done effectively!


Step #2
Reduce Your Risks
Many surgeons are shocked to find out that their patients are not protected from biofilms and resistant bacteria when they use saline and post-op antibiotics.
That’s Where Simini Comes In.
Why leave these risks and unmanaged? Just apply Simini Protect Lavage for one minute. Biofilms and resistant bacteria can be removed, and you can reduce two significant sources of infection.
Step #3
Take the Course
Preventing surgical infections is critical for patient safety and successful outcomes. This course covers:
- Aseptic techniques – Best practices to maintain a sterile field.
- Skin prep & draping – Proper methods to minimize contamination.
- Antibiotic stewardship – When and how to use perioperative antibiotics effectively.
Stay up to date with the latest evidence-based protocols. Click the link to start learning and earn CE credits!

Things to know
Do Dogs Calm Down After Being Spayed?
Learn how dogs behave after being spayed and when to expect them to calm down post-surgery.
It is one of the most common reasons owners choose to spay their female dog. The expectation of a calmer, more settled companion afterward.
Sometimes that is exactly what happens. Sometimes it does not. And in a small subset of cases, anxiety or excitability actually increases.
Understanding why gives you a more accurate picture of what to expect, which makes the outcome less surprising in either direction.
Quick answer: Many dogs do become calmer after spaying, but the effect is specific to hormone-driven behaviors, not overall temperament. Dogs that were restless, anxious, or excitable due to heat cycles typically show significant improvement. Dogs whose energy or anxiety has non-hormonal causes will not reliably calm down. Most behavioral changes, if they occur, appear over two to three months.
Key takeaways
- The calming effect is real but specific: It applies to behaviors driven by reproductive hormones, not all behaviors.
- Heat cycle behaviors disappear: Restlessness, roaming, frequent urination, and cyclical mood shifts all stop after spaying.
- Core energy level and personality do not change: A high-energy dog will still be high-energy after spaying.
- Breed and individual temperament matter: Some breeds retain high energy regardless of hormone status.
- The timeline is weeks to months, not days: Hormone levels decline gradually, so behavioral changes are gradual too.
- A small subset of dogs show increased fearfulness: This is documented in research and worth knowing about before surgery.
What "calming down" actually means after spaying
When people say they want their dog to calm down, they usually mean one of two things:
- They want heat cycle behaviors to stop: the roaming, the restlessness, the vocalization, the constant male attention.
- They want a generally more settled dog overall.
Spaying reliably delivers the first. The second is less predictable.
This distinction is the core of the honest answer to this question.
What spaying removes: the hormonal layer
Spaying removes the ovaries, which are the primary source of estrogen and progesterone. These hormones regulate the reproductive cycle and influence behaviors tied to it.
During heat cycles, which typically occur every six to eight months in adult dogs, estrogen surges create a set of predictable behaviors:
- Restlessness and inability to settle
- Increased vocalization
- Frequent urination in small amounts to signal reproductive status
- Strong drive to escape and find a mate
- Attracting intact male dogs
- Cyclical irritability or anxiety
All of these stop after spaying. The hormonal trigger is permanently removed.
Which dogs calm down most noticeably after spaying
Dogs whose difficult behaviors are primarily or significantly driven by the reproductive cycle show the most consistent improvement after spaying.
Dogs most likely to become calmer:
- Female dogs that showed significant behavior changes during heat cycles, including restlessness, anxiety, and clinginess
- Dogs prone to false pregnancies, with associated nesting, object guarding, and protective behavior
- Dogs that attempted to escape or roam during heat periods
- Dogs whose cyclical mood swings were disruptive to daily life
For these dogs, spaying removes a recurring source of behavioral disruption. The result is often a more predictable, stable dog.
Which dogs may not calm down after spaying
Dogs whose energy level, excitability, or anxiety comes from sources other than reproductive hormones will not reliably settle after spaying.
Dogs less likely to show a calming effect:
- High-energy working or sport breeds where drive is genetic, not hormonal
- Dogs with established anxiety, fearfulness, or reactivity from non-hormonal causes
- Dogs with learned problematic behaviors from their history and environment
- Dogs whose excitability comes from insufficient exercise or mental stimulation
A Border Collie that is highly energetic before spaying will still be highly energetic after. A Labrador that pulls on the leash before spaying will still pull after. These behaviors are not driven by estrogen.
The timeline: when does calming happen?
Behavioral changes from spaying do not happen within days of surgery. The immediate post-surgery period reflects recovery from anesthesia and pain, not hormonal adjustment.
Realistic timeline:
Owners who expect a noticeably calmer dog within days of surgery are working with an inaccurate timeline. The changes are gradual and unfold over weeks to months.
What research says about calming after spaying
The evidence is genuinely mixed, which is worth knowing rather than glossing over.
Supporting the calming effect:
A study of 591 dogs found behavioral problems reduced or eliminated in 59% of spayed females. Heat cycle-related behaviors showed the most consistent improvement. Many owners of females that were particularly difficult during heat cycles report significant positive changes after spaying.
Complicating the picture:
Two large-scale studies using the Canine Behavioral Assessment and Research Questionnaire (C-BARQ) found that sterilization was associated with a roughly 31% increase in fearfulness and a 33% increase in touch sensitivity in some dogs. These findings apply to both males and females.
What does this mean in practice? For a meaningful subset of dogs, spaying does not produce a calmer animal. It may even produce a more anxious one, particularly in dogs that had pre-existing fearfulness or were sterilized at a young age.
This does not mean spaying is wrong for these dogs. It means the behavioral outcome cannot be guaranteed, and expectations should be calibrated accordingly.
For the full picture of all the behavior changes to expect after spaying, including the research on unexpected outcomes, that guide covers the complete behavioral landscape across both sexes.
Does calming depend on the dog's age at spaying?
Yes, and this is one of the most important variables.
Dogs spayed before their first heat cycle:
The hormonal disruption of heat cycles is never established. Many owners report these dogs are consistently more settled than intact females across their lifetime, without ever having the difficult heat cycle period.
Dogs spayed after several heat cycles:
The calming effect from eliminating heat cycles is still real and significant. However, any behaviors that have become habitual through repetition during heat cycles may persist longer or require training to address.
Dogs spayed very young (before 6 months):
Research suggests a higher association with fearfulness in dogs sterilized very early, before hormonal maturity. For whether this applies specifically to puppies, the guide on calming effects specific to female dogs addresses this age-specific question in detail. For the puppy-specific picture, the guide on whether puppies calm down after being spayed covers the developmental nuances unique to younger dogs.
When the expected calming does not happen
If your dog does not seem noticeably calmer after spaying, consider these factors before concluding the surgery did not work.
Check the timeline: Have two to three months passed since surgery? If not, the hormonal adjustment may still be in progress.
Identify the behavior source: Is the behavior you wanted to address actually hormone-driven? If it is not, spaying was never going to address it.
Consider habituation: Some behaviors that started as hormone-driven become habitual over time. The hormone is removed but the habit persists. Consistent training addresses habituated behavior.
Consider an underlying anxiety: If your dog became more fearful or anxious post-surgery, this is a documented outcome in some dogs. A veterinary behaviorist or your regular vet can help evaluate what is happening and what options exist.
Understanding the truth behind the calming effect myth, including why the expectation of calming is sometimes oversold, helps put the variable outcomes in context.
What actually makes dogs calmer long-term
Whether or not spaying produces a calming effect, these factors reliably influence how settled and manageable a dog is:
- Adequate physical exercise: A dog that is genuinely tired is a calmer dog. Exercise needs are determined by breed and individual temperament.
- Mental stimulation: Breed-appropriate mental work, puzzle feeders, training sessions, and enrichment activities reduce restless, problematic behavior.
- Consistent training: Clear, reinforced expectations give dogs a behavioral framework. This is the single most reliable path to a calmer dog.
- Routine and predictability: Dogs settle more easily in stable, predictable environments.
Spaying contributes one element to this picture. It is not a standalone solution.
Frequently asked questions
How long after being spayed will my dog calm down?
If the calming effect is going to occur, most hormone-driven behavioral changes become apparent within two to six weeks as hormone levels decline. Full stabilization typically takes two to three months. Dogs that are still showing challenging behaviors three to four months after surgery are unlikely to improve further from the hormonal change alone.
Will spaying make my high-energy dog less active?
Probably not significantly. Energy level in dogs is primarily determined by breed, genetics, and conditioning. Spaying can cause a modest metabolic slowdown, but it does not reduce drive or enthusiasm. A high-energy breed will still need the same amount of exercise after spaying.
My dog got more anxious after being spayed. Why?
Research has documented increased fearfulness in a subset of dogs after sterilization, associated with a roughly 31% increase in fearfulness in some studies. This appears to occur more often in dogs sterilized at a young age and in dogs with pre-existing anxiety. If your dog shows increased anxiety after spaying, speak to your vet. A referral to a certified veterinary behaviorist may be helpful.
Will spaying help with aggression?
It depends on the type of aggression. Aggression linked to the heat cycle, competition with other female dogs, or false pregnancy guarding often decreases. Fear-based aggression, learned aggression, and resource guarding are not hormone-driven and are not reliably improved by spaying. For whether lower testosterone calms dogs down in the male counterpart to this question, that guide covers the testosterone-behavior link specifically.
Does breed affect whether spaying calms a dog down?
Yes. Breed temperament significantly influences baseline energy and anxiety levels. High-drive working breeds such as Border Collies, Australian Shepherds, and Belgian Malinois have energy and drive that is genetic, not hormonal. Removing reproductive hormones does not change these fundamental breed characteristics. Whether your specific dog falls into a calmer range after spaying depends on what was driving any difficult behavior in the first place.
The calming effect of spaying is real for dogs whose difficult behaviors are hormone-driven. For those dogs, eliminating the heat cycle and its associated hormonal disruption produces a meaningfully more stable animal. For dogs whose energy or anxiety comes from other sources, spaying is still beneficial for health reasons but should not be expected to produce behavioral transformation. The most accurate prediction is not based on "spaying calms dogs" but on "removing a specific hormonal influence changes the behaviors that influence drives."
Resources
The following sources were used as reference and background for this article:
- Stanley Coren, Psychology Today. Are There Behavior Changes When Dogs Are Spayed or Neutered? psychologytoday.com
- PubMed. Changes in the behavior of dogs after castration. pubmed.ncbi.nlm.nih.gov
- ManyPets. Do Dogs Change After Being Neutered or Spayed? manypets.com
- American Veterinary Medical Association (AVMA). Spaying and Neutering. avma.org
- Houndsy. How Spaying Affects Dog Behavior. houndsy.com

Puppy Neuter Recovery: What to Expect Day by Day
Learn what to expect day by day during your puppy's neuter recovery, including care tips and signs of complications.
Puppies bounce back from neutering faster than most pet owners expect. That is actually the tricky part.
A puppy that feels fine on day three is still healing internally. The faster energy return means more supervision is needed, not less. Young dogs do not understand that they need to rest, and they will not slow down on their own.
This guide walks you through what puppy neuter recovery actually looks like, day by day, and how it differs from adult dog recovery.
Quick answer: Most puppies recover fully within 10 to 14 days after neutering. They typically feel close to normal within two to three days, which makes activity restriction harder to enforce but no less important. The E-collar stays on the full 10 to 14 days. Supervision is especially critical for puppies because they are prone to overexerting before the incision has fully healed.
Key takeaways
- Puppies heal faster but need more supervision: Young dogs recover quickly but have less self-restraint and are more likely to reopen an incision through play.
- The 10 to 14 day rule still applies: Fast energy return does not mean fast healing. Activity must be restricted the full window.
- Neutering timing matters for puppies: For small breed puppies, six months is generally appropriate. For large breed puppies, your vet may recommend waiting longer.
- The E-collar is especially important for puppies: They are more likely to obsessively lick or chew a wound out of curiosity.
- Behavioral changes after neutering in puppies are gradual: Hormone-driven behaviors fade over weeks, not days.
- Watch for complications more frequently: Puppies may not show pain clearly, making daily incision checks even more important.
How puppy neuter recovery differs from adult dog recovery
Adult dogs and puppies go through the same surgical procedure and the same 10 to 14 day healing window. What differs is behavior during that window.
The incision heals at roughly the same pace in healthy puppies and adults. The difference is purely behavioral.
Day-by-day recovery guide
Day 1: surgery day
Your puppy comes home groggy, quiet, and possibly unsteady. This is normal anesthesia recovery.
What to do on day 1:
- Set up a clean, quiet recovery space away from other pets and children
- Put the E-collar on immediately and do not remove it
- Offer a small amount of water when you get home
- Offer half a normal meal two to three hours after returning home
- If your puppy vomits, remove food and water until morning
- Keep them indoors and on the floor, no jumping on furniture
The most important thing on day one is calm. Do not let visitors arrive. Do not let other pets near the incision. Keep noise and excitement low.
Day 2 to 3: the energy return
This is the most critical supervision window for puppies.
Energy comes back fast. Your puppy may seem almost back to normal. They will want to play, run, and interact with everything around them.
This is when most puppy neuter complications happen.
Keep activity strictly limited to short leash walks for bathroom breaks only. No playing with other dogs. No running in the yard. No jumping up on you or onto furniture.
Check the incision site morning and evening. A small amount of mild redness or slight puffiness is normal. Anything increasing, oozing, or smelling unusual warrants a vet call.
Days 4 to 7: still healing internally
The incision may look good. Your puppy may seem completely normal. The internal tissue is still healing.
The body's internal sutures need the full two-week window to gain strength. Even when the external skin looks closed, the deeper layers are still knitting together. Activity that stresses the incision at this stage can cause fluid accumulation, swelling, or wound breakdown.
Daily checklist for days 4 to 7:
- [ ] Cone on at all times
- [ ] Leash walks only, short and calm
- [ ] Incision check morning and evening
- [ ] No stairs if possible; carry small breed puppies
- [ ] No bathing, swimming, or getting the incision wet
- [ ] Keep other pets separated or supervised
Days 8 to 10: incision closing
By around day seven, the incision edges should be sealing visibly. Redness should be fading. Swelling should be largely resolved.
Your puppy will have a lot of energy by now. Stay firm on the activity restrictions. The cone stays on. For a clear visual reference of how the incision heals week by week, tracking the wound against a normal healing timeline helps you spot changes that might otherwise be easy to miss.
Some puppies develop mild itching at the incision site as healing progresses. This is normal and a sign that tissue is regenerating. The cone is what prevents that itch from becoming a wound.
Days 10 to 14: final healing and vet check
Most puppies are fully healed at the incision site by day 10 to 14. Your vet will confirm this at the follow-up appointment.
If your clinic uses dissolvable internal sutures (which most modern neuters do), there is nothing to remove. If external sutures were placed, they are typically removed at this visit.
Do not skip the follow-up. Internal healing continues beyond what is visible, and your vet can catch any subclinical issues that are not yet obvious at home.
Once cleared, you can gradually reintroduce normal activity. Start with longer leash walks before returning to off-leash play or dog park visits.
Puppy-specific care tips
Keeping a puppy calm during recovery
This is the hardest part of puppy neuter recovery for most owners.
Strategies that work:
- Crate training: If your puppy is already crate-trained, the crate is your best tool. It provides safe, calm containment without constant physical supervision.
- Food puzzles and chew toys: Mental stimulation without physical exertion. A stuffed Kong or lick mat can keep a puppy occupied for extended periods.
- Calm, low-stimulation interaction: Gentle petting and quiet company. Avoid rough play, tug of war, or anything that gets your puppy excited.
- Ask your vet about short-term calming support: For very high-energy breeds, some veterinarians prescribe mild sedatives for the first week of recovery. This is a legitimate option worth discussing.
Feeding a puppy after neutering
Puppies have higher metabolic needs than adults. Do not withhold food for extended periods.
Offer a small meal the evening of surgery. If they tolerate it without vomiting, return to normal puppy feeding the next day. Puppies who are not eating at all by 24 hours after surgery need a vet call.
Most puppies need to eat more frequently than adult dogs anyway. Maintain their regular feeding schedule throughout recovery, adjusting only if vomiting occurs.
The cone for puppies
Puppies are particularly prone to licking and chewing wounds out of curiosity, and they are more creative about getting around a cone that does not fit properly.
Check the cone fit carefully:
- The cone should extend at least two inches past your puppy's nose
- It should be snug but not tight enough to cause discomfort or chafing
- Check daily as puppies can lose or gain weight quickly
If your puppy absolutely cannot tolerate the hard plastic cone, a soft inflatable collar or a recovery suit are alternatives. The key is that they reliably prevent access to the incision.
Behavioral changes after neutering in puppies
Many owners neuter puppies specifically to reduce hormone-driven behaviors. It is worth setting realistic expectations about the timeline.
Testosterone does not disappear immediately after surgery. Hormone levels drop gradually over several weeks. Expect hormone-driven behaviors to fade over two to four weeks post-surgery, not overnight.
Behaviors that may decrease after neutering in male puppies:
- Urine marking
- Mounting behavior
- Roaming or escape attempts
- Some forms of same-sex aggression
Behaviors that are shaped by training and socialization, not hormones, will not change after neutering. A puppy that has learned to jump on people, bark at strangers, or resource-guard will still do those things. Training addresses learned behavior. Neutering addresses hormonal behavior.
For a full picture of behavior changes to expect in puppies after surgery, including what typically improves and what does not, knowing the realistic timeline prevents frustration during the recovery period.
When to call the vet
Puppies tend to mask pain and discomfort more than adult dogs. Stay especially vigilant with daily incision checks.
Call your vet if you notice:
- Yellow, green, or foul-smelling discharge from the incision
- Swelling that is increasing rather than decreasing after day three
- Persistent lethargy beyond 48 hours
- Refusal to eat for more than 24 hours
- Any wound opening or separation of incision edges
- Your puppy licking despite the cone (check the fit immediately)
For a complete guide on warning signs to watch for in puppies after surgery and which symptoms are emergencies versus same-day calls, having that reference during the recovery window prevents delayed action.
What about the right age to neuter a puppy?
Recovery differs based on the age at which surgery is performed.
Very young puppies (eight to twelve weeks) are sometimes neutered in shelter settings. These puppies heal quickly, but they are also at increased risk of anesthetic complications and require extra monitoring.
For most privately-owned puppies:
- Small breeds: Around six months is generally appropriate
- Medium breeds: Six to twelve months, depending on the individual
- Large breeds: Your vet may recommend waiting until 12 to 18 months to allow growth plate closure
For a detailed, breed-specific breakdown of the right age to neuter a puppy, the timing decision has meaningful long-term health implications for larger breeds especially.
The recovery process itself does not change much based on age, but puppies neutered very young may benefit from closer post-operative monitoring and more careful anesthetic management.
Frequently asked questions
How long does puppy neuter recovery take?
Most puppies are fully healed at the incision site within 10 to 14 days. They typically feel close to normal within two to three days, but internal healing requires the full two-week window. Activity must be restricted until your vet confirms the incision has healed at the follow-up appointment.
Do puppies recover faster than adult dogs from neutering?
They feel better faster, but the incision heals at roughly the same pace. The difference is behavioral, not biological. Puppies return to high energy levels quickly, which makes activity restriction harder to enforce and more important to maintain.
Can I remove the E-collar after a few days if my puppy seems fine?
No. The cone stays on for the full 10 to 14 days. Puppies are especially prone to licking wounds when bored or when the incision starts to itch during healing. A single licking episode can undo days of clean healing.
My puppy is bouncing off the walls on day three. Is this normal?
Yes, and it is the biggest challenge of puppy neuter recovery. Fast energy return is typical in young dogs. It does not mean they are healed. Strict activity restriction must continue regardless of how your puppy feels. For complete aftercare guidance on how to care for your dog during recovery, including specific strategies for keeping high-energy dogs calm, a structured plan makes the two weeks much more manageable.
When will my puppy calm down after being neutered?
Hormone-driven behaviors typically fade gradually over two to four weeks as testosterone levels decline. Some behaviors may take longer, especially if they have already become habitual through repetition. Neutering reduces hormonal behaviors, but training shapes all other behaviors.
Puppy neuter recovery is short but demands your full attention for two weeks. The puppies that sail through without complications are almost always the ones whose owners enforced the cone, the rest, and the leash walks without exception. Two weeks of discipline gives your puppy a lifetime of better health.
Resources
The following sources were used as reference and background for this article:
- PetMD. Dog Neuter Recovery: How to Care for Your Pup After Surgery. petmd.com
- Animal Humane Society. Spay/Neuter Post-Surgical Care and Recovery Instructions. animalhumanesociety.org
- Embrace Pet Insurance. Dog Neuter and Spay Recovery. embracepetinsurance.com
- Dogwood Animal Hospital. Speed Up Your Dog's Neuter Recovery: 10 Home Care Tips. dogwoodanimalhospital.com
- Bliss Animal Hospital. What to Expect After Your Dog's Spay or Neuter Surgery. blissanimalhospital.com
- ASPCA Spay-Neuter Alliance. After Surgery Instructions. aspca.org

Pinnal Vasculitis in Dogs: Signs, Causes & Management
Learn about pinnal vasculitis in dogs, including signs, causes, and effective management strategies to keep your pet healthy.
Pinnal vasculitis is inflammation of the small blood vessels in the ear flap (pinna). When these vessels are damaged, blood supply to the outer ear margin is reduced, causing the tissue to ulcerate, crust, and in severe cases die (necrose). Left untreated, it permanently changes the shape of the ear.
It is an uncommon condition but one that is often misidentified as a simple ear infection or skin irritation until the ear margin starts to notch and deform.
Quick answer: Pinnal vasculitis causes ulceration, crusting, and tissue death along ear tips and margins in dogs. It is an immune-mediated blood vessel injury triggered by infections, drugs, or autoimmune disease. Treatment uses pentoxifylline and immunosuppressives.
Key takeaways
- Pinnal vasculitis is a reaction pattern, not a specific diagnosis: blood vessel inflammation with multiple possible triggers
- Lesions start at the ear tip (apex) and spread inward along the pinnal margin
- Crusting, ulceration, and notching of the ear edge are the hallmark signs
- Pentoxifylline is the first-line medication, improving blood flow to damaged tissue
- Identifying the underlying trigger is essential; treating vasculitis without finding the cause leads to recurrence
- Permanent ear deformity can occur regardless of treatment if the condition is severe or caught late
What is pinnal vasculitis?
Vasculitis is inflammation of blood vessel walls. Merck Veterinary Manual defines it precisely: "Vasculitis is not a specific diagnosis but refers to inflammation of blood vessel walls. It is usually an immunologic response that results in damage to vascular components of the dermis or subcutaneous tissue."
When this process occurs specifically in the pinna, it is called pinnal vasculitis. DermaVet describes the hallmark clinical pattern: "Pinnal vasculitis can present as alopecia, erosions and ulcerations, necrosis, hyperpigmentation, scaling, cutaneous atrophy, and notching of the tissue along the pinnal margins and medial (concave) aspects of the pinnae."
The reason the ear tip is affected first is vascular anatomy. FirstVet explains: "Acute vasculitis commonly occurs in the dog's legs and feet, ears, lips, the tip of the tail, scrotum, and oral mucosa. These areas are more vulnerable as their blood supply has limited collateral circulation." When the main blood vessel supplying the ear tip is inflamed and partially blocked, there is no alternative vascular route to compensate.
What triggers pinnal vasculitis?
Clinician's Brief (Top 5 Conditions Affecting the Pinnae): "Vasculitis is a histopathologic reaction pattern that signals the presence of inflammatory cells in blood vessels and is an immunologic response (type III hypersensitivity disorder)."
Type III hypersensitivity means immune complexes (antibody-antigen pairs) deposit in blood vessel walls and trigger inflammation. The trigger can be:
Immune-mediated and autoimmune disease
Systemic lupus erythematosus and other autoimmune conditions cause the immune system to attack self-tissues including blood vessels. This is among the more serious causes and requires ongoing immunosuppressive management.
Infections
Tick-borne diseases (Rocky Mountain spotted fever, ehrlichiosis, anaplasmosis) are important causes of vasculitis in dogs. Bacteria and viruses can trigger the immune complex deposition that damages vessel walls. Clinician's Brief: "Any underlying infectious disease that acts as an inciting cause should be treated (e.g., tick-borne diseases can be treated with doxycycline)."
Drug reactions
Certain medications can trigger vasculitis as an adverse reaction. Merck notes that vasculitis can be "drug-induced." MSD Veterinary Manual specifically identifies an association between fenbendazole (a common deworming drug) and thrombo-ischemic pinnal necrosis in dogs.
Food hypersensitivity
Adverse food reactions can trigger immune complex formation and secondary vasculitis. Identifying and eliminating the offending food resolves the vasculitis in these cases.
Idiopathic (unknown cause)
In many cases, no underlying trigger can be identified despite thorough investigation. This is termed idiopathic vasculitis. Treatment is still possible and effective, but the condition may require long-term management.
What pinnal vasculitis looks like
Early signs
- Hair loss (alopecia) at the tip and margins of the ear flap
- Mild scaling or crusting along the ear edge
- The skin may appear slightly darker (hyperpigmentation)
Progressive signs
FirstVet: "The lesions usually start to develop on the tip of the pinna and spread along the pinnal surface. An ulcer is often found in the center of the lesion. The ulcer is surrounded by a thick layer of crust and scaling."
- Well-defined ulcers at the ear tip, covered by thick crust
- Purple-red discoloration (purpura) around the ulcer edge
- The ear margin develops irregular notches as tissue is lost
- The condition may be painful
Severe signs
- Tissue death (necrosis) of the ear tip
- The ear margin becomes permanently deformed with wedge-shaped notches
- Bleeding from ulcerated areas
- In generalized vasculitis cases: lesions may also appear on the paw pads, tail tip, and other distal extremities
DermaVet: "In some cases, tissue loss may cause changes to the shape of the pinnae." MSD Veterinary Manual: "Eventually, necrosis may deform the margin of the pinna."
Conditions that look like pinnal vasculitis
Merck: "Differential diagnoses for cutaneous vasculitis include fight wounds, cold agglutinin diseases, frostbite, and coagulopathies."
How vets diagnose pinnal vasculitis
Because vasculitis is a reaction pattern rather than a specific disease, diagnosis involves two steps: confirming vasculitis histopathologically, and identifying the underlying trigger.
Physical examination: the location (ear tip, spreading inward), the appearance (ulceration, crusting, notching), and the dog's history (medications, tick exposure, diet, systemic illness) guide the initial assessment.
Skin biopsy and histopathology: the definitive diagnostic test. A biopsy of the affected ear margin confirms vasculitis histologically by identifying inflammatory cells within blood vessel walls. This is essential for a confirmed diagnosis.
Blood tests: complete blood count, chemistry panel, tick-borne disease titers (especially in endemic areas), ANA (antinuclear antibody) testing for lupus.
Skin scraping and cytology: to rule out parasites and secondary infection.
Elimination diet trial: to rule out food hypersensitivity as a trigger.
The veterinary paper (5 dogs with pinnal vasculitis) confirms the standard diagnostic workup: "Physical examination, skin scrapings, CBC, serum biochemistry and impression cytology were done to rule out other skin diseases."
Treatment
Pentoxifylline: first-line medication
Clinician's Brief: "Pentoxifylline is often the treatment of choice. Pentoxifylline increases erythrocyte flexibility and decreases blood viscosity, thereby allowing increased oxygenation of damaged tissue."
MSD Veterinary Manual provides the dosing range: "Pentoxifylline 15 to 20 mg/kg orally every 8 to 12 hours has been anecdotally reported to be efficacious in some cases."
Pentoxifylline improves microcirculation in damaged tissue without directly suppressing the immune system, making it a relatively safe long-term option. Improvement is gradual and may take several weeks to assess.
Immunosuppressive medications
For cases not responding to pentoxifylline, or for confirmed immune-mediated causes:
- Prednisolone: at immunosuppressive doses, tapered slowly as the condition responds. The veterinary paper reports successful treatment with "oral Prednisolone at 1 mg/kg twice daily for 7 days, then tapered."
- Cyclosporine: an alternative immunosuppressive with a different side effect profile
- Azathioprine: used in refractory cases alongside prednisolone
Topical therapy
- Topical tacrolimus: the veterinary paper used this alongside prednisolone; calcineurin inhibitor that reduces local immune activation
- Topical glucocorticoids: MSD Veterinary Manual cautions these "must be used carefully because of their atrophogenic effects" (they thin the skin over time)
Treating the underlying cause
If an infectious trigger is identified: antibiotics (tick-borne disease), antifungals, or antiparasitic medication as appropriate. If a drug reaction is suspected: discontinue the offending medication. If food hypersensitivity: elimination diet and novel protein feeding.
Surgery
MSD Veterinary Manual: "If medical therapy has failed, surgical removal of diseased tissue should be considered." Surgical resection of the necrotic ear margin (pinnectomy) may be necessary in severe, non-responsive cases where tissue death is extensive.
Vitamin E supplementation
The veterinary paper used "oral administration of 200 mg vitamin E capsule" alongside prednisolone and tacrolimus. Vitamin E's antioxidant properties may support tissue healing in vasculitis.
For how skin lesions associated with vasculitis relate to other causes of scabbing in dogs, see vasculitis as a cause of skin lesions. For how severe vascular skin conditions can progress, see severe vascular skin conditions.
Long-term management and prognosis
MSD Veterinary Manual is honest about the outcome: "Permanent deformity of the pinnae is to be expected whether or not treatment has been instituted." The goal of treatment is to halt progression and manage the underlying trigger not to reverse existing structural changes.
For idiopathic cases without a finding underlying cause, long-term pentoxifylline may be required to maintain remission. For immune-mediated cases, periodic reassessment allows immunosuppressive doses to be tapered to the minimum effective level.
Dogs with identified and treatable triggers (tick-borne disease, drug reaction, food allergy) have a good prognosis for resolution if the trigger is successfully eliminated. Dogs with systemic autoimmune disease require ongoing management.
Frequently asked questions
Is pinnal vasculitis painful for dogs?
It can be. Ulcerated tissue on the ear tip is painful when touched, and dogs may shake their head or resist handling of the ears. Systemic signs of pain (behavioral changes, reluctance to eat) suggest widespread vasculitis involvement beyond just the ear. Pain management is an important component of treatment.
My dog's ear tips look crusty and notched. Could it be vasculitis?
Crusty, notched ear tips are a classic presentation of pinnal vasculitis. However, ear margin seborrhea (waxy crusting without ulceration, especially in Dachshunds) and fly bite dermatitis (mechanical injury) look similar. A vet examination and potentially a biopsy will distinguish these conditions. Do not assume a home remedy will resolve notched ear tips tissue notching indicates structural damage that requires medical assessment.
Can pinnal vasculitis spread to the rest of the body?
In generalized cutaneous vasculitis, yes. DermaVet notes that generalized forms affect "the paw pads, distal tail tip, pressure areas such as caudal elbows and hocks, claws, oral cavity, face, and ventral abdomen." If you notice similar ulcerative lesions elsewhere on the dog alongside the ear changes, this is a more serious presentation requiring urgent evaluation.
How long does treatment take before I see improvement?
Pentoxifylline typically produces gradual improvement over 4 to 8 weeks. Immunosuppressive therapy may produce faster visible improvement. New ulceration should stop within the first few weeks of effective treatment. Existing scars and notching will not reverse.
Is there a breed predisposition to pinnal vasculitis?
Generalized vasculitis has reported breed associations in some familial forms, but pinnal vasculitis specifically does not have a strong documented breed predisposition in dogs. Dachshunds are more prone to ear margin seborrhea (a different condition). Greyhounds and other breeds are noted for certain ischemic skin syndromes, but pinnal vasculitis can affect any breed.
Can pinnal vasculitis be prevented?
Prevention depends on the underlying cause. For dogs with tick-borne disease triggers: consistent tick prevention reduces risk. For food-triggered cases: maintaining the appropriate diet prevents recurrence. For idiopathic cases: no reliable prevention exists, and long-term maintenance medication may be needed. Early detection and prompt treatment limit the degree of permanent ear deformity.
Resources
- Merck Veterinary Manual. Miscellaneous Diseases of the Pinna in Dogs and Cats. merckvetmanual.com
- Clinician's Brief. Top 5 Conditions Affecting the Pinnae in Dogs and Cats. cliniciansbrief.com
- FirstVet. Pinnal Vasculitis: A Common Cause of Crusty Ear Tips in Dogs. firstvet.com
- DermaVet. Canine Vasculitis with Pinnal Lesions. pro.dermavet.com
- Royal Canin Academy. Cutaneous Vasculitis in Dogs. academy.royalcanin.com

Warning Signs to Watch for After Neutering a Dog
Learn the key warning signs to watch for after neutering your dog to ensure a safe recovery and when to seek veterinary care.
Most dogs recover from neutering without a hitch. But some do not, and the difference between a minor complication and a serious one often comes down to how quickly you notice it.
The tricky part is that some things that look alarming are completely normal, and some things that look minor are not.
This guide gives you a clear, symptom-by-symptom breakdown of what is expected, what to monitor, and what requires an immediate call to your vet.
Quick answer: Mild grogginess, reduced appetite, and slight redness at the incision are all normal in the first 24 to 48 hours. Ongoing bleeding, yellow or green discharge, swelling that grows after day three, lethargy lasting more than 48 hours, or a wound that appears to be opening are all warning signs that need veterinary attention promptly.
Key takeaways
- Normal recovery includes mild grogginess, slight swelling, and reduced appetite for 24 to 48 hours.
- Warning signs that need a vet call include discharge, increasing swelling, continuous bleeding, and persistent lethargy.
- Emergency signs require immediate action: pale gums, collapse, or abdomen that appears bloated.
- Licking is the most preventable complication: the cone prevents most infection and wound problems.
- Daily incision checks catch problems early, when they are still easy to treat.
- When in doubt, call your vet. It is always better to check than to wait.
What normal recovery looks like
Understanding normal first makes it easier to spot abnormal.
In the first 24 to 48 hours after surgery, expect:
- Grogginess, drowsiness, or mild disorientation from anesthesia
- Reduced appetite or no interest in food
- Mild redness or slight puffiness at the incision site
- A small amount of clear or very faintly pink fluid at the wound in the first 24 to 72 hours
- Quieter behavior and preference for rest
- Possible shivering or restlessness as anesthesia wears off
All of these resolve on their own. By day two or three, your dog should be more alert, eating normally, and showing interest in their surroundings again.
Warning signs: incision and wound
The incision site is where most post-surgical problems show up first. Check it morning and evening throughout the recovery period.
Discharge
Swelling
Some swelling in the first two to three days is expected. The body's inflammatory response is part of normal healing.
Swelling that increases after day three, feels warm and firm to the touch, or is accompanied by redness and discharge is not normal. This pattern points to infection or hematoma and needs veterinary evaluation.
In large breed male dogs, scrotal swelling is a specific concern. Moderate scrotal swelling that resolves within a week is often normal. Swelling that grows, becomes hot, or is accompanied by pain or discharge is not.
Wound opening
The incision edges should be staying together, not pulling apart.
If you see any gap in the wound, exposed pink or red tissue beneath the skin, or sutures that appear to have pulled through, contact your vet immediately. This is called dehiscence and requires prompt attention.
Do not attempt to close an open wound yourself. Keep your dog calm, prevent licking, and get to your vet.
Warning signs: behavior and general health
Lethargy
Mild tiredness for the first 24 to 48 hours is expected. Anesthesia and surgery are taxing on the body.
Lethargy that persists beyond 48 hours, or a dog that is completely unresponsive, unable to stand, or does not improve over the first two days, is a warning sign. Call your vet.
Loss of appetite
Not wanting to eat on surgery day and the following morning is normal.
A dog that still refuses food at 48 hours after surgery, particularly if also vomiting, may be experiencing a complication. Call your vet if appetite has not returned by day two.
Vomiting
One or two episodes of vomiting the evening of surgery can be a side effect of anesthesia. This is within normal range.
Vomiting that continues beyond 24 hours after surgery, or that contains blood, requires a vet call. Persistent vomiting can indicate a reaction to pain medication, an obstruction, or another post-surgical issue.
Difficulty urinating or defecating
Some dogs take a day or two to have a bowel movement after surgery. This is usually due to fasting before the procedure and reduced activity afterward.
No bowel movement after three to five days is worth reporting. Difficulty or pain during urination, especially in male dogs, can indicate inflammation near the surgical site and should be checked promptly.
Warning signs: pain
Your dog will have been sent home with pain medication. Use it on schedule.
Signs that pain is not being adequately controlled include:
- Whining, yelping, or crying that persists beyond the first day
- Hunched posture or reluctance to sit or lie down
- Guarding the incision site by flinching or snapping when touched
- Panting excessively without exertion
- Trembling or shivering beyond the first few hours post-anesthesia
Contact your vet if pain seems severe after day three, or if prescribed medication does not appear to be working. Do not give human pain medications. Aspirin, ibuprofen, and acetaminophen are toxic to dogs and can cause serious harm or death.
Emergency warning signs: act immediately
These signs require emergency veterinary care, not a wait-and-see approach.
Call your vet or go to an emergency clinic immediately if you observe:
- Pale, white, or bluish gums
- Sudden collapse or inability to stand
- Abdomen that appears bloated, distended, or hard
- Heavy bleeding that does not stop
- Rapid or labored breathing
- Signs of extreme pain: screaming, freezing in place, inability to move
These can indicate internal bleeding, systemic infection, or other serious complications that are time-sensitive.
The most preventable warning sign: licking
Most of the infection and wound-breakdown cases that end up back at the vet have one thing in common: the cone came off.
Licking introduces bacteria directly into the wound, softens the tissue, and can pull sutures loose. A dog that licks its incision even once can undo days of clean healing.
The E-collar stays on for the full 10 to 14 days. If your dog refuses the hard plastic cone, soft inflatable collars or recovery suits are legitimate alternatives, provided they reliably prevent the dog from reaching the wound site.
For a full guide on what normal recovery looks like day by day and how to distinguish healing progress from early complications, tracking the incision against a clear timeline makes daily monitoring more actionable.
When to call vs. when to go straight to emergency care
Use this as a quick decision guide.
When in doubt, call. Most veterinary practices would rather hear from you about something minor than have you wait too long on something serious.
The role of aftercare in preventing complications
Most warning signs are preventable, not inevitable.
The dogs most likely to develop post-surgical complications are those given too much freedom too soon, or whose cones were removed early. Following a complete aftercare plan covering rest, incision monitoring, medications, and the cone is the most effective way to keep your dog out of trouble during recovery.
For a complete, step-by-step plan on full post-surgery care covering each day of the recovery window, what to feed, how to check the wound, and how to keep your dog calm, having that reference from day one prevents most of the issues covered in this article. Understanding surgical risks that can cause complications beyond the routine is also worth reading before surgery if you have a large breed or older dog.
Frequently asked questions
Is it normal for my dog to be lethargic after neutering?
Yes, for the first 24 to 48 hours. Anesthesia causes genuine fatigue, and your dog needs rest. Lethargy that does not improve by day two or three, or a dog that is completely unresponsive, warrants a call to your veterinarian.
What does an infected incision look like?
An infected incision typically shows yellow or green discharge, increasing redness and swelling after the first few days, warmth around the wound, and often a foul odor. Any of these signs alone justify a same-day call to your vet. For a detailed visual guide to signs of an infected incision, knowing what to look for at each stage of healing helps you act at the right time.
My dog is licking the incision despite wearing a cone. What should I do?
Check that the cone extends at least two inches past your dog's nose. If it is too short, your dog can still reach the incision. Consider switching to a soft inflatable collar or recovery suit if the hard cone is not fitting properly. Contact your vet if there are signs the wound has been compromised.
Should I be worried about scrotal swelling after neutering?
Some scrotal swelling in the first few days is normal. The scrotum fills with fluid as part of the healing response. Swelling that increases after day three, feels hot or very firm, or is accompanied by discharge or pain is abnormal and should be evaluated by your vet.
When should I go to an emergency vet after neutering?
Go immediately if your dog has pale or white gums, collapses, has a bloated or hard abdomen, or is bleeding heavily and continuously. These signs can indicate internal bleeding or systemic infection and are time-sensitive emergencies.
The difference between a smooth recovery and a complication is usually not bad luck. It is usually the cone coming off too early, too much activity on day four, or a wound check that was skipped. Pay attention for two weeks, and most dogs sail through without a single issue.
Resources
The following sources were used as reference and background for this article:
- Ace of Spays. Signs of Complications After Spay/Neuter Surgery: When to Contact Your Veterinarian. aceofspays.com
- Animal Humane Society. Spay/Neuter Post-Surgical Care and Recovery Instructions. animalhumanesociety.org
- Homeaglow. 10 Warning Signs After Spaying or Neutering Your Dog. homeaglow.com
- American Kennel Club. Post-Surgical Care for Dogs Following a Spay or Neuter. akc.org
- Union Hill Animal Hospital. Neutering Recovery Guide for Male Dogs. unionhillvet.com
- Rivergate Veterinary Clinic. Signs of Infection After Spaying or Neutering a Dog. rivergateveterinaryclinic.com
Necrotizing Fasciitis in Dogs: Early Signs & Treatment
Learn about necrotizing fasciitis in dogs, including early signs, diagnosis, and effective treatment options to protect your pet's health.
Necrotizing fasciitis is one of the most serious bacterial infections a dog can develop. Commonly called flesh-eating disease, it destroys skin, fat, and the fascia that covers muscles at a speed that overwhelms normal medical treatment. Without emergency surgery, survival rates are near zero.
The challenge is that early signs look like any other skin infection redness, swelling, pain. By the time the hallmark purple-black skin discoloration appears, the infection has already advanced significantly.
Quick answer: Necrotizing fasciitis causes rapidly spreading swelling, pain disproportionate to wound size, and skin progressing from red to purple to black. Caused by Streptococcus canis. Requires emergency surgery; survival with surgery is 80 to 90%.
Key takeaways
- Necrotizing fasciitis is a life-threatening emergency: without immediate surgical debridement, it is nearly always fatal
- Pain disproportionate to wound size is the most important early warning sign of NF
- Skin color progression from red to purple to black indicates advancing tissue death
- Streptococcus canis is the most common causative organism: a normal skin commensal that turns lethal in specific conditions
- Do not use NSAIDs or fluoroquinolones: both can worsen outcomes in confirmed or suspected NF cases
- Survival with surgery is 80 to 90%: immediate surgical intervention changes the prognosis dramatically
What is necrotizing fasciitis?
Today's Veterinary Practice (case series, 4 dogs): "Necrotizing fasciitis is a rapidly progressive, life-threatening bacterial infection of the subcutaneous tissues, fascia, and occasionally skeletal muscle."
The word "necrotizing" means tissue-killing. The bacteria destroy tissue by two mechanisms:
- Direct toxin production: bacteria release enzymes and toxins that break down tissue proteins and cell membranes
- Vascular destruction: Kinship explains: "These bacteria release toxins that restrict blood flow to the area of the infection. Without a good blood supply, the tissues begin to die off, and the infection spreads more easily."
When blood supply is cut off, antibiotics in the bloodstream cannot reach the infected tissue in effective concentrations this is why surgery to physically remove the dead tissue is non-negotiable. Antibiotics alone cannot cure established necrotizing fasciitis.
What causes it?
Kinship: "The most commonly isolated bacterial species in these infections is β-hemolytic Streptococcus canis." This is a Group G Streptococcus species that normally lives on healthy dogs' skin and in their gastrointestinal tracts without causing problems.
Today's Veterinary Practice identifies additional causative organisms: Staphylococcus pseudintermedius, Staphylococcus aureus, Pasteurella multocida, Pseudomonas aeruginosa, Escherichia coli, and Serratia marcescens.
The critical point: these bacteria are part of normal canine microbiome. There is no way to pre-treat and eliminate them. NF is not caused by unusual contamination from the environment it is caused by a normally harmless organism behaving pathologically under specific conditions.
Predisposing factors (though often none are identified):
- Minor or blunt trauma
- Any skin wound, scratch, or puncture
- Immunocompromised states
Dr. Catherine Daniel (Central Island Veterinary Emergency Hospital): "Even if it gets under the skin by a wound, it doesn't always cause necrotizing fasciitis. It's still extremely rare."
Early signs: the critical window
The earliest signs of necrotizing fasciitis are indistinguishable from a straightforward local infection. This is what makes the condition so dangerous. Kinship: "The initial signs of flesh-eating disease share symptoms with most localized infections: regional pain, swelling, and redness."
The early warning signs that should prompt immediate emergency care:
1. Pain disproportionate to wound size
This is the most important early clinical clue. A small wound a scratch, a minor bite that causes extreme, intense pain far beyond what the wound size would suggest is a red flag for NF. The pain is internal, driven by fascia destruction, not proportional to the visible surface injury.
2. Rapidly spreading swelling
Today's Veterinary Practice: "The most common signs of NF are rapidly progressive swelling, lameness, and hemorrhagic skin pigmentation." Times Colonist (Dr. Daniel): "An early sign of necrotizing fasciitis is significant swelling or edemas a build up of fluid or protein under the skin. If you push on the swelling, an indent may be left behind."
Swelling that is spreading noticeably within hours not days is not typical of a simple skin infection.
3. Skin color change: red to purple to black
Kinship: "The severity of the condition becomes more obvious when a wide area of skin turns purplish or blackish." Today's Veterinary Practice describes the progression specifically: skin pigmentation that goes from red to purple to black indicates advancing tissue death (hemorrhagic infarction) beneath the skin.
Darkened skin around a wound is an emergency not a reason to "watch it."
4. The dog is systemically unwell
WSAVA (VIN): "Dogs present with fever, swelling, erythema, disproportionate pain on palpation, draining tracts and ulcers." Systemic illness (lethargy, fever, not eating) alongside a wound, especially one that does not look dramatically abnormal on the surface, should raise suspicion.
How NF progresses without treatment
Once bacteria gain entry to the fascial plane, they spread along that plane rapidly far faster than any visible skin change. The infection races through the connective tissue well ahead of the visible zone of skin damage. By the time large areas of skin turn black, the bacteria have already destroyed a much larger volume of tissue than is visible.
Today's Veterinary Practice: "Necrotizing fasciitis has a 100% mortality rate if surgical intervention is not rapidly instituted."
Diagnosis
Diagnosis is primarily clinical and requires emergency decision-making there is no time to wait for laboratory results before operating.
Physical examination: rapidly spreading swelling, disproportionate pain, skin color changes, and systemic illness in a dog with any wound.
Imaging: Kinship: "Imaging the area with radiographs or ultrasound may indicate that the infection is serious." Gas in the tissue on radiograph (gas gangrene) is a strongly confirmatory finding but is not always present.
Tissue biopsy and bacterial culture: Today's Veterinary Practice: "A veterinarian will make a definitive diagnosis with tissue biopsies and bacterial cultures taken from deep within the infected area, but those tests take days to return. Dogs with this condition often decline before the diagnosis is confirmed."
In practice: the clinical presentation of rapidly progressive swelling with skin color changes and systemic illness is sufficient to proceed directly to surgery without waiting for biopsy confirmation. Time is the critical variable.
Treatment
Immediate surgical debridement
The core of treatment. Today's Veterinary Practice: "The stark contrast in mortality rate with and without surgical intervention is compelling evidence for immediate surgical intervention."
Surgery involves radical removal of all dead and infected tissue, including apparently normal tissue at the margins (since bacteria have spread beyond the visible zone of damage). The wound is left open after debridement it cannot be closed because the infection continues to be active. Repeat surgical debridement may be required in subsequent days.
Intravenous antibiotics
WagWalking: "Initially, intravenous antibiotics (either clindamycin or amoxicillin-clavulanate) will be administered. Once the veterinarian has sensitivity testing results, the antibiotic may be changed."
WSAVA (VIN) adds a critical warning: "Do not use fluoroquinolones, as these have been associated with possibly engendering or enhancing the extreme toxicity of these Streptococcus strains." This is an important distinction from many other bacterial infections where fluoroquinolones are a first-line choice.
NSAIDs: contraindicated
WSAVA (VIN): "NSAIDs should also be avoided, as there is some evidence they may suppress neutrophil activity and mask clinical signs." This matters in practice: a dog presenting with pain that might be NF should not receive an NSAID before evaluation, as it could mask the disproportionate pain that is the primary early warning sign.
Supportive care
IV fluids, nutritional support, and intensive monitoring throughout hospitalization. Recovery requires days to weeks of inpatient care.
Wound management post-surgery
After debridement, the open wound requires aggressive ongoing management: frequent dressing changes, possible wound VAC therapy, and eventually skin grafts or flaps to close large tissue deficits.
For how deep skin infections like abscesses can serve as entry points for serious infections, see abscess as an entry point for severe infection. For how skin infection can progress from a furuncle to severe NF, see skin infection that can progress to necrotizing fasciitis. For how Pseudomonas is involved in severe wound infections, see Pseudomonas as a causative organism. For how Enterococcus contributes to severe wound infections, see Enterococcus as a causative organism.
Prognosis
Today's Veterinary Practice: "The most recent and extensive veterinary study suggests a survivability rate of 80 to 90% for dogs that receive a combination of surgery, antibiotic therapy, and supportive care."
This is encouraging for a condition with 100% mortality without surgery. However, survival requires early intervention. Dogs that present with advanced skin necrosis, systemic sepsis, or multi-organ involvement have significantly worse prognoses.
The Times Colonist documented a cluster of 6 affected dogs at one veterinary hospital, with at least 5 dying or being euthanized. All were described as presenting with rapidly fatal progression illustrating that even with aggressive care, timing is everything.
Prevention
There is no reliable way to prevent NF in individual dogs because the causative bacteria are part of the normal microbiome. What can reduce risk:
- Prompt wound treatment: clean and disinfect any bite wound, scratch, or puncture immediately
- Veterinary evaluation for wounds that seem disproportionately painful or swollen
- Monitor healing wounds closely: any wound that is not improving by 24 to 48 hours or is worsening should be rechecked
- Maintain immune health: immunocompromised dogs may be more susceptible
Frequently asked questions
How quickly does necrotizing fasciitis progress in dogs?
Extremely quickly hours to a day or two from initial signs to life-threatening tissue destruction. WSAVA notes dogs "present with fever, swelling, erythema, disproportionate pain on palpation, draining tracts and ulcers" a picture that can develop within a day of the initial wound. This speed is what makes the condition so dangerous: by the time owners recognize that something is seriously wrong, significant tissue damage has already occurred.
Can a dog recover from necrotizing fasciitis?
Yes, with early and aggressive surgery. Today's Veterinary Practice reports 80 to 90% survivability with combined surgery, antibiotics, and supportive care. The key word is "early." Dogs that receive surgery before extensive skin necrosis and systemic sepsis have a substantially better prognosis than those presenting at a late stage.
Is necrotizing fasciitis contagious from dog to dog or to humans?
It is not directly contagious in the traditional sense. WagWalking notes that transmission of the bacteria can occur through shared bowls, bedding, or contact between dogs, but the vast majority of dogs exposed to Streptococcus canis never develop NF. The disease requires specific host susceptibility conditions to establish itself. Dr. Daniel: "It's highly unlikely that a dog could pass the disease to a human, since it's caused by an animal-specific bacteria Group G streptococcus."
Why can't antibiotics alone treat necrotizing fasciitis?
Once bacteria have destroyed the blood supply to infected tissue, antibiotics delivered through the bloodstream cannot reach the bacteria in effective concentrations. The infected zone becomes avascular without blood flow, drugs cannot penetrate it. Only physical removal of the dead tissue (surgery) eliminates the bacterial reservoir. Antibiotics are essential to prevent spread and treat systemic infection, but they cannot substitute for surgery in established NF.
My dog has a painful wound that is spreading. How do I know if it's NF?
You cannot reliably distinguish early NF from a severe cellulitis or deep abscess at home. The key signals that should prompt emergency veterinary care (not a regular appointment) are: pain that seems far worse than the wound would suggest, swelling spreading significantly within hours, skin darkening to purple or black, or a dog that is systemically unwell alongside a skin problem. Err strongly on the side of emergency evaluation when these signs are present.
Can NF affect any part of the body?
Yes. While the limbs are commonly reported sites, NF can develop anywhere on the body where bacteria gain entry to the fascial plane. Generalized cutaneous vasculitis from severe infection can also affect the paw pads, distal tail, and pressure areas. The disease follows fascial planes, so it can spread in any direction from the entry point.
Resources
- Today's Veterinary Practice. Case Series: Necrotizing Fasciitis in 4 Dogs. todaysveterinarypractice.com
- Kinship. How to Keep Your Dog Safe From Flesh-Eating Bacteria. kinship.com
- WSAVA / VIN. Dermatology Disasters Necrotizing Fasciitis. vin.com
- WagWalking. Necrotizing Fasciitis in Dogs. wagwalking.com
- Times Colonist. Flesh-Eating Disease in Dogs Prompts Warning from Nanaimo Vet. timescolonist.com
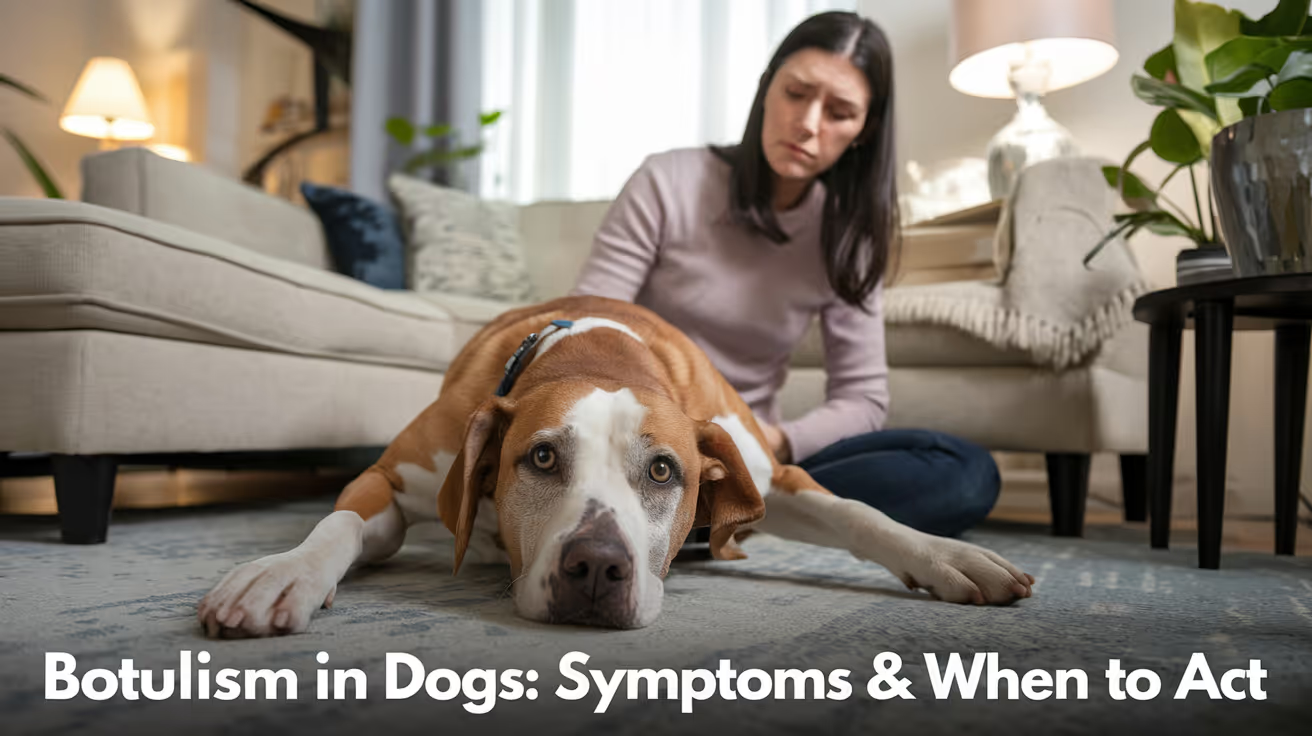
Botulism Symptoms in Dogs and When to Seek Help
Learn to recognize botulism symptoms in dogs and know when to seek urgent veterinary help to protect your pet's health.
Botulism is a rare but potentially fatal condition in dogs. It is not an infection it is a poisoning. The botulinum toxin produced by Clostridium botulinum bacteria blocks the nerve signals that control muscle movement, causing a progressive paralysis that can reach the breathing muscles.
Most dogs that develop botulism have eaten a dead animal or contaminated raw meat. The condition requires immediate veterinary attention the window for antitoxin treatment is narrow.
Quick answer: Botulism causes ascending paralysis in dogs, starting in the hind legs and progressing to breathing muscles. It is caused by ingesting botulinum toxin from decomposing carcasses or meat. Call your vet immediately.
Key takeaways
- Botulism is a poisoning, not a bacterial infection: the dog ingests preformed toxin, not live bacteria
- Symptoms begin 12 to 72 hours after ingestion and can be delayed up to 6 days
- Ascending paralysis is the hallmark: weakness starts in the hind legs and progresses forward to breathing muscles
- The dog remains mentally alert throughout, unlike many other neurological conditions
- Death can occur if the breathing muscles or heart are paralyzed
- Antitoxin is most effective before paralysis sets in early veterinary contact is essential
What is botulism in dogs?
Botulism is caused by the botulinum toxin, produced by the anaerobic bacterium Clostridium botulinum. VCA Animal Hospitals explains what happens after ingestion: "The botulinum toxin is then carried throughout the body, where it binds to nerve cells, resulting in paralysis."
The toxin works by blocking acetylcholine the neurotransmitter that triggers muscle contraction. Without acetylcholine signaling, muscles cannot contract. The result is flaccid (floppy) paralysis: muscles that are not stiff or spastic, but simply limp and non-functional.
Merck Veterinary Manual emphasizes that "botulism is a poisoning, not a true infection with bacteria." The bacteria themselves do not spread through the dog's body the damage is entirely from the preformed toxin that was ingested.
How do dogs get botulism?
The most common route is eating a contaminated carcass or spoiled meat. PetMD: "Dogs become affected by eating decomposing animal carcasses or spoiled vegetation where the bacterium grows."
Specific exposure scenarios include:
- Eating road kill or carrion found during walks (the most common cause)
- Consuming spoiled or improperly stored meat even cooked meat can harbor toxin if contaminated before cooking; AnimalWised notes that "even boiling doesn't necessarily destroy" the toxin once formed
- Access to garbage or compost containing decomposing organic material
- Rural and hunting dogs with access to wildlife carcasses are at higher risk
Botulism is most common in wild waterfowl and only rarely occurs in dogs. Merck Veterinary Manual notes: "Botulism is most common in wild water birds, like ducks, and only rarely occurs in dogs." This rarity is why many vets may not immediately consider it in the differential diagnosis.
Symptoms of botulism in dogs
VCA Animal Hospitals lists the clinical timeline: "Clinical signs of botulism typically develop 12 to 72 hours after ingesting contaminated meat, though the onset can be delayed up to six days."
Early symptoms (12 to 48 hours after ingestion)
- Vomiting (may occur very early as the toxin begins affecting the gut)
- Weakness in the hind legs the dog appears wobbly or reluctant to stand
- Difficulty rising from lying down
- Reduced muscle tone throughout
Progressive symptoms (as paralysis ascends)
- Ascending weakness: hind legs first, then forelimbs
- Difficulty swallowing (dysphagia) the dog may drool or be unable to eat or drink
- Changes in bark or voice (laryngeal muscle involvement)
- Vision problems (eye muscle weakness)
- Dropped jaw or facial droop
Vetster: "Symptoms of botulism generally develop within 24 to 48 hours after ingestion and include vomiting, difficulty swallowing, and progressive ascending motor paralysis that starts in the rear limbs."
Critical symptoms seek emergency care immediately
- Inability to breathe normally (labored breathing, open-mouth breathing)
- Complete inability to move
- Collapse
- Rapid heart rate
Merck Veterinary Manual: "Death can occur if breathing muscles or the heart is paralyzed."
The key distinguishing feature: the dog stays alert
A dog with botulism appears mentally aware throughout the paralysis. The toxin affects motor nerves (which control muscle movement) but not sensory perception or consciousness. WagWalking: "Should you notice that your dog appears alert but is unable to move, it is important to rush him to your veterinarian."
This alertness-with-paralysis combination is one of the strongest clinical clues pointing toward botulism rather than other neurological causes.
Conditions that look like botulism
The symptoms of botulism overlap significantly with several other conditions. Diagnosis is difficult and requires ruling out alternatives.
PetsVetCheck: "The diagnosis relies on the medical history and the exclusion of other causes, as specific tests are time-consuming and not always available."
How vets diagnose botulism
Diagnosis is primarily clinical based on the pattern of signs and the history of possible exposure.
History: the most important element. Has your dog had access to carcasses, garbage, or raw meat in the past 1 to 6 days?
Physical examination: assessing the pattern of weakness (ascending, flaccid), the level of alertness, and the presence of cranial nerve signs (swallowing, vision, jaw tone).
Toxin testing: blood, feces, vomit, and food samples can be tested for botulinum toxin. Vetster confirms this but notes that tests are time-consuming and not universally available treatment should not be delayed while waiting for results.
Rule-out testing: tick check (to rule out tick paralysis), chest X-ray (to assess respiratory function), bloodwork to rule out metabolic or endocrine causes.
Treatment
Antitoxin
Antitoxin binds and neutralizes circulating toxin that has not yet attached to nerve cells. VCA: "There is no vaccine available, although an antitoxin is available if the condition is identified before signs develop."
Important limitation: antitoxin only works on toxin still in circulation. Once the toxin has bound to nerve cells, it cannot be removed. This is why early diagnosis matters enormously.
Antibiotic warning: Vetster advises: "Contact a veterinarian before administering antibiotics as they can cause an increase in botulism toxin concentration, and some kinds of antibiotics can cause a worsening in neuromuscular function." Antibiotics that kill Clostridium in the gut can release additional toxin, worsening the condition.
Decontamination
If exposure is very recent and the dog is not yet showing signs, the vet may induce vomiting or administer activated charcoal or an enema to remove unabsorbed toxin from the digestive tract.
Supportive care
Once paralysis is established, treatment is primarily supportive:
- IV fluids to maintain hydration
- Assisted feeding soft or liquid diet; syringe feeding if swallowing is impaired
- Bladder management manual emptying if the dog cannot urinate independently
- Turning and repositioning every 2 to 4 hours to prevent bed sores in paralyzed dogs
- Respiratory support oxygen supplementation or mechanical ventilation if breathing muscles are compromised
- Prevention of aspiration pneumonia a major complication in dogs with swallowing difficulties
AnimalWised: "Dogs which have a more serious clinical picture will need help being moved. They may be given intravenous fluid to help their system work. If the dog fails to urinate on their own, the dog will have their bladder emptied manually."
Prognosis and recovery
Vetster: "With prompt and long-term, intensive nursing care, most paralyzed dogs recover within 1 to 3 weeks." The prognosis depends on two main factors: the dose of toxin ingested and the speed of treatment.
Dogs that receive antitoxin before significant paralysis develops have the best outcomes. Dogs with respiratory compromise have a significantly worse prognosis respiratory failure is the primary cause of death in severe cases.
Nerve regeneration after toxin binding is a natural process that occurs over weeks. The nerve terminals regrow and acetylcholine signaling is restored the dog essentially has to wait for the toxin's effects to dissipate as new nerve terminals form.
PetsVetCheck: "Long-term complications can include muscle weakness and, in some cases, permanent neurological deficits, depending on the duration and severity of the paralysis."
Prevention
- Prevent access to carcasses and carrion during walks, especially in rural or wildlife-rich areas
- Supervise dogs in areas with road kill or dead animals
- Store meat and food properly never feed dogs meat that has been improperly stored or smells off
- Keep dogs away from garbage, compost bins, and waste containing organic material
- Recall and leash train to prevent opportunistic scavenging
Frequently asked questions
My dog ate something dead on a walk. Should I go to the vet now?
Yes, contact your vet immediately. Eating a dead animal is the primary exposure route for botulism in dogs. Even if your dog shows no symptoms, your vet may recommend inducing vomiting or monitoring closely. Early decontamination before symptoms develop is significantly more effective than treatment after paralysis has begun.
What does botulism look like in dogs compared to a stroke?
A stroke typically affects one side of the body (head tilt, circling, one-sided weakness) and the dog may be disoriented or have altered consciousness. Botulism produces symmetric, ascending weakness with the dog remaining fully alert and mentally aware. A dog that cannot move but responds normally to voice and touch, and does not appear confused, is a stronger candidate for botulism than stroke.
Can humans get botulism from a dog that has it?
Botulism is not contagious it is a toxin poisoning, not a transmissible infection. You cannot get botulism from contact with an affected dog. However, if a shared food source caused the dog's illness, that same food could potentially affect humans. Identify and safely discard any suspected contaminated food.
How long does recovery from botulism take in dogs?
Most dogs that survive botulism and receive appropriate supportive care recover within 1 to 3 weeks. Recovery depends on regrowing the nerve terminals that the toxin has damaged this is a biological process that cannot be accelerated, only supported. Dogs with mild toxin exposure recover faster than those with severe paralysis.
Is there a vaccine for botulism in dogs?
No vaccine is currently available for dogs against botulism. Vaccines exist for livestock species in some countries, but canine botulism is rare enough that vaccination is not a standard recommendation. Prevention relies on limiting exposure to the toxin through management and supervision.
Why do vets say to avoid antibiotics with botulism?
Certain antibiotics (particularly aminoglycosides like gentamicin and neomycin) interfere with neuromuscular junction function and can worsen paralysis. Additionally, killing Clostridium bacteria in the gut can cause them to release additional stored toxin. If antibiotics are needed for a secondary complication (such as aspiration pneumonia), the vet will choose an antibiotic class that does not worsen neuromuscular function.
Resources
- VCA Animal Hospitals. Botulism in Dogs. vcahospitals.com
- PetMD. Botulism in Dogs. petmd.com
- Merck Veterinary Manual. Botulism in Dogs. merckvetmanual.com
- Vetster. Botulism (Clostridium Botulinum Toxin) in Dogs. vetster.com
- WagWalking. Botulism in Dogs. wagwalking.com
Red Lump on Dog's Leg: Common Causes Explained
Learn about common causes of a red lump on a dog's leg, symptoms, diagnosis, and treatment options to keep your pet healthy.
A red lump on a dog's leg is alarming to find, but the range of possible causes stretches from entirely harmless to requiring prompt surgery. The color alone does not tell you which one you are dealing with a bright red histiocytoma (benign, self-resolving) looks very similar to a low-grade mast cell tumor (potentially malignant). Only a vet examination and cell sampling provides a reliable answer.
This guide covers every common cause of red leg lumps in dogs, what distinguishes each one, and what the timeline to veterinary assessment should be.
Quick answer: Red leg lumps in dogs are most commonly histiocytomas (benign, self-resolving), abscesses (infected, warm, painful), or mast cell tumors (must always be tested). Any lump that grows rapidly, ulcerates, or persists over 4 weeks needs vet evaluation.
Key takeaways
- Histiocytomas are the most common red leg lump in young dogs: bright red, button-shaped, self-resolving within 2 to 3 months
- Mast cell tumors are the great imitators and the most common malignant skin tumor; always require testing
- Abscesses are infected pus pockets: warm, painful, often following a bite wound or puncture; always require veterinary treatment
- FNA (fine needle aspiration) is the standard first test for any unidentified leg lump; quick and usually definitive
- A lump that changes size rapidly is a mast cell tumor hallmark (histamine-driven) and needs urgent evaluation
- Most lumps found on routine vet checks are benign but cytology, not appearance, is the only reliable test
Why red lumps appear on a dog's leg specifically
The legs are among the most common sites for several specific tumor types and infections because:
- Legs have constant friction and impact from movement trauma creates entry points for bacteria and stresses existing skin
- Histiocytomas favor the head, ears, and limbs specifically (Merck Veterinary Manual)
- Mast cell tumors frequently occur on the limbs, particularly the upper thigh area
- Bite wounds and puncture injuries that cause abscesses are most common on the extremities
- Foreign body reactions (grass awns, splinters) typically affect feet and lower legs
Common causes of a red lump on a dog's leg
1. Histiocytoma
The most reassuring diagnosis for a red leg lump, particularly in a young dog. PetMD: "Sometimes referred to as button tumors in dogs, histiocytomas appear as single red bumps that are generally less than an inch wide. They most commonly grow on a dog's head, face, ears, or legs."
Key features:
- Bright red or pink, smooth, dome-shaped, hairless
- Usually under 2.5 cm (1 inch) wide
- Appears suddenly and grows quickly in the first few weeks then spontaneously regresses
- The dog is typically not bothered by it unless it becomes ulcerated from licking
Who gets them: primarily dogs under 3.5 years old. Merck: "English Bulldogs, Scottish Terriers, Greyhounds, Boxers, and Boston Terriers are most at risk." Labrador Retrievers, Staffordshire Terriers, and Dachshunds also have elevated incidence.
Why they resolve: VIN's Veterinary Partner explains the mechanism: "The histiocytoma is detected by the immune system, attacked and removed by T-lymphocytes. This process generates some inflammation and requires 2 to 3 months to complete."
Treatment: watchful waiting. The lesion should be monitored for 2 to 3 months. If it has not regressed, is growing, or the dog is bothering it, veterinary removal is appropriate.
The critical caveat: PetMD: "It is difficult to identify the type of skin mass simply by appearance, because mast cell tumors and histiocytomas may look similar. The only way to diagnose a skin mass in dogs is for a veterinarian to perform an FNA or a biopsy." Never assume a red lump is a histiocytoma without cytology.
2. Mast cell tumor (MCT)
The most important diagnosis to rule out for any new skin lump in a dog. Allan Veterinary Clinic: "Mast cell tumors are the most common form of skin cancer in dogs and are known among veterinarians as 'the great imitators' they can look like almost anything."
Key features:
- Highly variable appearance: firm or soft, raised or flat, ulcerated or smooth, red or skin-colored
- PetMD: "In some cases, mast cell tumors can also cause severe allergic (anaphylactic) reactions in dogs"
- The defining clinical feature: they change size. A lump that is visibly larger one week and smaller the next is strongly suggestive of MCT histamine release from mast cells causes local swelling
- Most common in middle-aged dogs; Boxers, Pugs, Boston Terriers at elevated risk
Where they appear: Merck notes that leg tumors "located near mucous membranes, feet, prepuce, or on the lower surface of the body are more likely to spread than mast cell tumors in other areas." Leg location therefore carries more prognostic significance than trunk location.
Diagnosis: fine needle aspiration mast cells have distinctive granular cytoplasm visible under microscopy. Staging (ultrasound, lymph node aspiration, blood work) follows for confirmed MCTs.
Treatment: surgical removal with wide margins; grade determines whether chemotherapy or radiation is needed.
For a broader guide on when cysts and tumors require surgical removal, see when red lumps need to be removed.
3. Abscess
An abscess is a pocket of pus formed when bacteria become walled off in tissue. On the leg, abscesses typically follow a bite wound, puncture injury, or embedded foreign object.
Allan Veterinary Clinic: "On the leg, abscesses can swell surprisingly quickly and become warm, tender, and visibly discolored. Unlike lipomas or cysts, abscesses are uncomfortable and always require veterinary treatment."
Key features:
- Warm, painful, fluctuant (soft and fluid-filled) swelling
- Red, discolored overlying skin
- Dog limps or guards the leg
- May rupture spontaneously and discharge pus
- Often follows a specific traumatic event (dog fight, outdoor activity)
Treatment: veterinary drainage, flushing, antibiotics, and pain management. Do not attempt to drain at home inadequate drainage leads to recurrence.
For the full abscess management guide including home care, see abscess as a cause of red lumps on the leg.
4. Infected or inflamed cyst
Sebaceous cysts and follicular cysts are normally benign and slow-growing. When they rupture or become infected, the overlying skin becomes red and the lump becomes warm and painful resembling an abscess.
Key features:
- History of a pre-existing lump at the site
- Sudden increase in redness and pain at a previously stable mass
- May discharge a thick, paste-like material
Treatment: veterinary assessment; antibiotics if infected; surgical removal if recurrent or growing.
5. Interdigital furunculosis
The reddish-purple swellings that form between the toes are technically a type of furuncle rather than a "lump on the leg," but owners frequently describe them as a red lump near the lower leg or paw.
Key features:
- Located in the webbing between toes
- Painful; dog licks obsessively
- May discharge blood or pus
- Driven by allergies or short-coat breed predisposition
6. Vaccine reaction / injection site sarcoma
A rare but important cause in dogs: a firm, growing lump at the site of a previous injection. Most vaccine-site lumps within 4 weeks of injection are benign inflammatory reactions. Lumps that are still present and growing 4 weeks post-injection, or that are larger than 2 cm, require biopsy.
Diagnostic triage: what to do based on what you see
When to call the vet same-day
- The lump has doubled in size within days
- It is ulcerated (open wound) or actively bleeding
- Your dog is limping or cannot use the affected leg
- The lump is hot and the dog seems systemically unwell (fever, not eating)
- You notice anaphylactic signs: facial swelling, difficulty breathing (rare MCT reaction)
For how benign and malignant diagnoses differ in terms of surgical recommendations, see whether a red lump is benign or malignant. For all the types of cysts and growths that can appear on a dog's leg, see cysts and tumors as causes of red lumps.
Frequently asked questions
My dog has a bright red lump on her leg that appeared overnight. Should I be worried?
A sudden red lump in a young dog is often a histiocytoma benign and self-resolving. However, mast cell tumors can also appear very suddenly. The only way to know which one you are dealing with is FNA cytology at a vet visit. Book an appointment within a week; same-day if the lump is growing rapidly, ulcerated, or the dog is lame.
Can a red lump on a dog's leg go away on its own?
Histiocytomas typically resolve completely within 2 to 3 months without treatment. Small infected cysts may resolve if the cyst ruptures and drains naturally, though antibiotic treatment is still prudent. Mast cell tumors and abscesses do not resolve without treatment. Never assume a lump will resolve without first confirming via FNA what type it is.
How do vets tell the difference between a histiocytoma and a mast cell tumor?
By fine needle aspiration (FNA). Histiocyte cells and mast cells look very different under a microscope. PetMD: "The only way to diagnose a skin mass in dogs is for a veterinarian to perform an FNA or a biopsy." Clinical appearance alone is not reliable even experienced veterinary dermatologists cannot reliably distinguish them without cytology.
Is a red lump on a dog's leg always cancer?
No. Most red lumps found on routine vet examinations are benign. Allan Veterinary Clinic: "The majority of lumps discovered during routine vet checks turn out to be benign." However, the only way to be confident is cytology not appearance or feel.
My dog's red leg lump keeps getting bigger and smaller. What does that mean?
This is the hallmark feature of mast cell tumors: histamine release from mast cells causes fluctuating local swelling. A lump that is noticeably different in size from one examination to the next larger with pressure or excitement, smaller at rest should be evaluated urgently as a potential MCT.
Can I squeeze or drain a red lump on my dog's leg at home?
No. Squeezing a cyst can rupture it internally, spreading inflammatory material into surrounding tissue and causing a severe reaction. Draining an abscess without proper technique leaves bacteria behind and leads to recurrence. Manipulating a mast cell tumor releases histamine and can trigger a local or systemic allergic reaction. All of these are better addressed with veterinary drainage and diagnosis.
Resources
- PetMD. Histiocytomas in Dogs. petmd.com
- PetMD. Mast Cell Tumor (Mastocytoma) in Dogs. petmd.com
- Merck Veterinary Manual. Tumors of the Skin in Dogs. merckvetmanual.com
- VIN Veterinary Partner. Histiocytoma is a Benign Skin Growth in Dogs. veterinarypartner.vin.com
- Allan Veterinary Clinic. Lump on Dog's Leg: Causes, Symptoms and When to Worry. allanveterinaryclinic.com
Do Dogs Calm Down After Being Spayed?
Learn how dogs behave after being spayed and when to expect them to calm down post-surgery.
It is one of the most common reasons owners choose to spay their female dog. The expectation of a calmer, more settled companion afterward.
Sometimes that is exactly what happens. Sometimes it does not. And in a small subset of cases, anxiety or excitability actually increases.
Understanding why gives you a more accurate picture of what to expect, which makes the outcome less surprising in either direction.
Quick answer: Many dogs do become calmer after spaying, but the effect is specific to hormone-driven behaviors, not overall temperament. Dogs that were restless, anxious, or excitable due to heat cycles typically show significant improvement. Dogs whose energy or anxiety has non-hormonal causes will not reliably calm down. Most behavioral changes, if they occur, appear over two to three months.
Key takeaways
- The calming effect is real but specific: It applies to behaviors driven by reproductive hormones, not all behaviors.
- Heat cycle behaviors disappear: Restlessness, roaming, frequent urination, and cyclical mood shifts all stop after spaying.
- Core energy level and personality do not change: A high-energy dog will still be high-energy after spaying.
- Breed and individual temperament matter: Some breeds retain high energy regardless of hormone status.
- The timeline is weeks to months, not days: Hormone levels decline gradually, so behavioral changes are gradual too.
- A small subset of dogs show increased fearfulness: This is documented in research and worth knowing about before surgery.
What "calming down" actually means after spaying
When people say they want their dog to calm down, they usually mean one of two things:
- They want heat cycle behaviors to stop: the roaming, the restlessness, the vocalization, the constant male attention.
- They want a generally more settled dog overall.
Spaying reliably delivers the first. The second is less predictable.
This distinction is the core of the honest answer to this question.
What spaying removes: the hormonal layer
Spaying removes the ovaries, which are the primary source of estrogen and progesterone. These hormones regulate the reproductive cycle and influence behaviors tied to it.
During heat cycles, which typically occur every six to eight months in adult dogs, estrogen surges create a set of predictable behaviors:
- Restlessness and inability to settle
- Increased vocalization
- Frequent urination in small amounts to signal reproductive status
- Strong drive to escape and find a mate
- Attracting intact male dogs
- Cyclical irritability or anxiety
All of these stop after spaying. The hormonal trigger is permanently removed.
Which dogs calm down most noticeably after spaying
Dogs whose difficult behaviors are primarily or significantly driven by the reproductive cycle show the most consistent improvement after spaying.
Dogs most likely to become calmer:
- Female dogs that showed significant behavior changes during heat cycles, including restlessness, anxiety, and clinginess
- Dogs prone to false pregnancies, with associated nesting, object guarding, and protective behavior
- Dogs that attempted to escape or roam during heat periods
- Dogs whose cyclical mood swings were disruptive to daily life
For these dogs, spaying removes a recurring source of behavioral disruption. The result is often a more predictable, stable dog.
Which dogs may not calm down after spaying
Dogs whose energy level, excitability, or anxiety comes from sources other than reproductive hormones will not reliably settle after spaying.
Dogs less likely to show a calming effect:
- High-energy working or sport breeds where drive is genetic, not hormonal
- Dogs with established anxiety, fearfulness, or reactivity from non-hormonal causes
- Dogs with learned problematic behaviors from their history and environment
- Dogs whose excitability comes from insufficient exercise or mental stimulation
A Border Collie that is highly energetic before spaying will still be highly energetic after. A Labrador that pulls on the leash before spaying will still pull after. These behaviors are not driven by estrogen.
The timeline: when does calming happen?
Behavioral changes from spaying do not happen within days of surgery. The immediate post-surgery period reflects recovery from anesthesia and pain, not hormonal adjustment.
Realistic timeline:
Owners who expect a noticeably calmer dog within days of surgery are working with an inaccurate timeline. The changes are gradual and unfold over weeks to months.
What research says about calming after spaying
The evidence is genuinely mixed, which is worth knowing rather than glossing over.
Supporting the calming effect:
A study of 591 dogs found behavioral problems reduced or eliminated in 59% of spayed females. Heat cycle-related behaviors showed the most consistent improvement. Many owners of females that were particularly difficult during heat cycles report significant positive changes after spaying.
Complicating the picture:
Two large-scale studies using the Canine Behavioral Assessment and Research Questionnaire (C-BARQ) found that sterilization was associated with a roughly 31% increase in fearfulness and a 33% increase in touch sensitivity in some dogs. These findings apply to both males and females.
What does this mean in practice? For a meaningful subset of dogs, spaying does not produce a calmer animal. It may even produce a more anxious one, particularly in dogs that had pre-existing fearfulness or were sterilized at a young age.
This does not mean spaying is wrong for these dogs. It means the behavioral outcome cannot be guaranteed, and expectations should be calibrated accordingly.
For the full picture of all the behavior changes to expect after spaying, including the research on unexpected outcomes, that guide covers the complete behavioral landscape across both sexes.
Does calming depend on the dog's age at spaying?
Yes, and this is one of the most important variables.
Dogs spayed before their first heat cycle:
The hormonal disruption of heat cycles is never established. Many owners report these dogs are consistently more settled than intact females across their lifetime, without ever having the difficult heat cycle period.
Dogs spayed after several heat cycles:
The calming effect from eliminating heat cycles is still real and significant. However, any behaviors that have become habitual through repetition during heat cycles may persist longer or require training to address.
Dogs spayed very young (before 6 months):
Research suggests a higher association with fearfulness in dogs sterilized very early, before hormonal maturity. For whether this applies specifically to puppies, the guide on calming effects specific to female dogs addresses this age-specific question in detail. For the puppy-specific picture, the guide on whether puppies calm down after being spayed covers the developmental nuances unique to younger dogs.
When the expected calming does not happen
If your dog does not seem noticeably calmer after spaying, consider these factors before concluding the surgery did not work.
Check the timeline: Have two to three months passed since surgery? If not, the hormonal adjustment may still be in progress.
Identify the behavior source: Is the behavior you wanted to address actually hormone-driven? If it is not, spaying was never going to address it.
Consider habituation: Some behaviors that started as hormone-driven become habitual over time. The hormone is removed but the habit persists. Consistent training addresses habituated behavior.
Consider an underlying anxiety: If your dog became more fearful or anxious post-surgery, this is a documented outcome in some dogs. A veterinary behaviorist or your regular vet can help evaluate what is happening and what options exist.
Understanding the truth behind the calming effect myth, including why the expectation of calming is sometimes oversold, helps put the variable outcomes in context.
What actually makes dogs calmer long-term
Whether or not spaying produces a calming effect, these factors reliably influence how settled and manageable a dog is:
- Adequate physical exercise: A dog that is genuinely tired is a calmer dog. Exercise needs are determined by breed and individual temperament.
- Mental stimulation: Breed-appropriate mental work, puzzle feeders, training sessions, and enrichment activities reduce restless, problematic behavior.
- Consistent training: Clear, reinforced expectations give dogs a behavioral framework. This is the single most reliable path to a calmer dog.
- Routine and predictability: Dogs settle more easily in stable, predictable environments.
Spaying contributes one element to this picture. It is not a standalone solution.
Frequently asked questions
How long after being spayed will my dog calm down?
If the calming effect is going to occur, most hormone-driven behavioral changes become apparent within two to six weeks as hormone levels decline. Full stabilization typically takes two to three months. Dogs that are still showing challenging behaviors three to four months after surgery are unlikely to improve further from the hormonal change alone.
Will spaying make my high-energy dog less active?
Probably not significantly. Energy level in dogs is primarily determined by breed, genetics, and conditioning. Spaying can cause a modest metabolic slowdown, but it does not reduce drive or enthusiasm. A high-energy breed will still need the same amount of exercise after spaying.
My dog got more anxious after being spayed. Why?
Research has documented increased fearfulness in a subset of dogs after sterilization, associated with a roughly 31% increase in fearfulness in some studies. This appears to occur more often in dogs sterilized at a young age and in dogs with pre-existing anxiety. If your dog shows increased anxiety after spaying, speak to your vet. A referral to a certified veterinary behaviorist may be helpful.
Will spaying help with aggression?
It depends on the type of aggression. Aggression linked to the heat cycle, competition with other female dogs, or false pregnancy guarding often decreases. Fear-based aggression, learned aggression, and resource guarding are not hormone-driven and are not reliably improved by spaying. For whether lower testosterone calms dogs down in the male counterpart to this question, that guide covers the testosterone-behavior link specifically.
Does breed affect whether spaying calms a dog down?
Yes. Breed temperament significantly influences baseline energy and anxiety levels. High-drive working breeds such as Border Collies, Australian Shepherds, and Belgian Malinois have energy and drive that is genetic, not hormonal. Removing reproductive hormones does not change these fundamental breed characteristics. Whether your specific dog falls into a calmer range after spaying depends on what was driving any difficult behavior in the first place.
The calming effect of spaying is real for dogs whose difficult behaviors are hormone-driven. For those dogs, eliminating the heat cycle and its associated hormonal disruption produces a meaningfully more stable animal. For dogs whose energy or anxiety comes from other sources, spaying is still beneficial for health reasons but should not be expected to produce behavioral transformation. The most accurate prediction is not based on "spaying calms dogs" but on "removing a specific hormonal influence changes the behaviors that influence drives."
Resources
The following sources were used as reference and background for this article:
- Stanley Coren, Psychology Today. Are There Behavior Changes When Dogs Are Spayed or Neutered? psychologytoday.com
- PubMed. Changes in the behavior of dogs after castration. pubmed.ncbi.nlm.nih.gov
- ManyPets. Do Dogs Change After Being Neutered or Spayed? manypets.com
- American Veterinary Medical Association (AVMA). Spaying and Neutering. avma.org
- Houndsy. How Spaying Affects Dog Behavior. houndsy.com
Why Is My Dog's Foot Swollen?
Discover why your dog's foot is swollen, common causes, treatments, and when to see a vet for proper care.
A swollen dog foot is one of the most common reasons owners call their vet. It can be as simple as a bee sting or as serious as a deep infection or bone tumor. The location, speed of onset, and other symptoms all help narrow down the cause.
This guide covers every common cause, how to assess severity at home, and the exact signs that mean your dog needs same-day care.
Quick answer: A swollen dog foot usually has a local cause: injury, insect sting, foreign object, or infection. Warm, increasing, or discharging swelling needs same-day vet care. Multiple swollen paws suggest allergies.
Key takeaways
- Single-paw swelling almost always has a local cause: injury, sting, foreign body, or infection
- Interdigital furunculosis (infected hair follicle cysts between toes) is among the most misidentified causes of recurring paw swelling
- Foreign objects like foxtails and glass splinters can migrate deep into tissue if left untreated
- Pododermatitis is the clinical term for inflamed paw skin; allergies are the most common underlying driver
- Swelling spreading up the leg or paired with face or neck swelling is an emergency requiring immediate care
- Most mild swelling from a sting or minor sprain improves within 24 to 48 hours with rest and monitoring
How to assess your dog's swollen foot before calling the vet
Before looking up causes, do a quick home assessment. This takes two minutes and tells you how urgent the situation is.
Step 1: Which paw?One paw = likely local cause. All four paws = likely allergic or systemic.
Step 2: Feel for heat.Warm or hot tissue means active inflammation or infection.
Step 3: Look between every toe.Redness, swelling between the digits, or visible nodules between the toes points to interdigital furunculosis or a foreign body.
Step 4: Check the pads.Burns appear as red, blistered, or peeling pad tissue. Cuts and punctures are often visible on the pad surface.
Step 5: Look at each nail.A broken nail or swollen nail bed causes localized pain and swelling at the toe tip.
VCA Animal Hospitals: "A deeper infection, like an abscess, will appear as a warm, soft to mildly firm swelling under the skin."
8 common causes of a swollen foot in dogs
1. Injury or trauma
Sprains, cuts, fractured toes, torn nails, and pad burns are the most frequent causes of sudden single-paw swelling. Dogs running on rough, hot, or icy terrain are especially prone.
PetMD notes that pad burns are particularly common in summer: check the pads after any walk on hot pavement. If your palm cannot hold against the pavement for five seconds, it is too hot for your dog's feet.
Signs: sudden lameness after activity, localized swelling, visible wound or bruising.
2. Foreign object
Thorns, glass, foxtails, and grass awns lodge between the toes or penetrate the pad. The body mounts an inflammatory response around the object, causing swelling that worsens over days.
SpectrumCare: "Foxtails and grass awns can lodge between the toes or in the pad and trigger pain, swelling, and infection."
Foxtails are particularly dangerous because they are barbed and can migrate deeper into tissue over days, eventually requiring surgical removal. If you cannot see and safely remove the object, do not probe. See a vet.
3. Insect sting or bite
Bees, wasps, fire ants, and spiders cause rapid single-paw swelling that appears within minutes of the sting. The paw may look puffy and your dog may lick or hold it up.
Dyer Animal Clinic advises watching for anaphylaxis signs: hives, difficulty breathing, excessive swelling spreading beyond the paw. These require emergency care immediately.
Localized sting swelling that stays in the paw and is not worsening can be monitored at home for 24 to 48 hours.
4. Infection: bacterial and fungal
Bacterial or fungal infections enter through cuts, puncture wounds, or damaged skin. Infected paws are typically warm, red, swollen, and often have an odor or discharge. VCA lists the visual signs: "Skin infections on the feet may result in red, moist lesions between the toes."
Pododermatitis (inflammation of the paw skin) is the umbrella clinical term. Common causes include:
- Secondary bacterial infection from chronic licking
- Yeast overgrowth in skin folds between toes
- Fungal infections (ringworm can affect paws)
- Demodectic mange (mite overgrowth)
Pododermatitis does not resolve without treatment. Antibiotics, antifungal medication, or both are typically required.
5. Interdigital furunculosis
This is one of the most commonly missed causes of recurring paw swelling. Interdigital furunculosis occurs when hair follicles between the toes become infected, forming painful reddish-purple nodules that may rupture and drain.
AKC notes that the condition is especially prevalent in short-coated, heavyset breeds: Bulldogs, Labrador Retrievers, and Chinese Shar-Pei are among the most commonly affected. Chronic licking due to allergies is a major driver.
Signs: swollen, painful nodules between the toes, draining tracts, recurrent swelling in the same location.
For how furuncles between the toes connect to abscess formation, see abscess as a cause of limb swelling.
6. Allergic reaction and pododermatitis
Environmental allergens (pollen, grass, lawn chemicals, road salt) and food allergies frequently cause paw inflammation. Dogs with allergies lick their feet chronically, creating secondary infection on top of the allergic reaction.
Wakefield Pet Vet: "Allergic reactions typically cause itching, redness, and sometimes blistering between the toes or on paw pads."
Allergic paw swelling usually affects multiple paws. It tends to recur seasonally or after contact with the trigger substance. Dogs with seasonal allergies often have their worst paw symptoms in spring and fall.
7. Bursitis
Bursae are small fluid-filled sacs that cushion joints. Repeated pressure on bony prominences, especially the elbow and hock, can cause bursitis. Affected joints may appear as soft, fluctuant swellings near a joint.
For how bursitis specifically produces foot and joint swelling, see bursitis as a common cause of foot swelling.
8. Cysts, tumors, and nail bed disease
Cysts, mast cell tumors, and subungual (under-nail) tumors can all present as localized swelling on or near the foot. Petcube notes that toenail tumors are more prevalent in large black-coated breeds such as Standard Poodles, Gordon Setters, and Schnauzers.
A lump that is growing, firm, or pigmented should always be evaluated by a vet rather than monitored at home.
For an overview of lumps that cause swelling on the legs, see lumps that can cause swelling.
Severity triage: what to do right now
Home care for mild cases
For minor swelling without infection signs:
- Keep the dog calm and limit walking
- Soak the paw in warm (not hot) water with Epsom salts for 10 minutes. PetMD recommends this as an excellent short-term measure regardless of cause.
- Gently clean any visible wound with mild soap and warm water
- Apply a cool damp cloth for 10 to 15 minutes to reduce swelling from sprains or stings
- Do not apply antibiotic ointments without vet guidance some formulations are toxic to dogs if licked
For pressure-related paw and leg swelling in dogs that rest in one position for extended periods, see pressure-related swelling in dogs.
Frequently asked questions
How do I treat my dog's swollen paw at home?
For mild swelling with no wound or discharge, rest the dog and soak the paw in warm Epsom salt water for 10 minutes. Check carefully for a foreign object or insect stinger. Do not use human antibiotic creams without vet guidance. If swelling has not reduced within 24 to 48 hours or is getting worse, contact your vet.
When should I be worried about my dog's swollen paw?
Be concerned immediately if the swelling is warm, increasing, or has discharge or odor. Call the vet the same day if your dog refuses to bear weight, if the swelling is spreading up the leg, or if there is any sign of an allergic reaction such as facial swelling or breathing difficulty.
What can I give my dog for a swollen paw?
Do not give human pain medications (ibuprofen, acetaminophen, aspirin) to dogs; many are toxic. For minor swelling, warm Epsom salt soaks are safe and effective for short-term relief. Your vet can prescribe appropriate anti-inflammatory medication if needed after examining the paw.
My dog's foot was normal this morning and is swollen now. What happened?
Sudden single-paw swelling most often means an insect sting, a foreign object picked up during activity, or a minor sprain. Check each toe carefully for a stinger, thorn, or visible wound. If swelling is mild and localized, monitor for 24 hours. If increasing or painful, call the vet the same day.
Can swelling in a dog's foot go away on its own?
Minor swelling from a bee sting or small sprain typically resolves within 24 to 48 hours with rest. Infections, foreign objects, interdigital furunculosis, and bursitis do not resolve without treatment. If swelling has not improved within 48 hours, veterinary assessment is needed.
My dog's foot smells bad and is swollen. Is that serious?
Yes. Odor from a swollen paw strongly indicates infection. A foul smell means bacteria are actively present. Common sources include interdigital furunculosis, a nail bed infection, or an abscess. This requires prompt veterinary treatment and should not be left to resolve on its own.
Resources
- PetMD. Dogs Swollen Paws: Causes and Treatments. petmd.com
- VCA Animal Hospitals. First Aid for Limping Dogs. vcahospitals.com
- AKC. Pododermatitis on Dog Paw: Causes, Symptoms and Treatment. akc.org
- SpectrumCare. Paw Swelling in Dogs. spectrumcare.pet
- Dyer Animal Clinic. Reasons Your Dog's Paw is Swollen. dyeranimalclinic.com

Why Does My Dog Have Scabs on Her Back?
Learn why your dog has scabs on her back, common causes, treatments, and when to see a vet for proper care.
Scabs on a dog's back are one of the most common skin complaints owners bring to the vet. They are almost always a symptom of something else an underlying condition causing the skin to break down, get infected, or be damaged by scratching. The location, pattern, and associated symptoms help narrow down the cause significantly.
This guide covers every common reason dogs develop back scabs, what each one looks like, and when the situation calls for a vet visit.
Quick answer: Back scabs in dogs most commonly result from flea allergy, allergies, pyoderma, or mange. Location helps: tail-base scabs suggest fleas; circular crusty patches suggest ringworm; intense all-over itching suggests sarcoptic mange.
Key takeaways
- Flea allergy dermatitis is the top cause of back scabs; a few flea bites trigger intense scratching in sensitized dogs
- Pyoderma (bacterial skin infection) often develops as a secondary complication of allergies or parasites, not as the primary cause
- Sarcoptic mange causes intensely itchy scabs that spread rapidly and can transfer to humans; it is highly contagious
- Ringworm is fungal, not a worm: circular crusty patches with hair loss, diagnosed by UV lamp or culture
- Honey-colored crusts suggest bacterial infection; dark or black scabs indicate chronic irritation or yeast
- Spreading or worsening scabs with hair loss or behavior changes need veterinary evaluation within 48 hours
How scabs form
Scabs are the body's healing response to skin damage. When skin is broken by scratching, biting, infection, parasites, or autoimmune attack it bleeds or weeps fluid. That fluid dries and forms a crust (scab) as part of the normal repair process.
In dogs, scabs on the back almost always indicate the dog has been repeatedly traumatizing the skin by scratching, biting, or rubbing or that an infection or parasite is directly damaging the skin surface. Vetified: "Scabs form as part of the skin's natural healing process, but recurring or widespread crusting usually signals an underlying condition that needs treatment."
The appearance of the scab offers diagnostic clues: honey-colored (bacterial infection), dark and flaky (chronic irritation or yeast), crusty circular rings (ringworm), or widespread tiny scabs with extreme itching (sarcoptic mange).
8 causes of scabs on a dog's back
1. Flea allergy dermatitis (FAD)
The most common cause of scabs on the back, especially concentrated at the tail base, rump, and lower back. Dogster: "Fleas are the most common parasite that causes scabbing on your dog's back and around their tail base. Some dogs suffer from flea allergy dermatitis (FAD) and are allergic to flea saliva injected by the bites of fleas."
The key feature: the allergy is to flea saliva, not the bites themselves. A single flea bite on a sensitized dog causes intense itching far out of proportion to the number of fleas present. You may never find a flea on the dog.
Signs: scabs clustered at the tail base and lower back; hair loss in the same area; intense scratching; secondary bacterial skin infection.
Treatment: rigorous flea control (all pets in the household, the home environment, and year-round prevention); anti-itch medication (Apoquel, Cytopoint) during flare-ups; antibiotics for secondary infection.
2. Environmental allergies (atopic dermatitis)
Dogs with environmental allergies react to pollen, dust mites, mold, and other airborne allergens. Dogster identifies "pollen, molds, house dust mites and storage mites" as the most common allergens. The skin becomes itchy and inflamed, and the dog scratches or bites until scabs form.
Signs: seasonal or year-round itching; scabs on the back, belly, paws, and face; secondary bacterial or yeast infection; recurrence in the same seasons each year.
Treatment: anti-itch medications; allergen-specific immunotherapy; medicated shampoos; fatty acid supplementation to support the skin barrier.
3. Food allergies
Food allergy dermatitis causes similar skin symptoms to environmental allergies but typically occurs year-round. Common culprits: beef, chicken, dairy, wheat, egg. Dr. Alison Diesel of Texas A&M CVM: "Self-trauma to the skin can create wounds that can become secondarily infected."
Signs: non-seasonal, year-round itching; scabs on the back, belly, and ears; recurrent ear infections; may be accompanied by gastrointestinal signs (soft stool, vomiting).
Treatment: strict elimination diet trial (8 to 12 weeks on a novel protein or hydrolyzed protein diet); veterinary-supervised food challenge to confirm the allergen.
4. Bacterial skin infection (pyoderma)
Pyoderma often develops as a secondary complication of allergies or parasites but can be the primary cause of scabbing. Vetified: "Honey-colored" crusts are characteristic of bacterial infection.
Merck Veterinary Manual identifies Staphylococcus pseudintermedius as responsible for over 90% of canine pyoderma. The bacteria thrive when the skin barrier is damaged by scratching, moisture, or underlying disease.
Signs: raised red pustules that rupture into crusts; circular scabs (epidermal collarettes); musty odor; hair loss over the affected area.
Treatment: medicated antibacterial shampoo 2 to 3 times weekly; oral antibiotics for 3 to 8 weeks depending on infection depth; treatment of the underlying cause to prevent recurrence.
For how bacterial skin infections progress from pustules to scabs, see pustules that leave scabs.
5. Sarcoptic mange (scabies)
Caused by the mite Sarcoptes scabiei. Hepper: "These mites burrow deep into the skin causing irritation, inflammation, and thickening of the skin or scab formation. Lesions in dogs are typically seen around the face, ear, and neck area but they can also develop in the back."
Key distinguishing feature: sarcoptic mange causes extreme, unrelenting itchiness often described as among the most intensely itchy conditions in veterinary medicine. It is also highly contagious to other dogs and to humans.
Signs: intense scratching; scabs on the edges of the ears, elbows, and hocks; spreading to the back and trunk in severe infestations; skin thickening.
Treatment: anti-parasitic medications (isoxazolines such as Bravecto or NexGard; selamectin; ivermectin); all in-contact animals must be treated; environmental decontamination.
6. Demodectic mange
Caused by Demodex mites, which live in hair follicles. Unlike sarcoptic mange, demodex is not contagious and causes minimal itching. Wild Earth: "Hormonal imbalances: conditions that affect your dog's hormones can change how much oil their skin produces, leading to dryness or irritation."
Signs: patchy hair loss; scaly, reddened skin; secondary bacterial infection common; localized form (one or a few patches, common in young dogs) or generalized form (widespread, more serious).
Treatment: topical or oral isoxazolines; treat secondary bacterial infections; investigate for underlying immunosuppression in adult-onset generalized cases.
7. Ringworm (dermatophytosis)
Despite the name, ringworm is a fungal infection, not a worm. It is caused by Microsporum canis, Trichophyton mentagrophytes, or related fungi. Vetified: "The appearance of a scab whether honey-colored, dark, flaky, or thick can help your veterinarian narrow down the cause."
Signs: circular or irregularly shaped patches of hair loss with crusty, scaly edges; the classic ring shape is not always present in dogs; may affect anywhere on the body including the back.
Diagnosis: Wood's lamp (some strains fluoresce green), hair trichogram, fungal culture (definitive).
Treatment: topical antifungal shampoo (miconazole-chlorhexidine); oral antifungals (itraconazole, terbinafine) for widespread cases; decontamination of environment as ringworm spores survive in the environment for months. Note: ringworm is contagious to humans and other pets.
8. Hormonal disorders
Hypothyroidism and Cushing's disease alter skin physiology changing sebum production, immune function, and skin thickness. Wild Earth: "Hormonal imbalances: conditions like hypothyroidism and Cushing's disease can change how much oil their skin produces, leading to dryness or irritation." The result is a skin that is more prone to secondary infection and crusting.
Signs: symmetrical hair loss; thickened or darkened skin; recurrent skin infections; other systemic signs (weight gain in hypothyroidism; potbelly and increased thirst in Cushing's).
Treatment: hormone replacement for hypothyroidism (levothyroxine); medication to suppress cortisol production in Cushing's disease (trilostane or mitotane).
Triage table: what to do based on the signs
When to call the vet
Call your vet if:
- Scabs are spreading, increasing in number, or worsening over 48 hours
- Hair loss is occurring along with the scabs
- The dog is scratching intensely and losing sleep
- There is odor, discharge, or visible infection
- You suspect mange (highly contagious do not let affected dogs contact other pets or people before assessment)
- Scabs have been present for more than 2 weeks without improvement
For how impetigo causes pustules that scab over in puppies, see impetigo as a cause of scabs. For how vasculitis causes skin lesions that resemble scabs, see vasculitis as a cause of skin lesions.
Frequently asked questions
My dog has scabs but I can't find any fleas. Could it still be flea allergy?
Yes. Flea allergy dermatitis can produce significant scabbing from very few flea bites. Dogs with FAD groom themselves intensively and may remove fleas before you see them. The scab location tail base and lower back is the key clue. Vetified confirms: "Dogs can react to even a few flea bites that are no longer visible." Year-round flea prevention is both the diagnostic test and the treatment.
Can I treat my dog's back scabs at home?
For mild cases with no spreading, no hair loss, and a known cause (e.g., minor skin irritation after a bath or a small scratch), gentle cleaning with dilute chlorhexidine and preventing licking may be sufficient. For recurring, widespread, or infectious causes, home treatment without diagnosis treats symptoms while the underlying cause continues. A vet visit provides the correct diagnosis and targeted treatment.
Is ringworm dangerous?
Ringworm is not life-threatening in otherwise healthy dogs, but it is important because it is contagious to other pets and to humans. Children, elderly people, and immunocompromised individuals are particularly vulnerable. If ringworm is suspected, avoid close contact with the dog's skin and consult your vet promptly.
Could my dog's back scabs be cancer?
Some skin tumors ulcerate and form crusts that look like scabs. This is uncommon and is not the most likely explanation for back scabs in most dogs but it is a reason to have any persistent, non-healing scab evaluated. A vet can perform a fine needle aspirate or skin biopsy if there is any concern about a specific lesion.
What does a flea allergy scab look like vs. a ringworm scab?
Flea allergy scabs cluster at the tail base and are accompanied by intense itching. Ringworm scabs form in roughly circular patches anywhere on the body, often with a clearer center and scaly ring at the edges. Itching is usually mild with ringworm. A Wood's lamp and fungal culture distinguish them definitively.
How long does it take for back scabs to heal in dogs?
With correct treatment, superficial bacterial pyoderma scabs typically heal within 3 to 4 weeks of antibiotic treatment. Flea allergy scabs improve within 2 to 4 weeks of effective flea control. Ringworm takes 4 to 8 weeks of antifungal treatment. Mange resolves over 4 to 12 weeks depending on the type and treatment used. Without treatment, most causes do not resolve on their own.
Resources
- Dogster. Why Does My Dog Have Scabs on Their Back? 6 Vet-Verified Reasons. dogster.com
- Vetified. Scabs on Dogs: Types, Causes and Treatment Guide. vetified.co
- Wild Earth. Crusty Scabs on a Dog's Back: Causes, Treatment and Prevention. wildearth.com
- Hepper. My Dog Has Crusty Scabs on His Back: Vet-Verified Causes and Treatments. articles.hepper.com
- Top Dog Tips. 8 Causes and Solutions to Crusty Scabs on Dog's Back. topdogtips.com

Furuncle in Dogs: Causes, Symptoms & Treatment
Learn about furuncles in dogs, including causes, symptoms, and effective treatments to keep your pet healthy and comfortable.
A furuncle is a deep, infected boil in the skin a more serious and painful version of a pustule that penetrates into the hair follicle and surrounding tissue. In dogs, furuncles most commonly develop between the toes (interdigital furunculosis), though they can appear anywhere short-bristled hair follicles are subject to repeated trauma or infection.
Most owners first notice them as swollen, reddish-purple nodules between the toes that their dog licks obsessively. Left untreated, they rupture, drain, and recur often for months without addressing the underlying cause.
Quick answer: Furuncles are deep infected boils from ruptured hair follicles. The most common type, interdigital furunculosis, causes painful nodules between toes. Allergies and breed predisposition are the main drivers. Treatment needs up to 12 weeks of antibiotics.
Key takeaways
- Furuncles are deeper and more serious than pustules: they involve the dermis and surrounding tissue, not just the skin surface
- Interdigital furunculosis is the most common type painful nodules in the webbing between toes
- Short-bristled breeds (Labrador Retrievers, English Bulldogs, Chinese Shar-Peis) are disproportionately affected
- Allergies are the most common underlying trigger for recurring interdigital furunculosis
- Treatment requires oral antibiotics for up to 12 weeks shorter courses lead to recurrence
- Underlying cause must be identified and treated antibiotics alone without addressing the trigger lead to chronic recurring disease
What is a furuncle?
Merck Veterinary Manual provides the clinical definition: "An abscess, or localized infection of the skin, between the toes is also called an interdigital furuncle. It is similar to a severely infected pimple or boil on the face. These painful, pus-filled blisters often occur in the webbing between a dog's toes."
The key distinction from a superficial pustule: a furuncle extends deep into the dermis and the hair follicle wall has ruptured, releasing keratin and hair shaft material into the surrounding tissue. The body treats this material as foreign, mounting a pyogranulomatous (pus-and-inflammatory cell) response. Dr. Buzby's ToeGrips explains: "Furunculosis in dogs is a painful skin condition that involves inflammation and infection of the deep layers of the skin surrounding the hair follicles."
This depth is why furuncles are more painful, take longer to treat, and recur more readily than superficial skin infections.
Types of furuncles in dogs
1. Interdigital furunculosis (between the toes)
The most common type. Occurs in the webbing between the toes when short, bristly hair shafts are forced backward into hair follicles during walking, rupturing them and triggering deep infection.
Appearance: reddish-purple, swollen nodules in the interdigital webbing; may be single or affect multiple toes; often rupture and drain a bloody or purulent discharge.
Common triggers: Unleashed Veterinary Dermatology explains the key mechanism: "When the dog is exposed to something it is allergic to, the skin becomes inflamed. Inflammation of the feet causes them to swell, though this swelling can range from subtle to severe. Subsequently, walking on the swollen feet can cause short bristly hairs to break off inside the skin due to frictional forces. The immune system then treats the broken off hair follicle as foreign material, much like a wood splinter."
Note: Merck Veterinary Manual clarifies a common misconception: "Interdigital furuncles are areas of deep pyoderma and are often incorrectly referred to as interdigital cysts. These lesions represent areas of nodular pyogranulomatous inflammation they are almost never cystic."
2. Post-grooming furunculosis
A specific syndrome that develops days after a dog is bathed or groomed. Bacteria are introduced into hair follicles during the grooming process, leading to widespread furuncle formation on the back, neck, or sides.
My Pet Nutritionist describes the typical presentation: "Usually starting with small red lumps on the skin. These often progress into large, boil-like, usually pus-filled furuncles. It's highly likely your dog will show signs of pain when touched in these areas, and they may even have a fever."
3. Anal furunculosis (perianal fistulas)
Painful ulceration and furuncle formation around the anus. Pure Pet Food notes this type "differs from other furuncle conditions because recent studies have indicated it may be an immune-mediated condition rather than a simple infection." It is most common in German Shepherds and is treated differently, often requiring immunosuppressive medication alongside antibiotics.
Which dogs are most affected?
Breed predisposition
Merck Veterinary Manual identifies specific breeds: "Chinese Shar-Peis, Labrador Retrievers, and English Bulldogs are predisposed to the condition because they have short, bristly hairs on the webbing between the toes and/or prominent amounts of webbing. The short hair shafts are easily forced backward into the hair follicles while the dog is walking."
Other commonly affected short-coated breeds: Bull Terriers, Boxers, Great Danes, Pit Bull Terriers, and Dachshunds.
Dogs with allergies
Allergic dogs have chronically inflamed skin, including their feet. This creates the swollen tissue environment that allows short hairs to break off inside follicles with normal walking. Bark & Whiskers: "The constant moisture and friction can eventually cause furuncles to form. In these cases, the skin infection is really a symptom of an allergic reaction that needs to be addressed from the inside out."
Overweight dogs
Obesity increases the weight and pressure on the paw webbing with every step, worsening friction and predisposing to follicular trauma. Bark & Whiskers: "Dogs that are overweight or have flat, wide paws may experience extra friction and pressure on the webbing between their toes."
Dogs with hormonal disorders
Hypothyroidism and Cushing's disease impair skin immune defenses. Bark & Whiskers: "Diseases like hypothyroidism or Cushing's disease can weaken a dog's immune system and skin defenses, making infections more likely."
Dogs kept on wire or concrete surfaces
Merck Veterinary Manual: "Furuncles in confined dogs are likely to recur unless the dog is removed from wire or concrete surfaces."
Symptoms
Interdigital furuncles:
- Reddish-purple swollen nodule(s) between the toes
- Pain the dog limps, licks the foot obsessively, or is reluctant to walk
- Discharge (blood or pus) if the furuncle has ruptured
- Recurring in the same location or spreading to other feet over time
Post-grooming furuncles:
- Multiple raised red lumps on the back, neck, or sides appearing 1 to 5 days after grooming
- Fever
- Pain when the skin is touched
All types:
- The dog may be reluctant to allow the affected area to be handled
- Secondary bacterial skin infection (pyoderma) often present in the surrounding tissue
How vets diagnose furuncles
Because interdigital furunculosis looks similar to abscesses, cysts, and even tumors, a vet examination is required. Bark & Whiskers: "Because interdigital furunculosis can look similar to other skin issues like cysts, abscesses, or even cancerous growths, a veterinary diagnosis is essential."
Diagnostic steps:
- Skin cytology: examination of cells from the lesion confirms bacteria and inflammatory cells consistent with deep pyoderma
- Culture and sensitivity: identifies the specific bacteria and antibiotic sensitivities essential for recurrent cases or cases not responding to initial treatment
- Skin scraping: rules out Demodex mites, which can cause secondary furunculosis
- Bloodwork: rules out hypothyroidism and Cushing's disease if these are suspected
- Biopsy: may be needed to confirm the diagnosis in atypical presentations or when neoplasia cannot be excluded
For how furuncles relate to abscesses and the progression of deep skin infection, see abscess as a related deep skin infection.
Treatment
Oral antibiotics: the cornerstone
Dr. Buzby's ToeGrips: "Since the infection is so deep in the dog's skin and hair follicles, the vet will typically prescribe a long course of systemic (oral) antibiotics potentially for up to 12 weeks."
This duration is non-negotiable. Shorter courses allow the deep infection to persist and recur. Culture and sensitivity results should guide antibiotic selection in all but the most straightforward initial presentations.
Topical treatment
- Medicated shampoos (chlorhexidine 2 to 4%, or benzoyl peroxide) applied to the affected feet 2 to 3 times per week
- Foot soaks in warm dilute chlorhexidine solution for 10 to 15 minutes
- Topical antimicrobial sprays or ointments applied directly between the toes
Unleashed Veterinary Dermatology: "Topical therapy to reduce inflammation and fight infection is often helpful."
Anti-inflammatory medication
Steroids (prednisone) significantly reduce the inflammation that drives follicular rupture in allergic dogs. Unleashed Veterinary Dermatology: "Prednisone is the best anti-inflammatory medication and most powerful treatment at inducing remission of furunculosis." Long-term use is reserved for severe cases due to systemic side effects.
Allergy management
If allergic dermatitis is driving the furunculosis, treating the allergy is essential to prevent recurrence. Options include:
- Oclacitinib (Apoquel) or lokivetmab (Cytopoint) for environmental allergies
- Allergen-specific immunotherapy (allergy shots)
- Elimination diet trial for food allergies
Unleashed Veterinary Dermatology: "If allergic dermatitis is suspected, anti-inflammatory allergy medications are the mainstay of treatment."
Surgical treatment
Merck: "In some long-term cases, surgical excision or surgical correction of the webbing may be needed." For dogs with severe, chronic, treatment-resistant interdigital furunculosis, surgical removal of the affected interdigital tissue or laser ablation of the lesions may be considered.
For how pustules precede furuncle formation as a progression of skin infection, see pustules that precede furuncle formation. For how severe skin infections like necrotizing fasciitis can develop from untreated deep infections, see severe skin infection progression.
Home care
- Soak the affected foot in warm dilute chlorhexidine solution for 10 to 15 minutes once or twice daily
- Keep the foot dry between soaks
- Prevent licking with an E-collar at all times chronic licking perpetuates the infection
- Trim the fur between the toes to reduce moisture retention (with vet guidance)
- Apply prescribed topical medications as directed after soaking
- Give all oral medications on schedule and complete the full course
Frequently asked questions
How do I know if my dog has a furuncle between the toes or just a cyst?
A furuncle is typically painful, red or purple, may have discharge, and the dog actively bothers it. A true cyst between the toes is usually less painful, smooth, and does not have an inflammatory color. However, Merck Veterinary Manual notes that interdigital furuncles are "often incorrectly referred to as interdigital cysts" the distinction matters for treatment. Only a vet examination with cytology can reliably confirm which one you are dealing with.
Why does my dog keep getting furuncles between the toes despite antibiotic treatment?
Recurring furuncles after antibiotic courses almost always mean the underlying trigger is not being managed. Allergies are the most common culprit. If your dog is allergic and you treat the infection without treating the allergy, the inflamed feet will continue to cause follicular trauma and the cycle will restart. Ask your vet about allergy testing and long-term allergy management.
Are furuncles between the toes contagious to other dogs?
No. Interdigital furunculosis is not contagious. The condition arises from the dog's own skin bacteria and an individual predisposition (breed conformation, allergies, hormonal disorders). A dog sharing a home with an affected dog will not develop furuncles from that exposure.
Can I treat a furuncle at home without going to the vet?
Home care (foot soaks, E-collar, keeping the area clean) provides comfort but does not treat the underlying deep infection. Furuncles require oral antibiotics for weeks to months, which are prescription-only. Attempting to manage furuncles without veterinary treatment typically results in chronic recurring disease and long-term discomfort for the dog.
How long does it take for a furuncle to heal in dogs?
With appropriate antibiotic treatment (typically 4 to 12 weeks), furuncles usually resolve within the treatment period. Without addressing the underlying cause (allergies, breed conformation, hormonal disease), recurrence is the rule rather than the exception. Some dogs manage their furunculosis as a chronic condition requiring ongoing allergy treatment and topical maintenance.
My dog licks between the toes constantly but I don't see any obvious swelling. Could it still be furunculosis?
Yes. Early-stage interdigital furunculosis and the allergic inflammation that drives it can cause intense itching and licking before visible nodules form. Chronic licking itself worsens follicular trauma and sets up conditions for furuncle development. A vet examination at this stage before visible nodules appear is worthwhile, as early allergy management can prevent the cycle from fully establishing.
Resources
- Merck Veterinary Manual. Abscesses Between the Toes (Interdigital Furunculosis) in Dogs. merckvetmanual.com
- Dr. Buzby's ToeGrips. Furunculosis in Dogs: 3 Types That Can Affect Your Dog. toegrips.com
- Unleashed Veterinary Dermatology. Interdigital Furunculosis in Dogs. unleashedvetderm.com
- Bark & Whiskers. Interdigital Furunculosis in Dogs: Causes, Signs and Care. barkandwhiskers.com

Acrochordons and Plaque Lesions in Dogs
Learn about acrochordons and plaque lesions in dogs, their causes, symptoms, diagnosis, and treatment options for pet owners.
Acrochordons and plaque lesions are common skin conditions in dogs that can cause concern for pet owners. These growths often appear as small, soft bumps or raised plaques on the skin and can vary in size and number. Understanding what these lesions are and how they affect your dog is important for timely diagnosis and treatment.
This article explains the causes, signs, diagnosis, and treatment options for acrochordons and plaque lesions in dogs. You will learn how to recognize these skin changes and when to seek veterinary care to keep your dog comfortable and healthy.
What are acrochordons and plaque lesions in dogs?
Acrochordons, also known as skin tags, are benign skin growths that appear as small, soft, and often pedunculated bumps on a dog's skin. Plaque lesions are raised, flat-topped areas of thickened skin that may result from chronic irritation or inflammation.
Both types of lesions are usually non-cancerous but can sometimes indicate underlying health issues. Recognizing these lesions early helps in managing them effectively.
- Acrochordon characteristics: These are soft, flesh-colored or slightly pigmented skin tags that hang from the skin by a narrow stalk and are usually painless.
- Plaque lesion features: Plaques are flat or slightly raised, thickened areas of skin that can be scaly or crusty, often caused by chronic skin irritation.
- Common locations: Both lesions commonly appear on areas like the neck, chest, abdomen, and near the limbs where skin folds or friction occur.
- Benign nature: Most acrochordons and plaques are harmless but should be monitored for changes in size, color, or ulceration.
Understanding these lesions helps pet owners distinguish between harmless growths and those needing veterinary attention.
What causes acrochordons and plaque lesions in dogs?
The exact causes of acrochordons and plaque lesions in dogs are not always clear but often relate to skin irritation, genetics, or underlying diseases. Several factors can contribute to their development.
Knowing these causes can help in preventing or managing the lesions effectively.
- Chronic skin irritation: Repeated rubbing or friction on certain skin areas can lead to the formation of acrochordons and plaques over time.
- Genetic predisposition: Some dog breeds may be more prone to developing these skin lesions due to inherited skin characteristics.
- Hormonal influences: Hormonal imbalances, especially in older dogs, can promote the growth of skin tags and plaques.
- Underlying skin diseases: Conditions like allergies, infections, or autoimmune disorders can cause skin changes that result in plaque formation.
Identifying and addressing these causes is key to managing your dog's skin health and preventing lesion recurrence.
How can you recognize acrochordons and plaque lesions in your dog?
Recognizing these skin lesions early allows for prompt veterinary evaluation. Owners should regularly check their dog's skin for any new or changing growths.
Knowing the typical appearance and symptoms of acrochordons and plaques helps in distinguishing them from other skin problems.
- Appearance of acrochordons: Look for small, soft, skin-colored or slightly pigmented bumps that hang from the skin by a narrow stalk.
- Appearance of plaques: Identify raised, flat-topped, thickened skin areas that may be scaly, crusty, or discolored.
- Symptoms to watch: Most lesions are painless, but watch for itching, bleeding, or ulceration which require veterinary attention.
- Changes over time: Monitor any rapid growth, color changes, or ulceration as these may indicate complications.
Regular skin checks and noting any changes help in early detection and treatment of these lesions.
How are acrochordons and plaque lesions diagnosed in dogs?
Diagnosis involves a veterinary examination and may include additional tests to rule out other skin conditions or malignancies. Accurate diagnosis ensures appropriate treatment.
Your veterinarian will assess the lesions and may recommend diagnostic procedures based on the lesion's appearance and your dog's health history.
- Physical examination: The vet will visually and physically examine the lesions and surrounding skin for signs of infection or malignancy.
- Skin scrapings or cytology: Samples from the lesion may be taken to check for infections or abnormal cells under a microscope.
- Biopsy and histopathology: A small tissue sample may be surgically removed and analyzed to confirm the lesion type and rule out cancer.
- Blood tests: These may be done to check for underlying systemic diseases that could contribute to skin changes.
Proper diagnosis helps differentiate benign lesions from more serious conditions and guides treatment decisions.
What treatment options are available for acrochordons and plaque lesions in dogs?
Treatment depends on the lesion type, size, location, and whether it causes discomfort or complications. Many lesions do not require treatment unless problematic.
Your veterinarian will recommend the best approach based on your dog's specific condition and overall health.
- Surgical removal: Small acrochordons or plaques causing irritation can be removed surgically under local or general anesthesia.
- Cryotherapy: Freezing the lesion with liquid nitrogen can be effective for some skin tags and plaques.
- Topical treatments: Medicated creams or ointments may reduce inflammation or secondary infections associated with plaques.
- Monitoring without treatment: If lesions are benign and not causing issues, regular monitoring may be advised instead of immediate removal.
Choosing the right treatment minimizes discomfort and prevents lesion recurrence or complications.
How can you prevent acrochordons and plaque lesions in your dog?
While not all lesions can be prevented, certain measures can reduce the risk or severity of acrochordons and plaque lesions. Good skin care and health maintenance are essential.
Implementing preventive strategies helps keep your dog's skin healthy and reduces the chance of lesion development.
- Maintain skin hygiene: Regular grooming and cleaning reduce dirt and bacteria that can irritate the skin and cause lesions.
- Manage allergies: Controlling environmental or food allergies prevents chronic skin inflammation that leads to plaques.
- Reduce friction: Avoid tight collars or harnesses that cause rubbing and skin irritation in vulnerable areas.
- Regular veterinary check-ups: Routine exams help detect early skin changes and address underlying health issues promptly.
Consistent care and attention to your dog's skin condition support overall health and comfort.
What are the potential complications of untreated acrochordons and plaque lesions?
Although often benign, untreated lesions can sometimes lead to complications such as infection, discomfort, or rarely, malignant transformation. Understanding these risks helps in deciding when to seek treatment.
Monitoring and timely veterinary care reduce the chance of complications and improve your dog's quality of life.
- Secondary infections: Lesions that ulcerate or are scratched can become infected, causing pain and requiring antibiotics.
- Discomfort and itching: Large or irritated lesions may cause itching or discomfort, affecting your dog's behavior and wellbeing.
- Interference with movement: Lesions near joints or skin folds can restrict movement or cause irritation during activity.
- Rare malignancy: Though uncommon, some lesions may develop into cancer, making early diagnosis critical.
Prompt veterinary evaluation and treatment prevent these complications and ensure your dog remains healthy and comfortable.
Conclusion
Acrochordons and plaque lesions in dogs are common skin growths that are usually benign but require attention to avoid complications. Recognizing these lesions early and understanding their causes help you provide the best care for your dog.
Regular skin checks, good hygiene, and timely veterinary visits are essential to manage these conditions effectively. If you notice any new or changing skin lesions on your dog, consult your veterinarian for proper diagnosis and treatment to keep your pet healthy and comfortable.
What causes acrochordons in dogs?
Acrochordons in dogs are caused mainly by chronic skin irritation, genetics, and hormonal changes, often appearing in areas with skin folds or friction.
Are plaque lesions in dogs dangerous?
Most plaque lesions are benign but can cause discomfort or infection if untreated; rare cases may require veterinary evaluation to rule out malignancy.
How are skin tags removed from dogs?
Skin tags can be removed surgically or by cryotherapy under veterinary care, especially if they cause irritation or grow in size.
Can acrochordons turn into cancer in dogs?
Acrochordons are usually benign and rarely become cancerous, but any rapid changes in size or appearance should be checked by a vet.
How often should I check my dog’s skin for lesions?
It is recommended to check your dog's skin monthly for any new or changing lesions and consult a vet if you notice abnormalities.

