

Do Dogs Have an Appendix?
Discover if dogs have an appendix, its function, and how it affects their health compared to humans.

This article is for informational purposes only and is not a substitute for professional veterinary advice. Every case is unique, so always consult your veterinarian for guidance specific to your pet.
This content is intended for veterinary professionals for educational purposes. It does not replace clinical judgment or tailored advice. Always rely on your training, expertise, and the specific context of your patients.
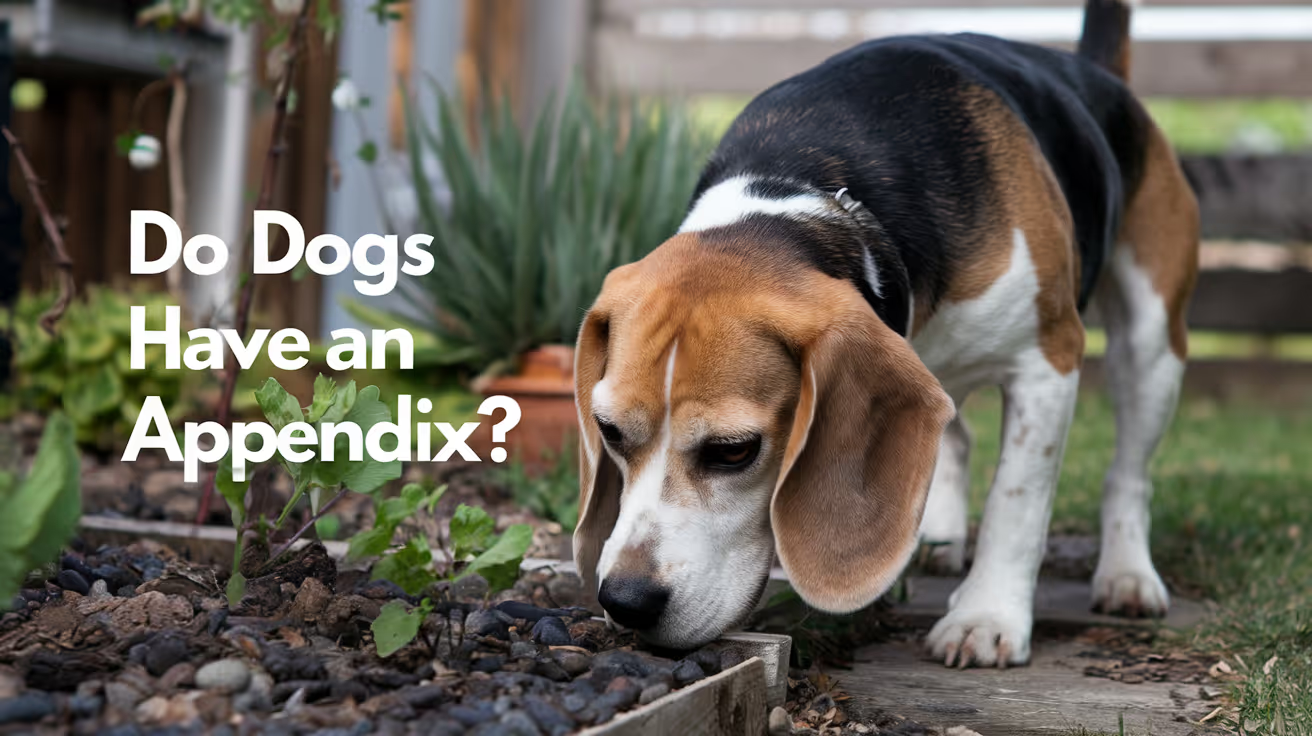
It is a reasonable question, especially for anyone who has had appendicitis or knows someone who has. The short answer: dogs do not have a vermiform appendix the way humans do.
They have a cecum, which serves some overlapping functions but is anatomically and functionally distinct.
Quick answer: Dogs do not have a vermiform appendix. They have a cecum a short pouch at the small-to-large intestine junction that supports gut bacteria. Dogs cannot get appendicitis because they lack the appendix structure that becomes inflamed in humans.
Key takeaways
- Dogs do not have a vermiform appendix: this is a normal anatomical difference from humans
- Dogs have a cecum, a short pouch at the ileocolic junction that performs some similar functions to the human appendix
- Veterinary anatomy confirms: the vermiform appendix is absent in domestic animals but present in rabbits
- Dogs cannot get appendicitis: they lack the structure that becomes inflamed in humans
- The cecum can become inflamed in dogs (typhlitis) but this is rare and has different causes than human appendicitis
- No surgery is needed for a missing appendix: the cecum serves dogs adequately without a vermiform appendix
What is the human appendix?
Kenhub (anatomy): "The vermiform appendix is attached dorsomedially to the end of the cecum. It lies intraperitoneally, most commonly retrocecally."
Wikipedia: "The appendix is a finger-like, blind-ended tube connected to the cecum. The term vermiform comes from Latin and means worm-shaped."
Kenhub: "The appendix is part of the GALT (gut-associated lymphatic tissue) and fulfills immunological functions.
Furthermore, it is assumed that it serves as a 'safe house' for enterobacteria, for example in cases of diarrhea."
In humans, the appendix has historically been considered vestigial, but modern research suggests it serves a modest immune function and acts as a reservoir for beneficial gut bacteria.
When it becomes blocked and inflamed, the result is appendicitis a surgical emergency.
Do dogs have an appendix?
No. PetsCare: "Dogs do not have an appendix. This is a normal anatomical difference between humans and canines."
Veterinary anatomy lecture material (SlideShare): "Vermiform appendix of cecum of man is absent in domestic animals but presents in rabbit."
Dial A Vet: "No, dogs do not have an appendix. They have a structure called the cecum, which is functionally different from the human appendix."
Animals that do have an appendix include: humans, some primates, rabbits, and certain other mammals with more plant-heavy diets. Animals that lack it include dogs, cats, and many other carnivores.
What dogs have instead: the cecum
Dogs have a cecum a short, pouch-like structure at the junction where the small intestine meets the large intestine.
Noble Vet Clinic: "Dogs have a structure called the cecum, a pouch located at the junction where the small and large intestines meet.
The cecum plays a role in breaking down fibrous plant material and supporting healthy gut bacteria."
Veterian Key (veterinary anatomy): "Although frequently described as the first part of the large intestine, the cecum in dogs is a true diverticulum that connects to the proximal colon."
Kenhub: "The main tasks of the cecum are the absorption of water and salts and the lubrication of the feces with mucus.
Especially components from plant-rich food (e.g. cellulose) are bacterially decomposed here."
Kenhub: "This explains why herbivores have considerably larger ceca in comparison to carnivores." Dogs, as primarily carnivores, have a relatively short and simple cecum compared to herbivorous species.
Functions of the canine cecum:
- Transition zone between small and large intestine
- Some fermentation of plant-based dietary fiber
- Support for beneficial gut bacteria
- Modest immune activity (lymphoid tissue present)
SustainableVet: "The cecum in dogs performs some similar functions to the human appendix, particularly in supporting gut bacteria and digestive processes."
Can dogs get appendicitis?
No. PetsCare: "No, dogs cannot get appendicitis because they don't have an appendix."
Appendicitis is specifically the inflammation of the vermiform appendix a structure dogs lack. Therefore, the diagnosis does not exist in canine medicine.
What dogs can get instead: typhlitis (cecal inflammation)
Noble Vet Clinic: "The cecum itself can become inflamed and infected, a condition that is similar to appendicitis in humans.
It's also known as typhlitis, which can be classified under colitis since it affects a part of the large intestine."
Noble Vet Clinic: "Typhlitis can come as a result of a variety of causes, such as bacteria, parasites, dietary changes, medication, and inflammatory bowel disease.
Dogs with cecal inflammation can often experience: abdominal pain, vomiting, and loss of appetite."
Noble Vet Clinic: "Diagnosing the condition typically involves a physical exam, fecal tests, and diagnostic imaging."
Typhlitis in dogs is rare. It is not an emergency in the same way human appendicitis is, but it warrants veterinary assessment when gastrointestinal signs are present.
Why is the appendix absent in dogs?
The presence or absence of the vermiform appendix tracks broadly with diet in evolutionary terms. Carnivores and omnivores with protein-dominated diets tend to have simpler cecal anatomy.
Herbivores, which need to ferment large amounts of plant fiber, have larger and more complex ceca and often retain a functional appendix.
Noble Vet Clinic: "Think of the cecum as a digestive powerhouse, an active player in digestion."
PetsCare: dogs evolved "a shorter, simpler digestive tract that's highly efficient at processing meat-based proteins and fats, with less emphasis on the complex fiber digestion that requires additional organs in plant-eating animals."
Gastrointestinal conditions to watch for in dogs
Without an appendix to worry about, owners should be aware of the gastrointestinal conditions that actually do affect dogs:
- Gastric dilatation-volvulus (GDV/bloat): stomach rotation emergency, most common in large deep-chested breeds
- Intestinal obstruction: from foreign bodies (toys, bones, fabric)
- Inflammatory bowel disease (IBD): chronic gut inflammation causing vomiting and diarrhea
- Parvovirus: severe viral enteritis, especially in unvaccinated young dogs
- Parasites: roundworms, hookworms, giardia, and others causing variable GI signs
Dial A Vet: "Common gastrointestinal issues in dogs, unlike appendicitis, often include symptoms such as vomiting, diarrhea, significant changes in appetite, and abdominal discomfort."
For the broader context of soft tissue surgical conditions that may relate to digestive and abdominal issues, see 15 common soft tissue surgeries in dogs explained simply.
Frequently asked questions
Do cats have an appendix?
No. Like dogs, cats lack a vermiform appendix. The absence is a feature of carnivorous mammals generally.
If dogs have no appendix, can they still have abdominal pain that looks like appendicitis?
Yes. Dogs can have other causes of acute abdominal pain intestinal obstruction, bloat, pancreatitis, typhlitis that produce similar signs to human appendicitis.
Abdominal pain in a dog is always a reason to see a vet promptly.
Has a dog ever been diagnosed with appendicitis?
Not with true appendicitis, since the structure is absent. Misuse of the term in lay discussions sometimes occurs when cecal inflammation (typhlitis) is present, but these are different conditions.
Is the cecum ever surgically removed in dogs?
Rarely, and only in cases of cecal inversion or typhlocolitis that fails to respond to medical management. Cecal surgery is uncommon and performed in specialist settings.
Do rabbits have an appendix?
Yes. Rabbits have a large, well-developed cecum and a functional appendix, which relates to their high-fiber herbivorous diet requiring extensive fermentation.
Why do herbivores have an appendix but carnivores do not?
The appendix is thought to support fermentation of plant fiber and maintain beneficial gut bacteria.
Herbivores, which digest large amounts of complex plant material, benefit more from this structure. Carnivores have simpler digestive tracts optimized for protein digestion and generally lack the appendix.
Resources
- PetsCare. Do Dogs Have an Appendix? Canine Digestive Facts. petscare.com
- Noble Vet Clinic. Do Dogs Have Appendicitis? Vet-Verified Answers. noblevetclinic.com
- Dial A Vet. Do Dogs Have an Appendix Like Humans? dialavet.com
- Kenhub. Cecum and Vermiform Appendix: Anatomy and Function. kenhub.com
- Veterian Key. Colon. veteriankey.com

Get a Free Poster
Enhance your workspace with a high-quality radiographs reference poster, designed for veterinary professionals. This free physical poster will be shipped directly to you—just fill out the form to request your copy.


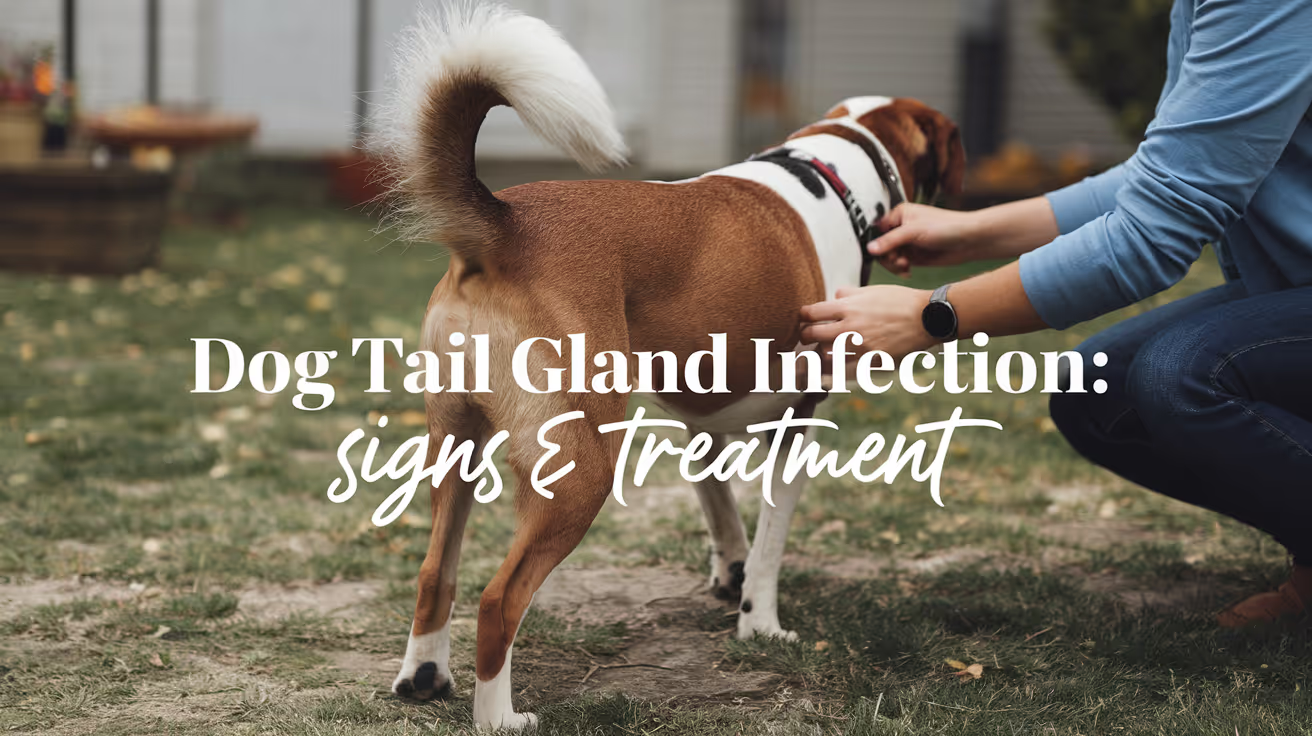


Taking Great TPLO Radiographs
Click Below to Watch Live Video Demos


We'll send you a Free Wall Poster with all the steps
Step #1
Getting Ready
Ensuring a clean surgical field starts with proper skin preparation. This video demonstrates the best practices for:
- Shaving the patient – Achieving a close, even shave while minimizing skin irritation
- The Dirty Scrub – The initial skin prep step to remove surface debris and reduce bacterial load before the sterile scrub.
Following these techniques helps reduce infection risk and improve surgical outcomes. Watch the video to see how it’s done effectively!


Step #2
Reduce Your Risks
Many surgeons are shocked to find out that their patients are not protected from biofilms and resistant bacteria when they use saline and post-op antibiotics.
That’s Where Simini Comes In.
Why leave these risks and unmanaged? Just apply Simini Protect Lavage for one minute. Biofilms and resistant bacteria can be removed, and you can reduce two significant sources of infection.
Step #3
Take the Course
Preventing surgical infections is critical for patient safety and successful outcomes. This course covers:
- Aseptic techniques – Best practices to maintain a sterile field.
- Skin prep & draping – Proper methods to minimize contamination.
- Antibiotic stewardship – When and how to use perioperative antibiotics effectively.
Stay up to date with the latest evidence-based protocols. Click the link to start learning and earn CE credits!

Things to know

Warning Signs to Watch for After Neutering a Dog
Learn the key warning signs to watch for after neutering your dog to ensure a safe recovery and when to seek veterinary care.
Most dogs recover from neutering without a hitch. But some do not, and the difference between a minor complication and a serious one often comes down to how quickly you notice it.
The tricky part is that some things that look alarming are completely normal, and some things that look minor are not.
This guide gives you a clear, symptom-by-symptom breakdown of what is expected, what to monitor, and what requires an immediate call to your vet.
Quick answer: Mild grogginess, reduced appetite, and slight redness at the incision are all normal in the first 24 to 48 hours. Ongoing bleeding, yellow or green discharge, swelling that grows after day three, lethargy lasting more than 48 hours, or a wound that appears to be opening are all warning signs that need veterinary attention promptly.
Key takeaways
- Normal recovery includes mild grogginess, slight swelling, and reduced appetite for 24 to 48 hours.
- Warning signs that need a vet call include discharge, increasing swelling, continuous bleeding, and persistent lethargy.
- Emergency signs require immediate action: pale gums, collapse, or abdomen that appears bloated.
- Licking is the most preventable complication: the cone prevents most infection and wound problems.
- Daily incision checks catch problems early, when they are still easy to treat.
- When in doubt, call your vet. It is always better to check than to wait.
What normal recovery looks like
Understanding normal first makes it easier to spot abnormal.
In the first 24 to 48 hours after surgery, expect:
- Grogginess, drowsiness, or mild disorientation from anesthesia
- Reduced appetite or no interest in food
- Mild redness or slight puffiness at the incision site
- A small amount of clear or very faintly pink fluid at the wound in the first 24 to 72 hours
- Quieter behavior and preference for rest
- Possible shivering or restlessness as anesthesia wears off
All of these resolve on their own. By day two or three, your dog should be more alert, eating normally, and showing interest in their surroundings again.
Warning signs: incision and wound
The incision site is where most post-surgical problems show up first. Check it morning and evening throughout the recovery period.
Discharge
Swelling
Some swelling in the first two to three days is expected. The body's inflammatory response is part of normal healing.
Swelling that increases after day three, feels warm and firm to the touch, or is accompanied by redness and discharge is not normal. This pattern points to infection or hematoma and needs veterinary evaluation.
In large breed male dogs, scrotal swelling is a specific concern. Moderate scrotal swelling that resolves within a week is often normal. Swelling that grows, becomes hot, or is accompanied by pain or discharge is not.
Wound opening
The incision edges should be staying together, not pulling apart.
If you see any gap in the wound, exposed pink or red tissue beneath the skin, or sutures that appear to have pulled through, contact your vet immediately. This is called dehiscence and requires prompt attention.
Do not attempt to close an open wound yourself. Keep your dog calm, prevent licking, and get to your vet.
Warning signs: behavior and general health
Lethargy
Mild tiredness for the first 24 to 48 hours is expected. Anesthesia and surgery are taxing on the body.
Lethargy that persists beyond 48 hours, or a dog that is completely unresponsive, unable to stand, or does not improve over the first two days, is a warning sign. Call your vet.
Loss of appetite
Not wanting to eat on surgery day and the following morning is normal.
A dog that still refuses food at 48 hours after surgery, particularly if also vomiting, may be experiencing a complication. Call your vet if appetite has not returned by day two.
Vomiting
One or two episodes of vomiting the evening of surgery can be a side effect of anesthesia. This is within normal range.
Vomiting that continues beyond 24 hours after surgery, or that contains blood, requires a vet call. Persistent vomiting can indicate a reaction to pain medication, an obstruction, or another post-surgical issue.
Difficulty urinating or defecating
Some dogs take a day or two to have a bowel movement after surgery. This is usually due to fasting before the procedure and reduced activity afterward.
No bowel movement after three to five days is worth reporting. Difficulty or pain during urination, especially in male dogs, can indicate inflammation near the surgical site and should be checked promptly.
Warning signs: pain
Your dog will have been sent home with pain medication. Use it on schedule.
Signs that pain is not being adequately controlled include:
- Whining, yelping, or crying that persists beyond the first day
- Hunched posture or reluctance to sit or lie down
- Guarding the incision site by flinching or snapping when touched
- Panting excessively without exertion
- Trembling or shivering beyond the first few hours post-anesthesia
Contact your vet if pain seems severe after day three, or if prescribed medication does not appear to be working. Do not give human pain medications. Aspirin, ibuprofen, and acetaminophen are toxic to dogs and can cause serious harm or death.
Emergency warning signs: act immediately
These signs require emergency veterinary care, not a wait-and-see approach.
Call your vet or go to an emergency clinic immediately if you observe:
- Pale, white, or bluish gums
- Sudden collapse or inability to stand
- Abdomen that appears bloated, distended, or hard
- Heavy bleeding that does not stop
- Rapid or labored breathing
- Signs of extreme pain: screaming, freezing in place, inability to move
These can indicate internal bleeding, systemic infection, or other serious complications that are time-sensitive.
The most preventable warning sign: licking
Most of the infection and wound-breakdown cases that end up back at the vet have one thing in common: the cone came off.
Licking introduces bacteria directly into the wound, softens the tissue, and can pull sutures loose. A dog that licks its incision even once can undo days of clean healing.
The E-collar stays on for the full 10 to 14 days. If your dog refuses the hard plastic cone, soft inflatable collars or recovery suits are legitimate alternatives, provided they reliably prevent the dog from reaching the wound site.
For a full guide on what normal recovery looks like day by day and how to distinguish healing progress from early complications, tracking the incision against a clear timeline makes daily monitoring more actionable.
When to call vs. when to go straight to emergency care
Use this as a quick decision guide.
When in doubt, call. Most veterinary practices would rather hear from you about something minor than have you wait too long on something serious.
The role of aftercare in preventing complications
Most warning signs are preventable, not inevitable.
The dogs most likely to develop post-surgical complications are those given too much freedom too soon, or whose cones were removed early. Following a complete aftercare plan covering rest, incision monitoring, medications, and the cone is the most effective way to keep your dog out of trouble during recovery.
For a complete, step-by-step plan on full post-surgery care covering each day of the recovery window, what to feed, how to check the wound, and how to keep your dog calm, having that reference from day one prevents most of the issues covered in this article. Understanding surgical risks that can cause complications beyond the routine is also worth reading before surgery if you have a large breed or older dog.
Frequently asked questions
Is it normal for my dog to be lethargic after neutering?
Yes, for the first 24 to 48 hours. Anesthesia causes genuine fatigue, and your dog needs rest. Lethargy that does not improve by day two or three, or a dog that is completely unresponsive, warrants a call to your veterinarian.
What does an infected incision look like?
An infected incision typically shows yellow or green discharge, increasing redness and swelling after the first few days, warmth around the wound, and often a foul odor. Any of these signs alone justify a same-day call to your vet. For a detailed visual guide to signs of an infected incision, knowing what to look for at each stage of healing helps you act at the right time.
My dog is licking the incision despite wearing a cone. What should I do?
Check that the cone extends at least two inches past your dog's nose. If it is too short, your dog can still reach the incision. Consider switching to a soft inflatable collar or recovery suit if the hard cone is not fitting properly. Contact your vet if there are signs the wound has been compromised.
Should I be worried about scrotal swelling after neutering?
Some scrotal swelling in the first few days is normal. The scrotum fills with fluid as part of the healing response. Swelling that increases after day three, feels hot or very firm, or is accompanied by discharge or pain is abnormal and should be evaluated by your vet.
When should I go to an emergency vet after neutering?
Go immediately if your dog has pale or white gums, collapses, has a bloated or hard abdomen, or is bleeding heavily and continuously. These signs can indicate internal bleeding or systemic infection and are time-sensitive emergencies.
The difference between a smooth recovery and a complication is usually not bad luck. It is usually the cone coming off too early, too much activity on day four, or a wound check that was skipped. Pay attention for two weeks, and most dogs sail through without a single issue.
Resources
The following sources were used as reference and background for this article:
- Ace of Spays. Signs of Complications After Spay/Neuter Surgery: When to Contact Your Veterinarian. aceofspays.com
- Animal Humane Society. Spay/Neuter Post-Surgical Care and Recovery Instructions. animalhumanesociety.org
- Homeaglow. 10 Warning Signs After Spaying or Neutering Your Dog. homeaglow.com
- American Kennel Club. Post-Surgical Care for Dogs Following a Spay or Neuter. akc.org
- Union Hill Animal Hospital. Neutering Recovery Guide for Male Dogs. unionhillvet.com
- Rivergate Veterinary Clinic. Signs of Infection After Spaying or Neutering a Dog. rivergateveterinaryclinic.com
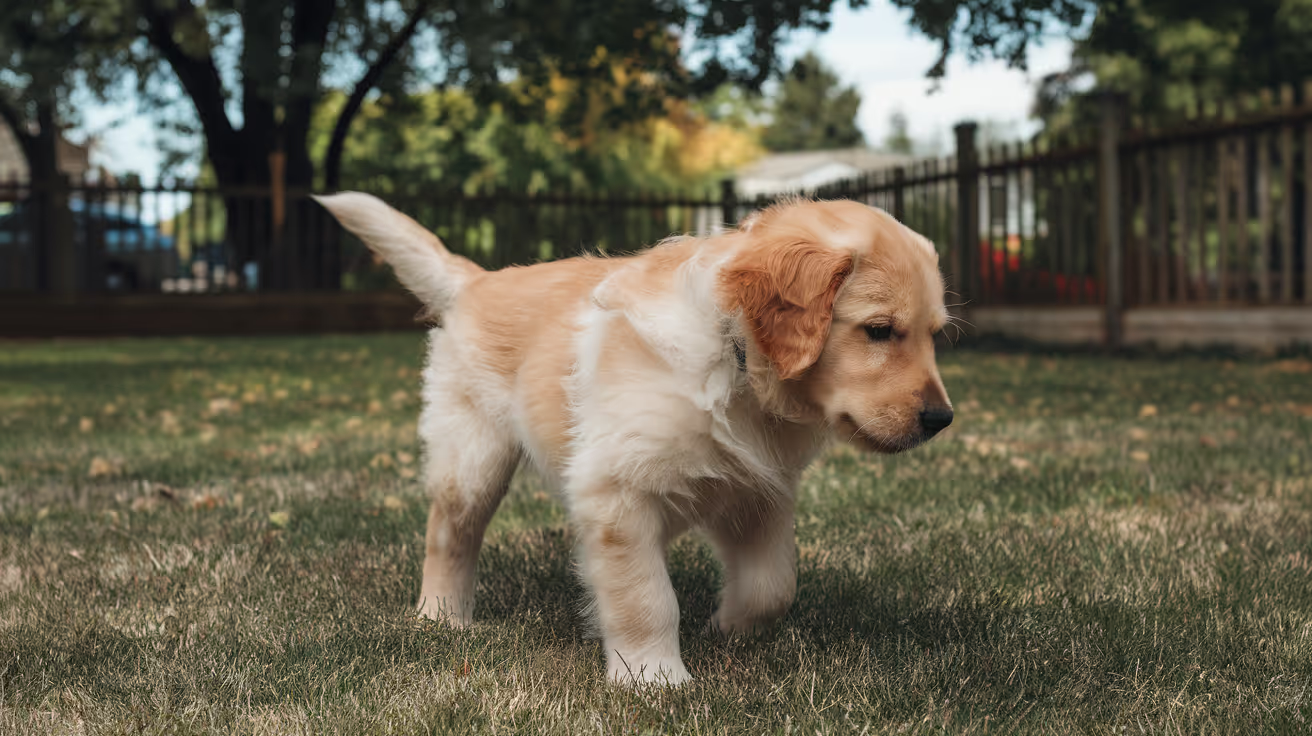
Can Dogs Get Impetigo?
Learn if dogs can get impetigo, its symptoms, causes, treatment, and prevention tips to keep your pet healthy.
Yes, dogs can get impetigo and it is more common than most owners realize, particularly in puppies between 3 and 6 months of age. The condition goes by several names: puppy pyoderma, juvenile pustular dermatitis, and canine impetigo. All refer to the same superficial bacterial skin infection.
Understanding what it looks like, how it differs from similar conditions, and when to call the vet can save your puppy from unnecessary discomfort and prevent complications.
Quick answer: Yes, dogs can get impetigo: a superficial bacterial skin infection from Staphylococcus, most common in puppies aged 3 to 6 months. Pustules appear on the belly and groin. Canine impetigo is not contagious to other dogs.
Key takeaways
- Canine impetigo is caused by Staphylococcus pseudintermedius or Staphylococcus aureus, the staph species responsible for most dog skin infections
- Puppies aged 3 to 6 months are most at risk due to their immature immune systems
- Pustules appear on hairless areas: belly, groin, armpits, and inside the hind legs
- Canine impetigo is not contagious to other dogs, unlike the human version
- Most mild cases resolve with topical antibiotics and medicated shampoo; severe cases need oral antibiotics
- Ringworm and mange can mimic impetigo a vet swab or skin scraping is needed to confirm the diagnosis
What is canine impetigo?
Impetigo in dogs is a superficial pyoderma an infection of the outermost layers of skin. WagWalking classifies it under three types of pyoderma: surface pyoderma (most superficial), superficial bacterial folliculitis (involving hair follicles), and deep pyoderma (penetrating deeper tissue layers). Puppy impetigo is the surface or superficial form.
Pets4Homes explains the mechanism: "It is usually caused by Staphylococcus bacterial strains, including Staphylococcus aureus and Staphylococcus pseudintermedius, which can cause pustules, crusty skin, and discomfort." These bacteria are normally present on healthy dog skin. They cause infection when the skin barrier is disrupted or the immune system is not yet mature enough to control their growth.
Unlike impetigo in humans, which spreads easily between people, Dogtime confirms: "Unlike human impetigo, canine impetigo is not contagious." This is an important distinction for multi-dog households.
Which dogs get impetigo?
Puppies 3 to 6 months
This is by far the most common group. BetterPet explains: "Puppies' immune systems aren't fully developed, making them especially vulnerable to infections." The immune system matures during the first year of life, which is why impetigo is primarily a puppy condition.
Puppies in unsanitary or communal environments
BetterPet notes that "puppies that live in unsanitary conditions are at higher risk. Communal environments like doggie daycares and boarding centers can be breeding grounds for the types of bacteria that can cause skin infections."
Dogs with underlying conditions
Adult dogs can develop impetigo, but it typically signals an underlying problem: allergies causing chronic skin scratching and damage, parasites (fleas, ticks) disrupting the skin barrier, hormonal disorders (hypothyroidism, Cushing's disease) impairing immune function, or other immunocompromising conditions.
What does impetigo look like in dogs?
The hallmark sign is small, pus-filled pustules on hairless or thinly haired areas of skin. Common locations include:
- Belly and abdomen (the most common site in puppies)
- Groin and inner thighs
- Armpits
- Inside the hind legs
- Muzzle and face (less common)
The pustules are fragile. Pets4Homes describes what happens when they rupture: "These pustules are fragile and itchy, rupturing easily to leave sore, inflamed areas that may scab over."
After rupturing, the affected skin develops yellow crusts, redness, and mild hair loss around the lesion. Dogtime notes that "the condition typically affects puppies under one year old" and the lesions cluster in areas where the skin is thinner and more exposed.
How impetigo differs from similar conditions
Impetigo is frequently confused with other skin conditions that look similar. A vet examination is needed to confirm the diagnosis.
WagWalking: "The veterinarian will take a skin scraping to get a tissue sample for microscopic examination, samples of the fluid or pus from the blisters for cytological analysis and direct impression smears of the lesions."
For how pustules connect to other bacterial skin conditions that progress if untreated, see pustules associated with impetigo.
How vets diagnose impetigo
Your vet will start with a visual examination of the pustules and lesion pattern. For puppies with classic presentation on the belly and groin, a clinical diagnosis may be sufficient. For atypical cases or adult dogs, the vet will:
- Skin scraping or swab: examined under a microscope to identify bacteria and rule out mites
- Cytology: direct impression smear from a ruptured pustule to identify bacterial cell types
- Fungal culture: rules out ringworm, which can look similar
- Culture and sensitivity test: used in recurrent or severe cases to identify the specific bacterial strain and guide antibiotic selection
Dogtime: "In some cases, your vet might recommend a culture and sensitivity test to identify the specific bacterial strain and determine the most effective antibiotic treatment."
Treatment options
Mild cases: topical treatment
Most puppy impetigo cases respond well to topical treatment without oral antibiotics. Dogtime lists the approach: "Mild cases of impetigo can often be managed with topical treatments."
Practical steps include:
- Medicated shampoo: chlorhexidine or benzoyl peroxide shampoo used 2 to 3 times per week. These disrupt bacterial colonies on the skin surface.
- Topical antibiotic cream or ointment: applied directly to lesions after cleaning
- Keeping the area dry and clean: moisture encourages bacterial growth
BetterPet notes that "this skin infection in puppies can resolve spontaneously, especially if the cause is related to factors like an unclean environment that a pup is then removed from."
Moderate to severe cases: oral antibiotics
When pustules are widespread, the dog is uncomfortable, or topical treatment has not resolved the infection within 2 to 3 weeks, oral antibiotics are prescribed. Common choices include cephalexin, amoxicillin-clavulanate, or trimethoprim-sulfamethoxazole, typically for 3 to 4 weeks.
WagWalking: "Although this condition may resolve itself without any treatment, antibiotics can speed up the recovery time and prevent spreading."
Underlying cause treatment
In adult dogs, treating impetigo without addressing the underlying cause leads to recurrence. Allergy management, parasite control, or hormonal treatment may be required alongside antibiotic therapy.
Home care during treatment
- Keep the affected skin clean and dry
- Avoid bathing with regular shampoo during treatment use the prescribed medicated formula only
- Prevent licking with an E-collar if the puppy is bothering the lesions
- Do not pop or squeeze pustules this increases the risk of secondary infection and scarring
- Wash bedding frequently to reduce bacterial load in the environment
For how scabs develop from ruptured pustules and bacterial skin infections, see scabs as a sign of skin infection. For how furuncles represent a more severe progression of skin infection beyond impetigo, see furuncles as a progression of skin infection.
Frequently asked questions
Is dog impetigo contagious to humans or other pets?
Canine impetigo caused by Staphylococcus pseudintermedius is not typically contagious to healthy humans or other dogs. However, Staphylococcus aureus strains can occasionally transfer between species. As a precaution, wash hands after handling a puppy with active impetigo and keep other pets separated until the infection is resolved.
How long does impetigo take to clear up in dogs?
Mild cases treated with medicated shampoo and topical antibiotics typically clear within 2 to 3 weeks. Cases requiring oral antibiotics usually resolve within 3 to 4 weeks of starting treatment. If the lesions have not improved after 3 weeks of appropriate treatment, return to the vet the diagnosis may need to be reconsidered or the antibiotic changed based on culture results.
Can impetigo in dogs be mistaken for ringworm?
Yes. Both conditions cause crusty lesions and hair loss in similar areas. The key difference is that ringworm causes circular bald patches and glows under a UV (Wood's) lamp, while impetigo does not. A vet skin scraping and fungal culture can definitively distinguish between them. Do not attempt to treat based on appearance alone.
Do puppies need antibiotics for impetigo?
Not always. Mild cases in healthy puppies in a clean environment often resolve with medicated shampoo baths alone. Your vet will assess whether oral antibiotics are needed based on the severity of the infection, how widespread the pustules are, and whether your puppy seems uncomfortable or systemically unwell.
Can adult dogs get impetigo?
Yes, but it is much less common. Adult dogs that develop impetigo usually have an underlying cause: allergies causing chronic skin damage, external parasites disrupting the skin barrier, or an immunosuppressive condition. A vet will investigate for these factors in any adult dog presenting with impetigo-like lesions.
How do I prevent impetigo from recurring in my puppy?
Keep bedding and living areas clean and dry. Bathe regularly with a mild or pH-balanced dog shampoo. Treat any parasite infestations promptly. Address allergies if your dog chronically licks or scratches. For puppies, the immune system matures over the first year, so most puppies naturally grow out of their susceptibility to recurring impetigo as they age.
Resources
- Dogtime. Puppy Impetigo in Dogs: Symptoms, Causes and Treatments. dogtime.com
- BetterPet. How to Identify and Treat Impetigo in Puppies. betterpet.com
- WagWalking. Puppy Impetigo in Dogs. wagwalking.com
- Pets4Homes. Puppy Impetigo: Causes, Symptoms and Treatment. pets4homes.co.uk

Do Puppies Calm Down After Being Spayed?
Learn how spaying affects puppy behavior and whether puppies calm down after the procedure.
Spaying a puppy and expecting her to calm down afterward is one of the most common expectations owners bring to the vet. Sometimes it is accurate. Often it is not quite right.
Puppies behave the way they do for several reasons: genetics, breed characteristics, developmental stage, exercise needs, and yes, hormones. Spaying addresses only the hormonal piece.
Here is what the evidence actually says about whether spaying calms puppies down, when it applies, and when it does not.
Quick answer: Spaying can reduce hormone-driven behaviors in female puppies, but most puppy energy is not hormone-driven. The wild, excitable behavior typical of young dogs is largely developmental and will naturally settle as the puppy matures, with or without surgery. Spaying eliminates heat cycle behaviors but does not reprogram a puppy's underlying energy level or temperament.
Key takeaways
- Most puppy energy is developmental, not hormonal: High activity in puppies reflects youth and brain development, not reproductive hormones.
- Heat cycle behaviors are eliminated by spaying: Restlessness, roaming, and urine marking during heat stop permanently after spaying.
- Natural maturation also produces calming: Puppies typically settle between 18 months and 3 years regardless of spay status.
- Timing of spaying affects long-term behavioral outcomes: Research suggests very early spaying may increase fearfulness in some dogs.
- Training and exercise calm puppies more reliably than surgery: These remain the primary tools for managing puppy behavior.
- Full post-spay hormonal adjustment takes two to three months: Not days.
Why puppies are energetic in the first place
Before connecting spaying to calming, it is worth understanding why puppies behave the way they do.
Puppy behavior is driven by several overlapping factors:
- Developmental stage: Puppies are neurologically immature. Their brains are still forming connections, their impulse control is limited, and they are driven to explore, play, and interact constantly.
- Breed genetics: A Border Collie puppy's drive, a Labrador's enthusiasm, a Jack Russell's intensity: these are genetic. They are not hormonal.
- Exercise and stimulation needs: Puppies that are not adequately exercised and mentally engaged redirect that energy into chaos.
- Learning and socialization: Puppies are in a constant state of learning. Without clear guidance, they default to whatever feels interesting.
- Hormonal influences: A relatively small proportion of puppy behavior is directly driven by reproductive hormones, and this increases as the puppy approaches sexual maturity.
Spaying addresses only item 5. Items 1 through 4 are untouched by surgery.
What spaying actually removes in a female puppy
Spaying removes the ovaries, which are the primary source of estrogen and progesterone. The effects are specific.
What spaying eliminates:
- Heat cycles, which in female dogs typically begin around 5 to 6 months of age in small breeds and later in large breeds
- The behavioral disruption of heat: restlessness, urine marking to attract males, roaming, vocalization
- False pregnancy cycles if the puppy would have been prone to these
- Cyclical mood changes linked to the hormonal fluctuations of estrus
What spaying does not eliminate:
- Breed-driven energy and drive
- Developmental excitability and poor impulse control that comes with youth
- Learned behaviors from the puppy's environment and training history
- Anxiety or fearfulness that has non-hormonal causes
The natural calming process: maturation
Here is a piece of the puzzle that often gets overlooked in the conversation about spaying and calming.
Puppies naturally become calmer as they mature.
Most dogs reach a noticeably more settled behavioral baseline between 18 months and 3 years of age. This happens regardless of spay status. The neurological development that improves impulse control, the reduction of developmental chaos, and the establishment of routines all contribute to this natural calming process.
Many owners who spay a puppy and then notice she is calmer six months later attribute the change to the surgery. In many cases, maturation deserves significant credit.
This is not to dismiss the real effects of spaying. It is to provide accurate context so that owners do not overestimate surgery's role or underestimate the contribution of time, training, and maturation.
What research says about puppies and spaying
The behavioral research on early spaying and puppies is worth understanding before making timing decisions.
Established findings:
- Spaying before the first heat cycle eliminates heat-related behaviors and reduces mammary cancer risk significantly.
- Behavioral problems were reduced or eliminated in the majority of spayed females in studies, but this applies primarily to hormone-driven behaviors.
More cautionary findings:
- Multiple studies have found that dogs spayed at a very young age, particularly before six months, show higher rates of fearfulness and anxiety than dogs spayed later.
- A study of Vizslas found that the younger the dog at the time of spaying, the earlier the mean age of onset of a behavioral disorder.
- Research using the C-BARQ assessment tool found increased fearfulness and touch sensitivity in spayed dogs compared to intact females.
These findings do not mean spaying causes behavioral problems in all puppies. They mean that very early spaying carries a different behavioral risk profile than spaying after maturity, and this is worth discussing with your vet when deciding on timing.
For the broader picture of full overview of behavior changes after spaying, including how the research applies to different ages and sexes, that guide provides the complete context.
Breed differences: why some puppies stay energetic after spaying
Breed temperament and genetic drive are not hormonal. Surgery does not change them.
A working Border Collie will need two hours of physical and mental exercise daily after spaying, just as she did before. An Australian Shepherd's herding instinct will remain intact. A Jack Russell Terrier's prey drive and intensity will not be reduced by the removal of her ovaries.
High-drive breeds are that way because of generations of selective breeding for those traits. Those traits sit in genetics, not in the reproductive system.
What this means practically:
If you have a high-energy breed puppy and are hoping spaying will reduce her energy to more manageable levels, realign those expectations before surgery. The energy level will remain. What changes is the absence of heat cycles and their associated disruption.
The timeline: when do puppies settle after spaying?
Two separate timelines operate here, and distinguishing them is important.
Post-spay hormonal adjustment:
- Days 1 to 14: Recovery from surgery. Any behavioral changes reflect pain and anesthesia.
- Weeks 2 to 6: Estrogen and progesterone levels declining.
- Months 2 to 3: Hormonal stabilization complete.
Developmental maturation:
- 6 to 12 months: Peak puppy chaos in most breeds.
- 12 to 18 months: Gradual improvement in impulse control and ability to settle.
- 18 months to 3 years: Most dogs reach a noticeably more settled behavioral baseline.
The calming that owners observe after spaying a puppy is often a combination of both timelines working together. The hormonal adjustment contributes. Maturation contributes. Exercise and training contribute. It is rarely attributable to surgery alone.
For the developmental nuances specific to younger dogs, the guide on calming effects in adult dogs covers the broader behavioral picture across different life stages.
What actually calms a puppy down
Whether or not your puppy is spayed, these are the most reliable interventions for managing puppy behavior:
1. Adequate physical exercise
A puppy that has genuinely burned physical energy is a calmer puppy at rest. Exercise needs vary by breed but most puppies are under-exercised relative to their needs.
2. Mental stimulation
Puzzle feeders, sniff walks, training sessions, and enrichment activities tire puppies in a way that physical exercise alone does not. Mental fatigue produces genuine calm.
3. Sleep
Puppies need significantly more sleep than adult dogs, often 16 to 18 hours per day. Over-tired puppies become dysregulated and difficult. Enforced rest periods reduce chaos.
4. Consistent training
Teaching a puppy to settle on a mat, to wait before doors, to sit before meals: these habits build impulse control that transfers across contexts. Training is the most durable path to a calm puppy.
5. Routine
Predictable daily schedules reduce ambient anxiety and help puppies know what to expect, which supports more settled behavior.
Spaying can contribute by removing the hormonal disruption of heat cycles. But it is most effective as one part of this picture, not as a standalone solution.
Frequently asked questions
Will my puppy calm down after being spayed?
She may become calmer in specific ways: heat cycle behaviors will be eliminated, and the cyclical hormonal disruption of estrus will stop. Whether she becomes generally calmer depends on what is driving her behavior. Developmental energy and breed-specific drive are not affected by spaying. For the best age to spay a puppy and how timing affects both health and behavioral outcomes, that guide covers the evidence-based timing recommendations in detail.
My puppy is three months old and incredibly wild. Should I spay her now to calm her down?
Spaying a puppy that young is unlikely to calm her down because the energy she is displaying is developmental, not hormonal. Female puppies typically do not experience their first heat until 5 to 6 months of age at the earliest. Spaying before that will not eliminate hormonal behavior because it has not yet started. What will help is exercise, training, mental stimulation, and sleep.
How long after spaying will my puppy start to calm down?
If the calming effect is going to occur, behavioral changes related to hormone reduction appear over two to six weeks and stabilize by two to three months. Any calming that happens faster than this is likely related to recovery rest and routine, not hormonal adjustment.
My puppy was spayed and she is just as hyper as before. Why?
Because spaying removes the hormonal layer of behavior, not the developmental and breed-driven layers. If her energy and excitability are not heat-driven, spaying was never going to address them. Training, exercise, and maturation are the tools for this type of puppy behavior.
What should I expect during my puppy's recovery from spaying?
The 10 to 14 day recovery period requires activity restriction, E-collar use, and daily incision monitoring. For a complete day-by-day guide on what to expect during puppy recovery, including how puppy recovery specifically differs from adult dog recovery, that guide covers every element of the post-surgical window.
Puppies are not energetic because of estrogen. They are energetic because they are puppies. Spaying addresses the hormonal layer of behavior, which for a young dog has barely had time to develop before surgery. The wild, chaotic, wonderful energy of a puppy is developmental. It settles with time, training, exercise, and maturation. Spaying contributes by preventing heat cycles and the disruption they bring. The rest of the work is yours.
Resources
The following sources were used as reference and background for this article:
- American Kennel Club. How Will Spaying Change My Dog? anasazivet.com
- Stanley Coren, Psychology Today. Are There Behavior Changes When Dogs Are Spayed or Neutered? psychologytoday.com
- Rebarkable. Do Puppies Calm Down After Being Spayed? rebarkable.com
- American Veterinary Medical Association (AVMA). Spaying and Neutering. avma.org
- PubMed. Changes in the behavior of dogs after castration. pubmed.ncbi.nlm.nih.gov
Can Dogs Get a Staph Infection?
Learn if dogs can get staph infections, their symptoms, causes, treatment, and prevention tips to keep your pet healthy.
Yes, dogs get staph infections, and they're among the most common skin problems seen in veterinary practice.
The bacteria responsible, primarily Staphylococcus pseudintermedius, are already present on healthy dogs. They live on the skin, in the mouth, nose, and gut without causing problems in most cases. Infection happens when the skin barrier breaks down or the immune system weakens, giving bacteria the opportunity to move from normal colonizer to active pathogen.
Quick answer: Yes, dogs get staph infections. Staphylococcus pseudintermedius is the most common cause in dogs and is found on the skin of roughly 50% of healthy dogs as normal flora. Infection typically occurs when the skin is damaged or immunity is compromised. Staph infections in dogs present as skin lesions, pustules, redness, and hair loss, and are treated with topical or systemic antibiotics depending on severity.
Key takeaways
- S. pseudintermedius is the primary staph species in dogs, not S. aureus (which is more common in humans).
- Staph is normal skin flora in about 50% of dogs and only causes infection under specific conditions.
- Skin barrier disruption is the most common trigger: allergies, wounds, and scratching allow bacteria in.
- Pyoderma (staph skin infection) is the most common form dogs develop, accounting for 92% of canine dermatitis.
- MRSP is the resistant form to watch for, particularly in dogs with prior antibiotic exposure.
- Transmission to humans is possible but uncommon with basic hygiene precautions.
Which staph bacteria affects dogs?
The primary staph species in dogs is Staphylococcus pseudintermedius. This is distinct from Staphylococcus aureus, which causes most human staph infections.
MedVet explains: "S. pseudintermedius is a bacterium commonly found on the skin, mouth, nose, or in the gastrointestinal tract of approximately 50% of dogs and cats. It typically causes no problems at all but can cause opportunistic infections."
The key word is opportunistic. This bacterium waits. When conditions shift in its favor, it becomes a pathogen.
Staphylococcus aureus can also affect dogs, though it's less common than in humans. Dogs can also harbor MRSA (methicillin-resistant S. aureus), but veterinarians are more concerned about MRSP (methicillin-resistant S. pseudintermedius) because it's more prevalent in canine infections.
For the full overview of staph infections in dogs including all affected body systems, see full overview of staph infections in dogs.
For the full breakdown of what staph aureus specifically is in dogs, see what staph aureus is specifically.
What triggers a staph infection in dogs?
Staph doesn't establish infection in healthy skin. Something has to compromise the barrier first.
Skin barrier disruption
The most common triggers are anything that breaks the skin or weakens its protective function:
- Allergies: atopic dermatitis causes chronic scratching and licking, creating micro-abrasions where bacteria enter
- Wounds and abrasions: even small cuts allow surface bacteria to penetrate
- Parasites: fleas and mites damage skin integrity and cause scratching-related trauma
- Moisture: skin folds and areas that stay wet create ideal bacterial growth conditions
Immune system compromise
Dogs with conditions that impair immune function are at higher risk:
- Hypothyroidism: reduces immune response and alters skin cell turnover
- Cushing's disease (hyperadrenocorticism): excess cortisol suppresses immune defenses
- Diabetes mellitus: impairs white blood cell function and healing
- Long-term corticosteroid use: similar effect to Cushing's, suppressing local immunity
Age and breed factors
Puppies have immature immune systems and are more susceptible to staph. Elderly dogs have declining immune function. Breeds with skin folds (Bulldogs, Shar-Peis, Basset Hounds) are at higher baseline risk because the warm, moist fold environment supports bacterial overgrowth.
What does a staph infection look like in dogs?
Staph infection in dogs most commonly presents as pyoderma, literally "pus in the skin." The clinical appearance varies by depth and severity.
Surface signs (superficial pyoderma):
- Small round pustules (pimple-like lesions)
- Redness and inflammation around hair follicles
- Circular crusted lesions with a clearing center ("epidermal collarettes")
- Hair loss in affected patches
- Itching and scratching
Deep infection signs:
- Nodules or boils beneath the skin surface
- Discharge from draining tracts
- Significant swelling and pain on palpation
- Fever and lethargy in severe cases
The AKC notes: "Dogs with allergies or diseases that weaken the immune system can develop infections in their skin, ears, and respiratory, reproductive, or urinary tracts."
Staph infections can affect the ears (otitis), urinary tract, and surgical wounds, not just the skin surface.
For how early-stage staph infections look and how they progress, see early signs of staph infection in dogs.
Diagnosis
Your vet will use one or more of these methods to confirm a staph infection:
Skin cytology: tape pressed to the skin collects surface cells and bacteria, then stained and examined under a microscope. Provides rapid results and can identify bacteria and inflammatory cells.
Culture and sensitivity: a swab from the lesion is cultured in a laboratory to identify the specific species and determine which antibiotics it is and isn't resistant to. Takes 5 to 7 days but is essential when MRSP is suspected or initial treatment fails.
Skin biopsy: used in severe or unusual presentations to examine deeper tissue changes.
Treatment
Treatment depends on whether the infection is superficial or deep and whether antibiotic resistance is a concern.
Topical treatment
Superficial staph infections often respond well to topical antibacterial therapy alone:
- Antibacterial shampoos: chlorhexidine-based or benzoyl peroxide shampoos used 2 to 3 times weekly
- Topical sprays or wipes: chlorhexidine applied directly to lesion areas
- Topical antibiotics: mupirocin or fusidic acid for localized infections
Topical treatment is preferred where possible because it avoids systemic antibiotic exposure and reduces resistance pressure.
Systemic antibiotics
More extensive or deep infections require oral antibiotics. The choice must be guided by culture and sensitivity results, particularly when MRSP is possible. Commonly used antibiotics (when sensitivity allows) include:
- Cefalexin (cephalexin)
- Clindamycin
- Doxycycline
- Trimethoprim-sulfamethoxazole
Course length: typically 3 to 6 weeks for superficial infections, longer for deep pyoderma or recurrent cases.
Addressing the underlying cause
Treating the staph infection without addressing what enabled it leads to recurrence. If allergies are the root cause, allergy management must be part of the plan. If hypothyroidism is present, thyroid supplementation is needed alongside antibiotic treatment.
Can staph spread from dogs to humans or other dogs?
Transmission is possible but uncommon with basic precautions. The AKC notes: "Staphylococcus pseudintermedius can be transferred from other dogs and even the people they live with. However, transmission between dogs and humans is uncommon."
Published case reports confirm that S. pseudintermedius can cause skin and soft tissue infections in humans who have close contact with infected dogs, typically through wound exposure or direct skin contact.
Practical hygiene during your dog's staph infection:
- Wash hands after handling the dog or their bedding
- Avoid direct contact between the dog's lesions and your broken skin or mucous membranes
- Wear gloves when applying topical treatments
- Limit face-to-face contact until the infection is resolved
For whether staph spreads between dogs in a household, see whether staph spreads between dogs. For how dogs contract staph infections specifically, see how dogs contract staph infections.
Frequently asked questions
My dog has a small patch of hair loss with some redness. Could that be staph?
Possibly. Circular patches of hair loss with redness and sometimes crusting are classic signs of superficial pyoderma. They can also be caused by ringworm or other conditions. A vet visit and skin cytology will clarify the cause. Don't treat with leftover human antibiotics: appropriate diagnosis matters, and human antibiotic formulations are not appropriate for dogs.
How long does staph treatment take in dogs?
Superficial staph pyoderma typically clears with 3 to 6 weeks of appropriate treatment. Deep pyoderma may require 6 to 12 weeks. Treatment should continue for at least one week beyond complete clinical resolution to prevent relapse. Stopping early is a common cause of recurrence.
Is MRSP the same as MRSA?
No. MRSP is methicillin-resistant Staphylococcus pseudintermedius, the dog-specific staph strain. MRSA is methicillin-resistant Staphylococcus aureus, more associated with humans. Both are drug-resistant staph bacteria, but they're different species. MRSP is the more clinically significant form in dogs because S. pseudintermedius is already the dominant staph species in canine infections.
Staph infections in dogs are common, treatable, and often preventable through management of the conditions that enable them. The bacteria are already there in most dogs. The question is always what allowed them to shift from harmless resident to active infection.
Resources
- MedVet. Methicillin-Resistant Staphylococcus Pseudintermedius (MRSP) in Dogs and Cats. medvet.com
- AKC. Staph Infections in Dogs: Signs, Symptoms, Treatments. akc.org
- Paw Origins. Understanding Staph Infections in Dogs. paworigins.com
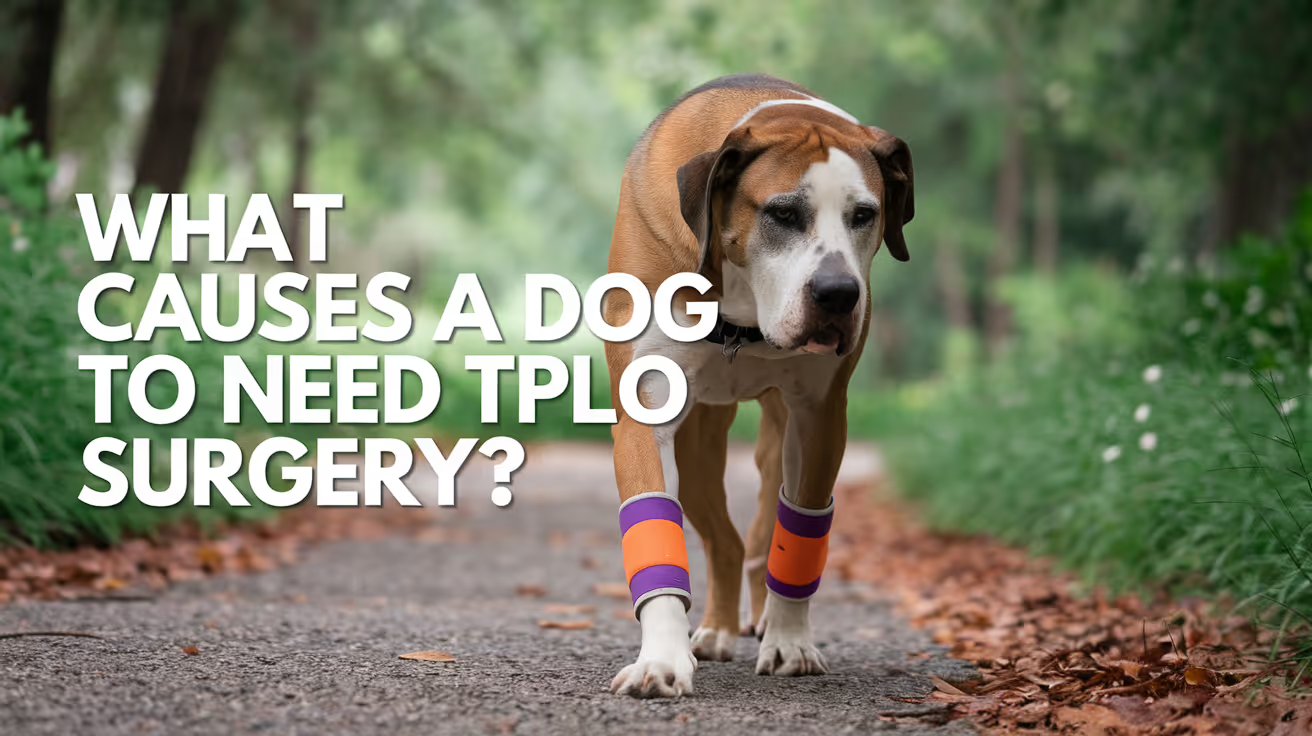
What Causes TPLO Surgery to Be Needed in Dogs
Learn what causes TPLO surgery to be needed in dogs, including common injuries and conditions leading to this important orthopedic procedure.
TPLO surgery is not performed because of a single moment of bad luck.
In the vast majority of cases, the cruciate ligament has been quietly degenerating for months or years before the day it finally fails.
Understanding what drives that degeneration and which dogs are most vulnerable is the first step toward recognizing early warning signs and making informed decisions about your dog's care.
Quick answer: TPLO is needed when a dog's CCL ruptures from progressive degeneration, causing stifle instability and lameness. Key risk factors are breed (Labs, Rottweilers, Mastiffs), obesity, steep tibial plateau angle, and neutering. CCL rupture costs US owners over $1 billion annually.
Key takeaways
- CCL rupture is the most common cause of hind limb lameness in dogs: over $1 billion spent annually in the US on treatment
- Most CCL ruptures result from degeneration, not trauma: sudden injury to a healthy ligament is rare in dogs
- Breed is the strongest single risk factor: Labs, Rottweilers, Mastiffs, and Newfoundlands most commonly affected
- Obesity significantly increases CCL rupture risk: excess weight increases mechanical load on the stifle and systemic inflammation
- Steep tibial plateau angle is a mechanical risk factor: extra CCL strain with every stride; TPLO corrects this directly
- Neutered dogs have higher CCL rupture rates than intact dogs across multiple studies, particularly in high-risk breeds
Why CCL rupture leads to TPLO
When the CCL ruptures, the stifle joint becomes unstable. With each step, the tibia slides forward under the femur a motion called cranial tibial thrust that normally the CCL prevents.
This sliding causes:
- Pain with every weight-bearing step
- Damage to the articular cartilage
- Progressive osteoarthritis
- Meniscal injury (the meniscus acts as a shock absorber and is frequently torn by the unstable joint)
Laguna Hills Animal Hospital explains that a dog with a torn CCL cannot walk normally, and the instability caused by the tear damages the bone and cartilage surrounding the joint.
TPLO surgery addresses this by rotating the tibial plateau to approximately 5 degrees a position at which cranial tibial thrust no longer occurs during normal weight-bearing.
The joint becomes stable without a functioning CCL.
The primary cause: CCL degeneration
The crucial distinction between canine CCL rupture and human ACL tears is the mechanism.
Virginia Veterinary Centers states directly: CCL rupture can result from activity-related trauma, but is most commonly caused by progressive degeneration of the ligament.
Laguna Hills Animal Hospital adds: unlike in humans, the CCL rarely ruptures from sudden trauma in an otherwise healthy ligament.
The degeneration process involves progressive deterioration of collagen fibers within the CCL weakening that begins long before any clinical signs appear.
By the time a dog presents lame, the CCL has typically been failing at a microscopic level for months.
The rupture event a step off a curb, a jump in the yard is the endpoint of this process, not the cause.
This degenerative process explains why partial tears almost always progress to full rupture.
NCBi (2014) confirms 22 to 54% of dogs rupture the other CCL within 6 to 17 months.
Risk factors for CCL rupture
Breed
Breed is the most powerful predictor of CCL rupture. MedVet lists Labs, Golden Retrievers, German Shepherds, Boxers, Pit Bulls, American Bulldogs, Mastiffs, Rottweilers, and Newfoundlands as most commonly affected.
Laguna Hills Animal Hospital confirms a genetic component has been established specifically in Newfoundlands and Labrador Retrievers.
The genetic risk likely involves inherited factors in ligament collagen quality, joint conformation, and inflammatory susceptibility.
Obesity
Excess body weight increases the compressive and shear forces on the CCL with every step.
Overweight dogs are at significantly higher risk of CCL rupture, and obesity is the most modifiable risk factor.
MetLife Pet Insurance identifies weight as a key contributing factor, noting that overweight dogs place additional stress on their joints, increasing rupture risk.
Maintaining a lean body condition score is one of the few actionable CCL prevention strategies available to owners.
Tibial plateau angle (TPA)
Dogs with a steeper-than-average tibial plateau angle experience higher cranial tibial thrust with each stride, increasing the load on the CCL throughout the dog's life.
MetLife Pet confirms that some dogs have a naturally steep tibial plateau angle, which puts extra strain on the CCL.
TPLO surgery addresses this directly by reducing the TPA to approximately 5 degrees it not only treats the rupture but corrects the underlying mechanical vulnerability.
Neutering
Multiple studies have found that neutered dogs both spayed females and castrated males have higher rates of CCL rupture than intact dogs.
PMC (agility risk factors study) lists neuter status as a previously identified risk factor alongside age, sex, breed, and body weight.
Proposed mechanisms include earlier closure of growth plates (affecting long bone development), changes in muscle mass distribution, and the absence of sex hormones that influence ligament maturation and quality.
Age
Older dogs have ligaments with more cumulative degeneration. The risk of CCL rupture increases with age, particularly in at-risk breeds.
Rancho Palos Verdes Vets lists age, obesity, poor conformation, breed, and lack of fitness as the main risk factors for CCL tears.
Physical conditioning
Poor physical fitness reduces the muscle mass that supports and offloads the stifle joint.
Well-conditioned muscles act as dynamic stabilizers; dogs with poor muscle mass rely more heavily on their passive stabilizers including the CCL increasing ligament load.
Clinical signs that TPLO is needed
When the CCL ruptures or significantly tears, dogs show:
- Sudden hind limb lameness often appearing after exercise or normal activity
- Toe-touching or non-weight-bearing on the affected leg
- Sitting with the leg extended to the side rather than folded under the body
- Stiffness after rest that may temporarily improve with movement
- Swelling or thickening around the stifle joint (medial buttress)
- Muscle atrophy of the affected thigh over time
- Positive cranial drawer sign or tibial compression test on examination
Rancho Palos Verdes Vets notes that sitting with one leg extended to the side is one of the most obvious signs that a CCL injury requiring evaluation is present.
For the full CCL causes article, see what causes cruciate ligament tears in dogs. For the TPLO surgery overview, see what is TPLO surgery in dogs?.
For the signs your dog needs TPLO, see 13 signs your dog may need TPLO surgery. For surgical alternatives, see alternatives to TPLO surgery for dogs.
For the long-term outcomes of TPLO, see long-term outcomes of TPLO surgery.
Frequently asked questions
Can a dog rupture its CCL just from running in the yard?
Yes but the run did not cause the rupture. In almost all cases, the ligament was already significantly degenerated before it failed.
The activity is the final stressor on an already compromised structure, not the cause. This is one of the most important things to understand about canine CCL disease.
What breeds are most likely to need TPLO surgery?
Labrador Retrievers, Golden Retrievers, Rottweilers, Boxers, Mastiffs, Newfoundlands, Staffordshire Terriers, and German Shepherds are most commonly affected. Genetic inheritance of CCL disease has been specifically confirmed in Labs and Newfoundlands.
Smaller breeds are less commonly affected and often managed with less invasive procedures when rupture does occur.
Does fixing the CCL prevent the other knee from tearing?
No. TPLO stabilizes the operated knee but does not prevent degeneration in the other knee, which is affected by the same systemic risk factors.
NCBi research shows 22 to 54% of dogs develop contralateral CCL rupture within 6 to 17 months. Weight management and controlled exercise are the main strategies for reducing the risk.
Can obesity cause CCL rupture?
Yes. Obesity increases joint load and systemic inflammation, both of which accelerate CCL degeneration. Weight management is the single most impactful lifestyle intervention for reducing CCL disease risk in predisposed breeds.
Is CCL rupture preventable?
Not entirely genetic factors are outside owner control. However, maintaining a lean body condition, providing consistent moderate exercise, and avoiding obesity are the most effective risk-reduction strategies.
Discuss the role of neutering timing with your veterinarian if you own a high-risk breed.
Resources
- Virginia Veterinary Centers. What Dog Owners Should Know About TPLO Surgery. virginiaveterinarycenters.com
- Laguna Hills Animal Hospital. Why Does My Dog Need TPLO Surgery? lhah.com
- MedVet. Dogs and Knee Surgery: Understanding TPLO Surgery. medvet.com
- MetLife Pet Insurance. TPLO Surgery for Dogs. metlifepetinsurance.com
- PMC. Radiographic Risk Factors for Contralateral Rupture in Dogs with Unilateral CCL Rupture. ncbi.nlm.nih.gov

Furuncle in Dogs: Causes, Symptoms & Treatment
Learn about furuncles in dogs, including causes, symptoms, and effective treatments to keep your pet healthy and comfortable.
A furuncle is a deep, infected boil in the skin a more serious and painful version of a pustule that penetrates into the hair follicle and surrounding tissue. In dogs, furuncles most commonly develop between the toes (interdigital furunculosis), though they can appear anywhere short-bristled hair follicles are subject to repeated trauma or infection.
Most owners first notice them as swollen, reddish-purple nodules between the toes that their dog licks obsessively. Left untreated, they rupture, drain, and recur often for months without addressing the underlying cause.
Quick answer: Furuncles are deep infected boils from ruptured hair follicles. The most common type, interdigital furunculosis, causes painful nodules between toes. Allergies and breed predisposition are the main drivers. Treatment needs up to 12 weeks of antibiotics.
Key takeaways
- Furuncles are deeper and more serious than pustules: they involve the dermis and surrounding tissue, not just the skin surface
- Interdigital furunculosis is the most common type painful nodules in the webbing between toes
- Short-bristled breeds (Labrador Retrievers, English Bulldogs, Chinese Shar-Peis) are disproportionately affected
- Allergies are the most common underlying trigger for recurring interdigital furunculosis
- Treatment requires oral antibiotics for up to 12 weeks shorter courses lead to recurrence
- Underlying cause must be identified and treated antibiotics alone without addressing the trigger lead to chronic recurring disease
What is a furuncle?
Merck Veterinary Manual provides the clinical definition: "An abscess, or localized infection of the skin, between the toes is also called an interdigital furuncle. It is similar to a severely infected pimple or boil on the face. These painful, pus-filled blisters often occur in the webbing between a dog's toes."
The key distinction from a superficial pustule: a furuncle extends deep into the dermis and the hair follicle wall has ruptured, releasing keratin and hair shaft material into the surrounding tissue. The body treats this material as foreign, mounting a pyogranulomatous (pus-and-inflammatory cell) response. Dr. Buzby's ToeGrips explains: "Furunculosis in dogs is a painful skin condition that involves inflammation and infection of the deep layers of the skin surrounding the hair follicles."
This depth is why furuncles are more painful, take longer to treat, and recur more readily than superficial skin infections.
Types of furuncles in dogs
1. Interdigital furunculosis (between the toes)
The most common type. Occurs in the webbing between the toes when short, bristly hair shafts are forced backward into hair follicles during walking, rupturing them and triggering deep infection.
Appearance: reddish-purple, swollen nodules in the interdigital webbing; may be single or affect multiple toes; often rupture and drain a bloody or purulent discharge.
Common triggers: Unleashed Veterinary Dermatology explains the key mechanism: "When the dog is exposed to something it is allergic to, the skin becomes inflamed. Inflammation of the feet causes them to swell, though this swelling can range from subtle to severe. Subsequently, walking on the swollen feet can cause short bristly hairs to break off inside the skin due to frictional forces. The immune system then treats the broken off hair follicle as foreign material, much like a wood splinter."
Note: Merck Veterinary Manual clarifies a common misconception: "Interdigital furuncles are areas of deep pyoderma and are often incorrectly referred to as interdigital cysts. These lesions represent areas of nodular pyogranulomatous inflammation they are almost never cystic."
2. Post-grooming furunculosis
A specific syndrome that develops days after a dog is bathed or groomed. Bacteria are introduced into hair follicles during the grooming process, leading to widespread furuncle formation on the back, neck, or sides.
My Pet Nutritionist describes the typical presentation: "Usually starting with small red lumps on the skin. These often progress into large, boil-like, usually pus-filled furuncles. It's highly likely your dog will show signs of pain when touched in these areas, and they may even have a fever."
3. Anal furunculosis (perianal fistulas)
Painful ulceration and furuncle formation around the anus. Pure Pet Food notes this type "differs from other furuncle conditions because recent studies have indicated it may be an immune-mediated condition rather than a simple infection." It is most common in German Shepherds and is treated differently, often requiring immunosuppressive medication alongside antibiotics.
Which dogs are most affected?
Breed predisposition
Merck Veterinary Manual identifies specific breeds: "Chinese Shar-Peis, Labrador Retrievers, and English Bulldogs are predisposed to the condition because they have short, bristly hairs on the webbing between the toes and/or prominent amounts of webbing. The short hair shafts are easily forced backward into the hair follicles while the dog is walking."
Other commonly affected short-coated breeds: Bull Terriers, Boxers, Great Danes, Pit Bull Terriers, and Dachshunds.
Dogs with allergies
Allergic dogs have chronically inflamed skin, including their feet. This creates the swollen tissue environment that allows short hairs to break off inside follicles with normal walking. Bark & Whiskers: "The constant moisture and friction can eventually cause furuncles to form. In these cases, the skin infection is really a symptom of an allergic reaction that needs to be addressed from the inside out."
Overweight dogs
Obesity increases the weight and pressure on the paw webbing with every step, worsening friction and predisposing to follicular trauma. Bark & Whiskers: "Dogs that are overweight or have flat, wide paws may experience extra friction and pressure on the webbing between their toes."
Dogs with hormonal disorders
Hypothyroidism and Cushing's disease impair skin immune defenses. Bark & Whiskers: "Diseases like hypothyroidism or Cushing's disease can weaken a dog's immune system and skin defenses, making infections more likely."
Dogs kept on wire or concrete surfaces
Merck Veterinary Manual: "Furuncles in confined dogs are likely to recur unless the dog is removed from wire or concrete surfaces."
Symptoms
Interdigital furuncles:
- Reddish-purple swollen nodule(s) between the toes
- Pain the dog limps, licks the foot obsessively, or is reluctant to walk
- Discharge (blood or pus) if the furuncle has ruptured
- Recurring in the same location or spreading to other feet over time
Post-grooming furuncles:
- Multiple raised red lumps on the back, neck, or sides appearing 1 to 5 days after grooming
- Fever
- Pain when the skin is touched
All types:
- The dog may be reluctant to allow the affected area to be handled
- Secondary bacterial skin infection (pyoderma) often present in the surrounding tissue
How vets diagnose furuncles
Because interdigital furunculosis looks similar to abscesses, cysts, and even tumors, a vet examination is required. Bark & Whiskers: "Because interdigital furunculosis can look similar to other skin issues like cysts, abscesses, or even cancerous growths, a veterinary diagnosis is essential."
Diagnostic steps:
- Skin cytology: examination of cells from the lesion confirms bacteria and inflammatory cells consistent with deep pyoderma
- Culture and sensitivity: identifies the specific bacteria and antibiotic sensitivities essential for recurrent cases or cases not responding to initial treatment
- Skin scraping: rules out Demodex mites, which can cause secondary furunculosis
- Bloodwork: rules out hypothyroidism and Cushing's disease if these are suspected
- Biopsy: may be needed to confirm the diagnosis in atypical presentations or when neoplasia cannot be excluded
For how furuncles relate to abscesses and the progression of deep skin infection, see abscess as a related deep skin infection.
Treatment
Oral antibiotics: the cornerstone
Dr. Buzby's ToeGrips: "Since the infection is so deep in the dog's skin and hair follicles, the vet will typically prescribe a long course of systemic (oral) antibiotics potentially for up to 12 weeks."
This duration is non-negotiable. Shorter courses allow the deep infection to persist and recur. Culture and sensitivity results should guide antibiotic selection in all but the most straightforward initial presentations.
Topical treatment
- Medicated shampoos (chlorhexidine 2 to 4%, or benzoyl peroxide) applied to the affected feet 2 to 3 times per week
- Foot soaks in warm dilute chlorhexidine solution for 10 to 15 minutes
- Topical antimicrobial sprays or ointments applied directly between the toes
Unleashed Veterinary Dermatology: "Topical therapy to reduce inflammation and fight infection is often helpful."
Anti-inflammatory medication
Steroids (prednisone) significantly reduce the inflammation that drives follicular rupture in allergic dogs. Unleashed Veterinary Dermatology: "Prednisone is the best anti-inflammatory medication and most powerful treatment at inducing remission of furunculosis." Long-term use is reserved for severe cases due to systemic side effects.
Allergy management
If allergic dermatitis is driving the furunculosis, treating the allergy is essential to prevent recurrence. Options include:
- Oclacitinib (Apoquel) or lokivetmab (Cytopoint) for environmental allergies
- Allergen-specific immunotherapy (allergy shots)
- Elimination diet trial for food allergies
Unleashed Veterinary Dermatology: "If allergic dermatitis is suspected, anti-inflammatory allergy medications are the mainstay of treatment."
Surgical treatment
Merck: "In some long-term cases, surgical excision or surgical correction of the webbing may be needed." For dogs with severe, chronic, treatment-resistant interdigital furunculosis, surgical removal of the affected interdigital tissue or laser ablation of the lesions may be considered.
For how pustules precede furuncle formation as a progression of skin infection, see pustules that precede furuncle formation. For how severe skin infections like necrotizing fasciitis can develop from untreated deep infections, see severe skin infection progression.
Home care
- Soak the affected foot in warm dilute chlorhexidine solution for 10 to 15 minutes once or twice daily
- Keep the foot dry between soaks
- Prevent licking with an E-collar at all times chronic licking perpetuates the infection
- Trim the fur between the toes to reduce moisture retention (with vet guidance)
- Apply prescribed topical medications as directed after soaking
- Give all oral medications on schedule and complete the full course
Frequently asked questions
How do I know if my dog has a furuncle between the toes or just a cyst?
A furuncle is typically painful, red or purple, may have discharge, and the dog actively bothers it. A true cyst between the toes is usually less painful, smooth, and does not have an inflammatory color. However, Merck Veterinary Manual notes that interdigital furuncles are "often incorrectly referred to as interdigital cysts" the distinction matters for treatment. Only a vet examination with cytology can reliably confirm which one you are dealing with.
Why does my dog keep getting furuncles between the toes despite antibiotic treatment?
Recurring furuncles after antibiotic courses almost always mean the underlying trigger is not being managed. Allergies are the most common culprit. If your dog is allergic and you treat the infection without treating the allergy, the inflamed feet will continue to cause follicular trauma and the cycle will restart. Ask your vet about allergy testing and long-term allergy management.
Are furuncles between the toes contagious to other dogs?
No. Interdigital furunculosis is not contagious. The condition arises from the dog's own skin bacteria and an individual predisposition (breed conformation, allergies, hormonal disorders). A dog sharing a home with an affected dog will not develop furuncles from that exposure.
Can I treat a furuncle at home without going to the vet?
Home care (foot soaks, E-collar, keeping the area clean) provides comfort but does not treat the underlying deep infection. Furuncles require oral antibiotics for weeks to months, which are prescription-only. Attempting to manage furuncles without veterinary treatment typically results in chronic recurring disease and long-term discomfort for the dog.
How long does it take for a furuncle to heal in dogs?
With appropriate antibiotic treatment (typically 4 to 12 weeks), furuncles usually resolve within the treatment period. Without addressing the underlying cause (allergies, breed conformation, hormonal disease), recurrence is the rule rather than the exception. Some dogs manage their furunculosis as a chronic condition requiring ongoing allergy treatment and topical maintenance.
My dog licks between the toes constantly but I don't see any obvious swelling. Could it still be furunculosis?
Yes. Early-stage interdigital furunculosis and the allergic inflammation that drives it can cause intense itching and licking before visible nodules form. Chronic licking itself worsens follicular trauma and sets up conditions for furuncle development. A vet examination at this stage before visible nodules appear is worthwhile, as early allergy management can prevent the cycle from fully establishing.
Resources
- Merck Veterinary Manual. Abscesses Between the Toes (Interdigital Furunculosis) in Dogs. merckvetmanual.com
- Dr. Buzby's ToeGrips. Furunculosis in Dogs: 3 Types That Can Affect Your Dog. toegrips.com
- Unleashed Veterinary Dermatology. Interdigital Furunculosis in Dogs. unleashedvetderm.com
- Bark & Whiskers. Interdigital Furunculosis in Dogs: Causes, Signs and Care. barkandwhiskers.com

How to Keep an Energetic Dog Calm After Surgery
Learn effective ways to keep your energetic dog calm after surgery with practical tips and expert advice for smooth recovery.
After surgery, energetic dogs can be a challenge to manage because their natural activity may interfere with healing. Keeping your dog calm is crucial to prevent complications and ensure a smooth recovery. This article explains how to handle your dog's energy safely after surgery.
You will learn practical strategies to reduce your dog's activity, create a comfortable environment, and support healing. These tips help you balance your dog's need for rest with their natural energy levels.
Why is it important to keep an energetic dog calm after surgery?
After surgery, your dog's body needs time to heal. Excessive activity can cause pain, reopen wounds, or delay recovery. Energetic dogs may struggle to stay still, increasing the risk of injury.
Understanding the importance of calmness helps you take steps to protect your dog's health during this vulnerable time.
- Prevents wound damage: Limiting movement reduces the chance of stitches tearing or wounds reopening, which can cause infections or require more surgery.
- Reduces pain and swelling: Rest helps control inflammation and discomfort, making recovery smoother and faster.
- Supports medication effectiveness: Calm behavior ensures your dog responds well to pain relief and antibiotics, improving healing outcomes.
- Prevents complications: Overexertion can lead to bleeding, bruising, or internal injuries, which are dangerous after surgery.
Keeping your dog calm is essential to avoid setbacks and promote a healthy recovery process.
What are the best ways to restrict your dog's activity safely?
Restricting activity after surgery requires careful planning. You want to limit movement without causing stress or anxiety. Using physical barriers and controlled routines helps manage your dog's energy safely.
Here are effective methods to keep your dog calm while preventing injury.
- Use a crate or small room: Confine your dog to a safe, comfortable space to limit running and jumping while allowing rest.
- Leash walks only: Take short, slow walks on a leash to allow bathroom breaks without overexertion or excitement.
- Remove toys and distractions: Avoid giving your dog balls or chew toys that encourage active play during recovery.
- Provide comfortable bedding: A soft, supportive bed encourages your dog to lie down and relax instead of moving around.
These steps help control your dog's activity level while keeping them safe and comfortable.
How can you create a calming environment for your dog after surgery?
A calm environment reduces stress and helps your dog rest better. Noise, bright lights, and busy areas can excite your dog and increase activity. Creating a peaceful space supports healing.
Consider these tips to make your dog's recovery area soothing and quiet.
- Choose a quiet room: Place your dog in a low-traffic area away from loud noises and household activity to minimize stimulation.
- Dim the lights: Soft lighting helps your dog relax and signals it is time to rest.
- Use calming scents: Lavender or chamomile diffusers can soothe anxiety and promote sleep in dogs.
- Play soft music: Gentle classical or specially designed pet relaxation music can reduce stress and encourage calmness.
A peaceful environment helps your dog stay calm and recover faster after surgery.
What role does diet and hydration play in calming an energetic dog after surgery?
Proper nutrition and hydration support healing and can influence your dog's energy levels. Feeding the right diet and ensuring water intake helps your dog feel comfortable and less restless.
Here are ways diet and hydration contribute to calming your dog post-surgery.
- Feed easily digestible food: Soft, bland diets reduce stomach upset and encourage eating during recovery.
- Maintain hydration: Fresh water availability prevents dehydration, which can cause irritability and restlessness.
- Limit treats: Avoid high-energy or sugary treats that may increase hyperactivity during healing.
- Follow vet dietary advice: Use prescribed diets or supplements that support tissue repair and immune function.
Balanced nutrition and hydration help your dog stay calm and heal efficiently after surgery.
How can you use mental stimulation to keep your dog calm without physical activity?
Mental stimulation can tire your dog’s mind and reduce restlessness without physical exertion. This approach helps energetic dogs stay calm while respecting activity restrictions.
Try these mental activities to keep your dog engaged safely.
- Use puzzle feeders: Food-dispensing toys challenge your dog’s brain and slow eating, providing calm focus.
- Teach simple commands: Short training sessions with basic commands keep your dog mentally active without movement.
- Offer scent games: Hide treats for your dog to find using smell, which stimulates the brain gently.
- Provide chew toys: Safe chew toys satisfy natural urges and promote relaxation without running or jumping.
Mental exercises help reduce boredom and energy, supporting calmness during recovery.
When should you contact your vet about your dog's activity after surgery?
Monitoring your dog’s behavior after surgery is important. If your dog is too active or shows signs of pain or complications, contact your vet promptly. Early intervention prevents serious problems.
Watch for these warning signs and know when to seek veterinary advice.
- Excessive licking or biting: Persistent attention to the surgical site may indicate pain or irritation needing vet evaluation.
- Swelling or bleeding: Any unusual swelling, redness, or bleeding around the wound requires immediate veterinary care.
- Restlessness or whining: Signs of discomfort or anxiety that do not improve with medication should be reported.
- Difficulty walking or limping: Changes in mobility may signal complications needing professional assessment.
Timely communication with your vet ensures your dog’s recovery stays on track and complications are minimized.
How can medication help keep an energetic dog calm after surgery?
Medications prescribed by your vet play a key role in managing pain and anxiety after surgery. Proper use of these drugs helps keep your dog comfortable and less active, aiding recovery.
Understand how medication supports calmness and what to expect.
- Pain relief drugs: Analgesics reduce discomfort, making your dog less likely to move excessively due to pain.
- Anti-anxiety medications: In some cases, vets prescribe mild sedatives to help overly energetic dogs relax safely.
- Follow dosage instructions: Administer medications exactly as directed to avoid side effects or underdosing.
- Monitor for reactions: Watch for adverse effects like drowsiness or vomiting and report concerns to your vet promptly.
Medication is a valuable tool for controlling activity and ensuring your dog’s comfort during healing.
Conclusion
Keeping an energetic dog calm after surgery is vital for a smooth and safe recovery. By restricting activity, creating a calming environment, and using mental stimulation, you can help your dog heal without stress or injury.
Following veterinary advice on diet, medication, and monitoring signs of complications ensures your dog stays comfortable and recovers well. With patience and care, your energetic dog can return to normal activity safely after surgery.
What should I do if my dog refuses to rest after surgery?
Try increasing mental stimulation with puzzle toys and short training sessions. If restlessness continues, consult your vet about possible anxiety medications or pain management adjustments.
Can I let my dog go outside to play after surgery?
Limit outdoor time to short, slow leash walks for bathroom breaks only. Avoid running, jumping, or playing until your vet confirms it is safe.
How long does it usually take for a dog to calm down after surgery?
Most dogs begin to calm within 7 to 14 days, depending on the surgery type and individual energy levels. Follow your vet’s recovery timeline closely.
Are there natural remedies to help calm my dog after surgery?
Calming scents like lavender and chamomile, as well as gentle massage, can help reduce anxiety. Always check with your vet before using supplements or herbal remedies.
What signs indicate my dog is too active after surgery?
Signs include excessive licking of the wound, swelling, bleeding, restlessness, whining, or difficulty walking. Contact your vet immediately if you notice these symptoms.

Can a Staph Infection Kill a Dog?
Learn if a staph infection can kill a dog, its symptoms, treatment options, and prevention tips to keep your pet safe and healthy.
It's a fair question, and the honest answer is: yes, but rarely, and almost never when the infection is caught and treated early.
Most staph infections in dogs are confined to the skin, respond to appropriate treatment, and resolve without lasting consequences. The infections that become life-threatening share a common thread: they went untreated, spread deeper than the skin, or occurred in dogs whose immune systems couldn't mount an adequate defense.
Quick answer: Staph infections can be fatal in dogs, but this outcome is uncommon and typically requires multiple compounding factors: untreated or undertreated infection, bacterial entry into the bloodstream causing sepsis, and a compromised immune system. Skin-confined staph infections, including MRSP, are rarely life-threatening when correctly diagnosed and treated. The danger escalates significantly when treatment is delayed or the infection spreads systemically.
Key takeaways
- Fatal outcomes from staph are rare and almost always involve delayed treatment or systemic spread.
- Sepsis is the primary fatal mechanism: bacteria in the bloodstream trigger organ failure.
- MRSP is harder to treat but not inherently more deadly than antibiotic-susceptible staph.
- Immunocompromised dogs carry the highest fatal risk: Cushing's, diabetes, and FIV equivalents matter.
- Early-stage staph is almost never life-threatening: the window for safe treatment is wide.
- Emergency signs requiring immediate vet contact: fever, lethargy, collapse, or rapidly spreading infection.
When is staph infection dangerous?
The vast majority of canine staph infections are pyoderma: skin infections that are uncomfortable but not dangerous. They itch, cause hair loss and lesions, and require veterinary treatment, but they stay on or near the surface.
Danger escalates in specific, definable scenarios:
Systemic spread and sepsis
If bacteria move from the skin into deeper tissue and eventually the bloodstream, sepsis develops. Sepsis is a systemic inflammatory response to circulating bacteria that can cause organ failure and death if not treated aggressively with IV fluids, appropriate antibiotics, and supportive care.
The AKC confirms: "Severe infection can lead to sepsis and fatalities, and you don't want your pet to spread the infection to other dogs."
The pathway to sepsis from a skin staph infection requires either an unusually aggressive strain, a very large bacterial burden reaching a wound close to blood vessels, or an immune system unable to contain the spread. This is not the typical trajectory of a surface pyoderma.
Deep tissue infection
Deep pyoderma, cellulitis (infection spreading through the subcutaneous tissue), or infection of internal organs creates a more dangerous picture than superficial skin disease. These infections require systemic antibiotics, sometimes hospitalization, and more aggressive intervention.
Untreated infection progression
All clear Vet Dermatology states: "Skin infections are not usually life-threatening unless they are extremely severe and get into the bloodstream, which is very rare." But "very rare" refers to infections that receive appropriate care. Infections that go entirely untreated can escalate through the tissue layers over time.
The role of antibiotic resistance
MRSP (methicillin-resistant Staphylococcus pseudintermedius) is the resistant form of the most common canine staph bacterium. It raises legitimate concern, but the resistance refers to antibiotic treatment difficulty, not biological aggression.
All Clear Vet Dermatology is direct on this point: "MRSP is not any more deadly than regular dog staph. It's just harder to kill with antibiotics. If we can find the right antibiotic to use, there is just as good a chance we'll resolve their infection as with regular staph."
The clinical danger with MRSP is:
- Standard first-line antibiotics don't work
- Culture and sensitivity testing is required before effective treatment can begin
- Treatment takes longer and may require less commonly used antibiotics
- Delayed effective treatment gives the infection more time to progress
MRSP can cause serious outcomes if undertreated, not because the bacteria is inherently more virulent, but because treatment errors are more likely when resistance isn't identified.
For more on how resistance affects treatment options and prognosis, see resistant staph as the most dangerous form.
Which dogs face the highest risk?
Immunocompromised dogs
Dogs whose immune systems are suppressed or dysfunctional are at significantly greater risk of staph progressing to dangerous levels:
- Cushing's disease: excess cortisol chronically suppresses immune response
- Diabetes mellitus: impairs white blood cell function and wound healing
- Long-term corticosteroid use: mimics the immunosuppressive effect of Cushing's
- Dogs on chemotherapy: deliberately immunosuppressed for cancer treatment
- Elderly dogs: declining immune competence with age
In these dogs, what would be a contained skin infection in a healthy dog can spread more aggressively because the immune response that normally limits bacterial invasion is absent or impaired.
Dogs with delayed or absent treatment
Healthy dogs with untreated staph infections don't progress to sepsis on a predictable timeline, but chronic untreated deep infections increase the probability over time. The sooner appropriate treatment begins, the lower the risk at every stage.
Dogs where the initial infection is mismanaged
Using the wrong antibiotic (for example, a beta-lactam against MRSP) doesn't just fail to treat the infection: it can select for more resistant bacteria while giving the infection more time to deepen. Culture and sensitivity testing before committing to an antibiotic course is particularly important in dogs with prior antibiotic exposure or in regions where MRSP prevalence is high.
For what catching staph early looks like in practice, see catching staph early to prevent severe outcomes.
Emergency signs: when to act immediately
These signs indicate that a staph infection may be progressing beyond skin disease and requires same-day emergency veterinary attention:
- High fever (temperature above 39.5°C / 103.1°F)
- Extreme lethargy: the dog won't stand or is unresponsive
- Collapse or weakness in the legs
- Rapidly spreading redness, warmth, or swelling beyond the original wound margins
- Pus or discharge tracking along limbs or spreading across body surfaces
- Refusal to eat or drink for more than 24 hours combined with visible illness
A dog that is sick, not just uncomfortable, is the key distinction. Surface pyoderma causes itching and discomfort. Systemic infection causes illness.
Context: why the answer is "rarely"
It's worth reframing the question. Deaths from canine staph infection in otherwise healthy dogs receiving appropriate treatment are genuinely uncommon in veterinary practice. The infections that progress fatally typically share one or more of:
- Severe immune compromise making containment impossible
- Significant treatment delay allowing deep progression
- Inadequate treatment (wrong drug, wrong dose, or wrong duration)
- A concurrent serious illness reducing the dog's ability to fight infection
For dogs without these risk factors, staph is a serious problem that warrants prompt veterinary attention, not a death sentence.
For the overview of all staph infections in dogs including less severe presentations, see overview of staph infections in dogs. For whether your dog's specific situation suggests high risk, see whether dogs are susceptible to staph. For MRSA and MRSP as the potentially more serious resistant forms, see MRSA and MRSP as potentially fatal staph variants.
Frequently asked questions
My dog has a staph infection. Should I be worried they might die?
For a healthy dog receiving appropriate veterinary treatment, the risk of a fatal outcome from staph is very low. Skin staph infections treated correctly carry an excellent prognosis. Focus on starting the right treatment promptly, following through for the full course, and monitoring for signs of spread. Worry about outcomes is appropriate if your dog is immunocompromised, if treatment isn't working, or if your dog appears systemically ill rather than just uncomfortable.
Is MRSP more likely to kill a dog than regular staph?
Not inherently. MRSP is harder to treat because standard antibiotics don't work against it, but its virulence (capacity to cause harm) is comparable to antibiotic-susceptible staph. The danger with MRSP is treatment delay and treatment errors, not the bacteria itself being more aggressive. Culture and sensitivity testing resolves this by identifying which antibiotics actually work.
My dog was diagnosed with staph. How quickly should I start treatment?
As soon as possible. There's no advantage to waiting with a confirmed staph infection. The sooner appropriate treatment begins, the lower the infection burden the immune system must manage and the smaller the window for the infection to progress. Same-week treatment for a new diagnosis is appropriate.
Staph infections kill dogs when the conditions align against them: wrong treatment, resistant bacteria, compromised immunity, and time. Remove any of those factors, and the risk drops substantially. For most dogs with staph, the path forward is straightforward: correct diagnosis, right treatment, full course, and monitoring for signs of spread.
Resources
- AKC. Staph Infections in Dogs: What You Need to Know. akc.org
- All Clear Vet Dermatology. Resistant Staph Infections in Pets. allclearvetderm.com
- Paws & Claws Animal Hospital. MRSA in Dogs. pawsandclawsanimalhospital.com

Why Does My Dog Have Scabs on Her Back?
Learn why your dog has scabs on her back, common causes, treatments, and when to see a vet for proper care.
Scabs on a dog's back are one of the most common skin complaints owners bring to the vet. They are almost always a symptom of something else an underlying condition causing the skin to break down, get infected, or be damaged by scratching. The location, pattern, and associated symptoms help narrow down the cause significantly.
This guide covers every common reason dogs develop back scabs, what each one looks like, and when the situation calls for a vet visit.
Quick answer: Back scabs in dogs most commonly result from flea allergy, allergies, pyoderma, or mange. Location helps: tail-base scabs suggest fleas; circular crusty patches suggest ringworm; intense all-over itching suggests sarcoptic mange.
Key takeaways
- Flea allergy dermatitis is the top cause of back scabs; a few flea bites trigger intense scratching in sensitized dogs
- Pyoderma (bacterial skin infection) often develops as a secondary complication of allergies or parasites, not as the primary cause
- Sarcoptic mange causes intensely itchy scabs that spread rapidly and can transfer to humans; it is highly contagious
- Ringworm is fungal, not a worm: circular crusty patches with hair loss, diagnosed by UV lamp or culture
- Honey-colored crusts suggest bacterial infection; dark or black scabs indicate chronic irritation or yeast
- Spreading or worsening scabs with hair loss or behavior changes need veterinary evaluation within 48 hours
How scabs form
Scabs are the body's healing response to skin damage. When skin is broken by scratching, biting, infection, parasites, or autoimmune attack it bleeds or weeps fluid. That fluid dries and forms a crust (scab) as part of the normal repair process.
In dogs, scabs on the back almost always indicate the dog has been repeatedly traumatizing the skin by scratching, biting, or rubbing or that an infection or parasite is directly damaging the skin surface. Vetified: "Scabs form as part of the skin's natural healing process, but recurring or widespread crusting usually signals an underlying condition that needs treatment."
The appearance of the scab offers diagnostic clues: honey-colored (bacterial infection), dark and flaky (chronic irritation or yeast), crusty circular rings (ringworm), or widespread tiny scabs with extreme itching (sarcoptic mange).
8 causes of scabs on a dog's back
1. Flea allergy dermatitis (FAD)
The most common cause of scabs on the back, especially concentrated at the tail base, rump, and lower back. Dogster: "Fleas are the most common parasite that causes scabbing on your dog's back and around their tail base. Some dogs suffer from flea allergy dermatitis (FAD) and are allergic to flea saliva injected by the bites of fleas."
The key feature: the allergy is to flea saliva, not the bites themselves. A single flea bite on a sensitized dog causes intense itching far out of proportion to the number of fleas present. You may never find a flea on the dog.
Signs: scabs clustered at the tail base and lower back; hair loss in the same area; intense scratching; secondary bacterial skin infection.
Treatment: rigorous flea control (all pets in the household, the home environment, and year-round prevention); anti-itch medication (Apoquel, Cytopoint) during flare-ups; antibiotics for secondary infection.
2. Environmental allergies (atopic dermatitis)
Dogs with environmental allergies react to pollen, dust mites, mold, and other airborne allergens. Dogster identifies "pollen, molds, house dust mites and storage mites" as the most common allergens. The skin becomes itchy and inflamed, and the dog scratches or bites until scabs form.
Signs: seasonal or year-round itching; scabs on the back, belly, paws, and face; secondary bacterial or yeast infection; recurrence in the same seasons each year.
Treatment: anti-itch medications; allergen-specific immunotherapy; medicated shampoos; fatty acid supplementation to support the skin barrier.
3. Food allergies
Food allergy dermatitis causes similar skin symptoms to environmental allergies but typically occurs year-round. Common culprits: beef, chicken, dairy, wheat, egg. Dr. Alison Diesel of Texas A&M CVM: "Self-trauma to the skin can create wounds that can become secondarily infected."
Signs: non-seasonal, year-round itching; scabs on the back, belly, and ears; recurrent ear infections; may be accompanied by gastrointestinal signs (soft stool, vomiting).
Treatment: strict elimination diet trial (8 to 12 weeks on a novel protein or hydrolyzed protein diet); veterinary-supervised food challenge to confirm the allergen.
4. Bacterial skin infection (pyoderma)
Pyoderma often develops as a secondary complication of allergies or parasites but can be the primary cause of scabbing. Vetified: "Honey-colored" crusts are characteristic of bacterial infection.
Merck Veterinary Manual identifies Staphylococcus pseudintermedius as responsible for over 90% of canine pyoderma. The bacteria thrive when the skin barrier is damaged by scratching, moisture, or underlying disease.
Signs: raised red pustules that rupture into crusts; circular scabs (epidermal collarettes); musty odor; hair loss over the affected area.
Treatment: medicated antibacterial shampoo 2 to 3 times weekly; oral antibiotics for 3 to 8 weeks depending on infection depth; treatment of the underlying cause to prevent recurrence.
For how bacterial skin infections progress from pustules to scabs, see pustules that leave scabs.
5. Sarcoptic mange (scabies)
Caused by the mite Sarcoptes scabiei. Hepper: "These mites burrow deep into the skin causing irritation, inflammation, and thickening of the skin or scab formation. Lesions in dogs are typically seen around the face, ear, and neck area but they can also develop in the back."
Key distinguishing feature: sarcoptic mange causes extreme, unrelenting itchiness often described as among the most intensely itchy conditions in veterinary medicine. It is also highly contagious to other dogs and to humans.
Signs: intense scratching; scabs on the edges of the ears, elbows, and hocks; spreading to the back and trunk in severe infestations; skin thickening.
Treatment: anti-parasitic medications (isoxazolines such as Bravecto or NexGard; selamectin; ivermectin); all in-contact animals must be treated; environmental decontamination.
6. Demodectic mange
Caused by Demodex mites, which live in hair follicles. Unlike sarcoptic mange, demodex is not contagious and causes minimal itching. Wild Earth: "Hormonal imbalances: conditions that affect your dog's hormones can change how much oil their skin produces, leading to dryness or irritation."
Signs: patchy hair loss; scaly, reddened skin; secondary bacterial infection common; localized form (one or a few patches, common in young dogs) or generalized form (widespread, more serious).
Treatment: topical or oral isoxazolines; treat secondary bacterial infections; investigate for underlying immunosuppression in adult-onset generalized cases.
7. Ringworm (dermatophytosis)
Despite the name, ringworm is a fungal infection, not a worm. It is caused by Microsporum canis, Trichophyton mentagrophytes, or related fungi. Vetified: "The appearance of a scab whether honey-colored, dark, flaky, or thick can help your veterinarian narrow down the cause."
Signs: circular or irregularly shaped patches of hair loss with crusty, scaly edges; the classic ring shape is not always present in dogs; may affect anywhere on the body including the back.
Diagnosis: Wood's lamp (some strains fluoresce green), hair trichogram, fungal culture (definitive).
Treatment: topical antifungal shampoo (miconazole-chlorhexidine); oral antifungals (itraconazole, terbinafine) for widespread cases; decontamination of environment as ringworm spores survive in the environment for months. Note: ringworm is contagious to humans and other pets.
8. Hormonal disorders
Hypothyroidism and Cushing's disease alter skin physiology changing sebum production, immune function, and skin thickness. Wild Earth: "Hormonal imbalances: conditions like hypothyroidism and Cushing's disease can change how much oil their skin produces, leading to dryness or irritation." The result is a skin that is more prone to secondary infection and crusting.
Signs: symmetrical hair loss; thickened or darkened skin; recurrent skin infections; other systemic signs (weight gain in hypothyroidism; potbelly and increased thirst in Cushing's).
Treatment: hormone replacement for hypothyroidism (levothyroxine); medication to suppress cortisol production in Cushing's disease (trilostane or mitotane).
Triage table: what to do based on the signs
When to call the vet
Call your vet if:
- Scabs are spreading, increasing in number, or worsening over 48 hours
- Hair loss is occurring along with the scabs
- The dog is scratching intensely and losing sleep
- There is odor, discharge, or visible infection
- You suspect mange (highly contagious do not let affected dogs contact other pets or people before assessment)
- Scabs have been present for more than 2 weeks without improvement
For how impetigo causes pustules that scab over in puppies, see impetigo as a cause of scabs. For how vasculitis causes skin lesions that resemble scabs, see vasculitis as a cause of skin lesions.
Frequently asked questions
My dog has scabs but I can't find any fleas. Could it still be flea allergy?
Yes. Flea allergy dermatitis can produce significant scabbing from very few flea bites. Dogs with FAD groom themselves intensively and may remove fleas before you see them. The scab location tail base and lower back is the key clue. Vetified confirms: "Dogs can react to even a few flea bites that are no longer visible." Year-round flea prevention is both the diagnostic test and the treatment.
Can I treat my dog's back scabs at home?
For mild cases with no spreading, no hair loss, and a known cause (e.g., minor skin irritation after a bath or a small scratch), gentle cleaning with dilute chlorhexidine and preventing licking may be sufficient. For recurring, widespread, or infectious causes, home treatment without diagnosis treats symptoms while the underlying cause continues. A vet visit provides the correct diagnosis and targeted treatment.
Is ringworm dangerous?
Ringworm is not life-threatening in otherwise healthy dogs, but it is important because it is contagious to other pets and to humans. Children, elderly people, and immunocompromised individuals are particularly vulnerable. If ringworm is suspected, avoid close contact with the dog's skin and consult your vet promptly.
Could my dog's back scabs be cancer?
Some skin tumors ulcerate and form crusts that look like scabs. This is uncommon and is not the most likely explanation for back scabs in most dogs but it is a reason to have any persistent, non-healing scab evaluated. A vet can perform a fine needle aspirate or skin biopsy if there is any concern about a specific lesion.
What does a flea allergy scab look like vs. a ringworm scab?
Flea allergy scabs cluster at the tail base and are accompanied by intense itching. Ringworm scabs form in roughly circular patches anywhere on the body, often with a clearer center and scaly ring at the edges. Itching is usually mild with ringworm. A Wood's lamp and fungal culture distinguish them definitively.
How long does it take for back scabs to heal in dogs?
With correct treatment, superficial bacterial pyoderma scabs typically heal within 3 to 4 weeks of antibiotic treatment. Flea allergy scabs improve within 2 to 4 weeks of effective flea control. Ringworm takes 4 to 8 weeks of antifungal treatment. Mange resolves over 4 to 12 weeks depending on the type and treatment used. Without treatment, most causes do not resolve on their own.
Resources
- Dogster. Why Does My Dog Have Scabs on Their Back? 6 Vet-Verified Reasons. dogster.com
- Vetified. Scabs on Dogs: Types, Causes and Treatment Guide. vetified.co
- Wild Earth. Crusty Scabs on a Dog's Back: Causes, Treatment and Prevention. wildearth.com
- Hepper. My Dog Has Crusty Scabs on His Back: Vet-Verified Causes and Treatments. articles.hepper.com
- Top Dog Tips. 8 Causes and Solutions to Crusty Scabs on Dog's Back. topdogtips.com
Red Lump on Dog's Leg: Common Causes Explained
Learn about common causes of a red lump on a dog's leg, symptoms, diagnosis, and treatment options to keep your pet healthy.
A red lump on a dog's leg is alarming to find, but the range of possible causes stretches from entirely harmless to requiring prompt surgery. The color alone does not tell you which one you are dealing with a bright red histiocytoma (benign, self-resolving) looks very similar to a low-grade mast cell tumor (potentially malignant). Only a vet examination and cell sampling provides a reliable answer.
This guide covers every common cause of red leg lumps in dogs, what distinguishes each one, and what the timeline to veterinary assessment should be.
Quick answer: Red leg lumps in dogs are most commonly histiocytomas (benign, self-resolving), abscesses (infected, warm, painful), or mast cell tumors (must always be tested). Any lump that grows rapidly, ulcerates, or persists over 4 weeks needs vet evaluation.
Key takeaways
- Histiocytomas are the most common red leg lump in young dogs: bright red, button-shaped, self-resolving within 2 to 3 months
- Mast cell tumors are the great imitators and the most common malignant skin tumor; always require testing
- Abscesses are infected pus pockets: warm, painful, often following a bite wound or puncture; always require veterinary treatment
- FNA (fine needle aspiration) is the standard first test for any unidentified leg lump; quick and usually definitive
- A lump that changes size rapidly is a mast cell tumor hallmark (histamine-driven) and needs urgent evaluation
- Most lumps found on routine vet checks are benign but cytology, not appearance, is the only reliable test
Why red lumps appear on a dog's leg specifically
The legs are among the most common sites for several specific tumor types and infections because:
- Legs have constant friction and impact from movement trauma creates entry points for bacteria and stresses existing skin
- Histiocytomas favor the head, ears, and limbs specifically (Merck Veterinary Manual)
- Mast cell tumors frequently occur on the limbs, particularly the upper thigh area
- Bite wounds and puncture injuries that cause abscesses are most common on the extremities
- Foreign body reactions (grass awns, splinters) typically affect feet and lower legs
Common causes of a red lump on a dog's leg
1. Histiocytoma
The most reassuring diagnosis for a red leg lump, particularly in a young dog. PetMD: "Sometimes referred to as button tumors in dogs, histiocytomas appear as single red bumps that are generally less than an inch wide. They most commonly grow on a dog's head, face, ears, or legs."
Key features:
- Bright red or pink, smooth, dome-shaped, hairless
- Usually under 2.5 cm (1 inch) wide
- Appears suddenly and grows quickly in the first few weeks then spontaneously regresses
- The dog is typically not bothered by it unless it becomes ulcerated from licking
Who gets them: primarily dogs under 3.5 years old. Merck: "English Bulldogs, Scottish Terriers, Greyhounds, Boxers, and Boston Terriers are most at risk." Labrador Retrievers, Staffordshire Terriers, and Dachshunds also have elevated incidence.
Why they resolve: VIN's Veterinary Partner explains the mechanism: "The histiocytoma is detected by the immune system, attacked and removed by T-lymphocytes. This process generates some inflammation and requires 2 to 3 months to complete."
Treatment: watchful waiting. The lesion should be monitored for 2 to 3 months. If it has not regressed, is growing, or the dog is bothering it, veterinary removal is appropriate.
The critical caveat: PetMD: "It is difficult to identify the type of skin mass simply by appearance, because mast cell tumors and histiocytomas may look similar. The only way to diagnose a skin mass in dogs is for a veterinarian to perform an FNA or a biopsy." Never assume a red lump is a histiocytoma without cytology.
2. Mast cell tumor (MCT)
The most important diagnosis to rule out for any new skin lump in a dog. Allan Veterinary Clinic: "Mast cell tumors are the most common form of skin cancer in dogs and are known among veterinarians as 'the great imitators' they can look like almost anything."
Key features:
- Highly variable appearance: firm or soft, raised or flat, ulcerated or smooth, red or skin-colored
- PetMD: "In some cases, mast cell tumors can also cause severe allergic (anaphylactic) reactions in dogs"
- The defining clinical feature: they change size. A lump that is visibly larger one week and smaller the next is strongly suggestive of MCT histamine release from mast cells causes local swelling
- Most common in middle-aged dogs; Boxers, Pugs, Boston Terriers at elevated risk
Where they appear: Merck notes that leg tumors "located near mucous membranes, feet, prepuce, or on the lower surface of the body are more likely to spread than mast cell tumors in other areas." Leg location therefore carries more prognostic significance than trunk location.
Diagnosis: fine needle aspiration mast cells have distinctive granular cytoplasm visible under microscopy. Staging (ultrasound, lymph node aspiration, blood work) follows for confirmed MCTs.
Treatment: surgical removal with wide margins; grade determines whether chemotherapy or radiation is needed.
For a broader guide on when cysts and tumors require surgical removal, see when red lumps need to be removed.
3. Abscess
An abscess is a pocket of pus formed when bacteria become walled off in tissue. On the leg, abscesses typically follow a bite wound, puncture injury, or embedded foreign object.
Allan Veterinary Clinic: "On the leg, abscesses can swell surprisingly quickly and become warm, tender, and visibly discolored. Unlike lipomas or cysts, abscesses are uncomfortable and always require veterinary treatment."
Key features:
- Warm, painful, fluctuant (soft and fluid-filled) swelling
- Red, discolored overlying skin
- Dog limps or guards the leg
- May rupture spontaneously and discharge pus
- Often follows a specific traumatic event (dog fight, outdoor activity)
Treatment: veterinary drainage, flushing, antibiotics, and pain management. Do not attempt to drain at home inadequate drainage leads to recurrence.
For the full abscess management guide including home care, see abscess as a cause of red lumps on the leg.
4. Infected or inflamed cyst
Sebaceous cysts and follicular cysts are normally benign and slow-growing. When they rupture or become infected, the overlying skin becomes red and the lump becomes warm and painful resembling an abscess.
Key features:
- History of a pre-existing lump at the site
- Sudden increase in redness and pain at a previously stable mass
- May discharge a thick, paste-like material
Treatment: veterinary assessment; antibiotics if infected; surgical removal if recurrent or growing.
5. Interdigital furunculosis
The reddish-purple swellings that form between the toes are technically a type of furuncle rather than a "lump on the leg," but owners frequently describe them as a red lump near the lower leg or paw.
Key features:
- Located in the webbing between toes
- Painful; dog licks obsessively
- May discharge blood or pus
- Driven by allergies or short-coat breed predisposition
6. Vaccine reaction / injection site sarcoma
A rare but important cause in dogs: a firm, growing lump at the site of a previous injection. Most vaccine-site lumps within 4 weeks of injection are benign inflammatory reactions. Lumps that are still present and growing 4 weeks post-injection, or that are larger than 2 cm, require biopsy.
Diagnostic triage: what to do based on what you see
When to call the vet same-day
- The lump has doubled in size within days
- It is ulcerated (open wound) or actively bleeding
- Your dog is limping or cannot use the affected leg
- The lump is hot and the dog seems systemically unwell (fever, not eating)
- You notice anaphylactic signs: facial swelling, difficulty breathing (rare MCT reaction)
For how benign and malignant diagnoses differ in terms of surgical recommendations, see whether a red lump is benign or malignant. For all the types of cysts and growths that can appear on a dog's leg, see cysts and tumors as causes of red lumps.
Frequently asked questions
My dog has a bright red lump on her leg that appeared overnight. Should I be worried?
A sudden red lump in a young dog is often a histiocytoma benign and self-resolving. However, mast cell tumors can also appear very suddenly. The only way to know which one you are dealing with is FNA cytology at a vet visit. Book an appointment within a week; same-day if the lump is growing rapidly, ulcerated, or the dog is lame.
Can a red lump on a dog's leg go away on its own?
Histiocytomas typically resolve completely within 2 to 3 months without treatment. Small infected cysts may resolve if the cyst ruptures and drains naturally, though antibiotic treatment is still prudent. Mast cell tumors and abscesses do not resolve without treatment. Never assume a lump will resolve without first confirming via FNA what type it is.
How do vets tell the difference between a histiocytoma and a mast cell tumor?
By fine needle aspiration (FNA). Histiocyte cells and mast cells look very different under a microscope. PetMD: "The only way to diagnose a skin mass in dogs is for a veterinarian to perform an FNA or a biopsy." Clinical appearance alone is not reliable even experienced veterinary dermatologists cannot reliably distinguish them without cytology.
Is a red lump on a dog's leg always cancer?
No. Most red lumps found on routine vet examinations are benign. Allan Veterinary Clinic: "The majority of lumps discovered during routine vet checks turn out to be benign." However, the only way to be confident is cytology not appearance or feel.
My dog's red leg lump keeps getting bigger and smaller. What does that mean?
This is the hallmark feature of mast cell tumors: histamine release from mast cells causes fluctuating local swelling. A lump that is noticeably different in size from one examination to the next larger with pressure or excitement, smaller at rest should be evaluated urgently as a potential MCT.
Can I squeeze or drain a red lump on my dog's leg at home?
No. Squeezing a cyst can rupture it internally, spreading inflammatory material into surrounding tissue and causing a severe reaction. Draining an abscess without proper technique leaves bacteria behind and leads to recurrence. Manipulating a mast cell tumor releases histamine and can trigger a local or systemic allergic reaction. All of these are better addressed with veterinary drainage and diagnosis.
Resources
- PetMD. Histiocytomas in Dogs. petmd.com
- PetMD. Mast Cell Tumor (Mastocytoma) in Dogs. petmd.com
- Merck Veterinary Manual. Tumors of the Skin in Dogs. merckvetmanual.com
- VIN Veterinary Partner. Histiocytoma is a Benign Skin Growth in Dogs. veterinarypartner.vin.com
- Allan Veterinary Clinic. Lump on Dog's Leg: Causes, Symptoms and When to Worry. allanveterinaryclinic.com
Bed Sores on Dogs Causes Treatment and Prevention
Learn about bed sores on dogs, including causes, treatments, and prevention tips to keep your pet healthy and comfortable.
Bed sores in dogs also called pressure sores or decubitus ulcers develop when prolonged pressure on a bony area cuts off blood supply, causing the tissue to break down. They are the same condition as bedsores in hospitalized humans, and they are just as serious when they reach advanced stages.
The good news is that early-stage bed sores are very treatable at home. The bad news is that they can progress from a small red patch to a deep infected wound within days if not caught and addressed.
Quick answer: Bed sores form over bony prominences like elbows and hips when sustained pressure blocks blood flow. Most common in senior, large-breed, and immobile dogs. Early stages respond to soft bedding and repositioning; advanced stages need veterinary care.
Key takeaways
- Bed sores form over bony prominences: elbows, hips, hocks, stifles, and sides of the knees
- Four stages exist: from mild redness to deep infected wounds reaching muscle and bone
- Senior dogs, large breeds, and post-surgical dogs are at highest risk
- Stage 1 sores reverse with home management: soft bedding and repositioning every 2 to 4 hours
- Stage 3 and 4 sores need veterinary debridement and often systemic antibiotics
- Thick orthopedic foam bedding is the single most effective prevention measure for at-risk dogs
What causes bed sores in dogs?
Bed sores develop when the weight of a dog's body continuously presses a bony prominence against a hard surface. Walkin' Pets explains the mechanism: "Decubital ulcers form when repeated pressure on an affected area constricts the blood vessels, decreasing the area's blood supply and as the skin is deprived of oxygen, it begins to die."
Once the tissue starts to die, it creates a wound that bacteria readily colonize. This is why advanced bed sores are almost always infected.
The process requires two things to come together: sustained mechanical pressure and skin that is not being repositioned or protected. Any dog that lies in the same position for hours without shifting is at risk.
Additional factors that increase risk
Incontinent dogs: urine-soaked skin breaks down much faster under pressure. Walkin' Pets advises that "reducing skin moisture from urine is important to help prevent the bacterial growth and skin degradation that contribute to pressure sores."
Thin or underweight dogs: less muscle and fat over bony prominences means the bone contacts the surface with less cushioning.
Obese dogs: more body weight concentrates greater compressive force at each contact point.
Dogs on hard floors: concrete, hardwood, and tile dramatically increase the pressure at contact points compared to soft surfaces.
Which dogs get bed sores?
Dr. Buzby's ToeGrips identifies the most at-risk groups:
- Senior dogs: reduced muscle mass, reduced mobility, longer periods in one position
- Large and giant breed dogs: more body weight, greater force at bony contact points
- Post-surgical patients: strict rest requirements limit natural repositioning
- Paralyzed or paraplegic dogs: unable to shift position at all
- Dogs with arthritis: pain limits movement and encourages sustained resting in one position
- Short-coated breeds: less coat padding between skin and hard surfaces
DogCancer.com notes that bed sores can also be a concern for dogs in late-stage cancer, where weakness and pain significantly reduce their ability to reposition.
The 4 stages of bed sores
Recognizing the stage determines the treatment approach.
Stage 1: redness and intact skin
The skin over the bony prominence is red, warm, and may have some hair loss. The surface is not broken. This is the ideal intervention point.
What to do at home: add thick orthopedic padding under the affected area, increase repositioning to every 2 hours, and monitor the site twice daily. Most Stage 1 sores reverse completely with these measures.
Stage 2: shallow open wound
The skin has partially broken down. A shallow blister or open area appears. The surrounding tissue remains inflamed and warm.
WagWalking: "Stage 1 ulcers may improve with padding, regular repositioning of the dog, and a quality moisture-wicking dog bed. Vets may instruct pet parents to regularly apply moist dressings to open pressure sores."
What to do: contact your vet. Stage 2 requires wound cleaning, appropriate dressings, and assessment for infection. Antibiotics may be started if signs of infection are present.
Stage 3: full-thickness wound
The sore extends through the full skin thickness into subcutaneous tissue. VetMobile describes what you see: "The sore becomes deeper and it may extend into the underlying tissue, such as the muscle layer. Pus or discharge may be present. At this stage, the area is surrounded by dead or dying tissue."
What to do: veterinary care is required. Treatment involves debridement of dead tissue, wound culture, and systemic antibiotics based on culture results.
Stage 4: bone or muscle involvement
The wound extends to muscle, tendon, or bone. This is a serious and potentially life-threatening stage. Bacteria can enter the bloodstream from a Stage 4 wound, causing sepsis.
What to do: emergency veterinary care. Hospitalization, IV antibiotics, surgical debridement, and reconstructive surgery may be necessary.
Treatment by stage
Home wound care for Stage 1 and 2
For Stage 1 and early Stage 2 sores, clean the area daily with dilute chlorhexidine solution (not hydrogen peroxide, which damages healing tissue). Apply a non-adherent wound dressing and change it once or twice daily. Keep the area dry between dressing changes.
Puainta recommends: "Pressure Relief: Encourage the dog to change positions frequently. Soft Bedding: Provide cushioned surfaces to reduce pressure. Cleanliness: Keep the area clean and dry."
For incontinent dogs, clean and dry the skin after every urination. Use a waterproof mattress cover that can be washed daily. Sheepskin pads are effective at wicking moisture away from skin while providing cushioning.
For how bed sores relate to callus formation at the same pressure sites, see calluses from similar pressure points.
When to call the vet
Call your vet within 24 hours if:
- The wound is open, moist, or has any discharge
- The area is warm and the dog shows signs of pain when the area is touched
- The sore is growing despite home management
- Your dog is lethargic, off food, or running a fever
These signs suggest infection is establishing. Early antibiotic treatment is significantly more effective than treating advanced infection.
WagWalking notes: "Antibiotics may be necessary if the wound is infected or at risk of becoming infected. Antibiotics have minimal risks and a high success rate when used early on."
For how the progression of pressure necrosis connects to bed sore development, see pressure necrosis in severe bed sore cases.
Prevention
Orthopedic bedding
The most effective single intervention. Memory foam or high-density egg-crate foam distributes weight across a larger surface area, reducing peak pressure at bony contact points. Petful emphasizes that "you might be more likely to notice pressure sores in dogs if you have a large breed pup or a short-haired breed" both groups where bedding choice is critical.
The foam must not fully compress under the dog's full weight. Test by pressing firmly: if it bottoms out quickly, it is not thick enough. For large dogs, minimum 4 inches of high-density foam is recommended.
Repositioning schedule
Reposition immobile dogs every 2 to 4 hours, alternating which side bears weight. Walkin' Pets advises: "Try not to let the dog rest on the hip bone on one side for very long, reposition your pet every 2 to 3 hours."
If you are not home during the day, consider whether a pet sitter or midday check can provide repositioning support for a dog with high risk.
Daily inspection
Check every bony prominence every day. Run your hand along the elbows, hips, hocks, and knees. Hair loss is the first visible sign act at Stage 1, before any skin breakdown occurs.
Moisture management for incontinent dogs
Wet skin under pressure breaks down dramatically faster than dry skin. Change diapers and male wraps frequently. Use raised mesh beds for overnight rest in incontinent dogs urine drains through rather than pooling under the dog. Walkin' Pets recommends sheepskin pads specifically for their wicking properties.
For how swelling associated with bed sores can extend to the feet and lower legs, see swelling associated with pressure injuries.
Frequently asked questions
How do I know if my dog has a bed sore starting?
The first sign is a small patch of hair loss over a bony area, sometimes with mild redness and warmth. The skin is still intact. Run your hand over the elbows, hips, and hocks daily in at-risk dogs. Acting at this point before the skin opens is far easier than treating an open wound.
Can bed sores in dogs heal on their own?
Stage 1 sores can reverse with prompt management: improved bedding, repositioning, and keeping the area dry. Stage 2 and above rarely resolve without veterinary intervention. The wound environment actively promotes bacterial growth, which prevents natural healing without treatment.
How long does a bed sore take to heal in a dog?
Stage 1 sores managed early typically show improvement within 1 to 2 weeks with good home care. Stage 2 wounds typically heal in 3 to 6 weeks with consistent veterinary wound care. Stage 3 and 4 wounds may take months and may not fully close in all cases.
My senior dog keeps getting bed sores despite soft bedding. What else can I do?
Check whether the foam has compressed over time and needs replacing. Add protective wraps (elbow pads or hock wraps) over at-risk sites. Increase repositioning frequency to every 2 hours. Consult your vet about whether the dog's underlying mobility level has declined and whether additional pain management or physiotherapy could help. Nutritional support including protein and vitamin C promotes skin healing.
Are bed sores painful for dogs?
Stage 1 sores are usually not painful. Stage 2 onward becomes progressively more painful as the wound deepens and infection sets in. Dogs with painful bed sores may lick or bite at the area, avoid lying on that side, or show behavioral changes. Pain management from your vet is an important part of treatment from Stage 2 onward.
Can bed sores become life-threatening in dogs?
Yes. Stage 3 and 4 sores can allow bacteria to enter deeper tissues and the bloodstream, causing sepsis. A dog with an advanced bed sore that is also lethargic, not eating, or running a fever is potentially septic and needs emergency veterinary care the same day.
Resources
- Dr. Buzby's ToeGrips. Pressure Sores on Dogs: Treatment and Prevention. toegrips.com
- WagWalking. Pressure Sores in Dogs. wagwalking.com
- Walkin' Pets. Pressure Sores in Pets: Treatment and Prevention. walkinpets.com
- Petful. Pressure Sores on Dogs: What You Need to Know. petful.com
- DogCancer.com. Bed Sores on Dogs: Preventing and Treating Pressure Sores. dogcancer.com
Warning Signs to Watch for After Neutering a Dog
Learn the key warning signs to watch for after neutering your dog to ensure a safe recovery and when to seek veterinary care.
Most dogs recover from neutering without a hitch. But some do not, and the difference between a minor complication and a serious one often comes down to how quickly you notice it.
The tricky part is that some things that look alarming are completely normal, and some things that look minor are not.
This guide gives you a clear, symptom-by-symptom breakdown of what is expected, what to monitor, and what requires an immediate call to your vet.
Quick answer: Mild grogginess, reduced appetite, and slight redness at the incision are all normal in the first 24 to 48 hours. Ongoing bleeding, yellow or green discharge, swelling that grows after day three, lethargy lasting more than 48 hours, or a wound that appears to be opening are all warning signs that need veterinary attention promptly.
Key takeaways
- Normal recovery includes mild grogginess, slight swelling, and reduced appetite for 24 to 48 hours.
- Warning signs that need a vet call include discharge, increasing swelling, continuous bleeding, and persistent lethargy.
- Emergency signs require immediate action: pale gums, collapse, or abdomen that appears bloated.
- Licking is the most preventable complication: the cone prevents most infection and wound problems.
- Daily incision checks catch problems early, when they are still easy to treat.
- When in doubt, call your vet. It is always better to check than to wait.
What normal recovery looks like
Understanding normal first makes it easier to spot abnormal.
In the first 24 to 48 hours after surgery, expect:
- Grogginess, drowsiness, or mild disorientation from anesthesia
- Reduced appetite or no interest in food
- Mild redness or slight puffiness at the incision site
- A small amount of clear or very faintly pink fluid at the wound in the first 24 to 72 hours
- Quieter behavior and preference for rest
- Possible shivering or restlessness as anesthesia wears off
All of these resolve on their own. By day two or three, your dog should be more alert, eating normally, and showing interest in their surroundings again.
Warning signs: incision and wound
The incision site is where most post-surgical problems show up first. Check it morning and evening throughout the recovery period.
Discharge
Swelling
Some swelling in the first two to three days is expected. The body's inflammatory response is part of normal healing.
Swelling that increases after day three, feels warm and firm to the touch, or is accompanied by redness and discharge is not normal. This pattern points to infection or hematoma and needs veterinary evaluation.
In large breed male dogs, scrotal swelling is a specific concern. Moderate scrotal swelling that resolves within a week is often normal. Swelling that grows, becomes hot, or is accompanied by pain or discharge is not.
Wound opening
The incision edges should be staying together, not pulling apart.
If you see any gap in the wound, exposed pink or red tissue beneath the skin, or sutures that appear to have pulled through, contact your vet immediately. This is called dehiscence and requires prompt attention.
Do not attempt to close an open wound yourself. Keep your dog calm, prevent licking, and get to your vet.
Warning signs: behavior and general health
Lethargy
Mild tiredness for the first 24 to 48 hours is expected. Anesthesia and surgery are taxing on the body.
Lethargy that persists beyond 48 hours, or a dog that is completely unresponsive, unable to stand, or does not improve over the first two days, is a warning sign. Call your vet.
Loss of appetite
Not wanting to eat on surgery day and the following morning is normal.
A dog that still refuses food at 48 hours after surgery, particularly if also vomiting, may be experiencing a complication. Call your vet if appetite has not returned by day two.
Vomiting
One or two episodes of vomiting the evening of surgery can be a side effect of anesthesia. This is within normal range.
Vomiting that continues beyond 24 hours after surgery, or that contains blood, requires a vet call. Persistent vomiting can indicate a reaction to pain medication, an obstruction, or another post-surgical issue.
Difficulty urinating or defecating
Some dogs take a day or two to have a bowel movement after surgery. This is usually due to fasting before the procedure and reduced activity afterward.
No bowel movement after three to five days is worth reporting. Difficulty or pain during urination, especially in male dogs, can indicate inflammation near the surgical site and should be checked promptly.
Warning signs: pain
Your dog will have been sent home with pain medication. Use it on schedule.
Signs that pain is not being adequately controlled include:
- Whining, yelping, or crying that persists beyond the first day
- Hunched posture or reluctance to sit or lie down
- Guarding the incision site by flinching or snapping when touched
- Panting excessively without exertion
- Trembling or shivering beyond the first few hours post-anesthesia
Contact your vet if pain seems severe after day three, or if prescribed medication does not appear to be working. Do not give human pain medications. Aspirin, ibuprofen, and acetaminophen are toxic to dogs and can cause serious harm or death.
Emergency warning signs: act immediately
These signs require emergency veterinary care, not a wait-and-see approach.
Call your vet or go to an emergency clinic immediately if you observe:
- Pale, white, or bluish gums
- Sudden collapse or inability to stand
- Abdomen that appears bloated, distended, or hard
- Heavy bleeding that does not stop
- Rapid or labored breathing
- Signs of extreme pain: screaming, freezing in place, inability to move
These can indicate internal bleeding, systemic infection, or other serious complications that are time-sensitive.
The most preventable warning sign: licking
Most of the infection and wound-breakdown cases that end up back at the vet have one thing in common: the cone came off.
Licking introduces bacteria directly into the wound, softens the tissue, and can pull sutures loose. A dog that licks its incision even once can undo days of clean healing.
The E-collar stays on for the full 10 to 14 days. If your dog refuses the hard plastic cone, soft inflatable collars or recovery suits are legitimate alternatives, provided they reliably prevent the dog from reaching the wound site.
For a full guide on what normal recovery looks like day by day and how to distinguish healing progress from early complications, tracking the incision against a clear timeline makes daily monitoring more actionable.
When to call vs. when to go straight to emergency care
Use this as a quick decision guide.
When in doubt, call. Most veterinary practices would rather hear from you about something minor than have you wait too long on something serious.
The role of aftercare in preventing complications
Most warning signs are preventable, not inevitable.
The dogs most likely to develop post-surgical complications are those given too much freedom too soon, or whose cones were removed early. Following a complete aftercare plan covering rest, incision monitoring, medications, and the cone is the most effective way to keep your dog out of trouble during recovery.
For a complete, step-by-step plan on full post-surgery care covering each day of the recovery window, what to feed, how to check the wound, and how to keep your dog calm, having that reference from day one prevents most of the issues covered in this article. Understanding surgical risks that can cause complications beyond the routine is also worth reading before surgery if you have a large breed or older dog.
Frequently asked questions
Is it normal for my dog to be lethargic after neutering?
Yes, for the first 24 to 48 hours. Anesthesia causes genuine fatigue, and your dog needs rest. Lethargy that does not improve by day two or three, or a dog that is completely unresponsive, warrants a call to your veterinarian.
What does an infected incision look like?
An infected incision typically shows yellow or green discharge, increasing redness and swelling after the first few days, warmth around the wound, and often a foul odor. Any of these signs alone justify a same-day call to your vet. For a detailed visual guide to signs of an infected incision, knowing what to look for at each stage of healing helps you act at the right time.
My dog is licking the incision despite wearing a cone. What should I do?
Check that the cone extends at least two inches past your dog's nose. If it is too short, your dog can still reach the incision. Consider switching to a soft inflatable collar or recovery suit if the hard cone is not fitting properly. Contact your vet if there are signs the wound has been compromised.
Should I be worried about scrotal swelling after neutering?
Some scrotal swelling in the first few days is normal. The scrotum fills with fluid as part of the healing response. Swelling that increases after day three, feels hot or very firm, or is accompanied by discharge or pain is abnormal and should be evaluated by your vet.
When should I go to an emergency vet after neutering?
Go immediately if your dog has pale or white gums, collapses, has a bloated or hard abdomen, or is bleeding heavily and continuously. These signs can indicate internal bleeding or systemic infection and are time-sensitive emergencies.
The difference between a smooth recovery and a complication is usually not bad luck. It is usually the cone coming off too early, too much activity on day four, or a wound check that was skipped. Pay attention for two weeks, and most dogs sail through without a single issue.
Resources
The following sources were used as reference and background for this article:
- Ace of Spays. Signs of Complications After Spay/Neuter Surgery: When to Contact Your Veterinarian. aceofspays.com
- Animal Humane Society. Spay/Neuter Post-Surgical Care and Recovery Instructions. animalhumanesociety.org
- Homeaglow. 10 Warning Signs After Spaying or Neutering Your Dog. homeaglow.com
- American Kennel Club. Post-Surgical Care for Dogs Following a Spay or Neuter. akc.org
- Union Hill Animal Hospital. Neutering Recovery Guide for Male Dogs. unionhillvet.com
- Rivergate Veterinary Clinic. Signs of Infection After Spaying or Neutering a Dog. rivergateveterinaryclinic.com

