

Arthrex TPLO Weight Chart Explained
Understand the Arthrex TPLO weight chart and how it guides post-op care for dogs after TPLO surgery.

This article is for informational purposes only and is not a substitute for professional veterinary advice. Every case is unique, so always consult your veterinarian for guidance specific to your pet.
This content is intended for veterinary professionals for educational purposes. It does not replace clinical judgment or tailored advice. Always rely on your training, expertise, and the specific context of your patients.
After TPLO surgery, one of the most important questions owners and rehabilitation teams ask is: how much weight should my dog be putting on the operated leg right now?
The Arthrex TPLO weight chart provides a structured, week-by-week answer to that question, giving both surgeons and owners a shared reference point for tracking recovery progress.
Quick answer: The Arthrex TPLO weight chart tracks the percentage of body weight a dog bears on the operated leg at each recovery stage — from 0 to 10% in the first weeks to 100% by 8 to 12 weeks post-surgery.
Key takeaways
- The weight chart tracks weight-bearing percentage at each stage, from 0 to 10% in weeks 1 to 2 to 100% by weeks 8 to 12
- It is a rehabilitation monitoring tool, not a surgical planning tool: the rotation chart governs intraoperative correction; this tracks recovery
- Progression must be gradual: advancing too fast risks implant failure; too slow leads to atrophy and stiffness
- The chart integrates with clinical examination: 8-week radiographs, gait assessment, and muscle mass evaluation are considered alongside chart milestones
- Individual dogs vary: the chart provides population-level benchmarks; your surgeon's instructions take precedence
- The chart is used alongside the plate size and rotation charts: together they form the Arthrex TPLO system framework
What the weight chart is and what it is not
The Arthrex TPLO weight chart is a post-operative rehabilitation tool.
It shows recommended weight-bearing percentages at specific time points after surgery a reference guide that helps veterinarians, rehabilitation therapists, and owners track whether a dog's recovery is progressing appropriately.
It is not the same as the rotation chart (which guides intraoperative tibial rotation) or the plate size chart (which guides implant selection before surgery).
These three charts together form the Arthrex TPLO planning and monitoring system.
For the rotation chart guide, see Arthrex TPLO rotation chart explained. For the plate overview, see Arthrex TPLO plate overview and use.
Understanding the weight-bearing percentages
The chart uses percentage of body weight as its unit of measurement.
This is a more useful measure than time alone because it relates directly to the mechanical load placed on the healing osteotomy and implant.
0 to 10% weight-bearing (weeks 1 to 2): toe-touching and minimal contact only. The dog is not actively loading the leg during this phase. Bathroom trips on leash are permitted, but no sustained weight-bearing.
10 to 30% (weeks 2 to 4): the dog begins placing meaningful weight on the leg during slow leash walks. This corresponds to the short 5 to 10 minute leash walks prescribed at this stage. The healing osteotomy is starting to consolidate but is not yet ready for full load.
30 to 60% (weeks 4 to 8): progressive loading during longer walks, sit-to-stand exercises, and early rehabilitation activities. Most dogs are visibly improving in gait symmetry during this phase.
60 to 100% (weeks 8 to 12): full weight-bearing is approached and typically achieved after the radiographic recheck at week 8 confirms adequate osteotomy healing. Activity levels increase under veterinary guidance.
How to use the chart in practice
As a clinical benchmark
Surgeons use the weight chart to assess whether a dog is progressing as expected at each recheck visit.
A dog that is well below the expected weight-bearing percentage for their stage may have inadequate pain control, implant complications, or infection.
A dog exceeding the expected percentage may be at risk of mechanical overload if the bone has not yet consolidated enough to tolerate the load.
As an owner reference
Owners are not expected to measure exact weight-bearing percentages at home this requires force plate analysis or pressure-sensitive walkway equipment.
The chart provides a conceptual framework: early recovery shows only toe-touching; by weeks 4 to 6, the dog places meaningful weight during walks; by weeks 10 to 12, gait symmetry improves steadily.
What affects weight-bearing progress
Bone healing rate: younger dogs and smaller breeds typically consolidate the osteotomy faster than older or giant breed dogs.
Pain control: inadequate analgesia is the most common cause of delayed weight-bearing. A dog in pain will protect the operated leg regardless of how well the surgery went. Contact your surgeon if your dog is significantly below expected weight-bearing benchmarks.
Muscle atrophy: dogs that enter surgery with significant muscle atrophy from prolonged pre-surgical lameness progress more slowly and benefit most from structured rehabilitation.
Body weight: heavier dogs place more absolute load on the healing osteotomy at any given percentage. This is one reason weight management is emphasized throughout the TPLO recovery period.
Rehabilitation: dogs receiving structured rehabilitation (PROM, sit-to-stand, hydrotherapy) consistently achieve better weight-bearing progression than those managed with rest alone.
When the chart says one thing and your dog does another
The weight chart represents population-level expectations. Individual dogs routinely deviate from the expected timeline for reasons that are often identifiable and manageable.
If your dog is significantly under-progressing: contact your surgeon to rule out infection, implant problems, or inadequate pain management before assuming slow healing.
If your dog appears to be weight-bearing well ahead of schedule: this does not mean the osteotomy is healed faster than expected.
Radiographic confirmation at week 8 is still required regardless of how the dog looks clinically. Apparent early function does not mean the bone has consolidated enough to withstand full unrestricted activity.
For the full weight-bearing recovery timeline guide, see how soon can a dog walk after TPLO surgery.
For the rotation chart that is used alongside the weight chart in the Arthrex system, see Arthrex TPLO rotation chart explained.
For the plate size chart used in conjunction with both, see TPLO plate size chart explained.
Frequently asked questions
Is the Arthrex TPLO weight chart the same as a standard recovery timeline?
Not exactly. A recovery timeline tells you what activities to do and avoid at each stage.
The weight chart specifically tracks how much weight the dog is placing on the operated leg at each stage, expressed as a percentage of body weight.
The two are related but provide different information.
Can I measure my dog's weight-bearing at home?
Not precisely. Force plate and pressure-sensitive walkway systems that measure actual weight distribution require specialist veterinary equipment.
At home, you can observe whether the dog is toe-touching, placing the foot flat, and walking with increasing symmetry which approximates the chart's progression categories without exact percentages.
What if my dog refuses to use the leg at all two weeks after TPLO?
Non-weight-bearing at two weeks is a warning sign. TPLO Austin confirms that if your pet is not bearing weight within two weeks of surgery, contact your veterinarian.
The most common causes are inadequate pain control, infection, or implant positioning concerns all of which are addressable if caught early.
Do all TPLO surgeons use the Arthrex weight chart?
No. The Arthrex system is one of the two major TPLO implant systems in the US (alongside Synthes). Surgeons using Synthes implants use Synthes-specific planning tools.
Some surgeons use individualized rehabilitation protocols rather than system-specific charts. The underlying recovery milestones are similar regardless of which chart or system is used.
What happens at the 8-week recheck in terms of weight-bearing?
At the 8-week recheck, radiographs assess osteotomy healing. If healing is adequate, the surgeon approves increased activity typically 20 to 30 minute leash walks and the beginning of return-to-normal activity.
The weight chart at this point expects the dog to be approaching or achieving 100% weight-bearing on the operated leg.
Resources
- Arthrex Veterinary. TPLO Surgical Technique. arthrex.com
- VCA Animal Hospitals. Tibial Plateau Leveling Osteotomy (TPLO) in Dogs. vcahospitals.com
- TPLO Austin. Step 6: TPLO Surgery Recovery. tploaustin.com
- ACVS. Cranial Cruciate Ligament Disease. acvs.org

Get a Free Poster
Enhance your workspace with a high-quality radiographs reference poster, designed for veterinary professionals. This free physical poster will be shipped directly to you—just fill out the form to request your copy.


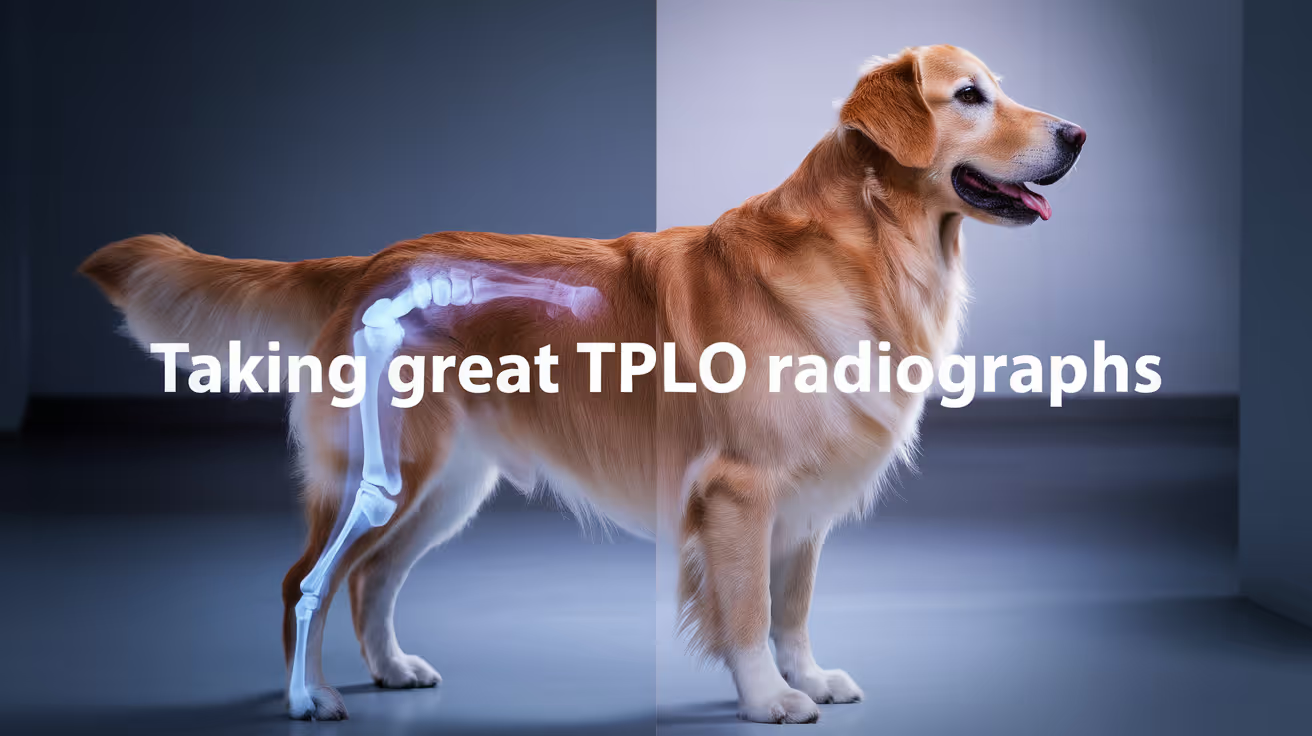


Taking Great TPLO Radiographs
Click Below to Watch Live Video Demos


We'll send you a Free Wall Poster with all the steps
Step #1
Getting Ready
Ensuring a clean surgical field starts with proper skin preparation. This video demonstrates the best practices for:
- Shaving the patient – Achieving a close, even shave while minimizing skin irritation
- The Dirty Scrub – The initial skin prep step to remove surface debris and reduce bacterial load before the sterile scrub.
Following these techniques helps reduce infection risk and improve surgical outcomes. Watch the video to see how it’s done effectively!


Step #2
Reduce Your Risks
Many surgeons are shocked to find out that their patients are not protected from biofilms and resistant bacteria when they use saline and post-op antibiotics.
That’s Where Simini Comes In.
Why leave these risks and unmanaged? Just apply Simini Protect Lavage for one minute. Biofilms and resistant bacteria can be removed, and you can reduce two significant sources of infection.
Step #3
Take the Course
Preventing surgical infections is critical for patient safety and successful outcomes. This course covers:
- Aseptic techniques – Best practices to maintain a sterile field.
- Skin prep & draping – Proper methods to minimize contamination.
- Antibiotic stewardship – When and how to use perioperative antibiotics effectively.
Stay up to date with the latest evidence-based protocols. Click the link to start learning and earn CE credits!

Things to know
Synthes TPLO Plate Overview and Use
Learn about Synthes TPLO plates, their design, surgical use, and benefits in canine cruciate ligament repair.
Cruciate ligament injuries are common in dogs, often requiring surgical repair to restore joint stability. The Synthes TPLO plate is a specialized orthopedic implant designed to support tibial plateau leveling osteotomy (TPLO) surgeries, which correct knee joint mechanics in affected dogs.
This article explains what the Synthes TPLO plate is, how it works, and why it is widely used in veterinary orthopedic surgery. You will learn about its design features, surgical application, and postoperative care to understand its role in successful cruciate ligament repair.
What is a Synthes TPLO Plate?
The Synthes TPLO plate is a metal implant used in veterinary surgery to stabilize the tibia after a TPLO procedure. It is specifically designed to fit the anatomy of a dog's tibia and support the bone during healing.
This plate helps maintain the new angle of the tibial plateau after osteotomy, allowing the knee to function without abnormal stress on the cruciate ligament.
- Purpose-built design: The plate is contoured to match the shape of the canine tibia, ensuring a precise fit and optimal stability during healing.
- Material strength: Made from stainless steel or titanium, the plate provides durable support to withstand the forces on the knee joint during recovery.
- Locking screw technology: It uses locking screws that secure the plate firmly to the bone, reducing the risk of loosening or shifting after surgery.
- Varied sizes: Available in multiple sizes to accommodate different dog breeds and sizes, allowing customized surgical repair.
These features make the Synthes TPLO plate a reliable choice for orthopedic surgeons treating cruciate ligament injuries in dogs.
How Does the Synthes TPLO Plate Work in Surgery?
During a TPLO surgery, the tibial plateau is cut and rotated to change its slope, reducing the strain on the cruciate ligament. The Synthes TPLO plate is then applied to stabilize the bone segments.
The plate holds the bone in the new position while it heals, allowing the dog to regain normal knee function without instability.
- Osteotomy stabilization: The plate bridges the cut bone, maintaining alignment and preventing movement during healing.
- Load distribution: It evenly distributes mechanical forces across the bone to reduce stress concentration and promote bone growth.
- Secure fixation: Locking screws anchor the plate firmly, preventing micromovements that could delay healing or cause implant failure.
- Facilitates early mobility: By stabilizing the joint, the plate allows controlled weight-bearing soon after surgery, aiding recovery.
Proper placement and fixation of the Synthes TPLO plate are critical for surgical success and long-term joint health.
What Are the Benefits of Using Synthes TPLO Plates?
The Synthes TPLO plate offers several advantages over other fixation methods in TPLO surgery. These benefits contribute to improved outcomes and faster recovery for dogs.
Understanding these benefits helps pet owners appreciate why this implant is often recommended by veterinary surgeons.
- Enhanced stability: The plate provides rigid fixation, reducing the risk of postoperative complications like implant loosening or bone displacement.
- Improved healing: Stable fixation promotes faster bone healing and reduces inflammation around the surgical site.
- Reduced pain: By stabilizing the joint, the plate minimizes abnormal joint movement that causes pain during recovery.
- Long-term joint function: Proper alignment and healing help restore normal knee mechanics, reducing the chance of arthritis development.
These benefits make the Synthes TPLO plate a preferred choice for treating cranial cruciate ligament rupture in dogs.
What Are the Surgical Steps for Using a Synthes TPLO Plate?
Successful use of the Synthes TPLO plate requires careful surgical technique. The procedure involves precise bone cutting, plate selection, and screw placement.
Following these steps helps ensure the implant functions correctly and the dog recovers well.
- Preoperative planning: Surgeons measure the tibial plateau and select the appropriate plate size to match the dog's anatomy.
- Performing osteotomy: The tibial plateau is cut using specialized saws to allow rotation and slope adjustment.
- Plate application: The Synthes TPLO plate is positioned on the bone and temporarily fixed with screws to confirm alignment.
- Final fixation: Locking screws are inserted to secure the plate firmly, ensuring stable fixation of the bone segments.
Each step requires precision and experience to minimize complications and optimize healing.
What Are the Postoperative Care Guidelines After Synthes TPLO Plate Surgery?
After surgery, proper care is essential to support healing and prevent implant-related problems. Owners must follow veterinary instructions closely.
Postoperative care focuses on activity restriction, pain management, and monitoring for complications.
- Restricted activity: Limit the dog's movement to prevent stress on the surgical site and allow bone healing.
- Pain control: Administer prescribed analgesics to keep the dog comfortable during recovery.
- Wound monitoring: Check the incision regularly for signs of infection such as redness, swelling, or discharge.
- Follow-up visits: Schedule regular veterinary appointments for X-rays to assess bone healing and implant position.
Adhering to these guidelines improves the chances of a successful outcome and full return to function.
What Are the Potential Complications of Synthes TPLO Plate Use?
While the Synthes TPLO plate is effective, some complications can occur. Awareness of these risks helps owners and surgeons manage them promptly.
Most complications relate to surgical technique, implant issues, or postoperative care.
- Infection risk: Surgical site infections can occur, requiring antibiotics or implant removal in severe cases.
- Implant failure: Plate or screw loosening or breakage may happen if the dog is too active or bone healing is poor.
- Delayed healing: Factors like poor blood supply or infection can slow bone repair, prolonging recovery time.
- Joint stiffness: Inadequate rehabilitation may cause reduced knee mobility and muscle wasting.
Close monitoring and timely intervention reduce the impact of these complications on the dog's recovery.
Conclusion
The Synthes TPLO plate is a key tool in veterinary orthopedic surgery for repairing cruciate ligament injuries in dogs. Its design and locking screw technology provide stable fixation that supports effective bone healing and joint function.
Understanding the plate's use, benefits, and care requirements helps pet owners support their dog's recovery and improve surgical outcomes. With proper surgical technique and postoperative management, the Synthes TPLO plate offers a reliable solution for restoring knee stability and mobility in affected dogs.
FAQs
How long does it take for a dog to heal after TPLO surgery with a Synthes plate?
Healing typically takes 8 to 12 weeks, depending on the dog's size and health. Regular veterinary check-ups monitor bone healing and implant stability during this period.
Can the Synthes TPLO plate be removed after healing?
Plate removal is usually not necessary unless complications arise. Most dogs keep the implant permanently without issues once healing is complete.
Is the Synthes TPLO plate suitable for all dog breeds?
The plate comes in various sizes to fit most breeds, but very small or very large dogs may require customized implants or alternative treatments.
What signs indicate complications after TPLO surgery?
Watch for swelling, redness, discharge, increased pain, or lameness worsening. These signs warrant prompt veterinary evaluation to address possible infection or implant problems.
How soon can a dog bear weight on the leg after Synthes TPLO plate surgery?
Most dogs begin partial weight-bearing within days after surgery, progressing to full weight-bearing over weeks as healing advances under veterinary guidance.
TPLO Bone Healing Time in Dogs Explained
Learn about TPLO bone healing time in dogs, factors affecting recovery, and how to support your pet's healing after surgery.
Tibial Plateau Leveling Osteotomy (TPLO) is a common surgical procedure used to treat cranial cruciate ligament (CCL) injuries in dogs. Understanding the bone healing time after TPLO surgery is important for pet owners to manage their dog's recovery effectively. This article explains the typical healing timeline, factors influencing bone healing, and how to support your dog during this critical period.
TPLO bone healing time in dogs usually ranges from 8 to 12 weeks, depending on various factors such as the dog's age, size, and overall health. This guide will help you learn what to expect during recovery, signs of proper healing, and tips to ensure your dog regains full mobility safely.
What is the typical bone healing time after TPLO surgery in dogs?
Bone healing after TPLO surgery is a gradual process that involves the formation of new bone tissue at the osteotomy site. Most dogs show significant healing within 8 to 12 weeks post-surgery. However, the exact time can vary based on individual factors.
- Healing duration range: Most dogs' bones heal sufficiently between 8 and 12 weeks after TPLO surgery, allowing gradual return to activity.
- Initial bone stability: The surgical plate and screws provide immediate stability, helping bones start healing without shifting.
- Radiographic confirmation: Veterinarians use X-rays around 8 weeks post-op to assess bone healing progress before increasing activity.
- Complete remodeling: Full bone remodeling and strength restoration can take several months beyond initial healing.
Understanding this timeline helps owners plan post-operative care and follow veterinary advice to avoid complications.
What factors influence TPLO bone healing time in dogs?
Several factors affect how quickly a dog's bone heals after TPLO surgery. Recognizing these can help you provide better care and anticipate recovery challenges.
- Dog's age: Younger dogs tend to heal faster due to better bone regeneration capacity compared to older dogs.
- Body weight and size: Larger or overweight dogs may experience slower healing because of increased stress on the surgical site.
- Overall health: Dogs with good nutrition and no underlying diseases generally heal more efficiently.
- Post-surgery activity level: Excessive movement or jumping can delay healing by stressing the osteotomy site.
By managing these factors, you can support your dog's recovery and reduce the risk of delayed healing or complications.
How can you support your dog's bone healing after TPLO surgery?
Proper care after TPLO surgery is crucial to promote bone healing and prevent setbacks. Owners should follow veterinary instructions closely and create a safe environment for recovery.
- Strict rest and confinement: Limit your dog's activity to prevent excessive strain on the healing bone during the first 8 weeks.
- Controlled leash walks: Short, slow walks help maintain muscle tone without risking injury to the surgical site.
- Balanced nutrition: Provide a diet rich in protein, calcium, and vitamins to support bone regeneration.
- Regular veterinary check-ups: Follow-up visits allow monitoring of healing progress and early detection of complications.
These steps help ensure your dog recovers safely and regains full function after TPLO surgery.
What signs indicate proper bone healing after TPLO surgery?
Monitoring your dog for signs of proper healing can reassure you that recovery is on track. Some clinical and radiographic signs are important to watch for.
- Decreased lameness: Gradual improvement in weight-bearing and reduced limping suggest healing progress.
- Reduced swelling and pain: Less inflammation around the surgical site indicates tissue recovery.
- Stable surgical site: No abnormal movement or instability when the leg is gently handled.
- Positive X-ray findings: Evidence of new bone formation bridging the osteotomy gap confirms healing.
If you notice worsening lameness or swelling, contact your veterinarian promptly as these may indicate complications.
What complications can affect TPLO bone healing time?
Some complications can delay or impair bone healing after TPLO surgery. Being aware helps you seek timely veterinary care if needed.
- Infection risk: Surgical site infections can slow healing and require antibiotics or further treatment.
- Implant failure: Loosening or breaking of plates and screws can destabilize the bone and delay healing.
- Delayed union or nonunion: Sometimes bones heal slowly or fail to unite, needing additional intervention.
- Excessive activity: Early or vigorous exercise can disrupt healing and cause complications.
Prompt veterinary attention for any concerns can prevent prolonged recovery and improve outcomes.
How long should activity be restricted after TPLO surgery?
Activity restriction is essential to protect the healing bone and surgical site. Most veterinarians recommend strict rest with limited movement for the first 8 weeks.
- First 2 weeks: Complete confinement with minimal movement, avoiding stairs and jumping.
- Weeks 3 to 8: Controlled leash walks only, gradually increasing duration based on healing progress.
- After 8 weeks: Veterinary assessment guides gradual return to normal activity if healing is adequate.
- Full recovery timeline: Most dogs resume normal activity by 12 to 16 weeks post-surgery after full bone remodeling.
Following these guidelines helps prevent re-injury and supports successful healing after TPLO surgery.
Conclusion
TPLO bone healing time in dogs typically ranges from 8 to 12 weeks, with full recovery taking several months. Understanding this timeline and the factors that influence healing helps owners provide the best care during their dog's recovery.
Strict activity restriction, proper nutrition, and regular veterinary follow-ups are key to ensuring your dog heals well after TPLO surgery. Watching for signs of proper healing and potential complications allows prompt action to support your pet's health and mobility.
FAQs
How long does it take for a dog's bone to heal after TPLO surgery?
Most dogs' bones heal sufficiently between 8 and 12 weeks after TPLO surgery, but full remodeling may take several months.
Can older dogs heal as well as younger dogs after TPLO?
Older dogs may heal more slowly due to reduced bone regeneration, but with proper care, they can still recover well after TPLO surgery.
When can my dog start walking normally after TPLO?
Controlled leash walks usually begin after 2 weeks, with gradual increase after 8 weeks based on veterinary assessment of healing.
What signs mean my dog is not healing properly after TPLO?
Signs like increased swelling, worsening lameness, or instability at the surgical site suggest complications and need veterinary evaluation.
Is physical therapy helpful during TPLO recovery?
Physical therapy can aid muscle strength and joint mobility but should only start after bone healing is confirmed by your veterinarian.
Before and After TPLO Surgery: Dog Health and Recovery Timeline
Discover how TPLO surgery restores mobility in dogs with torn CCL. Learn about recovery timelines, post-op care, and expected outcomes for your pet
TPLO surgery is a major orthopedic procedure that requires careful preparation before surgery and structured management after.
The recovery period -- 8 to 12 weeks of graduated activity restriction, multiple vet visits, and daily wound monitoring -- is as important as the surgery itself.
Most owners who struggle with recovery do so because they underestimated what the post-operative period involves. This guide walks through every phase.
Quick answer: Before TPLO surgery: complete pre-surgical bloodwork, fast 8 to 12 hours, prepare a crate and non-slip mats, fill prescriptions. After TPLO: crate rest weeks 1 to 2, progressive walking weeks 2 to 6, radiographic assessment weeks 6 to 8, activity increase after healing. Muscle recovery takes 4 to 6 months.
Key takeaways
- The home environment must be set up before surgery day: crate, non-slip mats, baby gates, low bedding, and supplies must be in place before the dog arrives home
- Fasting is required before surgery: no food for 8 to 12 hours before general anesthesia; water rules vary by facility
- The first 2 weeks are the most critical and restrictive: no running, jumping, stairs, or off-leash activity; bathroom trips on a short leash only; incision checked daily
- Radiographic assessment at 6 to 8 weeks is the gate that controls activity increase: without imaging confirmation, activity must not increase; radiographs are the only reliable confirmation
- Food intake should be reduced by approximately 30% during recovery: activity restriction rapidly leads to weight gain; extra weight stresses the healing osteotomy
- Full muscle recovery takes 4 to 6 months after bone healing is confirmed: bone healing at 12 weeks and full functional recovery are different endpoints
Before surgery: preparation checklist
Medical preparation (weeks before surgery)
Pre-surgical examination and bloodwork: your vet will perform a full physical examination and order a complete blood count and blood chemistry panel. These confirm the dog can safely handle anesthesia and healing. Senior dogs or those with health conditions may need additional testing.
Medication review: tell your vet all current medications and supplements. NSAIDs, certain supplements, and some other drugs need to be stopped before surgery. Never discontinue a prescription medication without vet instruction.
Weight management: if your dog is overweight, weight reduction before surgery reduces anesthetic and surgical risk. Even a 5 to 10% body weight reduction before surgery is beneficial.
Pre-surgical bathing: bathe 1 to 2 days before surgery if you wish; post-surgical bathing is restricted for 10 to 14 days.
Home preparation (day before surgery)
The recovery space:
- Crate (correctly sized: stand, turn, lie comfortably, not pace) in the main family living area
- Non-slip mats or yoga mats over all hard flooring in the recovery area
- Soft, washable bedding in the crate
- Water and food bowls at floor level
- Baby gates on stairs
- All furniture inaccessible to prevent jumping
Supplies to have ready:
- E-collar (confirm with the surgical facility whether one will be provided)
- Ice pack or bag of frozen peas for cold therapy
- Sling or lifting harness for larger dogs
- Short leash (4 to 6 foot, not retractable)
- Medications filled at the pharmacy before surgery day
SustainableVet.org confirms: before your dog comes home, prepare a safe and quiet recovery space with a crate or small room, soft bedding, good airflow, and away from stairs or slippery floors.
Fasting
No food for 8 to 12 hours before surgery. Water rules vary by facility -- confirm with your vet. Give no food the morning of surgery even if the dog appears hungry.
Surgery day: what to expect
Drop-off: typically early morning. The dog is admitted, weighed, examined, and an IV catheter is placed. IV antibiotics are given before the incision.
The procedure: the surgeon makes a medial incision over the proximal tibia, performs a small arthrotomy to assess the meniscus, makes the curved osteotomy cut, rotates the tibial plateau to approximately 5 degrees, and secures the plate and screws. The wound is closed in layers.
Duration: typically 1.5 to 2 hours.
Post-surgical care: the dog spends several hours in recovery before discharge (same day at some facilities; overnight at others).
Discharge: written instructions for medications, wound care, activity restrictions, and follow-up appointments are provided.
After surgery: week-by-week recovery timeline
Weeks 1 to 2: acute post-surgical phase
Activity: crate rest at all times except bathroom trips. Leash walks of 5 minutes maximum, 3 to 5 times daily. No stairs, no furniture, no off-leash time.
Weight bearing: most dogs begin toe-touching within the first few days. Some do not bear weight for the full 2 weeks -- both presentations are within normal range.
Wound care: e-collar on at all times except supervised eating. Inspect the incision daily at the same time. No bathing or wet incision exposure.
Cold therapy: 10 to 15 minutes of ice pack (wrapped in cloth) applied to the incision, 3 to 4 times daily for the first 3 to 5 days.
Medications: NSAIDs and gabapentin on the exact prescribed schedule. Give NSAIDs with food.
SustainableVet.org confirms: the first two weeks focus on rest and healing; the dog stays confined; short controlled leash walks are for bathroom breaks; check the incision daily for redness, swelling, or discharge.
2-week recheck: incision assessment, suture or staple removal if healing is confirmed, early mobility and pain management review.
Weeks 3 to 6: graduated activity phase
Activity: leash walk duration increases progressively. TPLO Info recommends increasing by up to 5 minutes per week. No off-leash activity. No stairs without guidance. No playing with other pets.
Weight bearing: most dogs should be bearing increasing weight through the operated leg. Three-legged walking during activity is still common but should be decreasing.
Passive range-of-motion exercises: gentle flexion and extension of the stifle, 5 to 10 repetitions, 2 to 3 times daily if the vet has approved.
Veterinary Healthcare Associates confirms: weeks 3 to 4, swelling should decrease; gradual increase in leash walking; passive range-of-motion exercises may begin.
Food management: Medcovet confirms reducing food intake by approximately 30% during the restriction period to prevent weight gain from inactivity.
Weeks 6 to 8: radiographic checkpoint
6-week radiograph (critical): images confirm whether the osteotomy is healing as expected. If healing is progressing, activity can be increased. If healing is delayed, restrictions continue.
If healing is confirmed: leash walks increase to 15 to 20 minutes, physiotherapy begins, short controlled hill walking may begin.
If healing is delayed: investigate for infection or non-union; extend restrictions; consider additional diagnostics.
Veterinary Healthcare Associates confirms: weeks 5 to 6, recheck X-rays may be taken to evaluate healing; improvement in weight-bearing and stability should be evident.
Weeks 8 to 12: consolidation and return to activity
8 to 10 week radiograph (in many protocols): confirms continued healing progression.
12-week radiograph (final major milestone): confirms bone union before lifting restrictions. After this confirmation:
- Running and off-leash play can gradually resume
- Stairs without support
- Normal household access
Post-12-week activity return: progressive reintroduction of activity over the following 4 to 6 weeks rather than an immediate full return.
Animal Outpatient Surgery confirms: in the final phase, your dog can return to normal activity levels, including running, jumping, and playing; continue monitoring for discomfort and maintain a balanced exercise routine.
Long-term: months 3 to 6
Full muscle recovery takes 4 to 6 months after bone healing. During this period:
- Progressive strengthening continues
- Hydrotherapy, balance work, and controlled running rebuild the atrophied operated leg
- Joint supplements (omega-3 fatty acids, glucosamine) are typically started or continued
- Weight management remains critical
Most dogs reach 90 to 95% of pre-injury function by 6 months with a compliant recovery.
For the recovery tips guide, see 10 essential TPLO recovery tips for pet owners. For confinement, see how to confine your dog after TPLO surgery.
For physical therapy, see when to start physical therapy after TPLO surgery. For long-term outcomes, see long-term outcomes of TPLO surgery.
Frequently asked questions
How strict does the activity restriction need to be in the first 2 weeks?
Very strict. No exceptions for stairs, sofa access, running, jumping, or unsupervised time without confinement.
A single running or jumping episode in the first 2 weeks can displace the plate before the osteotomy has any mechanical strength.
The restriction is designed to protect a bone that cannot yet protect itself.
My dog is eating less and seems depressed after surgery. Is this normal?
Yes, in the first 3 to 5 days. Anesthesia, post-surgical pain, and opioid medications can reduce appetite and alter behavior.
If the dog is not eating at all by day 3 or shows signs of significant distress, contact your vet.
Most dogs gradually return to normal eating and behavior within the first week.
When can my dog go swimming after TPLO?
Controlled hydrotherapy (underwater treadmill) can begin after the incision is confirmed healed at the 2-week recheck. Open water swimming (lakes, rivers) is typically not recommended until after the 12-week radiographic clearance.
Confirm with your vet in both cases.
Should I put my dog on a diet during recovery?
Reduce caloric intake rather than switching to a formal diet. Medcovet recommends approximately 30% reduction in food intake during the restriction period to prevent weight gain from inactivity.
If your dog was already at an ideal weight, a modest reduction (10 to 20%) is appropriate. Discuss with your vet.
My dog seems completely fine at week 4 and is pulling on the leash. Should I increase activity?
No. Continue the restriction protocol until the 6-week radiograph confirms bone healing progression.
The dog feeling well at week 4 is a positive sign, but bone healing lags significantly behind the dog's perceived comfort.
Dogs routinely feel ready to run before the osteotomy is safe to run on.
Resources
- SustainableVet. Before and After TPLO Surgery. sustainablevet.org
- Veterinary Healthcare Associates. TPLO Surgery in Dogs: Before and After. vhavets.com
- Medcovet. Essential Guide to Dog Recovery TPLO Surgery. medcovet.com
- TPLO Info. Preparing for Your Dog's TPLO Surgery. tploinfo.com

Ankle Swelling After TPLO Surgery in Dogs
Learn about causes, symptoms, and treatment of ankle swelling after TPLO surgery in dogs to ensure proper recovery and care.
Many owners are surprised to find their dog's ankle swollen after TPLO surgery especially when the surgery was performed on the knee, which is well above the ankle.
This gravity-dependent swelling is one of the most common post-TPLO findings, and in most cases it is a completely normal part of recovery.
Knowing what causes it, when it is expected, and when it becomes a reason to call your vet puts you in a much better position during recovery.
Quick answer: Ankle swelling 3 to 5 days post-TPLO is normal — gravity pools post-surgical fluid at the ankle. Resolves in 1 to 2 weeks with rest and cold packing. Call your vet if swelling is hot, fast-growing, or discharging.
Key takeaways
- Ankle swelling at 3 to 5 days post-TPLO is normal: fluid from the knee surgical site tracks down the leg; TPLO Info confirms this is routine
- Gravity pulls fluid to the ankle: dogs do not elevate the leg during recovery, so post-surgical fluid migrates downward
- Normal ankle swelling is mild, soft, and non-painful: not hot, red, rapidly growing, or producing any discharge
- Cold packing and gentle massage help resolve ankle swelling: they reduce inflammation and encourage fluid movement
- Excessive activity worsens ankle swelling: running, jumping, or sustained weight-bearing beyond short leash walks increases fluid accumulation
- Infection is the main abnormal cause: infected swelling is warm, painful, and accompanied by fever or lethargy
Why does ankle swelling happen after TPLO?
TPLO surgery is performed at the proximal tibia just below the knee. However, the inflammatory response and fluid production that result from surgery are not confined to the exact surgical site.
Gravity-dependent fluid migration: post-surgical serum and inflammatory fluid produced at the knee level migrate downward along tissue planes. Because dogs do not elevate their legs during recovery unlike a human keeping a leg raised on a pillow this fluid pools in the lower leg and ankle region.
TPLO Info confirms ankle swelling at 3 to 5 days post-TPLO is completely normal and recommends massage and icing if this occurs.
Lymphatic disruption: the surgery disrupts local lymphatic vessels that normally drain fluid from the lower leg. Until these pathways regenerate or compensate, fluid accumulation in the lower leg is common.
Reduced movement: when a dog is resting with the leg dependent (hanging down), fluid accumulates. Brief controlled leash walks stimulate the lymphatic pump and muscle contractions that help move fluid back up the leg.
Normal ankle swelling: what to expect
Normal post-TPLO ankle swelling typically:
- Appears at day 3 to 5 post-surgery
- Is soft and pitting (you can press on it and it indents temporarily)
- Is not warm to the touch
- Does not produce any discharge
- Does not cause significant additional pain beyond the expected post-operative discomfort
- Gradually reduces over 1 to 2 weeks with rest and activity restriction
VCA Animal Hospitals notes that mild to moderate swelling is expected after TPLO surgery as the body responds to tissue trauma and the healing process begins.
Abnormal ankle swelling: warning signs
Contact your veterinarian if you observe:
- Swelling that is rapidly increasing especially in the first 1 to 2 weeks
- Warmth or heat in the swollen area beyond mild
- Redness or skin discoloration around the ankle or lower leg
- Discharge or pus from the surgical incision or surrounding skin
- Your dog refusing to bear any weight on the leg
- Fever, lethargy, or loss of appetite alongside the swelling
- Swelling that is growing rather than shrinking after the first week
These signs suggest infection, hematoma, or a complication beyond normal gravity-dependent fluid pooling.
How to manage ankle swelling at home
Cold packing: apply a cold pack (frozen peas wrapped in a thin towel) to the ankle for 10 to 15 minutes, 2 to 3 times daily. Cold reduces local inflammation and provides mild pain relief. Always wrap the cold pack never apply ice directly to skin.
Gentle massage: TPLO Info recommends gentle massage if ankle swelling develops. Using a light hand, massage from the ankle upward toward the knee to encourage fluid to move back toward the body. Do not massage the surgical incision site itself.
Activity restriction: the most important intervention. Every unnecessary step the dog takes increases fluid production and worsens swelling. Strict confinement with leash-only bathroom walks is essential for the first 6 to 8 weeks.
Short controlled leash walks: paradoxically, very short leash walks (5 to 10 minutes) are better than complete immobility. Gentle controlled movement stimulates the lymphatic pump and helps clear fluid more effectively than prolonged rest. Do not allow the dog to run, jump, or play.
Timeline: when should ankle swelling resolve?
Most normal ankle swelling resolves within 1 to 2 weeks of surgery when activity restriction is maintained.
Vetplayas notes that swelling is a common response to surgical intervention and typically improves as healing progresses.
Persistent ankle swelling beyond 2 to 3 weeks, or swelling that worsens rather than improves, warrants a veterinary recheck.
This may indicate a seroma has formed in the lower leg, or that the dog is more active than recommended.
For the full fluid buildup and seroma guide, see fluid buildup after TPLO surgery in dogs.
For the full swelling timeline and duration guide, see how long does swelling last after TPLO surgery. For the complete complications overview, see 15 common complications after TPLO surgery in dogs.
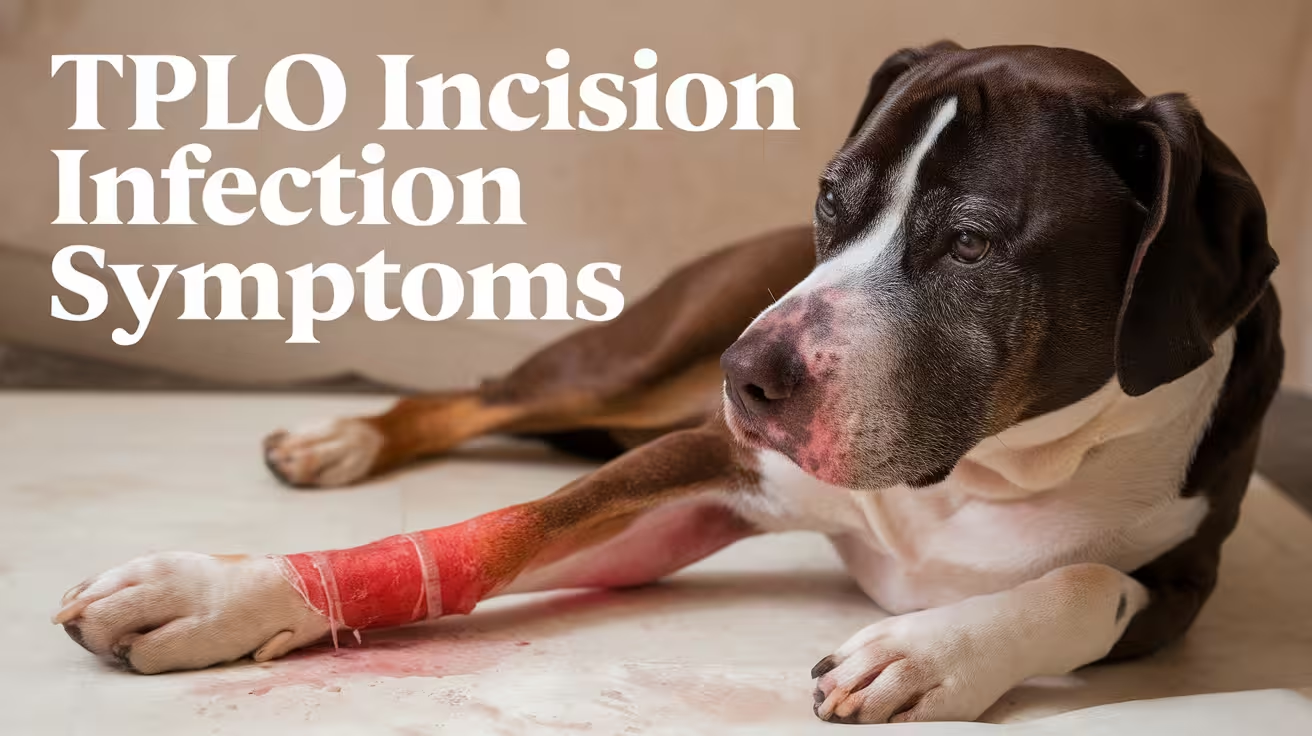
For the incision infection guide, see TPLO incision infection symptoms and prevention.
Frequently asked questions
Is ankle swelling after TPLO always from the surgery?
In the first 1 to 3 weeks post-surgery, yes ankle swelling almost always relates directly to the procedure.
Rarely, a dog might develop an unrelated issue (insect sting, foreign body, contact dermatitis) but the timing overwhelmingly points to post-surgical fluid migration in most cases.
Should I wrap my dog's ankle if it's swollen after TPLO?
Only if your vet specifically recommends it. Improper bandaging can cut off circulation or cause pressure sores.
If you are concerned about the ankle swelling, contact your vet before applying any bandage or wrap at home.
My dog's ankle is swollen but the knee looks fine. Is that normal?
Yes. The surgical site at the knee may look relatively normal while the ankle is more visibly swollen because gravity pulls fluid downward.
This pattern is completely consistent with normal post-TPLO fluid migration and is not a sign that something is wrong at the ankle itself.
Can I use a compression sock on my dog's ankle?
Not without veterinary guidance. Human compression garments are not designed for canine anatomy and can cause pressure injury, especially around the hock joint.
If compression is indicated, your vet will apply an appropriate veterinary bandage.
When should I take my dog back to the vet for ankle swelling?
If the swelling appears within the first 1 to 2 weeks and is mild, soft, and not causing distress monitor at home with cold packing and massage.
If it is growing, warm, accompanied by redness or discharge, or if your dog is in significant pain, contact your vet promptly rather than waiting for a scheduled recheck.
Resources
- TPLO Info. Recovery FAQs. tploinfo.com
- VCA Animal Hospitals. Tibial Plateau Leveling Osteotomy (TPLO) in Dogs. vcahospitals.com
- Vetplayas. Understanding Swelling After TPLO Surgery. vetplayas.com
- Midwest Veterinary Specialists. Post-Operative Care Following TPLO. midwestveterinaryspecialists.com
Modified Maquet Procedure vs TPLO Surgery
Compare Modified Maquet Procedure and TPLO surgery for canine cruciate ligament rupture treatment, including benefits, risks, and recovery.
The Modified Maquet Procedure (MMP) is an evolution of the Tibial Tuberosity Advancement (TTA) that uses a titanium foam wedge instead of a cage to advance the tibial tuberosity.
It has been positioned as a less invasive, faster-to-perform alternative to TPLO for dogs with CCL rupture.
Published clinical evidence shows both procedures produce good outcomes, with TPLO demonstrating a slight advantage in objective gait analysis at 3 months.
Quick answer: A prospective randomized study found TPLO achieves 93.9% of normal peak vertical force vs 89.4% for MMP at 6 months — no significant difference in complications or OA progression. MMP is less invasive, faster, and generally less expensive. Both are appropriate for medium-to-large breed dogs.
Key takeaways
- TPLO achieves 93.9% of normal ground reaction force at 6 months vs 89.4% for MMP — numerically superior but not statistically significant
- No significant difference in major complications or OA progression was found between TPLO and MMP in the comparative study
- MMP is less invasive and faster to perform: a titanium foam wedge and partial osteotomy instead of TPLO's full proximal tibial cut
- MMP is generally less expensive than TPLO: shorter surgical time and different implant costs reduce the procedure price
- Early partial weight-bearing may occur sooner after MMP due to less invasive fixation and the partial osteotomy
- TPLO has a much larger evidence base: 25+ years of data vs limited MMP evidence
How each procedure works
TPLO (Tibial Plateau Leveling Osteotomy)
TPLO addresses CCL rupture by making a curved osteotomy through the proximal tibia and rotating the tibial plateau to approximately 5 degrees.
This changes joint biomechanics so the stifle is stable during weight-bearing without a functioning CCL. The osteotomy is held in place with a bone plate and screws.
Modified Maquet Procedure (MMP)
MMP is an adaptation of TTA in which the tibial tuberosity is advanced cranially by making a partial osteotomy in the tibial crest.
A porous titanium foam wedge is inserted into the gap and a fixation staple holds the construct in position.
The cranial advancement of the tuberosity repositions the patellar tendon to neutralize the cranial thrust that occurs in the CCL-deficient stifle the same biomechanical principle as TTA, with different implants.
Animal Works Veterinary Surgery describes MMP as using improved implants and surgical techniques designed to reduce operating time and minimize complications compared to standard TTA.
The titanium foam wedge promotes bone ingrowth and healing without the need for a cage or plate system. Bone healing in the MMP osteotomy site is typically complete at 90 days radiographically.
Clinical evidence: TPLO vs MMP
Primary comparative study
PubMed (prospective randomized controlled study, 61 dogs, 76 joints): dogs were treated with TPLO (n=30, 41 joints) or MMP (n=31, 35 joints) and compared with healthy controls.
Outcomes were assessed by clinical examination, radiography, and treadmill force plate gait analysis at 6 weeks, 3 months, and 6 months.
Results at 6 months:
- TPLO: 93.9% of normal peak vertical force (PVF), 85.9% of normal vertical impulse (VI)
- MMP: 89.4% of normal PVF, 79.9% of normal VI
At 3 months, significantly more TPLO patients were within the reference range for healthy dogs on peak vertical force. By 6 months, the difference was not statistically significant.
No significant difference was found in major complications or OA progression at any time point.
Conclusion from the study: "Although no significant differences were found between the surgical methods, TPLO patients showed superiority with regard to clinical outcome."
MMP standalone study
PMC (35 dogs, unilateral CCL rupture, MMP): significant improvement in ground reaction forces at all time intervals. At 90 days, 54.2% of patients had a Symmetry Index suggesting normal gait.
Complete bone healing on radiographs at 90 days. Major complication rate: 8.5% (3 of 35), minor complication rate: 2.8%.
Practical comparison
Which dogs are best suited to each?
MMP is often chosen for:
- Medium and large breed dogs where a less invasive approach is preferred
- Cases where surgical time is a clinical consideration
- Practices experienced in MMP technique
- Dogs where cost is a factor
TPLO is typically recommended for:
- Large and giant breed dogs with high joint loads
- Dogs with steep tibial plateau angles where TPLO provides more precise biomechanical correction
- Cases where the largest available evidence base is preferred
- Surgeons with established TPLO experience
Animal Hospital of Adel notes that both surgeries are effective, with MMP being less invasive, less expensive, and quicker to perform.
Walkerville Vet's evidence review concludes that TPLO gives slightly better objective results and that MMP is expected to outperform standard TTA, though more evidence is needed.
For the full TPLO pros and cons, see TPLO surgery pros and cons for dogs. For the full alternatives overview, see alternatives to TPLO surgery for dogs.
Frequently asked questions
Is MMP as effective as TPLO for large dogs?
The evidence suggests TPLO has a slight advantage at 3 months, with equivalent outcomes by 6 months in the primary comparative study.
Most surgeons still prefer TPLO for large and giant breeds due to the larger evidence base and slightly superior short-term objective results. MMP is appropriate for many large dogs in experienced hands.
How much cheaper is MMP than TPLO?
MMP is generally less expensive than TPLO due to shorter surgical time and different implant costs. The specific difference varies by practice, region, and surgeon.
Ask your veterinarian for a direct cost comparison for your dog's specific case.
What is the complication rate for MMP compared to TPLO?
The MMP standalone study reported an 8.5% major complication rate. TPLO complication rates across the literature range from 14 to 34%.
However, these figures come from different study populations and settings, making direct comparison difficult. Neither procedure is free of risk.
How long does MMP recovery take compared to TPLO?
Both procedures require 8 to 12 weeks of restricted activity, though MMP's less invasive partial osteotomy may allow earlier partial weight-bearing in some dogs.
Full activity return for both procedures is typically at 4 to 6 months.
Can a dog have TPLO if MMP fails?
Yes. TPLO can be performed as a revision if MMP results in ongoing instability or poor function. The converse is less common.
Discuss revision options with an orthopedic specialist if your dog is not progressing as expected after MMP.
Resources
- PubMed. Outcome after Tibial Plateau Levelling Osteotomy and Modified Maquet Procedure in Dogs with CCL Rupture. pubmed.ncbi.nlm.nih.gov
- PMC. Outcome after Modified Maquet Procedure in Dogs: Force Plate Gait Analysis. ncbi.nlm.nih.gov
- Animal Works Veterinary Surgery. MMP vs TPLO. animalworksvets.com
- Dog Knee Injury. Modified Maquet Procedure (MMP Surgery) for Dogs. dogkneeinjury.com
- Walkerville Vet. Which ACL Surgery Is Best for Dogs? walkervillevet.com.au

TPLO Plate Rejection Symptoms in Dogs
Learn to recognize TPLO plate rejection symptoms in dogs, including signs, causes, and treatment options for better recovery.
TPLO plate rejection is one of the less common but more serious complications that can follow tibial plateau leveling osteotomy surgery.
The term "rejection" is sometimes used loosely distinguishing between true immune-mediated rejection, infection, and implant loosening matters because the treatment differs significantly for each.
Quick answer: True TPLO plate rejection is rare — implants are highly biocompatible. It produces persistent swelling, heat, pain over the plate, and sometimes a draining tract. Infection produces identical symptoms. Contact your vet if lameness worsens or discharge appears weeks to months after surgery.
Key takeaways
- True immune-mediated plate rejection is rare: TPLO plates are made from highly biocompatible titanium or stainless steel
- Symptoms overlap significantly with infection: pain, swelling, heat, and discharge occur in both; bacterial culture distinguishes them
- Infection is the most common implant complication: TPLO infection rates range from 0.8 to 14.3%; true rejection is a small subset
- Signs typically appear weeks to months after surgery: worsening lameness after initial improvement is the classic red flag
- A draining tract (fistula) over the plate is a hallmark sign of implant-associated infection or rejection
- True rejection requires plate removal: once the osteotomy heals (at least 12 weeks), the plate is removed; bone heals without it
What is TPLO plate rejection?
The TPLO plate and screws are made from medical-grade titanium or stainless steel.
These materials are designed to be biologically inert the body should recognize them as neutral foreign material and wall them off without reaction.
Laguna Hills Animal Hospital explains that in some cases, the TPLO plate is rejected by the dog's body because it is perceived as a foreign object.
True immune-mediated rejection occurs when the immune system mounts an inflammatory response against the implant material itself. This is distinct from:
- Periprosthetic infection: bacteria colonize the implant surface and cause chronic infection around the plate; this is far more common than true rejection
- Mechanical failure: the plate bends, breaks, or screws loosen due to excessive force; this is a structural problem, not an immune reaction
- Normal post-surgical inflammation: expected in the first 2 to 3 weeks; should be improving, not worsening
In clinical practice, the distinction between true rejection and low-grade infection is often made by bacterial culture of the fluid or tissue at the site.
True aseptic rejection produces inflammation without bacterial growth; periprosthetic infection produces the same symptoms with positive cultures.
Symptoms of TPLO plate rejection
Dog Discoveries' veterinary reference describes plate rejection as: the knee becomes inflamed and sore around the plate, the dog feels constant pain and irritation, and the dog gets worse rather than better.
Signs of trouble are generally seen weeks to months after surgery rather than in the immediate post-operative period.
Key symptoms to monitor:
Worsening or persistent lameness: a dog that was improving and then regresses, or one whose lameness fails to improve beyond the expected baseline, is showing a key red flag. This is distinct from the expected early post-TPLO lameness that should be progressively improving week by week.
Localized swelling over the plate: visible or palpable swelling directly over the plate site (proximal medial tibia) that does not resolve with rest and is not reducing over time.
Warmth and heat at the surgical site: warmth beyond the first 2 to 3 post-operative weeks suggests ongoing inflammation.
Draining tract (fistula): a small hole in the skin near the surgical site that produces persistent clear, bloody, or purulent discharge. This is a hallmark of implant-associated complications either infection or reaction. Vet Playas confirms persistent drainage or discharge, especially with a foul odor, may indicate infection or plate rejection.
Pain on palpation: the dog reacts to direct pressure over the plate site.
Failure to heal: the dog is not progressing as expected at radiographic rechecks; osteotomy bridging is delayed or absent.
How plate rejection is diagnosed
Clinical examination: systematic palpation of the plate site, assessment of lameness grade, and comparison to expected recovery trajectory.
Radiographs: assess osteotomy healing, implant position, screw integrity, and periimplant bone quality. Periprosthetic bone loss suggests infection or chronic reaction.
Culture and sensitivity: fluid or tissue from the surgical site is cultured to determine whether bacteria are present and which antibiotics are effective. Culture-negative inflammation supports true rejection; culture-positive results confirm infection.
Blood work: elevated inflammatory markers (C-reactive protein, white blood cell count) confirm systemic involvement.
Treatment
For infection (most common implant complication)
Culture-directed antibiotic therapy is initiated. If the osteotomy is not yet healed, the plate must remain in place removing the plate before the osteotomy heals causes the bone segments to lose support.
Targeted antibiotics and local wound management may control infection until healing is sufficient.
If the infection does not resolve with antibiotics, surgical debridement or implant removal (if the bone has healed) may be required.
For the full infection management guide, see TPLO plate infection signs and treatment.
For true aseptic rejection
Plate removal is the definitive treatment. Laguna Hills Animal Hospital confirms that the bone plate must remain in place for at least 12 weeks to allow the bone to heal.
Once healing is confirmed radiographically typically at 10 to 12 weeks the plate can be safely removed.
The bone does not require the plate long-term; it is a scaffold to hold the osteotomy while it heals.
When to contact your veterinarian
Contact your vet if:
- Lameness worsens or plateaus instead of progressively improving
- You notice new swelling, heat, or discharge at the surgical site weeks after surgery
- A draining tract appears at or near the incision
- Your dog shows signs of pain at the plate site on palpation
- Radiographs at rechecks show unexpected findings around the plate or screws
For the implant failure guide, see TPLO implant failure signs and causes. For the plate removal recovery guide, see TPLO plate removal recovery guide.
For the full complications reference, see 15 common complications after TPLO surgery in dogs. For the plate infection article with antibiotic treatment details, see TPLO plate infection signs and treatment.
For when the plate needs to come out due to infection, see when does a TPLO implant need to be removed due to infection.
Frequently asked questions
How common is TPLO plate rejection in dogs?
True immune-mediated rejection is uncommon. TPLO plates are manufactured from highly biocompatible titanium or stainless steel.
The more common implant complication is infection (0.8 to 14.3% of TPLO cases depending on the study), which produces similar symptoms to rejection.
Metal allergy or true rejection accounts for a small subset of these cases.
How do I know if it's plate rejection or infection?
The symptoms overlap significantly. Bacterial culture of fluid from the site distinguishes them: culture-positive means infection; culture-negative inflammation in the right clinical context suggests true rejection.
Both require veterinary evaluation do not attempt to manage either at home.
Can the plate stay in if my dog is rejecting it?
No. If true rejection is diagnosed and the plate is causing ongoing inflammation, it must be removed once the osteotomy has healed sufficiently.
Most dogs do not require the plate after 10 to 12 weeks once the bone has consolidated. Plate removal is a less complex procedure than the original TPLO.
Will my dog need another surgery if the plate is rejected?
Plate removal surgery is typically required if true rejection is confirmed and the osteotomy has healed. This is less invasive than the original TPLO.
In most cases the dog recovers well after plate removal, and long-term outcomes are good.
Can rejection be prevented?
Pre-surgical screening for metal sensitivities can help select the best implant material. Strict aseptic technique during surgery minimizes infection that can mimic rejection.
Activity restriction during recovery reduces mechanical stress on the implant that increases complication risk.
Resources
- Dog Discoveries. Signs of TPLO Plate Rejection in Dogs. dogdiscoveries.com
- Vetplayas. Unveiling TPLO Plate Rejection Symptoms. vetplayas.com
- Laguna Hills Animal Hospital. TPLO Surgery Complications. lhah.com
- ACVS. Cranial Cruciate Ligament Disease. acvs.org
Before and After TPLO Surgery: Dog Health and Recovery Timeline
Discover how TPLO surgery restores mobility in dogs with torn CCL. Learn about recovery timelines, post-op care, and expected outcomes for your pet
TPLO surgery is a major orthopedic procedure that requires careful preparation before surgery and structured management after.
The recovery period -- 8 to 12 weeks of graduated activity restriction, multiple vet visits, and daily wound monitoring -- is as important as the surgery itself.
Most owners who struggle with recovery do so because they underestimated what the post-operative period involves. This guide walks through every phase.
Quick answer: Before TPLO surgery: complete pre-surgical bloodwork, fast 8 to 12 hours, prepare a crate and non-slip mats, fill prescriptions. After TPLO: crate rest weeks 1 to 2, progressive walking weeks 2 to 6, radiographic assessment weeks 6 to 8, activity increase after healing. Muscle recovery takes 4 to 6 months.
Key takeaways
- The home environment must be set up before surgery day: crate, non-slip mats, baby gates, low bedding, and supplies must be in place before the dog arrives home
- Fasting is required before surgery: no food for 8 to 12 hours before general anesthesia; water rules vary by facility
- The first 2 weeks are the most critical and restrictive: no running, jumping, stairs, or off-leash activity; bathroom trips on a short leash only; incision checked daily
- Radiographic assessment at 6 to 8 weeks is the gate that controls activity increase: without imaging confirmation, activity must not increase; radiographs are the only reliable confirmation
- Food intake should be reduced by approximately 30% during recovery: activity restriction rapidly leads to weight gain; extra weight stresses the healing osteotomy
- Full muscle recovery takes 4 to 6 months after bone healing is confirmed: bone healing at 12 weeks and full functional recovery are different endpoints
Before surgery: preparation checklist
Medical preparation (weeks before surgery)
Pre-surgical examination and bloodwork: your vet will perform a full physical examination and order a complete blood count and blood chemistry panel. These confirm the dog can safely handle anesthesia and healing. Senior dogs or those with health conditions may need additional testing.
Medication review: tell your vet all current medications and supplements. NSAIDs, certain supplements, and some other drugs need to be stopped before surgery. Never discontinue a prescription medication without vet instruction.
Weight management: if your dog is overweight, weight reduction before surgery reduces anesthetic and surgical risk. Even a 5 to 10% body weight reduction before surgery is beneficial.
Pre-surgical bathing: bathe 1 to 2 days before surgery if you wish; post-surgical bathing is restricted for 10 to 14 days.
Home preparation (day before surgery)
The recovery space:
- Crate (correctly sized: stand, turn, lie comfortably, not pace) in the main family living area
- Non-slip mats or yoga mats over all hard flooring in the recovery area
- Soft, washable bedding in the crate
- Water and food bowls at floor level
- Baby gates on stairs
- All furniture inaccessible to prevent jumping
Supplies to have ready:
- E-collar (confirm with the surgical facility whether one will be provided)
- Ice pack or bag of frozen peas for cold therapy
- Sling or lifting harness for larger dogs
- Short leash (4 to 6 foot, not retractable)
- Medications filled at the pharmacy before surgery day
SustainableVet.org confirms: before your dog comes home, prepare a safe and quiet recovery space with a crate or small room, soft bedding, good airflow, and away from stairs or slippery floors.
Fasting
No food for 8 to 12 hours before surgery. Water rules vary by facility -- confirm with your vet. Give no food the morning of surgery even if the dog appears hungry.
Surgery day: what to expect
Drop-off: typically early morning. The dog is admitted, weighed, examined, and an IV catheter is placed. IV antibiotics are given before the incision.
The procedure: the surgeon makes a medial incision over the proximal tibia, performs a small arthrotomy to assess the meniscus, makes the curved osteotomy cut, rotates the tibial plateau to approximately 5 degrees, and secures the plate and screws. The wound is closed in layers.
Duration: typically 1.5 to 2 hours.
Post-surgical care: the dog spends several hours in recovery before discharge (same day at some facilities; overnight at others).
Discharge: written instructions for medications, wound care, activity restrictions, and follow-up appointments are provided.
After surgery: week-by-week recovery timeline
Weeks 1 to 2: acute post-surgical phase
Activity: crate rest at all times except bathroom trips. Leash walks of 5 minutes maximum, 3 to 5 times daily. No stairs, no furniture, no off-leash time.
Weight bearing: most dogs begin toe-touching within the first few days. Some do not bear weight for the full 2 weeks -- both presentations are within normal range.
Wound care: e-collar on at all times except supervised eating. Inspect the incision daily at the same time. No bathing or wet incision exposure.
Cold therapy: 10 to 15 minutes of ice pack (wrapped in cloth) applied to the incision, 3 to 4 times daily for the first 3 to 5 days.
Medications: NSAIDs and gabapentin on the exact prescribed schedule. Give NSAIDs with food.
SustainableVet.org confirms: the first two weeks focus on rest and healing; the dog stays confined; short controlled leash walks are for bathroom breaks; check the incision daily for redness, swelling, or discharge.
2-week recheck: incision assessment, suture or staple removal if healing is confirmed, early mobility and pain management review.
Weeks 3 to 6: graduated activity phase
Activity: leash walk duration increases progressively. TPLO Info recommends increasing by up to 5 minutes per week. No off-leash activity. No stairs without guidance. No playing with other pets.
Weight bearing: most dogs should be bearing increasing weight through the operated leg. Three-legged walking during activity is still common but should be decreasing.
Passive range-of-motion exercises: gentle flexion and extension of the stifle, 5 to 10 repetitions, 2 to 3 times daily if the vet has approved.
Veterinary Healthcare Associates confirms: weeks 3 to 4, swelling should decrease; gradual increase in leash walking; passive range-of-motion exercises may begin.
Food management: Medcovet confirms reducing food intake by approximately 30% during the restriction period to prevent weight gain from inactivity.
Weeks 6 to 8: radiographic checkpoint
6-week radiograph (critical): images confirm whether the osteotomy is healing as expected. If healing is progressing, activity can be increased. If healing is delayed, restrictions continue.
If healing is confirmed: leash walks increase to 15 to 20 minutes, physiotherapy begins, short controlled hill walking may begin.
If healing is delayed: investigate for infection or non-union; extend restrictions; consider additional diagnostics.
Veterinary Healthcare Associates confirms: weeks 5 to 6, recheck X-rays may be taken to evaluate healing; improvement in weight-bearing and stability should be evident.
Weeks 8 to 12: consolidation and return to activity
8 to 10 week radiograph (in many protocols): confirms continued healing progression.
12-week radiograph (final major milestone): confirms bone union before lifting restrictions. After this confirmation:
- Running and off-leash play can gradually resume
- Stairs without support
- Normal household access
Post-12-week activity return: progressive reintroduction of activity over the following 4 to 6 weeks rather than an immediate full return.
Animal Outpatient Surgery confirms: in the final phase, your dog can return to normal activity levels, including running, jumping, and playing; continue monitoring for discomfort and maintain a balanced exercise routine.
Long-term: months 3 to 6
Full muscle recovery takes 4 to 6 months after bone healing. During this period:
- Progressive strengthening continues
- Hydrotherapy, balance work, and controlled running rebuild the atrophied operated leg
- Joint supplements (omega-3 fatty acids, glucosamine) are typically started or continued
- Weight management remains critical
Most dogs reach 90 to 95% of pre-injury function by 6 months with a compliant recovery.
For the recovery tips guide, see 10 essential TPLO recovery tips for pet owners. For confinement, see how to confine your dog after TPLO surgery.
For physical therapy, see when to start physical therapy after TPLO surgery. For long-term outcomes, see long-term outcomes of TPLO surgery.
Frequently asked questions
How strict does the activity restriction need to be in the first 2 weeks?
Very strict. No exceptions for stairs, sofa access, running, jumping, or unsupervised time without confinement.
A single running or jumping episode in the first 2 weeks can displace the plate before the osteotomy has any mechanical strength.
The restriction is designed to protect a bone that cannot yet protect itself.
My dog is eating less and seems depressed after surgery. Is this normal?
Yes, in the first 3 to 5 days. Anesthesia, post-surgical pain, and opioid medications can reduce appetite and alter behavior.
If the dog is not eating at all by day 3 or shows signs of significant distress, contact your vet.
Most dogs gradually return to normal eating and behavior within the first week.
When can my dog go swimming after TPLO?
Controlled hydrotherapy (underwater treadmill) can begin after the incision is confirmed healed at the 2-week recheck. Open water swimming (lakes, rivers) is typically not recommended until after the 12-week radiographic clearance.
Confirm with your vet in both cases.
Should I put my dog on a diet during recovery?
Reduce caloric intake rather than switching to a formal diet. Medcovet recommends approximately 30% reduction in food intake during the restriction period to prevent weight gain from inactivity.
If your dog was already at an ideal weight, a modest reduction (10 to 20%) is appropriate. Discuss with your vet.
My dog seems completely fine at week 4 and is pulling on the leash. Should I increase activity?
No. Continue the restriction protocol until the 6-week radiograph confirms bone healing progression.
The dog feeling well at week 4 is a positive sign, but bone healing lags significantly behind the dog's perceived comfort.
Dogs routinely feel ready to run before the osteotomy is safe to run on.
Resources
- SustainableVet. Before and After TPLO Surgery. sustainablevet.org
- Veterinary Healthcare Associates. TPLO Surgery in Dogs: Before and After. vhavets.com
- Medcovet. Essential Guide to Dog Recovery TPLO Surgery. medcovet.com
- TPLO Info. Preparing for Your Dog's TPLO Surgery. tploinfo.com
Alternatives to TPLO Surgery for Dogs
Explore safe and effective alternatives to TPLO surgery for dogs with knee injuries, including treatments, benefits, and recovery options.
TPLO is the most commonly recommended surgical procedure for CCL rupture in medium and large breed dogs, but it is not the only option and it is not always the right option.
Some dogs are better served by a different surgical technique; others by non-surgical management. Understanding the full menu of alternatives helps owners have more informed conversations with their veterinarians.
Quick answer: Surgical alternatives to TPLO include TTA, extracapsular repair, Tightrope, MMP, and CBLO — most achieving 90 to 93% good function in the right patient. Non-surgical options produce variable outcomes and are not recommended for complete CCL rupture in large dogs.
Key takeaways
- Surgical alternatives achieve comparable outcomes in the right patient: TTA and Tightrope show 90 to 93% good function at one year
- Extracapsular repair is appropriate for dogs under 15 to 35 lbs: above 90% success in small dogs; significantly worse in larger breeds
- Conservative management is not recommended for large dogs with complete CCL rupture: outcomes are worse; appropriate only for comorbidities or small partial tears
- Knee braces do not have strong evidence of restoring joint stability; current studies show no significant benefit per Vetamac
- MMP and CBLO are newer alternatives with growing evidence: MMP uses a titanium wedge; CBLO uses a different osteotomy geometry
- The best alternative to TPLO is determined by dog size, activity level, surgeon training, and individual clinical factors not by owner preference alone
Surgical alternatives
TTA (Tibial Tuberosity Advancement)
TTA advances the tibial tuberosity cranially to change the angle of the patellar tendon relative to the tibial plateau.
This achieves mechanical neutralization of cranial tibial thrust through a different geometric approach than TPLO.
TTA is appropriate for large breed dogs, similar to TPLO. Studies show comparable outcomes at one year.
DVM360 notes that TTA recovery may be faster in the early post-operative period than TPLO, though TPLO tends to show better objective outcomes in size-matched longer-term comparisons.
For the full TTA vs TPLO comparison, see TPLO, CBLO, and TTA: a guide to cruciate surgery options.
Extracapsular repair (DeAngelis/lateral suture/ELSS)
Extracapsular repair uses a heavy suture outside the joint to stabilize the stifle.
It is the oldest and most widely available CCL repair technique and is appropriate for small dogs under 15 to 35 lbs.
Simon Veterinary Surgical confirms extracapsular repair achieves excellent results in appropriately sized patients (typically under 50 lbs), with many dogs living full, active lives.
In larger, more active dogs, the suture eventually stretches or fails, and outcomes are consistently inferior to TPLO.
Today's Veterinary Practice confirms TPLO produces higher peak vertical force and higher owner satisfaction at one year compared to extracapsular repair in size-matched dogs.
For the full comparison, see DeAngelis vs TPLO surgery for dogs.
Tightrope procedure
Tightrope uses a synthetic fiber-tape passed through bone tunnels in the femur and tibia to stabilize the stifle.
It is more anatomically positioned than extracapsular repair and achieves comparable outcomes to TPLO at 6 months in published comparative studies.
Tightrope is appropriate for small to medium dogs and as a less expensive alternative to TPLO. Dr.
Buzby's rehabilitation veterinary guide lists Tightrope among the established surgical options alongside TPLO, TTA, ELSS, and CBLO.
For the full comparison, see Tightrope vs TPLO surgery for dogs.
Modified Maquet Procedure (MMP)
MMP is an evolution of TTA that uses a porous titanium foam wedge instead of a cage to advance the tibial tuberosity.
It is less invasive and faster than TPLO, with comparable 6-month outcomes in the primary randomized study.
MMP is appropriate for medium and large breed dogs in the hands of surgeons trained in the technique.
For the full comparison, see Modified Maquet Procedure vs TPLO surgery.
CBLO (CORA-Based Leveling Osteotomy)
CBLO is a newer osteotomy technique that applies a different geometric principle to achieve tibial plateau leveling.
Rather than a radial osteotomy (as in TPLO), CBLO uses the CORA (center of rotation of angulation) to guide a wedge osteotomy.
Published success rates of 85 to 95% good function have been reported.
CBLO is an emerging alternative with growing evidence. For the full comparison, see CORA-based leveling osteotomy vs TPLO in dogs.
Zlig
Zlig is a synthetic implant placed inside the joint to replace the function of the CCL.
It is a less commonly discussed alternative with limited long-term veterinary evidence compared to the established osteotomy techniques.
For the full comparison, see Zlig vs TPLO: which surgery is better for dogs?.
Non-surgical alternatives
Conservative management
Conservative management refers to non-surgical approaches: strict rest and activity restriction, physical therapy and rehabilitation, weight management, NSAIDs for pain and inflammation control, and joint supplements.
Vetamac confirms: the main non-surgical treatments for CCL rupture include restricting activity, promoting weight loss, and physical therapy.
NSAIDs help manage pain and inflammation, although lameness persists as long as joint instability remains.
Simon Veterinary Surgical's guide notes: non-surgical outcomes are described as achieving "pasture soundness" comfortable for daily activities but the dog may not return to high-impact sports.
Consistency with physical therapy and weight management is the biggest predictor of good conservative outcomes.
When conservative management is appropriate:
- Dogs with serious concurrent medical conditions that make anesthesia high-risk
- Small dogs (under 10 to 15 lbs) with partial CCL tears
- As a temporary bridge to surgery when surgery is delayed
- Dogs whose owners cannot afford surgical options
When conservative management is not appropriate:
- Complete CCL rupture in dogs over 15 to 20 lbs lameness persists, arthritis progresses faster, and meniscal injury risk remains
- Active working dogs or dogs with high functional demands
For the full non-surgical guide, see non-surgical alternatives to TPLO surgery for dogs.
Orthopedic knee braces
Custom orthopedic braces provide external support to the stifle. They are sometimes used in dogs that cannot undergo surgery or during the waiting period before surgery.
Vetamac notes directly: current studies do not show significant benefits from orthopedic braces for CCL rupture.
They may improve comfort for some dogs but do not restore joint stability or prevent ongoing meniscal damage and arthritis progression. They are not a reliable substitute for surgical stabilization.
Regenerative medicine
Platelet-rich plasma (PRP) and stem cell therapy are emerging adjuncts.
Evidence for repairing a ruptured CCL is limited. These approaches may reduce inflammation but cannot restore the structural integrity that surgery provides.
Choosing between alternatives
For the lateral suture detailed comparison, see lateral suture vs TPLO: what's the difference?. For the full surgical options guide, see TPLO, CBLO, and TTA: a guide to cruciate surgery options.
Frequently asked questions
What is the best alternative to TPLO for a large dog?
TTA and MMP produce comparable outcomes to TPLO in large breed dogs and are appropriate alternatives.
Tightrope is less commonly recommended for very large dogs due to concerns about long-term stability at high joint forces.
The best choice depends on the individual dog, the surgeon's training and preference, and the specific clinical findings.
Can small dogs avoid surgery altogether?
Sometimes. Small dogs under 10 to 15 lbs with partial CCL tears sometimes achieve acceptable function with conservative management. However, surgery produces better outcomes even in small dogs.
If conservative management is chosen, strict weight management and physical therapy are essential.
Is a knee brace a good alternative to surgery?
Not as a primary treatment for complete CCL rupture. Braces may provide comfort and are sometimes used as a temporary measure or for dogs that truly cannot undergo surgery.
Vetamac confirms that current evidence does not support braces as an effective alternative to surgical stabilization.
How do I know which surgery is right for my dog?
A board-certified orthopedic surgeon (ACVS diplomate) is the most qualified person to advise on surgical selection for your specific dog.
Factors include body weight, tibial plateau angle, activity level, surgeon experience, and cost. General practitioners often refer to specialists for this decision.
Can a dog have a different surgery if the first one fails?
Yes. TPLO is a common revision option when extracapsular repair fails.
Different surgical approaches can be used as revisions depending on the original procedure, the current clinical state, and the degree of healing that has occurred.
Resources
- Vetamac. TPLO Surgery for Dogs: Success Rates and Alternative Options. vetamac.com
- Dr. Buzby's ToeGrips. Dog Torn ACL Treatment Without Surgery. toegrips.com
- Simon Veterinary Surgical. Alternatives to TPLO Surgery for Dogs. simonvetsurgical.com
- Animal Outpatient Surgery. Alternatives to TPLO Surgery for Dogs. animaloutpatientsurgery.com
- ACVS. Cranial Cruciate Ligament Disease. acvs.org
TPLO Surgery for Older Dogs: Is It a Worthwhile Option?
Considering TPLO surgery for your old dog? Learn the benefits, risks, and alternatives to ensure the best decision for their joint health
Age alone does not disqualify a dog from TPLO surgery.
The decision for an older or senior dog depends on overall health status, concurrent conditions, quality of life goals, and individual assessment -- not a chronological cutoff.
Many senior dogs benefit substantially from TPLO, while some older dogs are better managed conservatively. Understanding how to approach this decision is essential.
Quick answer: TPLO is viable for most older dogs with CCL rupture who are medically suitable for anesthesia. Published data estimates 85 to 90% of senior dogs regain near-normal or improved limb function. Age increases anesthetic risk and slows recovery -- manageable factors, not contraindications. Pre-surgical bloodwork and cardiac evaluation reduce risk.
Key takeaways
- Age alone is not a contraindication for TPLO: a comprehensive veterinary assessment is essential; the decision is based on health status, not chronological age
- 85 to 90% of senior dogs regain near-normal or improved limb function: comparable to the 90 to 95% general TPLO population; older dogs achieve similar success with appropriate post-operative care
- The primary risk factors for senior dogs are anesthetic risk and comorbidities: older dogs are more likely to have heart disease, kidney disease, or arthritis complicating anesthesia; pre-surgical screening manages these risks
- Recovery takes longer in older dogs: senior dogs need a longer recovery with extra monitoring and rehabilitation; timelines should be extended and expectations adjusted
- Conservative management is appropriate for some older dogs: very elderly dogs with limited activity needs, multiple health concerns, or advanced concurrent arthritis may benefit more from conservative management
- The quality of life cost of not operating is significant: untreated CCL rupture means chronic joint pain, progressive arthritis, and severe mobility impairment; TPLO offers a better quality of remaining life for many senior dogs
What changes with age in TPLO candidates
Anesthetic risk
General anesthesia in older dogs carries higher risk than in young adults. The primary reasons:
Cardiovascular function: cardiac output typically decreases with age. Dogs with occult cardiomyopathy, valve disease, or arrhythmias have reduced ability to compensate for the cardiovascular demands of general anesthesia. Pre-surgical cardiac evaluation (auscultation, chest radiographs, echocardiography if indicated) identifies and quantifies this risk.
Renal function: anesthesia and NSAIDs both affect renal perfusion. Dogs with reduced GFR are at risk for acute kidney injury. Pre-surgical blood chemistry (BUN, creatinine, SDMA) establishes baseline renal function and guides anesthetic protocol choices.
Hepatic function: the liver metabolizes most anesthetic agents. Hepatic insufficiency prolongs drug effect and increases toxicity risk. Pre-surgical liver enzyme panel and bile acids test if enzymes are elevated.
Thermoregulation: older dogs lose body heat more quickly during anesthesia. Active warming protocols (circulating warm water blankets, warm IV fluids, warm recovery environment) are particularly important.
Healing and regeneration
Bone healing takes longer in older dogs. The osteotomy that consolidates in 8 weeks in a 3-year-old Labrador may take 10 to 14 weeks in a 10-year-old dog.
Radiographic confirmation of healing before lifting restrictions is therefore even more critical in senior dogs.
Muscle rebuilding is also slower. Full muscle recovery may take 6 to 9 months rather than 4 to 6 months in older dogs.
Pre-existing arthritis
Most older dogs with CCL disease have concurrent arthritis in the affected stifle at the time of presentation.
This does not prevent TPLO from providing benefit, but it affects the baseline from which the dog recovers.
Upland Animal Hospital confirms: dogs with advanced degenerative joint disease may not be ideal candidates; existing joint damage could limit improvement in mobility.
The realistic expectation is not a return to young-dog mobility, but elimination of instability pain and slowing of further arthritis progression -- both of which meaningfully improve quality of life.
Pre-surgical assessment for older dogs
The pre-surgical workup for a senior dog should include:
Complete blood count: rule out anemia, infection, and thrombocytopenia.
Blood chemistry panel: kidney function (BUN, creatinine, SDMA), liver function (ALT, ALP, GGT), albumin, glucose.
Urinalysis: assess renal concentrating ability and rule out urinary tract infection (a source of bacteremia that can seed the implant).
Chest radiographs: assess cardiac silhouette and pulmonary fields for occult cardiac disease or pulmonary abnormalities.
Electrocardiography: if cardiac auscultation reveals arrhythmia or murmur.
Echocardiography: if the cardiac evaluation suggests significant structural disease; quantifies severity and guides anesthetic protocol.
Blood pressure: hypertension is common in older dogs and affects anesthetic management.
Companion Animal Hospital confirms: older patients are more likely to have heart disease, kidney problems, or arthritis complicating anesthesia and recovery. Each patient is evaluated thoroughly to weigh complications against expected benefits.
When TPLO is appropriate for older dogs
TPLO is generally appropriate when:
- Pre-surgical assessment confirms the dog is medically suitable for general anesthesia
- The dog has a good quality of life before the CCL rupture
- The owner is committed to the post-operative care demands
- Life expectancy is at least 1 to 2 years (enough time to benefit from the recovery period)
- Pain from CCL instability is significantly reducing the dog's quality of life
SustainableVet.org confirms: 85 to 90% of senior dogs regain near-normal or improved limb function. Older dogs achieve similar success rates when conditions like arthritis are managed well.
When conservative management may be more appropriate
Conservative management (strict rest, NSAIDs, physical therapy, weight management) may be more appropriate when:
- The dog has severe concurrent cardiac, renal, or hepatic disease that significantly elevates anesthetic mortality risk
- Pre-existing arthritis is so advanced that functional improvement from TPLO is unlikely
- The dog has very limited mobility needs (sedentary older dog in minimal pain before the CCL event)
- Life expectancy is significantly limited by a concurrent condition
Chewy confirms: TPLO can be performed in dogs of any age, but your veterinarian will consider overall health in senior dogs.
Upland Animal Hospital confirms: very elderly dogs might benefit more from conservative management if they have limited activity needs and multiple health concerns.
Adjusting expectations and the recovery plan for older dogs
For older dogs undergoing TPLO:
- The restriction period is the same (8 to 12 weeks) but radiographic healing may take longer; follow-up imaging should be extended if healing is not confirmed at the standard 6 and 12 week timepoints
- Recovery plans should include additional physiotherapy support, hydrotherapy, and pain management beyond the standard protocol
- Concurrent arthritis management (joint supplements, periodic NSAIDs, hydrotherapy) continues long-term after recovery
- Body condition monitoring is critical -- older dogs are more likely to gain weight during restriction
SustainableVet.org confirms: senior dogs need a longer recovery with extra monitoring and rehabilitation. Physical therapy helps, but patience and adjusted expectations are essential.
For the surgery overview, see what is TPLO surgery in dogs?. For recovery, see post-surgery recovery after TPLO in dogs. For long-term outcomes, see long-term outcomes of TPLO surgery.
For anesthesia protocol, see TPLO anesthesia protocol in dogs.
Frequently asked questions
My dog is 11 years old with a torn CCL. Should I get TPLO?
Age 11 is not a contraindication. The decision depends on your dog's overall health. Schedule a thorough pre-surgical assessment including bloodwork, urinalysis, and chest radiographs.
If your dog is medically suitable for anesthesia and has a reasonable life expectancy, TPLO will likely provide a better quality of remaining life than conservative management of an unstable stifle.
Does TPLO take longer to heal in older dogs?
Yes. Bone healing in older dogs typically takes 2 to 4 weeks longer than in young adults.
Muscle recovery also takes longer -- expect 6 to 9 months rather than 4 to 6 months. Radiographic follow-up should reflect this extended timeline.
Is the anesthetic risk for TPLO too high in senior dogs?
This depends entirely on the individual dog's health status. Pre-surgical assessment quantifies anesthetic risk. Many senior dogs in good health tolerate TPLO anesthesia well.
Dogs with significant cardiac or renal disease have elevated risk that must be weighed against the benefit of surgical stabilization. There is no population-level answer -- only individual assessments.
Can conservative management work for an older dog with CCL rupture?
For some older dogs, yes.
For most medium and large dogs over 15 kg with complete CCL rupture, conservative management does not restore normal joint stability, and chronic pain with progressive OA is the expected outcome.
Whether conservative management is appropriate depends on the dog's baseline activity level, severity of rupture, concurrent health status, and owner goals.
What is the recovery quality like for older dogs after TPLO?
With appropriate rehabilitation and arthritis management, most older dogs achieve meaningful improvement in mobility and pain control after TPLO.
The realistic goal is not the function of a young adult dog but rather elimination of the pain of joint instability and a return to comfortable daily activity.
SustainableVet.org confirms: when combined with weight management and physical therapy, TPLO offers lasting relief, often keeping dogs active well into their senior years.
Resources
- SustainableVet. TPLO Surgery for Older Dogs. sustainablevet.org
- Companion Animal Hospital Maize. Senior Dogs and TPLO. maizevet.com
- Upland Animal Hospital. What Is TPLO Surgery in Dogs? uplandanimalhospital.com
- ACVS. Cranial Cruciate Ligament Disease. acvs.org
Laser Therapy for Dogs After TPLO Surgery
Learn how laser therapy helps dogs recover faster and with less pain after TPLO surgery for cruciate ligament repair.
Laser therapy also called photobiomodulation (PBMT) or low-level laser therapy (LLLT) is one of the most commonly offered adjunct treatments during TPLO recovery. Many specialist and rehabilitation centres include it routinely.
But the evidence for its benefits is more nuanced than the marketing suggests, and owners deserve an honest picture of what it does and does not reliably achieve.
Quick answer: Laser therapy after TPLO uses specific light wavelengths to reduce inflammation and support tissue healing. Evidence for early pain reduction is moderately supported; evidence for improved radiographic bone healing is weak. It is a safe adjunct but should not replace rehabilitation exercises, pain medication, or activity restriction.
Key takeaways
- Laser therapy reduces postoperative inflammation and may improve gait scores: a TPLO study found better hindlimb function at 8 weeks in treated dogs
- Evidence for improving radiographic bone healing is weak: three controlled studies found no statistically significant difference in healing time
- The 2024 AVMA randomized trial found no significant difference in CRP, weight bearing, pain scores, or SSI rates between PBMT and sham groups
- Sessions typically begin within the first few days of surgery and continue through the rehabilitation phase
- Laser therapy is safe with few contraindications: avoid eyes and active tumour sites; safe over the TPLO incision once closed
- It works best as part of a multimodal plan: exercise therapy and pain medication carry stronger evidence than laser alone
What laser therapy does
Laser therapy for dogs, also known as photobiomodulation, involves using specific wavelengths of light to penetrate tissues and promote cellular regeneration and healing. The laser light stimulates the production of ATP (adenosine triphosphate), enhancing cell repair and growth, reducing inflammation, and increasing blood circulation.
Photobiomodulation therapy has been shown to decrease inflammation, and increase analgesia, vascularization, and tissue healing after musculoskeletal injury or surgery.
The mechanism is photochemical: light energy at specific wavelengths (typically 630 to 980 nm) is absorbed by mitochondria.
This increases ATP production, modulates reactive oxygen species, and influences gene expression related to inflammation and healing.
The effects are local confined to the tissue depth the light reaches.
For post-TPLO use, the targets are: the surgical incision, the osteotomy site in the proximal tibia, and the surrounding periarticular soft tissues.
What the clinical evidence shows
Pain and function
Research following TPLO surgery showed that dogs receiving LLLT had better hindlimb function and gait scores at 8 weeks compared to controls. This is especially valuable in orthopedic recovery, where early weight-bearing can prevent muscle atrophy and joint stiffness.
In a controlled veterinary study, dogs with surgical incisions treated with laser therapy exhibited significantly less inflammatory cell infiltration and tissue necrosis within the first week post-op compared to untreated controls.
The 2024 randomized trial
54 client-owned dogs with CCL rupture undergoing unilateral TPLO surgery were enrolled. The study population was randomly assigned to either a treatment group receiving PBMT (24 dogs) or a control group (30 dogs). PBMT was performed immediately after induction, and at 6 hours, 24 hours, 48 hours, and 8 weeks postoperatively. Evaluation of CRP, pain scores, evidence of SSI, and percentage weight bearing were assessed at all time points.
The trial found the therapy showed promise but no statistically significant difference between groups on any primary outcome measure.
Bone healing
Three studies compared LLLT to a control and concluded that LLLT treatment did not make a significant difference in improving radiographic bone healing. The studies collectively provide weak evidence for this outcome.
This is an important distinction: laser therapy may support soft tissue healing, pain, and early function but it does not appear to accelerate the osteotomy healing visible on radiographs.
When to start and how often
Laser therapy uses focused light energy on the surgical site to support healing.
Most rehabilitation programmes begin laser therapy within the first 1 to 3 days after TPLO surgery, often at the surgical centre before discharge or at the first rehabilitation visit.
Typical post-TPLO laser protocol:
- Frequency: 3 to 5 sessions per week in the first 2 to 3 weeks
- Frequency: 1 to 2 sessions per week from weeks 3 to 8
- Session duration: 5 to 15 minutes depending on the laser system and dosing protocol
- Total sessions: typically 6 to 12 in the first 8-week recovery phase
The protocol varies by laser system, power output, and the individual patient's response.
Realistic expectations
Laser therapy is a useful adjunct in TPLO recovery. It is not a substitute for the treatments with stronger evidence: pain medication, activity restriction, and structured rehabilitation exercises.
Laser therapy could be particularly helpful for dogs with weight-bearing and gait issues while recovering from TPLO surgery after a cruciate injury.
Dogs with significant early swelling, wound sensitivity, or slow initial weight-bearing progress may benefit most. Dogs recovering well with standard multimodal analgesia and rehabilitation may show less measurable difference.
For the bone healing timeline that laser therapy supports during recovery, see TPLO bone healing time in dogs explained.
For the full recovery plan that laser therapy fits into, see 10 essential TPLO recovery tips for pet owners.
For the physical therapy that is the primary evidence-based adjunct, see when to start physical therapy after TPLO surgery.
For swelling management in the recovery period, see how long does swelling last after TPLO surgery.
Frequently asked questions
Is laser therapy safe over the TPLO incision?
Yes, once the incision is closed. Laser therapy is safe over sutured incisions and can be applied at the surgical site from the first post-operative day in most protocols.
Avoid direct application over open wounds or actively infected tissue.
How many laser sessions does a dog need after TPLO?
Typically 6 to 12 sessions across the first 8 weeks.
Start at 3 to 5 sessions per week for the first 2 to 3 weeks, tapering to 1 to 2 per week through the rehabilitation phase.
The exact protocol depends on the laser system and rehabilitation plan.
Does laser therapy replace pain medication after TPLO?
No. Laser therapy is an adjunct to pharmaceutical pain management, not a replacement. Post-TPLO pain management requires NSAIDs, and often gabapentin or other analgesics.
Laser therapy may reduce the pain burden and support earlier mobility but does not provide sufficient analgesia on its own.
Can I do laser therapy at home with a consumer device?
Consumer-grade red light therapy devices exist but operate at lower power densities than veterinary therapeutic lasers. The clinical evidence discussed in this article relates to veterinary-grade PBMT devices.
Home devices may offer some benefit but cannot replicate the dosing of professional equipment. Discuss with your rehabilitation veterinarian before purchasing.
Will laser therapy prevent my dog from needing more medication?
Possibly. If laser therapy reduces post-operative inflammation and pain, some dogs may need lower doses of pain medication or taper off sooner.
This should be guided by your veterinarian based on your dog's individual recovery trajectory.
Resources
- AVMA Journal. Photobiomodulation Therapy in Dogs Undergoing TPLO After Cranial Cruciate Ligament Rupture. avmajournals.avma.org
- Veterinary Evidence. Does LLLT Improve Radiographic Healing for Dogs with CCL Rupture Undergoing TPLO Surgery? veterinaryevidence.org
- AKC. Laser Therapy For Dogs: Uses, Side Effects, and Alternatives. akc.org
- Erchonia. Laser Therapy for Post-Surgical Recovery in Pets. erchonia.com
TPLO Failure Rate in Dogs Explained
Learn about TPLO failure rates in dogs, causes, prevention, and recovery tips for better surgical outcomes.
Tibial Plateau Leveling Osteotomy (TPLO) is a common surgery to fix cranial cruciate ligament injuries in dogs. Many pet owners worry about the TPLO failure rate in dogs and what it means for their pet’s recovery. Understanding the risks and outcomes can help you make informed decisions for your dog’s health.
This article explains what TPLO failure means, how often it happens, and what factors affect it. You will learn how to recognize complications, prevent failure, and support your dog after surgery for the best results.
What is the TPLO failure rate in dogs?
The TPLO failure rate in dogs varies but is generally low when performed by experienced surgeons. Failure means the surgery did not fully restore knee stability or complications occurred that affect recovery.
Studies show failure rates range from 2% to 10%, depending on factors like surgical technique and dog size. Most dogs recover well and regain normal function after TPLO.
- Low overall failure: Most dogs have successful outcomes with TPLO, with failure rates usually under 10% in clinical studies.
- Variation by surgeon: Surgeons with more experience tend to have lower failure rates due to better technique and planning.
- Dog factors matter: Larger dogs or those with severe ligament damage may have a higher risk of failure after TPLO.
- Definition of failure: Failure includes persistent lameness, implant problems, or the need for revision surgery after TPLO.
Understanding these rates helps you set realistic expectations and discuss risks with your vet before surgery.
What causes TPLO failure in dogs?
Several factors can lead to TPLO failure. Knowing these causes helps prevent problems and improve recovery chances.
Failures often result from surgical errors, infection, or poor healing. Other causes include implant issues and the dog’s activity level after surgery.
- Surgical technique errors: Incorrect bone cuts or implant placement can cause instability or implant failure after TPLO.
- Infection risk: Postoperative infections can delay healing and lead to surgery failure if not treated promptly.
- Poor bone healing: Factors like age, nutrition, or underlying disease can slow bone healing and cause failure.
- Excessive activity: Dogs that are too active too soon may damage the surgical site and cause failure.
Preventing these causes requires careful surgical planning, good postoperative care, and close monitoring.
How can TPLO failure be prevented in dogs?
Prevention of TPLO failure starts with choosing a skilled surgeon and following postoperative instructions closely. Proper care reduces complications and supports healing.
Owners play a key role in managing their dog’s activity and health during recovery to avoid failure.
- Experienced surgeon choice: Select a board-certified surgeon with extensive TPLO experience to reduce technical errors.
- Strict activity control: Limit your dog’s movement and exercise as advised to protect the surgical site during healing.
- Infection prevention: Keep the incision clean and watch for signs of infection to catch problems early.
- Follow-up visits: Regular vet check-ups help monitor healing and detect complications before failure occurs.
Following these steps improves your dog’s chance of a successful TPLO surgery and recovery.
What are the signs of TPLO failure in dogs?
Recognizing failure signs early lets you seek veterinary care promptly. Signs often involve ongoing lameness or swelling around the knee.
Not all postoperative discomfort means failure, but persistent or worsening symptoms should be evaluated by a vet.
- Persistent lameness: Continued limping or inability to bear weight on the leg weeks after surgery may indicate failure.
- Swelling or pain: Increased swelling, heat, or pain around the knee can signal infection or implant problems.
- Unusual noises: Clicking or popping sounds from the knee might mean implant loosening or joint instability.
- Reduced range of motion: Difficulty bending or extending the knee joint may suggest complications affecting recovery.
If you notice any of these signs, contact your veterinarian immediately for assessment and treatment.
How is TPLO failure treated in dogs?
Treatment depends on the cause of failure. Some cases require revision surgery, while others may respond to medical management.
Your vet will perform exams and imaging to determine the best approach to restore function and relieve pain.
- Revision surgery: Some dogs need a second surgery to fix implant issues or correct bone alignment after failure.
- Antibiotic therapy: Infections causing failure require antibiotics and sometimes implant removal to heal properly.
- Pain management: Medications and physical therapy help control pain and improve mobility during recovery.
- Supportive care: Weight management and controlled exercise support healing and reduce stress on the knee joint.
Early treatment improves outcomes and helps your dog regain normal activity levels.
What is the recovery outlook after TPLO failure in dogs?
Recovery after TPLO failure can be more challenging but is often successful with proper care. Many dogs regain good function after treatment.
Recovery time may be longer, and some dogs need ongoing management to maintain comfort and mobility.
- Longer healing time: Dogs with failure often require extended recovery periods compared to uncomplicated TPLO cases.
- Physical therapy benefits: Rehabilitation exercises improve strength and joint function after failure treatment.
- Possible chronic issues: Some dogs may develop arthritis or mild lameness despite treatment.
- Owner commitment: Consistent care and monitoring are essential for a positive recovery after failure.
With patience and veterinary support, many dogs live active, happy lives following TPLO failure treatment.
What factors affect TPLO failure rates in different dog breeds?
Breed and size influence TPLO outcomes. Larger and more active breeds may face higher failure risks due to greater joint stress.
Understanding breed-specific risks helps tailor surgical and postoperative care for better success.
- Large breed challenges: Heavy dogs put more pressure on the knee, increasing the chance of implant failure or delayed healing.
- Active breed risks: Energetic dogs may be harder to restrict post-surgery, raising failure risk from premature activity.
- Bone quality differences: Some breeds have denser or more fragile bones affecting healing after TPLO.
- Genetic predispositions: Certain breeds may be more prone to ligament injuries and complications after surgery.
Discuss your dog’s breed and lifestyle with your vet to plan the best approach for TPLO surgery and recovery.
Conclusion
The TPLO failure rate in dogs is generally low but depends on many factors like surgeon skill, dog size, and postoperative care. Understanding these helps you prepare for surgery and recovery.
By choosing an experienced surgeon, following care instructions, and watching for signs of failure, you can help your dog heal well and return to a happy, active life after TPLO surgery.
What is the typical TPLO failure rate in dogs?
TPLO failure rates usually range between 2% and 10%, with most dogs recovering successfully after surgery.
Can infection cause TPLO failure in dogs?
Yes, infections at the surgical site can lead to delayed healing and failure if not treated quickly with antibiotics and care.
How soon can dogs return to activity after TPLO?
Dogs typically need 8 to 12 weeks of restricted activity to allow proper healing and reduce the risk of failure.
Is revision surgery common after TPLO failure?
Revision surgery is sometimes necessary to correct implant or alignment issues when TPLO fails to restore knee stability.
Do larger dogs have higher TPLO failure rates?
Larger dogs often have increased failure risk due to greater joint stress and challenges in controlling postoperative activity.
How to Confine Your Dog Post-TPLO Surgery
Keep your dog safe after TPLO surgery with smart confinement tips. Learn crate setup, barriers, and daily care for smooth healing
Confinement after TPLO surgery is not optional. It is the primary structural safeguard preventing the plate from failing before the osteotomy heals.
A dog that is allowed to run, jump, or spin in the first 8 weeks risks plate displacement -- a complication that requires revision surgery and extends recovery significantly.
Effective confinement is a practical skill that owners can prepare for before surgery.
Quick answer: Confine in a crate large enough to stand, turn, and lie but not to pace. An exercise pen works for crate-resistant dogs. A baby-gated small room is a third option. Non-slip flooring is essential. Outdoor access requires a leash. Strict confinement continues for 6 to 8 weeks.
Key takeaways
- The crate is the gold standard confinement tool: limits jumping, spinning, and running that risk plate displacement; large enough to stand and turn but not to pace
- Non-slip flooring is required in all confinement spaces: slipping generates uncontrolled leg movements that stress the plate
- Leash on the dog at all times outside the crate: every unsupervised second without a leash risks slipping or running; a house leash gives immediate control
- Exercise pens (X-pens) are a practical alternative for crate-resistant dogs: more space than a crate while still preventing free access to the rest of the house
- The confinement protocol changes weekly: strict crate-only in weeks 1 to 2, then gradual expansion as bone healing is confirmed on radiographs
- Clean bedding weekly: dirty bedding harbors S. pseudintermedius; the incision is in close contact with bedding throughout recovery
Why confinement matters
The TPLO plate holds the rotated tibial plateau in position while new bone grows across the osteotomy. The plate is strong but not indestructible.
Bone is not fully consolidated across the osteotomy for 8 to 12 weeks.
During this healing period, a dog that runs, jumps onto a sofa, slips on hardwood flooring, or spins to chase another pet can apply forces to the plate that exceed its tolerance.
Plate bending, screw loosening, or osteotomy displacement are the results. Each requires revision surgery.
SustainableVet.org confirms: dogs typically need 6 to 8 weeks of restricted activity before returning to light exercise; strict confinement ensures the bone plate stabilizes and heals properly.
Option 1: the crate
Why crates work best
A crate completely controls the dog's environment. The dog cannot run to the door, jump on the sofa, or spin in excitement. Every movement is small, controlled, and low-impact.
SustainableVet.org confirms: a crate is one of the safest ways to confine a dog after TPLO surgery; crates help prevent jumping, running, or sudden twisting that can damage the healing leg.
Crate selection
Size: the crate must be large enough for the dog to stand fully, turn around, and lie in any direction comfortably. It should NOT be large enough for the dog to trot or run inside it -- an oversized crate allows the dog to generate enough speed within the crate to create impact when stopping.
Flooring: avoid wire-bottomed crates. The dog's leg can slip through wire flooring. Use solid-floored crates or add a mat over wire flooring.
Bedding: comfortable, non-slip bedding. Memory foam dog mats are excellent for TPLO dogs -- they cushion pressure points during long rest periods.
Location: place the crate in the main family living area, not in an isolated room. Isolation increases separation anxiety and whining. A dog that can see and hear the family is calmer and more able to rest.
TPLO Info confirms: dogs do not like dirty bedding, so wash crate items at least once a week.
Transitioning a crate-naive dog
If the dog has never been crated, introduce the crate before surgery:
- Place meals in the crate with the door open for several days before surgery
- Gradually extend time inside with the door closed, building from 10 minutes to 1 hour
- Never force the dog in or use the crate for punishment
A dog that enters the crate willingly before surgery recovers with significantly less confinement-related distress.
Option 2: the exercise pen (X-pen)
An X-pen is a freestanding modular fence creating a confined area larger than a crate. It can be configured in different shapes and sizes.
TPLO Info confirms: X-pens give enough room to move while keeping the dog in one place. Larger dogs may attempt to jump over the fence and require monitoring.
Advantages: more space than a crate, reducing frustration in dogs that do not tolerate crates; can be set up in any room.
Disadvantages: requires monitoring for jumping attempts; the dog can build more momentum in a larger space; not suitable for very large or athletic dogs who can clear the fence.
Height: use a 48-inch or taller X-pen for medium and large dogs; even a non-athletic dog may clear a 36-inch pen if motivated.
Flooring inside the X-pen: place yoga mats or a rubber-backed rug inside to cover hard flooring.
When to use an X-pen: recommended after the initial 2 weeks of strictest confinement, when the dog has established initial healing and the wound is closed. Not ideal for weeks 1 to 2.
Option 3: a baby-gated small room
A bathroom, laundry room, or small bedroom can serve as a recovery room when gated with a baby gate.
Dog Knee Injury confirms: prepare your home for post-surgery by setting up a recovery space with a comfortable dog bed, non-slip flooring, and a baby gate to create a barrier.
Requirements:
- Non-slip flooring throughout (add yoga mats or rugs)
- No furniture the dog can jump onto or off
- Accessible water and food bowls at floor level
- The gate must prevent the dog exiting unsupervised
Advantages: familiar environment, easy human access, more comfortable than a crate for larger dogs.
Disadvantages: more space means more opportunity for movement; the dog can circle and pace in a room, which a crate prevents; requires strict monitoring.
Outdoor access: leash only, no exceptions
Every outdoor bathroom trip requires a leash. No exceptions.
SustainableVet.org confirms: always use a leash when outside, even for bathroom breaks; open-door access to the yard allows a dog to run, chase, or slip before the owner can intervene.
Leash length: short -- no retractable leashes. The owner must be able to prevent sudden running immediately. A 4 to 6 foot leash is appropriate.
Bathroom trip duration: 5 minutes maximum in weeks 1 to 2. Gradual increase per the vet's protocol.
Wet weather: rain and wet grass introduce bacteria to the incision area and also create slipping hazard. Time trips to avoid heavy rain where possible; carry a dry towel.
Week-by-week confinement protocol
Weeks 0 to 2 (strictest):
- Crate at all times except supervised bathroom leash walks
- 5-minute walks, 3 to 5 times daily
- E-collar on at all times
- No access to any area without owner supervision
Weeks 2 to 6 (moderate):
- Crate or X-pen when unsupervised
- Supervised time in the confinement room with owner present
- Leash walks increasing gradually per vet's direction
- E-collar until incision fully confirmed healed at 2-week recheck
Weeks 6 to 12 (graduated relaxation):
- Confinement continues but may expand to a room-sized area under supervision
- Activity increases based on radiographic findings at 6-week recheck
- Off-leash access to the house (not yard) under close supervision for some dogs, vet-directed
After 12 weeks (post-clearance):
- Full activity restriction lifted after radiographic bone healing confirmation
- Progressive return to normal environment and activity
- Still avoid high-impact play until full muscle recovery at 4 to 6 months
For the full recovery timeline, see what to expect after TPLO surgery in dogs. For keeping a dog calm during confinement, see how to keep a dog calm after TPLO surgery.
For physical therapy timing, see when to start physical therapy after TPLO surgery. For infection prevention, see post-operative care mistakes that increase TPLO infection risk.
Frequently asked questions
My dog has never been in a crate. Can I start at surgery?
Yes, but start before surgery if possible -- even a few days of crate introduction before surgery significantly reduces post-operative confinement distress.
If you cannot prepare beforehand, introduce the crate gently in the first day or two at home, using meals and treats to create positive associations.
How do I know if the crate is the right size?
The dog should be able to stand with their head up, turn in a full circle, and lie in multiple positions without being cramped.
They should NOT be able to trot or run within the crate space. If in doubt, err toward smaller.
My dog cries in the crate for hours. Is the confinement causing psychological harm?
Extended, severe crate distress may indicate inadequate pain management (the dog is in pain, not just frustrated) or genuine severe separation anxiety. Contact your vet.
Trazodone and gabapentin can significantly reduce confinement distress. Do not abandon confinement -- the physical risk of uncontrolled activity is greater than the psychological discomfort of confinement.
Can my dog sleep in my bed during recovery?
No. Jumping off the bed -- even a single time -- can displace the plate.
The dog must sleep in the crate or on a floor-level dog bed in the recovery area throughout the restriction period.
Can I let my dog outside in a fenced yard for bathroom breaks without a leash?
No. Dogs routinely run, spin, and perform sudden movements in yards even when told to go to the bathroom.
A single run to chase a squirrel or greet someone at the fence is enough to cause plate failure before the osteotomy heals. Leash only, every time.
Resources
- SustainableVet. How to Confine Your Dog Post-TPLO Surgery. sustainablevet.org
- TPLO Info. How to Confine Your Dog Post-TPLO Surgery. tploinfo.com
- Dog Knee Injury. How to Confine Your Dog After TPLO Surgery. dogkneeinjury.com
- VCA Animal Hospitals. Tibial Plateau Leveling Osteotomy (TPLO) in Dogs. vcahospitals.com

