
Protecting
Pets, People & Planet
Join a group of veterinarians leveraging the latest technologies to deliver excellent care to their patients while being a responsible and positive force for their local and global communities.
100% secure. We do not share your information
Recent Articles
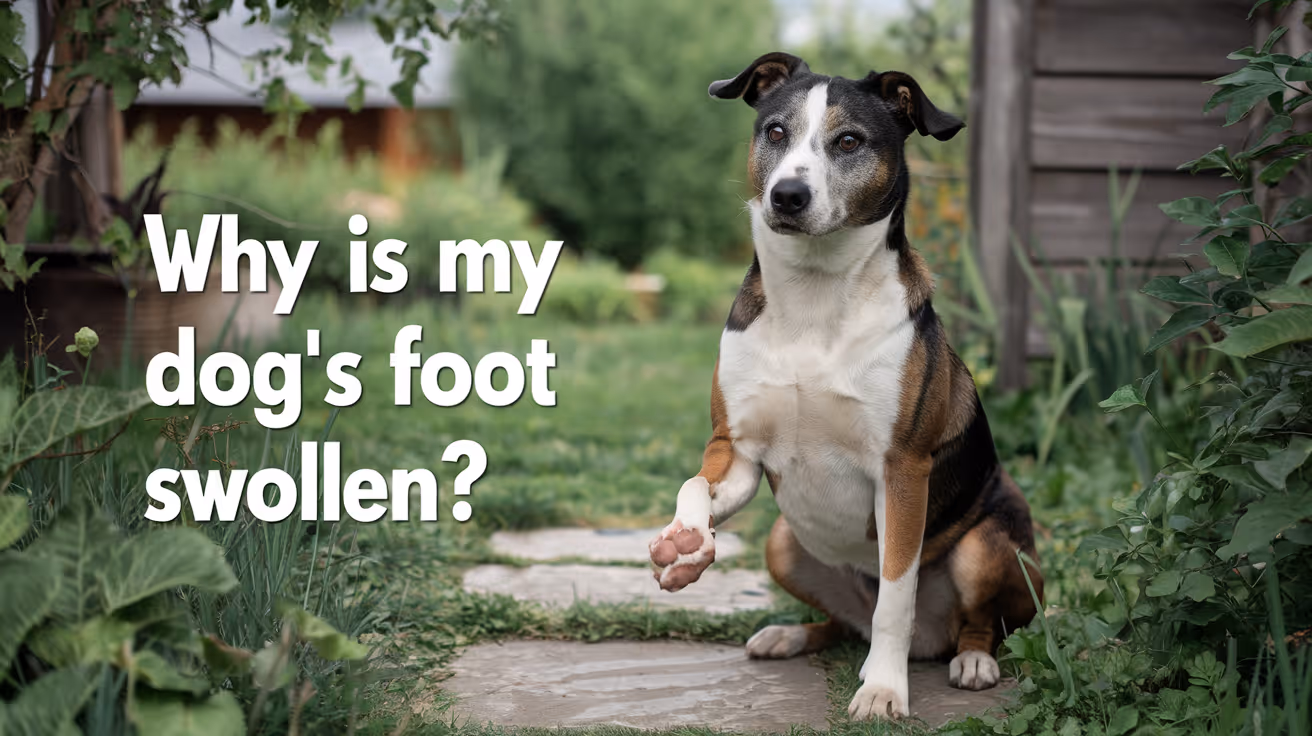
Why Is My Dog's Foot Swollen?
Discover why your dog's foot is swollen, common causes, treatments, and when to see a vet for proper care.
Seeing your dog's foot swollen can be worrying. Swelling in a dog's foot can happen for many reasons, from injuries to infections. Understanding why this happens helps you act quickly and keep your dog comfortable.
This article explains common causes of swollen dog feet, how to spot serious problems, and what treatments work best. You will learn when to treat at home and when to visit a vet for urgent care.
What Causes Swelling in a Dog's Foot?
Swelling in a dog's foot can come from many different problems. It often shows as puffiness, redness, or heat in the paw area. Knowing the cause helps you decide the right care.
Common causes include injuries, infections, allergies, and insect bites. Each cause needs a different approach to treatment.
- Injury or trauma: A cut, sprain, or broken bone can cause swelling due to inflammation and fluid buildup in the foot tissues.
- Infections: Bacterial or fungal infections can cause swelling, redness, and pain, often needing antibiotics or antifungal treatment.
- Allergic reactions: Allergies to plants, chemicals, or insect stings can cause sudden swelling and itching in the foot.
- Foreign objects: Thorns, splinters, or glass stuck in the paw can cause swelling and discomfort until removed.
Identifying the cause early helps prevent complications and speeds healing.
How Can I Tell If My Dog's Foot Swelling Is Serious?
Not all swelling is an emergency, but some signs mean you should see a vet quickly. Serious swelling can affect your dog's ability to walk or cause severe pain.
Look for symptoms like severe limping, open wounds, or signs of infection. These require prompt veterinary care.
- Severe limping or inability to walk: Indicates pain or serious injury needing urgent veterinary evaluation.
- Open wounds or bleeding: Risk of infection and need for cleaning and possibly stitches.
- Fever or lethargy: Signs that infection may have spread and requires medical treatment.
- Rapidly increasing swelling: Could signal an allergic reaction or deep infection needing emergency care.
When in doubt, it is safer to consult your vet to avoid worsening problems.
What Home Treatments Can Help a Swollen Dog Foot?
For mild swelling without serious signs, you can try some home care steps. These help reduce swelling and keep your dog comfortable.
Always watch your dog closely and stop home treatment if symptoms worsen or do not improve.
- Rest and limit activity: Keep your dog from running or jumping to reduce stress on the swollen foot.
- Cold compress application: Apply a cold pack wrapped in cloth for 10-15 minutes to reduce swelling and pain.
- Clean the paw gently: Use warm water to clean dirt or debris, especially if there are small cuts or irritations.
- Prevent licking or chewing: Use an Elizabethan collar if your dog tries to lick or bite the swollen area, which can worsen irritation.
These steps can help minor swelling but do not replace veterinary care for serious cases.
When Should I Take My Dog to the Vet for a Swollen Foot?
Knowing when to seek professional help is important. Some swelling needs medical treatment to avoid complications.
If your dog's swelling is severe, painful, or lasts more than a day or two, a vet visit is necessary. Early treatment can prevent infections or permanent damage.
- Persistent swelling over 48 hours: Indicates that the problem may not resolve without medical intervention.
- Signs of infection: Pus, foul odor, or heat around the swollen area require antibiotics or cleaning by a vet.
- Suspected broken bone or sprain: Needs X-rays and pain management from a veterinary professional.
- Severe allergic reactions: Swelling with difficulty breathing or collapse needs emergency veterinary care immediately.
Your vet can diagnose the cause and recommend the right treatment plan for your dog's recovery.
How Do Vets Diagnose the Cause of a Swollen Dog Foot?
Veterinarians use several methods to find the cause of swelling. A correct diagnosis is key to effective treatment.
They will examine your dog’s foot carefully and may use tests to look deeper into the problem.
- Physical examination: Checking for wounds, foreign objects, and signs of pain or infection in the foot.
- X-rays: Used to detect fractures, bone infections, or foreign bodies inside the paw.
- Skin scrapings or cultures: To identify infections caused by bacteria, fungi, or parasites.
- Blood tests: To check for systemic infection or allergic reactions affecting the swelling.
These tools help your vet create a treatment plan tailored to your dog's needs.
What Treatments Do Vets Use for Swollen Dog Feet?
Treatment depends on the cause of the swelling. Your vet may use medications, procedures, or supportive care to help your dog heal.
Some treatments can be done at home under vet guidance, while others require clinic visits.
- Antibiotics or antifungals: Prescribed to treat infections causing swelling and prevent spread.
- Anti-inflammatory drugs: Help reduce pain and swelling, improving your dog's comfort.
- Wound care and bandaging: Cleaning and protecting open wounds to promote healing and prevent infection.
- Surgery: May be needed to remove foreign objects or repair fractures causing swelling.
Follow your vet’s instructions carefully to ensure the best outcome for your dog.
How Can I Prevent My Dog's Foot from Swelling?
Preventing foot swelling involves protecting your dog from injuries and infections. Regular care and attention can reduce risks.
Simple habits help keep your dog's paws healthy and avoid painful swelling episodes.
- Regular paw inspections: Check your dog's feet daily for cuts, thorns, or swelling to catch problems early.
- Keep nails trimmed: Prevents nails from breaking or causing injury to the foot pads.
- Avoid walking on rough surfaces: Protect paws from sharp objects or hot pavement that can cause injuries.
- Use protective booties: Especially in harsh weather or rough terrain to shield paws from damage.
Good paw care supports your dog’s overall health and comfort.
Conclusion
Swelling in your dog's foot can have many causes, from minor injuries to serious infections. Understanding why your dog's foot is swollen helps you provide the right care quickly.
Always watch for signs of pain, infection, or worsening symptoms. When in doubt, seek veterinary advice to protect your dog's health and comfort. Early treatment can prevent complications and get your dog back on their feet faster.
Why is my dog's foot swollen after walking?
Your dog's foot may swell after walking due to minor injuries, irritation from rough surfaces, or allergic reactions. Rest and paw care usually help reduce swelling quickly.
Can a swollen dog foot heal without a vet?
Mild swelling from minor injuries or irritations can heal at home with rest and care. However, persistent or severe swelling needs veterinary evaluation to avoid complications.
How long does it take for a dog's swollen foot to go down?
Swelling may reduce within a few days with proper care. If swelling lasts more than 48 hours or worsens, consult a vet for treatment.
Is a swollen dog foot painful?
Yes, swelling often causes pain and discomfort. Your dog may limp, lick, or avoid putting weight on the swollen foot.
Can allergies cause a dog's foot to swell?
Yes, allergies to insect bites, plants, or chemicals can cause sudden swelling and itching in a dog's foot, sometimes requiring veterinary treatment.
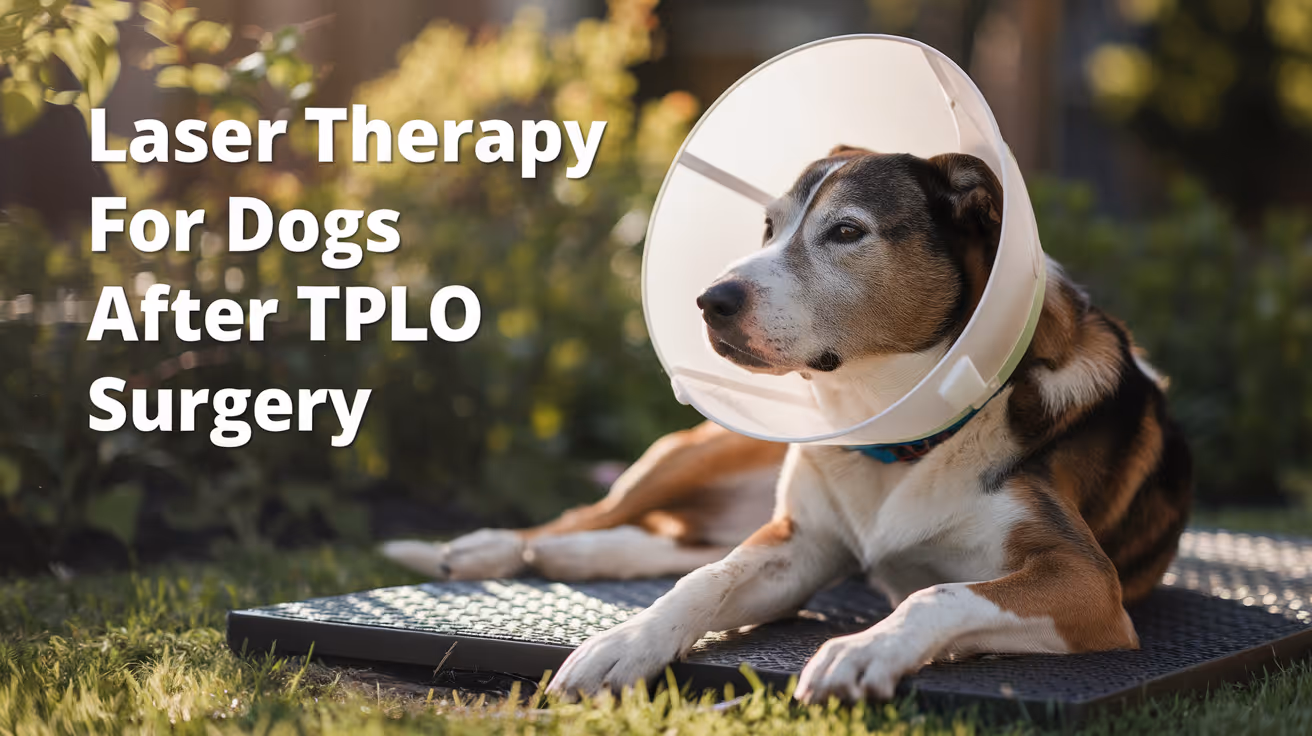
Laser Therapy for Dogs After TPLO Surgery
Learn how laser therapy helps dogs recover faster and with less pain after TPLO surgery for cruciate ligament repair.
TPLO surgery is a common procedure to fix torn cruciate ligaments in dogs. After surgery, many pet owners seek ways to help their dogs heal faster and feel less pain. Laser therapy is one treatment option that has gained popularity for post-TPLO recovery.
This article explains what laser therapy is, how it works for dogs after TPLO surgery, and what benefits you can expect. You will learn important details about safety, treatment schedules, and how to combine laser therapy with other care methods.
What is laser therapy for dogs after TPLO surgery?
Laser therapy uses focused light energy to stimulate healing in tissues. It is non-invasive and painless. After TPLO surgery, laser therapy targets the surgical site and surrounding tissues to reduce inflammation and promote repair.
The light penetrates the skin and affects cells at a deeper level. This encourages faster cell growth and blood flow, which are essential for healing the bone and soft tissues after surgery.
- Non-invasive treatment: Laser therapy does not require needles or surgery, making it a gentle option for post-operative care in dogs recovering from TPLO.
- Cell stimulation: The laser light encourages cells to produce energy and repair themselves faster, which helps the surgical site heal more quickly.
- Inflammation reduction: Laser therapy decreases swelling and redness around the surgery area, which reduces pain and discomfort for your dog.
- Improved blood flow: The treatment increases circulation, delivering oxygen and nutrients needed for tissue repair after TPLO surgery.
Overall, laser therapy supports the natural healing process after TPLO surgery by enhancing cellular function and reducing symptoms that slow recovery.
How does laser therapy help with pain management after TPLO surgery?
Pain control is a major concern after TPLO surgery. Laser therapy can reduce pain by calming nerve endings and lowering inflammation. This helps dogs feel more comfortable during their recovery.
Laser treatment can also reduce the need for high doses of pain medications, which sometimes have side effects. It works alongside medications to provide a balanced approach to pain relief.
- Nerve calming effect: Laser light decreases nerve sensitivity, which lowers the sensation of pain around the surgical site after TPLO surgery.
- Reduced inflammation: By lowering swelling, laser therapy helps relieve pressure on nerves and tissues that cause pain in dogs.
- Medication support: Laser therapy can reduce reliance on pain drugs, minimizing potential side effects from long-term medication use.
- Comfort improvement: Dogs often show better mobility and less limping after laser treatments, indicating effective pain relief.
Using laser therapy as part of a pain management plan can improve your dog's comfort and speed up their return to normal activity after TPLO surgery.
When should laser therapy start after TPLO surgery?
The timing of laser therapy after TPLO surgery depends on your veterinarian’s advice and your dog’s condition. Usually, treatment begins within a few days after surgery once the incision starts healing.
Early laser therapy can prevent excessive swelling and reduce pain. However, the surgical site must be stable enough to avoid irritation. Your vet will decide the best time to start based on healing progress.
- Early initiation: Starting laser therapy 2 to 3 days post-surgery can help control inflammation and pain early in recovery.
- Incision healing check: Therapy begins only after the surgical wound shows no signs of infection or excessive drainage.
- Regular sessions: Laser treatments are often scheduled 2 to 3 times per week for several weeks to maximize healing benefits.
- Veterinary guidance: Always follow your vet’s instructions on timing and frequency to ensure safe and effective laser therapy.
Proper timing ensures laser therapy supports healing without interfering with the surgical site’s recovery after TPLO surgery.
How many laser therapy sessions does a dog need after TPLO surgery?
The number of laser therapy sessions varies depending on your dog’s individual healing and response to treatment. Most dogs benefit from multiple sessions over several weeks.
Typically, veterinarians recommend 6 to 12 sessions spaced out over 2 to 4 weeks. This schedule allows consistent stimulation of healing while monitoring progress.
- Typical session count: Dogs often receive between 6 and 12 laser therapy treatments after TPLO surgery for optimal recovery support.
- Session frequency: Treatments are usually given 2 to 3 times per week to maintain steady healing stimulation.
- Progress evaluation: Your vet will assess healing and adjust the number of sessions based on your dog’s improvement.
- Individual variation: Some dogs may need more or fewer sessions depending on age, health, and surgery complexity.
Following a recommended session plan helps ensure your dog gets the full benefits of laser therapy after TPLO surgery.
Is laser therapy safe for dogs after TPLO surgery?
Laser therapy is generally safe when performed by trained professionals. It is non-invasive and has few side effects. However, proper use and precautions are important to avoid risks.
Dogs with certain conditions or sensitivities may require special care. Your veterinarian will evaluate your dog’s health before starting laser therapy to ensure it is appropriate.
- Non-invasive safety: Laser therapy does not break the skin or cause pain, making it a low-risk treatment option after TPLO surgery.
- Minimal side effects: Most dogs tolerate laser therapy well, with rare cases of mild redness or warmth at the treatment site.
- Professional administration: Treatments should be done by trained veterinary staff to ensure correct dosage and avoid eye exposure to the laser.
- Health screening: Dogs with cancer, photosensitivity, or certain infections may not be suitable candidates for laser therapy.
When used correctly, laser therapy is a safe and effective way to support healing and comfort after TPLO surgery.
Can laser therapy replace other post-TPLO treatments?
Laser therapy is a helpful addition but does not replace other important post-TPLO care. Surgery recovery requires a combination of treatments for best results.
Physical therapy, pain medications, rest, and controlled exercise all play vital roles. Laser therapy complements these by enhancing healing and reducing pain.
- Complementary treatment: Laser therapy works best alongside physical rehabilitation and medication, not as a sole treatment after TPLO surgery.
- Physical therapy importance: Controlled exercises and massage improve joint mobility and muscle strength during recovery.
- Medication role: Pain and anti-inflammatory drugs manage symptoms that laser therapy alone cannot fully address.
- Rest and care: Proper rest and restricted activity prevent complications and support healing after surgery.
Using laser therapy as part of a comprehensive recovery plan helps your dog heal faster and regain function after TPLO surgery.
Conclusion
Laser therapy is a valuable tool to help dogs recover after TPLO surgery. It reduces pain, inflammation, and speeds tissue healing through safe, non-invasive light treatment.
While laser therapy supports recovery, it should be combined with other treatments like physical therapy and medication. Following your veterinarian’s guidance ensures the best outcome for your dog’s post-surgical healing journey.
FAQs
How soon after TPLO surgery can laser therapy begin?
Laser therapy typically starts 2 to 3 days after surgery once the incision begins healing and shows no infection signs.
Is laser therapy painful for dogs?
No, laser therapy is painless and non-invasive. Most dogs tolerate it well and may even find it soothing.
How long does each laser therapy session last?
Sessions usually last 5 to 15 minutes depending on the size of the treatment area and the laser device used.
Can laser therapy reduce the need for pain medications?
Yes, laser therapy can lower inflammation and pain, potentially reducing the amount of pain medication needed.
Are there any risks with laser therapy after TPLO surgery?
Risks are minimal when done properly. Avoid use on dogs with cancer or photosensitivity, and always have a vet supervise treatment.
All Articles
Can Dogs Get Impetigo?
Learn if dogs can get impetigo, its symptoms, causes, treatment, and prevention tips to keep your pet healthy.
Impetigo is a common skin infection in humans, especially children, but many pet owners wonder, can dogs get impetigo? This question is important because skin infections can cause discomfort and health issues in dogs if left untreated. Understanding whether impetigo affects dogs helps you recognize symptoms early and seek proper care.
In short, yes, dogs can get a form of impetigo, but it differs slightly from the human version. This article explains what impetigo is in dogs, how to identify it, causes, treatment options, and ways to prevent it. You will learn how to protect your dog’s skin health effectively.
What is impetigo in dogs?
Impetigo in dogs is a superficial bacterial skin infection that mainly affects puppies and young dogs. It causes pustules and crusty sores, usually on the belly, groin, and limbs. Unlike human impetigo, which is often contagious between people, canine impetigo is less contagious but still requires attention.
The condition is also called puppy pyoderma because it often occurs in young dogs with immature immune systems. It is caused by bacteria that invade the skin through minor injuries or irritation.
- Superficial infection: Impetigo affects only the top layers of the skin, causing pustules and small blisters filled with pus that break and form crusts.
- Common in puppies: Young dogs are more prone due to their sensitive skin and developing immune defenses, making early detection important.
- Non-contagious to humans: Canine impetigo does not usually spread to people, but good hygiene is still essential to prevent bacterial spread among dogs.
- Localized areas: The infection mainly appears on the belly, groin, and inner thighs where skin is thinner and more vulnerable.
Recognizing impetigo early helps prevent the infection from worsening or spreading to deeper skin layers.
What causes impetigo in dogs?
The main cause of impetigo in dogs is bacterial infection, typically by Staphylococcus bacteria. These bacteria normally live on the skin but can cause infection when the skin barrier is broken. Several factors increase the risk of impetigo in dogs.
Understanding the causes helps you reduce your dog’s risk and manage the environment to support healthy skin.
- Skin trauma: Small cuts, scratches, or insect bites allow bacteria to enter and infect the skin, triggering impetigo.
- Immature immune system: Puppies have weaker immune defenses, making it easier for bacteria to cause infection.
- Moist environments: Damp or dirty skin encourages bacterial growth, increasing the chance of impetigo developing.
- Underlying allergies: Dogs with allergies often scratch or lick their skin, causing irritation that can lead to bacterial infection.
By controlling these causes, you can lower the chance of your dog developing impetigo or similar skin infections.
What are the symptoms of impetigo in dogs?
Impetigo symptoms in dogs are usually visible on the skin and include pustules, redness, and crusting. These signs help differentiate impetigo from other skin conditions. Early symptoms are often mild but can worsen without treatment.
Knowing the symptoms allows you to seek veterinary care promptly and avoid complications.
- Pustules and blisters: Small, pus-filled bumps appear on the skin, often breaking open and forming yellow crusts.
- Redness and inflammation: The affected skin looks red and swollen, indicating infection and irritation.
- Hair loss: Hair may fall out around the infected areas due to inflammation and scratching.
- Itching and discomfort: Dogs may lick or scratch the sores, causing further irritation and risk of spreading the infection.
If you notice these symptoms, it is important to get a veterinary diagnosis to confirm impetigo and start treatment.
How is impetigo diagnosed in dogs?
Diagnosis of impetigo in dogs involves a physical exam and sometimes laboratory tests. Your veterinarian will look at the skin lesions and may take samples to identify the bacteria causing the infection. Accurate diagnosis ensures proper treatment.
Early veterinary evaluation helps prevent the infection from worsening or spreading to other parts of the body.
- Physical examination: The vet inspects the skin for typical pustules, crusts, and inflammation that suggest impetigo.
- Skin cytology: A sample of pus or skin cells is examined under a microscope to detect bacteria and inflammatory cells.
- Bacterial culture: Sometimes, a culture is done to identify the exact bacteria and check antibiotic sensitivity.
- Rule out other conditions: The vet excludes other skin diseases like fungal infections or allergies that can look similar.
Once diagnosed, your vet will recommend the best treatment plan to clear the infection safely.
How is impetigo treated in dogs?
Treatment for impetigo in dogs usually involves antibiotics and proper skin care. Most dogs respond well to treatment and recover quickly. It is important to follow the vet’s instructions and complete the full course of medication.
Good hygiene and preventing re-infection are key to successful treatment and avoiding complications.
- Antibiotic therapy: Oral or topical antibiotics kill the bacteria causing impetigo and stop the infection from spreading.
- Medicated shampoos: Special antibacterial shampoos help clean the skin and soothe irritation during treatment.
- Keep skin dry: Drying the affected areas prevents bacterial growth and supports healing.
- Prevent licking: Using an Elizabethan collar stops the dog from licking or scratching the sores, reducing further damage.
Follow-up visits with your vet ensure the infection has cleared and the skin is healing properly.
How can you prevent impetigo in dogs?
Preventing impetigo involves good skin care, hygiene, and managing risk factors. Puppies and dogs with sensitive skin benefit most from preventive measures. Keeping your dog’s environment clean and healthy reduces the chance of bacterial infections.
Prevention helps maintain your dog’s comfort and avoids costly treatments for skin infections.
- Regular grooming: Brushing and bathing with gentle shampoos keep the skin clean and free from irritants that cause infections.
- Dry skin thoroughly: After baths or swimming, dry your dog’s skin well to prevent moisture buildup that encourages bacteria.
- Check for injuries: Inspect your dog’s skin regularly for cuts or scratches and treat them promptly to avoid infection.
- Healthy diet: Feeding a balanced diet supports immune health and skin integrity, reducing infection risk.
By following these steps, you can help protect your dog from impetigo and other skin problems.
What complications can impetigo cause in dogs?
If left untreated, impetigo can lead to more serious skin infections and discomfort for your dog. Understanding possible complications helps you act quickly if symptoms worsen or persist.
Prompt veterinary care prevents complications and promotes faster recovery.
- Deep skin infection: The bacteria can spread to deeper layers, causing painful cellulitis or abscesses that require intensive treatment.
- Secondary infections: Scratching and licking can introduce other bacteria or fungi, complicating the infection.
- Scarring and hair loss: Severe or prolonged infections may cause permanent skin damage and patchy hair loss.
- Systemic illness: In rare cases, bacteria can enter the bloodstream, causing fever and systemic illness needing urgent care.
Early treatment and prevention reduce the risk of these complications and keep your dog healthy.
Conclusion
Yes, dogs can get impetigo, especially puppies and young dogs with sensitive skin. It is a superficial bacterial skin infection that causes pustules, redness, and crusting, mainly on the belly and groin areas. Recognizing symptoms early and seeking veterinary care ensures effective treatment and prevents complications.
Good hygiene, regular grooming, and managing skin injuries help prevent impetigo in dogs. If you notice any signs of skin infection, consult your veterinarian promptly to keep your dog comfortable and healthy.
Can impetigo spread from dogs to humans?
Canine impetigo is generally not contagious to humans, but good hygiene is important to avoid bacterial spread. Wash hands after handling infected dogs and clean their environment regularly.
How long does impetigo take to heal in dogs?
With proper treatment, impetigo usually heals within 2 to 3 weeks. Follow your vet’s instructions and complete all medication to ensure full recovery.
Can adult dogs get impetigo?
While impetigo is most common in puppies, adult dogs with weakened immune systems or skin injuries can also develop the infection, though it is less frequent.
Is impetigo painful for dogs?
Impetigo causes mild discomfort due to itching and irritation. Dogs may scratch or lick the sores, which can increase pain if untreated.
Can impetigo recur in dogs?
Yes, impetigo can recur if underlying causes like allergies or skin trauma are not managed. Preventive care and hygiene reduce the risk of repeat infections.
Do Dogs Calm Down After Being Spayed?
Learn how dogs behave after being spayed and when to expect them to calm down post-surgery.
Many dog owners wonder if their pets will calm down after being spayed. This surgery can affect a dog's behavior, but understanding the changes helps you care for your dog better. Knowing what to expect can ease your worries and help your dog recover comfortably.
Dogs often show changes in activity and mood after spaying. Usually, they do calm down over time, but the process varies by dog. This article explains how spaying affects behavior, when calming happens, and how you can support your dog during recovery.
What behavioral changes occur after spaying?
Spaying removes the ovaries and uterus, which changes hormone levels. These hormonal shifts can affect your dog's energy and mood. Most dogs show some behavior changes, but these vary widely.
Understanding these changes helps you recognize normal recovery behavior and when to seek help.
- Reduced heat cycles: Spaying stops heat cycles, which often reduces restlessness and mood swings related to hormones.
- Lower activity levels: Many dogs become less hyperactive after spaying due to decreased estrogen levels.
- Temporary discomfort: Post-surgery pain can make dogs quieter or more withdrawn for a few days.
- Possible anxiety: Some dogs may show anxiety or clinginess during recovery because of discomfort or changes in routine.
These behavioral changes are usually temporary and improve as your dog heals. Monitoring your dog closely helps ensure a smooth recovery.
How long does it take for dogs to calm down after being spayed?
The calming process after spaying depends on the individual dog’s age, temperament, and health. Some dogs settle quickly, while others take weeks or months.
Knowing the typical timeline helps you set realistic expectations and provide proper care.
- Immediate post-op phase: Dogs may be quiet and inactive for 3 to 7 days due to surgery and pain medication effects.
- Short-term adjustment: Within 2 to 4 weeks, most dogs begin returning to normal energy but often calmer than before.
- Long-term behavior: Over 2 to 3 months, hormone changes stabilize, leading to lasting calmer behavior in many dogs.
- Individual variation: Some dogs remain energetic despite spaying; personality and environment also influence behavior.
Patience and gentle care during this period support your dog’s comfort and adjustment to new hormone levels.
Does spaying affect a dog's temperament permanently?
Spaying can influence temperament by altering hormone-driven behaviors. However, it does not change your dog’s core personality. Most changes are positive or neutral.
Understanding these effects helps you recognize normal behavior and avoid unnecessary concern.
- Reduced aggression: Spaying often lowers hormone-related aggression, making dogs calmer and less reactive.
- Less roaming behavior: Dogs usually stop searching for mates, reducing escape attempts and anxiety.
- Stable mood: Hormonal fluctuations decrease, leading to more consistent moods over time.
- Personality remains: Core traits like playfulness or friendliness usually stay the same after spaying.
Overall, spaying supports healthier, more manageable behavior without altering your dog's unique character.
How can owners help their dogs calm down after spaying?
Supporting your dog after spaying helps reduce stress and encourages calm behavior. Proper care and environment make recovery smoother.
Simple steps can make a big difference in your dog’s comfort and mood.
- Provide a quiet space: A calm, comfortable area helps your dog rest and reduces anxiety during healing.
- Limit activity: Avoid running or jumping for 10 to 14 days to prevent injury and promote calmness.
- Use pain management: Follow your vet’s advice on pain relief to keep your dog comfortable and relaxed.
- Offer gentle affection: Calm petting and soothing voices reassure your dog without overstimulation.
These actions support your dog’s physical and emotional recovery, helping them settle down naturally.
Can spaying cause hyperactivity or restlessness?
While spaying usually reduces activity, some dogs may show restlessness or hyperactivity after surgery. This is often temporary and related to discomfort or anxiety.
Recognizing these signs helps you respond appropriately and keep your dog comfortable.
- Post-surgery discomfort: Pain or itching at the incision site can cause restlessness or pacing behavior.
- Medication side effects: Some pain or antibiotic medications may cause mild hyperactivity in sensitive dogs.
- Stress response: Changes in routine and environment can make dogs anxious and more active temporarily.
- Underlying temperament: Naturally energetic dogs may show more restlessness despite surgery effects.
If restlessness persists beyond two weeks or worsens, consult your veterinarian for advice and possible treatment.
When should you consult a vet about post-spay behavior?
Most behavior changes after spaying are normal and improve with time. However, some signs need veterinary attention to rule out complications.
Knowing when to seek help ensures your dog stays healthy and comfortable.
- Excessive lethargy: If your dog is unusually weak or unresponsive beyond a week, contact your vet immediately.
- Persistent restlessness: Continuous pacing or inability to settle after two weeks may indicate pain or anxiety needing treatment.
- Signs of infection: Swelling, redness, discharge, or foul odor at the incision site require prompt veterinary care.
- Behavioral extremes: Sudden aggression or severe anxiety not improving with time should be evaluated by a professional.
Early intervention helps prevent complications and supports your dog’s full recovery after spaying.
Conclusion
Dogs generally calm down after being spayed due to hormonal changes and recovery from surgery. This calming process can take days to months depending on your dog’s age, personality, and health.
Understanding typical behavior changes and providing gentle care helps your dog heal comfortably. If you notice unusual signs or prolonged restlessness, consult your veterinarian to ensure your dog’s well-being.
FAQs
How soon after spaying do dogs stop being hyper?
Most dogs begin to calm down within 2 to 4 weeks after spaying as hormone levels adjust and pain subsides.
Can spaying change a dog's personality?
Spaying affects hormone-driven behaviors but does not change your dog’s core personality or unique traits.
Is it normal for dogs to be restless after spaying?
Yes, mild restlessness can occur due to pain, medication, or anxiety but usually improves within two weeks.
How can I help my dog recover calmly after spaying?
Provide a quiet space, limit activity, manage pain with vet guidance, and offer gentle affection to support calm recovery.
When should I worry about my dog's behavior post-spay?
Consult your vet if your dog shows excessive lethargy, persistent restlessness, signs of infection, or sudden behavioral changes.
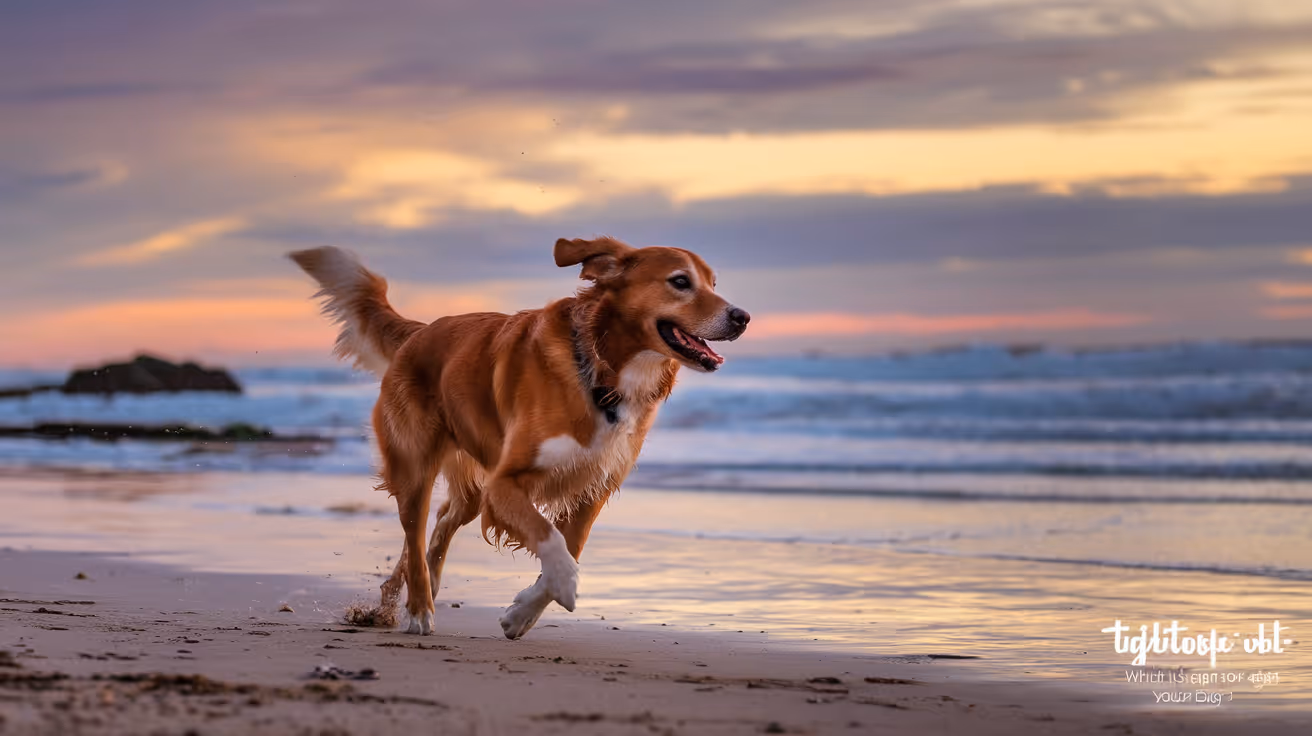
Tightrope vs TPLO Surgery: Which Is Right for Your Dog?
Compare Tightrope and TPLO surgeries to find the best option for your dog's cruciate ligament injury treatment.
When your dog suffers a torn cranial cruciate ligament (CCL), deciding on the right surgery can feel overwhelming. Two common surgical options are Tightrope and TPLO surgery, each with unique benefits and considerations. Understanding these can help you make the best choice for your dog's recovery and long-term health.
This article explains what Tightrope and TPLO surgeries involve, their advantages, risks, and recovery processes. You will learn how to decide which surgery suits your dog's size, activity level, and lifestyle to ensure the best outcome.
What is Tightrope surgery for dogs?
Tightrope surgery is a minimally invasive technique used to stabilize the knee after a cranial cruciate ligament rupture. It uses a strong synthetic ligament to mimic the function of the torn ligament, helping restore joint stability.
This procedure is often chosen for smaller or less active dogs but can be suitable for many cases. It aims to reduce surgical trauma and speed up recovery.
- Minimally invasive approach: Tightrope surgery uses small incisions and specialized instruments, which reduces tissue damage and post-operative pain compared to open surgeries.
- Synthetic ligament use: The procedure replaces the torn ligament with a strong, durable suture material that stabilizes the knee joint effectively.
- Faster recovery time: Dogs often regain mobility quicker after Tightrope surgery due to less surgical trauma and quicker healing of soft tissues.
- Suitable for small to medium dogs: This surgery is ideal for dogs under 40 pounds or those with less intense activity levels to avoid excessive stress on the repair.
After Tightrope surgery, dogs usually require controlled activity and physical therapy to regain full function. The synthetic ligament provides immediate stability, allowing earlier weight-bearing.
What is TPLO surgery and how does it work?
TPLO (Tibial Plateau Leveling Osteotomy) surgery is a more invasive procedure that changes the geometry of the dog's knee to stabilize it without replacing the ligament. It involves cutting and rotating the tibia bone to alter the joint angle.
This surgery is often recommended for larger or highly active dogs because it provides strong, long-lasting joint stability.
- Bone cutting technique: TPLO involves cutting the tibia and rotating the bone to change the slope of the tibial plateau, which stabilizes the knee during movement.
- Eliminates ligament strain: By changing the joint angle, TPLO reduces the forces that cause instability, allowing the knee to function without the torn ligament.
- Strong and durable repair: The surgery provides excellent stability for large or athletic dogs that put high stress on their knees.
- Longer recovery period: TPLO requires more extensive healing due to bone surgery, often needing 8 to 12 weeks of restricted activity and rehabilitation.
TPLO surgery requires careful post-operative care and physical therapy to ensure proper bone healing and regain full joint function. It is considered the gold standard for many canine cruciate injuries.
How do Tightrope and TPLO surgeries compare in recovery time?
Recovery time is a key factor when choosing between Tightrope and TPLO surgeries. Each surgery has different healing demands and rehabilitation protocols.
Understanding these differences helps owners plan for their dog's care and manage expectations during recovery.
- Tightrope faster mobility: Dogs often start bearing weight and walking within days after surgery due to less invasive technique and synthetic ligament support.
- TPLO longer healing: Bone healing after TPLO requires 8 to 12 weeks of restricted activity, delaying full return to normal function.
- Physical therapy importance: Both surgeries benefit from guided rehabilitation, but TPLO may need more intensive therapy due to bone involvement.
- Activity restrictions differ: Tightrope patients may resume controlled activity sooner, while TPLO dogs need longer confinement and gradual increase in exercise.
Choosing the right surgery includes considering your ability to manage post-op care and your dog's lifestyle needs during recovery.
What are the risks and complications of Tightrope surgery?
Like any surgery, Tightrope has potential risks and complications. Knowing these helps you prepare and recognize warning signs early.
Although generally safe, complications can affect healing and long-term joint function.
- Infection risk: Small incisions reduce infection chances, but any surgical site can become infected if not properly cared for.
- Implant failure: The synthetic ligament may stretch or break under excessive stress, especially in large or very active dogs.
- Knee instability: If the repair loosens, the knee may remain unstable, requiring revision surgery or alternative treatment.
- Arthritis development: Despite surgery, some dogs develop arthritis over time due to joint damage from the initial injury.
Close follow-up with your veterinarian after Tightrope surgery is essential to monitor healing and address any complications promptly.
What are the risks and complications of TPLO surgery?
TPLO surgery carries its own set of risks due to the invasive nature of bone cutting and fixation. Understanding these helps owners weigh benefits against potential challenges.
Proper surgical technique and post-op care reduce complication rates.
- Infection and wound issues: Larger incisions increase infection risk, requiring strict hygiene and monitoring after surgery.
- Bone healing problems: Delayed union or non-union of the tibia can occur, needing additional treatment or surgery.
- Implant complications: Plates and screws used to fix the bone may loosen or cause irritation, sometimes requiring removal.
- Post-op pain and swelling: TPLO can cause more pain and inflammation initially, needing effective pain management.
Despite these risks, TPLO has a high success rate when performed by experienced surgeons and followed by proper rehabilitation.
How do I decide which surgery is best for my dog?
Choosing between Tightrope and TPLO depends on several factors including your dog's size, activity level, age, and your lifestyle. Consulting your veterinarian is crucial to make an informed decision.
Each surgery has strengths and limitations that suit different dogs and owners.
- Dog size consideration: Tightrope is often better for dogs under 40 pounds, while TPLO suits larger breeds with higher joint stress.
- Activity level impact: Active or working dogs may benefit more from TPLO’s strong stability for intense movements.
- Recovery management: Consider your ability to manage longer recovery and rehabilitation needed for TPLO surgery.
- Veterinary recommendation: Your vet’s experience and assessment of your dog’s condition guide the best surgical choice.
Discuss all options, risks, and expected outcomes with your veterinary surgeon to choose the surgery that best fits your dog’s needs.
What is the cost difference between Tightrope and TPLO surgeries?
Cost is an important factor when deciding on cruciate ligament surgery. Tightrope and TPLO have different price ranges due to surgical complexity and equipment used.
Knowing approximate costs helps you plan financially for your dog’s treatment.
- Tightrope surgery cost: Typically ranges from $1,500 to $3,000 depending on location and veterinary clinic fees.
- TPLO surgery cost: Usually costs between $3,000 and $5,000 due to more complex procedure and implants.
- Additional expenses: Both surgeries require follow-up visits, medications, and physical therapy which add to total cost.
- Insurance coverage: Pet insurance may cover part of the surgery and rehab, so check your policy details before treatment.
Balancing cost with expected outcomes and your dog’s needs ensures you make a sustainable choice for their health.
Conclusion
Choosing between Tightrope and TPLO surgery for your dog’s cruciate ligament injury depends on many factors. Tightrope offers a less invasive option with faster recovery, ideal for smaller or less active dogs.
TPLO provides strong, durable stability suited for larger or highly active dogs but requires longer healing time and more intensive care. Discussing your dog’s specific condition and lifestyle with your veterinarian will help you select the best surgery for a successful recovery.
FAQs
How long does Tightrope surgery recovery take?
Recovery usually takes 6 to 8 weeks with gradual return to normal activity. Controlled exercise and physical therapy speed healing and improve joint function.
Can TPLO surgery prevent arthritis in dogs?
TPLO stabilizes the knee but cannot fully prevent arthritis. Early surgery and rehabilitation reduce joint damage and slow arthritis progression.
Is Tightrope surgery painful for dogs?
Dogs experience some pain after Tightrope surgery, but it is generally less than TPLO due to smaller incisions and less tissue trauma.
Are there weight limits for Tightrope surgery?
Tightrope is best for dogs under 40 pounds. Larger dogs may put too much strain on the synthetic ligament, risking failure.
What physical therapy is needed after TPLO surgery?
Physical therapy includes controlled leash walks, range of motion exercises, and hydrotherapy to restore strength and mobility over several months.
Dog Leg Shaking After TPLO Surgery: Causes & Care
Learn why your dog may shake its leg after TPLO surgery, what to expect during recovery, and how to support healing safely.
After your dog undergoes TPLO surgery, you might notice its leg shaking. This can be worrying, but it is often a normal part of recovery. Understanding why this happens helps you care for your pet better and know when to seek veterinary advice.
This article explains the common reasons for leg shaking after TPLO surgery, what signs to watch for, and how to support your dog's healing process effectively.
Why is my dog’s leg shaking after TPLO surgery?
Leg shaking after TPLO surgery is usually related to muscle weakness, nerve recovery, or pain. The surgery changes the knee joint mechanics, and your dog’s muscles and nerves need time to adjust.
Shaking can also be a sign of discomfort or anxiety during the healing phase. It is important to observe the frequency and severity to distinguish normal recovery from complications.
- Muscle weakness: After surgery, muscles around the knee may be weak from disuse, causing involuntary shaking as they regain strength.
- Nerve healing: Nerves affected during surgery can cause tremors while they recover and re-establish normal signals.
- Pain response: Mild pain or soreness can trigger shaking as your dog tries to protect the leg.
- Stress or anxiety: Recovery can be stressful, and shaking may be a physical sign of your dog’s nervousness or discomfort.
Monitoring these signs helps you understand your dog’s healing progress and when to contact your vet for further evaluation.
How long does leg shaking last after TPLO surgery?
The duration of leg shaking varies depending on your dog’s age, health, and rehabilitation. Typically, shaking decreases as muscles strengthen and nerves heal over weeks to months.
Consistent physical therapy and pain management can shorten recovery time and reduce shaking episodes.
- Initial weeks: Shaking is most common in the first 2 to 4 weeks as your dog adjusts to the surgery and limited movement.
- Muscle rebuilding phase: Between 4 to 12 weeks, shaking should lessen as muscle tone improves with gentle exercise.
- Nerve recovery timeline: Nerve-related shaking may persist longer but usually improves within 3 to 6 months post-surgery.
- Persistent shaking alert: If shaking continues beyond 6 months or worsens, it may indicate complications needing veterinary assessment.
Patience and following your vet’s rehabilitation plan are key to helping your dog recover fully and reduce leg shaking over time.
What should I do if my dog’s leg shakes after TPLO surgery?
When you notice leg shaking, it is important to provide supportive care and monitor your dog closely. Proper pain control and controlled activity help reduce shaking and promote healing.
Consult your vet if shaking is severe, persistent, or accompanied by other concerning symptoms.
- Manage pain: Use prescribed pain medications exactly as directed to keep your dog comfortable and reduce shaking caused by discomfort.
- Limit activity: Restrict your dog’s movement to prevent strain on the healing leg, which can worsen shaking or cause injury.
- Physical therapy: Follow recommended exercises to rebuild muscle strength gradually and improve leg stability.
- Observe symptoms: Watch for swelling, redness, or worsening lameness, which require prompt veterinary attention.
Early intervention and careful management can prevent complications and support a smoother recovery process.
Can leg shaking after TPLO surgery indicate complications?
While leg shaking is often normal, it can sometimes signal problems like infection, implant issues, or nerve damage. Recognizing warning signs helps you act quickly to protect your dog’s health.
Contact your vet if shaking is accompanied by other symptoms or changes in your dog’s behavior.
- Infection signs: Shaking with swelling, heat, or discharge around the surgery site may indicate infection needing immediate care.
- Implant problems: Persistent shaking with increased pain or instability can suggest implant loosening or failure.
- Nerve damage: Severe tremors or loss of leg function may point to nerve injury requiring specialized treatment.
- Excessive pain: If shaking occurs alongside vocalizing or refusal to bear weight, it may indicate uncontrolled pain or complications.
Timely veterinary evaluation ensures proper diagnosis and treatment to avoid long-term issues.
How can I help my dog recover safely from TPLO surgery?
Supporting your dog’s recovery involves a combination of rest, controlled exercise, and proper nutrition. Creating a safe environment reduces stress and promotes healing.
Following your veterinarian’s instructions closely is essential for a successful outcome.
- Provide a quiet space: Set up a comfortable, confined area to limit movement and prevent accidental injury during recovery.
- Follow rehab plan: Perform physical therapy exercises as directed to rebuild strength without overloading the leg.
- Maintain nutrition: Feed a balanced diet to support tissue repair and overall health during healing.
- Regular check-ups: Attend all veterinary appointments to monitor progress and adjust care as needed.
Consistent care and patience help your dog regain normal leg function and reduce shaking after surgery.
When should I call the vet about leg shaking after TPLO surgery?
Knowing when to seek veterinary advice is crucial for your dog’s safety. Some shaking patterns or additional symptoms require prompt professional evaluation.
Do not hesitate to contact your vet if you notice signs that may indicate complications or distress.
- Severe or worsening shaking: If shaking intensifies or spreads beyond the operated leg, it may signal a serious problem.
- Signs of infection: Redness, swelling, heat, or discharge at the surgery site need urgent veterinary attention.
- Loss of leg use: Sudden inability to bear weight or move the leg properly requires immediate evaluation.
- Behavioral changes: Excessive whining, aggression, or lethargy alongside shaking may indicate pain or illness.
Prompt veterinary care ensures your dog receives the right treatment to recover safely and comfortably.
Conclusion
Leg shaking after TPLO surgery is common and usually part of the normal healing process. It often results from muscle weakness, nerve recovery, or mild pain as your dog adjusts to the surgery.
By providing proper pain management, controlled exercise, and close monitoring, you can support your dog’s recovery and reduce shaking over time. Always consult your veterinarian if shaking worsens or is accompanied by other concerning signs to ensure the best outcome for your pet.
FAQs
Is leg shaking normal after TPLO surgery?
Yes, mild leg shaking is normal due to muscle weakness and nerve healing during recovery. It usually improves with time and proper care.
How long does leg shaking last after TPLO surgery?
Leg shaking typically decreases within weeks to months as muscles strengthen and nerves recover, but varies by individual dog and rehabilitation progress.
When should I worry about leg shaking after TPLO surgery?
Worry if shaking worsens, lasts beyond six months, or is accompanied by swelling, pain, or loss of leg function. Contact your vet promptly.
Can physical therapy reduce leg shaking after TPLO surgery?
Yes, physical therapy helps rebuild muscle strength and improve leg stability, which can reduce shaking and speed up recovery.
What signs indicate complications after TPLO surgery?
Signs include infection symptoms, increased pain, implant instability, severe tremors, or inability to use the leg, all requiring veterinary evaluation.
Can Dogs Get a Staph Infection?
Learn if dogs can get staph infections, their symptoms, causes, treatment, and prevention tips to keep your pet healthy.
Staph infections are common in humans, but many pet owners wonder, can dogs get a staph infection? The answer is yes. Dogs can develop staph infections, which can affect their skin and other parts of the body.
This article explains what staph infections are in dogs, how to recognize symptoms, causes, treatment options, and ways to prevent these infections. Understanding this can help you protect your dog’s health effectively.
What is a Staph Infection in Dogs?
A staph infection in dogs is caused by bacteria called Staphylococcus. These bacteria normally live on the skin and in the nose without causing harm. However, if the skin barrier breaks or the immune system weakens, the bacteria can multiply and cause infection.
Staph infections often appear as skin problems but can sometimes affect other organs. Knowing what a staph infection looks like helps you seek timely veterinary care.
- Common bacteria type: Staphylococcus pseudintermedius is the main staph bacteria causing infections in dogs, different from the human strain.
- Skin infection site: These infections usually affect areas with broken skin like wounds, scratches, or irritated spots.
- Opportunistic infection: Staph bacteria cause infection mainly when the dog’s skin or immune defenses are compromised.
- Not always contagious: While staph bacteria can spread, many infections arise from the dog’s own bacteria overgrowth.
Recognizing the nature of staph infections helps you understand why your dog might develop one and how it differs from human infections.
What Are the Symptoms of Staph Infection in Dogs?
Staph infections in dogs usually cause skin problems. You might notice redness, swelling, or pus-filled bumps. The affected area may be itchy or painful, causing your dog to scratch or lick excessively.
Symptoms can vary depending on the infection’s location and severity. Early detection is key to preventing worsening of the infection.
- Redness and inflammation: The infected skin often becomes red, swollen, and warm to the touch, signaling inflammation.
- Pustules and sores: Small pus-filled bumps or open sores may appear, which can leak fluid or crust over.
- Itching and discomfort: Dogs may scratch, lick, or bite the infected area due to irritation and pain.
- Hair loss: Hair around the infected site may fall out because of inflammation and damage to follicles.
If you see these signs, it is important to consult your veterinarian for diagnosis and treatment to avoid complications.
How Do Dogs Get Staph Infections?
Dogs get staph infections when the bacteria enter the skin through cuts, wounds, or other damage. Factors that weaken the immune system or skin barrier increase the risk. Some dogs are more prone due to allergies or other skin conditions.
Understanding the causes helps you reduce your dog’s risk and maintain healthy skin.
- Skin injuries: Cuts, scrapes, or insect bites provide entry points for staph bacteria to infect the skin.
- Allergies and irritation: Dogs with allergies often scratch and damage their skin, making infections more likely.
- Weakened immunity: Illness or stress can reduce your dog’s ability to fight off bacteria, increasing infection risk.
- Excess moisture: Damp skin from bathing or humidity creates a favorable environment for bacterial growth.
By managing these risk factors, you can help prevent staph infections in your dog.
How Are Staph Infections Diagnosed in Dogs?
Diagnosis of staph infections involves a veterinary examination and sometimes laboratory tests. Your vet will look at the skin and may take samples to identify the bacteria and choose the best treatment.
Proper diagnosis ensures effective treatment and helps avoid antibiotic resistance.
- Physical exam: The vet inspects the skin for typical signs of staph infection such as redness, pustules, and swelling.
- Skin cytology: A sample of skin cells or pus is examined under a microscope to detect bacteria and inflammatory cells.
- Bacterial culture: Swabs from the infected area can be cultured to identify the exact bacteria and test antibiotic sensitivity.
- Additional tests: In chronic or severe cases, blood tests or biopsies may be needed to rule out other diseases.
Following your vet’s advice on testing helps ensure your dog receives the right treatment quickly.
What Treatments Are Available for Staph Infections in Dogs?
Treatment depends on the infection’s severity. Mild cases may improve with topical medications, while more serious infections require oral antibiotics. Supporting skin healing and preventing recurrence are also important.
Always follow your veterinarian’s instructions carefully to ensure your dog recovers fully.
- Topical antibiotics: Creams or ointments applied directly to the infected skin help kill bacteria and reduce inflammation.
- Oral antibiotics: For deeper or widespread infections, your vet may prescribe oral antibiotics for 2 to 4 weeks.
- Medicated shampoos: Special shampoos can clean the skin and reduce bacterial load, aiding healing.
- Address underlying causes: Treating allergies or skin conditions helps prevent future staph infections.
Completing the full course of treatment is essential to avoid resistant infections and relapse.
How Can You Prevent Staph Infections in Dogs?
Preventing staph infections involves good hygiene, skin care, and managing health conditions. Keeping your dog’s skin healthy reduces the chance of bacteria causing infection.
Simple steps can protect your dog and reduce veterinary visits.
- Regular grooming: Brushing and bathing your dog helps remove dirt and bacteria that can cause skin problems.
- Prompt wound care: Clean and protect any cuts or scratches to prevent bacterial entry and infection.
- Manage allergies: Work with your vet to control allergies that cause itching and skin damage.
- Healthy diet: A balanced diet supports immune function and skin health, reducing infection risk.
By following these tips, you can help keep your dog’s skin strong and infection-free.
When Should You See a Vet for a Suspected Staph Infection?
If your dog shows signs of a skin infection, it is important to visit a veterinarian promptly. Early treatment prevents the infection from worsening or spreading.
Delaying care can lead to more serious health problems and longer recovery times.
- Persistent redness: If redness or swelling does not improve within a day or two, seek veterinary advice.
- Open sores or pus: Visible sores or discharge indicate infection needing professional treatment.
- Excessive scratching: Constant licking or biting at one spot may signal an infection or underlying issue.
- Systemic signs: If your dog shows fever, lethargy, or loss of appetite, urgent veterinary care is needed.
Timely veterinary evaluation ensures your dog receives the best care and recovers quickly.
Conclusion
Dogs can get staph infections, especially when their skin is damaged or their immune system is weak. These infections mainly affect the skin and cause redness, itching, and sores.
Recognizing symptoms early and seeking veterinary care is vital. With proper treatment and prevention, you can keep your dog healthy and comfortable. Good skin care and managing underlying conditions reduce the risk of staph infections.
Can staph infections spread from dogs to humans?
Staph infections in dogs are usually caused by bacteria different from those in humans, but close contact can sometimes transmit bacteria. Good hygiene reduces this risk.
How long does it take for a staph infection in dogs to heal?
With proper treatment, mild staph infections often improve within 1 to 2 weeks, but severe cases may take longer and require ongoing care.
Are staph infections in dogs contagious to other pets?
Staph bacteria can spread between pets through direct contact or shared bedding, so isolating infected animals helps prevent transmission.
Can diet affect the risk of staph infections in dogs?
A balanced diet supports immune health and skin integrity, lowering the chance of infections. Poor nutrition can increase susceptibility.
Is it safe to use human antibiotic creams on dogs?
Human antibiotics may not be safe or effective for dogs. Always use medications prescribed by your veterinarian to avoid harm.
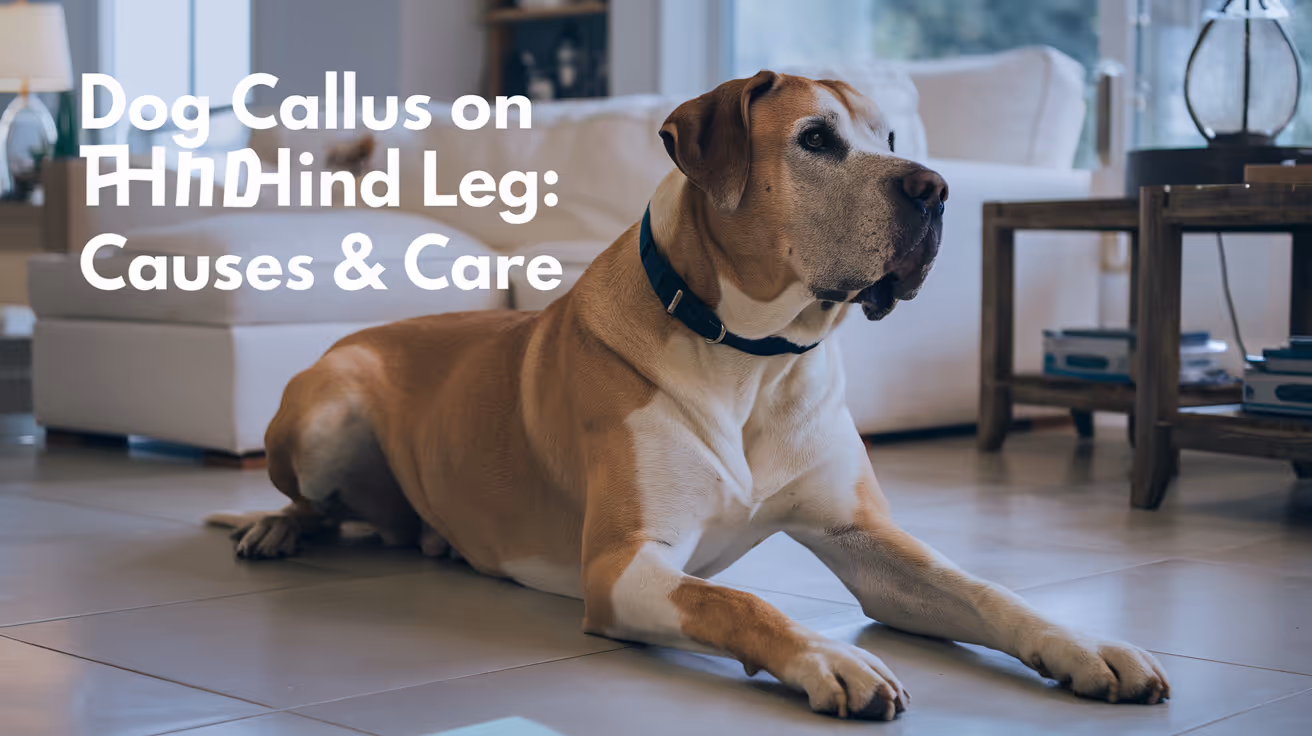
Dog Callus on Hind Leg Causes & Treatment
Learn about dog callus on the hind leg, its causes, symptoms, and effective treatments to keep your pet comfortable and healthy.
Dog callus on the hind leg is a common skin problem that many pet owners notice during routine care. These thickened, hardened skin patches often develop on pressure points like the hocks, causing discomfort or pain if untreated. Understanding why calluses form and how to treat them is important for your dog's well-being.
This article explains the main causes of calluses on a dog's hind leg and offers practical treatment options. You will learn how to identify calluses early, prevent them, and when to seek veterinary care to ensure your dog stays comfortable and active.
What causes dog callus on the hind leg?
Calluses form when the skin is repeatedly exposed to pressure or friction. On a dog's hind leg, this usually happens at the hock area, where the leg bends and touches the ground during rest or movement. Several factors can contribute to callus formation.
Understanding these causes helps you prevent calluses and manage existing ones effectively.
- Repeated pressure: Constant weight bearing on the hock causes skin thickening as a protective response to avoid injury or irritation.
- Hard surfaces: Dogs lying or walking on rough floors or concrete increase friction, which promotes callus development on their hind legs.
- Obesity: Excess weight increases pressure on joints and skin, making calluses more likely to form on the hind legs.
- Breed predisposition: Large breeds with thin skin or low muscle padding over joints are more prone to calluses on their hind legs.
Other factors like age, arthritis, or limited mobility can also increase callus risk by changing how a dog rests or moves.
How can you identify a callus on your dog's hind leg?
Recognizing calluses early allows for prompt treatment and prevents complications. Calluses have distinct features that you can observe during grooming or veterinary exams.
Knowing these signs helps you differentiate calluses from other skin problems like infections or tumors.
- Thickened skin: Calluses appear as rough, raised patches that feel hard compared to surrounding skin.
- Hair loss: The skin over calluses often loses hair due to constant rubbing or pressure.
- Discoloration: Callused areas may look darker or yellowish compared to normal skin tones.
- Possible soreness: Dogs may lick or chew the area if the callus becomes irritated or painful.
If you notice swelling, bleeding, or foul odor, these may indicate infection and require veterinary attention.
What are the risks if dog calluses are left untreated?
Ignoring calluses can lead to worsening skin damage and discomfort for your dog. Calluses can crack, bleed, or become infected, causing pain and mobility issues.
Understanding these risks highlights why timely treatment and prevention are essential for your dog's health.
- Skin cracking: Thickened skin can split, creating open wounds that are painful and prone to infection.
- Infection risk: Open sores from calluses allow bacteria to enter, leading to cellulitis or abscess formation.
- Chronic pain: Persistent irritation causes discomfort, making your dog reluctant to walk or rest properly.
- Mobility problems: Painful calluses may alter gait or cause limping, affecting overall quality of life.
Regular inspection and care reduce these risks and keep your dog comfortable.
How can you treat dog callus on the hind leg at home?
Many mild calluses respond well to home care, especially when started early. Treatment focuses on reducing pressure, moisturizing the skin, and preventing infection.
Consistent care helps heal calluses and stops them from worsening.
- Soft bedding: Provide cushioned, clean resting areas to reduce pressure on the hind legs and promote healing.
- Moisturizing creams: Apply vet-approved emollients to soften thickened skin and prevent cracking.
- Regular cleaning: Gently clean callused areas with mild antiseptic solutions to avoid infection.
- Weight management: Maintain a healthy weight to reduce stress on joints and skin pressure points.
Always consult your veterinarian before using any topical treatments to ensure safety and effectiveness.
When should you see a vet for your dog's callus?
Veterinary care is necessary if calluses cause pain, infection, or do not improve with home treatment. A vet can provide advanced therapies and rule out other conditions.
Early professional intervention prevents complications and improves outcomes.
- Signs of infection: Seek vet help if the callus area is red, swollen, oozing pus, or has a bad smell.
- Persistent pain: If your dog shows limping, licking, or sensitivity around the callus, professional assessment is needed.
- Non-healing wounds: Calluses that crack and fail to heal require veterinary treatment to avoid chronic issues.
- Underlying conditions: Vets can check for arthritis or mobility problems contributing to callus formation.
Veterinarians may recommend medications, protective bandages, or physical therapy to support healing.
How can you prevent calluses on your dog's hind legs?
Prevention is the best way to protect your dog from painful calluses. By reducing pressure and friction, you help maintain healthy skin and comfort.
Simple lifestyle changes and regular care make a big difference in callus prevention.
- Provide soft surfaces: Use padded mats or beds where your dog rests to minimize pressure on hind legs.
- Keep skin clean: Regular grooming and cleaning reduce irritation and risk of skin damage.
- Maintain ideal weight: Prevent obesity to lower stress on joints and skin pressure areas.
- Exercise moderation: Avoid excessive hard surface walking or running that increases friction on hocks.
Routine veterinary check-ups help identify early skin changes and address problems promptly.
What veterinary treatments are available for dog calluses?
When home care is insufficient, vets offer treatments to heal calluses and relieve pain. These may include medications, protective devices, or advanced therapies.
Professional treatment improves healing speed and prevents complications.
- Topical medications: Prescription creams with antibiotics or steroids reduce infection and inflammation in callused areas.
- Bandaging: Protective wraps cushion the callus and prevent further trauma during healing.
- Physical therapy: Techniques like laser therapy or massage improve blood flow and skin repair.
- Addressing underlying issues: Treating arthritis or mobility problems reduces abnormal pressure causing calluses.
Your veterinarian will tailor treatment based on callus severity and your dog’s overall health.
Conclusion
Dog callus on the hind leg is a common but manageable condition caused by repeated pressure and friction. Early recognition and proper care help prevent pain and complications.
By providing soft resting areas, maintaining healthy weight, and monitoring skin regularly, you can protect your dog from calluses. Veterinary treatment is important when calluses become painful or infected to ensure your dog stays comfortable and active.
FAQs
Can dog calluses heal on their own?
Mild calluses may improve with reduced pressure and home care, but persistent or painful calluses usually need veterinary treatment to heal properly.
Are calluses painful for dogs?
Calluses are often painless initially but can become sore or painful if they crack, bleed, or get infected, causing discomfort to your dog.
Is it safe to use human creams on dog calluses?
Human creams can contain harmful ingredients; always use vet-recommended products to avoid skin irritation or toxicity in dogs.
How long does it take for a dog callus to heal?
Healing time varies but usually takes several weeks with proper care; severe or infected calluses may require longer treatment.
Can diet affect callus formation in dogs?
A balanced diet supports healthy skin and weight management, which helps reduce the risk of callus development on pressure points.
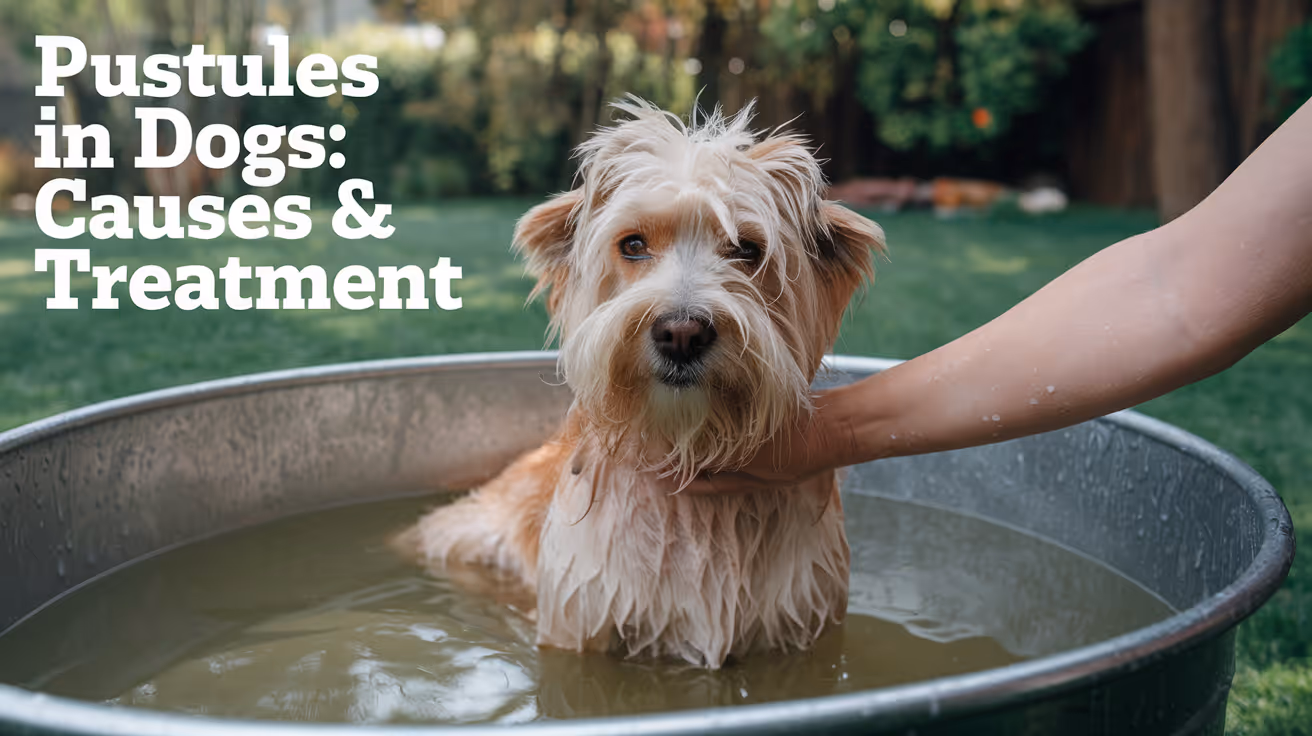
Pustules in Dogs Causes and Treatment
Learn about pustules in dogs, their causes, symptoms, and effective treatments to keep your pet healthy and comfortable.
Pustules in dogs are small, pus-filled bumps that appear on the skin. They often indicate an infection or inflammation and can cause discomfort for your pet. Understanding what causes pustules and how to treat them is important for any dog owner.
This article explains the common causes of pustules in dogs, how to recognize them, and the best treatment options available. You will learn how to help your dog heal and when to seek veterinary care.
What causes pustules in dogs?
Pustules form when the skin becomes infected or irritated. Several factors can lead to this condition, ranging from bacterial infections to allergies. Knowing the cause helps in choosing the right treatment.
- Bacterial infections: Pustules often result from bacterial infections like Staphylococcus, which invade damaged skin and cause pus-filled bumps.
- Parasitic infestations: Parasites such as fleas or mites can irritate the skin, leading to pustule formation as the dog scratches or bites the area.
- Allergic reactions: Allergies to food, pollen, or chemicals can cause skin inflammation and pustules as a secondary effect.
- Hormonal imbalances: Conditions like hypothyroidism can weaken the skin’s defenses, making infections and pustules more likely.
Identifying the exact cause requires a veterinary examination, including skin scrapings or cultures. This helps tailor the treatment to your dog’s specific needs.
How can you recognize pustules on your dog?
Pustules are visible signs on your dog’s skin that can be easy to spot if you know what to look for. Early detection helps prevent worsening of the condition.
- Appearance of bumps: Pustules look like small, raised bumps filled with yellow or white pus, often surrounded by redness.
- Location on body: They commonly appear on the belly, groin, or areas your dog can easily lick or scratch.
- Associated symptoms: Dogs may show itching, redness, hair loss, or scabs near pustules due to irritation.
- Behavior changes: Your dog might lick or bite the affected areas more frequently, showing discomfort or pain.
Regularly checking your dog’s skin, especially if they have allergies or parasites, helps catch pustules early and start treatment promptly.
What are the common treatments for pustules in dogs?
Treatment depends on the cause and severity of the pustules. Most cases require veterinary care to ensure proper healing and prevent complications.
- Antibiotic therapy: If bacteria cause the pustules, your vet will prescribe antibiotics to clear the infection effectively.
- Topical medications: Medicated shampoos or creams can reduce inflammation and kill bacteria on the skin surface.
- Parasite control: Treating fleas or mites with appropriate medications stops ongoing irritation and pustule formation.
- Allergy management: Identifying and avoiding allergens, along with antihistamines or steroids, helps reduce skin inflammation and pustules.
Following your vet’s instructions carefully and completing the full treatment course is essential for your dog’s recovery.
When should you see a vet for pustules in dogs?
Some pustules heal with simple care, but others need professional attention. Knowing when to visit the vet can prevent serious problems.
- Persistent pustules: If pustules do not improve within a week or worsen, veterinary evaluation is necessary.
- Spreading infection: Rapid spread of pustules or signs of pain and fever require immediate veterinary care.
- Underlying diseases: Dogs with other health issues or weakened immune systems should see a vet promptly for pustules.
- Severe discomfort: Excessive itching, licking, or behavioral changes indicate your dog needs professional help.
Early veterinary diagnosis helps identify the cause and prevents complications like deep skin infections or scarring.
How can you prevent pustules in your dog?
Preventing pustules involves good skin care and managing risk factors. Healthy skin is less likely to develop infections or inflammation.
- Regular grooming: Keeping your dog clean and brushing their coat removes dirt and reduces skin irritation.
- Parasite control: Use flea and tick preventatives year-round to avoid parasite-related skin problems.
- Balanced diet: Feeding a nutritious diet supports skin health and immune function.
- Allergy management: Identify and avoid allergens that trigger skin reactions in your dog.
Consistent care and monitoring help maintain your dog’s skin health and reduce the risk of pustules.
What home care can support treatment of pustules?
Alongside veterinary treatment, you can help your dog recover by providing proper home care. This supports healing and comfort.
- Keep affected areas clean: Gently clean pustules with vet-recommended solutions to remove crusts and prevent further infection.
- Prevent licking: Use an Elizabethan collar or other devices to stop your dog from licking or biting pustules.
- Follow medication schedule: Administer all prescribed medications exactly as directed by your vet for best results.
- Monitor progress: Watch for changes in pustules or new symptoms and report them to your vet promptly.
Good home care combined with veterinary treatment improves your dog’s recovery and comfort during pustule healing.
Conclusion
Pustules in dogs are often a sign of skin infections or irritation caused by bacteria, parasites, allergies, or other factors. Recognizing pustules early and understanding their causes helps you provide timely care.
Effective treatment usually involves antibiotics, parasite control, or allergy management guided by your veterinarian. Preventive care and proper home support are key to keeping your dog’s skin healthy and pustule-free.
What are pustules in dogs?
Pustules are small, pus-filled bumps on a dog’s skin caused by infections or inflammation. They indicate an underlying skin problem requiring attention.
Can allergies cause pustules in dogs?
Yes, allergies can cause skin inflammation and secondary infections that lead to pustule formation in dogs.
How long does it take for pustules to heal?
With proper treatment, pustules usually start improving within a week but may take several weeks to fully heal.
Are pustules contagious to other pets?
Some causes of pustules, like bacterial infections or parasites, can spread to other pets, so prompt treatment is important.
Can I treat pustules at home without a vet?
Home care can support treatment, but veterinary diagnosis and medication are essential for effective and safe pustule treatment.
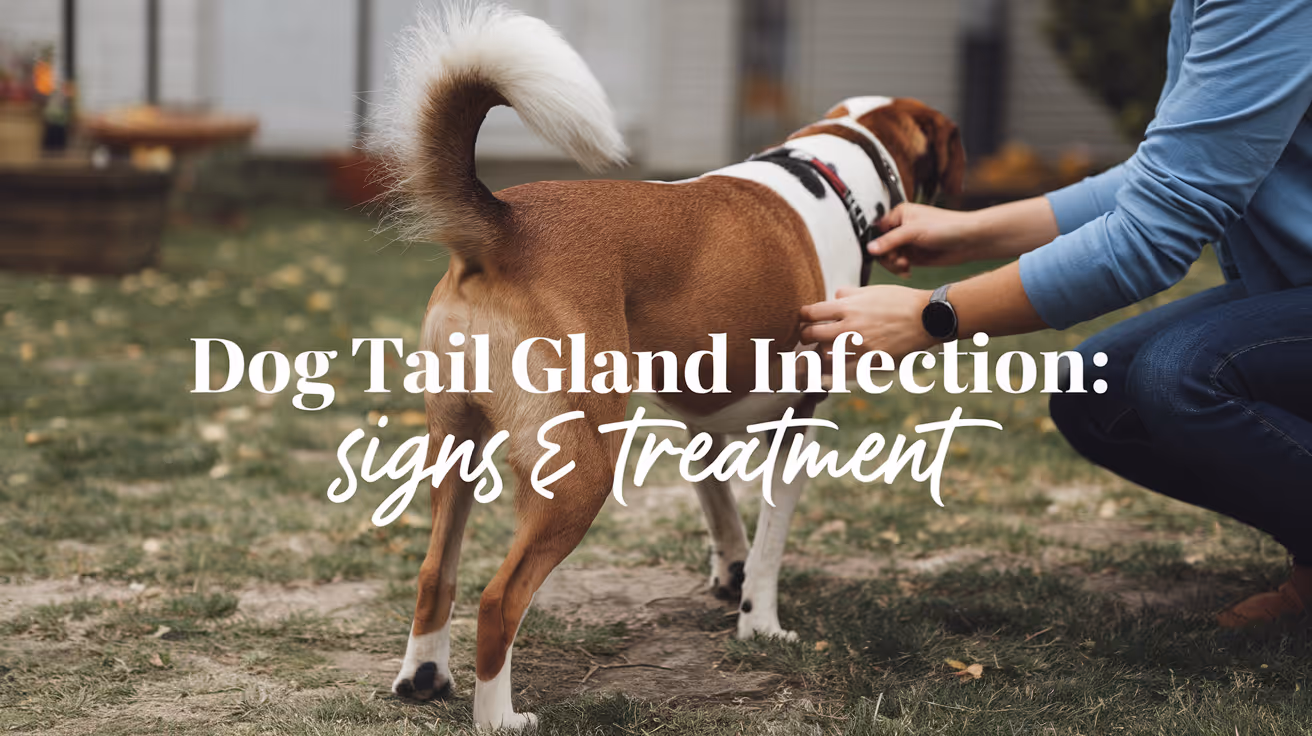
Dog Tail Gland Infection Symptoms and Treatment
Learn about dog tail gland infection symptoms, causes, and effective treatment options to keep your pet healthy and comfortable.
Dog tail gland infections can cause discomfort and health issues for your pet. Recognizing the symptoms early helps you seek proper treatment and prevent complications. This article explains the common signs of tail gland infections and the best ways to treat them.
Understanding dog tail gland infection symptoms and treatment is essential for every pet owner. You will learn how to identify infection signs, what causes these infections, and how veterinarians treat them effectively.
What are the common symptoms of a dog tail gland infection?
Identifying symptoms early helps prevent worsening infection. Tail gland infections often show visible and behavioral signs. You should watch your dog closely for any unusual changes around the tail area.
- Swelling and redness: The infected gland area usually appears swollen and red, indicating inflammation and irritation that need prompt attention.
- Discharge or pus: You may notice yellowish or greenish discharge oozing from the gland, which signals bacterial infection requiring treatment.
- Excessive licking: Dogs often lick the infected tail gland excessively to relieve discomfort, which can worsen the infection if untreated.
- Foul odor: A strong, unpleasant smell may come from the infected area due to bacterial growth and tissue breakdown.
These symptoms often appear together and worsen over time without treatment. Early veterinary consultation is important to avoid complications.
What causes tail gland infections in dogs?
Understanding the causes helps in prevention and treatment. Tail gland infections usually result from bacterial invasion of the gland due to various factors. These factors weaken the skin barrier or introduce bacteria.
- Poor grooming habits: Lack of regular cleaning around the tail can lead to dirt buildup and bacterial growth causing infection.
- Trauma or injury: Scratches, bites, or wounds near the tail gland allow bacteria to enter and cause infection.
- Underlying skin conditions: Allergies or dermatitis can irritate the skin, making it easier for infections to develop in the gland.
- Obesity or poor hygiene: Overweight dogs or those with poor hygiene may have difficulty keeping the tail area clean, increasing infection risk.
Identifying and managing these causes can help reduce the chance of tail gland infections in your dog.
How do veterinarians diagnose tail gland infections?
Veterinarians use a combination of physical exams and diagnostic tests to confirm tail gland infections. Accurate diagnosis ensures proper treatment and recovery.
- Physical examination: The vet inspects the tail area for swelling, redness, discharge, and pain to assess infection severity.
- Sample collection: Swabs of discharge or tissue samples may be taken to identify the bacteria causing the infection.
- Skin scrapings: These help rule out parasites or other skin diseases that might mimic infection symptoms.
- Imaging tests: In severe cases, X-rays or ultrasounds check for abscess formation or deeper tissue involvement.
These diagnostic steps help the vet decide the best treatment plan tailored to your dog's condition.
What are the effective treatment options for dog tail gland infections?
Treatment depends on infection severity and underlying causes. Most infections respond well to medical and supportive care. Prompt treatment reduces pain and prevents spread.
- Antibiotic therapy: Oral or topical antibiotics prescribed by the vet target the bacteria causing the infection and clear it effectively.
- Cleaning and flushing: Regular cleaning of the infected gland with antiseptic solutions helps remove debris and reduce bacterial load.
- Pain relief medications: Anti-inflammatory drugs may be given to reduce pain and swelling for your dog's comfort.
- Surgical drainage: In cases with abscesses, minor surgery may be needed to drain pus and promote healing.
Following the vet's instructions carefully during treatment ensures a faster recovery and reduces chances of recurrence.
Can dog tail gland infections be prevented?
Prevention focuses on good hygiene and early care. Keeping your dog's tail area clean and healthy reduces infection risk. Regular checks help catch problems early.
- Regular grooming: Clean your dog's tail area frequently to remove dirt and debris that can harbor bacteria.
- Prompt wound care: Treat any cuts or injuries near the tail immediately to prevent bacterial entry and infection.
- Manage skin conditions: Control allergies and dermatitis with vet guidance to maintain healthy skin around the tail.
- Maintain healthy weight: Avoid obesity to help your dog keep the tail area clean and reduce infection risk.
Good preventive care reduces the chance of tail gland infections and keeps your dog comfortable and healthy.
When should you see a vet for your dog's tail gland infection?
Knowing when to seek veterinary help is crucial. Early intervention improves outcomes and prevents complications. Watch for signs that need professional care.
- Persistent swelling or redness: If the tail gland remains swollen or red beyond a day or two, veterinary evaluation is necessary.
- Discharge or pus present: Any oozing from the gland indicates infection and requires prompt vet treatment.
- Behavioral changes: Excessive licking, biting, or signs of pain around the tail should prompt a vet visit.
- Foul smell or fever: A bad odor or fever suggests a worsening infection needing urgent medical attention.
Timely veterinary care helps your dog recover quickly and avoid serious health issues related to tail gland infections.
What home care can support your dog's recovery from tail gland infection?
Along with veterinary treatment, proper home care is important for healing. You can help your dog by maintaining cleanliness and comfort.
- Keep the area clean: Gently clean the infected tail gland with vet-approved antiseptic solutions as directed to prevent further infection.
- Prevent licking: Use an Elizabethan collar or other methods to stop your dog from licking and irritating the infected gland.
- Follow medication schedule: Administer all prescribed antibiotics and pain medications exactly as the vet instructs for best results.
- Monitor healing progress: Watch the infection site daily for improvement or worsening signs and report concerns to your vet promptly.
Consistent home care combined with veterinary treatment ensures your dog recovers fully and comfortably from tail gland infections.
Conclusion
Dog tail gland infection symptoms and treatment require timely attention to prevent pain and complications. Recognizing signs like swelling, discharge, and excessive licking helps you act quickly.
Effective treatment involves veterinary antibiotics, cleaning, and sometimes surgery. Preventive care and proper home management support your dog's recovery and health. Always consult your vet if you suspect a tail gland infection for the best care.
What causes dog tail gland infections?
Tail gland infections in dogs are caused by bacteria entering through wounds, poor hygiene, skin conditions, or trauma near the tail area.
How can I tell if my dog has a tail gland infection?
Look for swelling, redness, discharge, foul odor, and excessive licking around the tail gland as common infection signs.
What treatments do vets use for tail gland infections?
Veterinarians typically use antibiotics, cleaning, pain relief, and sometimes surgical drainage to treat tail gland infections.
Can I prevent tail gland infections in my dog?
Yes, regular grooming, wound care, managing skin issues, and maintaining healthy weight help prevent tail gland infections.
When should I take my dog to the vet for tail gland problems?
Visit the vet if swelling, discharge, pain, foul odor, or behavioral changes around the tail gland persist or worsen.
Modified Maquet Procedure vs TPLO Surgery
Compare Modified Maquet Procedure and TPLO surgery for canine cruciate ligament rupture treatment, including benefits, risks, and recovery.
Cruciate ligament rupture is a common cause of hind limb lameness in dogs. Choosing the right surgical treatment is crucial for your pet’s recovery and long-term joint health. Two popular surgeries are the Modified Maquet Procedure (MMP) and Tibial Plateau Leveling Osteotomy (TPLO).
This article compares Modified Maquet Procedure vs TPLO surgery to help you understand their differences, benefits, and what to expect during recovery. You will learn which surgery might suit your dog best based on clinical outcomes and surgical details.
What is the Modified Maquet Procedure?
The Modified Maquet Procedure is a surgical technique designed to stabilize the knee after cranial cruciate ligament rupture. It involves advancing a small bone segment on the tibia to change joint mechanics and reduce ligament stress.
This procedure aims to restore normal limb function with less bone cutting than other surgeries. It is often chosen for dogs with specific anatomical features or when a less invasive approach is preferred.
- Bone advancement technique: MMP uses a partial osteotomy to move a tibial fragment forward, altering joint forces to stabilize the knee without complete bone rotation.
- Less invasive surgery: The procedure requires smaller bone cuts and less soft tissue disruption, potentially reducing surgical trauma and recovery time.
- Use of titanium foam wedge: A titanium wedge is inserted to maintain the advanced bone position, providing stable fixation and promoting bone healing.
- Suitable patient selection: MMP is often recommended for dogs with moderate tibial plateau angles and good bone quality to optimize outcomes.
Overall, MMP offers a mechanical solution to cruciate rupture that preserves more bone and soft tissue compared to some other techniques.
What is TPLO surgery and how does it work?
Tibial Plateau Leveling Osteotomy (TPLO) is a widely used surgery for cranial cruciate ligament rupture in dogs. It involves cutting and rotating the tibial plateau to change the knee joint angle and neutralize ligament forces.
TPLO aims to restore normal joint stability by altering the biomechanics of the knee, allowing dogs to regain function and reduce pain.
- Complete tibial osteotomy: TPLO requires a full circular cut of the tibial plateau to rotate it and change the slope angle.
- Biomechanical stabilization: By leveling the tibial plateau, TPLO reduces the forward thrust on the tibia during weight-bearing, stabilizing the joint without replacing the ligament.
- Rigid fixation with plates: Specialized locking plates and screws secure the rotated bone segment to allow early weight-bearing and healing.
- Widely studied technique: TPLO has extensive clinical data supporting its effectiveness across many dog breeds and sizes.
TPLO remains a gold standard surgery for cruciate ligament rupture due to its predictable outcomes and ability to restore joint function.
How do the recovery times compare between MMP and TPLO?
Recovery time is an important factor when choosing between Modified Maquet Procedure and TPLO surgery. Both surgeries require careful post-operative care but differ in healing speed and rehabilitation protocols.
Understanding recovery expectations can help you prepare for your dog's post-surgical needs and improve outcomes.
- Faster bone healing with MMP: MMP’s partial osteotomy often results in quicker bone healing due to less bone disruption compared to TPLO’s full osteotomy.
- Early weight-bearing potential: Dogs undergoing MMP may begin partial weight-bearing sooner because of less invasive fixation and reduced pain.
- Longer rehabilitation for TPLO: TPLO typically requires 8 to 12 weeks of restricted activity and physical therapy to ensure proper bone healing and joint function.
- Similar long-term function: Despite differences in early recovery, both surgeries generally lead to comparable limb function after full healing.
Discussing recovery plans with your veterinarian will help tailor rehabilitation to your dog’s surgery type and individual needs.
What are the risks and complications of Modified Maquet Procedure?
Like all surgeries, the Modified Maquet Procedure carries risks and potential complications. Knowing these helps you monitor your dog closely and seek timely veterinary care if needed.
Understanding complications specific to MMP can guide your decision-making and post-operative management.
- Wedge displacement risk: The titanium wedge can shift if fixation is inadequate, requiring additional surgery to correct alignment.
- Infection possibility: Surgical site infections can occur but are minimized with proper sterile technique and post-op care.
- Delayed bone healing: Although less common, some dogs may experience slower bone union, prolonging recovery time.
- Implant irritation: The titanium wedge and screws may cause soft tissue irritation or discomfort in some cases.
Regular follow-up exams and radiographs help detect complications early and ensure successful healing after MMP.
What are the risks and complications of TPLO surgery?
TPLO surgery also has known risks that pet owners should understand before proceeding. Awareness of these complications helps in early detection and treatment.
Most complications are manageable with prompt veterinary intervention and proper post-op care.
- Fracture risk: The full tibial osteotomy can lead to bone fractures if excessive stress occurs during healing.
- Infection rates: Surgical site infections occur in a small percentage of cases but require antibiotics and sometimes implant removal.
- Implant failure: Plates or screws may loosen or break, especially if the dog is too active during recovery.
- Meniscal injury: Some dogs develop meniscal tears after TPLO, which may require additional surgery.
Close monitoring and adherence to activity restrictions reduce complication risks and promote successful TPLO outcomes.
Which surgery is better for large breed dogs?
Large breed dogs often have specific needs when treating cruciate ligament rupture due to their weight and joint stresses. Choosing between Modified Maquet Procedure and TPLO depends on multiple factors.
Understanding how each surgery performs in large breeds helps guide the best surgical choice for your dog.
- TPLO preferred for heavy dogs: TPLO’s strong fixation and biomechanical correction suit large breeds with high joint loads.
- MMP suitable for moderate sizes: MMP may be less ideal for very large dogs due to potential wedge displacement under heavy weight.
- Surgeon experience matters: Outcomes depend on surgeon skill and familiarity with each procedure for large breed patients.
- Individual assessment required: Your vet will consider bone quality, tibial slope, and overall health when recommending surgery.
Large breed dogs often benefit from TPLO, but some may be candidates for MMP after thorough evaluation.
How do costs compare between Modified Maquet Procedure and TPLO?
Cost is a practical consideration when deciding on cruciate ligament surgery. Both Modified Maquet Procedure and TPLO have different expense profiles based on surgical complexity and implant costs.
Knowing typical costs helps you plan financially and discuss options with your veterinarian.
- TPLO generally more expensive: TPLO involves specialized plates and longer surgery time, increasing overall cost.
- MMP may reduce implant costs: The titanium wedge and less extensive fixation can lower implant expenses compared to TPLO.
- Hospital fees vary: Anesthesia, hospitalization, and rehabilitation fees affect total cost regardless of surgery type.
- Insurance coverage differs: Some pet insurance plans cover TPLO more commonly due to its widespread use.
Request detailed cost estimates from your vet to understand financial commitments for each surgery option.
Conclusion
Choosing between Modified Maquet Procedure vs TPLO surgery depends on your dog’s size, anatomy, and your goals for recovery. Both surgeries effectively treat cruciate ligament rupture but differ in technique, risks, and recovery time.
Discussing options with your veterinary surgeon will help select the best approach tailored to your dog’s needs. Understanding these differences empowers you to make informed decisions for your pet’s health and mobility.
FAQs
Is the Modified Maquet Procedure less painful than TPLO?
MMP may cause less post-operative pain due to smaller bone cuts and less soft tissue trauma, but pain levels vary by individual dog and surgical technique.
Can dogs return to normal activity after TPLO?
Yes, most dogs regain full function and return to normal activity after TPLO with proper rehabilitation and healing time.
Are there breed restrictions for Modified Maquet Procedure?
MMP is generally recommended for medium-sized dogs with specific tibial anatomy; very large or heavy breeds may not be ideal candidates.
How long does it take for bone healing after TPLO?
Bone healing after TPLO typically takes 8 to 12 weeks, during which activity must be restricted to allow proper recovery.
Is physical therapy necessary after these surgeries?
Physical therapy supports muscle strength and joint mobility after both MMP and TPLO, improving recovery outcomes and reducing complications.
Bed Sores on Dogs Causes Treatment and Prevention
Learn about bed sores on dogs, including causes, treatments, and prevention tips to keep your pet healthy and comfortable.
Bed sores on dogs are painful skin injuries that develop when a dog lies in one position for too long. These sores, also called pressure ulcers, happen when constant pressure cuts off blood flow to the skin. Bed sores can cause discomfort and lead to serious infections if not treated promptly.
This article explains what causes bed sores in dogs, how to recognize them, and the best ways to treat and prevent these painful wounds. Understanding this condition helps you keep your dog safe and comfortable, especially if they have limited mobility or health issues.
What causes bed sores on dogs?
Bed sores in dogs happen mainly because of prolonged pressure on certain body parts. When blood flow is blocked, the skin and underlying tissues start to break down. Dogs with limited movement or health problems are at higher risk.
Several factors contribute to bed sores in dogs. Knowing these helps you identify if your dog is at risk and take early action.
- Immobility risk: Dogs that cannot move well due to age, injury, or illness are more likely to develop pressure sores from staying in one position too long.
- Thin skin: Older dogs or those with poor nutrition may have fragile skin that breaks down more easily under pressure.
- Hard surfaces: Lying on rough or hard floors increases pressure points, causing sores to form faster than on soft bedding.
- Moisture buildup: Wet or dirty fur from urine or saliva can weaken skin and increase the chance of sores developing.
Understanding these causes helps you watch for early signs and protect your dog from bed sores.
How can you recognize bed sores on your dog?
Spotting bed sores early is important to prevent worsening damage. These sores usually appear on bony areas like elbows, hips, and hocks where pressure is greatest. They start as red, irritated patches and can progress to open wounds.
Look carefully for these signs to catch bed sores early:
- Redness and swelling: The skin over pressure points looks red, swollen, or warm, showing early irritation.
- Hair loss: Fur may fall out around the sore area due to skin damage or constant licking.
- Open wounds: Bed sores can break through the skin, creating painful ulcers that may bleed or ooze.
- Behavior changes: Your dog may lick, bite, or avoid lying down because of discomfort or pain.
If you notice any of these signs, consult your veterinarian quickly to prevent infection and further damage.
What treatments are available for bed sores on dogs?
Treating bed sores in dogs requires cleaning the wound, relieving pressure, and supporting healing. Early treatment improves recovery and reduces the risk of infection.
Your vet will guide you through the best treatment options based on the sore’s severity and your dog’s health.
- Wound cleaning: Regular gentle cleaning with vet-approved solutions removes dirt and bacteria to promote healing.
- Pressure relief: Using soft bedding and repositioning your dog often reduces pressure on sore areas.
- Medications: Antibiotics or pain relievers may be prescribed to treat infection and reduce discomfort.
- Surgical care: Severe sores might need surgery to remove dead tissue and close wounds for proper healing.
Following your vet’s instructions carefully is key to successful treatment and recovery.
How can you prevent bed sores in dogs?
Preventing bed sores is easier than treating them. Keeping your dog comfortable and moving reduces pressure on vulnerable skin. Good hygiene and nutrition also support skin health.
Here are practical steps to prevent bed sores in dogs:
- Regular repositioning: Change your dog’s lying position every two hours to avoid prolonged pressure on one spot.
- Soft bedding: Provide thick, cushioned bedding to protect bony areas from hard surfaces.
- Skin care: Keep your dog’s skin clean and dry to prevent irritation and breakdown.
- Healthy diet: Feed a balanced diet rich in vitamins and minerals to maintain strong skin and tissue repair.
These simple measures help keep your dog’s skin healthy and prevent painful sores.
When should you see a vet for your dog’s bed sores?
It is important to seek veterinary care as soon as you notice any signs of bed sores. Early treatment prevents complications and speeds healing.
Visit your vet if your dog shows:
- Open wounds: Any ulcer or sore that breaks the skin needs professional cleaning and care.
- Signs of infection: Redness, swelling, pus, or foul odor around the sore indicate infection requiring antibiotics.
- Persistent pain: If your dog shows ongoing discomfort or refuses to lie down, prompt evaluation is needed.
- Underlying illness: Dogs with mobility issues or chronic diseases should have regular skin checks to catch sores early.
Timely veterinary care improves outcomes and prevents serious health problems.
What home care can support healing of bed sores?
Along with veterinary treatment, you can help your dog heal faster at home. Proper care reduces pain and prevents new sores from forming.
Follow these home care tips:
- Keep wounds clean: Follow your vet’s instructions for gentle wound cleaning and dressing changes to avoid infection.
- Encourage movement: Help your dog change positions often and take short walks if possible to improve circulation.
- Maintain hygiene: Regularly clean bedding and keep your dog’s fur dry to prevent moisture buildup.
- Monitor progress: Check sores daily for signs of healing or worsening and report concerns to your vet.
Consistent home care is essential for a smooth recovery and your dog’s comfort.
Conclusion
Bed sores on dogs are painful wounds caused by prolonged pressure and poor circulation. They mostly affect dogs with limited mobility or health issues. Recognizing early signs and seeking veterinary care quickly can prevent serious complications.
Treatment involves wound care, pressure relief, and sometimes medication or surgery. Preventing bed sores with regular repositioning, soft bedding, and good hygiene is the best approach. With proper care, your dog can heal comfortably and avoid these painful sores.
What are the first signs of bed sores in dogs?
Early signs include redness, swelling, and warmth over bony areas. You may also notice hair loss or your dog licking the affected spot frequently.
Can bed sores on dogs heal without treatment?
Minor sores may improve with pressure relief, but most need veterinary care to prevent infection and promote proper healing.
How often should I reposition my dog to prevent bed sores?
Reposition your dog at least every two hours to reduce pressure on vulnerable skin and improve blood flow.
Is soft bedding enough to prevent bed sores in dogs?
Soft bedding helps but should be combined with regular repositioning and skin care for effective prevention.
When is surgery needed for dog bed sores?
Surgery is necessary for deep or infected sores that do not heal with medical treatment to remove damaged tissue and close wounds.
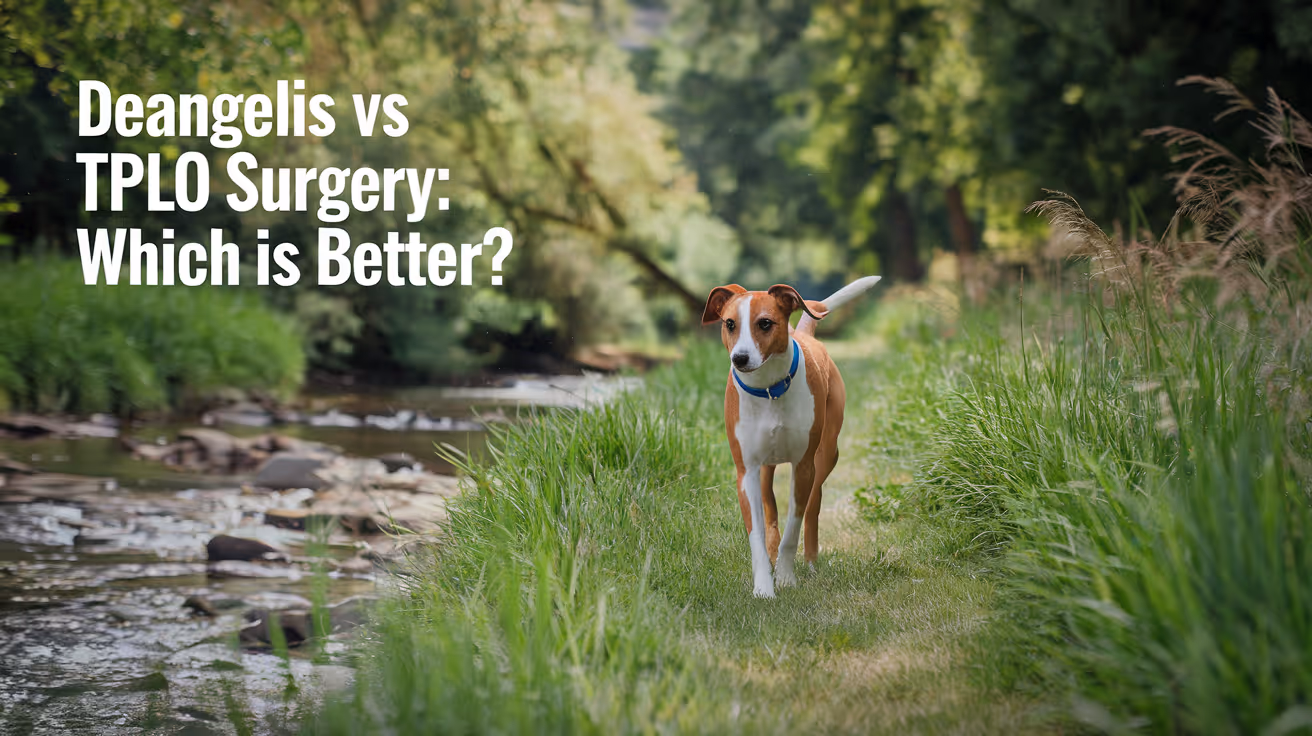
DeAngelis vs TPLO Surgery for Dogs
Compare DeAngelis and TPLO surgery for dogs, exploring benefits, risks, recovery, and costs to help pet owners choose the best treatment.
When a dog suffers a torn cranial cruciate ligament (CCL), choosing the right surgery is crucial for recovery. Many pet owners face the decision between DeAngelis surgery and TPLO surgery for dogs. Understanding these options helps you make the best choice for your pet’s health and mobility.
This article explains the differences between DeAngelis and TPLO surgeries, including how each works, their benefits, risks, recovery times, and costs. You will learn what to expect and how to care for your dog after surgery.
What is DeAngelis surgery for dogs?
DeAngelis surgery is a technique to stabilize a dog's knee after a CCL tear. It uses a suture to mimic the ligament's function and prevent joint instability. This method is less invasive than some alternatives and is often chosen for smaller or less active dogs.
- Surgical method: DeAngelis surgery uses a strong suture placed outside the joint to stabilize the knee, avoiding bone cutting or implants.
- Purpose: It aims to restore knee stability by replacing the damaged ligament’s function with a synthetic ligament substitute.
- Suitability: Best for small to medium dogs or those with lower activity levels who need less aggressive repair.
- Recovery time: Typically shorter than TPLO, with less post-operative pain and quicker return to normal activities.
DeAngelis surgery is a simpler option that can work well for many dogs. However, it may not be ideal for larger or very active dogs because the suture can stretch or break over time.
What is TPLO surgery for dogs?
TPLO (Tibial Plateau Leveling Osteotomy) surgery is a more advanced procedure to fix CCL tears. It changes the angle of the tibia bone to stabilize the knee without relying on the ligament itself. This method is common for larger or active dogs needing strong, long-term support.
- Surgical method: TPLO involves cutting and rotating the tibia bone to change its slope, then fixing it with a metal plate and screws.
- Purpose: It stabilizes the knee by altering joint mechanics, reducing the need for the ligament to prevent slipping.
- Suitability: Ideal for large, active dogs or those with severe ligament damage requiring strong mechanical support.
- Recovery time: Longer than DeAngelis surgery, often 8 to 12 weeks, with strict rest and rehabilitation needed.
TPLO surgery is more invasive but provides durable stability. It is often recommended for dogs that put high stress on their knees or have complex injuries.
How do DeAngelis and TPLO surgeries compare in effectiveness?
Both surgeries aim to restore knee stability and reduce pain. Their effectiveness depends on the dog’s size, activity level, and injury severity. Studies show TPLO often provides better long-term outcomes for large dogs, while DeAngelis works well for smaller dogs.
- Long-term stability: TPLO offers stronger, more reliable knee stability for active or large dogs compared to DeAngelis sutures.
- Risk of re-injury: DeAngelis surgery has a higher chance of suture failure or stretching, increasing re-injury risk in active dogs.
- Functional recovery: Both surgeries improve mobility, but TPLO may allow dogs to return to high-impact activities more safely.
- Complication rates: TPLO carries higher surgical risks due to bone cutting, but DeAngelis may have more late failures needing revision.
Choosing the right surgery depends on balancing these factors with your dog’s lifestyle and health. Your veterinarian can help decide which option fits best.
What are the risks and complications of DeAngelis and TPLO surgeries?
All surgeries carry some risks. Understanding potential complications helps you prepare and watch for problems during recovery. Both DeAngelis and TPLO surgeries have unique risks related to their techniques.
- Infection risk: Both surgeries can cause infection, but TPLO’s longer surgery time and implants increase this risk slightly.
- Implant issues: TPLO uses metal plates and screws that may loosen or cause irritation, sometimes requiring removal.
- Suture failure: DeAngelis surgery sutures can stretch or break, leading to joint instability and possible repeat surgery.
- Delayed healing: TPLO’s bone cutting requires time to heal, and some dogs may have delayed or poor bone healing.
Close post-operative monitoring and following veterinary advice reduce risks. Early detection of complications improves outcomes.
How long is recovery after DeAngelis vs TPLO surgery?
Recovery time varies between the two surgeries. DeAngelis surgery generally allows faster healing, while TPLO requires more time and rehabilitation. Knowing what to expect helps you plan care and support for your dog.
- Initial rest period: DeAngelis dogs usually need 4 to 6 weeks of restricted activity, while TPLO dogs require 8 to 12 weeks.
- Physical therapy: Both surgeries benefit from controlled exercises, but TPLO often needs more intensive rehab to regain full function.
- Return to activity: DeAngelis dogs may resume normal walks sooner, but high-impact activities should wait longer.
- Follow-up visits: TPLO patients need regular X-rays to monitor bone healing, while DeAngelis follow-up focuses on joint stability.
Patience and careful management during recovery improve success for both surgeries. Avoiding early overuse prevents setbacks.
How much do DeAngelis and TPLO surgeries cost for dogs?
Cost is a major factor for many owners. DeAngelis surgery is generally less expensive than TPLO because it is less complex and requires fewer implants. Knowing typical costs helps you prepare financially.
- DeAngelis surgery cost: Usually ranges from $1,200 to $2,500 depending on location and clinic fees.
- TPLO surgery cost: Typically costs between $3,500 and $5,000 due to implants, longer surgery, and follow-up care.
- Additional expenses: Both surgeries may require pre-surgical tests, pain medications, and physical therapy adding to total cost.
- Insurance coverage: Some pet insurance plans cover part of the surgery and rehab costs, reducing out-of-pocket expenses.
Discuss costs upfront with your veterinarian and consider financing or insurance options to manage expenses.
What factors should influence choosing DeAngelis or TPLO surgery?
Choosing the best surgery depends on several factors related to your dog’s condition and lifestyle. Understanding these helps you make an informed decision with your vet.
- Dog’s size and weight: Larger dogs often benefit more from TPLO due to stronger knee stabilization needs.
- Activity level: Active or working dogs usually require TPLO for durable repair, while less active dogs may do well with DeAngelis.
- Severity of injury: Complex or chronic ligament tears may need TPLO, while fresh, simple tears can be treated with DeAngelis.
- Owner budget and resources: DeAngelis is less costly and has shorter recovery, which may suit some owners better.
Discuss these factors with your veterinarian to choose the surgery that best fits your dog’s needs and your situation.
Conclusion
DeAngelis and TPLO surgeries both treat cranial cruciate ligament tears in dogs but differ in technique, recovery, and cost. DeAngelis is less invasive and cheaper, suited for smaller or less active dogs. TPLO is more complex, offering stronger stability for large or active dogs.
Choosing the right surgery depends on your dog’s size, activity, injury severity, and your budget. Working closely with your veterinarian ensures the best outcome and helps your dog return to a happy, active life.
FAQs
Is DeAngelis surgery painful for dogs?
DeAngelis surgery causes some pain, but it is generally less painful than TPLO. Pain management and proper care help dogs recover comfortably.
Can dogs fully recover after TPLO surgery?
Yes, most dogs fully recover after TPLO surgery with proper rest and rehabilitation, often returning to normal or high activity levels.
How long should I restrict my dog's activity after DeAngelis surgery?
Activity should be limited for about 4 to 6 weeks after DeAngelis surgery to allow healing and prevent suture failure.
Are there any long-term problems after TPLO surgery?
Some dogs may develop arthritis or implant-related issues after TPLO, but many live active lives with minimal problems.
Can both surgeries be done on the same dog if needed?
In rare cases, if one surgery fails, the other may be performed later. Your vet will evaluate the best option based on your dog's condition.
What Causes TPLO Surgery to Be Needed in Dogs
Learn what causes TPLO surgery to be needed in dogs, including common injuries and conditions leading to this important orthopedic procedure.
TPLO surgery is a common orthopedic procedure used to treat dogs with a torn cranial cruciate ligament (CCL). This injury causes pain and instability in the knee joint, making it difficult for dogs to walk or run normally. Understanding what causes TPLO surgery to be needed helps pet owners recognize symptoms early and seek timely veterinary care.
In this article, you will learn about the main causes of TPLO surgery in dogs, including ligament injuries, risk factors, and how these problems affect your dog's mobility. We will also explain why TPLO surgery is often the best treatment option to restore your dog's quality of life.
What is TPLO surgery and why is it needed in dogs?
TPLO stands for Tibial Plateau Leveling Osteotomy. It is a surgical technique used to stabilize the knee joint after a cranial cruciate ligament injury. This ligament is crucial for knee stability, and when it tears, the joint becomes unstable and painful.
TPLO surgery changes the angle of the tibial plateau to reduce strain on the damaged ligament. This helps restore normal knee function and reduces arthritis progression.
- Ligament stabilization: TPLO surgery stabilizes the knee by altering bone alignment, which compensates for the torn ligament and prevents abnormal joint movement.
- Pain reduction: By stabilizing the knee, TPLO reduces pain caused by ligament instability and inflammation in the joint.
- Improved mobility: Dogs regain the ability to walk, run, and play normally after recovery from TPLO surgery.
- Arthritis prevention: Early TPLO surgery helps slow down arthritis development by restoring joint stability and reducing cartilage damage.
TPLO surgery is often recommended when conservative treatments like rest and medication fail to improve the dog's condition or when the ligament injury is severe.
What causes cranial cruciate ligament tears in dogs?
The main reason dogs need TPLO surgery is a torn cranial cruciate ligament (CCL). This ligament connects the femur to the tibia and keeps the knee stable during movement. When it tears, the knee becomes unstable and painful.
Several factors can cause or contribute to CCL tears in dogs, including trauma, genetics, and lifestyle.
- Trauma or injury: Sudden twisting or impact to the knee during activities like running or jumping can cause the ligament to tear partially or completely.
- Genetic predisposition: Some breeds, such as Labradors and Rottweilers, are more prone to CCL injuries due to inherited joint structure weaknesses.
- Obesity: Excess weight increases stress on the knee joints, making ligament damage more likely over time.
- Age-related degeneration: Ligaments can weaken with age, leading to gradual tears even without obvious trauma.
Understanding these causes helps pet owners take preventive measures and recognize early signs of ligament injury.
How do risk factors increase the need for TPLO surgery?
Certain risk factors make dogs more likely to suffer CCL tears that require TPLO surgery. These factors affect the dog's joint health and ligament strength.
By knowing these risks, you can better protect your dog and reduce the chance of needing surgery.
- Breed susceptibility: Large and active breeds have a higher risk of ligament injury due to their size and activity levels.
- Excessive activity: High-impact activities or repetitive jumping can strain the knee ligaments and increase injury risk.
- Joint conformation: Dogs with abnormal knee angles or joint shapes may experience uneven ligament stress leading to tears.
- Previous injuries: Dogs with past knee injuries or instability are more prone to ligament rupture and may require surgery.
Managing these risk factors through weight control, controlled exercise, and regular veterinary checkups can help prevent ligament injuries.
What symptoms indicate a dog might need TPLO surgery?
Recognizing symptoms of a torn cranial cruciate ligament is crucial for early diagnosis and treatment. If your dog shows signs of knee pain or instability, a veterinary exam is needed to determine if TPLO surgery is necessary.
Common symptoms include limping, swelling, and difficulty moving.
- Limping or lameness: Dogs often favor the injured leg and avoid putting weight on it due to pain and instability.
- Swelling around the knee: Inflammation from ligament injury causes visible swelling and warmth in the joint area.
- Difficulty standing or climbing stairs: Knee pain and weakness make movements like standing up or climbing challenging.
- Decreased activity or reluctance to play: Dogs may become less active because of discomfort and joint instability.
If you notice these signs, consult your veterinarian promptly to discuss diagnostic options and treatment plans.
How is TPLO surgery performed to fix ligament injuries?
TPLO surgery involves cutting and rotating the top of the tibia bone to change the knee joint angle. This reduces the force on the damaged ligament and stabilizes the joint.
The procedure requires precise surgical techniques and specialized equipment to ensure proper healing and function.
- Bone cutting and rotation: The surgeon cuts the tibial plateau and rotates it to a more stable angle to reduce ligament strain.
- Plate and screw fixation: A metal plate and screws secure the bone in its new position to allow healing.
- Soft tissue repair: Damaged ligaments and surrounding tissues may be trimmed or repaired during surgery.
- Postoperative care: Strict rest and rehabilitation are necessary to ensure proper healing and regain mobility.
TPLO surgery is highly effective but requires skilled surgeons and careful postoperative management for the best outcomes.
What are the alternatives to TPLO surgery for dogs with ligament injuries?
While TPLO surgery is often the best option for severe ligament tears, some alternatives exist depending on the dog's size, age, and injury severity. These options may be less invasive but might not provide the same long-term stability.
Understanding alternatives helps owners make informed decisions with their veterinarians.
- Conservative management: Rest, pain medication, and physical therapy may help mild ligament injuries heal without surgery.
- Extracapsular repair: A surgical technique using sutures outside the joint to stabilize the knee, often used in smaller dogs.
- Tibial Tuberosity Advancement (TTA): Another surgical method that changes knee mechanics to reduce ligament strain, similar to TPLO.
- Stem cell therapy: Emerging treatments aim to promote ligament healing but are still experimental and not widely available.
Discussing all options with your veterinarian ensures the best treatment plan tailored to your dog's needs.
Conclusion
TPLO surgery is needed in dogs primarily due to cranial cruciate ligament tears that cause knee instability and pain. These injuries result from trauma, genetics, obesity, and other risk factors that weaken the ligament over time.
Recognizing symptoms early and understanding the causes helps pet owners seek timely veterinary care. TPLO surgery offers an effective solution to restore knee stability, reduce pain, and improve mobility. Alternative treatments exist but may not provide the same long-term benefits. Always consult your veterinarian to choose the best option for your dog’s health and quality of life.
What is the recovery time after TPLO surgery in dogs?
Recovery usually takes 8 to 12 weeks with strict rest and controlled exercise. Physical therapy can help speed healing and improve joint function.
Can small breed dogs need TPLO surgery?
Yes, although less common, small dogs with severe ligament tears may require TPLO or alternative surgeries for knee stabilization.
Is TPLO surgery painful for dogs?
Postoperative pain is managed with medications. Most dogs recover well and experience less pain than before surgery once healed.
How can I prevent my dog from needing TPLO surgery?
Maintain a healthy weight, avoid high-impact activities, and schedule regular veterinary checkups to monitor joint health.
What are the risks of not treating a torn cranial cruciate ligament?
Untreated ligament tears cause chronic pain, worsening arthritis, and decreased mobility, severely affecting your dog’s quality of life.
Sustainable Vet | Copyright ©2026 | All Rights Reserved

