

Protecting
Pets, People & Planet
Join a group of veterinarians leveraging the latest technologies to deliver excellent care to their patients while being a responsible and positive force for their local and global communities.
100% secure. We do not share your information


Recent Articles
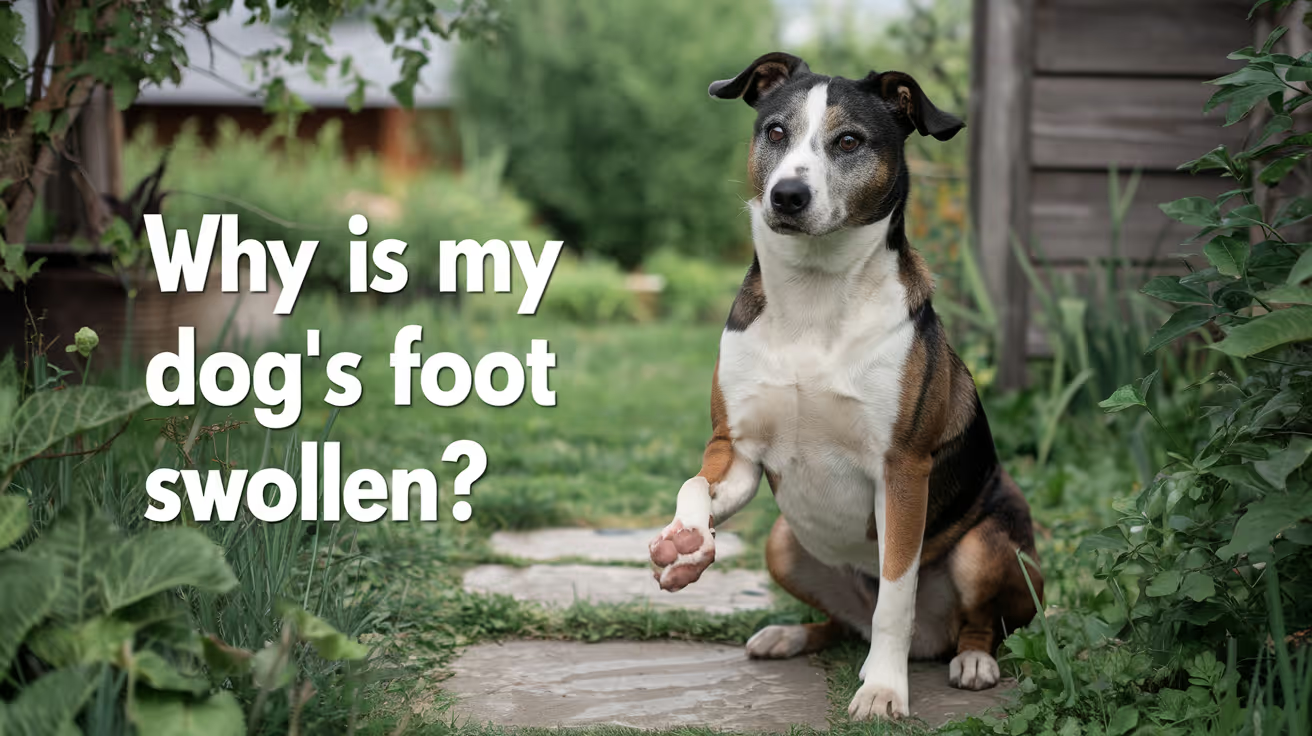
Why Is My Dog's Foot Swollen?
Discover why your dog's foot is swollen, common causes, treatments, and when to see a vet for proper care.
A swollen dog foot is one of the most common reasons owners call their vet. It can be as simple as a bee sting or as serious as a deep infection or bone tumor. The location, speed of onset, and other symptoms all help narrow down the cause.
This guide covers every common cause, how to assess severity at home, and the exact signs that mean your dog needs same-day care.
Quick answer: A swollen dog foot usually has a local cause: injury, insect sting, foreign object, or infection. Warm, increasing, or discharging swelling needs same-day vet care. Multiple swollen paws suggest allergies.
Key takeaways
- Single-paw swelling almost always has a local cause: injury, sting, foreign body, or infection
- Interdigital furunculosis (infected hair follicle cysts between toes) is among the most misidentified causes of recurring paw swelling
- Foreign objects like foxtails and glass splinters can migrate deep into tissue if left untreated
- Pododermatitis is the clinical term for inflamed paw skin; allergies are the most common underlying driver
- Swelling spreading up the leg or paired with face or neck swelling is an emergency requiring immediate care
- Most mild swelling from a sting or minor sprain improves within 24 to 48 hours with rest and monitoring
How to assess your dog's swollen foot before calling the vet
Before looking up causes, do a quick home assessment. This takes two minutes and tells you how urgent the situation is.
Step 1: Which paw?One paw = likely local cause. All four paws = likely allergic or systemic.
Step 2: Feel for heat.Warm or hot tissue means active inflammation or infection.
Step 3: Look between every toe.Redness, swelling between the digits, or visible nodules between the toes points to interdigital furunculosis or a foreign body.
Step 4: Check the pads.Burns appear as red, blistered, or peeling pad tissue. Cuts and punctures are often visible on the pad surface.
Step 5: Look at each nail.A broken nail or swollen nail bed causes localized pain and swelling at the toe tip.
VCA Animal Hospitals: "A deeper infection, like an abscess, will appear as a warm, soft to mildly firm swelling under the skin."
8 common causes of a swollen foot in dogs
1. Injury or trauma
Sprains, cuts, fractured toes, torn nails, and pad burns are the most frequent causes of sudden single-paw swelling. Dogs running on rough, hot, or icy terrain are especially prone.
PetMD notes that pad burns are particularly common in summer: check the pads after any walk on hot pavement. If your palm cannot hold against the pavement for five seconds, it is too hot for your dog's feet.
Signs: sudden lameness after activity, localized swelling, visible wound or bruising.
2. Foreign object
Thorns, glass, foxtails, and grass awns lodge between the toes or penetrate the pad. The body mounts an inflammatory response around the object, causing swelling that worsens over days.
SpectrumCare: "Foxtails and grass awns can lodge between the toes or in the pad and trigger pain, swelling, and infection."
Foxtails are particularly dangerous because they are barbed and can migrate deeper into tissue over days, eventually requiring surgical removal. If you cannot see and safely remove the object, do not probe. See a vet.
3. Insect sting or bite
Bees, wasps, fire ants, and spiders cause rapid single-paw swelling that appears within minutes of the sting. The paw may look puffy and your dog may lick or hold it up.
Dyer Animal Clinic advises watching for anaphylaxis signs: hives, difficulty breathing, excessive swelling spreading beyond the paw. These require emergency care immediately.
Localized sting swelling that stays in the paw and is not worsening can be monitored at home for 24 to 48 hours.
4. Infection: bacterial and fungal
Bacterial or fungal infections enter through cuts, puncture wounds, or damaged skin. Infected paws are typically warm, red, swollen, and often have an odor or discharge. VCA lists the visual signs: "Skin infections on the feet may result in red, moist lesions between the toes."
Pododermatitis (inflammation of the paw skin) is the umbrella clinical term. Common causes include:
- Secondary bacterial infection from chronic licking
- Yeast overgrowth in skin folds between toes
- Fungal infections (ringworm can affect paws)
- Demodectic mange (mite overgrowth)
Pododermatitis does not resolve without treatment. Antibiotics, antifungal medication, or both are typically required.
5. Interdigital furunculosis
This is one of the most commonly missed causes of recurring paw swelling. Interdigital furunculosis occurs when hair follicles between the toes become infected, forming painful reddish-purple nodules that may rupture and drain.
AKC notes that the condition is especially prevalent in short-coated, heavyset breeds: Bulldogs, Labrador Retrievers, and Chinese Shar-Pei are among the most commonly affected. Chronic licking due to allergies is a major driver.
Signs: swollen, painful nodules between the toes, draining tracts, recurrent swelling in the same location.
For how furuncles between the toes connect to abscess formation, see abscess as a cause of limb swelling.
6. Allergic reaction and pododermatitis
Environmental allergens (pollen, grass, lawn chemicals, road salt) and food allergies frequently cause paw inflammation. Dogs with allergies lick their feet chronically, creating secondary infection on top of the allergic reaction.
Wakefield Pet Vet: "Allergic reactions typically cause itching, redness, and sometimes blistering between the toes or on paw pads."
Allergic paw swelling usually affects multiple paws. It tends to recur seasonally or after contact with the trigger substance. Dogs with seasonal allergies often have their worst paw symptoms in spring and fall.
7. Bursitis
Bursae are small fluid-filled sacs that cushion joints. Repeated pressure on bony prominences, especially the elbow and hock, can cause bursitis. Affected joints may appear as soft, fluctuant swellings near a joint.
For how bursitis specifically produces foot and joint swelling, see bursitis as a common cause of foot swelling.
8. Cysts, tumors, and nail bed disease
Cysts, mast cell tumors, and subungual (under-nail) tumors can all present as localized swelling on or near the foot. Petcube notes that toenail tumors are more prevalent in large black-coated breeds such as Standard Poodles, Gordon Setters, and Schnauzers.
A lump that is growing, firm, or pigmented should always be evaluated by a vet rather than monitored at home.
For an overview of lumps that cause swelling on the legs, see lumps that can cause swelling.
Severity triage: what to do right now
Home care for mild cases
For minor swelling without infection signs:
- Keep the dog calm and limit walking
- Soak the paw in warm (not hot) water with Epsom salts for 10 minutes. PetMD recommends this as an excellent short-term measure regardless of cause.
- Gently clean any visible wound with mild soap and warm water
- Apply a cool damp cloth for 10 to 15 minutes to reduce swelling from sprains or stings
- Do not apply antibiotic ointments without vet guidance some formulations are toxic to dogs if licked
For pressure-related paw and leg swelling in dogs that rest in one position for extended periods, see pressure-related swelling in dogs.
Frequently asked questions
How do I treat my dog's swollen paw at home?
For mild swelling with no wound or discharge, rest the dog and soak the paw in warm Epsom salt water for 10 minutes. Check carefully for a foreign object or insect stinger. Do not use human antibiotic creams without vet guidance. If swelling has not reduced within 24 to 48 hours or is getting worse, contact your vet.
When should I be worried about my dog's swollen paw?
Be concerned immediately if the swelling is warm, increasing, or has discharge or odor. Call the vet the same day if your dog refuses to bear weight, if the swelling is spreading up the leg, or if there is any sign of an allergic reaction such as facial swelling or breathing difficulty.
What can I give my dog for a swollen paw?
Do not give human pain medications (ibuprofen, acetaminophen, aspirin) to dogs; many are toxic. For minor swelling, warm Epsom salt soaks are safe and effective for short-term relief. Your vet can prescribe appropriate anti-inflammatory medication if needed after examining the paw.
My dog's foot was normal this morning and is swollen now. What happened?
Sudden single-paw swelling most often means an insect sting, a foreign object picked up during activity, or a minor sprain. Check each toe carefully for a stinger, thorn, or visible wound. If swelling is mild and localized, monitor for 24 hours. If increasing or painful, call the vet the same day.
Can swelling in a dog's foot go away on its own?
Minor swelling from a bee sting or small sprain typically resolves within 24 to 48 hours with rest. Infections, foreign objects, interdigital furunculosis, and bursitis do not resolve without treatment. If swelling has not improved within 48 hours, veterinary assessment is needed.
My dog's foot smells bad and is swollen. Is that serious?
Yes. Odor from a swollen paw strongly indicates infection. A foul smell means bacteria are actively present. Common sources include interdigital furunculosis, a nail bed infection, or an abscess. This requires prompt veterinary treatment and should not be left to resolve on its own.
Resources
- PetMD. Dogs Swollen Paws: Causes and Treatments. petmd.com
- VCA Animal Hospitals. First Aid for Limping Dogs. vcahospitals.com
- AKC. Pododermatitis on Dog Paw: Causes, Symptoms and Treatment. akc.org
- SpectrumCare. Paw Swelling in Dogs. spectrumcare.pet
- Dyer Animal Clinic. Reasons Your Dog's Paw is Swollen. dyeranimalclinic.com
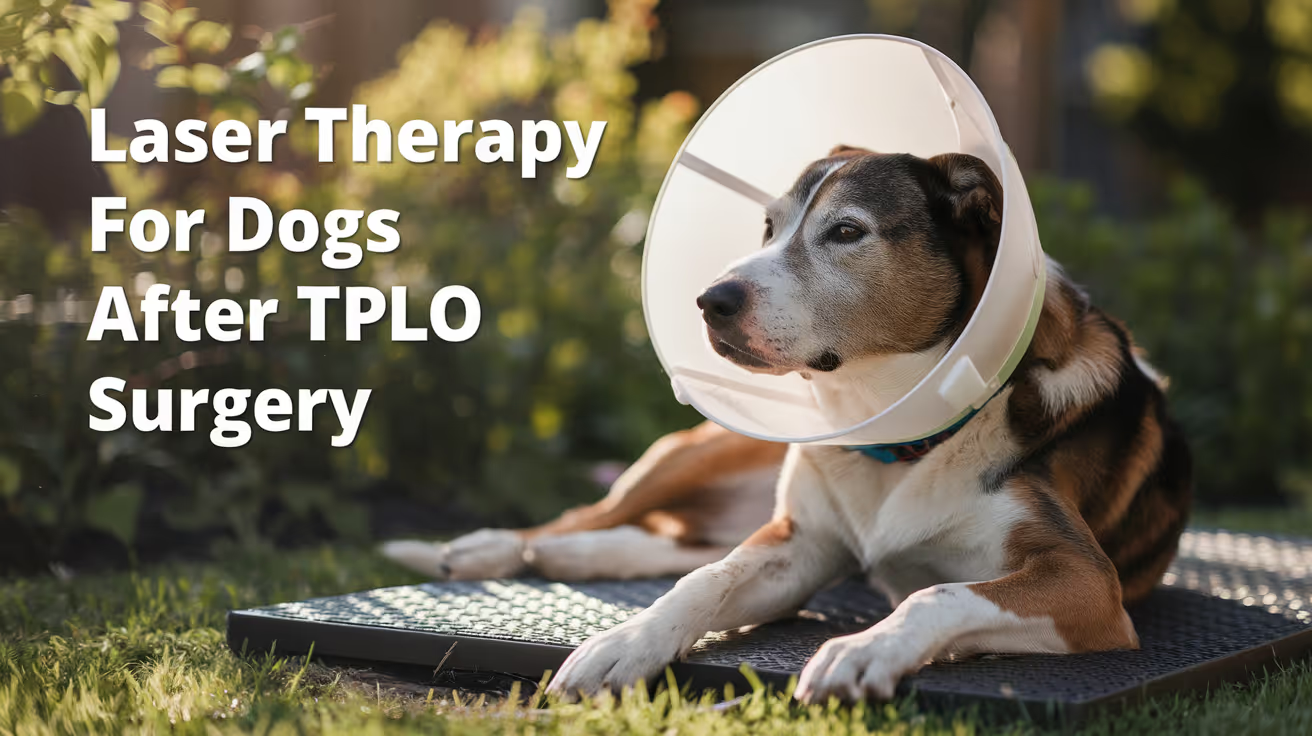
Laser Therapy for Dogs After TPLO Surgery
Learn how laser therapy helps dogs recover faster and with less pain after TPLO surgery for cruciate ligament repair.
Laser therapy also called photobiomodulation (PBMT) or low-level laser therapy (LLLT) is one of the most commonly offered adjunct treatments during TPLO recovery. Many specialist and rehabilitation centres include it routinely.
But the evidence for its benefits is more nuanced than the marketing suggests, and owners deserve an honest picture of what it does and does not reliably achieve.
Quick answer: Laser therapy after TPLO uses specific light wavelengths to reduce inflammation and support tissue healing. Evidence for early pain reduction is moderately supported; evidence for improved radiographic bone healing is weak. It is a safe adjunct but should not replace rehabilitation exercises, pain medication, or activity restriction.
Key takeaways
- Laser therapy reduces postoperative inflammation and may improve gait scores: a TPLO study found better hindlimb function at 8 weeks in treated dogs
- Evidence for improving radiographic bone healing is weak: three controlled studies found no statistically significant difference in healing time
- The 2024 AVMA randomized trial found no significant difference in CRP, weight bearing, pain scores, or SSI rates between PBMT and sham groups
- Sessions typically begin within the first few days of surgery and continue through the rehabilitation phase
- Laser therapy is safe with few contraindications: avoid eyes and active tumour sites; safe over the TPLO incision once closed
- It works best as part of a multimodal plan: exercise therapy and pain medication carry stronger evidence than laser alone
What laser therapy does
Laser therapy for dogs, also known as photobiomodulation, involves using specific wavelengths of light to penetrate tissues and promote cellular regeneration and healing. The laser light stimulates the production of ATP (adenosine triphosphate), enhancing cell repair and growth, reducing inflammation, and increasing blood circulation.
Photobiomodulation therapy has been shown to decrease inflammation, and increase analgesia, vascularization, and tissue healing after musculoskeletal injury or surgery.
The mechanism is photochemical: light energy at specific wavelengths (typically 630 to 980 nm) is absorbed by mitochondria.
This increases ATP production, modulates reactive oxygen species, and influences gene expression related to inflammation and healing.
The effects are local confined to the tissue depth the light reaches.
For post-TPLO use, the targets are: the surgical incision, the osteotomy site in the proximal tibia, and the surrounding periarticular soft tissues.
What the clinical evidence shows
Pain and function
Research following TPLO surgery showed that dogs receiving LLLT had better hindlimb function and gait scores at 8 weeks compared to controls. This is especially valuable in orthopedic recovery, where early weight-bearing can prevent muscle atrophy and joint stiffness.
In a controlled veterinary study, dogs with surgical incisions treated with laser therapy exhibited significantly less inflammatory cell infiltration and tissue necrosis within the first week post-op compared to untreated controls.
The 2024 randomized trial
54 client-owned dogs with CCL rupture undergoing unilateral TPLO surgery were enrolled. The study population was randomly assigned to either a treatment group receiving PBMT (24 dogs) or a control group (30 dogs). PBMT was performed immediately after induction, and at 6 hours, 24 hours, 48 hours, and 8 weeks postoperatively. Evaluation of CRP, pain scores, evidence of SSI, and percentage weight bearing were assessed at all time points.
The trial found the therapy showed promise but no statistically significant difference between groups on any primary outcome measure.
Bone healing
Three studies compared LLLT to a control and concluded that LLLT treatment did not make a significant difference in improving radiographic bone healing. The studies collectively provide weak evidence for this outcome.
This is an important distinction: laser therapy may support soft tissue healing, pain, and early function but it does not appear to accelerate the osteotomy healing visible on radiographs.
When to start and how often
Laser therapy uses focused light energy on the surgical site to support healing.
Most rehabilitation programmes begin laser therapy within the first 1 to 3 days after TPLO surgery, often at the surgical centre before discharge or at the first rehabilitation visit.
Typical post-TPLO laser protocol:
- Frequency: 3 to 5 sessions per week in the first 2 to 3 weeks
- Frequency: 1 to 2 sessions per week from weeks 3 to 8
- Session duration: 5 to 15 minutes depending on the laser system and dosing protocol
- Total sessions: typically 6 to 12 in the first 8-week recovery phase
The protocol varies by laser system, power output, and the individual patient's response.
Realistic expectations
Laser therapy is a useful adjunct in TPLO recovery. It is not a substitute for the treatments with stronger evidence: pain medication, activity restriction, and structured rehabilitation exercises.
Laser therapy could be particularly helpful for dogs with weight-bearing and gait issues while recovering from TPLO surgery after a cruciate injury.
Dogs with significant early swelling, wound sensitivity, or slow initial weight-bearing progress may benefit most. Dogs recovering well with standard multimodal analgesia and rehabilitation may show less measurable difference.
For the bone healing timeline that laser therapy supports during recovery, see TPLO bone healing time in dogs explained.
For the full recovery plan that laser therapy fits into, see 10 essential TPLO recovery tips for pet owners.
For the physical therapy that is the primary evidence-based adjunct, see when to start physical therapy after TPLO surgery.
For swelling management in the recovery period, see how long does swelling last after TPLO surgery.
Frequently asked questions
Is laser therapy safe over the TPLO incision?
Yes, once the incision is closed. Laser therapy is safe over sutured incisions and can be applied at the surgical site from the first post-operative day in most protocols.
Avoid direct application over open wounds or actively infected tissue.
How many laser sessions does a dog need after TPLO?
Typically 6 to 12 sessions across the first 8 weeks.
Start at 3 to 5 sessions per week for the first 2 to 3 weeks, tapering to 1 to 2 per week through the rehabilitation phase.
The exact protocol depends on the laser system and rehabilitation plan.
Does laser therapy replace pain medication after TPLO?
No. Laser therapy is an adjunct to pharmaceutical pain management, not a replacement. Post-TPLO pain management requires NSAIDs, and often gabapentin or other analgesics.
Laser therapy may reduce the pain burden and support earlier mobility but does not provide sufficient analgesia on its own.
Can I do laser therapy at home with a consumer device?
Consumer-grade red light therapy devices exist but operate at lower power densities than veterinary therapeutic lasers. The clinical evidence discussed in this article relates to veterinary-grade PBMT devices.
Home devices may offer some benefit but cannot replicate the dosing of professional equipment. Discuss with your rehabilitation veterinarian before purchasing.
Will laser therapy prevent my dog from needing more medication?
Possibly. If laser therapy reduces post-operative inflammation and pain, some dogs may need lower doses of pain medication or taper off sooner.
This should be guided by your veterinarian based on your dog's individual recovery trajectory.
Resources
- AVMA Journal. Photobiomodulation Therapy in Dogs Undergoing TPLO After Cranial Cruciate Ligament Rupture. avmajournals.avma.org
- Veterinary Evidence. Does LLLT Improve Radiographic Healing for Dogs with CCL Rupture Undergoing TPLO Surgery? veterinaryevidence.org
- AKC. Laser Therapy For Dogs: Uses, Side Effects, and Alternatives. akc.org
- Erchonia. Laser Therapy for Post-Surgical Recovery in Pets. erchonia.com
All Articles

Warning Signs to Watch for After Neutering a Dog
Learn the key warning signs to watch for after neutering your dog to ensure a safe recovery and when to seek veterinary care.
Sustainable Vet Group
Most dogs recover from neutering without a hitch. But some do not, and the difference between a minor complication and a serious one often comes down to how quickly you notice it.
The tricky part is that some things that look alarming are completely normal, and some things that look minor are not.
This guide gives you a clear, symptom-by-symptom breakdown of what is expected, what to monitor, and what requires an immediate call to your vet.
Quick answer: Mild grogginess, reduced appetite, and slight redness at the incision are all normal in the first 24 to 48 hours. Ongoing bleeding, yellow or green discharge, swelling that grows after day three, lethargy lasting more than 48 hours, or a wound that appears to be opening are all warning signs that need veterinary attention promptly.
Key takeaways
- Normal recovery includes mild grogginess, slight swelling, and reduced appetite for 24 to 48 hours.
- Warning signs that need a vet call include discharge, increasing swelling, continuous bleeding, and persistent lethargy.
- Emergency signs require immediate action: pale gums, collapse, or abdomen that appears bloated.
- Licking is the most preventable complication: the cone prevents most infection and wound problems.
- Daily incision checks catch problems early, when they are still easy to treat.
- When in doubt, call your vet. It is always better to check than to wait.
What normal recovery looks like
Understanding normal first makes it easier to spot abnormal.
In the first 24 to 48 hours after surgery, expect:
- Grogginess, drowsiness, or mild disorientation from anesthesia
- Reduced appetite or no interest in food
- Mild redness or slight puffiness at the incision site
- A small amount of clear or very faintly pink fluid at the wound in the first 24 to 72 hours
- Quieter behavior and preference for rest
- Possible shivering or restlessness as anesthesia wears off
All of these resolve on their own. By day two or three, your dog should be more alert, eating normally, and showing interest in their surroundings again.
Warning signs: incision and wound
The incision site is where most post-surgical problems show up first. Check it morning and evening throughout the recovery period.
Discharge
Swelling
Some swelling in the first two to three days is expected. The body's inflammatory response is part of normal healing.
Swelling that increases after day three, feels warm and firm to the touch, or is accompanied by redness and discharge is not normal. This pattern points to infection or hematoma and needs veterinary evaluation.
In large breed male dogs, scrotal swelling is a specific concern. Moderate scrotal swelling that resolves within a week is often normal. Swelling that grows, becomes hot, or is accompanied by pain or discharge is not.
Wound opening
The incision edges should be staying together, not pulling apart.
If you see any gap in the wound, exposed pink or red tissue beneath the skin, or sutures that appear to have pulled through, contact your vet immediately. This is called dehiscence and requires prompt attention.
Do not attempt to close an open wound yourself. Keep your dog calm, prevent licking, and get to your vet.
Warning signs: behavior and general health
Lethargy
Mild tiredness for the first 24 to 48 hours is expected. Anesthesia and surgery are taxing on the body.
Lethargy that persists beyond 48 hours, or a dog that is completely unresponsive, unable to stand, or does not improve over the first two days, is a warning sign. Call your vet.
Loss of appetite
Not wanting to eat on surgery day and the following morning is normal.
A dog that still refuses food at 48 hours after surgery, particularly if also vomiting, may be experiencing a complication. Call your vet if appetite has not returned by day two.
Vomiting
One or two episodes of vomiting the evening of surgery can be a side effect of anesthesia. This is within normal range.
Vomiting that continues beyond 24 hours after surgery, or that contains blood, requires a vet call. Persistent vomiting can indicate a reaction to pain medication, an obstruction, or another post-surgical issue.
Difficulty urinating or defecating
Some dogs take a day or two to have a bowel movement after surgery. This is usually due to fasting before the procedure and reduced activity afterward.
No bowel movement after three to five days is worth reporting. Difficulty or pain during urination, especially in male dogs, can indicate inflammation near the surgical site and should be checked promptly.
Warning signs: pain
Your dog will have been sent home with pain medication. Use it on schedule.
Signs that pain is not being adequately controlled include:
- Whining, yelping, or crying that persists beyond the first day
- Hunched posture or reluctance to sit or lie down
- Guarding the incision site by flinching or snapping when touched
- Panting excessively without exertion
- Trembling or shivering beyond the first few hours post-anesthesia
Contact your vet if pain seems severe after day three, or if prescribed medication does not appear to be working. Do not give human pain medications. Aspirin, ibuprofen, and acetaminophen are toxic to dogs and can cause serious harm or death.
Emergency warning signs: act immediately
These signs require emergency veterinary care, not a wait-and-see approach.
Call your vet or go to an emergency clinic immediately if you observe:
- Pale, white, or bluish gums
- Sudden collapse or inability to stand
- Abdomen that appears bloated, distended, or hard
- Heavy bleeding that does not stop
- Rapid or labored breathing
- Signs of extreme pain: screaming, freezing in place, inability to move
These can indicate internal bleeding, systemic infection, or other serious complications that are time-sensitive.
The most preventable warning sign: licking
Most of the infection and wound-breakdown cases that end up back at the vet have one thing in common: the cone came off.
Licking introduces bacteria directly into the wound, softens the tissue, and can pull sutures loose. A dog that licks its incision even once can undo days of clean healing.
The E-collar stays on for the full 10 to 14 days. If your dog refuses the hard plastic cone, soft inflatable collars or recovery suits are legitimate alternatives, provided they reliably prevent the dog from reaching the wound site.
For a full guide on what normal recovery looks like day by day and how to distinguish healing progress from early complications, tracking the incision against a clear timeline makes daily monitoring more actionable.
When to call vs. when to go straight to emergency care
Use this as a quick decision guide.
When in doubt, call. Most veterinary practices would rather hear from you about something minor than have you wait too long on something serious.
The role of aftercare in preventing complications
Most warning signs are preventable, not inevitable.
The dogs most likely to develop post-surgical complications are those given too much freedom too soon, or whose cones were removed early. Following a complete aftercare plan covering rest, incision monitoring, medications, and the cone is the most effective way to keep your dog out of trouble during recovery.
For a complete, step-by-step plan on full post-surgery care covering each day of the recovery window, what to feed, how to check the wound, and how to keep your dog calm, having that reference from day one prevents most of the issues covered in this article. Understanding surgical risks that can cause complications beyond the routine is also worth reading before surgery if you have a large breed or older dog.
Frequently asked questions
Is it normal for my dog to be lethargic after neutering?
Yes, for the first 24 to 48 hours. Anesthesia causes genuine fatigue, and your dog needs rest. Lethargy that does not improve by day two or three, or a dog that is completely unresponsive, warrants a call to your veterinarian.
What does an infected incision look like?
An infected incision typically shows yellow or green discharge, increasing redness and swelling after the first few days, warmth around the wound, and often a foul odor. Any of these signs alone justify a same-day call to your vet. For a detailed visual guide to signs of an infected incision, knowing what to look for at each stage of healing helps you act at the right time.
My dog is licking the incision despite wearing a cone. What should I do?
Check that the cone extends at least two inches past your dog's nose. If it is too short, your dog can still reach the incision. Consider switching to a soft inflatable collar or recovery suit if the hard cone is not fitting properly. Contact your vet if there are signs the wound has been compromised.
Should I be worried about scrotal swelling after neutering?
Some scrotal swelling in the first few days is normal. The scrotum fills with fluid as part of the healing response. Swelling that increases after day three, feels hot or very firm, or is accompanied by discharge or pain is abnormal and should be evaluated by your vet.
When should I go to an emergency vet after neutering?
Go immediately if your dog has pale or white gums, collapses, has a bloated or hard abdomen, or is bleeding heavily and continuously. These signs can indicate internal bleeding or systemic infection and are time-sensitive emergencies.
The difference between a smooth recovery and a complication is usually not bad luck. It is usually the cone coming off too early, too much activity on day four, or a wound check that was skipped. Pay attention for two weeks, and most dogs sail through without a single issue.
Resources
The following sources were used as reference and background for this article:
- Ace of Spays. Signs of Complications After Spay/Neuter Surgery: When to Contact Your Veterinarian. aceofspays.com
- Animal Humane Society. Spay/Neuter Post-Surgical Care and Recovery Instructions. animalhumanesociety.org
- Homeaglow. 10 Warning Signs After Spaying or Neutering Your Dog. homeaglow.com
- American Kennel Club. Post-Surgical Care for Dogs Following a Spay or Neuter. akc.org
- Union Hill Animal Hospital. Neutering Recovery Guide for Male Dogs. unionhillvet.com
- Rivergate Veterinary Clinic. Signs of Infection After Spaying or Neutering a Dog. rivergateveterinaryclinic.com
When Can I Bathe My Dog After TPLO Surgery?
Learn when it is safe to bathe your dog after TPLO surgery and how to care for their incision during recovery.
Sustainable Vet Group
After your dog undergoes TPLO surgery, you may wonder when it is safe to bathe them. TPLO surgery is a common procedure to repair a torn cranial cruciate ligament in dogs. Proper post-operative care, including bathing, is essential to ensure a smooth recovery and avoid complications.
This article explains when you can bathe your dog after TPLO surgery, how to protect the surgical site, and what precautions to take during the healing process. You will learn practical tips to keep your dog clean without risking infection or delayed healing.
When Can I Bathe My Dog After TPLO Surgery?
The general recommendation is to avoid bathing your dog for at least 10 to 14 days after TPLO surgery. This time allows the incision to begin healing and reduces the risk of infection. Bathing too early can expose the wound to moisture and bacteria, which can cause complications.
Once the incision is fully closed and your veterinarian gives the go-ahead, you can bathe your dog carefully. It is important to keep the surgical site dry and clean during the initial healing phase.
- Healing time frame: Most veterinarians advise waiting 10 to 14 days before bathing to allow the incision to close properly and reduce infection risk.
- Veterinary approval: Always consult your vet before bathing to ensure the wound has healed enough for water exposure.
- Incision protection: Keep the surgical site dry and avoid direct water contact until fully healed to prevent complications.
- Signs of healing: Look for a dry, closed incision without redness or discharge before considering a bath.
Following these guidelines helps protect your dog’s surgical site and supports a healthy recovery.
How Should I Protect My Dog’s Incision When Bathing?
When your vet approves bathing, protecting the incision is crucial. You want to avoid water, soap, or shampoo reaching the surgical site. Using gentle methods can keep your dog clean without risking infection or irritation.
Proper protection also helps prevent your dog from licking or scratching the incision, which can delay healing.
- Use waterproof covers: Apply a waterproof bandage or plastic wrap over the incision to keep it dry during baths.
- Gentle cleaning: Use a damp cloth to clean areas away from the incision instead of full baths initially.
- Mild shampoos: Choose vet-recommended, gentle shampoos to avoid skin irritation around the surgery site.
- Dry thoroughly: After bathing, dry your dog carefully, especially near the incision, to prevent moisture buildup.
These steps help maintain cleanliness while protecting the surgical site during recovery.
What Are the Risks of Bathing Too Soon After TPLO Surgery?
Bathing your dog too soon after TPLO surgery can lead to several complications. The main concern is infection, which can delay healing or require additional treatment. Moisture can also weaken the incision and cause the sutures or staples to loosen.
Understanding these risks helps you avoid mistakes that could harm your dog’s recovery.
- Infection risk: Water exposure can introduce bacteria into the incision, causing infection and inflammation.
- Delayed healing: Moisture can soften the skin and slow the natural healing process of the wound.
- Suture damage: Wet sutures or staples may loosen or fall out prematurely, risking wound reopening.
- Increased discomfort: Bathing too early can cause pain or irritation at the surgery site, stressing your dog.
Waiting the recommended time and following vet advice reduces these risks significantly.
How Can I Keep My Dog Clean Without Bathing After Surgery?
Since full baths are not recommended immediately after TPLO surgery, there are alternative ways to keep your dog clean. These methods help maintain hygiene without exposing the incision to water.
Using gentle cleaning techniques and monitoring your dog’s activity can keep them comfortable and clean during recovery.
- Spot cleaning: Use a damp cloth or pet wipes to clean dirty areas away from the incision gently.
- Dry shampoo: Apply vet-approved dry shampoo powders or sprays to absorb oils and dirt without water.
- Limit outdoor exposure: Avoid muddy or wet areas to keep your dog cleaner between cleanings.
- Regular brushing: Brush your dog’s coat to remove dirt and loose hair, promoting cleanliness without bathing.
These alternatives help maintain hygiene while protecting the surgical site during healing.
What Signs Should I Watch for Around the Incision?
Monitoring your dog’s incision daily is important to catch any problems early. Knowing what signs indicate infection or delayed healing can help you seek veterinary care promptly.
Early detection of issues can prevent complications and support a faster recovery.
- Redness and swelling: Persistent or worsening redness and swelling around the incision may signal infection.
- Discharge or odor: Any pus, blood, or foul smell from the wound requires immediate veterinary attention.
- Excessive licking: If your dog licks or chews the incision excessively, it can cause damage and delay healing.
- Opening of the wound: If the incision starts to open or bleed, contact your vet right away.
Keeping a close eye on these signs ensures timely care and prevents serious complications.
How Can I Help My Dog Stay Comfortable During Recovery?
Comfort is key to a smooth recovery after TPLO surgery. Managing pain, limiting activity, and protecting the incision all contribute to your dog’s well-being.
Taking simple steps can reduce stress and support healing during this critical time.
- Pain management: Follow your vet’s instructions on pain medications to keep your dog comfortable.
- Restricted activity: Limit running, jumping, and rough play to prevent strain on the surgery site.
- Use an Elizabethan collar: Prevent your dog from licking or biting the incision with a cone or collar.
- Provide a clean resting area: Keep your dog’s bedding clean and dry to avoid contamination of the wound.
These measures help your dog heal faster and reduce the chance of complications.
Conclusion
Bathing your dog after TPLO surgery requires careful timing and protection of the surgical site. Waiting at least 10 to 14 days before bathing helps prevent infection and supports proper healing. Always follow your veterinarian’s advice and watch the incision closely for any signs of problems.
Using alternative cleaning methods and protecting the incision during baths ensures your dog stays clean and comfortable throughout recovery. With proper care, your dog can heal well and return to normal activities safely.
FAQs
Can I use a wet cloth to clean my dog before the incision heals?
Yes, you can use a damp cloth to gently clean areas away from the incision, but avoid touching or wetting the surgical site until fully healed.
When can my dog swim again after TPLO surgery?
Swimming should be avoided until the incision is fully healed and your vet approves, usually several weeks after surgery to prevent infection and injury.
What should I do if the incision gets wet accidentally?
If the incision gets wet, dry it gently with a clean towel and contact your vet for advice to prevent infection or complications.
Are there special shampoos recommended after TPLO surgery?
Use mild, vet-approved shampoos that are gentle on sensitive skin and avoid harsh chemicals that could irritate the incision area.
How often should I check my dog’s incision during recovery?
Check the incision at least once daily for redness, swelling, discharge, or other signs of infection to catch problems early and seek veterinary care if needed.
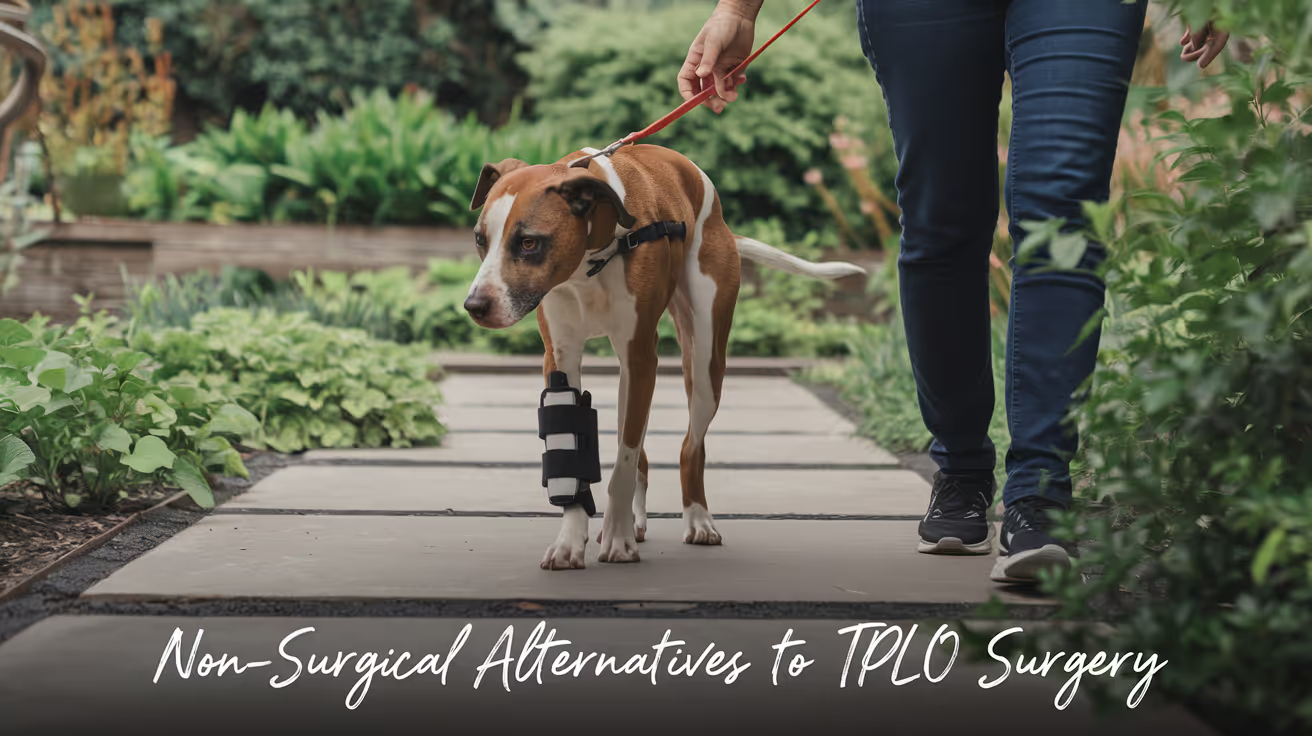
Non-Surgical Alternatives to TPLO Surgery for Dogs
Explore non-surgical alternatives to TPLO surgery for dogs, including therapy options, benefits, and when they are suitable.
Sustainable Vet Group
When your dog suffers from a torn cranial cruciate ligament (CCL), you might worry about the need for TPLO surgery. TPLO, or tibial plateau leveling osteotomy, is a common surgical procedure to stabilize the knee joint. However, not every dog is an ideal candidate for surgery, and some owners seek non-surgical options.
This article explains the main non-surgical alternatives to TPLO surgery for dogs. You will learn about physical therapy, weight management, braces, and medications that can help manage your dog's condition without surgery.
What are the main non-surgical treatments for CCL injuries in dogs?
Non-surgical treatments aim to reduce pain, improve joint stability, and maintain mobility. These treatments are often recommended for dogs with mild to moderate ligament tears or those who cannot undergo surgery due to age or health issues.
Choosing the right treatment depends on your dog's size, activity level, and severity of the injury.
- Physical therapy benefits: Physical therapy helps strengthen muscles around the knee, improving joint support and reducing pain for better mobility.
- Weight management importance: Maintaining a healthy weight reduces stress on the knee joint, slowing arthritis progression and improving comfort.
- Knee braces role: Custom knee braces stabilize the joint externally, limiting abnormal movement and providing pain relief during activity.
- Medications use: Anti-inflammatory drugs and pain relievers reduce swelling and discomfort, improving your dog's quality of life.
Combining these treatments often provides the best results for managing CCL injuries without surgery.
How effective is physical therapy compared to TPLO surgery?
Physical therapy focuses on muscle strengthening, joint flexibility, and pain management. It can improve your dog's function but may not fully stabilize the knee like surgery does.
Therapy is more effective in dogs with partial ligament tears or those with low activity demands.
- Muscle strengthening impact: Stronger muscles support the knee, reducing instability and helping your dog move more comfortably.
- Range of motion exercises: These exercises prevent stiffness and maintain joint flexibility, which is crucial for long-term mobility.
- Pain management techniques: Modalities like cold laser therapy and hydrotherapy reduce inflammation and promote healing.
- Limitations of therapy: Physical therapy cannot repair the ligament or fully prevent joint instability in severe tears.
Physical therapy can be a valuable part of recovery but may not replace TPLO surgery for all dogs.
When should a dog wear a knee brace instead of having surgery?
Knee braces provide external support to the injured joint. They are often used in dogs who cannot tolerate surgery or while waiting for surgery.
Braces can improve comfort and function but require proper fitting and regular monitoring.
- Suitable candidates: Small to medium dogs with partial tears or older dogs with health risks benefit most from braces.
- Bracing goals: The brace limits abnormal joint movement, reducing pain and preventing further injury.
- Fitting and adjustment: A custom brace fitted by a veterinary professional ensures comfort and effectiveness.
- Care and monitoring: Regular checks prevent skin irritation and ensure the brace remains supportive during activity.
While braces help manage symptoms, they do not heal the ligament and are often part of a broader treatment plan.
What role do medications play in managing CCL injuries without surgery?
Medications help control pain and inflammation associated with ligament injuries. They improve your dog's comfort and ability to participate in therapy.
Medications are usually combined with other treatments for best results.
- NSAIDs use: Non-steroidal anti-inflammatory drugs reduce joint swelling and pain, improving mobility.
- Pain relievers: Additional analgesics may be prescribed for severe discomfort or during flare-ups.
- Supplements benefits: Joint supplements like glucosamine and chondroitin support cartilage health and may slow arthritis progression.
- Medication risks: Long-term use requires veterinary supervision to avoid side effects like stomach upset or kidney issues.
Medications are an important part of non-surgical management but do not replace mechanical joint stabilization.
Can weight management alone improve a dog's CCL injury?
Excess weight increases stress on the knee joint, worsening pain and arthritis. Managing your dog's weight can significantly improve symptoms.
Weight control is essential whether your dog undergoes surgery or not.
- Reducing joint stress: Less body weight means less pressure on the injured ligament and joint surfaces.
- Improving mobility: A leaner dog moves more easily and participates better in therapy or exercise.
- Diet planning: A balanced, calorie-controlled diet helps achieve and maintain ideal weight safely.
- Regular monitoring: Frequent weight checks ensure your dog stays within a healthy range to protect joints.
Weight management is a cornerstone of non-surgical care and improves overall health.
What are the risks and limitations of non-surgical treatment for CCL tears?
While non-surgical options can help many dogs, they have limitations. Not all dogs will regain full function without surgery.
Understanding these risks helps you make informed decisions with your veterinarian.
- Incomplete joint stabilization: Non-surgical methods do not repair the ligament, so instability may persist.
- Progression of arthritis: Without surgery, joint wear may worsen over time, causing chronic pain.
- Activity restrictions: Dogs may need limited exercise to prevent further injury during healing.
- Variable outcomes: Success depends on injury severity, dog size, and owner compliance with treatment plans.
Discuss your dog's specific case with your vet to weigh the benefits and risks of non-surgical care.
Conclusion
Non-surgical alternatives to TPLO surgery for dogs include physical therapy, knee braces, medications, and weight management. These options can reduce pain and improve mobility, especially for dogs with mild injuries or those who cannot have surgery.
However, non-surgical treatments have limitations and may not fully stabilize the knee joint. Working closely with your veterinarian will help you choose the best approach for your dog's health and lifestyle.
FAQs
Can small dogs recover from CCL tears without surgery?
Yes, small dogs with partial tears often respond well to non-surgical treatments like physical therapy and braces, but close monitoring is essential to prevent worsening.
How long does it take to see improvement with non-surgical care?
Improvement usually begins within weeks of starting therapy and weight management, but full benefits may take several months depending on the dog's condition.
Are knee braces uncomfortable for dogs?
Properly fitted braces are generally comfortable, but dogs may need time to adjust. Regular checks prevent skin irritation and ensure proper fit.
Can supplements replace medications for pain relief?
Supplements support joint health but do not provide immediate pain relief like medications. They are best used alongside prescribed drugs.
Is non-surgical treatment cheaper than TPLO surgery?
Non-surgical care often costs less upfront but may require ongoing therapy and medications. Surgery has higher initial costs but may offer faster recovery.

TPLO Implant Failure Signs and Causes
Learn the common signs and causes of TPLO implant failure in dogs to ensure timely treatment and recovery.
Sustainable Vet Group
Tibial Plateau Leveling Osteotomy (TPLO) is a common surgery to fix cruciate ligament injuries in dogs. However, sometimes the implants used in TPLO can fail. Recognizing the signs of TPLO implant failure early is important to prevent further damage and pain for your dog.
This article explains the main signs and causes of TPLO implant failure. You will learn what symptoms to watch for and why implants might fail. Understanding these points helps you act quickly and get the best care for your pet.
What are the common signs of TPLO implant failure?
Implant failure after TPLO surgery can show in several ways. Early detection of these signs helps your vet decide if further treatment is needed. Watch your dog closely after surgery for any unusual symptoms.
- Persistent lameness: If your dog keeps limping or refuses to put weight on the leg weeks after surgery, it may indicate implant loosening or breakage.
- Swelling and pain: Noticeable swelling around the surgery site along with pain can suggest implant irritation or infection causing failure.
- Visible deformity: A change in leg shape or abnormal movement can mean the implant is broken or the bone is not healing properly.
- Warmth and redness: Increased warmth or redness at the surgical area often points to infection, which can weaken the implant’s hold.
These signs require prompt veterinary evaluation. Ignoring them can lead to worsening damage and longer recovery times.
Why do TPLO implants fail after surgery?
Several factors can cause TPLO implant failure. Understanding these helps in preventing problems and improving surgical outcomes. Causes include mechanical, biological, and technical issues.
- Improper implant placement: Incorrect positioning during surgery can cause uneven stress and early implant loosening or breakage.
- Infection at surgery site: Bacterial infection weakens bone healing and can cause implant instability or failure.
- Poor bone quality: Dogs with weak or diseased bones may not hold the implant well, leading to failure.
- Excessive activity too soon: Allowing the dog to run or jump before full healing puts extra strain on the implant and risks failure.
Knowing these causes helps vets and owners take steps to reduce implant failure risk.
How can implant failure be diagnosed after TPLO?
Diagnosing implant failure involves a combination of physical exams and imaging tests. Your vet will look for clinical signs and confirm implant status with tools.
- Physical examination: The vet checks for pain, swelling, and abnormal leg movement indicating implant problems.
- X-rays: Radiographs show implant position, bone healing, and any fractures or loosening of the implant.
- CT scans: In complex cases, CT provides detailed images of bone and implant condition.
- Blood tests: These help detect infection or inflammation that may contribute to implant failure.
Early and accurate diagnosis is key to planning effective treatment.
What treatments are available for TPLO implant failure?
Treatment depends on the cause and severity of implant failure. Options range from conservative care to surgery. Your vet will recommend the best plan.
- Rest and restricted activity: Limiting movement helps reduce stress on the implant and supports healing if failure is minor.
- Antibiotics for infection: If infection is present, antibiotics are essential to control bacteria and protect the implant.
- Revision surgery: In cases of implant breakage or severe loosening, surgery to replace or remove the implant may be needed.
- Physical therapy: Controlled rehab exercises improve joint function and muscle strength after treatment.
Timely treatment improves recovery chances and reduces complications.
How can TPLO implant failure be prevented?
Preventing implant failure starts before surgery and continues through recovery. Owners and vets must work together to ensure success.
- Choose experienced surgeons: Skilled surgeons reduce risks by placing implants correctly and managing surgery well.
- Follow post-op care instructions: Strictly limiting activity and following medication schedules help implants heal securely.
- Monitor for infection signs: Early detection and treatment of infection prevent implant weakening.
- Regular follow-up visits: Routine check-ups with X-rays confirm proper healing and implant stability.
Good communication and care improve outcomes and lower failure rates.
What risks do dogs face if TPLO implant failure is untreated?
Ignoring implant failure can cause serious problems for your dog. The implant supports bone healing and joint stability, so failure affects mobility and health.
- Chronic pain: Failed implants cause ongoing discomfort, reducing your dog’s quality of life.
- Joint instability: Without a stable implant, the knee joint may become unstable, leading to arthritis or further injury.
- Bone fractures: Weak implants increase fracture risk around the surgery site.
- Infection spread: Untreated infection can spread to other tissues or the bloodstream, causing severe illness.
Prompt veterinary care is essential to avoid these risks and help your dog recover fully.
Conclusion
TPLO implant failure is a serious complication that can affect your dog’s recovery after cruciate ligament surgery. Recognizing the signs like persistent lameness, swelling, and deformity helps you seek veterinary care quickly.
Understanding the causes such as infection, poor implant placement, and early activity guides prevention and treatment. With proper care, most dogs recover well and regain normal function. Stay alert and follow your vet’s advice to protect your pet’s health.
FAQs
How soon after TPLO surgery can implant failure occur?
Implant failure can happen anytime but is most common within the first 6 to 12 weeks after surgery during the bone healing phase.
Can implant failure cause permanent lameness in dogs?
If untreated, implant failure can lead to chronic pain and joint instability, which may cause long-term lameness or arthritis in dogs.
Is implant removal always necessary if failure occurs?
Not always; minor loosening or infection may be treated conservatively, but severe failure often requires surgical implant removal or replacement.
What signs indicate infection around a TPLO implant?
Signs include redness, swelling, warmth, discharge from the incision, fever, and increased pain at the surgery site.
How can I help my dog recover safely after TPLO surgery?
Follow your vet’s activity restrictions, give prescribed medications, attend follow-up visits, and watch for any unusual symptoms to ensure safe recovery.
TPLO Bone Healing Time in Dogs Explained
Learn about TPLO bone healing time in dogs, factors affecting recovery, and how to support your pet's healing after surgery.
Sustainable Vet Group
Tibial Plateau Leveling Osteotomy (TPLO) is a common surgical procedure used to treat cranial cruciate ligament (CCL) injuries in dogs. Understanding the bone healing time after TPLO surgery is important for pet owners to manage their dog's recovery effectively. This article explains the typical healing timeline, factors influencing bone healing, and how to support your dog during this critical period.
TPLO bone healing time in dogs usually ranges from 8 to 12 weeks, depending on various factors such as the dog's age, size, and overall health. This guide will help you learn what to expect during recovery, signs of proper healing, and tips to ensure your dog regains full mobility safely.
What is the typical bone healing time after TPLO surgery in dogs?
Bone healing after TPLO surgery is a gradual process that involves the formation of new bone tissue at the osteotomy site. Most dogs show significant healing within 8 to 12 weeks post-surgery. However, the exact time can vary based on individual factors.
- Healing duration range: Most dogs' bones heal sufficiently between 8 and 12 weeks after TPLO surgery, allowing gradual return to activity.
- Initial bone stability: The surgical plate and screws provide immediate stability, helping bones start healing without shifting.
- Radiographic confirmation: Veterinarians use X-rays around 8 weeks post-op to assess bone healing progress before increasing activity.
- Complete remodeling: Full bone remodeling and strength restoration can take several months beyond initial healing.
Understanding this timeline helps owners plan post-operative care and follow veterinary advice to avoid complications.
What factors influence TPLO bone healing time in dogs?
Several factors affect how quickly a dog's bone heals after TPLO surgery. Recognizing these can help you provide better care and anticipate recovery challenges.
- Dog's age: Younger dogs tend to heal faster due to better bone regeneration capacity compared to older dogs.
- Body weight and size: Larger or overweight dogs may experience slower healing because of increased stress on the surgical site.
- Overall health: Dogs with good nutrition and no underlying diseases generally heal more efficiently.
- Post-surgery activity level: Excessive movement or jumping can delay healing by stressing the osteotomy site.
By managing these factors, you can support your dog's recovery and reduce the risk of delayed healing or complications.
How can you support your dog's bone healing after TPLO surgery?
Proper care after TPLO surgery is crucial to promote bone healing and prevent setbacks. Owners should follow veterinary instructions closely and create a safe environment for recovery.
- Strict rest and confinement: Limit your dog's activity to prevent excessive strain on the healing bone during the first 8 weeks.
- Controlled leash walks: Short, slow walks help maintain muscle tone without risking injury to the surgical site.
- Balanced nutrition: Provide a diet rich in protein, calcium, and vitamins to support bone regeneration.
- Regular veterinary check-ups: Follow-up visits allow monitoring of healing progress and early detection of complications.
These steps help ensure your dog recovers safely and regains full function after TPLO surgery.
What signs indicate proper bone healing after TPLO surgery?
Monitoring your dog for signs of proper healing can reassure you that recovery is on track. Some clinical and radiographic signs are important to watch for.
- Decreased lameness: Gradual improvement in weight-bearing and reduced limping suggest healing progress.
- Reduced swelling and pain: Less inflammation around the surgical site indicates tissue recovery.
- Stable surgical site: No abnormal movement or instability when the leg is gently handled.
- Positive X-ray findings: Evidence of new bone formation bridging the osteotomy gap confirms healing.
If you notice worsening lameness or swelling, contact your veterinarian promptly as these may indicate complications.
What complications can affect TPLO bone healing time?
Some complications can delay or impair bone healing after TPLO surgery. Being aware helps you seek timely veterinary care if needed.
- Infection risk: Surgical site infections can slow healing and require antibiotics or further treatment.
- Implant failure: Loosening or breaking of plates and screws can destabilize the bone and delay healing.
- Delayed union or nonunion: Sometimes bones heal slowly or fail to unite, needing additional intervention.
- Excessive activity: Early or vigorous exercise can disrupt healing and cause complications.
Prompt veterinary attention for any concerns can prevent prolonged recovery and improve outcomes.
How long should activity be restricted after TPLO surgery?
Activity restriction is essential to protect the healing bone and surgical site. Most veterinarians recommend strict rest with limited movement for the first 8 weeks.
- First 2 weeks: Complete confinement with minimal movement, avoiding stairs and jumping.
- Weeks 3 to 8: Controlled leash walks only, gradually increasing duration based on healing progress.
- After 8 weeks: Veterinary assessment guides gradual return to normal activity if healing is adequate.
- Full recovery timeline: Most dogs resume normal activity by 12 to 16 weeks post-surgery after full bone remodeling.
Following these guidelines helps prevent re-injury and supports successful healing after TPLO surgery.
Conclusion
TPLO bone healing time in dogs typically ranges from 8 to 12 weeks, with full recovery taking several months. Understanding this timeline and the factors that influence healing helps owners provide the best care during their dog's recovery.
Strict activity restriction, proper nutrition, and regular veterinary follow-ups are key to ensuring your dog heals well after TPLO surgery. Watching for signs of proper healing and potential complications allows prompt action to support your pet's health and mobility.
FAQs
How long does it take for a dog's bone to heal after TPLO surgery?
Most dogs' bones heal sufficiently between 8 and 12 weeks after TPLO surgery, but full remodeling may take several months.
Can older dogs heal as well as younger dogs after TPLO?
Older dogs may heal more slowly due to reduced bone regeneration, but with proper care, they can still recover well after TPLO surgery.
When can my dog start walking normally after TPLO?
Controlled leash walks usually begin after 2 weeks, with gradual increase after 8 weeks based on veterinary assessment of healing.
What signs mean my dog is not healing properly after TPLO?
Signs like increased swelling, worsening lameness, or instability at the surgical site suggest complications and need veterinary evaluation.
Is physical therapy helpful during TPLO recovery?
Physical therapy can aid muscle strength and joint mobility but should only start after bone healing is confirmed by your veterinarian.
TPLO Implant Loosening Causes and Treatment
Learn about TPLO implant loosening causes, symptoms, and effective treatments to help your dog recover safely after surgery.
Sustainable Vet Group
Tibial Plateau Leveling Osteotomy (TPLO) is a common surgery to fix cranial cruciate ligament injuries in dogs. However, sometimes the implants used in TPLO can loosen, causing pain and complications. Understanding TPLO implant loosening causes and treatment options is important for pet owners to ensure a smooth recovery.
This article explains why TPLO implant loosening happens, how to recognize it, and what treatment choices are available. You will learn practical information to help your dog heal well after TPLO surgery.
What causes TPLO implant loosening?
TPLO implant loosening happens when the screws or plates used to stabilize the bone move or fail to hold properly. Several factors can contribute to this problem. Knowing these causes helps prevent loosening and guides treatment decisions.
- Improper surgical technique: If the implant is not placed correctly, it may not secure the bone well, increasing the risk of loosening during healing.
- Infection at surgical site: Infection can weaken bone and soft tissues around the implant, causing instability and loosening over time.
- Poor bone quality: Dogs with weak or diseased bone may not hold implants firmly, leading to early loosening after surgery.
- Excessive activity post-surgery: Allowing the dog to move too much before healing can stress the implant and cause it to loosen.
Understanding these causes helps veterinarians and owners work together to minimize implant loosening risks after TPLO surgery.
How can you recognize TPLO implant loosening in your dog?
Detecting implant loosening early is key to preventing further damage. Owners should watch for signs that suggest the implant is not stable. These signs often appear within weeks to months after surgery.
- Increased lameness or pain: If your dog suddenly limps more or shows pain around the surgery site, it may indicate implant problems.
- Swelling or heat at incision: Infection or inflammation near the implant can cause visible swelling or warmth.
- Abnormal limb movement: Unusual wobbling or instability when walking can signal implant loosening.
- Changes in behavior: Reluctance to bear weight or decreased activity may reflect discomfort from implant issues.
If you notice these signs, consult your veterinarian promptly for evaluation and imaging tests to confirm implant status.
What diagnostic methods confirm TPLO implant loosening?
Veterinarians use several diagnostic tools to assess implant stability. Accurate diagnosis guides treatment and helps prevent complications.
- Physical examination: Palpation and manipulation of the leg can reveal abnormal movement or pain near the implant.
- Radiographs (X-rays): X-rays show implant position, bone healing, and any signs of loosening such as gaps or screw back-out.
- Advanced imaging: CT scans provide detailed views of bone and implant interfaces, useful in complex cases.
- Laboratory tests: Blood work and culture samples help detect infection that may cause loosening.
Combining these methods ensures a thorough assessment of TPLO implant condition.
What treatment options exist for TPLO implant loosening?
Treatment depends on the cause and severity of implant loosening. Early intervention improves outcomes and reduces complications.
- Restricted activity: Limiting movement helps reduce stress on the implant and supports healing.
- Antibiotic therapy: If infection is present, targeted antibiotics are essential to control bacterial growth.
- Surgical revision: In severe cases, removing or replacing the loosened implant may be necessary to restore stability.
- Supportive care: Pain management and physical therapy aid recovery and improve limb function.
Your veterinarian will tailor treatment based on your dog’s condition and response to therapy.
How can TPLO implant loosening be prevented?
Prevention focuses on careful surgery and post-operative care. Owners play a key role in following veterinary instructions to avoid complications.
- Choose experienced surgeons: Skilled surgeons reduce risks by placing implants accurately and minimizing tissue damage.
- Follow post-op restrictions: Strictly limiting your dog’s activity during healing prevents undue implant stress.
- Monitor for infection: Keeping the incision clean and watching for signs of infection helps catch problems early.
- Regular veterinary check-ups: Scheduled visits allow early detection of implant issues before they worsen.
These steps help ensure the implant remains secure and the bone heals properly after TPLO surgery.
What is the prognosis after treating TPLO implant loosening?
The outlook depends on how quickly loosening is identified and treated. Early care often leads to good recovery, while delays can cause complications.
- Early intervention success: Prompt treatment usually restores implant stability and allows normal healing.
- Complications risk: Untreated loosening can cause chronic pain, infection, or joint instability.
- Long-term function: Many dogs regain good limb use after successful treatment and rehabilitation.
- Owner compliance importance: Following veterinary advice improves healing and reduces recurrence risk.
With proper management, most dogs recover well and return to active lives after TPLO implant loosening treatment.
What are the common complications of TPLO implant loosening?
Implant loosening can lead to several complications that affect your dog’s health and recovery. Recognizing these helps in timely management.
- Infection spread: Loosened implants can harbor bacteria, causing deep infections that are harder to treat.
- Delayed bone healing: Instability slows or prevents proper bone fusion after osteotomy.
- Joint instability: Loss of implant support may cause abnormal joint movement and arthritis development.
- Chronic pain: Persistent discomfort reduces quality of life and mobility.
Early diagnosis and treatment of implant loosening minimize these risks and improve recovery chances.
Conclusion
TPLO implant loosening is a serious but manageable complication after cruciate ligament surgery in dogs. Knowing the causes, signs, and treatment options helps owners support their pets through recovery.
Early veterinary evaluation and following post-operative care instructions are essential to prevent and treat implant loosening effectively. With proper care, most dogs regain good limb function and enjoy a healthy, active life after TPLO surgery.
What are the signs of TPLO implant loosening in dogs?
Signs include increased limping, swelling or heat at the surgery site, abnormal limb movement, and reluctance to bear weight or play.
Can infection cause TPLO implant loosening?
Yes, infection weakens tissues around the implant, leading to instability and loosening if not treated promptly.
How is TPLO implant loosening diagnosed?
Diagnosis involves physical exams, X-rays, possibly CT scans, and lab tests to check for infection or implant movement.
What treatments are available for TPLO implant loosening?
Treatment includes restricted activity, antibiotics for infection, surgical revision if needed, and supportive care like pain management.
How can I prevent TPLO implant loosening after surgery?
Prevention involves choosing skilled surgeons, following strict post-op activity limits, monitoring for infection, and attending regular vet check-ups.

Do Puppies Calm Down After Being Spayed?
Learn how spaying affects puppy behavior and whether puppies calm down after the procedure.
Sustainable Vet Group
Spaying a puppy and expecting her to calm down afterward is one of the most common expectations owners bring to the vet. Sometimes it is accurate. Often it is not quite right.
Puppies behave the way they do for several reasons: genetics, breed characteristics, developmental stage, exercise needs, and yes, hormones. Spaying addresses only the hormonal piece.
Here is what the evidence actually says about whether spaying calms puppies down, when it applies, and when it does not.
Quick answer: Spaying can reduce hormone-driven behaviors in female puppies, but most puppy energy is not hormone-driven. The wild, excitable behavior typical of young dogs is largely developmental and will naturally settle as the puppy matures, with or without surgery. Spaying eliminates heat cycle behaviors but does not reprogram a puppy's underlying energy level or temperament.
Key takeaways
- Most puppy energy is developmental, not hormonal: High activity in puppies reflects youth and brain development, not reproductive hormones.
- Heat cycle behaviors are eliminated by spaying: Restlessness, roaming, and urine marking during heat stop permanently after spaying.
- Natural maturation also produces calming: Puppies typically settle between 18 months and 3 years regardless of spay status.
- Timing of spaying affects long-term behavioral outcomes: Research suggests very early spaying may increase fearfulness in some dogs.
- Training and exercise calm puppies more reliably than surgery: These remain the primary tools for managing puppy behavior.
- Full post-spay hormonal adjustment takes two to three months: Not days.
Why puppies are energetic in the first place
Before connecting spaying to calming, it is worth understanding why puppies behave the way they do.
Puppy behavior is driven by several overlapping factors:
- Developmental stage: Puppies are neurologically immature. Their brains are still forming connections, their impulse control is limited, and they are driven to explore, play, and interact constantly.
- Breed genetics: A Border Collie puppy's drive, a Labrador's enthusiasm, a Jack Russell's intensity: these are genetic. They are not hormonal.
- Exercise and stimulation needs: Puppies that are not adequately exercised and mentally engaged redirect that energy into chaos.
- Learning and socialization: Puppies are in a constant state of learning. Without clear guidance, they default to whatever feels interesting.
- Hormonal influences: A relatively small proportion of puppy behavior is directly driven by reproductive hormones, and this increases as the puppy approaches sexual maturity.
Spaying addresses only item 5. Items 1 through 4 are untouched by surgery.
What spaying actually removes in a female puppy
Spaying removes the ovaries, which are the primary source of estrogen and progesterone. The effects are specific.
What spaying eliminates:
- Heat cycles, which in female dogs typically begin around 5 to 6 months of age in small breeds and later in large breeds
- The behavioral disruption of heat: restlessness, urine marking to attract males, roaming, vocalization
- False pregnancy cycles if the puppy would have been prone to these
- Cyclical mood changes linked to the hormonal fluctuations of estrus
What spaying does not eliminate:
- Breed-driven energy and drive
- Developmental excitability and poor impulse control that comes with youth
- Learned behaviors from the puppy's environment and training history
- Anxiety or fearfulness that has non-hormonal causes
The natural calming process: maturation
Here is a piece of the puzzle that often gets overlooked in the conversation about spaying and calming.
Puppies naturally become calmer as they mature.
Most dogs reach a noticeably more settled behavioral baseline between 18 months and 3 years of age. This happens regardless of spay status. The neurological development that improves impulse control, the reduction of developmental chaos, and the establishment of routines all contribute to this natural calming process.
Many owners who spay a puppy and then notice she is calmer six months later attribute the change to the surgery. In many cases, maturation deserves significant credit.
This is not to dismiss the real effects of spaying. It is to provide accurate context so that owners do not overestimate surgery's role or underestimate the contribution of time, training, and maturation.
What research says about puppies and spaying
The behavioral research on early spaying and puppies is worth understanding before making timing decisions.
Established findings:
- Spaying before the first heat cycle eliminates heat-related behaviors and reduces mammary cancer risk significantly.
- Behavioral problems were reduced or eliminated in the majority of spayed females in studies, but this applies primarily to hormone-driven behaviors.
More cautionary findings:
- Multiple studies have found that dogs spayed at a very young age, particularly before six months, show higher rates of fearfulness and anxiety than dogs spayed later.
- A study of Vizslas found that the younger the dog at the time of spaying, the earlier the mean age of onset of a behavioral disorder.
- Research using the C-BARQ assessment tool found increased fearfulness and touch sensitivity in spayed dogs compared to intact females.
These findings do not mean spaying causes behavioral problems in all puppies. They mean that very early spaying carries a different behavioral risk profile than spaying after maturity, and this is worth discussing with your vet when deciding on timing.
For the broader picture of full overview of behavior changes after spaying, including how the research applies to different ages and sexes, that guide provides the complete context.
Breed differences: why some puppies stay energetic after spaying
Breed temperament and genetic drive are not hormonal. Surgery does not change them.
A working Border Collie will need two hours of physical and mental exercise daily after spaying, just as she did before. An Australian Shepherd's herding instinct will remain intact. A Jack Russell Terrier's prey drive and intensity will not be reduced by the removal of her ovaries.
High-drive breeds are that way because of generations of selective breeding for those traits. Those traits sit in genetics, not in the reproductive system.
What this means practically:
If you have a high-energy breed puppy and are hoping spaying will reduce her energy to more manageable levels, realign those expectations before surgery. The energy level will remain. What changes is the absence of heat cycles and their associated disruption.
The timeline: when do puppies settle after spaying?
Two separate timelines operate here, and distinguishing them is important.
Post-spay hormonal adjustment:
- Days 1 to 14: Recovery from surgery. Any behavioral changes reflect pain and anesthesia.
- Weeks 2 to 6: Estrogen and progesterone levels declining.
- Months 2 to 3: Hormonal stabilization complete.
Developmental maturation:
- 6 to 12 months: Peak puppy chaos in most breeds.
- 12 to 18 months: Gradual improvement in impulse control and ability to settle.
- 18 months to 3 years: Most dogs reach a noticeably more settled behavioral baseline.
The calming that owners observe after spaying a puppy is often a combination of both timelines working together. The hormonal adjustment contributes. Maturation contributes. Exercise and training contribute. It is rarely attributable to surgery alone.
For the developmental nuances specific to younger dogs, the guide on calming effects in adult dogs covers the broader behavioral picture across different life stages.
What actually calms a puppy down
Whether or not your puppy is spayed, these are the most reliable interventions for managing puppy behavior:
1. Adequate physical exercise
A puppy that has genuinely burned physical energy is a calmer puppy at rest. Exercise needs vary by breed but most puppies are under-exercised relative to their needs.
2. Mental stimulation
Puzzle feeders, sniff walks, training sessions, and enrichment activities tire puppies in a way that physical exercise alone does not. Mental fatigue produces genuine calm.
3. Sleep
Puppies need significantly more sleep than adult dogs, often 16 to 18 hours per day. Over-tired puppies become dysregulated and difficult. Enforced rest periods reduce chaos.
4. Consistent training
Teaching a puppy to settle on a mat, to wait before doors, to sit before meals: these habits build impulse control that transfers across contexts. Training is the most durable path to a calm puppy.
5. Routine
Predictable daily schedules reduce ambient anxiety and help puppies know what to expect, which supports more settled behavior.
Spaying can contribute by removing the hormonal disruption of heat cycles. But it is most effective as one part of this picture, not as a standalone solution.
Frequently asked questions
Will my puppy calm down after being spayed?
She may become calmer in specific ways: heat cycle behaviors will be eliminated, and the cyclical hormonal disruption of estrus will stop. Whether she becomes generally calmer depends on what is driving her behavior. Developmental energy and breed-specific drive are not affected by spaying. For the best age to spay a puppy and how timing affects both health and behavioral outcomes, that guide covers the evidence-based timing recommendations in detail.
My puppy is three months old and incredibly wild. Should I spay her now to calm her down?
Spaying a puppy that young is unlikely to calm her down because the energy she is displaying is developmental, not hormonal. Female puppies typically do not experience their first heat until 5 to 6 months of age at the earliest. Spaying before that will not eliminate hormonal behavior because it has not yet started. What will help is exercise, training, mental stimulation, and sleep.
How long after spaying will my puppy start to calm down?
If the calming effect is going to occur, behavioral changes related to hormone reduction appear over two to six weeks and stabilize by two to three months. Any calming that happens faster than this is likely related to recovery rest and routine, not hormonal adjustment.
My puppy was spayed and she is just as hyper as before. Why?
Because spaying removes the hormonal layer of behavior, not the developmental and breed-driven layers. If her energy and excitability are not heat-driven, spaying was never going to address them. Training, exercise, and maturation are the tools for this type of puppy behavior.
What should I expect during my puppy's recovery from spaying?
The 10 to 14 day recovery period requires activity restriction, E-collar use, and daily incision monitoring. For a complete day-by-day guide on what to expect during puppy recovery, including how puppy recovery specifically differs from adult dog recovery, that guide covers every element of the post-surgical window.
Puppies are not energetic because of estrogen. They are energetic because they are puppies. Spaying addresses the hormonal layer of behavior, which for a young dog has barely had time to develop before surgery. The wild, chaotic, wonderful energy of a puppy is developmental. It settles with time, training, exercise, and maturation. Spaying contributes by preventing heat cycles and the disruption they bring. The rest of the work is yours.
Resources
The following sources were used as reference and background for this article:
- American Kennel Club. How Will Spaying Change My Dog? anasazivet.com
- Stanley Coren, Psychology Today. Are There Behavior Changes When Dogs Are Spayed or Neutered? psychologytoday.com
- Rebarkable. Do Puppies Calm Down After Being Spayed? rebarkable.com
- American Veterinary Medical Association (AVMA). Spaying and Neutering. avma.org
- PubMed. Changes in the behavior of dogs after castration. pubmed.ncbi.nlm.nih.gov

Lameness After TPLO Surgery in Dogs
Learn about causes, diagnosis, and treatment of lameness after TPLO surgery in dogs to help your pet recover fully.
Sustainable Vet Group
Lameness after TPLO surgery in dogs is a common concern for pet owners. TPLO, or Tibial Plateau Leveling Osteotomy, is a surgical procedure to stabilize the knee after a cranial cruciate ligament rupture. Sometimes, dogs show limping or difficulty walking after this surgery, which can worry owners.
This article explains why lameness happens after TPLO surgery, how veterinarians diagnose it, and what treatments help dogs recover. You will learn what signs to watch for and how to support your dog’s healing process effectively.
What causes lameness after TPLO surgery in dogs?
Lameness after TPLO surgery can arise from several factors. Understanding these causes helps you recognize if your dog’s limping is normal or needs veterinary attention. Some causes are related to surgery recovery, while others may indicate complications.
- Postoperative pain: Pain from surgery and inflammation can cause limping during the first weeks, which usually improves with pain management and rest.
- Soft tissue swelling: Swelling around the knee joint after surgery can limit movement and cause discomfort, leading to temporary lameness.
- Implant irritation: The metal plate and screws used in TPLO can sometimes irritate surrounding tissues, causing discomfort and limping.
- Infection risk: Surgical site infections can cause pain, swelling, and lameness, requiring prompt veterinary care.
Other causes include meniscal injury, implant failure, or improper bone healing. Monitoring your dog closely after surgery helps detect these issues early.
How do veterinarians diagnose lameness after TPLO surgery?
Diagnosing the cause of lameness after TPLO involves a thorough physical exam and diagnostic tests. Your veterinarian will assess your dog’s gait, pain level, and surgical site condition.
- Physical examination: Checking the operated leg for swelling, heat, pain, and range of motion helps identify inflammation or injury.
- Gait analysis: Observing how your dog walks or stands can reveal the severity and pattern of lameness.
- Radiographs (X-rays): X-rays evaluate bone healing, implant position, and detect complications like fractures or loosening.
- Joint fluid analysis: In some cases, sampling joint fluid helps detect infection or inflammation inside the knee.
These diagnostic steps guide the veterinarian in choosing the best treatment plan for your dog’s recovery.
What treatments help dogs with lameness after TPLO surgery?
Treatment depends on the cause and severity of lameness. Most dogs improve with conservative care, but some need additional interventions.
- Pain management: Using prescribed pain medications and anti-inflammatories reduces discomfort and supports healing.
- Restricted activity: Limiting running, jumping, and rough play during recovery prevents stress on the surgical site.
- Physical therapy: Controlled exercises and rehabilitation improve muscle strength and joint mobility, aiding recovery.
- Surgical revision: In cases of implant failure, infection, or meniscal injury, additional surgery may be necessary to correct problems.
Following your veterinarian’s instructions closely ensures the best outcome for your dog’s lameness after TPLO surgery.
When is lameness after TPLO surgery normal versus a concern?
Some lameness is expected after TPLO surgery, especially in the first few weeks. However, persistent or worsening limping needs evaluation.
- Normal recovery lameness: Mild limping that improves gradually over 6 to 12 weeks with rest and medication is typical.
- Warning signs: Increasing pain, swelling, heat, or inability to bear weight on the leg indicates complications.
- Delayed healing: If lameness does not improve after 3 months, further diagnostics are needed to check bone healing.
- Infection symptoms: Fever, discharge from the surgical site, or foul odor require urgent veterinary attention.
Early communication with your veterinarian helps address concerns and prevents long-term problems.
How can you support your dog’s recovery after TPLO surgery?
Supporting your dog’s recovery involves careful home care and following veterinary advice. Your role is vital to reduce lameness and promote healing.
- Follow medication schedule: Administer all prescribed painkillers and antibiotics exactly as directed to control pain and prevent infection.
- Limit exercise: Keep your dog confined to a small area and avoid stairs or slippery floors to protect the surgical site.
- Use supportive devices: Consider harnesses or slings to help your dog walk safely during early recovery stages.
- Attend follow-ups: Regular veterinary visits allow monitoring of healing progress and timely intervention if needed.
Patience and consistency in care improve your dog’s comfort and speed recovery after TPLO surgery.
What are the long-term outcomes for dogs with lameness after TPLO surgery?
Most dogs regain good function after TPLO surgery despite initial lameness. Long-term success depends on proper healing and rehabilitation.
- Improved mobility: Successful TPLO surgery stabilizes the knee, allowing dogs to return to normal activity levels over time.
- Arthritis risk: Some dogs develop arthritis in the operated joint, which may cause mild chronic lameness later.
- Rehabilitation benefits: Physical therapy improves muscle strength and joint health, reducing long-term lameness risks.
- Owner vigilance: Monitoring for new limping or pain helps catch problems early and maintain quality of life.
With proper care, dogs can enjoy active lives after recovering from lameness post-TPLO surgery.
Conclusion
Lameness after TPLO surgery in dogs is common but often temporary. It usually results from pain, swelling, or normal healing processes. Understanding the causes and treatments helps you support your dog’s recovery effectively.
If lameness persists or worsens, prompt veterinary evaluation is essential to identify complications like infection or implant issues. Following your veterinarian’s advice on medication, activity restriction, and rehabilitation maximizes your dog’s chances for a full recovery and return to normal activity.
FAQs
How long does lameness last after TPLO surgery?
Lameness usually improves gradually over 6 to 12 weeks after surgery with proper care. Some dogs may take longer depending on individual healing rates.
When should I contact my vet about lameness after TPLO?
Contact your vet if lameness worsens, your dog cannot bear weight, or you notice swelling, heat, discharge, or fever around the surgical site.
Can physical therapy help with lameness after TPLO?
Yes, physical therapy strengthens muscles and improves joint mobility, which helps reduce lameness and supports faster recovery.
Is infection common after TPLO surgery?
Infection is a possible but uncommon complication. Signs include redness, swelling, discharge, and fever, requiring prompt veterinary treatment.
Will my dog fully recover normal use of the leg?
Most dogs regain good leg function after TPLO surgery, especially with proper care and rehabilitation, though some may have mild long-term arthritis.
Synthes TPLO Plate Overview and Use
Learn about Synthes TPLO plates, their design, surgical use, and benefits in canine cruciate ligament repair.
Sustainable Vet Group
Cruciate ligament injuries are common in dogs, often requiring surgical repair to restore joint stability. The Synthes TPLO plate is a specialized orthopedic implant designed to support tibial plateau leveling osteotomy (TPLO) surgeries, which correct knee joint mechanics in affected dogs.
This article explains what the Synthes TPLO plate is, how it works, and why it is widely used in veterinary orthopedic surgery. You will learn about its design features, surgical application, and postoperative care to understand its role in successful cruciate ligament repair.
What is a Synthes TPLO Plate?
The Synthes TPLO plate is a metal implant used in veterinary surgery to stabilize the tibia after a TPLO procedure. It is specifically designed to fit the anatomy of a dog's tibia and support the bone during healing.
This plate helps maintain the new angle of the tibial plateau after osteotomy, allowing the knee to function without abnormal stress on the cruciate ligament.
- Purpose-built design: The plate is contoured to match the shape of the canine tibia, ensuring a precise fit and optimal stability during healing.
- Material strength: Made from stainless steel or titanium, the plate provides durable support to withstand the forces on the knee joint during recovery.
- Locking screw technology: It uses locking screws that secure the plate firmly to the bone, reducing the risk of loosening or shifting after surgery.
- Varied sizes: Available in multiple sizes to accommodate different dog breeds and sizes, allowing customized surgical repair.
These features make the Synthes TPLO plate a reliable choice for orthopedic surgeons treating cruciate ligament injuries in dogs.
How Does the Synthes TPLO Plate Work in Surgery?
During a TPLO surgery, the tibial plateau is cut and rotated to change its slope, reducing the strain on the cruciate ligament. The Synthes TPLO plate is then applied to stabilize the bone segments.
The plate holds the bone in the new position while it heals, allowing the dog to regain normal knee function without instability.
- Osteotomy stabilization: The plate bridges the cut bone, maintaining alignment and preventing movement during healing.
- Load distribution: It evenly distributes mechanical forces across the bone to reduce stress concentration and promote bone growth.
- Secure fixation: Locking screws anchor the plate firmly, preventing micromovements that could delay healing or cause implant failure.
- Facilitates early mobility: By stabilizing the joint, the plate allows controlled weight-bearing soon after surgery, aiding recovery.
Proper placement and fixation of the Synthes TPLO plate are critical for surgical success and long-term joint health.
What Are the Benefits of Using Synthes TPLO Plates?
The Synthes TPLO plate offers several advantages over other fixation methods in TPLO surgery. These benefits contribute to improved outcomes and faster recovery for dogs.
Understanding these benefits helps pet owners appreciate why this implant is often recommended by veterinary surgeons.
- Enhanced stability: The plate provides rigid fixation, reducing the risk of postoperative complications like implant loosening or bone displacement.
- Improved healing: Stable fixation promotes faster bone healing and reduces inflammation around the surgical site.
- Reduced pain: By stabilizing the joint, the plate minimizes abnormal joint movement that causes pain during recovery.
- Long-term joint function: Proper alignment and healing help restore normal knee mechanics, reducing the chance of arthritis development.
These benefits make the Synthes TPLO plate a preferred choice for treating cranial cruciate ligament rupture in dogs.
What Are the Surgical Steps for Using a Synthes TPLO Plate?
Successful use of the Synthes TPLO plate requires careful surgical technique. The procedure involves precise bone cutting, plate selection, and screw placement.
Following these steps helps ensure the implant functions correctly and the dog recovers well.
- Preoperative planning: Surgeons measure the tibial plateau and select the appropriate plate size to match the dog's anatomy.
- Performing osteotomy: The tibial plateau is cut using specialized saws to allow rotation and slope adjustment.
- Plate application: The Synthes TPLO plate is positioned on the bone and temporarily fixed with screws to confirm alignment.
- Final fixation: Locking screws are inserted to secure the plate firmly, ensuring stable fixation of the bone segments.
Each step requires precision and experience to minimize complications and optimize healing.
What Are the Postoperative Care Guidelines After Synthes TPLO Plate Surgery?
After surgery, proper care is essential to support healing and prevent implant-related problems. Owners must follow veterinary instructions closely.
Postoperative care focuses on activity restriction, pain management, and monitoring for complications.
- Restricted activity: Limit the dog's movement to prevent stress on the surgical site and allow bone healing.
- Pain control: Administer prescribed analgesics to keep the dog comfortable during recovery.
- Wound monitoring: Check the incision regularly for signs of infection such as redness, swelling, or discharge.
- Follow-up visits: Schedule regular veterinary appointments for X-rays to assess bone healing and implant position.
Adhering to these guidelines improves the chances of a successful outcome and full return to function.
What Are the Potential Complications of Synthes TPLO Plate Use?
While the Synthes TPLO plate is effective, some complications can occur. Awareness of these risks helps owners and surgeons manage them promptly.
Most complications relate to surgical technique, implant issues, or postoperative care.
- Infection risk: Surgical site infections can occur, requiring antibiotics or implant removal in severe cases.
- Implant failure: Plate or screw loosening or breakage may happen if the dog is too active or bone healing is poor.
- Delayed healing: Factors like poor blood supply or infection can slow bone repair, prolonging recovery time.
- Joint stiffness: Inadequate rehabilitation may cause reduced knee mobility and muscle wasting.
Close monitoring and timely intervention reduce the impact of these complications on the dog's recovery.
Conclusion
The Synthes TPLO plate is a key tool in veterinary orthopedic surgery for repairing cruciate ligament injuries in dogs. Its design and locking screw technology provide stable fixation that supports effective bone healing and joint function.
Understanding the plate's use, benefits, and care requirements helps pet owners support their dog's recovery and improve surgical outcomes. With proper surgical technique and postoperative management, the Synthes TPLO plate offers a reliable solution for restoring knee stability and mobility in affected dogs.
FAQs
How long does it take for a dog to heal after TPLO surgery with a Synthes plate?
Healing typically takes 8 to 12 weeks, depending on the dog's size and health. Regular veterinary check-ups monitor bone healing and implant stability during this period.
Can the Synthes TPLO plate be removed after healing?
Plate removal is usually not necessary unless complications arise. Most dogs keep the implant permanently without issues once healing is complete.
Is the Synthes TPLO plate suitable for all dog breeds?
The plate comes in various sizes to fit most breeds, but very small or very large dogs may require customized implants or alternative treatments.
What signs indicate complications after TPLO surgery?
Watch for swelling, redness, discharge, increased pain, or lameness worsening. These signs warrant prompt veterinary evaluation to address possible infection or implant problems.
How soon can a dog bear weight on the leg after Synthes TPLO plate surgery?
Most dogs begin partial weight-bearing within days after surgery, progressing to full weight-bearing over weeks as healing advances under veterinary guidance.
Bruising After TPLO Surgery in Dogs
Learn about bruising after TPLO surgery in dogs, its causes, care tips, and when to seek veterinary help.
Sustainable Vet Group
Bruising after TPLO surgery in dogs is a common concern for many pet owners. TPLO, or Tibial Plateau Leveling Osteotomy, is a surgical procedure to stabilize a dog's knee after a cruciate ligament injury. After surgery, owners often notice bruising around the incision site or leg, which can be alarming.
This article explains why bruising happens after TPLO surgery, how to care for your dog during recovery, and when to contact your veterinarian. Understanding bruising helps you support your dog's healing process effectively.
Why Does Bruising Occur After TPLO Surgery in Dogs?
Bruising happens when blood vessels under the skin break and leak blood into surrounding tissues. After TPLO surgery, bruising is usually due to the trauma of surgery and tissue manipulation. The surgical area may show discoloration as part of normal healing.
It is important to recognize that some bruising is expected, but excessive or worsening bruising may indicate complications. Knowing the causes helps you monitor your dog’s recovery closely.
- Surgical trauma: The cutting and repositioning of bone and soft tissue during TPLO can cause small blood vessels to rupture, leading to bruising around the surgical site.
- Inflammation response: The body’s natural healing process causes inflammation, which can increase blood flow and cause visible bruising and swelling near the incision.
- Blood thinning medications: If your dog is on medications like aspirin or NSAIDs, these can increase bruising risk by affecting clotting mechanisms.
- Movement after surgery: Excessive activity or pressure on the leg soon after surgery can worsen bruising by disrupting healing tissues and blood vessels.
Understanding these causes helps you differentiate normal bruising from signs of complications that need veterinary attention.
What Does Normal Bruising Look Like After TPLO Surgery?
Normal bruising after TPLO surgery usually appears as a purple, blue, or reddish discoloration around the incision or leg. It often develops within 24 to 48 hours post-surgery and gradually fades over 1 to 2 weeks.
Knowing the typical appearance and timeline of bruising helps you track your dog’s healing and identify abnormal changes early.
- Color changes: Bruises typically start dark purple or blue, then change to green, yellow, and finally fade as healing progresses over days to weeks.
- Size and spread: Normal bruising is usually localized near the incision and does not spread extensively to other parts of the leg or body.
- Swelling presence: Mild swelling often accompanies bruising but should not cause severe discomfort or limb deformity.
- Pain level: Some tenderness is expected, but your dog should not show signs of severe pain or limping beyond normal post-surgical recovery.
Monitoring these signs helps ensure bruising is part of normal healing and not a sign of infection or bleeding complications.
How Should You Care for Bruising After TPLO Surgery?
Proper care reduces bruising severity and supports healing after TPLO surgery. Following your veterinarian’s instructions and providing gentle care helps your dog recover comfortably and safely.
Simple steps at home can minimize bruising and swelling while preventing complications.
- Rest and restricted activity: Limit your dog’s movement to prevent pressure on the surgical site and avoid worsening bruising or swelling.
- Cold compress application: Applying a cold pack wrapped in cloth for 10–15 minutes several times daily during the first 48 hours can reduce swelling and bruising.
- Proper bandage care: Keep any surgical bandages clean and dry, and follow your vet’s instructions on changing or removing them to avoid irritation.
- Medication adherence: Administer all prescribed painkillers and anti-inflammatory drugs exactly as directed to control pain and reduce inflammation.
Consistent care helps your dog heal faster and reduces the risk of bruising-related complications.
When Should You Be Concerned About Bruising After TPLO Surgery?
While bruising is normal, certain signs indicate that your dog may need urgent veterinary evaluation. Recognizing these warning signs early can prevent serious complications.
If you notice any of the following, contact your veterinarian promptly for advice or examination.
- Rapidly expanding bruises: Bruising that spreads quickly or becomes very large may signal active bleeding or hematoma formation requiring medical attention.
- Excessive swelling and heat: Swelling that worsens with warmth and redness around the incision could indicate infection or inflammation needing treatment.
- Severe pain or lameness: If your dog shows intense pain, refuses to bear weight, or has a limp worsening over time, this may suggest complications.
- Discharge or foul odor: Any pus, bleeding, or bad smell from the surgical site is a sign of infection and requires immediate veterinary care.
Early detection of problems helps ensure timely treatment and better recovery outcomes.
Can Bruising Affect Your Dog’s Recovery After TPLO Surgery?
Bruising itself usually does not affect the overall success of TPLO surgery if it is mild and managed properly. However, severe bruising or related complications can delay healing and cause discomfort.
Understanding the impact of bruising helps you provide better care and communicate effectively with your veterinarian during recovery.
- Minor bruising benefits: Mild bruising is a normal sign of healing and usually resolves without affecting joint stability or function.
- Severe bruising risks: Large bruises or hematomas can increase pain, limit mobility, and sometimes require drainage or additional treatment.
- Infection risk: Bruised tissue is more vulnerable to infection, so keeping the area clean and monitoring closely is essential.
- Physical therapy considerations: Bruising may limit early physical therapy, so adjusting rehabilitation plans based on your dog’s condition is important.
Working closely with your vet ensures bruising does not interfere with your dog’s full recovery and return to normal activity.
How Can You Prevent Bruising After TPLO Surgery in Dogs?
While some bruising is unavoidable due to surgery, certain steps can reduce its severity and support smooth healing. Prevention focuses on careful handling and following veterinary guidance.
Taking precautions before and after surgery helps protect your dog’s tissues and blood vessels from excessive damage.
- Pre-surgery health check: Ensuring your dog is healthy and not on blood-thinning medications before surgery reduces bruising risk.
- Gentle post-op handling: Avoid rough play, jumping, or excessive pressure on the leg during recovery to prevent new bruises.
- Follow medication instructions: Use prescribed drugs properly and avoid over-the-counter medications without vet approval to prevent clotting issues.
- Regular veterinary follow-up: Attend all scheduled check-ups so your vet can monitor healing and address bruising or other concerns early.
Prevention and careful management promote a safer, faster recovery with minimal bruising complications.
Conclusion
Bruising after TPLO surgery in dogs is a common and usually normal part of the healing process. It results from surgical trauma and inflammation, appearing as discoloration near the incision site. Mild bruising typically resolves within two weeks without affecting recovery.
Proper care, including rest, cold compresses, and medication adherence, helps reduce bruising and supports healing. However, owners should watch for signs of excessive bruising, swelling, pain, or infection and contact their veterinarian promptly if these occur. Understanding bruising after TPLO surgery allows you to care for your dog confidently and ensure a smooth recovery.
FAQs
Is bruising after TPLO surgery normal for all dogs?
Yes, mild bruising is common after TPLO surgery due to tissue trauma and inflammation. However, the amount varies by individual and surgical factors.
How long does bruising last after TPLO surgery?
Bruising usually appears within 1–2 days after surgery and fades over 1 to 2 weeks as the tissues heal naturally.
Can I use cold packs on my dog’s bruising after surgery?
Yes, applying cold compresses wrapped in cloth for 10–15 minutes several times daily during the first 48 hours helps reduce swelling and bruising.
When should I call the vet about bruising after TPLO?
Contact your vet if bruising spreads rapidly, swelling worsens, pain is severe, or if there is discharge or foul odor from the incision.
Does bruising affect my dog’s ability to walk after TPLO surgery?
Mild bruising usually does not affect walking, but severe bruising or pain may cause limping and require veterinary evaluation.

How to Keep an Energetic Dog Calm After Surgery
Learn effective ways to keep your energetic dog calm after surgery with practical tips and expert advice for smooth recovery.
Sustainable Vet Group
After surgery, energetic dogs can be a challenge to manage because their natural activity may interfere with healing. Keeping your dog calm is crucial to prevent complications and ensure a smooth recovery. This article explains how to handle your dog's energy safely after surgery.
You will learn practical strategies to reduce your dog's activity, create a comfortable environment, and support healing. These tips help you balance your dog's need for rest with their natural energy levels.
Why is it important to keep an energetic dog calm after surgery?
After surgery, your dog's body needs time to heal. Excessive activity can cause pain, reopen wounds, or delay recovery. Energetic dogs may struggle to stay still, increasing the risk of injury.
Understanding the importance of calmness helps you take steps to protect your dog's health during this vulnerable time.
- Prevents wound damage: Limiting movement reduces the chance of stitches tearing or wounds reopening, which can cause infections or require more surgery.
- Reduces pain and swelling: Rest helps control inflammation and discomfort, making recovery smoother and faster.
- Supports medication effectiveness: Calm behavior ensures your dog responds well to pain relief and antibiotics, improving healing outcomes.
- Prevents complications: Overexertion can lead to bleeding, bruising, or internal injuries, which are dangerous after surgery.
Keeping your dog calm is essential to avoid setbacks and promote a healthy recovery process.
What are the best ways to restrict your dog's activity safely?
Restricting activity after surgery requires careful planning. You want to limit movement without causing stress or anxiety. Using physical barriers and controlled routines helps manage your dog's energy safely.
Here are effective methods to keep your dog calm while preventing injury.
- Use a crate or small room: Confine your dog to a safe, comfortable space to limit running and jumping while allowing rest.
- Leash walks only: Take short, slow walks on a leash to allow bathroom breaks without overexertion or excitement.
- Remove toys and distractions: Avoid giving your dog balls or chew toys that encourage active play during recovery.
- Provide comfortable bedding: A soft, supportive bed encourages your dog to lie down and relax instead of moving around.
These steps help control your dog's activity level while keeping them safe and comfortable.
How can you create a calming environment for your dog after surgery?
A calm environment reduces stress and helps your dog rest better. Noise, bright lights, and busy areas can excite your dog and increase activity. Creating a peaceful space supports healing.
Consider these tips to make your dog's recovery area soothing and quiet.
- Choose a quiet room: Place your dog in a low-traffic area away from loud noises and household activity to minimize stimulation.
- Dim the lights: Soft lighting helps your dog relax and signals it is time to rest.
- Use calming scents: Lavender or chamomile diffusers can soothe anxiety and promote sleep in dogs.
- Play soft music: Gentle classical or specially designed pet relaxation music can reduce stress and encourage calmness.
A peaceful environment helps your dog stay calm and recover faster after surgery.
What role does diet and hydration play in calming an energetic dog after surgery?
Proper nutrition and hydration support healing and can influence your dog's energy levels. Feeding the right diet and ensuring water intake helps your dog feel comfortable and less restless.
Here are ways diet and hydration contribute to calming your dog post-surgery.
- Feed easily digestible food: Soft, bland diets reduce stomach upset and encourage eating during recovery.
- Maintain hydration: Fresh water availability prevents dehydration, which can cause irritability and restlessness.
- Limit treats: Avoid high-energy or sugary treats that may increase hyperactivity during healing.
- Follow vet dietary advice: Use prescribed diets or supplements that support tissue repair and immune function.
Balanced nutrition and hydration help your dog stay calm and heal efficiently after surgery.
How can you use mental stimulation to keep your dog calm without physical activity?
Mental stimulation can tire your dog’s mind and reduce restlessness without physical exertion. This approach helps energetic dogs stay calm while respecting activity restrictions.
Try these mental activities to keep your dog engaged safely.
- Use puzzle feeders: Food-dispensing toys challenge your dog’s brain and slow eating, providing calm focus.
- Teach simple commands: Short training sessions with basic commands keep your dog mentally active without movement.
- Offer scent games: Hide treats for your dog to find using smell, which stimulates the brain gently.
- Provide chew toys: Safe chew toys satisfy natural urges and promote relaxation without running or jumping.
Mental exercises help reduce boredom and energy, supporting calmness during recovery.
When should you contact your vet about your dog's activity after surgery?
Monitoring your dog’s behavior after surgery is important. If your dog is too active or shows signs of pain or complications, contact your vet promptly. Early intervention prevents serious problems.
Watch for these warning signs and know when to seek veterinary advice.
- Excessive licking or biting: Persistent attention to the surgical site may indicate pain or irritation needing vet evaluation.
- Swelling or bleeding: Any unusual swelling, redness, or bleeding around the wound requires immediate veterinary care.
- Restlessness or whining: Signs of discomfort or anxiety that do not improve with medication should be reported.
- Difficulty walking or limping: Changes in mobility may signal complications needing professional assessment.
Timely communication with your vet ensures your dog’s recovery stays on track and complications are minimized.
How can medication help keep an energetic dog calm after surgery?
Medications prescribed by your vet play a key role in managing pain and anxiety after surgery. Proper use of these drugs helps keep your dog comfortable and less active, aiding recovery.
Understand how medication supports calmness and what to expect.
- Pain relief drugs: Analgesics reduce discomfort, making your dog less likely to move excessively due to pain.
- Anti-anxiety medications: In some cases, vets prescribe mild sedatives to help overly energetic dogs relax safely.
- Follow dosage instructions: Administer medications exactly as directed to avoid side effects or underdosing.
- Monitor for reactions: Watch for adverse effects like drowsiness or vomiting and report concerns to your vet promptly.
Medication is a valuable tool for controlling activity and ensuring your dog’s comfort during healing.
Conclusion
Keeping an energetic dog calm after surgery is vital for a smooth and safe recovery. By restricting activity, creating a calming environment, and using mental stimulation, you can help your dog heal without stress or injury.
Following veterinary advice on diet, medication, and monitoring signs of complications ensures your dog stays comfortable and recovers well. With patience and care, your energetic dog can return to normal activity safely after surgery.
What should I do if my dog refuses to rest after surgery?
Try increasing mental stimulation with puzzle toys and short training sessions. If restlessness continues, consult your vet about possible anxiety medications or pain management adjustments.
Can I let my dog go outside to play after surgery?
Limit outdoor time to short, slow leash walks for bathroom breaks only. Avoid running, jumping, or playing until your vet confirms it is safe.
How long does it usually take for a dog to calm down after surgery?
Most dogs begin to calm within 7 to 14 days, depending on the surgery type and individual energy levels. Follow your vet’s recovery timeline closely.
Are there natural remedies to help calm my dog after surgery?
Calming scents like lavender and chamomile, as well as gentle massage, can help reduce anxiety. Always check with your vet before using supplements or herbal remedies.
What signs indicate my dog is too active after surgery?
Signs include excessive licking of the wound, swelling, bleeding, restlessness, whining, or difficulty walking. Contact your vet immediately if you notice these symptoms.
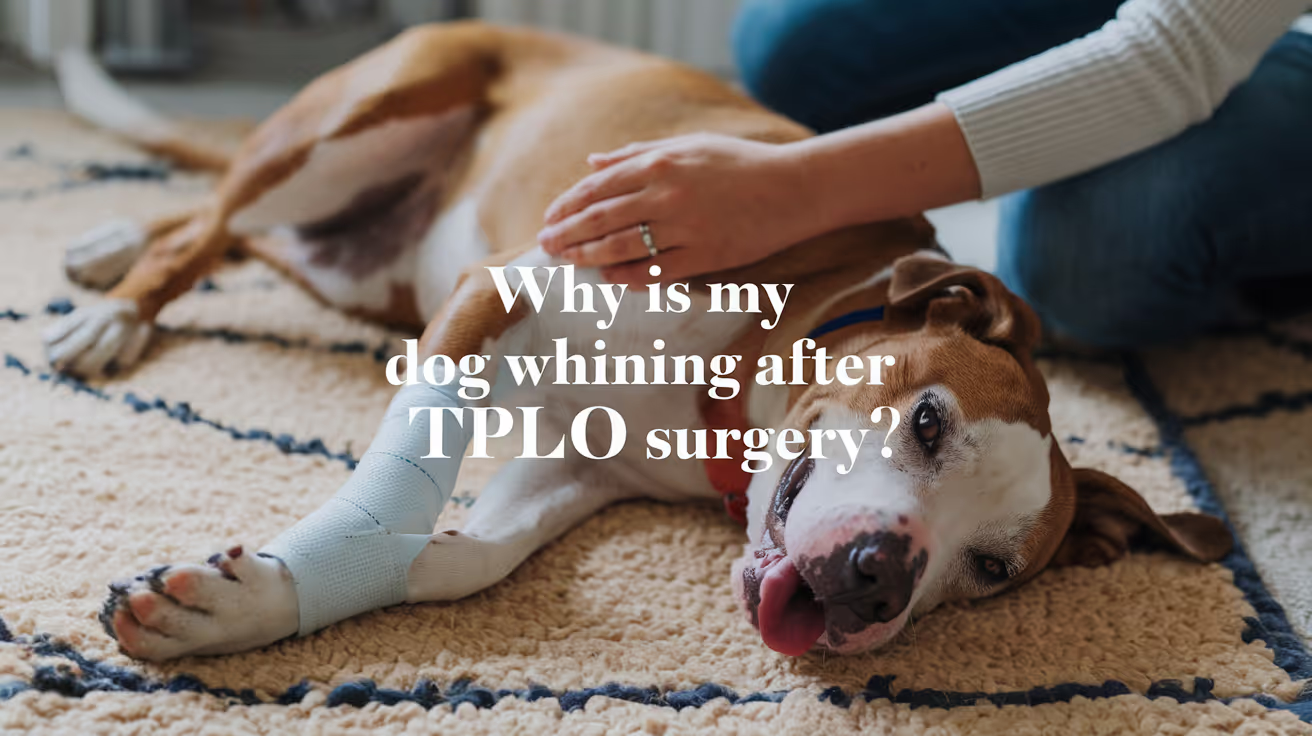
Dog Whining After TPLO Surgery: Causes and Care
Learn why your dog may whine after TPLO surgery, what it means, and how to help your pet recover comfortably and safely.
Sustainable Vet Group
After your dog undergoes TPLO surgery, you might notice whining behavior that can worry you. Dog whining after TPLO surgery is common and can signal pain, discomfort, or anxiety during recovery. Understanding why your dog whines helps you provide better care and support during this critical healing phase.
This article explains the main reasons dogs whine after TPLO surgery, how to recognize when it is normal or concerning, and what steps you can take to ease your dog's discomfort. You will learn practical tips for managing pain, preventing complications, and promoting a smooth recovery.
Why is my dog whining after TPLO surgery?
Whining after TPLO surgery usually relates to pain or discomfort from the operation. Dogs cannot tell us how they feel, so whining is one way they express distress. It can also be a sign of anxiety or frustration due to restricted movement during recovery.
Recognizing the cause of whining helps you respond appropriately to your dog's needs and avoid unnecessary stress or complications.
- Postoperative pain: Pain from the surgical site is the most common reason for whining and usually peaks in the first few days after surgery.
- Restricted mobility: Limited ability to move or walk can cause frustration and whining as your dog adjusts to the recovery process.
- Anxiety or stress: Changes in routine, confinement, and discomfort can make your dog anxious, leading to vocalization like whining.
- Need for attention: Your dog may whine to seek comfort, reassurance, or physical contact from you during recovery.
Understanding these causes allows you to provide better comfort and care to your dog after TPLO surgery.
How can I tell if my dog’s whining is normal or a sign of a problem?
Not all whining after TPLO surgery is cause for alarm. Normal whining is usually mild and occurs during movement or when your dog is settling down. However, excessive or persistent whining may indicate complications or uncontrolled pain.
Knowing the difference helps you decide when to contact your veterinarian for advice or intervention.
- Normal whining: Occurs intermittently, especially when your dog tries to move or change position, and decreases over time.
- Signs of severe pain: Loud, continuous whining combined with limping, restlessness, or refusal to bear weight may signal uncontrolled pain.
- Signs of infection: Whining with swelling, redness, discharge, or foul odor at the surgical site requires immediate veterinary attention.
- Behavioral changes: Excessive whining with aggression, lethargy, or loss of appetite may indicate complications or distress.
Monitoring your dog closely and noting changes in whining patterns helps ensure timely care and prevents worsening conditions.
What pain management options are available after TPLO surgery?
Effective pain control is essential to reduce whining and promote healing after TPLO surgery. Your veterinarian will prescribe medications and suggest supportive measures to keep your dog comfortable.
Following the prescribed pain management plan closely improves your dog's recovery experience and reduces stress for both of you.
- Prescription painkillers: Non-steroidal anti-inflammatory drugs (NSAIDs) or opioids are commonly used to control postoperative pain safely.
- Cold therapy: Applying cold packs to the surgical area can reduce swelling and numb pain during the first 48 hours after surgery.
- Physical support: Using slings or harnesses helps your dog move without putting full weight on the operated leg, reducing pain during walking.
- Environmental comfort: Providing a quiet, soft resting area minimizes discomfort and encourages rest, which reduces whining.
Always follow your veterinarian's instructions on medication dosage and duration to avoid side effects or complications.
How should I care for my dog’s surgical site to reduce discomfort?
Proper wound care after TPLO surgery helps prevent infection and reduces pain that can cause whining. Keeping the surgical site clean and protected is vital during recovery.
Regular inspection and gentle care promote healing and comfort for your dog.
- Keep the incision dry: Avoid bathing or allowing water on the surgical site until your vet confirms it is safe to do so.
- Prevent licking or chewing: Use an Elizabethan collar or protective clothing to stop your dog from irritating the wound.
- Check for signs of infection: Look for redness, swelling, discharge, or foul smell and report concerns to your vet promptly.
- Follow dressing instructions: Change bandages as directed by your veterinarian to maintain cleanliness and support healing.
Consistent care of the surgical site reduces pain and helps your dog feel more comfortable during recovery.
What activity restrictions should I follow to help my dog heal?
Limiting your dog's activity after TPLO surgery is crucial to prevent injury and reduce pain that causes whining. Controlled movement supports proper healing and avoids complications.
Understanding and enforcing these restrictions ensures your dog recovers safely and comfortably.
- Strict confinement: Keep your dog in a small area or crate to limit running, jumping, or climbing for at least 6 to 8 weeks post-surgery.
- Leash walks only: Allow short, slow leash walks for bathroom breaks, avoiding off-leash activity or rough surfaces.
- Avoid stairs: Prevent stair climbing to reduce strain on the healing leg and minimize pain.
- Gradual reintroduction: Follow your veterinarian’s guidance to slowly increase activity as healing progresses, monitoring for any signs of discomfort.
Adhering to activity restrictions helps reduce whining caused by pain or injury during recovery.
When should I contact my veterinarian about my dog’s whining?
Knowing when to seek veterinary help is important if your dog’s whining signals a problem after TPLO surgery. Prompt attention can prevent complications and improve outcomes.
Being proactive about your dog’s symptoms ensures timely care and peace of mind.
- Persistent severe whining: If your dog whines continuously and shows signs of severe pain or distress, contact your vet immediately.
- Signs of infection: Whining accompanied by swelling, redness, discharge, or fever requires urgent veterinary evaluation.
- Changes in mobility: Sudden inability to bear weight or worsening lameness with whining should be assessed by a professional.
- Behavioral or appetite changes: Excessive whining with lethargy, aggression, or loss of appetite may indicate complications needing veterinary care.
Timely communication with your veterinarian helps ensure your dog’s recovery stays on track and reduces unnecessary suffering.
Conclusion
Dog whining after TPLO surgery is a common way your pet expresses pain, discomfort, or anxiety during recovery. Understanding the reasons behind the whining helps you provide better care and comfort to your dog.
By managing pain effectively, caring for the surgical site, restricting activity, and monitoring for complications, you can support your dog's healing and reduce distress. Always consult your veterinarian if you are concerned about your dog's whining or recovery progress.
FAQs
How long does whining usually last after TPLO surgery?
Whining typically decreases within the first two weeks as pain and discomfort lessen. Persistent or worsening whining beyond this period should be evaluated by a veterinarian.
Can I give my dog over-the-counter pain medication for TPLO recovery?
Do not give over-the-counter pain medications without veterinary approval, as some can be toxic to dogs or interfere with prescribed treatments.
Is it normal for my dog to whine at night after TPLO surgery?
Yes, dogs may whine at night due to discomfort or anxiety. Providing a comfortable, quiet space and following pain management helps reduce nighttime whining.
How can I comfort my dog when it whines after surgery?
Offer gentle petting, speak softly, and stay close to reassure your dog. Avoid excessive stimulation that may increase anxiety or pain.
When can my dog start physical therapy after TPLO surgery?
Physical therapy usually begins 1 to 2 weeks post-surgery, depending on healing progress. Follow your veterinarian’s recommendations for timing and exercises.

Sustainable Vet | Copyright ©2026 | All Rights Reserved

