

Protecting
Pets, People & Planet
Join a group of veterinarians leveraging the latest technologies to deliver excellent care to their patients while being a responsible and positive force for their local and global communities.
100% secure. We do not share your information


Recent Articles
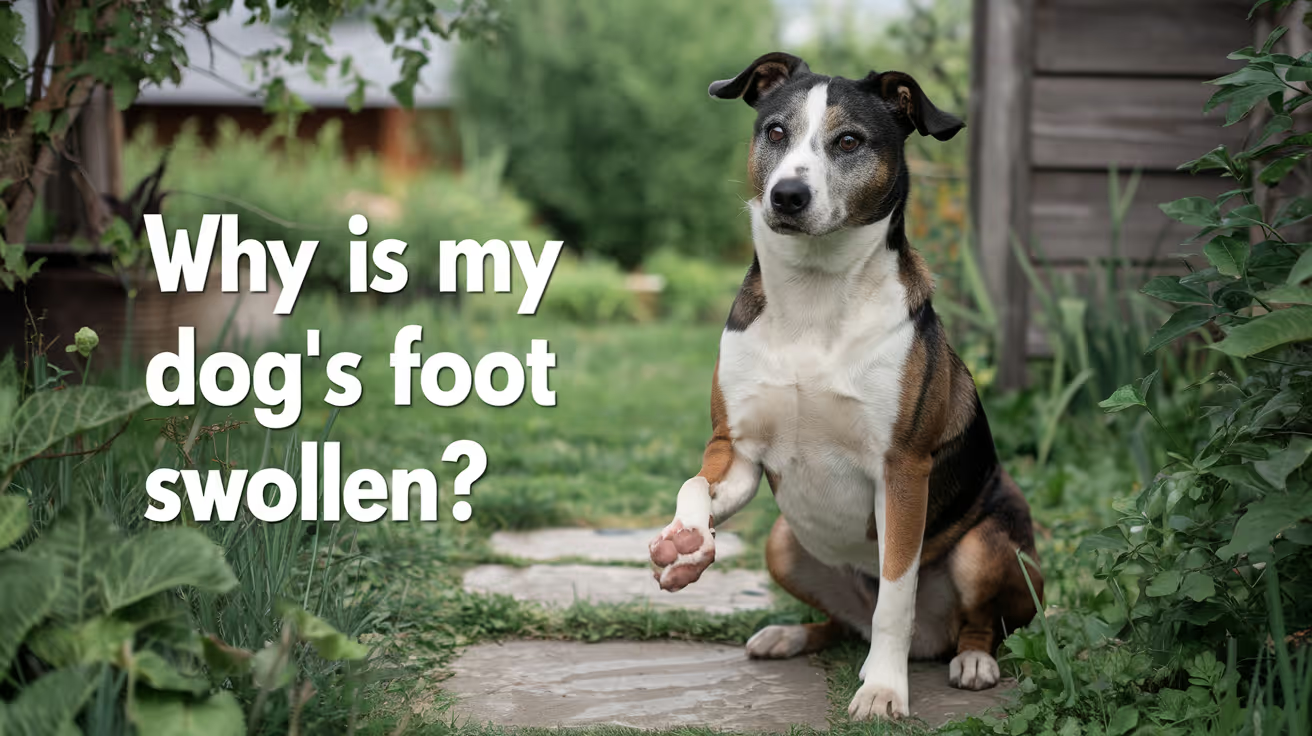
Why Is My Dog's Foot Swollen?
Discover why your dog's foot is swollen, common causes, treatments, and when to see a vet for proper care.
A swollen dog foot is one of the most common reasons owners call their vet. It can be as simple as a bee sting or as serious as a deep infection or bone tumor. The location, speed of onset, and other symptoms all help narrow down the cause.
This guide covers every common cause, how to assess severity at home, and the exact signs that mean your dog needs same-day care.
Quick answer: A swollen dog foot usually has a local cause: injury, insect sting, foreign object, or infection. Warm, increasing, or discharging swelling needs same-day vet care. Multiple swollen paws suggest allergies.
Key takeaways
- Single-paw swelling almost always has a local cause: injury, sting, foreign body, or infection
- Interdigital furunculosis (infected hair follicle cysts between toes) is among the most misidentified causes of recurring paw swelling
- Foreign objects like foxtails and glass splinters can migrate deep into tissue if left untreated
- Pododermatitis is the clinical term for inflamed paw skin; allergies are the most common underlying driver
- Swelling spreading up the leg or paired with face or neck swelling is an emergency requiring immediate care
- Most mild swelling from a sting or minor sprain improves within 24 to 48 hours with rest and monitoring
How to assess your dog's swollen foot before calling the vet
Before looking up causes, do a quick home assessment. This takes two minutes and tells you how urgent the situation is.
Step 1: Which paw?One paw = likely local cause. All four paws = likely allergic or systemic.
Step 2: Feel for heat.Warm or hot tissue means active inflammation or infection.
Step 3: Look between every toe.Redness, swelling between the digits, or visible nodules between the toes points to interdigital furunculosis or a foreign body.
Step 4: Check the pads.Burns appear as red, blistered, or peeling pad tissue. Cuts and punctures are often visible on the pad surface.
Step 5: Look at each nail.A broken nail or swollen nail bed causes localized pain and swelling at the toe tip.
VCA Animal Hospitals: "A deeper infection, like an abscess, will appear as a warm, soft to mildly firm swelling under the skin."
8 common causes of a swollen foot in dogs
1. Injury or trauma
Sprains, cuts, fractured toes, torn nails, and pad burns are the most frequent causes of sudden single-paw swelling. Dogs running on rough, hot, or icy terrain are especially prone.
PetMD notes that pad burns are particularly common in summer: check the pads after any walk on hot pavement. If your palm cannot hold against the pavement for five seconds, it is too hot for your dog's feet.
Signs: sudden lameness after activity, localized swelling, visible wound or bruising.
2. Foreign object
Thorns, glass, foxtails, and grass awns lodge between the toes or penetrate the pad. The body mounts an inflammatory response around the object, causing swelling that worsens over days.
SpectrumCare: "Foxtails and grass awns can lodge between the toes or in the pad and trigger pain, swelling, and infection."
Foxtails are particularly dangerous because they are barbed and can migrate deeper into tissue over days, eventually requiring surgical removal. If you cannot see and safely remove the object, do not probe. See a vet.
3. Insect sting or bite
Bees, wasps, fire ants, and spiders cause rapid single-paw swelling that appears within minutes of the sting. The paw may look puffy and your dog may lick or hold it up.
Dyer Animal Clinic advises watching for anaphylaxis signs: hives, difficulty breathing, excessive swelling spreading beyond the paw. These require emergency care immediately.
Localized sting swelling that stays in the paw and is not worsening can be monitored at home for 24 to 48 hours.
4. Infection: bacterial and fungal
Bacterial or fungal infections enter through cuts, puncture wounds, or damaged skin. Infected paws are typically warm, red, swollen, and often have an odor or discharge. VCA lists the visual signs: "Skin infections on the feet may result in red, moist lesions between the toes."
Pododermatitis (inflammation of the paw skin) is the umbrella clinical term. Common causes include:
- Secondary bacterial infection from chronic licking
- Yeast overgrowth in skin folds between toes
- Fungal infections (ringworm can affect paws)
- Demodectic mange (mite overgrowth)
Pododermatitis does not resolve without treatment. Antibiotics, antifungal medication, or both are typically required.
5. Interdigital furunculosis
This is one of the most commonly missed causes of recurring paw swelling. Interdigital furunculosis occurs when hair follicles between the toes become infected, forming painful reddish-purple nodules that may rupture and drain.
AKC notes that the condition is especially prevalent in short-coated, heavyset breeds: Bulldogs, Labrador Retrievers, and Chinese Shar-Pei are among the most commonly affected. Chronic licking due to allergies is a major driver.
Signs: swollen, painful nodules between the toes, draining tracts, recurrent swelling in the same location.
For how furuncles between the toes connect to abscess formation, see abscess as a cause of limb swelling.
6. Allergic reaction and pododermatitis
Environmental allergens (pollen, grass, lawn chemicals, road salt) and food allergies frequently cause paw inflammation. Dogs with allergies lick their feet chronically, creating secondary infection on top of the allergic reaction.
Wakefield Pet Vet: "Allergic reactions typically cause itching, redness, and sometimes blistering between the toes or on paw pads."
Allergic paw swelling usually affects multiple paws. It tends to recur seasonally or after contact with the trigger substance. Dogs with seasonal allergies often have their worst paw symptoms in spring and fall.
7. Bursitis
Bursae are small fluid-filled sacs that cushion joints. Repeated pressure on bony prominences, especially the elbow and hock, can cause bursitis. Affected joints may appear as soft, fluctuant swellings near a joint.
For how bursitis specifically produces foot and joint swelling, see bursitis as a common cause of foot swelling.
8. Cysts, tumors, and nail bed disease
Cysts, mast cell tumors, and subungual (under-nail) tumors can all present as localized swelling on or near the foot. Petcube notes that toenail tumors are more prevalent in large black-coated breeds such as Standard Poodles, Gordon Setters, and Schnauzers.
A lump that is growing, firm, or pigmented should always be evaluated by a vet rather than monitored at home.
For an overview of lumps that cause swelling on the legs, see lumps that can cause swelling.
Severity triage: what to do right now
Home care for mild cases
For minor swelling without infection signs:
- Keep the dog calm and limit walking
- Soak the paw in warm (not hot) water with Epsom salts for 10 minutes. PetMD recommends this as an excellent short-term measure regardless of cause.
- Gently clean any visible wound with mild soap and warm water
- Apply a cool damp cloth for 10 to 15 minutes to reduce swelling from sprains or stings
- Do not apply antibiotic ointments without vet guidance some formulations are toxic to dogs if licked
For pressure-related paw and leg swelling in dogs that rest in one position for extended periods, see pressure-related swelling in dogs.
Frequently asked questions
How do I treat my dog's swollen paw at home?
For mild swelling with no wound or discharge, rest the dog and soak the paw in warm Epsom salt water for 10 minutes. Check carefully for a foreign object or insect stinger. Do not use human antibiotic creams without vet guidance. If swelling has not reduced within 24 to 48 hours or is getting worse, contact your vet.
When should I be worried about my dog's swollen paw?
Be concerned immediately if the swelling is warm, increasing, or has discharge or odor. Call the vet the same day if your dog refuses to bear weight, if the swelling is spreading up the leg, or if there is any sign of an allergic reaction such as facial swelling or breathing difficulty.
What can I give my dog for a swollen paw?
Do not give human pain medications (ibuprofen, acetaminophen, aspirin) to dogs; many are toxic. For minor swelling, warm Epsom salt soaks are safe and effective for short-term relief. Your vet can prescribe appropriate anti-inflammatory medication if needed after examining the paw.
My dog's foot was normal this morning and is swollen now. What happened?
Sudden single-paw swelling most often means an insect sting, a foreign object picked up during activity, or a minor sprain. Check each toe carefully for a stinger, thorn, or visible wound. If swelling is mild and localized, monitor for 24 hours. If increasing or painful, call the vet the same day.
Can swelling in a dog's foot go away on its own?
Minor swelling from a bee sting or small sprain typically resolves within 24 to 48 hours with rest. Infections, foreign objects, interdigital furunculosis, and bursitis do not resolve without treatment. If swelling has not improved within 48 hours, veterinary assessment is needed.
My dog's foot smells bad and is swollen. Is that serious?
Yes. Odor from a swollen paw strongly indicates infection. A foul smell means bacteria are actively present. Common sources include interdigital furunculosis, a nail bed infection, or an abscess. This requires prompt veterinary treatment and should not be left to resolve on its own.
Resources
- PetMD. Dogs Swollen Paws: Causes and Treatments. petmd.com
- VCA Animal Hospitals. First Aid for Limping Dogs. vcahospitals.com
- AKC. Pododermatitis on Dog Paw: Causes, Symptoms and Treatment. akc.org
- SpectrumCare. Paw Swelling in Dogs. spectrumcare.pet
- Dyer Animal Clinic. Reasons Your Dog's Paw is Swollen. dyeranimalclinic.com
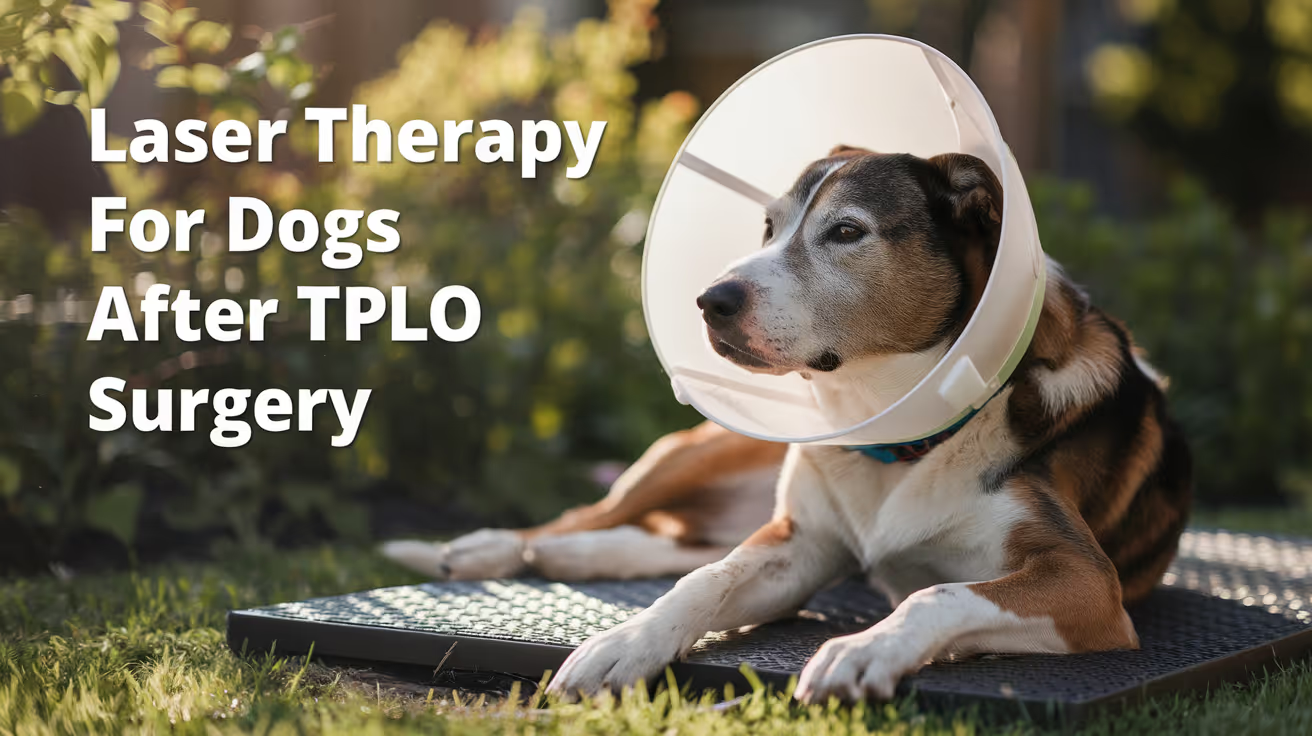
Laser Therapy for Dogs After TPLO Surgery
Learn how laser therapy helps dogs recover faster and with less pain after TPLO surgery for cruciate ligament repair.
Laser therapy also called photobiomodulation (PBMT) or low-level laser therapy (LLLT) is one of the most commonly offered adjunct treatments during TPLO recovery. Many specialist and rehabilitation centres include it routinely.
But the evidence for its benefits is more nuanced than the marketing suggests, and owners deserve an honest picture of what it does and does not reliably achieve.
Quick answer: Laser therapy after TPLO uses specific light wavelengths to reduce inflammation and support tissue healing. Evidence for early pain reduction is moderately supported; evidence for improved radiographic bone healing is weak. It is a safe adjunct but should not replace rehabilitation exercises, pain medication, or activity restriction.
Key takeaways
- Laser therapy reduces postoperative inflammation and may improve gait scores: a TPLO study found better hindlimb function at 8 weeks in treated dogs
- Evidence for improving radiographic bone healing is weak: three controlled studies found no statistically significant difference in healing time
- The 2024 AVMA randomized trial found no significant difference in CRP, weight bearing, pain scores, or SSI rates between PBMT and sham groups
- Sessions typically begin within the first few days of surgery and continue through the rehabilitation phase
- Laser therapy is safe with few contraindications: avoid eyes and active tumour sites; safe over the TPLO incision once closed
- It works best as part of a multimodal plan: exercise therapy and pain medication carry stronger evidence than laser alone
What laser therapy does
Laser therapy for dogs, also known as photobiomodulation, involves using specific wavelengths of light to penetrate tissues and promote cellular regeneration and healing. The laser light stimulates the production of ATP (adenosine triphosphate), enhancing cell repair and growth, reducing inflammation, and increasing blood circulation.
Photobiomodulation therapy has been shown to decrease inflammation, and increase analgesia, vascularization, and tissue healing after musculoskeletal injury or surgery.
The mechanism is photochemical: light energy at specific wavelengths (typically 630 to 980 nm) is absorbed by mitochondria.
This increases ATP production, modulates reactive oxygen species, and influences gene expression related to inflammation and healing.
The effects are local confined to the tissue depth the light reaches.
For post-TPLO use, the targets are: the surgical incision, the osteotomy site in the proximal tibia, and the surrounding periarticular soft tissues.
What the clinical evidence shows
Pain and function
Research following TPLO surgery showed that dogs receiving LLLT had better hindlimb function and gait scores at 8 weeks compared to controls. This is especially valuable in orthopedic recovery, where early weight-bearing can prevent muscle atrophy and joint stiffness.
In a controlled veterinary study, dogs with surgical incisions treated with laser therapy exhibited significantly less inflammatory cell infiltration and tissue necrosis within the first week post-op compared to untreated controls.
The 2024 randomized trial
54 client-owned dogs with CCL rupture undergoing unilateral TPLO surgery were enrolled. The study population was randomly assigned to either a treatment group receiving PBMT (24 dogs) or a control group (30 dogs). PBMT was performed immediately after induction, and at 6 hours, 24 hours, 48 hours, and 8 weeks postoperatively. Evaluation of CRP, pain scores, evidence of SSI, and percentage weight bearing were assessed at all time points.
The trial found the therapy showed promise but no statistically significant difference between groups on any primary outcome measure.
Bone healing
Three studies compared LLLT to a control and concluded that LLLT treatment did not make a significant difference in improving radiographic bone healing. The studies collectively provide weak evidence for this outcome.
This is an important distinction: laser therapy may support soft tissue healing, pain, and early function but it does not appear to accelerate the osteotomy healing visible on radiographs.
When to start and how often
Laser therapy uses focused light energy on the surgical site to support healing.
Most rehabilitation programmes begin laser therapy within the first 1 to 3 days after TPLO surgery, often at the surgical centre before discharge or at the first rehabilitation visit.
Typical post-TPLO laser protocol:
- Frequency: 3 to 5 sessions per week in the first 2 to 3 weeks
- Frequency: 1 to 2 sessions per week from weeks 3 to 8
- Session duration: 5 to 15 minutes depending on the laser system and dosing protocol
- Total sessions: typically 6 to 12 in the first 8-week recovery phase
The protocol varies by laser system, power output, and the individual patient's response.
Realistic expectations
Laser therapy is a useful adjunct in TPLO recovery. It is not a substitute for the treatments with stronger evidence: pain medication, activity restriction, and structured rehabilitation exercises.
Laser therapy could be particularly helpful for dogs with weight-bearing and gait issues while recovering from TPLO surgery after a cruciate injury.
Dogs with significant early swelling, wound sensitivity, or slow initial weight-bearing progress may benefit most. Dogs recovering well with standard multimodal analgesia and rehabilitation may show less measurable difference.
For the bone healing timeline that laser therapy supports during recovery, see TPLO bone healing time in dogs explained.
For the full recovery plan that laser therapy fits into, see 10 essential TPLO recovery tips for pet owners.
For the physical therapy that is the primary evidence-based adjunct, see when to start physical therapy after TPLO surgery.
For swelling management in the recovery period, see how long does swelling last after TPLO surgery.
Frequently asked questions
Is laser therapy safe over the TPLO incision?
Yes, once the incision is closed. Laser therapy is safe over sutured incisions and can be applied at the surgical site from the first post-operative day in most protocols.
Avoid direct application over open wounds or actively infected tissue.
How many laser sessions does a dog need after TPLO?
Typically 6 to 12 sessions across the first 8 weeks.
Start at 3 to 5 sessions per week for the first 2 to 3 weeks, tapering to 1 to 2 per week through the rehabilitation phase.
The exact protocol depends on the laser system and rehabilitation plan.
Does laser therapy replace pain medication after TPLO?
No. Laser therapy is an adjunct to pharmaceutical pain management, not a replacement. Post-TPLO pain management requires NSAIDs, and often gabapentin or other analgesics.
Laser therapy may reduce the pain burden and support earlier mobility but does not provide sufficient analgesia on its own.
Can I do laser therapy at home with a consumer device?
Consumer-grade red light therapy devices exist but operate at lower power densities than veterinary therapeutic lasers. The clinical evidence discussed in this article relates to veterinary-grade PBMT devices.
Home devices may offer some benefit but cannot replicate the dosing of professional equipment. Discuss with your rehabilitation veterinarian before purchasing.
Will laser therapy prevent my dog from needing more medication?
Possibly. If laser therapy reduces post-operative inflammation and pain, some dogs may need lower doses of pain medication or taper off sooner.
This should be guided by your veterinarian based on your dog's individual recovery trajectory.
Resources
- AVMA Journal. Photobiomodulation Therapy in Dogs Undergoing TPLO After Cranial Cruciate Ligament Rupture. avmajournals.avma.org
- Veterinary Evidence. Does LLLT Improve Radiographic Healing for Dogs with CCL Rupture Undergoing TPLO Surgery? veterinaryevidence.org
- AKC. Laser Therapy For Dogs: Uses, Side Effects, and Alternatives. akc.org
- Erchonia. Laser Therapy for Post-Surgical Recovery in Pets. erchonia.com
All Articles
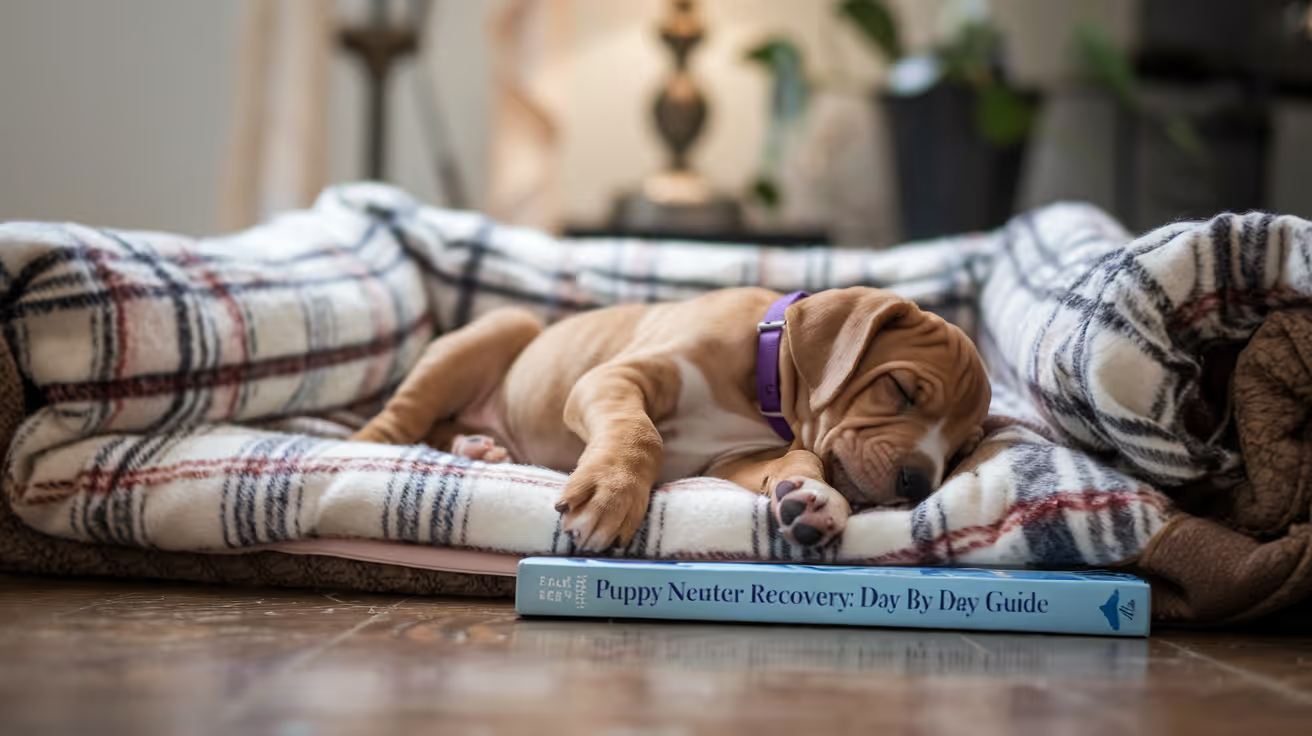
Puppy Neuter Recovery: What to Expect Day by Day
Learn what to expect day by day during your puppy's neuter recovery, including care tips and signs of complications.
Sustainable Vet Group
Puppies bounce back from neutering faster than most pet owners expect. That is actually the tricky part.
A puppy that feels fine on day three is still healing internally. The faster energy return means more supervision is needed, not less. Young dogs do not understand that they need to rest, and they will not slow down on their own.
This guide walks you through what puppy neuter recovery actually looks like, day by day, and how it differs from adult dog recovery.
Quick answer: Most puppies recover fully within 10 to 14 days after neutering. They typically feel close to normal within two to three days, which makes activity restriction harder to enforce but no less important. The E-collar stays on the full 10 to 14 days. Supervision is especially critical for puppies because they are prone to overexerting before the incision has fully healed.
Key takeaways
- Puppies heal faster but need more supervision: Young dogs recover quickly but have less self-restraint and are more likely to reopen an incision through play.
- The 10 to 14 day rule still applies: Fast energy return does not mean fast healing. Activity must be restricted the full window.
- Neutering timing matters for puppies: For small breed puppies, six months is generally appropriate. For large breed puppies, your vet may recommend waiting longer.
- The E-collar is especially important for puppies: They are more likely to obsessively lick or chew a wound out of curiosity.
- Behavioral changes after neutering in puppies are gradual: Hormone-driven behaviors fade over weeks, not days.
- Watch for complications more frequently: Puppies may not show pain clearly, making daily incision checks even more important.
How puppy neuter recovery differs from adult dog recovery
Adult dogs and puppies go through the same surgical procedure and the same 10 to 14 day healing window. What differs is behavior during that window.
The incision heals at roughly the same pace in healthy puppies and adults. The difference is purely behavioral.
Day-by-day recovery guide
Day 1: surgery day
Your puppy comes home groggy, quiet, and possibly unsteady. This is normal anesthesia recovery.
What to do on day 1:
- Set up a clean, quiet recovery space away from other pets and children
- Put the E-collar on immediately and do not remove it
- Offer a small amount of water when you get home
- Offer half a normal meal two to three hours after returning home
- If your puppy vomits, remove food and water until morning
- Keep them indoors and on the floor, no jumping on furniture
The most important thing on day one is calm. Do not let visitors arrive. Do not let other pets near the incision. Keep noise and excitement low.
Day 2 to 3: the energy return
This is the most critical supervision window for puppies.
Energy comes back fast. Your puppy may seem almost back to normal. They will want to play, run, and interact with everything around them.
This is when most puppy neuter complications happen.
Keep activity strictly limited to short leash walks for bathroom breaks only. No playing with other dogs. No running in the yard. No jumping up on you or onto furniture.
Check the incision site morning and evening. A small amount of mild redness or slight puffiness is normal. Anything increasing, oozing, or smelling unusual warrants a vet call.
Days 4 to 7: still healing internally
The incision may look good. Your puppy may seem completely normal. The internal tissue is still healing.
The body's internal sutures need the full two-week window to gain strength. Even when the external skin looks closed, the deeper layers are still knitting together. Activity that stresses the incision at this stage can cause fluid accumulation, swelling, or wound breakdown.
Daily checklist for days 4 to 7:
- [ ] Cone on at all times
- [ ] Leash walks only, short and calm
- [ ] Incision check morning and evening
- [ ] No stairs if possible; carry small breed puppies
- [ ] No bathing, swimming, or getting the incision wet
- [ ] Keep other pets separated or supervised
Days 8 to 10: incision closing
By around day seven, the incision edges should be sealing visibly. Redness should be fading. Swelling should be largely resolved.
Your puppy will have a lot of energy by now. Stay firm on the activity restrictions. The cone stays on. For a clear visual reference of how the incision heals week by week, tracking the wound against a normal healing timeline helps you spot changes that might otherwise be easy to miss.
Some puppies develop mild itching at the incision site as healing progresses. This is normal and a sign that tissue is regenerating. The cone is what prevents that itch from becoming a wound.
Days 10 to 14: final healing and vet check
Most puppies are fully healed at the incision site by day 10 to 14. Your vet will confirm this at the follow-up appointment.
If your clinic uses dissolvable internal sutures (which most modern neuters do), there is nothing to remove. If external sutures were placed, they are typically removed at this visit.
Do not skip the follow-up. Internal healing continues beyond what is visible, and your vet can catch any subclinical issues that are not yet obvious at home.
Once cleared, you can gradually reintroduce normal activity. Start with longer leash walks before returning to off-leash play or dog park visits.
Puppy-specific care tips
Keeping a puppy calm during recovery
This is the hardest part of puppy neuter recovery for most owners.
Strategies that work:
- Crate training: If your puppy is already crate-trained, the crate is your best tool. It provides safe, calm containment without constant physical supervision.
- Food puzzles and chew toys: Mental stimulation without physical exertion. A stuffed Kong or lick mat can keep a puppy occupied for extended periods.
- Calm, low-stimulation interaction: Gentle petting and quiet company. Avoid rough play, tug of war, or anything that gets your puppy excited.
- Ask your vet about short-term calming support: For very high-energy breeds, some veterinarians prescribe mild sedatives for the first week of recovery. This is a legitimate option worth discussing.
Feeding a puppy after neutering
Puppies have higher metabolic needs than adults. Do not withhold food for extended periods.
Offer a small meal the evening of surgery. If they tolerate it without vomiting, return to normal puppy feeding the next day. Puppies who are not eating at all by 24 hours after surgery need a vet call.
Most puppies need to eat more frequently than adult dogs anyway. Maintain their regular feeding schedule throughout recovery, adjusting only if vomiting occurs.
The cone for puppies
Puppies are particularly prone to licking and chewing wounds out of curiosity, and they are more creative about getting around a cone that does not fit properly.
Check the cone fit carefully:
- The cone should extend at least two inches past your puppy's nose
- It should be snug but not tight enough to cause discomfort or chafing
- Check daily as puppies can lose or gain weight quickly
If your puppy absolutely cannot tolerate the hard plastic cone, a soft inflatable collar or a recovery suit are alternatives. The key is that they reliably prevent access to the incision.
Behavioral changes after neutering in puppies
Many owners neuter puppies specifically to reduce hormone-driven behaviors. It is worth setting realistic expectations about the timeline.
Testosterone does not disappear immediately after surgery. Hormone levels drop gradually over several weeks. Expect hormone-driven behaviors to fade over two to four weeks post-surgery, not overnight.
Behaviors that may decrease after neutering in male puppies:
- Urine marking
- Mounting behavior
- Roaming or escape attempts
- Some forms of same-sex aggression
Behaviors that are shaped by training and socialization, not hormones, will not change after neutering. A puppy that has learned to jump on people, bark at strangers, or resource-guard will still do those things. Training addresses learned behavior. Neutering addresses hormonal behavior.
For a full picture of behavior changes to expect in puppies after surgery, including what typically improves and what does not, knowing the realistic timeline prevents frustration during the recovery period.
When to call the vet
Puppies tend to mask pain and discomfort more than adult dogs. Stay especially vigilant with daily incision checks.
Call your vet if you notice:
- Yellow, green, or foul-smelling discharge from the incision
- Swelling that is increasing rather than decreasing after day three
- Persistent lethargy beyond 48 hours
- Refusal to eat for more than 24 hours
- Any wound opening or separation of incision edges
- Your puppy licking despite the cone (check the fit immediately)
For a complete guide on warning signs to watch for in puppies after surgery and which symptoms are emergencies versus same-day calls, having that reference during the recovery window prevents delayed action.
What about the right age to neuter a puppy?
Recovery differs based on the age at which surgery is performed.
Very young puppies (eight to twelve weeks) are sometimes neutered in shelter settings. These puppies heal quickly, but they are also at increased risk of anesthetic complications and require extra monitoring.
For most privately-owned puppies:
- Small breeds: Around six months is generally appropriate
- Medium breeds: Six to twelve months, depending on the individual
- Large breeds: Your vet may recommend waiting until 12 to 18 months to allow growth plate closure
For a detailed, breed-specific breakdown of the right age to neuter a puppy, the timing decision has meaningful long-term health implications for larger breeds especially.
The recovery process itself does not change much based on age, but puppies neutered very young may benefit from closer post-operative monitoring and more careful anesthetic management.
Frequently asked questions
How long does puppy neuter recovery take?
Most puppies are fully healed at the incision site within 10 to 14 days. They typically feel close to normal within two to three days, but internal healing requires the full two-week window. Activity must be restricted until your vet confirms the incision has healed at the follow-up appointment.
Do puppies recover faster than adult dogs from neutering?
They feel better faster, but the incision heals at roughly the same pace. The difference is behavioral, not biological. Puppies return to high energy levels quickly, which makes activity restriction harder to enforce and more important to maintain.
Can I remove the E-collar after a few days if my puppy seems fine?
No. The cone stays on for the full 10 to 14 days. Puppies are especially prone to licking wounds when bored or when the incision starts to itch during healing. A single licking episode can undo days of clean healing.
My puppy is bouncing off the walls on day three. Is this normal?
Yes, and it is the biggest challenge of puppy neuter recovery. Fast energy return is typical in young dogs. It does not mean they are healed. Strict activity restriction must continue regardless of how your puppy feels. For complete aftercare guidance on how to care for your dog during recovery, including specific strategies for keeping high-energy dogs calm, a structured plan makes the two weeks much more manageable.
When will my puppy calm down after being neutered?
Hormone-driven behaviors typically fade gradually over two to four weeks as testosterone levels decline. Some behaviors may take longer, especially if they have already become habitual through repetition. Neutering reduces hormonal behaviors, but training shapes all other behaviors.
Puppy neuter recovery is short but demands your full attention for two weeks. The puppies that sail through without complications are almost always the ones whose owners enforced the cone, the rest, and the leash walks without exception. Two weeks of discipline gives your puppy a lifetime of better health.
Resources
The following sources were used as reference and background for this article:
- PetMD. Dog Neuter Recovery: How to Care for Your Pup After Surgery. petmd.com
- Animal Humane Society. Spay/Neuter Post-Surgical Care and Recovery Instructions. animalhumanesociety.org
- Embrace Pet Insurance. Dog Neuter and Spay Recovery. embracepetinsurance.com
- Dogwood Animal Hospital. Speed Up Your Dog's Neuter Recovery: 10 Home Care Tips. dogwoodanimalhospital.com
- Bliss Animal Hospital. What to Expect After Your Dog's Spay or Neuter Surgery. blissanimalhospital.com
- ASPCA Spay-Neuter Alliance. After Surgery Instructions. aspca.org
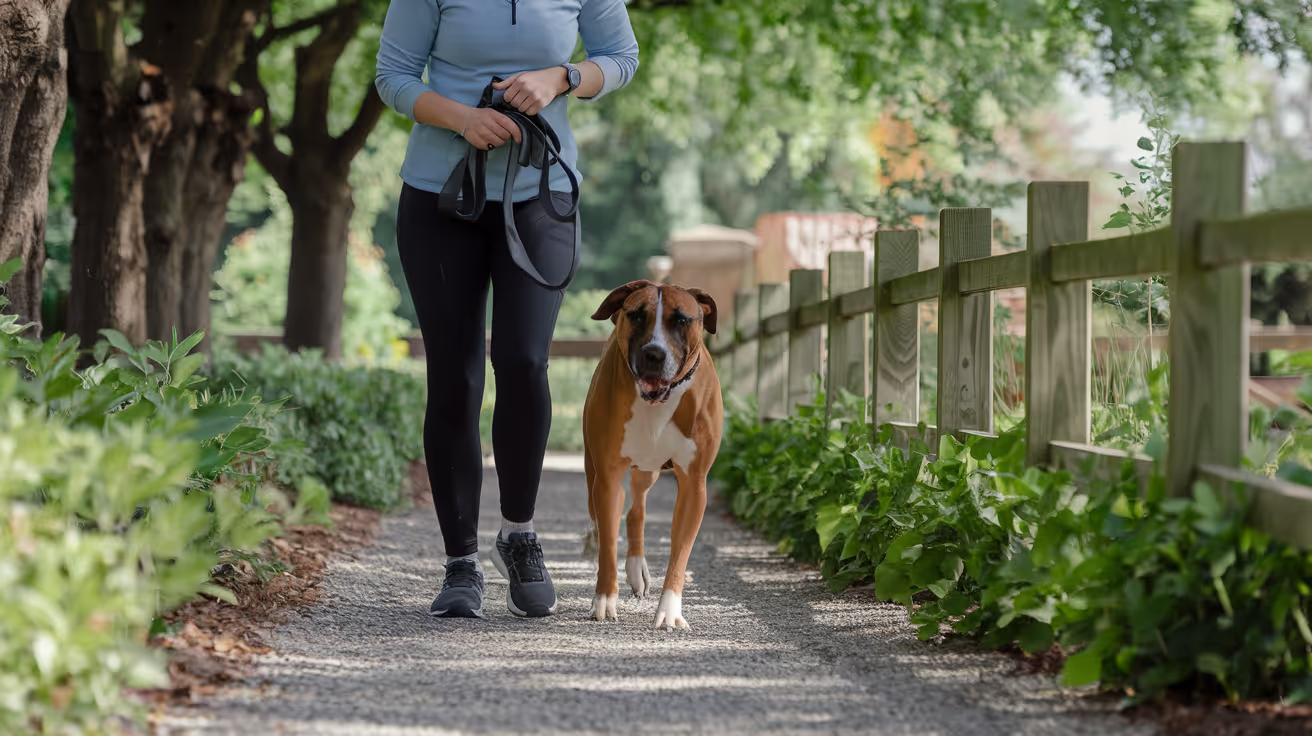
TPLO Rehab Exercises for Dogs
Learn effective TPLO rehab exercises for dogs to ensure safe recovery and regain mobility after surgery.
Sustainable Vet Group
Rehabilitation after TPLO surgery is not optional it is one of the primary determinants of long-term outcome.
Dogs that complete a structured rehabilitation program return to function faster, develop better muscle mass, and have lower rates of long-term lameness than those managed with rest alone.
The program follows a predictable progression from passive exercises in the first days to full activity at 4 to 6 months.
Quick answer: TPLO rehab begins with PROM and cold packing in the first days, progresses to controlled leash walks and sit-to-stand from weeks 2 to 6, then adds hydrotherapy and balance work from weeks 6 to 12. Full activity returns at 4 to 6 months after surgeon approval and radiographic confirmation.
Key takeaways
- Rehabilitation follows four phases: passive exercises, active weight-bearing, strength building, and return to activity over 3 to 6 months
- Sit-to-stand is the most important active exercise: targets quadriceps and hamstrings; begins once partial weight-bearing is established
- Hydrotherapy begins once the incision is closed (3 to 4 weeks post-surgery): up to 90% joint load reduction
- Balance work begins at weeks 4 to 6: weight shifting, single leg lifts, and balance pads correct gait patterns
- All exercise increases require surgeon approval: do not advance without veterinary guidance, especially before the 8-week radiographic recheck
- Cavalletti poles and incline walks begin at weeks 8 to 12 to challenge muscle activation and range of motion
Why rehabilitation matters after TPLO
TPLO surgery stabilizes the stifle, but surgery alone does not rebuild the muscle mass lost to months of pre-surgical lameness and the early post-operative period. Without rehabilitation, dogs develop:
- Persistent muscle atrophy and asymmetric hindlimb development
- Joint stiffness from scar tissue and reduced range of motion
- Altered gait patterns that stress the contralateral knee
- Slower overall recovery and increased risk of re-injury
Veterinary Partner (VIN) divides post-TPLO rehab into three phases.
Phase 1 manages pain while encouraging limb use (days 1 to 14).
Phase 2 restores musculoskeletal function (weeks 2 to 8). Phase 3 builds core strength and returns to activity (weeks 8 to 16+).
Phase 1: Immediate post-operative (days 1 to 14)
Passive range of motion (PROM)
Begin PROM at 2 to 5 days post-surgery. Dog on their side, operated leg up gently flex and extend the stifle in a slow bicycle motion. Ten repetitions, 3 times daily.
Full guide: PROM exercises for dogs after TPLO surgery.
Cold packing
Apply ice or a cold pack wrapped in a thin towel to the surgical site for 10 to 15 minutes after each PROM session.
Repeat 3 times daily for at least the first 5 days. Cold packing reduces local inflammation and post-exercise swelling.
Short controlled leash walks
5 to 10 minutes, 2 to 3 times daily from day 10 to 14 onward (after suture removal). Slow pace on a flat, even surface.
Leash only no off-leash time at any stage during restricted recovery.
Massage
Gentle massage of the muscles above and below the stifle joint the quadriceps, hamstrings, and calf muscles improves local circulation and reduces muscle spasm.
Use palm pressure in a circular motion, not surface stroking.
Phase 2: Active weight-bearing (weeks 2 to 8)
Sit-to-stand exercises
Sit-to-stand is the most important active strengthening exercise in TPLO rehabilitation. Ask your dog to sit, then stand, repeatedly.
TPLO Info confirms that sit-to-stand action helps with range of motion in the hindlimb joints and activates the muscles that support the stifle.
Protocol:
- Begin with 5 repetitions, 2 times daily at week 2 to 3
- Progress to 10 to 20 repetitions, 2 to 3 times daily as strength improves
- Ensure the dog sits squarely, not off to one side
- Use a wall on the operated leg's side if needed to prevent kicking the leg out
Progressive leash walk duration
Week 3 to 4: 10 to 15 minutes, 3 times dailyWeek 5 to 6: 15 to 20 minutes, 3 times dailyWeek 7 to 8: 20 to 30 minutes, 2 to 3 times daily
All walks on leash. No running, jumping, or off-leash time.
Warm packs before exercise
After the first 5 post-operative days, apply warm compresses for 5 minutes before each exercise session.
Warmth relaxes muscles and improves local circulation before PROM and active exercises.
Phase 3: Strength building (weeks 6 to 12)
Hydrotherapy (underwater treadmill)
Begin hydrotherapy once the incision is fully healed typically 3 to 4 weeks post-surgery. Water buoyancy reduces joint load by up to 90% while allowing the muscles to work against water resistance.
WM Referrals' post-TPLO physiotherapy guide recommends starting hydrotherapy around week 6, with sessions of 15 to 30 minutes at progressive durations as strength improves.
For the full hydrotherapy and laser therapy guide, see laser therapy for dogs after TPLO surgery.
Balance and proprioception exercises
Begin from weeks 4 to 6 once partial weight-bearing is reliable:
Weight shifting: with the dog standing, gently nudge the hips from side to side to encourage weight transfer between limbs. TPLO Info recommends this once the dog is consistently bearing weight on the surgical limb, typically 3 to 4 weeks post-surgery.
Single leg lifts (contralateral leg): while the dog stands, lift one front or non-surgical hind leg for 10 to 15 seconds. This forces weight onto the operated limb and activates stabilizing muscles. Do not lift the operated leg.
Balance pad or wobble board: progress to standing on a soft or unstable surface from weeks 6 to 8. Begin with seconds of contact and build to 30+ seconds as confidence and strength improve.
Cavalletti poles
Slow stepping over 4 to 5 poles laid flat on the ground at shoulder-width spacing.
Introduced at weeks 6 to 8, this forces controlled hip and stifle flexion, improving range of motion and coordination. Two to four passes per session, 2 to 3 sessions daily.
Incline walking
Gentle uphill walking increases hindlimb muscle load without high joint impact.
WM Referrals recommends slow walks up and down inclines from weeks 6 to 8, starting at 1 to 3 minutes and progressing as tolerated.
Phase 4: Return to full activity (months 3 to 6)
After the 8 to 12 week radiographic recheck confirms adequate osteotomy healing, the surgeon approves progressive return to normal activity.
Madison Veterinary Specialists' rehabilitation guide notes that trotting on leash is allowed after the dog is comfortable with extended walks of 1 hour or more and sit-to-stand exercises.
Activity milestones:
- Month 3: 30 to 45 minute leash walks, light trot on leash
- Month 4: free trotting on leash, gentle play
- Month 5 to 6: off-leash play approved by surgeon, return to normal activity
High-impact activities jumping, ball chasing, agility are reintroduced last, typically at 5 to 6 months, after a final clinical assessment.
For the range of motion exercises covered in this program, see TPLO range of motion exercises for dogs. For the recovery exercises at each stage, see TPLO recovery exercises for dogs.
For the PROM technique guide, see PROM exercises for dogs after TPLO surgery. For when physical therapy begins, see when to start physical therapy after TPLO surgery.
For the full recovery tips overview, see 10 essential TPLO recovery tips for pet owners.
Frequently asked questions
When should TPLO rehabilitation begin?
Rehabilitation begins within days of surgery. PROM starts at 2 to 5 days post-surgery. Cold packing begins on day 1.
Short controlled leash walks begin at 10 to 14 days after suture removal. Formal hydrotherapy and balance exercises begin at 3 to 6 weeks depending on healing.
Can I do all the rehab exercises at home?
Many exercises PROM, sit-to-stand, controlled leash walks, balance nudging, cold and warm packing can be done at home. Hydrotherapy requires a specialist facility.
Balance boards and cavalletti poles require some equipment investment but are achievable at home.
A formal rehabilitation assessment at a certified canine rehab centre is strongly recommended for at least the first few sessions.
How do I know if I'm pushing too hard?
Signs of over-exercise: increased swelling or heat at the surgical site, markedly worse lameness the next day, or the dog refusing to perform the exercise or vocalizing during it.
Reduce exercise intensity immediately and contact your vet. Start each phase at the minimum repetitions and increase only if there is no increase in pain or swelling.
Is hydrotherapy necessary for TPLO recovery?
It is not mandatory but is highly beneficial. Studies show dogs receiving hydrotherapy alongside land-based rehabilitation recover faster and develop better muscle mass than those doing land exercises alone.
If access to a hydrotherapy facility is limited, land-based exercises performed consistently produce good outcomes.
What happens if I skip rehabilitation?
Dogs managed with rest alone after TPLO develop significant muscle atrophy, reduced range of motion, and often persistent lameness. Rehabilitation dramatically improves functional outcomes.
Even a simple home program of PROM, controlled leash walks, and sit-to-stand exercises produces substantially better results than passive rest alone.
Resources
- Veterinary Partner (VIN). Physical Rehabilitation of Dogs Following TPLO. veterinarypartner.vin.com
- TPLO Info. Rehab for Dogs After TPLO Surgery. tploinfo.com
- WM Referrals. Post-Operative Rehabilitation After TPLO. wm-referrals.com
- Madison Veterinary Specialists. TPLO Rehabilitation Home Care Instructions. mvsvets.com
- Vetplayas. TPLO Rehab Exercises: Accelerating Recovery and Restoring Mobility. vetplayas.com
Bursitis in Dogs: Symptoms, Causes & Treatment
Learn about bursitis in dogs, including symptoms, causes, and effective treatments to help your pet recover comfortably.
Sustainable Vet Group
Bursitis is inflammation of a bursa a small, fluid-filled sac that sits between bones, tendons, and muscles to reduce friction at joints. When a bursa becomes inflamed, it fills with excess fluid, swells, and causes pain with movement. In dogs, it most commonly affects the elbow, shoulder, and hip.
The condition ranges from a minor, manageable inconvenience to a painful, chronically recurring problem that affects your dog's quality of life. Catching it early and addressing the cause is the most effective approach.
Quick answer: Bursitis is inflammation of the bursae (fluid-filled joint cushions), causing swelling and pain most commonly at the elbow or hip. Large breed and senior dogs are most affected. Treatment involves rest, NSAIDs, and soft bedding.
Key takeaways
- Bursae are fluid-filled cushions located at high-friction points around joints; inflammation of these is bursitis
- Repeated trauma from lying on hard surfaces is the most common cause in large breed dogs
- Elbow bursitis is especially common in male dogs and large/giant breeds like Great Danes, Mastiffs, and Dalmatians
- A hygroma is a type of acquired bursitis: a fluid pocket the body forms over a repeatedly traumatized bony area
- Septic bursitis (infected bursa) is more serious and requires antibiotics alongside other treatment
- Soft orthopedic bedding is the single most effective prevention measure for pressure-related bursitis
What are bursae and why do they become inflamed?
Bursae are small, synovial membrane-lined sacs filled with fluid. Their job is to reduce friction between moving structures bones, tendons, and muscles at and around joints. The Pet Vet describes them as "small, fluid-filled sacs that sit between bones, tendons, and muscles around joints. These tiny cushions reduce friction and allow smooth movement."
When the bursa is subjected to repeated trauma or sustained pressure, it responds by producing more fluid and thickening its lining. AnimalWised explains the mechanism: "When the synovial bursae are affected by inflammatory processes, the synovial membrane thickens and excess fluid is produced. This inflammation causes pain in the dog's joints."
There are two types of bursitis in dogs:
Acquired bursitis: develops in response to repeated mechanical trauma the most common type in dogs. The elbow bursa is the most frequent site because dogs repeatedly contact hard surfaces at this point when lying down.
Septic bursitis: occurs when bacteria infect the bursa, either through a puncture wound or via the bloodstream. More painful, requires antibiotic treatment, and carries a higher risk of complications.
Causes of bursitis in dogs
Repeated trauma from hard surfaces
The most common cause. Dogs that routinely lie on concrete, hardwood, or tile repeatedly traumatize the bursa over bony prominences with every impact. VIN's Veterinary Partner describes what happens: "The dog has most likely been resting on a fairly hard surface and the pressure of their weight has created tissue damage over the elbow bones. The area is not able to heal because of the repeated tissue damage from the dog simply resting on their elbows. A fluid pocket forms as the body attempts to create its own cushion."
Obesity
Excess body weight concentrates greater force at each bony contact point with every movement and impact. AnimalWised: "Obesity can put additional strain on a dog's joints and lead to greater incidence of bursitis."
Compensatory overloading
When a dog injures one limb, it shifts weight to the others. AnimalWised notes: "If a dog receives an injury to one limb, they will often over-compensate and put more weight on another. This can lead to bursitis in the latter limb."
Underlying joint disease
Dogs with existing arthritis or joint degeneration have altered movement patterns and increased local inflammation, making them more prone to secondary bursitis. The Pet Vet: "Underlying arthritis dogs with existing joint disease are more prone to bursitis."
Infection (septic bursitis)
Bacteria can enter a bursa through a puncture wound or, rarely, travel through the bloodstream from a distant infection site. Merck Veterinary Manual: "Septic bursitis is more serious and is associated with pain and lameness. Infection of a bursa may be hematogenous or follow direct penetration."
Which dogs are most affected?
- Large and giant breeds: Great Danes, Mastiffs, Saint Bernards, Dalmatians, German Shepherds more body weight, greater pressure at bony contact points
- Senior dogs: reduced muscle mass provides less natural padding; reduced activity means longer periods in one position
- Male dogs: elbow bursitis specifically shows a higher prevalence in male dogs according to AnimalWised
- Sedentary dogs: more time lying on hard surfaces means more cumulative trauma to bursae
- Overweight dogs: heavier impact forces at every bony prominence
Symptoms of bursitis in dogs
The presentation depends on whether the bursitis is acute (sudden), chronic, or septic.
Acute bursitis signs:
- Soft, fluid-filled swelling at the affected joint
- Warmth at the swelling site
- Pain on palpation (dog pulls away when the area is touched)
- Mild lameness or stiffness
Chronic bursitis signs:
- Larger, firmer swelling (the bursa wall thickens with fibrous tissue over time)
- Merck Veterinary Manual: "Excess bursal fluid accumulates, and the wall of the bursa is thickened by fibrous tissue. These bursal enlargements develop as cold, painless swellings and, unless greatly enlarged, do not severely interfere with function."
- Callus formation over the swelling site
- Hair loss over the affected area
Septic bursitis signs (more serious call the vet the same day):
- Hot, painful swelling
- Discharge from the site if it ruptures
- Dog is lame and reluctant to move
- Systemic signs: lethargy, fever, reduced appetite
For how swelling caused by bursitis overlaps with other causes of foot and joint swelling, see swelling caused by bursitis.
Bursitis vs. hygroma: what's the difference?
The terms are closely related. Merck Veterinary Manual defines it precisely: "Accumulation of fluid in acquired bursitis is termed hygroma."
In practical terms, a hygroma is a specific type of acquired bursitis: the fluid pocket that forms at the elbow or hock in response to repeated trauma. The word "bursitis" is the broader clinical term for inflammation of any bursa; "hygroma" specifically refers to the fluid-filled cavity that forms at pressure points in dogs.
How vets diagnose bursitis
A vet can usually diagnose bursitis from a physical examination alone: the characteristic location, fluctuant swelling, and history of hard surface exposure are typically sufficient. Additional tests may be ordered to:
- Rule out septic bursitis: fluid aspiration and cytology to check for bacteria and inflammatory cells
- Rule out neoplasia: if the mass is firm, growing, or atypical in appearance, fine needle aspiration or biopsy may be needed
- Confirm joint vs. extra-articular location: Merck notes that "radiography or ultrasonography can be useful to help confirm an extra-articular location of the lesion" this confirms the swelling is not within the joint itself
Treatment
Mild and early bursitis
- Soft bedding: orthopedic foam to remove the source of ongoing trauma. The Pet Vet and Pets4Homes both identify this as the cornerstone of management.
- Protective padding: donut bandages or commercially available elbow pads (DogLeggs) protect the site from further impact during healing
- NSAIDs: veterinary anti-inflammatory medications (meloxicam, carprofen) reduce pain and inflammation. Pets4Homes: "Pain and inflammation are managed with veterinary-prescribed medications such as NSAIDs."
- Activity modification: limit hard floor access and avoid activities that load the affected joint
Moderate bursitis: fluid drainage
Aspiration (needle drainage) of the bursa fluid can temporarily reduce swelling. However, VIN notes that "FNA and surgery is often not recommended, as these can introduce infection and the hygroma will return." Drainage is typically combined with protective padding and bedding changes; drainage alone without environmental correction leads to recurrence.
Septic bursitis
Antibiotics are required, ideally guided by culture of the aspirated fluid. The antibiotic course typically runs 3 to 6 weeks. Surgical drainage or debridement may be needed for severely infected bursae.
Surgical treatment for chronic or severe cases
Pets4Homes: "Surgery is rarely needed but can be considered for severe or chronic bursitis that does not respond to medical treatment." Surgical options include removal of the thickened bursa wall, debridement of chronic wounds, and reconstruction with skin flaps for large defects.
For how callus formation at the same pressure sites relates to bursitis, see calluses that develop alongside bursitis. For how pressure injuries at the same sites can progress beyond bursitis, see pressure injuries in bursitis-prone areas.
Prevention
- Orthopedic bedding: place thick foam beds in every location the dog rests, especially on hard floors
- Weight management: reducing body weight in overweight dogs directly reduces force at bony contact points
- Protective elbow/hock pads: useful for dogs that continue to use hard floors despite having soft bedding available
- Prompt treatment of joint injuries: addressing the primary injury prevents compensatory overloading of other limbs
Frequently asked questions
Is bursitis painful for dogs?
Acute bursitis is usually painful the dog shows reluctance to have the area touched and may limp. Chronic bursitis (the large, firm, cold swellings described by Merck) is often surprisingly painless unless the swelling is very large or becomes infected. Septic bursitis is reliably painful and requires urgent treatment.
Can bursitis in dogs go away on its own?
Mild early bursitis can improve with environmental changes: switching from hard floors to thick foam bedding and avoiding the source of trauma may allow the bursa to reabsorb its excess fluid. Without addressing the underlying cause, however, the condition typically recurs or worsens over time.
My dog has a soft lump on the elbow that does not seem to hurt. Should I be worried?
A soft, non-painful swelling at the elbow is the classic presentation of an elbow hygroma (acquired bursitis). It is not immediately dangerous but should be evaluated by a vet to confirm the diagnosis and rule out infection or neoplasia. Without protection from further trauma, it will typically grow larger and become more difficult to manage.
How long does bursitis take to heal in dogs?
Mild cases managed with soft bedding and NSAIDs may improve over 4 to 8 weeks. Chronic bursitis with a thickened, fibrotic bursa wall takes much longer to remodel and may never fully resolve. Septic bursitis responds to antibiotics over 3 to 6 weeks but requires consistent environmental correction to prevent recurrence.
Can bursitis become dangerous in dogs?
Yes, if it becomes septic (infected). An infected bursa can spread bacteria to surrounding tissue and, rarely, into the bloodstream. A bursitis swelling that becomes hot, painful, shows discharge, or is accompanied by systemic signs (lethargy, fever, not eating) needs same-day veterinary care.
What is the difference between bursitis and arthritis in dogs?
Arthritis is degeneration of the cartilage and bone surfaces within a joint. Bursitis is inflammation of the fluid-filled sac outside the joint. Both cause joint area swelling and pain, but they require different treatments and have different prognoses. They can and frequently do occur together in older large breed dogs, with arthritis contributing to the altered movement patterns that promote bursitis.
Resources
- AnimalWised. Bursitis in Dogs: Causes and Treatment. animalwised.com
- Merck Veterinary Manual. Hygroma in Dogs. merckvetmanual.com
- VIN Veterinary Partner. Elbow Hygromas in Dogs. veterinarypartner.vin.com
- Pets4Homes. Bursitis Infections in Dogs. pets4homes.co.uk
- The Pet Vet. Bursitis in Dogs: Best Medications and Treatment Guide. thepetvet.com
Seroma in Dogs After TPLO Surgery: Causes & Care
Learn about seroma in dogs after TPLO surgery, including causes, symptoms, treatment, and prevention tips for pet owners.
Sustainable Vet Group
A seroma is one of the most common soft tissue complications after TPLO surgery in dogs.
Finding a soft lump under the skin near the surgical site is alarming, but in most cases it is a benign finding that resolves with strict rest and time.
Understanding the difference between a seroma and a more serious complication helps you respond appropriately.
Quick answer: A seroma is clear serum fluid under the TPLO incision, not an infection. Small seromas resolve in 1 to 3 weeks with rest; larger ones need sterile aspiration. Call your vet if the swelling is hot, fast-growing, or producing discharge.
Key takeaways
- A seroma is clear serum fluid under the skin — not an infection; a benign accumulation from disrupted blood and lymphatic vessels
- Excessive activity is the leading preventable cause: unnecessary movement produces more fluid and enlarges the seroma
- Small seromas resolve with strict rest in 1 to 3 weeks: the lymphatic system reabsorbs the fluid without intervention
- Large seromas may need needle aspiration: a sterile outpatient procedure by your vet; never drain at home
- Warm packs twice daily help reabsorption: 10 minutes of warmth twice daily is recommended for established seromas
- A seroma that becomes warm, red, painful, or produces discharge needs immediate vet attention it may have become infected
What is a seroma?
Vetinfo explains that a seroma is a swelling resulting from the accumulation of fluid under the skin.
It is made of serous fluid (blood plasma without most of the cells), so it is usually watery with a slight pink tinge rather than dark blood or cloudy infected fluid.
After TPLO surgery, the osteotomy site and surrounding soft tissues leave behind a space between tissue layers called dead space where fluid from disrupted capillaries and lymphatics can collect.
The fluid pools there before the body's healing processes close the space.
Seromas feel soft, fluctuant (squishy), and move under finger pressure. They are usually not painful when small and are not warm to the touch.
These features distinguish them from infections, which are typically warm, firm, painful, and may produce purulent discharge.
What causes seromas after TPLO?
Excessive activity
This is the most important and most preventable cause. Vetinfo confirms that seromas occur when a dog is active immediately after surgery instead of remaining inactive during recovery.
Every unnecessary step disrupts the tissue planes that need to approximate and seal, producing more fluid.
The surgeon Dr.
Matt confirms on JustAnswer that the best way to reduce seromas is to restrict activity as much as possible at least 8 weeks of restricted activity after TPLO is recommended.
Dead space at the surgical site
TPLO surgery involves significant soft tissue dissection around the proximal tibia. Closing this space with sutures reduces but does not eliminate dead space.
Any gap between tissue layers fills with fluid before normal healing closes it.
Surgical drainage
In some cases, surgical drains are placed during the procedure to allow fluid to escape rather than collect.
Not all surgeons routinely place drains some reserve them for dogs considered at higher risk of seroma formation.
Patient factors
Larger dogs produce more dead space and more fluid. Dogs with more subcutaneous fat are at higher risk.
Dogs that are particularly active during recovery despite attempts at confinement are most likely to develop significant seromas.
Recognizing a seroma
Classic signs:
- Soft, squishy swelling directly under or near the incision site
- The swelling moves under pressure it feels like a water balloon
- Normal skin color over the swelling (not red or purple)
- Not painful when gentle pressure is applied
- Not warm to the touch
- No discharge from the skin over the swelling
When to suspect infection instead:
- The swelling is warm, red, or firm rather than soft
- A draining tract or discharge appears from the skin
- The dog shows increased pain, fever, lethargy, or loss of appetite
- The swelling is growing rapidly
Treatment
Small seromas: observation and rest
Cuteness notes that most often the body absorbs the fluid and the swelling diminishes. For small seromas (typically under 3 cm), the approach is:
- Enforce strict activity restriction no running, jumping, or free roaming
- Cold compresses in the first few days (reduces new fluid production)
- Warm compresses from days 5 onward 10 minutes, twice daily to promote fluid reabsorption
- Monitor size and character daily
Large or persistent seromas: needle aspiration
Large seromas that are uncomfortable or not responding to rest may be drained by your veterinarian using a sterile needle and syringe. This is a simple outpatient procedure.
Cuteness confirms that veterinarians may drain or aspirate the seroma to make the dog more comfortable.
Aspiration provides relief but does not address the underlying dead space. The seroma may refill sometimes multiple aspirations are required. After aspiration, continued strict rest is essential.
Compression bandaging
A gentle compression bandage applied by your vet reduces dead space and discourages fluid refilling after aspiration.
Improper bandaging can cause pressure sores or circulatory compromise, so bandages must be applied and monitored by a veterinarian.
Surgical drain placement
If a seroma repeatedly refills after aspiration, a closed suction drain may be placed to allow ongoing drainage until the dead space closes.
This is uncommon but is an option for persistent or large seromas.
For the full fluid buildup guide covering all types of post-TPLO fluid accumulation, see fluid buildup after TPLO surgery in dogs.
For incision complications including infection, see TPLO incision infection symptoms and prevention. For the full complications reference, see 15 common complications after TPLO surgery in dogs.
For the incision redness guide to distinguish seroma from infection, see redness after TPLO surgery in dogs: causes and care.
Frequently asked questions
Can a seroma go away on its own?
Yes in the majority of cases, small seromas resolve without intervention as the body reabsorbs the fluid over 1 to 3 weeks.
Strict activity restriction is essential; without it, the seroma will continue to refill as fast as it drains.
Do not assume a seroma will resolve if the dog is not being properly confined.
Should I drain the seroma myself at home?
Never. Home drainage risks introducing bacteria into a sterile fluid collection, converting a benign seroma into an infected abscess. Only a veterinarian should aspirate a seroma under sterile conditions.
If you believe the seroma needs draining, contact your vet.
My dog's seroma looks like it ruptured through the skin. What do I do?
Spontaneous seroma rupture does occasionally occur. The fluid drains through the skin, leaving a small wound.
Contact your vet immediately for guidance the wound will need to be kept clean and monitored for infection. A veterinarian Dr.
Matt reports this occurrence on JustAnswer, confirming prompt vet contact is appropriate.
How long does a seroma last after TPLO?
Small seromas typically resolve in 1 to 3 weeks with strict activity restriction. Larger ones may take 4 to 6 weeks and may require aspiration.
If a seroma persists beyond 4 weeks without improvement, a veterinary recheck is warranted.
Is a seroma the same as an infection?
No. A seroma is sterile fluid no bacteria. An infection involves bacterial colonization and produces different characteristics: warmth, redness, purulent discharge, systemic illness signs.
Bacterial culture distinguishes them definitively if clinical assessment is uncertain.
Resources
- Vetinfo. Seroma After-Surgery Care for Dogs. vetinfo.com
- Cuteness. What Are the Treatments for Seroma Formation in Dogs? cuteness.com
- VCA Animal Hospitals. Seroma in Dogs. vcahospitals.com
- TPLO Info. Recovery FAQs. tploinfo.com
Can a Dog Re-Tear ACL After TPLO Surgery?
Learn if a dog can re-tear the ACL after TPLO surgery, signs to watch for, and how to prevent re-injury effectively.
Sustainable Vet Group
TPLO surgery does not repair or replace the torn CCL it changes the biomechanics of the stifle so the CCL is no longer needed. This means there is no ligament to re-tear.
The question most owners are really asking is: can the operated knee fail again? The answer requires separating the different ways a TPLO can stop working well.
Quick answer: Dogs cannot re-tear the CCL after TPLO because TPLO makes the ligament unnecessary. Late meniscal tears occur in 5% of dogs. Contralateral rupture is the biggest risk: 22 to 54% rupture the other knee within 6 to 17 months.
Key takeaways
- Dogs cannot re-tear the CCL after TPLO: TPLO changes joint geometry so the CCL is unnecessary; no ligament remains to re-tear
- Late meniscal tears affect approximately 5% of dogs with intact meniscus at TPLO; they are the most common cause of sudden lameness regression
- 30 to 40% of dogs have concurrent meniscal injury treated at TPLO surgery; this is not the same as a late post-operative tear
- Contralateral CCL rupture is the biggest re-injury risk: 22 to 54% of dogs rupture the other knee within 6 to 17 months
- Sudden non-weight-bearing after previous progress is the main warning sign for any post-TPLO complication it requires prompt veterinary evaluation
- Implant failure is a hardware problem, not a CCL re-tear; it presents with sudden lameness and is diagnosed on radiographs
Why dogs cannot re-tear the CCL after TPLO
TPLO surgery works by rotating the tibial plateau to approximately 5 degrees. At this angle, the stifle is mechanically stable during weight-bearing without the cranial cruciate ligament.
The torn CCL is not repaired, reconstructed, or replaced.
Because no ligament substitute is in place, there is nothing to re-tear.
The joint stability provided by TPLO is structural it comes from the new bone geometry, not from any biological or synthetic material that could fail.
This is different from human ACL surgery, which typically involves a ligament graft (autograft or allograft) that can be re-torn.
Dog owners familiar with human ACL surgery often incorrectly assume the same risk applies after TPLO.
What can go wrong with the operated knee after TPLO
Late meniscal tears
This is the most important cause of sudden lameness regression after successful TPLO recovery.
TPLO Austin confirms: approximately 5% of dogs with an intact meniscus at the time of surgery will develop a meniscal tear at some point in the future.
When this occurs, patients may become acutely lame. In some cases, a second surgery is needed to remove the torn portion of the meniscus.
Laguna Hills Animal Hospital notes that dogs with a meniscal tear frequently exhibit a meniscal click an audible clicking noise as one of the telltale signs of injury.
Signs of a late meniscal tear:
- Sudden regression to significant lameness after the dog was progressing well
- Clicking or clunking sound from the knee during movement
- Swelling of the stifle joint
- Reluctance to bear full weight on a leg that was previously well-recovered
Vetplayas confirms that early identification and intervention for meniscal tears after TPLO are crucial to prevent further damage, chronic pain, and decreased joint function.
Tibial tuberosity fracture
This is a rare but serious complication occurring in 1 to 9% of TPLO cases (Laguna Hills Animal Hospital).
The tibial tuberosity the bony prominence where the patellar tendon inserts can fracture if placed under excessive stress, particularly in large, active dogs during the early healing phase.
Sudden severe lameness in the first weeks after surgery is the presentation. Radiographs confirm the diagnosis.
Implant failure (plate or screw problems)
If the TPLO plate bends, breaks, or screws loosen, the osteotomy site loses support and the bone may shift. This produces sudden or progressive lameness and is confirmed on radiographs.
Premature return to activity, obesity, and overexertion during the healing phase are the main risk factors for implant failure. For the full guide, see TPLO implant failure signs and causes.
The most important re-injury risk: the other knee
The operated knee rarely fails after successful TPLO recovery. The far greater risk is the other knee.
PMC (NCBi 2014) confirms that among dogs with unilateral CCL rupture, a large proportion will develop contralateral CCL rupture within 12 to 24 months.
The risk is 22 to 54% at 6 to 17 months of initial diagnosis.
This is because both CCLs are affected by the same systemic risk factors: genetics, body weight, conformation, and hormonal environment.
The degeneration that caused one CCL to fail is almost certainly affecting the other.
Weight management is the most impactful owner action for reducing the risk of contralateral rupture. Maintaining a lean body condition score reduces mechanical load on both stifle joints simultaneously.
Signs that the operated knee has a new problem
Contact your veterinarian if you notice:
- Sudden regression to non-weight-bearing or severe lameness after the dog was progressing well
- A new clicking or popping sound from the operated knee
- New swelling or heat at the operated knee months after surgery
- Progressive rather than improving lameness between weeks 8 and 16
Contact your veterinarian about the other knee if you notice:
- New hind limb lameness on the opposite side
- Bilateral stiffness, especially in the morning
- Sitting with one leg extended to the side (the opposite leg from the TPLO)
For the TPLO failure rate context, see TPLO failure rate in dogs explained. For the meniscal complication guide, see dog meniscus tear after TPLO: symptoms and solutions.
For the full complications reference, see 15 common complications after TPLO surgery in dogs. For signs of lameness and their causes, see lameness after TPLO surgery in dogs.
For guidance on return-to-activity, see when can dogs resume agility training post-TPLO?.
Frequently asked questions
My dog had TPLO and is suddenly limping badly again. Did they re-tear their ACL?
Not in the literal sense TPLO does not leave a CCL to re-tear.
Sudden regression after successful initial recovery is most likely a late meniscal tear, though implant complications, infection, or patellar issues can also present this way.
Any sudden regression to severe lameness after TPLO warrants same-day or next-day veterinary evaluation.
How can I tell if it's a meniscal tear vs. a plate problem?
A meniscal click or clunk during movement is more characteristic of meniscal injury. Implant failure is more likely to show subtle progressive changes visible on radiographs.
A vet cannot reliably distinguish them on clinical examination alone radiographs and often arthroscopy are needed.
Can TPLO surgery fail entirely?
Complete failure where the joint reverts to pre-surgical instability is uncommon. Partial complications (late meniscal tear, infection, implant issues) are more typical. The overall reoperation rate for TPLO complications is below 10%.
Most dogs that have successful initial recovery maintain good long-term function.
How do I reduce my dog's risk of a late meniscal tear after TPLO?
Strict activity restriction for the full 8 to 12 weeks minimizes abnormal forces on the healing meniscus. Maintaining healthy body weight reduces meniscal loading throughout the dog's life.
The surgeon assesses the meniscus at TPLO if it was already damaged and removed, a late tear in that knee is no longer possible.
Should I worry about my dog's other knee after TPLO?
Yes the contralateral CCL rupture risk of 22 to 54% within 6 to 17 months is substantial.
Weight management, consistent controlled exercise, and watching for new lameness on the opposite side are the appropriate responses.
Early diagnosis and surgery on the second knee (when it ruptures) produce the same good outcomes as the first.
Resources
- TPLO Austin. Step 6: TPLO Surgery Recovery. tploaustin.com
- Laguna Hills Animal Hospital. TPLO Surgery Complications. lhah.com
- Vetplayas. Dog Meniscus Tear After TPLO: Understanding and Managing the Complication. vetplayas.com
- PMC. Radiographic Risk Factors for Contralateral Rupture in Dogs with Unilateral CCL Rupture. ncbi.nlm.nih.gov
- ACVS. Cranial Cruciate Ligament Disease. acvs.org
What Causes Cruciate Ligament Tears in Dogs?
Learn what causes cruciate ligament tears in dogs, including risk factors, symptoms, and prevention tips for your pet’s joint health.
Sustainable Vet Group
CCL rupture in dogs is not the same injury as ACL rupture in humans.
In humans, the anterior cruciate ligament typically tears during sudden trauma a pivoting fall on a ski slope, a tackle on a football field.
In dogs, the same ligament almost always fails through slow, progressive degeneration that began months or years before the day the dog comes in lame.
Understanding why the canine CCL fails and which dogs are most at risk is essential for prevention strategies and for recognizing early warning signs.
Quick answer: The canine CCL fails through progressive degeneration, not sudden trauma. Key risk factors are breed, obesity, poor fitness, tibial slope, and genetics. At least 50% of dogs that rupture one CCL will rupture the other within 1 to 2 years.
Key takeaways
- CCL rupture results from degeneration, not trauma: ACVS confirms slow, progressive degeneration rather than acute injury to a healthy ligament
- Obesity is the most modifiable risk factor: excess weight increases compressive and shear forces on the CCL with every step
- High-risk breeds include Labrador, Rottweiler, Newfoundland, Mastiff, and Akita: genetic inheritance has been demonstrated in Newfoundlands and Labradors
- Partial tears almost always progress to complete rupture: ACVS confirms this and notes progression is the rule, not the exception
- At least 50% of dogs rupture the opposite CCL within 1 to 2 years of the first rupture
- Neuter status increases CCL risk: spayed and neutered dogs show higher rates in multiple studies
Why dog CCL disease differs from human ACL injury
Colorado State University: "In humans, trauma (such as skiing, football, or soccer injuries) is the most common reason for injury of the ACL.
This 'traumatic' rupture can happen in dogs but is quite rare."
CSU: "Most commonly, CCLD is caused by a combination of many factors, including aging of the ligament (degeneration), obesity, poor physical condition, conformation, and breed."
In humans, a healthy ACL tears from a single high-energy event. In dogs, the ligament is already weakened before it ruptures.
The moment of obvious lameness is the endpoint of a months-long degenerative process.
ACVS: ligament rupture is "the result of subtle, slow degeneration that has been taking place over a period of time rather than the result of sudden trauma to an otherwise healthy ligament."
Fitzpatrick Referrals: "In the vast majority of dogs, the CrCL ruptures as a result of long-term degeneration, whereby the fibres weaken and fray over time, losing their structure and function."
The main causes and risk factors
Degeneration (aging and immune-mediated)
The underlying degenerative process in CCL disease involves progressive breakdown of collagen fibers within the ligament.
PMC (Cranial Cruciate Ligament Rupture Review): "The structural weakening of this joint due to the progressive degeneration of the ligament is the most accredited etiopathogenetic hypothesis."
The degeneration appears to involve both mechanical fatigue and immune-mediated inflammatory processes within the joint.
Synovitis (joint inflammation) often precedes complete rupture and may be detected during veterinary examination before full failure occurs.
Breed and genetics
ACVS: "Certain dog breeds are known to have a higher incidence: Rottweiler, Newfoundland, Staffordshire Terrier, Mastiff, Akita, Saint Bernard, Chesapeake Bay Retriever, and Labrador Retriever."
ACVS: "A genetic mode of inheritance has been shown for Newfoundlands and Labrador Retrievers."
Fitzpatrick Referrals: "Genetic factors are likely very important, with certain breeds being predisposed including Labradors, Rottweilers, Boxers, West Highland White Terriers, and Newfoundlands."
Breeds with low CCL disease incidence include Greyhounds, Dachshunds, Basset Hounds, and Old English Sheepdogs.
Fitzpatrick: "Supporting evidence for a genetic cause was obtained by assessment of family lines and the knowledge that many animals rupture both knees relatively early in life."
Obesity
ACVS: "Poor physical body condition and excessive body weight are risk factors for the development of CrCLD. Both of these factors can be influenced by pet owners."
PMC: "A predisposing factor is obesity, in which the concentrations of circulating inflammatory mediators increase, such as the concentrations of pro-inflammatory adipokines released from adipose tissue, which may contribute to degenerative phenomena."
Obesity matters in two ways: it increases the mechanical load on the CCL with every step, and it elevates systemic inflammation, which accelerates ligament degeneration.
A dog 10% overweight places significantly more stress on both stifle joints with every stride.
Tibial plateau angle (conformation)
The tibial plateau is the top surface of the tibia. In dogs, it slopes caudally. During weight-bearing, this slope creates a cranial shear force on the tibia that the CCL normally resists.
Fitzpatrick: "Increased tibial plateau angle (backwards slope at the top of the tibia) may play a role" in CCL disease.
Dogs with steeper tibial plateau angles experience greater cranial thrust with each step, increasing CCL load.
This is why TPLO and CBLO surgery (which reduce the tibial plateau angle) neutralize the instability rather than replacing the torn ligament.
Neuter status
Multiple studies have found that spayed and neutered dogs have higher rates of CCL disease than intact dogs. The relationship is stronger in some breeds than others.
Proposed mechanisms include the loss of sex hormones that influence joint development and ligament maturation, longer bone growth periods in dogs neutered before skeletal maturity, and altered body composition.
Contralateral (opposite knee) risk
NCBi (Radiographic Risk Factors study): "Among dogs presented with unilateral CCL rupture, a large proportion will develop contralateral CCL rupture within 12 to 24 months of initial diagnosis.
This risk is in the range of 22 to 54% at 6 to 17 months of diagnosis."
CSU: "At least half of the dogs that have a cruciate ligament problem in one knee will likely, at some future time, develop a similar problem in the other knee."
This bilateral risk reflects the systemic nature of CCL degeneration both ligaments are affected by the same genetic, hormonal, and conformation factors.
Partial tears: the warning stage
The CCL typically does not rupture all at once. Partial tears are common and produce intermittent hind limb lameness that owners sometimes attribute to a sprain.
CSU: "Partial tearing of the CCL is common in dogs and frequently precedes complete rupture."
ACVS: "Partial tearing of the CCL is common in dogs and almost always progresses to a full tear over time."
A dog with a partial CCL tear that receives cage rest and returns to activity will almost always eventually progress to complete rupture.
Surgical intervention at the partial tear stage can be considered for active dogs, though evidence on whether it prevents eventual complete rupture is limited.
Signs of CCL disease
- Hind limb lameness, especially after exercise
- Sudden onset of non-weight-bearing on a back leg
- Stiffness when getting up, especially after rest
- Muscle atrophy on the affected hind limb
- Thickening on the inside of the knee joint (medial buttress)
- Positive cranial drawer test or tibial compression test on orthopedic examination
Can CCL tears be prevented?
Risk cannot be eliminated in predisposed breeds, but it can be reduced.
ACVS: "Consistent physical conditioning with regular activity and close monitoring of food intake to maintain a lean body mass is advisable."
Evidence-based prevention strategies:
- Maintain healthy body weight (most impactful modifiable factor)
- Consistent, regular exercise rather than intermittent intense activity
- Avoid sudden load increases (the "weekend warrior" pattern)
- Discuss neutering timing with your vet, particularly in high-risk breeds
For the surgical treatment of CCL rupture, see CBLO surgery in dogs: cost, recovery, and success rate. For the surgery vs. conservative management decision, see canine cruciate injuries: surgery vs. conservative management.
For meniscal injury that often accompanies CCL tears, see torn meniscus surgery cost in dogs. For when CCL disease requires specialist referral, see when to refer for orthopedic surgery.
Frequently asked questions
My dog tore its CCL running in the yard. Wasn't that traumatic?
The event may have looked sudden, but the ligament was almost certainly already degenerated.
ACVS: the rupture is "the result of subtle, slow degeneration... rather than sudden trauma to an otherwise healthy ligament." The yard run was the last straw, not the cause.
Which dog breeds are at highest risk for CCL tears?
ACVS identifies Rottweilers, Newfoundlands, Staffordshire Terriers, Mastiffs, Akitas, Saint Bernards, Chesapeake Bay Retrievers, and Labrador Retrievers as high-incidence breeds. Fitzpatrick Referrals adds Boxers and West Highland White Terriers.
Does obesity really make that much difference?
Yes. Obesity increases both mechanical load on the CCL and systemic inflammation via adipokines from fat tissue.
It is the most modifiable risk factor maintaining healthy body weight is the single most impactful thing an owner can do for CCL disease prevention.
My dog had surgery on one knee. How long before the other goes?
NCBi data: the risk of contralateral CCL rupture is 22 to 54% within 6 to 17 months of the first diagnosis. Monitoring the other knee closely after the first diagnosis is important.
Maintaining lean body weight and avoiding abrupt increases in activity are the main protective strategies.
Can a dog with a partial CCL tear be managed without surgery?
Conservative management (rest, weight loss, physical therapy) may be attempted for partial tears, particularly in small dogs. But ACVS states partial tears "almost always progress to a full tear over time."
Discuss with an orthopedic specialist whether surgery at the partial tear stage is appropriate for your dog.
What is the difference between CCL and ACL?
CCL (cranial cruciate ligament) is the correct term in dogs; ACL (anterior cruciate ligament) is the human equivalent. They are anatomically similar structures that stabilize the knee joint.
The key clinical difference: in humans, ACL tears are usually traumatic; in dogs, CCL tears are almost always degenerative.
Resources
- ACVS. Cranial Cruciate Ligament Disease. acvs.org
- CSU Veterinary Health System. Canine Cruciate Ligament Injury. vetmedbiosci.colostate.edu
- Fitzpatrick Referrals. Cruciate Ligament Disease or Injury. fitzpatrickreferrals.co.uk
- NCBi PMC. Radiographic Risk Factors for Contralateral Rupture in Dogs with Unilateral CCL Rupture. ncbi.nlm.nih.gov
- PMC. Cranial Cruciate Ligament Rupture in Dogs: Review on Biomechanics, Etiopathogenetic Factors and Rehabilitation. ncbi.nlm.nih.gov
Arthrex TPLO Weight Chart Explained
Understand the Arthrex TPLO weight chart and how it guides post-op care for dogs after TPLO surgery.
Sustainable Vet Group
After TPLO surgery, one of the most important questions owners and rehabilitation teams ask is: how much weight should my dog be putting on the operated leg right now?
The Arthrex TPLO weight chart provides a structured, week-by-week answer to that question, giving both surgeons and owners a shared reference point for tracking recovery progress.
Quick answer: The Arthrex TPLO weight chart tracks the percentage of body weight a dog bears on the operated leg at each recovery stage — from 0 to 10% in the first weeks to 100% by 8 to 12 weeks post-surgery.
Key takeaways
- The weight chart tracks weight-bearing percentage at each stage, from 0 to 10% in weeks 1 to 2 to 100% by weeks 8 to 12
- It is a rehabilitation monitoring tool, not a surgical planning tool: the rotation chart governs intraoperative correction; this tracks recovery
- Progression must be gradual: advancing too fast risks implant failure; too slow leads to atrophy and stiffness
- The chart integrates with clinical examination: 8-week radiographs, gait assessment, and muscle mass evaluation are considered alongside chart milestones
- Individual dogs vary: the chart provides population-level benchmarks; your surgeon's instructions take precedence
- The chart is used alongside the plate size and rotation charts: together they form the Arthrex TPLO system framework
What the weight chart is and what it is not
The Arthrex TPLO weight chart is a post-operative rehabilitation tool.
It shows recommended weight-bearing percentages at specific time points after surgery a reference guide that helps veterinarians, rehabilitation therapists, and owners track whether a dog's recovery is progressing appropriately.
It is not the same as the rotation chart (which guides intraoperative tibial rotation) or the plate size chart (which guides implant selection before surgery).
These three charts together form the Arthrex TPLO planning and monitoring system.
For the rotation chart guide, see Arthrex TPLO rotation chart explained. For the plate overview, see Arthrex TPLO plate overview and use.
Understanding the weight-bearing percentages
The chart uses percentage of body weight as its unit of measurement.
This is a more useful measure than time alone because it relates directly to the mechanical load placed on the healing osteotomy and implant.
0 to 10% weight-bearing (weeks 1 to 2): toe-touching and minimal contact only. The dog is not actively loading the leg during this phase. Bathroom trips on leash are permitted, but no sustained weight-bearing.
10 to 30% (weeks 2 to 4): the dog begins placing meaningful weight on the leg during slow leash walks. This corresponds to the short 5 to 10 minute leash walks prescribed at this stage. The healing osteotomy is starting to consolidate but is not yet ready for full load.
30 to 60% (weeks 4 to 8): progressive loading during longer walks, sit-to-stand exercises, and early rehabilitation activities. Most dogs are visibly improving in gait symmetry during this phase.
60 to 100% (weeks 8 to 12): full weight-bearing is approached and typically achieved after the radiographic recheck at week 8 confirms adequate osteotomy healing. Activity levels increase under veterinary guidance.
How to use the chart in practice
As a clinical benchmark
Surgeons use the weight chart to assess whether a dog is progressing as expected at each recheck visit.
A dog that is well below the expected weight-bearing percentage for their stage may have inadequate pain control, implant complications, or infection.
A dog exceeding the expected percentage may be at risk of mechanical overload if the bone has not yet consolidated enough to tolerate the load.
As an owner reference
Owners are not expected to measure exact weight-bearing percentages at home this requires force plate analysis or pressure-sensitive walkway equipment.
The chart provides a conceptual framework: early recovery shows only toe-touching; by weeks 4 to 6, the dog places meaningful weight during walks; by weeks 10 to 12, gait symmetry improves steadily.
What affects weight-bearing progress
Bone healing rate: younger dogs and smaller breeds typically consolidate the osteotomy faster than older or giant breed dogs.
Pain control: inadequate analgesia is the most common cause of delayed weight-bearing. A dog in pain will protect the operated leg regardless of how well the surgery went. Contact your surgeon if your dog is significantly below expected weight-bearing benchmarks.
Muscle atrophy: dogs that enter surgery with significant muscle atrophy from prolonged pre-surgical lameness progress more slowly and benefit most from structured rehabilitation.
Body weight: heavier dogs place more absolute load on the healing osteotomy at any given percentage. This is one reason weight management is emphasized throughout the TPLO recovery period.
Rehabilitation: dogs receiving structured rehabilitation (PROM, sit-to-stand, hydrotherapy) consistently achieve better weight-bearing progression than those managed with rest alone.
When the chart says one thing and your dog does another
The weight chart represents population-level expectations. Individual dogs routinely deviate from the expected timeline for reasons that are often identifiable and manageable.
If your dog is significantly under-progressing: contact your surgeon to rule out infection, implant problems, or inadequate pain management before assuming slow healing.
If your dog appears to be weight-bearing well ahead of schedule: this does not mean the osteotomy is healed faster than expected.
Radiographic confirmation at week 8 is still required regardless of how the dog looks clinically. Apparent early function does not mean the bone has consolidated enough to withstand full unrestricted activity.
For the full weight-bearing recovery timeline guide, see how soon can a dog walk after TPLO surgery.
For the rotation chart that is used alongside the weight chart in the Arthrex system, see Arthrex TPLO rotation chart explained.
For the plate size chart used in conjunction with both, see TPLO plate size chart explained.
Frequently asked questions
Is the Arthrex TPLO weight chart the same as a standard recovery timeline?
Not exactly. A recovery timeline tells you what activities to do and avoid at each stage.
The weight chart specifically tracks how much weight the dog is placing on the operated leg at each stage, expressed as a percentage of body weight.
The two are related but provide different information.
Can I measure my dog's weight-bearing at home?
Not precisely. Force plate and pressure-sensitive walkway systems that measure actual weight distribution require specialist veterinary equipment.
At home, you can observe whether the dog is toe-touching, placing the foot flat, and walking with increasing symmetry which approximates the chart's progression categories without exact percentages.
What if my dog refuses to use the leg at all two weeks after TPLO?
Non-weight-bearing at two weeks is a warning sign. TPLO Austin confirms that if your pet is not bearing weight within two weeks of surgery, contact your veterinarian.
The most common causes are inadequate pain control, infection, or implant positioning concerns all of which are addressable if caught early.
Do all TPLO surgeons use the Arthrex weight chart?
No. The Arthrex system is one of the two major TPLO implant systems in the US (alongside Synthes). Surgeons using Synthes implants use Synthes-specific planning tools.
Some surgeons use individualized rehabilitation protocols rather than system-specific charts. The underlying recovery milestones are similar regardless of which chart or system is used.
What happens at the 8-week recheck in terms of weight-bearing?
At the 8-week recheck, radiographs assess osteotomy healing. If healing is adequate, the surgeon approves increased activity typically 20 to 30 minute leash walks and the beginning of return-to-normal activity.
The weight chart at this point expects the dog to be approaching or achieving 100% weight-bearing on the operated leg.
Resources
- Arthrex Veterinary. TPLO Surgical Technique. arthrex.com
- VCA Animal Hospitals. Tibial Plateau Leveling Osteotomy (TPLO) in Dogs. vcahospitals.com
- TPLO Austin. Step 6: TPLO Surgery Recovery. tploaustin.com
- ACVS. Cranial Cruciate Ligament Disease. acvs.org

Types of Cysts and Tumors in Dogs
Explore the common types of cysts and tumors in dogs, their signs, diagnosis, and treatment options for better pet care.
Sustainable Vet Group
Finding a lump on your dog is one of the most common reasons owners call their vet. Most lumps in dogs are benign but some are not, and it is not possible to reliably tell the difference by looking or feeling alone.
This guide covers every common type of cyst and tumor in dogs: what each one looks like, where it tends to appear, and which ones require prompt attention.
Quick answer: Dogs develop cysts (almost always benign) and tumors (benign or malignant). Common benign types include lipomas and sebaceous cysts. Mast cell tumors are the most common malignant skin tumor. All new lumps need vet assessment.
Key takeaways
- Cysts are almost always benign and consist of a sac filled with fluid, sebum, or cellular material
- Tumors can be benign or malignant; appearance and feel alone cannot reliably distinguish between them
- Lipomas are the most common benign tumor in dogs: soft, movable fatty lumps most often found in middle-aged to senior dogs
- Mast cell tumors are the most common malignant skin tumor in dogs, representing 11% of all canine skin cancers
- Fine needle aspiration (FNA) is the standard first diagnostic step for any unidentified lump it is quick, minimally invasive, and usually provides a definitive answer
- Any lump that grows rapidly, ulcerates, bleeds, or causes pain needs same-day veterinary evaluation
Cysts vs. tumors: the key distinction
A cyst is a sac-like structure with a defined wall, filled with liquid or semi-solid material. Dr. Buzby's ToeGrips explains the distinction clearly: cysts "are masses made up of a cavity that contains liquid or semi-solid material," while "tumors, whether benign or malignant, are comprised of solid tissue that forms from abnormal cell growth."
This matters for two reasons:
- Cysts are not cancerous and do not spread to other parts of the body
- Tumors vary widely a lipoma (benign fat tumor) behaves very differently from a mast cell tumor (potentially malignant)
The challenge: some malignant tumors feel soft and movable, while some benign cysts feel firm. Merck Veterinary Manual warns specifically about mast cell tumors: "These tumors vary greatly in size and rate of growth. They can mimic lipomas; therefore, visual signs alone cannot establish a diagnosis."
Common types of cysts in dogs
1. Sebaceous cysts
Formed when the opening of a sebaceous (oil) gland becomes blocked, trapping sebum inside. PetMD describes them as containing a thick material that releases "white, yellow, or brown" discharge when expressed.
- Appearance: raised bump, often with a whitish or bluish tint through the skin
- Location: anywhere on the body, but most common on the trunk, head, and limbs
- Size: usually small (under 1 cm) but can grow larger
- Behavior: slow-growing; may rupture and release pasty discharge; prone to secondary infection if ruptured
- Treatment: monitoring for small, stable cysts; surgical removal if infected, growing, or bothering the dog
- Important: Merck cautions against squeezing: "You should not attempt to remove the cysts by squeezing them because this can spread the cyst contents into the surrounding tissues."
2. Follicular cysts (epidermoid cysts)
Associated with hair follicles rather than sebaceous glands. PetMD: "Follicular cysts are large, benign bumps on the skin that grow up from the hair follicle. They may release a thick material that is white, yellow, or brown when you push on them."
- Appearance: firm, raised bump; contents are often dark, cheesy, or foul-smelling when expressed
- Location: anywhere, but legs and around the mouth are particularly common according to Bark & Whiskers
- Behavior: may become infected (folliculitis); can grow to several centimeters and become painful
- Treatment: monitoring if stable; surgical removal if growing, infected, or painful; will not regrow if fully removed
A specific subtype interdigital cysts forms between the toes. Dr. Buzby's ToeGrips explains: "These cysts develop between the toes and are often a consequence of allergies, obesity, or breed-related factors. The affected hair follicle becomes inflamed and may rupture."
3. True cysts (sweat gland cysts)
Form in the secretory lining of sweat glands, which continuously produces fluid the more fluid produced, the larger the cyst grows. True cysts are most common around the eyes and in the ear canals.
- Appearance: smooth, fluid-filled, usually bluish or translucent
- Location: eyelids, ear canals most commonly
- Behavior: slow-growing, almost always benign; can impair vision if near the eye
- Treatment: surgical removal or laser ablation if causing problems
4. Dermoid cysts
Congenital cysts that form when a piece of epidermis becomes trapped below the skin during fetal development. Merck notes they are "most commonly found in Boxers, Kerry Blue Terriers, and Rhodesian Ridgebacks. Most dermoid cysts are multiple and contain fully formed hair shafts."
- Appearance: firm, often contains hair
- Behavior: benign; can become infected
- Treatment: surgical removal is the definitive treatment
Common types of benign tumors in dogs
5. Lipoma (fatty tumor)
University of Illinois veterinary cytology department confirms: "Lipomas are a benign mesenchymal tumor and probably the most common benign tumor in dogs."
- Appearance: soft, round, movable under the skin; no overlying hair changes
- Location: trunk and upper limbs most common; can occur anywhere
- At-risk dogs: older and overweight dogs
- Behavior: slow-growing; most remain stable for years; do not spread or become malignant
- Treatment: monitoring is standard for most; surgical removal if the lipoma is in a location causing discomfort (over a joint, in the axilla, on the leg where it affects movement)
The exception is the infiltrative lipoma, which grows into surrounding muscle and fascia rather than displacing it. These require more aggressive surgical removal.
6. Histiocytoma
A benign skin tumor arising from immune (Langerhans) cells in the skin. PetMD describes them as tumors that "usually regress spontaneously over time without treatment."
- Appearance: small, round, firm, raised, often red ("button-like") on the surface; may ulcerate
- Location: most common on the head, ears, and limbs
- At-risk dogs: young dogs under 3 years; Boxers, Bulldogs, Dachshunds, Cocker Spaniels
- Behavior: hallmark feature is spontaneous regression within 1 to 3 months
- Treatment: monitoring most resolve without treatment; removal if the dog is bothering it or if it persists beyond 3 months
7. Skin tags (acrochordons)
Fleshy, pedunculated (on a stalk) growths that form where skin rubs together. Bark & Whiskers: "These are small, fleshy growths that often appear on areas where the skin rubs together, like the armpit or eyelids. They're usually harmless unless they get irritated."
- Treatment: none required unless causing irritation; simple surgical removal
8. Papillomas (warts)
Caused by the canine papillomavirus. Embrace Pet Insurance: "These are caused by a virus and are most often found in and around the mouth of young dogs."
- Appearance: cauliflower-like, pale, rough surface; clustered
- Location: mouth, lips, eyelids
- At-risk dogs: young dogs with immature immunity; immunosuppressed dogs
- Behavior: contagious between dogs; most resolve spontaneously within weeks to months
- Treatment: monitoring; antiviral treatment or surgical removal for persistent or symptomatic cases
Mast cell tumors: the most important malignant skin tumor
Mast cell tumors (MCTs) deserve special attention. The published consensus review in PMC confirms: "It is the most common malignant skin tumor in dogs, corresponding to 11% of skin cancer cases."
Why they are important:
- They are highly variable in appearance they can look like almost anything: a small firm nodule, a soft squishy mass, an ulcerated sore, or a wart
- They can change size rapidly (especially when stimulated by pressure or trauma), which is a characteristic feature called Darier's sign
- They release histamine and other chemicals, which can cause local redness and swelling
At-risk breeds: Merck Veterinary Manual identifies Boxers and Pugs (often multiple tumors), Rhodesian Ridgebacks, and Boston Terriers as especially prone.
High-risk locations: Merck: "Tumors located near mucous membranes, feet, prepuce, or on the lower surface of the body are more likely to spread than mast cell tumors in other areas."
Diagnosis: fine needle aspiration. Mast cells have a characteristic granular appearance under the microscope that is usually immediately identifiable.
Treatment: surgical removal with wide margins; grade determines whether additional treatment (chemotherapy, radiation) is needed.
For how to assess whether a lump should be removed, see how to tell which lumps need removal. For mast cell tumor removal cost specifically, see mast cell tumor as a common tumor type.
Other significant tumor types
Melanoma
Arises from pigment-producing cells. Bark & Whiskers notes that "some types can be aggressive." Oral melanomas (in the mouth) are significantly more aggressive than cutaneous (skin) melanomas. A dark, irregularly shaped growth on or around the mouth, on the nail bed, or on mucosal surfaces warrants prompt evaluation.
Perianal adenoma
PetMD: "Perianal adenomas are benign growths common in older, unneutered male dogs. They grow from oil glands near the anus but can also occur in similar glands along the abdomen, on the back, and near the tail." Neutering is both preventive and may cause regression of existing tumors.
How vets diagnose lumps: fine needle aspiration
FNA is the standard first step for any unidentified lump. A thin needle is inserted into the mass and cells are aspirated onto a slide for microscopic examination. University of Illinois veterinary cytology: this technique reliably distinguishes lipomas, cysts, mast cell tumors, and histiocytomas in most cases.
FNA is quick, minimally invasive, and can be done in a routine vet visit without anesthesia for most lumps. If FNA is inconclusive, a biopsy (removing a small tissue core) or surgical excision with histopathology provides a definitive diagnosis.
For when cysts and tumors require surgery based on diagnosis, see when cysts and tumors require surgery. For how red lumps on the leg relate to these growth types, see red lumps as a presenting sign of cysts or tumors.
When to call the vet immediately
Contact your vet the same day if a lump:
- Appeared suddenly and is growing fast
- Is ulcerated, bleeding, or has discharge
- Is warm and painful to the touch
- Changes size rapidly (getting larger then smaller mast cell feature)
- Is on a high-risk location: mouth, nail bed, foot pad, groin
- Causes your dog pain or changes their behavior
For cost context on tumor removal, see cost of removing tumors.
Frequently asked questions
Can I tell if a lump is cancerous by touching it?
No. Merck Veterinary Manual is explicit that mast cell tumors "can mimic lipomas; therefore, visual signs alone cannot establish a diagnosis." Soft, movable lumps can be malignant; firm, fixed lumps can be benign. Fine needle aspiration by a vet is the only reliable way to get an answer.
Should I wait and watch a new lump on my dog?
For lumps that are small, stable, and have been present without change for months, monitoring is reasonable. Any new lump should be evaluated by a vet within a few weeks of discovery not because every lump is dangerous, but because knowing what it is guides whether monitoring or action is appropriate.
How often do dogs get cancer?
Cancer is the leading cause of death in dogs over 10 years of age. However, many lumps found on dogs are benign. The probability of malignancy increases with age, rapid growth, ulceration, and location on or near mucous membranes.
What is fine needle aspiration and does it hurt?
FNA involves inserting a thin needle into the lump to collect a small sample of cells. Most dogs tolerate it without sedation and show little reaction. It takes a few seconds and provides very useful diagnostic information. It is much less invasive than a biopsy.
My dog has multiple lipomas. Is that a concern?
Multiple lipomas are common in older dogs, especially Labrador Retrievers and overweight dogs. Most are benign and can be monitored. Your vet will recommend FNA for any new or atypical lump in a dog with known lipomas to make sure a new growth is not a different tumor type that happens to look similar.
What is the difference between a cyst and an abscess?
Both are fluid-filled pockets but with different contents and causes. A cyst contains sebum, cellular debris, or glandular secretions and is usually not infected. An abscess contains pus the product of bacterial infection and is almost always painful, warm, and surrounded by inflamed tissue. Abscesses need antibiotic treatment; many cysts can simply be monitored.
Resources
- PetMD. Lumps, Bumps, and Cysts on Dogs. petmd.com
- Merck Veterinary Manual. Tumors of the Skin in Dogs. merckvetmanual.com
- Dr. Buzby's ToeGrips. Dog Cyst vs. Tumor: How Can You Tell? toegrips.com
- Embrace Pet Insurance. Dog Cyst vs Tumor: Understanding the Types. embracepetinsurance.com
- University of Illinois College of Veterinary Medicine. Cytology of Lumps and Bumps. vetmed.illinois.edu
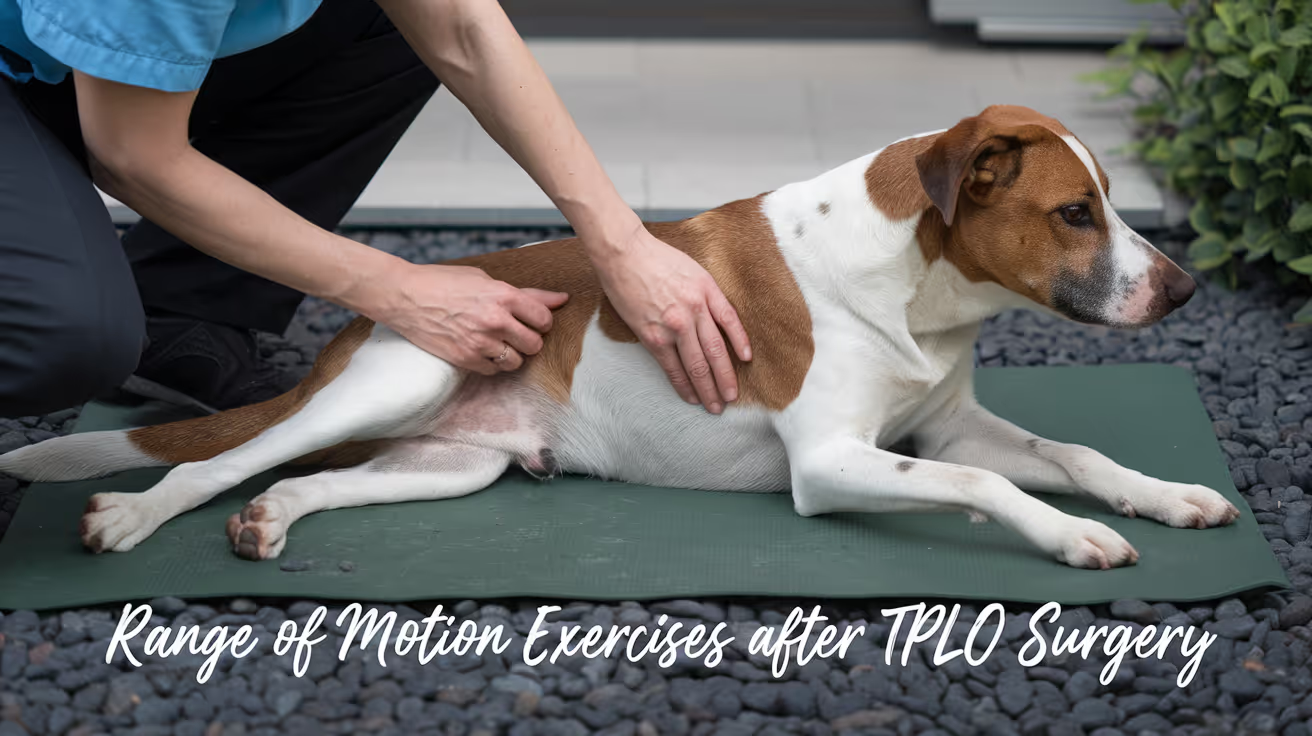
TPLO Range of Motion Exercises for Dogs
Learn effective TPLO range of motion exercises to help your dog recover safely and regain mobility after surgery.
Sustainable Vet Group
Range of motion (ROM) exercises are one of the earliest and most consistently prescribed rehabilitation interventions after TPLO surgery.
They prevent joint stiffness, reduce scar tissue adhesion, and maintain the joint mobility that ultimately determines how well the dog walks and bears weight long-term.
A key research finding from a study of 412 TPLO patients: loss of stifle extension greater than 10 degrees was associated with significantly greater long-term lameness.
Quick answer: TPLO ROM exercises involve gently flexing and extending the stifle for 10 repetitions, 2 to 3 times daily, beginning 2 to 5 days post-surgery. Extension is critical: loss of more than 10 degrees is strongly linked to long-term lameness.
Key takeaways
- ROM exercises begin at 2 to 5 days post-TPLO: early initiation prevents scar tissue formation that progressively limits joint mobility
- Extension is more critical than flexion: loss of more than 10 degrees is strongly associated with increased long-term lameness
- Normal stifle ROM: extension 158 to 162 degrees, flexion 41 to 45 degrees; loss of more than 10 degrees warrants intervention
- Hydrotherapy significantly improves stifle ROM: 122 vs 105 degrees at week 12 in a randomized controlled trial
- Goniometry is the clinical tool: a goniometer measures joint angles and tracks ROM improvement at each rehabilitation assessment
- 10 repetitions, 2 to 3 times daily is the standard passive ROM protocol; stop if the dog vocalizes or tenses
What range of motion means after TPLO
Range of motion is the arc through which a joint can move from maximum flexion (the most bent position) to maximum extension (the most straight position).
In the stifle (knee), this is measured in degrees using a goniometer, a protractor-like device placed over the joint.
After TPLO surgery, the stifle is swollen, painful, and surrounded by muscles that have contracted to protect the injury.
Without regular movement, periarticular muscles tighten and scar tissue forms between tissue planes.
Clinical research confirms: dogs with normal stifle extension have greater weight-bearing on the operated limb at trot than those with restricted extension. ROM restoration is directly linked to functional outcome.
Normal stifle ROM values in dogs
Understanding what "normal" looks like helps set realistic goals for rehabilitation:
Extension: approximately 158 to 162 degrees (near full straightening of the joint)Flexion: approximately 41 to 45 degrees (the most bent position)
Loss of extension or flexion greater than 10 degrees from these reference values is clinically significant and associated with increased lameness (Veterian Key, 412-dog TPLO study).
Extension loss is worse than flexion loss: it is less tolerable, less amenable to rehabilitation, and more strongly correlated with osteoarthritis.
TPLO ROM exercise technique
Passive ROM (PROM) weeks 1 to 6
Passive ROM means you move the joint; the dog's muscles are relaxed.
Setup: dog lying on their side, operated leg facing up. Support the leg above and below the stifle with both hands.
Movement: gently flex the stifle (bring the lower leg toward the body), then extend it back toward neutral. Slow, smooth, continuous bicycle motion. Stay within the comfortable range do not push past resistance.
Repetitions: 10 per session, 2 to 3 sessions daily.
After: apply a cold pack for 5 to 10 minutes to reduce post-exercise inflammation.
This is identical to the PROM technique described in PROM exercises for dogs after TPLO surgery.
Active-assisted ROM weeks 4 to 8
As the dog begins bearing weight, active-assisted ROM incorporates the dog's own muscle activation:
Sit-to-stand: the dog moves from sit to stand repeatedly. Each sit flexes the stifle; each rise extends it. Begin with 5 to 10 repetitions, 2 to 3 times daily. This is one of the most effective active ROM exercises because the dog controls the movement within their own comfortable range.
Slow leash walks: controlled leash walking through a full gait cycle moves the stifle through its functional ROM repeatedly. Walking pace and surface affect how much ROM is required slow walks on level ground are most appropriate in early recovery.
Warm pack before exercise: from day 5 onward, apply a warm pack for 5 minutes before ROM sessions to relax the periarticular muscles and improve the range achieved.
Facilitated ROM weeks 6 to 12
As strength and confidence improve, exercises that challenge and expand ROM are introduced:
Cavaletti poles: stepping over poles at shoulder height (approximately 10 to 15 cm) requires active stifle flexion beyond normal walking ROM. Begin with 2 to 4 passes over 4 to 5 poles, increasing as strength improves.
Incline walking: walking up a gentle slope increases hindlimb extension demand; walking down increases flexion demand. Progress from 1 to 3 minutes per session at weeks 6 to 8 onward.
Passive stretching: gentle end-range holding of flexion and extension, 10 to 30 seconds per position, introduced at weeks 6 to 8 to address persistent stiffness. Do not force the joint; hold at comfortable resistance only.
The role of hydrotherapy in ROM recovery
A randomized controlled trial comparing hydrotherapy vs. land-based physiotherapy in post-TPLO dogs found that by week 12, hydrotherapy dogs achieved stifle ROM of 122 degrees compared to 105 degrees in land-only controls.
This is a clinically and statistically significant difference.
The underwater treadmill protocol involved twice-weekly sessions from week 3 onward, water at the level of the greater trochanter, 15 to 30 minute sessions.
Water buoyancy reduces joint load while the resistance and natural gait pattern in water challenge ROM more effectively than many land exercises at the same stage.
PMC (UWTM pilot study, 50 dogs): after 10 sessions, significant ROM improvement occurred in all joints including the stifle.
When to be concerned about ROM
Contact your veterinarian or rehabilitation therapist if:
- The dog resists or vocalizes during ROM exercises that were previously comfortable
- You notice a hard end-point to ROM (hard stop rather than soft resistance) suggesting joint capsule contracture
- ROM appears to be decreasing rather than improving at the 4- or 8-week recheck
- The dog is significantly lame and the stifle will not flex or extend near normal range
For the full PROM technique guide, see PROM exercises for dogs after TPLO surgery. For the complete rehab program that ROM fits into, see TPLO rehab exercises for dogs.
For the physical therapy guide, see when to start physical therapy after TPLO surgery. For the recovery exercises guide, see TPLO recovery exercises for dogs.
Frequently asked questions
How do I know if I'm achieving enough range of motion during home exercises?
Normal stifle flexion is approximately 41 to 45 degrees; normal extension is approximately 158 to 162 degrees.
If you are performing PROM correctly, you should feel gentle resistance at the end of each range not a hard stop, not complete looseness.
A rehabilitation practitioner can demonstrate the correct technique and measure your dog's current ROM with a goniometer at their first session.
My dog gets stiff after rest. Is this related to ROM?
Yes. Post-rest stiffness is one of the earliest signs of reduced ROM following TPLO. The joint has developed some adhesion and scar tissue that resolves partially with movement.
This is a signal to increase the frequency of ROM sessions and to ensure warm-up before walks.
If stiffness does not improve with ROM exercises over 1 to 2 weeks, contact your vet.
How long should ROM exercises continue after TPLO?
Passive ROM (PROM) is typically discontinued around weeks 6 to 8 when the dog achieves near-normal active ROM.
Active ROM exercises sit-to-stand, leash walks, cavaletti continue through weeks 8 to 16 and beyond until full function is restored. Ongoing ROM maintenance through normal activity continues for the dog's lifetime.
Can I use a goniometer at home to track progress?
Yes, but training is needed to use it accurately. Goniometers are inexpensive and available from physiotherapy suppliers. Your rehabilitation therapist can demonstrate the correct placement for the stifle joint.
Accurate home tracking provides useful objective data for your veterinarian alongside clinical assessments.
Does every TPLO dog need formal ROM therapy?
Home-based PROM performed 2 to 3 times daily produces good results for most dogs when performed correctly. Formal rehabilitation sessions add goniometric tracking, professional technique guidance, and modalities like hydrotherapy and laser.
Dogs that enter surgery with significant pre-surgical muscle atrophy or stiffness, or those not progressing at expected milestones, particularly benefit from formal rehabilitation.
Resources
- Veterian Key. Range-of-Motion and Stretching Exercises. veteriankey.com
- ScienceDirect. How Does CCL Rupture Treatment Affect Range of Motion in Dogs? sciencedirect.com
- PMC. Pilot Study on the Effects of UWTM on Canine Joint Range of Motion. ncbi.nlm.nih.gov
- TPLO Info. Rehab for Dogs After TPLO Surgery. tploinfo.com
- WM Referrals. Post-Operative Rehabilitation After TPLO. wm-referrals.com

What Does TPLO Stand For in Veterinary Medicine?
Learn what TPLO stands for in veterinary medicine and how this surgical procedure helps dogs with cruciate ligament injuries.
Sustainable Vet Group
If your dog has been diagnosed with a torn cranial cruciate ligament, you have likely encountered the acronym TPLO possibly before you knew what it meant or why it was being recommended.
TPLO is the most commonly performed CCL surgery in the US. Understanding what the acronym means helps demystify why the surgery works the way it does.
Quick answer: TPLO stands for Tibial Plateau Leveling Osteotomy: Tibial (shin bone), Plateau (upper surface forming the knee), Leveling (making the plateau closer to horizontal), Osteotomy (controlled bone cut). The surgery stabilizes the knee by rotating the tibia, making the CCL biomechanically unnecessary.
Key takeaways
- T = Tibial: the tibia, the shin bone below the knee (stifle) joint
- P = Plateau: the upper tibial surface forming the knee joint; in dogs it has a significant slope called the tibial plateau angle
- L = Leveling: reducing the tibial plateau angle to closer to parallel with the ground, changing joint biomechanics
- O = Osteotomy: a controlled surgical bone cut that allows the tibial segment to be repositioned and fixed
- TPLO does not repair the torn CCL: it changes joint geometry so the ligament becomes biomechanically unnecessary
- TPLO was first described in the early 1980s by Dr. Barclay Slocum and is now the most reliable procedure for CCL disease in dogs
Breaking down each word
T Tibial
The tibia is the main weight-bearing bone of the lower leg, running from the knee (stifle) joint to the ankle (tarsus).
In dogs, the tibia is not perfectly vertical it angles slightly forward relative to the femur above it. This angle contributes to the mechanical forces that act on the stifle during weight-bearing.
Veterinary Partner (VIN) explains: tibial refers to the shin bone.
P Plateau
The tibial plateau is the upper, relatively flat surface of the tibia that contacts the bottom of the femur to form the stifle joint.
Unlike in humans, where the tibial plateau is nearly horizontal, in dogs it has a significant slope the tibial plateau angle (TPA).
A steeper TPA creates more cranial tibial thrust during weight-bearing, which is the force that normally the CCL resists.
Veterinary Partner (VIN) defines it as: the upper surface of the shin bone; the bottom of the knee joint.
L Leveling
Leveling refers to the goal of the surgery: reducing the tibial plateau angle to approximately 5 degrees, making it closer to parallel with the ground.
When the tibial plateau is leveled, the femur no longer tends to slide forward relative to the tibia during weight-bearing the cranial tibial thrust is neutralized.
This is why a functioning CCL is no longer required after TPLO.
Veterinary Partner (VIN) defines it as: making the plateau more parallel to the ground.
O Osteotomy
An osteotomy is a controlled surgical cut through a bone a deliberate, planned fracture performed under anesthesia to allow repositioning of a bone segment.
TPLO involves a curved osteotomy through the proximal tibia, creating a segment that is rotated to the new angle and fixed with a bone plate and screws during healing.
Veterinary Partner (VIN) defines it as: a bone-cutting procedure like a controlled fracture of the bone.
Why TPLO was developed
Before TPLO, the dominant approach to CCL repair was extracapsular stabilization placing sutures outside the joint to mimic the CCL's function.
While effective in small dogs, this approach was unreliable in large, active dogs because the suture material eventually stretched or failed, and the joint depended on periarticular scar tissue for long-term stability.
Veterinary Specialty Center explains: TPLO changes the biomechanics of the knee so the joint can remain stable without relying on the damaged CCL.
Instead of replacing the torn ligament, it changes the mechanics of the knee entirely.
DVM360 confirms: TPLO alters the mechanical forces acting on the stifle, rendering the cranial cruciate ligament unnecessary.
Dr. Barclay Slocum first described TPLO in the early 1980s.
Veterinary Partner (VIN) notes that much research has been done since to refine the technique, and it has emerged as the most reliable technique for CCL disease management in dogs.
How TPLO differs from human ACL surgery
This is one of the most common points of confusion for owners.
In humans, ACL surgery typically involves replacing the torn ligament with a graft (taken from the patient's hamstring, patellar tendon, or a donor).
The new ligament is reconstructed to restore normal joint function.
TPLO does not reconstruct the CCL. It bypasses the need for a functioning CCL entirely by changing joint geometry.
Veterinary Specialty Center confirms: in people, ACL surgery replaces the torn ligament; in dogs, TPLO changes knee mechanics so the joint functions without the CCL.
This is why dogs cannot "re-tear" their CCL after TPLO there is no ligament replacement to fail. The stability provided by TPLO is structural and permanent.
What TPLO treats and who it is for
TPLO is used to treat cranial cruciate ligament (CCL) rupture the canine equivalent of the human ACL.
CCL rupture is the most common cause of hind limb lameness in dogs and costs US dog owners over $1 billion annually.
The ACVS recommends TPLO as the most commonly performed procedure for dogs over 60 lbs. It is also recommended for smaller dogs where long-term mechanical stability and minimal arthritis progression are priorities.
For the surgical causes guide, see what causes TPLO surgery to be needed in dogs. For the full surgical overview, see what is TPLO surgery in dogs?.
For the pros and cons of the procedure, see TPLO surgery pros and cons for dogs.
Frequently asked questions
Does TPLO stand for the same thing in all dogs?
Yes. The acronym and the procedure are the same regardless of breed, size, or the specific implant system used (Arthrex or Synthes).
The variation between cases is in the amount of tibial rotation required (based on the individual TPA), the plate size selected, and the post-operative protocol.
Is TPLO the same as TTA?
No. TTA (Tibial Tuberosity Advancement) is a different procedure with a similar goal both change knee biomechanics rather than replacing the CCL.
TTA advances the tibial tuberosity cranially rather than rotating the tibial plateau. They achieve knee stabilization through different geometric approaches.
Why is it called leveling if the bone is rotated?
The rotation of the tibial bone segment achieves the leveling.
When the proximal tibial segment is rotated, the angle of the tibial plateau changes it becomes less sloped, i.e., more level relative to the ground.
The procedure is named for the result (leveling) rather than the method (rotation).
Was TPLO invented for dogs?
Yes. TPLO was developed specifically for veterinary use in dogs in the early 1980s by Dr. Barclay Slocum.
It was developed because the canine stifle's anatomy and biomechanics differ significantly from the human knee particularly the steep tibial plateau angle that is uniquely problematic in dogs.
Why is TPLO preferred over other CCL surgeries for large dogs?
Large, active dogs generate higher joint forces than small dogs.
Extracapsular repair (lateral suture) provides stability through scar tissue formation adequate for small dogs but inadequate for the forces generated by large, active breeds.
TPLO provides bone-based mechanical stability that is not dependent on scar tissue, making it more durable and reliable for larger patients.
Resources
- Veterinary Partner (VIN). TPLO Surgery. veterinarypartner.vin.com
- VCA Animal Hospitals. Tibial Plateau Leveling Osteotomy (TPLO). vcahospitals.com
- DVM360. Understanding Tibial Plateau Leveling Osteotomies in Dogs. dvm360.com
- Veterinary Specialty Center. TPLO Surgery for Dogs. vetspecialty.com
- ACVS. Cranial Cruciate Ligament Disease. acvs.org
Alternatives to TPLO Surgery for Dogs
Explore safe and effective alternatives to TPLO surgery for dogs with knee injuries, including treatments, benefits, and recovery options.
Sustainable Vet Group
TPLO is the most commonly recommended surgical procedure for CCL rupture in medium and large breed dogs, but it is not the only option and it is not always the right option.
Some dogs are better served by a different surgical technique; others by non-surgical management. Understanding the full menu of alternatives helps owners have more informed conversations with their veterinarians.
Quick answer: Surgical alternatives to TPLO include TTA, extracapsular repair, Tightrope, MMP, and CBLO — most achieving 90 to 93% good function in the right patient. Non-surgical options produce variable outcomes and are not recommended for complete CCL rupture in large dogs.
Key takeaways
- Surgical alternatives achieve comparable outcomes in the right patient: TTA and Tightrope show 90 to 93% good function at one year
- Extracapsular repair is appropriate for dogs under 15 to 35 lbs: above 90% success in small dogs; significantly worse in larger breeds
- Conservative management is not recommended for large dogs with complete CCL rupture: outcomes are worse; appropriate only for comorbidities or small partial tears
- Knee braces do not have strong evidence of restoring joint stability; current studies show no significant benefit per Vetamac
- MMP and CBLO are newer alternatives with growing evidence: MMP uses a titanium wedge; CBLO uses a different osteotomy geometry
- The best alternative to TPLO is determined by dog size, activity level, surgeon training, and individual clinical factors not by owner preference alone
Surgical alternatives
TTA (Tibial Tuberosity Advancement)
TTA advances the tibial tuberosity cranially to change the angle of the patellar tendon relative to the tibial plateau.
This achieves mechanical neutralization of cranial tibial thrust through a different geometric approach than TPLO.
TTA is appropriate for large breed dogs, similar to TPLO. Studies show comparable outcomes at one year.
DVM360 notes that TTA recovery may be faster in the early post-operative period than TPLO, though TPLO tends to show better objective outcomes in size-matched longer-term comparisons.
For the full TTA vs TPLO comparison, see TPLO, CBLO, and TTA: a guide to cruciate surgery options.
Extracapsular repair (DeAngelis/lateral suture/ELSS)
Extracapsular repair uses a heavy suture outside the joint to stabilize the stifle.
It is the oldest and most widely available CCL repair technique and is appropriate for small dogs under 15 to 35 lbs.
Simon Veterinary Surgical confirms extracapsular repair achieves excellent results in appropriately sized patients (typically under 50 lbs), with many dogs living full, active lives.
In larger, more active dogs, the suture eventually stretches or fails, and outcomes are consistently inferior to TPLO.
Today's Veterinary Practice confirms TPLO produces higher peak vertical force and higher owner satisfaction at one year compared to extracapsular repair in size-matched dogs.
For the full comparison, see DeAngelis vs TPLO surgery for dogs.
Tightrope procedure
Tightrope uses a synthetic fiber-tape passed through bone tunnels in the femur and tibia to stabilize the stifle.
It is more anatomically positioned than extracapsular repair and achieves comparable outcomes to TPLO at 6 months in published comparative studies.
Tightrope is appropriate for small to medium dogs and as a less expensive alternative to TPLO. Dr.
Buzby's rehabilitation veterinary guide lists Tightrope among the established surgical options alongside TPLO, TTA, ELSS, and CBLO.
For the full comparison, see Tightrope vs TPLO surgery for dogs.
Modified Maquet Procedure (MMP)
MMP is an evolution of TTA that uses a porous titanium foam wedge instead of a cage to advance the tibial tuberosity.
It is less invasive and faster than TPLO, with comparable 6-month outcomes in the primary randomized study.
MMP is appropriate for medium and large breed dogs in the hands of surgeons trained in the technique.
For the full comparison, see Modified Maquet Procedure vs TPLO surgery.
CBLO (CORA-Based Leveling Osteotomy)
CBLO is a newer osteotomy technique that applies a different geometric principle to achieve tibial plateau leveling.
Rather than a radial osteotomy (as in TPLO), CBLO uses the CORA (center of rotation of angulation) to guide a wedge osteotomy.
Published success rates of 85 to 95% good function have been reported.
CBLO is an emerging alternative with growing evidence. For the full comparison, see CORA-based leveling osteotomy vs TPLO in dogs.
Zlig
Zlig is a synthetic implant placed inside the joint to replace the function of the CCL.
It is a less commonly discussed alternative with limited long-term veterinary evidence compared to the established osteotomy techniques.
For the full comparison, see Zlig vs TPLO: which surgery is better for dogs?.
Non-surgical alternatives
Conservative management
Conservative management refers to non-surgical approaches: strict rest and activity restriction, physical therapy and rehabilitation, weight management, NSAIDs for pain and inflammation control, and joint supplements.
Vetamac confirms: the main non-surgical treatments for CCL rupture include restricting activity, promoting weight loss, and physical therapy.
NSAIDs help manage pain and inflammation, although lameness persists as long as joint instability remains.
Simon Veterinary Surgical's guide notes: non-surgical outcomes are described as achieving "pasture soundness" comfortable for daily activities but the dog may not return to high-impact sports.
Consistency with physical therapy and weight management is the biggest predictor of good conservative outcomes.
When conservative management is appropriate:
- Dogs with serious concurrent medical conditions that make anesthesia high-risk
- Small dogs (under 10 to 15 lbs) with partial CCL tears
- As a temporary bridge to surgery when surgery is delayed
- Dogs whose owners cannot afford surgical options
When conservative management is not appropriate:
- Complete CCL rupture in dogs over 15 to 20 lbs lameness persists, arthritis progresses faster, and meniscal injury risk remains
- Active working dogs or dogs with high functional demands
For the full non-surgical guide, see non-surgical alternatives to TPLO surgery for dogs.
Orthopedic knee braces
Custom orthopedic braces provide external support to the stifle. They are sometimes used in dogs that cannot undergo surgery or during the waiting period before surgery.
Vetamac notes directly: current studies do not show significant benefits from orthopedic braces for CCL rupture.
They may improve comfort for some dogs but do not restore joint stability or prevent ongoing meniscal damage and arthritis progression. They are not a reliable substitute for surgical stabilization.
Regenerative medicine
Platelet-rich plasma (PRP) and stem cell therapy are emerging adjuncts.
Evidence for repairing a ruptured CCL is limited. These approaches may reduce inflammation but cannot restore the structural integrity that surgery provides.
Choosing between alternatives
For the lateral suture detailed comparison, see lateral suture vs TPLO: what's the difference?. For the full surgical options guide, see TPLO, CBLO, and TTA: a guide to cruciate surgery options.
Frequently asked questions
What is the best alternative to TPLO for a large dog?
TTA and MMP produce comparable outcomes to TPLO in large breed dogs and are appropriate alternatives.
Tightrope is less commonly recommended for very large dogs due to concerns about long-term stability at high joint forces.
The best choice depends on the individual dog, the surgeon's training and preference, and the specific clinical findings.
Can small dogs avoid surgery altogether?
Sometimes. Small dogs under 10 to 15 lbs with partial CCL tears sometimes achieve acceptable function with conservative management. However, surgery produces better outcomes even in small dogs.
If conservative management is chosen, strict weight management and physical therapy are essential.
Is a knee brace a good alternative to surgery?
Not as a primary treatment for complete CCL rupture. Braces may provide comfort and are sometimes used as a temporary measure or for dogs that truly cannot undergo surgery.
Vetamac confirms that current evidence does not support braces as an effective alternative to surgical stabilization.
How do I know which surgery is right for my dog?
A board-certified orthopedic surgeon (ACVS diplomate) is the most qualified person to advise on surgical selection for your specific dog.
Factors include body weight, tibial plateau angle, activity level, surgeon experience, and cost. General practitioners often refer to specialists for this decision.
Can a dog have a different surgery if the first one fails?
Yes. TPLO is a common revision option when extracapsular repair fails.
Different surgical approaches can be used as revisions depending on the original procedure, the current clinical state, and the degree of healing that has occurred.
Resources
- Vetamac. TPLO Surgery for Dogs: Success Rates and Alternative Options. vetamac.com
- Dr. Buzby's ToeGrips. Dog Torn ACL Treatment Without Surgery. toegrips.com
- Simon Veterinary Surgical. Alternatives to TPLO Surgery for Dogs. simonvetsurgical.com
- Animal Outpatient Surgery. Alternatives to TPLO Surgery for Dogs. animaloutpatientsurgery.com
- ACVS. Cranial Cruciate Ligament Disease. acvs.org
TPLO Plate Removal Recovery Guide
Learn about TPLO plate removal recovery, including healing time, care tips, risks, and what to expect after surgery.
Sustainable Vet Group
The TPLO plate is designed to stay in permanently. TPLO Info confirms that implants are designed to stay in for life they only need to be removed if a problem develops.
When plate removal is necessary, it is generally a less complex procedure than the original TPLO, and most dogs recover well.
Understanding when removal is needed, what recovery involves, and what to watch for helps owners navigate this phase confidently.
Quick answer: TPLO plate removal is performed when the plate causes infection, chronic pain, or implant failure. Recovery takes 6 to 12 weeks: 2 weeks for wound healing, 6 to 8 weeks for bone remodeling at the screw holes. Activity restriction for at least 6 weeks is required.
Key takeaways
- The TPLO plate does not routinely need to be removed: designed for permanent placement; removal is only indicated when it causes a problem
- The three main reasons for plate removal are: infection, chronic implant-associated pain causing ongoing lameness, and implant failure requiring revision
- Removal is only safe after the osteotomy has healed: typically 6 to 12 months post-TPLO once radiographs confirm bone union
- Recovery after plate removal takes 6 to 12 weeks: 2 weeks for wound healing; 6 to 8 weeks for bone remodeling
- Screw holes take 6 to 8 weeks to remodel: cortical defects temporarily weaken the bone; activity restriction prevents fracture
- Most dogs improve significantly after plate removal: implant irritation-related lameness typically resolves within weeks of removal
When is TPLO plate removal necessary?
Infection involving the implant (most common indication)
Bacterial biofilm colonizing the implant surface is the most common reason for plate removal.
Implant-associated infections often fail to resolve with antibiotics alone because bacteria form protective biofilms on the metal surface that antibiotics cannot penetrate adequately.
Once the osteotomy has healed typically at 6 to 12 months post-TPLO the plate can be safely removed, the bone is debrided, and the infection treated without the implant present.
Veterinary Orthopaedic and Mobility Center (VOMC) confirms that infection is the most common reason for implant removal.
For the full infection guide, see TPLO plate infection signs and treatment and when does a TPLO implant need to be removed due to infection.
Implant-associated pain without infection
Some dogs develop chronic lameness caused by the plate irritating surrounding soft tissues rather than infection.
The plate may irritate the periosteum, cause a local inflammatory reaction to the metal, or become symptomatic once the dog returns to activity.
TPLO Austin confirms: in rare instances, patients may simply be uncomfortable with the presence of the plate. In these cases, removal of the plate after bone healing will typically resolve the lameness.
Implant failure
If the plate bends, breaks, or screws loosen or fail, structural revision may be required.
Depending on the degree of bone healing at the time of failure, revision may involve plate removal and replacement, or removal alone once healing is sufficient.
TPLO Austin notes this is a very rare complication (under 1%) when activity restriction protocols are followed.
When is plate removal safe?
Plate removal requires confirmed radiographic bone healing the osteotomy must be fully bridged before the plate is removed.
The plate is the only structure holding the osteotomy in place; removing it before healing is complete risks the bone segments displacing.
Sustainablevet.org confirms: the plate can be removed once the bone is fully healed, typically 6 to 12 months after the operation.
SustainableVet's clinical guide for post-removal recovery confirms: removing hardware too early or in cases with incomplete healing increases the risk of delayed union or fracture. Careful radiographic assessment before surgery is essential.
The plate removal procedure
Plate removal is performed under general anesthesia. The original incision is reopened, the plate and screws are removed, and the wound is closed.
The procedure is significantly shorter and simpler than the original TPLO there is no bone cutting or rotation involved.
Vetplayas explains that the procedure involves removing the metal plate and screws from the tibia, with the wound closed in layers after removal.
If the indication was infection, the bone surface around the screw holes is debrided and the area flushed thoroughly. Bacterial culture is obtained to guide antibiotic selection.
Recovery timeline after TPLO plate removal
Weeks 1 to 2: wound healing
The incision heals similarly to the original TPLO incision. Pain management with NSAIDs and, in many cases, gabapentin is prescribed. The dog is confined and leash-walked only. Cold packing reduces post-surgical swelling.
SustainableVet's recovery guide confirms: the first 2 weeks focus on wound healing and pain management after surgery.
Weeks 2 to 8: bone remodeling
The primary recovery challenge after plate removal is the screw holes left in the tibia. These cortical defects temporarily reduce bone strength at those sites.
The bone requires 6 to 8 weeks to remodel and fill in these defects before normal activity loads can be tolerated.
SustainableVet's clinical guide confirms: bone typically requires 6 to 8 weeks post-plate removal to regain sufficient strength; high-impact activities must be limited during this critical period to prevent fracture.
Activity restrictions during recovery
- Leash walks only for the first 6 weeks minimum
- No running, jumping, stairs, or off-leash activity
- Rehabilitation exercises (PROM, sit-to-stand, controlled leash walks) as prescribed
- 8-week radiographs typically required to confirm screw hole remodeling before return to normal activity
Weeks 8 to 12: return to activity
If radiographs at week 8 confirm adequate bone remodeling, the surgeon approves progressive return to normal activity. Most dogs return to full activity by 10 to 12 weeks post-removal.
Complications of plate removal
Infection: the surgical site can develop a new infection during the removal procedure. Strict aseptic technique and sometimes antibiotic prophylaxis reduce this risk.
Fracture through screw holes: the cortical defects from screw removal temporarily weaken the bone. Activity restriction during the remodeling phase is essential to prevent fracture through these sites.
Delayed union: rare, but can occur if the bone at the surgical site is already compromised by chronic infection.
Incomplete resolution: if implant irritation was the indication and lameness persists after removal, additional investigation (nerve involvement, joint pathology) is warranted.
For related guides, see TPLO plate rejection symptoms in dogs, can a dog heal normally after TPLO plate removal, and TPLO implant loosening causes and treatment.
For the cost of plate removal, see TPLO plate removal cost.
Frequently asked questions
Does every TPLO dog eventually need the plate removed?
No. Most dogs retain the plate for life without problems. TPLO Info confirms that implants are designed to stay in place permanently.
Plate removal is only performed when there is a clinical indication: infection, persistent lameness from implant irritation, or implant failure.
How long does it take to recover from plate removal?
Generally 6 to 12 weeks, depending on the indication and the individual dog. Infection cases may take longer because bone debridement and antibiotic treatment add complexity.
Straightforward irritation-related removals with no infection typically have the shorter end of this timeline.
Is plate removal surgery serious?
It is a general anesthetic procedure and carries the standard risks of any surgical intervention, but it is significantly simpler than the original TPLO.
The main specific risk is fracture through the screw holes if activity restriction is not followed. Most dogs do well with appropriate post-operative care.
Can the plate be removed too early?
Yes, and this is dangerous. Removing the plate before the osteotomy has fully healed causes the bone segments to lose their only structural support, potentially leading to displacement or fracture.
Radiographic confirmation of bone healing is mandatory before plate removal is scheduled.
Will my dog need another round of rehabilitation after plate removal?
Typically a milder version, yes controlled leash walks, PROM if stiffness is present, and gradual return to activity over 6 to 12 weeks.
Dogs that had ongoing lameness from implant irritation often improve quickly once the plate is removed, but the bone still requires the restricted activity period regardless of how well the dog feels.
Resources
- TPLO Info. Step 6: TPLO Surgery Recovery Process. tploinfo.com
- TPLO Austin. Step 6: TPLO Surgery Recovery. tploaustin.com
- Vetplayas. Ensuring a Successful TPLO Plate Removal Recovery. vetplayas.com
- VOMC. TPLO Veterinary Orthopaedic and Mobility Center. vomcvet.com
- VCA Animal Hospitals. Tibial Plateau Leveling Osteotomy (TPLO) in Dogs. vcahospitals.com

Sustainable Vet | Copyright ©2026 | All Rights Reserved

