
Protecting
Pets, People & Planet
Join a group of veterinarians leveraging the latest technologies to deliver excellent care to their patients while being a responsible and positive force for their local and global communities.
100% secure. We do not share your information
Recent Articles
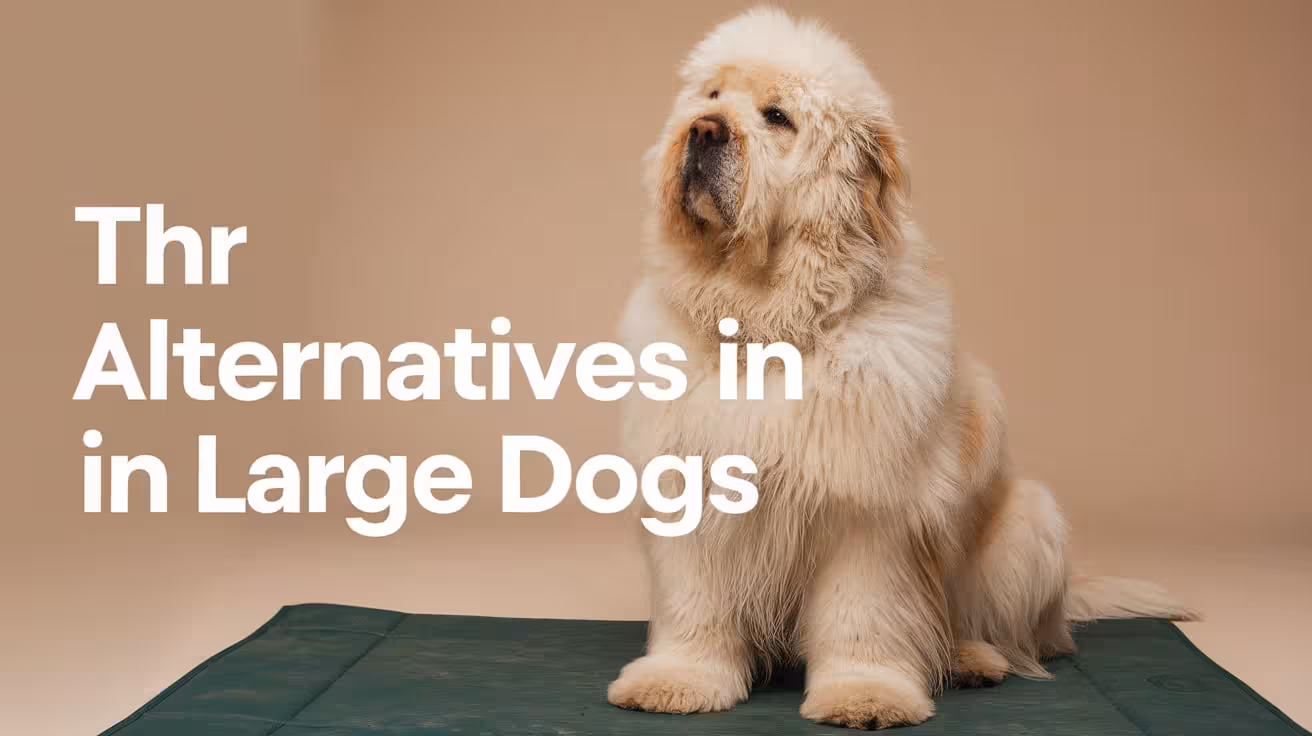
Alternatives to Hip Replacement Surgery in Large Dogs
Explore effective alternatives to hip replacement surgery in large dogs, including surgical options, non-surgical care, regenerative therapies, and long-term outcomes
Why Look for Alternatives to Hip Replacement in Large Dogs?
Total hip replacement (THR) is considered the gold standard for treating severe hip disease, but it may not be the right choice for every dog. Large breeds, in particular, require careful consideration because of their size, weight, and the demands placed on their joints.
- High Cost of Surgery – THR often ranges from $4,000 to $10,000 per hip, which may be unaffordable for some owners.
- Age and Health Concerns – Senior dogs or those with systemic illnesses may face higher surgical risks and longer recovery times.
- Owner Preference – Some families prefer less invasive options, especially when managing comfort rather than pursuing full joint restoration.
- Unique Large-Breed Challenges – Heavier dogs place more stress on implants, increasing the importance of evaluating alternatives that can still reduce pain and improve mobility.
Considering alternatives ensures that every dog receives the most practical and safe solution for its individual needs.
Surgical Alternatives to Hip Replacement
While THR is the most effective treatment, certain surgical alternatives may provide relief when hip replacement is not possible. These procedures are usually chosen based on the dog’s age, size, and stage of hip disease.
1. Femoral Head Ostectomy (FHO) in Large Dogs
FHO involves removing the femoral head, which allows a false joint to form. It can relieve pain by stopping bone-on-bone contact, but in large breeds, outcomes are less predictable because body weight and muscle mass place more stress on the joint.
Many large dogs develop an abnormal gait or limited strength post-FHO. Still, it may be useful when THR is not affordable or possible, especially in cases of severe fractures or chronic dislocations where pain relief is the priority over restoring full mobility.
2. Triple or Double Pelvic Osteotomy (TPO/DPO)
TPO and DPO surgeries involve cutting and rotating sections of the pelvis to improve coverage of the femoral head. These procedures are designed for younger dogs—typically under one year—who show early signs of hip dysplasia but have not yet developed arthritis.
When performed at the right stage, TPO/DPO can help preserve the natural hip joint and delay the need for more advanced surgeries. However, once arthritis sets in, results are poor. Large breed dogs diagnosed early may benefit, but the strict age and condition requirements limit its use.
3. Juvenile Pubic Symphysiodesis (JPS)
JPS is a preventive surgery done in puppies younger than 5 months. It works by altering the growth of the pelvis so the hip socket develops better coverage of the femoral head. This reduces the chance of severe hip dysplasia later in life.
However, timing is critical—if the puppy is older or already showing signs of arthritis, JPS is no longer effective. In large dogs, JPS is rarely used once hip disease is established, but it may help breeders or owners of high-risk puppies by reducing future problems.
Non-Surgical Alternatives for Large Dogs
When hip replacement is not an option, non-surgical approaches can still improve comfort and mobility in large dogs. These methods focus on managing pain, protecting joints, and supporting long-term quality of life.
1. Weight Management and Exercise Control
Excess weight puts enormous strain on already weak hips, especially in large dogs. Careful weight management through calorie-controlled diets is one of the most effective ways to reduce pain. Controlled, low-impact exercise such as leash walking and swimming keeps joints flexible without overloading them.
Activities like running, jumping, or rough play should be avoided. Consistency is key, as even moderate weight loss can significantly reduce hip stress. With proper exercise control, large dogs maintain strength while avoiding activities that accelerate joint degeneration.
2. Pain Management and Medications
Medications are often essential for long-term comfort in large dogs with hip disease. Non-steroidal anti-inflammatory drugs (NSAIDs) help reduce both pain and inflammation.
Additional medications like gabapentin or tramadol may be used for nerve or breakthrough pain. Joint supplements containing glucosamine, chondroitin, and omega-3s support joint health and reduce stiffness.
These treatments do not cure hip disease but provide meaningful relief and improve daily function. Long-term veterinary monitoring is needed to adjust dosages and minimize potential side effects.
3. Physical Therapy and Hydrotherapy
Physical therapy builds strength in the muscles surrounding the hip, providing extra stability to weakened joints. Exercises like controlled sit-to-stand routines, gentle stretching, and balance training can improve mobility.
Hydrotherapy, including swimming and underwater treadmill sessions, allows dogs to exercise without putting weight on painful joints. These methods increase circulation, reduce stiffness, and improve confidence in movement.
Structured rehabilitation under professional guidance can extend mobility and significantly improve quality of life. For many large dogs, consistent physiotherapy delays the need for surgery and provides safer long-term management.
Regenerative and Advanced Therapies
Regenerative medicine is increasingly being explored as an alternative for managing hip disease in large dogs. These advanced therapies focus on reducing pain and promoting healing within the joint.
- Stem Cell Therapy – Mesenchymal stem cells, often harvested from fat or bone marrow, are injected into the hip joint to reduce inflammation and encourage tissue repair. Some dogs show improved comfort and mobility, though results can be variable.
- Platelet-Rich Plasma (PRP) – PRP injections deliver concentrated growth factors that help decrease inflammation and promote healing. These can be combined with other treatments for better results.
- Prolotherapy – Involves injecting irritant solutions around ligaments to stimulate new tissue growth, potentially increasing joint stability.
- Limitations in Large Dogs – While promising, these therapies often provide partial improvement and may not restore full function, especially in heavier breeds.
Regenerative therapies can reduce pain and delay surgery but are rarely permanent solutions. For large dogs, they are best considered as part of a broader treatment plan.
Supportive Devices and Lifestyle Adjustments
Supportive devices and home adjustments play a major role in improving comfort and independence for large dogs with hip disease. These simple interventions protect joints and make daily living safer.
- Hip Braces and Harnesses – Braces stabilize the hip joint and reduce pain during movement. Harnesses give owners better control when assisting dogs with walking or climbing.
- Orthopedic Beds – Provide cushioning and joint support, reducing stiffness after rest and encouraging proper posture.
- Ramps and Stairs Alternatives – Installing ramps for vehicles, furniture, or outdoor steps prevents jumping, which can worsen hip pain.
- Non-Slip Flooring – Mats or rugs prevent slipping on tile or hardwood, reducing the risk of falls.
- Owner’s Role – Monitoring activity, creating a safe space, and maintaining routine adjustments are vital for long-term success.
With the right support devices and home care, many large dogs can remain active and comfortable despite hip disease.
Combination Approaches for Better Outcomes
No single alternative can fully match the success of hip replacement, especially in large dogs. However, combining multiple strategies often leads to better long-term results and improved quality of life.
- Braces Plus Weight Control – Using hip braces alongside strict weight management reduces stress on the joint and supports stability.
- Exercise with Therapy – Low-impact exercise, combined with hydrotherapy or physiotherapy, strengthens muscles and helps compensate for joint weakness.
- Medications with Supplements – Long-term NSAID use, supported by glucosamine, chondroitin, and omega-3s, provides layered pain control and joint support.
- Advanced Therapies as Add-Ons – Stem cell or PRP injections can be used in combination with physical therapy to extend mobility further.
- Setting Expectations – While these methods improve comfort, they rarely restore full athletic ability in large dogs. The goal is pain reduction and better daily function.
Multi-modal management maximizes results by addressing hip disease from several angles. With realistic expectations, dogs can enjoy meaningful improvements in quality of life.
Cost Comparison of Hip Replacement Alternatives
When total hip replacement is not possible, cost often becomes a major deciding factor in choosing alternatives. Each option carries its own expense range, depending on the procedure, follow-up care, and the dog’s size.
- Femoral Head Ostectomy (FHO) – Typically costs $2,000–$4,500. While less expensive, results are less predictable in large dogs and may lead to gait changes.
- Triple or Double Pelvic Osteotomy (TPO/DPO) – Priced around $3,000–$6,000. Best for younger dogs before arthritis develops, making it less commonly applicable in adults.
- Stem Cell Therapy or PRP Injections – Range from $2,000–$5,000. Provide temporary pain relief but usually require repeat treatments.
- Hip Braces – Cost $200–$800. Affordable and non-invasive, but they provide only partial support.
- Conservative Management – Includes medications, supplements, and physiotherapy. While monthly costs may seem low, they accumulate significantly over a dog’s lifetime.
Though less costly upfront, many alternatives may require repeat treatments or ongoing care. Owners should balance immediate affordability with long-term outcomes.
Long-Term Expectations Without Hip Replacement
Alternatives to hip replacement can provide significant relief, but they rarely restore full hip function in large dogs. Owners should understand what outcomes are realistic.
- Pain Reduction – Surgeries like FHO or therapies such as PRP can decrease pain, but results may not equal the stability of a prosthetic joint.
- Mobility Improvements – Physiotherapy, hydrotherapy, and braces help maintain function, though gait abnormalities may persist in heavier dogs.
- Limitations in Large Breeds – Because of their size, large dogs often place more stress on affected joints, making results less predictable compared to smaller breeds.
- Importance of Early Diagnosis – Interventions like TPO or JPS are only effective when started early, before arthritis permanently damages the joint.
- Ongoing Management – Consistent weight control, supplements, and veterinary monitoring are required for long-term comfort.
While alternatives can extend mobility and reduce suffering, they cannot fully replicate hip replacement. Realistic goals focus on comfort, daily function, and slowing disease progression.
Conclusion
Total hip replacement (THR) remains the gold standard for treating severe hip disease, offering the best chance for restoring full mobility and long-term comfort. However, it is not always possible for every large dog due to cost, health, or owner preference. In such cases, alternatives like FHO, TPO/DPO, regenerative therapies, and conservative management can still provide meaningful relief.
Large dogs benefit most from tailored solutions that combine surgery, rehabilitation, weight management, and supportive lifestyle adjustments. While these options may not match the complete outcomes of THR, they can extend mobility, reduce pain, and improve quality of life.
The final step should always be consulting a veterinary orthopedic specialist. With expert guidance, owners can make the safest, most effective choice for their dog’s unique needs.
FAQs
What are the main alternatives to hip replacement in large dogs?
Alternatives include femoral head ostectomy (FHO), triple or double pelvic osteotomy (TPO/DPO), juvenile pubic symphysiodesis (JPS), regenerative therapies like stem cells or PRP, supportive devices such as hip braces, and conservative management with medications, weight control, and physiotherapy. The best option depends on the dog’s age, size, and stage of disease.
Is femoral head ostectomy (FHO) effective for large dogs?
FHO can relieve pain by removing the femoral head, but outcomes are less predictable in large breeds due to their weight and muscle mass. Many large dogs develop an altered gait or reduced strength after FHO. It may still be considered when hip replacement is not possible, especially for pain relief.
Can younger large-breed dogs benefit from pelvic osteotomy?
Yes, triple or double pelvic osteotomy (TPO/DPO) can help younger dogs diagnosed with hip dysplasia before arthritis develops. It realigns the hip socket to improve stability. However, the procedure must be performed early, usually under one year of age, making it unsuitable for older large dogs with advanced joint damage.
How do regenerative therapies help dogs with hip disease?
Stem cell therapy, platelet-rich plasma (PRP) injections, and prolotherapy reduce inflammation, promote healing, and may improve comfort. These therapies are less invasive than surgery and can delay progression of hip disease. However, results vary, and in large dogs, they often provide partial improvement rather than restoring full mobility or joint function.
Are braces and lifestyle changes enough for large dogs with hip problems?
Braces, ramps, orthopedic bedding, and non-slip flooring can make daily life safer and more comfortable. While these adjustments do not cure hip disease, they reduce stress on joints and prevent further injury. When combined with weight control and low-impact exercise, they can significantly improve quality of life for large dogs.
How do costs of alternatives compare to hip replacement?
Alternatives are generally less expensive than total hip replacement. FHO costs $2,000–$4,500, TPO/DPO around $3,000–$6,000, and regenerative therapies $2,000–$5,000. Braces range from $200–$800, while long-term conservative care builds ongoing monthly costs. While more affordable, these options may require repeat treatments and usually don’t match the lasting results of THR.
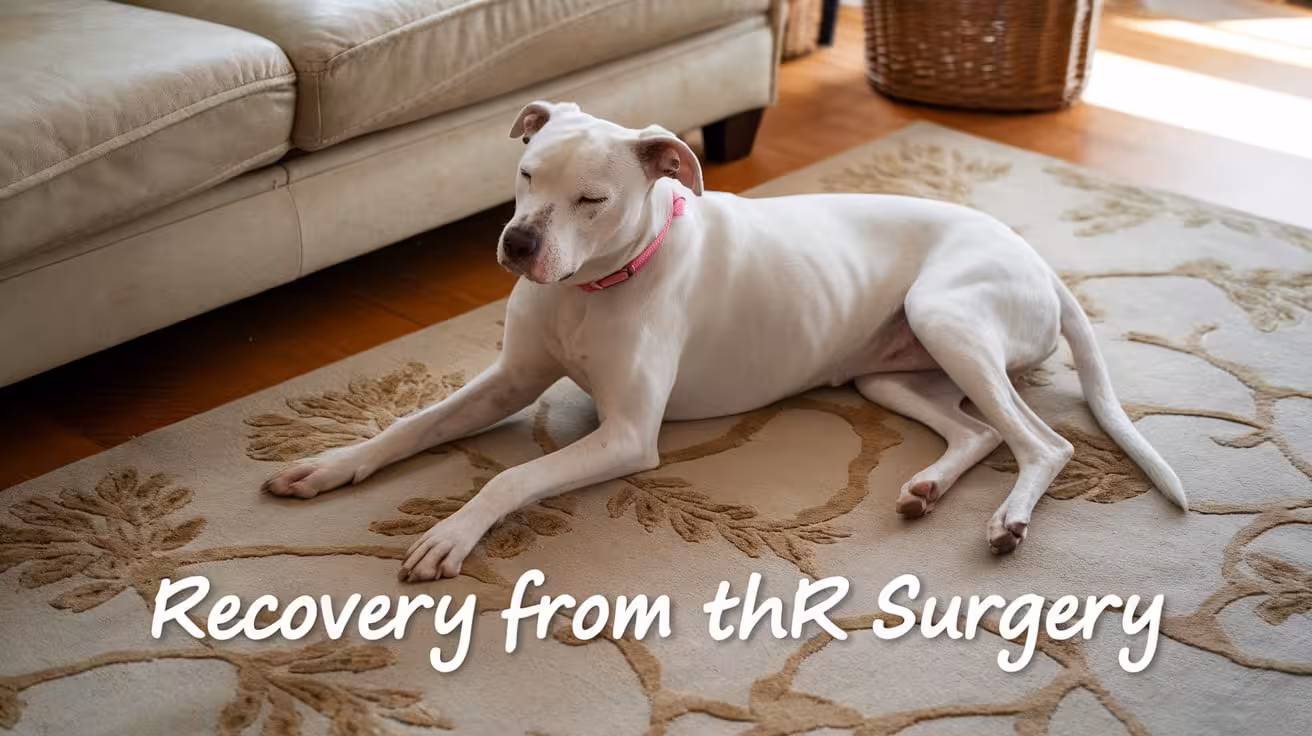
What to Expect During Recovery from Total Hip Replacement in Dogs
Learn what to expect during recovery from total hip replacement (THR) in dogs, including activity restrictions, rehab milestones, follow-ups, and long-term outcomes
Immediate Post-THR Surgery Care for Dogs
The first days after total hip replacement are critical for preventing complications and ensuring proper healing. Careful management of the surgical site and effective pain control set the foundation for recovery.
- Incision Protection – The surgical site must stay clean and dry at all times. Prevent your dog from licking or chewing at the incision to avoid infection.
- Elizabethan Collar – An e-collar or protective barrier should be worn until the incision heals fully, usually for 10–14 days.
- Pain Management – Veterinarians prescribe NSAIDs, opioids, or pain patches to control discomfort and support early mobility.
- Hospital Monitoring – Dogs are closely observed for bleeding, swelling, or complications before being safely discharged home.
Proper immediate care reduces risks and helps your dog transition smoothly into the next phase of recovery.
Activity Restrictions After THR Surgery
Activity control is the most important part of recovery after total hip replacement. In the first weeks, even small mistakes like a jump or slip can damage the implant. Owners must provide a safe and structured environment.
- Strict Confinement – Dogs should stay in a crate or small enclosed area with non-slip flooring. This prevents running or sudden twisting movements that can harm the hip.
- No High-Impact Activity – Jumping on furniture, climbing stairs, or playing with other pets must be avoided. These actions place stress on the implant and may cause loosening.
- Leash-Controlled Breaks – Only short bathroom walks on a leash are allowed. Owners should guide movements carefully to avoid slips or overexertion.
- Constant Supervision – Dogs cannot be left unsupervised during recovery. Owners must watch closely to prevent sudden activity or accidents.
While these restrictions may feel difficult, they are temporary. Following them closely gives the implant time to heal securely and ensures long-term success.
THR Recovery Milestones and Mobility Timeline
Recovery from hip replacement follows a predictable timeline, with steady improvements in comfort and activity. Knowing these milestones helps owners track progress and stay encouraged.
- Early Weight Bearing – Within the first week, many dogs cautiously use the operated limb, showing implant stability and reduced pain.
- 6–8 Weeks – Lameness improves significantly, with dogs walking more normally and using the leg with increasing confidence.
- 12 Weeks – By this stage, most dogs can resume near-normal activities such as walking around the home, climbing short steps, and enjoying longer leash walks.
- 3–4 Months – Full function is typically regained. Dogs often return to running, swimming, and even athletic play with veterinary approval.
Recovery takes patience, but each step forward builds strength and stability. By following the timeline, most dogs achieve lasting, pain-free mobility.
Exercise and Walking Plan During THR Recovery
Exercise must be carefully structured after total hip replacement. A gradual walking plan builds strength and coordination while protecting the implant.
- Starting Walks – Begin with short 10–15 minute leash walks, two to three times per day. Keep surfaces flat and steady, avoiding hills or uneven ground.
- Progressive Increases – Add about 5 minutes to each walk weekly if your dog shows no signs of soreness or limping. This steady buildup strengthens muscles without straining the hip.
- Avoid Slippery Surfaces – For at least 6 weeks, dogs should stay off slick floors like tile or hardwood. These surfaces increase the risk of slips that can damage the implant.
- Transitioning to Longer Walks – Once dogs are comfortable with 30–40 minute walks, they can begin light, supervised play in a safe area.
- Off-Leash Activity – Running or free play should be introduced only at 8–12 weeks, and only after veterinary clearance confirms stability.
A structured walking plan ensures safe recovery. With time and patience, dogs rebuild muscle strength and return to their normal activities without risk.
Rehabilitation and Physiotherapy After THR in Dogs
Rehabilitation is one of the most important parts of recovery after hip replacement. It helps rebuild strength, restore range of motion, and ensures the implant is fully supported by healthy muscles.
- Hydrotherapy for Early Support – Around 4 weeks post-op, underwater treadmill or swimming sessions can begin. Water reduces weight on the new joint while allowing safe movement, which helps improve circulation and flexibility without stressing the implant.
- Controlled Strengthening Exercises – Sit-to-stand drills, slow leash walking on gentle inclines, and treadmill sessions help retrain balance and coordination. These exercises are done in short, controlled sessions to prevent fatigue.
- Muscle Rebuilding Phase – From 6–8 weeks, the focus shifts to strengthening the hip, gluteal, and quadriceps muscles, which are key for long-term joint stability.
- Flexibility and Range of Motion – Targeted stretches and guided movements prevent stiffness and encourage smooth joint function as healing continues.
- Benefits of Structured Rehab – Dogs in physiotherapy programs typically achieve faster recovery, lower complication rates, and better long-term outcomes.
Rehab is not optional—it’s a structured process that greatly improves both the comfort and durability of the hip replacement.
Veterinary Follow-Up After THR Surgery
Follow-up care is a lifelong commitment after hip replacement. These visits ensure healing is progressing properly and catch issues before they become serious.
- Initial Post-Surgery Recheck (10–14 Days) – At this appointment, the incision is inspected, sutures or staples are removed, and any early wound concerns are addressed.
- Six-Week Assessment with X-Rays – Imaging confirms that the implant is seated correctly, while gait assessments show how well the dog is regaining normal movement.
- Intermediate Recovery Checks – Some dogs may require additional visits to adjust pain medication, track muscle development, or refine exercise plans.
- Annual or Biannual Radiographs – Once healing is complete, routine imaging is recommended to confirm implant stability and identify any early changes in bone support.
- Value of Consistent Monitoring – Regular visits allow quick responses to potential problems such as implant loosening, helping preserve long-term success.
These follow-ups ensure the hip replacement remains secure for life and give owners reassurance that recovery is on track.
Diet, Supplements, and Medications After THR
Long-term hip health depends on more than surgery alone. Nutrition, supplements, and proper medication use all support healing and protect the new implant.
- Medication Compliance – Prescribed NSAIDs, opioids, or antibiotics must be given exactly as directed. These drugs control pain, prevent infection, and create the conditions for steady healing.
- Weight Control as a Priority – Every extra pound adds stress to the hip joint. Maintaining an ideal body weight through portion-controlled meals and regular monitoring is one of the best ways to protect the implant.
- Support from Supplements – Omega-3 fatty acids reduce inflammation, while glucosamine and chondroitin nourish cartilage and support surrounding joints. Though the replaced hip does not need cartilage, these supplements benefit the entire musculoskeletal system.
- Balanced Recovery Diet – High-quality proteins repair muscle tissue, while vitamins and minerals strengthen bones. A balanced diet is critical during the rebuilding phase.
- Long-Term Lifestyle – Ongoing weight control, anti-inflammatory support, and proper nutrition ensure that the replaced hip remains functional for a lifetime.
Combining surgery with lifelong diet and supplement management ensures stronger, healthier outcomes that last.
Home Modifications to Support THR Recovery
A safe home environment is crucial for protecting the new hip during recovery. Making small but thoughtful adjustments can prevent accidents and help your dog heal more comfortably.
- Ramps Instead of Stairs – Install ramps for staircases, furniture, or vehicles to reduce jumping or climbing, which can strain the implant.
- Supportive Harnesses – A rehabilitation harness allows owners to assist dogs with standing, walking, and navigating difficult areas without stressing the hip.
- Raised Feeding Stations – Elevated food and water bowls reduce strain on the hips, making mealtimes easier and more comfortable.
- Orthopedic Bedding – Soft, supportive bedding cushions the joints and provides a designated rest area that encourages proper healing.
- Slip-Free Flooring – Use rugs, mats, or non-slip coverings on tile and hardwood to prevent dangerous falls during the recovery phase.
Simple modifications make the home safer and support smoother recovery. By reducing physical stress, you give your dog the best chance for a strong return to mobility.
Complications During THR Recovery: Warning Signs to Watch
Though most dogs recover smoothly, complications can occur. Recognizing early warning signs allows owners to seek help before problems become severe.
- Incision Concerns – Redness, swelling, discharge, or foul odor from the surgical site may indicate infection and require prompt treatment.
- Weight-Bearing Issues – Reluctance to use the operated limb or sudden worsening of lameness may signal implant instability or dislocation.
- Excessive Pain – Pain that seems more severe or lasts longer than expected should not be ignored, as it may point to complications.
- Behavioral Changes – Refusing food, restlessness, or hiding may reflect discomfort or underlying infection.
- Immediate Veterinary Attention – Any suspected complication should be reported to the surgeon immediately for evaluation and treatment.
Close observation at home is vital. Quick action ensures complications are addressed early, protecting both the implant and your dog’s long-term comfort.
Long-Term Expectations After THR in Dogs
Total hip replacement offers dogs the chance to return to an active, pain-free lifestyle. Long-term expectations are excellent when recovery protocols are followed closely.
- Full Mobility Restored – Most dogs regain normal walking ability within weeks and return to running, swimming, and playing by 3–4 months.
- Implant Longevity – Modern prosthetic implants are designed to last the lifetime of the dog, with very few requiring revision surgery.
- Lifelong Comfort – Successful THR eliminates the chronic pain of hip disease, improving energy, mood, and overall quality of life.
- Owner Commitment – Long-term success depends on maintaining a healthy weight, scheduling annual check-ups, and preventing high-impact injuries.
- Return to Normal Lifestyle – Family pets can resume daily activities, and even working or sporting dogs often return to their previous roles.
With proper aftercare and monitoring, THR provides reliable, lasting results. For most dogs, this surgery represents not just recovery but a true return to a pain-free life.
FAQs
How long is recovery after total hip replacement in dogs?
Recovery usually takes 8–12 weeks. Dogs begin bearing weight within the first week, lameness improves by 6–8 weeks, and most resume near-normal activity by 12 weeks. Full athletic ability, such as running and swimming, often returns by 3–4 months, provided rehabilitation and follow-up guidelines are strictly followed.
What activity restrictions are needed after THR surgery?
Dogs must remain on strict crate rest or confined in a non-slip area. No running, jumping, climbing, or stairs are allowed in the early weeks. Only short, controlled leash walks for bathroom breaks are permitted. Owner supervision is essential, as even one slip or jump can compromise the new implant’s stability.
When can my dog start physiotherapy after THR?
Rehabilitation usually begins around 4 weeks post-surgery. Hydrotherapy, sit-to-stand drills, incline walking, and treadmill therapy are gradually introduced. From 6–8 weeks, exercises focus on muscle rebuilding and hip flexibility. A structured rehabilitation program greatly improves long-term outcomes, helping dogs regain strength and confidence without overloading the new hip joint.
What signs of complications should I watch for during recovery?
Warning signs include redness, swelling, or discharge at the incision, worsening lameness, or reluctance to bear weight on the operated leg. Excessive pain beyond the expected recovery timeline also signals potential issues. If any of these occur, immediate veterinary attention is critical to protect the implant and ensure safe recovery.
How can I make my home safer for recovery?
Simple modifications support healing. Use ramps for stairs, furniture, or cars to prevent jumping. Place non-slip mats on slick floors to avoid falls. Provide raised food bowls, orthopedic bedding, and a rehabilitation harness for added support. These changes create a safe, comfortable environment that reduces stress on the new hip.
Will my dog return to a normal lifestyle after THR?
Yes, most dogs regain full mobility and quality of life within 3–4 months. Once healed, they can walk, run, swim, and play without pain. With proper care, implants usually last a lifetime, giving dogs the chance to enjoy daily family activities and, in many cases, even return to work or sport.
All Articles
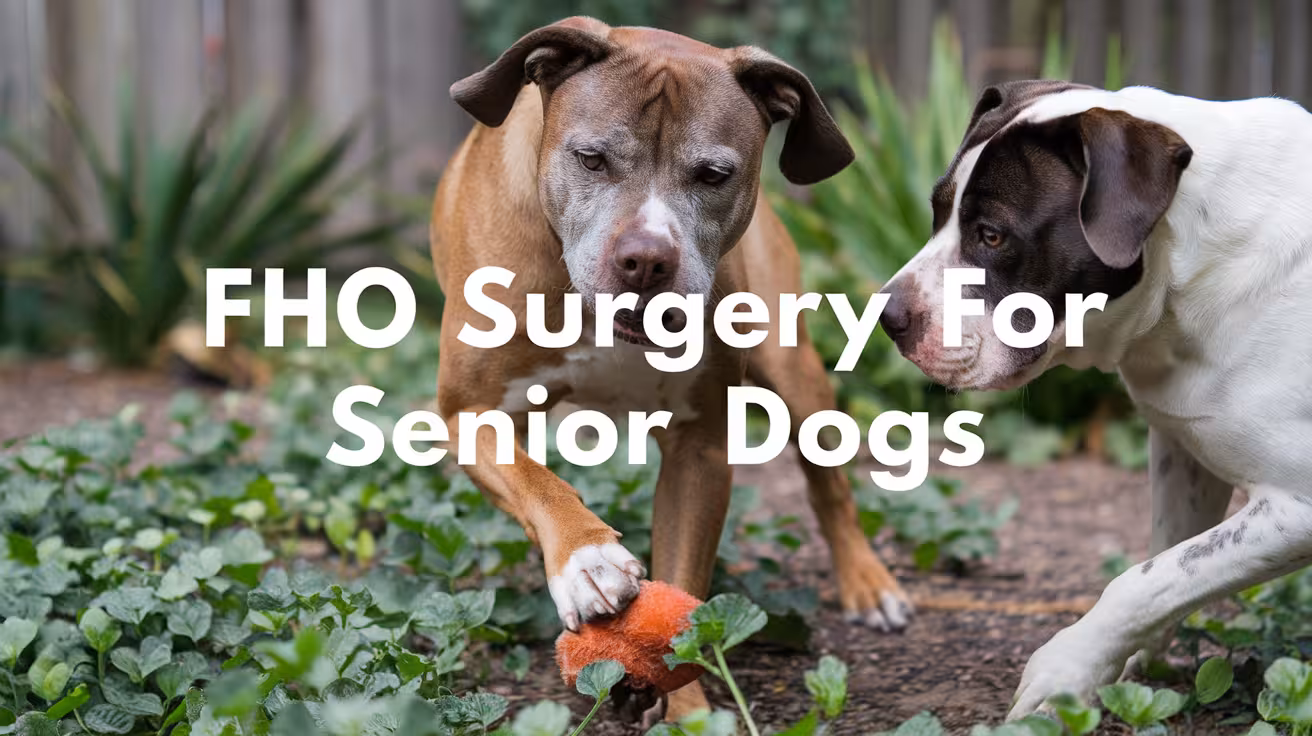
Is FHO a Good Option for Senior Dogs?
Wondering if FHO is right for your senior dog? Learn when it works, recovery expectations, and how to decide if surgery is the best option for older dogs
Understanding FHO Surgery
Femoral Head Ostectomy (FHO) is a surgical procedure where the head and neck of the femur are removed to relieve pain in the hip joint. It’s most often used for dogs with severe hip dysplasia, arthritis, or fractures that can’t be repaired. Instead of replacing the joint, FHO allows the body to form a “false joint” made of scar tissue, which can support pain-free movement.
FHO doesn’t restore a normal hip, but it removes the painful bone-on-bone contact. It’s especially useful when total hip replacement is not possible due to cost, size, or medical risks. Many dogs return to active lives with good mobility after recovery. This makes FHO a common and trusted option for managing chronic hip pain in both young and older dogs.
Can Senior Dogs Benefit from FHO?
FHO can be a suitable option for senior dogs, especially when joint pain affects their quality of life. Success depends on their overall health, body size, and how well post-op care is managed at home.
Pain Relief and Comfort Outcomes
One of the biggest benefits of FHO surgery is long-term pain relief. For senior dogs suffering from chronic hip dysplasia or arthritis, this surgery can remove the constant discomfort caused by bone rubbing on bone. While the surgery doesn’t create a normal joint, most dogs form a fibrous joint that allows them to walk, sit, and even play comfortably.
A mechanical limp may remain, meaning the dog’s gait may not look perfect, but it is usually not painful. What matters most is comfort. Many older dogs that were once limping or refusing to move show renewed interest in walks, food, and interaction after surgery.
FHO helps reduce suffering and brings noticeable comfort to aging dogs.
Recovery Expectations in Senior Dogs
Senior dogs can recover well from FHO, but they often take longer than younger dogs. In most cases, walking improves within 4 to 6 weeks after surgery. Full recovery may take 3 to 6 months, depending on the dog’s weight, muscle condition, and overall health. Older dogs with arthritis in other joints may need extra support throughout recovery.
Rehabilitation plays a key role in how well the leg functions after surgery. Daily short walks, massage, and passive exercises are essential. Hydrotherapy or physical therapy sessions can help build muscle without straining the healing joint.
It's also important to monitor for fatigue or stiffness. Let your senior dog go at their own pace, and never force activity. With patience and consistent care, many senior dogs regain good mobility and enjoy a better quality of life.
Successful outcomes are possible with the right balance of rest, rehab, and regular vet checkups.
Read more:
Which Senior Dogs Are Good Candidates for FHO?
This checklist can help you and your vet decide if FHO is the right choice for your senior dog.
Ideal Conditions
Some senior dogs are well-suited for FHO and tend to have smoother recoveries. Small to medium-sized breeds usually adapt better because their lighter body weight puts less stress on the healing joint. Dogs who remain motivated to move, even with pain, often show good results after surgery. A willingness to use the leg, even during early recovery, helps build strength.
It’s also important that the dog is generally healthy. Dogs without major heart or lung issues are less likely to face complications during anesthesia or recovery. Mental and behavioral health also matter—dogs that are alert, cooperative, and responsive to care typically do better.
- Small to medium breeds
- Active or motivated to walk
- No severe heart or lung problems
- Mentally alert and able to follow simple routines
These dogs often recover well and enjoy greater comfort after surgery.
Caution Cases
FHO may not be the best option for every senior dog. Larger or overweight dogs can struggle more with healing because their body weight adds pressure on the healing joint. Dogs with advanced arthritis, especially if it affects more than just the hip, may not benefit as much from this surgery.
Some dogs are naturally less active or reluctant to use the limb even before surgery. These dogs may have a slower or incomplete recovery. FHO also requires weeks of structured rehab. If the owner cannot commit to daily therapy or follow-up visits, results may suffer.
- Large or obese dogs
- Multiple joint issues or advanced arthritis
- Dogs that avoid movement or have low drive
- Lack of time or ability for daily rehab
In these cases, your vet may suggest other options or added support to help your dog live more comfortably.
Read more:
Comparing FHO With Other Options
When managing hip pain in senior dogs, there are a few choices: surgery, medication, or both. FHO is often chosen when other treatments fail or when more advanced surgeries are too risky.
Total Hip Replacement (THR) offers a full joint replacement, but it’s complex and expensive. Medical management with pain medications and supplements may help early on, but may not be enough for long-term comfort.
For many older dogs, FHO offers a middle ground—relieving pain without the high cost or risks of THR.
FHO vs Total Hip Replacement (THR)
Total Hip Replacement is a more advanced surgery that replaces the entire joint with an artificial implant. While THR can restore nearly normal function, it is costly and carries more surgical risk—especially in senior dogs. Older pets may have trouble with longer anesthesia times and slower healing.
FHO, by comparison, is less invasive. It removes only the femoral head and neck, allowing the body to form a fibrous joint. This surgery has fewer complications, lower cost, and a faster recovery for most dogs. It also works well in dogs under 50 pounds, which includes many seniors.
- THR has a longer, more complex recovery
- FHO is easier on older dogs with health concerns
- FHO offers pain relief with fewer surgical risks
For many seniors, FHO offers the best balance of safety and comfort.
FHO vs Medical Management
Medical management includes using anti-inflammatory drugs, pain relievers, and joint supplements to ease hip discomfort. While this can help in the early stages of arthritis or dysplasia, it may not be enough as the condition worsens. Some dogs build a tolerance to medications, and long-term use of NSAIDs can lead to stomach or kidney problems—especially in older dogs.
FHO offers a long-term solution by removing the source of bone-on-bone pain. After recovery, many dogs can reduce or stop their daily medications. This not only improves comfort but also protects organs from the side effects of long-term drug use.
- Medications help but don’t fix joint damage
- FHO reduces or eliminates need for daily drugs
- Senior dogs benefit from fewer side effects
For dogs not responding to medication, FHO may offer stronger, longer-lasting relief.
Read more:
Key Factors That Affect Recovery in Older Dogs
Age doesn’t rule out recovery—but it adds complexity.
Older dogs can still recover well from FHO surgery, but several factors may slow or complicate the process. One major factor is muscle mass. Senior dogs often have weaker muscles, which makes it harder to support the healing leg. Body weight also plays a role. Overweight dogs place more strain on the joint and tend to recover slower.
- Less muscle mass can delay progress
- Extra body weight increases joint pressure
- Other joint problems may limit mobility
- Rehab consistency helps maintain gains
- Active, alert dogs often heal more quickly
Recovery success depends on managing these factors carefully. With a focused rehab plan and the right support, older dogs can still regain comfort and mobility after FHO.
Why Rehab Is Even More Important for Senior Dogs
Rehab is the most important part of FHO recovery in senior dogs. As they age, stiffness and muscle loss happen more quickly, especially without regular movement. If rehab is missed, the new joint can become tight, the limp can last longer, and strength may not fully return.
- PROM exercises improve flexibility and reduce joint stiffness
- Hydrotherapy builds strength without stressing joints
- Massage helps with blood flow and comfort
- Regular rehab prevents weight gain and keeps dogs active
For older dogs, rehab is not optional—it’s what turns a successful surgery into a full recovery. With daily care and consistency, rehab protects your dog’s long-term comfort and mobility.
Questions to Ask Your Vet Before Choosing FHO
Before deciding on FHO surgery for your senior dog, it’s important to ask the right questions. This helps ensure you’re fully prepared and that FHO is the best option for your dog’s specific needs.
- Will surgery offer enough pain relief for my dog’s condition?
- Is my dog healthy enough for anesthesia and healing?
- Can I manage daily rehab at home or with a therapist?
- Are there any lower-risk or non-surgical options to consider?
These questions give you a full picture of what to expect and what’s required. A thoughtful talk with your vet helps you choose the best path for your dog’s comfort and future well-being.
Read more:
Final Thoughts: Is FHO Right for Your Senior Dog?
FHO can bring real relief to many senior dogs, especially those with painful hip joints that limit movement. When the dog is a good candidate and receives proper rehab, the results can be life-changing.
- FHO relieves joint pain and improves comfort
- It’s often safer and simpler than other surgeries
- Recovery needs daily effort and patience
- Older dogs with motivation often do very well
The decision to choose FHO should come from a clear understanding of your dog’s health, behavior, and your ability to follow through with rehab. When those pieces come together, FHO can help your senior dog enjoy more happy, pain-free years.
FAQs About FHO in Senior Dogs
Is FHO safe for older dogs?
Yes, FHO can be safe for senior dogs if they are in stable health. Your vet will check heart, lung, and kidney function before surgery. With proper anesthesia and post-op care, many older dogs recover well. The key is matching the procedure with the dog’s size, behavior, and overall condition.
How long does it take for a senior dog to recover from FHO?
Senior dogs typically take 3 to 6 months to recover after FHO surgery. Early improvements may be seen within 4 to 6 weeks, but full strength and stability take time. Recovery speed depends on age, muscle condition, and how consistent rehab is during each phase.
Will my senior dog still limp after FHO surgery?
A slight limp may remain after FHO, especially in older dogs. This limp is usually mechanical, not painful. With regular rehab and proper weight management, many senior dogs walk comfortably and stay active, even if their gait isn't perfect.
Can older dogs build enough muscle after FHO?
Yes, but it may take longer than in younger dogs. Daily rehab, including walks, massage, and hydrotherapy, helps rebuild muscle around the hip. Progress depends on the dog’s energy level and consistency with therapy routines.
Is FHO better than medications for senior dogs?
FHO can provide more lasting pain relief than long-term medication alone. Many senior dogs reduce or stop using pain meds after surgery. This helps avoid side effects from drugs and improves comfort in daily activities. Your vet will help decide the right balance for your dog.
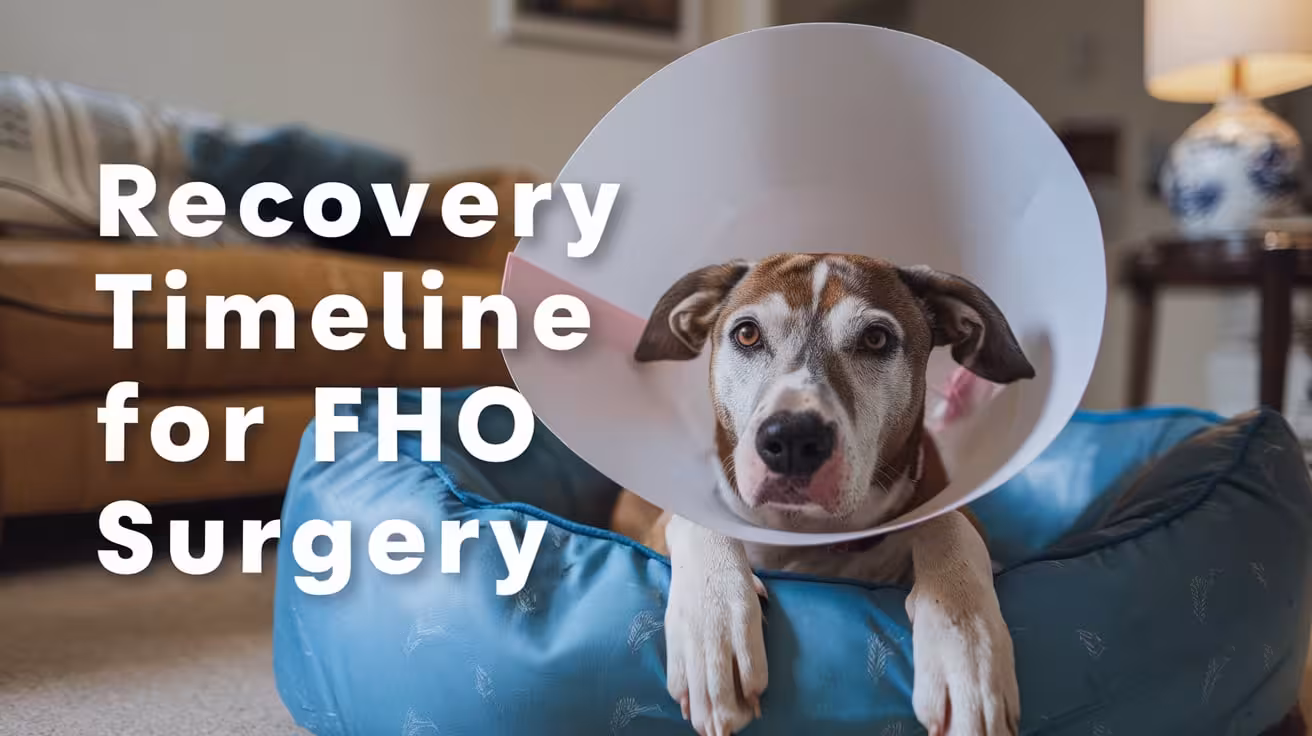
Recovery Timeline for Dogs After FHO Surgery
Week-by-week recovery timeline for dogs after FHO surgery. Learn healing stages, rehab tips, and when your dog can return to normal activity
What to Expect After FHO Surgery
Recovery after femoral head ostectomy (FHO) surgery is a gradual process. The surgery removes the ball of the hip joint, so your dog needs time to build a new fibrous joint and regain muscle strength. Healing does not happen overnight, and pushing too fast can lead to setbacks. That’s why understanding the recovery timeline is so important.
This guide will help you know what’s normal at each stage—from the first few days after surgery to long-term care. You’ll learn what to expect, what to do at home, and when to get help. Each dog heals at their own pace, but following this timeline gives you a clear picture of the journey ahead.
With patience, the right therapy, and your vet’s guidance, most dogs return to a happy, active life without pain. Recovery takes time—but every step counts.
Week-by-Week Recovery Timeline
FHO recovery usually takes 8 to 12 weeks. Here's what to expect during each stage of your dog’s healing journey.
Week 0–2: Healing Begins
The first two weeks after surgery are all about healing and protecting the surgical site. Your dog should rest in a crate or small room to prevent sudden movements. Take your dog out only for short potty walks, lasting 5 to 10 minutes, three times a day. During the first 72 hours, apply ice packs on the hip to reduce swelling. After that, switch to warm compresses to promote circulation.
You can start gentle passive range of motion (PROM) exercises if your dog allows it. Light massage and simple hip stretches may also help relieve tension. Be very careful during this time. Avoid stairs, running, jumping, or any off-leash activity. This period builds a safe foundation for recovery.
- Crate rest and restricted activity
- Short potty breaks with leash
- Ice therapy for 3 days, then warm compress
- Gentle PROM and massage if tolerated
- No stairs or off-leash movement
This phase is about comfort, calm, and preventing complications.
Read more:
Week 2–3: Early Mobility Returns
By the third week, many dogs begin to show signs of improvement. You may notice your dog toe-touching with the operated leg or starting to bear light weight. Leash walks can now extend to 10 to 15 minutes, still done multiple times a day. This light activity supports early muscle engagement and helps prevent stiffness.
At this stage, you can introduce simple home exercises like sit-to-stand routines or balance work using soft mats. If the incision has fully healed and your vet agrees, hydrotherapy can also begin. Water-based rehab helps your dog move without putting pressure on the joint. Continue PROM and massage to keep the joint flexible and reduce soreness.
- Increase leash walks to 10–15 minutes
- Start sit-to-stand or gentle balance drills
- Toe-touching or early leg use may begin
- Hydrotherapy if incision is healed
- Keep up PROM and massage
These small steps lead to bigger gains in the coming weeks.
Week 3–6: Strength Building Phase
Your dog is now ready to build real strength. Leash walks should be increased by 5 to 10 minutes each week, depending on your dog’s comfort and energy levels. Controlled activities like walking up hills, figure-8 drills, and stair climbing can now be included. These help improve coordination and muscle tone.
Strength-focused exercises like sit-to-stand repetitions, gentle “dancing” (where your dog stands on back legs), and weight-shifting drills on balance cushions become more useful. Some limping may still occur, but regular use of the leg should improve steadily. Allow moderate play under supervision, but watch closely for signs of fatigue or discomfort.
- Extend walks by 5–10 minutes weekly
- Add hill walks and stair use
- Begin sit-to-stand, weight shifts, and dancing
- Limping may still be present but improving
- Short, supervised play allowed
This is the most active and rewarding part of recovery if done right.
Week 6–8: Stability and Confidence
In weeks 6 to 8, your dog should start moving more naturally and with greater confidence. Leash walks can go up to 30 to 40 minutes, once or twice a day. Swimming and hydrotherapy should continue if possible, as they are excellent for building endurance without joint strain.
You may begin short jogs or light trotting if your vet approves. Activities like gentle fetch games and supervised stair climbing are also appropriate now. Keep sessions short and avoid sharp turns or jumps. Around the 6-week mark, a follow-up vet exam is recommended to confirm healing progress and adjust the rehab plan.
- Walks up to 30–40 minutes
- Add short jogs or gentle fetch
- Controlled stair use continues
- Rehab and swimming stay part of routine
- Vet recheck to assess joint recovery
This phase helps transition your dog back to everyday movement.
Read more:
Week 9–12: Near Full Recovery
By now, most dogs show clear progress. Limping should be minimal or gone altogether. Jogging, fast-paced walking, and light play become part of your dog’s daily routine. You may slowly reintroduce off-leash activity, but only in safe, enclosed areas where the dog won’t sprint or twist suddenly.
Energy levels will vary, so always monitor for signs of soreness or fatigue after active play. Continue rehab activities a few times a week to keep muscles strong. Your dog may still prefer to rest more after longer outings, and that’s normal at this stage of healing.
- Jogging and active walks become routine
- Off-leash time allowed in safe areas
- Limping should be almost gone
- Moderate play and outdoor time resume
- Watch for post-exercise fatigue
Your dog is close to full function, but slow pacing still matters.
3–6 Months: Long-Term Recovery Outcomes
By three to six months, your dog should be fully adjusted to the new fibrous joint formed after surgery. Most dogs return to their normal lives, including walks, light runs, and even agility or hiking activities. However, some dogs may show mild stiffness after resting, especially in colder weather or after long periods of activity.
Ongoing fitness is key. Swimming, leash walks, and core-strengthening exercises should stay in the routine. Reintroduce higher-impact activities like hiking or jumping only if your dog is strong and shows no signs of limping. A final check-in with your vet helps confirm the success of the recovery.
- Long walks, play, and hikes become normal
- Mild stiffness after rest is possible
- Maintain weekly fitness to avoid setbacks
- Gradually return to pre-surgery activity
- Vet follow-up to confirm full recovery
This phase ensures your dog enjoys lasting mobility and comfort.
What Influences the Recovery Speed?
Not all dogs heal at the same pace. These factors can speed up or slow down healing.
Several things affect how quickly your dog recovers after FHO surgery. Age and general health play a big role. Puppies and young adult dogs usually heal faster because their bodies are still growing and flexible. Older dogs, especially those with arthritis or other health issues, may need more time and support.
Body weight also matters. Overweight dogs tend to recover slower because their joints carry more pressure, making movement harder. Breed and size can influence healing too. Smaller dogs often adapt faster to the fibrous joint formed after surgery, while larger breeds may need more therapy to gain full strength.
- Older age or arthritis can delay recovery
- Overweight dogs put more strain on healing joints
- Large breeds may need longer therapy
- Active, healthy dogs bounce back more easily
- Regular rehab and vet checkups speed up healing
Most importantly, owner consistency with physical therapy and home care often makes the biggest difference in how well your dog recovers.
Signs of Delayed Healing (When to Call the Vet)
It’s important to know what signs may suggest delayed healing or a complication after FHO surgery. If your dog is still not putting any weight on the leg by week 3, this may mean they need more pain control or a therapy adjustment. While a mild limp is normal early on, a strong limp that lasts beyond week 8 is not expected.
Swelling, heat, or pain near the surgery site could signal infection or inflammation. Behavior changes like poor appetite, low energy, or disrupted sleep may also be signs of discomfort. Most concerning is any sign of wound reopening or pus discharge, which needs quick vet attention.
- Non-weight bearing beyond week 3
- Severe limp remains after week 8
- Swelling or redness around the incision
- Poor appetite or increased restlessness
- Open wound or signs of infection
If you notice any of these problems, contact your vet right away. Early action can prevent bigger issues and get your dog back on track.
Read more:
Tips to Support a Smooth Recovery
Recovery after FHO surgery takes daily effort. Small actions at home can make a big difference. Use tools and habits that make the process smoother for both you and your dog. A well-prepared home, good nutrition, and careful tracking help speed up healing while avoiding stress or injury.
Weekly Checklist for Pet Owners
A simple weekly checklist can keep recovery on track. Write down daily goals such as how long your dog walked, whether the limp improved, and which exercises were done. Set reminders for medication times and upcoming vet appointments. You can also take short videos each week to track progress visually.
- Note leash walk duration and limp level
- Track daily therapy exercises
- Set alerts for medications and checkups
- Use a recovery journal or app
Having a record of what works (or what doesn’t) helps your vet make better rehab decisions and gives you peace of mind during the process.
Nutrition and Weight Management
Proper nutrition supports healing from the inside out. During the early rest phase, your dog will burn fewer calories. To prevent weight gain, reduce food portions by 10 to 15 percent unless your vet advises otherwise. Overweight dogs may take longer to regain mobility.
Joint-support supplements such as glucosamine, chondroitin, or omega-3 fatty acids can help reduce inflammation and support long-term hip function. Make sure your dog stays hydrated, especially if they’re taking medications. Use healthy treats or enrichment chews to keep their mind busy during crate time.
- Cut daily food intake by 10–15% during rest
- Consider vet-recommended joint supplements
- Provide clean water at all times
- Offer light snacks or puzzles for engagement
Balanced nutrition reduces pressure on healing joints and improves overall recovery.
Home Setup for Safe Movement
Your home environment can either help or hinder your dog’s recovery. Create a space that limits risk while supporting safe movement. Add non-slip rugs, yoga mats, or foam tiles to areas where your dog walks or rests. This prevents slipping, which could harm the healing hip.
Block access to stairs or jumping surfaces with baby gates. If your dog is used to climbing on furniture, install pet ramps or stairs to help them move safely without jumping. Keep their crate or rest area in a calm spot away from loud noises or other pets.
- Place rugs or mats to create a safe walking path
- Use gates to prevent stair use
- Install ramps for couch or bed access
- Keep rest area quiet and easy to supervise
A safe setup gives your dog the freedom to move without risking re-injury.
Comparing FHO Recovery to Other Surgeries
Compared to more complex orthopedic procedures, FHO recovery is often shorter, less expensive, and less invasive. Dogs do not receive a metal implant, so there’s no risk of implant failure. Instead, they rely on building a strong fibrous joint. While total hip replacement may offer a more “natural” joint function, it also carries higher risks and longer healing.
FHO works especially well for small to medium-sized dogs. Many regain full leg use and return to active lifestyles. Some dogs may keep a mild limp or favor the leg when tired, but it usually doesn’t affect quality of life. With proper rehab, most dogs are pain-free and energetic again.
This surgery gives great results with the right care and patience, especially for dogs that don’t need high-impact activities like working or sporting dogs. It remains one of the most effective surgeries for hip problems in everyday pets.
Read more:
FAQs About FHO Recovery Timeline
How long does it take for a dog to fully recover from FHO surgery?
Most dogs recover within 8 to 12 weeks after FHO surgery. Small breeds may heal faster, while larger or older dogs may take more time. Full function, including running or jumping, often returns by 3 to 6 months. A structured rehab plan with vet guidance helps ensure long-term success.
When will my dog start using the leg after FHO?
Some dogs begin toe-touching within the first 1 to 2 weeks. Most start partial weight bearing by week 3. Regular short walks, passive exercises, and pain control support early leg use. If your dog isn’t using the leg by week 3, consult your vet to check for discomfort or complications.
Is it normal for my dog to limp weeks after FHO surgery?
Yes, a limp is normal in the early stages of recovery. It usually gets better by week 6 to 8. If the limp remains severe beyond week 8 or returns after activity, a vet check is needed. Ongoing rehab can help reduce long-term limping in most cases.
Can my dog go off-leash after FHO recovery?
Off-leash activity should wait until your dog walks and trots without limping. This usually happens around weeks 9 to 12. Start in a safe, enclosed area and monitor for fatigue. Sudden twisting or high-impact play too early can slow healing or cause reinjury.
What if my dog doesn’t follow the expected FHO recovery timeline?
Every dog heals at a different pace. Delays can happen due to age, weight, pain control, or missed rehab. If progress stalls for more than a week or signs of pain return, contact your vet. They may adjust the therapy plan or look for underlying issues affecting healing.
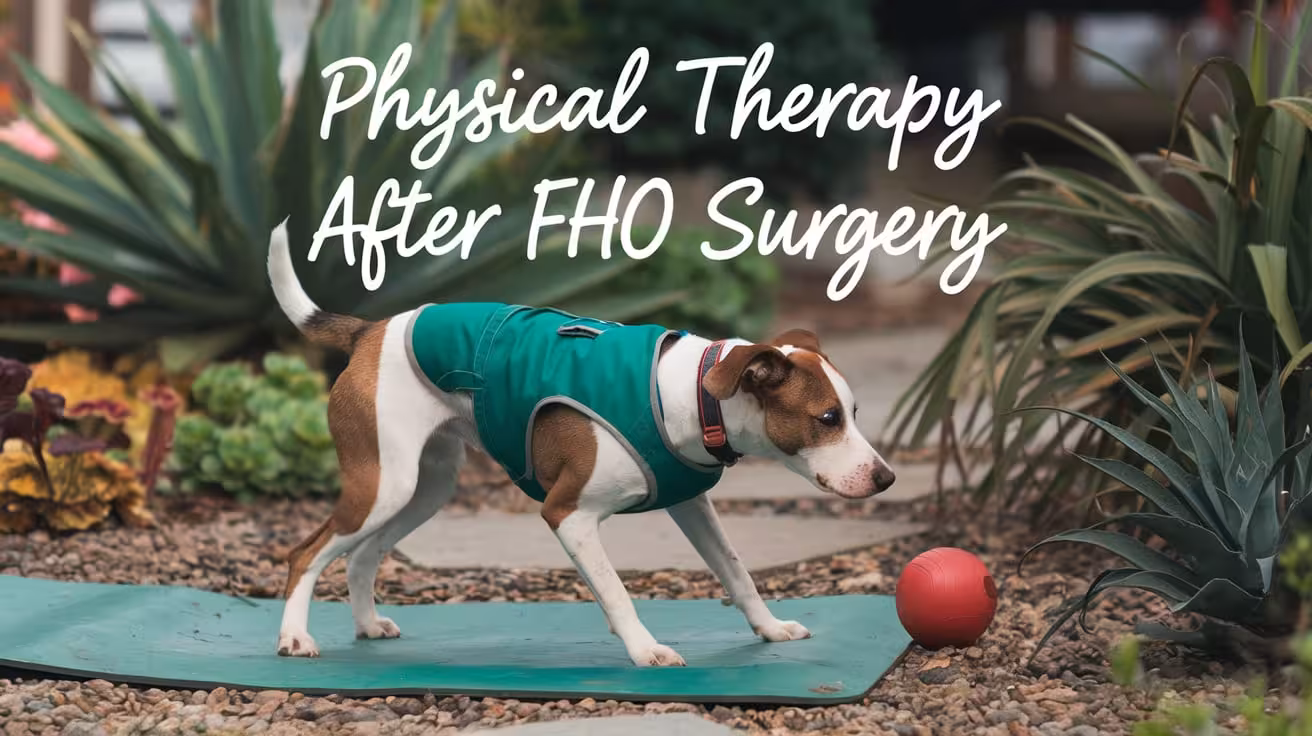
Physical Therapy After Femoral Head Ostectomy in Dogs
Step-by-step physical therapy guide for dogs after FHO surgery. Learn rehab stages, safe exercises, and recovery tips to restore mobility
After femoral head ostectomy (FHO) surgery, physical therapy is a key part of your dog’s recovery. While the surgery removes the damaged femoral head, it does not replace it with an artificial joint. Instead, the body forms a fibrous joint over time.
To make this new joint work well, your dog needs regular movement and controlled exercise. Without physical therapy, scar tissue may build up in the wrong way, and muscles can become weak. This can lead to long-term stiffness or limping.
Physical therapy helps in many ways:
- Reduces post-surgery pain and swelling
- Restores joint range of motion
- Builds muscle strength around the hip
- Helps your dog walk, sit, and play more naturally
- Speeds up overall recovery and boosts confidence
With the right therapy plan, most dogs regain good use of the leg and return to an active, pain-free life.
Key Phases of FHO Recovery in Dogs
A structured rehab plan helps your dog heal safely, build strength, and return to daily life without pain.
Immediate Post-Op Care (Days 1–3)
The first few days after FHO surgery are focused on rest and pain control. Your dog should be kept in a quiet, confined space like a crate or small room to avoid sudden movements. This prevents injury to the healing tissues. Use ice packs on the surgery site for 10–15 minutes every few hours to help reduce swelling. Your vet will prescribe pain relief, which may include NSAIDs or opioids—give these exactly as directed.
It’s also important to start gentle passive range of motion (PROM) exercises with your vet’s guidance. These help prevent stiffness by slowly moving the leg through its natural range. Avoid allowing your dog to jump or walk on slippery floors. Add rugs or mats for safety and always supervise during bathroom breaks. This phase builds a safe foundation for the next stages of rehab.
- Crate rest to limit movement
- Ice packs 3–4 times daily
- Pain meds given as prescribed
- PROM to reduce stiffness
Early Rehab Phase (Week 1–2)
During the first two weeks after surgery, your dog slowly begins to move more. Start with short leash walks—just 2 to 3 minutes, 3 to 4 times a day. These walks help your dog start using the leg and prevent muscle loss. Always walk on flat, non-slippery surfaces, and go slow. Before each session, apply moist heat to the hip for 10 minutes to relax the muscles and ease pain.
Add gentle massage to the thigh and hip area to improve blood flow and reduce soreness. Continue daily passive range of motion (PROM) exercises to maintain joint flexibility. Cookie bends, where you guide your dog’s nose to each side with a treat, encourage stretching and help build core balance. All exercises must be done with care and should never cause pain.
- Short, frequent leash walks on flat surfaces
- Moist heat therapy before exercise
- Light massage to loosen stiff muscles
- Daily PROM to improve mobility
- Cookie bends to increase body awareness and stretch
This phase sets the stage for strength building in the coming weeks.
Read more:
Strengthening Phase (Week 3–6)
In this stage, your dog starts to rebuild strength and muscle control. Sit-to-stand exercises against a wall are great for engaging the rear legs. You can guide your dog into a sit and then help them stand, repeating 5–10 times per session. Controlled stair climbing is also useful—start with low steps and go slowly to avoid strain.
Walking on gentle slopes or small hills helps improve balance and weight-bearing. Cavaletti poles, placed a few inches above the ground, teach your dog to lift their legs properly. Weaving through cones or furniture improves body coordination. You can also introduce weight-shifting using a cushion or balance pad, encouraging the dog to stand on all fours and gently shift their weight side to side.
- Sit-to-stand reps to build muscle
- Controlled stair use (low steps only)
- Hill walking to improve power and balance
- Cavaletti poles for stride awareness
- Balance pad work to improve control
Each activity should be done calmly and gradually to avoid re-injury.
Advanced Rehab (Week 6+)
Once your dog is moving comfortably, the focus shifts to rebuilding endurance and fine motor control. Water therapy, like swimming or underwater treadmill work, is excellent for low-impact muscle building. These activities reduce joint stress while improving strength and range of motion.
Introduce tools like wobble boards or physio balls to challenge your dog’s balance. These tools force the stabilizing muscles around the hip to engage more deeply. Continue leash walking but increase the time by 5 minutes each week based on your dog’s energy and comfort level. Still include PROM and earlier strength drills to maintain gains.
Keep a close eye on any signs of limping, fatigue, or stiffness after exercise. If you notice these signs, reduce the intensity and consult your vet or rehab therapist. By this stage, most dogs are close to full function but still need consistency.
- Underwater treadmill or swim sessions
- Balance tools for core strength
- Leash walks with gradual time increase
- Ongoing PROM and earlier exercises
- Monitor closely for soreness or limping
This phase brings your dog back to full mobility with confidence.
Read more:
At-Home Therapy Tips for Dog Owners
These simple steps help you support your dog’s recovery safely and confidently at home.
Creating a Weekly Rehab Calendar
A weekly rehab calendar helps you stay organized and ensures your dog follows a consistent recovery routine. Write down all exercises, walks, and rest periods each day so nothing is missed. You can use a whiteboard, notebook, or digital app—whatever works best for your family. This schedule helps you track progress, note any signs of pain, and adjust the plan when needed.
By planning ahead, you’ll avoid skipping important sessions or repeating the same activity too often. It also helps different family members follow the same routine if more than one person is helping with care. Include reminders for medications, vet checkups, and when to add new exercises.
- Plan rehab exercises in advance
- Keep records of walk time, reps, and energy levels
- Use photos or videos to track limb use
- Adjust based on fatigue or stiffness signs
Consistency makes recovery smoother and faster.
Safe Exercise Space at Home
A safe space makes it easier for your dog to move without risk of injury. Choose a quiet area away from noise and other pets. Use non-slip rugs, yoga mats, or rubber flooring to prevent your dog from slipping, especially during exercises or walks around the house. Avoid hard surfaces like tile or hardwood.
Remove obstacles like furniture edges, cords, or toys that can cause tripping. Block access to stairs with baby gates to prevent accidental climbing. Keep the space well-lit and easy to supervise. If your dog is crate-trained, set up the crate nearby for rest after rehab.
A calm, clean setup helps reduce stress and keeps your dog focused on the exercises. It also makes transitions between rest and movement smoother.
- Use rugs or mats for better traction
- Block stairs and high furniture
- Keep the area quiet and clutter-free
- Ensure the space is easy to supervise
Safety at home supports better rehab outcomes.
How to Use Household Items for Rehab
You don’t need expensive tools for rehab—simple items at home can work well. A rolled towel can support your dog’s hip or be used to help with range of motion stretches. Place it under the belly for gentle lift support during assisted walks. Couch cushions or sofa ramps help dogs get on or off furniture safely without jumping.
Set up DIY cavaletti poles using broomsticks or PVC pipes balanced on boxes or books to train stride awareness. Use a yoga ball or pillow for gentle balance work. Even folded blankets can create soft inclines or padded surfaces for added challenge.
These simple tools keep your dog engaged and promote recovery while keeping costs low. Just ensure every item is stable and safe.
- Rolled towels for support or stretches
- Cushions and ramps for furniture access
- Broomsticks for DIY walking poles
- Blankets or pillows for balance work
Get creative while keeping safety first.
Mental Stimulation During Recovery
Mental stimulation is just as important as physical rehab, especially during periods of rest. When your dog is not allowed to move much, boredom can lead to stress or destructive behavior. Use puzzle feeders or treat-dispensing toys to keep their brain active. These slow down eating and challenge your dog to problem-solve.
Snuffle mats are great for scent games. You can also hide treats around the room and let your dog search for them, encouraging light movement and focus. Training short commands like “sit,” “stay,” or “touch” helps maintain obedience and builds confidence.
Keep sessions short—just 5 to 10 minutes, 2–3 times per day. Rotate toys and games so your dog doesn’t get bored. This helps with healing and keeps your dog happy.
- Puzzle toys to challenge the brain
- Snuffle mats for scent work
- Hide-and-seek treat games
- Gentle command training for focus
Mental exercise supports full recovery inside and out.
Read more:
Common Mistakes to Avoid in Rehab
Even with the best intentions, some common mistakes can slow down your dog’s recovery. One of the biggest issues is overdoing exercise too soon. Skipping rest or adding activities without your vet’s guidance can cause setbacks. Always warm up with gentle walks and cool down with light stretching or massage.
Letting your dog walk or play off-leash before they’re ready is risky, even in the yard. They might run, jump, or twist the leg, undoing the progress made. Not attending follow-up vet visits also leads to missed signs of delayed healing or complications.
Stick to the plan your vet or rehab expert provides. If your dog seems sore, stiff, or tired, scale back and adjust. Patience and proper pacing are key to success.
- Do not skip rest phases
- Never let the dog roam freely too early
- Warm-up and cool-down are essential
- Follow all progress checks with your vet
Avoiding these mistakes keeps your dog’s recovery on track.
Long-Term Care and Mobility Maintenance
After your dog has completed the main stages of rehab, long-term care becomes essential for keeping their hip strong and pain-free. Even though the joint forms a functional fibrous connection, it still needs regular use to stay flexible. Low-impact activities like swimming or walking on an underwater treadmill are ideal. These support muscle tone without adding pressure on the joint.
- Weekly swimming or treadmill sessions for gentle exercise
- Keep your dog at a healthy weight to reduce joint strain
- Use joint supplements like glucosamine if advised by your vet
- Watch for signs of limping or stiffness that return later
Over time, you should gradually build your dog’s strength with moderate exercise. Long walks, gentle fetch, and uphill strolls are fine—as long as your dog stays comfortable. Lifelong care helps your dog enjoy an active, happy life after FHO.
When to Call the Vet During Rehab
It's important to know when something is not right during recovery. Some soreness is normal, but certain signs mean you should call your vet immediately. Increased limping, swelling around the hip, or signs of infection should never be ignored. If your dog seems quieter than usual, refuses food, or has a wound that reopens, get help.
- Limping that worsens or returns after exercise
- Swelling, redness, or heat near the surgery site
- Wound that opens or leaks fluid
- Mood change, tiredness, or poor appetite
Quick action can prevent setbacks and protect your dog from further pain. Always follow your vet’s advice if you're unsure what’s normal during recovery.
Read more:
FAQs About Physical Therapy After FHO Surgery
How soon should I start physical therapy after FHO surgery?
Most dogs begin basic rehab like passive range of motion within 1 to 3 days after surgery, depending on the vet’s recommendation. Active exercises like leash walks or sit-to-stands usually start in week 1 or 2, once pain is managed and healing begins.
Can my dog fully recover without physical therapy?
It’s possible, but less likely. Without physical therapy, the leg may stay weak or stiff, and scar tissue can limit movement. Rehab helps your dog regain full use of the leg faster and more completely.
What if my dog doesn’t want to use the leg?
It’s common early on, but avoid forcing it. Use short, slow leash walks and supportive exercises like towel slings or underwater therapy. If the limp lasts beyond a few weeks, consult your vet or a rehab specialist.
Are joint supplements necessary after FHO?
Joint supplements like glucosamine or omega-3s can support long-term comfort and joint health. While not required for all dogs, they’re especially helpful for older pets or those with arthritis in other joints.
Is swimming good for dogs after FHO surgery?
Yes, swimming or underwater treadmill is highly recommended after week 6. These exercises build muscle without stressing the joint and can become part of your dog’s regular fitness routine post-recovery.
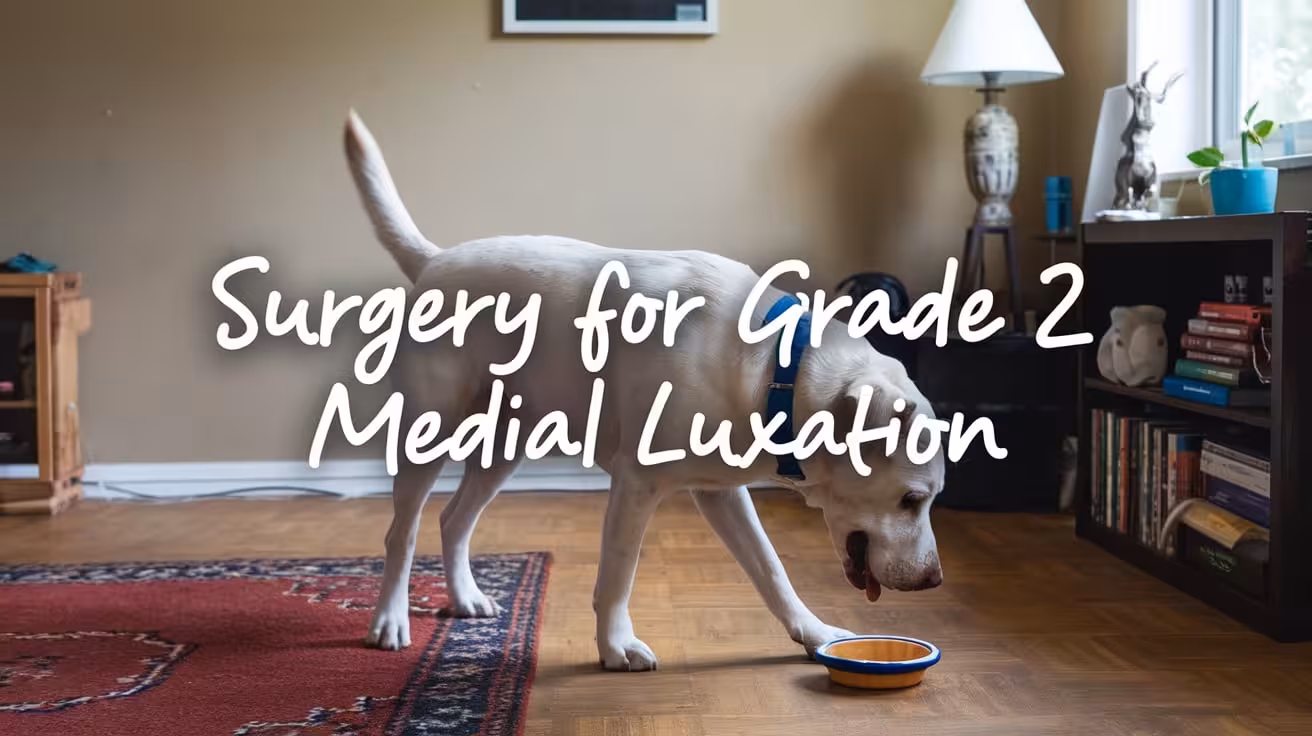
Should You Consider Surgery for Grade 2 Medial Luxation?
Wondering if surgery is needed for Grade 2 medial patellar luxation? Learn when to choose surgery vs. conservative care and what to expect
What Does Grade 2 Medial Patellar Luxation Mean?
Grade 2 medial patellar luxation (MPL) is a moderate form of kneecap instability seen in many dogs, especially small breeds. It means the patella (kneecap) moves out of its groove but can return on its own or with light pressure.
This type of luxation may not always cause pain, but it can affect how your dog walks. Many dogs with Grade 2 MPL show signs like:
- Occasional limping or skipping in the back leg
- Sudden lifting of one hind limb for a few steps
- Clicking or popping sounds from the knee
- Reluctance to run or jump due to instability
Vets often find Grade 2 MPL during regular exams, even if there are no clear symptoms. The condition may not need surgery right away, but it does require monitoring. Some dogs stay stable for years, while others may slowly worsen to Grade 3.
The decision to treat depends on how often the patella dislocates, how it affects mobility, and whether your dog shows pain. Your vet may suggest rehab, weight control, or surgery depending on how your dog responds to these early signs.
Does Every Dog With Grade 2 MPL Need Surgery?
Not always—many dogs with Grade 2 MPL can live comfortably without surgery.
- Mild cases often need no surgery
- Some dogs never show pain or limping
- Conservative care can keep the joint stable
- Surgery is usually for dogs with visible signs
If your dog shows no pain and stays active without limping, surgery might not be needed. Some small breeds with mild luxation live normal lives with proper care. The key is to monitor their symptoms closely. If you start noticing signs like hopping, stiffness, or discomfort during walks, it’s time to consider surgery.
Veterinarians often suggest checking the patella every few months, especially during growth. Surgery becomes necessary if there's a risk of worsening or if the dog’s quality of life is affected. But if your dog is symptom-free and active, conservative treatment may be enough to manage Grade 2 MPL safely.
Read more | Signs and Symptoms of Medial Patellar Luxation in Dogs
When Should You Choose Surgery for Grade 2 MPL?
Surgery is recommended when symptoms get worse or the knee becomes unstable.
- Persistent limping or skipping
- Pain during activity or joint touch
- Visible muscle loss in the affected leg
- Frequent patella dislocation
- Signs of arthritis on X-rays
When these signs appear, surgery is often the best way to prevent further joint damage. Over time, the repeated movement of the kneecap in and out of place can strain other structures in the knee, including the cruciate ligament. Early surgery reduces this risk and improves long-term comfort.
In many cases, vets recommend operating before Grade 2 becomes Grade 3. Dogs with frequent dislocations are more likely to develop arthritis or suffer from more severe joint problems later. A proactive surgical approach can protect the joint and restore normal function early in life.
When Is Conservative Management a Better Option?
If your dog has no pain and a stable gait, conservative care may be enough.
- Ideal for dogs with no visible lameness
- Best for older dogs or those with low activity
- Requires committed home care and regular vet checks
Conservative treatment focuses on reducing stress on the joint and supporting joint health. This includes maintaining a healthy weight, using joint-friendly diets, and giving supplements like glucosamine and omega-3s. Physical therapy, swimming, and controlled walks help strengthen the muscles that support the knee.
- Weight control to reduce joint pressure
- Joint supplements for cartilage health
- Rehabilitation exercises for strength
- Vet rechecks every 3 to 6 months
Owners need to be consistent with care, as this approach doesn’t stop the structural problem. However, for mild cases or dogs not showing signs, it can delay or avoid the need for surgery. If symptoms start to appear later, you can always revisit the surgical option with your vet.
Pros and Cons of Surgery vs. Conservative Care
Each option has benefits and limitations, and the right choice depends on your dog’s symptoms and lifestyle.
Surgery Pros
- Fixes the kneecap alignment permanently
- Prevents arthritis and further damage
- High success rate with full recovery
Surgery gives long-term joint stability. Dogs often return to full activity after healing.
Surgery Cons
- Costly ($1,500–$3,500 depending on location)
- Needs anesthesia and post-op care
- Recovery takes 6–12 weeks with rehab
The commitment during recovery can be hard for busy owners.
Conservative Pros
- Less expensive upfront
- No surgery or anesthesia risks
- Can manage symptoms in mild cases
Good for dogs with no pain and older dogs with stable knees.
Conservative Cons
- Won’t fix the knee’s structure
- Needs regular care and monitoring
- May not prevent future joint damage
Long-term, untreated luxation may lead to arthritis or cruciate injuries.
Read more | Recovery After Medial Patellar Luxation Surgery in Dogs
Questions to Ask Your Vet Before Choosing Surgery
Ask your vet the right questions to make a confident decision.
- Is my dog in pain or limping regularly?
- Has the luxation worsened over time?
- Is arthritis starting to form in the joint?
- Would early surgery reduce future complications?
These questions help you understand the risks and benefits clearly. Your vet will assess your dog’s movement, palpate the kneecap, and may suggest X-rays. Together, you’ll decide if surgery should be done now or if you can continue with home care and regular checks.
The decision depends on your dog’s health, age, lifestyle, and how well they respond to non-surgical treatments. If the patella slips often or your dog starts avoiding walks, surgery is likely the right choice. If they’re playful and show no signs, conservative care might work for now.
Read more:
What to Expect After Surgery for Grade 2 MPL
Surgery for Grade 2 MPL is very successful with proper aftercare.
- Procedures include trochleoplasty, tibial tuberosity transposition, soft tissue tightening
- Recovery starts with crate rest and pain control
- Rehab includes gentle exercises and slow return to walking
Recovery takes about 6 to 12 weeks. In the first 2–3 weeks, strict rest is needed. After that, you can begin leash walks, massage, and hydrotherapy as recommended by your vet.
- Week 1–2: Pain control, crate rest
- Week 3–6: Light rehab and passive movement
- Week 7–12: Gradual return to normal walks and play
Most dogs regain full use of the leg and show better gait and comfort. Early surgery often leads to less arthritis in the future and gives your dog a much better quality of life.
What Happens If You Don’t Do Surgery?
Delaying or avoiding surgery can lead to more serious joint problems.
- Risk of progression to Grade 3 or 4
- More joint wear leads to early arthritis
- Increased risk of cruciate ligament tear
- Future surgeries may become more complex and expensive
Even if your dog seems okay now, the kneecap slipping over time may change how they walk. That causes stress on the hips, lower spine, and the other knee.
Without surgery, managing the condition requires strict care—low-impact activity, controlled weight, and regular checkups. Some dogs still do well with this, but others start showing symptoms a few months or years later.
If symptoms worsen, the surgery needed later might be more involved, with a longer recovery and higher cost. Early action can prevent this cycle.
Read more | How to Tell If Your Dog Has a Medially Luxating Patella
Final Thoughts: Is Surgery Right for Your Dog?
The decision depends on how your dog is doing today and what risks you want to avoid in the future.
- Does your dog limp or show pain?
- Is the knee slipping more often?
- Are you able to give consistent home care if avoiding surgery?
Surgery is often a good choice if symptoms are active or your vet sees signs of progression. Many dogs go back to a full, pain-free life after recovery. But if your dog is comfortable and you can manage the condition with care, surgery might not be needed yet.
Every case is different. Talk to your vet, observe your dog closely, and choose the plan that works best for their health and your lifestyle.
Read more | Unilateral vs. Bilateral Medial Patellar Luxation in Dogs
FAQs
Can my dog live a normal life with Grade 2 MPL without surgery?
Yes, many dogs with Grade 2 MPL can live comfortably without surgery, especially if they show no pain or lameness. Conservative care like weight control, joint supplements, and physiotherapy helps manage the condition. Regular checkups are important to catch any signs of worsening and adjust the care plan as needed.
Will Grade 2 MPL always get worse over time?
Not always. Some dogs remain stable for years with no change, especially if managed well. However, in active dogs or if symptoms like limping appear, the condition can worsen and lead to arthritis or cruciate injuries. Monitoring and early intervention help reduce the chance of progression to higher-grade luxation.
Is surgery risky for small dogs?
Surgery is generally safe for small dogs when done by a skilled orthopedic vet. Risks are present, like with any anesthesia or orthopedic procedure, but serious complications are rare. Pre-surgical exams, including blood work and heart checks, help reduce these risks. Most small dogs recover well and regain full mobility.
How long should I wait before deciding on surgery?
If your dog shows mild or no symptoms, you can try conservative care and observe for a few months. But if signs like limping, pain, or skipping steps become frequent, it’s best to consult your vet about surgery. Early intervention often leads to better results and prevents joint damage.
What is the success rate of surgery for Grade 2 MPL?
Surgery for Grade 2 MPL has a high success rate, often above 90%. Most dogs regain normal or near-normal function after recovery. The key factors are early treatment, proper post-op care, and following rehab instructions. When done before joint damage sets in, the outcome is usually excellent.

Unilateral vs. Bilateral Medial Patellar Luxation in Dogs
Compare unilateral vs. bilateral medial patellar luxation in dogs—symptoms, treatment, surgery options, and recovery differences explained simply
What Is Medial Patellar Luxation (MPL)?
Medial Patellar Luxation (MPL) is a condition where a dog’s kneecap slips out of its normal position, usually toward the inside of the leg.
In a healthy knee, the patella (kneecap) sits in a groove on the thigh bone and moves smoothly as the leg bends. With MPL, the kneecap moves out of place, causing the joint to become unstable. This can lead to limping, pain, or an unusual gait.
MPL is most often congenital, meaning a dog is born with it. It may also develop from poor skeletal alignment or trauma to the knee. It’s common in small breeds like Pomeranians, Chihuahuas, and Poodles, but it can also affect large breeds like Labradors or Great Pyrenees.
MPL is graded by severity:
- Grade I: Occasional luxation
- Grade II: Frequent but returns on its own
- Grade III: Constant but manually correctable
- Grade IV: Permanently out and not correctable manually
Understanding the grade helps guide treatment.
Unilateral vs. Bilateral MPL: What’s the Difference?
Some dogs have MPL in one knee (unilateral), while others have it in both knees (bilateral). The difference matters for treatment, recovery, and long-term health.
- Unilateral MPL affects only one knee, often showing signs like limping or skipping on a single limb.
- Bilateral MPL means both knees are unstable, leading to crouched posture, bunny-hopping, or bow-legged gait.
- Around 50% of dogs diagnosed with MPL have both knees involved.
- Even if only one knee shows symptoms now, the other may develop problems later.
- Dogs may be born with both knees affected or develop the second case over time.
Knowing whether MPL is unilateral or bilateral helps you and your vet plan treatment. Surgery decisions, home recovery setup, and rehab routines may differ.
Your vet will examine both knees, even if only one looks painful, to catch early signs. Treating both knees at once can be harder short term but may reduce future complications. Monitoring both knees is important, no matter which type your dog has.
Read more | Grade 2 Medial Patellar Luxation: Surgery Decision Guide
Symptoms Comparison in Unilateral vs. Bilateral Cases
The signs of medial patellar luxation (MPL) can differ depending on whether one or both knees are affected. Understanding these differences helps in faster recognition and proper care.
Unilateral MPL usually causes signs in one back leg. You might notice:
- Limping or skipping on the affected limb
- Sudden return to normal gait after skipping
- Less weight-bearing on one side
Bilateral MPL tends to affect the dog’s posture and overall movement more visibly:
- Bunny-hopping when running
- Crouched stance or stiffness in both legs
- Bow-legged posture, especially in small breeds
In both cases, you may see behavioral changes such as reduced play, unwillingness to go on walks, or hesitation to jump. Often, dogs compensate by using the stronger leg more, which can hide the issue for a while. That’s why many unilateral cases go unnoticed until the second knee shows signs.
Early signs are often subtle, so regular observation of how your dog moves is key. Watch for changes in rhythm, posture, or hesitation during movement. Prompt evaluation helps in catching the condition early—before the second knee becomes involved or symptoms worsen.
Read more | How to Prevent Medial Patellar Luxation in Puppies
Diagnosis and Imaging for One or Both Knees
Vets use hands-on exams and imaging to confirm MPL and check whether one or both knees are involved. Diagnosis is important to plan treatment and avoid future issues.
During the physical exam, your vet will:
- Feel the kneecap for looseness or misalignment
- Apply pressure to assess luxation and assign a grade (I to IV)
- Observe your dog’s gait for limping, skipping, or stance changes
Each knee is graded separately. Even if signs appear in one leg, both knees are always checked. Around half of MPL cases affect both knees, so early diagnosis can guide preventive care for the other side.
Radiographs (X-rays) may also be recommended:
- Help evaluate bone alignment and shape
- Detect signs of joint wear or arthritis
- Rule out fractures or other problems
In some cases, advanced imaging (like CT scans) may be used for surgical planning. Diagnosis isn’t just about confirming MPL—it’s about understanding the extent and making the best plan for treatment. Whether surgery is needed or not, knowing both knees’ condition helps avoid surprises later.
Read more | Medial Patellar Luxation in Small vs. Large Dogs
Surgical Options: Treating One or Both Knees
Surgery is often needed when MPL causes pain or affects movement. The decision to operate on one or both knees depends on symptoms, severity, and the dog’s overall condition.
Unilateral Surgery
- Recommended when only one knee shows signs
- Less intense recovery since one leg stays stable
- If the second knee worsens later, surgery can be done separately
- Helps dogs return to normal activity with fewer risks
Bilateral Surgery
- Done when both knees are affected or if one is borderline
- Can be performed at once (simultaneous) or one after another (staged)
- Offers long-term relief and cost savings when done together
- Slightly tougher recovery since both legs are healing
Most dogs recover well from either approach. The choice depends on vet advice, owner ability to manage post-op care, and how the dog is handling its current condition. Many vets prefer to treat both knees if symptoms exist, to avoid multiple surgeries and extended downtime.
Read more | Best Exercises and Rehab for Dogs After MPL Surgery
Pros and Cons of Bilateral vs. Unilateral Surgery
Owners often wonder whether fixing one knee or both is better. Each option has trade-offs in terms of cost, recovery, and long-term outcomes.
Bilateral Surgery Pros
- One anesthesia event instead of two
- Single recovery period with no second surgery later
- Often more cost-effective overall
Bilateral Surgery Cons
- Harder for dogs to walk during early healing
- May require more hands-on care (sling walking, crate rest)
- Slightly increased risk of surgical stress
Unilateral Surgery Pros
- Easier recovery using the healthy leg for support
- Less intensive aftercare
- Good for mild or first-time cases
Unilateral Surgery Cons
- Second knee may need surgery later
- Total recovery timeline could be longer
- Dogs may overuse healthy leg, causing strain
Choosing depends on your dog’s health, the vet’s opinion, and your ability to manage care. Discuss risks and benefits openly with your vet so you’re prepared for either scenario.
Read more | Medial Patellar Luxation Treatment Without Surgery
Long-Term Outlook and Risk of Progression
Understanding the long-term effects of unilateral and bilateral MPL is key to managing your dog’s mobility and comfort. Even if only one knee is affected now, there’s a strong chance the other may show symptoms later.
For unilateral MPL:
- Many dogs develop issues in the second knee within months or years
- Overuse of the healthy leg may cause early joint wear
- Ongoing monitoring is needed to catch problems early
For bilateral MPL:
- Dogs treated for both knees often enjoy better balance and long-term comfort
- Posture and gait return to normal faster
- Risk of progression is lower once both knees are stabilized
Dogs with Grade I or II luxation may live comfortably with exercise control and monitoring, but higher grades often require surgery to prevent worsening. Without treatment, MPL can lead to joint damage, arthritis, or permanent mobility issues.
Early intervention, whether surgical or not, helps preserve quality of life and joint health. Work closely with your vet to reassess alignment and gait during routine visits. Catching changes early often leads to easier, less invasive treatment and fewer complications.
Read more | How to Tell If Your Dog Has a Medially Luxating Patella
Post-Operative Care: What Differs by Type
Recovery after MPL surgery is slightly different for unilateral and bilateral cases. The basic care principles stay the same, but the intensity and support required can vary.
For unilateral surgery:
- Dogs often manage with one strong leg
- Shorter duration of assisted walking
- Faster return to weight-bearing activity
For bilateral surgery:
- May need help walking for the first 7–10 days
- Use of a sling or harness is common
- Physical therapy is often more intensive
Key aspects of post-op care for both:
- Restricted activity for 6–8 weeks
- Controlled leash walks to rebuild strength
- Passive range-of-motion exercises (if advised)
- Pain management and anti-inflammatories
- Preventing access to stairs or jumping surfaces
Recovery timelines vary by dog, but many show big improvements by week 4. It’s important to follow your vet’s timeline closely. Skipping steps or increasing activity too fast can cause setbacks.
Bilateral cases may feel harder early on, but both types require patience and consistency to achieve full healing and normal movement.
Read more | Recovery After Medial Patellar Luxation Surgery in Dogs
Owner Considerations When Choosing Surgery Type
Choosing between unilateral and bilateral MPL surgery depends on more than just vet advice. Your lifestyle, budget, and support system also matter when planning for your dog’s recovery.
Key things to consider:
- Care support: Can someone help with sling walking or lifting?
- Budget: Bilateral surgery may cost more upfront but saves on future anesthesia and follow-up visits.
- Time: One recovery period vs. two separate ones
- Home setup: Stairs, slippery floors, and crate space all play a role
- Dog's comfort: Some dogs do better when both knees are treated together, while others need a slower approach
Your vet will guide you based on your dog’s health and luxation grade. But your role in daily care is just as important. If you work long hours or have limited help at home, staged unilateral surgeries may be easier to manage.
On the other hand, if your dog is struggling with both legs, doing both at once may offer quicker overall relief. Think about the long run—not just the surgery day.
Monitoring for Changes in the Opposite Knee
Even if your dog only has MPL in one leg now, the other knee may be at risk too. Keeping a close eye on gait and posture helps you catch early signs before things get worse.
Watch for these signs in the “healthy” leg:
- Skipping, limping, or toe-touching
- Slower movement or hesitation to climb stairs
- Shifting weight to one side
- Bunny-hopping gait during fast movement
Regular rechecks are important. Your vet may perform:
- Physical exams to grade luxation
- X-rays to check bone angles and joint wear
- Gait assessments to spot compensation or early imbalance
Home videos of your dog walking can also help detect changes between visits. If the second knee begins to show signs, treatment can start early, often avoiding a crisis. Early detection helps prevent cartilage damage, arthritis, or falls from instability.
Stay proactive even after surgery. The second knee might stay stable, but many dogs eventually need care for both legs. Monitoring ensures you act before the issue becomes painful or limits movement.
Read more | Signs and Symptoms of Medial Patellar Luxation in Dogs
Final Thoughts: Which Option Is Better?
There’s no single “best” option—unilateral or bilateral MPL surgery both have value depending on your dog’s situation. What matters most is tailoring the approach to your dog’s needs and your ability to manage recovery.
Choose unilateral if:
- Only one knee is affected
- You prefer an easier recovery process
- You want to space out costs and care time
Choose bilateral if:
- Both knees show symptoms or have high-grade luxation
- Your dog struggles with movement or posture
- You want to avoid two anesthesia events and staggered healing
Many dogs thrive after either route when post-op care is done right. The goal isn’t just to fix the knee, it’s to restore comfort, prevent joint damage, and let your dog enjoy normal play again.
Trust your vet’s assessment and be honest about your home setup. Either way, early treatment and steady follow-through give your dog the best shot at a full, active life.
FAQs
Is it common for unilateral MPL to become bilateral?
Yes, it’s quite common. Many dogs diagnosed with unilateral medial patellar luxation eventually develop it in the other knee. This is especially true in small breeds or dogs with poor limb alignment. The added stress on the unaffected leg can speed up the problem. Regular vet checks help catch early signs so you can plan treatment before the second knee worsens or becomes painful.
Can both knees be operated on at the same time?
Yes, both knees can be treated in one surgical session, especially if both are symptomatic or have high-grade luxation. Many vets recommend bilateral surgery when the dog struggles to walk or stand properly. Recovery may be more intense at first, but long-term healing is faster. Your vet will consider age, overall health, and your ability to support the recovery process before recommending this approach.
Which surgery has a faster recovery—unilateral or bilateral?
Unilateral surgery often feels easier in the short term. The dog can rely on the healthy leg during early recovery, making movement and care simpler. Bilateral surgery may look harder at first but can shorten overall recovery by addressing both knees at once. If managed carefully with support and rehab, dogs recover well from either surgery type and return to normal activity with proper care.
Is bilateral MPL more painful or severe?
Bilateral MPL can cause more discomfort and instability than unilateral cases because both knees lack support. Dogs may show more signs of lameness, awkward walking, or reluctance to move. Surgery for both knees can cause more soreness early on, but pain is well controlled with medication. Once healed, dogs often regain better balance and comfort compared to treating just one knee at a time.
What if only one knee shows symptoms?
Even if just one knee shows signs, the other may be affected mildly or start developing changes later. Your vet will check both knees during the exam to assess risk. If the second knee is stable, your dog may only need unilateral treatment. However, keep monitoring the other leg. Early signs like skipping or shifting weight may mean it’s time to discuss further care.
Can Medial Patellar Luxation Be Prevented in Puppies?
Learn how to reduce the risk of medial patellar luxation in puppies with early care tips, safe exercise, diet, and vet-guided joint support
What Is Medial Patellar Luxation in Puppies?
Medial Patellar Luxation (MPL) is a common knee problem in puppies, where the kneecap doesn’t stay in the right place.
In a healthy knee, the patella (kneecap) sits in a groove at the end of the femur and slides smoothly as the leg moves. In puppies with MPL, the kneecap slips inward—toward the other leg—causing an unstable joint. This can lead to limping, skipping steps, or trouble walking as the puppy grows.
MPL can be congenital, meaning the puppy is born with a shallow groove or weak ligaments that allow the kneecap to move out of place. It can also be acquired, which means it develops later due to injury, poor nutrition, or uneven bone growth during puppyhood.
Some breeds are more prone to MPL due to their body structure and genetics. These include:
- Yorkshire Terrier
- Pomeranian
- Chihuahua
- Poodle
- Boston Terrier
While not all puppies will show signs early, it’s important for owners of at-risk breeds to monitor for any leg issues and begin prevention early. Early care can reduce long-term problems.
Is Medial Patellar Luxation Preventable?
MPL is mostly genetic, but there are ways to reduce the risk and support healthy joint development in puppies.
Most cases of MPL are hereditary, especially in small breeds. Puppies can be born with shallow grooves in the knee or loose ligaments, which cause the kneecap to slip. While there's no guaranteed way to prevent it, smart early care can delay or reduce the severity of symptoms.
Ways to lower MPL risk include:
- Avoid breeding dogs with a known history of MPL
- Choose responsible breeders who screen for orthopedic issues
- Support joint health through proper weight, nutrition, and exercise
- Detect early signs like “skipping” steps or limping during puppy exams
Starting joint-friendly habits early helps protect the knees during growth. Supplements and low-impact activity don’t stop MPL from forming, but they can improve joint strength and comfort.
If your puppy is in a high-risk breed, talk to your vet about a prevention plan. While MPL may still develop, you can reduce pain, improve function, and possibly avoid surgery later in life with early care and close monitoring.
Read more | Unilateral vs. Bilateral Medial Patellar Luxation in Dogs
How to Identify Puppies at Higher Risk
Some puppies are born more likely to develop MPL based on their breed and family background. Spotting risk early can help you act before the condition worsens.
High-risk breeds often include small or toy dogs. Their bone structure and genetics make MPL more common.
Breeds at higher risk:
- Yorkshire Terrier
- Chihuahua
- Pomeranian
- French Bulldog
- Poodle
Family history also matters. If a parent or sibling had MPL, the puppy has a higher chance of getting it. Even if they look fine now, underlying joint issues could appear as they grow.
Signs of early MPL include:
- Occasional “skipping” steps
- Limping that comes and goes
- Back leg held up for a few strides
- Reluctance to play or jump
Ask your vet during puppy checkups:
- Are the kneecaps tracking normally?
- Is there any looseness or instability in the joints?
- Should we consider early joint support or supplements?
The earlier MPL is identified, the easier it is to manage. Don’t wait until limping becomes regular—track movement and behavior from the start.
Read more | Grade 2 Medial Patellar Luxation: Surgery Decision Guide
Joint Health Tips to Lower Risk in Puppies
Simple changes in daily care can help reduce joint stress as your puppy grows. These habits won’t prevent MPL completely but can lower the chances of joint damage or worsening symptoms.
Maintain a Healthy Weight During Growth
Keeping your puppy at a healthy weight is one of the best ways to protect their knees.
- Avoid overfeeding or too many treats
- Watch for rapid weight gain in the first year
- Monitor weight monthly, especially in small breeds
Extra weight adds stress to developing joints and increases the risk of instability.
Use Low-Impact Exercise to Build Muscle
Gentle movement builds strength without causing joint strain.
- Short daily leash walks on even surfaces
- No fetch, running, or jumping games
- Safe play on soft grass or padded floors
This keeps the leg muscles strong while protecting the kneecap.
Avoid High-Risk Movements and Environments
Jumping or slipping increases injury risk during growth.
- Don’t let puppies use stairs or jump from furniture
- Use ramps or steps for couches and beds
- Cover floors with non-slip rugs or foam mats
Start Joint-Friendly Supplements Early (If Vet Approves)
Talk to your vet before starting anything, but early support may help.
- Glucosamine and chondroitin
- Omega-3 fatty acids for joint lubrication
- Vitamin C and manganese-rich diets to support collagen
Each small step adds protection as the puppy grows.
Read more | Medial Patellar Luxation in Small vs. Large Dogs
Puppy Growth and Bone Development: What Matters Most
Puppies grow rapidly in their first year, and how their bones form during this stage can affect joint health for life. Balanced nutrition and proper rest play a huge role in preventing joint stress.
One key factor is calcium and phosphorus balance. Too much calcium can cause uneven bone growth or joint issues. That’s why you should always feed vet-recommended puppy food, not adult food or homemade diets without guidance.
Important tips for healthy bone development:
- Choose a complete and balanced puppy formula based on breed size
- Avoid adding extra calcium or supplements unless approved
- Don’t let your puppy over-exercise during growth spurts
- Provide crate or pen rest periods during the day to avoid fatigue
- Monitor height and weight with regular vet visits
For large or small breeds, each bone growth stage must be supported. Sudden changes in weight or intense exercise can affect the knee structure. Puppy bones are soft and flexible—good habits during this stage create stronger joints for the future.
Read more | Best Exercises and Rehab for Dogs After MPL Surgery
Sample Prevention Plan for Puppy Owners
Building joint-friendly habits into daily life can make a big difference, especially if your puppy is in a high-risk breed. A prevention plan doesn’t need to be complex—it just needs to be consistent.
Vet care routine:
- Full orthopedic exam at each puppy visit
- Ask about kneecap tracking and joint health
- Discuss early signs like skipping or leg favoring
Daily activity:
- Controlled leash walks on grass or carpet
- Avoid rough play with larger dogs
- Play with puzzle toys or soft tug games instead of fetch
Feeding tips:
- Use puppy food with proper calcium-phosphorus ratio
- Keep portions small and frequent
- Monitor body condition weekly (you should feel ribs but not see them)
Home setup:
- Place rugs on tile or wood floors
- Use ramps or steps for furniture
- Block off stairs with baby gates
Starting these practices early supports strong joint development and reduces the chance of painful knee problems later in life.
Read more | Medial Patellar Luxation Treatment Without Surgery
Myths About MPL Prevention You Should Know
Many well-meaning owners believe myths that could delay proper care for MPL. Knowing the facts helps you make better choices for your puppy’s joint health.
Myth 1: “Supplements will prevent MPL.”
Supplements can support joint health, but they don’t prevent misaligned bones or hereditary luxation.
Myth 2: “If there’s no limp, there’s no problem.”
Early MPL signs may be subtle or come and go. Skipping steps or brief lameness may be the first signs.
Myth 3: “Muscle strength alone can fix it.”
Strong muscles help stabilize the joint, but they can’t correct bone structure problems if the kneecap doesn’t track properly.
Myth 4: “All limping is due to injury.”
Puppies with recurring limping or skipping should always be checked by a vet, even if it seems mild.
Avoiding these myths helps you take early action when needed. Prevention isn’t about guessing—it’s about watching closely and supporting healthy growth.
Read more:
Final Thoughts on Preventing MPL in Puppies
You can’t completely prevent Medial Patellar Luxation, but you can lower the risk and reduce long-term joint problems by making smart choices early in your puppy’s life.
Dogs with strong muscles, healthy joints, and good weight control are less likely to develop painful symptoms, even if they carry a genetic risk.
Key takeaways:
- You can’t control genetics, but you can control environment and care
- Early joint support leads to better long-term outcomes
- Regular vet exams help spot MPL early
- Focus on safe play, joint-friendly diets, and avoiding high-impact activity
Prevention is about setting up your puppy for a healthy future. Every small step—from soft flooring to gentle exercise—adds up. With close vet guidance and a bit of planning, your puppy can grow into a strong, active dog with minimal joint issues.
FAQs
Can you stop MPL from developing in puppies?
You can’t fully stop MPL from developing, especially if it’s genetic. However, you can reduce the risk of symptoms by managing your puppy’s weight, providing joint-friendly exercise, and avoiding high-impact activity. Early vet care and a proper home environment also help minimize joint stress during growth.
What breeds are most prone to MPL in puppies?
Small and toy breeds are most commonly affected by MPL. This includes Yorkshire Terriers, Chihuahuas, Pomeranians, Toy Poodles, and French Bulldogs. These breeds often have shallow knee grooves and soft tissue looseness from birth, increasing the chance of the kneecap slipping out of place as they grow.
Do joint supplements work for prevention?
Joint supplements don’t prevent MPL, but they can support healthy cartilage and reduce inflammation. Ingredients like glucosamine, chondroitin, and omega-3s may help protect the joint as the puppy grows. Always ask your vet before starting supplements, especially in very young or small-breed puppies.
Is exercise safe for puppies with suspected MPL?
Yes, but only low-impact, vet-approved exercise is safe. Avoid running, fetch, or jumping. Instead, stick to short, slow leash walks on soft ground. If your puppy shows signs like skipping steps or limping, limit activity and consult your vet before continuing any movement routine.
When should a vet examine patella alignment in puppies?
A vet should check your puppy’s kneecaps during every routine exam, starting as early as 8 weeks. Early detection of loose or misaligned patellae helps guide care. If your puppy is in a high-risk breed or showing unusual movement, ask your vet to assess patellar tracking closely.
Best Exercises and Rehab for Dogs After MPL Surgery
Discover the best rehab and exercises for dogs after MPL surgery—step-by-step recovery timeline, home tips, and safe strengthening routines
Why Rehab Is Important After MPL Surgery
Rehabilitation is a key part of recovery and helps your dog heal safely and fully after MPL surgery.
After surgery, your dog’s muscles may weaken from rest, and the knee joint can become stiff. Rehab exercises help rebuild strength and improve how the leg moves. Without movement, swelling and tightness can slow healing and cause discomfort.
Proper rehab also lowers the risk of future problems, such as the kneecap slipping again or the other knee becoming injured. By keeping the joint strong and balanced, your dog is less likely to need more surgery later.
Key benefits of post-surgical rehab include:
- Helps regain muscle strength and joint mobility
- Reduces stiffness and swelling in the knee
- Prevents re-injury or surgical complications
- Supports a faster, safer return to normal activity
Rehab should start slowly and be guided by your vet or a certified canine physiotherapist to match your dog’s healing stage.
Recovery Timeline After MPL Surgery (By Weeks)
Recovery after MPL surgery usually takes 8–12 weeks or more and follows a step-by-step timeline based on healing progress.
Weeks 1–2 focus on rest and pain control. Your dog should have limited movement during this time. Short sling-supported potty walks and gentle range-of-motion exercises help prevent stiffness.
- Cold therapy to reduce swelling
- Pain medications as prescribed
- Passive range-of-motion (PROM) under vet guidance
- Short sling walks for potty breaks
- Strict rest and crate time when unsupervised
Weeks 3–6 introduce basic strength-building.
- Controlled leash walks (5–10 minutes, 2–3 times a day)
- Sit-to-stand exercises for muscle tone
- Gentle massage to improve circulation
- Hill walking (short and gradual)
Weeks 6–8 add more challenging movements.
- Longer leash walks
- Figure-eight drills for joint control
- Stair walking (only if cleared by your vet)
Weeks 8–12+ focus on returning to normal activities.
- Off-leash movement in controlled areas
- Slow trotting on soft ground
- Hydrotherapy like underwater treadmill or swimming
Every dog heals at a different pace. Always follow your vet’s guidance before moving to the next phase.
Read more | Unilateral vs. Bilateral Medial Patellar Luxation in Dogs
Best Exercises for Dogs After MPL Surgery
After MPL surgery, exercise should be safe, slow, and designed to rebuild strength without stressing the joint. Each movement should match your dog’s healing stage and be guided by your vet or rehab therapist.
Start with simple exercises like sit-to-stand (also called puppy squats) to build back leg muscles. Leash walks should be short and done on flat ground at a steady pace. As your dog progresses, you can add more advanced exercises to improve control and balance.
Effective rehab exercises include:
- Sit-to-stand: Strengthens thigh and hip muscles
- Short, controlled leash walks: 5–10 minutes, 2–3 times daily
- Figure-eight drills: Improves coordination and balance
- Hill or ramp walking: Builds rear-end strength
- Cavaletti poles: Encourages high stepping and joint control
- Stair walking: Only after vet approval, helps joint use
- Wobble board routines: Builds stability and balance
- Weight-shifting: Helps dogs learn to use the surgical leg again
Avoid rushing into too much exercise. If limping increases or your dog seems sore afterward, reduce the activity and contact your vet. Slow and steady movement is best for healing.
Read more | Grade 2 Medial Patellar Luxation: Surgery Decision Guide
Hydrotherapy and Water Exercises
Hydrotherapy is one of the best low-impact ways to help dogs recover after MPL surgery. Water supports the body and reduces joint stress while still allowing muscles to work.
Swimming is a great starting point once your vet approves. It builds strength evenly and improves joint range without the pressure of land exercise. Always supervise and use a dog life vest if needed.
Another excellent option is the underwater treadmill, where your dog walks in water at a slow, steady pace. It provides resistance to strengthen muscles and supports the joint for safer movement.
Water-based rehab includes:
- Swimming: Improves endurance and flexibility
- Underwater treadmill: Controls speed, resistance, and water level
- Warm water sessions: Loosens tight tissues and reduces pain
- Start 3–4 weeks after surgery (with vet clearance)
- Frequency: 1–2 times per week depending on progress
Hydrotherapy should always be done at a certified facility with trained staff. It’s especially helpful for large dogs, overweight pets, or those struggling with land exercises.
Read more | How to Prevent Medial Patellar Luxation in Puppies
Pain and Inflammation Management During Rehab
Keeping pain and swelling under control is critical for a successful recovery. A dog in pain won’t move normally, which slows healing and may cause stiffness or more joint damage.
Veterinarians often prescribe NSAIDs (like Carprofen or Galliprant) to manage post-op inflammation. These medications should always be given as directed and never mixed with human pain relievers.
In the first 1–2 weeks, cold packs help reduce swelling and numb the area. Later, once inflammation goes down, heat therapy can be used to loosen muscles before exercise.
Pain relief and comfort tools include:
- NSAIDs or vet-prescribed meds for daily pain control
- Cold therapy: 10–15 minutes, 2–3 times a day early on
- Heat therapy: After 2 weeks, before stretching or walking
- Massage: Eases soreness and helps circulation
- PROM exercises: Gently move the joint without weight
Never force motion or skip pain meds. If your dog is limping more, stops eating, or acts withdrawn, contact your vet. Comfort is key to keeping rehab on track.
Read more | Medial Patellar Luxation in Small vs. Large Dogs
Home Setup Tips for Safe Recovery
A safe home environment helps prevent injury and supports healing after MPL surgery. Your dog’s space should reduce slipping, prevent jumping, and make walking easy during the recovery period.
Start by using rugs or foam mats on slippery floors to give better traction. Block off stairs and furniture with baby gates or barriers to avoid unwanted movement. When walking, a towel sling under the belly can help support your dog, especially in the first two weeks.
Helpful home tips:
- Place non-slip rugs on all walking areas
- Block stairs or furniture access with gates
- Use a towel or sling during short walks for support
- Lower food portions by 25–33% to prevent weight gain
- Provide a crate or quiet space for rest when unsupervised
If your dog is very active, crate rest might be needed during early recovery to prevent injury. Keep toys and play areas calm and simple. The more you manage the environment, the easier recovery becomes for both you and your dog.
Read more | Medial Patellar Luxation Treatment Without Surgery
Mistakes to Avoid During MPL Recovery
Even with a good plan, recovery can be delayed by a few common mistakes. Avoiding these will help your dog heal faster and reduce the risk of complications.
One of the biggest mistakes is starting rehab too early. While movement is important, doing too much too soon can lead to swelling, pain, or re-injury. Skipping recheck appointments also puts your dog at risk since you may miss signs of poor healing.
Mistakes to avoid include:
- Starting rehab before your vet says it’s safe
- Skipping follow-up vet visits
- Allowing your dog to jump on furniture or run freely
- Letting them use stairs too early
- Ignoring new limping or signs of pain
Each stage of recovery has a specific goal. Trying to rush progress only increases the risk of setbacks. Stay consistent with rehab, monitor your dog’s behavior, and keep communication open with your vet. Slow progress is still progress.
Read more | How to Tell If Your Dog Has a Medially Luxating Patella
When to See the Vet Again
Follow-up visits are a critical part of MPL surgery recovery. Your vet checks how the joint is healing, adjusts your rehab plan, and helps prevent long-term issues.
Most dogs have their first recheck around 6 to 8 weeks after surgery. At this visit, your vet may perform a physical exam and possibly take follow-up X-rays to check bone healing or implant position. If needed, your vet may also adjust pain meds or rehab exercises.
Reasons to schedule follow-ups:
- Routine recheck at 6–8 weeks
- Evaluation of healing progress and joint function
- New signs of limping or swelling
- Concerns about infection, discharge, or fever
- Sudden changes in walking pattern or behavior
Don’t wait until something goes wrong. Even if things seem fine, scheduled check-ins help ensure your dog stays on track. If you notice any setback—big or small—call your vet for guidance.
Read more | Recovery After Medial Patellar Luxation Surgery in Dogs
Adjusting Rehab by Dog Type and Condition
Not all dogs recover the same after MPL surgery. Breed, age, body weight, and any other health conditions all affect how rehab should be planned.
Small dogs often heal faster and can do simple exercises at home. Large dogs may need professional therapy, especially to manage weight and avoid overloading the knee. Senior or overweight dogs usually need more time and support.
Rehab adjustments may include:
- Slower pace for large, heavy breeds
- Shorter sessions for older dogs with less endurance
- Extra care for dogs with previous ACL (CrCL) injuries
- Breeds like Bulldogs may need gentler activities
- Smaller dogs can often do balance work earlier
Your vet or rehab therapist will consider these factors when building a plan. What works for one dog may not work for another, even with the same surgery. Customized care ensures your dog’s recovery is safe and effective.
Sample Daily Rehab Routine (Week 3–6 Example)
A structured daily routine helps build strength without overloading the healing knee. This sample plan works well for many dogs in the week 3 to 6 recovery stage.
Morning Routine:
- 5–10 minutes of PROM (passive range of motion) exercises
- Short leash walk on flat ground (5 minutes)
Midday Routine:
- Gentle massage or cold compress if swelling is present
- Quiet rest in a crate or bed with limited movement
Evening Routine:
- Sit-to-stand exercises (5–10 reps)
- Short incline walk (small hill or ramp)
Always include rest periods between sessions to avoid fatigue. Limit total daily exercise time and adjust based on how your dog feels. If you notice limping after an activity, reduce intensity and ask your vet for guidance.
Tracking your dog’s progress each day can also help you spot improvements or problems early.
Read more | Signs and Symptoms of Medial Patellar Luxation in Dogs
Final Thoughts on Safe Rehab After MPL Surgery
Rehab is just as important as the surgery itself when it comes to helping your dog recover fully. Success depends on consistency, patience, and careful planning.
Stick to the timeline, don’t rush progress, and always monitor your dog’s comfort. Follow-up appointments, rest days, and gradual activity are all part of a complete recovery.
Keep in mind:
- Consistency is key—do a little each day
- Avoid pushing too hard, too fast
- Watch for signs of pain or limping
- Work with your vet or rehab therapist throughout
Every dog heals at a different pace. With the right support and a structured rehab plan, your dog can return to a happy, active life after MPL surgery.
FAQs
When can my dog start walking after MPL surgery?
Most dogs can begin short, controlled leash walks within 7–10 days after surgery, but only with vet approval. These walks are usually just for potty breaks at first. Gradual increase in walking time and difficulty should follow a structured rehab plan to avoid stressing the joint too soon.
How long does rehab take after MPL surgery?
Rehab usually lasts 8 to 12 weeks, depending on your dog’s size, age, and surgical grade. Some dogs need longer, especially large breeds or those with other joint issues. Progress is gradual, moving from rest to full activity in phases. Your vet will guide each stage to ensure safe, steady healing.
Are home exercises safe or should I visit a rehab center?
Home exercises can be very effective when done correctly and under veterinary guidance. Sit-to-stands, leash walks, and massage are helpful at home. However, rehab centers offer tools like underwater treadmills and trained therapists. For large dogs or complex cases, combining both home care and professional rehab works best.
Can dogs climb stairs again after recovery?
Yes, most dogs can use stairs again after full recovery, usually by week 8 to 12, if cleared by the vet. Stair climbing helps rebuild strength, but should be introduced gradually. Always start with supervision, and use gates early in recovery to prevent accidental stair use.
Is swimming safe after MPL surgery?
Yes, swimming is safe and highly recommended after MPL surgery—but only with vet approval. It usually starts around week 4 to 6. Swimming builds strength without stressing joints. Start slow in calm water, always supervised, and avoid slippery entry points. Never force your dog to swim if they’re uncomfortable.
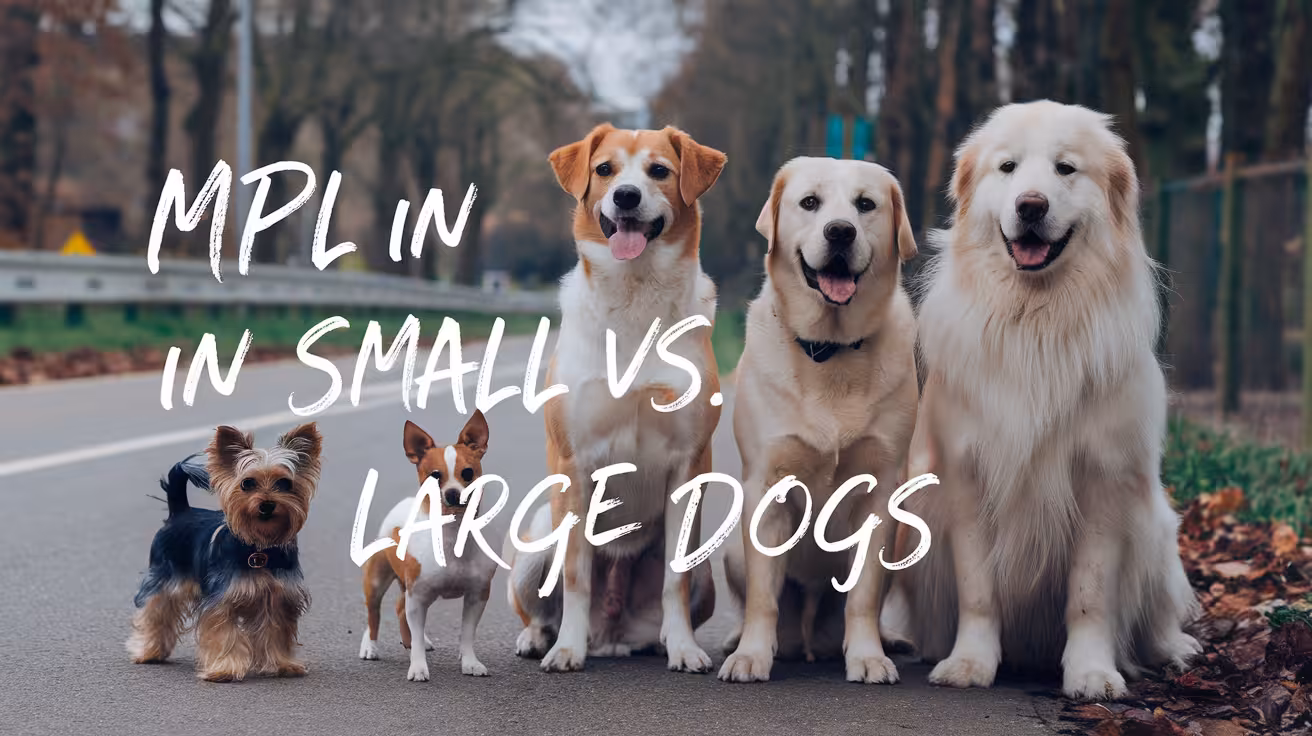
Medial Patellar Luxation in Small vs. Large Dogs
Learn how medial patellar luxation affects small vs. large dogs—compare symptoms, treatment options, surgery needs, recovery, and care tips by size
What Is Medial Patellar Luxation (MPL)?
Medial Patellar Luxation (MPL) is a knee condition where the kneecap (patella) slips out of its normal groove toward the inside of the leg. This makes the joint unstable and can lead to limping, pain, or changes in how your dog walks.
MPL is different from Lateral Patellar Luxation (LPL). In MPL, the kneecap moves inward (toward the other leg). In LPL, it slips outward. MPL is much more common, especially in small dogs.
When the patella doesn’t stay in place, the knee joint becomes weak and unstable. Over time, this can cause joint damage, pain, and arthritis if not treated.
MPL is graded by severity:
- Grade I: Kneecap pops out but goes back easily
- Grade II: Slips out more often, may cause limping
- Grade III: Stays out, but can be moved back by hand
- Grade IV: Always out and can’t be returned without surgery
Understanding the grade helps guide the right treatment for your dog’s needs.
How MPL Differs Between Small and Large Dogs (Quick Comparison)
MPL appears in both small and large dogs, but it behaves differently depending on the dog’s size. Small dogs usually have it from a young age, often due to genetics. In large dogs, MPL may develop later and is sometimes linked to trauma or uneven growth. Understanding these differences helps in planning the right treatment and recovery.
Key differences include:
- Prevalence: MPL is more common in small dogs, while large dogs may have lateral luxation more often.
- Type of Luxation: Small dogs typically have medial luxation; large dogs may develop medial or lateral types.
- Common Breeds: Small breeds include Pomeranians, Chihuahuas, and Poodles. Large breeds include Labradors and German Shepherds.
- Severity and Grading: Small dogs usually have mild to moderate (Grade I–II) MPL. Large dogs often show severe grades (III–IV).
- Age of Onset: Small dogs often show signs before 1 year old. In large dogs, signs may appear later.
- Bone Deformity Likelihood: Small dogs have a higher chance of congenital bone deformities. Large dogs may develop changes over time.
- Surgical Approach: Surgery in large dogs is more complex due to size and joint stress. Small dogs often respond well to simpler procedures.
- Recovery Outlook: Small dogs recover faster and need less rehab. Large dogs may require longer recovery and stricter care.
Read more | Signs and Symptoms of Medial Patellar Luxation in Dogs
Which Breeds Are Most at Risk?
Certain dog breeds are more likely to develop Medial Patellar Luxation (MPL) due to inherited traits and body structure. Genetics play a major role, especially in small dogs, where MPL often shows up early in life. Large breeds can also be affected, though less frequently, and often with more complex presentations.
Small breeds most at risk include:
- Yorkshire Terrier
- Pomeranian
- Chihuahua
- Miniature and Toy Poodle
- Pekingese
These breeds are often born with shallow knee grooves or loose ligaments, making it easier for the kneecap to slip out of place.
Large breeds that may develop MPL include:
- Labrador Retriever
- Flat-Coated Retriever
- Great Pyrenees
- Akita
- Newfoundland
In large breeds, MPL may not appear until later in life and can be linked to trauma, poor joint alignment, or fast growth during puppyhood.
While not every dog in these breeds will get MPL, their genetic makeup increases the risk. Breeders are encouraged to screen for joint issues and avoid breeding dogs with known luxation problems.
If your dog belongs to one of these breeds, keep an eye out for early symptoms like limping or skipping steps, and have your vet assess their knees during routine checkups. Early detection gives your dog the best chance at long-term joint health.
Read more | Recovery After Medial Patellar Luxation Surgery in Dogs
Symptoms in Small vs. Large Dogs
The signs of Medial Patellar Luxation (MPL) can look different depending on your dog’s size. Small dogs often show quick, obvious signs, while large dogs may hide discomfort until it worsens.
In small dogs, the kneecap may pop out and back in during movement. This causes:
- Limping that comes and goes
- A sudden “skipping” step during walks
- Temporary leg lifting followed by normal walking
- Mild pain or licking at the knee
These signs may be brief but happen often, especially after play or getting up from rest.
In large dogs, symptoms can be harder to spot at first. Instead of skipping steps, they may show:
- Slow or stiff movements
- Reluctance to exercise or climb stairs
- Subtle lameness that worsens with activity
- Trouble rising or turning quickly
Some dogs have bilateral MPL, meaning both knees are affected. This can make them walk stiffly or show signs in both legs.
If your dog shows any of these changes, even if mild, it’s important to see your vet. Early diagnosis helps prevent long-term joint damage and allows for better treatment planning tailored to your dog’s size and condition.
Read more | How to Tell If Your Dog Has a Medially Luxating Patella
Diagnosis and Grading in Both Size Groups
Medial Patellar Luxation is diagnosed through a physical exam and imaging. Your vet will check how easily the kneecap moves out of place and assess joint function. This helps decide the severity and treatment.
The grading system is the same for all dogs:
- Grade I: Kneecap moves out easily but pops back in
- Grade II: Slips out on its own and stays briefly
- Grade III: Always out but can be moved back by hand
- Grade IV: Always out and can’t be moved back
X-rays are used to confirm joint structure and rule out other issues like hip dysplasia or trauma. This is especially important in large breeds, where symptoms may overlap with other orthopedic conditions.
Common misdiagnoses in large dogs include arthritis, hip problems, or muscle strain. That’s why a full orthopedic exam is key, not just looking at gait.
Although the grading is the same, large dogs may have more bone involvement or need more detailed imaging. Small dogs often show clearer signs during a basic exam. In all cases, grading helps guide whether surgery or conservative care is the right path.
Treatment Options: Small Dogs vs. Large Dogs
The choice between surgical and non-surgical treatment depends not just on the grade of MPL but also on your dog’s size. Small and large dogs respond differently to conservative care.
Small dogs with Grade I or II often improve with:
- Weight management
- Joint supplements
- Controlled exercise
- Bracing and physiotherapy
These treatments can stabilize the knee and reduce symptoms without surgery. Small dogs benefit from lighter body weight and lower joint stress.
Large dogs, even with Grade II, may require surgery because:
- Their size adds pressure to the joint
- Conservative care may not fully control the luxation
- Mobility problems worsen faster with weight-bearing stress
Challenges by size include:
- Harder to limit large dogs’ movement indoors
- Weight loss is slower in big breeds
- Braces are harder to fit and keep in place
For both groups, combining care—like supplements, therapy, and lifestyle changes—can reduce pain and protect the knee. But large dogs are less likely to succeed with non-surgical treatment alone. Your vet will consider all factors before creating a plan.
Read more | Medial Patellar Luxation Treatment Without Surgery
Surgery: What’s Different by Dog Size?
Surgical treatment for MPL is common and effective, but the approach depends heavily on your dog’s size and the grade of luxation.
Small dogs usually need simpler procedures such as:
- Trochlear sulcoplasty (deepening the groove for the kneecap)
- Soft tissue release or tightening
- Tibial tuberosity transposition (in more advanced cases)
These surgeries are effective in most small breeds and carry a low risk of complications when done early.
Large dogs often require more advanced techniques like:
- Corrective osteotomies (cutting and realigning the bone)
- Use of surgical implants for joint support
- More extensive soft tissue reconstruction
Key differences in large breeds:
- Higher force on the joint requires stronger repairs
- Increased anesthesia risk due to body weight
- Longer surgical time and more complex aftercare
Post-op care also varies. Small dogs may return to light activity in 4–6 weeks. Large dogs may need 8–12 weeks of structured rehab and close monitoring.
Surgical success is high in both groups, but choosing the right procedure for your dog’s size is critical for long-term joint health and mobility.
Read more | Best Exercises and Rehab for Dogs After MPL Surgery
Recovery and Prognosis: What to Expect
Recovery from MPL surgery or conservative care varies by dog size, but most dogs show excellent outcomes with proper treatment.
Small dogs often bounce back faster due to their lighter weight and easier mobility control. With routine care and basic rehab, many are back to normal within 4–6 weeks. Risks like implant failure or complications are rare if surgery is done early.
Large dogs may need:
- More time to heal
- Ongoing physical therapy
- Strict activity limits for 8–12 weeks
- Closer monitoring for complications like joint swelling or stiffness
Success rates for both groups are high—over 90% in most cases. However, complications are more common in large dogs due to size, strength, and stress on healing tissues.
Long-term, most dogs regain normal function and show no signs of lameness. Some may need continued supplements or periodic vet checkups to keep joints healthy.
Whether surgical or non-surgical, the key to a good recovery is sticking to the plan, avoiding overuse, and adjusting care based on your dog’s response. Vet-guided follow-ups improve long-term outcomes significantly.
Cost Differences in Treatment
Cost is another important factor when deciding how to treat MPL, and it varies greatly between small and large dogs.
Surgical costs for small dogs are typically lower due to:
- Smaller bone and joint size
- Simpler procedures
- Less anesthesia and material use
Most small dog MPL surgeries cost $1,500–$2,500 depending on location and hospital fees.
Large dog surgeries are more expensive due to:
- Longer surgical time
- Larger implants or plates
- Increased anesthesia needs
- More rehab or post-op care
For large breeds, costs may range from $3,000–$5,000+, especially if bone realignment or custom plates are needed.
Non-surgical costs include:
- Joint supplements ($30–$80/month)
- Rehab or hydrotherapy sessions ($50–$100/session)
- Braces ($100–$400 depending on size)
Budgeting ahead is essential. Ask your vet for a full breakdown of possible costs for both surgical and non-surgical options. Some clinics offer payment plans or referrals to orthopedic specialists with package pricing.
Choosing the right treatment should balance cost, outcome, and your dog’s long-term comfort.
Read more | How to Prevent Medial Patellar Luxation in Puppies
Managing MPL at Home: Tips by Dog Size
Managing MPL at home requires adapting your environment and care routine to suit your dog’s size. Small and large dogs need different setups for safety and support.
For small dogs:
- Use pet stairs or carry them to avoid jumping
- Place soft mats or rugs in walkways to prevent slipping
- Choose braces designed for toy or small breeds
- Encourage short leash walks to build strength
For large dogs:
- Use ramps for cars or beds
- Block access to stairs with baby gates
- Add non-slip flooring in main rooms
- Use heavy-duty braces made for large breeds
- Focus on structured, slow-paced exercises
For all dogs:
- Keep weight under control with portioned meals
- Stick to your vet’s rehab or supplement plan
- Avoid off-leash running or rough play
Customizing care by size helps reduce joint stress and supports long-term joint health. Your vet or canine therapist can give breed-specific advice to improve comfort and prevent flare-ups.
Read more | Grade 2 Medial Patellar Luxation: Surgery Decision Guide
Final Thoughts: Does Dog Size Change the MPL Plan?
Yes—dog size has a big impact on how MPL is managed. From diagnosis to treatment and recovery, small and large dogs face different challenges and require tailored plans.
Small dogs often respond well to conservative care or simple surgery. They recover quickly, and the procedures are usually less costly. Large dogs may need more complex treatment, longer rehab, and closer monitoring due to their size and weight.
Major points to remember:
- MPL is more common in small breeds
- Symptoms may be subtle in large dogs
- Treatment should match the dog’s grade and size
- Surgery is often more urgent in large breeds
- Recovery time and cost are higher in larger dogs
Early diagnosis, consistent care, and working closely with your vet give your dog the best chance for a pain-free, active life. Whether small or large, your dog can recover well with the right plan.
FAQs
Is MPL more serious in large dogs than small dogs?
Yes, MPL tends to be more serious in large dogs. Their size puts more pressure on the knee joint, which can lead to faster joint damage and a higher need for surgery. Larger dogs also face more complex surgeries and longer recovery times compared to smaller breeds with the same grade of luxation.
Can large dogs recover without surgery?
Some large dogs with mild MPL may improve with non-surgical care, but this is less common. Their heavier weight makes it harder to manage joint stress with therapy alone. Surgery is often recommended for long-term stability and comfort, especially for Grade II or higher cases in large-breed dogs.
Are certain breeds more prone to complications?
Yes, large breeds like Labrador Retrievers or Great Pyrenees are more prone to surgical complications due to their size and joint stress. Small dogs generally recover faster and with fewer issues. Dogs with severe grades or other orthopedic problems may also have higher risks during and after treatment.
Is lateral luxation more common in big dogs?
Yes, lateral patellar luxation (LPL), where the kneecap moves outward, is more common in large dogs. While MPL is still seen in big breeds, LPL tends to occur more frequently due to different bone angles and joint stresses found in larger body structures.
What is the recovery time for small vs. large dogs after surgery?
Small dogs typically recover in 4–6 weeks with light care. Large dogs may need 8–12 weeks or longer, along with structured rehab and activity limits. Recovery depends on surgery type, joint condition, and post-op care, but large dogs often take more time due to body weight and joint pressure.
Medial Patellar Luxation Treatment Without Surgery
Explore safe, effective ways to treat medial patellar luxation in dogs without surgery—home care, rehab, supplements, braces, and more
Can You Treat Medial Patellar Luxation Without Surgery?
Some dogs with MPL can be treated without surgery, but it depends on how serious the condition is.
Medial Patellar Luxation (MPL) means the kneecap (patella) slides out of its normal place inside the groove of the thigh bone. This makes the leg feel unstable and can cause pain or limping.
MPL is divided into four grades:
- Grade I: The kneecap moves out sometimes but goes back easily. Usually no pain.
- Grade II: The kneecap pops out more often and may cause mild limping.
- Grade III: The kneecap stays out most of the time but can be moved back with the hand.
- Grade IV: The kneecap is always out and can’t be moved back in.
Dogs with Grade I and some Grade II luxations can often be treated without surgery using physical therapy, weight control, and joint supplements. These help build muscle and reduce pressure on the knee.
However, Grade III and IV usually need surgery. Without it, the joint may become more damaged, and the dog may have long-term pain or difficulty walking.
Always work with your vet to decide what’s best for your dog’s specific case.
Signs Your Dog Might Benefit From Non-Surgical Treatment
Not all dogs with a loose kneecap need surgery. Some signs show your dog may do well with conservative care instead.
Dogs with mild Medial Patellar Luxation often have symptoms that come and go. One common sign is an occasional limp or a brief “skipping” step during walks. This happens when the kneecap pops out and then goes back in place. These dogs usually return to normal quickly after a few steps.
You may also hear a soft popping sound or notice the knee shift when your dog moves. If your dog rests and the signs improve, that’s another clue that non-surgical care might help.
Some symptoms that respond to:
- Rest or limited activity
- Joint supplements like glucosamine
- Gentle physical therapy
- Maintaining a healthy weight
But if the limping gets more frequent, or if your dog avoids putting weight on the leg, the condition could be getting worse. In that case, see a vet right away. Early help gives the best chance to avoid long-term joint problems.
Read more | Signs and Symptoms of Medial Patellar Luxation in Dogs
Vet Diagnosis Is Still a Must (Even for Non-Surgical Plans)
Even if your dog has mild symptoms, a vet should always confirm the diagnosis before you start treatment.
Vets use a hands-on exam to check how easily the kneecap moves out of place and which grade the MPL is. Grades I and II might not need surgery, but you need to know the grade first.
Your vet may also take X-rays to check for other problems in the knee or hip. Sometimes a dog has both MPL and hip issues, which changes the treatment plan. Without this full checkup, you might miss other problems.
Skipping the vet visit can lead to:
- Wrong treatment choices
- Delays in healing
- Worsening joint damage
- Unnecessary pain for your dog
Even if you plan to use rest, supplements, or therapy, it’s important to be sure you’re treating the right thing. A proper diagnosis helps you avoid wasting time and keeps your dog safe and comfortable. Always make the first step a vet exam.
Read more | Recovery After Medial Patellar Luxation Surgery in Dogs
Best Non-Surgical Treatments for MPL in Dogs
If your dog has a mild or moderate case of MPL, these non-surgical treatments can help manage symptoms and slow progression.
1. Weight Management to Reduce Knee Stress
Even a few extra pounds can put added pressure on your dog’s knees, especially with an unstable kneecap. Keeping your dog at a healthy weight is one of the most important steps in managing MPL.
Extra weight increases the strain on the joint and can make the patella slip out more often. Weight loss reduces inflammation and improves your dog’s ability to move comfortably.
To manage weight:
- Feed based on your vet’s calorie recommendation
- Use a body condition score chart to check for ideal shape
- Avoid table scraps and high-calorie treats
Ask your vet about the target weight for your dog’s breed and size. Track it every 2–4 weeks to stay on course. A lighter frame means less knee strain and fewer symptoms.
2. Joint Supplements for Lubrication and Repair
Joint supplements help cushion and support your dog’s knee over time. They don’t fix the luxation but can reduce pain and inflammation.
Look for products that contain:
- Glucosamine and chondroitin to support cartilage
- MSM for anti-inflammatory support
- Omega-3 fatty acids for joint lubrication
These ingredients work slowly, so it may take 4–8 weeks to see visible improvement. You might notice your dog limping less or moving more easily.
Always choose veterinary-grade supplements and follow the correct dosage for your dog’s weight. Giving more than recommended won’t help faster and can upset the stomach. If you’re unsure, ask your vet to guide you toward trusted brands.
Supplements are most effective when paired with weight control and light exercise.
Read more | How to Tell If Your Dog Has a Medially Luxating Patella
3. Controlled Exercise to Build Stability
Exercise is helpful, but it must be controlled to avoid stress on the joint. The goal is to strengthen muscles around the knee without making the luxation worse.
Focus on:
- Short, slow leash walks
- Avoiding fast turns or running
- Flat, even surfaces only
Avoid activities like:
- Stairs
- Rough play or fetch
- Jumping on furniture
Even five to ten minutes of calm walking twice a day can help. Over time, it builds leg strength and supports the kneecap’s position. Always monitor your dog after exercise for signs of soreness or increased limping. If symptoms get worse, reduce the activity and speak to your vet.
4. Strengthening Exercises You Can Try at Home
Home exercises help build muscle around the knee, improving joint stability. These are gentle and easy to do with dogs that have mild MPL.
Try these options:
- Sit-to-stand: Ask your dog to sit and then stand 5–10 times slowly
- Cavaletti poles: Use broomsticks laid low to encourage step-over motion
- Ramp or hill walking: Use a slight incline to build thigh strength
- Army crawls: Gently encourage your dog to crawl short distances (only if no pain)
Do these exercises on soft ground or carpet. Keep sessions short—5 to 10 minutes daily—and always watch your dog’s reaction. If your dog seems tired, sore, or limping more, stop the activity and check with your vet. Never force any motion.
5. Physiotherapy and Professional Rehab
Working with a certified canine rehab vet can make a big difference. Physiotherapy targets specific muscles and movements that support the knee joint.
Your rehab vet might recommend:
- Range-of-motion stretches to keep the joint flexible
- Balance exercises using wobble boards or cushions
- Laser or cold therapy to reduce pain
Sessions are usually once or twice a week at first, depending on your dog’s condition. At-home plans may be included for daily practice.
The goal is to improve strength, reduce discomfort, and keep the luxation from worsening. Ask your vet to refer you to a certified canine rehab therapist in your area.
Read more | Best Exercises and Rehab for Dogs After MPL Surgery
6. Hydrotherapy for Low-Impact Strength Building
Hydrotherapy is one of the best ways to build strength without stressing the knee. It uses water to support your dog’s body while still allowing muscle movement.
Two main methods are:
- Underwater treadmill: Your dog walks on a belt inside a water tank
- Swimming in a rehab pool: Guided by a therapist, if safe for your dog
Water reduces joint pressure by supporting weight and allowing a fuller range of motion. At the same time, resistance helps improve strength.
Hydrotherapy is ideal for dogs that can’t tolerate land exercises or have arthritis along with MPL. Most dogs enjoy the sessions and improve steadily over a few weeks. Your vet or rehab therapist will tell you how often to go—usually once or twice per week at first.
7. Pain Relief with Vet-Approved Medications
Even with mild MPL, some dogs have joint pain. Medications help manage this discomfort so your dog can stay active and heal better.
Common vet-approved options include:
- NSAIDs like Galliprant, Carprofen, or Meloxicam
- Gabapentin for nerve-related pain
- Joint-protecting injections (like Adequan)
These meds must always be prescribed by your vet, and the dose must match your dog’s weight and health condition. Never give human painkillers—many are toxic to dogs.
Pain control makes it easier for your dog to walk, rest, and take part in therapy. It also prevents muscle loss due to reduced activity.
Always watch for side effects like stomach upset or changes in appetite and report them to your vet.
Read more | Medial Patellar Luxation in Small vs. Large Dogs
8. Physical Therapy Extras That Help
Besides basic rehab, some alternative therapies can help reduce pain and improve movement. They’re not required but can support the main treatment plan.
Helpful options include:
- Massage therapy to relax tight muscles and improve circulation
- Chiropractic care, but only by trained, certified animal chiropractors
- Acupuncture or cold laser therapy for joint pain and inflammation
These options should always be done by professionals trained in canine care. They can be used alone or along with other treatments like hydrotherapy or medication.
Some dogs respond well to one method, while others need a mix. Discuss with your vet or rehab team to find what fits your dog best.
9. Using Dog Knee Braces for Extra Support
Knee braces can help dogs with Grade I or II MPL by giving extra support during movement. They don't fix the kneecap but can stop it from slipping as often.
You might consider a brace if:
- Your dog limps during walks
- You want to avoid surgery
- You’re starting physical therapy
Look for braces that offer side support and adjustable straps. Brands like Walkin’ Pets and Ortocanis make popular models. Always measure your dog’s leg carefully for a good fit.
Some dogs take time to adjust to wearing a brace. Start with short sessions indoors. Reward calm behavior and watch for rubbing or skin problems.
Use braces during walks or active periods, not all day. Ask your vet or therapist to show you how to put it on safely and check for signs of irritation.
Home Modifications That Support Recovery
Making small changes in your home can help your dog heal more comfortably and safely from MPL without surgery.
Dogs with unstable kneecaps need secure footing. Slippery floors like tile or wood can cause the knee to slide out of place. To fix this, place non-slip rugs or yoga mats in areas where your dog walks often, especially around food bowls and beds.
You should also use pet stairs or ramps to help your dog get on furniture or in and out of the car. Jumping up or down puts pressure on the knee and can worsen the condition.
Helpful home changes include:
- Block off stairs or high beds
- Avoid letting your dog jump on sofas or beds
- Use baby gates to limit movement during recovery
- Keep your dog’s essentials on one floor
These simple changes reduce strain on the joint and make your dog feel more secure. They also support the effects of weight control and therapy. Always watch how your dog moves through the house and adjust the environment as needed to prevent slips or overuse.
Read more | How to Prevent Medial Patellar Luxation in Puppies
What a Weekly Routine Might Look Like
Creating a weekly routine helps manage MPL without surgery by balancing exercise, rest, and joint support. A structured plan keeps your dog active without overloading the knee.
Here’s what a sample day might look like:
- Morning: Short 5-minute leash walk, joint supplement with breakfast
- Midday: Sit-to-stand exercise or gentle hill walking
- Evening: Massage or range-of-motion stretches, then rest
You can adjust based on your dog’s energy level and vet recommendations. For example, if using hydrotherapy or rehab, schedule it 1–2 times per week. Keep the rest of the week low-impact to avoid fatigue.
Track progress with:
- A journal of limp-free days
- Changes in mood or energy
- Photos or videos of movement
Avoid doing the same routine every single day. Dogs also need rest days with minimal activity to allow muscle recovery. Balance is key.
Your vet or canine rehab therapist can help tailor the plan further. Sticking to a schedule makes it easier to spot progress or setbacks quickly.
What to Avoid When Managing MPL Without Surgery
While there are many ways to help your dog without surgery, some mistakes can slow recovery or even make things worse.
One common issue is skipping rest days. Muscles need time to recover, especially after exercise or therapy. Too much activity without breaks can lead to swelling or pain.
Also avoid:
- Overexercising too soon – Build strength slowly to avoid injury
- Letting your dog run, jump, or climb stairs without guidance
- Using only joint supplements without a complete care plan
- Delaying vet checkups when symptoms change
Some dogs act fine even when their knee is unstable. But ignoring small changes—like more frequent limping or reduced play—can lead to worse problems later.
You don’t need to overprotect your dog, but structure and balance matter. Always adjust based on how your dog responds, and check with your vet if anything seems off.
Small daily mistakes can undo weeks of good care, so stay consistent and alert.
Read more | Grade 2 Medial Patellar Luxation: Surgery Decision Guide
How Long Does Recovery Take Without Surgery?
Recovery from MPL without surgery takes time and patience. The timeline depends on the severity of the condition, your dog’s age, and how closely you follow the care plan.
For dogs with Grade I or mild Grade II, visible improvement can start in 4 to 6 weeks. Full recovery, where symptoms are rare or gone, may take 8 to 12 weeks or longer. Some dogs need ongoing support through supplements and light exercise for life.
Signs that your dog is improving include:
- Less frequent limping or skipping steps
- Better muscle tone in the hind legs
- Increased comfort during walks
However, if the condition worsens—more frequent knee popping, longer limping episodes, or pain while resting—it’s time to re-evaluate. A follow-up vet visit can help adjust the plan or decide if surgery is now the better option.
MPL often stays manageable with consistent care, but don’t expect overnight results. Keep a record of changes to help your vet guide next steps. Recovery is a journey, and small improvements matter.
When to Reconsider Surgery
Even with the best home care, some dogs may not improve enough and will need surgery. Knowing when to shift gears can protect your dog’s comfort and long-term joint health.
You should talk to your vet about surgery if:
- Limping continues for more than 8–12 weeks
- Your dog has a Grade III or IV MPL that’s not responding
- Your dog avoids using the leg, even with treatment
Other signs to watch for include worsening pain, trouble rising, or changes in behavior like less interest in walks. These may mean that conservative treatments are no longer enough.
Quality of life is the key factor. If your dog can’t enjoy normal daily activities without pain, surgery becomes the better path.
While we all want to avoid invasive procedures, surgery often gives long-term stability and comfort for higher-grade cases. Your vet will help you weigh the risks and benefits.
It’s okay to start with non-surgical care, but be open to changing the plan if your dog isn’t getting better.
Read more | Unilateral vs. Bilateral Medial Patellar Luxation in Dogs
Final Thoughts on Avoiding Surgery for MPL
Treating Medial Patellar Luxation without surgery is possible—especially in mild cases—and often helps dogs live more comfortably when done with care.
Key strategies for success include:
- Weight control
- Joint supplements
- Structured exercise and home safety changes
- Regular vet visits and tracking symptoms
The most important part is consistency. Daily effort with even small changes builds up over time. Dogs with mild MPL can stay pain-free for years if managed properly.
However, always stay in touch with your vet. They’ll guide you when to push forward and when it’s time to consider other options like surgery.
You know your dog best, and with a clear plan, steady care, and expert guidance, many dogs can avoid surgery and still enjoy a happy, active life.
FAQs
Is it safe to avoid surgery for patellar luxation?
Yes, it’s safe in mild cases (Grade I or some Grade II) if managed correctly. Weight control, joint support, and regular vet checkups can help reduce symptoms. But if your dog’s limping worsens or pain increases, surgery may become necessary. Always follow your vet’s advice to ensure the safest outcome for your dog.
How do I know if my dog’s MPL is getting worse?
Watch for more frequent limping, longer recovery after walks, or signs of pain while resting. If your dog avoids using the leg, hesitates to climb stairs, or shows stiffness after rest, these may be signs the MPL is progressing. A worsening condition needs a vet recheck to adjust the treatment plan or consider surgery.
What supplements are best for dogs with MPL?
Good joint supplements often include glucosamine, chondroitin, MSM, and omega-3 fatty acids. These support cartilage, reduce inflammation, and improve joint function over time. Choose veterinary-grade brands and use the correct dose based on your dog’s weight. Talk to your vet before starting supplements to make sure they’re right for your dog’s condition.
Can braces fix luxating patella permanently?
No, braces don’t permanently fix the condition. They provide temporary support by helping the kneecap stay in place during movement. Braces work best in mild cases or while doing rehab. They may reduce symptoms but don’t correct bone or joint shape. For permanent correction, surgery is needed in moderate to severe cases.
How long should I try non-surgical treatment before seeing results?
Most dogs show improvement in 4 to 6 weeks with consistent care. This includes exercise, joint support, and weight control. Full benefits may take 8 to 12 weeks. If there’s no progress or symptoms worsen during that time, see your vet. They’ll help decide if surgery or a new plan is needed.
Signs of Complications After Any Soft Tissue Surgery
Learn how to care for your dog after soft tissue surgery with simple tips on feeding, wound care, activity limits, and signs to watch during recovery
What’s Normal and What’s Not After Soft Tissue Surgery
After soft tissue surgery, it’s normal for your dog to act a bit tired and quiet. You might see mild bruising or swelling near the incision site. This is a normal part of healing and should improve over a few days. Your dog may eat less and sleep more during the first 24 to 48 hours.
Some redness and scabbing around the stitches can also be expected. The area should stay clean and dry, and the swelling should not get worse. If your dog is calm, walking slowly, and showing interest in food or water by the second day, that’s a good sign.
- Normal signs: Mild swelling, scabbing, slight redness, low energy, reduced appetite
- Watch closely: Any changes that worsen or don’t improve after two days
Knowing what’s normal helps you catch complications early.
Red Flags to Watch for at the Incision Site
Even small changes at the incision site can signal serious problems—knowing what to look for makes a difference.
Signs of Infection or Poor Healing
An incision should improve a little every day. If it starts to look worse instead of better, that’s a red flag. Infection often begins with redness that spreads or becomes brighter. Swelling that feels hot or painful can also be a sign. If you notice thick discharge—especially yellow, green, or foul-smelling—call your vet right away. Other warning signs include a bad odor from the bandage, dark or blackened skin near the wound, or excess bleeding or pus.
Poor healing may happen if your dog is licking, scratching, or too active. Keep the incision dry, clean, and protected. Take photos daily to track progress and catch early changes.
- Redness that worsens or spreads
- Swelling that feels warm, painful, or keeps growing
- Yellow, green, or smelly discharge
- Pus, blood, or moisture leaking from the wound
- Skin turning dark, cold, or dry around the incision
- Bad smell coming from the bandage
These signs usually mean the wound needs medical attention right away.
When the Incision Opens Up
A healing incision should stay closed and dry. If the wound splits or opens, this is called dehiscence—and it needs urgent vet care. You might see the skin gaping, with tissue, fat, or fluid bulging through. This often happens when a dog licks, chews, or moves too much. Some wounds may look wet or shiny before opening fully.
Loose or missing stitches, especially those that seem chewed out, should never be ignored. The skin might look pulled apart, with less redness around the edges due to tension. If the incision opens, keep your dog calm and prevent more movement until you can reach the vet.
- Stitches that come loose or fall out early
- Skin that looks pulled open or stretched
- Bulging fat or soft tissue under the skin
- Wet, shiny, or sticky surface over the incision
- Gaping wound with pink or yellow tissue showing
If the wound opens, cover it gently with a clean cloth and contact your vet right away. Avoid pressure, creams, or cleaning until you get professional advice.
Unusual Behavior and Physical Signs of Complications
Behavioral changes often appear before visible symptoms—watch your dog closely during recovery.
Whining, Pacing, or Hiding
If your dog begins to act differently after surgery, pay close attention. Whining, pacing, or hiding can be early signs of pain, stress, or infection. Some dogs may act restless and can’t seem to get comfortable. Others might isolate themselves or avoid touch. While a little discomfort is normal, a sudden change in behavior usually signals that something isn’t right.
You may also notice panting without heat or exercise, looking anxious, or constantly shifting positions. These behaviors often mean your dog is uncomfortable and may need pain relief or a wound check.
- Whining or crying without reason
- Pacing around or unable to settle
- Hiding under beds or in closets
- Avoiding people or eye contact
- Trouble sleeping or lying still
These behavior shifts should not be ignored. If your dog shows new or worsening signs after the first two days, call your vet. Pain or discomfort left untreated can delay healing or lead to other complications.
Systemic or Internal Complications
Not all complications are visible—some affect your dog’s entire body and require fast action.
Internal Bleeding or Shock
Internal bleeding is rare but serious. It can happen if a blood vessel wasn’t sealed properly or if your dog became too active too soon. One of the first signs is pale gums or tongue—normal gums should be pink. Your dog may also appear very weak, unsteady, or collapse suddenly. Cold limbs, shaking, or low body temperature are also red flags.
These signs may appear suddenly or come on slowly over several hours. If you notice more than one of them, get emergency help right away. Internal bleeding can quickly become life-threatening if not treated.
- Pale or white gums or tongue
- Sudden weakness or collapse
- Shaking or trembling for no reason
- Cold paws, ears, or limbs
- Fast breathing or rapid heart rate
If you suspect internal bleeding, do not wait. Carry your dog gently and call your vet or the nearest emergency clinic immediately.
Infection or Fever
A fever is your dog’s way of fighting off infection—but it’s also a sign something may be wrong. After surgery, your dog should slowly gain energy. If they seem more tired after the second day or feel hot to the touch, this may signal an internal infection.
Fever can come with body aches, decreased appetite, or changes in breathing. Touch your dog’s ears, paws, or armpits—if they feel much warmer than usual, it’s a warning sign. In some cases, dogs may limp or show pain even if the surgical site looks okay.
- Body feels hot, especially ears and paws
- Lethargy that worsens instead of improving
- Refusal to eat or drink
- Shivering or acting cold in a warm room
- Limping or guarding part of the body
Don’t give fever-reducing medicine meant for humans. Call your vet if you notice these signs—they’ll check for infection and may prescribe antibiotics or further testing.
Digestive or Urinary Issues
After surgery, your dog’s bathroom habits might change slightly—but major changes can signal deeper problems. If your dog hasn’t urinated for more than 24 hours, that’s a concern. Straining to pee, leaking urine, or crying while urinating are also red flags.
Digestive issues like constipation, diarrhea, or belly swelling could mean the medications are affecting your dog’s system—or worse, that an internal issue is developing. A swollen belly could also mean fluid buildup or gas that needs immediate care.
- No urination in 24 hours
- Straining, crying, or leaking while urinating
- Constipation lasting over 48 hours
- Pain when pooping or signs of bloating
- Hard, swollen belly or visible discomfort
Keep a close eye on bathroom patterns and tell your vet about any problems. The earlier you catch internal issues, the easier they are to treat.
Rare but Serious Signs to Know
Some complications are uncommon—but when they happen, they need urgent care.
Seromas and Fluid Pockets
A seroma is a soft, fluid-filled swelling near the incision. It often looks like a small balloon under the skin. These usually form when fluid collects in the empty space created during surgery, especially if your dog moved too much early on. Seromas aren’t usually painful, but they can grow if not monitored.
In most cases, your vet may just observe it and let the fluid absorb on its own. But if it becomes red, warm, or starts leaking, it may need to be drained. Never try to pop or press on a seroma at home.
- Soft swelling near the incision site
- Usually not warm or painful at first
- May jiggle when touched
- Can appear several days after surgery
- Needs vet attention if it grows, leaks, or changes color
If you suspect a seroma, keep your dog calm and call your vet. It may not be an emergency—but it does need professional review.
Crepitus or Skin Necrosis
Crepitus is a crackling or popping sound under the skin. It happens when gas builds up in the tissues, sometimes from bacteria. It’s rare, but dangerous. If you feel this when touching near the wound, it must be reported to your vet immediately.
Skin necrosis is when tissue starts dying. It can happen if the blood flow to the area is reduced—often due to infection, pressure, or tight stitches. The skin may turn gray, cold, flaky, or begin peeling. This condition is serious and may require wound cleaning, new sutures, or even surgery.
- Crackling under the skin (crepitus)
- Skin turns gray, purple, or cold
- Dry, flaky, or peeling wound edges
- Loss of skin around the incision
- Strong odor or deep darkening of tissue
These signs mean urgent tissue damage is happening. Call your vet or go to the nearest emergency center right away—this is not something that can wait.
When to Call Your Vet Immediately
Some symptoms can’t wait; quick action could save your dog’s life or prevent major complications.
During recovery, there are certain signs that require immediate veterinary help. Bleeding from the incision, especially if it soaks through a bandage, is always urgent. Pus or fluid leaking from the wound can signal a serious infection. Gums that look pale, blue, or gray may indicate internal bleeding or lack of oxygen, both are emergencies.
Other signs like collapse, refusal to move, or extreme pain should never be ignored. Vomiting, diarrhea, or a high fever that doesn't improve within 12–24 hours may point to infection or a reaction to medication. Finally, if your dog hasn't urinated or had any interest in water for more than 24 hours, it’s time to call the vet.
- Bleeding or pus from the incision
- Gums that appear pale, gray, or blue
- Sudden collapse or extreme stiffness
- Refusing to move, eat, or drink
- Vomiting, diarrhea, or fever not improving
- No urination in 24+ hours
These signs mean something serious may be happening. Don’t wait—get help from your vet or an emergency clinic right away.
Final Thoughts
Some swelling or bruising is normal—but trust your gut when something feels wrong.
Recovering from soft tissue surgery takes time, patience, and close observation. While many signs like mild bruising, sleepiness, or low appetite are normal in the first day or two, it’s important to watch for changes that go beyond typical healing. Trust what you see and feel—if your dog’s condition seems off or getting worse, you’re probably right to be concerned.
Taking clear photos of the incision site every day can help you compare healing progress and spot problems early. If you’re unsure whether something is normal, it’s always better to call your vet. Most complications can be managed well when caught early.
- Mild swelling, scabbing, or bruising is usually normal
- Keep a consistent routine and check the wound daily
- Use photos to track healing and catch red flags
- Watch behavior closely, changes often appear before visible signs
- Never wait if something feels wrong; call your vet
Your care plays a big role in how well your dog heals. With attention and quick action, most dogs recover smoothly.
FAQs
How do I know if my dog’s incision is healing properly?
A healing incision should look dry, closed, and slightly pink. Mild bruising or swelling is normal in the first few days. It should not be redder, smell bad, or leak fluid. If you're unsure, take daily photos to track progress and call your vet if anything looks worse.
What are warning signs of infection after soft tissue surgery?
Infection signs include redness that spreads, hot or swollen areas, yellow or green discharge, foul odor, or increased pain. Your dog may also act more tired or refuse food. Any of these signs should be reported to your vet immediately.
Is it okay if my dog is not eating after surgery?
It's normal for dogs to have low appetite for 24–48 hours. Offer bland food and fresh water. If your dog refuses to eat or drink beyond that time, or shows vomiting or diarrhea, call your vet.
How can I tell if my dog is in pain during recovery?
Signs of pain include whining, panting, shaking, pacing, or not wanting to move. Some dogs hide or become aggressive when they hurt. If you see any of these behaviors, speak to your vet about pain relief options.
What does it mean if the incision opens?
If the incision splits or gapes, this is called dehiscence. You might see loose stitches, bulging tissue, or shiny wet areas. Cover it gently and call your vet right away. Do not clean or apply anything to the wound without guidance.
When should I go to the emergency vet after soft tissue surgery?
Go immediately if your dog collapses, has pale gums, strong bleeding, a foul-smelling wound, or can’t walk or pee. Sudden changes in behavior, vomiting that won’t stop, or signs of shock also need emergency care.
Soft tissue Surgery Care for Dogs: Feeding, Wounds & Rest
Learn how to care for your dog after soft tissue surgery with simple tips on feeding, wound care, activity limits, and signs to watch during recovery
Why Post-Op Care Matters for Soft Tissue Recovery
Proper care after soft tissue surgery is key to your dog’s full recovery. These procedures may involve the skin, muscles, or internal organs. After surgery, your dog’s body needs time and support to heal. If the wound is not protected or the care routine is missed, it can lead to serious problems like infection, swelling, or pain. That’s why post-op care is just as important as the surgery itself.
Good aftercare lowers your dog’s discomfort and helps the wound heal faster. It also keeps stress low—for both your dog and you. When you follow the vet’s care plan, your dog stays safe, calm, and on track to heal well.
- Speeds up healing by protecting the wound
- Prevents infections and other problems
- Keeps your dog’s pain levels under control
- Reduces the risk of costly complications
- Gives peace of mind to both pet and owner
Feeding Your Dog After Soft Tissue Surgery
Help your dog regain strength and stay comfortable by managing food and water carefully.
First Meal After Surgery
Your dog may feel groggy or slightly nauseous after surgery due to anesthesia. That’s why the first meal should be light and easy to digest. A bland diet like boiled chicken and white rice is ideal. Wait 3 to 4 hours after getting home before offering food. This gives your dog’s stomach time to settle.
Start with half the usual portion to avoid upset stomach or vomiting. Don’t be alarmed if your dog isn’t very hungry right away. Appetite usually returns slowly. Make sure the food is plain—no salt, oils, or seasonings.
- Offer the first meal 3–4 hours after returning home
- Choose bland, vet-recommended options (e.g., boiled chicken and rice)
- Give half the normal portion to prevent nausea
- Remove uneaten food after 20 minutes
- Stay calm and don’t force-feed
If your dog eats well, you can continue with small meals through the day. Always check with your vet before introducing any treats or supplements too soon.
Gradually Return to Regular Food
Most dogs can return to their normal diet within 24 to 48 hours after surgery, but only if there are no signs of vomiting or discomfort. Once your dog finishes bland meals without issues, you can slowly reintroduce their usual food. Mix a small portion of regular kibble with the bland food at first. Increase the amount over 1–2 days.
If your vet has prescribed a special recovery diet, follow that plan strictly. Don’t give new foods or treats during this time, as they might upset your dog’s stomach. Watch for signs like loose stool or reduced appetite.
- Begin mixing regular food 24–48 hours after surgery
- Transition slowly over 1–2 days
- Avoid rich treats or table scraps during recovery
- Follow any vet-prescribed diet closely
- Watch for changes in stool, energy, or behavior
Stick to a feeding schedule and measure meals carefully. This helps avoid overeating or bloating, which can slow healing. If your dog struggles to eat or shows new symptoms, contact your vet right away.
Keep Water Available at All Times
Water is just as important as food—maybe even more so after surgery. Anesthesia, medications, or stress can reduce your dog’s desire to drink. But dehydration can delay healing, cause fatigue, or worsen nausea. Make sure your dog always has access to clean, fresh water.
Place the bowl near your dog’s resting area and check it often. If they are unwilling to drink, try offering ice cubes or adding water to their food. You can also offer a small amount of low-sodium chicken broth, but only if your vet approves.
- Keep water bowls full and clean
- Use shallow or wide bowls for easier access
- Offer ice cubes or broth for extra encouragement
- Add water to meals to increase fluid intake
- Monitor how much your dog drinks each day
If your dog drinks too little or shows signs like dry gums, panting, or dark yellow urine, reach out to your vet. Hydration plays a big role in your dog’s comfort and wound healing after surgery.
When to Call the Vet About Feeding
It’s normal for your dog to eat a little less for the first day, but ongoing refusal to eat could mean something more serious. If your dog hasn’t eaten anything for more than 24 to 48 hours, call your vet right away. Lack of appetite, vomiting, or diarrhea may be signs of pain, infection, or a reaction to medication.
Always monitor how your dog eats and drinks during recovery. If they show discomfort while eating, seem nauseous, or throw up after meals, these need to be addressed. Never give over-the-counter medications without vet guidance.
- Call the vet if your dog refuses food for 24–48 hours
- Report vomiting or diarrhea after eating
- Watch for signs of pain while chewing or swallowing
- Note if water intake drops or your dog avoids the bowl
- Avoid guessing—early action prevents bigger problems
Feeding issues can be early signs of complications. Keep a simple log of meals, water intake, and any changes in behavior. This helps your vet respond quickly if something is wrong.
Wound Care After Soft Tissue Procedures
Protecting the incision site is key to safe healing and preventing infection.
Daily Wound Checks
It’s important to check your dog’s wound at least once a day. Look closely at the skin around the incision. Mild redness, slight swelling, and light bruising are common and usually not a concern. But signs like pus, foul smell, or gaping skin should be reported to your vet.
Try to check the wound when your dog is calm, such as after a walk or meal. Use soft lighting and talk gently while you inspect. If your dog seems bothered or won’t stay still, ask for help or wait until they relax.
- Look for redness, swelling, or warm skin
- Mild bruising is normal, but pus or blood is not
- Watch for gaps in the incision or torn stitches
- Sniff gently—bad odor may mean infection
- Take a daily photo to track healing
Daily checks help you spot early warning signs. If you’re unsure whether something is normal, don’t wait—call your vet for advice.
Keep the Area Clean and Dry
Cleanliness is vital for preventing infection. After surgery, do not bathe your dog until your vet says it’s safe—usually 10 to 14 days later. Water can soften the skin and disturb the healing wound. Dirt or moisture can also allow bacteria to grow.
If your dog has a bandage, keep it dry when outdoors. Use a clean plastic cover or dog boot. Indoors, remove the cover so air can reach the wound. Never apply ointments, creams, or sprays unless your vet tells you to.
- Avoid baths or swimming until approved by your vet
- Keep outdoor walks short and dry
- Use a cover only when outside; remove indoors
- Clean around the area gently if needed—never scrub
- Contact your vet if bandage gets wet or smells bad
A dry, well-ventilated wound area promotes faster healing and lowers the risk of complications.
Prevent Licking or Scratching
Licking or scratching can reopen the wound or introduce bacteria. Your dog may try to groom the area because of itchiness or discomfort as it heals. That’s why it’s important to block access to the incision site.
An Elizabethan collar (e-collar), inflatable collar, or recovery shirt are common tools used to stop licking. Choose the one your dog tolerates best. Always check that the wound is protected, even during sleep or rest.
- Use an e-collar for full protection
- Try inflatable collars for comfort if vet-approved
- Recovery shirts work well for body or belly wounds
- Watch for pawing, chewing, or rubbing the area
- Redirect behavior with a toy or gentle distraction
Some dogs may need time to adjust to wearing a collar. Be patient, and offer rewards for calm behavior. Preventing access to the wound is one of the most effective ways to avoid setbacks.
When to Call the Vet About the Wound
If something about the wound doesn’t look right, it’s always safer to call your vet. Don’t wait for things to worsen. Signs like active bleeding, thick yellow discharge, or a strong odor can point to an infection or wound breakdown.
Also call your vet if the stitches look loose, if the incision opens up, or if swelling increases after the third day. Quick action can prevent further damage and save your dog from added pain.
- Bleeding that soaks through a bandage
- Foul smell or thick discharge from the site
- Redness that spreads or feels hot to touch
- Gaping stitches or loose sutures
- Swelling that gets worse instead of better
It’s okay to be cautious—better one extra call than missing a serious issue. Your vet is there to help guide the recovery process and make sure healing stays on track.
Activity and Movement Restrictions
Limiting your dog’s movement helps protect the surgical site and avoid setbacks.
Limit Movement for 1–2 Weeks
After soft tissue surgery, your dog must rest. This helps the wound heal and keeps stitches or internal repairs from tearing. Active movements like jumping, running, or rough play can cause swelling, bleeding, or even open the wound.
Keep walks short and only for potty breaks. Always use a leash, even in fenced yards. Your dog may seem full of energy after a few days, but healing is still in progress inside the body. Stick to your vet’s timeline even if your dog looks normal.
- No running, jumping, or play for 1–2 weeks
- Only allow short leash walks for bathroom breaks
- Avoid visits from other pets or children
- Watch for sudden movements like shaking or rolling
- Use calming tools if your dog gets too excited
Even small activities can cause problems during early healing. Controlled rest is the best support you can give your dog after surgery.
Use Crate Rest or Small Room Confinement
Some dogs struggle with staying calm, especially puppies or high-energy breeds. In these cases, crate rest or confining them to a small room is essential. It limits their space and helps prevent sudden, harmful movements.
Choose a quiet space without stairs or furniture. Line the area with soft bedding and keep food, water, and toys nearby. Avoid overuse of toys that encourage too much excitement or chewing. If your dog is crate-trained, this method feels natural and safe.
- Use crate rest if your dog won’t stay still
- Block off a small room if crates are too stressful
- Keep the space calm and distraction-free
- Provide enrichment toys that don’t require movement
- Visit often for comfort and care without overstimulation
Restricted spaces create a calm healing zone and make it easier for you to monitor your dog’s wound, appetite, and bathroom habits.
Block Access to Stairs and Furniture
Your dog should not climb stairs or jump onto furniture during recovery. These actions put too much pressure on the surgery site and may cause tearing or bleeding. Even one wrong jump can undo days of healing.
Use baby gates to block stairways and close doors to rooms with beds, sofas, or chairs. If your dog normally sleeps on furniture, prepare a cozy space on the floor to avoid confusion. Keep the area well-padded to reduce pressure on joints.
- Use pet gates to block stairs and elevated areas
- Keep doors closed to limit wandering
- Create a low, soft sleeping space
- Remove tempting furniture from your dog’s rest zone
- Supervise constantly if furniture access is possible
It only takes one leap or slip to cause serious issues. Keeping your dog grounded ensures the wound stays safe and stable.
When to Reintroduce Activity
Your dog may seem ready to play again after a few days, but true healing takes time. Never restart activity without your vet’s approval. Internal tissues often need more healing time than what we see on the outside.
At your dog’s follow-up visit, your vet will check the incision and may recommend light activity. This usually starts with longer leash walks or slow movement indoors. Avoid dog parks, stairs, or off-leash areas until your vet gives the go-ahead.
- Reintroduce movement slowly and only with vet approval
- Start with short, gentle walks on a leash
- Monitor your dog closely for limping or fatigue
- Avoid play with other dogs until fully healed
- Report any signs of pain or swelling right away
Pushing too fast can undo healing progress. Be patient—it’s better to go slow than risk a setback that extends recovery.
Daily Recovery Routine Example
A simple, steady routine helps your dog heal comfortably and reduces stress for both of you.
Creating a calm, predictable schedule makes recovery smoother. Dogs feel safer when they know what to expect each day. Keeping the same times for meals, rest, walks, and wound care helps them stay relaxed and cooperative. You don’t need a complex plan—just consistency and quiet time.
Try to do medical tasks like giving medicine or checking the wound when your dog is already calm. Keep all supplies nearby to avoid stress or delays. Praise your dog gently and offer a small treat after care time to build trust.
- Morning: Take your dog out on a short leash for a potty break → Give any prescribed medications → Offer a small meal
- Midday: Check the wound for swelling, redness, or discharge → Quiet rest time in a crate or safe room → Refill clean water
- Evening: Short walk for bathroom → Feed dinner → Light cuddle time or sit quietly together
This basic routine keeps things manageable while allowing your dog to heal safely and comfortably.
Supporting Your Dog Emotionally
Recovery isn’t just physical—your dog needs comfort and emotional support too.
Comforting During Wound Checks
Wound checks can feel scary or uncomfortable for your dog. Even calm pets may become anxious when touched near the incision. To make this process easier, use a soft voice and slow, gentle hands. If your dog is nervous, have another person help hold or distract them.
Choose a quiet time for checks—after meals or walks. Let your dog see and smell any supplies before you start. Praise them during and after care, and offer a small treat once it’s over. This helps build a positive connection to the routine.
- Use a calm voice and steady hands
- Ask for help if your dog is jumpy or large
- Do checks when your dog is relaxed
- Reward cooperation with gentle praise or treats
- Stop if your dog shows pain and call your vet
A kind approach can turn a stressful task into a bonding moment, helping your dog trust you through the healing process.
Preventing Boredom with Safe Enrichment
Rest doesn’t have to be boring. Mental stimulation is a great way to help your dog stay calm and happy during recovery. While physical activity is limited, you can offer low-energy brain games and gentle enrichment activities that won’t risk the surgical site.
Puzzle toys, snuffle mats, and frozen KONGs are great for keeping your dog busy while they rest. Always choose toys that don’t involve jumping, tugging, or lots of movement. Ask your vet before offering any chew treats, especially if your dog had oral surgery or stomach-related procedures.
- Use snuffle mats for slow, scent-based feeding
- Offer frozen treats or filled toys for quiet fun
- Rotate toys to keep things interesting
- Play calming music or use white noise for relaxation
- Avoid toys that require running, pulling, or climbing
Keeping your dog mentally engaged during healing helps reduce restlessness and stress, making the recovery period smoother for both of you.
Monitoring Bathroom Habits and Hydration
Daily tracking helps catch signs of dehydration or digestive issues early.
After surgery, your dog’s bathroom habits may change. Some dogs may urinate less due to reduced water intake or may become constipated due to medication and inactivity. It’s important to watch for these changes so you can act early if something goes wrong.
Check the color of your dog’s urine—it should be pale yellow. If it’s dark or if your dog strains to pee, call your vet. Bowel movements may be slower in the first few days. If your dog hasn’t pooped after 48 hours, or if you see straining or blood, let your vet know.
- Track urine output and color each day
- Watch for constipation, straining, or diarrhea
- Encourage hydration by offering fresh water often
- Add water to meals if needed
- Report changes that last more than 24–48 hours
Monitoring these small daily habits can help prevent dehydration, pain, or infection during recovery.
When to Call the Vet Immediately
Fast action prevents small problems from becoming serious.
Some signs mean you should call your vet right away. Refusing food or water for more than 24 hours is a red flag. Vomiting, diarrhea, or signs of pain—like yelping or panting—need quick attention. If your dog seems “off” or not like themselves, trust your gut.
Always keep your vet’s number nearby and know their after-hours plan. If you’re ever unsure whether something is urgent, it’s better to ask than wait.
- No eating or drinking for 24+ hours
- Vomiting, diarrhea, or straining that doesn’t improve
- Bleeding, swelling, or bad-smelling discharge at the wound
- Shaking, yelping, or refusing to move
- Sudden change in behavior or energy
Early care can prevent infections, wound issues, and longer recovery times. When in doubt, reach out to your vet for advice.
Final Thoughts
Stick to your vet’s instructions and daily routines
Your dog’s healing depends on your care, patience, and attention.
Soft tissue surgery recovery takes time, but most dogs heal well with the right support. Following your vet’s plan, giving medications on time, and keeping activity low all help your dog recover safely.
Remember to check the wound daily, track feeding and bathroom habits, and offer emotional comfort along the way. If you’re unsure about anything, don’t wait—reach out to your vet.
- Be consistent with rest, feeding, and meds
- Watch for small signs before they become big issues
- Offer love, calm, and reassurance every day
- Celebrate small wins, like eating well or walking calmly
- Keep your vet involved throughout recovery
Your care makes a real difference. With time and attention, your dog will be back to normal and happy again.
FAQs
What should I feed my dog after soft tissue surgery?
Start with bland food like boiled chicken and rice about 3–4 hours after returning home. Offer half a portion at first. If your dog eats without vomiting, continue small meals. Most dogs can return to their normal diet within 1–2 days unless your vet says otherwise.
How do I know if my dog’s wound is infected?
Check the wound daily. Signs of infection include redness, swelling, yellow or green discharge, a foul smell, or gaping skin. Mild bruising is normal, but pus or bleeding is not. If you see any of these signs, contact your vet as soon as possible.
Can my dog walk after soft tissue surgery?
Yes, but only short leash walks for potty breaks. Avoid running, jumping, or stairs for at least 1–2 weeks. Too much movement can slow healing or open the wound. Your vet will tell you when it’s safe to allow more activity again.
Is it normal if my dog doesn’t eat right after surgery?
It’s common for dogs to have a low appetite the first day after surgery due to anesthesia and stress. Offer bland food and fresh water. If your dog refuses food or water for more than 24–48 hours, or shows other signs like vomiting, call your vet.
How can I stop my dog from licking the incision?
Use an e-collar, inflatable collar, or recovery shirt to block access to the wound. Licking can reopen stitches and cause infection. Watch your dog closely, especially when resting or alone. If they remove the collar or continue licking, contact your vet for advice.
When should I call the vet during recovery?
Call your vet if your dog won’t eat or drink for over 24 hours, vomits, has diarrhea, shows pain, or if the wound is bleeding, smells bad, or has pus. Any behavior that feels unusual or worrying should be checked by your vet right away.
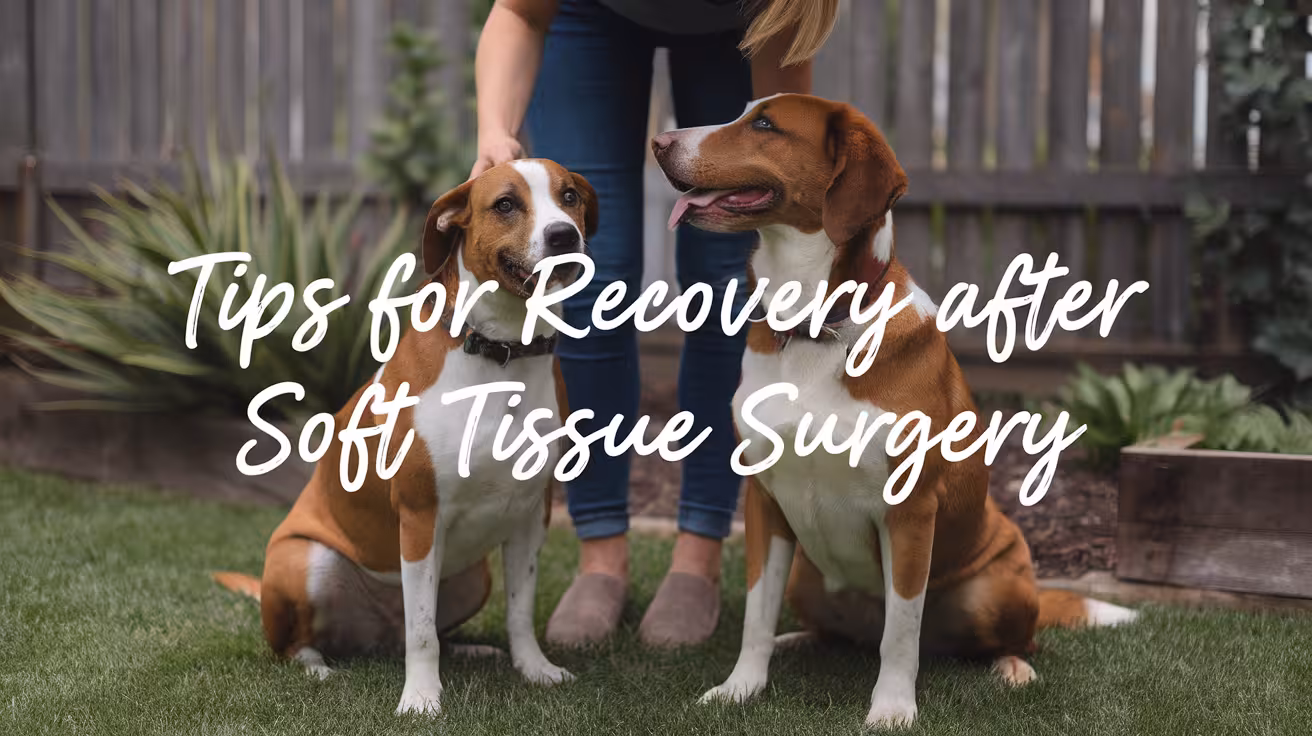
Tips for Managing Pain and Recovery After Dog Soft Tissue Surgery
Discover simple tips to manage pain and support your dog’s recovery after surgery. Learn signs of pain, safe care methods, and when to call your vet
Why Managing Pain Matters After Soft Tissue Surgery
Soft tissue surgeries often involve internal organs, skin, or muscles. While they don’t affect bones or joints, they can still cause soreness, swelling, and stress. If your dog’s pain is not well managed, it can slow healing, reduce appetite, and affect behavior.
Here’s why pain control after soft tissue surgery is so important:
- Helps tissues heal faster by reducing tension and inflammation.
- Keeps your dog eating and drinking, which is vital for recovery.
- Prevents stress-related issues like whining, panting, or pacing.
- Reduces the risk of self-trauma, such as licking or biting the incision.
Most dogs hide their pain, so don’t wait for crying or limping. Instead, watch for changes like restlessness, heavy panting, or avoiding movement.
Good pain control with vet-approved medication, a quiet space, and gentle care helps your dog feel better and heal properly. Always follow your vet’s instructions and speak up if anything feels off.
How to Tell If Your Dog Is in Pain
Recognizing pain early helps prevent complications and keeps recovery on track.
After soft tissue surgery, pain signs are often subtle. Dogs rarely cry or limp unless pain is severe. Instead, they may show small behavior changes. Knowing what to watch for can help you take quick action and adjust care as needed.
Common signs your dog may be in pain include:
- Whining, panting, or restlessness: Your dog may seem unsettled or unable to sleep comfortably.
- Hunched back or reluctance to move: Pain can cause stiffness, especially near the incision site.
- Licking or biting the surgical area: This may be your dog’s way of soothing discomfort.
- Loss of appetite or hiding behavior: Pain often reduces interest in food or social interaction.
Other signs may include trembling, tucked tail, pinned ears, or slow movement. If your dog shows any of these behaviors despite medication, contact your vet. Early adjustments in pain relief can lead to better healing. Never assume your dog is fine just because they are quiet.
Safe Pain Relief Options for Soft Tissue Recovery
Pain relief is more than just medication—it is a full care plan approved by your vet.
Vet-Prescribed Medications
Vet-approved pain medications are the foundation of soft tissue surgery recovery. Your vet will prescribe one or more drugs based on your dog’s age, weight, and the type of surgery.
Common medications include:
- NSAIDs (non-steroidal anti-inflammatory drugs): These reduce pain and swelling. Examples include carprofen or meloxicam.
- Gabapentin: Used for nerve pain or general discomfort.
- Opioids: Sometimes prescribed for short-term pain management after major surgery.
Follow your vet’s instructions exactly.
- Give medications at the same time each day.
- Use food or treats to help with swallowing pills.
- Do not skip doses, even if your dog seems fine.
Never increase the dose without vet approval. Overdosing can lead to kidney or liver problems. Keep a written schedule so you don’t miss any doses. Store medications safely, out of reach of pets and children.
If you notice vomiting, diarrhea, or unusual tiredness after giving meds, call your vet. Adjustments can often be made to improve comfort and avoid side effects. Pain control works best when given consistently and under supervision.
Avoid Human Medications
One of the biggest mistakes dog owners make is giving human painkillers without asking the vet. Many over-the-counter medications that are safe for people are toxic to dogs and can lead to serious illness or even death.
Never give your dog:
- Ibuprofen or naproxen (found in Advil, Aleve)
- Acetaminophen (found in Tylenol)
- Aspirin unless specifically prescribed
- Muscle relaxers or sedatives for humans
These drugs can cause internal bleeding, liver damage, kidney failure, or stomach ulcers in dogs. Even a small dose of some painkillers can be dangerous for small breeds.
Instead of guessing, always ask your vet what’s safe.
- Write down the name and strength of any human medicine you’re considering.
- Let your vet decide if there’s an animal-safe version.
Remember, even natural products like essential oils or herbal pain relief should be cleared by your vet first. Soft tissue recovery requires gentle, targeted care—not general pain relief meant for humans.
Cold Therapy in the First 48 Hours
Cold therapy can be helpful in the first two days after soft tissue surgery. It reduces swelling, numbs pain, and helps slow inflammation at the incision site.
How to apply cold packs safely:
- Use a soft, wrapped ice pack or frozen veggie bag.
- Apply to the area for 10–15 minutes at a time, 2–3 times a day.
- Always place a towel between the cold pack and your dog’s skin.
Ask your vet before using ice, especially if your dog had abdominal or internal surgery. Cold packs are typically more helpful for surface-level procedures, such as lump removals or wound repairs.
Do not use cold therapy if:
- Your vet has advised against it
- The incision is deep or near the organs
- Your dog seems anxious or reacts negatively
Stay with your dog during cold therapy to prevent chewing or discomfort. Used correctly, cold packs can help reduce the need for extra medication and make the first few days more manageable.
Sedatives or Anxiety Relief (If Needed)
Some dogs struggle to stay calm during recovery. This can be a problem, especially after soft tissue surgery, where movement must be limited to protect stitches and healing tissues. If your dog is pacing, jumping, or barking non-stop, speak to your vet about temporary calming options.
Your vet may recommend:
- Trazodone or acepromazine: Light sedatives that help your dog rest.
- Gabapentin: Offers both pain relief and mild sedation.
- Anti-anxiety supplements: Only with vet approval.
Never give human sleeping pills or CBD oil without professional advice. These can cause dangerous side effects in dogs.
Tips to support calm behavior:
- Keep your dog in a quiet room away from visitors.
- Use a covered crate or pen for security.
- Play soft music or white noise to reduce outside triggers.
Dogs that are too active risk pulling stitches or reopening wounds. When activity control is difficult, mild sedation can protect both your dog’s comfort and surgical success.
Making Your Dog Comfortable at Home
Creating a calm, safe space is one of the best ways to support your dog’s recovery after soft tissue surgery. Your dog needs plenty of rest, limited movement, and a space where they feel secure and protected. Small adjustments at home can make a big difference in healing.
Start with a recovery area:
- Choose a quiet room away from stairs, kids, and other pets.
- Use soft, washable bedding that keeps your dog off hard floors.
- Keep water nearby in a shallow, non-spill bowl.
Prevent licking or biting the incision:
- Use an e-collar (cone) or a soft recovery shirt as directed by your vet.
- Make sure the cone fits well and doesn't rub or fall off.
Avoid slips and overexertion:
- Block access to stairs and remove rugs that slide.
- Limit movement by closing doors or using baby gates.
A calm environment reduces stress, keeps your dog from hurting themselves, and supports faster healing. Keep noise levels low, keep routines simple, and supervise any time your dog is out of their rest space.
Feeding and Digestion During Recovery
After soft tissue surgery, your dog’s digestive system may take a little time to return to normal. Anesthesia and pain medications can cause temporary appetite loss, nausea, or constipation. Providing gentle meals and watching your dog’s bowel habits helps prevent setbacks during recovery.
Feeding tips for the first few days:
- Offer bland meals like boiled chicken and rice if your vet recommends it.
- Keep portions small and increase gradually as appetite returns.
- Transition slowly back to your dog’s regular food after 24 to 48 hours.
Monitor digestion closely:
- Make sure fresh water is always available.
- Watch for constipation or straining when pooping.
- Report vomiting, diarrhea, or refusal to eat after the first day.
If needed, ask your vet about adding canned pumpkin or a stool softener to help with constipation. Avoid giving any over-the-counter digestive aids without approval. A calm feeding routine supports steady recovery and keeps your dog comfortable as they heal.
Managing Activity and Movement
Movement should be limited during the first 1 to 2 weeks after surgery. Even though your dog might seem energetic, soft tissue wounds need time to close and strengthen. Too much activity can reopen stitches or slow healing.
Here’s how to keep movement safe:
- No running, jumping, or rough play until your vet says it’s okay.
- Avoid stairs, slippery floors, and high furniture.
- Use short leash walks only for bathroom breaks.
Support weak or wobbly dogs:
- Use a towel sling or rear-end harness under the belly for support.
- Keep walks short and always stay close.
- Don’t allow off-leash time, even in a fenced yard.
Supervise your dog during rest time. Crates or playpens are great for limiting movement, especially if your dog is young or energetic. Follow your vet’s timeline for slowly returning to regular walks and play. A few quiet days now can prevent weeks of delay later.
Incision and Wound Care
Caring for the surgical site is one of the most important parts of recovery. The goal is to keep the area clean, dry, and undisturbed until it heals completely. Your vet will tell you what to expect and when to come back for a check-up.
Check the incision daily for:
- Swelling, redness, or warmth around the area
- Yellow or green discharge, bad odor, or bleeding
- Any missing stitches or skin pulling apart
Basic care guidelines:
- Do not bathe your dog unless your vet says it’s okay.
- Keep the area dry and free from dirt, grass, or hair.
- Prevent licking or scratching with an e-collar or recovery suit.
Gently lift the fur to look at the wound. Use calm praise or treats to keep your dog still. Call your vet if anything looks worse instead of better. Early action prevents infection and supports faster healing.
Supporting Your Dog Emotionally
After surgery, your dog may not act like their usual self. Many dogs become more clingy, anxious, or withdrawn as they recover. These emotional changes are normal, especially in the first few days.
What your dog may show:
- Restlessness or following you everywhere
- Whining when left alone
- Sleeping more or hiding in corners
How to help emotionally:
- Give calm affection and stay nearby for comfort
- Stick to a routine with feeding, meds, and short walks
- Offer soft blankets, quiet music, and low lighting
- Use puzzle feeders or frozen treats for light mental activity
Avoid visitors or loud activity during recovery. Let your dog settle at their own pace. Emotional support is just as important as physical care. A calm environment builds trust and helps your dog feel safe while healing.
When to Call Your Vet
Even with proper care, some signs mean your dog needs a vet check right away. Always trust your instincts. If something feels off, don’t wait.
Call your vet if you notice:
- Crying, limping, or yelping even with pain meds
- Refusal to eat or drink after 24 hours
- Vomiting, diarrhea, or constipation lasting more than two days
- Trouble peeing, straining, or signs of discomfort when going to the bathroom
- Redness, heat, bleeding, or pus around the incision
- Lethargy, disorientation, or behavior that’s unusual for your dog
Keep your vet’s contact info and emergency clinic number easily available. The sooner problems are caught, the easier they are to treat. Post-surgical problems can develop quickly, so never hesitate to call.
Signs That Your Dog Is Recovering Well
Recovery progress may look different for each dog, but certain signs show your dog is healing as expected. These small improvements usually happen within the first week and continue with time.
Signs of good recovery include:
- Eating and drinking normally
- Sleeping well and waking up alert
- Walking short distances with more confidence
- Calm behavior and less whining or shaking
- Incision is dry, clean, and slowly closing
As the days go by, your dog should seem more comfortable and return to familiar habits. Appetite should improve, bathroom routines become regular, and the surgical site should look better each day. Keep following your vet’s timeline and instructions, and attend all follow-up visits.
Final Thoughts
Managing pain and recovery after soft tissue surgery takes time, but your efforts make all the difference. With proper care, most dogs heal well and return to their normal lives.
Keep these core steps in mind:
- Follow your vet’s instructions closely
- Stay on track with medications and incision checks
- Provide rest, calm, and comfort each day
- Watch for warning signs and act early when needed
Every dog is different. Some bounce back quickly, while others take more time. Your job is to stay patient, consistent, and alert. Comfort, routine, and gentle support will help your dog feel safe and heal smoothly at home.
FAQs
How long should my dog take pain medicine after soft tissue surgery?
Most dogs take pain medicine for 5 to 7 days, depending on the procedure. Your vet will guide the exact duration. Don’t stop early, even if your dog looks better. Pain can return once meds wear off. Always complete the full course unless your vet says otherwise.
Is it normal if my dog seems restless after surgery?
Yes. Restlessness is common during the first 24–48 hours, especially as anesthesia wears off. It may also be a sign of pain. Make sure your dog is calm, warm, and has taken prescribed meds. If restlessness continues or worsens, contact your vet to adjust the recovery plan.
What if my dog won’t eat after surgery?
A low appetite is normal for the first day. Offer bland food like boiled chicken and rice in small amounts. Make sure water is available. If your dog still refuses to eat or drink after 24 hours, or vomits, call your vet to check for post-op complications.
Can I let my dog walk freely indoors?
No. Even indoors, your dog’s movement should be restricted. Jumping, running, or climbing stairs can damage healing tissues or stitches. Keep your dog in a small, quiet room or use a crate. Leash walks should be short and only for bathroom breaks during the early recovery phase.
When can I stop using the cone or recovery shirt?
You can stop using the cone or recovery suit when the incision is fully closed, dry, and your vet confirms it’s safe. This usually takes 10 to 14 days. Never remove it early—even one lick or scratch can reopen the wound or lead to infection.
How do I know if my dog is healing well?
Healing is going well if your dog is eating, resting comfortably, peeing and pooping normally, and the incision is clean and dry. Each day, your dog should seem slightly more relaxed and alert. If anything looks worse instead of better, schedule a follow-up visit with your vet.
Sustainable Vet | Copyright ©2025 | All Rights Reserved

