

Protecting
Pets, People & Planet
Join a group of veterinarians leveraging the latest technologies to deliver excellent care to their patients while being a responsible and positive force for their local and global communities.
100% secure. We do not share your information


Recent Articles
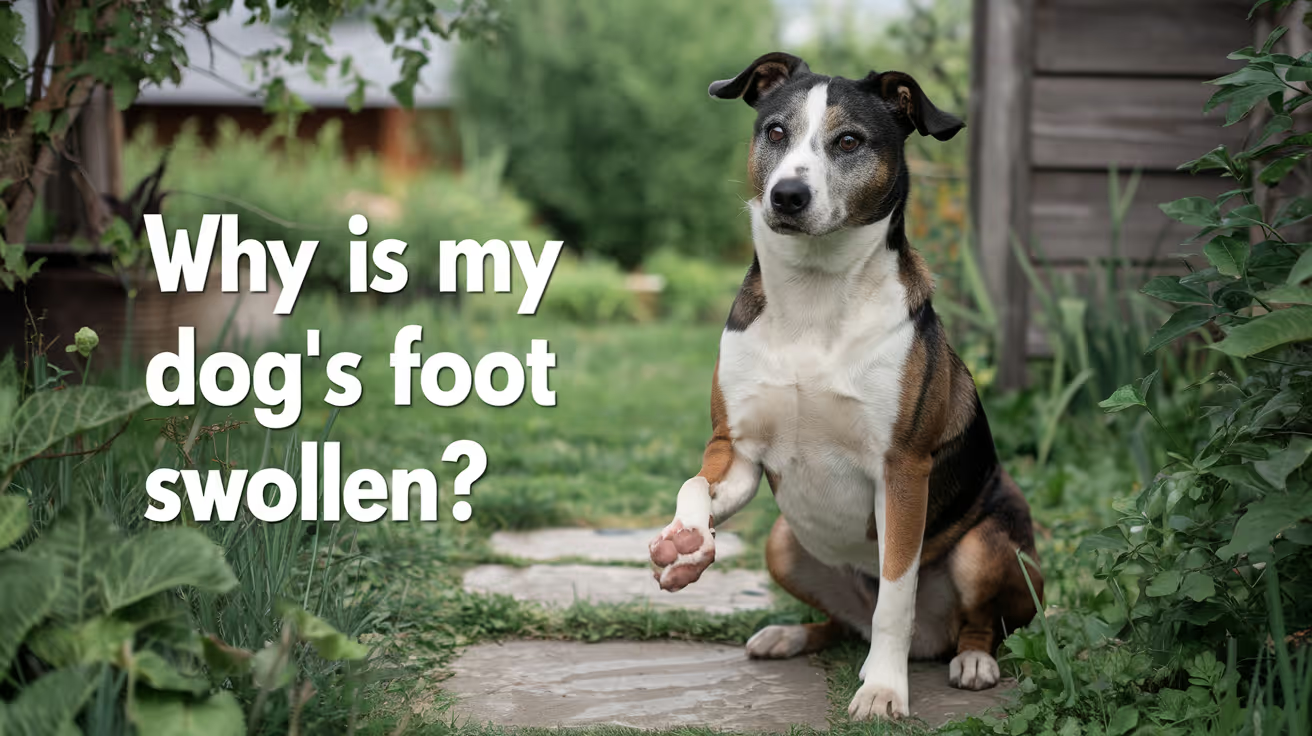
Why Is My Dog's Foot Swollen?
Discover why your dog's foot is swollen, common causes, treatments, and when to see a vet for proper care.
A swollen dog foot is one of the most common reasons owners call their vet. It can be as simple as a bee sting or as serious as a deep infection or bone tumor. The location, speed of onset, and other symptoms all help narrow down the cause.
This guide covers every common cause, how to assess severity at home, and the exact signs that mean your dog needs same-day care.
Quick answer: A swollen dog foot usually has a local cause: injury, insect sting, foreign object, or infection. Warm, increasing, or discharging swelling needs same-day vet care. Multiple swollen paws suggest allergies.
Key takeaways
- Single-paw swelling almost always has a local cause: injury, sting, foreign body, or infection
- Interdigital furunculosis (infected hair follicle cysts between toes) is among the most misidentified causes of recurring paw swelling
- Foreign objects like foxtails and glass splinters can migrate deep into tissue if left untreated
- Pododermatitis is the clinical term for inflamed paw skin; allergies are the most common underlying driver
- Swelling spreading up the leg or paired with face or neck swelling is an emergency requiring immediate care
- Most mild swelling from a sting or minor sprain improves within 24 to 48 hours with rest and monitoring
How to assess your dog's swollen foot before calling the vet
Before looking up causes, do a quick home assessment. This takes two minutes and tells you how urgent the situation is.
Step 1: Which paw?One paw = likely local cause. All four paws = likely allergic or systemic.
Step 2: Feel for heat.Warm or hot tissue means active inflammation or infection.
Step 3: Look between every toe.Redness, swelling between the digits, or visible nodules between the toes points to interdigital furunculosis or a foreign body.
Step 4: Check the pads.Burns appear as red, blistered, or peeling pad tissue. Cuts and punctures are often visible on the pad surface.
Step 5: Look at each nail.A broken nail or swollen nail bed causes localized pain and swelling at the toe tip.
VCA Animal Hospitals: "A deeper infection, like an abscess, will appear as a warm, soft to mildly firm swelling under the skin."
8 common causes of a swollen foot in dogs
1. Injury or trauma
Sprains, cuts, fractured toes, torn nails, and pad burns are the most frequent causes of sudden single-paw swelling. Dogs running on rough, hot, or icy terrain are especially prone.
PetMD notes that pad burns are particularly common in summer: check the pads after any walk on hot pavement. If your palm cannot hold against the pavement for five seconds, it is too hot for your dog's feet.
Signs: sudden lameness after activity, localized swelling, visible wound or bruising.
2. Foreign object
Thorns, glass, foxtails, and grass awns lodge between the toes or penetrate the pad. The body mounts an inflammatory response around the object, causing swelling that worsens over days.
SpectrumCare: "Foxtails and grass awns can lodge between the toes or in the pad and trigger pain, swelling, and infection."
Foxtails are particularly dangerous because they are barbed and can migrate deeper into tissue over days, eventually requiring surgical removal. If you cannot see and safely remove the object, do not probe. See a vet.
3. Insect sting or bite
Bees, wasps, fire ants, and spiders cause rapid single-paw swelling that appears within minutes of the sting. The paw may look puffy and your dog may lick or hold it up.
Dyer Animal Clinic advises watching for anaphylaxis signs: hives, difficulty breathing, excessive swelling spreading beyond the paw. These require emergency care immediately.
Localized sting swelling that stays in the paw and is not worsening can be monitored at home for 24 to 48 hours.
4. Infection: bacterial and fungal
Bacterial or fungal infections enter through cuts, puncture wounds, or damaged skin. Infected paws are typically warm, red, swollen, and often have an odor or discharge. VCA lists the visual signs: "Skin infections on the feet may result in red, moist lesions between the toes."
Pododermatitis (inflammation of the paw skin) is the umbrella clinical term. Common causes include:
- Secondary bacterial infection from chronic licking
- Yeast overgrowth in skin folds between toes
- Fungal infections (ringworm can affect paws)
- Demodectic mange (mite overgrowth)
Pododermatitis does not resolve without treatment. Antibiotics, antifungal medication, or both are typically required.
5. Interdigital furunculosis
This is one of the most commonly missed causes of recurring paw swelling. Interdigital furunculosis occurs when hair follicles between the toes become infected, forming painful reddish-purple nodules that may rupture and drain.
AKC notes that the condition is especially prevalent in short-coated, heavyset breeds: Bulldogs, Labrador Retrievers, and Chinese Shar-Pei are among the most commonly affected. Chronic licking due to allergies is a major driver.
Signs: swollen, painful nodules between the toes, draining tracts, recurrent swelling in the same location.
For how furuncles between the toes connect to abscess formation, see abscess as a cause of limb swelling.
6. Allergic reaction and pododermatitis
Environmental allergens (pollen, grass, lawn chemicals, road salt) and food allergies frequently cause paw inflammation. Dogs with allergies lick their feet chronically, creating secondary infection on top of the allergic reaction.
Wakefield Pet Vet: "Allergic reactions typically cause itching, redness, and sometimes blistering between the toes or on paw pads."
Allergic paw swelling usually affects multiple paws. It tends to recur seasonally or after contact with the trigger substance. Dogs with seasonal allergies often have their worst paw symptoms in spring and fall.
7. Bursitis
Bursae are small fluid-filled sacs that cushion joints. Repeated pressure on bony prominences, especially the elbow and hock, can cause bursitis. Affected joints may appear as soft, fluctuant swellings near a joint.
For how bursitis specifically produces foot and joint swelling, see bursitis as a common cause of foot swelling.
8. Cysts, tumors, and nail bed disease
Cysts, mast cell tumors, and subungual (under-nail) tumors can all present as localized swelling on or near the foot. Petcube notes that toenail tumors are more prevalent in large black-coated breeds such as Standard Poodles, Gordon Setters, and Schnauzers.
A lump that is growing, firm, or pigmented should always be evaluated by a vet rather than monitored at home.
For an overview of lumps that cause swelling on the legs, see lumps that can cause swelling.
Severity triage: what to do right now
Home care for mild cases
For minor swelling without infection signs:
- Keep the dog calm and limit walking
- Soak the paw in warm (not hot) water with Epsom salts for 10 minutes. PetMD recommends this as an excellent short-term measure regardless of cause.
- Gently clean any visible wound with mild soap and warm water
- Apply a cool damp cloth for 10 to 15 minutes to reduce swelling from sprains or stings
- Do not apply antibiotic ointments without vet guidance some formulations are toxic to dogs if licked
For pressure-related paw and leg swelling in dogs that rest in one position for extended periods, see pressure-related swelling in dogs.
Frequently asked questions
How do I treat my dog's swollen paw at home?
For mild swelling with no wound or discharge, rest the dog and soak the paw in warm Epsom salt water for 10 minutes. Check carefully for a foreign object or insect stinger. Do not use human antibiotic creams without vet guidance. If swelling has not reduced within 24 to 48 hours or is getting worse, contact your vet.
When should I be worried about my dog's swollen paw?
Be concerned immediately if the swelling is warm, increasing, or has discharge or odor. Call the vet the same day if your dog refuses to bear weight, if the swelling is spreading up the leg, or if there is any sign of an allergic reaction such as facial swelling or breathing difficulty.
What can I give my dog for a swollen paw?
Do not give human pain medications (ibuprofen, acetaminophen, aspirin) to dogs; many are toxic. For minor swelling, warm Epsom salt soaks are safe and effective for short-term relief. Your vet can prescribe appropriate anti-inflammatory medication if needed after examining the paw.
My dog's foot was normal this morning and is swollen now. What happened?
Sudden single-paw swelling most often means an insect sting, a foreign object picked up during activity, or a minor sprain. Check each toe carefully for a stinger, thorn, or visible wound. If swelling is mild and localized, monitor for 24 hours. If increasing or painful, call the vet the same day.
Can swelling in a dog's foot go away on its own?
Minor swelling from a bee sting or small sprain typically resolves within 24 to 48 hours with rest. Infections, foreign objects, interdigital furunculosis, and bursitis do not resolve without treatment. If swelling has not improved within 48 hours, veterinary assessment is needed.
My dog's foot smells bad and is swollen. Is that serious?
Yes. Odor from a swollen paw strongly indicates infection. A foul smell means bacteria are actively present. Common sources include interdigital furunculosis, a nail bed infection, or an abscess. This requires prompt veterinary treatment and should not be left to resolve on its own.
Resources
- PetMD. Dogs Swollen Paws: Causes and Treatments. petmd.com
- VCA Animal Hospitals. First Aid for Limping Dogs. vcahospitals.com
- AKC. Pododermatitis on Dog Paw: Causes, Symptoms and Treatment. akc.org
- SpectrumCare. Paw Swelling in Dogs. spectrumcare.pet
- Dyer Animal Clinic. Reasons Your Dog's Paw is Swollen. dyeranimalclinic.com
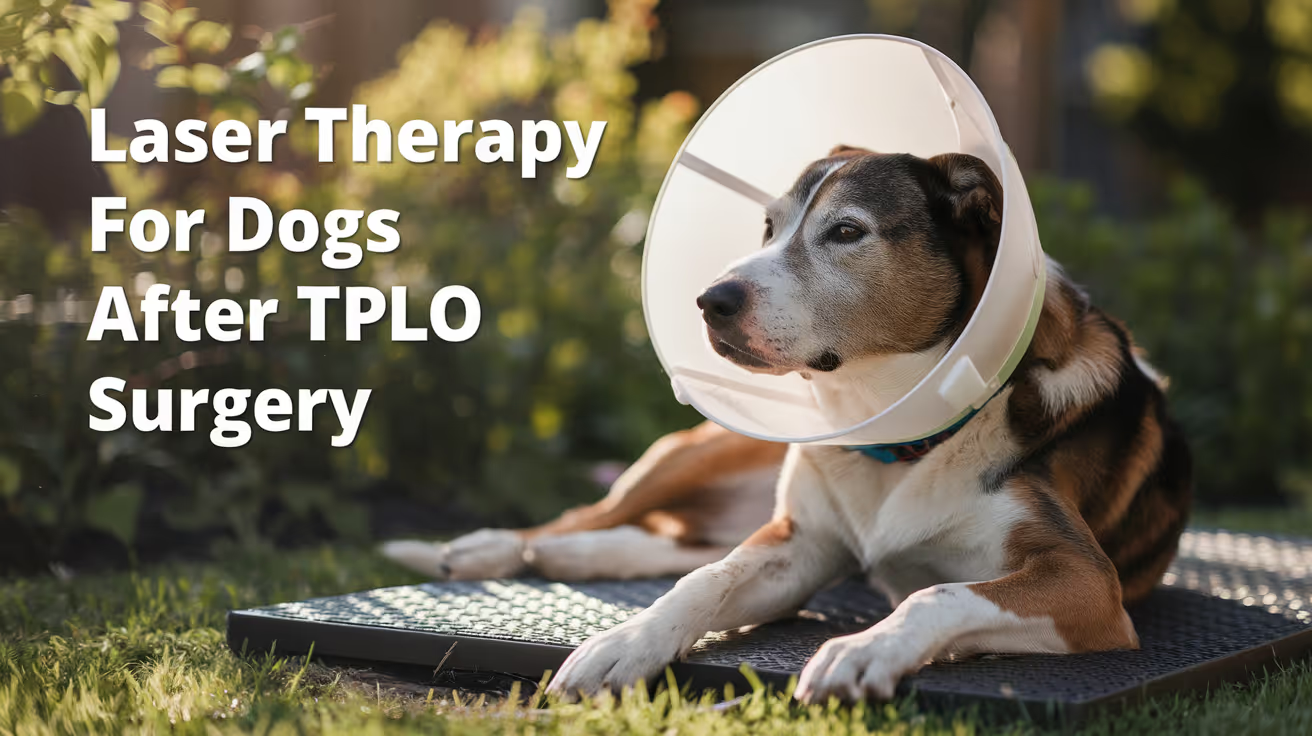
Laser Therapy for Dogs After TPLO Surgery
Learn how laser therapy helps dogs recover faster and with less pain after TPLO surgery for cruciate ligament repair.
Laser therapy also called photobiomodulation (PBMT) or low-level laser therapy (LLLT) is one of the most commonly offered adjunct treatments during TPLO recovery. Many specialist and rehabilitation centres include it routinely.
But the evidence for its benefits is more nuanced than the marketing suggests, and owners deserve an honest picture of what it does and does not reliably achieve.
Quick answer: Laser therapy after TPLO uses specific light wavelengths to reduce inflammation and support tissue healing. Evidence for early pain reduction is moderately supported; evidence for improved radiographic bone healing is weak. It is a safe adjunct but should not replace rehabilitation exercises, pain medication, or activity restriction.
Key takeaways
- Laser therapy reduces postoperative inflammation and may improve gait scores: a TPLO study found better hindlimb function at 8 weeks in treated dogs
- Evidence for improving radiographic bone healing is weak: three controlled studies found no statistically significant difference in healing time
- The 2024 AVMA randomized trial found no significant difference in CRP, weight bearing, pain scores, or SSI rates between PBMT and sham groups
- Sessions typically begin within the first few days of surgery and continue through the rehabilitation phase
- Laser therapy is safe with few contraindications: avoid eyes and active tumour sites; safe over the TPLO incision once closed
- It works best as part of a multimodal plan: exercise therapy and pain medication carry stronger evidence than laser alone
What laser therapy does
Laser therapy for dogs, also known as photobiomodulation, involves using specific wavelengths of light to penetrate tissues and promote cellular regeneration and healing. The laser light stimulates the production of ATP (adenosine triphosphate), enhancing cell repair and growth, reducing inflammation, and increasing blood circulation.
Photobiomodulation therapy has been shown to decrease inflammation, and increase analgesia, vascularization, and tissue healing after musculoskeletal injury or surgery.
The mechanism is photochemical: light energy at specific wavelengths (typically 630 to 980 nm) is absorbed by mitochondria.
This increases ATP production, modulates reactive oxygen species, and influences gene expression related to inflammation and healing.
The effects are local confined to the tissue depth the light reaches.
For post-TPLO use, the targets are: the surgical incision, the osteotomy site in the proximal tibia, and the surrounding periarticular soft tissues.
What the clinical evidence shows
Pain and function
Research following TPLO surgery showed that dogs receiving LLLT had better hindlimb function and gait scores at 8 weeks compared to controls. This is especially valuable in orthopedic recovery, where early weight-bearing can prevent muscle atrophy and joint stiffness.
In a controlled veterinary study, dogs with surgical incisions treated with laser therapy exhibited significantly less inflammatory cell infiltration and tissue necrosis within the first week post-op compared to untreated controls.
The 2024 randomized trial
54 client-owned dogs with CCL rupture undergoing unilateral TPLO surgery were enrolled. The study population was randomly assigned to either a treatment group receiving PBMT (24 dogs) or a control group (30 dogs). PBMT was performed immediately after induction, and at 6 hours, 24 hours, 48 hours, and 8 weeks postoperatively. Evaluation of CRP, pain scores, evidence of SSI, and percentage weight bearing were assessed at all time points.
The trial found the therapy showed promise but no statistically significant difference between groups on any primary outcome measure.
Bone healing
Three studies compared LLLT to a control and concluded that LLLT treatment did not make a significant difference in improving radiographic bone healing. The studies collectively provide weak evidence for this outcome.
This is an important distinction: laser therapy may support soft tissue healing, pain, and early function but it does not appear to accelerate the osteotomy healing visible on radiographs.
When to start and how often
Laser therapy uses focused light energy on the surgical site to support healing.
Most rehabilitation programmes begin laser therapy within the first 1 to 3 days after TPLO surgery, often at the surgical centre before discharge or at the first rehabilitation visit.
Typical post-TPLO laser protocol:
- Frequency: 3 to 5 sessions per week in the first 2 to 3 weeks
- Frequency: 1 to 2 sessions per week from weeks 3 to 8
- Session duration: 5 to 15 minutes depending on the laser system and dosing protocol
- Total sessions: typically 6 to 12 in the first 8-week recovery phase
The protocol varies by laser system, power output, and the individual patient's response.
Realistic expectations
Laser therapy is a useful adjunct in TPLO recovery. It is not a substitute for the treatments with stronger evidence: pain medication, activity restriction, and structured rehabilitation exercises.
Laser therapy could be particularly helpful for dogs with weight-bearing and gait issues while recovering from TPLO surgery after a cruciate injury.
Dogs with significant early swelling, wound sensitivity, or slow initial weight-bearing progress may benefit most. Dogs recovering well with standard multimodal analgesia and rehabilitation may show less measurable difference.
For the bone healing timeline that laser therapy supports during recovery, see TPLO bone healing time in dogs explained.
For the full recovery plan that laser therapy fits into, see 10 essential TPLO recovery tips for pet owners.
For the physical therapy that is the primary evidence-based adjunct, see when to start physical therapy after TPLO surgery.
For swelling management in the recovery period, see how long does swelling last after TPLO surgery.
Frequently asked questions
Is laser therapy safe over the TPLO incision?
Yes, once the incision is closed. Laser therapy is safe over sutured incisions and can be applied at the surgical site from the first post-operative day in most protocols.
Avoid direct application over open wounds or actively infected tissue.
How many laser sessions does a dog need after TPLO?
Typically 6 to 12 sessions across the first 8 weeks.
Start at 3 to 5 sessions per week for the first 2 to 3 weeks, tapering to 1 to 2 per week through the rehabilitation phase.
The exact protocol depends on the laser system and rehabilitation plan.
Does laser therapy replace pain medication after TPLO?
No. Laser therapy is an adjunct to pharmaceutical pain management, not a replacement. Post-TPLO pain management requires NSAIDs, and often gabapentin or other analgesics.
Laser therapy may reduce the pain burden and support earlier mobility but does not provide sufficient analgesia on its own.
Can I do laser therapy at home with a consumer device?
Consumer-grade red light therapy devices exist but operate at lower power densities than veterinary therapeutic lasers. The clinical evidence discussed in this article relates to veterinary-grade PBMT devices.
Home devices may offer some benefit but cannot replicate the dosing of professional equipment. Discuss with your rehabilitation veterinarian before purchasing.
Will laser therapy prevent my dog from needing more medication?
Possibly. If laser therapy reduces post-operative inflammation and pain, some dogs may need lower doses of pain medication or taper off sooner.
This should be guided by your veterinarian based on your dog's individual recovery trajectory.
Resources
- AVMA Journal. Photobiomodulation Therapy in Dogs Undergoing TPLO After Cranial Cruciate Ligament Rupture. avmajournals.avma.org
- Veterinary Evidence. Does LLLT Improve Radiographic Healing for Dogs with CCL Rupture Undergoing TPLO Surgery? veterinaryevidence.org
- AKC. Laser Therapy For Dogs: Uses, Side Effects, and Alternatives. akc.org
- Erchonia. Laser Therapy for Post-Surgical Recovery in Pets. erchonia.com
All Articles
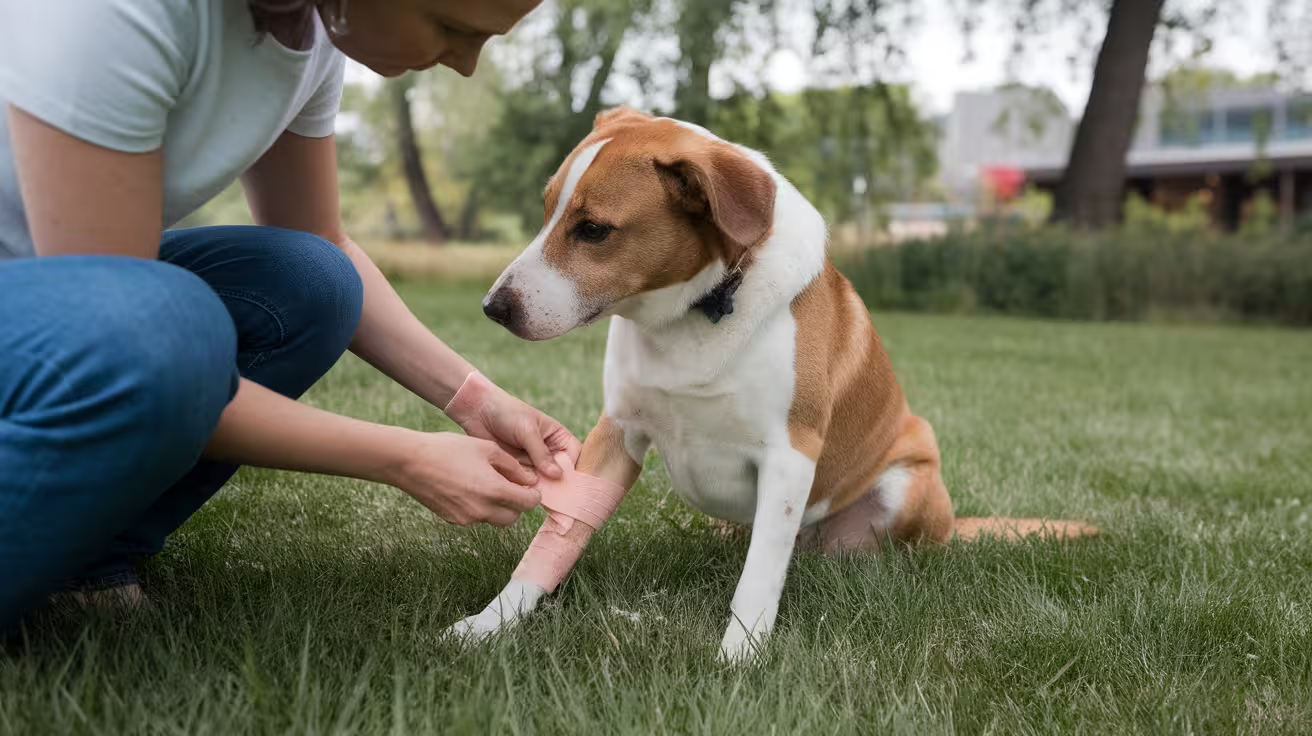
Effective Ways to Prevent Infections in Dog Wounds
Learn effective methods to prevent infections in dog wounds, ensure quick healing, and recognize signs needing veterinary care
A wound doesn't become infected instantly. There's a window the first hours and days after injury when what you do at home significantly affects whether bacteria establish or are cleared.
These are the steps that make the most difference.
Quick answer: The most effective wound infection prevention steps are: stop licking immediately with an E-collar, clean the wound with dilute chlorhexidine or sterile saline (not hydrogen peroxide or alcohol), apply a clean bandage if needed, check the wound twice daily for early infection signs, and follow all veterinary aftercare instructions exactly. Daily monitoring catches early infection when it's simplest to treat.
Key takeaways
- The E-collar is the single most important infection prevention tool licking introduces oral bacteria directly into the wound.
- Chlorhexidine or sterile saline for wound cleaning hydrogen peroxide and alcohol damage healing tissue and delay recovery.
- Change bandages daily or sooner if wet, dirty, or loose.
- Check the wound twice daily for the first two weeks minimum.
- Daily photographs track change better than memory alone.
- Early infection caught in the first 3 to 7 days responds to simpler treatment than established infection.
Step 1: Stop licking immediately
Licking is the most common way dogs infect their own wounds. The dog's mouth contains Staphylococcus pseudintermedius, Pasteurella, streptococcal species, and other bacteria that have direct access to the wound with every lick.
Bond Vet states: "A dog's licking might interfere with healing by opening the wound up again, making it worse, or introducing an infection."
E-collar (Elizabethan collar): the standard, most reliable option. Must extend past the tip of the dog's nose to prevent the dog from reaching the wound. Apply immediately even one night without the collar can allow contamination that delays healing for days.
Alternatives if the dog resists the E-collar:
- Inflatable collar (not as reliable for determined lickers)
- Recovery bodysuit or onesie (effective for trunk wounds)
- Protective wrap or boot (for paw wounds)
The E-collar must be worn at all times during sleep, during meals, and outdoors not just when you're watching.
Step 2: Clean the wound correctly
What to use
- Dilute chlorhexidine (0.05%): mix 1 part 2% chlorhexidine with 40 parts sterile water. Most effective antiseptic for wound cleaning.
- Sterile saline: safe for all wound types; no antiseptic activity but mechanically rinses bacteria.
- Prescribed antiseptic solutions: follow your vet's specific instructions if a solution was prescribed.
What not to use
- Hydrogen peroxide: damages granulation tissue (the new pink tissue forming in the wound) and slows healing
- Alcohol (rubbing alcohol): painful on open tissue and damages healing cells
- Human antibiotic ointments (Neosporin, Polysporin): may contain zinc (toxic if licked) or other ingredients not safe for dogs
How to clean
Bond Vet recommends: clean the wound 1 to 3 times daily. Use gauze or a clean cloth never bare hands. Gently irrigate the wound with the cleaning solution. If using a syringe for flushing, apply gentle pressure only high-pressure flushing can drive bacteria deeper.
Pat dry gently with clean gauze. Do not rub.
Step 3: Bandage correctly (if needed)
Not all wounds require bandaging, but wounds in high-contamination areas (paws, lower limbs), wounds that the dog can reach, and wounds with discharge benefit from protection.
Bandaging steps
- Cover the wound with a sterile, non-stick gauze pad
- Wrap with a soft, self-adhesive bandage (not too tight two fingers should slide under the wrap)
- Check for swelling or discoloration below the bandage (signs of too-tight wrapping)
- Check for moisture (a wet bandage against skin creates an infection-friendly environment)
Bandage change frequency
- Every 24 hours under normal conditions
- Sooner if wet, visibly dirty, or loose
- Use only new, sterile materials for each change
Fairview Veterinary Clinic confirms: "Change sterile bandages daily or when they become wet or dirty."
For wounds at paws, consider waterproof protective boots during short outdoor trips to prevent contamination from soil.
Step 4: Monitor twice daily
Early infection is caught by observation, not by waiting for the wound to look obviously wrong.
What to check at each observation
- Redness: staying at the wound edge (normal) or spreading outward (infection sign)
- Discharge: clear/slightly pink (normal) or yellow/green/cloudy (infection sign)
- Odor: minimal to none (normal) or foul/sour smell (infection sign)
- Wound edges: together and approximating (normal) or separating (concern)
- Warmth: mild and decreasing (normal) or increasing heat (infection sign)
- Dog behavior: returning to normal (normal) or increased wound focus and guarding (infection sign)
Practical tip: Photograph the wound at the same time each day in consistent lighting. Daily photographs allow you to compare yesterday vs. today objectively small changes that escape memory are visible in photographs.
For complete wound infection sign identification, see complete wound infection signs.
Step 5: Follow all veterinary aftercare instructions
This step prevents more infections than any home remedy. Post-operative care instructions are written for a reason: they account for the specific procedure, the dog's risk factors, and the antibiotic/antiseptic choices made during surgery.
Non-negotiable aftercare items:
- Complete the full antibiotic course: stopping early because the wound "looks better" allows surviving bacteria to re-establish. Incomplete courses are a leading driver of resistant infections.
- Attend all scheduled rechecks: even when the wound appears to be healing well. Rechecks catch developing problems before they become serious.
- Restrict activity per instructions: activity violations (jumping, running) stress the incision and can create dehiscence that opens the wound to contamination.
- Keep the wound dry: no bathing until your vet clears it. Moisture softens sutures, promotes bacterial growth, and can create wound breakdown.
For how to prevent surgical site infections specifically before and after surgery, see preventing surgical site infections.
Step 6: Environmental hygiene
The dog's environment contributes bacteria to wounds through direct surface contact.
During wound healing:
- Keep the dog's resting area clean and dry
- Wash bedding every 2 to 3 days in hot water and dry completely
- Disinfect hard surfaces the dog contacts daily (dilute bleach 1:32, rinse before use)
- Avoid grass, soil, and outdoor surfaces with open wounds unless the wound is well covered
For wound infections that have already established, see established wound infection management. For how biofilm makes wound infections harder to treat once established, see biofilm in wound infections.
When to call your vet
Call the same day for:
- Redness spreading beyond the wound margin
- Yellow, green, or cloudy discharge
- Foul odor from the wound
- Wound edges separating
- Dog not eating or drinking by day 3 post-surgery
Go to emergency for:
- Wound significantly opened with visible underlying tissue
- Bleeding not stopping within 5 minutes
- Fever and severe lethargy together
- Red streaks radiating from the wound (lymphangitis)
For monitoring by post-operative day, see post-op infection timeline.
Frequently asked questions
Can I use honey on my dog's wound to prevent infection?
Medical-grade Manuka honey has documented antibacterial properties and is being used in some veterinary wound management contexts. However, regular grocery store honey has inconsistent antibacterial activity and can attract insects. If considering honey, discuss it with your vet and use only veterinary-approved preparations.
My dog pulled off the bandage at night. What should I do?
Apply the E-collar first to prevent further access to the wound. Examine the wound for any visible contamination. Clean gently with dilute chlorhexidine or saline and re-cover with a clean gauze pad until you can contact your vet. If the wound appears significantly contaminated or damaged, call the emergency line.
How long do I need to prevent my dog from licking?
Until the wound is fully healed and your vet confirms it's safe to remove the collar not until it "looks better." For most surgical wounds, this is 10 to 14 days for suture removal, but the collar may be needed longer if healing is delayed or infection developed. Follow your vet's specific guidance for your dog's procedure.
Wound infection prevention is mostly about consistency in four things: keeping the dog away from the wound, cleaning correctly without products that harm healing tissue, monitoring attentively, and completing whatever treatment the vet prescribed. All four are owner-controlled. All four matter.
Resources
- Bond Vet. Step-By-Step Wound Care for a Dog at Home and When to Call the Vet. bondvet.com
- Fairview Veterinary Clinic. How to Clean a Dog Wound. fairviewveterinaryclinic.com
- UrgentVet. Dog Wound Care: How to Care For Open Wounds on Dogs. urgentvet.com
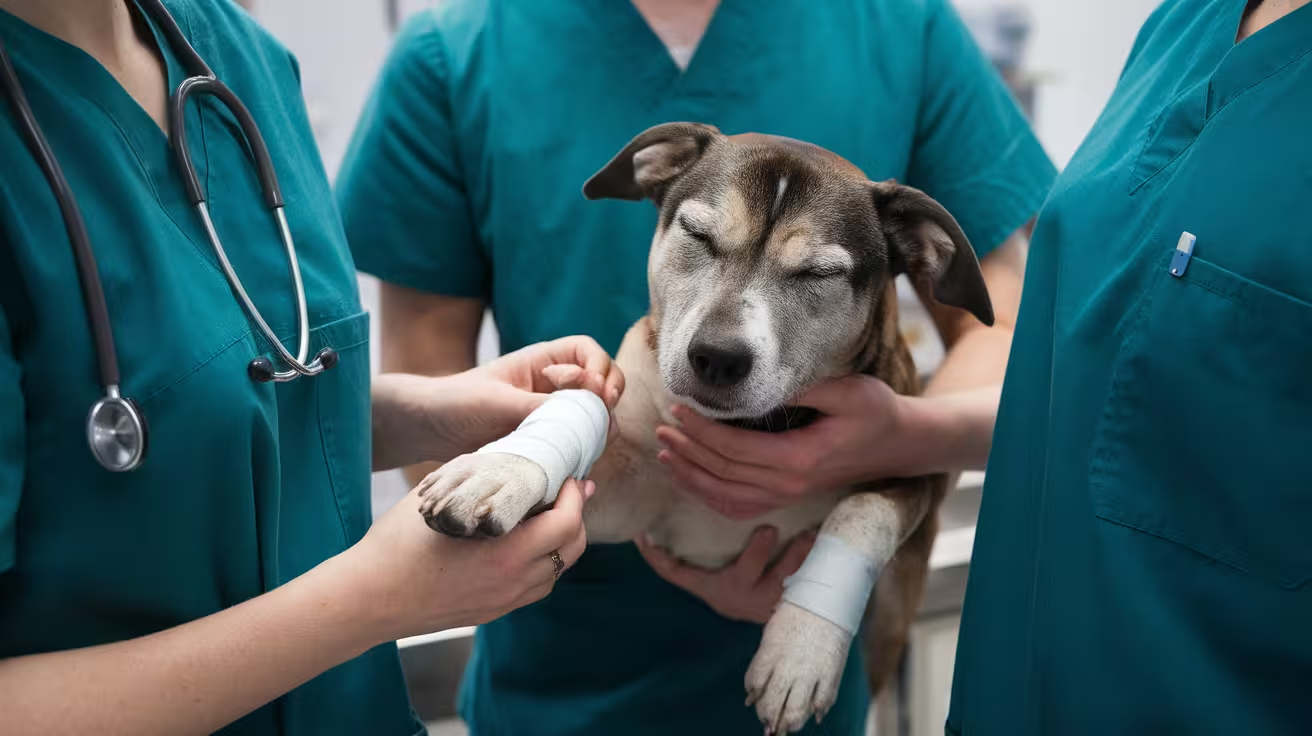
How to Prevent Surgical Site Infections in Dogs
Ensure your dog's safe surgical recovery by preventing infections with advanced strategies, expert tips, and effective post-op care
Surgical site infections (SSIs) in dogs occur in approximately 2.8% of surgical procedures, rising to 8 to 17% in TPLO cases. Most are preventable. Prevention operates on three fronts: what the veterinary team does before and during surgery, what happens intraoperatively, and what the owner does at home.
Quick answer: SSI prevention requires aseptic technique, perioperative antibiotics within 60 minutes of incision, chlorhexidine-alcohol skin prep, sterile instrument handling, and wound irrigation. At home, E-collar compliance to prevent licking is the most effective owner action.
Key takeaways
- SSIs occur in approximately 2.8% of canine surgeries overall; TPLO rates of 8 to 17% are reported in some studies
- Endogenous skin flora is the most common SSI source: the patient's own bacteria, not airborne contaminants
- Perioperative antibiotics given within 60 minutes before incision; extending post-operatively does not reduce SSI rates in clean cases
- Chlorhexidine-alcohol skin prep is the preferred two-step method for most surgical sites
- Wound irrigation during surgery removes debris and bacteria; non-antibiotic lavage solutions also reduce biofilm
- E-collar compliance is the most important owner-controlled variable; licking introduces oral bacteria directly into the healing wound
Who causes most SSIs?
The Veterinary Nurse: "Translocation of endogenous microbial flora is the most common route of surgical site infection. Skin preparation and aseptic techniques aim to reduce or eliminate the growth of resident and transient flora at the wound site."
The dog's own skin bacteria -- primarily Staphylococcus pseudintermedius, Escherichia coli, and Pseudomonas species -- dominate as SSI sources. They enter the wound during surgery or in the post-operative period. The surgical team controls intraoperative contamination; the owner controls much of the post-operative contamination risk.
Pre-operative prevention: patient preparation
Skin clipping
The surgical site is clipped in a preparation area, not in the operating room, to prevent clipper-derived debris from contaminating the sterile field. Clipper blades should be cleaned between patients; microabrasions from dull blades increase bacterial load.
Skin antisepsis
SustainableVet: "A two-step method -- scrubbing with antiseptic soap followed by an alcohol-based solution -- has been shown to be very effective in reducing microbes."
Chlorhexidine gluconate: broad-spectrum, residual activity, superior to povidone-iodine for gram-positive organism reduction. Two percent chlorhexidine in 70% alcohol is the most effective preparation.
Povidone-iodine: effective against gram-positive and gram-negative bacteria, fungi, and some viruses. Less sustained residual activity than chlorhexidine.
NCBi (skin asepsis study): "Most samples collected at the post-asepsis did not present bacterial growth, both for the animals subjected to the povidone-iodine (74%) or to the chlorhexidine (70%) protocols" -- both are effective when applied correctly.
Application technique: antiseptic applied in expanding circles from the incision site outward; two alternating applications of antiseptic and alcohol.
Patient-level risk factors
Acta Veterinaria Scandinavica identified SSI risk factors: "More people present in the operating room, prolonged duration of anesthesia and surgery, presence of a drain, concurrent endocrinopathy, and the use of propofol."
For elective surgery: address concurrent infections, achieve healthy body weight, treat uncontrolled endocrine disease, and screen for skin disease that elevates surface bacterial load.
Intraoperative prevention: aseptic technique and irrigation
Aseptic technique
SustainableVet (asepsis checklist): the team must perform a surgical scrub before gowning and gloving, wear sterile gowns, gloves, masks, and caps, use sterile gloving technique, and avoid unnecessary movement and talking in the operating room.
AVMA Journal (student aseptic breach study): "At least 1 aseptic protocol breach was noted in 46.3% of the 96 procedures observed" -- highlighting how frequently technique lapses occur even in supervised settings.
Wound irrigation
SustainableVet: "Irrigation is essential for preventing SSIs, as it helps remove bacteria, debris, and dead cells from the surgical site."
Saline: mechanically removes debris through lavage volume and pressure. Does not actively kill bacteria or disrupt biofilm.
Dilute chlorhexidine: topical antiseptic activity; must be used at correct dilution -- concentrated chlorhexidine is tissue-toxic.
Non-antibiotic lavage: SustainableVet: "Advanced tools, such as non-antibiotic lavage solutions, can greatly reduce the risk of SSIs by reducing bacterial load and biofilm without antibiotic resistance concerns."
Perioperative antibiotics: what the evidence says
SustainableVet: "Prophylactic antibiotics are essential in high-risk surgeries such as TPLO or gastrointestinal surgery. Clear guidelines suggest giving antibiotics within 60 minutes before the first incision and stopping them within 24 hours unless there are signs of infection."
NCBi (TPLO antibiotic study): "Results showed no difference in SSI rates" between perioperative-only and peri-and-post-operative antibiotic groups. "Eliminating postoperative antibiotic medication in a clean orthopedic procedure helps to reduce antibiotic resistance and is in line with antimicrobial stewardship."
Acta Veterinaria Scandinavica: "Even complete omission of antimicrobials was not associated with increased risk for SSI" in clean orthopedic and neurosurgeries at the Helsinki teaching hospital.
Post-operative prevention: the owner's role
E-collar at all times: the single most impactful owner action. Dog saliva contains high concentrations of oral bacteria. Even brief licking can deliver sufficient bacterial inoculum to establish infection.
Keep the wound dry: moisture promotes bacterial proliferation. No bathing, swimming, or rain exposure until vet clearance at the recheck.
Complete the full antibiotic course: when prescribed for contaminated or dirty cases. Partial courses select for resistance.
Daily incision monitoring: twice-daily visual checks; photograph daily. Call the vet same-day for increasing redness after day 3, yellow or green discharge, or wound odor.
For the wound care protocol during recovery, see wound care after surgery. For signs of developing SSI, see dog incision infection signs causes and treatment. For the complications guide, see signs of complications after soft tissue surgery.
Frequently asked questions
Do all dogs need antibiotics before surgery?
No. Antibiotics are indicated for clean-contaminated and contaminated surgeries, orthopedic implant procedures, and immunocompromised patients. Routine clean soft tissue procedures (simple mass removal, spay/neuter) do not always require prophylactic antibiotics.
Does bathing my dog before surgery help prevent SSI?
Yes, with caveats. Bathing 1 to 2 days before surgery reduces skin bacterial load. Bathing on the day of surgery is not recommended; wet skin delays veterinary prep. Confirm with your clinic.
Can my dog get an SSI even if the surgical team did everything correctly?
Yes. SSI rates of 2 to 17% occur even with optimal technique. The dog's own flora, systemic health factors, and post-operative events all contribute. Perfect technique reduces but does not eliminate risk.
Why should antibiotics stop within 24 hours when there is no sign of infection?
Extending antibiotics without infection evidence provides no additional protection and promotes resistant organism selection. This is standard antimicrobial stewardship.
What is biofilm and why does it matter for SSI prevention?
Biofilm is a structured bacterial community 100 to 1,000 times more resistant to antibiotics than planktonic bacteria. Once established, it is extremely difficult to treat. Preventing biofilm through debridement and lavage is far more effective than treating it.
My dog had surgery but the vet did not prescribe antibiotics. Is that normal?
Yes, for clean elective soft tissue surgery. Acta Veterinaria Scandinavica found no increased SSI risk even in dogs not receiving perioperative antibiotics in clean orthopedic cases. Routine antibiotic overuse promotes resistance; your vet follows antimicrobial stewardship guidelines.
Resources
- Veterinary Nurse. Surgical Site Infections: Preparation, Technique and Perioperative Prevention. theveterinarynurse.com
- SustainableVet. How to Prevent Surgical Site Infections in Dogs. sustainablevet.org
- NCBi. Comparison of SSI Rates in Dogs Undergoing TPLO. ncbi.nlm.nih.gov
- Acta Veterinaria Scandinavica. Antimicrobial Prophylaxis in Clean Orthopaedic and Neurosurgeries in Dogs. springer.com
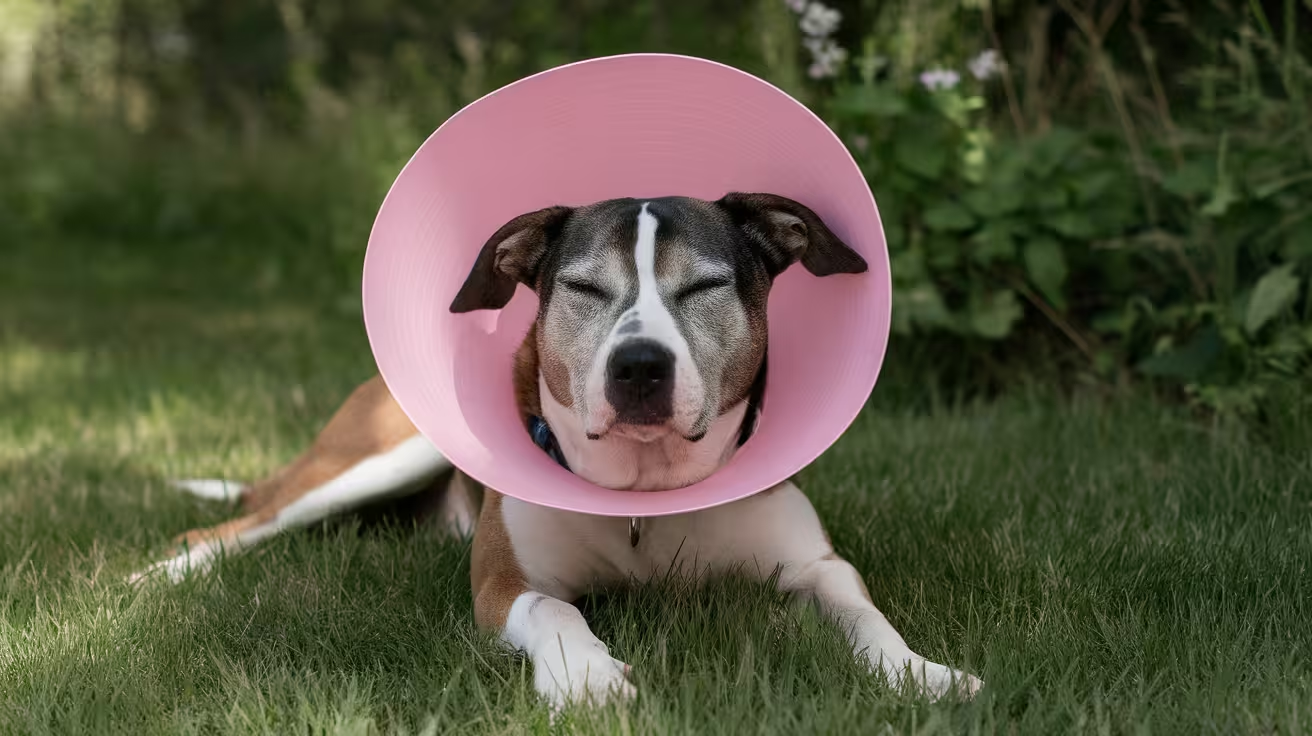
Post-Operative Infection in Dogs: Symptoms and Solutions
Learn about symptoms and solutions for post-operative infections in dogs to ensure a smooth and healthy recovery after surgery
Post-operative infections are among the most common complications after surgery in dogs. The Pet Vet reports they affect approximately 5 to 10% of surgical patients. Most are preventable. When they do develop, the difference between a minor setback and a serious crisis is usually how quickly they are caught.
This guide covers the full picture: symptoms, causes, treatment, and prevention with specific guidance on what owners control versus what the vet team manages.
Quick answer: Symptoms of post-operative infection include redness after day 3, yellow or green discharge, warmth, swelling not improving, foul odor, and worsening pain. Systemic signs including fever need urgent care. Call the vet same-day.
Key takeaways
- 5 to 10% of surgical patients develop a post-operative infection despite appropriate veterinary care
- Early signs appear 3 to 5 days post-surgery: redness increasing, warmth, discharge becoming cloudy or colored
- Licking is the most common preventable cause: saliva deposits bacteria directly into the healing wound
- Surface infections respond to antibiotics and wound care; deep infections may require surgical debridement
- Complete the full antibiotic course: stopping early when the dog looks better is a leading cause of recurrent infection
- Call the vet same-day for yellow or green discharge, foul odor, increasing swelling, or systemic signs
Why post-operative infections occur
Surgery creates a wound. Even under ideal sterile conditions, some bacteria are always present on the skin surface and in the air. The immune system normally clears this low-level contamination. Infection develops when bacterial load overwhelms the local defenses either because too many bacteria entered, the wound environment favors bacterial growth, or the dog's immune response is impaired.
The Pet Vet: "When bacteria enter the surgical site, they can multiply rapidly, causing inflammation, pain, and potentially life-threatening complications if left untreated."
Key pathways:
- Self-trauma: licking introduces oral bacteria directly into the wound
- Moisture: wet wound environments dramatically accelerate bacterial multiplication
- Contaminated environment: contact with dirty bedding, soil, or other animals
- Systemic factors: hypoalbuminemia, obesity, immunosuppression, allergic skin disease, and poor perfusion all reduce wound healing capacity
Symptoms of post-operative infection
Normal healing baseline (to compare against)
- Days 1 to 2: mild redness and swelling at incision edges; possibly a small amount of clear or slightly pink serum discharge
- Days 3 to 5: redness fading, swelling reducing, discharge stopped
- Days 5 to 10: wound edges fully closed; no discharge; no odor
Early signs of infection (days 3 to 7)
Redness that is increasing rather than decreasing after day 3 is the primary early signal. Other early indicators:
- Warmth at the incision site not present or not improving in the first 3 days
- Swelling increasing after the expected peak at days 1 to 2
- Discharge changing from clear to cloudy or milky
Preventing post-op infections article (SustainableVet): "Early detection of redness, swelling, or discharge allows prompt treatment before biofilms develop extensively."
Established infection signs
- Yellow or green pus discharge from the incision at any time
- Foul or rotten odor
- Swelling clearly larger than the post-surgical baseline
- Pain increasing rather than decreasing (dog guarding more, licking more intensely despite E-collar)
- Wound edges beginning to separate (early dehiscence from infection undermining the suture line)
Systemic signs (serious requires urgent care)
The Pet Vet: "Post-surgical infection in dogs is a serious complication. If left untreated, they can cause inflammation, pain, and potentially life-threatening complications."
- Fever (rectal temperature above 103.5 degrees Fahrenheit)
- Lethargy that is worsening rather than improving after day 2 to 3
- Complete loss of appetite at day 2 or beyond
- Increased thirst and urination (can indicate systemic inflammation)
- Pale gums
These systemic signs indicate the infection may have entered the bloodstream. This requires same-day or emergency veterinary contact.
Solutions: treatment options
Local wound care and antibiotics
For superficial infections involving the skin and immediate subcutaneous tissue: the vet will prescribe systemic antibiotics (ideally culture-guided) and may direct gentle wound cleaning with dilute chlorhexidine.
SustainableVet: "Keep the incision site clean and dry at all times. Do not apply creams, ointments, or disinfectants to the incision unless specifically instructed."
The Pet Vet identifies five medication categories used in managing post-surgical infections:
- Antibiotics: to eliminate the causative bacteria; always culture-guided when available
- NSAIDs: to reduce inflammation at the infection site
- Pain medications: to maintain comfort, eating, and rest during treatment
- Topical treatments: directed antiseptic cleaning as instructed
- Immune support: nutritional support to maintain immune function during recovery
Surgical debridement
For infections extending into deeper tissue layers, forming abscesses, or failing to respond to antibiotic therapy: surgical debridement removes infected and necrotic tissue to allow healing from a clean base. Drain placement may accompany debridement.
Hospitalization
When systemic signs are present: intravenous antibiotics, intravenous fluid support, and monitoring for septic deterioration. This is intensive care territory, not outpatient management.
Prevention: the owner's role
The Pet Vet: "Proper incision care at home is perhaps the most important preventive measure."
E-collar compliance: wear at all times, including during sleep and eating, until suture removal and vet clearance. One sustained licking episode can establish infection.
Keep the wound dry: no bathing, swimming, or exposure to rain until the vet confirms healing is complete.
Complete the full antibiotic course: even if the dog appears completely well.
Daily wound checks: twice daily at minimum. Photograph the incision to track subtle changes. Call the vet for any change trending toward the infection signs described above.
Clean bedding: wash bedding before the dog returns home; prevent contact with soil, water, or other animals during recovery.
SustainableVet: "Owners and veterinary staff must work together to maintain clean wounds and detect early signs of infection."
For the full wound care protocol, see how to care for a dog wound after surgery. For the broader complications guide, see signs of complications after soft tissue surgery. For detail on infection signs and causes specifically, see dog incision infection signs causes and treatment.
Frequently asked questions
How quickly do post-operative infections develop after dog surgery?
Early signs typically appear between days 3 and 7. Bacterial growth in wound tissue takes 24 to 72 hours after contamination; visible signs follow as the immune response escalates.
Can I treat my dog's post-operative infection at home without seeing a vet?
No. Antibiotics require a prescription. Incorrect wound care can worsen the infection. Any suspected infection needs veterinary assessment to determine the depth, causative organism, and appropriate treatment.
My dog's wound was fine at day 5 but now at day 9 it looks infected. Is that possible?
Yes. Late infections can occur even after apparent initial healing. Causes include retained suture material acting as a nidus for bacteria, failure of a deep tissue layer, or a delayed E-collar compliance breach. Call the vet for assessment.
How do I know if the infection is superficial or deep?
Superficial infections affect only the skin and immediately below it; the incision edges remain intact. Deep infections cause more significant swelling, significant pain, systemic signs, and often wound breakdown. The vet uses palpation, culture, and imaging to assess depth.
What happens if a post-operative infection goes untreated?
Untreated infection progresses from localized to deep tissue, then to systemic (bloodstream). Sepsis, a life-threatening systemic inflammatory response to infection, can develop rapidly. In orthopedic cases, infection can spread to bone (osteomyelitis) or implants, requiring hardware removal.
Will a post-operative infection affect my dog's long-term recovery?
Superficial infections caught early typically resolve without lasting impact. Deep infections, osteomyelitis, or sepsis can delay recovery significantly. Early detection and prompt treatment matter for prognosis, not just comfort.
Resources
- The Pet Vet. Post-Surgical Infection in Dogs: 5 Vital Medications for Recovery. thepetvet.com
- SustainableVet. Post-Operative Infection in Dogs: Symptoms and Solutions. sustainablevet.org
- SustainableVet. Preventing Post-Operative Infections in Dogs. sustainablevet.org
- Veterinary Practice News. Exploring Surgical Site Infections. veterinarypracticenews.com

Sustainable Vet | Copyright ©2026 | All Rights Reserved

