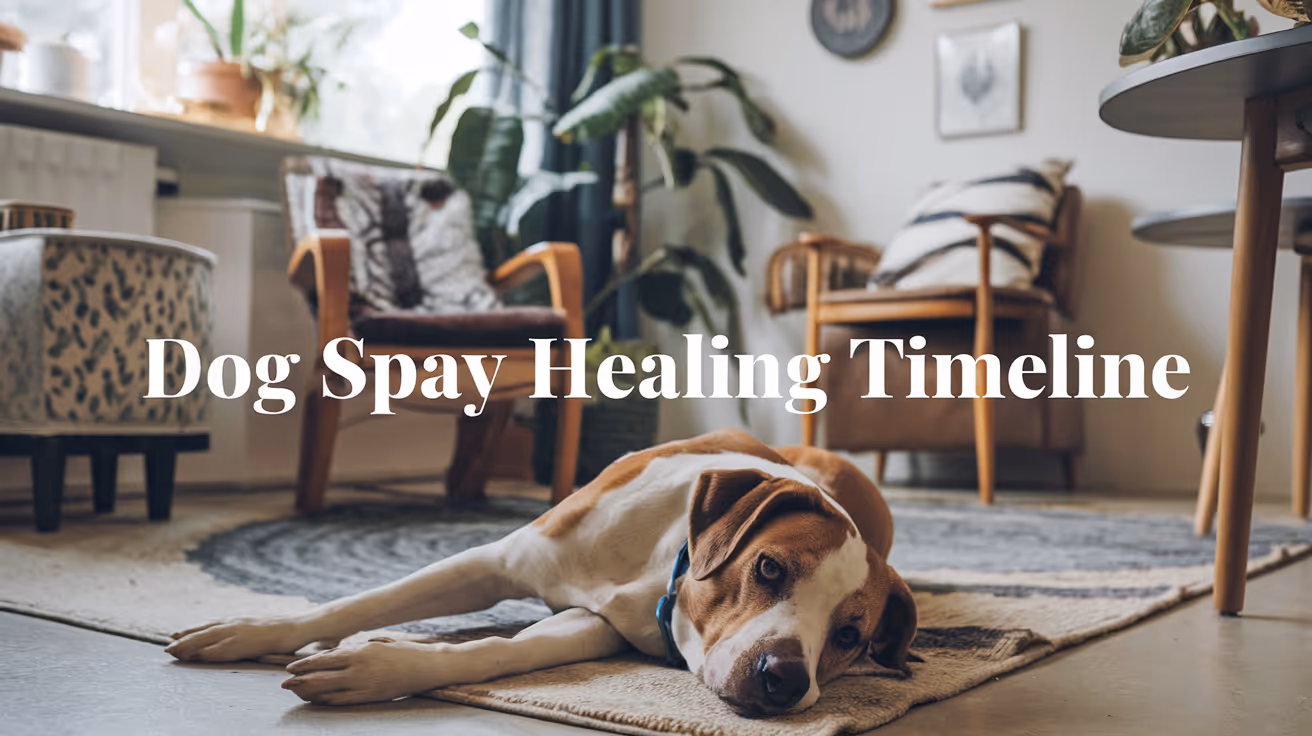
spay incision healing process dog
Learn the spay incision healing process in dogs, what’s normal during recovery, common concerns owners misread, and when to contact your vet.

This article is for informational purposes only and is not a substitute for professional veterinary advice. Every case is unique, so always consult your veterinarian for guidance specific to your pet.
Normal Dog Spay Incision Healing Stages
You must monitor the spay incision closely to ensure proper healing and avoid complications like infection or dehiscence. Recognizing normal healing stages helps you decide when intervention is necessary.
Healing progresses through predictable phases, each with distinct clinical signs. Knowing these stages guides your post-operative care and client instructions to optimize recovery.
Inflammatory phase: This initial stage lasts 3 to 5 days, featuring redness and mild swelling as immune cells clear debris and prevent infection around the incision site.
Proliferative phase: Occurring from day 4 to 14, new tissue forms, and the incision edges begin to close. You should see reduced swelling and no discharge during this phase.
Maturation phase: Starting around day 14 and lasting weeks, collagen strengthens the wound. The incision may appear slightly raised but should not be painful or open.
Normal scab formation: A thin scab may develop within the first week, protecting the wound. Avoid premature removal to prevent delayed healing or infection.
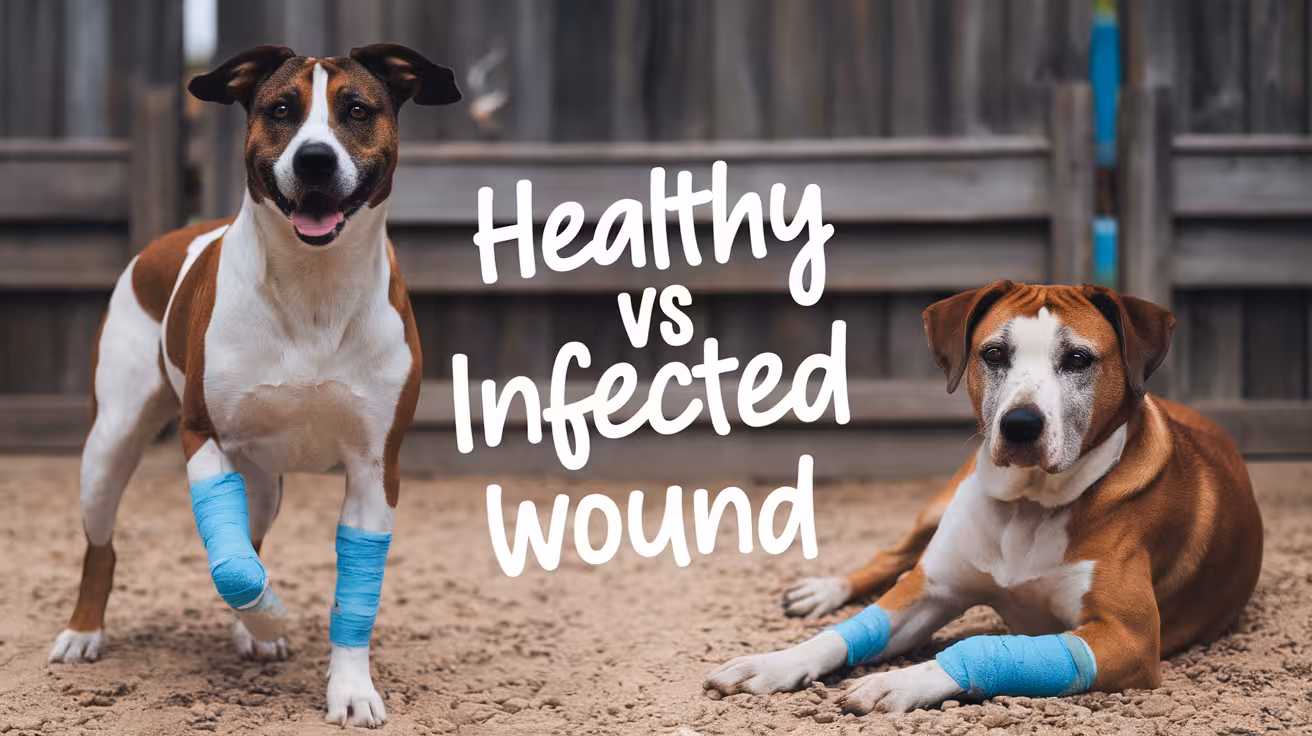
Signs of complications: Persistent redness, swelling, discharge, or opening of the incision beyond day 5 indicate infection or dehiscence requiring prompt veterinary assessment.
Understanding these healing stages allows you to support recovery effectively and recognize when the incision deviates from normal progress. Timely action improves outcomes and reduces post-operative risks.
What a Healing Dog Spay Incision Looks Like
You need to monitor your dog's spay incision closely to catch any signs of infection or complications early. Recognizing normal healing helps you avoid unnecessary stress and ensures timely intervention if problems arise.
Knowing what a healthy incision looks like allows you to provide better care and communicate effectively with your veterinarian. This knowledge directly impacts your dog's recovery and comfort during the critical post-operative period.
Incision appearance: The incision should be clean, dry, and slightly pink without swelling or discharge, indicating normal tissue repair and absence of infection.
Swelling expectations: Mild swelling around the incision is common for 2–3 days but should not increase or feel warm, which could signal inflammation or infection.
Discharge concerns: Clear or slightly bloody fluid is normal initially, but thick, yellow, green, or foul-smelling discharge requires immediate veterinary evaluation.
Skin integrity: The skin edges should remain closed without gaping or separation, as opening can lead to infection or delayed healing.
Behavioral signs: Excessive licking, chewing, or signs of pain at the incision site often indicate irritation or complications needing prompt attention.
Careful observation of your dog's spay incision supports early detection of problems and promotes faster healing. You can help ensure a smooth recovery by knowing what to expect and when to seek help.
Healing Timeline After Dog Spay Surgery
Managing your dog's recovery after spay surgery is critical to prevent complications and ensure optimal healing. You must monitor incision sites and behavior closely to identify any signs of infection or distress early.
Understanding the typical healing stages helps you make informed decisions about activity restriction, pain management, and follow-up care. This knowledge reduces risks and supports a smooth recovery process.
Immediate post-op phase: The first 24 to 48 hours require strict rest and pain control to minimize swelling and discomfort, reducing the risk of wound disruption or bleeding complications.
Incision healing: The surgical site usually begins to close within 5 to 7 days; you should watch for redness, discharge, or swelling that may indicate infection or dehiscence.
Activity restriction: Limiting your dog's movement for at least 10 to 14 days prevents strain on sutures and supports proper tissue repair, avoiding complications like seroma formation.
Follow-up evaluation: A veterinary check between 7 and 14 days post-surgery ensures the incision is healing well and allows removal of sutures or staples if needed.
Full recovery timeline: Most dogs return to normal activity within 2 to 3 weeks, but internal healing continues; gradual reintroduction of exercise is essential to prevent setbacks.
Careful observation and adherence to post-operative instructions are key to successful healing after spay surgery. You play a vital role in supporting your dog's recovery and preventing complications.
Normal vs Abnormal Swelling During Healing
Swelling is a common clinical sign during the healing process, but distinguishing between normal and abnormal swelling is critical to avoid complications. You must assess swelling carefully to decide if intervention is necessary or if the healing is progressing as expected.
Abnormal swelling can indicate infection, hematoma, or other complications that require prompt action. Recognizing these signs early helps you prevent delayed healing or systemic illness in your patient.
Timing of swelling: Normal swelling peaks within 48 to 72 hours post-injury or surgery and then gradually subsides, whereas persistent or increasing swelling beyond this period suggests abnormality.
Swelling characteristics: Normal swelling is soft and non-painful, while abnormal swelling may be firm, warm, painful, or fluctuant, indicating possible infection or hematoma formation.
Associated signs: Abnormal swelling often accompanies systemic signs like fever, lethargy, or discharge, which are absent in normal healing swelling.
Response to treatment: Normal swelling responds well to cold therapy and rest, but abnormal swelling may worsen or fail to improve, signaling the need for further diagnostics.
Impact on function: Swelling that restricts movement or causes severe discomfort beyond expected healing limits should raise concern for abnormal processes.
Careful monitoring and timely differentiation between normal and abnormal swelling enable you to optimize healing and reduce the risk of complications in your patients.
Signs a Dog Spay Incision Is Not Healing
You must monitor a dog's spay incision closely to avoid complications that can delay healing or cause infection. Early recognition of abnormal signs helps you intervene promptly and improve outcomes.
Failure to identify poor healing can lead to wound dehiscence, systemic infection, or prolonged pain. Knowing what to look for guides your decisions on when to seek veterinary attention.
Persistent redness and swelling: Ongoing inflammation beyond 3-5 days suggests infection or irritation that requires veterinary evaluation to prevent worsening tissue damage.
Discharge or pus: Any yellow, green, or foul-smelling fluid from the incision indicates bacterial contamination needing prompt antimicrobial treatment and wound care.
Incision opening or gaping: Separation of wound edges signals poor healing or mechanical stress, increasing the risk of internal organ exposure and necessitating urgent surgical repair.
Excessive licking or chewing: Repeated trauma from licking delays healing and introduces bacteria, so you must use protective devices to prevent further damage.
Systemic signs of illness: Fever, lethargy, or loss of appetite alongside incision issues indicate systemic infection or sepsis, requiring immediate veterinary intervention.
Recognizing these signs early allows you to act decisively to protect your dog’s health. Timely veterinary care reduces complications and supports a smooth recovery process.
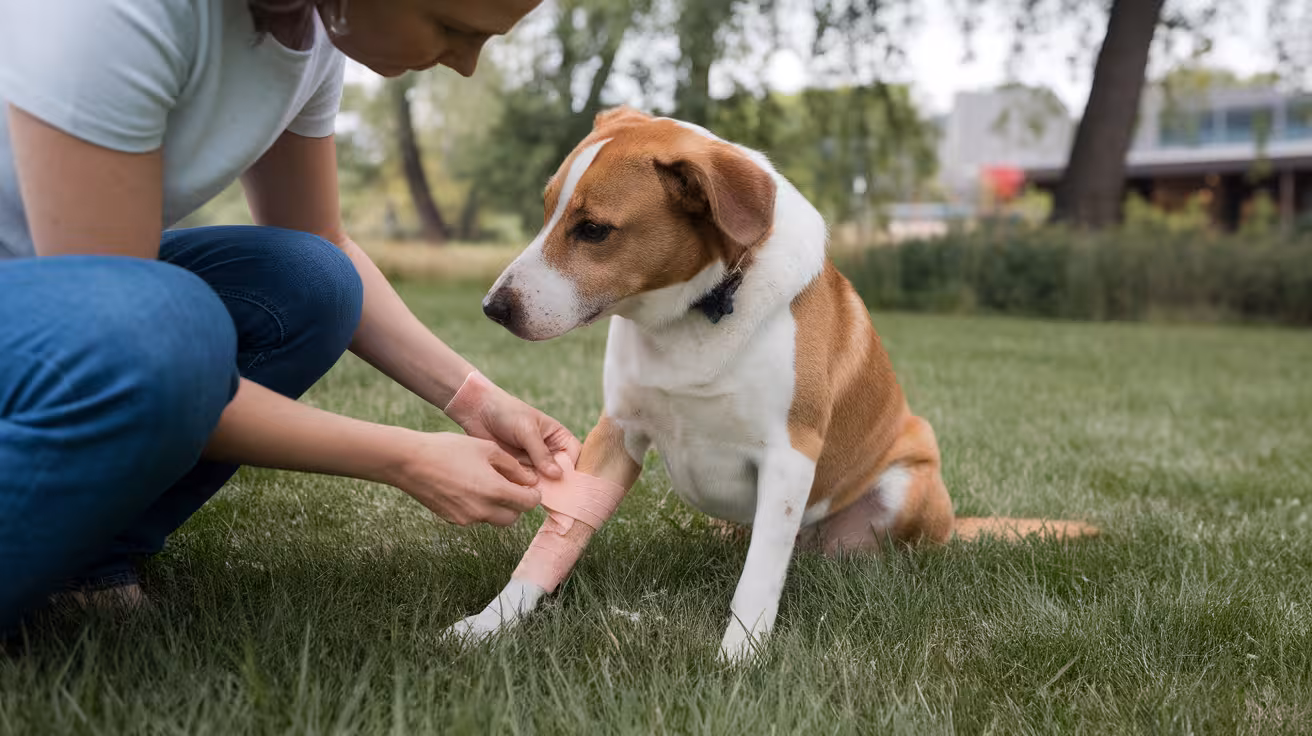
Proper care of a dog's spay incision is critical to avoid infection and ensure a smooth recovery. You must monitor the site closely and manage your dog's activity to prevent complications.
Understanding how to support healing reduces the risk of reopening the incision or causing irritation. This knowledge helps you make informed decisions during the recovery period.
How to Help a Dog’s Spay Incision Heal Properly
Managing your dog's spay incision requires careful attention to prevent infection and mechanical stress. You should restrict activity and maintain a clean environment to promote healing.
Regular inspection helps detect early signs of complications, allowing timely intervention. Preventing licking or chewing at the site is essential to avoid wound breakdown.
Activity restriction: Limiting your dog's movement reduces tension on the incision, preventing dehiscence and promoting stable healing during the critical early days post-surgery.
Incision monitoring: Check the site daily for redness, swelling, discharge, or odor, which indicate infection or other complications requiring prompt veterinary attention.
Prevent licking: Use an Elizabethan collar or alternative barriers to stop your dog from licking or chewing the incision, reducing risk of contamination and delayed healing.
Maintain cleanliness: Keep the incision dry and clean by avoiding baths or swimming until fully healed, minimizing bacterial exposure and irritation.
Follow medication protocols: Administer prescribed antibiotics or pain medications exactly as directed to control infection and discomfort, supporting optimal recovery.
Consistent care and vigilance are key to ensuring your dog’s spay incision heals without complications. Your proactive management directly influences recovery quality and speed.
When to Seek Vet Care During Healing
Healing can be unpredictable, and timely veterinary intervention is crucial to avoid complications. You need to recognize signs that suggest your pet’s recovery is not progressing as expected to prevent worsening conditions.
Delaying care during healing increases risks of infection, delayed wound closure, or systemic illness. Knowing when to seek veterinary advice helps you protect your pet’s health and supports better outcomes.
Persistent swelling or redness: If swelling or redness around a wound or surgical site worsens or does not improve within 48 hours, it may indicate infection requiring prompt veterinary evaluation.
Unusual discharge or odor: Any pus, foul-smelling fluid, or excessive bleeding from a healing site suggests infection or dehiscence, necessitating immediate veterinary attention.
Increased pain or discomfort: If your pet shows escalating pain signs despite pain management, it could reflect complications such as infection or internal issues needing reassessment.
Changes in appetite or behavior: Loss of appetite, lethargy, or unusual behavior during healing may signal systemic illness or pain, warranting veterinary examination without delay.
Failure to heal or wound reopening: If wounds fail to close or reopen after initial healing, you must seek veterinary care to address underlying causes and prevent further damage.
Monitoring your pet closely during healing and acting on concerning signs ensures you provide timely care. Early intervention improves recovery chances and minimizes risks of serious complications.
Conclusion on Dog Spay Incision Healing Process
Monitoring the healing of a dog’s spay incision is vital to prevent complications such as infection or dehiscence. You must assess the incision regularly to ensure it is healing within expected timeframes and without abnormal signs.
Proper post-operative care directly influences recovery outcomes and reduces the risk of delayed healing or secondary issues. Timely intervention can improve your dog’s comfort and surgical success.
Infection risk: Early signs like redness, swelling, or discharge require prompt attention to avoid worsening infection and delayed healing.
Activity restriction: Limiting your dog’s movement reduces tension on the incision, preventing suture disruption and promoting faster tissue repair.
Incision monitoring: Regular inspection helps detect subtle changes that indicate complications, allowing you to act before serious problems develop.
Proper wound care: Keeping the incision clean and dry supports natural healing processes and minimizes bacterial contamination risks.
Follow-up visits: Scheduled veterinary checks confirm the incision is healing well and allow early management of any concerns.
Consistent care and vigilance during the healing phase ensure your dog recovers smoothly from spay surgery. You play a key role in supporting optimal incision healing and overall post-operative success.
FAQs
What is the normal spay incision healing timeline in dogs?
A dog’s spay incision usually heals within 10 to 14 days. Mild redness and slight swelling are normal in the first few days. The incision should stay closed, dry, and show daily improvement as the skin and deeper tissues heal.
What should a healthy spay incision look like during healing?
A healthy healing incision looks clean, dry, and closed. The edges may be light pink early on but should not spread. There should be no discharge, bad smell, heat, or increasing pain as healing progresses.
Is swelling normal during the spay incision healing process?
Yes, mild swelling is common during the first few days after surgery. It should slowly decrease with rest. Swelling that becomes hard, painful, warm, or larger over time may signal a complication.
How does licking affect spay incision healing in dogs?
Licking irritates the incision and introduces bacteria. Even brief licking can delay healing or cause infection. An e-collar should be used until the incision is fully healed and your vet confirms it is safe to remove.
How much activity is safe while a spay incision heals?
Activity should be limited for 10 to 14 days. Running, jumping, or rough play can strain internal sutures. Short leash walks for bathroom breaks are fine, but calm rest is essential for proper healing.
When should I worry about my dog’s spay incision healing?
You should worry if redness spreads, swelling increases, discharge appears, or the incision opens. Fever, pain, lethargy, or appetite loss are also warning signs. If healing does not improve daily, contact your vet promptly.

Get a Free Poster
Enhance your workspace with a high-quality radiographs reference poster, designed for veterinary professionals. This free physical poster will be shipped directly to you—just fill out the form to request your copy.

Taking Great TPLO Radiographs
Click Below to Watch Live Video Demos


We'll send you a Free Wall Poster with all the steps
Step #1
Getting Ready
Ensuring a clean surgical field starts with proper skin preparation. This video demonstrates the best practices for:
- Shaving the patient – Achieving a close, even shave while minimizing skin irritation
- The Dirty Scrub – The initial skin prep step to remove surface debris and reduce bacterial load before the sterile scrub.
Following these techniques helps reduce infection risk and improve surgical outcomes. Watch the video to see how it’s done effectively!


Step #2
Reduce Your Risks
Many surgeons are shocked to find out that their patients are not protected from biofilms and resistant bacteria when they use saline and post-op antibiotics.
That’s Where Simini Comes In.
Why leave these risks and unmanaged? Just apply Simini Protect Lavage for one minute. Biofilms and resistant bacteria can be removed, and you can reduce two significant sources of infection.
Step #3
Take the Course
Preventing surgical infections is critical for patient safety and successful outcomes. This course covers:
- Aseptic techniques – Best practices to maintain a sterile field.
- Skin prep & draping – Proper methods to minimize contamination.
- Antibiotic stewardship – When and how to use perioperative antibiotics effectively.
Stay up to date with the latest evidence-based protocols. Click the link to start learning and earn CE credits!

Things to know
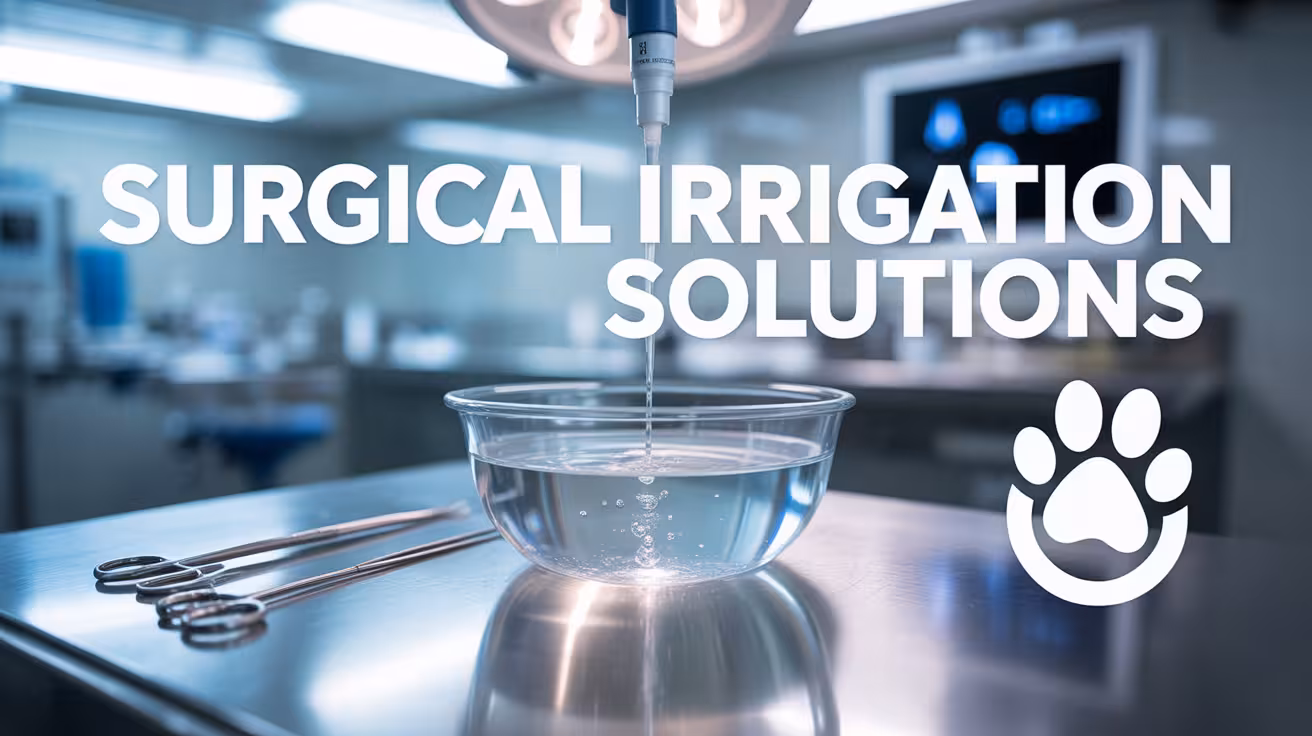
Surgical Irrigation Solutions: A Complete Guide for Veterinary Surgeons
Explore safe and effective surgical irrigation solutions for dogs. Learn best practices and discover why many vets trust Simini Protect Lavage
Why Surgical Irrigation Matters in Dog Surgeries
Surgical irrigation plays a key role in keeping wounds clean during and after surgery. When a dog undergoes a procedure, blood, tissue debris, and bacteria can build up in the surgical site. Irrigation helps flush out these contaminants, lowering the risk of infection.
Clean wounds heal faster and with fewer problems. By removing bacteria early, irrigation prevents biofilm formation, which can make infections harder to treat. It also helps keep the tissue moist, which supports better healing and reduces cell damage.
In orthopedic and soft tissue surgeries, proper irrigation reduces post-op swelling, keeps the wound environment stable, and improves visibility for the surgeon. This leads to better surgical outcomes and comfort for the patient. Overall, irrigation is not just a cleaning step—it’s an important part of protecting the dog’s health and speeding up recovery.
Types of Irrigation Fluids Used in Veterinary Surgeries
Choosing the right irrigation fluid is important for reducing infection and helping tissues heal. Different fluids serve different purposes depending on the wound type, surgical procedure, and risk of contamination.
1. Sterile saline and lactated Ringer’s solution
These are the most common and safest options for routine wound irrigation. They help flush out debris without harming healthy tissues.
- Sterile saline is isotonic and non-toxic, making it ideal for general use in clean and contaminated wounds.
- Lactated Ringer’s solution contains electrolytes that support tissue health and is often used in larger wounds or longer surgeries.
Both options are gentle and effective for maintaining a clean surgical field while preserving the body’s natural healing process.
2. Antiseptic options: chlorhexidine, povidone-iodine
When infection risk is high, antiseptic fluids are sometimes used to reduce bacterial load. However, they must be used carefully.
- Chlorhexidine has strong antimicrobial effects but can irritate tissues if too concentrated.
- Povidone-iodine is broad-spectrum but can be toxic to cells if not diluted properly.
These are typically used only in contaminated wounds or during lavage after opening infected areas. Vets must weigh the benefits against the potential for tissue damage.
3. Risks of using tap water, detergents, or alcohol-based fluids
Non-sterile or harsh fluids may seem convenient but can cause more harm than good.
- Tap water may contain bacteria or minerals that irritate tissues and increase infection risk.
- Detergents are not designed for use on living tissue and may delay healing.
- Alcohol-based solutions are cytotoxic and can cause pain, especially on open wounds.
These fluids should be avoided during surgical irrigation unless no sterile alternatives are available. Even then, extreme caution is needed.
Practical Guidelines for Effective Lavage
For surgical irrigation to work well, it must be done with the right tools, fluid pressure, and technique. Proper lavage reduces bacteria, clears debris, and prepares the wound for closure or further treatment.
- Ideal pressure (7–8 psi): This range provides enough force to remove bacteria and debris without damaging healthy tissue. Pressure can be achieved using large syringe-and-catheter systems or specialized pulsatile lavage devices.
- Recommended fluid temperature (30–35°C): Using warm fluids helps maintain the dog's body temperature during surgery. Cold fluids can lower tissue temperature, slow healing, and increase anesthesia risk.
- Importance of volume and wound coverage: Adequate volume ensures that the entire wound is flushed properly. High-risk wounds may require 500–1000 mL or more to achieve proper cleaning. Every part of the wound should be irrigated, including deep pockets or joint spaces.
- Keeping the wound bed moist and debris-free: Dry tissues can die quickly. Continuous or repeated lavage keeps the wound moist and clears any clots, bone fragments, or foreign material that could delay healing.
Following these simple but essential steps leads to better healing, fewer infections, and improved surgical outcomes.
Understanding Biofilms and Resistant Bacteria
Biofilms are a major concern in veterinary surgeries. A biofilm is a layer of bacteria that sticks to a surface, like bone, tissue, or implants, and covers itself with a slimy protective coating. Once formed, it becomes very hard to remove and can block antibiotics or immune cells from reaching the bacteria inside. This leads to chronic infection, delayed healing, and sometimes surgical failure.
Resistant bacteria, such as Pseudomonas aeruginosa or MRSP (methicillin-resistant Staphylococcus pseudintermedius), are often found in surgical wounds—especially in repeat surgeries or cases with previous antibiotic use. These bacteria can survive common treatments and spread quickly in hospital settings if hygiene is poor.
Standard fluids like saline or Ringer’s solution are good at flushing out loose debris and some bacteria, but they cannot break down biofilms or kill resistant organisms. Once a biofilm forms, basic irrigation is no longer enough. This is why understanding these threats is important for every surgeon. Using advanced irrigation products or combining mechanical flushing with antiseptics may be necessary in high-risk cases to prevent long-term complications.
Limitations of Traditional Irrigation Solutions
While traditional irrigation solutions like sterile saline and antiseptics are widely used, they come with important limitations that every surgeon should understand. These solutions help with basic wound flushing, but they often fall short in dealing with deeper infection risks, especially in complex or contaminated cases.
Key limitations include:
- No active effect on bacteria or biofilms: Sterile saline and lactated Ringer’s solution are excellent for cleaning, but they don’t kill bacteria or disrupt biofilms. This limits their usefulness in high-risk or infected wounds.
- Potential tissue toxicity of some antiseptics: Antiseptic agents like chlorhexidine and povidone-iodine can harm healthy tissue if used in high concentrations or for prolonged contact. Tissue damage may delay healing or increase post-op complications.
- Inconsistent preparation or "home-brew" mixes: Some clinics mix their own solutions using various ingredients. These mixes may lack standardization in concentration, pH, or sterility, increasing the risk of irritation or infection rather than preventing it.
Because of these issues, many surgeons are now turning to advanced irrigation products specifically designed to be both tissue-safe and effective against biofilms and resistant bacteria.
Introducing Simini Protect Lavage
Simini Protect Lavage is an advanced surgical irrigation solution designed for veterinary use. Unlike basic fluids, Simini works intra-operatively to reduce biofilms and drug-resistant bacteria, without using antibiotics.
It’s non-toxic to tissue, safe for open wounds, and leaves no harmful residue. Because it’s not antibiotic-based, there’s no known risk of resistance, making it reliable even in repeated surgeries.
Simini is easy to use with standard lavage tools, so it fits smoothly into existing surgical workflows. Trusted by leading surgeon Dr. Aldo Vezzoni, it has already been used in over 30,000 veterinary surgeries worldwide with excellent results.
Why More Surgeons Are Switching to Simini
Veterinary surgeons are increasingly choosing Simini Protect Lavage because it offers better infection control right when it matters most—before wound closure. By actively targeting biofilms and resistant bacteria during surgery, Simini helps reduce post-operative complications and improves healing outcomes.
It also supports antimicrobial stewardship, a key goal in modern veterinary medicine. Since Simini is non-antibiotic and has no known resistance, it lowers the need for systemic antibiotics and helps fight the global issue of drug resistance.
Surgeons appreciate the peace of mind that comes from using a solution backed by clinical use and trusted names like Dr. Aldo Vezzoni. For clients, knowing their pet received the highest standard of surgical care builds confidence and satisfaction. Simini is a simple, science-backed upgrade to routine lavage that adds real value to every procedure.
FAQs
What does Simini Protect Lavage do?
Simini Protect Lavage is an intra-operative irrigation solution that helps reduce bacteria and biofilms, two major infection risks in veterinary surgery. It is non-antibiotic, has no known resistance, and is designed to support wound hygiene during surgery without damaging healthy tissue. It fits easily into existing surgical workflows without extra equipment.
Can Simini be used in both clean and contaminated surgeries?
Yes, Simini can be used in both routine and contaminated procedures. Many surgeons initially used it in complex or revision surgeries, then adopted it for clean cases as part of their routine surgical protocol. Its ability to reduce biofilms and resistant bacteria makes it a valuable option across various surgical scenarios.
How is Simini different from saline or povidone-iodine?
Saline helps flush debris but has no active effect on bacteria or biofilms. Povidone-iodine may cause tissue irritation or damage if not used correctly. Simini is different—it reduces bacterial load and biofilms without harming healthy tissue, and it's easy to use without mixing or dilution.
Is Simini Protect Lavage safe for surgical tissue?
Yes. Simini is tissue-compatible and does not require dilution. It has been used in over 30,000 veterinary surgeries and is based on a leading antibiofilm product used in human medicine. It does not contain antibiotics and supports antimicrobial stewardship goals in veterinary practice.
Does Simini require special tools or training?
No special tools are needed. Simini can be used with standard lavage systems such as syringes, catheters, or pulsatile lavage devices. There’s no need for new techniques or extra staff training, which makes it easy to integrate into your current surgical setup.
Why are more surgeons using Simini today?
Veterinary surgeons are choosing Simini because it helps reduce two of the biggest surgical risks—biofilms and resistant bacteria. It supports better wound hygiene, fits antimicrobial stewardship efforts, and gives surgeons more control before wound closure. With its ease of use and strong safety profile, Simini has become part of routine surgical protocols for many leading practices.
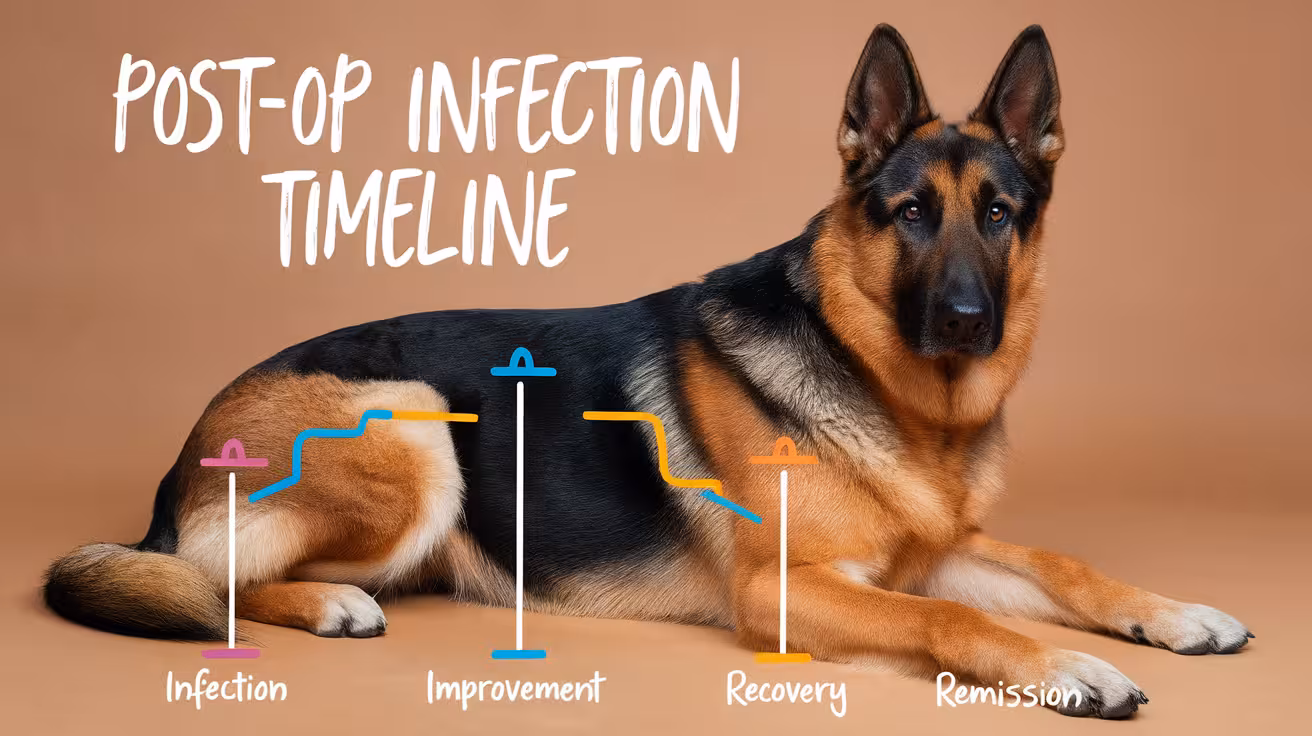
Post-Op Infection Timeline: When to Expect Warning Signs
Know when post-op infections start, key symptoms by day, and what warning signs to watch for after surgery
What Is a Post-Operative Infection?
A post-operative infection, also called a surgical site infection (SSI), happens when bacteria enter the wound after surgery. These infections can develop on the skin, under the surface, or even deeper in the tissues or organs.
There are three main types:
- Superficial SSIs affect only the skin around the incision.
- Deep SSIs go into the muscle or tissue layers under the skin.
- Organ/space SSIs occur in body parts that were operated on, such as joints or the abdomen.
Understanding the timeline of post-op infections is important because symptoms don’t always appear right away. Some signs may show within a few days, while others take a week or more. Knowing when to expect normal healing and when to worry helps you act fast and protect your dog’s health after surgery.
General Timeline of Post-Surgical Infections
Knowing when infections usually appear after surgery helps you catch warning signs early and respond quickly.
0–2 Days After Surgery: Normal Reactions vs. Infection
Right after surgery, it’s normal for your dog to have mild redness, swelling, and warmth around the incision. A slight fever, tiredness, and less appetite may also occur as the body heals. These signs usually settle within 48 hours and are not considered infection unless they get worse.
If the wound stays dry, the skin color improves, and your dog becomes more active each day, healing is likely on track. Watch for sudden changes, not just normal post-op reactions.
3–7 Days After Surgery: First Signs of Infection May Appear
This is the most common window for early infections to appear. Redness that spreads, increased swelling, warmth, or leaking fluid (especially yellow or green) can signal an issue. If your dog starts licking the wound, seems more uncomfortable, or shows a bad odor from the incision, it’s time to call your vet.
Pain that worsens instead of improves is also a red flag. Catching symptoms now can prevent deep infections and keep recovery on track.
7–21 Days After Surgery: Deep Infections Surface
In some dogs, deeper infections appear later and may not be obvious right away. If the incision looks delayed in healing, oozes pus, or becomes painful to the touch, the infection may have spread below the surface.
Fever, loss of energy, or signs like limping after orthopedic surgery could mean a deeper problem.
- Superficial infections stay near the skin and may resolve faster.
- Deep or organ/space infections affect muscles, joints, or internal tissues and need more intensive care.
Within 30 Days: Peak Window for Post-Op Infections
The CDC defines post-op infections as those occurring within 30 days of surgery, or within 1 year if an implant (like a bone plate or joint prosthesis) is used.
This period is the most important for monitoring. Daily checks for swelling, warmth, discharge, and changes in behavior can help you act early. Always complete the full antibiotic course, keep the wound clean, and follow all aftercare steps provided by your vet.
1–12 Months: Infections in Implant or Prosthetic Surgeries
In surgeries involving implants, infections can develop months later. These are often harder to detect and may appear as subtle signs like joint stiffness, swelling, or mild pain.
The risk is often due to biofilm, a layer of bacteria that forms on implants and is resistant to antibiotics. In these cases, your vet may need special tests to confirm infection.
If your dog shows unusual limping or swelling long after surgery, especially near the implant site, don’t ignore it.
Long-Term Risk: Late-Onset Infections from Bloodstream Spread
Even long after surgery, an infection elsewhere in the body can reach the surgical site through the bloodstream. This is called a hematogenous infection and can happen months or years later.
For example, dental infections, urinary tract infections, or skin abscesses can carry bacteria through the blood and infect joints or implants.
Dogs with orthopedic implants or joint surgeries should get regular checkups and dental care to lower this risk. Tell your vet if your dog had prior surgery before any new treatments.
How to Track Symptoms Over Time
Tracking your dog’s healing progress helps you spot problems early. A symptom log or recovery journal is a simple way to record daily changes like swelling, redness, appetite, energy, and behavior. Take daily photos of the wound to compare healing and catch subtle changes.
You should also check your dog’s temperature once a day if advised by your vet. A fever may be an early sign of infection. Gently inspect the wound for warmth, odor, discharge, or pain during cleaning.
Call your vet if you notice signs that are getting worse, not better, after 2–3 days. Your notes will help your vet decide whether the infection is superficial or deep, and what treatment steps are needed.
What to Expect at Each Follow-Up Visit
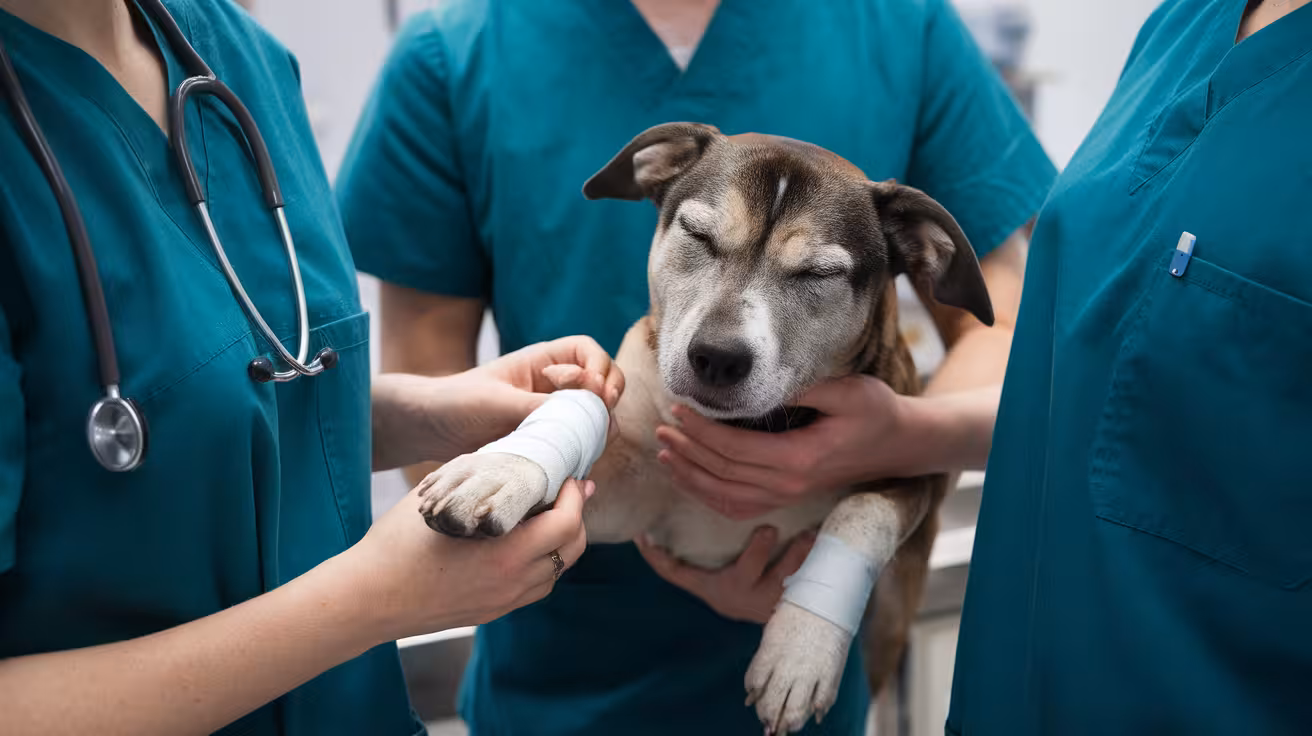
Most dogs have their first post-op check within 7 to 10 days after surgery. During this visit, the vet examines the incision for redness, swelling, discharge, or signs of pain. They also check for proper wound closure, suture condition, and whether healing is on track.
If your dog had implants or orthopedic surgery, follow-up visits may continue for several weeks or months. X-rays or bloodwork may be done to rule out deep infections, especially if there’s limping, stiffness, or delayed healing.
Your vet will ask about any changes at home—such as licking, loss of appetite, or behavior shifts—that could point to a developing infection. These visits are key for spotting issues early and making treatment adjustments before complications arise. Always bring your notes or photos to help with the exam.
When to Seek Immediate Help
Some post-surgery signs mean your dog needs urgent veterinary care, not just routine follow-up. Watch for increased swelling, spreading redness, or thick discharge from the wound, especially if it smells bad. These may signal a deep or fast-spreading infection.
Other red flags include:
- Fever above 103°F
- Limping, stiffness, or joint swelling
- Wound reopening or active bleeding
- Sudden tiredness, vomiting, or refusal to eat
These are emergency symptoms, especially if they appear quickly or worsen within hours. Don’t wait for the next appointment—call your vet or emergency clinic right away.
On the other hand, mild redness, slight scabbing, or minor licking may be monitored with home care and mentioned at your next check-up. When in doubt, always ask your vet. Early action prevents serious complications and supports a safe recovery.
FAQs
What is the most common time for post-op infections to appear in dogs?
Most post-surgical infections show up within 3 to 7 days after surgery. This is when redness, swelling, or discharge may start. However, some infections can appear later, especially with implants or deep wounds, so it’s important to keep monitoring for up to 30 days or more.
How do I know if it’s healing or getting infected?
Healing wounds improve daily—less swelling, a dry incision, and no strong odor. Infected wounds may show spreading redness, pus, pain, or heat. If your dog seems more tired, licks the wound often, or stops eating, those are warning signs that it could be infected.
Can a post-op infection start after two weeks?
Yes, especially with deeper tissue surgeries or implants. Some infections stay hidden for 1 to 3 weeks or longer. Late signs include swelling, joint pain, or poor healing. Always follow your vet’s full aftercare plan, even if the wound looks fine early on.
Should I clean the surgical wound at home?
Only clean the wound if your vet tells you to. Use vet-approved saline or antiseptic solutions and never apply creams unless advised. Keeping the area dry and protected is often enough. Over-cleaning or using human products can cause irritation or delay healing.
How often should I check the wound?
Check your dog’s wound once or twice a day for signs of redness, discharge, or swelling. Look for any behavior changes, like licking, limping, or pain. Taking daily photos can help you notice small changes and share them easily with your vet.
What should I do if I miss a follow-up appointment?
Call your vet right away to reschedule. Missing a check-up could delay spotting early signs of infection or poor healing. Even if everything looks fine, post-op exams are important for your dog’s recovery and may catch issues before they become serious.
How to Prevent Surgical Site Infections in Dogs
Ensure your dog's safe surgical recovery by preventing infections with advanced strategies, expert tips, and effective post-op care
Surgical site infections (SSIs) are a major challenge in canine surgical care. These infections not only delay a dog's recovery but also increase treatment costs, extend hospital stays, and cause stress for both dogs and their owners. SSIs can affect surgical outcomes, leading to complications like delayed wound healing or systemic infections, which can even become life-threatening.
Preventing SSIs in dogs requires a proactive and careful approach. While following standard protocols like aseptic techniques and proper wound care is important, relying solely on these basics may not be enough. Advanced strategies, such as improved preparation, evidence-based irrigation methods, and innovative techniques, can greatly reduce the risk of SSIs.
In this article, we will explore basic practices along with advanced tools, such as non-antibiotic lavage solutions and innovative post-operative care measures, to ensure safer outcomes and faster recoveries for dogs. Preventing SSIs is not just about improving health; it's about setting higher standards in canine surgical care and maintaining the trust of dog owners.
Preoperative Measures: Preparing the Dog and the Team
When it comes to preventing SSIs in dogs, preparing both the patient and the surgical team is crucial. This preparation sets the stage for a successful surgery.
Patient Preparation
Proper preparation of the dog is essential to reducing the risk of SSIs. Clipping the fur is a key step and must be done carefully to avoid causing microtrauma. Always clip the fur close to the skin without shaving down to the dermis, as this can create tiny abrasions that allow bacteria to enter. Clipping should ideally be done just before surgery to reduce regrowth and contamination.
For antiseptic site preparation, chlorhexidine gluconate is considered the best choice in canine surgeries due to its wide-ranging effectiveness and long-lasting action. Povidone-iodine is another option, especially for dogs with sensitive skin. A two-step method—scrubbing with antiseptic soap followed by an alcohol-based solution—has been shown to be very effective in reducing microbes.
Surgical Team Preparedness
The surgical team’s adherence to aseptic techniques is equally vital. Proper hand scrubbing using chlorhexidine or iodine-based solutions, followed by wearing sterile gloves, is critical to minimize contamination risks.
Ensuring no breaches in gowning and gloving protocols during surgery is essential. Limiting movement and conversation in the surgical suite further reduces airborne contaminants, which is particularly important in high-risk procedures.
Prophylactic Antibiotics
Prophylactic antibiotics are essential in certain high-risk surgeries, such as orthopedic procedures (e.g., TPLO) or gastrointestinal surgeries, where the risk of contamination is naturally higher. However, using antibiotics too often in routine procedures like spays or neuters can lead to antibiotic resistance. Clear guidelines suggest giving antibiotics within 60 minutes before the first incision and stopping them within 24 hours unless there are signs of infection.
For instance, in TPLO surgeries for dogs, the proper use of antibiotics has greatly reduced post-operative infection rates, highlighting the importance of targeted prophylaxis.
Intraoperative Protocols: Ensuring Sterility Throughout Surgery
Every step we take during surgery to maintain sterility is crucial for protecting dogs from surgical site infections.
Surgical Site Integrity
Keeping the surgical site sterile is key to reducing SSIs. We aim to keep surgical time as short as possible to limit exposure to airborne contaminants. Careful handling of tissues is also important, as excessive manipulation can cause trauma and increase the risk of infection.
We ensure that instruments remain sterile throughout the procedure and reduce contamination by limiting unnecessary movement in the surgical area. Following strict aseptic protocols helps maintain the integrity of the surgical field.
Irrigation and Infection Control
Irrigation is essential for preventing SSIs, as it helps remove bacteria, debris, and dead cells from the surgical site. We use enough irrigation to thoroughly clean the area while being gentle to avoid harming healthy tissues.
Simini Protect Lavage is a popular choice for many veterinarians because its non-antibiotic formula helps reduce both bacteria and biofilms, which are major causes of persistent infections. Unlike saline, which only rinses away debris, or povidone-iodine, which can be harmful to tissues, Simini actively reduces biofilm and bacterial load without damaging tissue health.
Simini has been used in over 30,000 veterinary procedures and is endorsed by experts like Dr. Aldo Vezzoni, demonstrating its effectiveness in improving surgical outcomes.
Postoperative Care: Strengthening Infection Prevention Efforts
What happens after surgery is just as important as the procedure itself when it comes to preventing SSIs in dogs.
Immediate Postoperative Care
We must focus on careful wound management right after surgery to reduce infection risks. It's essential to ensure that wound closures are secure with high-quality sutures and protective dressings. Avoiding unnecessary disruptions, like frequent dressing changes, helps keep the area sterile.
During the first 24–72 hours, we watch for early signs of infection, such as redness, swelling, unusual discharge, or increased discomfort. Spotting these signs early allows for quick action, reducing complications.
Educating Dog Owners
Dog owners play a crucial role in the post-operative phase. Clear and practical instructions help them manage wound care at home effectively. We show owners how to clean the wound properly and explain how to prevent their dogs from licking or scratching the incision. Recommending tools like Elizabethan collars or wound protectors can greatly reduce risks.
We emphasize the importance of follow-up visits, as subtle signs of infection may only be detectable by trained professionals.
Advanced Tips for SSI Prevention in Canine Surgeries
To make infection control a routine practice, we should prioritize regular team training sessions. This ensures all staff understand and follow the latest evidence-based practices. Updating protocols as new research emerges is crucial, as our strategies must adapt to effectively address new challenges.
Investing in advanced tools can significantly improve outcomes. For example, Simini Protect Lavage has demonstrated its ability to reduce bacterial load and biofilm formation without added toxicity, setting a new standard in surgical irrigation.
Conclusion
Preventing surgical site infections in dogs is a team effort that requires attention, skill, and dedication to high standards. It involves working closely together, ongoing education, and using evidence-based protocols at every step.
Looking forward, adopting innovative solutions like Simini Protect Lavage can significantly boost our efforts to control SSIs. Its proven ability to target bacteria and biofilms without added toxicity makes it a breakthrough in veterinary surgery.
By sharing knowledge, updating protocols, and embracing new advancements, we can collectively improve surgical outcomes for dogs and ensure safer, healthier recoveries.
Source:
Vet Times: Contamination Control: Preventing Surgical Site Infections
How Dogs Get Enterococcus faecalis
Learn how dogs acquire Enterococcus faecalis, its transmission routes, risk factors, and prevention methods to protect your pet from infections
What is Enterococcus faecalis?
Enterococcus faecalis is a type of bacteria commonly found in the gastrointestinal tract of dogs. It is a commensal bacterium, meaning it lives with the body’s natural flora without causing harm under normal conditions. In a healthy dog, E. faecalis helps with digestion and maintains a balanced gut microbiome.
However, this bacterium can become opportunistic and pathogenic when a dog’s immune system is weakened or when there is an imbalance in gut bacteria. Factors like prolonged antibiotic use, chronic illness, surgery, or infections can disrupt this balance, allowing E. faecalis to multiply uncontrollably and spread to other tissues. When this occurs, it can lead to urinary tract infections (UTIs), wound infections, or more severe systemic infections.
Although usually harmless, E. faecalis can develop resistance to antibiotics, making infections harder to treat, especially in hospitalized or immunocompromised dogs.
How Do Dogs Get Enterococcus faecalis?
Dogs primarily acquire Enterococcus faecalis from their own gastrointestinal tract, where it naturally exists as part of the normal gut flora. However, under certain conditions, this bacterium can spread and cause infections in other parts of the body.
One of the most common modes of transmission is fecal contamination. If a dog’s feces contain E. faecalis, the bacteria can spread to the urinary tract, wounds, or other vulnerable areas through direct contact. This often happens when a dog grooms itself after defecation or comes into contact with contaminated bedding, floors, or other surfaces.
Environmental exposure is another route of transmission. Dogs can pick up E. faecalis from contaminated water, soil, or surfaces, especially in places like kennels, veterinary clinics, or dog parks. Shared water bowls, medical instruments, and poorly sanitized environments can all serve as sources of bacterial transfer.
Additionally, direct transmission can occur through licking, grooming, or ingesting contaminated food or objects. Dogs frequently use their mouths to explore their surroundings, making it easy for bacteria to spread. Immunocompromised dogs, those recovering from surgery, or those on long-term antibiotics are at a higher risk of developing infections from E. faecalis.
Risk Factors for Enterococcus faecalis Infections in Dogs
Dogs typically carry Enterococcus faecalis in their gastrointestinal tract without issues, but certain factors can increase the risk of this bacterium causing infections, particularly in the urinary tract and other vulnerable areas. These risk factors can be categorized into urinary tract-related factors and systemic conditions that compromise the body's natural defenses.
Urinary Tract-Related Factors
Several conditions affecting the lower urinary tract (LUT) create an environment where E. faecalis can thrive and cause infections:
- Recurrent bacteriuria – Frequent bacterial presence in the urine weakens the urinary tract’s natural defenses, allowing E. faecalis to establish infections.
- Lower urinary tract (LUT) anatomic abnormalities – Structural issues such as congenital defects or acquired conditions (e.g., urethral strictures) can lead to incomplete bladder emptying, increasing bacterial colonization.
- Urolithiasis (bladder stones) – The presence of bladder stones creates a favorable surface for bacterial attachment and biofilm formation, making infections more persistent and harder to treat.
- LUT neoplasia (tumors) – Tumors in the bladder or urethra can cause obstruction, tissue damage, and chronic inflammation, providing an entry point for E. faecalis to invade and multiply.
Systemic Conditions Increasing Risk
Beyond localized urinary tract issues, certain systemic health problems can compromise a dog’s ability to fight off infections:
- Neurologic dysfunction – Conditions affecting nerve control of the bladder (such as intervertebral disc disease or spinal cord injuries) can result in urine retention, which increases bacterial colonization.
- Endocrinopathies (hormonal disorders) – Diseases like diabetes mellitus and hyperadrenocorticism (Cushing’s disease) alter immune function and can lead to sugar-rich urine, which fosters bacterial growth.
- Urinary incontinence – Dogs with incontinence may have prolonged exposure to urine on their skin and mucosa, allowing E. faecalis to migrate from fecal contamination to the urinary tract.
- Corticosteroid administration – Long-term steroid use suppresses the immune system, reducing the body's ability to clear infections effectively.
- Chronic kidney disease (CKD) – Dogs with CKD often have altered urine concentration and immune dysfunction, making them more susceptible to urinary tract infections (UTIs) caused by E. faecalis.
- Urinary catheterization – Catheterized dogs, especially those requiring long-term urinary catheters, face a high risk of bacterial introduction into the bladder, providing E. faecalis a direct pathway to colonize the urinary tract.
Understanding these risk factors is crucial in preventing and managing E. faecalis infections in dogs. Regular veterinary checkups, proper hygiene, and addressing underlying conditions can significantly reduce the likelihood of infection.
Surgical and Post-Operative Infections Due to Enterococcus faecalis
How Surgical Infections Occur
Surgical site infections (SSIs) caused by Enterococcus faecalis can develop when bacteria enter the wound during or after surgery. Several factors contribute to these infections:
- Contaminated surgical tools or implants – If sterilization protocols are inadequate, E. faecalis can be introduced into the surgical site through contaminated instruments, implants, or sutures.
- Poor wound hygiene post-surgery – Inadequate wound care, improper bandage changes, or exposure to dirt and moisture can allow bacteria to multiply and infect the incision site.
- Exposure to multi-drug resistant (MDR) strains in hospital settings – Veterinary hospitals, particularly intensive care units, may harbor antibiotic-resistant E. faecalis strains that can cause difficult-to-treat infections in post-surgical patients.
- Pre-existing conditions like diabetes or immune suppression – Dogs with conditions like diabetes, chronic illness, or those receiving immunosuppressive therapy (e.g., corticosteroids) have a reduced ability to fight infections, increasing their risk.
Common Types of Infections in Post-Surgical Dogs
- Soft tissue infections – E. faecalis can cause swelling, redness, pain, and pus formation at the incision site, potentially leading to abscesses or delayed healing.
- Deep wound infections – When bacteria invade deeper tissues, infections can become more severe, requiring drainage, debridement, or antibiotic therapy.
- Orthopedic infections – Post-surgical infections involving bones, joints, or implants (e.g., TPLO plates) can be particularly challenging to treat, often necessitating prolonged antibiotic use or implant removal.
Preventing E. faecalis infections requires strict surgical asepsis, careful wound management, and appropriate post-operative monitoring to ensure proper healing.
Orthopedic Infections After TPLO Surgery and Enterococcus faecalis
Why TPLO Surgery Is at Risk
Tibial Plateau Leveling Osteotomy (TPLO) is a common surgical procedure for repairing cranial cruciate ligament (CCL) injuries in dogs. However, TPLO surgery carries a risk of post-operative infection, particularly from Enterococcus faecalis, due to several factors:
- Presence of surgical implants – Metal plates and screws used in TPLO surgery provide surfaces where bacteria like E. faecalis can adhere and form protective biofilms, making infections difficult to eliminate.
- Post-surgical inflammation and healing challenges – Normal healing involves inflammation, which can create an environment conducive to bacterial growth if E. faecalis contaminates the surgical site.
Complications Caused by Enterococcus faecalis in TPLO Surgeries
- Biofilm formation on implants – E. faecalis can develop biofilms on metal implants, creating a protective layer that resists antibiotics and the immune system, leading to persistent infections.
- Prolonged healing time – Chronic bacterial presence can delay bone healing, cause ongoing pain, and increase the risk of implant loosening.
- Increased risk of revision surgery or implant removal – If infection persists despite treatment, revision surgery may be necessary to remove infected implants and debride affected tissue, adding to recovery time and cost.
Preventing E. faecalis infections in TPLO cases requires strict aseptic techniques, post-operative monitoring, and early intervention if signs of infection arise.
Preventing Enterococcus faecalis Infections in Dogs
Hygiene Measures
Maintaining proper hygiene is essential in preventing Enterococcus faecalis infections. Cleanliness reduces the risk of bacterial exposure and helps keep your dog healthy:
- Proper cleaning of bedding, bowls, and living areas – Regularly wash your dog’s bedding, food and water bowls, and living spaces to remove bacteria and other contaminants. Disinfecting these items frequently is essential, especially in environments like kennels or vet clinics.
- Regular bathing and grooming – Keeping your dog clean through regular baths and grooming reduces the chance of bacterial buildup on their skin and fur, especially in areas like the paws or genital region, where bacteria can thrive.
Post-Surgery Care
Dogs recovering from surgery are at higher risk for infections like E. faecalis, and proper care can significantly reduce these risks:
- Keeping wounds clean and monitored for signs of infection – Gently clean surgical wounds as recommended by your vet and watch for redness, swelling, or discharge, which could indicate an infection.
- Following veterinary guidelines for post-op wound management – Adhere to all instructions regarding bandage changes, medication, and activity restrictions to promote healing and prevent bacterial contamination.
After surgery, keeping wounds clean and monitored for signs of infection is crucial. During surgery, advanced solutions like Simini Protect Lavage can be used by veterinary surgeons to minimize the risk of infection.
This non-antibiotic surgical lavage solution helps reduce bacterial contamination and prevents biofilm formation on surgical sites.
By using Simini during surgery, the risk of post-surgical infections is significantly lowered, contributing to faster, safer healing
Managing Underlying Health Conditions
Dogs with chronic health conditions are more vulnerable to infections, including E. faecalis:
- Regular vet check-ups for dogs with chronic illnesses – Regular veterinary visits help manage conditions like diabetes or kidney disease, which may predispose dogs to infections.
- Monitoring for early signs of urinary tract or surgical infections – Pay attention to symptoms such as changes in urination, discomfort, or poor wound healing, and seek veterinary care promptly if these signs appear.
By following these preventive measures, you can help protect your dog from E. faecalis infections and promote overall health.
Read more about:
- TPLO incision infection symptoms & prevention
- Signs of TPLO failure in dogs
- Staph infection after TPLO surgery
- MRSP infection in dogs: Causes & symptoms
- How to Treat MRSP in Dogs: Best Practices
Conclusion
Dogs usually get Enterococcus faecalis from their gastrointestinal tract, but infections can happen in different ways, such as through fecal contamination, environmental exposure, or direct transmission from licking or grooming. Dogs with existing health issues, surgical wounds, or weakened immune systems are more prone to these infections.
Early detection and prevention are key to reducing the risks of E. faecalis infections. Keeping good hygiene, checking wounds, and managing health conditions can greatly lower the chance of infection. Regular vet visits are important, especially for dogs with chronic illnesses or those healing from surgery.
If you notice signs of infection like redness, swelling, discomfort, or changes in behavior, contact your vet right away. Quick action is crucial to stop the infection from spreading and to ensure proper treatment, which helps support your dog's health and well-being.
FAQs
Can Dogs Get Enterococcus faecalis?
Yes, dogs can get Enterococcus faecalis naturally from their gastrointestinal tract. It’s normally harmless and part of their gut flora. However, if the immune system is compromised or there’s an imbalance, E. faecalis can become pathogenic, leading to infections in areas like the urinary tract, wounds, or post-surgery sites.
What Is the Most Common Source of Enterococcus faecalis in Dogs?
The most common source of Enterococcus faecalis in dogs is their gastrointestinal tract. It lives naturally in the gut and can spread to other parts of the body, especially through fecal contamination or poor hygiene. Contact with contaminated surfaces, water, or food also poses a risk for infection.
What Causes Enterococcus faecalis Infections in Dogs' Urine?
Enterococcus faecalis infections in dogs' urine are often caused by fecal contamination, urinary tract abnormalities, or conditions that compromise the immune system, such as diabetes or chronic kidney disease. Factors like urinary incontinence, prolonged catheterization, or surgical procedures can also increase the risk of urinary infections due to this bacterium.
What Kills Enterococcus faecalis Naturally?
Enterococcus faecalis can be killed naturally by the body’s immune system, which typically fights off infections in healthy dogs. Natural remedies like probiotics and a healthy diet can help support immune function. However, in cases of infection, antibiotics are usually required to target the bacteria, especially if it’s resistant to natural defenses.
Can Enterococcus faecalis Go Away on Its Own?
Enterococcus faecalis infections can go away on their own in some cases, particularly if the dog has a strong immune system and the infection is mild. However, if the infection is persistent or severe, such as in urinary tract or surgical site infections, veterinary intervention and antibiotics are usually needed to clear the infection effectively.
MRSP Infection in Dogs: Causes and Symptoms
MRSP infection in dogs is a drug-resistant bacterial infection causing skin issues and wounds. Learn its causes, symptoms, and the best treatment options
What is MRSP Infection in Dogs?
Methicillin-Resistant Staphylococcus pseudintermedius (MRSP) is a type of bacteria that causes infections in dogs and is resistant to many common antibiotics, including methicillin and other beta-lactam antibiotics.
MRSP is a strain of Staphylococcus pseudintermedius, a bacterium naturally found on a dog’s skin and mucous membranes. While regular S. pseudintermedius infections can be treated with standard antibiotics, MRSP infections are much harder to manage due to their resistance to multiple drugs.
Unlike typical bacterial infections, MRSP does not respond to first-line antibiotics, making treatment more complex and prolonged. This resistance develops when bacteria are repeatedly exposed to antibiotics, leading to mutations that allow them to survive even in the presence of these medications.
MRSP is a major concern for veterinarians and dog owners because it can cause persistent skin infections, surgical site infections, and deep tissue infections. These infections are often recurrent and challenging to eradicate.
TL;DR
- MRSP spreads through direct contact, contaminated surfaces, and repeated antibiotic use, making multi-dog environments high-risk.
- Antibiotic resistance makes standard treatments ineffective, leading to persistent and recurrent infections.
- Infected dogs often develop skin lesions, swelling, non-healing wounds, and, in severe cases, fever and lethargy.
- Topical antiseptics and targeted antibiotics may help, but MRSP-related surgical infections remain difficult to manage.
- Simini Protect Lavage is the only effective non-antibiotic solution for MRSP surgical cases, preventing bacterial biofilm formation and reinfection.
How Common is MRSP in Dogs?
MRSP infections are becoming increasingly common in veterinary medicine, with rising cases reported worldwide. While Staphylococcus pseudintermedius is a normal part of a dog’s skin flora, the methicillin-resistant strain (MRSP) has been identified more frequently in veterinary clinics, kennels, and households with multiple pets.
Studies indicate that MRSP prevalence varies by region, but infection rates have increased due to widespread antibiotic use in veterinary medicine. Some research suggests that up to 40% of S. pseudintermedius isolates in certain veterinary hospitals show methicillin resistance.
Where MRSP is Commonly Found
MRSP is often detected in dogs with chronic skin conditions, post-surgical wounds, ear infections, and deep tissue abscesses. It is frequently seen in:
- Dogs with recurrent pyoderma or allergic skin disease
- Postoperative surgical site infections
- Dogs undergoing long-term antibiotic treatment
- Pets in shelters, kennels, or multi-dog households
Why Antibiotic Resistance is Increasing
The overuse and misuse of antibiotics are the primary drivers of MRSP resistance. Repeated exposure to antibiotics, particularly in cases where treatment is stopped early or used unnecessarily, allows bacteria to develop resistance.
Additionally, MRSP can spread between dogs through direct contact or contaminated surfaces, making infection control crucial in veterinary settings.
How Do Dogs Get MRSP?
MRSP is a highly resilient bacterium that spreads easily in veterinary settings and among dogs in close contact. Unlike typical bacterial infections that respond to standard antibiotics, MRSP thrives in environments with frequent antibiotic use, causing treatment-resistant infections.
Ways Dogs Can Contract MRSP
- Direct Contact with Infected Animals - Dogs can contract MRSP by coming into contact with another infected pet. This is especially common in multi-dog households, kennels, and veterinary clinics where animals interact closely.
- Exposure to Contaminated Surfaces - MRSP can survive on objects such as bedding, grooming tools, medical equipment, and kennel surfaces. Dogs that frequently visit grooming facilities, boarding kennels, or veterinary clinics may be exposed to these contaminated environments.
- Repeated Antibiotic Treatments - Overuse or misuse of antibiotics contributes to MRSP infections. When a dog is given antibiotics repeatedly—especially if treatments are stopped early—the bacteria can develop resistance, making future infections harder to treat.
- Weakened Immune System - Dogs with compromised immune systems, whether due to chronic illnesses, endocrine disorders, or stress, are more susceptible to MRSP. Their bodies struggle to fight off infections, increasing the likelihood of colonization by resistant bacteria.
Risk Factors for MRSP Infection
- Dogs with Allergies or Endocrine Disorders - Conditions like atopic dermatitis, hypothyroidism, or Cushing’s disease weaken the skin barrier and immune response, making dogs more vulnerable to MRSP infections.
- Frequent or Prolonged Antibiotic Use - Long-term antibiotic exposure alters bacterial populations, increasing the risk of antibiotic-resistant strains like MRSP.
- Extended Hospital Stays or Frequent Veterinary Visits - Dogs that require hospitalization, surgery, or repeated treatments are at higher risk due to increased exposure to MRSP-contaminated environments.
By understanding these transmission routes and risk factors, veterinarians and pet owners can take preventive measures to reduce the spread of MRSP and protect canine health.
Signs and Symptoms of MRSP in Dogs
MRSP infections primarily affect the skin but can also lead to deeper tissue infections. Since MRSP is resistant to many antibiotics, symptoms often persist despite initial treatments. Recognizing the signs early can help in timely diagnosis and management.
Common Skin-Related Symptoms
MRSP often presents as a skin infection (pyoderma) with visible lesions. You may notice:
- Abscesses or pustules (small pus-filled bumps)
- Redness and inflammation around the affected area
- Crusting or scabbing of the skin
- Non-healing wounds that worsen over time
Hair Loss and Excessive Itching
Dogs with MRSP infections may develop patchy hair loss (alopecia) due to chronic skin irritation. Constant itching, licking, or chewing of the infected area can lead to further skin damage and secondary infections.
Swelling, Pain, or Discomfort
Affected areas may become swollen and tender to the touch. If the infection spreads deeper, pain and localized warmth may be noticeable.
General Signs of Illness
If the infection becomes more severe, dogs may show systemic symptoms, such as:
- Fever
- Lethargy or weakness
- Loss of appetite
Since MRSP infections can mimic other skin conditions, a proper veterinary diagnosis is crucial for effective treatment.
Diagnosis: How Vets Confirm MRSP in Dogs
Diagnosing MRSP requires laboratory testing because it cannot be identified through visual examination alone. Since MRSP is resistant to many antibiotics, early and accurate diagnosis is essential for selecting the right treatment.
Culture and Sensitivity Testing
The most reliable way to confirm MRSP is through bacterial culture and antibiotic sensitivity testing. A veterinarian will collect a sample from an infected area—such as a skin lesion, wound, or ear discharge—using a sterile swab.
This sample is then sent to a laboratory, where technicians grow the bacteria and test its response to various antibiotics. If the bacteria show resistance to methicillin and other common drugs, MRSP is confirmed.
Why MRSP Requires Lab Testing
MRSP infections look similar to other bacterial skin infections, making it impossible to diagnose based on appearance alone. Without lab testing, standard antibiotic treatments may fail, leading to prolonged or worsening infections.
Importance of Early Diagnosis
Timely identification of MRSP allows veterinarians to prescribe the appropriate antibiotic or alternative treatments, reducing the risk of complications. Early diagnosis also helps prevent the spread of MRSP to other pets, especially in multi-dog households, veterinary clinics, and kennels.
How is MRSP Different from Other Staph Infections?
MRSP (Methicillin-Resistant Staphylococcus pseudintermedius) differs from typical Staphylococcus pseudintermedius infections in one key way: antibiotic resistance.
While both types of bacteria can cause skin infections, wounds, and post-surgical complications in dogs, MRSP is resistant to methicillin and many other commonly used antibiotics.
This makes it much harder to treat than regular S. pseudintermedius infections, which typically respond to first-line antibiotics like cephalexin or amoxicillin-clavulanate.
MRSP vs. MRSA: What’s the Difference?
MRSP is often compared to Methicillin-Resistant Staphylococcus aureus (MRSA), another drug-resistant staph infection. However, MRSP primarily affects dogs, while MRSA is more common in humans. Although MRSP can occasionally spread to humans, the risk of transmission is lower compared to MRSA.
Why MRSP is Harder to Treat
- Limited antibiotic options – Many standard antibiotics fail against MRSP, requiring veterinarians to use second-line or specialized treatments.
- Recurrent infections – MRSP infections often return after treatment, requiring long-term management.
- Environmental persistence – MRSP can survive on surfaces like bedding, kennels, and grooming tools, increasing the risk of reinfection.
Because of its resistance and persistence, MRSP requires careful antibiotic selection and strict infection control to prevent outbreaks in veterinary clinics and multi-pet households.
Are Certain Dog Breeds More Prone to MRSP?
Some dog breeds are more susceptible to MRSP due to genetic factors and breed-specific skin conditions. Breeds prone to allergies, skin folds, or chronic dermatitis have a higher risk of developing bacterial infections, which can lead to MRSP if antibiotics are overused.
Breeds at Higher Risk
- Bulldogs, Pugs, and Shar-Peis – Skin folds trap moisture, creating a breeding ground for bacteria.
- Labrador Retrievers and Golden Retrievers – Prone to allergic dermatitis and chronic ear infections.
- German Shepherds – More likely to develop deep pyoderma, a severe skin infection.
Proper skin care and infection prevention are key for these breeds.
Is MRSP Contagious to Other Dogs?
Yes, MRSP can spread between dogs, especially in multi-pet households, kennels, and veterinary clinics. It spreads through direct contact with infected dogs, contaminated surfaces (bedding, food bowls, grooming tools), and shared environments.
Risk Factors for Transmission
- Dogs in kennels, shelters, or veterinary hospitals
- Shared items like toys, blankets, or grooming tools
- Open wounds or skin infections that allow bacteria to enter
Can Asymptomatic Carriers Spread MRSP?
Yes, some dogs carry MRSP without showing symptoms but can spread it to others, making infection control crucial. Regular hygiene and isolation of infected dogs help prevent outbreaks.
Treatment Options for MRSP in Dogs
MRSP infections require a multifaceted treatment approach due to their resistance to common antibiotics. Treatment typically includes culture-guided antibiotic therapy, topical antiseptics, and infection management strategies to prevent recurrence.
Medical Treatments
- Antibiotic Therapy - Since MRSP does not respond to many first-line antibiotics, culture and sensitivity testing is essential to identify effective options. Some MRSP strains remain susceptible to chloramphenicol, doxycycline, rifampin, or amikacin, but each case requires individualized treatment.
- Why Some Antibiotics Don’t Work - MRSP carries resistance genes that make it immune to methicillin and other beta-lactam antibiotics, such as cephalexin and amoxicillin-clavulanate. Using ineffective antibiotics can worsen resistance, leading to chronic or recurrent infections.
Topical Treatments
- Antibacterial Shampoos and Solutions - Regular bathing with chlorhexidine or miconazole-based shampoos helps reduce bacterial load and prevent reinfection.
- Medicated Wipes and Ointments - For localized infections, antiseptic wipes, gels, or ointments (containing chlorhexidine or mupirocin) help control bacterial spread and promote healing.
The Role of Simini in Surgical MRSP Cases
For MRSP-related post-surgical infections, Simini Protect Lavage is a critical non-antibiotic solution. MRSP increases the risk of surgical site infections (SSIs), which can be difficult to treat with standard antibiotics.
Simini Protect Lavage effectively removes bacteria, disrupts biofilms, and lowers infection risks without contributing to antibiotic resistance. It is particularly beneficial for orthopedic surgeries, wound management, and post-operative care, where MRSP contamination poses a significant challenge.
For non-surgical MRSP infections, a combination of targeted antibiotics, antiseptic treatments, and strict hygiene measures is necessary to prevent recurrence and transmission.
Managing MRSP at Home: Infection Control and Prevention
MRSP can spread easily in multi-pet households, making strict hygiene and infection control measures essential. Since MRSP is resistant to many antibiotics, preventing transmission is just as important as treating the infected dog.
Strict Hygiene Measures
- Wash hands thoroughly after handling an infected dog, especially before touching other pets or household items.
- Use disposable gloves when applying topical treatments to avoid spreading bacteria.
- Limit direct contact, such as cuddling or allowing the dog to sleep on furniture, to prevent contamination.
Cleaning and Disinfecting
- Wash bedding, toys, collars, and bowls frequently using hot water and pet-safe disinfectants.
- Clean surfaces like floors and furniture with antibacterial solutions to eliminate lingering bacteria.
- Use separate grooming tools and feeding dishes for the infected dog to prevent cross-contamination.
Minimizing Spread to Other Pets and Humans
- Keep the infected dog in a separate space until the infection resolves.
- Regularly bathe pets with antibacterial shampoos if they share a home with an infected dog.
- Although MRSP is rarely transmitted to humans, immunocompromised individuals should take extra precautions when handling an infected pet.
Consistent infection control measures help prevent MRSP from spreading and reduce the risk of reinfection.
How to Prevent MRSP in Dogs
Preventing MRSP infections requires a proactive approach that focuses on responsible antibiotic use, regular veterinary care, and maintaining a strong immune system.
Since MRSP thrives in environments where antibiotics are overused or misused, reducing unnecessary antibiotic exposure is key to controlling its spread.
Responsible Antibiotic Use to Prevent Resistance
One of the biggest contributors to MRSP infections is antibiotic resistance, which develops when antibiotics are used improperly. To prevent this:
- Always complete prescribed antibiotic courses, even if symptoms improve before finishing the medication.
- Avoid using antibiotics without veterinary guidance, as incorrect treatment can promote resistant bacteria.
- If your dog has a history of bacterial infections, ask your vet about alternative treatments, such as antibacterial shampoos or topical antiseptics, instead of relying on systemic antibiotics.
Regular Vet Check-Ups to Detect Early Signs
Routine veterinary visits help catch skin infections, wounds, or other risk factors before they become severe. Early intervention reduces the chance of an infection becoming resistant to treatment.
Dogs with allergies, endocrine disorders, or chronic skin issues should have frequent skin assessments to monitor for signs of bacterial infections.
Strengthening the Immune System Through Diet and Hygiene
A strong immune system helps dogs fight off bacterial infections naturally. To improve immunity:
- Feed a balanced diet with high-quality proteins, essential fatty acids, and vitamins. Omega-3 and Omega-6 fatty acids support skin health, reducing infection risk.
- Maintain good hygiene by regularly bathing dogs with veterinary-approved shampoos to remove bacteria from the skin.
- Keep bedding, grooming tools, and food bowls clean to prevent bacterial buildup.
Prognosis: Can Dogs Recover from MRSP?
How Long It Takes to Treat MRSP
The duration of MRSP treatment depends on the severity of the infection and the effectiveness of treatment.
- Mild skin infections may resolve within 4-6 weeks with proper antibiotic and topical therapy.
- Deep or recurrent infections can take several months to fully heal, requiring a combination of antibiotics, antiseptic treatments, and strict hygiene measures.
- Post-surgical MRSP infections require specialized wound management, and in severe cases, additional procedures may be needed to remove infected tissue.
Chances of Recurrence and Long-Term Management
MRSP has a high recurrence rate, especially in dogs with underlying conditions like allergies, hypothyroidism, or chronic skin disease. Preventing reinfection requires:
- Monitoring for early signs of reinfection, such as skin redness, pustules, or excessive itching.
- Following hygiene protocols to minimize bacterial spread in the home.
- Using non-antibiotic alternatives like antiseptic washes and medicated shampoos to reduce bacterial load without contributing to antibiotic resistance.
When to Seek Veterinary Care for Persistent Infections
If a dog’s MRSP infection does not improve with treatment, spreads to deeper tissues, or recurs frequently, veterinary intervention is crucial. Seek immediate care if:
- Lesions worsen or new infections appear despite antibiotic therapy.
- The dog develops fever, lethargy, or loss of appetite, which may indicate a systemic infection.
- A post-surgical wound shows signs of MRSP, as these infections require specialized management to prevent complications.
With early detection, responsible treatment, and infection control, dogs with MRSP can recover and live healthy lives while minimizing the risk of recurrence.
Read more about:
- Effective ways to prevent infections in dog wounds
- How to prevent surgical site infections in dogs
- Post-operative infection in dogs: Symptoms and solutions
- TPLO incision infection: Symptoms and prevention
- Staph infection after TPLO surgery
Summary
- MRSP is a severe, drug-resistant bacterial infection that makes standard antibiotic treatments ineffective, leading to persistent or recurrent infections.
- Dogs contract MRSP through direct contact, contaminated surfaces, or repeated antibiotic exposure, making multi-pet households, kennels, and vet clinics high-risk environments.
- Symptoms include non-healing skin infections, abscesses, redness, swelling, and fever, which can worsen without proper treatment.
- Accurate diagnosis through lab testing (culture and sensitivity) is essential, as misidentifying MRSP can lead to ineffective treatments and prolonged illness.
- Treatment requires targeted antibiotics, medicated shampoos, and antiseptics, while Simini Protect Lavage is the only proven non-antibiotic solution for surgical cases.
- Preventing MRSP involves strict hygiene, responsible antibiotic use, and early detection, helping reduce resistance and protect both pets and veterinary environments.
FAQs
Can humans catch MRSP from dogs?
MRSP is primarily a canine-associated bacterium, and transmission to humans is rare. However, immunocompromised individuals or those with open wounds may be at higher risk. Practicing good hygiene, such as handwashing after handling an infected dog, helps minimize the risk. Unlike MRSA, MRSP is not a significant human health threat but requires proper infection control.
How long does MRSP last in dogs?
The duration of MRSP infections depends on severity and treatment response. Mild cases may resolve in 4-6 weeks with targeted antibiotic therapy and topical treatments. However, severe or recurrent infections can last several months, requiring long-term management. Regular vet check-ups and strict hygiene measures help shorten recovery time and prevent reinfection.
What happens if MRSP is left untreated?
Untreated MRSP infections can worsen and spread, leading to chronic skin infections, deep tissue abscesses, or systemic illness in severe cases. Persistent infections may cause pain, discomfort, and hair loss, and in post-surgical cases, they can lead to serious complications. Since MRSP is antibiotic-resistant, early diagnosis and proper management are crucial to avoid long-term health issues.
Can MRSP come back after treatment?
Yes, MRSP infections have a high recurrence rate, especially in dogs with allergies, chronic skin disease, or weakened immune systems. Reinfection often occurs due to environmental contamination or incomplete treatment. To prevent recurrence, follow strict hygiene protocols, use antiseptic washes, and monitor for early signs of reinfection. Regular vet visits can help manage underlying conditions.
Are there vaccines for MRSP prevention?
No, there is currently no vaccine for MRSP. Prevention relies on responsible antibiotic use, good hygiene, and early detection of infections. Regular bathing with antibacterial shampoos, maintaining a clean environment, and avoiding unnecessary antibiotic use help reduce the risk of MRSP infections in dogs.
Post-Operative Infection in Dogs: Symptoms and Solutions
Learn about symptoms and solutions for post-operative infections in dogs to ensure a smooth and healthy recovery after surgery
Surgical procedures can save a dog's life or improve their quality of life, but recovery is just as important. Post-operative infections are among the most common complications after surgery in dogs. These infections can slow healing, cause discomfort, and in severe cases, pose serious risks to your pet's health. Knowing how infections occur, what signs to look for, and how to prevent them can greatly improve your dog's recovery.
As someone who has performed many surgeries, We want to share what you need to know to ensure a smooth and infection-free healing process. Let's understand how to care for your dog after surgery and prevent complications.
What Are Post-Op Infections in Dogs?
Post-op infections in dogs happen when bacteria enter a surgical wound, causing inflammation, delayed healing, and discomfort. These infections usually occur due to contamination during surgery, poor wound care, or a weakened immune system. Common bacteria involved include Staphylococcus, Pseudomonas, and Escherichia coli.
Factors like poor hygiene, excessive licking of the wound, or exposure to dirty environments increase the risk. Dogs with conditions like diabetes or obesity are more at risk because their immune systems may not fight infections well.
Statistics show that post-op infections in dogs occur in about 2% to 5% of surgical cases, depending on the type and length of the procedure. For more complex surgeries, like orthopedic or implant-based operations, the infection rate can rise to 8% or more.
Understanding these causes and risks is crucial for ensuring a smooth recovery for your dog after surgery.
Signs of Post-Op Infections in Dogs
Recognizing the signs of a post-op infection early can prevent complications and help your dog recover smoothly. Here are the symptoms to watch for:
- Redness, swelling, or warmth at the incision site: While mild redness is normal after surgery, excessive redness, noticeable swelling, or warmth around the wound may indicate an infection. This is often related to inflammation in the area.
- Pain, lethargy, or loss of appetite: If your dog seems unusually tired, uninterested in food, or shows signs of discomfort when the incision is touched, it could mean the wound is infected. Pain may result from tissue inflammation or an underlying abscess.
- Foul odor or discharge from the wound: Pus-like discharge—yellow, green, or bloody—and a bad smell are strong signs of a bacterial infection.
- Fever or abnormal behavior: A body temperature above 102.5°F, along with shivering, hiding, or restlessness, may indicate a systemic infection.
If you notice any of these symptoms, consult your vet promptly. Early treatment is crucial for your dog’s health and comfort.
Risk Factors That Increase the Chances of Infection
Certain factors make some dogs more likely to get post-op infections. Knowing these risks can help you take preventive steps.
- Pre-existing conditions: Dogs with diabetes, obesity, or diseases that weaken the immune system are at higher risk. These conditions slow wound healing and make it harder for the body to fight bacteria. For example, in diabetic dogs, high blood sugar can encourage bacterial growth, increasing the risk of infection.
- Longer surgery times: Longer surgeries give bacteria more time to enter the wound. Also, extended anesthesia can weaken the immune response, making the dog more vulnerable. Surgeons try to keep surgery times short while being precise to reduce this risk.
- Use of urinary catheters or preoperative shaving techniques: Catheters can introduce bacteria into the urinary tract if not handled correctly. Similarly, shaving the surgical site can cause tiny cuts, allowing bacteria to enter. Proper surgical protocols, like using clippers instead of razors and keeping a sterile environment, greatly reduce these risks.
Many of these factors can be managed with careful preparation and diligent post-op care. As a pet owner, make sure to follow your vet’s advice closely.
Preventing Post-Op Infections in Dogs
A proactive approach during and after surgery is essential to minimizing the risk of infections and ensuring your dog’s recovery is smooth and pain-free.
During Surgery
Preventing post-op infections starts in the operating room with strict sterile techniques. Surgeons carefully sterilize tools and use protective barriers like surgical drapes to reduce contamination. However, bacteria and biofilms can still be a threat, especially in complex procedures.
That's why many surgeons prefer using advanced solutions like Simini Protect Lavage instead of saline or povidone-iodine. Unlike traditional antibiotic solutions, Simini is a non-antibiotic option that effectively reduces biofilms and bacteria better than conventional treatments. This makes it a preferred choice for leading surgeons like Dr. Aldo Vezzoni. With this, vets can significantly lower the risk of post-op infections, improving outcomes for dogs.
After Surgery
After surgery, your role as a pet parent is crucial. Keep the incision site clean and dry, this means no baths until your vet says it’s safe. Use an Elizabethan collar (E-collar) or recovery suit to stop your dog from licking or chewing the wound, as their saliva can introduce harmful bacteria.
Follow your vet’s instructions for giving medications, whether antibiotics to fight infection or anti-inflammatory drugs to reduce swelling. Skipping doses or stopping early can cause problems. Lastly, check the wound daily for redness, swelling, or discharge, and schedule follow-ups as advised. These steps ensure a smooth recovery for your furry friend.
When to Contact Your Veterinarian
It's always better to act quickly if you suspect a post-op infection. Certain signs need immediate attention to prevent complications. Persistent swelling or discharge, especially if it's yellow, green, or has a bad smell, often indicates an infection that needs veterinary care. Similarly, if your dog has a high fever (above 102.5°F), shows a loss of appetite, or seems lethargic, these could be signs of a systemic infection.
A wound that reopens or shows excessive bleeding is also a warning sign and should prompt an urgent visit to the vet. Even if you're unsure whether a symptom is serious, it's always better to call your veterinarian. They can guide you on whether immediate care is necessary or if monitoring at home is enough.
Quick action can make all the difference in your dog's recovery. Remember, your vet is there to help and will always prioritize your dog's well-being.
Conclusion
Proper post-op care is essential for preventing infections and ensuring your dog recovers well. Keeping the surgical site clean and following your vet's instructions are key steps in reducing risks. Spotting symptoms like swelling, discharge, or lethargy early can greatly improve outcomes.
Advanced techniques like Simini Protect Lavage have transformed surgical care by effectively removing bacteria and biofilms, lowering the risk of infection without needing antibiotics. Their use in veterinary practices sets a new standard for safety and success in surgeries.
As a pet owner, always consult your veterinarian for advice and follow their recommendations closely. Your attention and commitment are vital to your dog's health and happiness.
Source:
ScienceDirect: Post-Surgical Infections in Veterinary Medicine.
Infected Dog Wound Healing Stages Explained Clearly
Learn the 4 infected dog wound healing stages, signs of infection, and when to call the vet. Simple, clear, and vet-approved guide
What Happens When a Dog’s Wound Gets Infected?
Normally, a dog’s wound heals through a clear process—clotting, cleaning, tissue repair, and skin rebuilding. This starts right after injury and helps the body close the wound and fight off minor germs. With proper care, healing begins within hours and continues over days or weeks.
But when a wound gets infected, harmful bacteria take over. Instead of moving through the normal healing stages, the wound becomes stuck in the inflammation phase. Infection causes swelling, redness, pain, and pus. The body’s immune system keeps fighting the bacteria, which delays tissue repair and scab formation.
Infected wounds often get worse instead of better. Skin may break down, the wound may grow, and your dog might feel sick. Treating the infection quickly helps the wound return to its natural healing path and avoids serious complications.
Common Signs of Infection in Dog Wounds
Knowing the signs of infection can help you act fast and prevent serious problems.
- One of the first signs is redness and swelling around the wound that doesn’t go away or gets worse over time. While mild redness is normal at first, spreading or dark red skin may mean infection.
- Pus or discharge is another clear warning. Healthy wounds might have a little clear fluid, but thick, yellow, green, or white discharge is not normal. This often means bacteria are present and the body is trying to fight back.
- A bad smell coming from the wound is a strong sign that tissue is breaking down or infected. The area may also become more painful. Your dog might flinch, cry, or avoid touch.
- In more serious cases, you may notice fever, lethargy, or loss of appetite. These signs mean the infection is affecting your dog’s whole body and needs immediate veterinary care.
If you see any of these signs, don’t wait—contact your vet to begin proper treatment.
What Slows Down Healing in Infected Wounds?
Several factors can slow down healing in infected wounds, making recovery harder for your dog.
- One major factor is old age or a weak immune system. Older dogs or those with immune issues may not fight infection as strongly, leading to longer healing times.
- Deep or dirty wounds are also slower to heal. If dirt, hair, or bacteria stay trapped in the tissue, the infection may spread or become chronic. These wounds often need professional cleaning and care.
- Constant licking or biting by the dog can keep the wound open, add more bacteria, and delay scab formation. This is why using an e-collar or protective covering is important.
- Lastly, underlying health problems like diabetes or hormone disorders can affect the body’s ability to heal.
Dogs with these conditions often need extra care and closer monitoring during recovery. Treating both the wound and the root cause gives the best outcome.
Infected Dog Wound Healing Stages Explained
When a dog’s wound is infected, healing still follows four basic stages—but they take longer and may not go smoothly.
Stage 1: Inflammation - This begins right after the injury. In infected wounds, swelling, redness, and heat last longer. The body sends white blood cells to fight the bacteria, causing more visible irritation.
Stage 2: Debridement - During this phase, the body clears out dead tissue, dirt, and bacteria. You may see pus, fluid, or scabs forming. This stage can take longer if the infection is deep or spreading.
Stage 3: Repair - New tissue starts to grow, but more slowly than in clean wounds. You might see pink, bumpy granulation tissue or crusts forming over the wound. This means healing has begun but is still fragile.
Stage 4: Maturation - Finally, the wound closes and forms a scar. In infected wounds, this stage may take weeks or longer, depending on the severity and care given.
How to Track Healing in an Infected Wound
Tracking your dog’s wound daily helps you see if it’s healing or getting worse. Improvement looks like reduced redness and swelling, less discharge, and scabs or pink tissue forming. Your dog should seem more comfortable and stop licking the area as much.
Healing is likely delayed if redness spreads, swelling increases, or pus returns. A foul smell, growing wound size, or new pain are also signs things aren’t improving. If your dog becomes tired, stops eating, or runs a fever, the infection may be spreading.
To monitor healing closely, take daily photos of the wound. This helps you spot small changes you might miss otherwise. Check for new discharge, odor, or heat around the wound each day. Write down your observations and share them with your vet during follow-up visits. Early action based on these changes can prevent setbacks and support full healing.
When to Call the Vet
Even with home care, some infected wounds need professional treatment. You should call the vet if the wound gets worse after 2–3 days of cleaning and bandaging. Signs include more swelling, pus, redness, or a bad smell that wasn’t there before.
Also seek help if your dog shows signs of illness, such as fever, extreme tiredness, vomiting, or not eating. These symptoms mean the infection may be spreading through the body, which can become serious quickly.
If you see black, grey, or dying tissue around the wound, contact your vet immediately. This could mean the tissue isn’t getting blood flow or the infection is severe.
Finally, if there’s no sign of healing after several days, even with proper care, don’t wait. Some wounds need stronger antibiotics, surgical cleaning, or drainage. Getting help early gives your dog the best chance for a full and safe recovery.
Conclusion
Infected dog wounds go through the same healing stages as normal wounds—inflammation, debridement, repair, and maturation—but take longer and require close care. Watching for signs like swelling, pus, odor, or changes in your dog’s behavior helps you know if the wound is improving or getting worse.
Healing should bring less redness, reduced discharge, and slow scab formation. If the wound stays inflamed, smells bad, or if your dog seems tired or unwell, the infection may be spreading.
Always track progress with daily checks or photos, and don’t ignore small changes. Infections can worsen quickly, especially in older dogs or those with health issues.
If the wound doesn’t improve in a few days or new symptoms appear, act fast and call your vet. Early care helps prevent serious complications and gives your dog the best chance to heal fully and comfortably.
FAQs
What does an infected dog wound look like during healing?
During healing, an infected wound should show less redness, swelling, and discharge each day. You may see pink tissue or scabs forming. If the area stays red, oozes pus, or smells bad, it may not be healing properly and should be checked by your vet.
How long does it take for an infected wound to heal in dogs?
Healing time depends on the severity of the infection and your dog’s overall health. Mild infections may heal in 7–10 days, while deeper wounds can take several weeks. With proper treatment and daily care, most infected wounds show improvement within a few days.
Can I treat my dog’s infected wound at home?
Yes, if the infection is mild. Clean the area gently, apply a vet-approved ointment, and keep it bandaged. Watch for signs of worsening. If the wound doesn’t improve in 2–3 days or your dog seems sick, contact your vet immediately for professional care.
What should I avoid putting on an infected wound?
Avoid hydrogen peroxide, alcohol, iodine, or human creams with steroids. These can damage healthy tissue and slow healing. Stick to sterile saline or vet-approved antiseptics like diluted chlorhexidine. Always check with your vet before applying anything to the wound.
Is pus a normal part of healing or a sign of infection?
Pus is not part of normal healing. It usually means the wound is infected. Thick yellow, green, or white discharge is a sign your dog’s body is fighting bacteria. If you see pus, it’s best to contact your vet for further care and antibiotics.
How often should I clean an infected dog wound?
Clean the wound once or twice a day, depending on your vet’s advice. Use sterile saline or a gentle antiseptic solution. Avoid over-cleaning, which can slow healing. Always change the bandage if it gets wet, dirty, or if there’s new discharge.
Post-Op Infection Timeline: When to Expect Warning Signs
Know when post-op infections start, key symptoms by day, and what warning signs to watch for after surgery
What Is a Post-Operative Infection?
A post-operative infection, also called a surgical site infection (SSI), happens when bacteria enter the wound after surgery. These infections can develop on the skin, under the surface, or even deeper in the tissues or organs.
There are three main types:
- Superficial SSIs affect only the skin around the incision.
- Deep SSIs go into the muscle or tissue layers under the skin.
- Organ/space SSIs occur in body parts that were operated on, such as joints or the abdomen.
Understanding the timeline of post-op infections is important because symptoms don’t always appear right away. Some signs may show within a few days, while others take a week or more. Knowing when to expect normal healing and when to worry helps you act fast and protect your dog’s health after surgery.
General Timeline of Post-Surgical Infections
Knowing when infections usually appear after surgery helps you catch warning signs early and respond quickly.
0–2 Days After Surgery: Normal Reactions vs. Infection
Right after surgery, it’s normal for your dog to have mild redness, swelling, and warmth around the incision. A slight fever, tiredness, and less appetite may also occur as the body heals. These signs usually settle within 48 hours and are not considered infection unless they get worse.
If the wound stays dry, the skin color improves, and your dog becomes more active each day, healing is likely on track. Watch for sudden changes, not just normal post-op reactions.
3–7 Days After Surgery: First Signs of Infection May Appear
This is the most common window for early infections to appear. Redness that spreads, increased swelling, warmth, or leaking fluid (especially yellow or green) can signal an issue. If your dog starts licking the wound, seems more uncomfortable, or shows a bad odor from the incision, it’s time to call your vet.
Pain that worsens instead of improves is also a red flag. Catching symptoms now can prevent deep infections and keep recovery on track.
7–21 Days After Surgery: Deep Infections Surface
In some dogs, deeper infections appear later and may not be obvious right away. If the incision looks delayed in healing, oozes pus, or becomes painful to the touch, the infection may have spread below the surface.
Fever, loss of energy, or signs like limping after orthopedic surgery could mean a deeper problem.
- Superficial infections stay near the skin and may resolve faster.
- Deep or organ/space infections affect muscles, joints, or internal tissues and need more intensive care.
Within 30 Days: Peak Window for Post-Op Infections
The CDC defines post-op infections as those occurring within 30 days of surgery, or within 1 year if an implant (like a bone plate or joint prosthesis) is used.
This period is the most important for monitoring. Daily checks for swelling, warmth, discharge, and changes in behavior can help you act early. Always complete the full antibiotic course, keep the wound clean, and follow all aftercare steps provided by your vet.
1–12 Months: Infections in Implant or Prosthetic Surgeries
In surgeries involving implants, infections can develop months later. These are often harder to detect and may appear as subtle signs like joint stiffness, swelling, or mild pain.
The risk is often due to biofilm, a layer of bacteria that forms on implants and is resistant to antibiotics. In these cases, your vet may need special tests to confirm infection.
If your dog shows unusual limping or swelling long after surgery, especially near the implant site, don’t ignore it.
Long-Term Risk: Late-Onset Infections from Bloodstream Spread
Even long after surgery, an infection elsewhere in the body can reach the surgical site through the bloodstream. This is called a hematogenous infection and can happen months or years later.
For example, dental infections, urinary tract infections, or skin abscesses can carry bacteria through the blood and infect joints or implants.
Dogs with orthopedic implants or joint surgeries should get regular checkups and dental care to lower this risk. Tell your vet if your dog had prior surgery before any new treatments.
How to Track Symptoms Over Time
Tracking your dog’s healing progress helps you spot problems early. A symptom log or recovery journal is a simple way to record daily changes like swelling, redness, appetite, energy, and behavior. Take daily photos of the wound to compare healing and catch subtle changes.
You should also check your dog’s temperature once a day if advised by your vet. A fever may be an early sign of infection. Gently inspect the wound for warmth, odor, discharge, or pain during cleaning.
Call your vet if you notice signs that are getting worse, not better, after 2–3 days. Your notes will help your vet decide whether the infection is superficial or deep, and what treatment steps are needed.
What to Expect at Each Follow-Up Visit
Most dogs have their first post-op check within 7 to 10 days after surgery. During this visit, the vet examines the incision for redness, swelling, discharge, or signs of pain. They also check for proper wound closure, suture condition, and whether healing is on track.
If your dog had implants or orthopedic surgery, follow-up visits may continue for several weeks or months. X-rays or bloodwork may be done to rule out deep infections, especially if there’s limping, stiffness, or delayed healing.
Your vet will ask about any changes at home—such as licking, loss of appetite, or behavior shifts—that could point to a developing infection. These visits are key for spotting issues early and making treatment adjustments before complications arise. Always bring your notes or photos to help with the exam.
When to Seek Immediate Help
Some post-surgery signs mean your dog needs urgent veterinary care, not just routine follow-up. Watch for increased swelling, spreading redness, or thick discharge from the wound, especially if it smells bad. These may signal a deep or fast-spreading infection.
Other red flags include:
- Fever above 103°F
- Limping, stiffness, or joint swelling
- Wound reopening or active bleeding
- Sudden tiredness, vomiting, or refusal to eat
These are emergency symptoms, especially if they appear quickly or worsen within hours. Don’t wait for the next appointment—call your vet or emergency clinic right away.
On the other hand, mild redness, slight scabbing, or minor licking may be monitored with home care and mentioned at your next check-up. When in doubt, always ask your vet. Early action prevents serious complications and supports a safe recovery.
FAQs
What is the most common time for post-op infections to appear in dogs?
Most post-surgical infections show up within 3 to 7 days after surgery. This is when redness, swelling, or discharge may start. However, some infections can appear later, especially with implants or deep wounds, so it’s important to keep monitoring for up to 30 days or more.
How do I know if it’s healing or getting infected?
Healing wounds improve daily—less swelling, a dry incision, and no strong odor. Infected wounds may show spreading redness, pus, pain, or heat. If your dog seems more tired, licks the wound often, or stops eating, those are warning signs that it could be infected.
Can a post-op infection start after two weeks?
Yes, especially with deeper tissue surgeries or implants. Some infections stay hidden for 1 to 3 weeks or longer. Late signs include swelling, joint pain, or poor healing. Always follow your vet’s full aftercare plan, even if the wound looks fine early on.
Should I clean the surgical wound at home?
Only clean the wound if your vet tells you to. Use vet-approved saline or antiseptic solutions and never apply creams unless advised. Keeping the area dry and protected is often enough. Over-cleaning or using human products can cause irritation or delay healing.
How often should I check the wound?
Check your dog’s wound once or twice a day for signs of redness, discharge, or swelling. Look for any behavior changes, like licking, limping, or pain. Taking daily photos can help you notice small changes and share them easily with your vet.
What should I do if I miss a follow-up appointment?
Call your vet right away to reschedule. Missing a check-up could delay spotting early signs of infection or poor healing. Even if everything looks fine, post-op exams are important for your dog’s recovery and may catch issues before they become serious.

Pseudomonas in Dogs: Symptoms, Causes & Treatment
Learn about Pseudomonas in dogs—common symptoms, causes, diagnosis, and treatment options to help your dog recover and prevent reinfection
What is Pseudomonas in Dogs?
Pseudomonas aeruginosa is a type of bacteria that can infect dogs, especially when their immune system is weak or they have open wounds. It’s called an opportunistic pathogen, which means it usually doesn't cause harm unless the body is already vulnerable. This bacterium is commonly found in the environment—like soil, water, and even on the skin—but can become dangerous inside the body.
In dogs, it often leads to ear infections, wound infections, or complications after surgery. What makes Pseudomonas a concern in veterinary care is its resistance to many antibiotics. This means normal treatments may not work, making the infection harder to control.
In hospital settings, it can also spread through contaminated tools or surfaces, putting other animals at risk. Quick diagnosis and proper treatment are important to stop it from getting worse.
Common Types of Infections in Dogs
Pseudomonas infections in dogs can affect different body parts, especially when the skin or immune system is already weak. These infections are often linked to moisture, injury, or poor healing. Below are the most common types seen in dogs:
- Ear Infections (Otitis externa and media): These are very common, especially in dogs with floppy ears or those who swim often. Symptoms include pain, head shaking, and a bad smell with discharge.
- Skin Infections: Damaged or irritated skin can become infected. Signs include redness, swelling, and oozing wounds.
- Wound Infections: Pseudomonas can infect surgical cuts or injuries, especially if healing is slow or hygiene is poor.
- Urinary Tract Infections (UTIs): These occur more in dogs with bladder issues and may cause pain, frequent urination, or blood in urine.
- Eye Infections (Corneal Ulcers): These are painful and can lead to serious damage if not treated early.
What Causes Pseudomonas Infections in Dogs
Pseudomonas infections don’t usually affect healthy dogs. But when the body is stressed or damaged, this bacteria can take advantage and cause serious problems. Several factors increase the risk of infection:
- Allergies or hormonal imbalances: Dogs with skin allergies or hormonal conditions like hypothyroidism often have weak or inflamed skin. This makes it easier for bacteria to enter and grow.
- Chronic moisture in ears or skin folds: Breeds with floppy ears or deep skin folds trap moisture, creating the perfect place for Pseudomonas to grow.
- Use of contaminated grooming tools: Dirty clippers, scissors, or combs can carry bacteria from one dog to another, especially in grooming salons or shelters.
- Weakened immune system: Dogs recovering from illness or those with immune disorders are more likely to develop infections.
- Previous long-term antibiotic use: Using antibiotics for a long time can kill helpful bacteria and give Pseudomonas a chance to grow. It may also lead to antibiotic resistance, making infections harder to treat.
Understanding these causes helps prevent infection and guides early treatment when symptoms appear.
Symptoms of Pseudomonas Infection
Pseudomonas infections in dogs can affect the ears, skin, eyes, and wounds. The signs often depend on where the infection is, but most show clear symptoms that should not be ignored. Early detection helps prevent the spread and reduces the risk of long-term damage.
Look out for these common signs:
- Foul-smelling discharge from ears or wounds: This is one of the first signs, especially in ear infections. The discharge may be yellow, green, or thick.
- Swelling, redness, or open sores: These signs can appear on the skin or around wounds and may be painful to touch.
- Head shaking and scratching ears: If the infection is in the ear, dogs may shake their heads often or scratch their ears due to discomfort.
- Balance issues or hearing loss: In deeper ear infections, dogs may lose balance or show signs of hearing problems.
- Skin ulcers or slow-healing wounds: Infected skin may develop deep ulcers that take longer than usual to heal.
If you notice any of these symptoms, contact your vet for proper testing and treatment.
How Vets Diagnose Pseudomonas
Diagnosing a Pseudomonas infection in dogs involves more than just looking at the surface. Since this bacterium can resist many common treatments, vets use specific steps to confirm the infection and choose the right medication.
The diagnosis usually starts with:
- Physical exam and visible symptoms: Vets first check the affected area for signs like redness, swelling, discharge, and odor. They also ask about the dog’s medical history and recent treatments.
- Cytology and bacterial culture: A sample of fluid or tissue is taken from the infected site. Under a microscope, vets look for signs of bacteria. The sample is also sent to a lab for bacterial culture, which helps confirm if Pseudomonas is present.
- Sensitivity testing (for drug resistance): This test shows which antibiotics will work against the infection. Pseudomonas is known for resisting many drugs, so this step is very important.
- Imaging in severe or chronic cases: If the infection goes deep, such as in the middle ear or a joint, X-rays or advanced imaging like CT scans may be needed to check the extent of the infection.
Quick and accurate diagnosis helps guide successful treatment.
Treatment Options for Pseudomonas in Dogs
Treating Pseudomonas infections in dogs needs a careful and targeted approach. Since this bacteria often resists common antibiotics, vets rely on test results to choose the best treatment plan. Depending on how serious the infection is, one or more of the following methods may be used:
1. Topical treatments and medicated ear cleaners
Topical treatments are often the first step, especially for ear or skin infections. These may include antibiotic drops, ointments, or special medicated ear cleaners that help reduce bacteria and inflammation. Cleaners with drying agents are useful for ears with excess moisture.
Vets usually recommend regular cleaning at home, combined with check-ups to monitor progress. In some cases, topical treatments alone can fully clear the infection if caught early.
2. Systemic antibiotics based on sensitivity results
When topical therapy isn’t enough, vets prescribe systemic antibiotics. These are given by mouth or injection and reach deeper tissues. Since Pseudomonas is known to resist many drugs, the vet uses sensitivity test results to select the right antibiotic.
Common choices include fluoroquinolones or aminoglycosides. Treatment may last several weeks, and it’s important not to stop early, even if the dog looks better. Incomplete treatment can cause the infection to return.
3. Anti-inflammatory medications
Pseudomonas infections often cause swelling, pain, and irritation. To reduce these symptoms, vets may prescribe anti-inflammatory drugs, such as corticosteroids or non-steroidal anti-inflammatory drugs (NSAIDs). These medicines help improve comfort and allow healing to begin.
In ear infections, reducing swelling helps the ear canal open up for better drainage and medication delivery. Anti-inflammatory treatment is usually given along with antibiotics and is carefully dosed to avoid side effects.
4. Deep cleaning or flushing under anesthesia
For severe or long-term ear infections, normal cleaning may not be enough. In these cases, the vet may recommend deep ear flushing under anesthesia. This allows full access to the ear canal to remove pus, debris, and bacteria.
Special tools are used to clean the middle ear safely. This step can greatly improve the effect of medications and reduce the risk of the infection spreading deeper into the ear or brain.
5. Surgical options for advanced ear infections
If medical treatment fails or the infection keeps returning, surgery may be the best option. In chronic cases, especially when the middle ear is involved, vets may perform a Total Ear Canal Ablation (TECA) to remove the infected tissue. This stops the pain and removes the source of infection.
While this is a major surgery, it can greatly improve quality of life in dogs with long-standing, painful infections that haven’t responded to other treatments.
Why Pseudomonas is Hard to Treat
Pseudomonas infections are known for being stubborn and difficult to eliminate. This is because the bacteria have several defense strategies that protect them from treatment:
- Strong natural resistance to antibiotics: Pseudomonas has a thick outer wall and special pumps that remove antibiotics before they can work. Many common drugs have little to no effect.
- Biofilm formation: The bacteria can build a slimy protective layer called a biofilm. This layer sticks to tissues and shields the bacteria inside from both medications and the immune system.
- Frequent recurrence: Even if symptoms improve, the infection can return if the treatment is not strong or long enough. Leftover bacteria can grow back, often becoming even harder to treat.
These features make it important for vets to choose the right treatment based on lab tests and to follow through with full care plans to prevent relapse.
How to Prevent Pseudomonas Infections
Preventing Pseudomonas infections in dogs is possible with regular care and attention. Since this bacteria often takes advantage of weak or damaged skin, keeping your dog healthy and clean is the best defense.
- Keep your dog’s ears clean and dry: Moisture is a major factor in ear infections, especially in dogs that swim or have floppy ears. Use vet-approved ear cleaners and dry the ears well after bathing.
- Avoid dirty or shared grooming tools: Always use clean, disinfected tools when grooming your dog. Avoid sharing clippers, combs, or scissors with other pets unless they are properly cleaned between uses.
- Manage allergies and chronic conditions: Dogs with skin allergies or hormonal imbalances are more at risk. Regular vet visits and proper medication help keep their skin strong and less prone to infection.
- Follow full treatment plans: If your dog is being treated for any infection, make sure to complete the full course, even if they seem better. Stopping early can leave behind bacteria that may come back stronger.
Good hygiene and routine vet care go a long way in preventing infection.
Is Pseudomonas in Dogs Contagious?
Pseudomonas infections in dogs are not usually contagious to humans or other pets. This bacterium mostly causes problems when a dog already has a weak immune system, open wounds, or ongoing health issues. However, it can survive on surfaces and in moist environments, so basic hygiene is important.
Wash your hands after touching an infected area or applying medication. Clean bedding, grooming tools, and surfaces that the dog uses during treatment. While the risk of spreading is low, these steps help protect other animals and support faster healing.
When to See a Vet
Pseudomonas infections can worsen quickly if not treated properly, so it’s important to know when to get veterinary help. If you notice any of the signs below, schedule a vet visit right away:
- Persistent ear odor or discharge: A foul smell, pus, or constant head shaking could mean a serious ear infection.
- Wounds not healing: If a wound stays open, becomes red, or starts oozing, it may be infected with resistant bacteria like Pseudomonas.
- Signs of pain or behavior changes: Limping, whining, licking the same spot, or sudden mood shifts can signal discomfort or infection.
- After failed treatment with common antibiotics: If your dog has already taken antibiotics but symptoms return or get worse, drug-resistant bacteria may be the cause.
Early diagnosis and proper testing can prevent the infection from spreading or becoming chronic.
FAQs
Can dogs recover fully from a Pseudomonas infection?
Yes, most dogs can fully recover with proper diagnosis and treatment. It’s important to follow the vet’s instructions and complete the entire treatment plan. Some cases may take longer or need stronger medications, but with timely care and follow-up checks, the infection can be cleared and your dog can return to normal health.
How long does treatment usually take?
Treatment length depends on the severity and location of the infection. Mild cases may improve in 1 to 2 weeks, while deeper or chronic infections can take several weeks. In some situations, long-term antibiotics or repeat treatments are needed. Your vet will monitor the progress and adjust treatment based on how your dog responds.
Is it safe to clean my dog’s ears at home?
Yes, but only with products and instructions provided by your vet. Over-cleaning or using the wrong solution can irritate the ear and make things worse. If your dog has had ear infections before, regular gentle cleaning can help prevent new infections when done correctly and safely.
Will the infection come back again?
There is a risk of recurrence, especially if the infection wasn’t fully treated or if the dog has ongoing skin or ear problems. Following through with full treatment, keeping the area clean, and managing any underlying health issues can lower the chances of the infection coming back.
Can Pseudomonas cause long-term damage?
Yes, if left untreated or poorly managed, Pseudomonas infections can lead to long-term problems like hearing loss, deep skin ulcers, or chronic pain. Early treatment helps prevent lasting damage. In severe ear cases, surgery might be needed to stop the spread and reduce pain.
Are certain dog breeds more at risk?
Yes, breeds with floppy ears like Cocker Spaniels or Basset Hounds are more prone to ear infections due to poor air flow. Dogs with skin folds, such as Bulldogs or Shar-Peis, also face higher risk. Regular grooming and ear care are especially important for these breeds to prevent infections like Pseudomonas.
Post-Operative Infection in Dogs: Symptoms and Solutions
Learn about symptoms and solutions for post-operative infections in dogs to ensure a smooth and healthy recovery after surgery
Surgical procedures can save a dog's life or improve their quality of life, but recovery is just as important. Post-operative infections are among the most common complications after surgery in dogs. These infections can slow healing, cause discomfort, and in severe cases, pose serious risks to your pet's health. Knowing how infections occur, what signs to look for, and how to prevent them can greatly improve your dog's recovery.
As someone who has performed many surgeries, We want to share what you need to know to ensure a smooth and infection-free healing process. Let's understand how to care for your dog after surgery and prevent complications.
What Are Post-Op Infections in Dogs?
Post-op infections in dogs happen when bacteria enter a surgical wound, causing inflammation, delayed healing, and discomfort. These infections usually occur due to contamination during surgery, poor wound care, or a weakened immune system. Common bacteria involved include Staphylococcus, Pseudomonas, and Escherichia coli.
Factors like poor hygiene, excessive licking of the wound, or exposure to dirty environments increase the risk. Dogs with conditions like diabetes or obesity are more at risk because their immune systems may not fight infections well.
Statistics show that post-op infections in dogs occur in about 2% to 5% of surgical cases, depending on the type and length of the procedure. For more complex surgeries, like orthopedic or implant-based operations, the infection rate can rise to 8% or more.
Understanding these causes and risks is crucial for ensuring a smooth recovery for your dog after surgery.
Signs of Post-Op Infections in Dogs
Recognizing the signs of a post-op infection early can prevent complications and help your dog recover smoothly. Here are the symptoms to watch for:
- Redness, swelling, or warmth at the incision site: While mild redness is normal after surgery, excessive redness, noticeable swelling, or warmth around the wound may indicate an infection. This is often related to inflammation in the area.
- Pain, lethargy, or loss of appetite: If your dog seems unusually tired, uninterested in food, or shows signs of discomfort when the incision is touched, it could mean the wound is infected. Pain may result from tissue inflammation or an underlying abscess.
- Foul odor or discharge from the wound: Pus-like discharge—yellow, green, or bloody—and a bad smell are strong signs of a bacterial infection.
- Fever or abnormal behavior: A body temperature above 102.5°F, along with shivering, hiding, or restlessness, may indicate a systemic infection.
If you notice any of these symptoms, consult your vet promptly. Early treatment is crucial for your dog’s health and comfort.
Risk Factors That Increase the Chances of Infection
Certain factors make some dogs more likely to get post-op infections. Knowing these risks can help you take preventive steps.
- Pre-existing conditions: Dogs with diabetes, obesity, or diseases that weaken the immune system are at higher risk. These conditions slow wound healing and make it harder for the body to fight bacteria. For example, in diabetic dogs, high blood sugar can encourage bacterial growth, increasing the risk of infection.
- Longer surgery times: Longer surgeries give bacteria more time to enter the wound. Also, extended anesthesia can weaken the immune response, making the dog more vulnerable. Surgeons try to keep surgery times short while being precise to reduce this risk.
- Use of urinary catheters or preoperative shaving techniques: Catheters can introduce bacteria into the urinary tract if not handled correctly. Similarly, shaving the surgical site can cause tiny cuts, allowing bacteria to enter. Proper surgical protocols, like using clippers instead of razors and keeping a sterile environment, greatly reduce these risks.
Many of these factors can be managed with careful preparation and diligent post-op care. As a pet owner, make sure to follow your vet’s advice closely.
Preventing Post-Op Infections in Dogs
A proactive approach during and after surgery is essential to minimizing the risk of infections and ensuring your dog’s recovery is smooth and pain-free.
During Surgery
Preventing post-op infections starts in the operating room with strict sterile techniques. Surgeons carefully sterilize tools and use protective barriers like surgical drapes to reduce contamination. However, bacteria and biofilms can still be a threat, especially in complex procedures.
That's why many surgeons prefer using advanced solutions like Simini Protect Lavage instead of saline or povidone-iodine. Unlike traditional antibiotic solutions, Simini is a non-antibiotic option that effectively reduces biofilms and bacteria better than conventional treatments. This makes it a preferred choice for leading surgeons like Dr. Aldo Vezzoni. With this, vets can significantly lower the risk of post-op infections, improving outcomes for dogs.
After Surgery
After surgery, your role as a pet parent is crucial. Keep the incision site clean and dry, this means no baths until your vet says it’s safe. Use an Elizabethan collar (E-collar) or recovery suit to stop your dog from licking or chewing the wound, as their saliva can introduce harmful bacteria.
Follow your vet’s instructions for giving medications, whether antibiotics to fight infection or anti-inflammatory drugs to reduce swelling. Skipping doses or stopping early can cause problems. Lastly, check the wound daily for redness, swelling, or discharge, and schedule follow-ups as advised. These steps ensure a smooth recovery for your furry friend.
When to Contact Your Veterinarian
It's always better to act quickly if you suspect a post-op infection. Certain signs need immediate attention to prevent complications. Persistent swelling or discharge, especially if it's yellow, green, or has a bad smell, often indicates an infection that needs veterinary care. Similarly, if your dog has a high fever (above 102.5°F), shows a loss of appetite, or seems lethargic, these could be signs of a systemic infection.
A wound that reopens or shows excessive bleeding is also a warning sign and should prompt an urgent visit to the vet. Even if you're unsure whether a symptom is serious, it's always better to call your veterinarian. They can guide you on whether immediate care is necessary or if monitoring at home is enough.
Quick action can make all the difference in your dog's recovery. Remember, your vet is there to help and will always prioritize your dog's well-being.
Conclusion
Proper post-op care is essential for preventing infections and ensuring your dog recovers well. Keeping the surgical site clean and following your vet's instructions are key steps in reducing risks. Spotting symptoms like swelling, discharge, or lethargy early can greatly improve outcomes.
Advanced techniques like Simini Protect Lavage have transformed surgical care by effectively removing bacteria and biofilms, lowering the risk of infection without needing antibiotics. Their use in veterinary practices sets a new standard for safety and success in surgeries.
As a pet owner, always consult your veterinarian for advice and follow their recommendations closely. Your attention and commitment are vital to your dog's health and happiness.
Source:
ScienceDirect: Post-Surgical Infections in Veterinary Medicine.

Antibiotics for Surgery Wound Infection: What Vets Should Know
Discover top antibiotics for treating post-surgical wound infections in dogs, learn how to choose the right drug, and see how Simini Protect Lavage enhances infection control
Understanding Post-Surgical Wound Infections
A surgical site infection (SSI) is any infection that occurs at or near the surgical incision within 30 days after surgery—or up to a year if implants are placed. In dogs, SSIs can develop due to bacteria entering the wound during or after surgery.
Common causes include poor wound hygiene, contamination during surgery, licking or scratching the wound, or underlying conditions like diabetes or immune suppression. Resistant bacteria and biofilm formation can also increase the risk.
Early identification is critical. Signs like swelling, redness, heat, discharge, or wound breakdown should be addressed right away. Delays in treatment can lead to deeper infections, delayed healing, or implant failure. With early detection, appropriate antibiotic use and wound care can improve outcomes and reduce the risk of complications for both the dog and the veterinary team.
First-Line Antibiotics for Surgical Wound Infections
Choosing the right antibiotic depends on the depth, severity, and bacterial load in the wound. Mild infections may respond to oral treatment, while deeper or resistant infections may need IV drugs. Topical options can help with surface-level contamination or as part of a combined approach.
1. Oral antibiotics used in mild-to-moderate cases
For uncomplicated infections, oral antibiotics are often the first choice. These drugs are easy to administer at home and are effective against many common skin and soft tissue bacteria.
- Amoxicillin-clavulanate: Broad-spectrum coverage, especially for mixed infections.
- Cephalexin: Commonly used for skin infections caused by Staphylococcus.
- Clindamycin: Good choice for anaerobes and gram-positive bacteria.
- Doxycycline: Often used for resistant strains or tick-borne coinfections.
- Trimethoprim-sulfamethoxazole (TMP-SMX): Useful for resistant or deep skin infections.
Duration and dosage should be guided by culture and sensitivity testing whenever possible.
2. IV antibiotics for severe or deep infections
In more serious infections—such as deep tissue abscesses, bone involvement, or systemic signs—IV antibiotics are required for faster and stronger action.
- Cephalosporins (e.g., Cefazolin): Good initial choice for surgical prophylaxis and early infection.
- Carbapenems (e.g., Imipenem): Used in resistant, hospital-acquired infections.
- Fluoroquinolones (e.g., Enrofloxacin): Broad coverage, often used when gram-negative bacteria are involved.
These drugs are usually started in the clinic and adjusted based on the dog’s response and lab results.
3. Topical antibiotic options for superficial wounds
Topical antibiotics help reduce local bacterial load in shallow or healing wounds. They can also support systemic therapy by targeting surface bacteria directly.
- Mupirocin: Effective against Staphylococcus, including some resistant strains.
- Bacitracin: Often used in triple antibiotic ointments for minor wounds.
- Nitrofurazone: Broad-spectrum agent used in moist dressings and bandages.
Topical agents should be applied to clean wounds and not used as a substitute for systemic treatment in deep or infected surgical sites.
How to Choose the Right Antibiotic
Selecting the appropriate antibiotic is essential to effectively treat surgical wound infections while minimizing resistance. Several factors guide this choice.
1. Role of culture and sensitivity testing
Culture and sensitivity testing is the gold standard for selecting antibiotics. It involves collecting a sample from the infected wound and growing the bacteria in a lab. This helps identify the exact bacteria causing the infection and reveals which antibiotics the bacteria are sensitive or resistant to.
Using this information ensures the chosen antibiotic will be effective, reducing treatment failures and side effects. It also helps prevent the misuse of broad-spectrum antibiotics, which can lead to resistance.
Whenever possible, vets should perform culture and sensitivity before starting treatment, especially in cases of persistent or severe infections.
2. Duration of treatment and follow-up care
The length of antibiotic treatment depends on infection severity, type of bacteria, and response to therapy. Mild infections may require 7 to 14 days of antibiotics, while deeper or complicated wounds can need several weeks.
Stopping antibiotics too early can cause relapse or resistance. Follow-up care is critical, including wound monitoring, cleaning, and adjusting treatment based on healing progress or new culture results.
Regular communication with clients ensures adherence to the treatment plan and early detection of any problems. Proper duration and care lead to better outcomes and fewer complications.
3. When surgical debridement is necessary
Surgical debridement involves removing dead, infected, or damaged tissue from the wound to promote healing and reduce bacterial load. It is necessary when antibiotics alone cannot control the infection, especially in cases with necrotic tissue, abscesses, or biofilm formation.
Debridement helps expose healthy tissue to antibiotics and immune cells, improving treatment success. It is also recommended when wounds are not healing or worsening despite medical therapy.
Timely debridement combined with appropriate antibiotic use can prevent chronic infections and improve recovery. Vets must evaluate each case individually to decide if and when debridement is needed.
Antibiotic Resistance in Surgical Wounds
Antibiotic resistance is a growing concern in managing surgical wound infections. Understanding its causes and prevention is key to maintaining effective treatments.
1. Why resistance is rising in post-op infections
Resistance in post-surgical infections is increasing due to several factors. Bacteria like Pseudomonas and MRSP adapt quickly to antibiotics, especially when drugs are used improperly.
Incomplete or incorrect treatment allows resistant strains to survive and multiply. Hospital environments can also harbor resistant bacteria, which spread between patients and staff.
Additionally, biofilms protect bacteria from antibiotics, making infections harder to clear. This rise in resistance makes standard treatments less effective, leading to longer recoveries and more complications in veterinary surgeries.
2. The danger of overprescribing and improper use
Overprescribing antibiotics or using them without proper diagnosis encourages resistance. Giving antibiotics when they’re not needed, using the wrong drug, or stopping treatment too soon allows bacteria to adapt. This misuse can turn common infections into resistant, difficult-to-treat problems. It also increases risks of side effects for patients.
Veterinarians must carefully assess each case and avoid unnecessary prescriptions, focusing on targeted therapy guided by culture and sensitivity testing to ensure antibiotics remain effective for future patients.
3. Importance of antibiotic stewardship in veterinary settings
Antibiotic stewardship means using antibiotics responsibly to preserve their effectiveness. In veterinary surgery, this involves selecting the right drug, dose, and treatment duration based on evidence and testing. Stewardship also encourages non-antibiotic options when possible and prevents unnecessary use.
It helps reduce resistant bacteria in animals and protects public health by limiting the spread of resistance between animals and humans. Implementing stewardship programs improves patient outcomes, supports ethical veterinary practice, and safeguards antibiotics for future generations.
Limitations of Antibiotic-Only Treatment
Antibiotic-only treatment often faces challenges due to biofilms, which are protective layers that bacteria form on tissues or implants. These biofilms shield bacteria from antibiotics and the immune system, allowing infections to persist even after treatment. Additionally, resistant bacteria can survive standard antibiotic protocols, making infections harder to clear.
Because of these factors, some infections may not respond well to antibiotics alone. In severe or chronic cases, vets might need to perform repeat surgeries to remove infected tissue or even remove implants to fully eliminate the infection. Combining antibiotics with other treatments, such as surgical cleaning or advanced irrigation solutions, often leads to better outcomes and reduces the need for further surgery.
Simini Protect Lavage: Reducing Infection Risk Before It Starts
Simini Protect Lavage is an intra-operative irrigation solution designed to reduce two major infection risks: biofilms and resistant bacteria. Applied during surgery, it flushes the wound and surgical site, breaking down protective biofilms that shield bacteria from treatment.
This action helps lower the bacterial load in both clean and contaminated wounds before closing the incision. Because it works during the operation, Simini supports better wound hygiene and may reduce complications caused by difficult-to-treat bacteria.
How Simini complements antibiotics without contributing to resistance
Unlike antibiotics, Simini is a non-antibiotic product with no known risk of resistance. It targets biofilms and bacteria through mechanisms unrelated to traditional antibiotics, meaning it can be safely used alongside systemic antibiotic treatments.
This approach supports antimicrobial stewardship by reducing dependence on antibiotics and helping preserve their effectiveness. Simini’s unique action focuses on preventing infection risks at the surgical site without promoting resistant strains.
Why leading surgeons trust Simini for clean and contaminated wounds
Simini Protect Lavage has been used in over 30,000 veterinary surgeries worldwide, earning the trust of many veterinary surgeons. It is strongly recommended by Dr. Aldo Vezzoni, a respected orthopedic surgeon, who highlights its effectiveness in managing both clean and infected wounds.
This extensive clinical experience and expert endorsement make Simini a valuable tool for reducing infection risks in modern veterinary surgery.
Final Takeaway: A Smarter Approach to Surgical Infections
Treating surgical wound infections effectively requires more than antibiotics alone. Combining traditional antibiotic therapy with modern tools like Simini Protect Lavage offers a smarter, more complete approach. Simini works during surgery to reduce biofilms and resistant bacteria, lowering infection risks before the wound is closed. This complements antibiotics by addressing bacteria that are often hard to reach or resistant.
Focusing on both treatment and prevention improves healing, reduces complications, and shortens recovery times for dogs. It also supports responsible antibiotic use, helping to protect against antimicrobial resistance (AMR)—a critical concern in veterinary medicine today.
Using these combined strategies gives vets better control over infection outcomes while providing peace of mind for themselves and their clients. Embracing innovations like Simini is key to advancing surgical care and ensuring healthier, faster recoveries for patients.
FAQs
Can Simini replace antibiotics completely?
No, Simini Protect Lavage is designed to reduce bacteria and biofilms during surgery but does not replace systemic antibiotics. It complements antibiotic therapy by targeting bacteria in the wound that antibiotics may not reach. Antibiotics remain necessary for treating infections, especially if systemic signs are present.
How do I know which antibiotic to start with?
The choice of antibiotic should be based on the wound type, severity, and common bacteria involved. When possible, perform culture and sensitivity testing before starting treatment. In urgent cases, vets often begin with broad-spectrum antibiotics and adjust once lab results are available.
What if culture results are delayed?
If culture results take time, start with a broad-spectrum antibiotic covering likely bacteria. Monitor the patient closely and adjust treatment when test results arrive. Early wound care and tools like Simini can help reduce bacterial load while waiting.
Can Simini be used in infected revision surgeries?
Yes, Simini is effective in both clean and contaminated wounds, including infected revision surgeries. Its ability to reduce biofilms and resistant bacteria supports better management of difficult infections during surgical revisions.
Is Simini safe for use with surgical implants?
Simini Protect Lavage is tissue-compatible and safe around implants. It helps reduce biofilms and bacteria that can colonize implants without damaging surrounding tissues, making it a valuable part of implant-related surgeries.
How to Prevent Surgical Site Infections in Dogs
Ensure your dog's safe surgical recovery by preventing infections with advanced strategies, expert tips, and effective post-op care
Surgical site infections (SSIs) are a major challenge in canine surgical care. These infections not only delay a dog's recovery but also increase treatment costs, extend hospital stays, and cause stress for both dogs and their owners. SSIs can affect surgical outcomes, leading to complications like delayed wound healing or systemic infections, which can even become life-threatening.
Preventing SSIs in dogs requires a proactive and careful approach. While following standard protocols like aseptic techniques and proper wound care is important, relying solely on these basics may not be enough. Advanced strategies, such as improved preparation, evidence-based irrigation methods, and innovative techniques, can greatly reduce the risk of SSIs.
In this article, we will explore basic practices along with advanced tools, such as non-antibiotic lavage solutions and innovative post-operative care measures, to ensure safer outcomes and faster recoveries for dogs. Preventing SSIs is not just about improving health; it's about setting higher standards in canine surgical care and maintaining the trust of dog owners.
Preoperative Measures: Preparing the Dog and the Team
When it comes to preventing SSIs in dogs, preparing both the patient and the surgical team is crucial. This preparation sets the stage for a successful surgery.
Patient Preparation
Proper preparation of the dog is essential to reducing the risk of SSIs. Clipping the fur is a key step and must be done carefully to avoid causing microtrauma. Always clip the fur close to the skin without shaving down to the dermis, as this can create tiny abrasions that allow bacteria to enter. Clipping should ideally be done just before surgery to reduce regrowth and contamination.
For antiseptic site preparation, chlorhexidine gluconate is considered the best choice in canine surgeries due to its wide-ranging effectiveness and long-lasting action. Povidone-iodine is another option, especially for dogs with sensitive skin. A two-step method—scrubbing with antiseptic soap followed by an alcohol-based solution—has been shown to be very effective in reducing microbes.
Surgical Team Preparedness
The surgical team’s adherence to aseptic techniques is equally vital. Proper hand scrubbing using chlorhexidine or iodine-based solutions, followed by wearing sterile gloves, is critical to minimize contamination risks.
Ensuring no breaches in gowning and gloving protocols during surgery is essential. Limiting movement and conversation in the surgical suite further reduces airborne contaminants, which is particularly important in high-risk procedures.
Prophylactic Antibiotics
Prophylactic antibiotics are essential in certain high-risk surgeries, such as orthopedic procedures (e.g., TPLO) or gastrointestinal surgeries, where the risk of contamination is naturally higher. However, using antibiotics too often in routine procedures like spays or neuters can lead to antibiotic resistance. Clear guidelines suggest giving antibiotics within 60 minutes before the first incision and stopping them within 24 hours unless there are signs of infection.
For instance, in TPLO surgeries for dogs, the proper use of antibiotics has greatly reduced post-operative infection rates, highlighting the importance of targeted prophylaxis.
Intraoperative Protocols: Ensuring Sterility Throughout Surgery
Every step we take during surgery to maintain sterility is crucial for protecting dogs from surgical site infections.
Surgical Site Integrity
Keeping the surgical site sterile is key to reducing SSIs. We aim to keep surgical time as short as possible to limit exposure to airborne contaminants. Careful handling of tissues is also important, as excessive manipulation can cause trauma and increase the risk of infection.
We ensure that instruments remain sterile throughout the procedure and reduce contamination by limiting unnecessary movement in the surgical area. Following strict aseptic protocols helps maintain the integrity of the surgical field.
Irrigation and Infection Control
Irrigation is essential for preventing SSIs, as it helps remove bacteria, debris, and dead cells from the surgical site. We use enough irrigation to thoroughly clean the area while being gentle to avoid harming healthy tissues.
Simini Protect Lavage is a popular choice for many veterinarians because its non-antibiotic formula helps reduce both bacteria and biofilms, which are major causes of persistent infections. Unlike saline, which only rinses away debris, or povidone-iodine, which can be harmful to tissues, Simini actively reduces biofilm and bacterial load without damaging tissue health.
Simini has been used in over 30,000 veterinary procedures and is endorsed by experts like Dr. Aldo Vezzoni, demonstrating its effectiveness in improving surgical outcomes.
Postoperative Care: Strengthening Infection Prevention Efforts
What happens after surgery is just as important as the procedure itself when it comes to preventing SSIs in dogs.
Immediate Postoperative Care
We must focus on careful wound management right after surgery to reduce infection risks. It's essential to ensure that wound closures are secure with high-quality sutures and protective dressings. Avoiding unnecessary disruptions, like frequent dressing changes, helps keep the area sterile.
During the first 24–72 hours, we watch for early signs of infection, such as redness, swelling, unusual discharge, or increased discomfort. Spotting these signs early allows for quick action, reducing complications.
Educating Dog Owners
Dog owners play a crucial role in the post-operative phase. Clear and practical instructions help them manage wound care at home effectively. We show owners how to clean the wound properly and explain how to prevent their dogs from licking or scratching the incision. Recommending tools like Elizabethan collars or wound protectors can greatly reduce risks.
We emphasize the importance of follow-up visits, as subtle signs of infection may only be detectable by trained professionals.
Advanced Tips for SSI Prevention in Canine Surgeries
To make infection control a routine practice, we should prioritize regular team training sessions. This ensures all staff understand and follow the latest evidence-based practices. Updating protocols as new research emerges is crucial, as our strategies must adapt to effectively address new challenges.
Investing in advanced tools can significantly improve outcomes. For example, Simini Protect Lavage has demonstrated its ability to reduce bacterial load and biofilm formation without added toxicity, setting a new standard in surgical irrigation.
Conclusion
Preventing surgical site infections in dogs is a team effort that requires attention, skill, and dedication to high standards. It involves working closely together, ongoing education, and using evidence-based protocols at every step.
Looking forward, adopting innovative solutions like Simini Protect Lavage can significantly boost our efforts to control SSIs. Its proven ability to target bacteria and biofilms without added toxicity makes it a breakthrough in veterinary surgery.
By sharing knowledge, updating protocols, and embracing new advancements, we can collectively improve surgical outcomes for dogs and ensure safer, healthier recoveries.
Source:
Vet Times: Contamination Control: Preventing Surgical Site Infections

